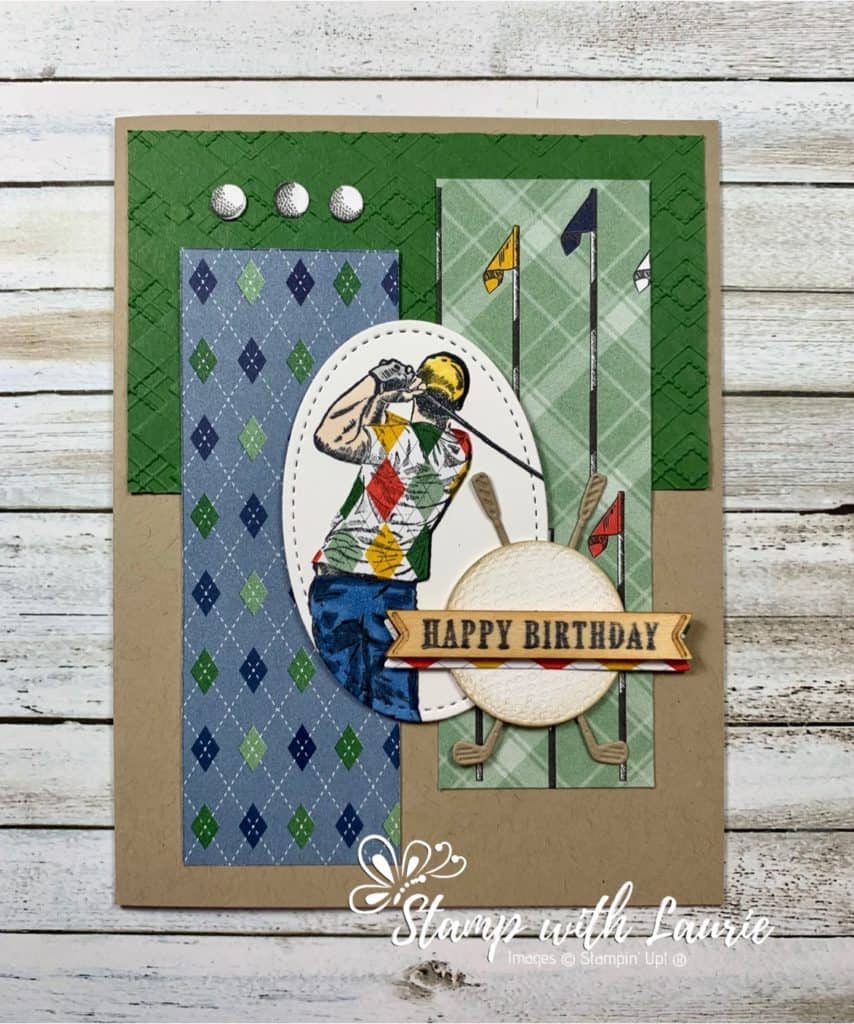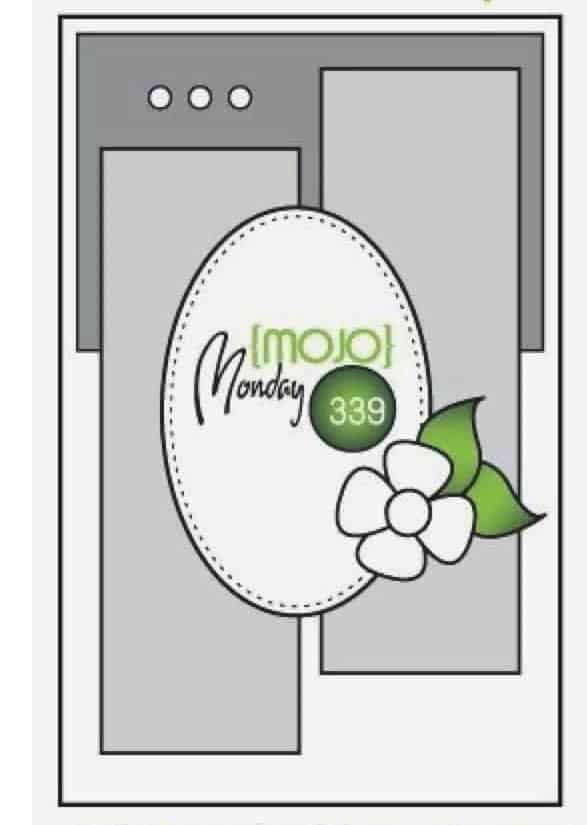
Thought I would share with you my Clubhouse Birthday Card. The Clubhouse Bundle is perfect to create those hard to make masculine cards, especially for that golfer in your life! The demonstrator group I belong to are doing weekly sketch challenges to keep us busy during this crazy time. I thought to switch things up, I would create a masculine card even though the sketch (see below) had a flower image. That’s one thing I love about sketches! They give you inspiration and you can interpret it however you would like. Let’s get started.

Supplies:
Stamps: Clubhouse Cling Stamp Set (151583)
Inks: Night Of Navy Classic Stampin’ Pad (147110), Tuxedo Black Memento Ink Pad (132708), Crumb Cake Classic Stampin’ Pad (147116)
Paper: Crumb Cake (120953), Garden Green (102584), Whisper White (100730), Country Club Designer Series Paper (151314)
Accessories: Golf Club Dies (151580), Absolutely Argyle 3D Embossing Folder (151590), Stitched Shapes Dies (152323 ), Country Club Elements (151315), Night Of Navy Stampin’ Blends Markers Combo Pack (144040), Ivory Stampin’ Blends Marker (144606), Daffodil Delight Stampin’ Blends Markers Combo Pack (144603), Smoky Slate Stampin’ Blends Markers Combo Pack (145058), Stamping Sponges (141337), Paper Snips (103579), Bone Folder (102300), Mini Glue Dots (103683), SNAIL Adhesive (104332), Multipurpose Liquid Glue (110755), Stampin’ Dimensionals (104430)
Measurements:
- Crumb Cake: 8 ½” x 5 ½”; scored at 4 ¼” and scrap for golf clubs
- Garden Green: 4” x 2 ½”
- Whisper White: 2 ½” x 1 ½” and scrap for golf ball
- Country Club Designer Series Paper: 2 pieces at 4 ¼” x 1 ½” and scraps for the banner, the golfer’s shirt and 3 golf balls
Instructions:
- Fold the Crumb Cake card stock in half to create the card base.
- Emboss the Garden Green card stock with the Absolutely Argyle 3D Embossing Folder.
- Stamp in Night Of Navy the sentiment on the wooden banner from the Country Club Elements.
- Stamp the golfer in Tuxedo Black Memento Ink on the Whisper White card stock.
- Colour the golfer with the Blends markers.
- Stamp the golfer’s shirt in Memento on a scrap of the Country Club Designer Series Paper. Fussy cut it out.
- Next, die cut the golfer with the third largest oval in the Stitched Shapes Dies.
- Using the 3 golf balls die from the Golf Club Dies, carefully line up and die cut the golf balls from the DSP.
- Using the larger banner from the Golf Club Dies, die cut a scrap piece of DSP.
- Die cut the golf ball from the Golf Club Dies with the Whisper White card stock.
- Sponge Crumb Cake ink around the edges of the golf ball.
- Die cut two golf clubs from a scrap of Crumb Cake.
- Using Multipurpose Liquid Glue, adhere the DSP shirt to the golfer.
- Adhere the embossed Garden Green piece to the card base with SNAIL.
- Adhere the strips of DSP by staggering them to the card base with SNAIL.
- Next, using dimensionals, adhere the golfer.
- Using glue dots adhere the golf clubs to the back of the golf ball.
- Using Multipurpose Liquid Glue, adhere the banner to the wood element and attached this to the golf ball.
- Place a dimensional on the right side of the golf ball and Multipurpose Liquid Glue on the left side. Overlap this with the golfer piece.
- Using glue dots adhere three golf balls above the DSP.
For Further Info:
Hope you like my Clubhouse Birthday Card!
A Stampin’ Up! video on the Country Club Designer Series Paper:
https://www.youtube.com/watch?time_continue=9&v=gLcSHhVyj1M&feature=emb_logo
You will find the items listed above in my online store at: https://www.stampinup.com/ecweb/products/101024/country-club?dbwsdemoid=2103981.
