My Achievement Unlocked Card

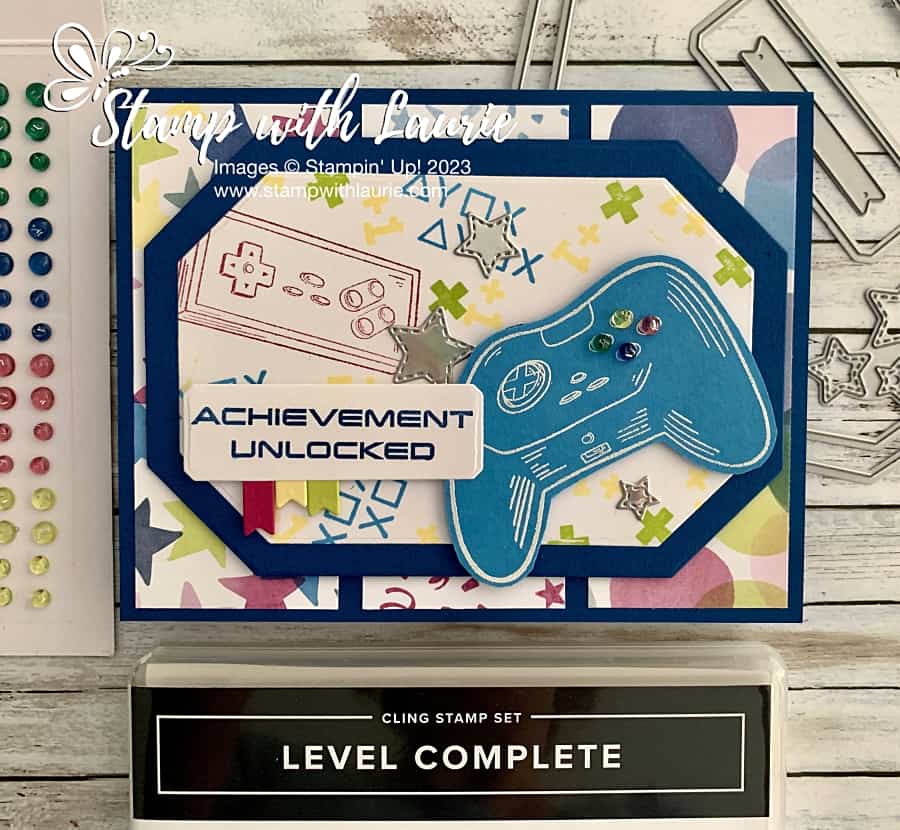
My Achievement Unlocked Card - card with a video controller on it
My Achievement Unlocked Card

Hello Crafty Friends! Laurie here again! I am sharing My Achievement Unlocked Card using the Level Complete Stamp Set by Stampin’ Up! Tomorrow is National Video Games Day and this stamp set is perfect way to celebrate all those gamers in your life (and I have many! Lol!)!

The Details of My Achievement Unlocked Card

For my card, I decided to pull my fun colour scheme from the Bright & Beautiful DSP which I thought was perfect for a gamer card! Once I decided that, I stamped all the bits from the stamp set on a piece of Basic White in the various colours. I saved the controller stamp so that I could heat emboss it in white on a piece of Azure Afternoon which I then fussy cut out.

The Countryside Corners Dies were used to die cut out the stamped piece, the mat, and the Blueberry Bushel stamped sentiment. In addition to them, I used the smallest die to create coloured flags under the sentiment show the “different levels unlocked”.

Since I created this card for a swap, I went with a panel of three different papers for my card base. This allowed me to get more cards made using the paper with minimal waste. Plus, it permitted me to include a piece of the stars paper on each card. To me, stars are the personification of a gamer card!

To mirror the stars from the DSP, I die cut some stars from the Holographic Trio Specialty Paper using the Give It a Whirl Dies. Love that the colours seem to shift and change as you move holographic paper! Such a fun mesmerizing effect for a fun card!

Four gems from the Tinsel Gems Four-Pack were used to mimic the buttons on the controller and to add some colour the controller.

Supplies:

Stamps/Bundles/Dies: Level Complete Stamp Set (161563), Countryside Corners Dies (161471), Give It a Whirl Dies (154336)

Inks: VersaMark (102283), Blueberry Bushel (147138), Azure Afternoon (161663), Berry Burst (147143), Lemon Lolly (161666), Lemon Lime Twist (147145)

Paper: Blueberry Bushel (146968), Azure Afternoon (161719), Basic White (159276), Berry Burst (144243), Lemon Lolly (161720), Lemon Lime Twist (144245), Bright & Beautiful 6” x 6” Designer Series Paper (161449), Holographic Trio 12” x 12” Specialty Paper (161744)

Accessories: Basics Embossing Powder (155554), Heat Tool (129053), Tinsel Gems Four-Pack (161623), Paper Snips (103579), Bone Folder (102300), Stampin’ Dimensionals (104430), Stampin’ Seal (152813), Mini Glue Dots (103683)
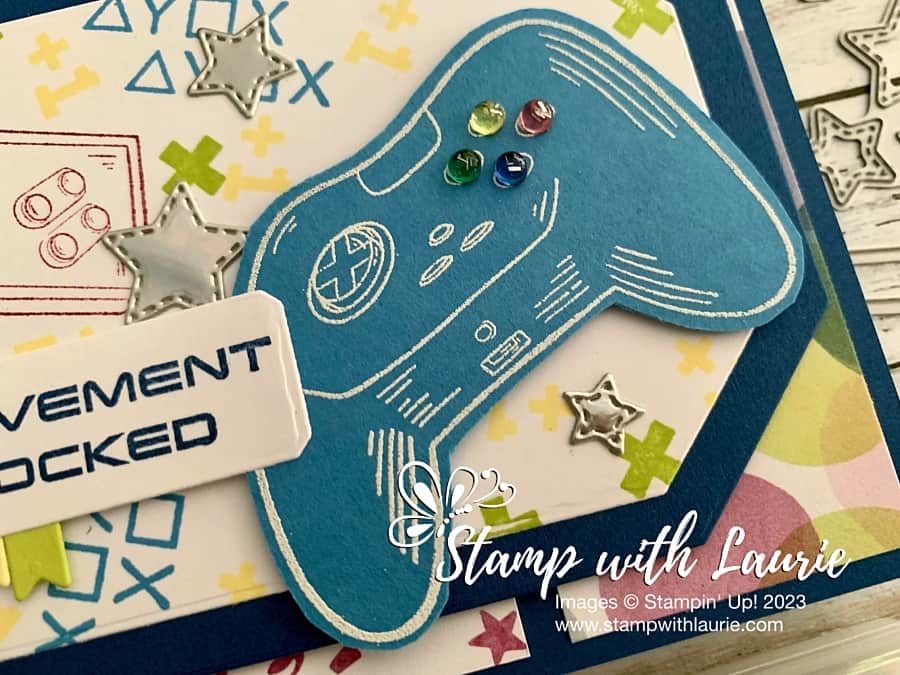
Close Up of video controller on card
Close Up of Card

Measurements: 

  • Blueberry Bushel (2 pieces):
    • 8 ½” x 5 ½” scored at 4 ¼”
    • 5” x 3 ½”
  • Azure Afternoon:
    • 2 ¼” x 3”
  • Basic White: (2 pieces)
    • Sentiment: 2 ¼” x ½”
    • Background: 4 ½” x 3”
  • Lemon Lolly:
    • Scrap
  • Berry Burst:
    • Scrap
  • Lemon Lime Twist:
    • Scrap
  • Bright & Beautiful 12” x 12” Designer Series Paper (3 pieces):
    • 4” x 1-5/8”
  • Holographic Trio 12″ x 12″ Specialty Paper:
    • Scraps

More Information on My Achievement Unlocked Card

For more of my Stampin’ Up! cards, please click here.

You will find the items listed above in my online store.

You’re Stellar Wobble Card

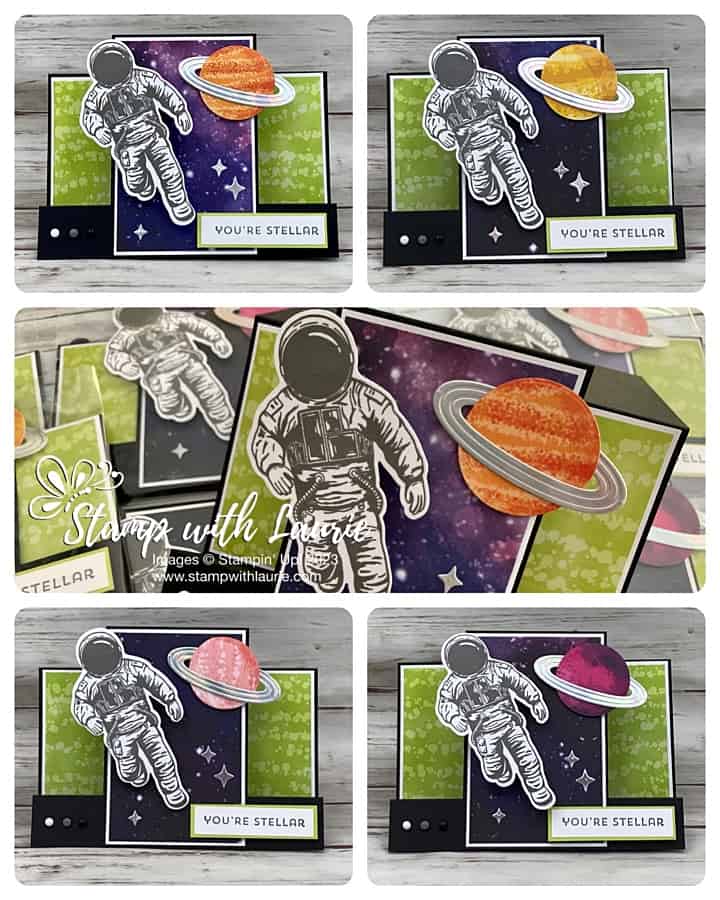
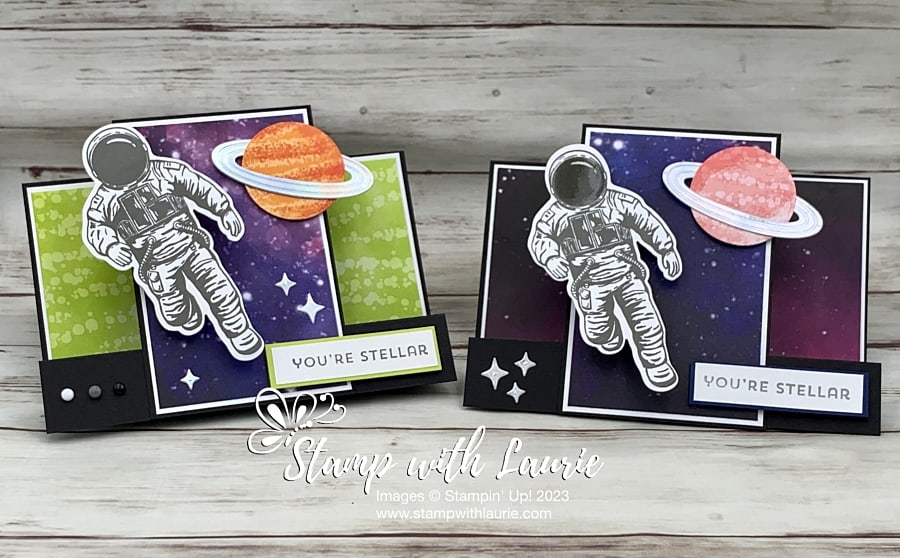
A card with an Astronaut and planet on it.
You’re Stellar Wobble Card

Hello Crafty Friends! Laurie here again! I am sharing my You’re Stellar Wobble Card using the Stargazing Suite Collection by Stampin’ Up! This Collection includes the Reach for the Stars Stamp Set, Reach for the Stars Dies and Stargazing 12” x 12” Designer Series Paper.

The Details of My Card

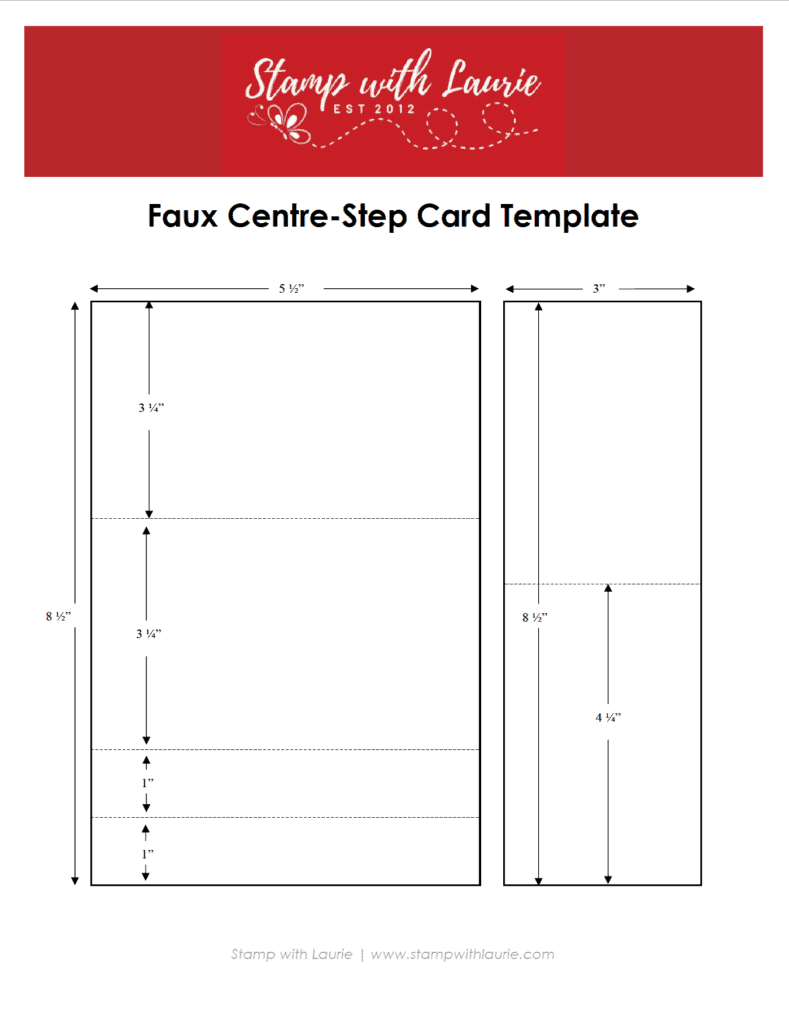
My card was for a swap, and I decided to make a fun faux centre-step card to allow enough room for the astronaut and a planet to fit on my centre panel. I used the measurements from my faux centre-step template which I have included at the end of this post.

When I saw this Suite in the Annual Catty, I knew that I wanted to make a wobble card as well! They are so fun and interactive! I bought the Mini Action Wobble on Amazon.ca, but you could easily make your own by using a piece of bendable wire and wrap it around a pencil. Then, secure one end to your wobble piece and the other end to the card base.

Astronaut in Action

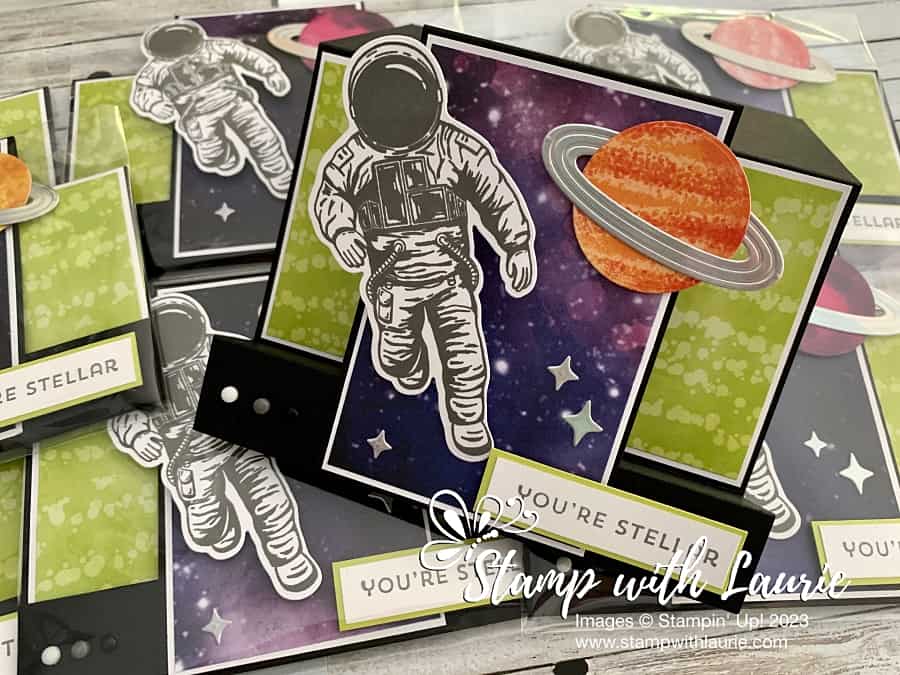
Since I made this card for a swap, I needed several planets, but only a couple fit the planet die and the rings die. I really wanted to use the ring die with silver foil paper! I thought it would add some cosmic shimmer along with the die cut stars! So, I fudged it. Tip: if you die cut the larger planets, make sure that the shadow is showing in the centre of the die. This gives it a realistic 3D look.

All Cards with Different Planets
Swap Cards with Different Planets

I decided to stamp my astronaut and sentiment in Basic Gray since there was already a lot of black to my card. Besides, it was a good alternative to colouring the astronaut since I would have used Smoky Slate to colour his shadows and left most of him white anyways. So, this did it for me!

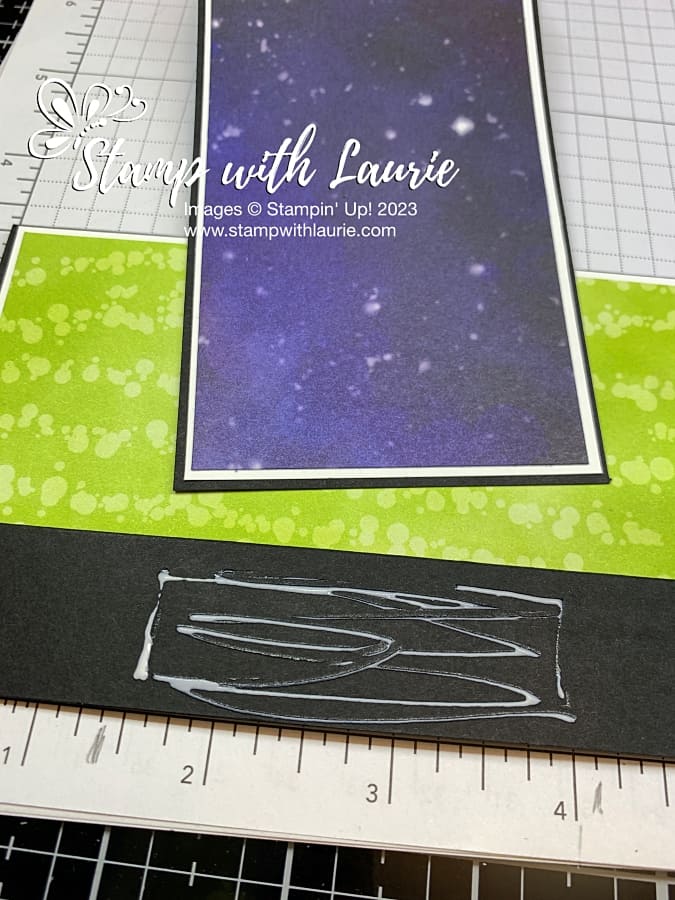
Tip: to figure out where to place glue for the centre panel, I used my grid paper a pencil to mark the section.

Showing Gluing Tip
Showing Gluing Tip

The only embellishments were three Classic Matte Dots in each colour tying in my colour scheme. Of course, they had to be in a row showing my Star Trekkie side of me! Lol!

I made another card as well for a friend. This time I added the retired Shimmery Crystal Effects to the astronaut’s helmet. So fun!

Supplies:

Stamps/Bundles/Dies: Stargazing Suite Collection (161189)

Inks: Basic Gray (149165)

Paper: Basic Black (121045), Basic White (159276), Lemon Lime Twist (144245), Silver Foil 12” x 12” Specialty Pack (156457), Stargazing 12” x 12” Designer Series Paper (in Collection)

Accessories: Classic Matte Dots (158146), Multipurpose Liquid Glue (110755), Bone Folder (102300), Stampin’ Dimensionals (104430), Stampin’ Seal (152813), Mini Glue Dots (103683), Grid Paper (130148), pencil, Mini Action Wobble (from Amazon.ca)

Multiple cards with astronaut and planet on then
Swap Cards

Measurements: 

  • Basic Black: (2 pieces)
    • 8 ½” x 5 ½” cut/scored according to template below
    • 8 ½” x 3” cut/scored according to template below
  • Basic White: (4 pieces)
    • Sentiment: 2 ¼” x ½”
    • Astronaut: 4” x 2”
    • Centre Panel: 4-1/8” x 2-5/8”
    • Back Panel: 3-5/8” x 3-1/8”
  • Lemon Lime Twist
    • Scrap
  • Silver Foil (2 pieces):
    • 2 ½” x 1”
    • Stars: Scrap
  • Stargazing 12” x 12” Designer Series Paper (3 pieces):
    • Centre Panel: 4” x 2 ½”
    • Back Panel: 3” x 5 ¼”
    • Planet

More Information on My You’re Stellar Wobble Card

Downloadable Faux Centre-Step Template

To download a PDF of the Faux Centre-Step Template, please click here or on the picture.

Downloadable Faux Centre-Step Template

For more of my Stampin’ Up! cards, please click here.

You will find the items listed above in my online store.
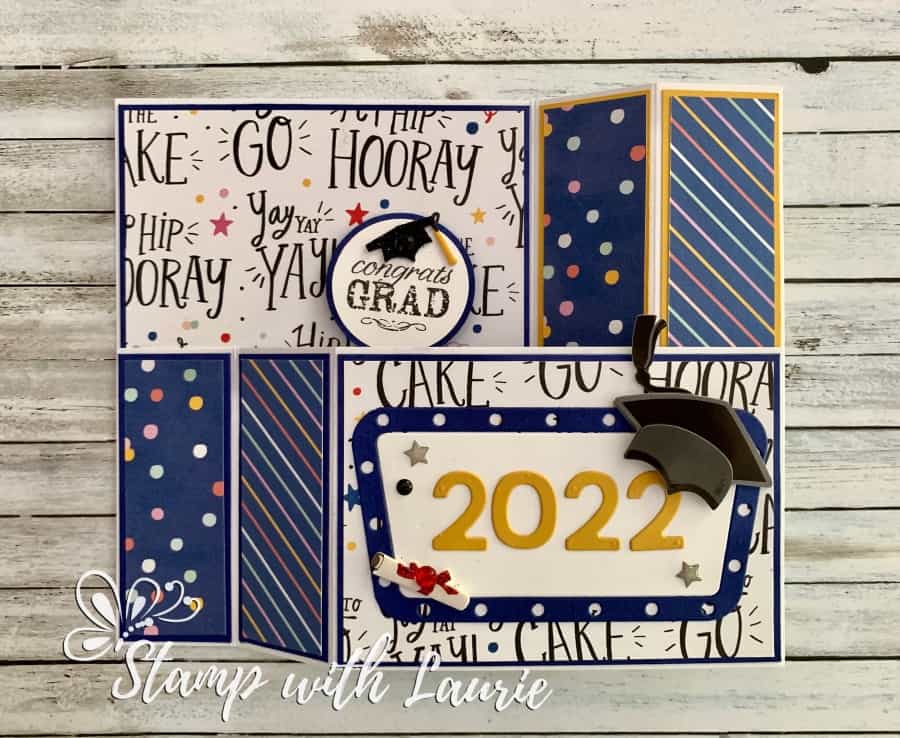
Congrats Grad Wiper Card

A Wiper Card for a Graduate
Congrats Grad! Wiper Card

Hello Crafty Friends! It’s Laurie here to share my Congrats Grad Wiper Card. This fun interactive card is perfect way to celebrate a special grad on his/her special day!

The Details of My Card

This card is super easy to make since I used a Wiper Card Kit by Photo Play. All the guess work for how to make a wiper card was done for me. I just had to decorate my card.

The Celebrate! Paper Pad by Simple Stories was perfect with such sentiments as “Hip Hip Hooray” and “Yay, yay, yay” and “Way to go” on it. It’s supposed to be for birthdays, but I thought all those sentiments suited a grad!

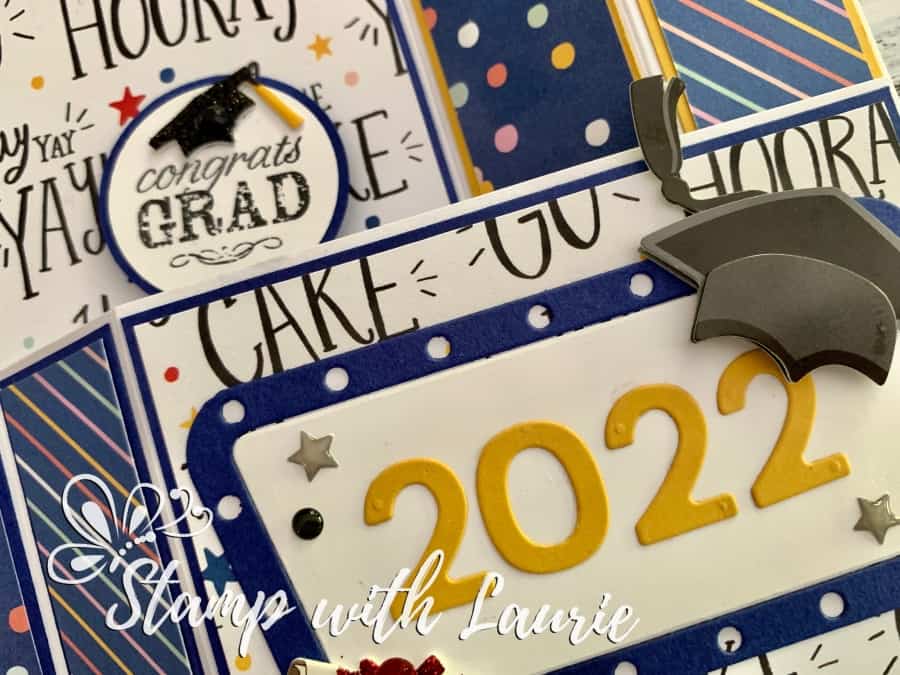
Close Up of Year on Front of Card
Close Up of Year in Broadway Lights

Once I added my paper, it was time to decorate my card. I thought it would be neat to have the year on the front in Crushed Curry like it was lite up on Broadway! To decorate the Broadway sign, I used several stickers that matched my grad theme. But the fun part is when you pull the card open, the “Congrats Grad” sentiment with a sparkly Grad cap pops up! Just like when the grads throw their caps!

————————–

Card Recipe for Congrats Grad Wiper Card:

Wiper Card Kit, Photo Play
Celebrate! 6” x 8” Paper Pad, Simple Stories
Blue Ribbon Stamp Set, Stampin’ Up!
Tuxedo Black Memento Ink, Stampin’ Up!
1 ¼” Circle Punch, Stampin’ Up!
1-3/8” Circle Punch, Stampin’ Up!
Broadway Lights Dies, Stampin’ Up!
Playful Alphabets Dies, Stampin’ Up!
Hats Off Cardstock Stickers, Doodlebug Designs Inc.
Graduation Shape Sprinkles, Doodlebug Designs Inc.
Grad Caps and Diploma Repeats, Jolee’s Boutique, EK Success
Starry Sky, Crushed Curry and Basic White Card Stock Stampin’ Up!

Finished card size: 4.25” x 5.5”

Congrats Grad Wiper Card in Action

————————–

Hope you like My Congrats Grad Wiper Card using
the Wiper Card Kit by Photo Play!

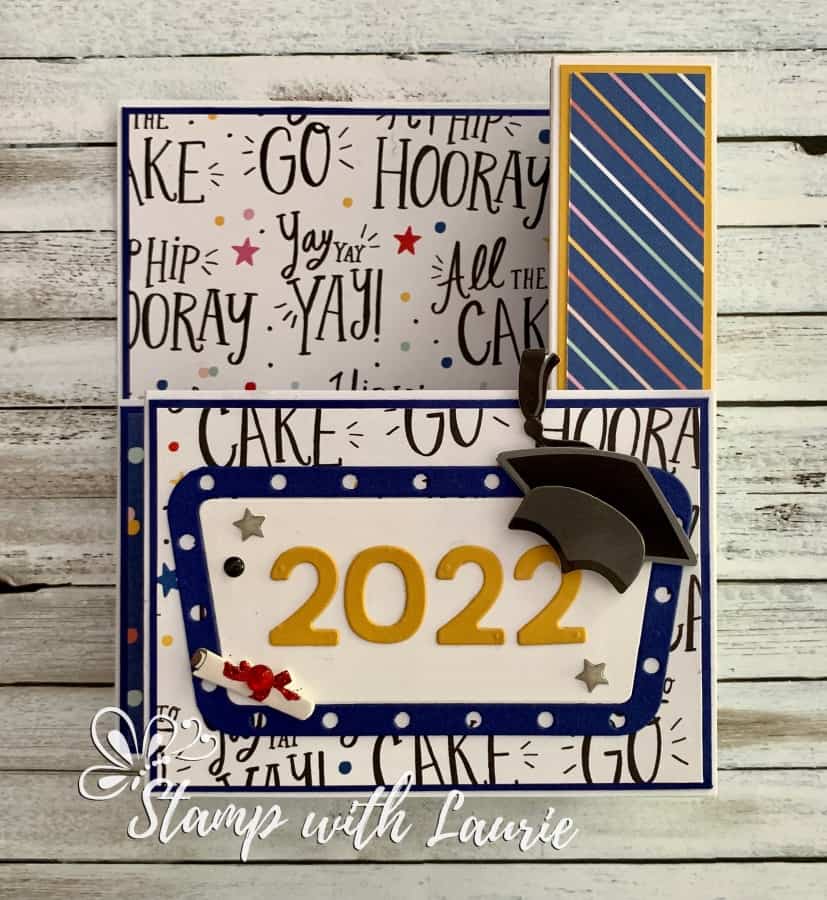
Wiper Card Closed
Wiper Card Closed

For more of my interactive cards, please click here.

Thank you for stopping by!

Hugs,
Laurie