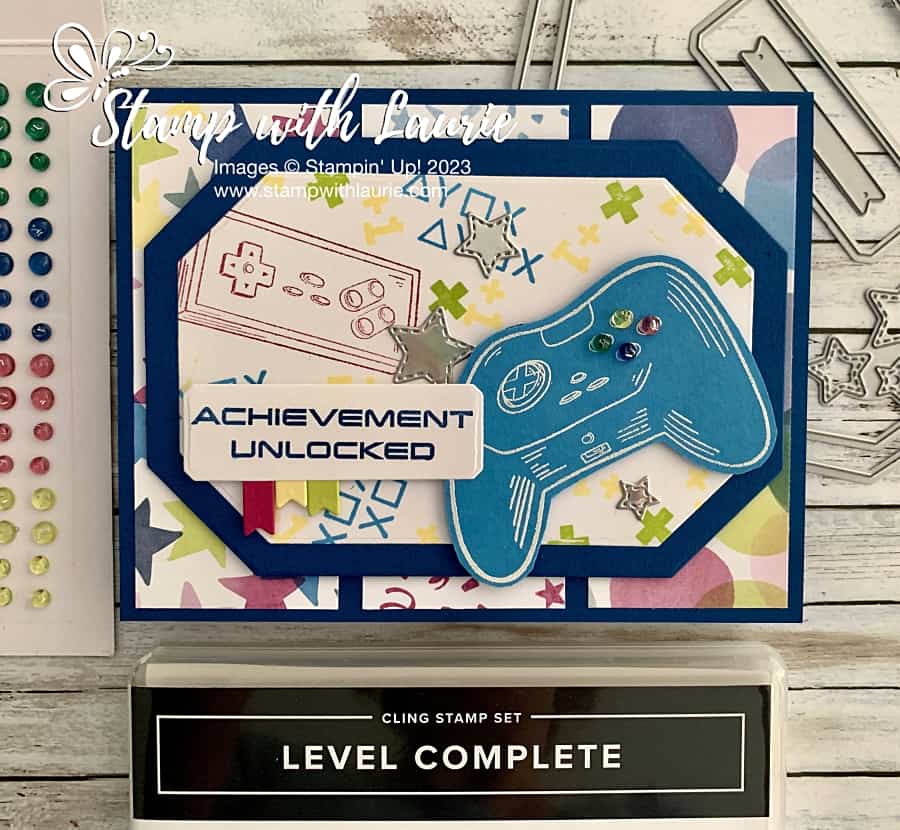
My Achievement Unlocked Card

My Achievement Unlocked Card - card with a video controller on it
My Achievement Unlocked Card

Hello Crafty Friends! Laurie here again! I am sharing My Achievement Unlocked Card using the Level Complete Stamp Set by Stampin’ Up! Tomorrow is National Video Games Day and this stamp set is perfect way to celebrate all those gamers in your life (and I have many! Lol!)!

The Details of My Achievement Unlocked Card

For my card, I decided to pull my fun colour scheme from the Bright & Beautiful DSP which I thought was perfect for a gamer card! Once I decided that, I stamped all the bits from the stamp set on a piece of Basic White in the various colours. I saved the controller stamp so that I could heat emboss it in white on a piece of Azure Afternoon which I then fussy cut out.

The Countryside Corners Dies were used to die cut out the stamped piece, the mat, and the Blueberry Bushel stamped sentiment. In addition to them, I used the smallest die to create coloured flags under the sentiment show the “different levels unlocked”.

Since I created this card for a swap, I went with a panel of three different papers for my card base. This allowed me to get more cards made using the paper with minimal waste. Plus, it permitted me to include a piece of the stars paper on each card. To me, stars are the personification of a gamer card!

To mirror the stars from the DSP, I die cut some stars from the Holographic Trio Specialty Paper using the Give It a Whirl Dies. Love that the colours seem to shift and change as you move holographic paper! Such a fun mesmerizing effect for a fun card!

Four gems from the Tinsel Gems Four-Pack were used to mimic the buttons on the controller and to add some colour the controller.

Supplies:

Stamps/Bundles/Dies: Level Complete Stamp Set (161563), Countryside Corners Dies (161471), Give It a Whirl Dies (154336)

Inks: VersaMark (102283), Blueberry Bushel (147138), Azure Afternoon (161663), Berry Burst (147143), Lemon Lolly (161666), Lemon Lime Twist (147145)

Paper: Blueberry Bushel (146968), Azure Afternoon (161719), Basic White (159276), Berry Burst (144243), Lemon Lolly (161720), Lemon Lime Twist (144245), Bright & Beautiful 6” x 6” Designer Series Paper (161449), Holographic Trio 12” x 12” Specialty Paper (161744)

Accessories: Basics Embossing Powder (155554), Heat Tool (129053), Tinsel Gems Four-Pack (161623), Paper Snips (103579), Bone Folder (102300), Stampin’ Dimensionals (104430), Stampin’ Seal (152813), Mini Glue Dots (103683)
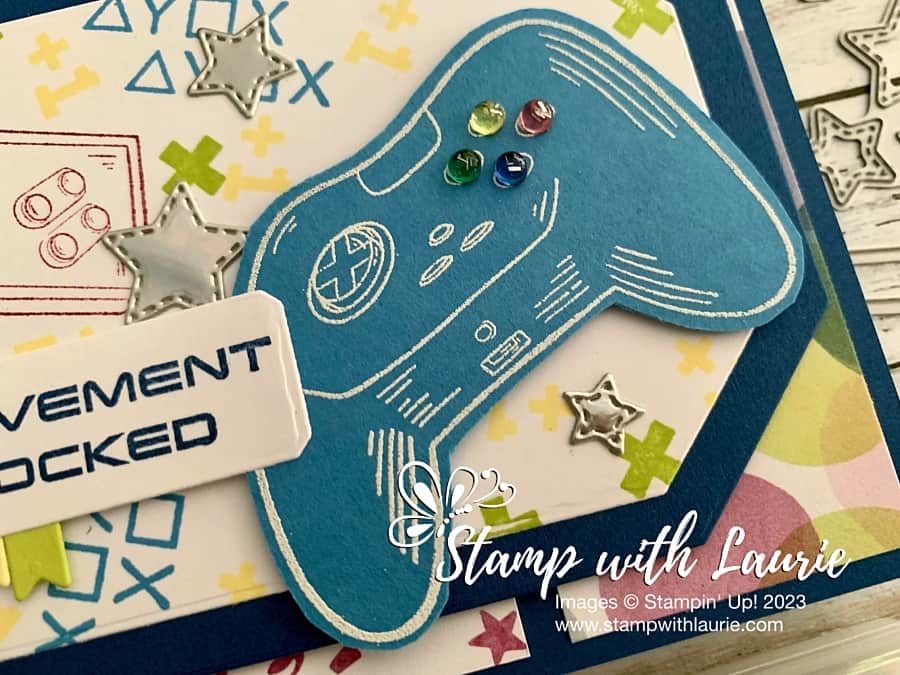
Close Up of video controller on card
Close Up of Card

Measurements: 

  • Blueberry Bushel (2 pieces):
    • 8 ½” x 5 ½” scored at 4 ¼”
    • 5” x 3 ½”
  • Azure Afternoon:
    • 2 ¼” x 3”
  • Basic White: (2 pieces)
    • Sentiment: 2 ¼” x ½”
    • Background: 4 ½” x 3”
  • Lemon Lolly:
    • Scrap
  • Berry Burst:
    • Scrap
  • Lemon Lime Twist:
    • Scrap
  • Bright & Beautiful 12” x 12” Designer Series Paper (3 pieces):
    • 4” x 1-5/8”
  • Holographic Trio 12″ x 12″ Specialty Paper:
    • Scraps

More Information on My Achievement Unlocked Card

For more of my Stampin’ Up! cards, please click here.

You will find the items listed above in my online store.

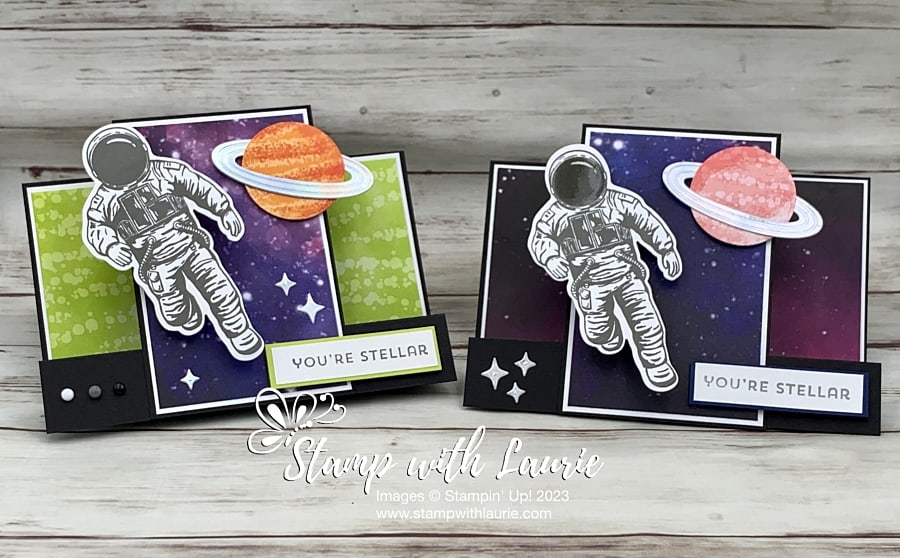
You’re Stellar Wobble Card

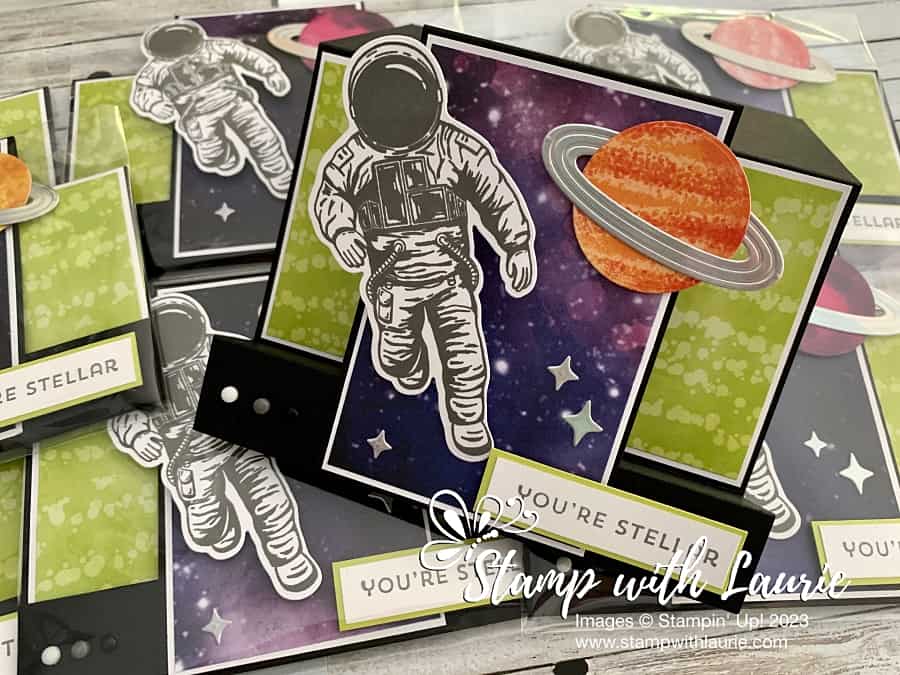
A card with an Astronaut and planet on it.
You’re Stellar Wobble Card

Hello Crafty Friends! Laurie here again! I am sharing my You’re Stellar Wobble Card using the Stargazing Suite Collection by Stampin’ Up! This Collection includes the Reach for the Stars Stamp Set, Reach for the Stars Dies and Stargazing 12” x 12” Designer Series Paper.

The Details of My Card

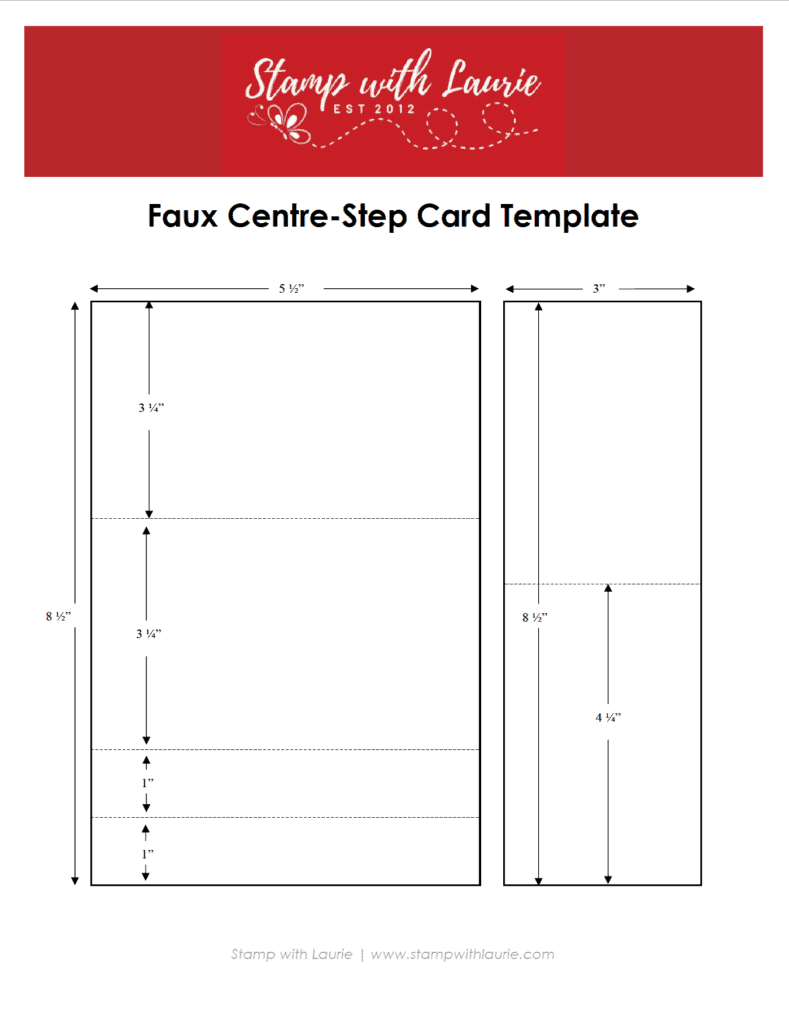
My card was for a swap, and I decided to make a fun faux centre-step card to allow enough room for the astronaut and a planet to fit on my centre panel. I used the measurements from my faux centre-step template which I have included at the end of this post.

When I saw this Suite in the Annual Catty, I knew that I wanted to make a wobble card as well! They are so fun and interactive! I bought the Mini Action Wobble on Amazon.ca, but you could easily make your own by using a piece of bendable wire and wrap it around a pencil. Then, secure one end to your wobble piece and the other end to the card base.

Astronaut in Action

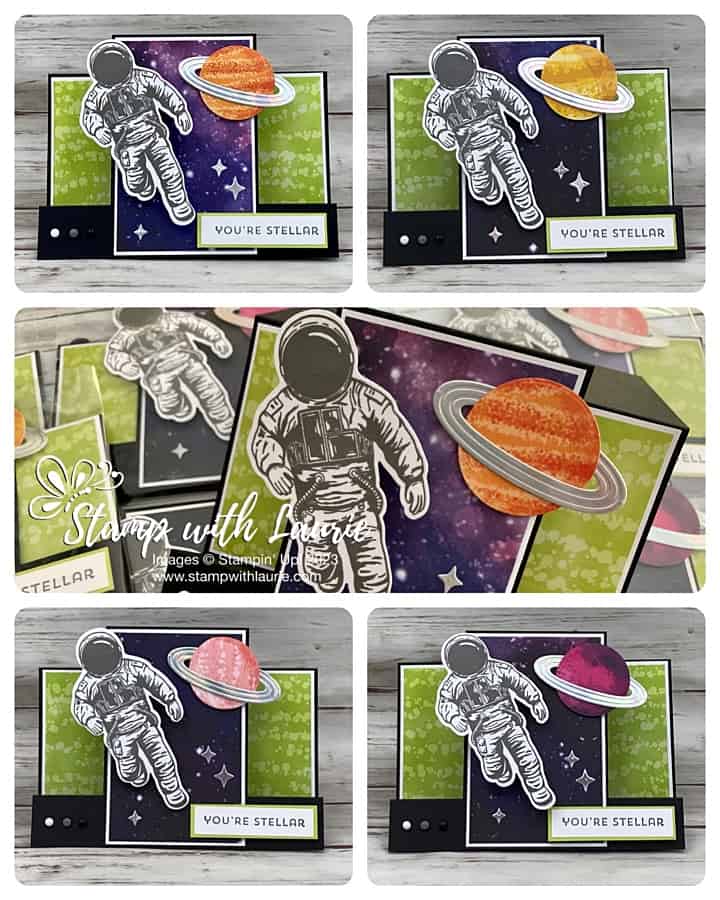
Since I made this card for a swap, I needed several planets, but only a couple fit the planet die and the rings die. I really wanted to use the ring die with silver foil paper! I thought it would add some cosmic shimmer along with the die cut stars! So, I fudged it. Tip: if you die cut the larger planets, make sure that the shadow is showing in the centre of the die. This gives it a realistic 3D look.

All Cards with Different Planets
Swap Cards with Different Planets

I decided to stamp my astronaut and sentiment in Basic Gray since there was already a lot of black to my card. Besides, it was a good alternative to colouring the astronaut since I would have used Smoky Slate to colour his shadows and left most of him white anyways. So, this did it for me!

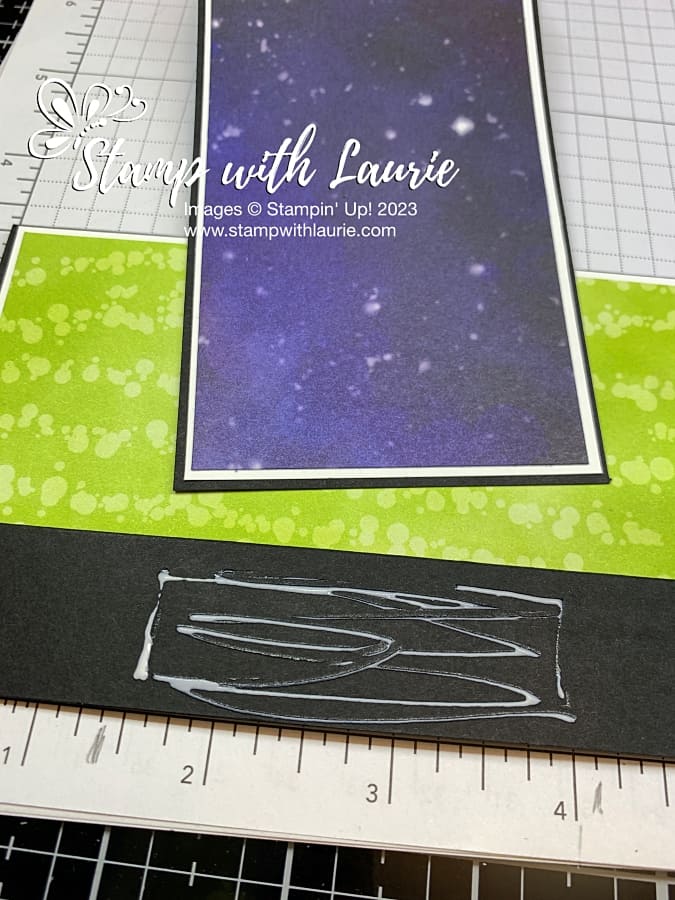
Tip: to figure out where to place glue for the centre panel, I used my grid paper a pencil to mark the section.

Showing Gluing Tip
Showing Gluing Tip

The only embellishments were three Classic Matte Dots in each colour tying in my colour scheme. Of course, they had to be in a row showing my Star Trekkie side of me! Lol!

I made another card as well for a friend. This time I added the retired Shimmery Crystal Effects to the astronaut’s helmet. So fun!

Supplies:

Stamps/Bundles/Dies: Stargazing Suite Collection (161189)

Inks: Basic Gray (149165)

Paper: Basic Black (121045), Basic White (159276), Lemon Lime Twist (144245), Silver Foil 12” x 12” Specialty Pack (156457), Stargazing 12” x 12” Designer Series Paper (in Collection)

Accessories: Classic Matte Dots (158146), Multipurpose Liquid Glue (110755), Bone Folder (102300), Stampin’ Dimensionals (104430), Stampin’ Seal (152813), Mini Glue Dots (103683), Grid Paper (130148), pencil, Mini Action Wobble (from Amazon.ca)

Multiple cards with astronaut and planet on then
Swap Cards

Measurements: 

  • Basic Black: (2 pieces)
    • 8 ½” x 5 ½” cut/scored according to template below
    • 8 ½” x 3” cut/scored according to template below
  • Basic White: (4 pieces)
    • Sentiment: 2 ¼” x ½”
    • Astronaut: 4” x 2”
    • Centre Panel: 4-1/8” x 2-5/8”
    • Back Panel: 3-5/8” x 3-1/8”
  • Lemon Lime Twist
    • Scrap
  • Silver Foil (2 pieces):
    • 2 ½” x 1”
    • Stars: Scrap
  • Stargazing 12” x 12” Designer Series Paper (3 pieces):
    • Centre Panel: 4” x 2 ½”
    • Back Panel: 3” x 5 ¼”
    • Planet

More Information on My You’re Stellar Wobble Card

Downloadable Faux Centre-Step Template

To download a PDF of the Faux Centre-Step Template, please click here or on the picture.

Downloadable Faux Centre-Step Template

For more of my Stampin’ Up! cards, please click here.

You will find the items listed above in my online store.
Seashell Wishes Card

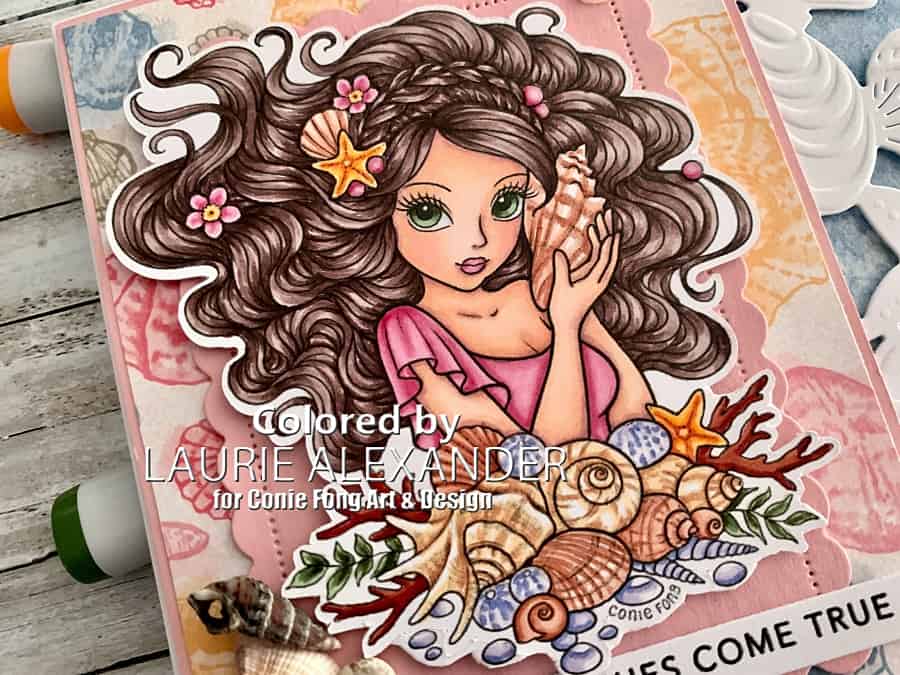
A birthday card with a girl listening to a seashell
Seashell Wishes Card

Hello Crafty Friends! It’s Laurie here! I am sharing my Seashell Wishes Card as my Design Team Inspiration Card for Conie Fong Art & Design using the beautiful new release Seashell Rosealea

The Details of My Card

When I saw the new release for Conie Fong, I couldn’t wait to get started colouring her, especially that hair! So gorgeous! So, I used my Copic markers to colour her up. I decided to go with natural tones for the shells since I wanted her to shine. A scattering of the coloured blue shells tied in my blue colour scheme from the DSP. 

Once she was coloured, I placed Rosealea onto a Blushing Bride die cut scallop base to help anchor her and distinguish her from the shells DSP.

The DSP was perfect for my cards with its shells in different colours and blue watery sheets! I thought the white shells die against the blue DSP really popped! To add to the dimension of the die cut shells, I used my Embossing Mat to make the details really stand out.

I thought it would be fun to add real shells to my card! So, I used some from the Dollar Store. Tip: use Glossy Accents to create a strong adhesive hold. I also used Glossy accents on the pink pearls in her hair. 

To add an iridescent look, I used a scattering of Flat Adhesive-Backed Pearls and Clear Wink of Stella on the flowers in her hair.

The finishing touch was a stamped die cut sentiment making this a perfect birthday card!

————————–

Copic Markers:

Skin: E000/E00/E21/E11/E04/R20
Hair: E79/E77/E74/E71
Eyes: G99/G94/G21/C3/C1/0
Lips: R83/R81
Pinks: R85/R83/R81
Starfishes: YR18/YR04/Y38/Y35
Shells 1: E15/E13/E11
Shells 2: E33/Y32
Blue Shells: BV000/BV13
Coral: E19/E18/E15
Flowers: R85/R53/R81/YR24/Y21

Close Up of Girl listening to seashell
Close Up of Seashell Rosealea

————————–

Card Recipe for My Seashell Wishes Card:

Seashell Rosealea, Conie Fong Art & Design
Paper Basics – Stamper’s Select White Cardstock, Papertrey Ink
Sand & Sea Designer Series Paper, Stampin’ Up!
Scalloped Contours Dies, Stampin’ Up!
Joy! Crafts Shell Border Die
Embossing Mat, Stampin’ Up!
Manual Die Cutting Machine 
Simple Strips – Birthday, Taylored Expressions
Simple Strips Die, Taylored Expressions
VersaFine Ink, Onyx Black, Tsukineko
Flat Adhesive-Backed Pearls, Stampin’ Up!
Shells from Dollar Store 
Clear Wink of Stella, Stampin’ Up!
Glossy Accents, Ranger
Blushing Bride and Thick Basic White Card Stock, Stampin’ Up!

Finished card size: 5 ½” x 5 ½”

————————–

Blog Challenges

I am entering this card into the following challenges:
Crafting Happiness Challenges: May: 142 Anything Goes
Your Scrapbook Place: May Challenge – Beccy’s Place – Top 3 Winner
613 Avenue Create: May 2023-Anything Goes – Won Top Rocker and Front Porch

————————–

To view my other Conie Fong Art & Design projects, please click here.

Hope you like my Design Team Inspiration Card using Seashell Rosealea for Conie Fong Art & Design!

Thank you for stopping by!

Hugs,
Laurie

Colour Your World

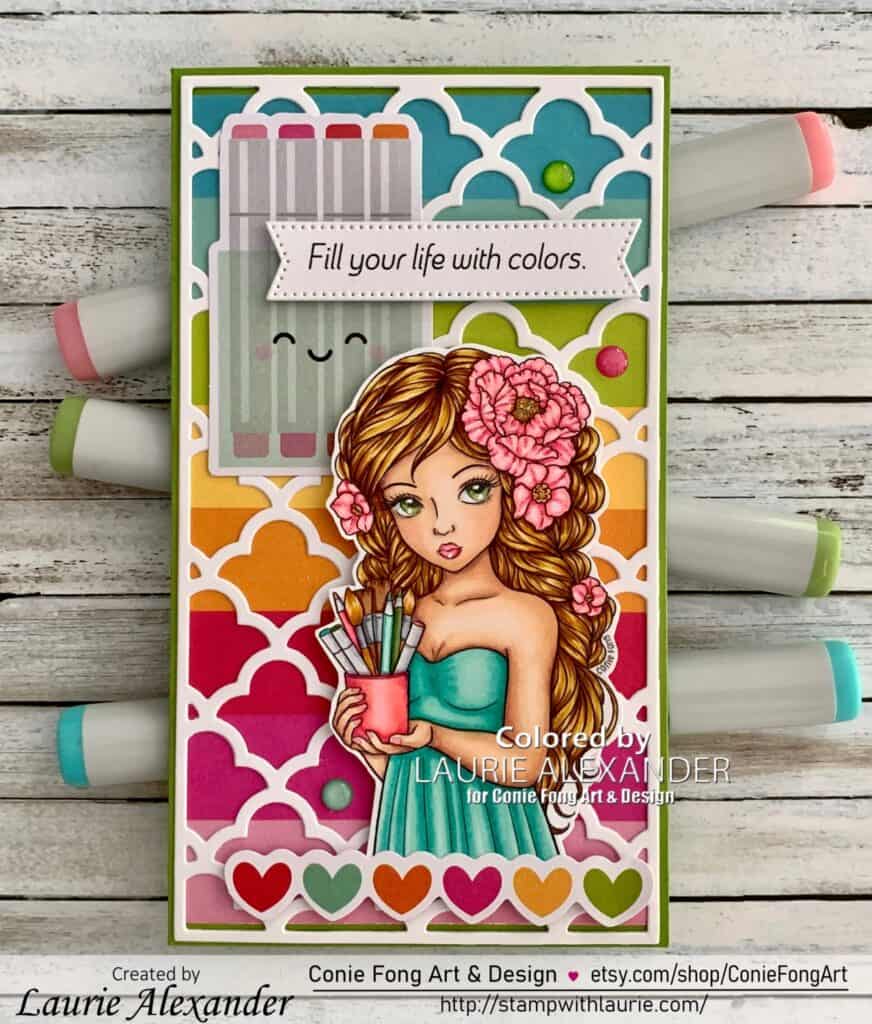
A card with a Girl holding art supplies saying Fill your life with colors.
Colour Your World

Hello Crafty Friends! It’s Laurie here! I am sharing my Colour Your World as my Design Team Inspiration Card for Conie Fong Art & Design using the beautiful Artistic Leilani. She comes with 9 stamps including:

  • Artistic Leilani Left 
  • Artistic Leilani Right
  • Artistic Leilani Left – Short Dress
  • Artistic Leilani Right – Short Dress
  • Sentiment: You Color My World
  • Sentiment: You Colour My World
  • Sentiment: Happy Birthday To An Amazing Friend
  • Sentiment: I am not a hoarder. I am an artist.
  • Sentiment: Art comes from the heart

The Details of My Card

A good friend of mine retired recently and she loves to colour. In fact, she was the one who got me into making cards and colouring! So, I thought that Artistic Leilani would be perfect for her retirement card!

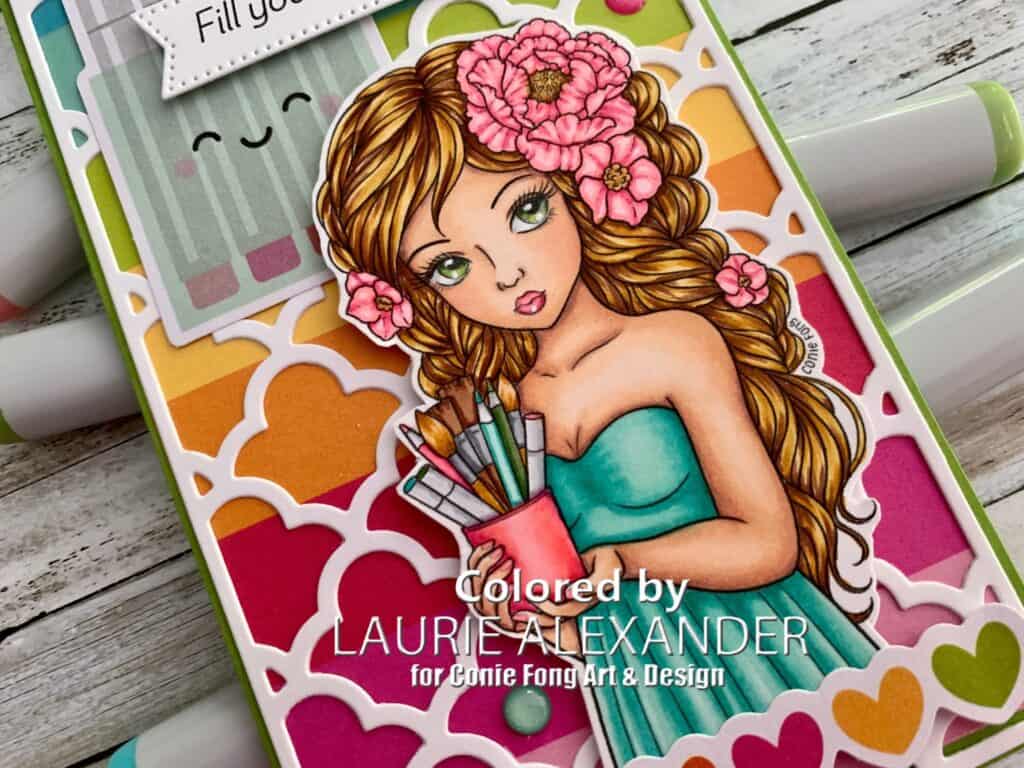
For my mini slimline card, I coloured Leilani with my Copic markers using the colour scheme of the Cute & Crafty Paper Pad with its bright colours. It was idea for my crafty colouring theme.

I used the piece of designer paper that had the bands of rainbow colours and layered it beneath my quatrefoil die cut. Isn’t it neat how the different bands of colour peek through the white die cut!

I love the cute Copic marker die cut piece from the Odds and Ends that I layered beneath my sentiment. A row of rainbow-coloured hearts is the other die cut piece that I pulled from the Chit Chat. You must have hearts when it comes to what you love to do!

I used Wink of Stella on the flowers in her hair and Glossy Accents on her pink jar. The finishing touch was some glittery sprinkles that matched my colour scheme.

————————–

Copic Markers:

Skin: E04/E11/E21/E00/E000/R20
Hair: E25/YR24/Y26/Y21
Pinks: RV25/RV23/RV10
Yellows: Y21/YR23/E25
Dress: BG15/BG13/BG11/BG10
Eyes: YG03/YG63/YG67
Copic Markers: C3/C0/YG67/RV23/BG15
Pencils: YG63/YG67/BG13/BG11/RV25/RV23
Paint Brushes: C5/C3/E25/E23/YR24/E21

Close Up of Girl holding art supplies
Close up of Artistic Leilani

————————–

Card Recipe for My Colour Your World:

Artistic Leilani, Conie Fong Art & Design
Paper Basics – Stamper’s Select White Cardstock, Papertrey Ink
Cute & Crafty 6” x 6” Paper Pad, Doodlebug Designs Inc.
#6 Quatrefoil Coverplate Etched Die, Photo Play
Stylish Shapes Dies, Stampin’ Up!
Cute & Crafty Odds & Ends, Doodlebug Designs Inc.
Cute & Crafty Chit Chat, Doodlebug Designs Inc.
Bright Glitter Assortment Sprinkles, Doodlebug Designs Inc.
White Gelly Roll Pen, Sakura
Glossy Accents, Ranger
Clear Wink of Stella, Stampin’ Up!
Granny Apple Green Card Stock, Stampin’ Up!

Finished card size: 6.5” x 3.5”

————————–

To view my other Conie Fong Art & Design projects, please click here.

Hope you like my Design Team Inspiration Card using
Artistic Leilani for Conie Fong Art & Design!

I am entering this card in the following challenges:
613 Avenue Create – ATG (1 of 2)
World Wide Open Design Team Challenge Blog – ATG (1 of 3)
Polkadoodles Craft Challenge – ATG

Thank you for stopping by!

Hugs,
Laurie

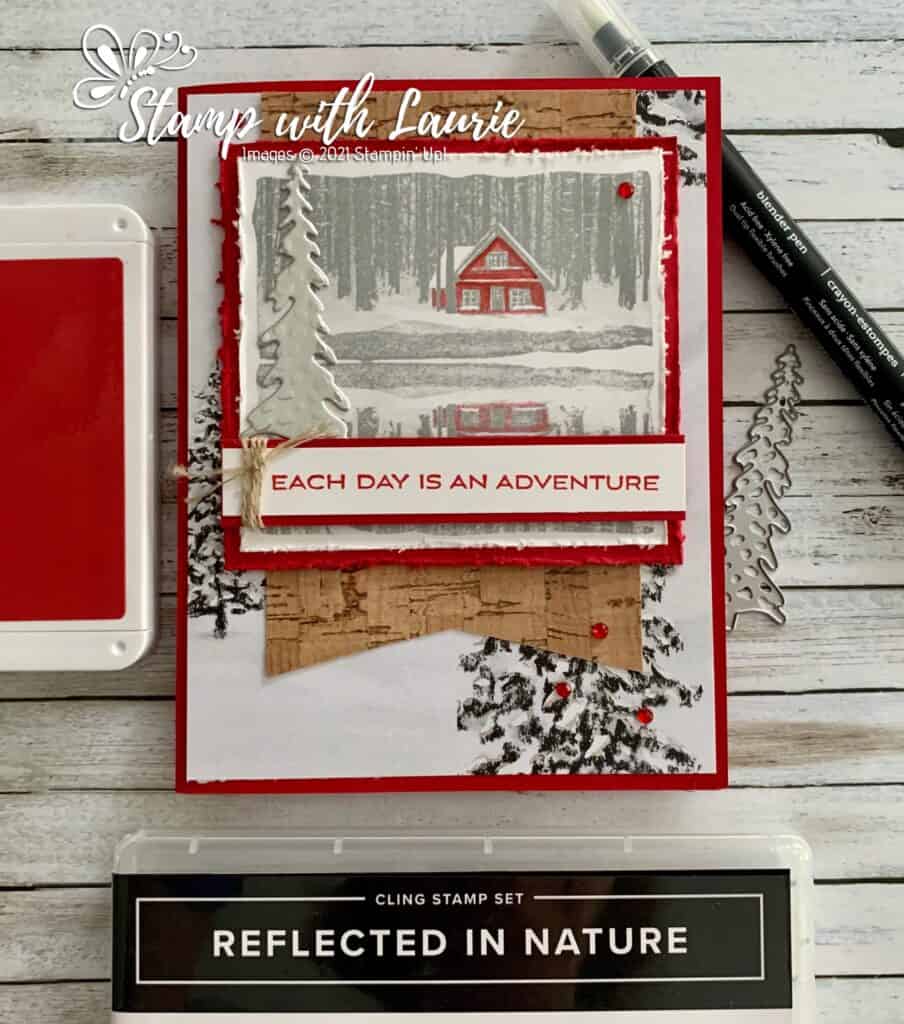
Nature is an Adventure Card

A Cabin in the forest on a card
Nature is an Adventure Card

Hello Crafty Friends! Laurie here again! I am sharing my Nature is an Adventure Card using the Reflected in Nature Stamp Set by Stampin’ Up!

The Details of My Card

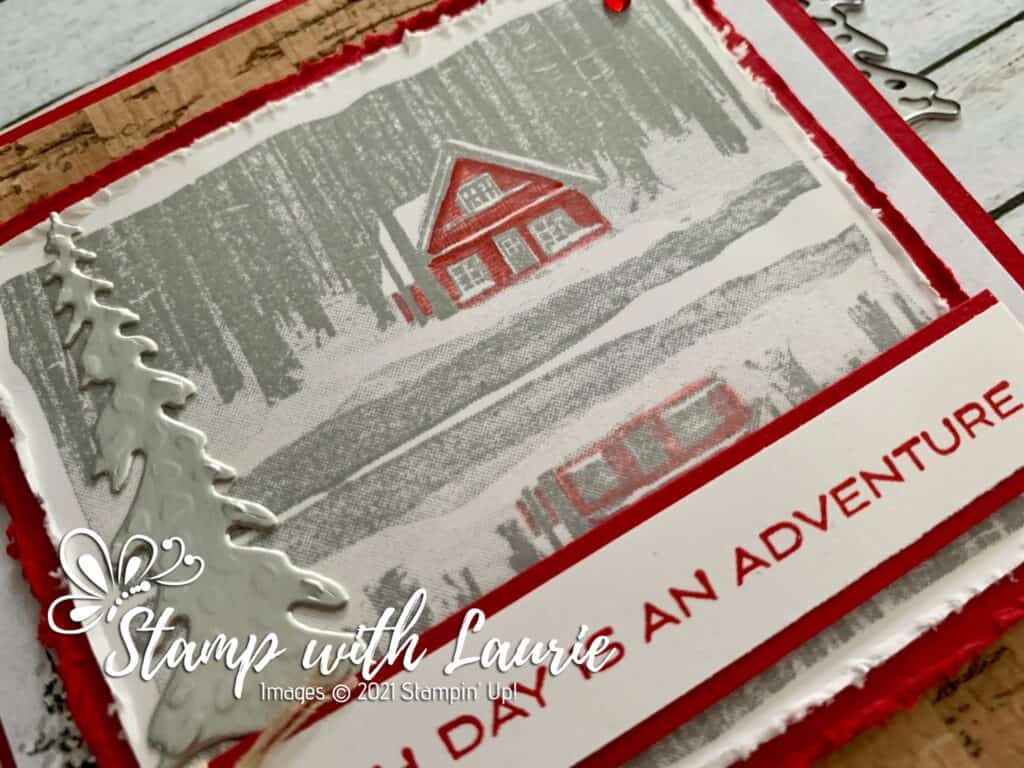
The inspiration for my card is the prints that you see which have one pop of red in amongst a black/white scene. To create this, I pulled out my Blender Pen once I had stamped the image. I took the pen and dipped it into my Real Red 

Ink Pad to pick up some ink. I started in the shadow areas, like under the roof line, and moved out from there. As you use the pen, the ink gets lighter and lighter until there is no more ink on it. I love this softer look that suited the stamped image! As the ink runs out, you get lots of dimension with the shadows, mid-tones, and highlights. I haven’t done this technique in a long time.

To match my rustic cottage in the woods theme, I distressed the edges of my stamped image and the Real Red mat with my Paper Snips. The Peaceful Place Designer Series Paper is gorgeous with its unexpected silver accents and perfect for my theme! I thought that adding a flag of the Cork Paper behind my focal point would add a bit of colour and interest. To match the silver accents on the DSP, I added a Silver Foil die cut tree from the Cabin Dies. For embellishments, I used Linen Thread wrapped around my sentiment and a scattering of Red Rhinestones to add some colour.

Supplies:

Stamps/Bundles/Dies: Reflected in Nature Stamp Set (156437), Cabin Dies (156404)

Inks: Real Red Classic Stampin’ Pad (147084), Smoky Slate Classic Stampin’ Pad (131202)

Paper: Real Red (102482), Basic White (159276), Cork 12″ x 12″ Specialty Paper (156393), Peaceful Place Designer Series Paper (156394), Silver Foil 12″ x 12″ Specialty Pack (156457)

Accessories: Blender Pens (102845), Linen Thread (104199), Red Rhinestone Basic Jewels (146924), Paper Snips (103579), Bone Folder (102300), Stampin’ Dimensionals (104430), Stampin’ Seal (152813), Mini Glue Dots (103683)

Close Up of the Cabin on my card
Close Up of the Cottage on My Card

Measurements: 

  • Real Red: 3 pieces
    • 5 ½” x 8 ½” scored at 4 ¼”
    • 3 ½” x 3 ¼”
    • 3 ½” x 5/8” (Sentiment)
  • Peaceful Place Designer Series Paper: 4” x 5 ¼”
  • Basic White: 2 pieces:
    • 3 ¼” x 3”
    • 3 ¼” x ½” (Sentiment)
  • Cork Specialty Paper: 2 7/8” x 4 ½”
  • Silver Foil Specialty Pack: scrap

More Information on My Nature is an Adventure Card:

For more of my Stampin’ Up! cards, please click here.

Here is a video on the Peaceful Place Suite:
https://youtu.be/bYaJWfSgoEQ

You will find the items listed above in my online store.
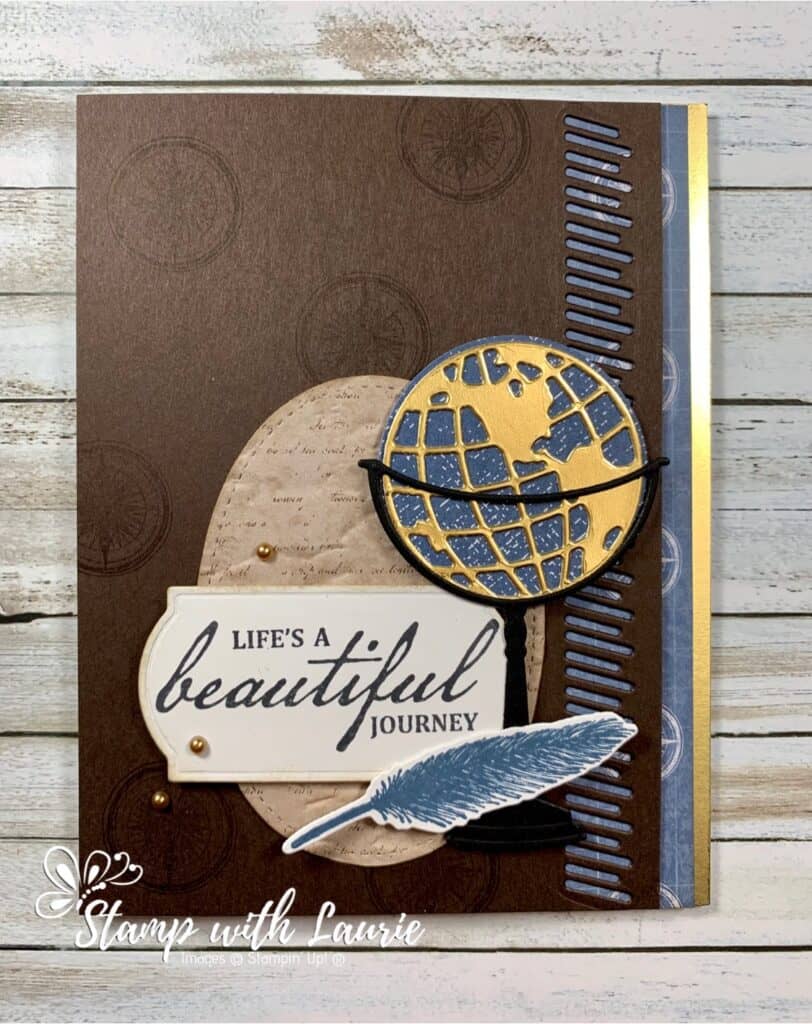
Life Is A Beautiful Journey

A Beautiful Journey Card using the World of Good Suite
Life is A Beautiful Journey Card using the World of Good Suite

Today I am sharing My Life Is A Beautiful Journey Card that I created for a swap that uses products from the new Stampin’ Up! Annual Catalogue and the World of Good Suite. This card is a perfect masculine card especially for a retirement or a graduation!

I love how the pops of Misty Moonlight ink and the World of Good Designer Series Paper add a nice touch of colour to this very neutral card. I used Gold Foil Sheets instead of the Brass Foil Sheets only because they were on backorder at the time. The Brass ones would look just as nice! I wanted to add a bit of an old paper look by sponging Crumb Cake around the sentiment’s edges and on the DSP after it was embossed with the Old World Paper 3D Embossing Folder. I was so happy to find out that the Metallic Pearls had carried over and I used them as the perfect accent to finish the card.

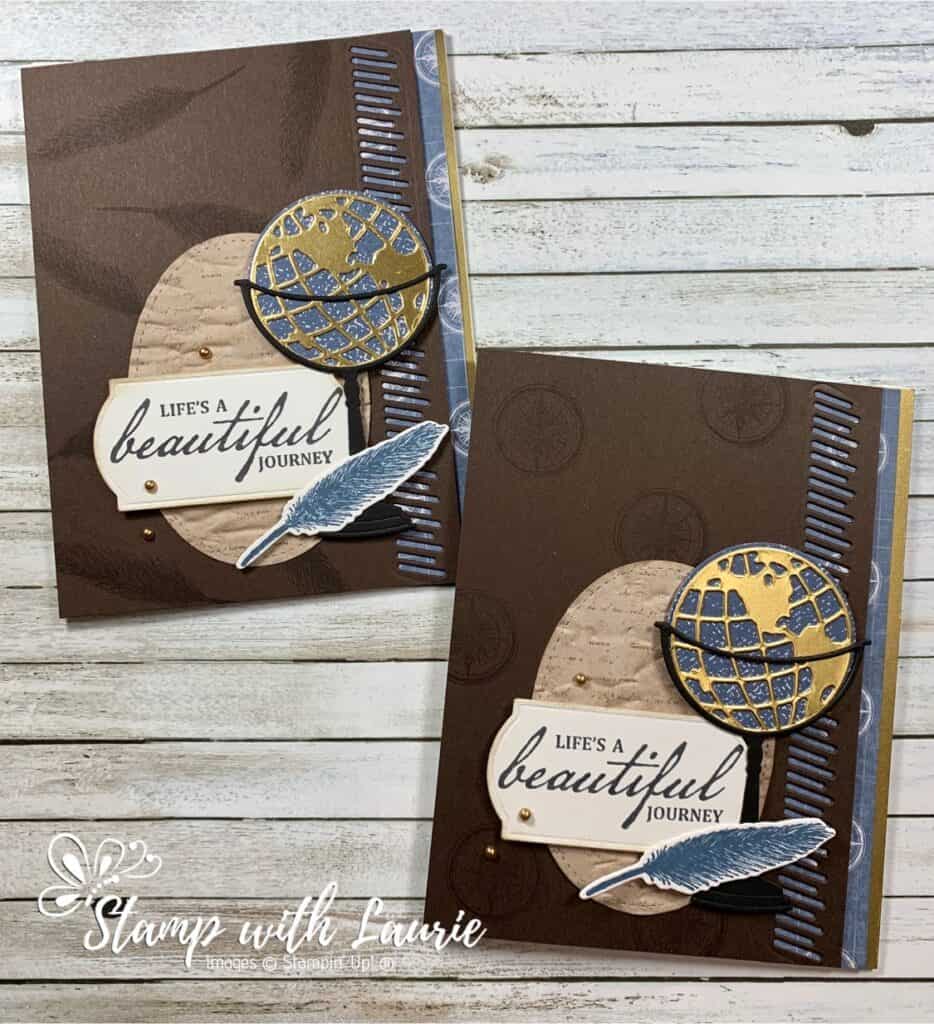
A Beautiful Journey Alternative Card using the World of Good Suite
Life is A Beautiful Journey Alternative Card using the World of Good Suite

I had so much fun playing with this Suite that I created another card using the feather stamp as the background. Which one do you like best?

Supplies for My Life Is A Beautiful Journey Card:

Stamps: Beautiful World Bundle (154091)

Inks: Tuxedo Black Memento Ink Pad (132708), Early Espresso Classic Stampin’ Pad (147114), Crumb Cake Classic Stampin’ Pad (147116), Misty Moonlight Classic Stampin’ Pad (153118)

Paper: Whisper White Thick (140272 ), Early Espresso (119686), Whisper White (100730), Basic Black (121045), Gold Foil Sheets (132622), World of Good Designer Series Paper (152491), 2020–2022 In Color 6″ x 6″ Designer Series Paper (153070)

Accessories: World Map Dies (152712), Old World Paper 3D Embossing Folder (153200), Painted Label Dies (151605), Stitched Shapes Dies (152323 ), Metallic Pearls (146282), Stamping Sponges (141337), Bone Folder (102300), Adhesive Sheets (152334 ), Multipurpose Liquid Glue (110755 ), Mini Glue Dots (103683), Stampin’ Seal (152813), Stampin’ Dimensionals (104430)

Measurements for My Life is a Beautiful Journey Card: 

  • Whisper White Thick: 8 ½” x 5 ½”; scored at 4 ¼” 
  • Early Espresso: 3 7/8” x 5 ½”
  • World of Good Designer Series Paper – 2 pieces
    • 5 ½” x 1” (for border)
    • 3 ½” 2 ½” (for stitched Oval)
  • 2020–2022 In Color 6″ x 6″ Designer Series Paper: 2” x 2”
  • Gold Foil Sheets – 2 pieces: 5 ½” x ½” (for border)
    • 2” x 2” (for world)
  • Basic Black : 3” x 2 ¼”
  • Whisper White – 2 pieces: 2 ¾” x 1 ½” (sentiment)
    • Scrap for feather

Instructions for My Life Is A Beautiful Journey Card:

  1. Fold the Whisper White Thick card stock in half to create the card base.
  2. Stamp the compass image in Early Espresso randomly on the Early Espresso card stock
  3. Die cut the border die from the World Map Dies on the right side of the Early Espresso card stock
  4. Die cut the piece of the World of Good Designer Series Paper that looks like old paper with the largest Stitched Oval Die
  5. Emboss the stitched oval with the Old World Paper 3D Embossing Folder
  6. Sponge Crumb Cake Ink over the embossed oval and around the edges to make it look older
  7. Stamp the sentiment in Tuxedo Black Memento Ink Pad on the Whisper White card stock and die cut it with the appropriate Painted Label Die
  8. Sponge Crumb Cake Ink around the edges of the sentiment piece to make it look older
  9. Using Adhesive Sheets, adhere the Gold Foil Sheet to it and then die cut the world from the World Map Dies
  10. Die cut the 2020–2022 In Color 6″ x 6″ Designer Series Paper using the circle from the World Map Dies
  11. Peel off the Adhesive Sheets and adhere the world to this circle
  12. Die cut the Basic Black card stock with the pedestal from the World Map Dies
  13. Using glue dots, adhere the globe to the pedestal
  14. Using Stampin’ Seal, adhere the Gold Foil strip to the card base
  15. Adhere the World of Good Designer Series Paper to the card base with Stampin’ Seal allowing the Gold Foil to show
  16. Adhere the Early Espresso piece to the card base with Stampin’ Seal
  17. Using Stampin’ Seal, adhere the Stitched Oval to the card base on the lower right
  18. Using dimensionals, adhere the sentiment, globe and feather
  19. Randomly add 3 Metallic Pearls

For Further Info:

Hope you like My Life Is A Beautiful Journey Card!

Check out the Stampin’ Up! video on the World of Good Suite:
https://www.youtube.com/watch?v=ukzbjrCgmvo&feature=youtu.be

Amazing how beautiful and packed full of coordinating products the WORLD OF GOOD SUITE in the Stampin’ Up! Annual Catalog is. The Beautiful World cling stamp set has globe imagery and sentiments that have to do with adventure. The sentiments are designed to work on the outside and the inside of your card project. The World Map dies cut out the imagery from the stamp set. The World of Good Specialty DSP has a 16th Century map style feel with gold foiling. The star maps on the DSP represent both Northern and Southern Hemispheres. Get the perfect weathered looking paper with the Old World Paper 3D embossing folder. Using this embossing folder will make it faster and easier to get an aged look on your paper, without the unwanted tearing.

To add to the travel and adventure theme Stampin’ Up! has included the Old World Memories and more card pack. When adding the final touches to your project you will love the antiqued brushed embellishments and the Early Espresso ribbon.

You will find the items listed above in my online store at: https://www.stampinup.ca/products/in-good-taste-suite-collection-(english)?demoid=2103981