My Evil Queen Card

My Design Team Card
My Evil Queen Card

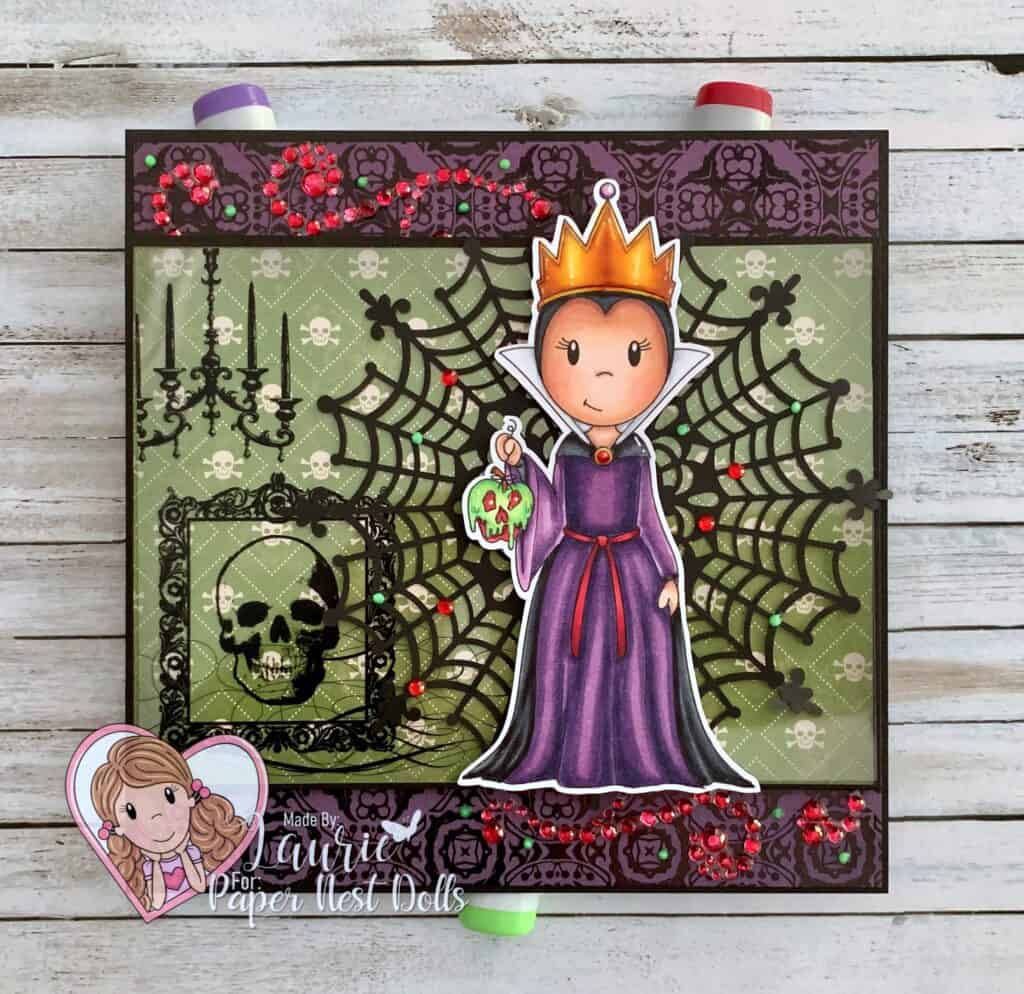
Hello Crafty Friends! It’s Laurie here! I am sharing My Evil Queen Card as my Design Team Inspiration Card for Paper Nest Dolls using the new release Evil Queen digital stamp. She is also available as a rubber stamp here. She just makes the cutest Halloween card!

For my stamp, I coloured the Evil Queen with my Copic Markers. I made her sleeves one shade lighter since I noticed in the Disney Show White movie that they are lighter. I then “painted” the Glow Drops onto her apple where the green is showing. Love that when you turn out the lights the poison glows! Next, I added some highlights with my White Gelly Roll Pen on the crown and jewels which I followed up with Glossy accents to make them shiny.

Video of The Nuvo Glow Drops in Action

For my card, I had these cool overlay acetates leftover from Halloween last year and thought having the poison paper show through it was a neat effect! Plus, the picture frame with the skeleton reminded me of her Magic Mirror! The spider web doily was in my stash, and I thought it was perfect way to frame her! The swirling rhinestones remind me of a magic spell being cast, but I wanted them red not clear. Easy enough to colour them with my R37 Copic Marker. To carry on the glowing theme, I added some dots with my Nuvo Glow Drops amongst the red rhinestones and on the web.

————————–

Copic Markers:

Skin: E04/E11/E21/E00/E000/R20
Dress: BV08/V17/V15
Sleeves: V17/V15/V12
Blacks: C9/C7/C6/C5
White: C3/C/0
Reds: R39/R37/R35
Gold: E15/Y38/Y35/Y060/0
Green: YG09/YG06/YG03/YG00
Apple Stem: E15
Rhinestones: R37
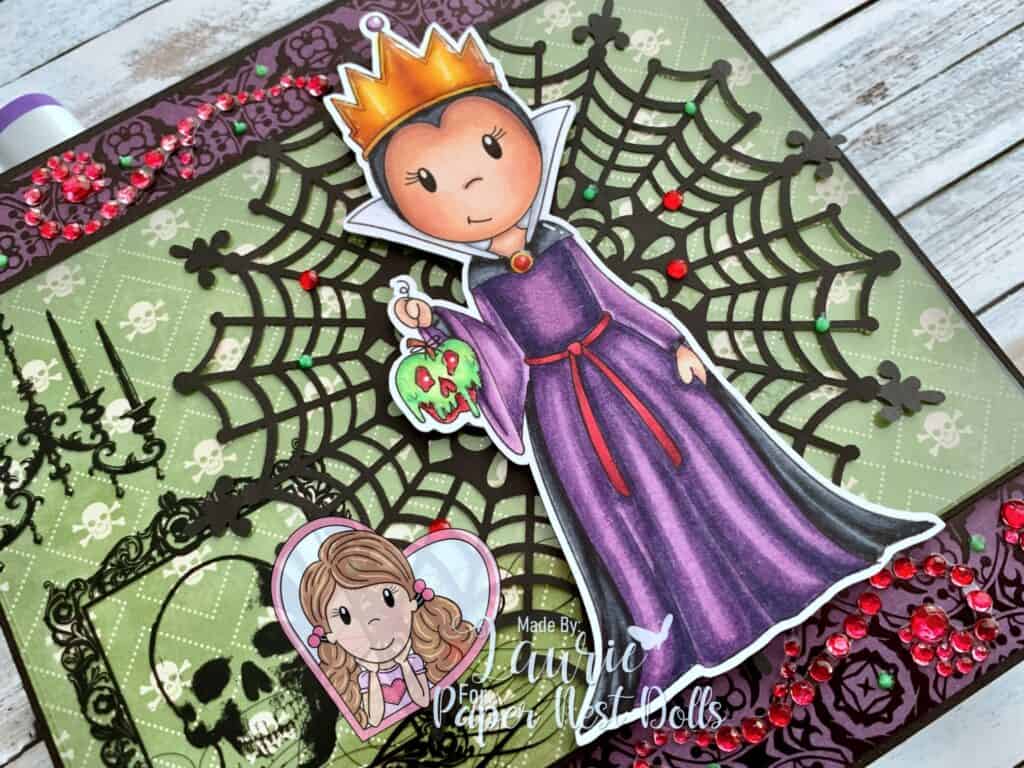
Close Up of My Evil Queen Card
Close Up of My Design Team Card

————————–

Card Recipe for My Evil Queen Card:

Evil Queen, Paper Nest Dolls
Paper Basics – Stamper’s Select White Cardstock, Papertrey Ink
13th Hour 6.5” x 6.5” Paper Pad, Kaiser Craft
Witches Brew 6” x 6” Paper Pad, Jillibean Soup
Black Soot Distress Ink, Ranger
Blending Brush, Stampin’ Up!
Midnight Magic Overlays, Recollections, Michaels Arts & Crafts Store
Spider Web Doily, Stampin’ Up!
Adhesive Rhinestones, Recollections, Michael’s Arts & Crafts
Red Rhinestones Basic Jewels, Stampin’ Up!
Apple Sour, Nuvo Glow Drops
Glossy Accents, Ranger
White Gelly Roll Pen
Old Paintbrush
Basic Black Card Stock, Stampin’ Up!

Finished card size: 5.75” x 5.75”

————————–

To view my other Paper Nest Dolls cards, please click here.

Hope you like my Design Team card using
Evil Queen by Paper Nest Dolls!

Thank you for stopping by!

Hugs,
Laurie

Have A Spooktacular Birthday Card

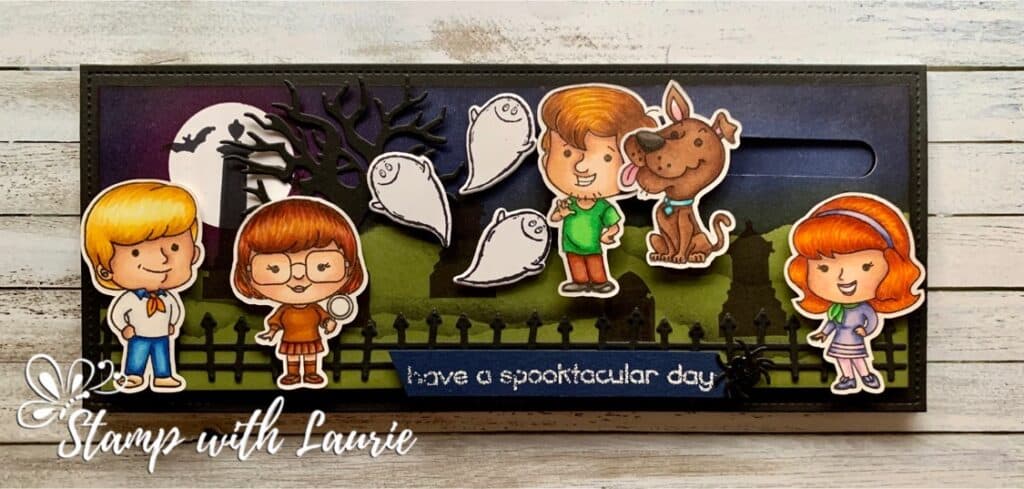
My Have a Spooktacular Birthday Card

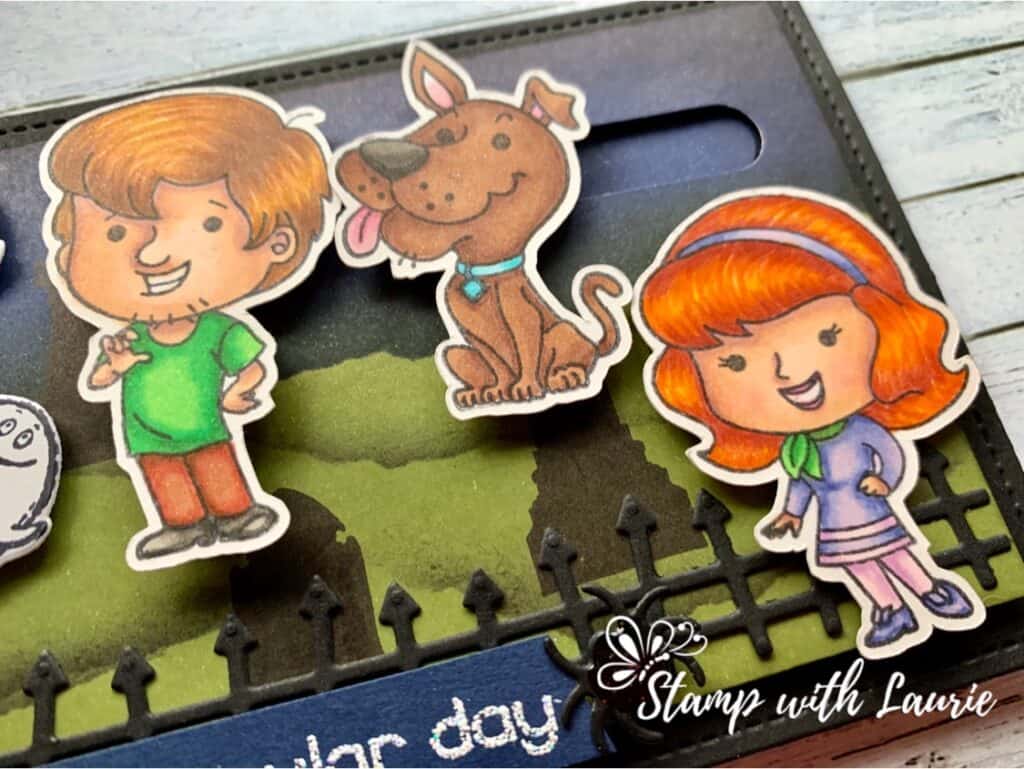
Hello Crafty Friends! It’s Laurie here with my Have a Spooktacular Birthday Card. Today is my Hubby’s birthday! He’s been hinting at a Scooby Doo card since I made one for my brother back in May (I have posted it at the end) or a Halloween card. So, I made him both! I coloured with my Copic markers the Teen Detectives from Kindred Stamps for the 30 Day Coloring Challenge in June in anticipation of this card. My card is a slimline card since they are all the rage right now.

Instructions for
Have a Spooktacular Birthday Card

I had a ton of fun creating the spooky graveyard scene with lots of sponging and masking! The moon and the ground were masked while sponging Rich Razzleberry around the moon, Night of Navy for the sky and Memento at the edges of the sky. Next, I sponged the ground in Old Olive. Since it is a lighter colour then Night of Navy, I didn’t have to bother masking the sky. I added some hills by using the same masks and lightly sponging some black ink on different angles. Once I removed the masks, I stamped the grave stones and bats in black ink.

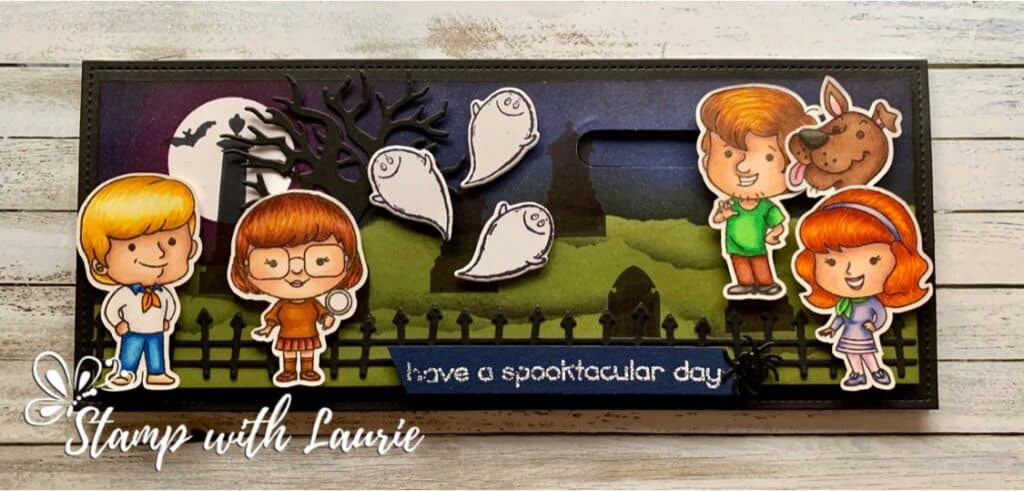
My Have a Spooktacular Birthday Card
My Have a Spooktacular Birthday Card with Shaggy and Scooby Running Away

I added a slider mechanism for Shaggy and Scooby since they are always running away from the scary monsters in the series! LOL! And in this case, it is the cute ghosts that are immerging from the graveyard! The Large Slimline with Sliders Dies comes with sliders, but I found that they were too long for what I wanted. So, I created my own using the retired Classic Label Punch by Stampin’ Up! I punched one and a half times overlapping in the area I wanted the slider to be. I used some pennies and dimensionals to create my sliders.

A die cut spooky fence, tree and spider with Shimmery Crystal Effects to make it glitter add to the Spooktacular scene!

————————–

Copic Markers:

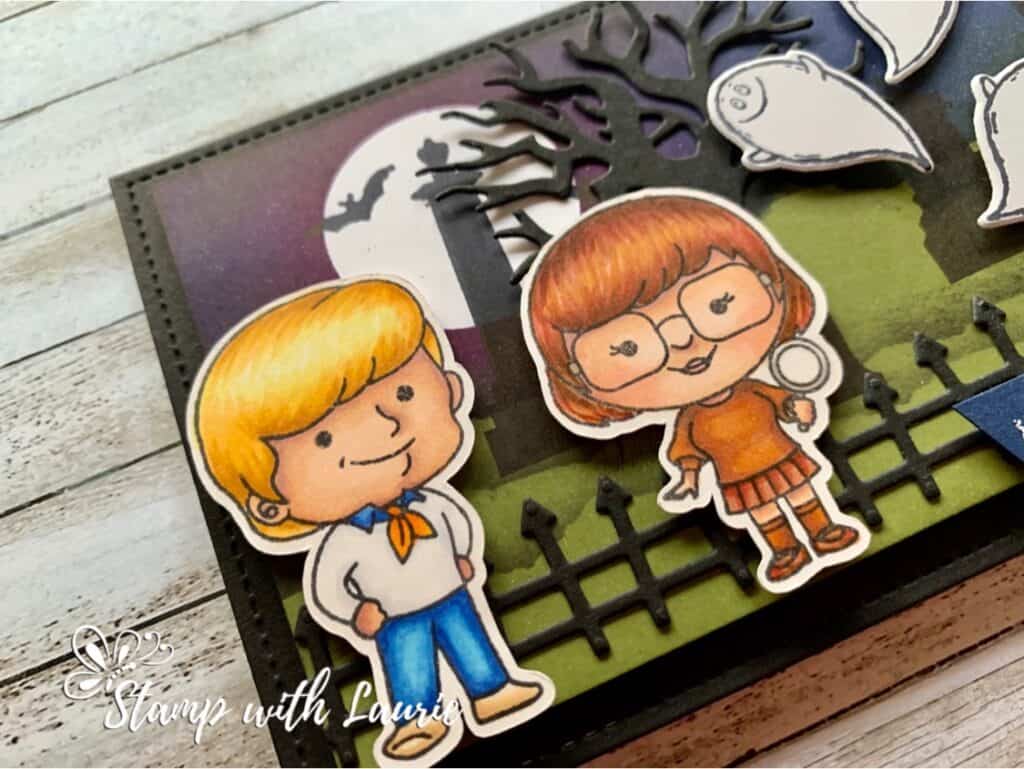
Fred
Skin: E000/E00/E21/E11/E04
Hair: YR24/Y35/Y13/Y11/Y00
Scarf: YR09/YR16/Y17
Shoes: E50/E53/E55
Pants/ shirt collar: B18, B26, B24, B12, B41 
Sweater: C0/C1/0

Velma
Skin: E000/E00/E21/E11/E04/R20
Hair: E57/E37/E08/E15/YR27
Skirt: E37/E08/E15
Shirt: E57/E15/YR27
Magnifier: W4/0

Close Up of Fred and Velma

Shaggy
Skin: E50/E51/E53
Hair: E57/E25/E99/YR27/YR24
Shirt: G07/YG09/YG06
Pants: E37/E08,/E15
Shoes: W8/W6/W4

Daphne
Skin: E50/E51/E53/R20
Lips: RV34
Hair: E08/YR18/YR07/YR04/Y17
Scarf: G07/YG09/YG05
Dress/Shoes/Headband: BV04/BV00/BV02
Stripes/Tights: V12/V01/RV00

Scooby
Fur: E27/E25/E23/W9
Collar: BG45/BG01
Tongue/Ears: RV34/RV32
Nose: W9/W7/W5/0

Close Up of Shaggy, Scooby and Daphne

————————–

Card Recipe for
Have a Spooktacular Birthday Card:

Teen Detectives, Kindred Stamps
Paper Basics – Stamper’s Select White Cardstock, Papertrey Ink
Large Slimline with Sliders, Lawn Fawn
Spooky Fence Die-Namics, My Favorite Things
Halloween Scene Edgelits, Stampin’ Up!
Wicked Dies, Stampin’ Up!
Cauldron Framelits Dies, Stampin’ Up!
Caldron Bubble Stamp Set
Spooky Village Stamp Set, Lawn Fawn
Graveyard Gate Stamp Set, Stampin’ Up!
Classic Label Punch, Stampin’ Up!
Glossy Accents
Shimmery Crystal Effects, Stampin’ Up!
VersaMark Ink
Shimmery White Stampin’ Emboss Powder, Stampin’ Up!
Rich Razzleberry Classic Stampin’ Pad, Stampin’ Up!
Night of Navy Classic Stampin’ Pad, Stampin’ Up!
Tuxedo Black Memento Ink Pad, Stampin’ Up!
Old Olive Classic Stampin’ Pad, Stampin’ Up!
Stampin Sponges, Stampin’ Up!
Basic Black, Night of Navy, and Whisper White Card Stock
2 Pennies for slider
Finished card size: 8.5” x 3.5”

————————–

My other Teen Detectives Card that I made for my brother. I used the same colours of the characters for both cards.

————————–

You tried to hide your birthday & you would have gotten away with it if it wasn’t for those pesky kids!.

To view my other Copic cards, please click here.

Hope you like my Have a Spooktacular Birthday Card using Teen Detectives by Kindred Stamps!

Thank you for stopping by!

Hugs,
Laurie
A Goth Family Portrait Halloween Card

A Goth Family Portrait Halloween Card

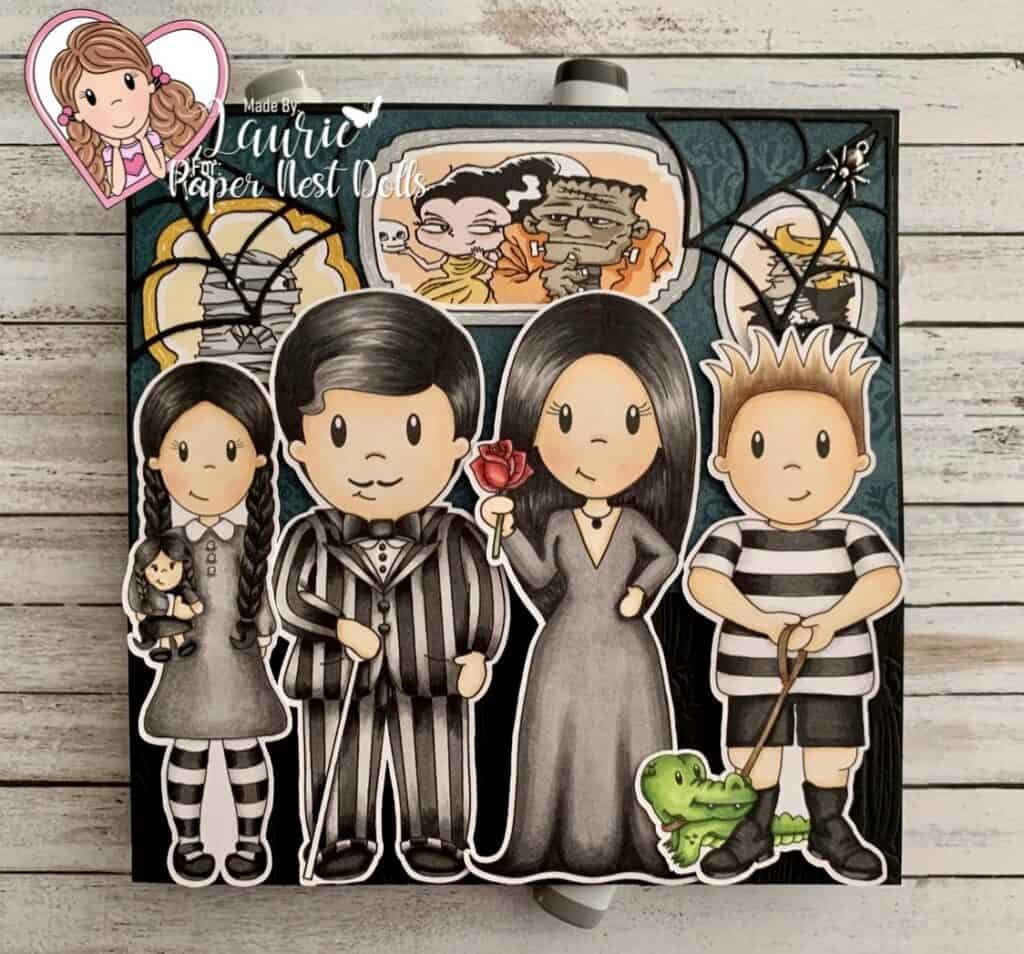
Hello Crafty Friends! It’s Laurie here sharing my Goth Family Portrait for the Design Team of Paper Nest Dolls. This card incorporates 4 different digital stamps that include Goth DadGoth MomGoth Boy and Goth Girl from the October New Release to create my family portrait!

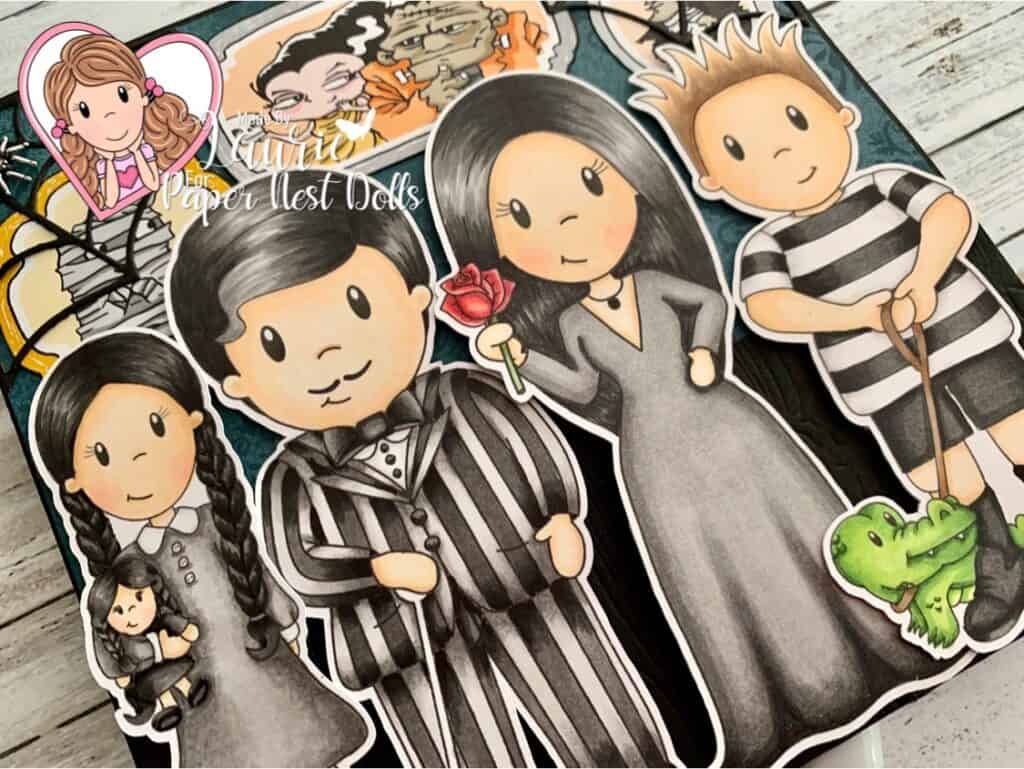
When I was little, I loved to watch the Addams Family in B&W on TV. I was so excited when I saw this month’s release! I decided to colour the family in the colours from the Addams Family movies. So, I gave them very pale skin, but with dark clothing using only T Copic Markers to achieve the effect. I love the pop of colour with the rose and the alligator. I thought they would want to have their portrait taken in front of some of their ancestors that are hung on the wall. Being a Halloween card, you have to have spider webs with spiders in the corners. I hope you like my take on my family portrait!

Close Up of A Goth Family Portrait Halloween Card

————————–

Copic Markers:

Goth Dad
Skin: E50/E51/E53
Hair: T9/T7/T5/T3
Suit: T9/T7/T5 (dark stripes), T5/T3/T1 (light stripes)
Tie: T9/T7/T5/T4
Shirt: T2/0
Shoes: T9/T7/T5

Goth Mom
Skin: E50/E51/E53/R20
Hair: T9/T7/T5/T4/T3
Dress: T9/T7/T5/T3
Rose: R39/R37/R35/R32/G21/G94/G99

Goth Boy
Skin: E50/E51/E53
Hair: E57/E43/E53/E50
Shirt: T9/T7/T5 (dark stripes), T2/T1/0 (light stripes)
Pants/Socks/Shoes: T9/T7/T5
Alligator: YG03/YG17/YG67
Leash: E57/E43

Goth Girl
Skin: E50/E51/E53/R20
Hair: T9/T7/T5/T3
Dress: T5/T4/T3/T2/T1/0
Shoes: T9/T7/T5
Socks: T9/T7/T5 (dark stripes), T2/T1/0 (light stripes)
Doll: Same colours as Girl

————————–

Card Recipe for A Goth Family Portrait Halloween Card:

Goth DadGoth MomGoth BoyGoth Girls, Paper Nest Dolls
Sweet Sentiment Premium Coloring Paper
Cauldron Framelits Dies, Stampin’ Up!
Pinewood Planks 3D Embossing Folder, Stampin Up!
Magic in this Night Designer Series Paper, Stampin Up!
Monster Bash Designer Series Paper, Stampin Up!
Spider Trinkets, Stampin’ Up!
Basic Black Card Stock, Stampin’ Up!

————————–

To view my other Paper Nest Dolls cards, please click here.

Hope you like my Goth Family Portrait
using The Goth Digital Stamps by Paper Nest Dolls!

Thank you for stopping by!

Hugs,
Laurie
Spooky Double Z-Fold Halloween Card

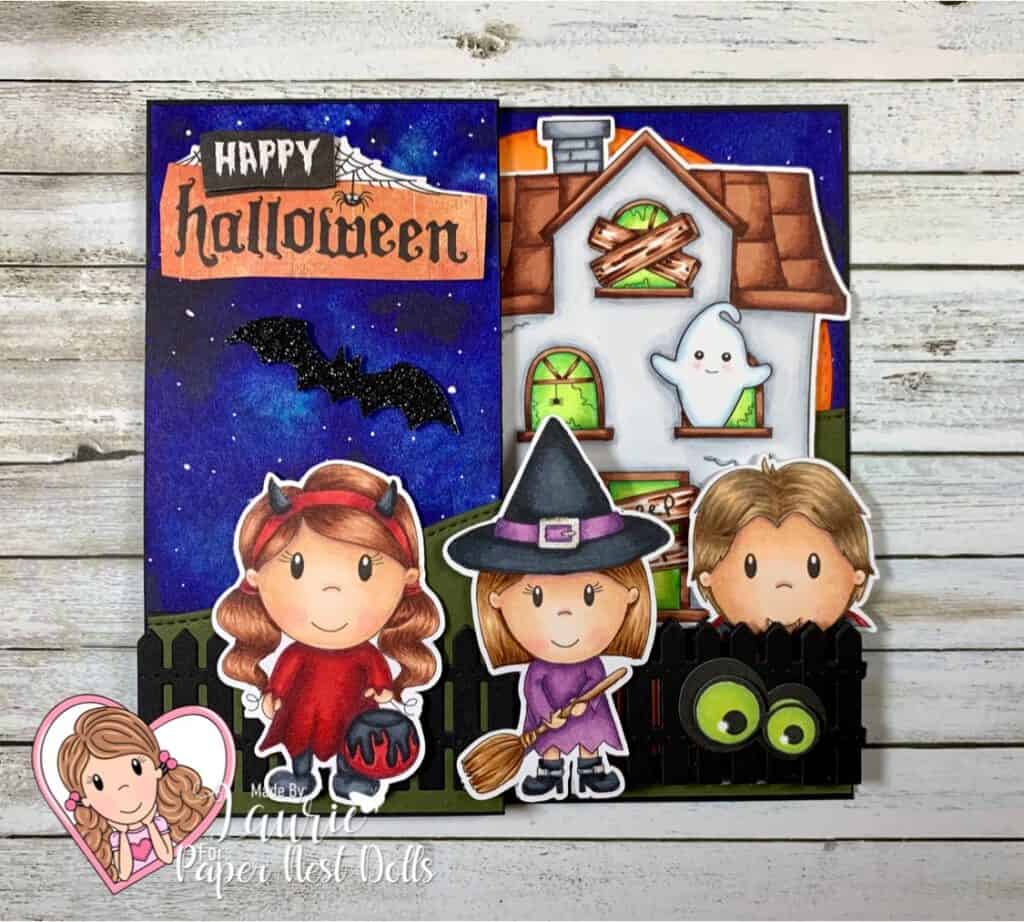
Spooky Double Z-Fold Card

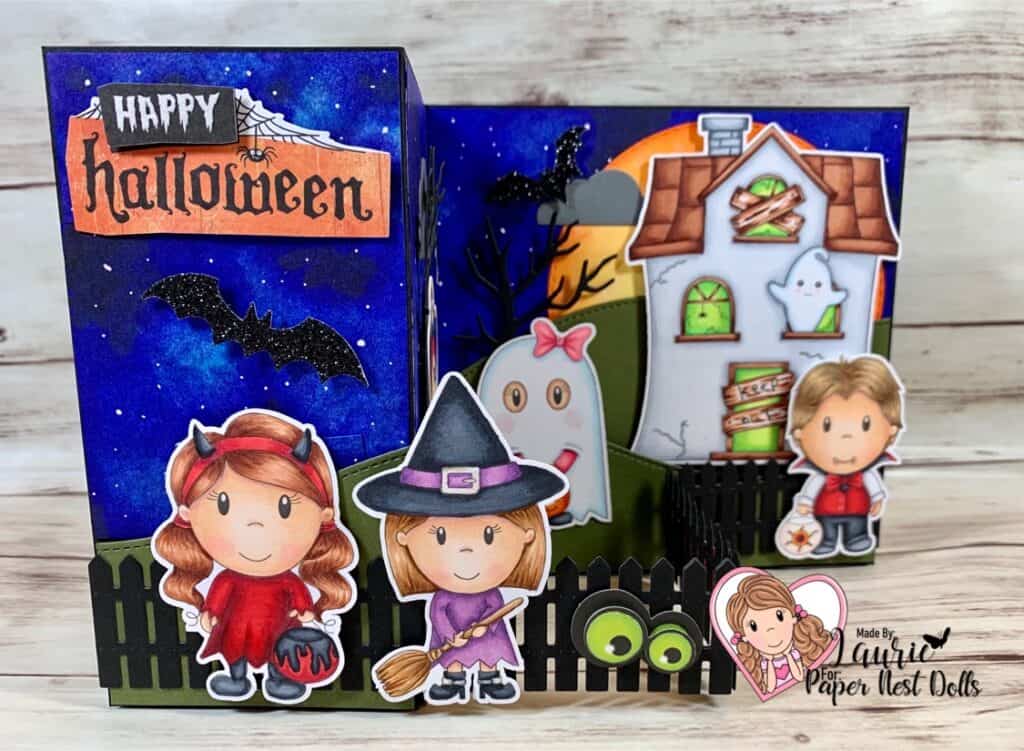
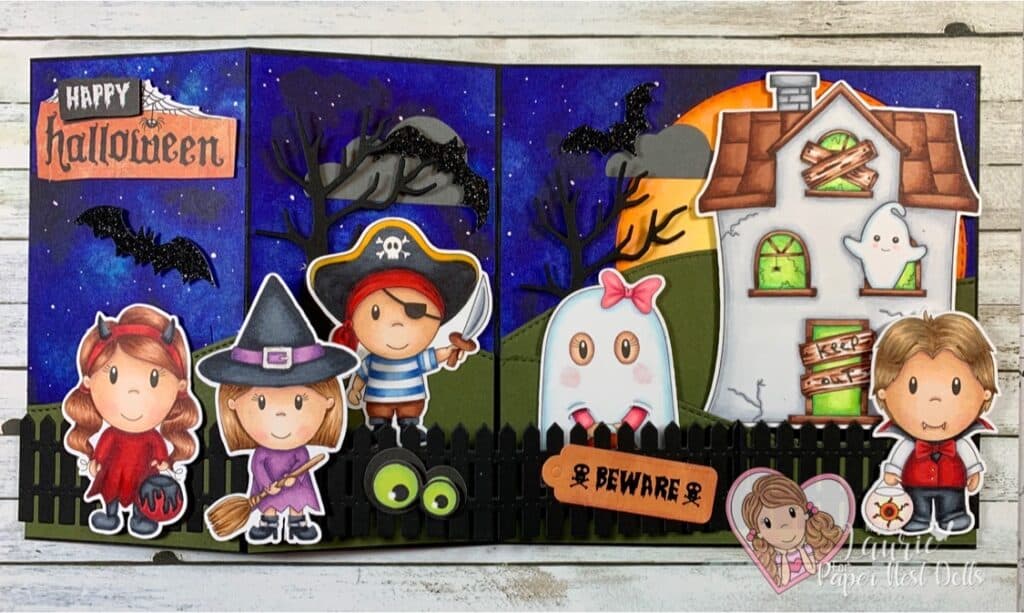
Hello Crafty Friends! It’s Laurie here sharing my Spooky Double Z-Fold Halloween Card for the Design Team of Paper Nest Dolls. I had so much fun colouring with my Copic Markers these cuties from the Spooky House Set (7 Stamps). This set comes with 7 stamps including 6 characters and a haunted house. I used the digital stamps, but this set also comes in rubber and can be found in the store here.

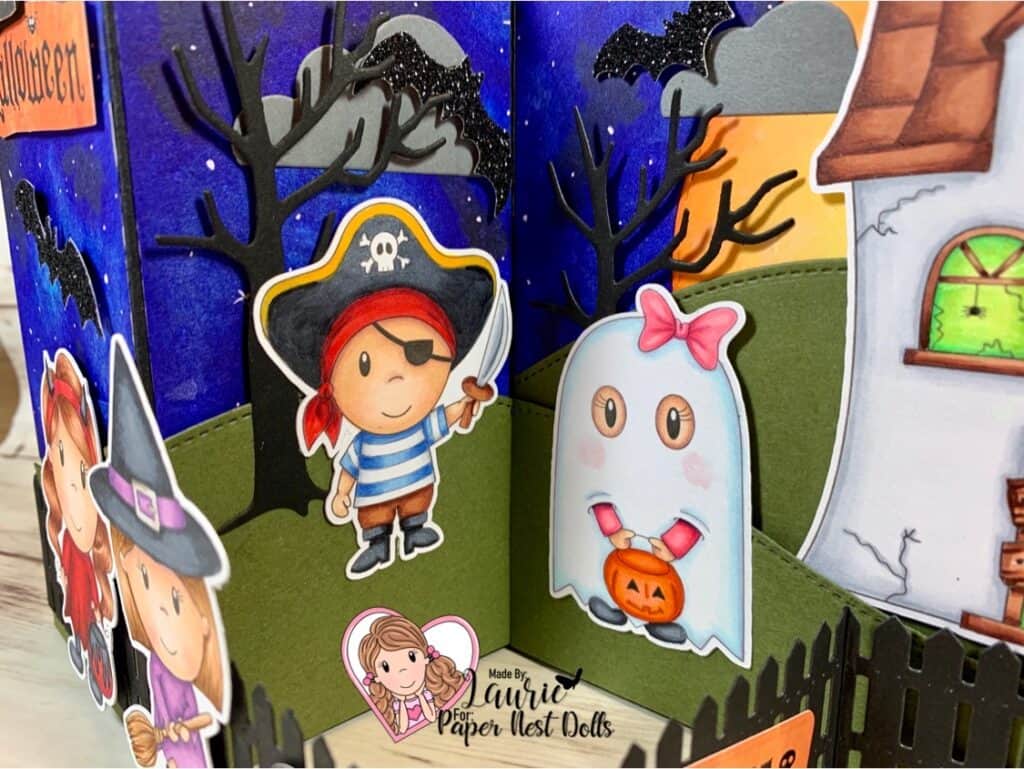
I had a ton of fun creating this spooky double z-fold card for our trick-or-treaters who are out roaming around! Do they dare go to the eerily spooky house on the hill??? The pirate and the ghost are headed that way!

Spooky Double Z-Fold Halloween Card Flat

Techniques Used in My Spooky Double Z-Fold Halloween Card

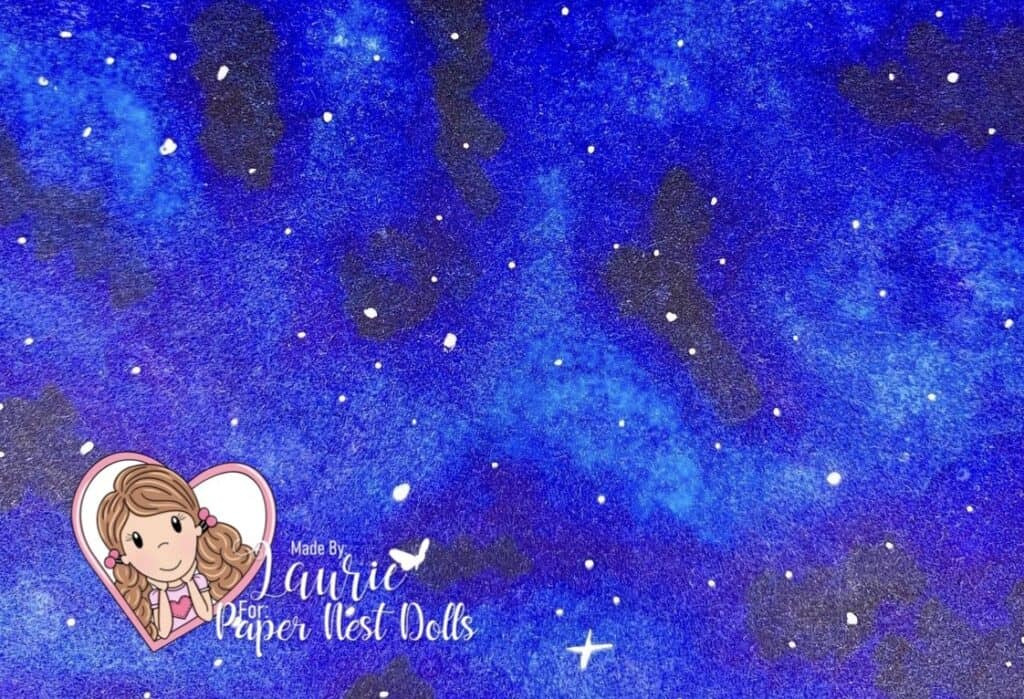
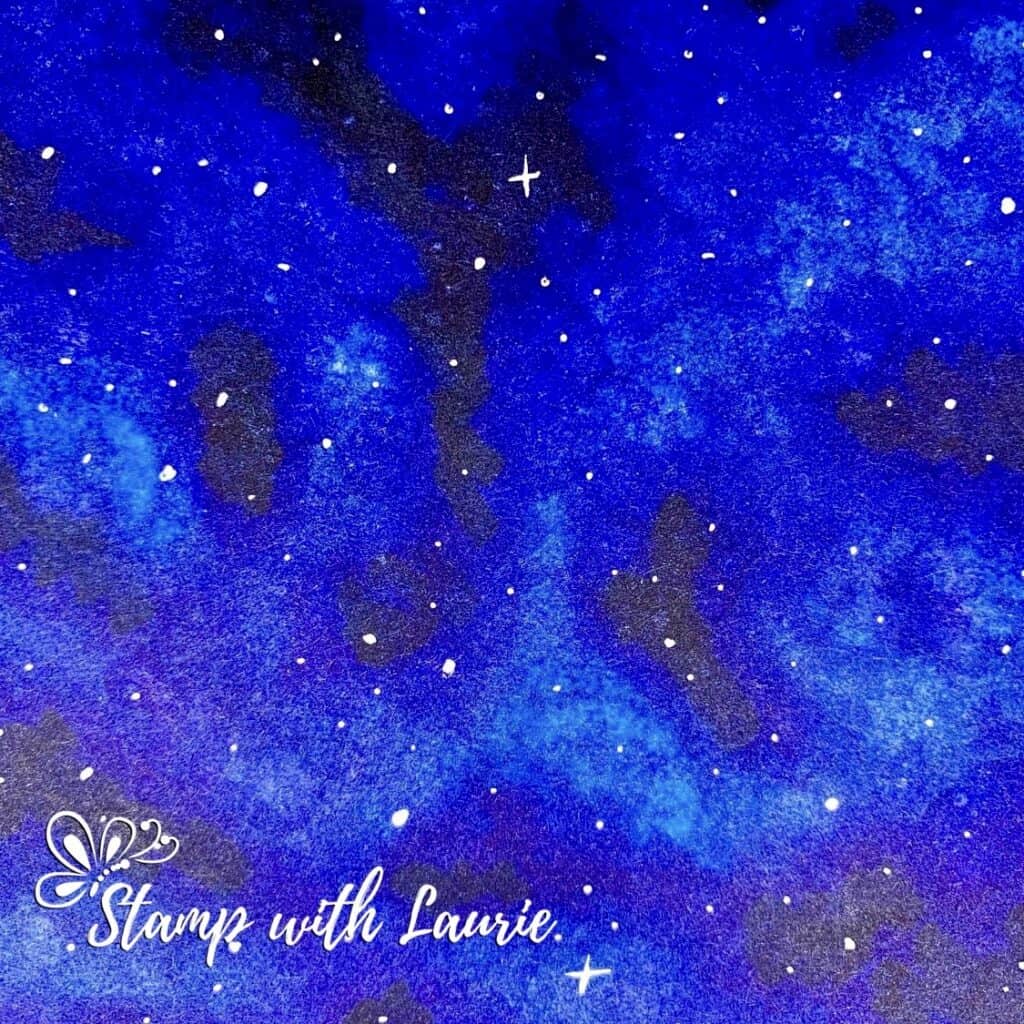
To create my spooky night sky, I used a technique called the Copic Galaxy Background. For the galaxy stars, I used my Tim Holtz Distress Splatter Brush. I also used a White Gelly Roll Pen and the Colorless Blender, to make my some of my stars appear brighter/closer.

Galaxy Sky
Galaxy Sky

Next I used Tim Holtz Squeezed Lemonade, Carved Pumpkin and Ripe Persimmon Distress Ink Pads with a Round Blending Tool to create my glowing moon on a stitched circle die. Using the Splatter Brush again, I splattered water onto the moon to give a bit of texture once it was dry.

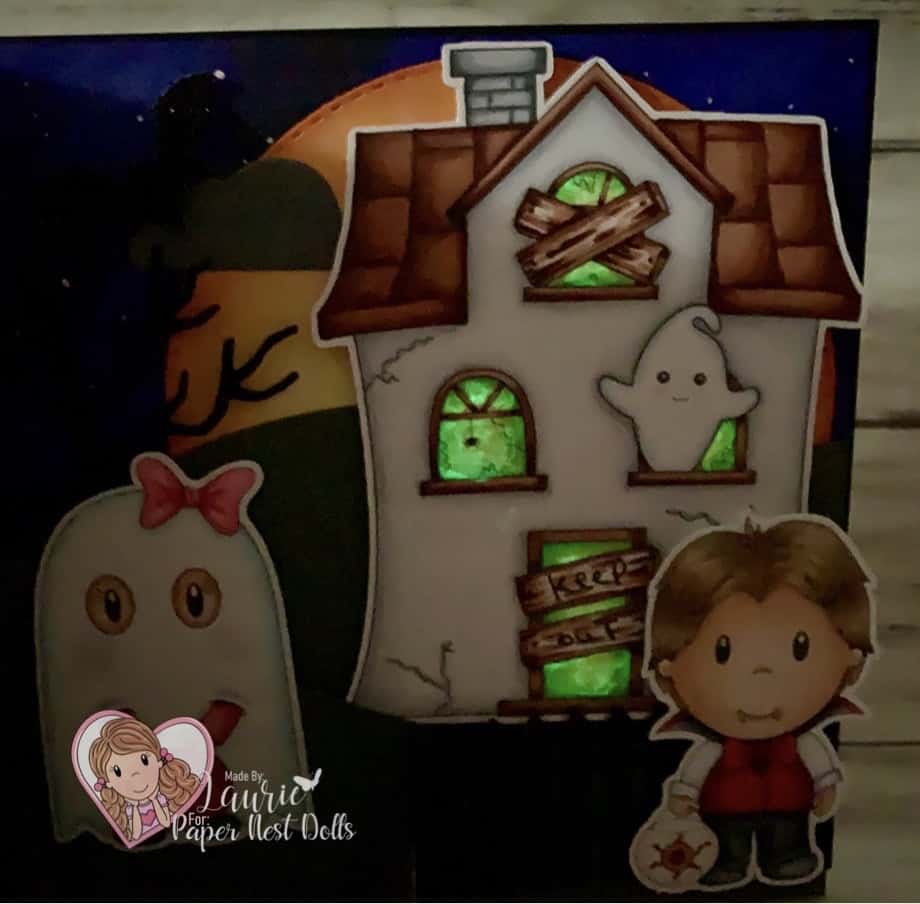
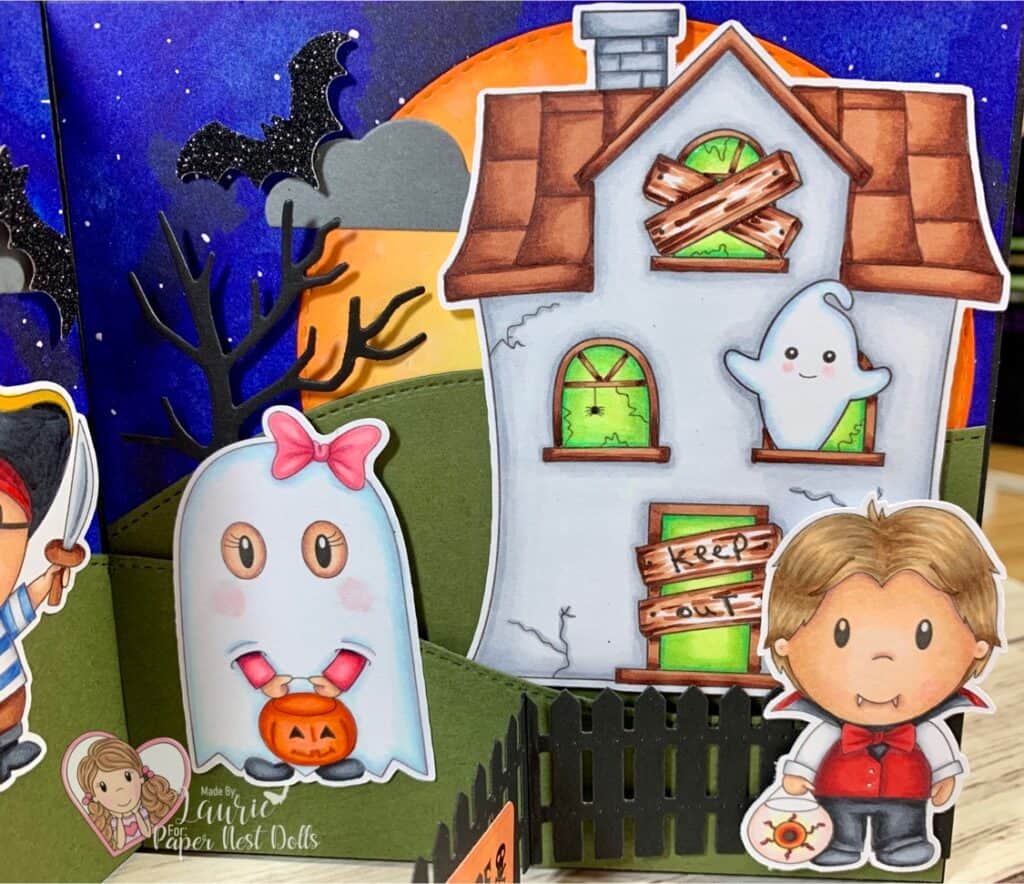
I love the Spooky House that comes with this set! I had fun colouring it, especially those glowing windows and doorway! In addition to colouring them, I use a paint brush and painted a thin layer of Apple Sour Nuvo Glow Drops. I wanted the details of the broken panes of glass and the spider to still be seen, but when you turn out the lights, the windows and door glow spookily.

Glowing Windows and Door

————————–

Copic Markers:

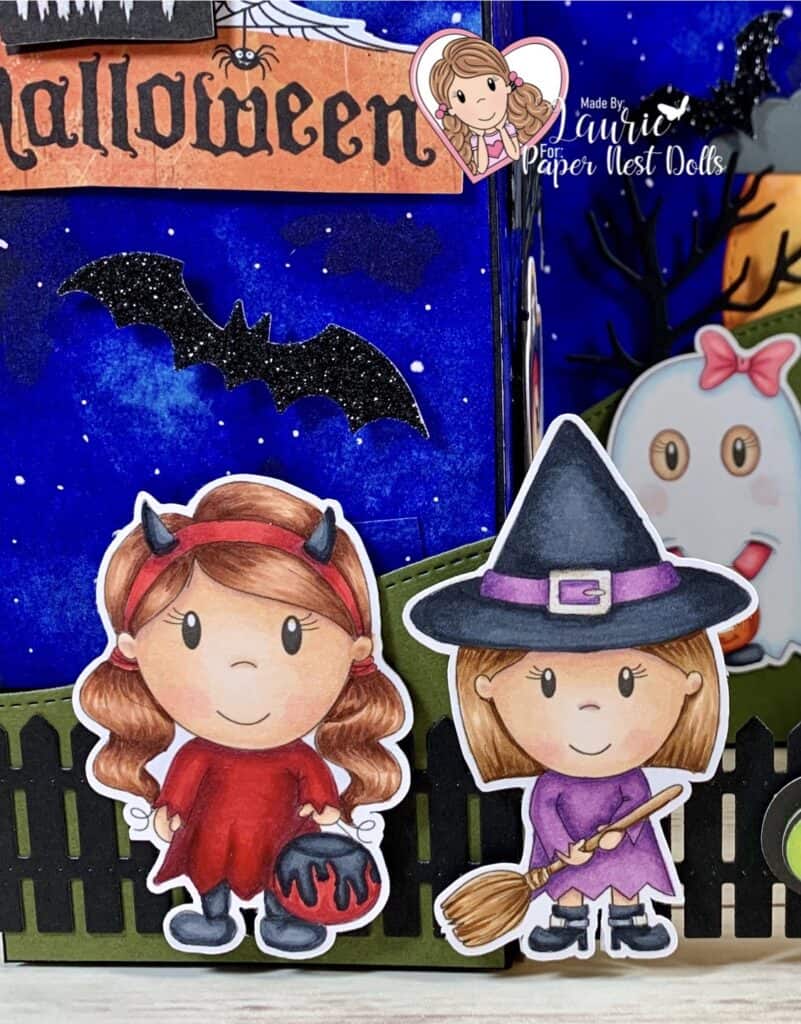
Devil
Skin: E000/00/21/11/04/R20
Hair: E18/E15/E13/E11
Red Bits: R39/R37/R35/C3
Black Bits: C9/C7/C6/C4

Witch
Skin: E000/00/21/11/04/R20
Hair/Broom: E30/E33/E35/E37
Dress: V12/V15/V17
Hat/Boots: C9/C7/C6/C4

Close Up of Devil and Witch

Pirate
Skin: E000/00/21/11/04/R20
Hat: C9/C7/C6/Y17/Y19/Y28
Bandana: R39/R37/R35/C3
Shirt: B21/B23/B26/C3/C1/C0/0
Pants: E15/E18/E18
Boots: C9/C7/C6

Ghost
Skin: E000/00/21/11/04/R20
Sheet:B000/BV00/B0000/0
Pinks: RV17/RV14/RV13/RV21
Shoes: C7/C6/C4
Pumpkin: YR02/YR04/R05/R08/YR27

Close Up of Pirate and Ghost

Vampire
Skin: E000/00/21/11/04/R20
Hair: E28/E53/E43
Shirt: C3/C1/C0/0
Vest: R39/R37/R35/C3
Pants/Shoes: C9/C7/C6/C4/C3
Eyeball: R39/R00/R000/Y17/Y00

Spooky House
House: C3/C2/C1/C00
Wood Trim/Roof: E18/E17/E13
Windows: YG00/YG03/YG06/YG09
Chimney: C6/C3/C2
Ghost: B000/BV00/B0000/0E31/E33/E35/E37

Galaxy Sky
B79/B69/FB2/BG32/100/0/Colorless Blender Refill

Close Up of Ghost, Vampire and House

————————–

Card Recipe for Spooky Double
Z-Fold Halloween Card:

Spooky House Set (7 Stamps), Paper Nest Dolls
Sweet Sentiment Premium Coloring Paper
Squeezed Lemonade Distress Ink Pad, Tim Holtz
Carved Pumpkin Distress Ink Pad, Tim Holtz
Ripe Persimmon Distress Ink Pad, Tim Holtz
Slimline Stitched Hillside Boarders Dies, Lawn Fawn
Picket Fence Die-namics, MFT
Flat-Bottom Clouds Die-namics, MFT
4” Stitched Circle Die, Memory Box
Spooky Bats Punch, Stampin’ Up!
Haunted House Die-Namics, MFT
KP Halloween Icon Die-cut Cardstock, K & Company
KP Halloween Layered Accents, K & Company
Black Glitter Paper, Stampin’ Up!
Apple Sour, Nuvo Glow Drops
Small Paint Bruch
Black Gelly Roll Pen
Silver Gelly Roll Pen
White Gelly Roll Pen
Tim Holtz Distress Splatter Brush
Tim Holtz Mini Round Blending Tool
Basic Black, Mossy Meadow, Basic Gray and
Whisper White Card Stock, Stampin’ Up!
Card Size: 5 ½” x 5 ½”
Digital Characters Size: 2 ½” Tall
Digital House Size: 4” x 3 ¼”

My Spooky Double Z-Fold Halloween Card Folded Down

————————–

To view my other Paper Nest Dolls cards, please click here.

Hope you like my Spooky Double Z-Fold Halloween Card
using Spooky House Set (7 Stamps) by Paper Nest Dolls!

Thank you for stopping by!

Hugs,
Laurie
Happy Halloween Design Team Card

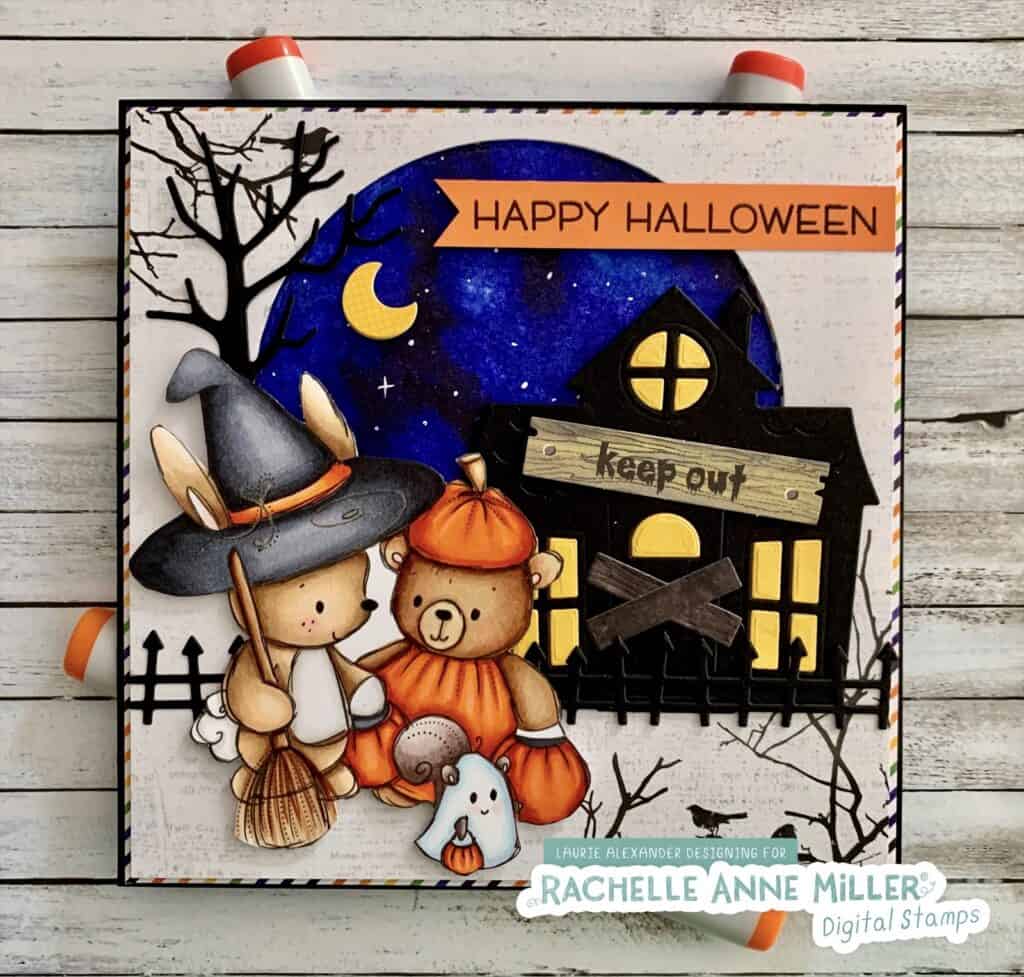
My Happy Halloween Design Team Card

Hello Crafty Friends! It’s Laurie here with my Happy Halloween Design Team Card for Rachelle Anne Miller Creative Studios. My card is using the super cute Halloween Costumes Digital Stamp! Halloween is just around the corner and this year will be different for everyone, especially the little ones.

For my card, I decided to create a haunted house scene as these cute Trick-or-treaters make their rounds. To create the spooky night sky, I used a technique with my Copic Markers that I learned from Elaine Hughes, Marker Geek. It is called the Copic Galaxy Background and was so fun to see it transform before my eyes. I didn’t have FBG2. So, I used BG32 instead and it worked just as well. For the galaxy stars, I used my Tim Holtz Distress Splatter Brush. I also used a White Gelly Roll Pen and the Colorless Blender, to make my some of my stars appear brighter/closer. I am very happy with how my night sky turned out!

Here is the link to Elaine Hughes’ Colouring Video & Step by Step Guide: https://markergeek.com/2015/07/copic-galaxy-background-colouring-video/.

My Copic Galaxy Background

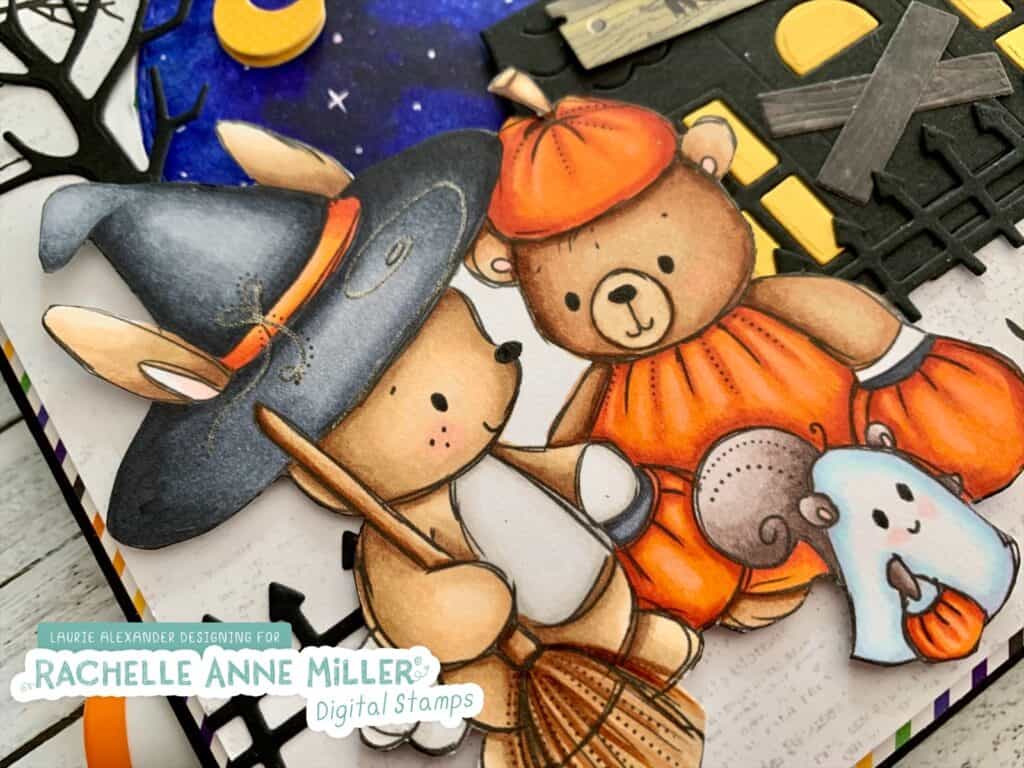
I decided to create a vignette of the night sky that sets off my spooky scene. The paper with the branches and birds was perfect for my card and a die cut tree on the left adds to the branches. The haunted house is lit up ready for tricker-or-treaters, but with lots of notices to keep out. It reminds me of when I was little, some people decorated the inside of their houses as well. You could enter but beware! I decided to fussy cut the cute little animals out so that the scene can surround them. I just love them and wanted to make them the focal point of my card!

————————–

Copic Markers:

Bear/Broom: E31/E33/E35/E37/R20
Bunny: E50/E51/E53/E55/E57/W0/W1/W3/0/R20
Squirrel: E70/E71/E74/E77
Ghost Sheet: B000/BV00/B0000/0/R20
Pumpkins/Pumpkin Costume: YR02/YR04/R05/R08/YR27
Witches Hat: C9/C7/C6/C5/C3/YR02/YR04/R05/R08
Galaxy Sky: B79/B69/FB2/BG32/100/0/Colorless Blender Refill

————————–

Close Up of My Happy Halloween Design Team Card

————————–

Card Recipe for My
Happy Halloween Design Team Card:

Halloween Costumes Digital Stamp, Rachelle Anne Miller Creative
Sweet Sentiment Premium Coloring Paper
Spooky Village Photopolymer Stamp, Lawn Fawn (sentiment)
Haunted House Die-Namics, My Favorite Things
Spooky Fence Die-Namics, My Favorite Things
4” Stitched Circle Die, Memory Box
13th Hour 6 ½” Paper Pad, KaiserCraft
Ghouls & Goodies 6” x 6” Paper Pad, Doodlebug Designs Inc.
Wood Textures Designer Series Paper Stack, Stampin’ Up!
KP Halloween Icon Die-cut Cardstock, K & Company
Wee Witch Doodle Pops Cardstock Sticker, Doodlebug Designs Inc.
Tuxedo Black Memento Ink Pad
Black Gelly Roll Pen
Clear Gelly Roll Pen
White Gelly Roll Pen
Tim Holtz Distress Splatter Brush, Ranger
Basic Black, Pumpkin Pie and Crushed Curry Card Stock
Finished card size: 6” x 6”

————————–

Wishing you a spook-tacular Halloween!

To view my other Rachelle Anne Miller Creative Studios cards, please click here.

Hope you like my Happy Halloween Design Team Card for
Rachelle Anne Miller Creative Studios!

Thank you for stopping by!

Hugs,
Laurie