My Beary Christmas Cards 

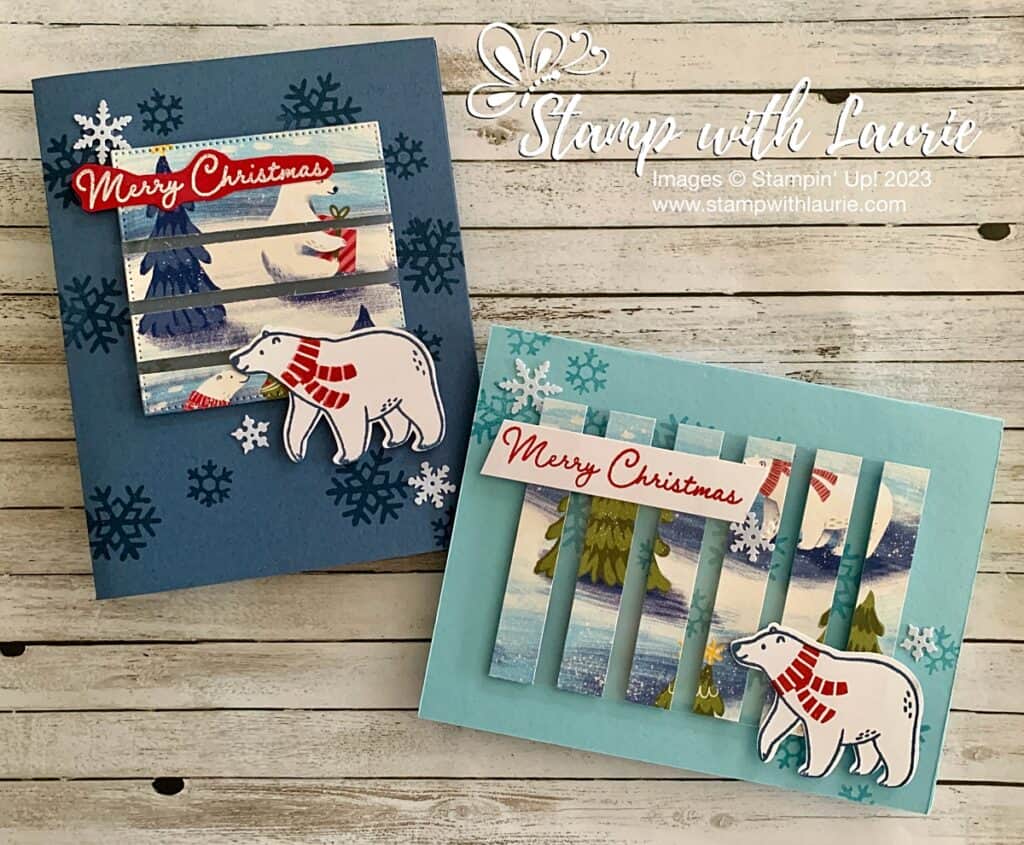
My Beary Christmas Cards  - two Christmas card with a Polar Bear and a wintery scene
My Beary Christmas Cards

Hello Crafty Friends! Laurie here again! I am sharing My Beary Christmas Cards using the Beary Cute Bundle by Stampin’ Up! which includes the Beary Cute Stamp Set and coordinating Beary Cute Punch. This bundle is retiring. So, make sure you get it before it’s too late!

The Details of My Beary Christmas Cards

For my cards, I decided to make a floating element using one of the scenes from the Beary Christmas Designer Series Paper. I had so much fun that I created two different cards with the same elements. For one, I used Misty Moonlight and the other, Balmy Blue card stock bases. A floating element uses acetate or window sheet on which you adhere strips of DSP leaving gaps between the pieces. Then you use dimensionals under the DSP to make it look like the element is floating.

The scene strips were cut at ½” width and lined up in order on my window sheet for placement before adhering them down. I started with the two end pieces and then the centre ones working out to the ends. Tip: use grid paper for an even gap between pieces. Since the DSP was ½ wide, it allowed me to place my dimensionals behind the paper. Thus, hiding them to complete my floating element.

Misty Moonlight Card

I made the Misty Moonlight card portrait and used the largest square from the Stylish Shapes Dies to die cut my square once I had adhered the 5 DSP scene pieces to the Window Sheet.
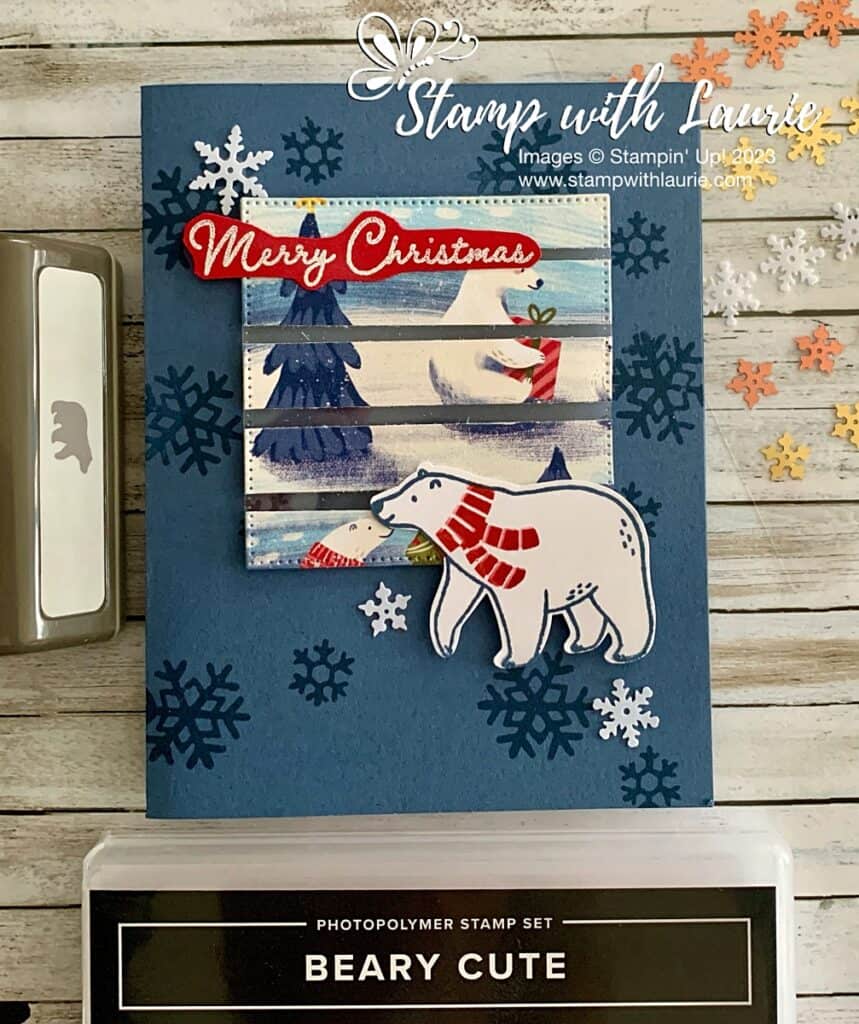
Misty Moonlight Card with a Polar Bear on it.
Misty Moonlight Card

I stamped snowflakes in Misty Moonlight for a tone-on-tone around my central focal point.

The sentiment was white embossed on some Real Red card stock and then fussy cut with my Paper Snips.

The polar bear was stamped in Misty Moonlight and Real Red for his scarf before it was punched out.

Balmy Blue Card

For my Balmy Blue card, I decided that I wanted to use more of the DSP. So, I made the floating element larger with 6 pieces of DSP and wider gaps. I stamped the Balmy Blue snowflakes at an angle through the centre of the card. This allowed the snowflakes to show through the Window Sheet!
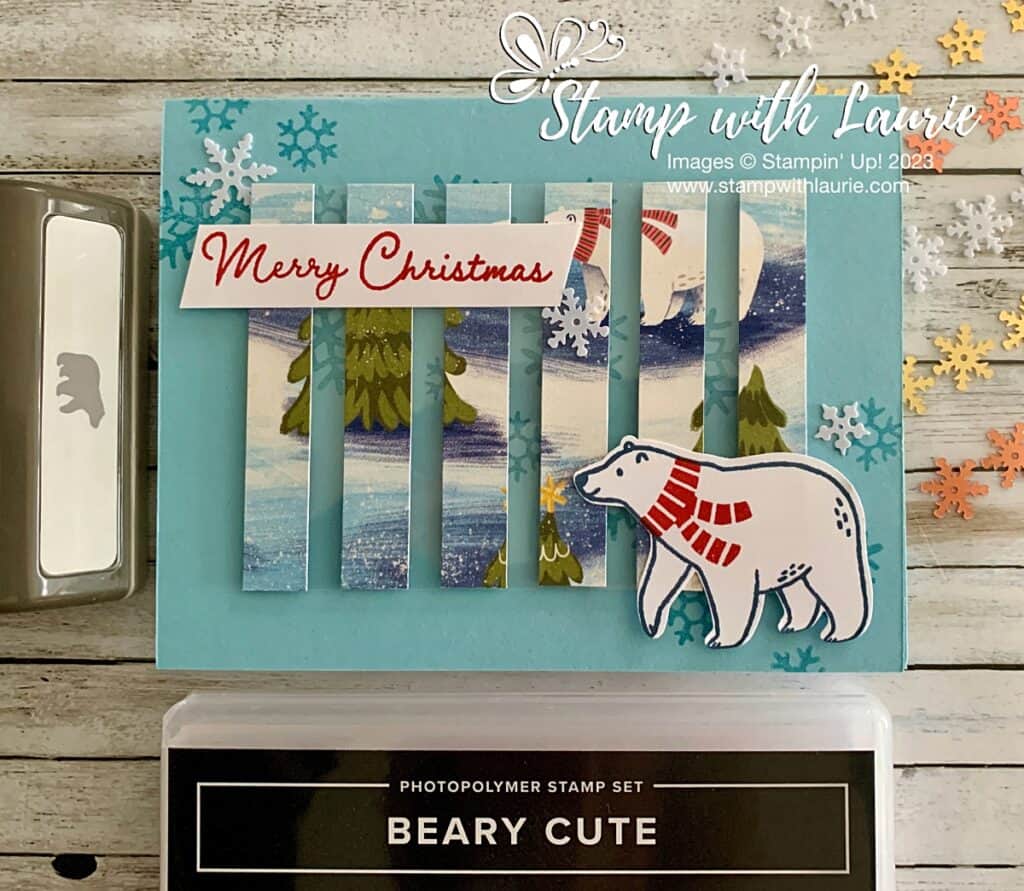
Balmy Blue Card with a Polar Bear on it
Balmy Blue Card

The sentiment was stamped in Real Red and snipped on an angle with my Paper Snips.

For both cards, I used the white snowflakes from the Adhesive-Backed Snowflake Assortment as my embellishments.

Supplies:

Stamps/Bundles/Dies: Beary Cute Bundle (162023), Stylish Shapes Dies (159183)

Inks: Misty Moonlight Classic Stampin’ Pad (153118), VersaMark Ink (102283), Balmy Blue Classic Stampin’ Pad (147105), Real Red Classic Stampin’ Pad (147084)

Paper: Misty Moonlight (153081), Balmy Blue (146982), Window Sheets (142314), Real Red (102482), Basic White (159276), Beary Christmas Designer Series Paper (162015)

Accessories: Adhesive-Backed Snowflake Assortment (162129), Basics Embossing Powder (155554), Embossing Additions Tool Kit (159971), Heat Tool (129053), Paper Snips (103579), Grid Paper (130148), Bone Folder (102300), Stampin’ Dimensionals (104430), Mini Glue Dots (103683), Mulitpurpose Liquid Glue (110755)

Measurements: 

  • Misty Moonlight/Balmy Blue:
    • 8 ½” x 5 ½” scored at 4 ¼”
  • Window Sheet:
    • 3” x 3” (for Misty Moonlight Card)
    • 3” x 4 1/8” (for Balmy Blue Card)
  • Real Red:
    • Scrap
  • Basic White: (3 pieces)
    • 2” x 2 ½” (Polar Bears)
    • Scrap (Sentiment)
  • Beary Christmas Designer Series Paper:
    • 3” x 2 ½” (for Misty Moonlight Card)
    • 3” x 3” (for Balmy Blue Card)

More Information on My Beary Christmas Cards:

For more of my Stampin’ Up! cards, please click here.

You will find the items listed above in my online store

Our Steampunk Journey Card

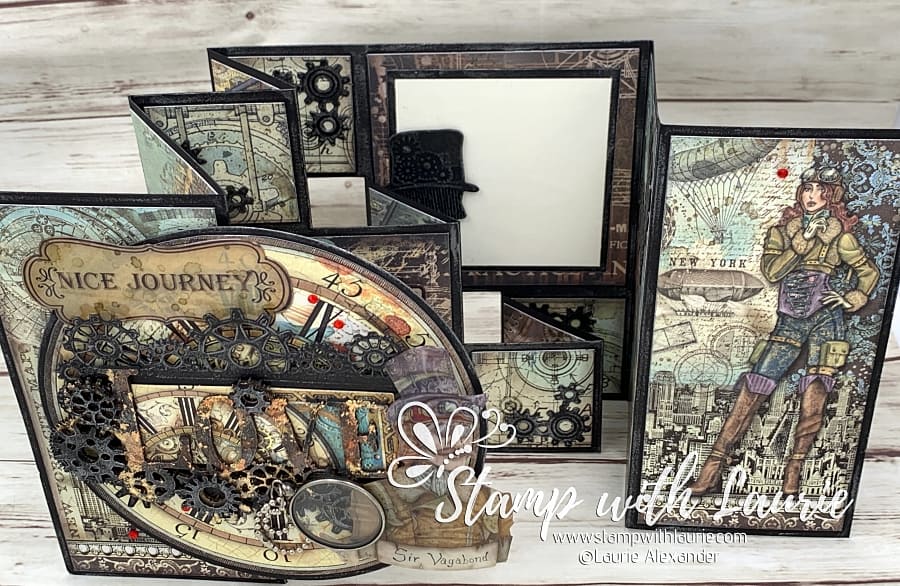
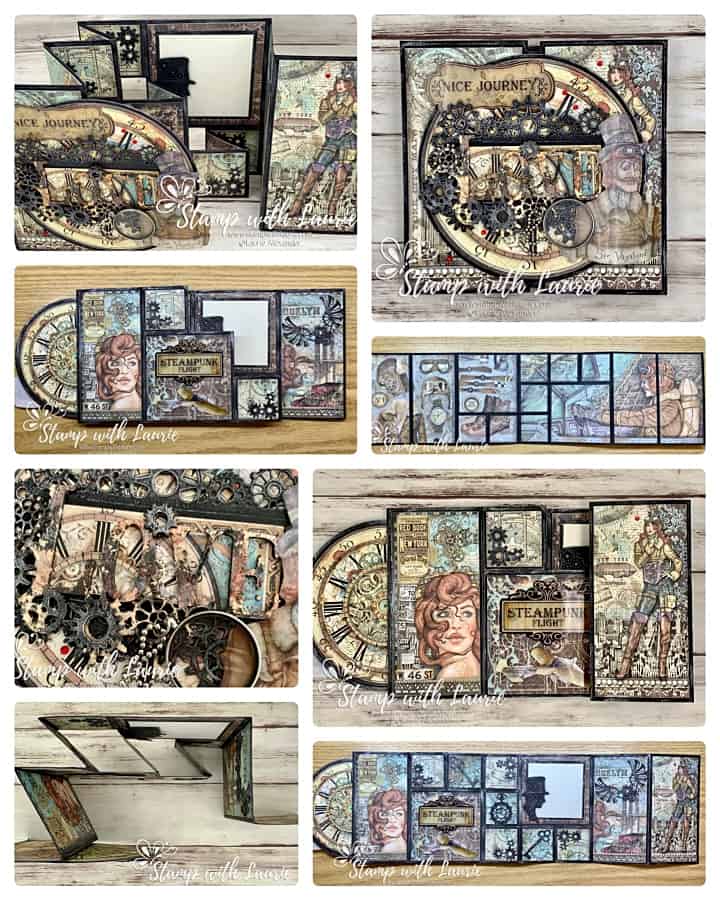
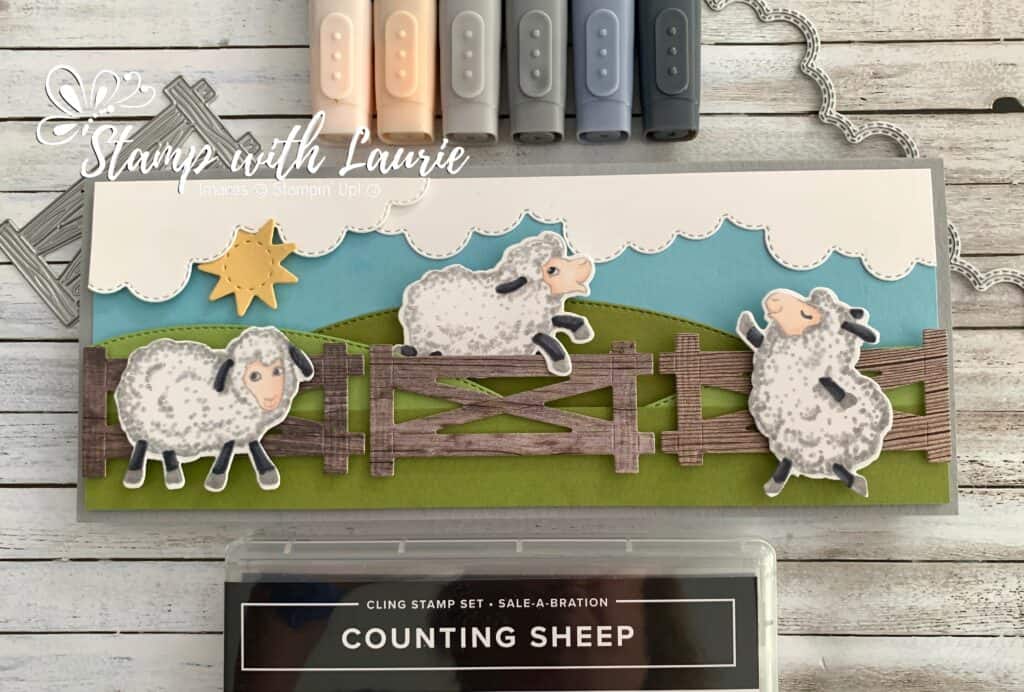
My Steampunk Journey Card - an anniversary card with gears and love on it
My Steampunk Journey Card

Hello Crafty Friends! Laurie here again! I am sharing Our Steampunk Journey Card using the Stamperia Vagabond Series of paper and die cuts to create my anniversary card for my Hubby. 

The Details of Our Steampunk Journey Card

My Hubby is always encouraging me to do what I love and explore mixed media more since I am still a novice. So, I decided to create a fun mixed media front with a steampunk feel for his anniversary card. He loves anything steampunk and I bought the Stamperia papers and all the bits in anticipation of making a card for him.

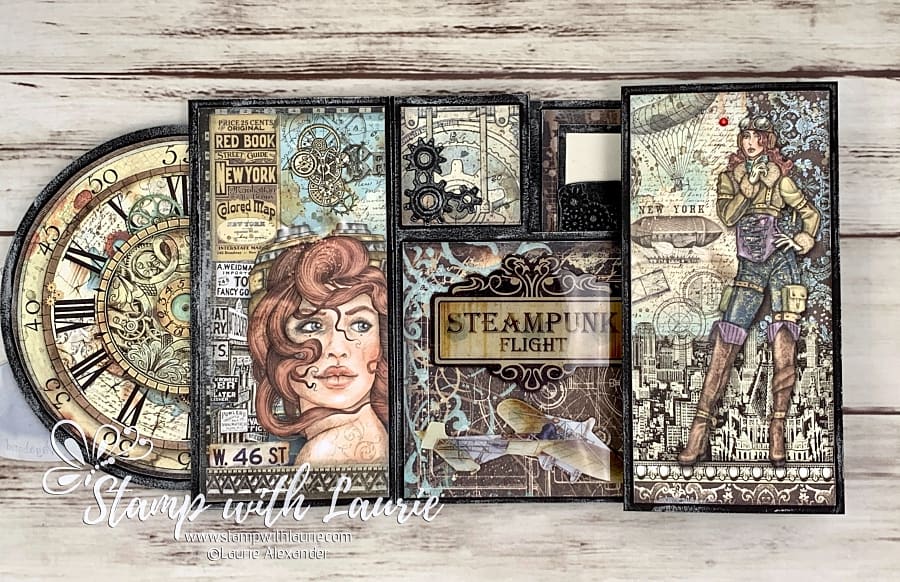
Angled View of Folds of the card
Angled View of Folds of the Card

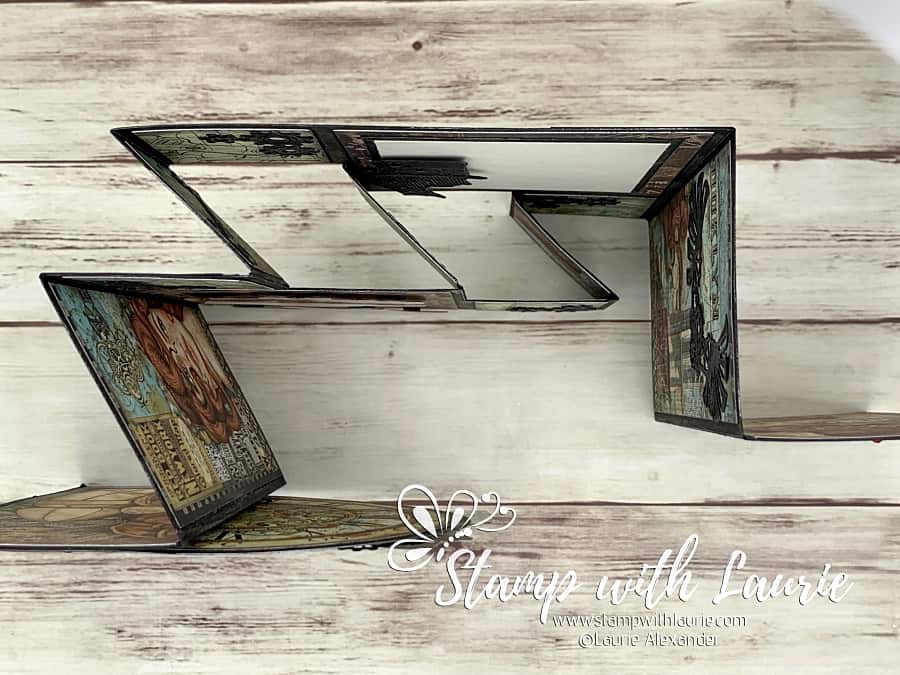
For my card, I only used papers and die cuts…no stamping or colouring for me which is a rarity for me! Lol! But, when I saw the Stamperia papers, I knew that I wanted to create a 3-step fun fold card that would keep on going as my hubby opened it…almost like a mini album. I even decorated the back of it and made a custom envelope with the papers.

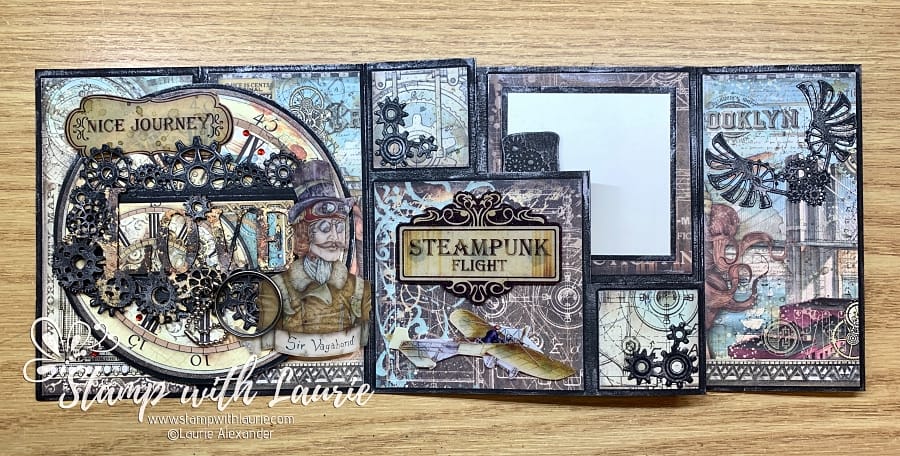
Top View of Card
Top View of Card

Fun with Mixed Media

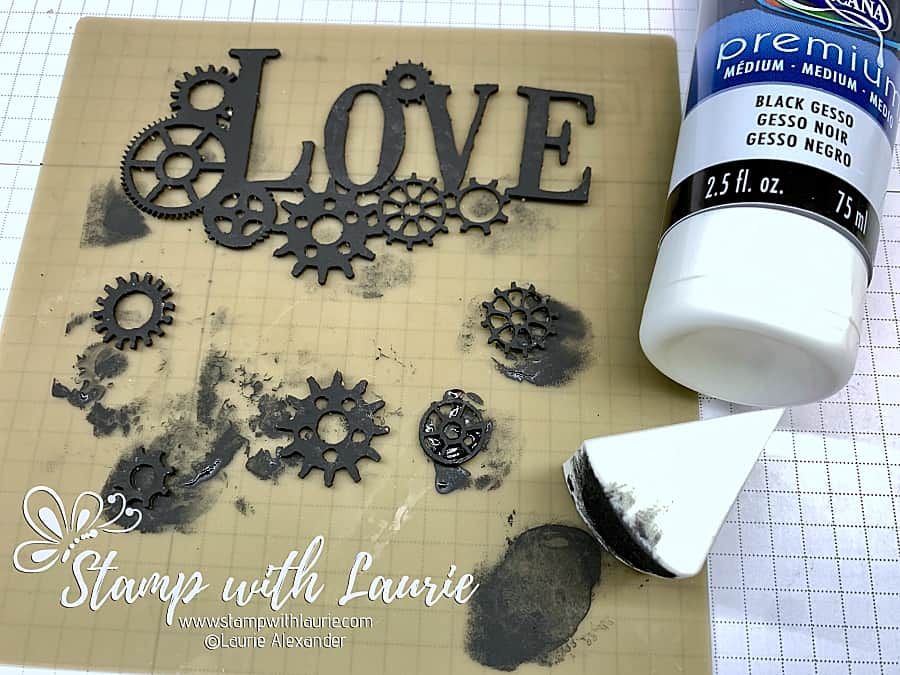
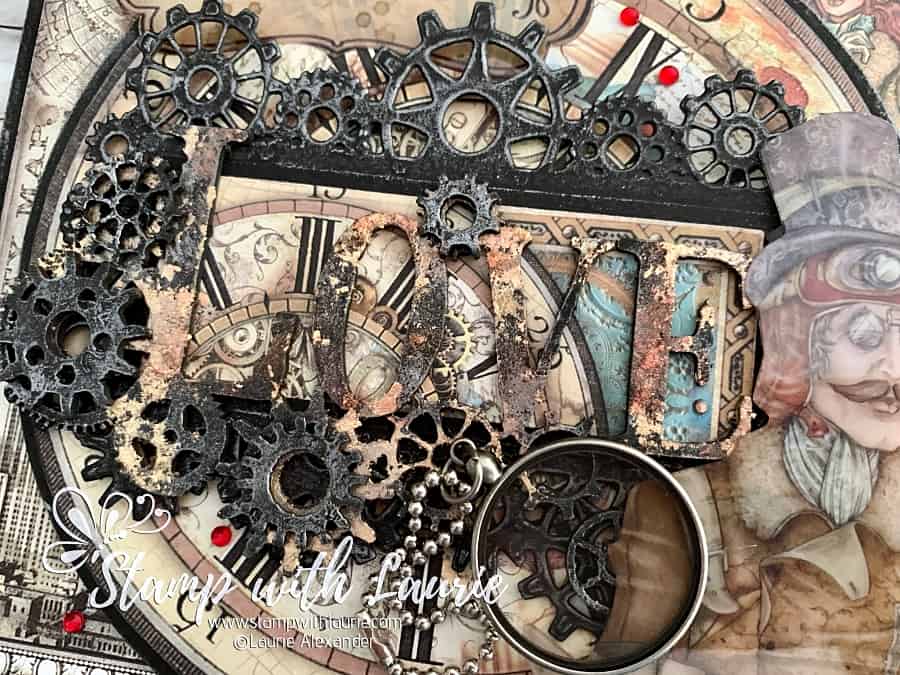
For my mixed media, I sponged black gesso on my chipboards and then rubbed with my fingertips the Brushed Iron and Firebird waxes over the “Love” piece to help differentiate it from the other chipboard pieces. Next, I added some Gilding Flakes to give it some shimmer and brushed more wax where needed to give it a gritty feel. More gears that were rubbed with the Brushed Iron wax were adhered with glossy accents on top of the “Love” piece for dimension.

Mixed Media of gears and word love
Mixed Media

Once that was done, I added a gear frame tag behind the decorated chipboard that consisted of a snippet of paper with a small clock. The gears on this tag were lightly rubbed with the Brushed Iron wax as well. I added a few clear die cuts from Stamperia to represent my theme of a marriage being a journey, albeit a steampunk one! Lol!

Close Up of the gears and word love
Close Up of Mixed Media Focal Point

A monocle with an attached ball bead chain was glued in place with glossy accents. A scattering of red rhinestones added some sparkle and brightness to the front.

Part of Inside of Card
Inside of Card – Part 1

For my backdrop of my focal point, I decided to use a clock since it is the epitome of steampunk! I fussy cut two clocks out from the papers…one for the front and one for the back of the circle since you will see it when the card is opened. I needed a 5 ½” circle to mount these clocks and since I didn’t have a die that big, I pulled out my retired circle cutter from Stampin’ Up! It was what they used before they had dies!

Another Part of Inside of Card
Inside of Card – Part 2

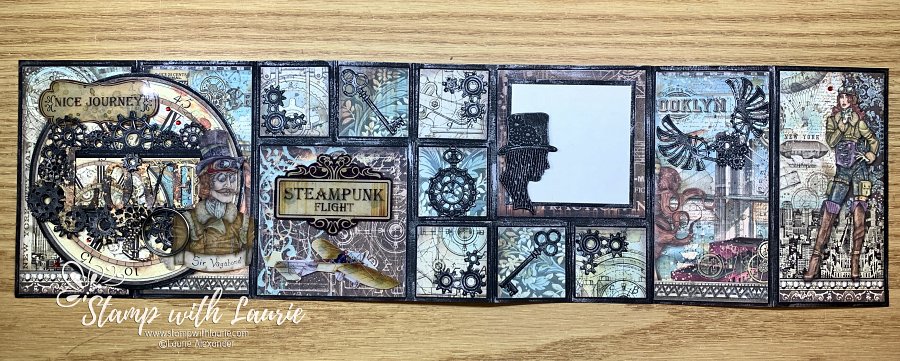
Inside Our Steampunk Journey Card

For the inside of my card, I used several steampunk dies cuts and brushed the Brushed Iron wax on them to bring out the details. I even brushed it on the black edges of all the folds and card base. Of course, I used lots of die cut gears again with a stylized steampunk key, watch and wings! A few clear die cuts from Stamperia were added inside to continue my theme of a journey.

Full Inside of Card
Full Inside of Card Laid Flat

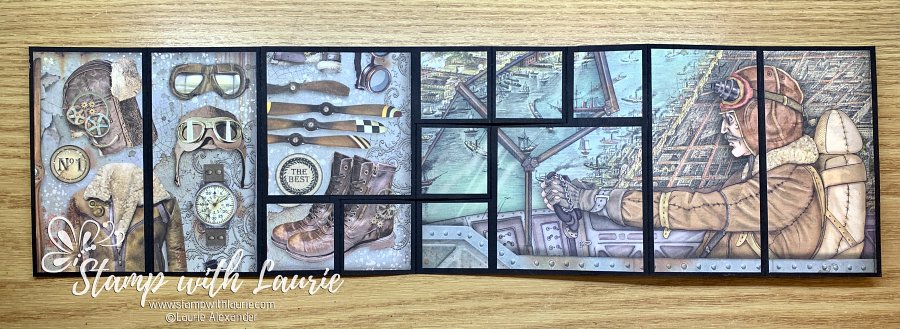
Since the back was so long, I used two different papers and pieced them together to create a continual scene of a pilot in flight on one side and flight gear on the other.

Full Back of Card with pilot and flight gear
Full Back of Card Laid Flat

————————–

Card Recipe for Our Steampunk Journey Card:

12” x 12” Paper, Sir Vagabond Aviator, Stamperia
6” x 6” Paper, Sir Vagabond Aviator, Stamperia
Sir Vagabond Aviator Collectables, Stamperia
Steampunk Greyboard Cuts and Scraps, Stamperia
Sir Vagabond Aviator Clear Die Cuts, Stamperia
Black Gesso, Deco Arts Americana
Makeup Sponges
Verdigris Gilding Flakes, Cosmic Shimmer
Art Alchemy-Metallique Wax – Brushed Iron, Prima Marketing
Art Alchemy-Metallique Wax – Firebird, Prima Marketing
Industrial Chic – Frame & Tag Dies, Sue Wilson, Creative Expressions
Industrial Chic – Mixed Essentials Dies, Sue Wilson, Creative Expressions
Garage Gear Thinlits Dies, Stampin’ Up!
Monocles, Idea-ology, Tim Holtz
6” Ball Bead Chain with Connector Clasp, Local Hardware Store
Red Rhinestone Jewels, Stampin’ Up!
Black Ribbon, From my Stash
Floral Romance Seal, Stampin’ Up!
Silicon Craft Mat, Stampin’ Up!
Glossy Accents, Ranger
Circle Cutter, Stampin’ Up!
Paper Snips, Stampin’ Up!
Liquid Glue, Stampin’ Up!

Basic Black and Very Vanilla Card Stock, Stampin’ Up!

Finished card size: 6” x 6”

Our Steampunk Journey Card in Action
A Pictorial of the Card
Different Views of the Card

————————–

To view my other mixed media piece, please click here.

To view my other steampunk cards, please click here.

Hope you like Our Steampunk Journey Card using the Stamperia Vagabond Series!

Thank you for stopping by!

Hugs,
Laurie

2023-25 In Color Bookmarks

Bookmarks
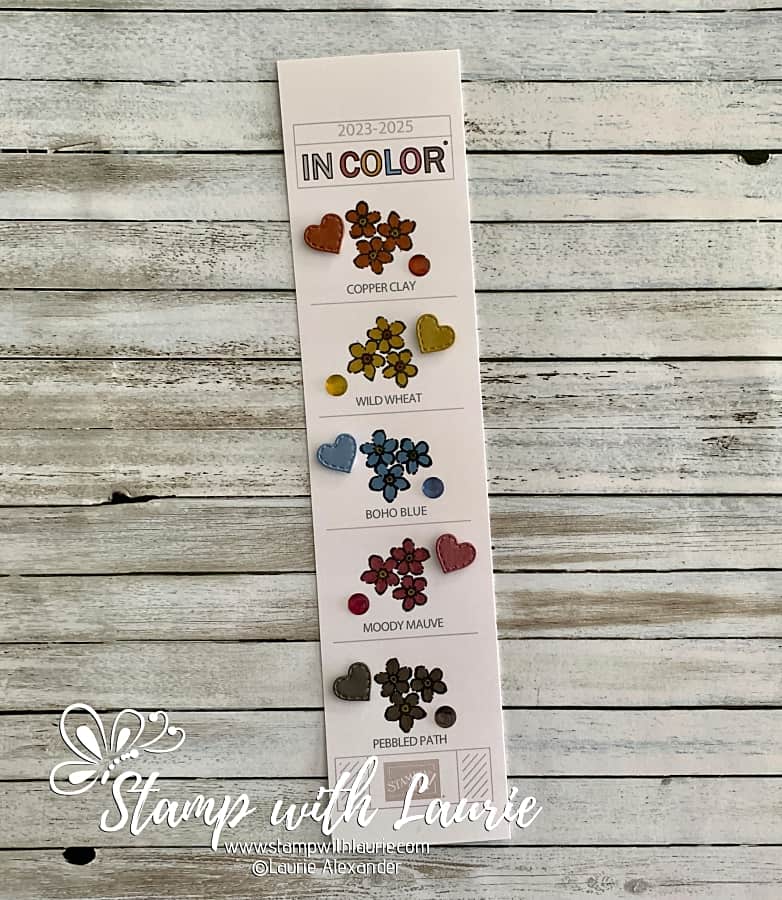
Stampin’ Up! 2023-25 In Color Bookmark

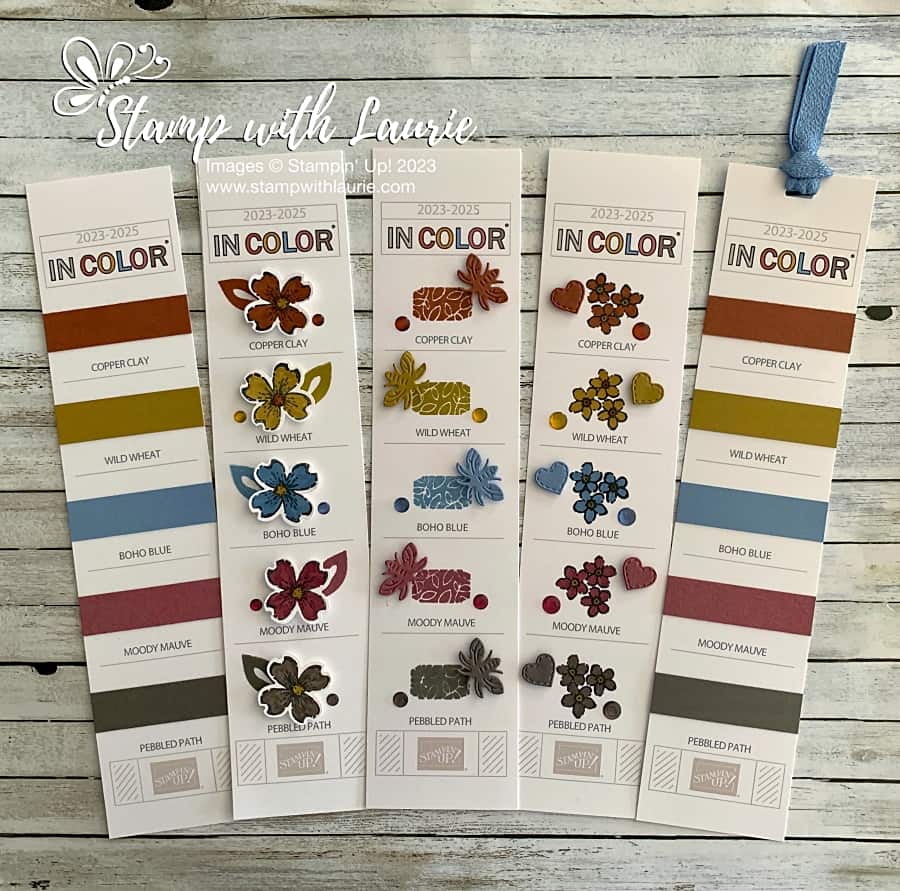
Every year I am asked to create a Stampin’ Up! In Color bookmark file. So, I am sharing my 2023-25 In Color Bookmarks using my PDF file that I created for this purpose. When you download the PDF files print them with the fit to page setting in the Adobe Acrobat on Basic White. All files are at the end of this post, as well as the files for the 2022-24 In Colors from last year.

Ink/Card Stock Bookmark

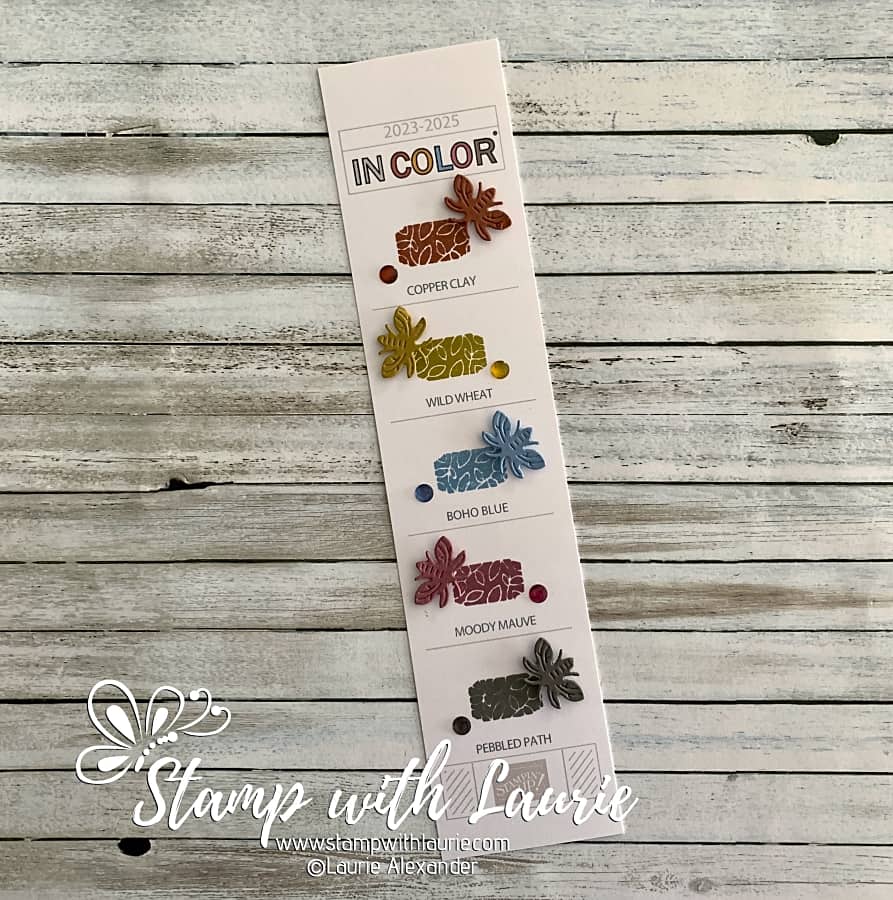
For this bookmark, I used the leaf stamp from the Alphabest Stamp Set to stamp my In Colors. Next, I die cut fireflies from the card stock. I thought it would be fun like the fireflies are flying around the leaves. To balance out the fireflies, I added the medium size In Color Dots.

Inks and Cardstock Bookmark
Ink and Cardstock Bookmark

Stampin’ Write Markers/Ink Bookmark

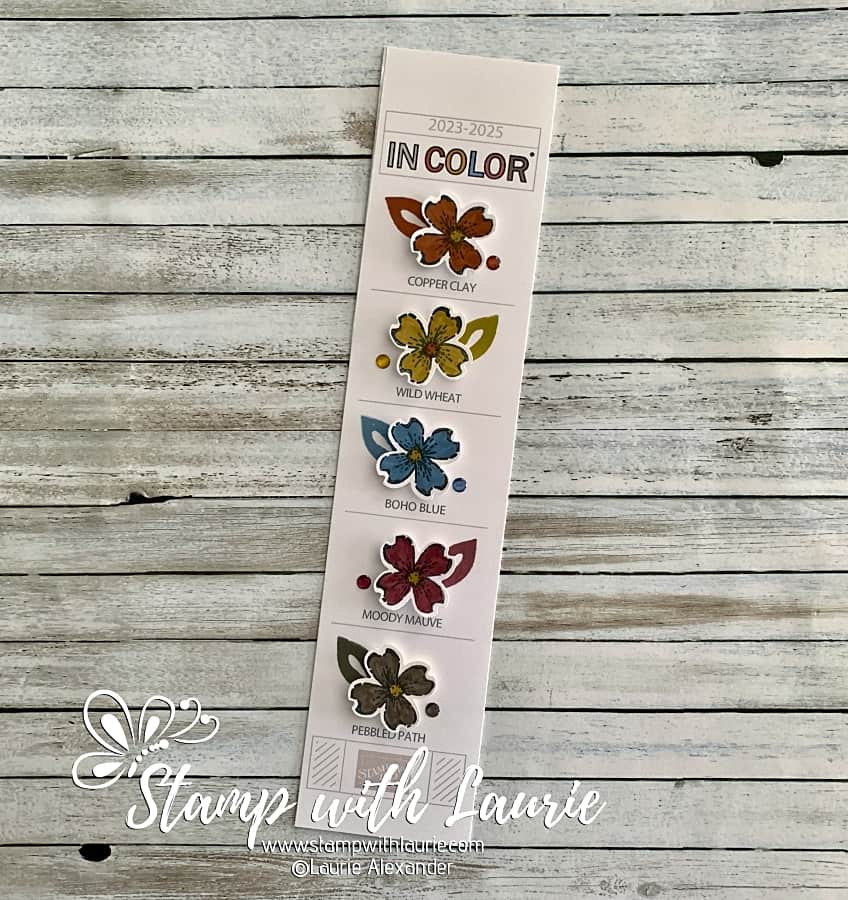
For my next bookmark, I stamped in Memento Ink the cluster of flowers from the Petal Park Bundle on Basic White. Using the Stampin’ Write Markers (you could also use Stampin’ Blends), I coloured the medium sized flower and punched it out using the Petal Park Builder Punch. Next, I stamped the leaf from Petal Park Stamp Set directly on the bookmark. I add the smallest In Color Dots.

2023-25 In Color Stampin' Write Markers Bookmark
Stampin’ Write Markers and Ink Bookmark

Card Stock/Stampin’ Write Markers Bookmark

For this bookmark, I used Stampin’ Write Markers, card stock and the largest In Color Dots to create them. I love the stitched hearts sharing my love for the new In Colors.

Cardstock and Stampin' Write Bookmark
Cardstock and Stampin’ Write Bookmark

Easy Card Stock Bookmarks

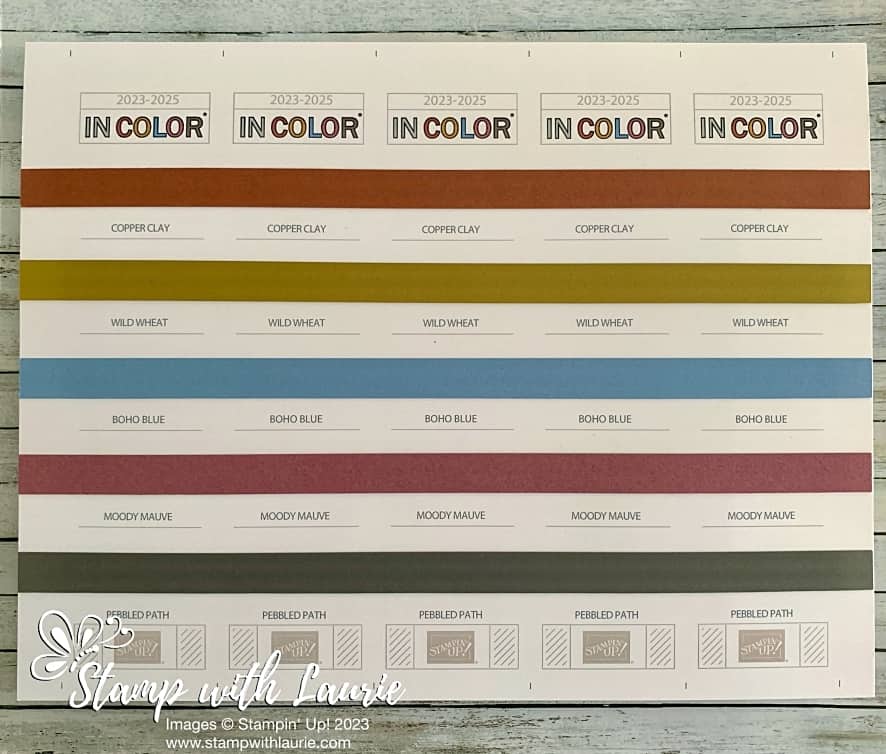
For my last set of bookmarks, I cut a ½” x 11” strip of card stock for each colour. I glue them directly to the print out before cropping the bookmarks down. I them cut them apart creating 5 bookmarks. Fast and easy!

Easy Card Stock Bookmarks

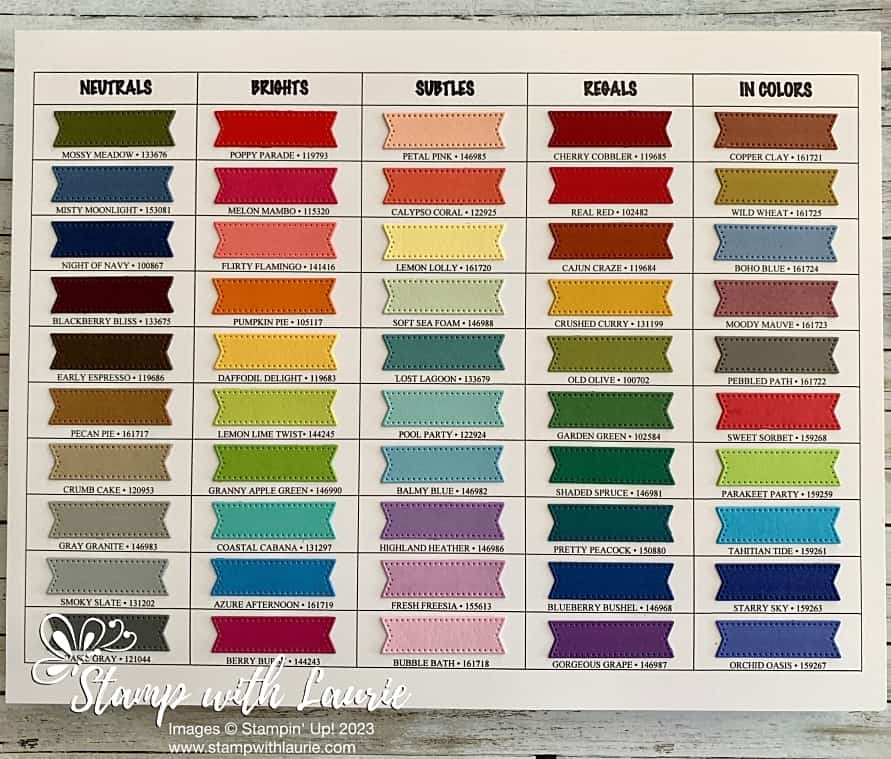
Color Families Chart

I also created a Color Families Chart listing all the colours including the new ones in a one sheet PDF. For my colour swatches I used the smallest stitched banner from the Stylish Shapes Dies. Please click here to download a copy.

A chart with colour swatches
Stamping’ Up! Color Families

Supplies:

Stamps: Petal Park Bundle (160577), Alphabest Stamp Set (158884)

Dies: Stylish Shapes Dies (159183), Lighting the Way Dies (160496), Give It a Whirl Dies (154336)

Inks: Copper Clay Classic Stampin’ Pad (161647), Wild Wheat Classic Stampin’ Pad (161651), Boho Blue Classic Stampin’ Pad (161650), Moody Mauve Classic Stampin’ Pad (161649), Pebbled Path Classic Stampin’ Pad (161648), Memento Ink (132708)

Paper: Basic White (159276), Copper Clay (161721), Wild Wheat (161725), Boho Blue (161724), Moody Mauve (161723), Pebbled Path (161722)

Accessories: 23-2025 In Color Dots (161620), Boho Blue Textured Ribbon (161631), In Color Stampin’ Write Markers (161695)

For Further Information on My 2023-25 In Color Bookmarks:

2023-2025 In Color Bookmark File

English Version
French Version
German Version

2022-2024 In Color Bookmark File

For my post with further details on how I decorated my 2022-2024 Bookmarks, please click here.

English Version
German Version
French Version

Stampin' Up! 2022-24 In Color Bookmark
Stampin’ Up! 2022-24 In Color Bookmark

For more of my Stampin’ Up!  cards and projects, please click here.

You will find the items listed above in my online store.

Mini Slimline Rose Card

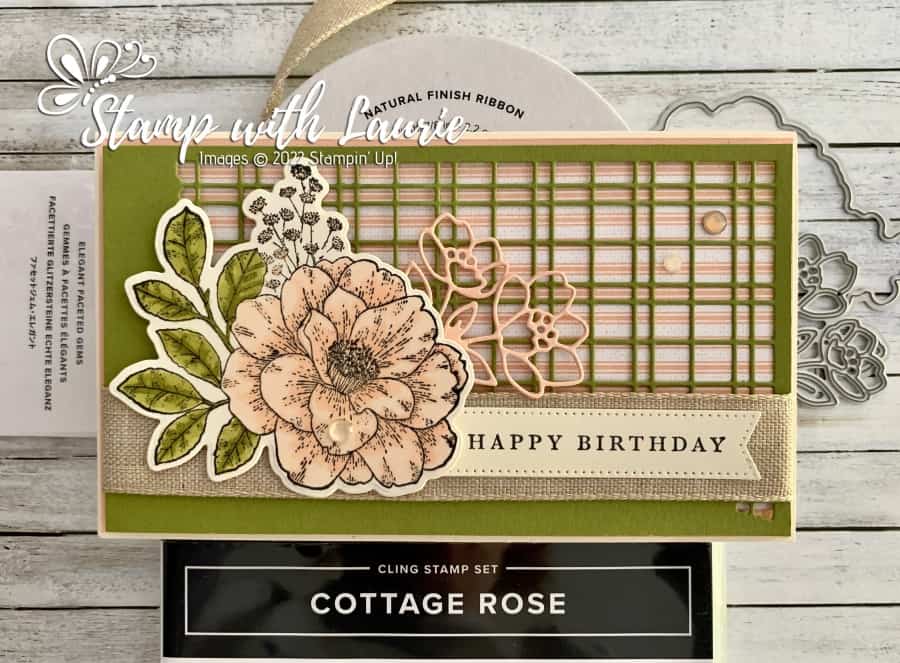
A birthday card with a rose on it
Mini Slimline Rose Card

Hello Crafty Friends! Laurie here again! I was honoured to be asked to present my colouring with Stampin’ Blends at a Playdate during World Card Making Day for fellow Stampin’ Up! demonstrators. I am sharing my Mini Slimline Rose Card from the WCMD using products from the Abigail Rose Suite Collection by Stampin’ Up!

The Details of My Card

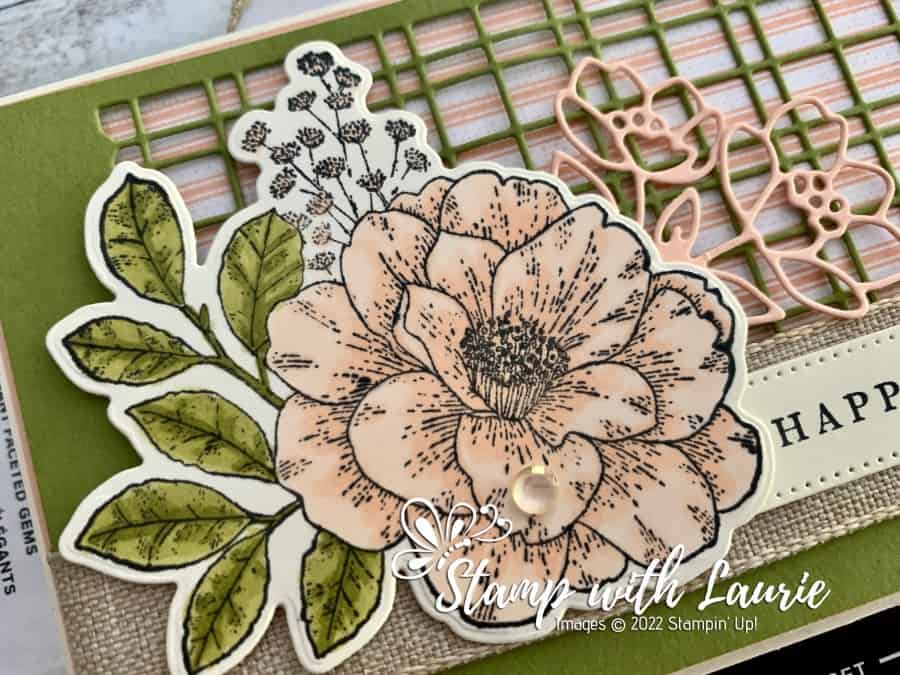
For my card, I decided to use the Cottage Rose Stamp Set since the artist has indicated where the shadows are with their line art. I thought it would be a good image for beginners. It also has two different areas that I could demonstrate the techniques of light-to-dark on the petals and dark-to-light on the leaves. I have included links to some videos at the end of this post that cover these techniques and more.

The Split Card Textures Dies were top of my list to buy when I saw them in the catty. I have seen a lot of cards made with them using the regular A2 (4 ¼” x 5 ½”) card base, but I thought a mini slimline card would be a fun alternative!

Mini slimline cards can come is different sizes to match your design/products. For instance, a 3” x 6” mini slimline is perfect for 6” x 6” paper packs. They also come in 3 ½” x 6” or 3 ½” x 6 ½”. They fit in No. 8 envelope (3-5/8” x 6 ½”) which you can pick up at any dollar store. For my card I choose 3 ½” x 6” since this size fitted the Split Card Textures Die well.

I love how the Split Card Textures Die allows the beautiful Abigail Rose Designer Series Paper to show through on one half of the card while allowing the rose to fit perfectly in the other corner! Some Petal Pink die cut flowers extend the focal point into the card. The Natural Finish Ribbon adds a nice backdrop for the sentiment. And a scattering of gems, one on the flower and two in the top right corner, tie in the colour scheme.

Supplies:

Stamps/Bundles/Dies: Abigail Rose Suite Collection (159052), Cottage Rose Bundle (159048) (Included in Collection), Split Card Textures Dies (159162), Stylish Shapes Dies (159183)

Inks: Tuxedo Black Memento Ink Pad (132708)

Paper: Very Vanilla Thick (144237), Petal Pink (146985), Old Olive (100702), Very Vanilla (101650), Abigail Rose Designer Series Paper (159037) (Included in Collection)

Accessories: Petal Pink Stampin’ Blends Combo Pack (154893), Old Olive Stampin’ Blends Combo Pack (154892), Stampin’ Blends Color Lifter (144608), Elegant Faceted Gems (152464), Natural Finish Ribbon (159051) (Included the Collection), Bone Folder (102300), Stampin’ Dimensionals (104430), Stampin’ Seal (152813), Mini Glue Dots (103683)

Measurements: 

  • Very Vanilla Thick: 
    • 7” x 6” scored at 3 ½” on 7” side
  • Petal Pink:
    • 3-3/8” x 6-7/8”
    • Scrap for flower die
  • Old Olive:
    • 3 ¼” x 5 ¾”
  • Very Vanilla:
    • 3” x 3”
    • Scrap for sentiment
  • Abigail Rose Designer Series Paper:
    • 3 ¼” x 5 ¾”
Close Up Colouring of Rose

More Information on My Mini Slimline Rose Card:

How to Use Stampin’ Blends
Stampin-Up-Blends-2020.pdf

Part 1Whiskey Business Card using Blending Different Colours Technique
Video Tutorial: Blending Different Colours Together

Part 2Country Harvest Card using Light to Dark Technique
Video Tutorial: Light to Dark/Dark to Light Colouring

Part 3Beautiful Poppy Birthday Card using Smooth Colouring Technique
Video Tutorial: Smooth Colouring

Part 4Let’s Gather Together Card using Tip to Tip Blending Technique
Video Tutorial: Tip to Tip Colouring

Part 5So Grateful Cardinal Card using Flicking Colouring Technique
Video Tutorial: Flicking Colouring

Part 6Let’s Celebrate You Card using Flicking of Different Colours Technique
Video Tutorial: Flicking of Different Colours Technique

No-Lines Technique CardsMy Cardinal Anniversary Card and My Cardinal Card

How to Create a Scene: https://youtu.be/6w4fkxgA9rg

For more of my Stampin’ Blends cards, please click here.

For more of my Stampin’ Up! cards, please click here.

For more of my cards, please join my Facebook Group or my Instagram.

You will find the items listed above in my online store.

2022-24 In Color Bookmarks

Stampin' Up! 2022-24 In Color Bookmark
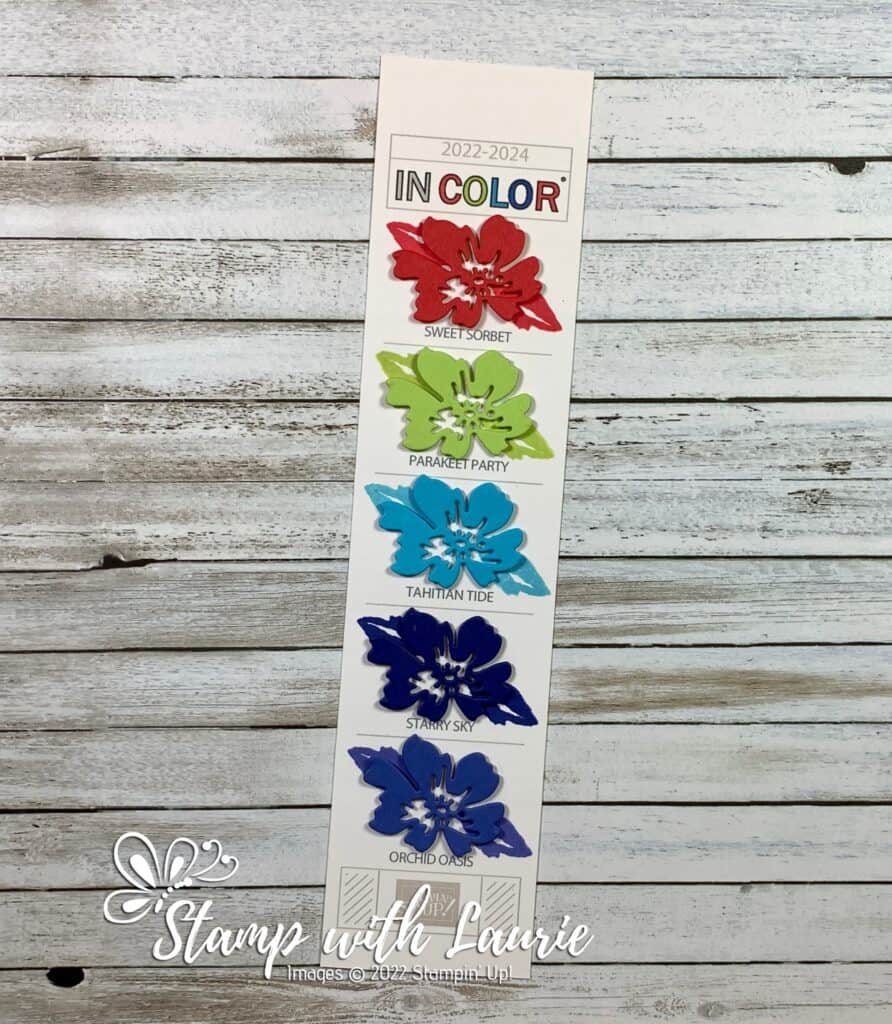
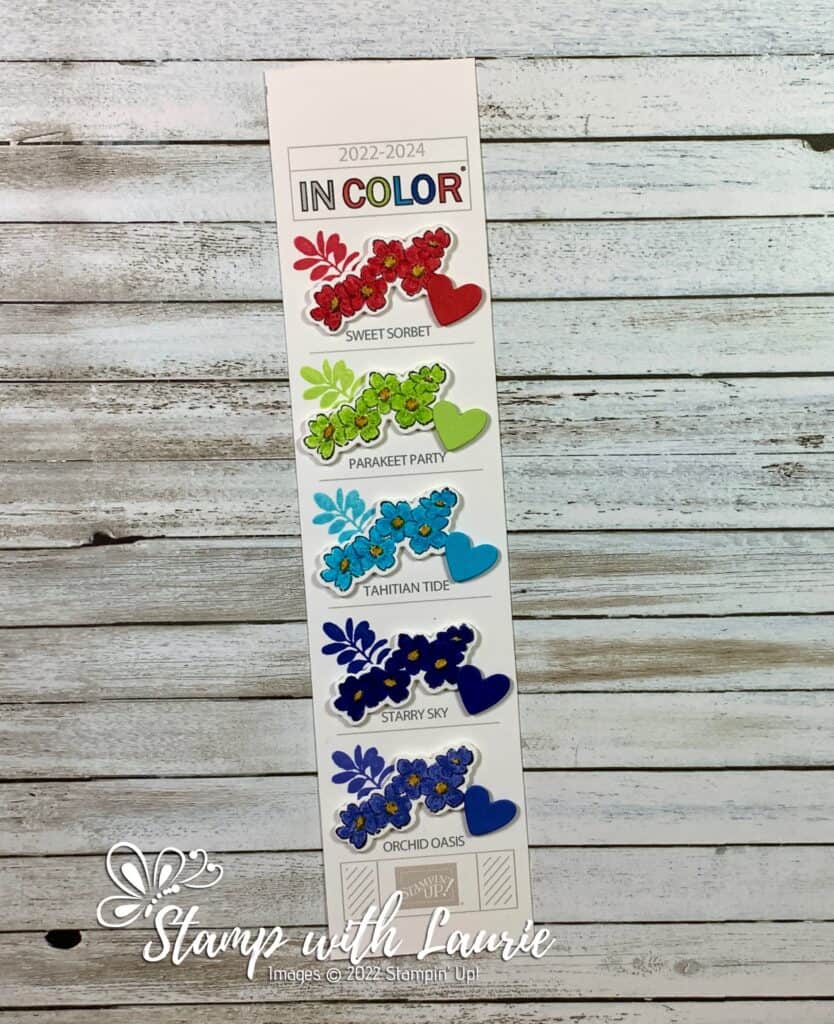
Stampin’ Up! 2022-24 In Color Bookmark

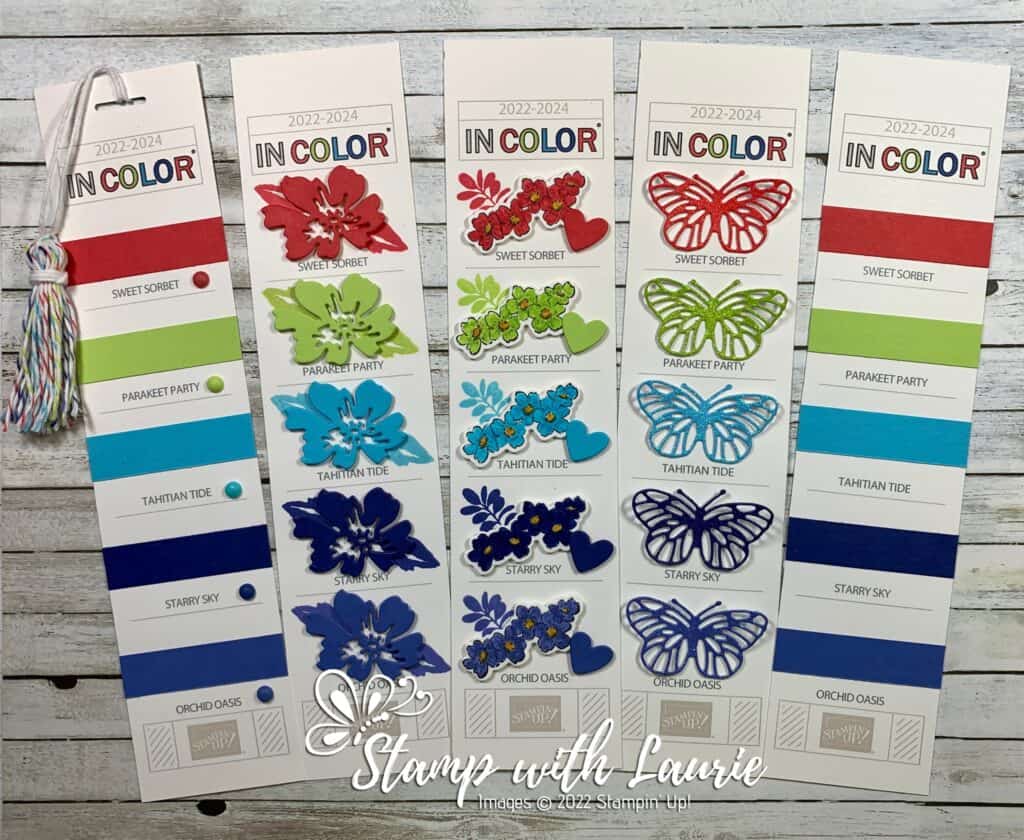
Every year I am asked to create a Stampin’ Up! In Color bookmark file. So, I am sharing my 2022-24 In Color Bookmarks using my Stampin’ Up! 2022-24 In Color Bookmark file that I created for this purpose. When you download the PDF files print them with the fit to page setting in the Adobe Acrobat on Basic White. All files are at the end of this post including a German and French version, as well as the files for the 2021-2023 In Colors from last year.

Inks and Cardstock Bookmark

For this bookmark, I kept it simple with just ink and cardstock. First, I stamped one of the leaves from the Hand-Penned Petals Stamp Set and then I used a die cut flower from the Penned Flower Dies.

Inks and Cardstock Bookmark

2022-2024 In Color Stampin’ Write Bookmark

For my next bookmark, I stamped in Memento Ink the cluster of flowers from the Honeybee Home Stamp Set and coloured them in with the Stampin’ Write Markers. Next, I stamped the leaf from Uniquely Artistic Stamp Set. Finally, I die cut the heart with the Teacup Dies.

2022-24 In Color Stampin' Write Markers Bookmark
2022-24 In Color Stampin’ Write Markers Bookmark

Tassel Bookmark

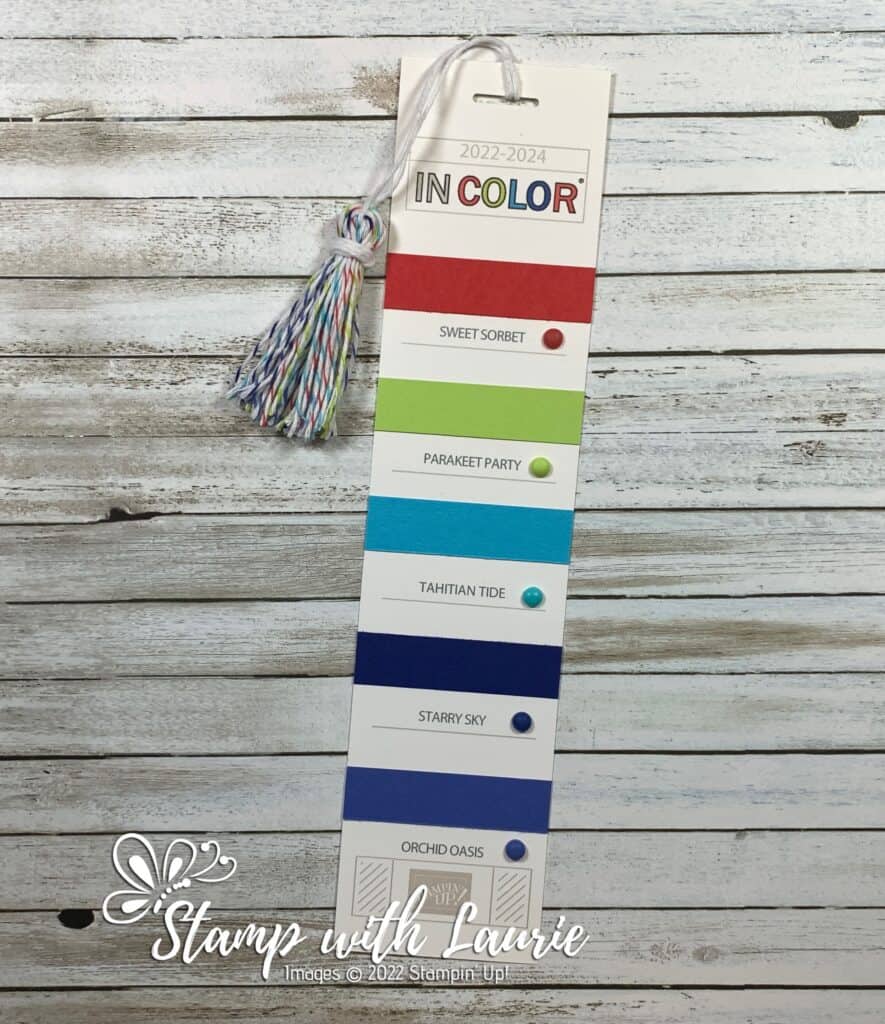
For my next bookmark, I thought it would be fun to create a tassel with the 2022-2024 In Color Baker’s Twine. I added 2022-2024 In Color Matte Decorative Dots to the corresponding colours.

Tassel Bookmark
Tassel Bookmark

Glimmer Bookmark

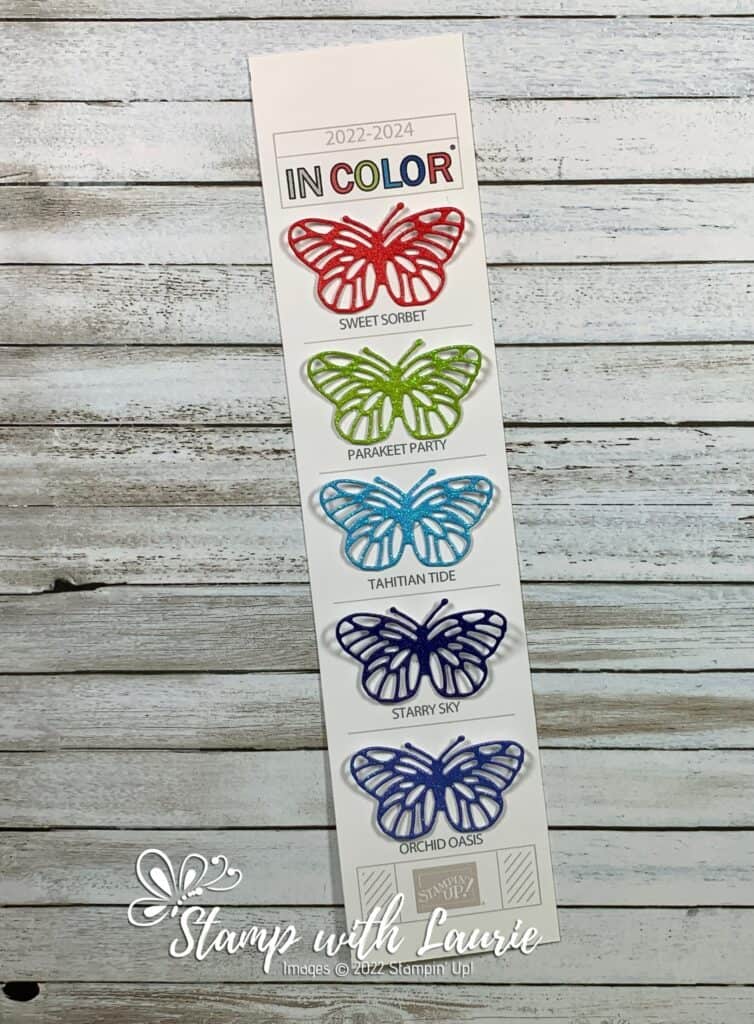
For this bookmark, I wanted the gorgeous 2022-2024 In Color Glimmer Paper to be front and centre. A simple, but wow bookmark!

Glimmer Bookmark
Glimmer Bookmark

Easy Card Stock Bookmarks

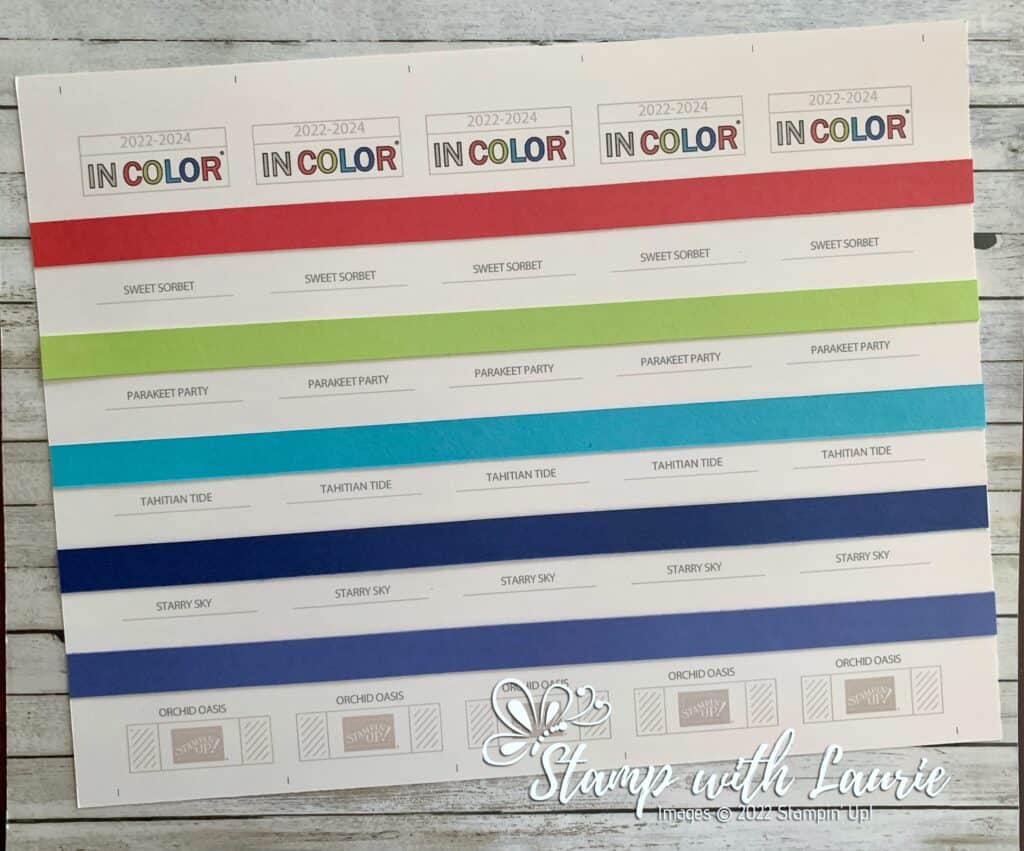
For my last set of bookmarks, I cut a ½” x 11” strip of card stock for each colour. I glue them directly to the print out before cropping the bookmarks down. I them cut them apart creating 5 bookmarks. Fast and easy!

Easy Card Stock Bookmarks

Supplies:

Stamps: Hand-Penned Petals (155070), Honeybee Home Bundle (157952), Uniquely Artistic (158935)

Dies: Brilliant Wings Dies (155523), Penned Flowers Dies (155557), Teacup Dies (160186)

Inks: Sweet Sorbet Classic Stampin’ Pad (159216), Parakeet Party Classic Stampin’ Pad (159208), Tahitian Tide Classic Stampin’ Pad (159210), Starry Sky Classic Stampin’ Pad (159212), Orchid Oasis Classic Stampin’ Pad (159214), Memento Ink (132708)

Paper: Basic White (159276), Sweet Sorbet (159268), Parakeet Party (159259), Tahitian Tide (159261), Starry Sky (159263), Orchid Oasis (159267), 2022/2024 In Color Glimmer Paper (159246)

Accessories: 22-2024 In Color Matte Decorative Dots (159186), 2022-24 In Color Baker’s Twine (159195), In Color Stampin’ Write Markers (159219), Baker’s Twine Essentials Pack (155475)

For Further Information on My 2022-24 In Color Bookmarks:

2022-2024 In Color Bookmark File

English Version
German Version
French Version

2021-2023 In Color Bookmark File

For my post with further details on how I decorated my 2021-2023 Bookmarks, please click here.

English Version
German Version
French Version

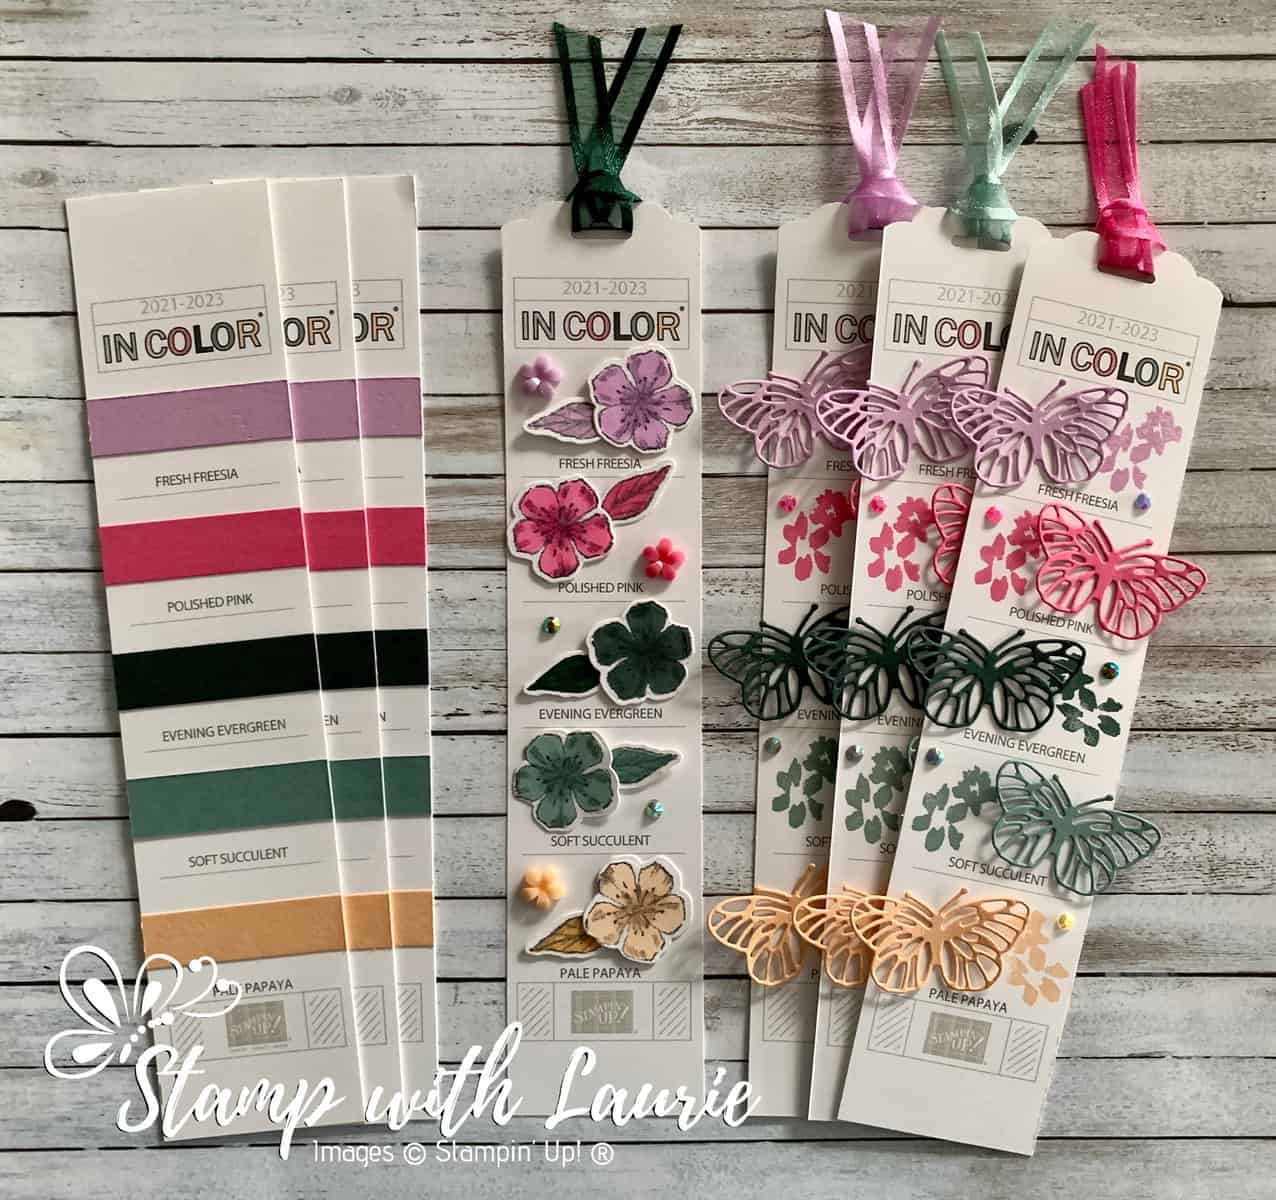
My 2021-2023 In Color Bookmarks

For more of my Stampin’ Up!  cards and projects, please click here.

You will find the items listed above in my online store.

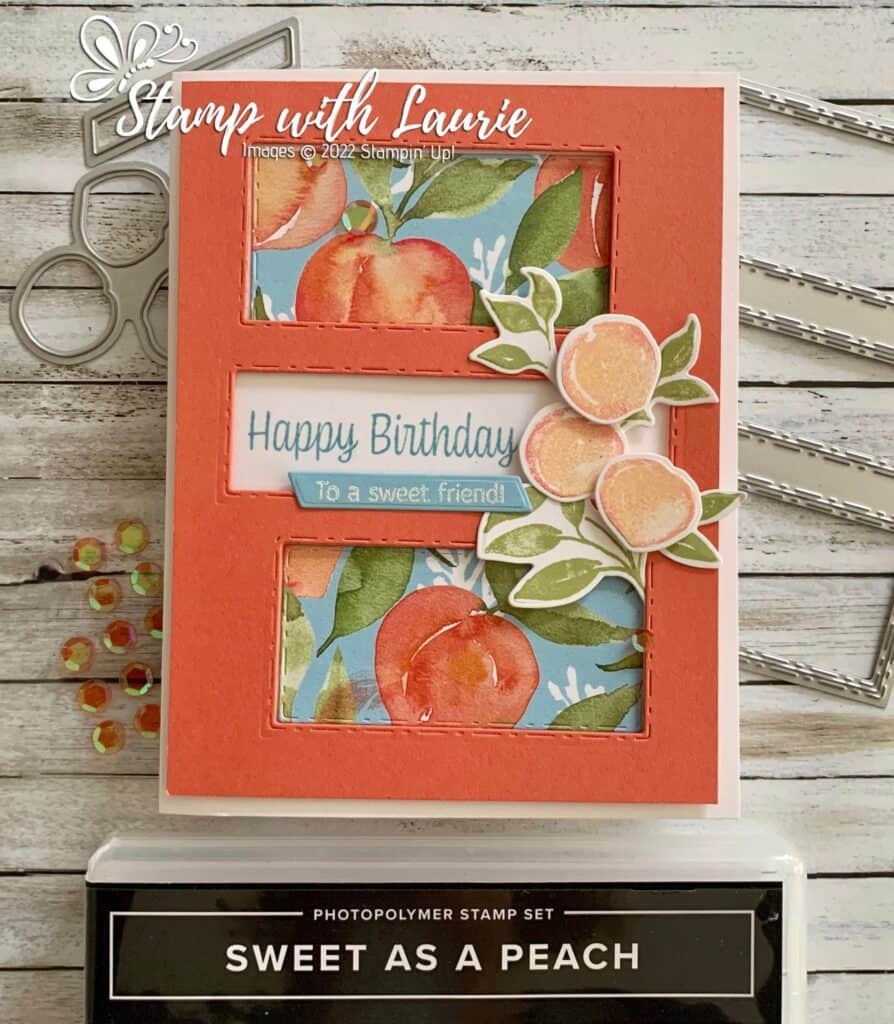
My Peachy Keen Birthday Card

A Birthday Card with Peaches on it.
Peachy Keen Birthday Card

Hello Crafty Friends! Laurie here again! I am sharing My Peachy Keen Birthday Card using the Sweet As a Peach Bundle which includes the Sweet As a Peach Stamp Set and the matching Peach Dies.

The Details of My Card

For my card, I love the colours of the pretty You’re a Peach Designer Series Paper and decided that I wanted to pair it with the Picture This Dies.

For the sentiment, I positioned the die cut Calypsol Coral piece, without adhering it, on the card base and stamped the sentiment directly onto the Thick Basic White card base. Next, I popped up the Calypso Coral card stock with dimensionals onto the card base. I then used liquid adhesive on the DSP shifting them into place to allow them to peek through the two of the openings. For the Balmy Blue sentiment, I white embossed it with my heat gun to make it pop.

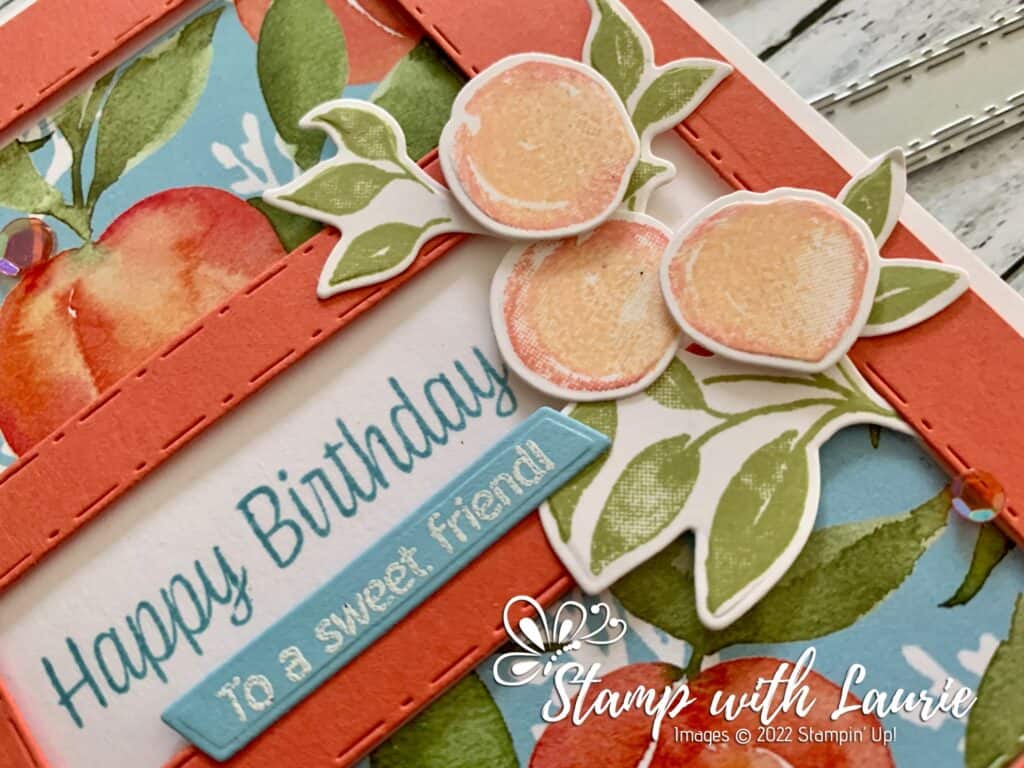
I decide that I wanted the Pear Pizzazz leaves to be exploding from the Picture This Dies frame onto the sentiment with the stamped peaches layered on top.

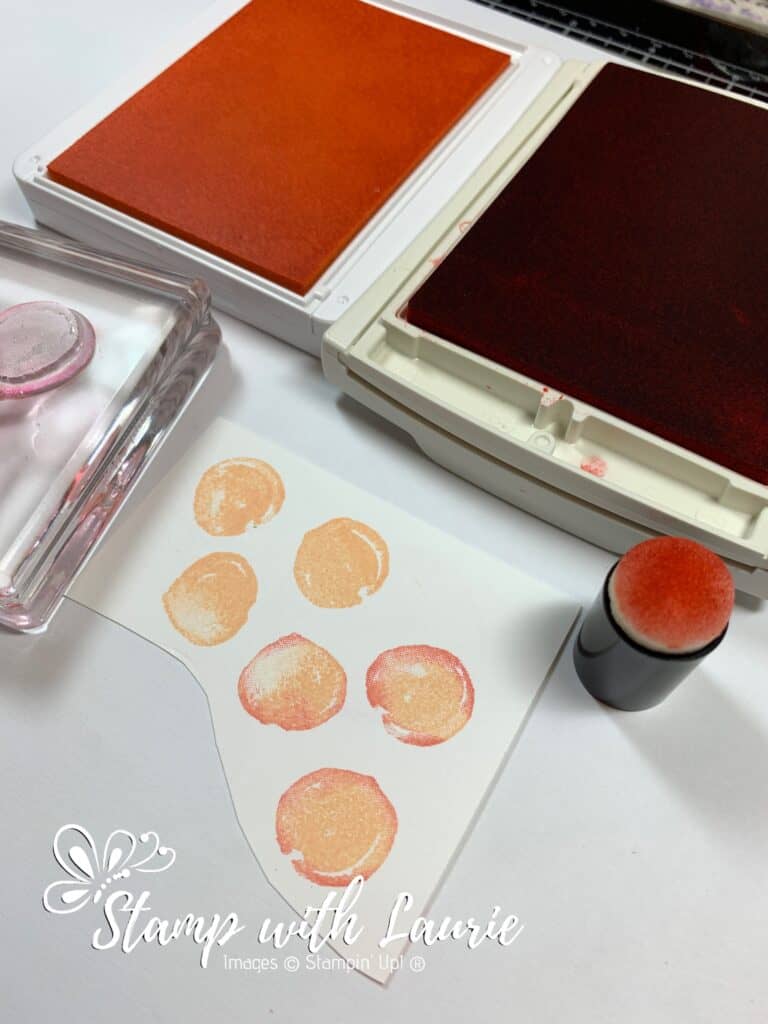
For the peaches, I used a technique where you use a sponge dauber to add a second colour to your stamps and create dimension. I stamped the peaches from the Sweet as a Peach stamp set twice. The top three are in Pale Papaya. The bottom three are Pale Papaya with Calypso Coral daubed on the edges after inking them with the Pale Papaya. What a difference it makes!

Technique to add second colour to the peaches.
Sponge Dauber Technique to Add Second Colour to Stamp

A couple of Calypso Coral Artistry Blooms Sequins tie in the colour scheme and add a bit of sparkle.

Supplies:

Stamps/Bundles/Dies: Sweet As a Peach Bundle (155823), Picture This Dies (155559)

Inks: Calypso Coral Classic Stampin’ Pad (147101), Pale Papaya Classic Stampin’ Pad (155670), Balmy Blue Classic Stampin’ Pad (147105), Pear Pizzazz Classic Stampin’ Pad (147104), VersaMark Ink (102283)

Paper: Calypso Coral (122925), Thick Basic White (159229), Basic White (159276), Balmy Blue (146982), You’re a Peach Designer Series Paper (155686)

Accessories: Basics Embossing Powder (155554), Sponge Daubers (133773), Artistry Blooms Sequins (152477), Bone Folder (102300), Stampin’ Dimensionals (104430), Stampin’ Seal (152813), Mini Glue Dots (103683), Multipurpose Liquid Glue (110755), Heat Tool (129053)

Close Up of My Card with Peaches on it
Close Up of My Card

Measurements: 

  • Thick Basic White: 5 ½” x 8 ½” scored at 4 ¼”
  • Calypso Coral: 5 ¼” x 4”
  • Basic White (2 pieces):
    • 1 ¾” x 1 ½” (Peaches)
    • 2 ¾” x 2 ¼” (Leaves)
  • You’re a Peach Designer Series Paper (2 pieces): 2 11/16” x 1 5/16”
  • Balmy Blue: 1 3/16” x ¼”

More Information on My Peachy Keen Birthday Card:

For more of my Stampin’ Up! cards, please click here.

You will find the items listed above in my online store.

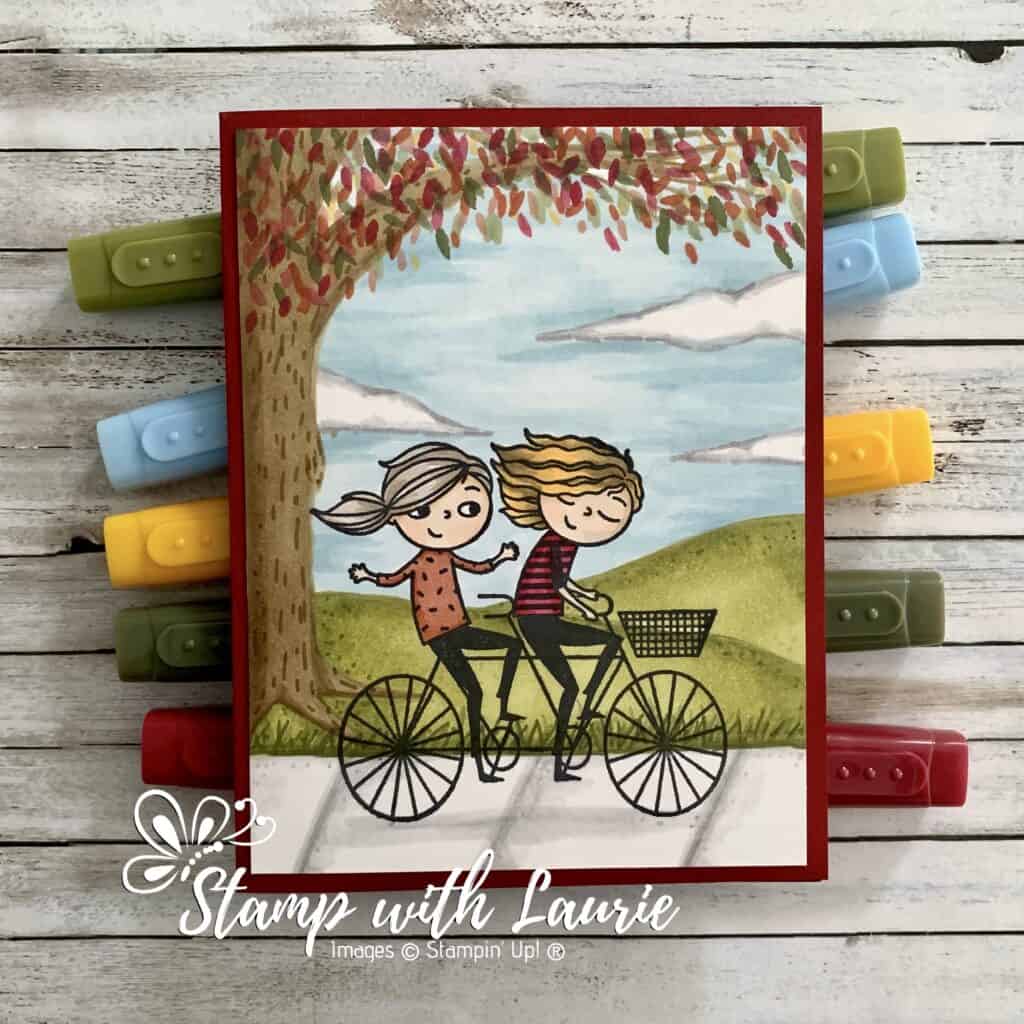
My Welcome Fall Card

My Welcome Fall Card

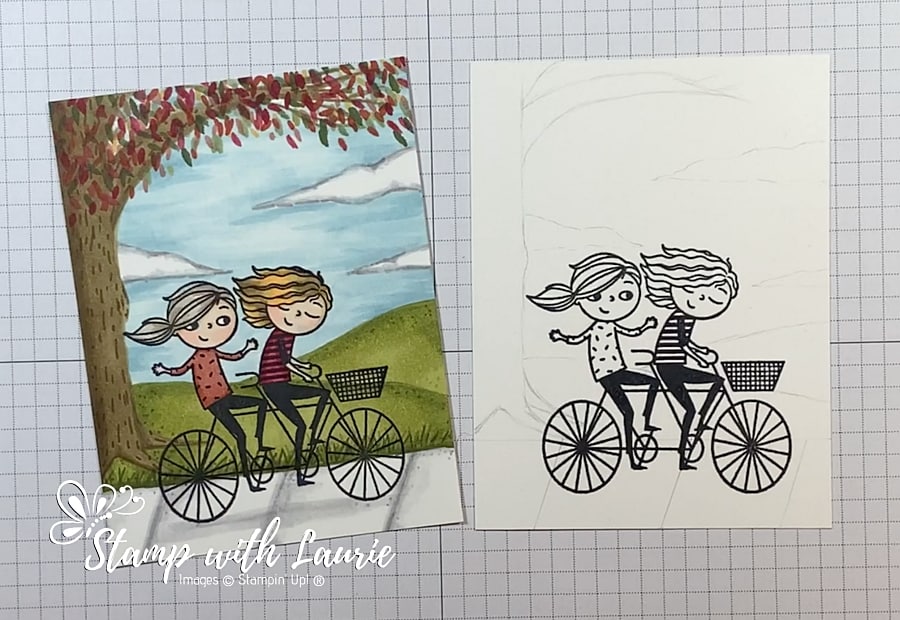
Welcome Fall! Hello Crafty Friends! Laurie here again! I was honoured to have been asked to present my colouring using Stampin’ Blends at a playdate this past weekend for fellow Stampin’ Up! demonstrators. So, I thought I would share my card and first YouTube video with you on the First Day of Fall. For My Welcome Fall Card, I used the Right Behind You Stamp Set and a ton of Stampin’ Blends including the Color Lifter which I used a lot in this video!

I mentioned another video and notes in my presentation. I have included those notes and several videos from that presentation at the end of this post for your reference.

Pencil Sketch of Scene

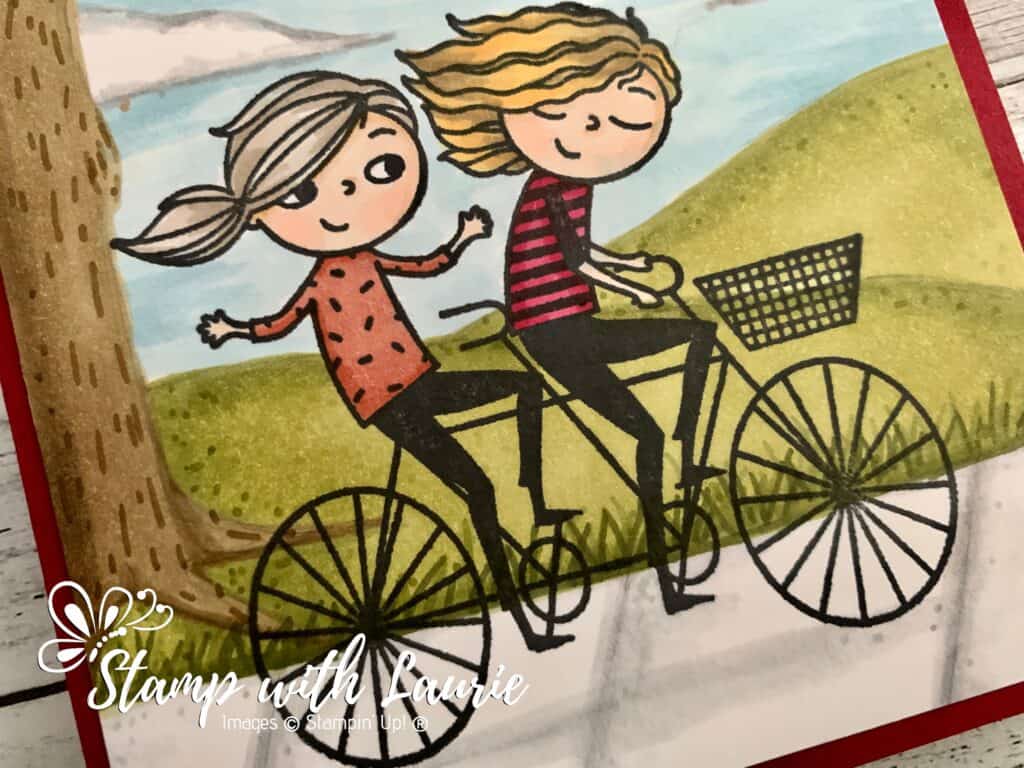
For my card, I stamp multiple times the girls riding the bicycle in Tuxedo Black Memento Ink on my Stamparatus to get a good coverage of ink on their pants. Next, I lightly drew in as a guide a simple scene with a sidewalk, a tree, some hills, and clouds. Once I did that, I started my colouring. Here is my very first YouTube video so that you can follow along:

YouTube Video
YouTube Video of How to Create a Scene With Stampin’ Blends

Stampin’ Blends:

Skin: Ivory/Petal Pink Dark
Ponytail Girl’s Hair: Crumb Cake Light/Dark
Sweater: Cajun Craze Light/Dark
Second Girl’s Hair: Soft Suede Light/Dark/Mango Melody Dark
Shirt: Cherry Cobbler Light/ Dark
Sidewalk/Clouds: Gray Granite Light/Dark/Color Lifter
Sky: Balmy Blue Light/Dark/Color Lifter
Grass: Old Olive Light/Dark/ Mossy Meadow Light/Dark
Tree Trunk: Soft Suede Light/Dark
Leaves: Cherry Cobbler Light/Dark
Cajun Craze Light/Dark
Old Olive Light/Dark
Mossy Meadow Light/Dark
Mango Melody Dark

Supplies:

Stamp: Right Behind You Cling Stamp Set (155790

Ink: Tuxedo Black Memento Ink Pad (132708)

Paper: Basic White (159276), Cherry Cobbler (119685)

Accessories: Stamparatus (146276), Stampin’ Blends Color Lifter (144608), Bronze & Ivory Stampin’ Blends Combo Pack (154922), Petal Pink Stampin’ Blends Combo Pack (154893), Crumb Cake Stampin’ Blends Combo Pack (154882), Old Olive Stampin’ Blends Combo Pack (154892), Balmy Blue Stampin’Blends Combo Pack (154830), Soft Suede Stampin’ Blends Combo Pack (154906), Gray Granite Stampin’ Blends Combo Pack (154886), Cherry Cobbler Stampin’ Blends Combo Pack (154880), Cajun Craze Stampin’ Blends Combo Pack (154879), Mossy Meadow Stampin’ Blends Combo Pack (154890), Bone Folder (102300), Stampin’ Dimensionals (104430), Stampin’ Seal (152813)

Measurements: 

  • Cherry Cobbler: 5 ½” x 8 ½” scored at 4 ¼”
  • Basic White: 4” x 5 ¼”
Close Up of my Card
Close Up of The Stamped Girls on my Card

More Information on My Welcome Fall Card:

To watch my YouTube video of my presentation on how to create a scene with Stampin’ Blends:
https://youtu.be/6w4fkxgA9rg

How to Use Stampin’ Blends
https://stampwithlaurie.com/wp-content/uploads/2020/08/Stampin-Up-Blends-2020.pdf

Part 1Whiskey Business Card using Blending Different Colours Technique
Video Tutorial: Blending Different Colours Together

Part 2Country Harvest Card using Light to Dark Technique
Video Tutorial: Light to Dark/Dark to Light Colouring

Part 3Beautiful Poppy Birthday Card using Smooth Colouring Technique
Video Tutorial: Smooth Colouring

Part 4Let’s Gather Together Card using Tip to Tip Blending Technique
Video Tutorial: Tip to Tip Colouring

Part 5So Grateful Cardinal Card using Flicking Colouring Technique
Video Tutorial: Flicking Colouring

Part 6Let’s Celebrate You Card using Flicking of Different Colours Technique
Video Tutorial: Flicking of Different Colours Technique

No-Lines Technique CardsMy Cardinal Anniversary Card and My Cardinal Card

For more of my Stampin’ Blends cards, please click here.

For more of my Stampin’ Up! cards, please click here.

You will find the items listed above in my online store
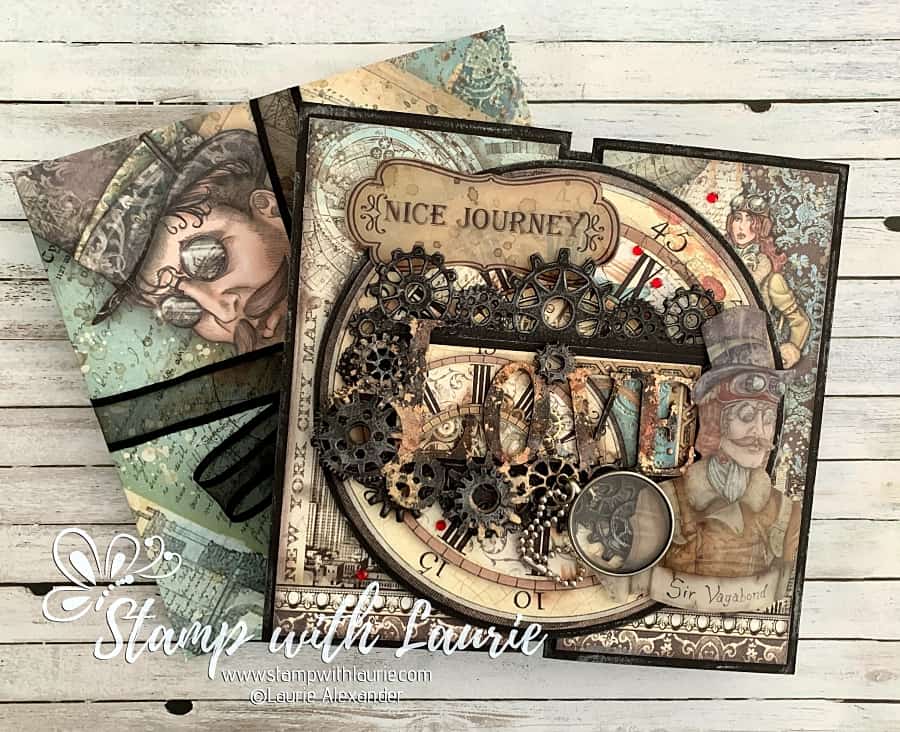
My Great Escape Card

My Stampin' Up! Card
My Great Escape Card

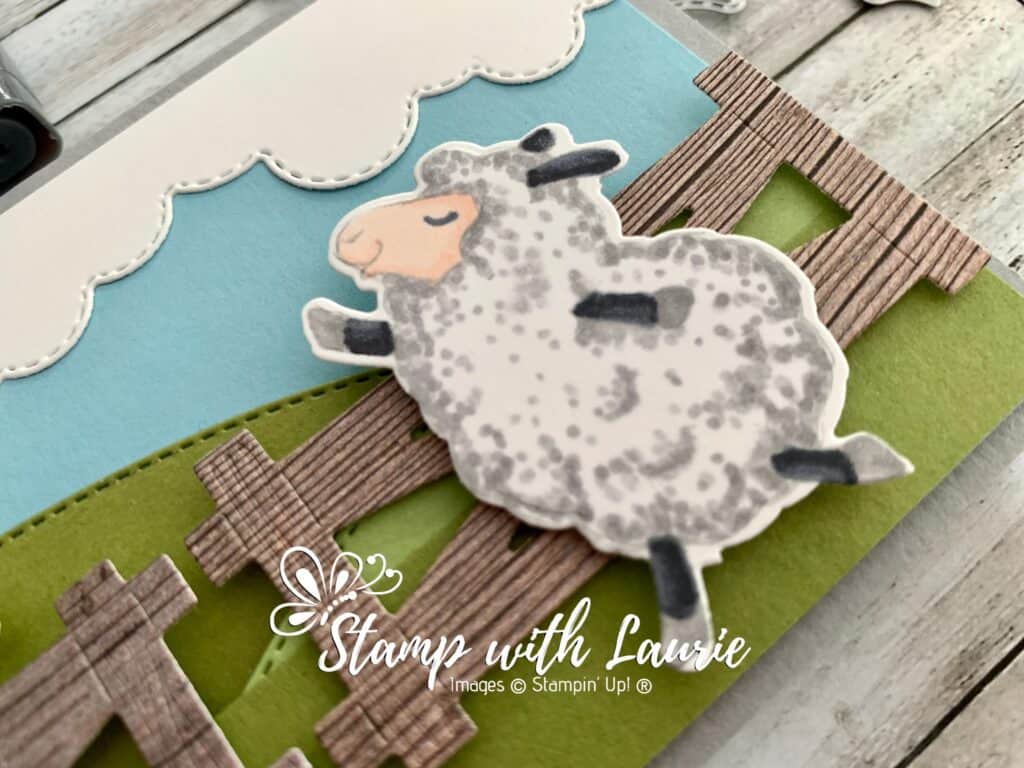
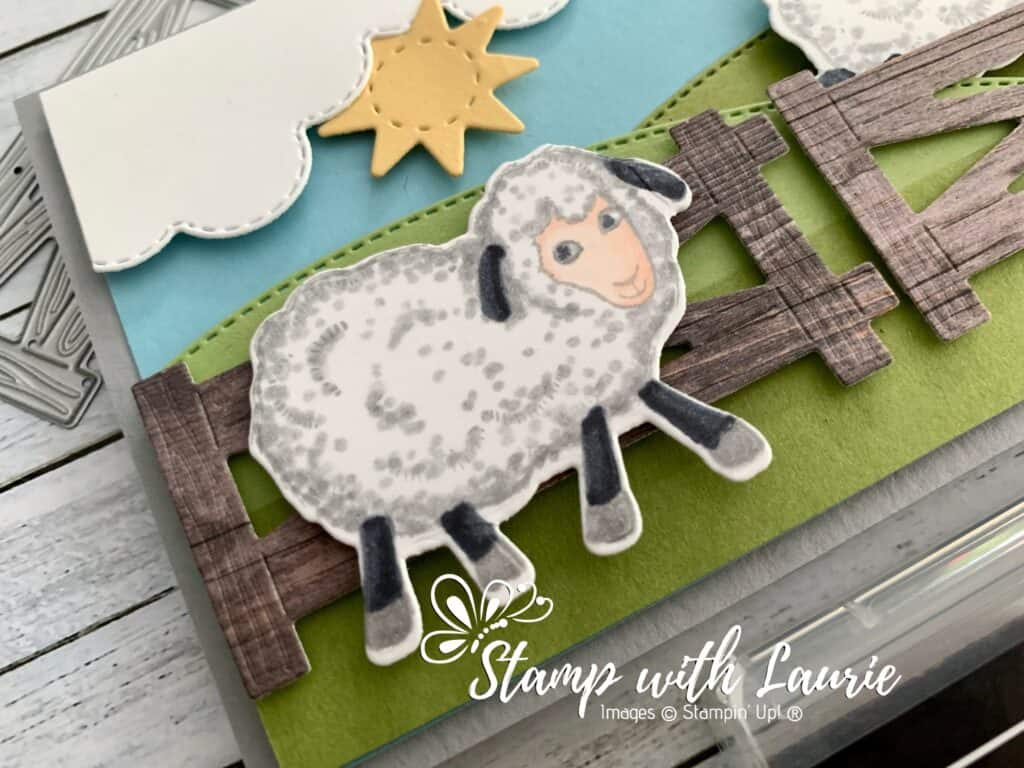
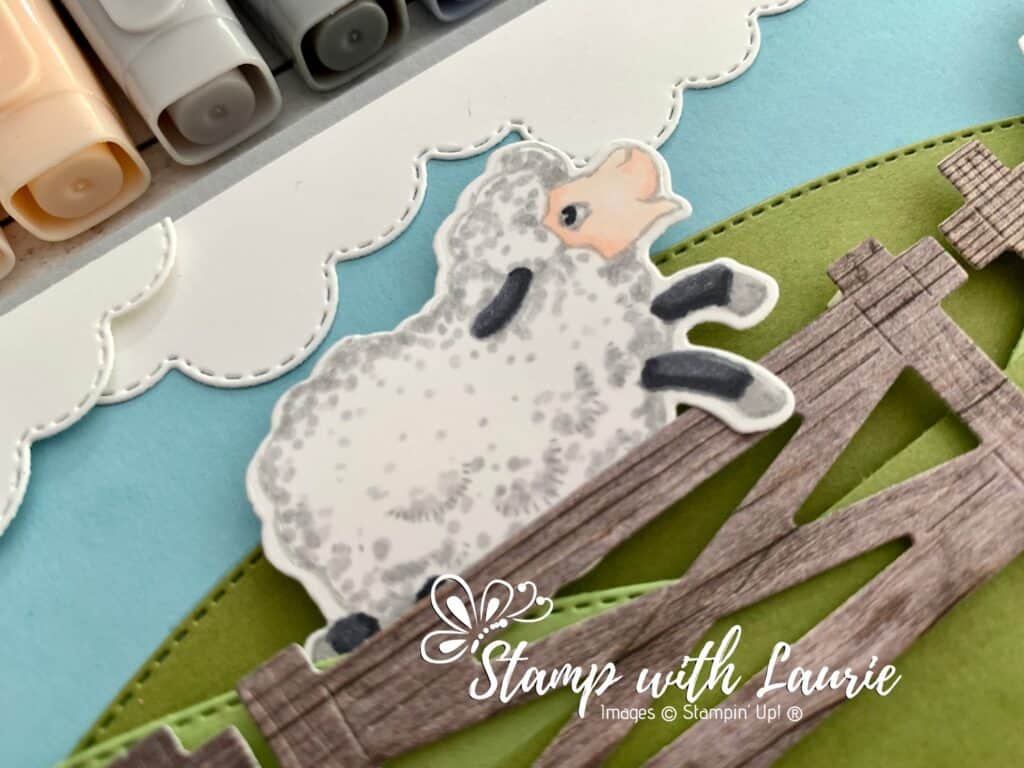
Hello Crafty Friends! Laurie here again! I am sharing My Great Escape Card using the Counting Sheep Stamp Set and matching Sheep Dies by Stampin’ Up! You can get both for free with a qualifying order during Sale-A-Bration. I am a big fan of Shaun the Sheep and love watching all the antic that he gets up to with the other sheep at the farm! The ewe on the right reminds me of him as she orchestrates a breakout from the farmer’s field. Lol!

Close up sheep on of my card
Close Up of Ewe Orchestrating Escape

My Colouring Techniques

For my card, I used several techniques to colour my sheep so that they looked fluffy. I stamped the sheep in Smokey Slate Classic Ink on Basic White card stock. This allowed me to colour with the no-line technique which created a softer finished image without the harsh black lines with Memento Ink. Once the colouring was finished, the lines would fade in with the dots.

The second techniques I used was dots for their wool. I used the Dark Smokey Slate Stampin’ Blend in the shadows. So, along the edges where the stamped Smokey Slate ink was, where the artist indicated fluffiness in the wool and anywhere I thought a shadow would show up.

Next, I used the Light Smokey Slate Stampin’ Blend to add to the shadow areas and extend my dots further into the image from the shadows. I added a few random dots to break up the white areas in the centre of the wool.

Finally, I used my Stampin’ Blends Color Lifter and lightly brushed over all the dots to soften them a little bit. For the face and legs, I used the Smooth colouring technique. For more information on these techniques and others, I have included links on how to use your Stampin’ Blends at the end of this post.

Close Up of Sheep on Left Side

The Details of my Card

I decided that I needed a slimline card to fit my scene so that I could include all three sheep in the great escape. Since the Basic Border Dies that I used were not long enough for a slimline card, I had to create layers to fill my scene. With lots of dimensionals, I was able to create a hilly pastureland with a cloud filled sky. For my pastureland I used two different card stocks, Pear Pizzaz and Old Olive, to add dimension to my scene. I added an 8 ½” strip of Old Olive at the base of my card on top of all the hills to hide all the uneven pieces. The In Good Taste DSP was perfect for my wooden fences.

Supplies:

Stamps/Bundles/Dies: Counting Sheep Stamp Set (156591), Sheep Dies (156600), Basic Borders Dies (155558)

Inks: Smoky Slate Classic Stampin’ Pad (147113)

Paper: Smoky Slate (131202), Balmy Blue (146982), Pear Pizzazz (131201), Old Olive (100702), Basic White (159276), So Saffron (105118), In Good Taste Designer Series Paper (152494)

Accessories: Smoky Slate Stampin’ Blends Combo Pack (154904), Basic Black Stampin’ Blends Combo Pack (154843), Petal Pink Stampin’ Blends Combo Pack (154893), Stampin’ Blends Color Lifter (144608), Bone Folder (102300), Stampin’ Dimensionals (104430), Stampin’ Seal (152813)

Close Up of Jumping Sheep
Close Up of Escaping Sheep

Measurements: 

  • Smoky Slate: 7” x 8 ½” scored at 3 ½” – finished card 3 ½” x 8 ½”
  • Balmy Blue: 8 ¼” x 3 ¼”
  • Old Olive: 1 ½” x 5” (hill in distance)
    • 1” x 8 ¼” (flat band at bottom of hills)
  • Pear Pizzazz: 1 ½” x 5” (left hill)
    • 1 ½” x 3” (right hill)
  • Basic White: 5 ¾” x 1 1/8” (right cloud)
    • 3 ¼” 1 ¼” (left cloud)
    • 2 ¼” x1 ½” (Sheep – 3 pieces)
  • So Saffron: scraps
  • In Good Taste Designer Series Paper: 3” x 1 ½” (3 pieces)

More Information on My Great Escape Card:

Hope you like My Great Escape Card!

How to Use Stampin’ Blends
https://stampwithlaurie.com/wp-content/uploads/2020/08/Stampin-Up-Blends-2020.pdf

Part 1Whiskey Business Card using Blending Different Colours Technique
Video Tutorial: Blending Different Colours Together

Part 2Country Harvest Card using Light to Dark Technique
Video Tutorial: Light to Dark/Dark to Light Colouring

Part 3Beautiful Poppy Birthday Card using Smooth Colouring Technique
Video Tutorial: Smooth Colouring

Part 4Let’s Gather Together Card using Tip to Tip Blending Technique
Video Tutorial: Tip to Tip Colouring

Part 5So Grateful Cardinal Card using Flicking Colouring Technique
Video Tutorial: Flicking Colouring

Part 6Let’s Celebrate You Card using Flicking of Different Colours Technique
Video Tutorial: Flicking of Different Colours Technique

No-Lines Technique CardsMy Cardinal Anniversary Card and My Cardinal Card

For more of my Stampin’ Blends cards, please click here.

For more of my Stampin’ Up! cards, please click here.

You will find the items listed above in my online store.

My Twisty Thank You Card

My Card Front
My Twisty Thank You Card

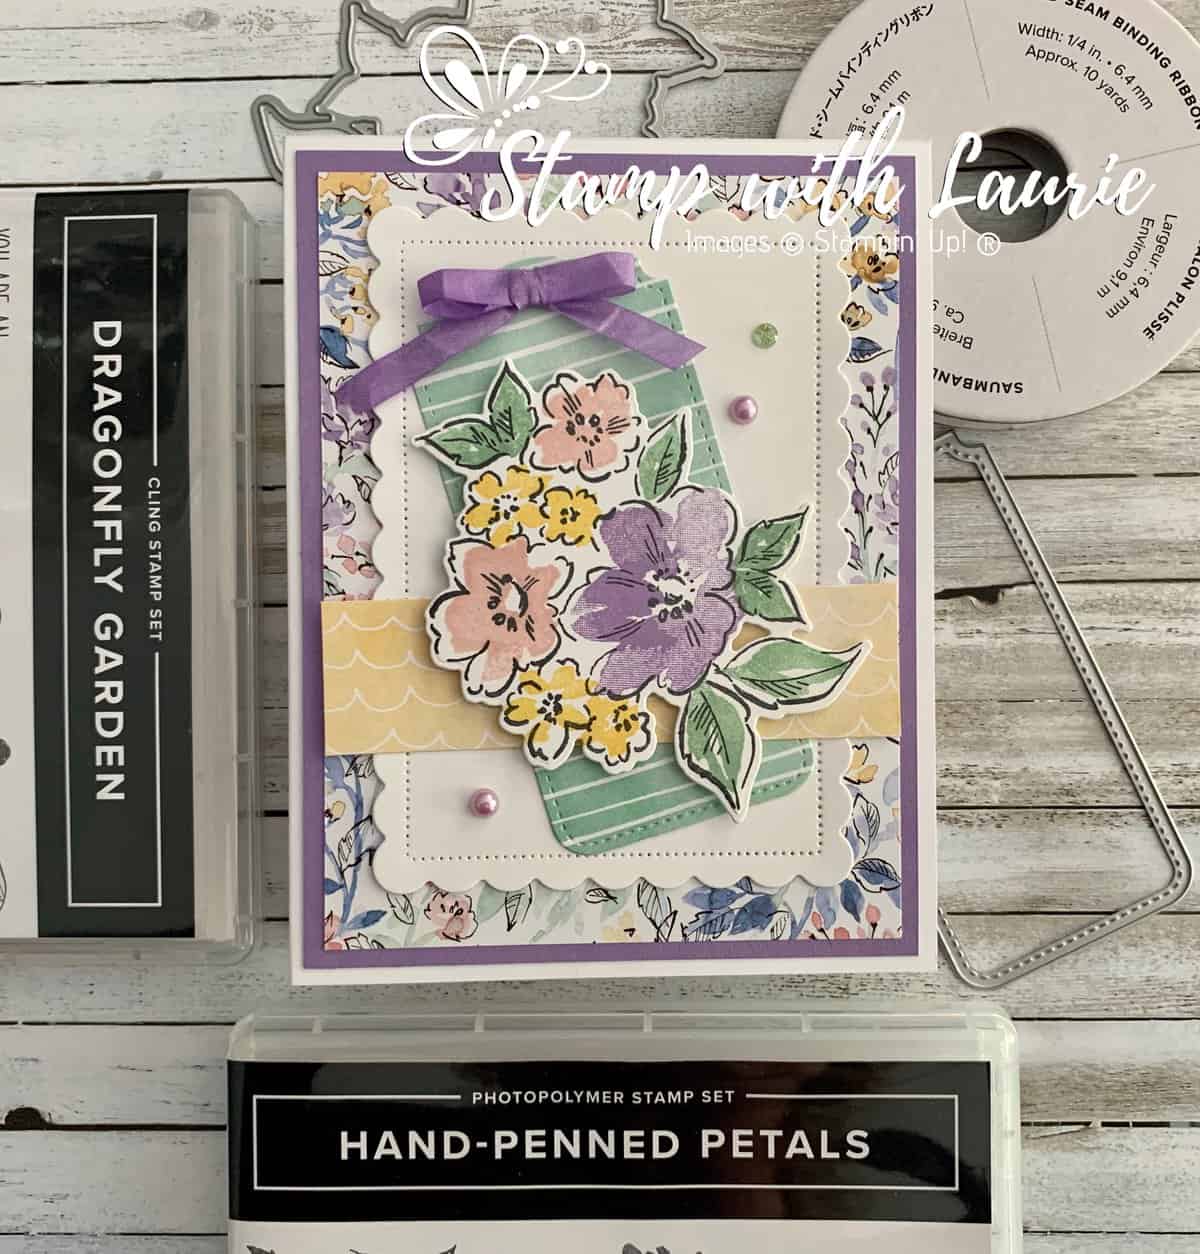
Hello Crafty Friends! I am excited to share My Twisty Thank You Card that I made using the beautiful Hand-Penned Designer Series Paper by Stampin’ Up! I made a similar card at a retreat and thought that it would be a perfect way to showcase this gorgeous DSP while providing an interactive fun fold!

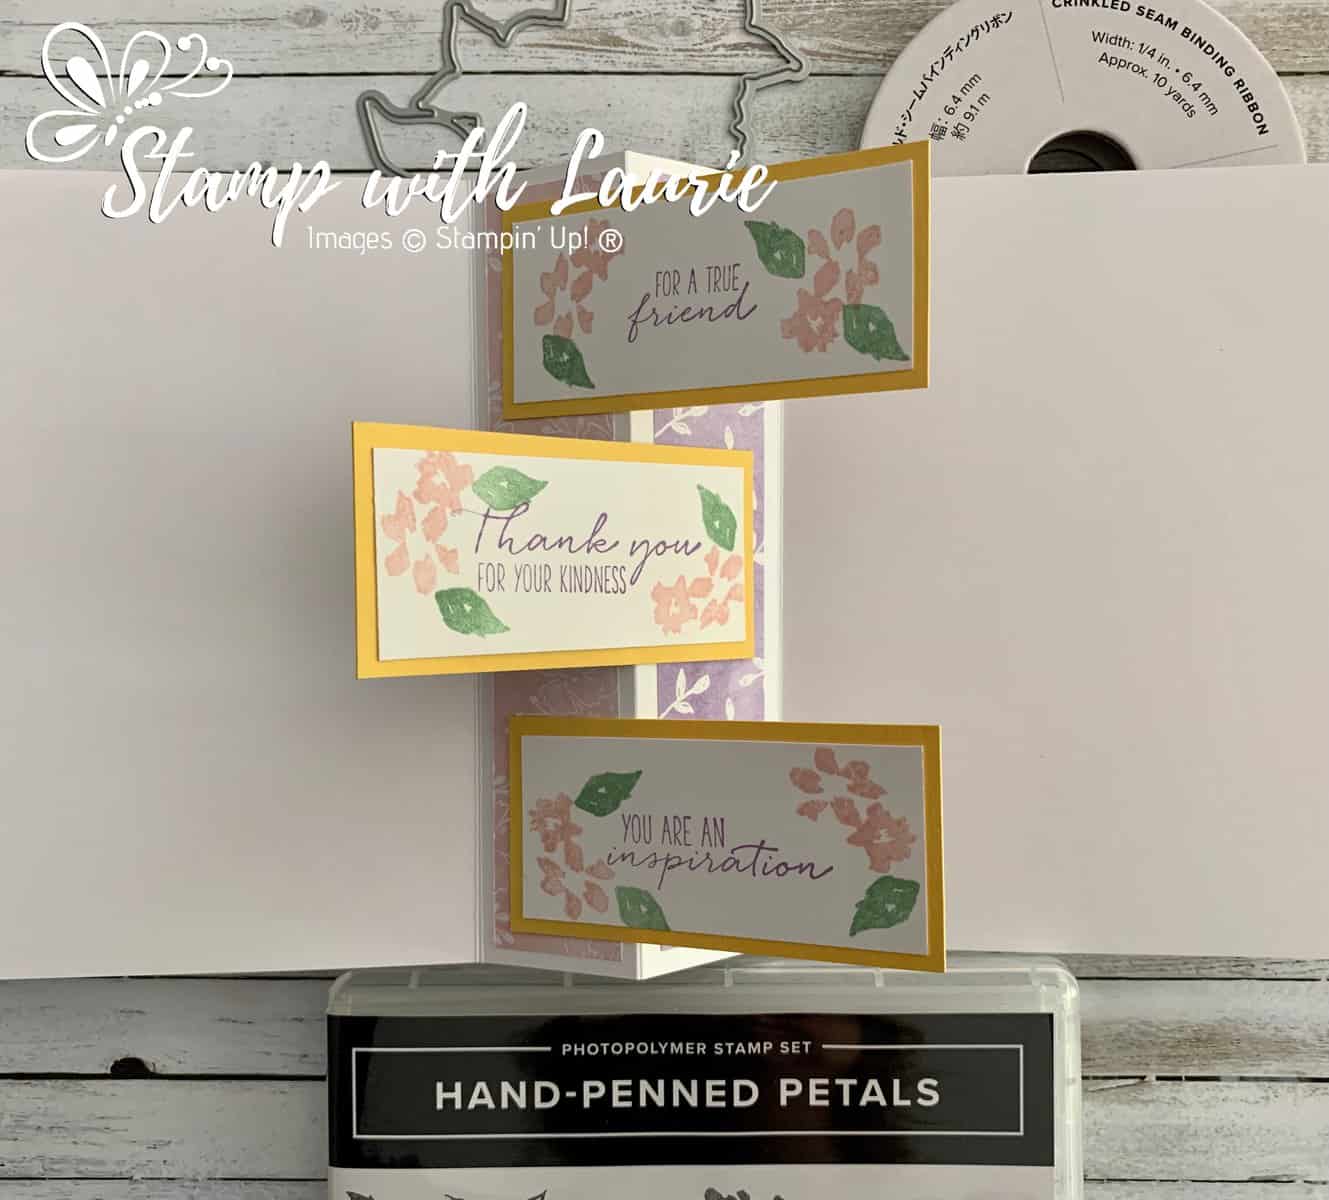
Don’t you just love that when you open the card you get the first set of sentiments and then you keep opening and the sentiments flip to see the other side of them. When the card is fully open, you get all three sentiments displayed.

My Twisty Thank You Card in Action

The Details of My Card

For my card, I used the Hand-Penned Petals Bundle which includes the Hand-Penned Petals Stamp Set and the matching Penned Flowers Dies by Stampin’ Up! Since I needed 3 sentiments that went together, I used the Dragonfly Garden Stamp Set as well. I have included my Twisty Card Template that you can download at the end of this post.

The Front of My Card

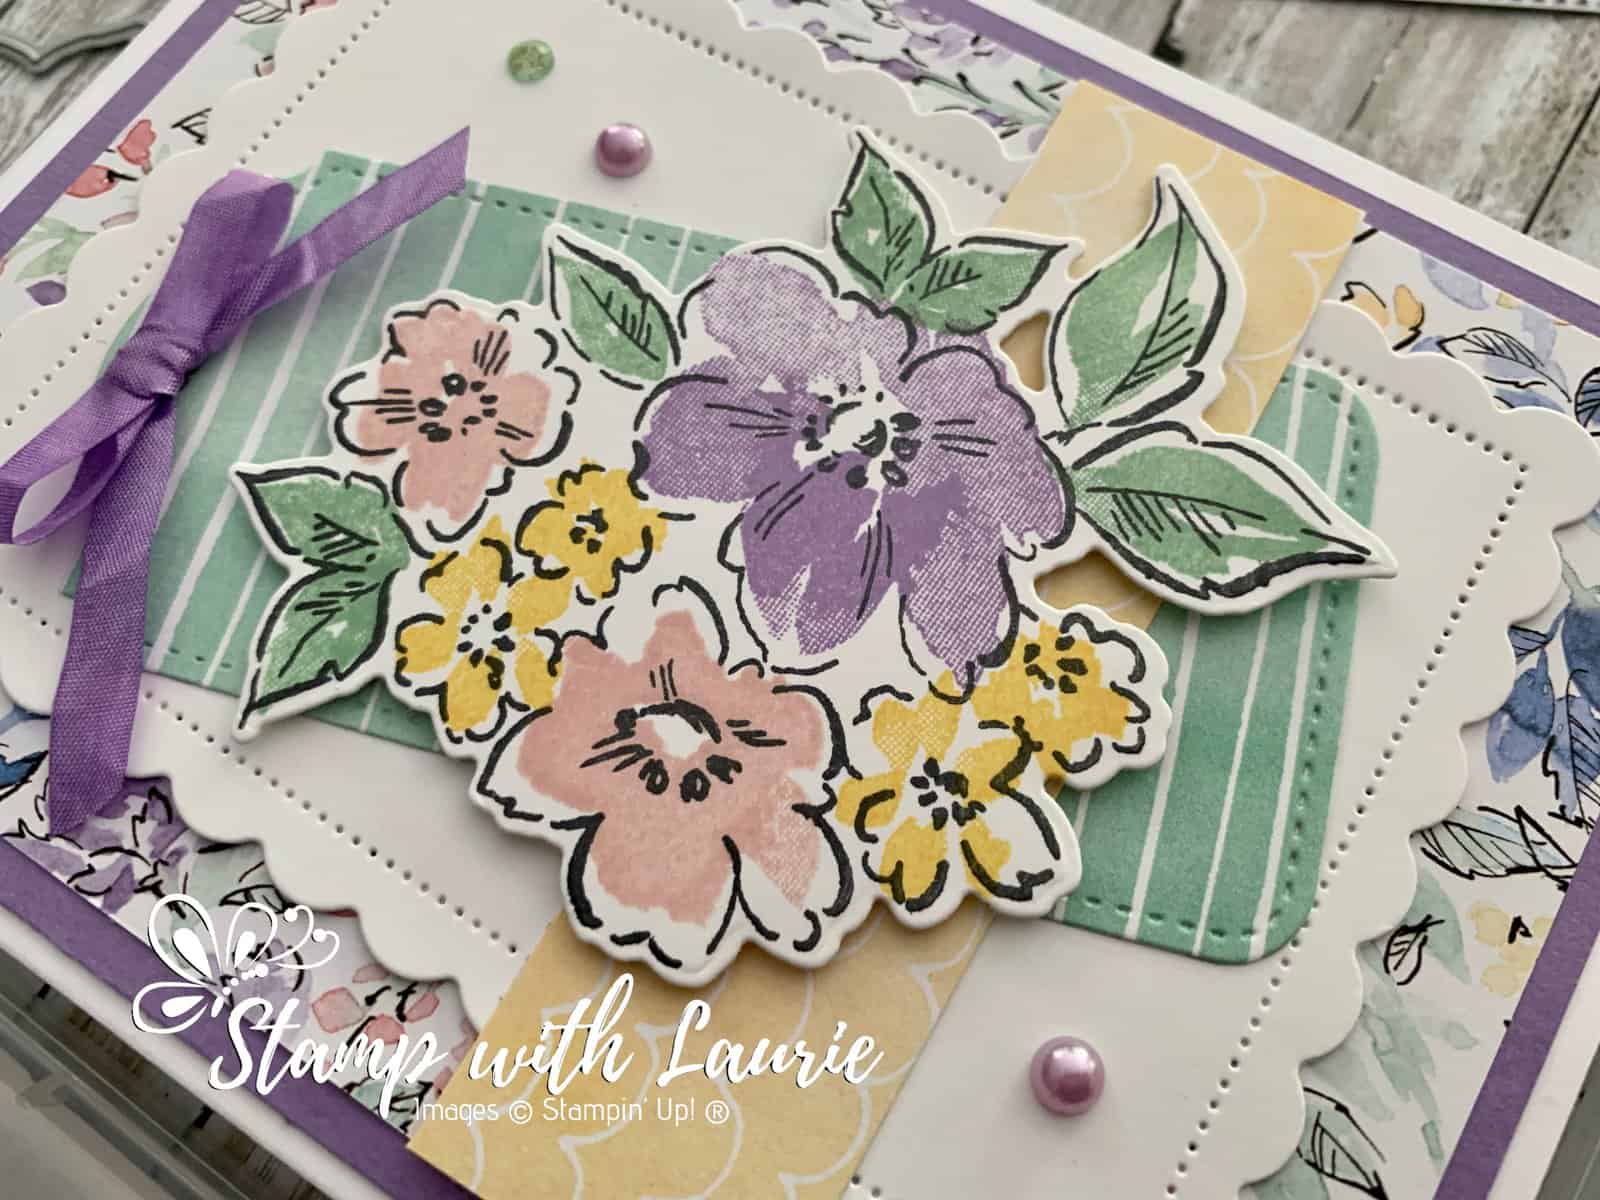
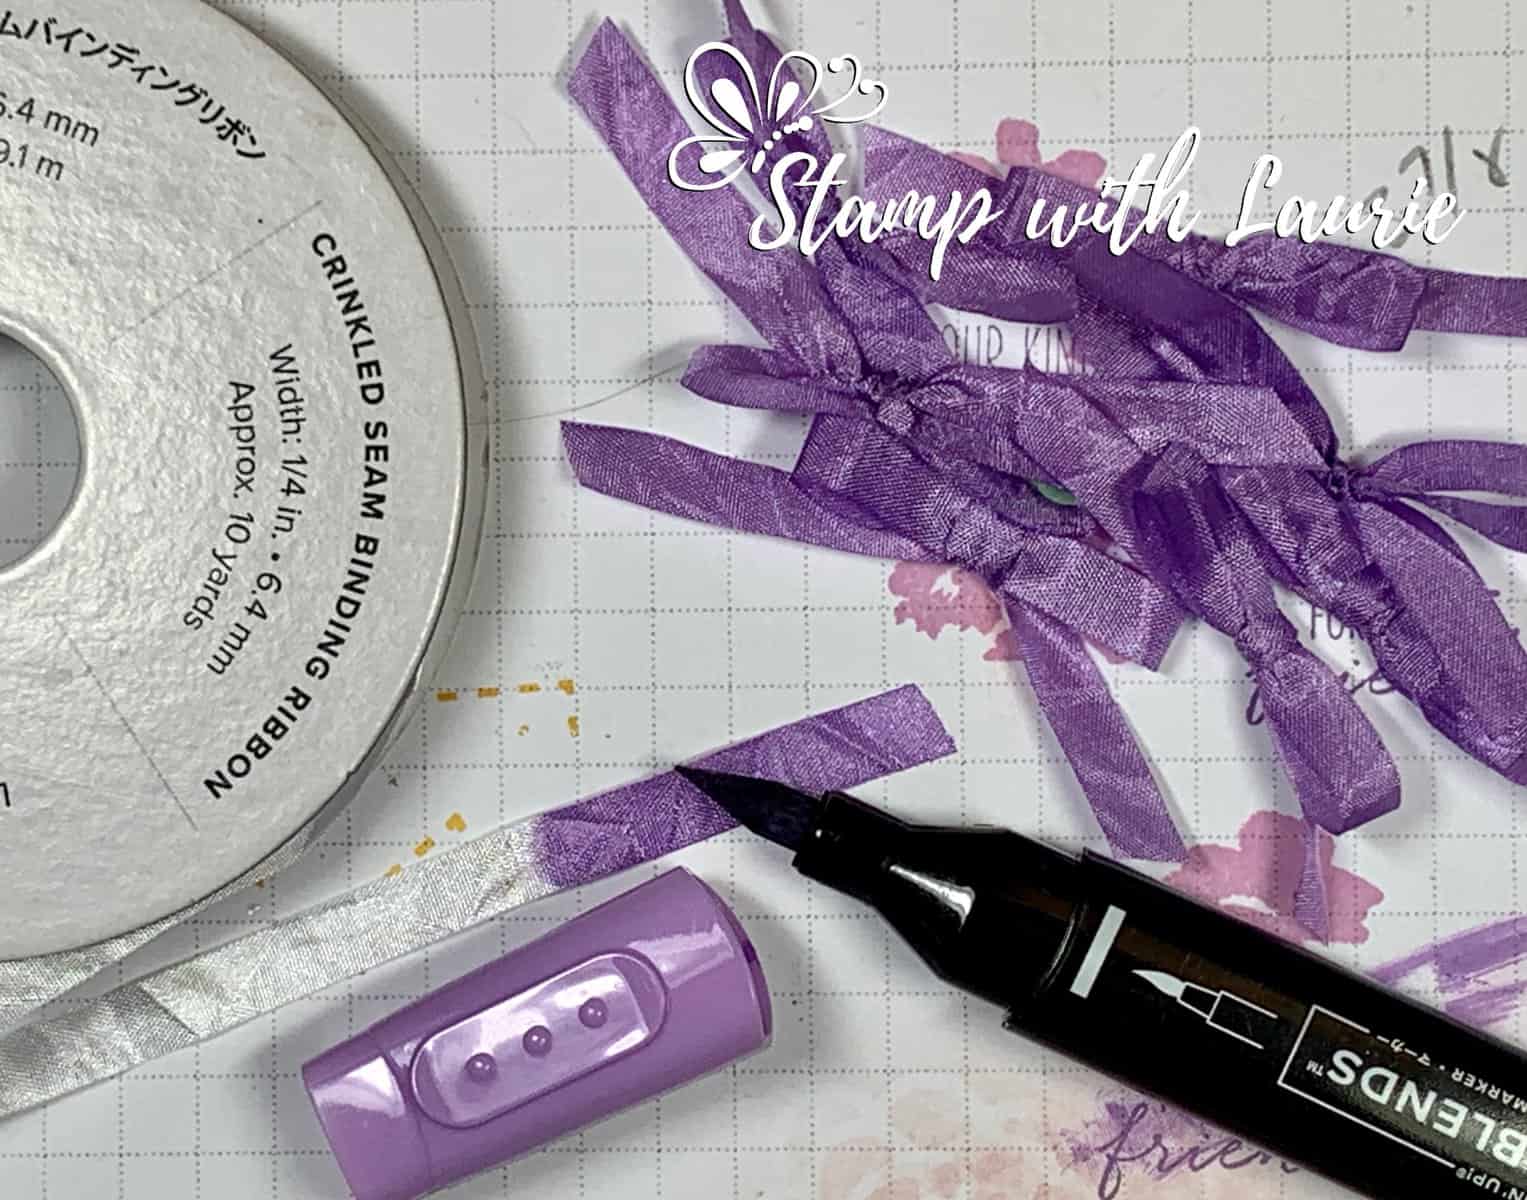
I stamped the colours of Highland Heather, Mint Macaron, Daffodil Delight and Blushing Bride for my flowers which matched the DSP and die cut them out with the matching dies. The Daffodil Delight piece of DSP helped to give a pop of colour to draw the eyes to the stamped flowers. I die cut the tag from the DSP as well. Love the Tailor Made Tags! They are so versatile! For my ribbon, I wanted it to match the colours of my card. So, I used my Dark Highland Heather Stampin’ Blend to colour the ribbon. This is a great way to add matching accents to your card!

Tip for using Markers on Ribbon
Tip for Colouring Ribbon with Stampin’ Blends

I found that the DSP is quite busy. So, to make my focal point stand out, I added a Basic White scallop cut piece underneath it to help ground it. A couple of Highland Heather pearls and a Mint Macaron Genial Gem tie in the colours of my card.

Close Up of My Card
Close Up of the Front of My Twisty Thank You Card

Inside of My Card

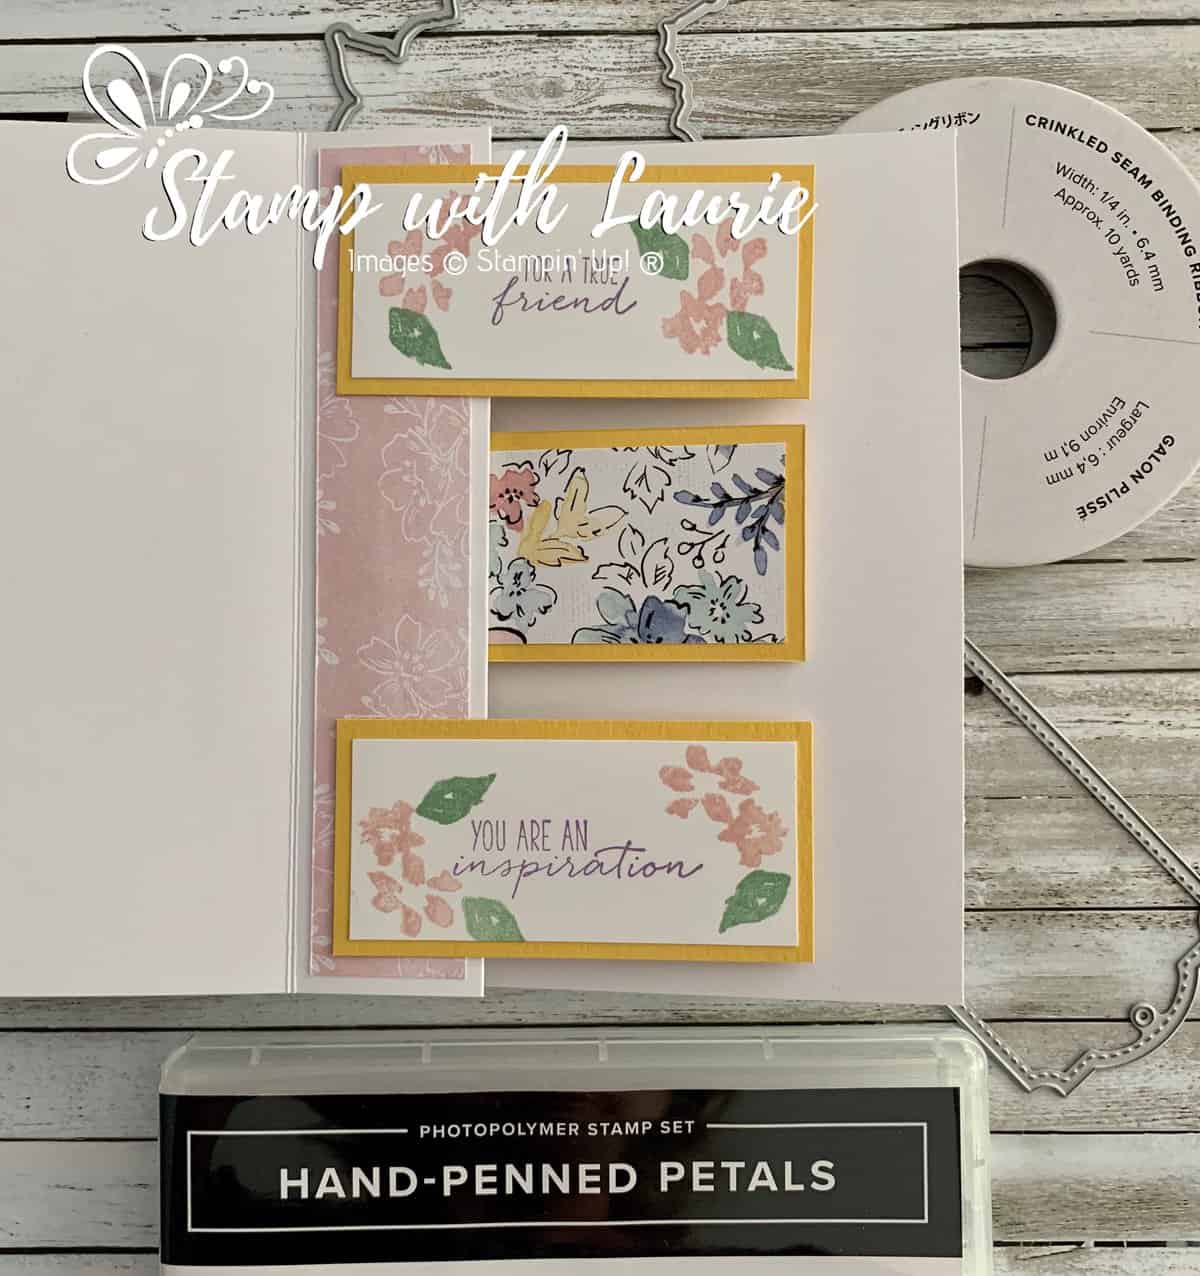
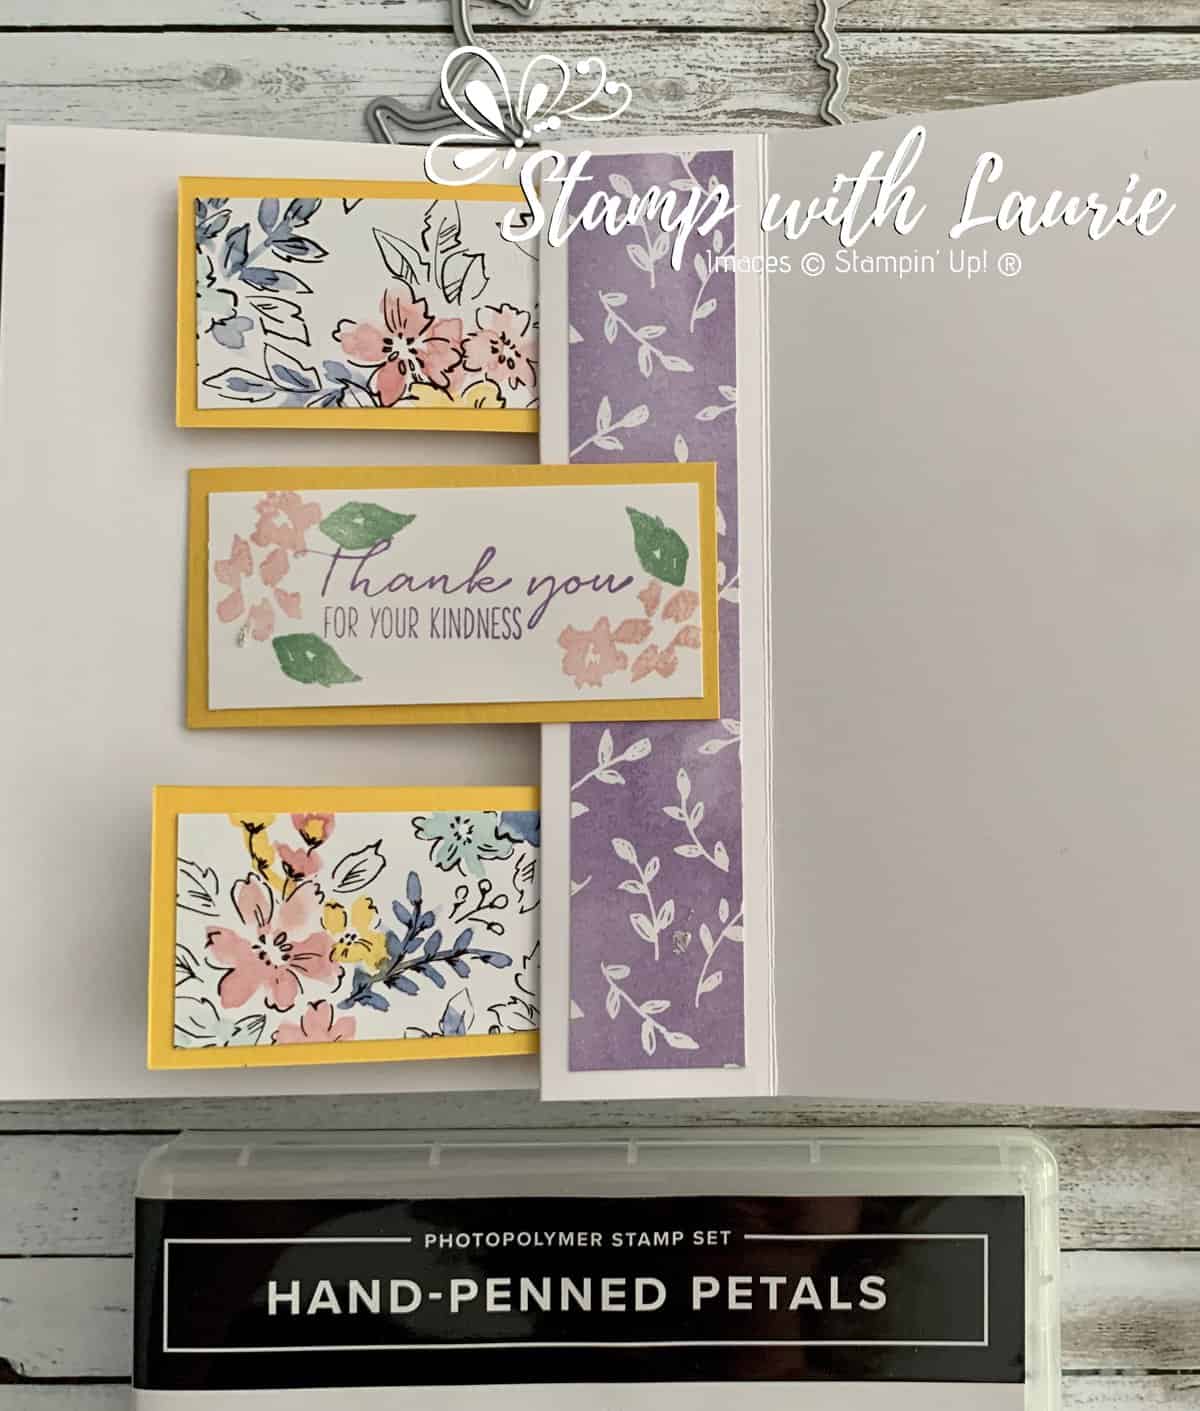
For the inside of my card, I added two of the neutral simple patterns to the inside folds and then attached the sentiment. I made sure that as you flip it, the sentiments made sense: “For a true friend” “You are an inspiration” Thank you for your kindness”. I added some DSP to the back of the sentiment pieces since you see the backs as they flip. Tip: adhere top and bottom sentiment pieces and then the middle to get even placement between the pieces.

Inside of my card
Inside of My Twisty Thank You Card

Supplies:

Stamps/Bundles/Dies: Hand-Penned Petals Bundle (155492), Dragonfly Garden Stamp Set (154411), Tailor Made Tags Dies (155563), Scalloped Contours Dies (155560)

Inks: Tuxedo Black Memento Ink Pad (132708), Highland Heather Classic Stampin’ Pad (147103), Mint Macaron Classic Stampin’ Pad (147106), Daffodil Delight Classic Stampin’ Pad (147094), Blushing Bride Classic Stampin’ Pad (147100)

Paper: Highland Heather (146986), Daffodil Delight (119683), Basic White (159276), Hand-Penned Designer Series Paper (158420)

Accessories: Whisper White Crinkled Seam Binding Ribbon (151326), Genial Gems (155500), Highland Heather Stampin’ Blends Combo Pack (154887), Pastel Pearls (154571), Bone Folder (102300), Stampin’ Dimensionals (104430), Stampin’ Seal (152813), Mini Glue Dots (103683)

The Flip Side
The Flip Side of the inside of My Card

Measurements: 

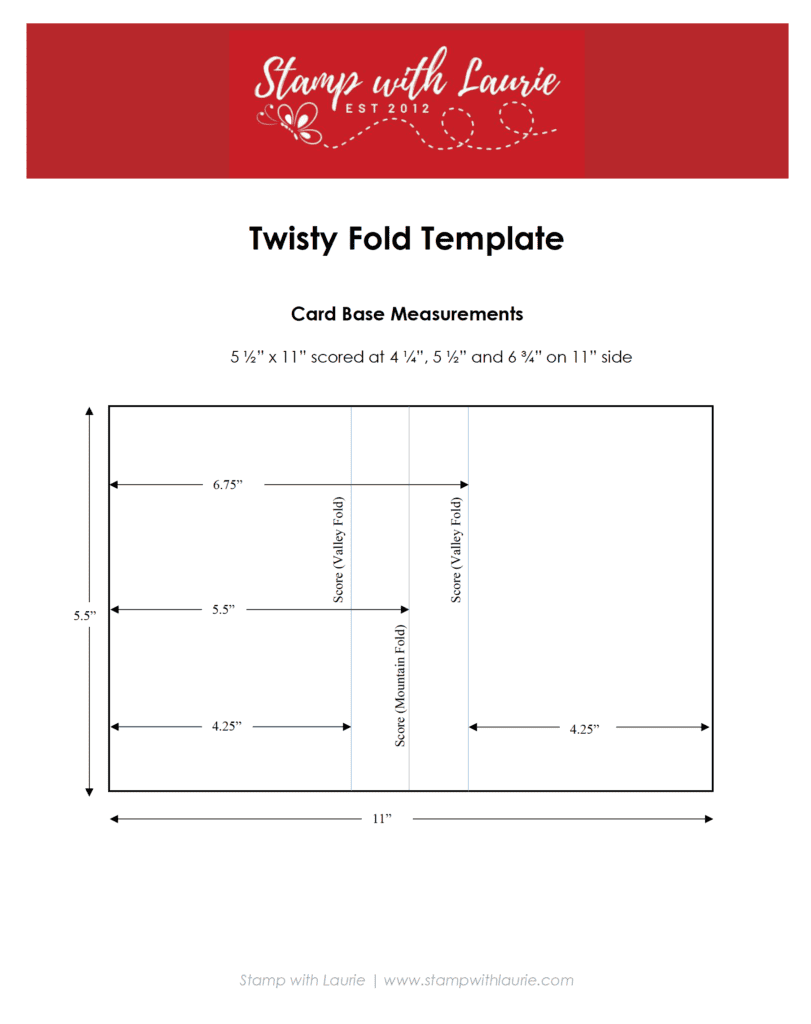
  • Basic White: 5 ½” x 11” scored at 4 ¼”, 5 ½” and 6 ¾”
  • Highland Heather: 4” x 5 ¼”
  • Hand-Penned Designer Series Paper: 3 ¾” x 5”
    • 1” x 3 ¾” (Daffodil Delight DSP)
    • 4” x 2” (Tag)
    • 1” x 5 ¼” (2 pieces)
    • 1 ¼” x 2 ¾” (3 pieces)
  • Basic White: 1 ¼” x 2 ¾” (3 pieces)
    • 3 ¼” x 4 ½” (Scalloped Contours Die)
    • 2 ¾” x 3 ½” (Penned Flowers Dies)
  • Daffodil Delight: 1 ½” x 3” (3 pieces)
  • Whisper White Crinkled Seam Binding Ribbon: 5”
Inside of Card
Sentiments Displayed When Card is Fully Opened

More Information on My Twisty Thank You Card:

Twisty Fold Template:

Twisty Fold Template Download

Hope you like my Twisty Thank You Card.

To download the Twisty Fold Template, please click here or on the image above.

For more of my Stampin’ Up! cards, please click here.

You will find the items listed above in my online store.

My Mandalorian Card

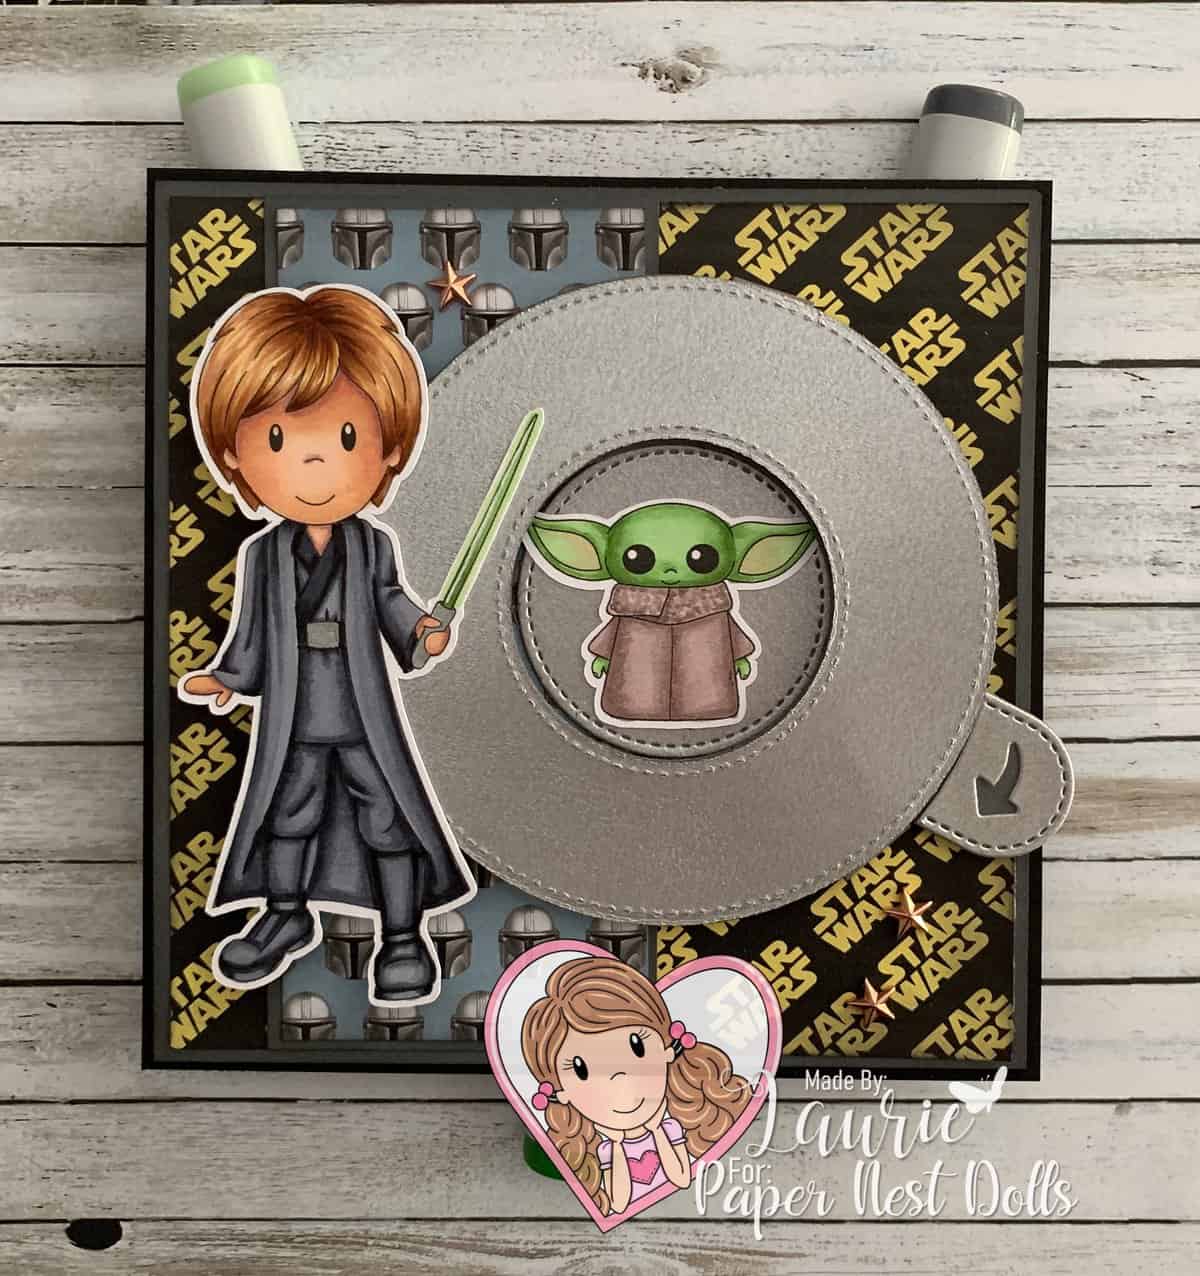
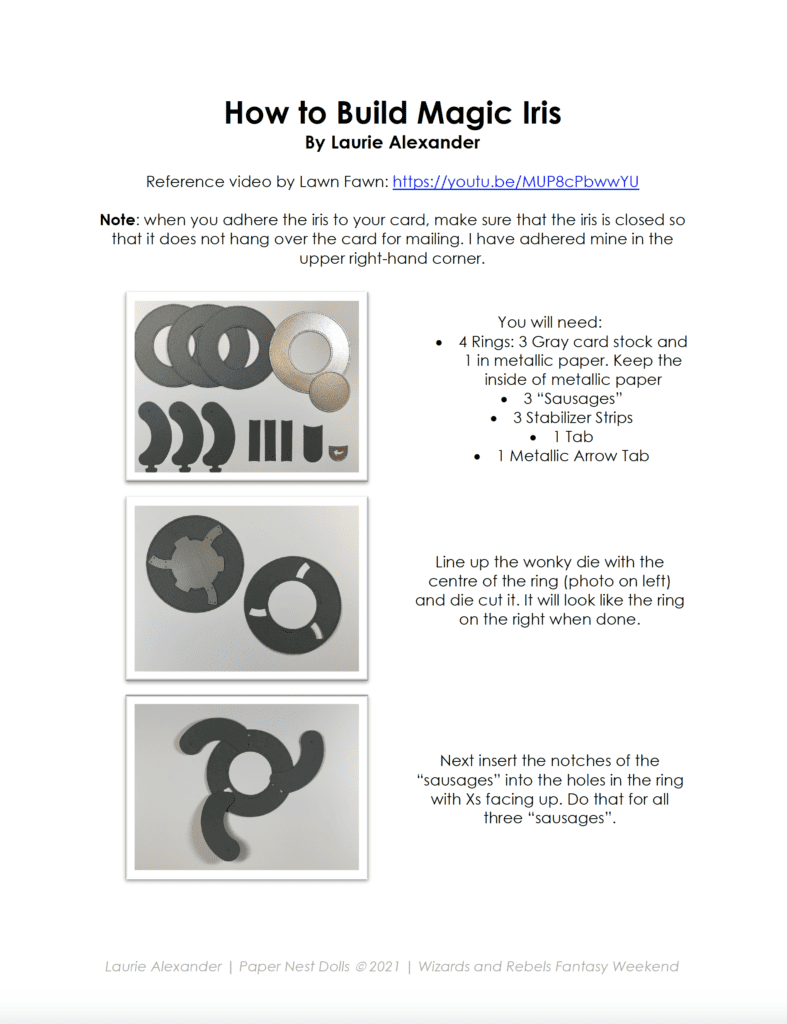
Hello Crafty Friends! It’s Laurie here! I was honoured to have been asked to present this card and my colouring for it at the Rebels and Wizards Online Event for Paper Nest Dolls that was this past weekend. My Mandalorian Card is using Rebel Hero and the new release Rebel Baby by Paper Nest Dolls and the Magic Iris Dies by Lawn Fawn. I have included a PDF with step by step instructions on how to build the Magic Iris at the end of this post.

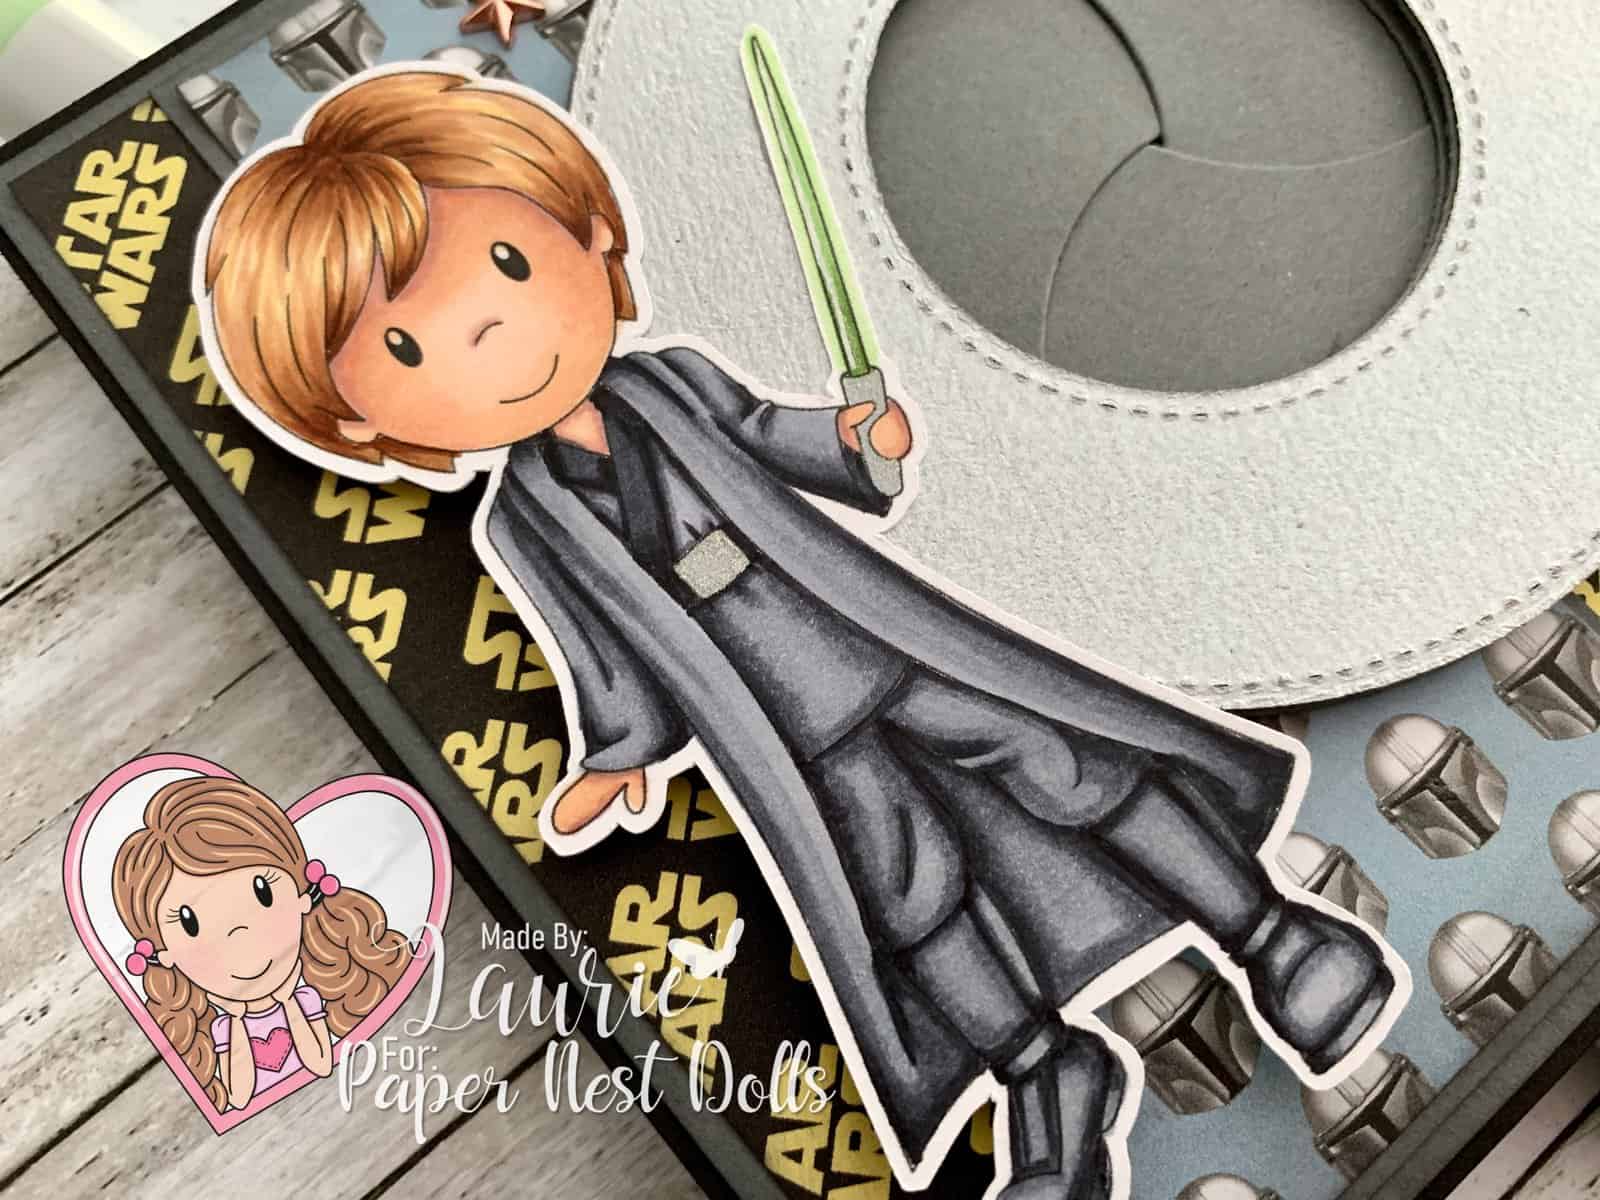
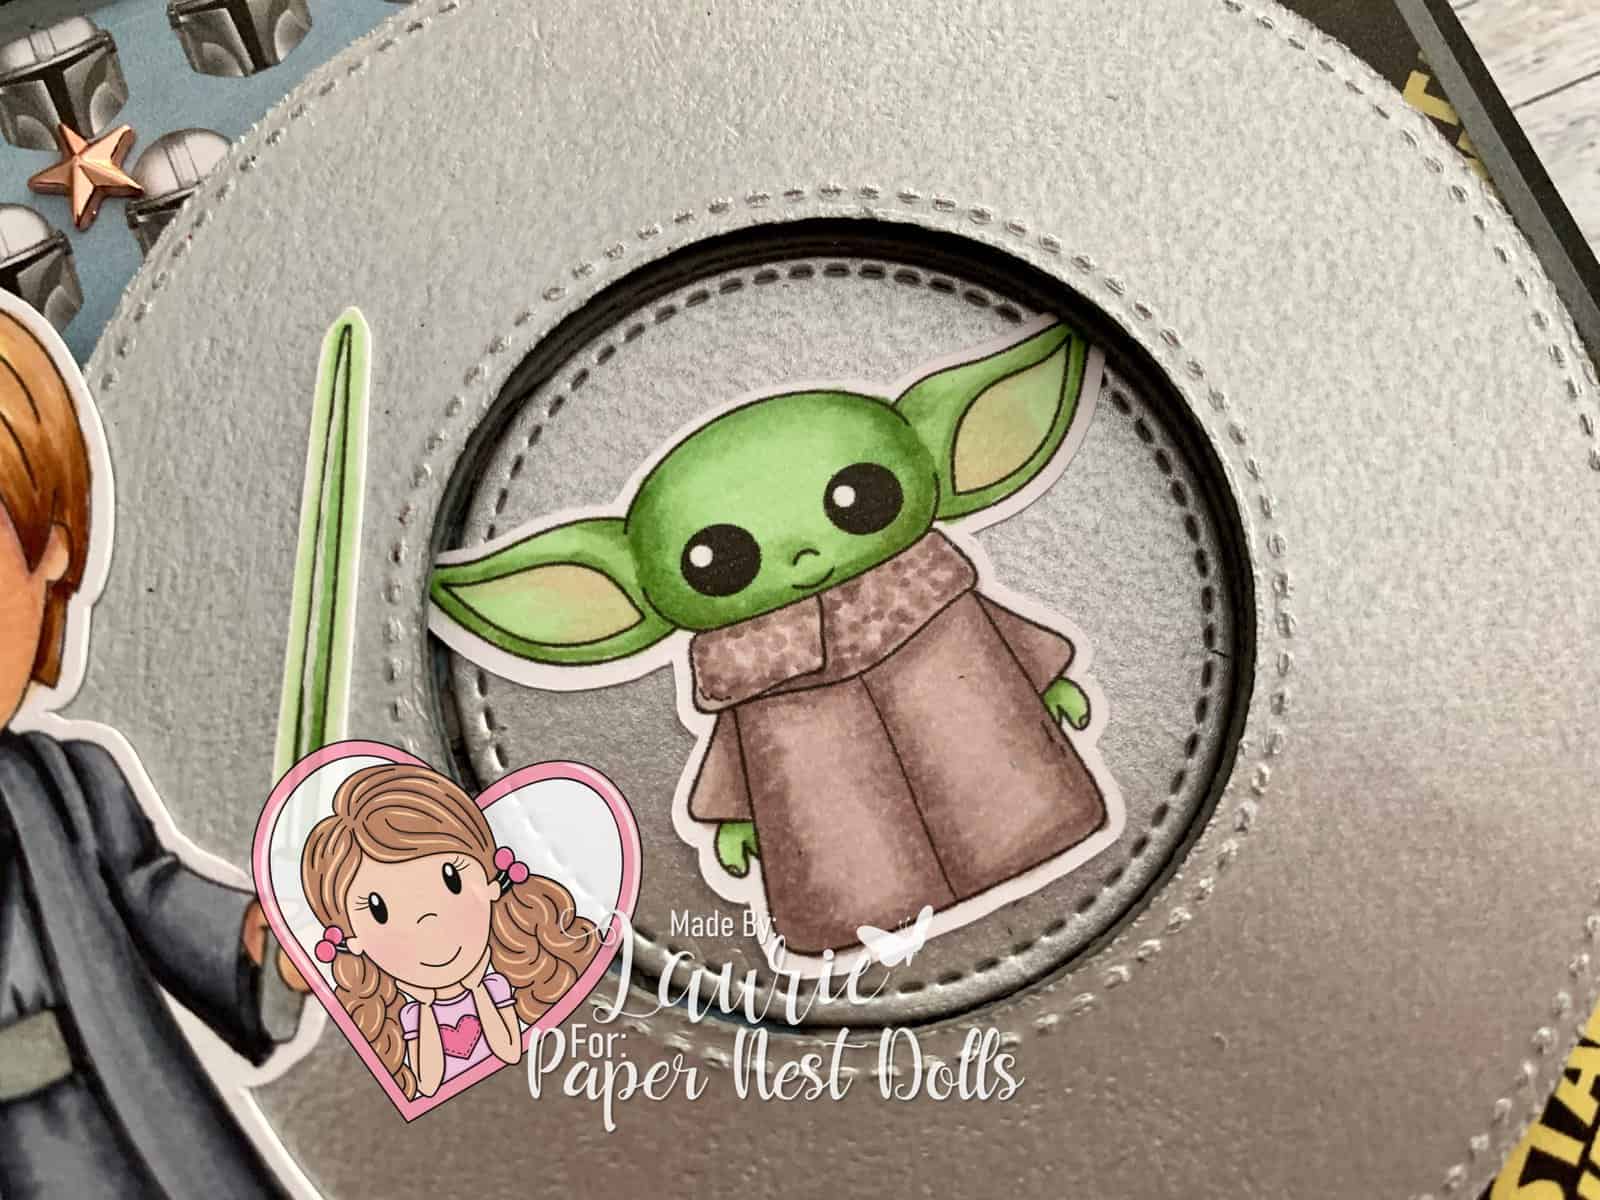
I just love Baby Yoda in the Mandalorian TV series. He is soooo cute! I even have a Baby Yoda stuffy that gets into all kinds of mischief. Lol! So, when I saw the new Rebel Baby digital stamp, I just had to make a card with him! My card was inspired by the last episode of season two where Luke comes to rescue Baby Yoda and his friends. I coloured Luke in dark clothes with a green light saver (or life saver as my Baby Yoda calls it! Lol!) as he appeared in this episode. The Rebel Baby is hidden behind the “door” and is revealed by the Magic Iris mechanism when the Jedi Hero opens it.

Magic Iris Opened
Magic Iris Door Open to Reveal Rebel Baby

Don’t you just love the digital paper that I used with the Mandalorian helmets and the original Star Wars logo! They were perfect for my card and were free from HaleGrafix. I sponged some Black Soot to the edges of it to give my card a gritty feel. I couple of star embellishments was all this card needed to finish it off.

————————–

Copic Markers:

Rebel Hero
Skin: E04/E11/E21/E00/E000/R20
Hair: YR31/E33/E35/E37
Robes: C9/C7/C6/C5/C3
Belt: C9/C7/C6/Silver Gelly Roll Pen
Light Saber: YG11/YG13/YG17/White, Silver and Clear Star Gelly Roll Pens

Close Up of Stamp
Close Up of Rebel Hero

Rebel Baby
Skin: YG11/YG13/YG17
Robes: E70/E71/E74

Close Up Jedi Baby on Card
Close Up of Rebel Baby

————————–

Measurements:

Black Card Base: 5.25” x 10 ½” scored at 5.25”
Gray Mat: 5 1/8” x 5 1/8”
Star Wars Paper: 4 7/8” x 4 7/8”
Gray Mat for Mando Helmets: 5” x 2 ¼”
Mando Helmets: 4 7/8” x 2 1/8”
Rebel Hero: 4” tall
Rebel Baby: 1 ¾” wide

Finished card sizes: 5.25” x 5.25”

————————–

Card Recipe for My Mandalorian Card:

Rebel Hero and Rebel Baby , Paper Nest Dolls
Paper Basics – Stamper’s Select White Cardstock, Papertrey Ink
FREE Printable Star Wars Digital Paper Pack, HaleGrafix
FREE Printable Star Wars Mandalorian Digital Paper Pack, HaleGrafix
Galvanized Metallic Sheet, Stampin’ Up!
Magic Iris Dies, Lawn Fawn
Star Designer Elements, Stampin’ Up!
Black Soot Distress Ink, Ranger
Mini Ink Blending Tool, Ranger
White Gelly Roll Pen
Silver Gelly Roll Pen
Clear Star Gelly Roll Pen
Basic Black and Basic Gray Card Stock, Stampin’ Up!

Movie of My Mandalorian Card in Action

————————–

Magic Iris Instructions Download

To view my other Paper Nest Dolls cards, please click here.

My presentation went so well, that I have been asked to present at
the Party with The Villains (Online) Event October 2nd and 3rd.
https://www.papernestdolls.com/product/online-party-with-the-villains-event/

Hope you like my card using Rebel Hero and Rebel Baby by Paper Nest Dolls!

Thank you for stopping by!

Hugs,
Laurie

My Christmas Besties Card

My Design Team Card
My Christmas Besties Design Team Card

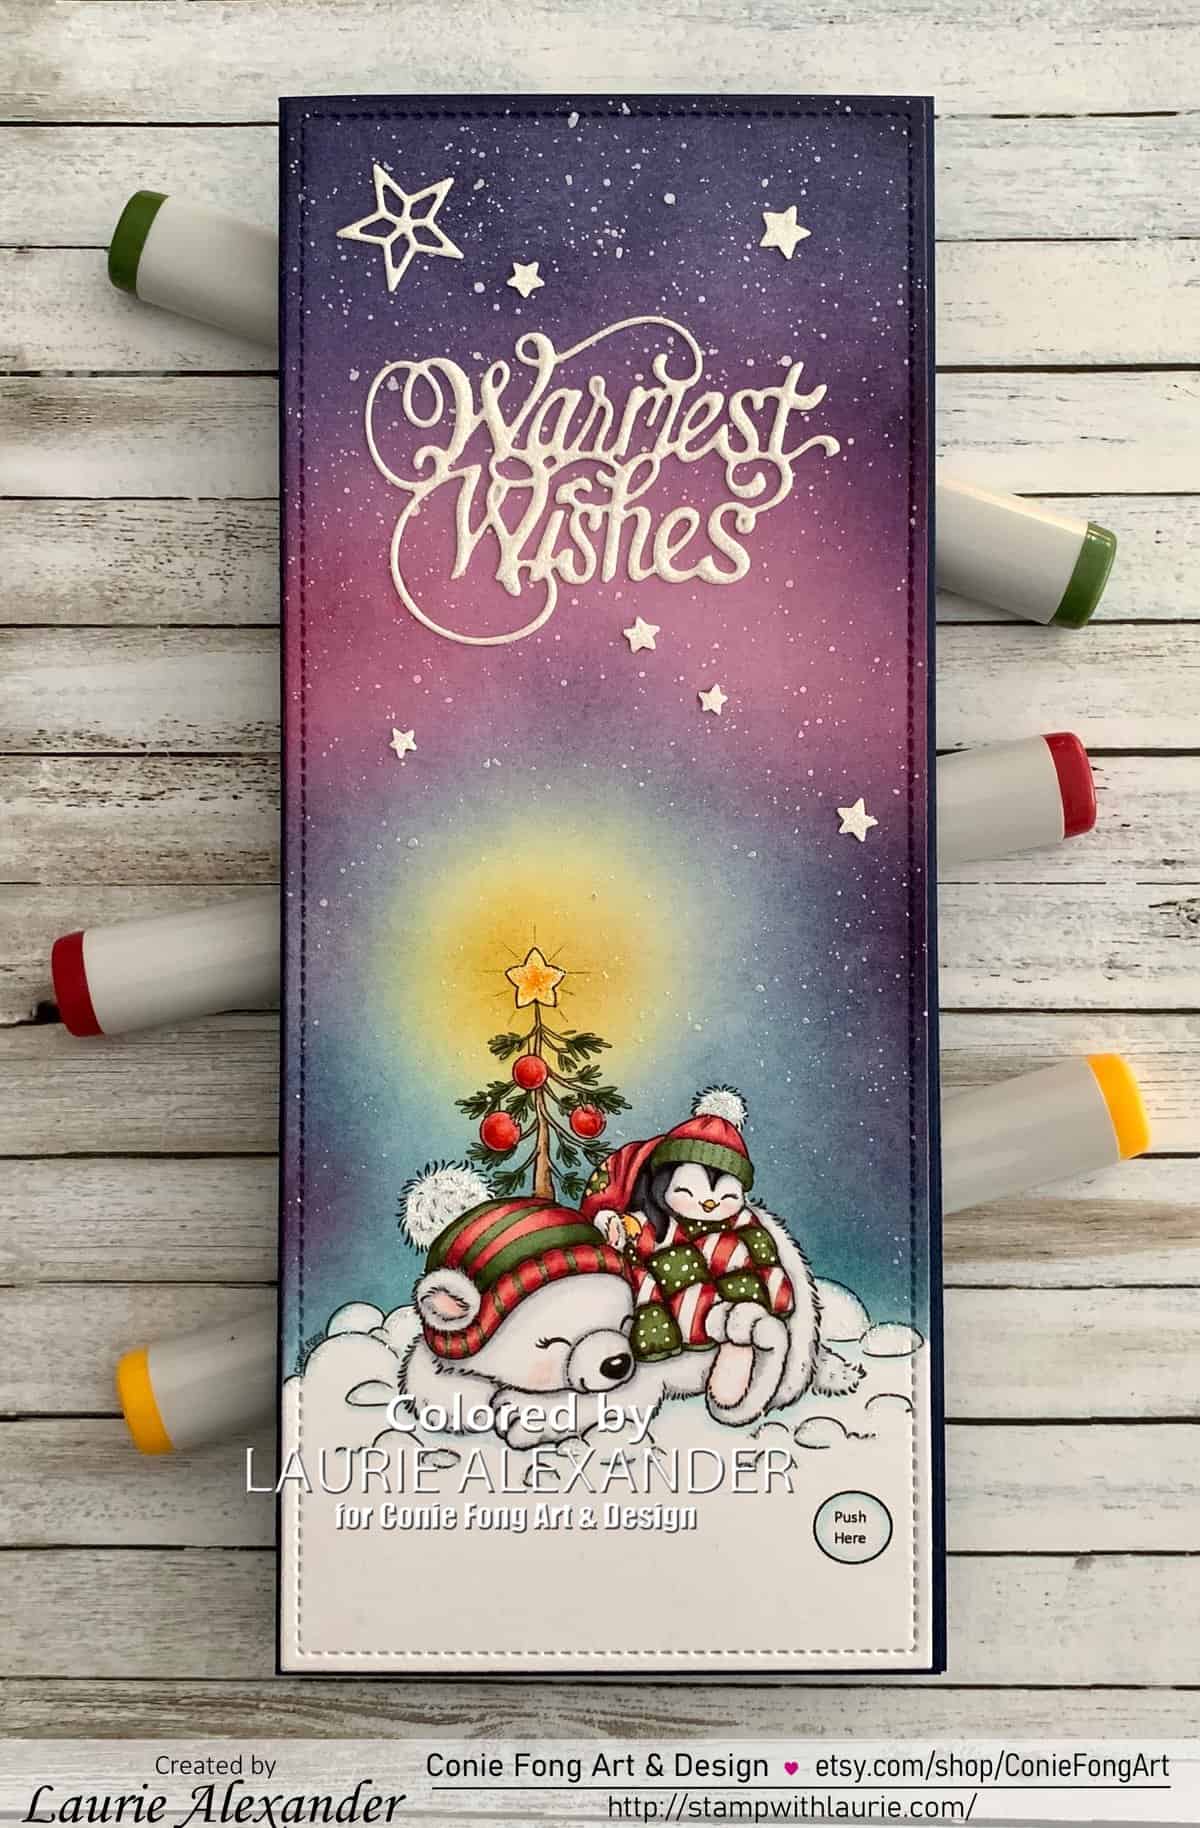
Hello Crafty Friends! It’s Laurie here! One last Christmas in July card before July is over! I am sharing my Slimline Interactive Christmas Besties Card as my Design Team Card for Conie Fong Art & Design. My card is using Christmas Besties digital stamp which comes with 3 stamps including Snowy the Penguin – Christmas Besties with tree, without tree and without background. I used Snowy the Penguin – Christmas Besties with tree for my card.

Details of My Card

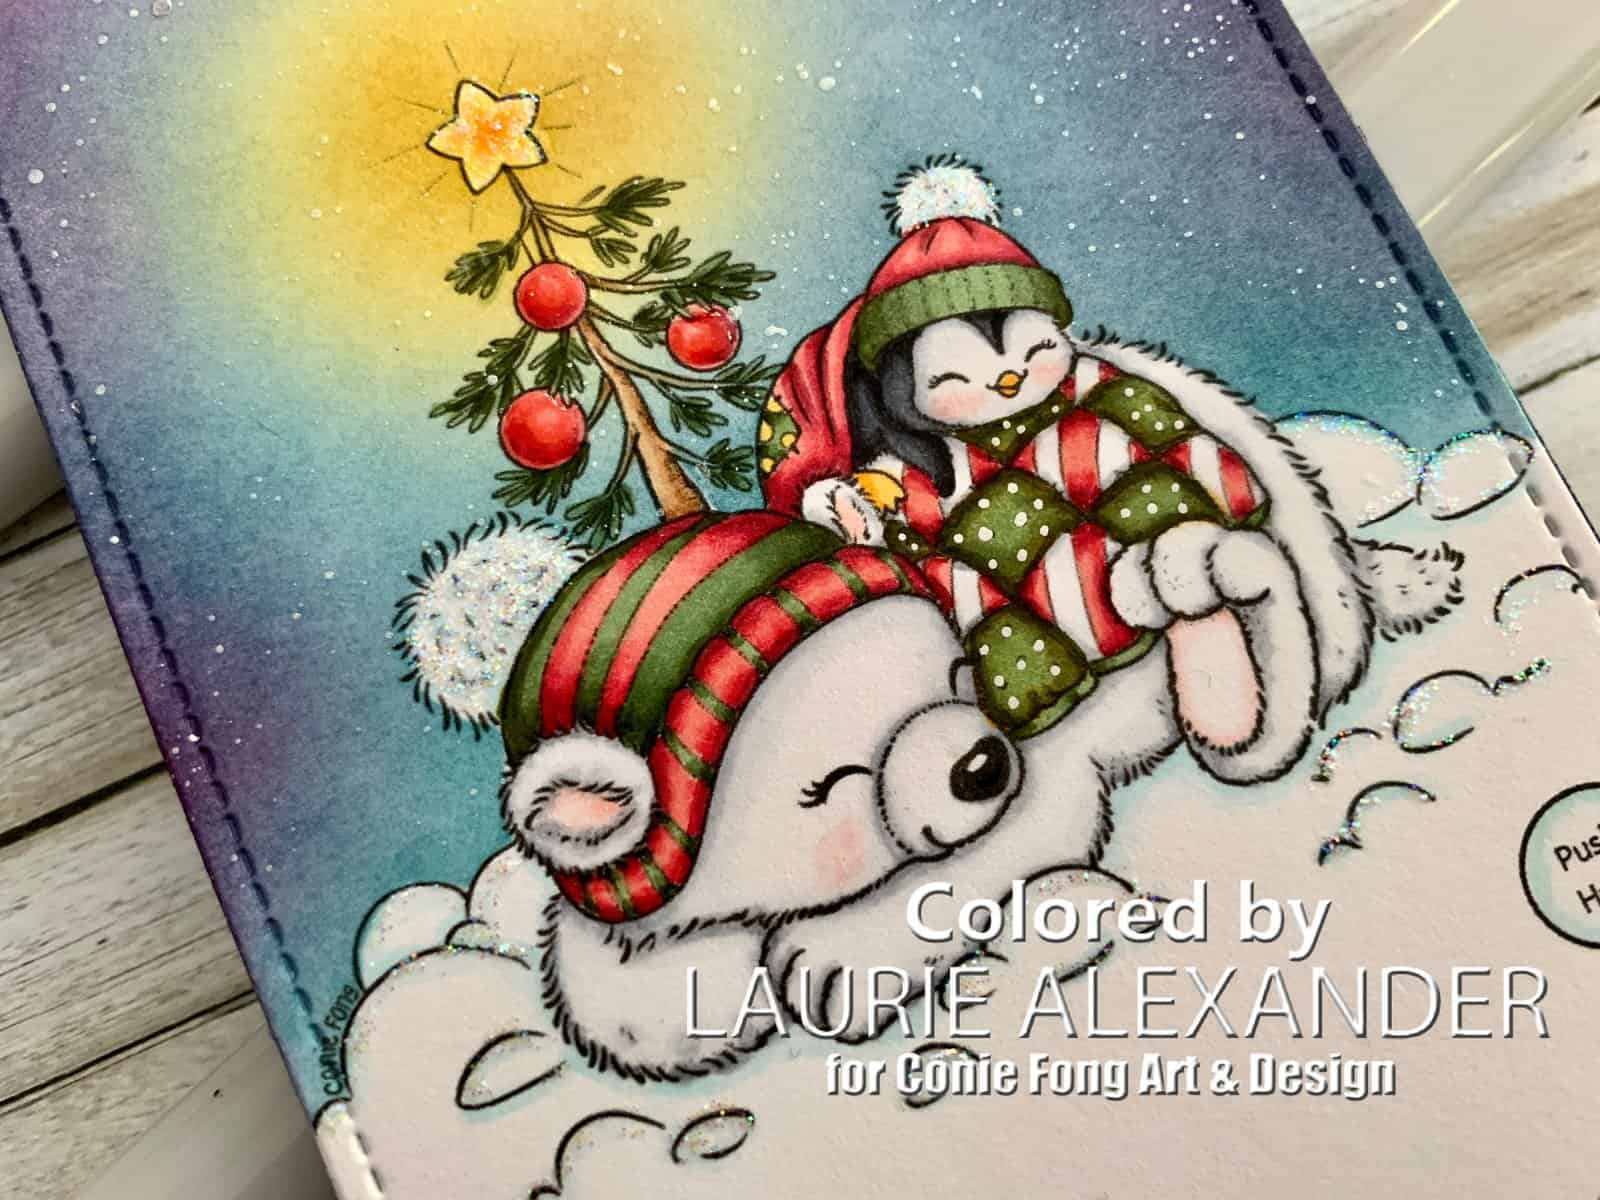
For my card, I coloured Snowy Penguin and his sweet friend with my Copic markers. I knew that I wanted to create a slimline card with the aurora borealis filling the night sky above these cuties. One of these days, I hope to see the aurora borealis in person! It is on my Bucket List of things to do.

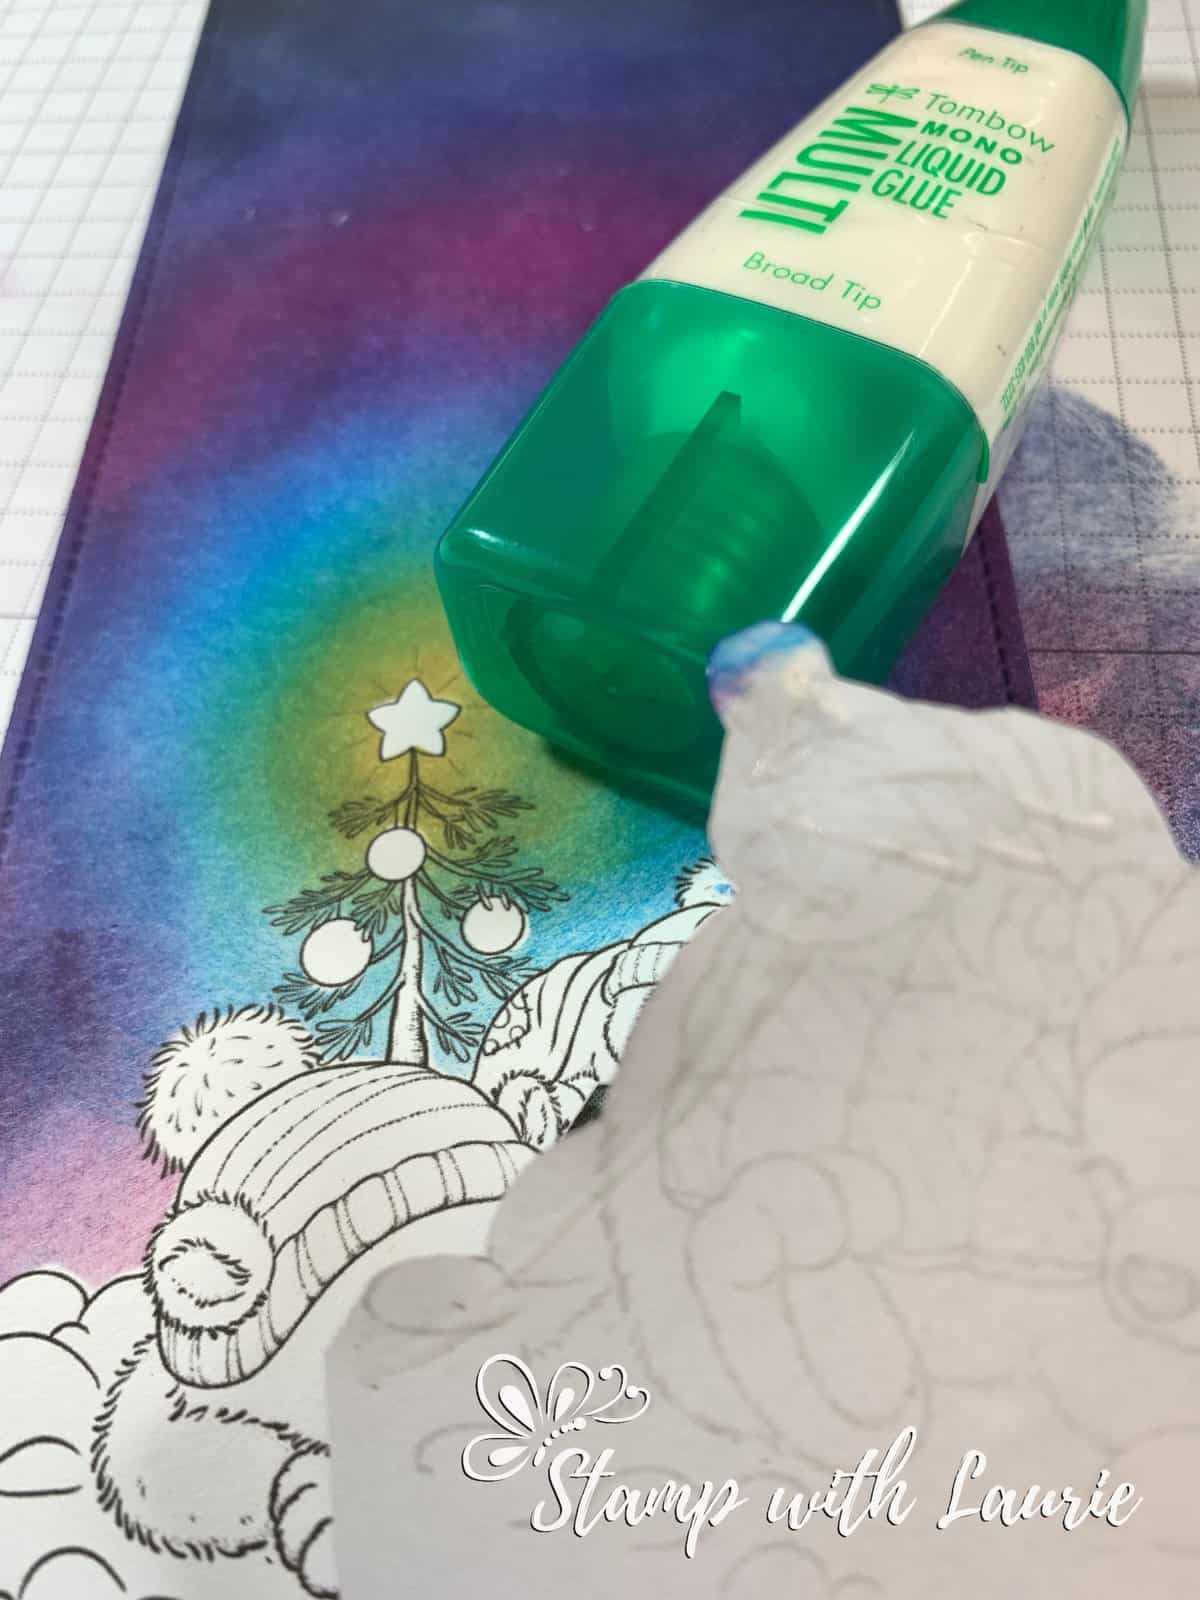
For my aurora borealis, I created a mask to go over my colouring using Tombow Liquid Glue. I printed out an extra image on copy paper. Once I fussy cut out the image including the star and the Christmas baubles, I applied Tombow to the back of them and let it dry.

Creating a Mask with Tombow Liquid Glue

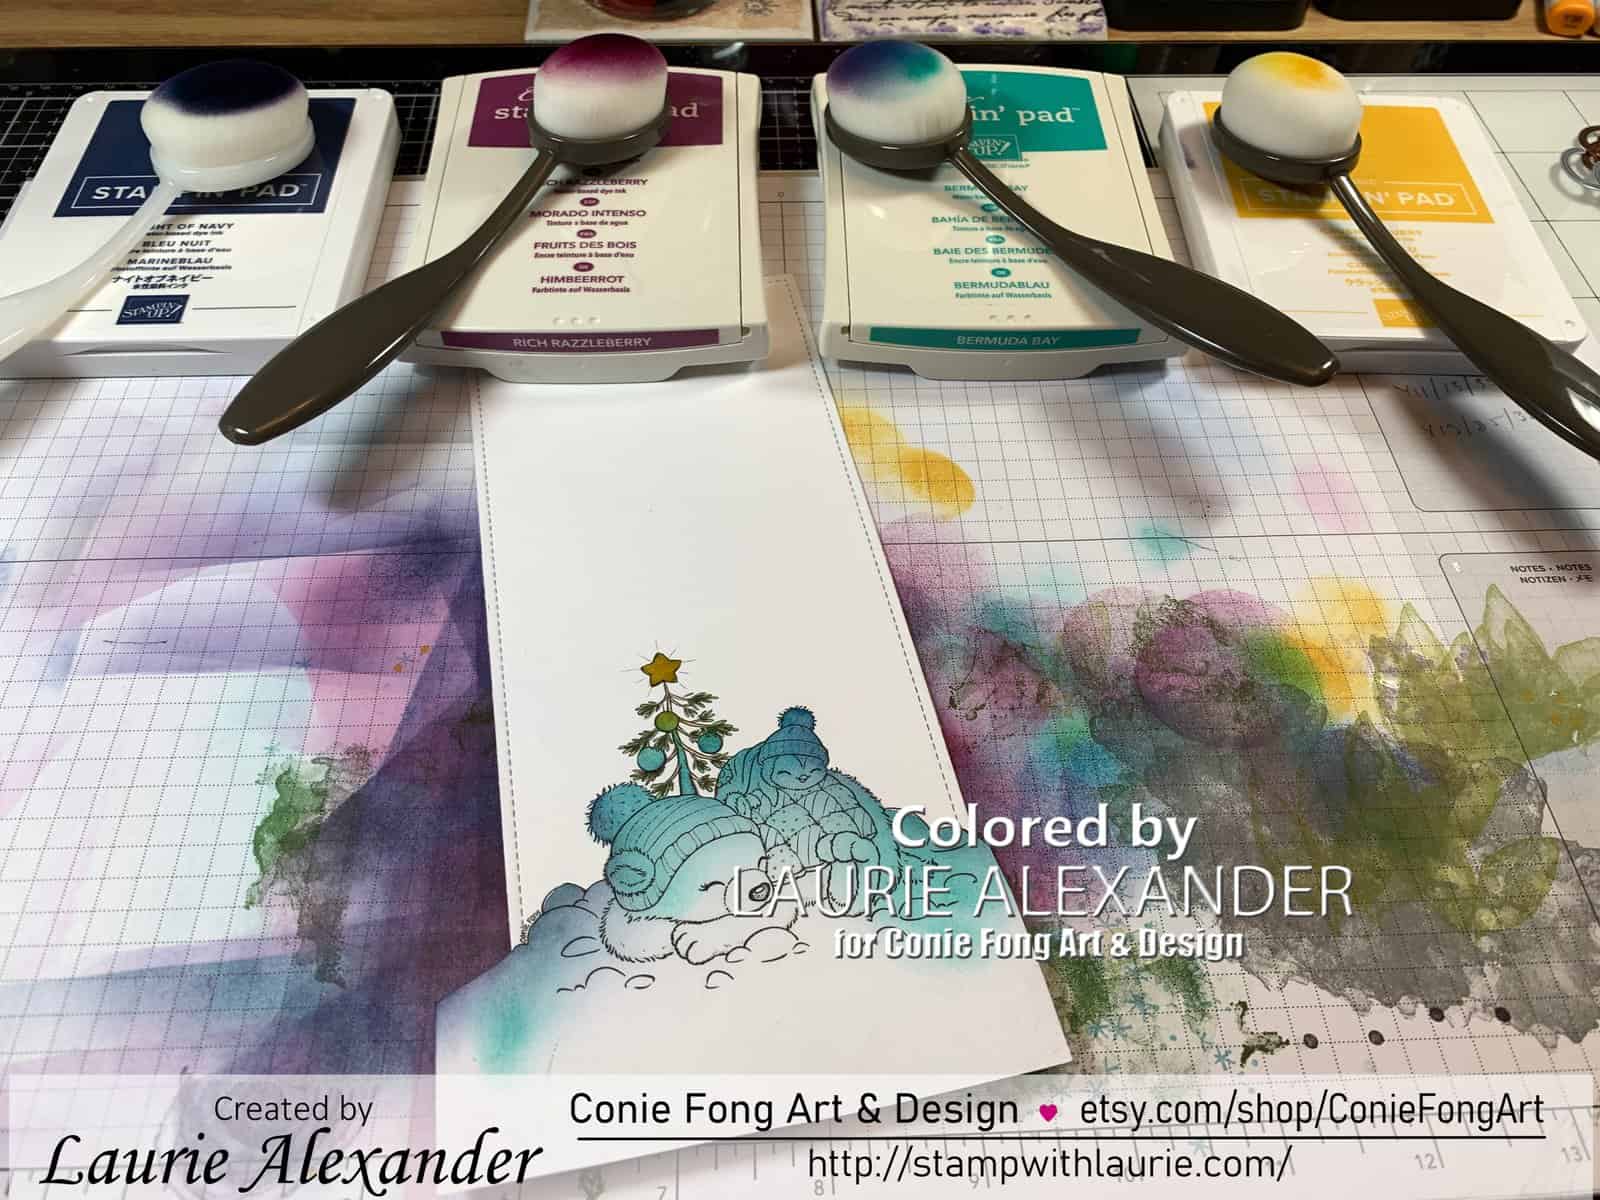
How to Create the Sky

For my colours of the aurora borealis, I used my Blending Brushes and the Stampin’ Up! Inks of Bermuda Bay, Rich Razzleberry and Night of Navy with Crushed Curry for the glow of the star on their tree. While the mask was still in place, I splattered Frost White All-Purpose Ink with my Splatter Brush all over the panel.

Getting Ready to Create Aurora Borealis Sky

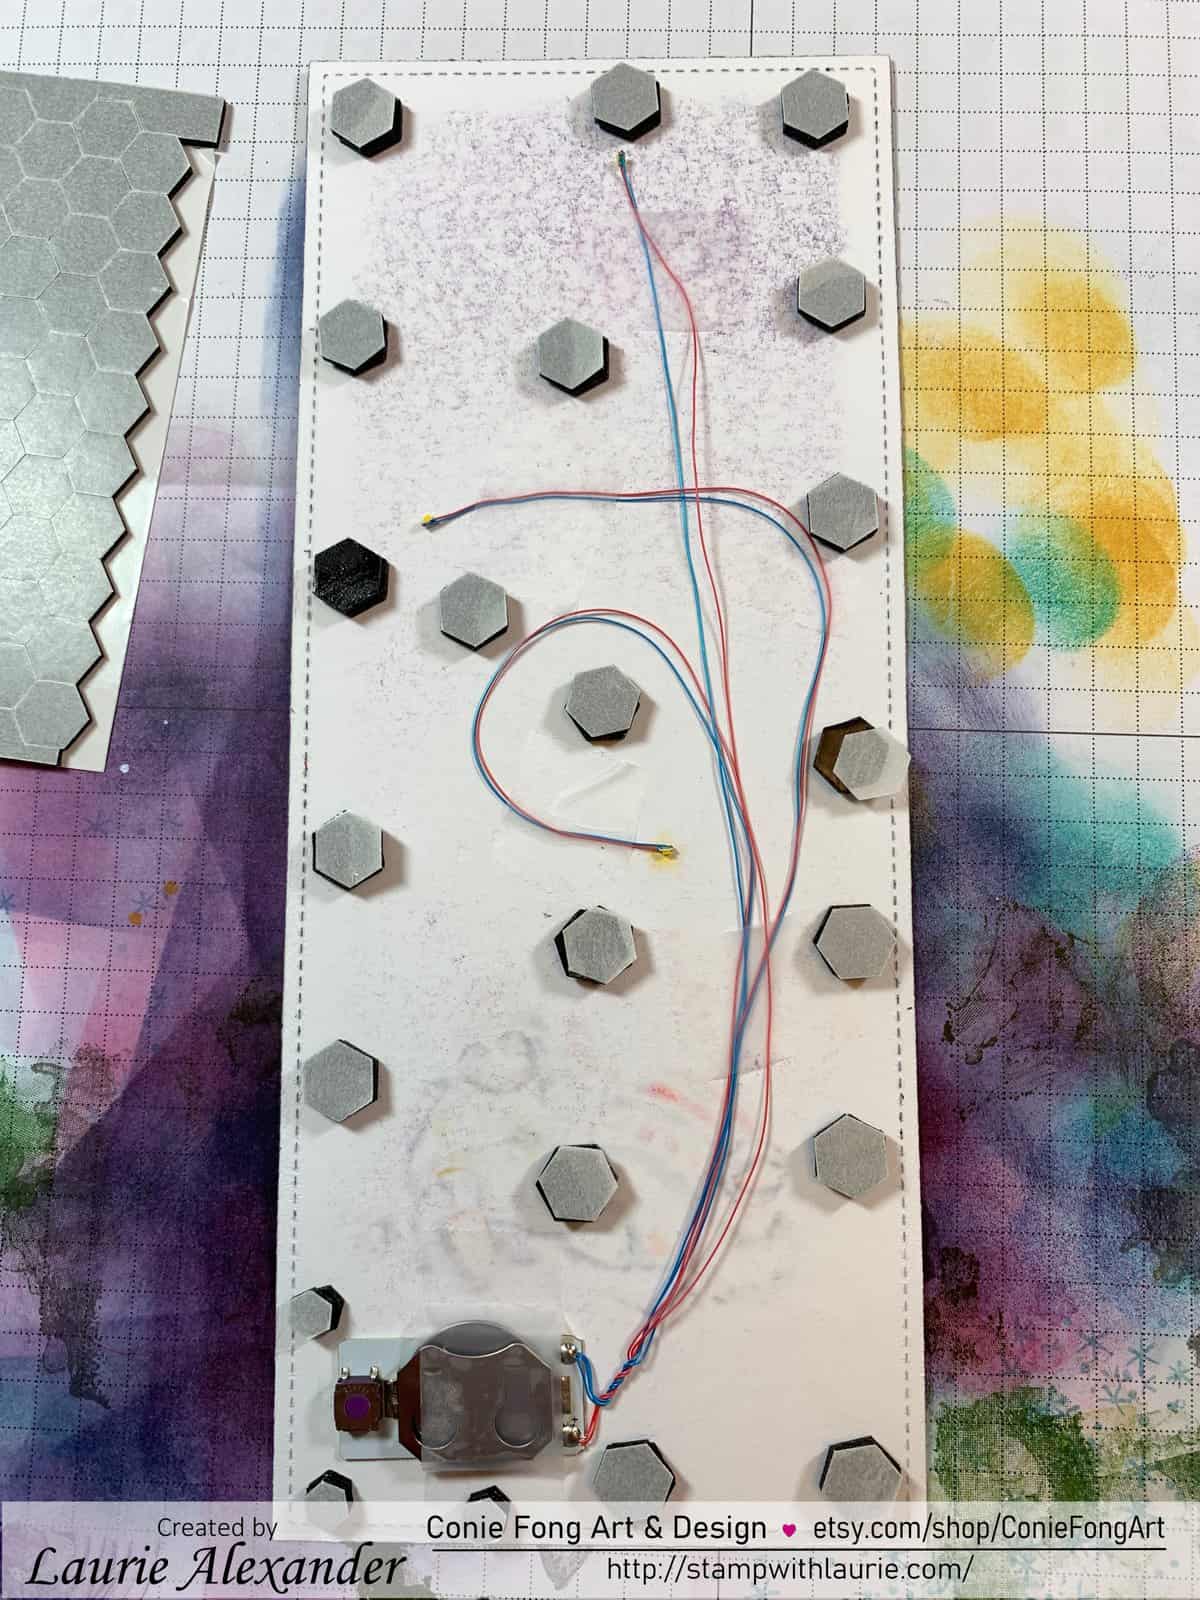
Another reason why I went with a slimline card is that I wanted to make it interactive and add lights. The Ez-Lights from Pear Blossom Press come with 3 lights and the mechanism to make them work. I adhered with scotch tape one behind the star and the other two on either side of the sentiment. Then I used a ton of black dimensionals that were doubled high so that they cleared the mechanism.

Light Placement on Back of Card

To finish off my card, my sentiment was die cut from Dazzling Diamonds Glimmer paper along with the die cut star and punched stars. I used Glossy Accents on the Christmas Baubles and Star Dust Stickles on the star, pompoms, and snow.

————————–

Copic Markers:

Snowy: C9/C7/C6/C5 and C3/C00/0/R20
Snowy’s Beak: Y35/Y38
Polar Bear: C3/C00/0/R20
Greens: G21/G94/G99
Reds: R32/R35/R37/R39
White on Quilt: C3/C00/0
Star: Y13/Y35/Y38
Tree Branches: E35/E33/E31
Snow/Pompoms: B0000/B000/Star Dust Stickles

Close Up of My Design Team Card

————————–

Card Recipe for My Christmas Besties Card:

Christmas Besties, Conie Fong Art & Design
Paper Basics – Stamper’s Select White Cardstock, Papertrey Ink
Dazzling Diamonds Glimmer Paper, Stampin’ Up!
EZ-Light, Pear Blossom Press
Large Slimline with Sliders Dies, Lawn Fawn
Sue Wilson Festive Warmest Wishes Craft Die, Creative Expressions
Stitched Stars Dies, Stampin’ Up!
Confetti Stars Border Punch, Stampin’ Up!
Blending Brushes, Stampin’ Up!
Bermuda Bay Classic Stampin’ Pad, Stampin’ Up!
Rich Razzleberry Classic Stampin’ Pad, Stampin’ Up!
Night of Navy Classic Stampin’ Pad, Stampin’ Up!
Crushed Curry Classic Stampin’ Pad, Stampin’ Up!
Tim Holtz Distress Splatter Brush, Ranger
Frost White All-Purpose Ink, Stampin’ Up!
White Gelly Roll Pen, Sakura
Black Gelly Roll Pen, Sakura
Star Dust Stickles, Ranger
Glossy Accents, Ranger
Scotch Tape
Copy Paper
Tombow Multipurpose Liquid Glue, Stampin’ Up!
Night of Navy Card Stock, Stampin’ Up!

Finished card size: 3.5” x 8.5”

Video of My Christmas Besties Card All Lit Up

————————–

To view my other Conie Fong Art & Design cards, please click here.

Hope you like my Design Team Inspiration Card using
Christmas Besties for Conie Fong Art & Design!


Thank you for stopping by!

Hugs,
Laurie

My Father’s Day Card

My Father's Day Card
My Father’s Day Card

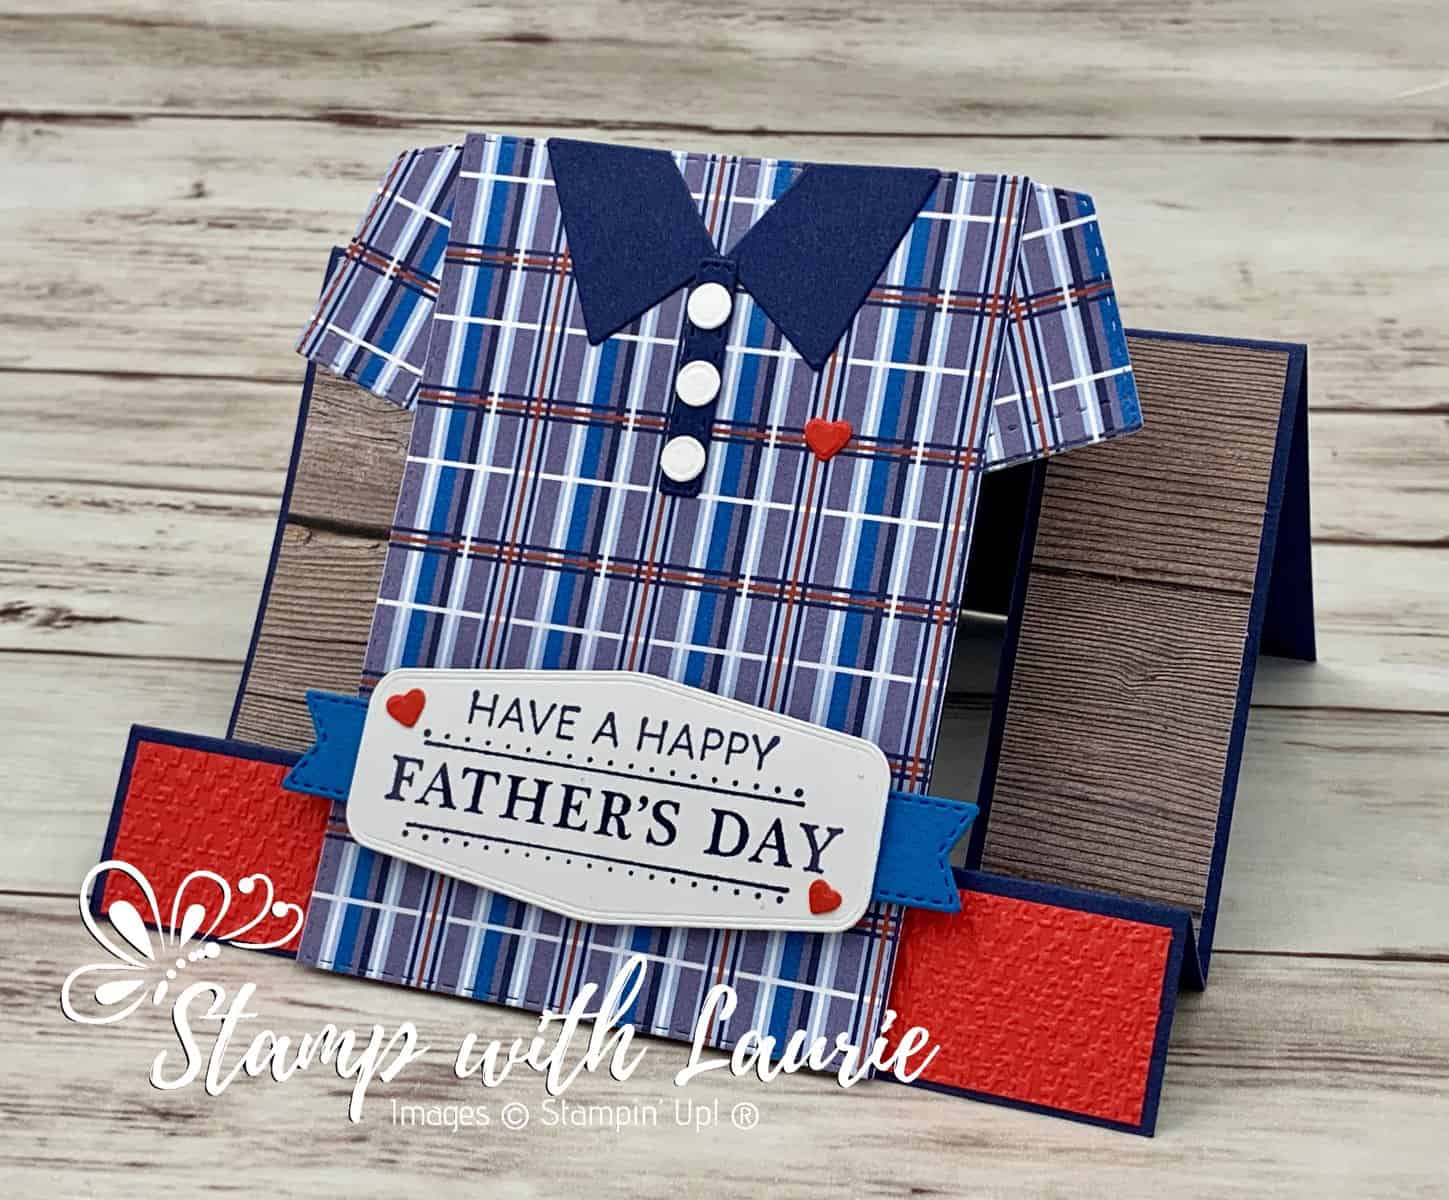
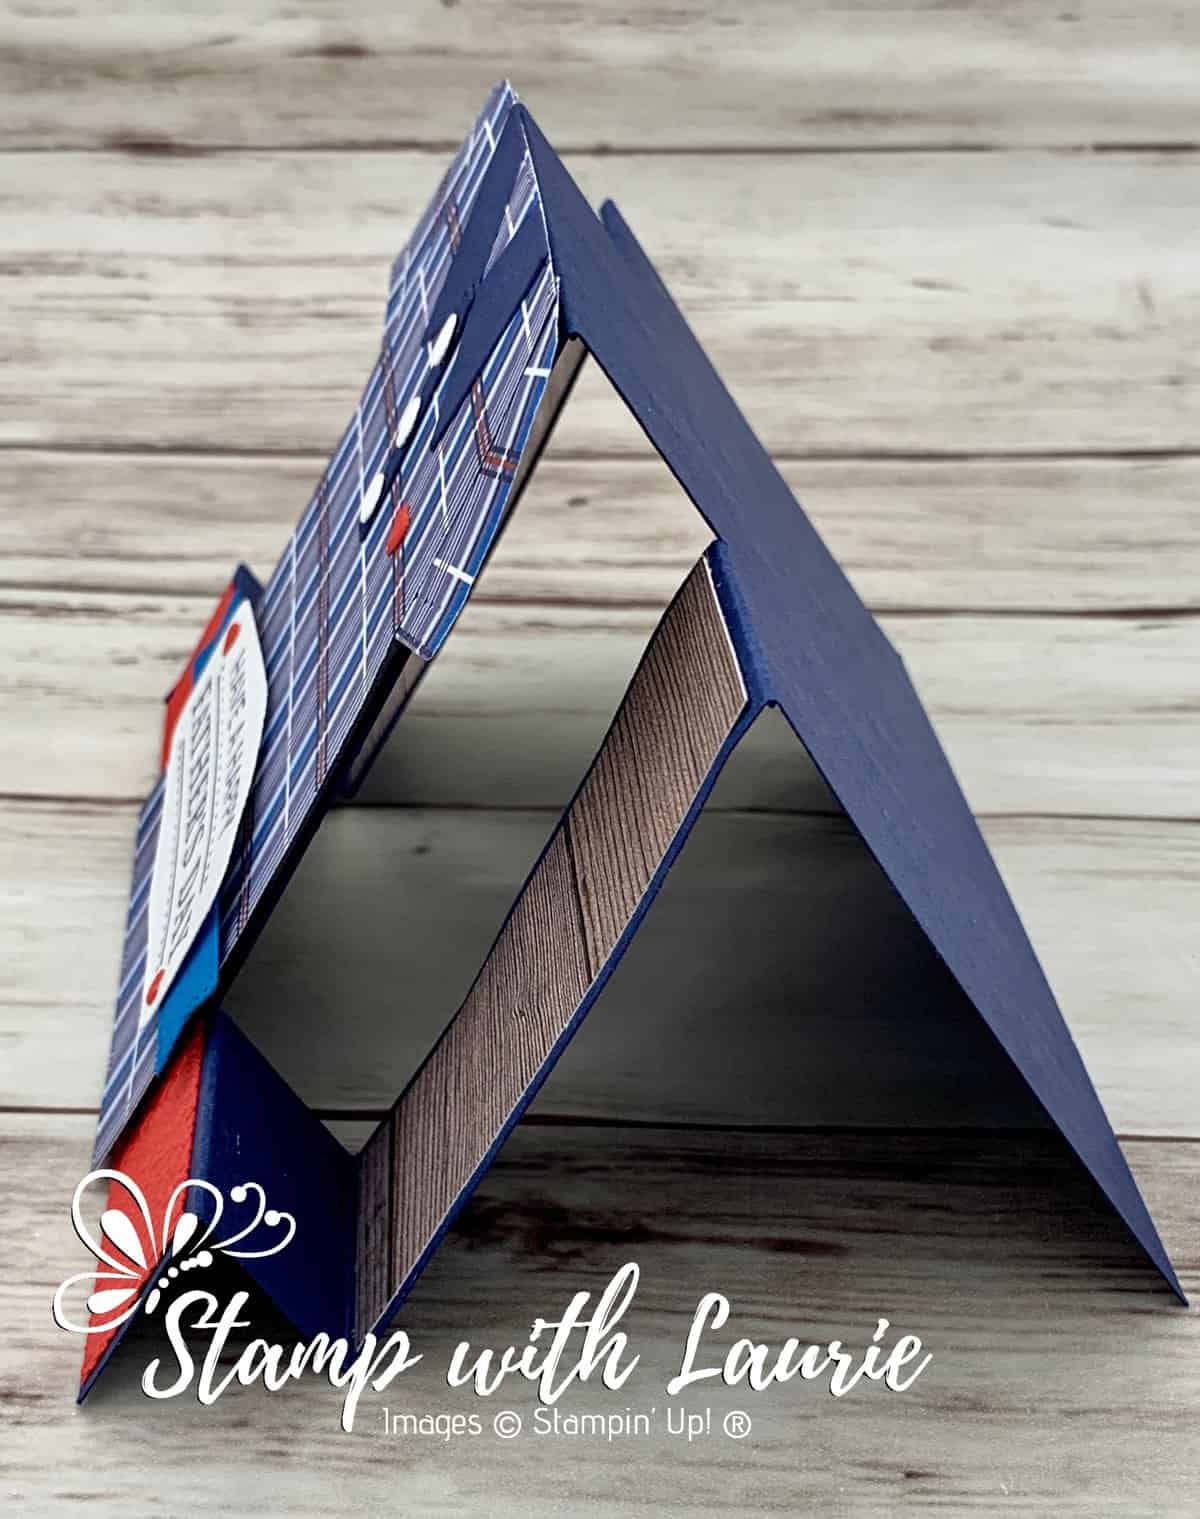
Today is I am sharing My Father’s Day Card that is using the Handsomely Suited Bundle by Stampin’ Up! I decided to create a Centre-Step Fun Fold card with the shirt on the centre panel. There is a link at the end of this post to a Horizontal Centre-Step Template.

The Details of My Card

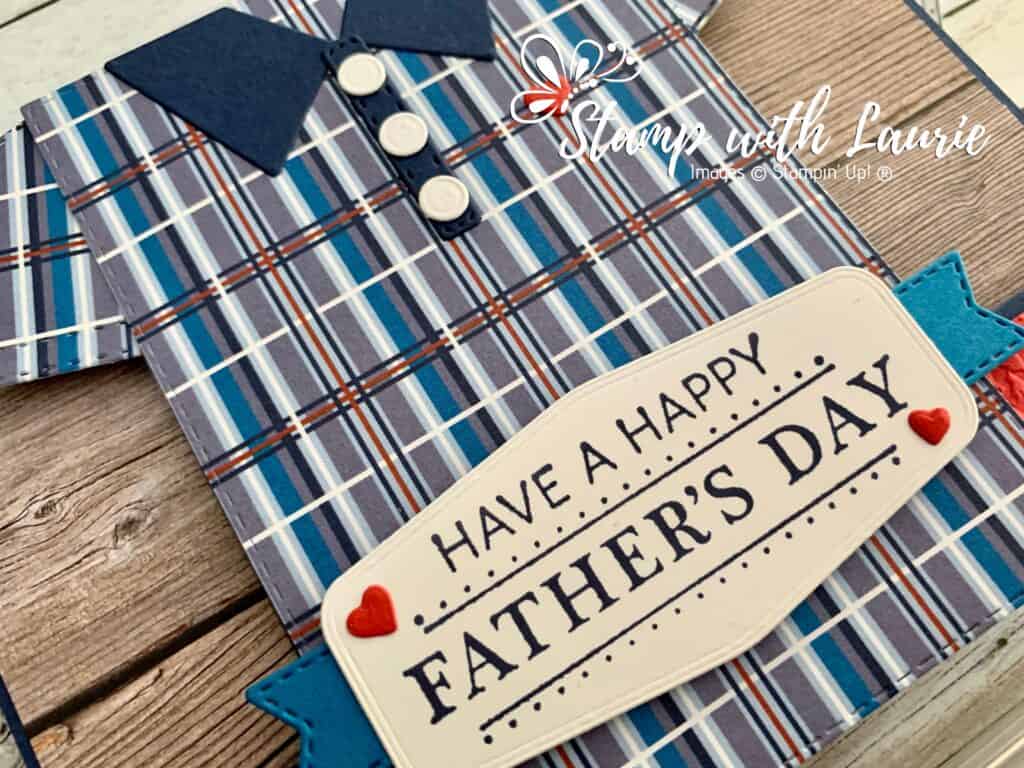
My Father-in-law isn’t a suit kind of guy, but he does wear golf shirts in blues. So, I created a short sleeve golf shirt using the Well Suited Designer Series Paper. For the sleeves, I used the pocket die and the shirt was die cut from the Stitched Rectangle Dies. I trimmed the stitched rectangle to 4 ¼” after it was die cut to fit an envelope. A number of his shirts are Lacoste with a small green allegator on the left side. Since I didn’t have any alligator dies, I used the hearts from the paws of the Pets Dies. I also figured that having a heart to represent his real heart was perfect for Father’s Day!

My Father's Day Card
My Father’s Day Card

For my sentiment, I didn’t think “Have a Happy Father’s Day Handsome” coming from both my husband and I would be appropriate for my father-in-law. So, I used the technique of covering the part of the sentiment that I didn’t want with scotch tape. Then, I inked the stamp up and removed the tape before stamping. Once the sentiment was stamped like this, I discovered that it fit perfectly in one of the dies from the Tasteful Labels Dies. The Pacific Point banner that flanks my sentiment was also from the Tasteful Labels Dies, but it wasn’t long enough to show on both sides of my sentiment. So, I cut in half giving the illusion that my banner is longer than it is.

For my other panels, I used the In Good Taste Designer Series Paper since he is a very handy man and likes to build things with wood. The Tasteful Textile 3D Embossing Folder was perfect for that material kind of look it gives my card. 

Tips for Cutting/Scoring Card Base

At 1 ¼” from the edge of the long side of card stock cut from 1” to 5 ¼” using the Paper Trimmer blade guide. Once I cut one side, I flipped the card stock over to cut the other side. Make sure that your new cut line will be parallel to the first one. Turn so that the long edge of card stock is horizontal and score side panels at 1”, 2” and 5 ¼” and 4 ¼” for the centre panel. To download a PDF file, please see the template link at the end of the post or click the image below.

Horizontal Centre-Step Card
Horizontal Centre-Step Card Template

Supplies:

Stamps/Bundles/Dies: Handsomely Suited Bundle (156240), Tasteful Labels Dies (152886), Stitched Rectangle Dies (151820)

Inks: Night of Navy Classic Stampin’ Pad (147110)

Paper: Night of Navy (100867), Pacific Point (111350), Poppy Parade (119793), Basic White (159276), Well Suited Designer Series Paper (154562), In Good Taste Designer Series Paper (152494)

Accessories: Tasteful Textile 3D Embossing Folder (152718), Bone Folder (102300), Stampin’ Dimensionals (104430), Stampin’ Seal (152813), Mini Glue Dots (103683), Multipurpose Liquid Glue (110755), Paper Trimmer (152392)

Close Up of My Card
Close Up of My Father’s Day Card

Measurements: 

  • Night of Navy: 5 ½” x 8 ½” (see template for score marks), scraps (collar, buttonholes)
  • Well Suited Designer Series Paper (3 pieces): 3” x 4 3/8” (trimmed to 4 ¼” after die cut to fit envelope), scraps for sleeves
  • In Good Taste Designer Series Paper (2 pieces): 1” x 3 1/8”
  • Basic White: 1 ¼” x 2 ¾”, scraps (buttons)
  • Pacific Point: ½” x 2 3/16”
  • Poppy Parade: 1” x 5 3/8”, scraps (hearts)
Side View of My Card
Side View of My Father’s Day Card

For Further Info:

Hope you like My Father’s Day Card. To download a PDF of this card, please click here.

For more of my Stampin’ Up! cards, please click here.

You will find the items listed above in my online store.

Wish Upon a Star Card

My Wish Upon a Star Design Team Card
My Wish Upon a Star Card

Hello Crafty Friends! It’s Laurie here! I am sharing my Wish Upon a Star Card as my Design Team Inspiration Card for Paper Nest Dolls using the sweet digital stamp Minnie Amara. You can buy this stamp in either rubber or digital if you join the Paper Nest Dolls Stamp Club. I am a big Disney fan and when I saw that you can get the cutest Disney inspired stamp by Paper Nest Dolls, I just had to join it! 

Disney World 2018
Me at Disney World 2018

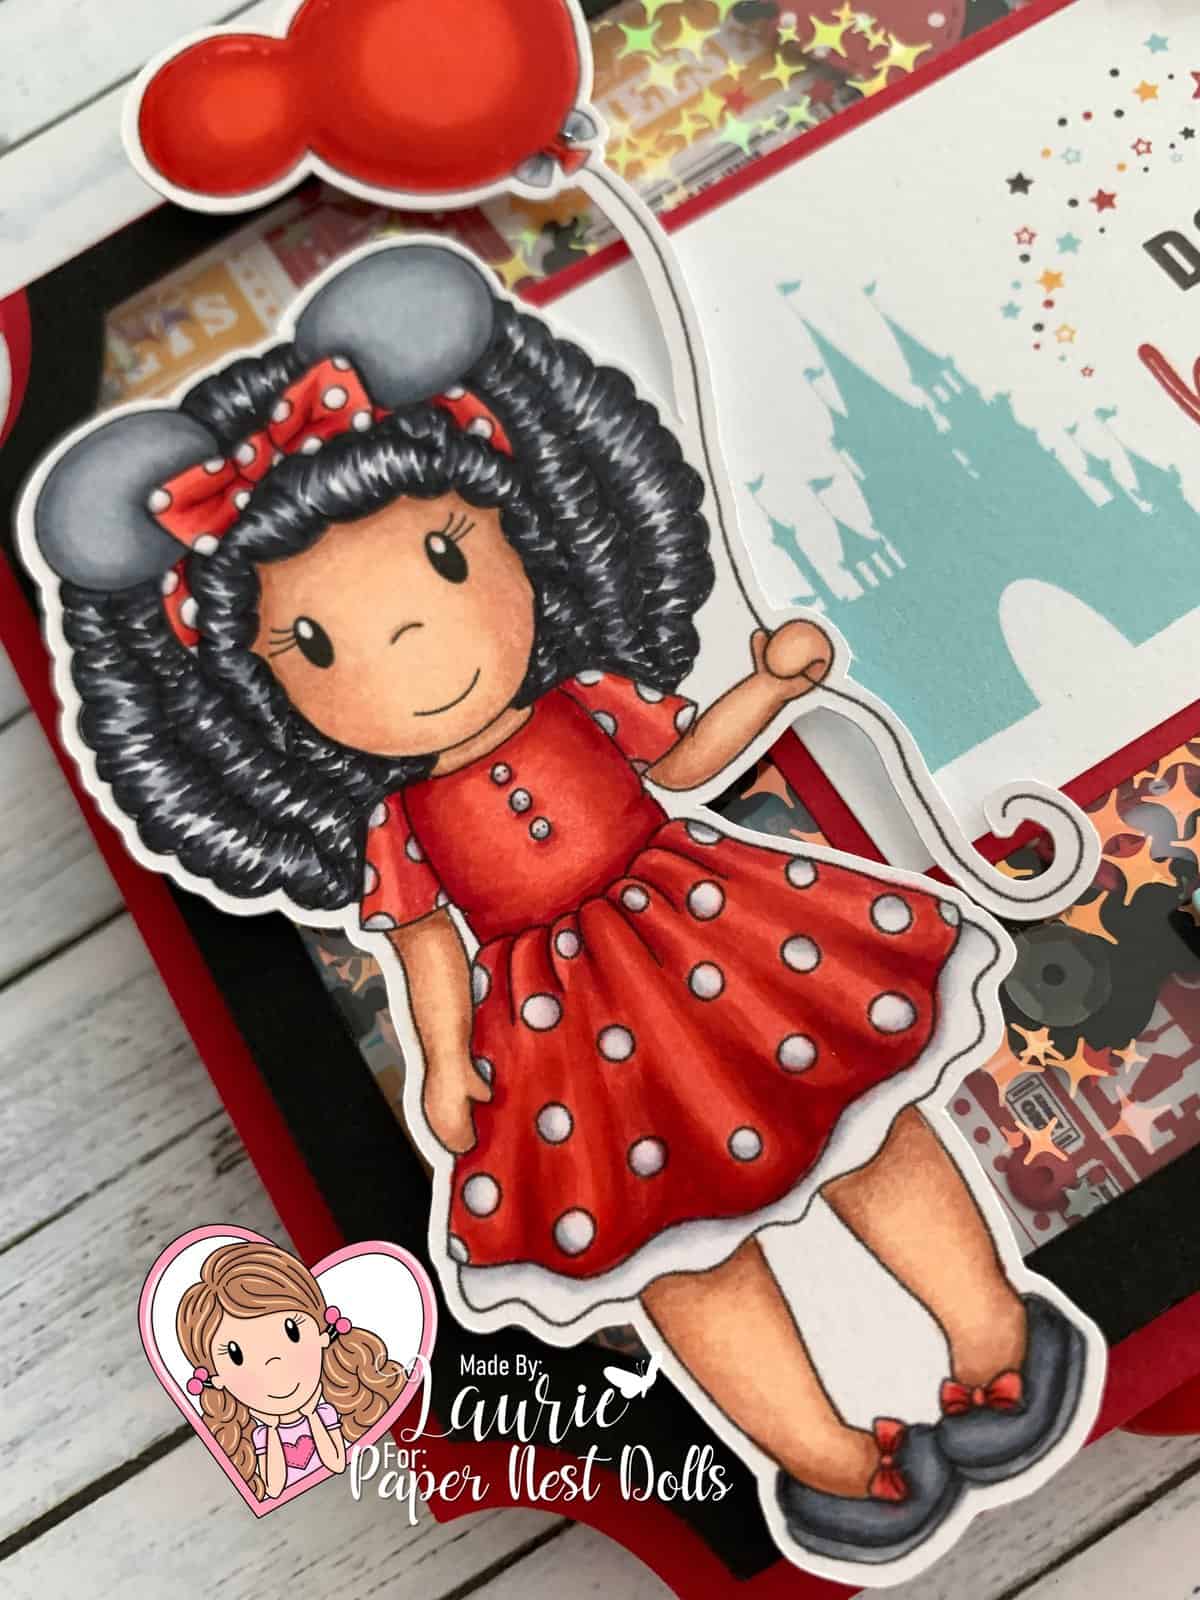
I had a lot of fun colouring Minnie Amara with my Copic Markers even though I found it challenging to colour her skin and hair.

The Details of My Card

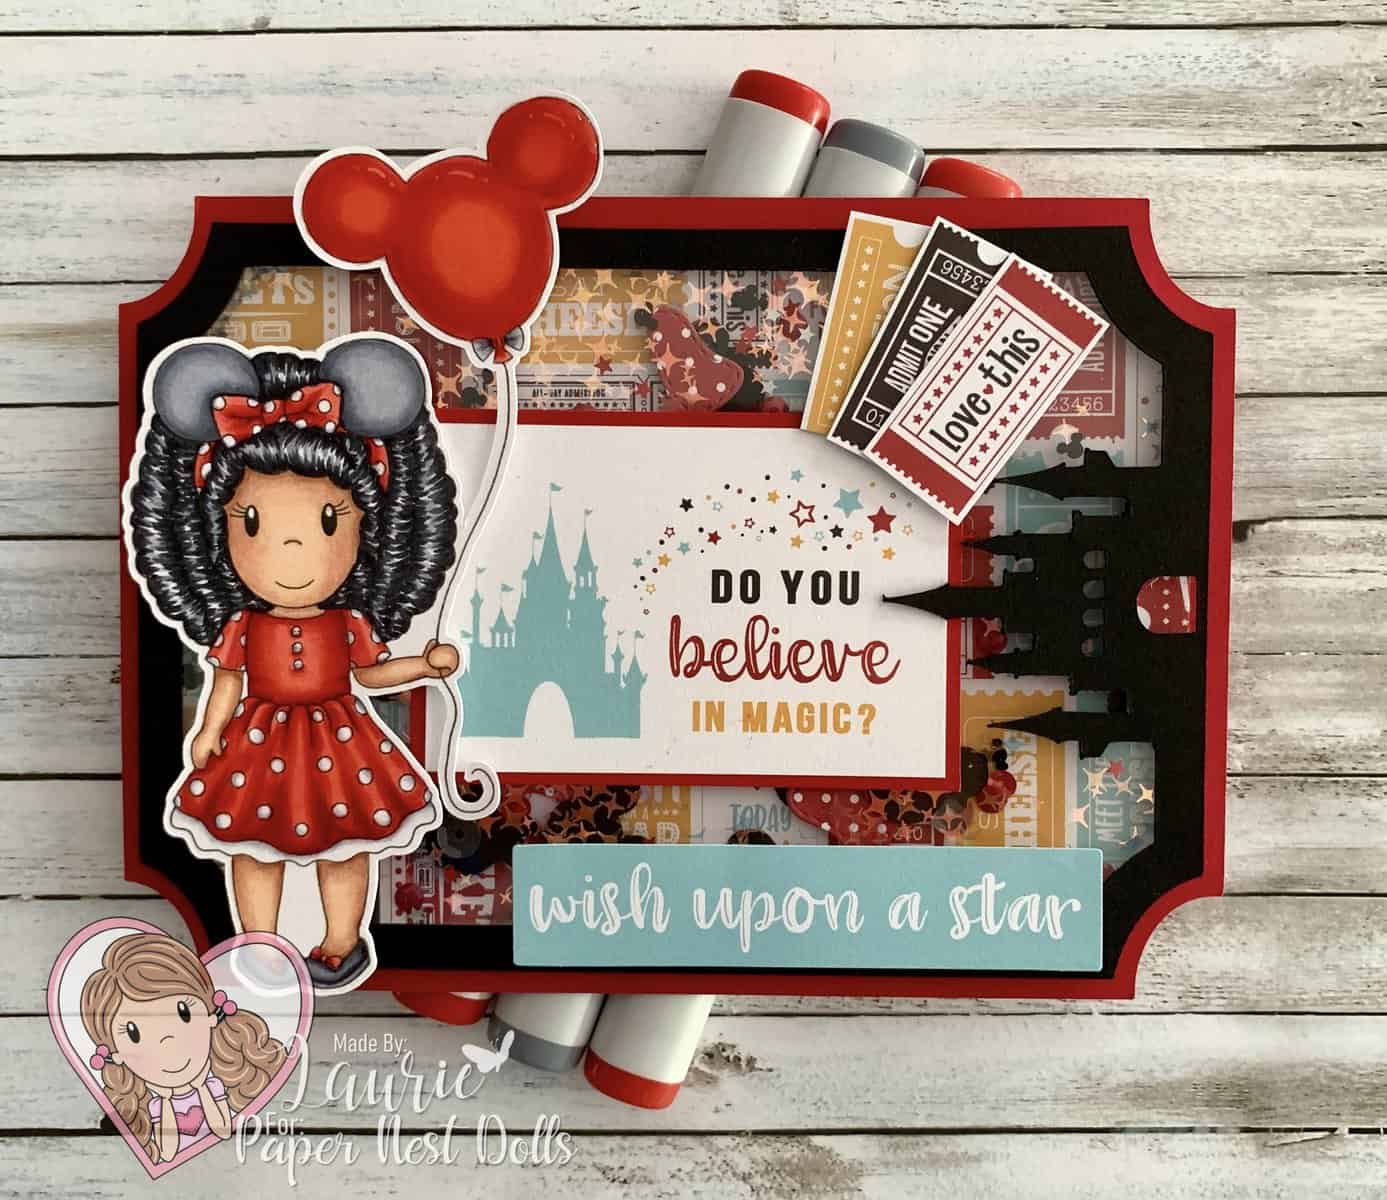
For my card, I thought a shaker card in the shape of an admission ticket would be so fun! I used my Silhouette Cameo to find a ticket shape and downloaded the file. This shape came with a number of other ticket designs, but I loved the Magic Kingdom Castle shape at one end. Since I didn’t have any Disney confetti, I downloaded a Mickey head SVG file and cut some out on my Silhouette Cameo. I die cut the Stitched Minnie Bows from Stamp AnnieThing’s Magical Celebrations Grab and Go Box using a piece of paper from the paper pads with a red background and white dots that matched my colouring. I also threw in some red, black and gold sequins and stars that I had in my stash. Did you know that Paper Nest Dolls has Krafty Bling which includes a Magical Mix and Mouse Ears. I will have to get some for my next card!

I love the Magical Adventure 2 and Wish Upon a Star paper pads by Echo Park. Perfect for my Disney themed card! I fussy cut a couple of tickets from the paper that was leftover when I used it for the base of my shaker window. The Do You Believe was a tag in the paper pad and the wish upon a star was from the matching Ephemera.

————————–

Copic Markers:

Skin: E15/E13/E11/E00/E000/R20
Hair: C3/C5/C7/C9
Dress: R29/R24/R24/R22/C3/C0/0/Clear Wink of Stella on Hair Bow
Shoes: C7/C5/C3/R22/R24/R27/Clear Wink of Stella on Bows
Mouse Ears: C7/C5/C3/C2
Balloon: R29/R27/R24/R22/C2/C3/C5/White Gelly Roll Pen/Glossy Accents

Close Up of My Design Team Card

————————–

Card Recipe Wish Upon a Star Card:

Minnie Amara, Stamp Club, Paper Nest Dolls
Paper Basics – Stamper’s Select White Cardstock, Papertrey Ink
Wish Upon a Star Paper Pad, Echo Park
Magical Adventure 2 Paper Pad, Echo Park
Magical Adventure 2 Ephemera Die Cut Cardstock Pieces, Echo Park
Window Sheet, Stampin’ Up!
5″x7″ ticket magic memories album page set, Design #88951, Silhouette Design Store
Mickey Mouse SVG, Elinas Crystal Corner, Etsy
Stitched Minnie Bow Die, Grab and Go Box, Stamp AnnieThing
Foam Adhesive Strips, Stampin’ Up!
Pirates Premium Sequins, 28 Lilac Lane Buttons Galore & More
Glossy Accents, Ranger
Clear Wink of Stella, Stampin’ Up!
White Gelly Roll Pen
Real Red and Basic Black Card Stock, Stampin’ Up!

Finished card size: 4 ½” x 6 ½”

————————–

To view my other Paper Nest Dolls cards, please click here.

Hope you like my Design Team card using
Minnie Amara by Paper Nest Dolls!

Thank you for stopping by!

Hugs,
Laurie

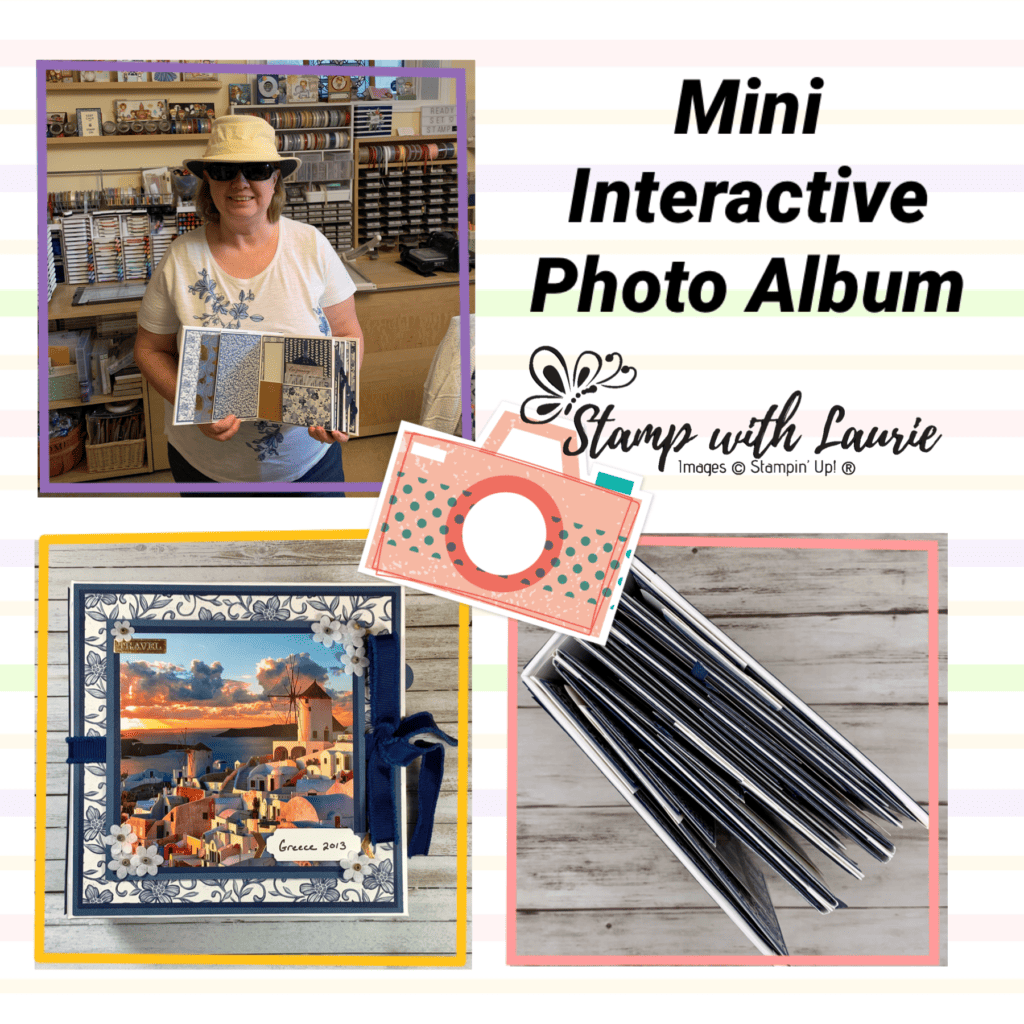
My Mini Interactive Photo Album

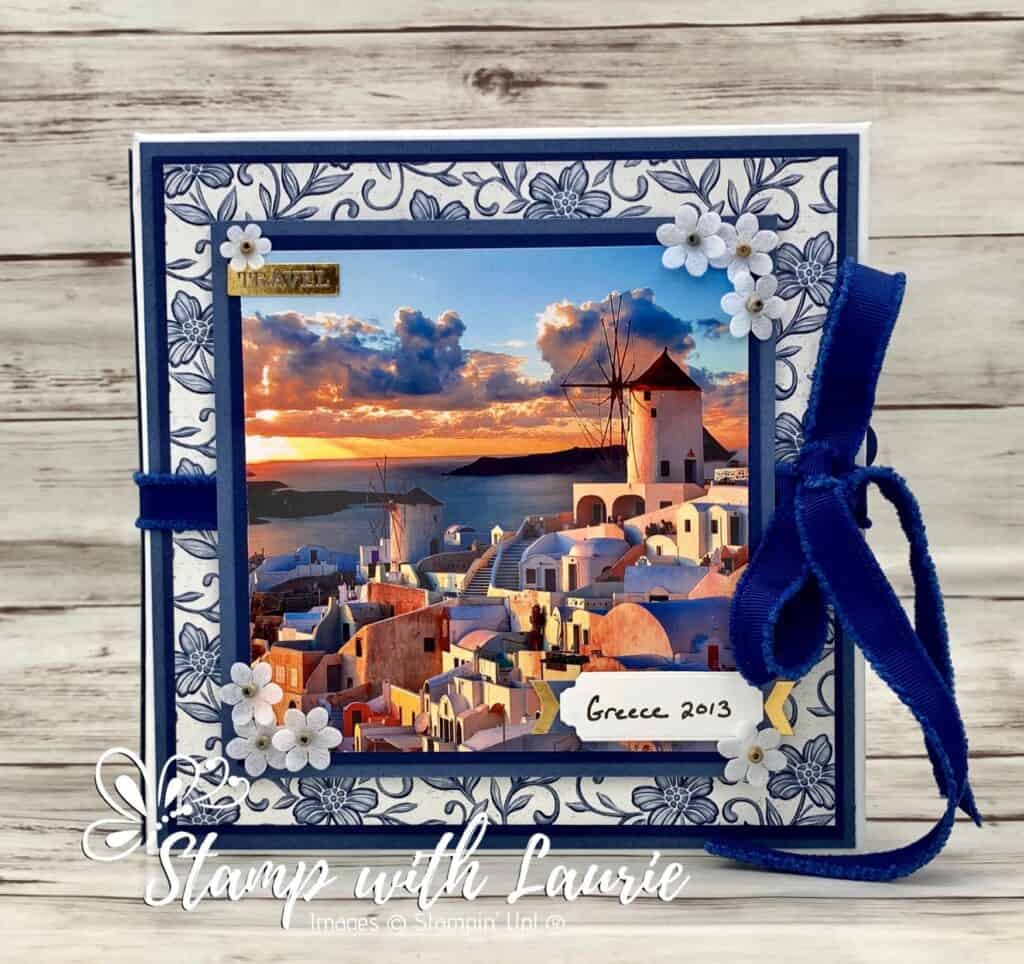
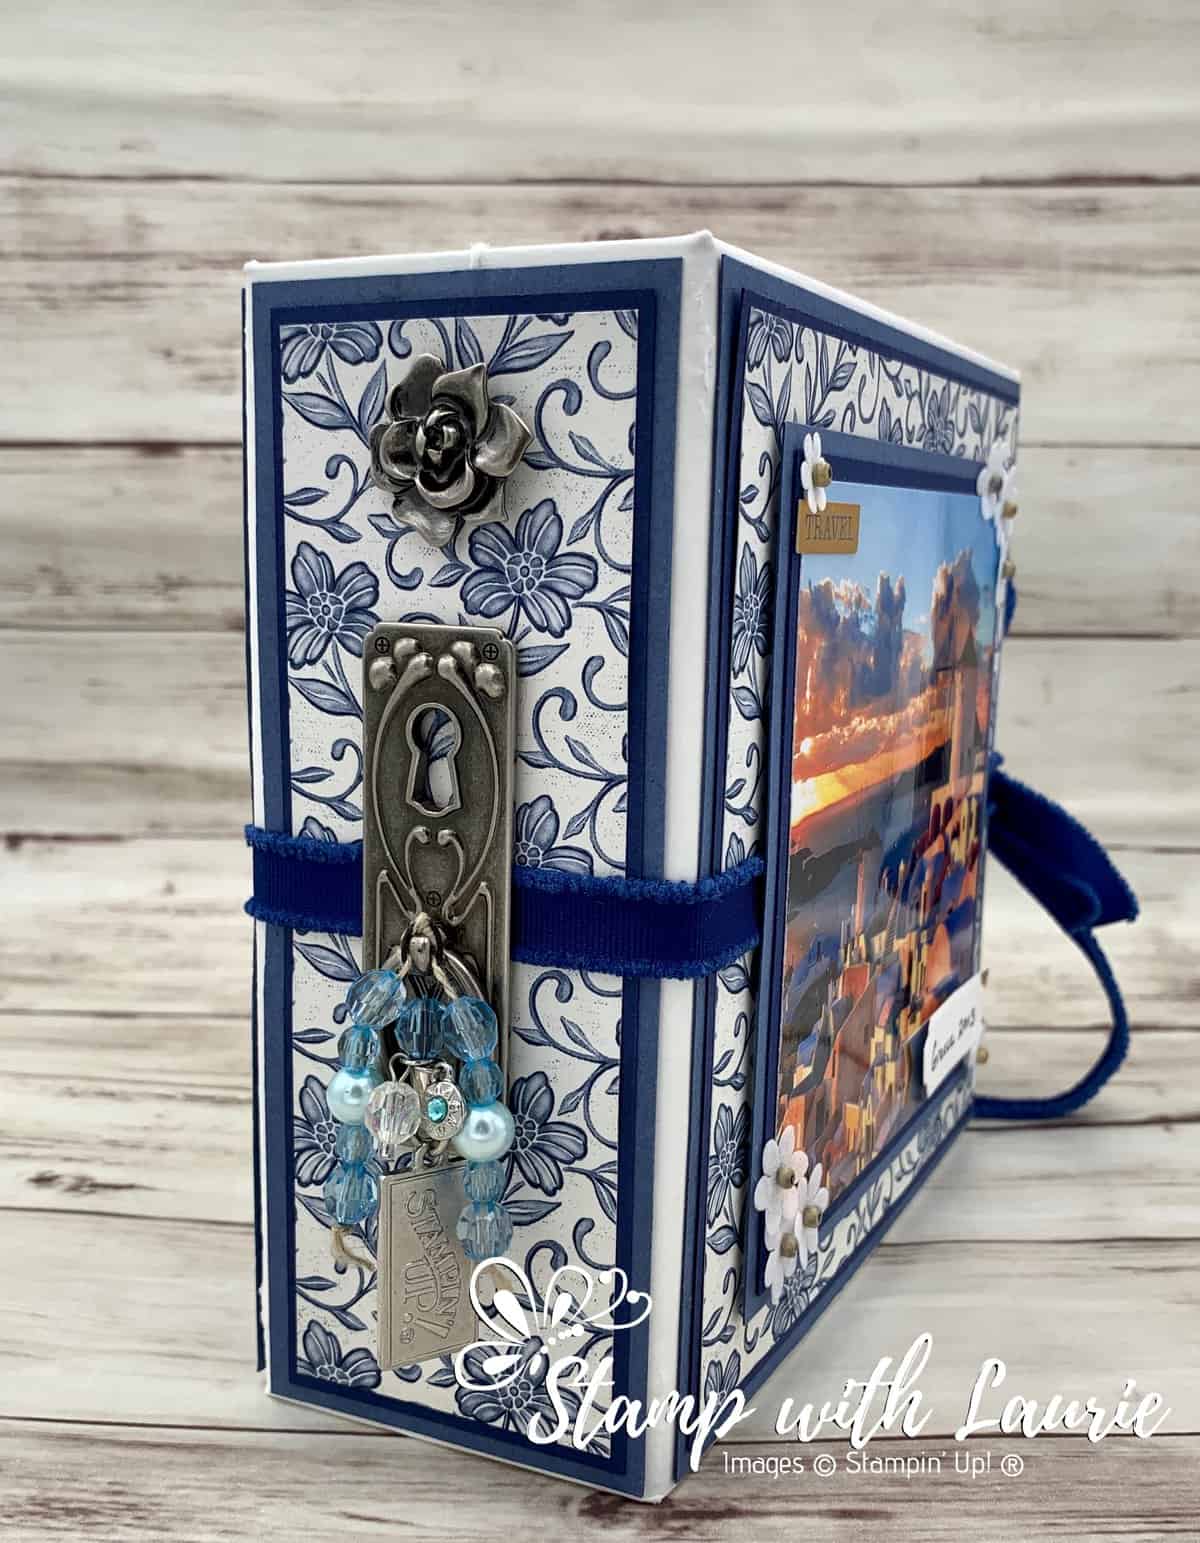
Cover of Mini Interactive Photo Album

Today is I am sharing something different than a card. I was asked by a fellow demonstrator to create a project with a Greek theme for a Demonstrator Playdate. I decided instead of creating a card that I would make a photo album from scratch of a past trip that my husband and I went on which started in Paris went on to Venice to catch a cruise visiting Dubrovnik, Corfu, Santorini, Athens, Katakolon and back to Venice. So, I am sharing my Mini Interactive Photo Album using photos from that trip.

Video of my Mini Interactive Photo Album

Video of my Mini Interactive Photo Album
Music Copyright – Moose Ca Ca, My Big Fat Greek Wedding

I had wanted to create one of these interactive albums for a long time. So, I googled how to create one and found a four part series of videos by Cal Summers with a PDF with the measurements. I will include links to her PDF and videos at the end of this post.

The Details of My Album

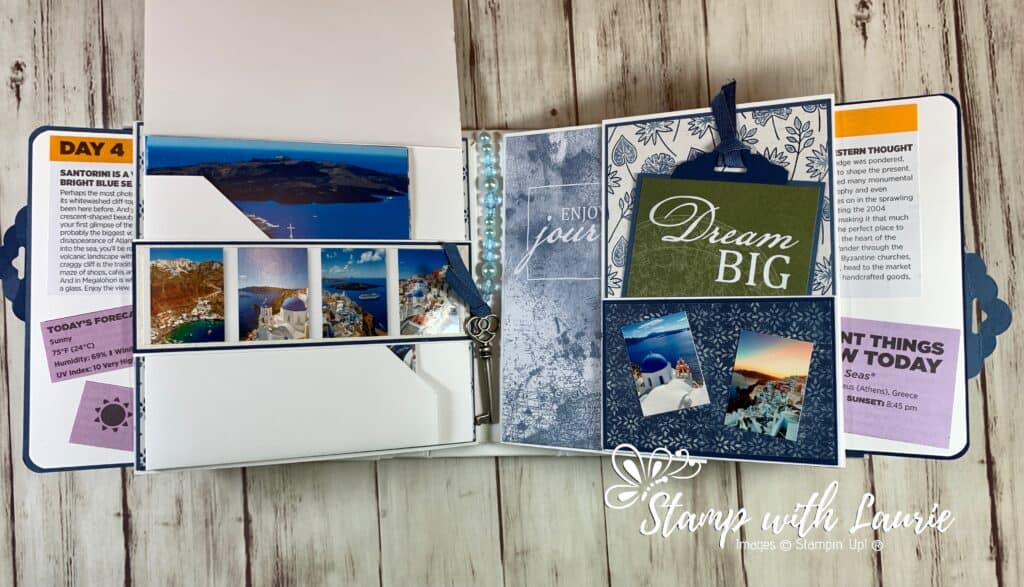
This kind of album is perfect for any 6” x 6” Designer Series Paper. But, since the colours of the Greek flag are blue and white, I decided to use the Boho Indigo Product Medley. The pretty little paper flowers that come in the Medley were perfect to decorate my cover. I used the World of Good Memories and More Cards and stickers with their travel theme to decorate my album along with the cut outs from the Boho Indigo Medley. The Scallop Tag Topper Punch was used for my tags and pull outs.

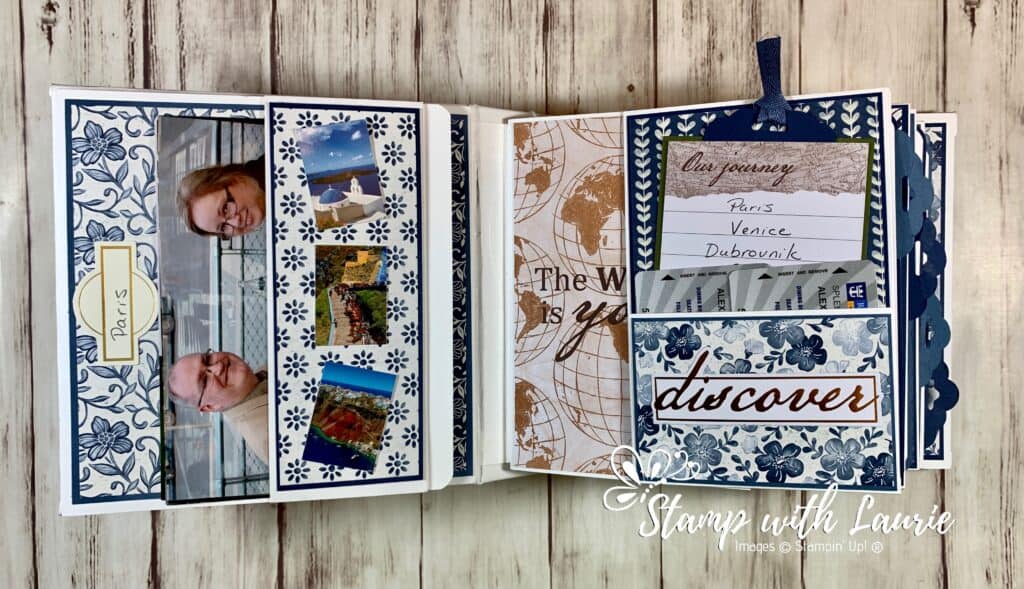
What is so nice about this album is that it is flexible to suit your needs. It uses the same 4 page designs twice giving you 8 pages that you can place in whatever order you like.

Spine of My Mini Album
Spine of My Mini Interactive Photo Album

I decorated my spine with a vintage metal key hole/latch with a rose that I bought from Michael’s Arts & Crafts a while back. The beads were from the dollar store and threaded on Whisper White Baker’s Twine from the Snail Mail Twine Combo Pack. I added a pretty charm with a blue stone to represent “Greece” and a Stampin’ Up! charm that I had from a key chain.
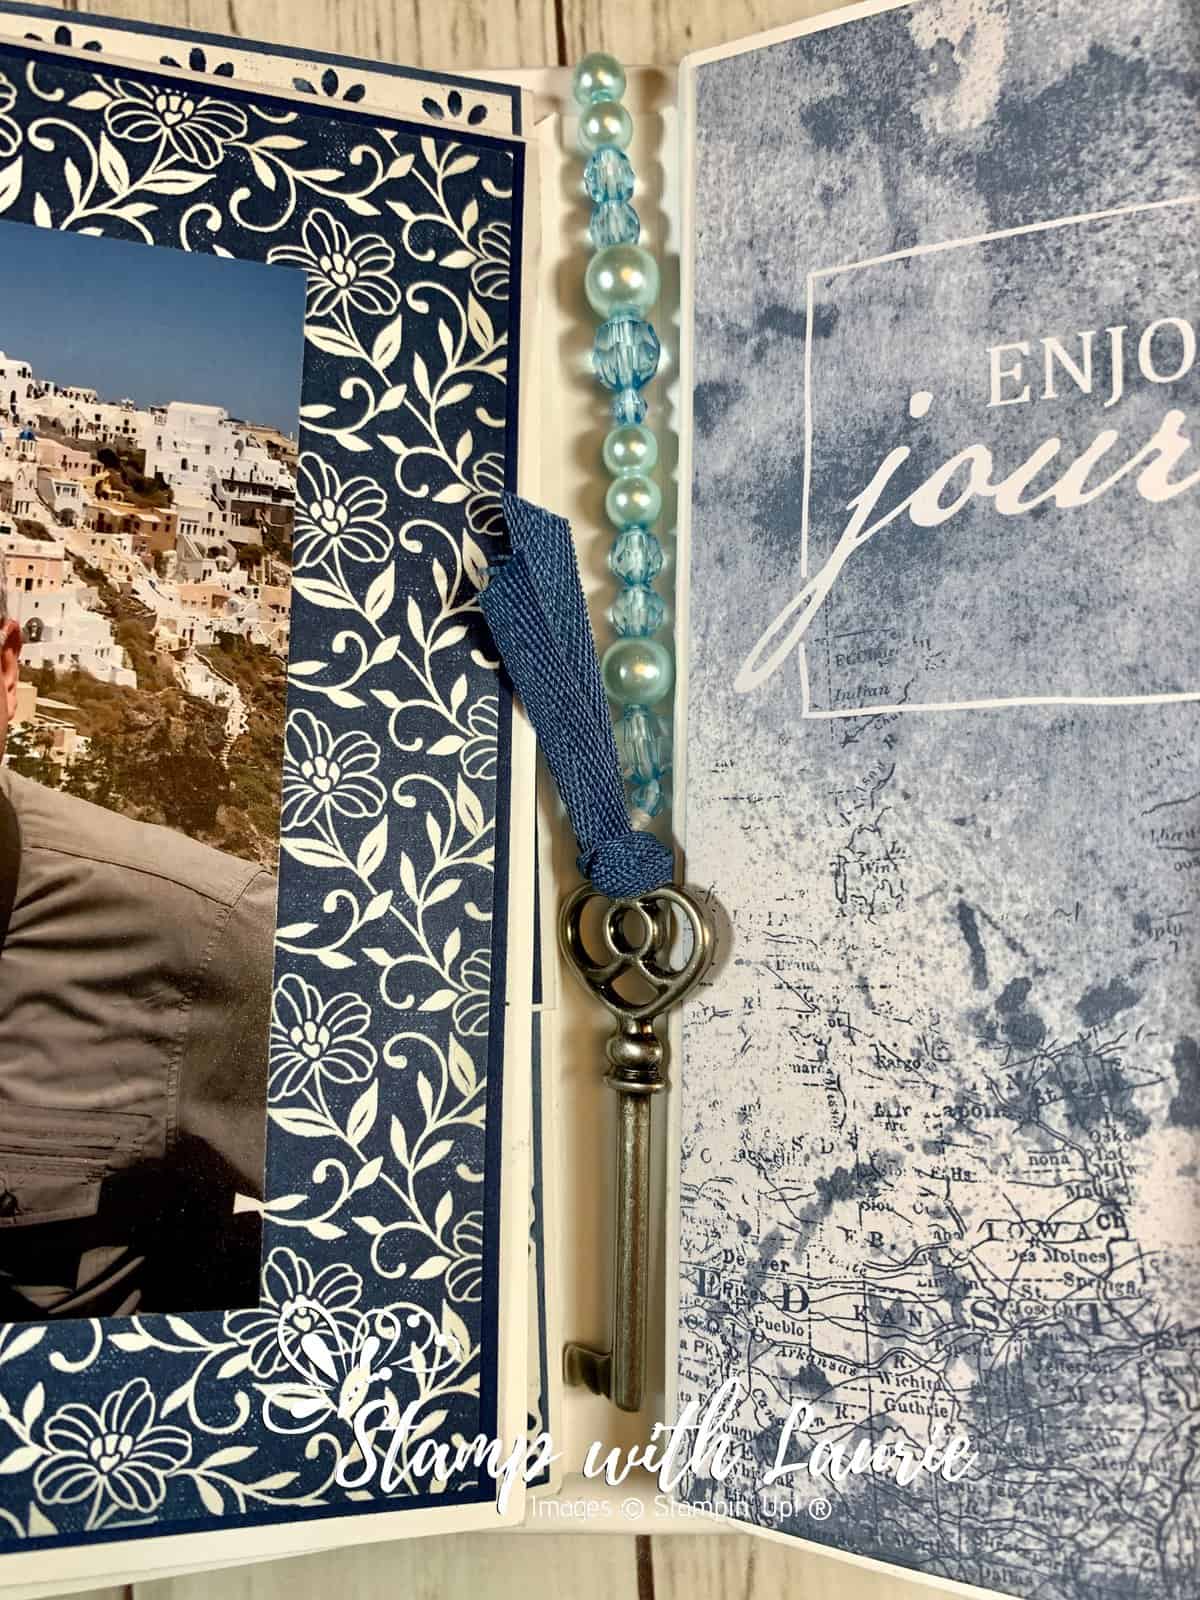
I also created a beaded bookmark with a key and Misty Moonlight Ribbon for the inside of my album.

Bookmark
Beaded Bookmark

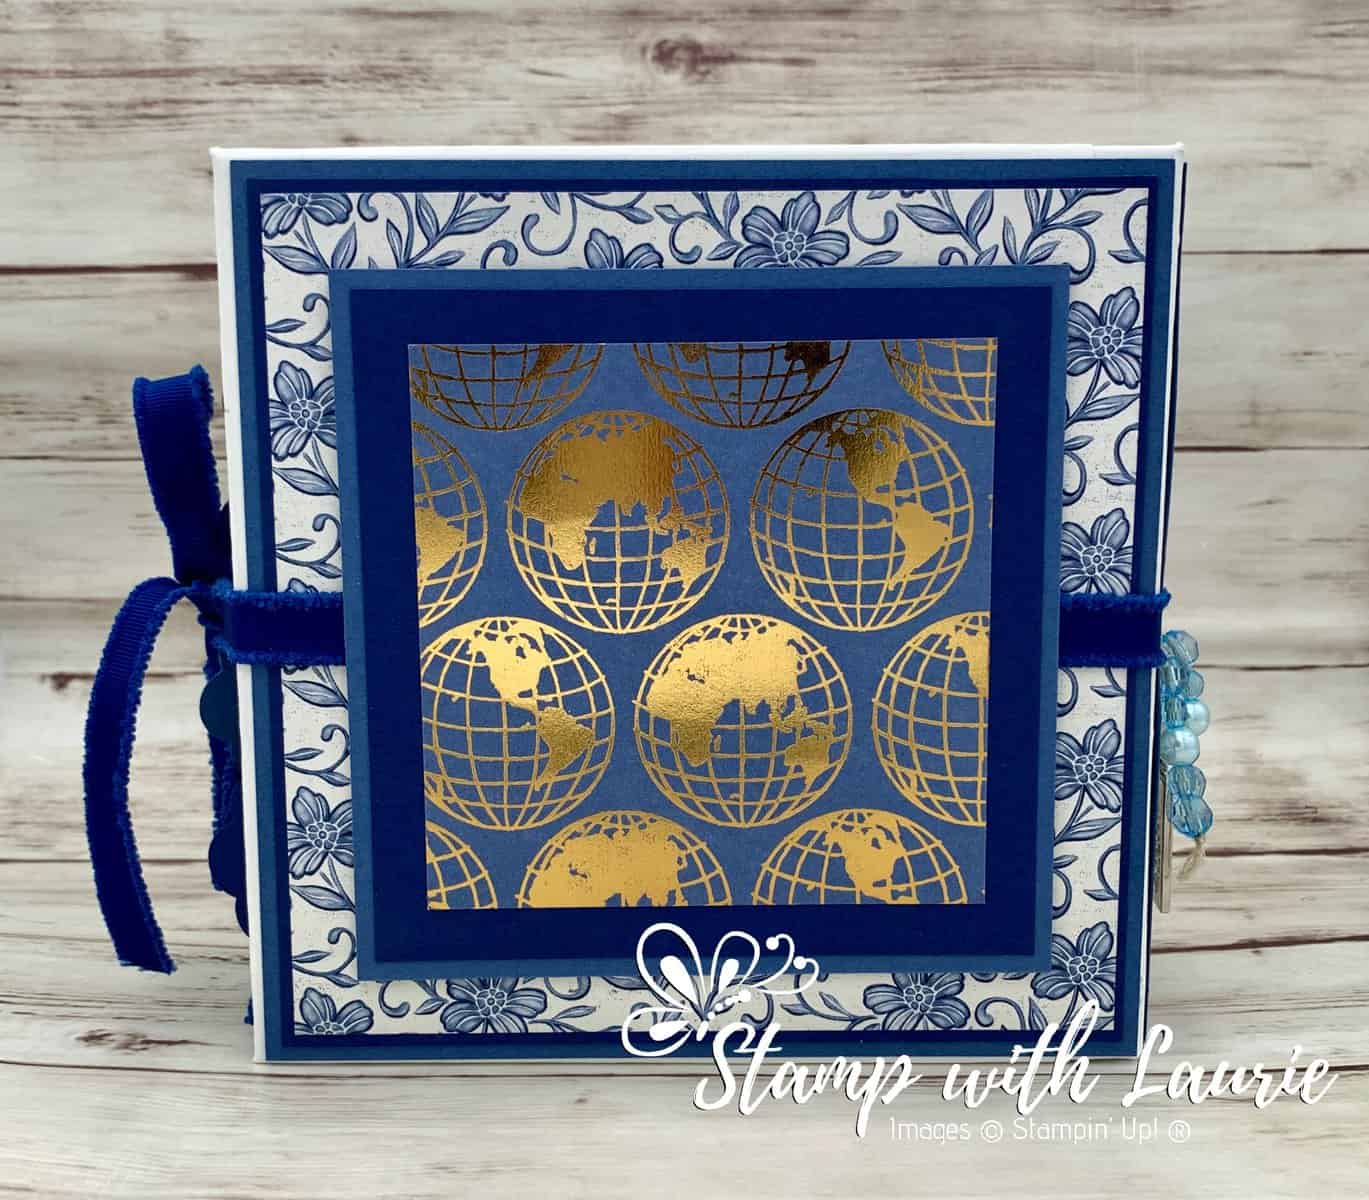
Finally I decorated the back of the cover with the World of Good Designer Series Paper that has the golden globes on it. 

Back Cover
Back Cover of My Album

Some Tips

For my covers, I used the cardboard found with the instruction for the Paper Pumpkin Kits. I tend to keep them just in case I can recycle them somehow.

I didn’t have any Tyvek. So I used a used plastic mailing envelope that I cut down to the correct size. As long as it will not stretch or rip and is flexible, it should work.

Make sure that you secure the ribbon to tie your album closed to the cover before you add the decorative elements on the covers and spine. Lol!
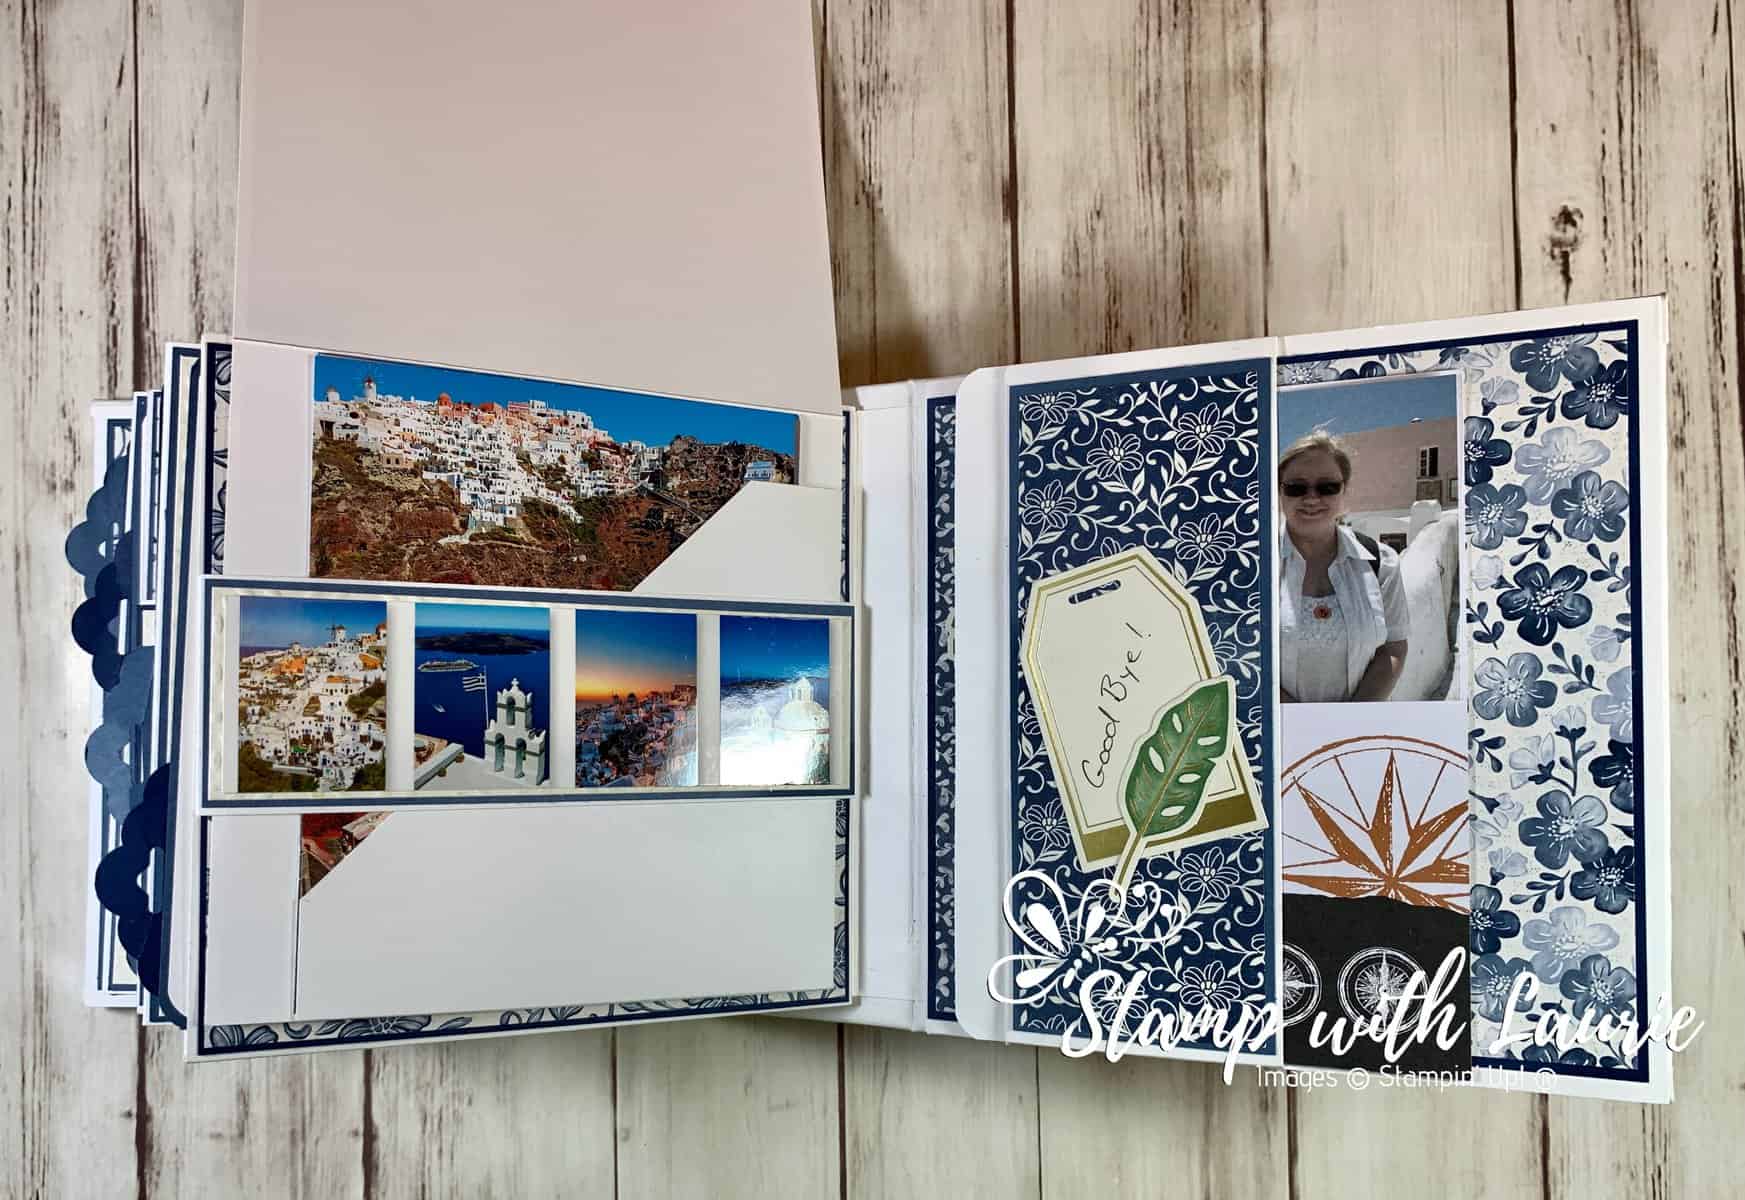
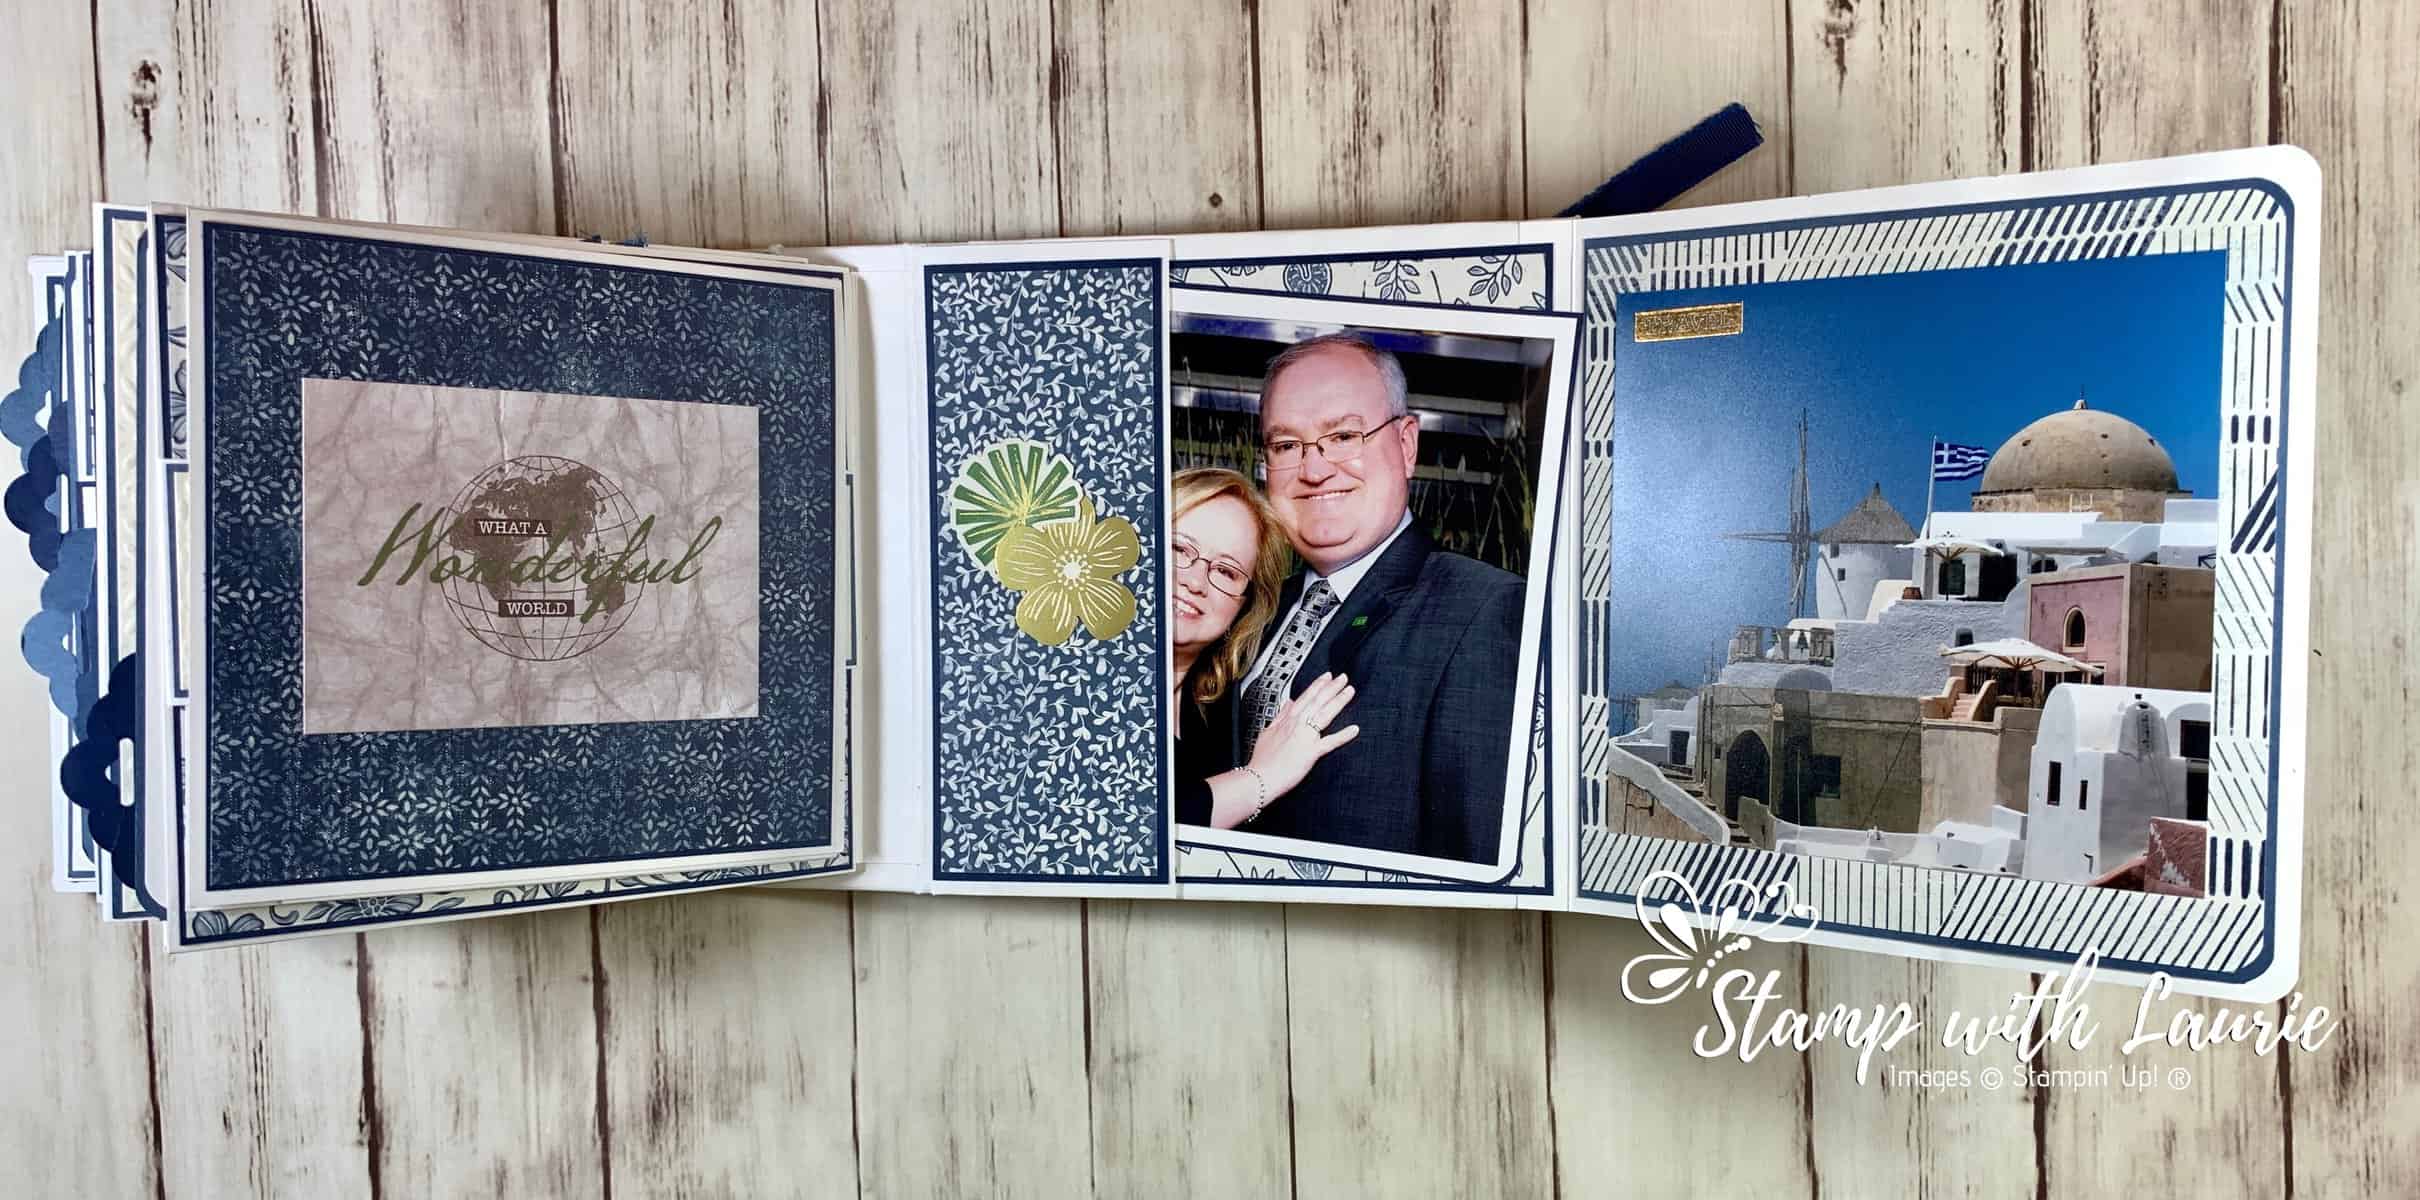
Photos of the Inside of my Album

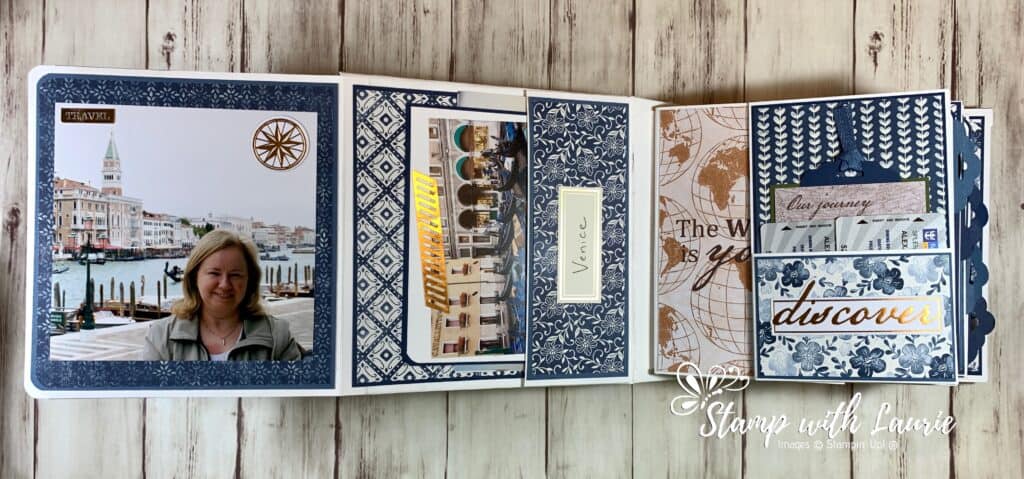
Inside Cover and Page 1
Paris – Spread of Inside Cover and Page 1
Inside Front Cover
Venice – Inside Front Cover
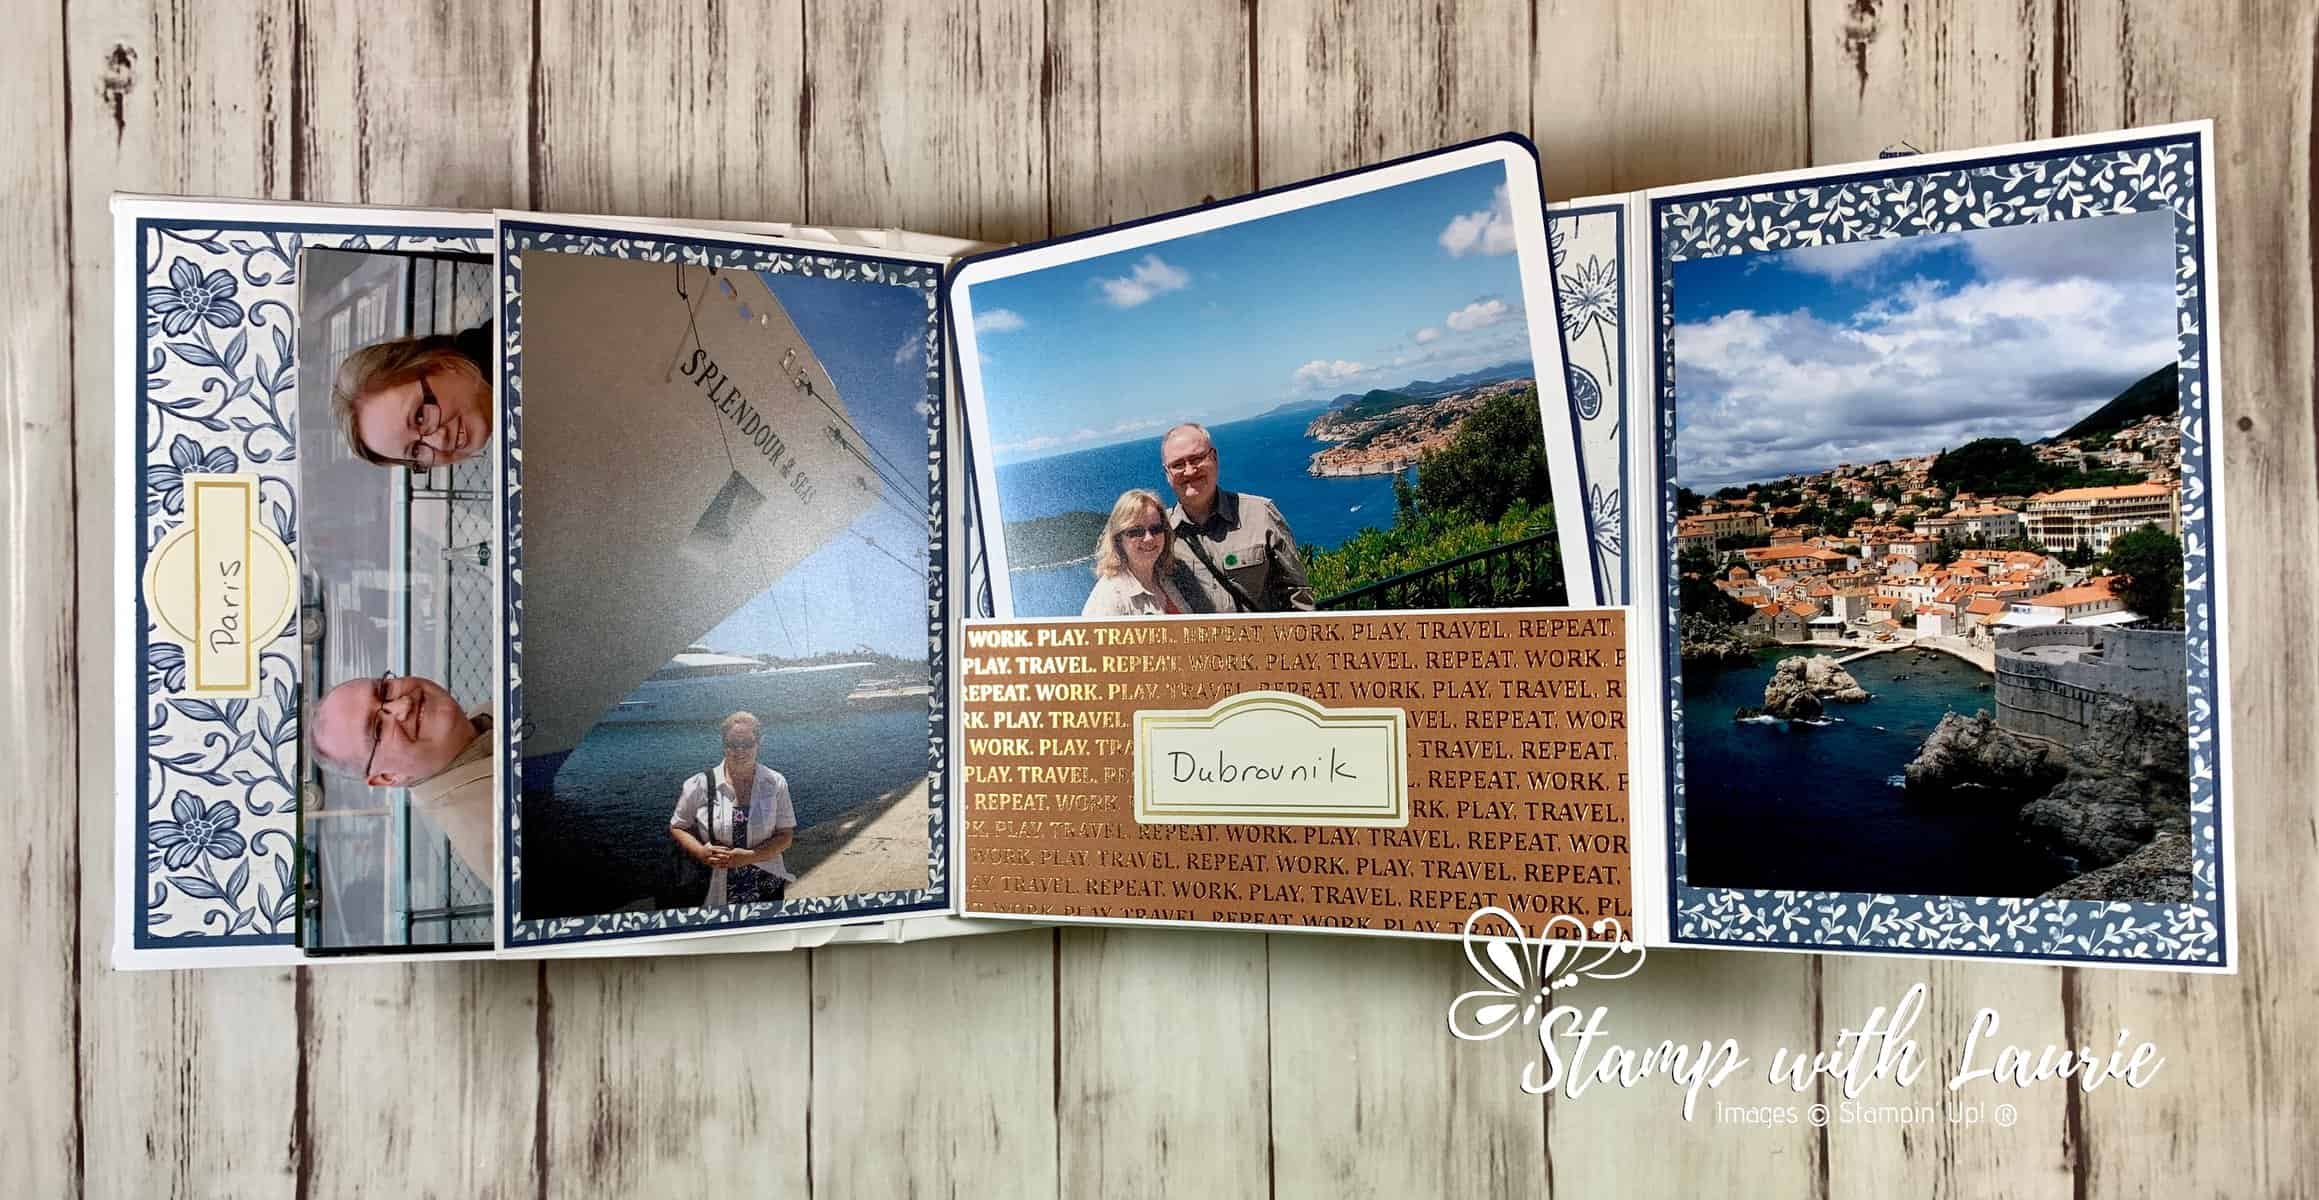
Page 1
Dubrovinik – Page 1
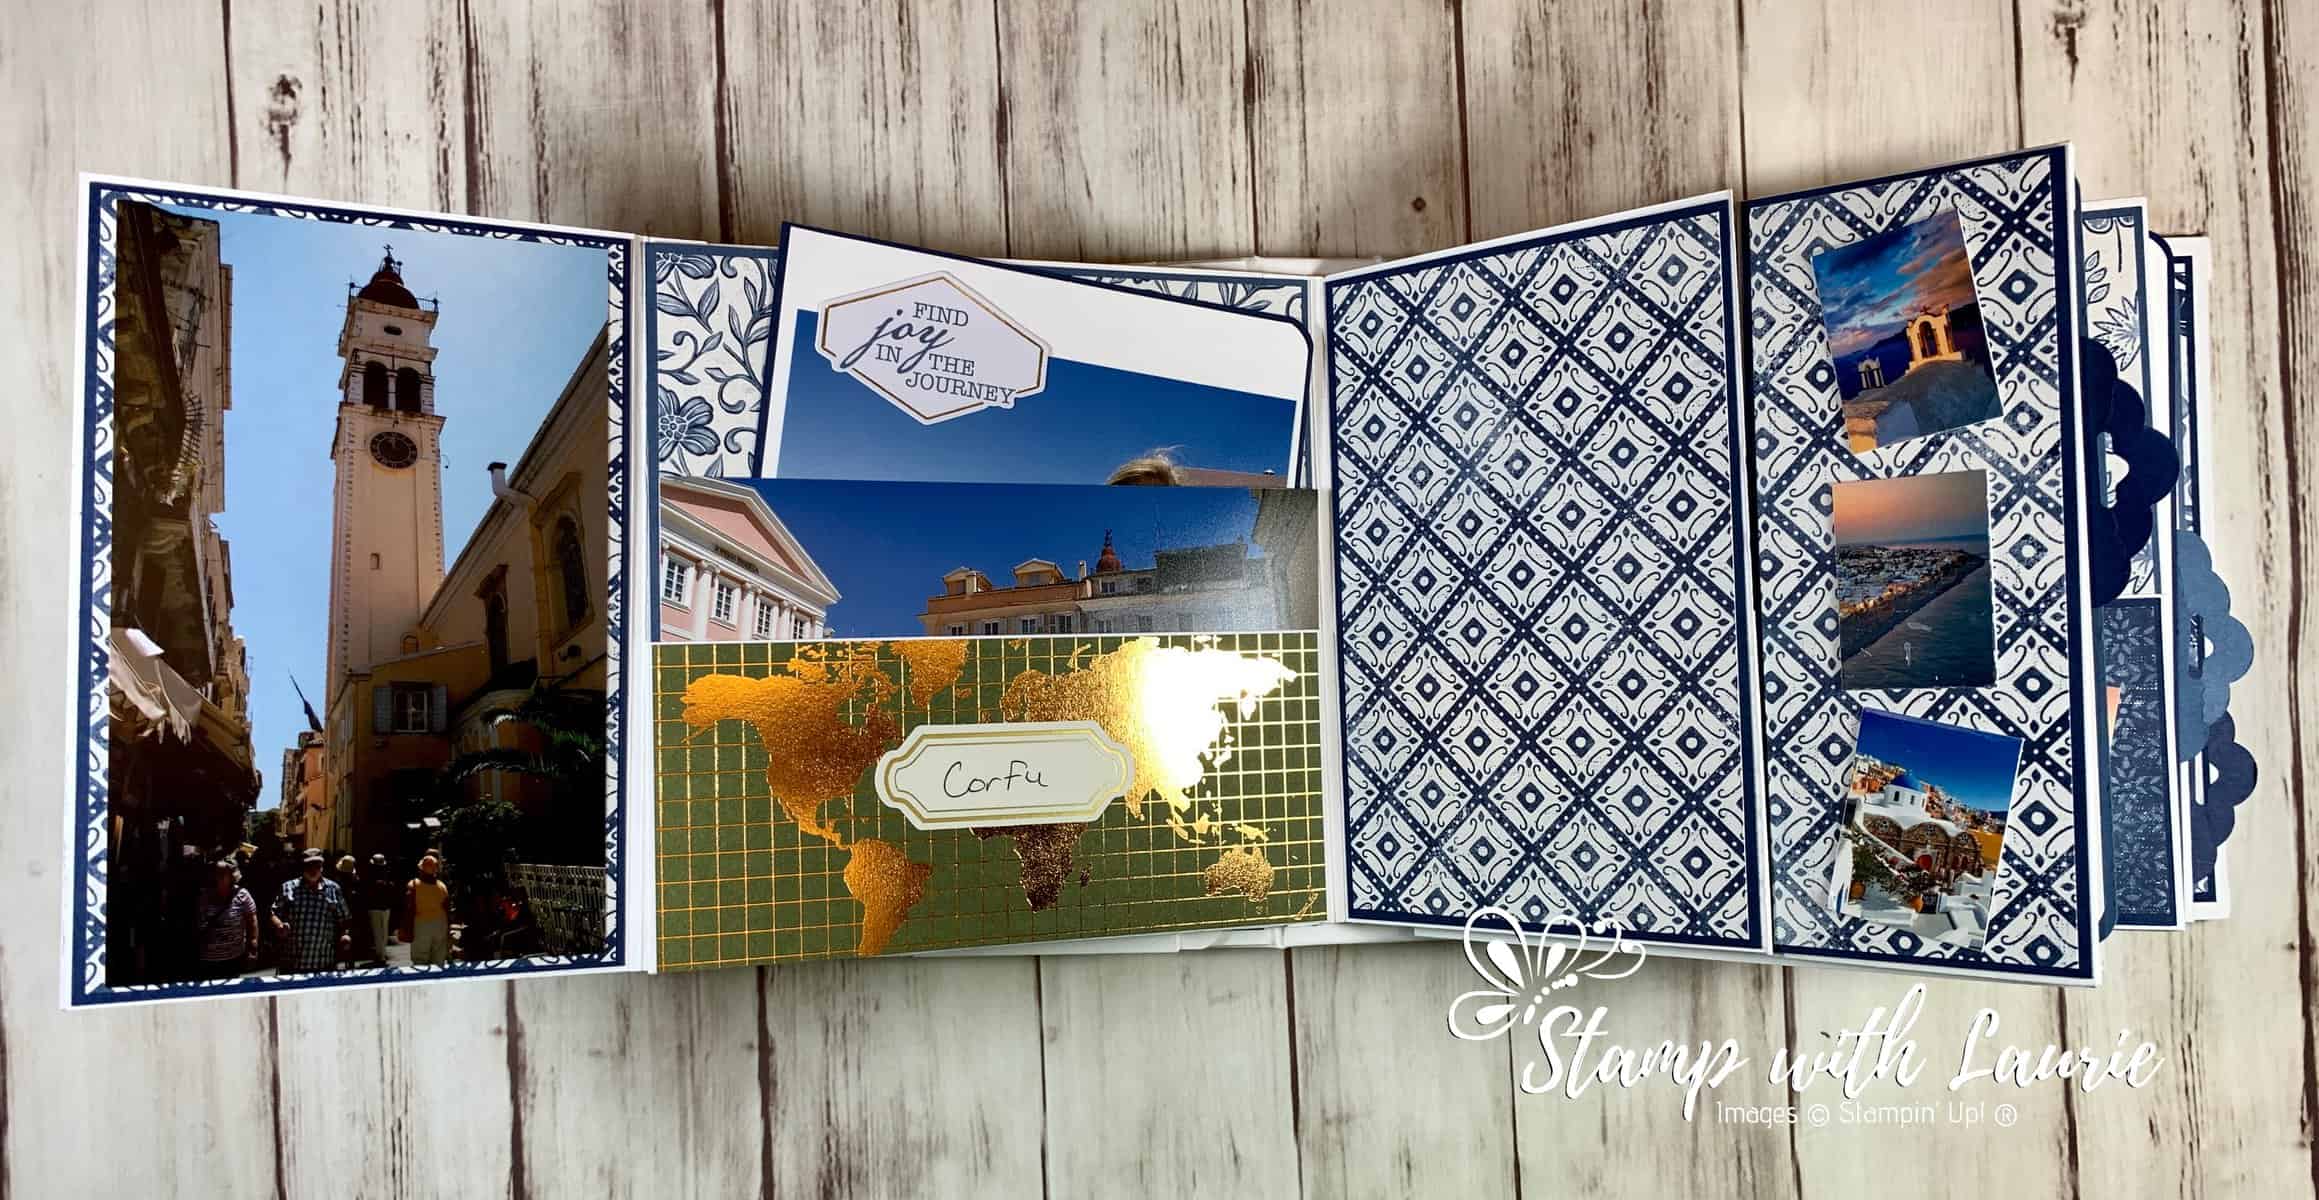
Page 2 and 3 Spread
Page 2 and 3 Spread
Page 1
Corfu – Page 2
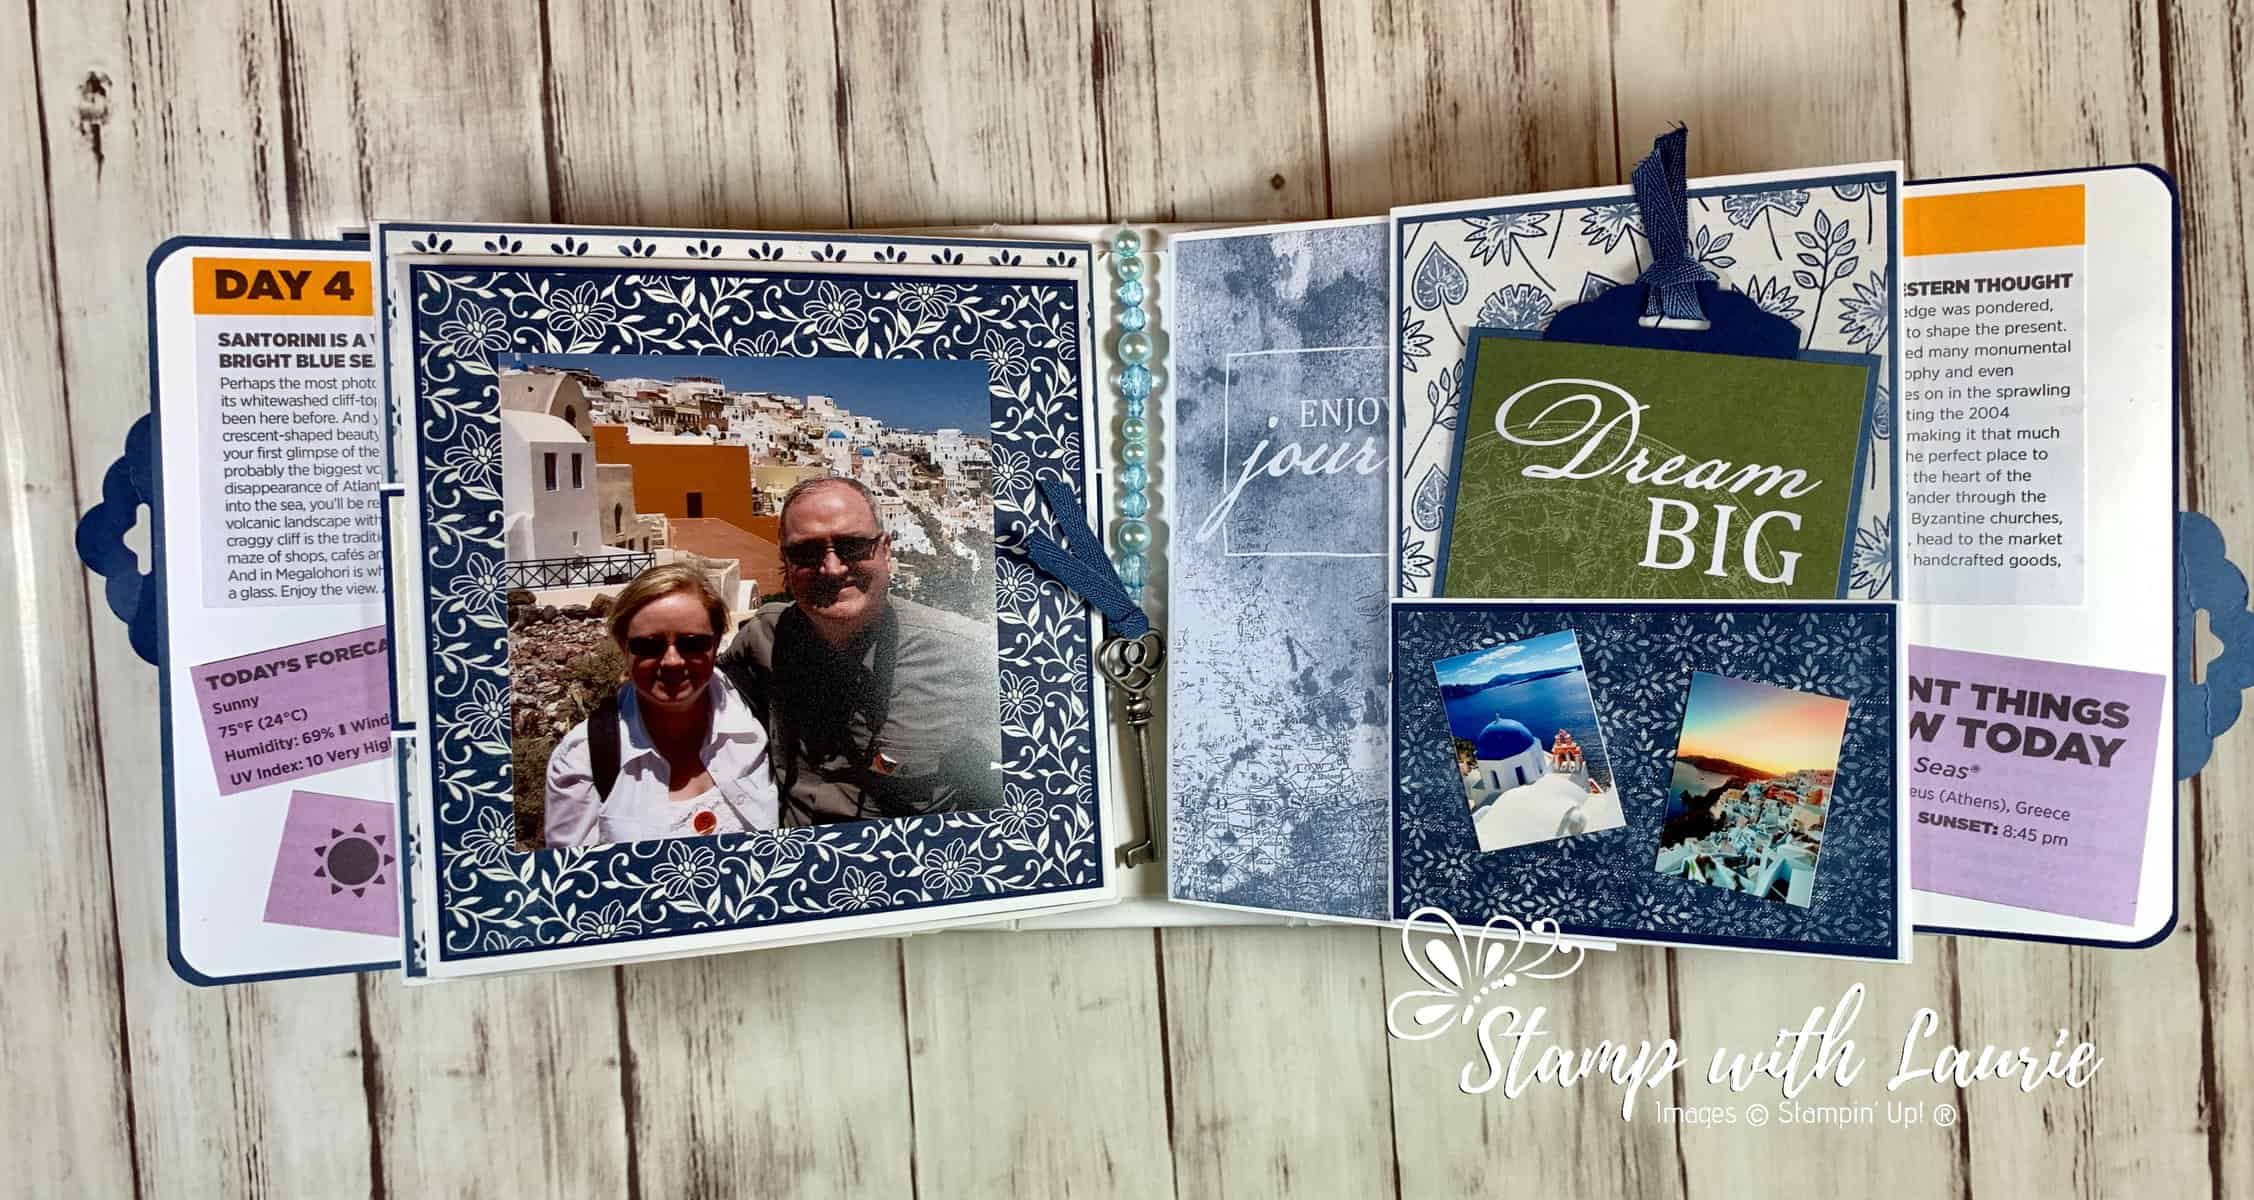
Page 4 and 5 Spread
Page 4 and 5 Spread
Page 4
Page 4 – Picture Folder
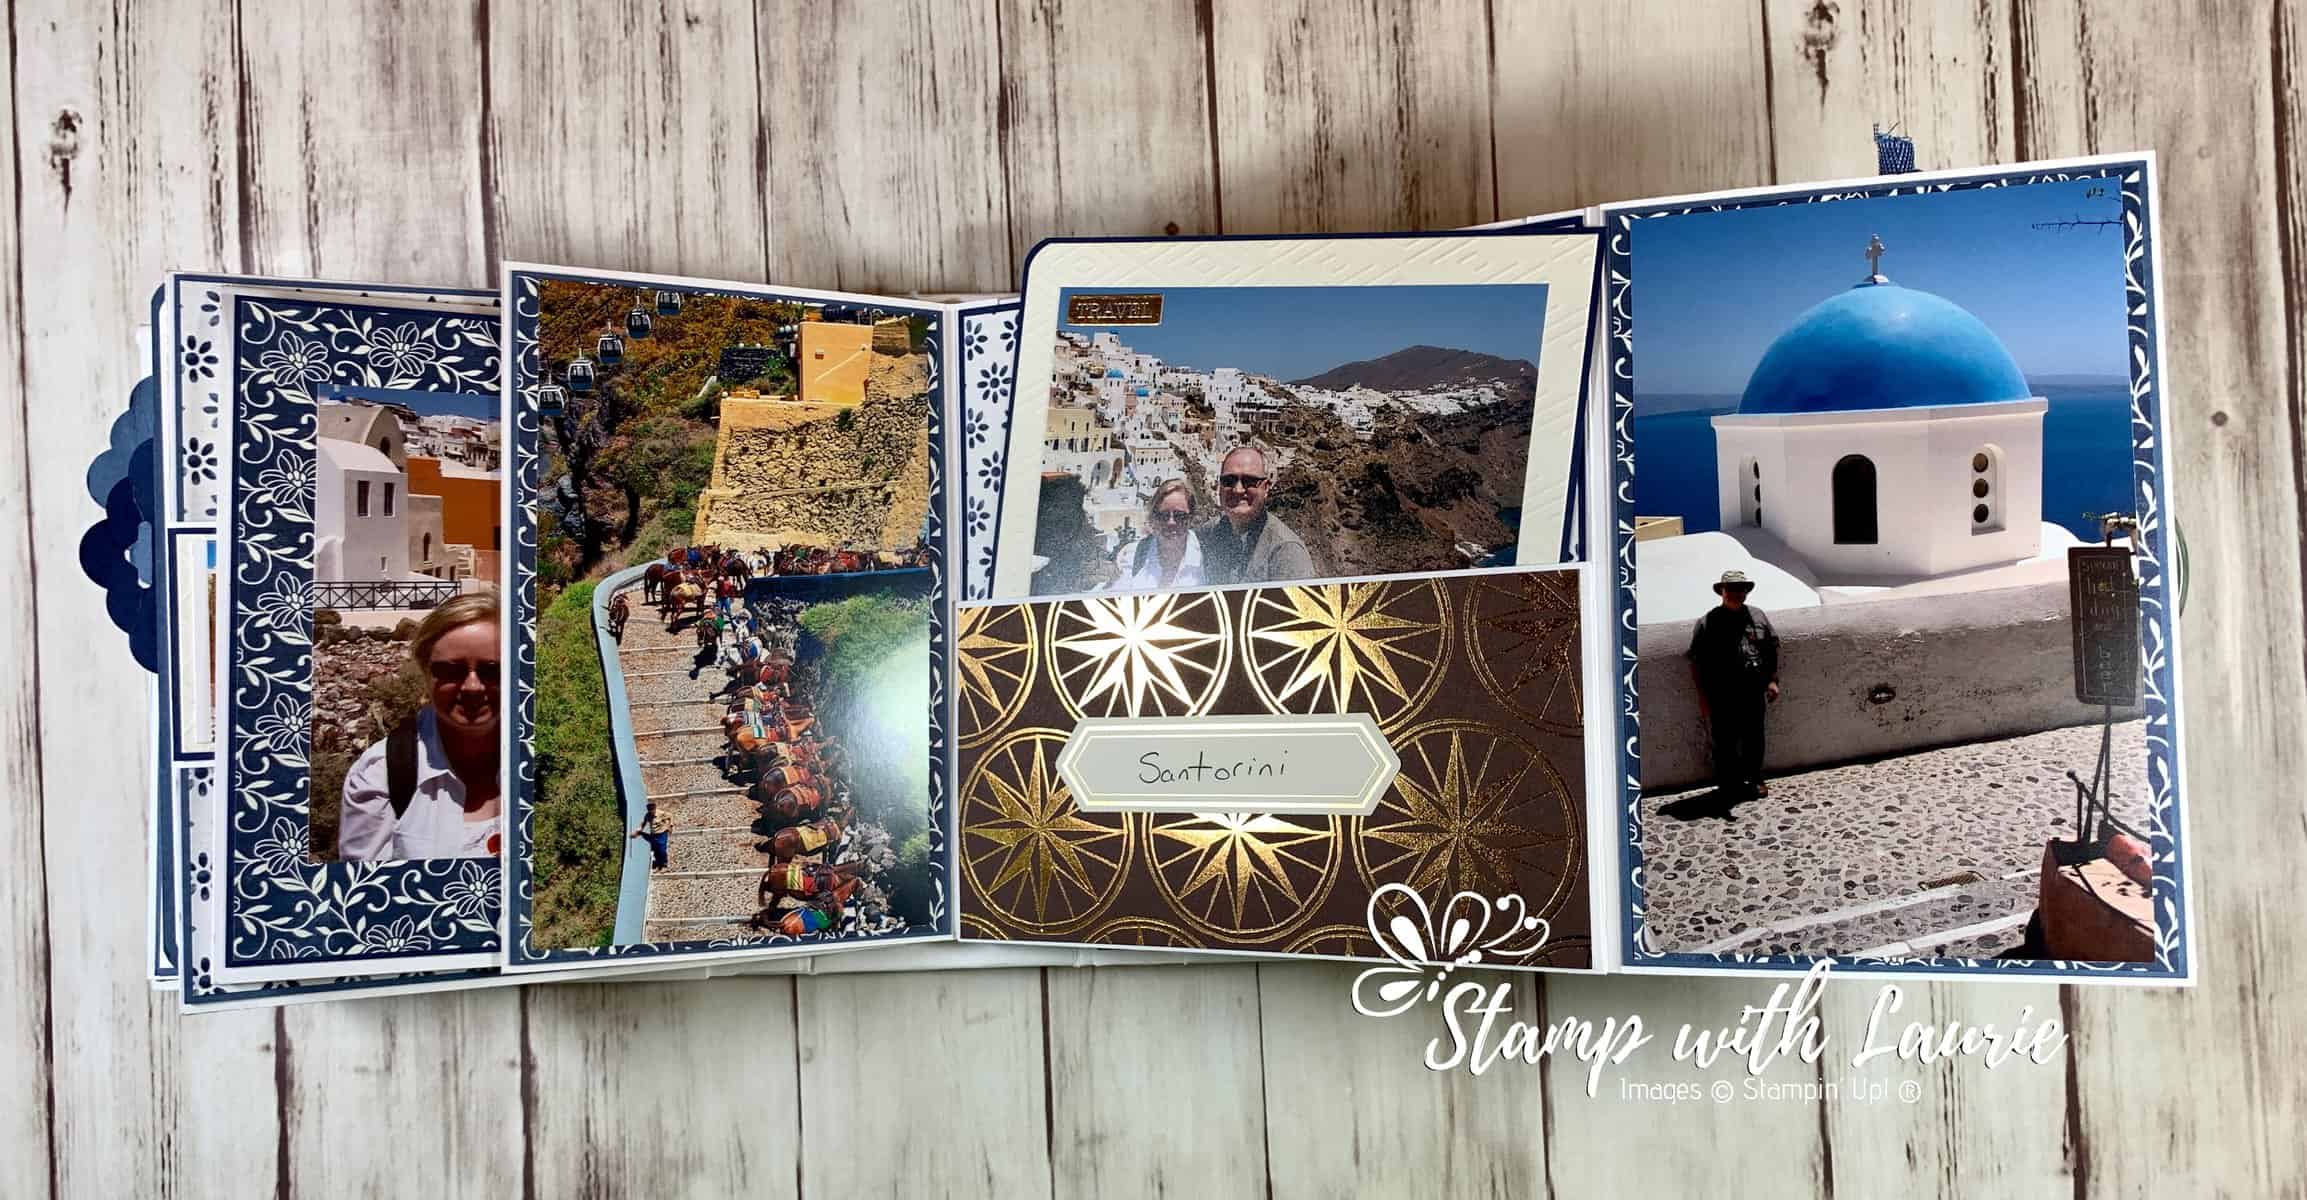
Page 5 - Santorini
Santorini – Page 5
Page 6 and 7 Spread
Page 6 and 7 Spread
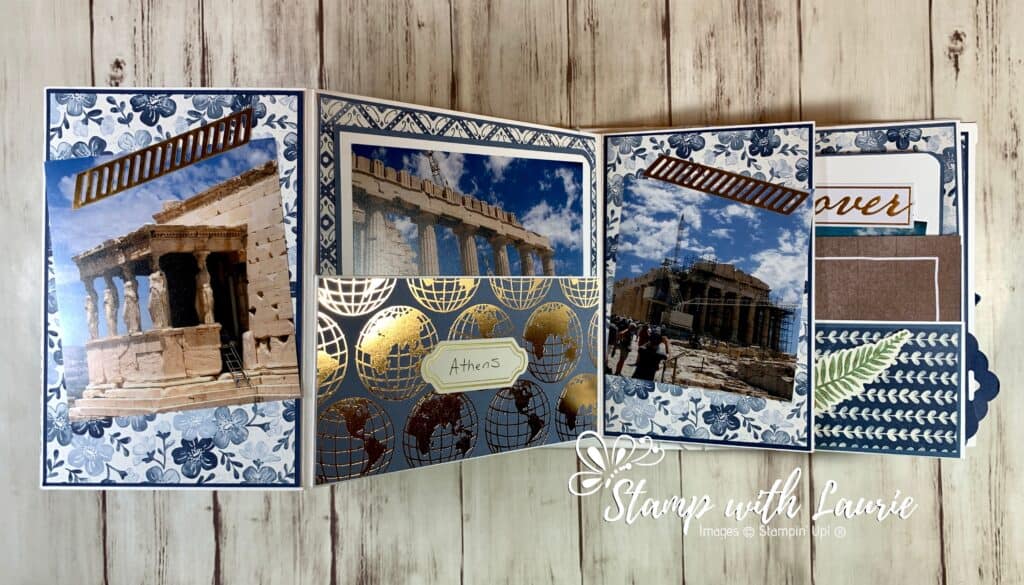
Page 6 - Athens
Athens – Page 6
Page 7
Page 7
Spread
Spread of Page 8 and Inside Back Cover
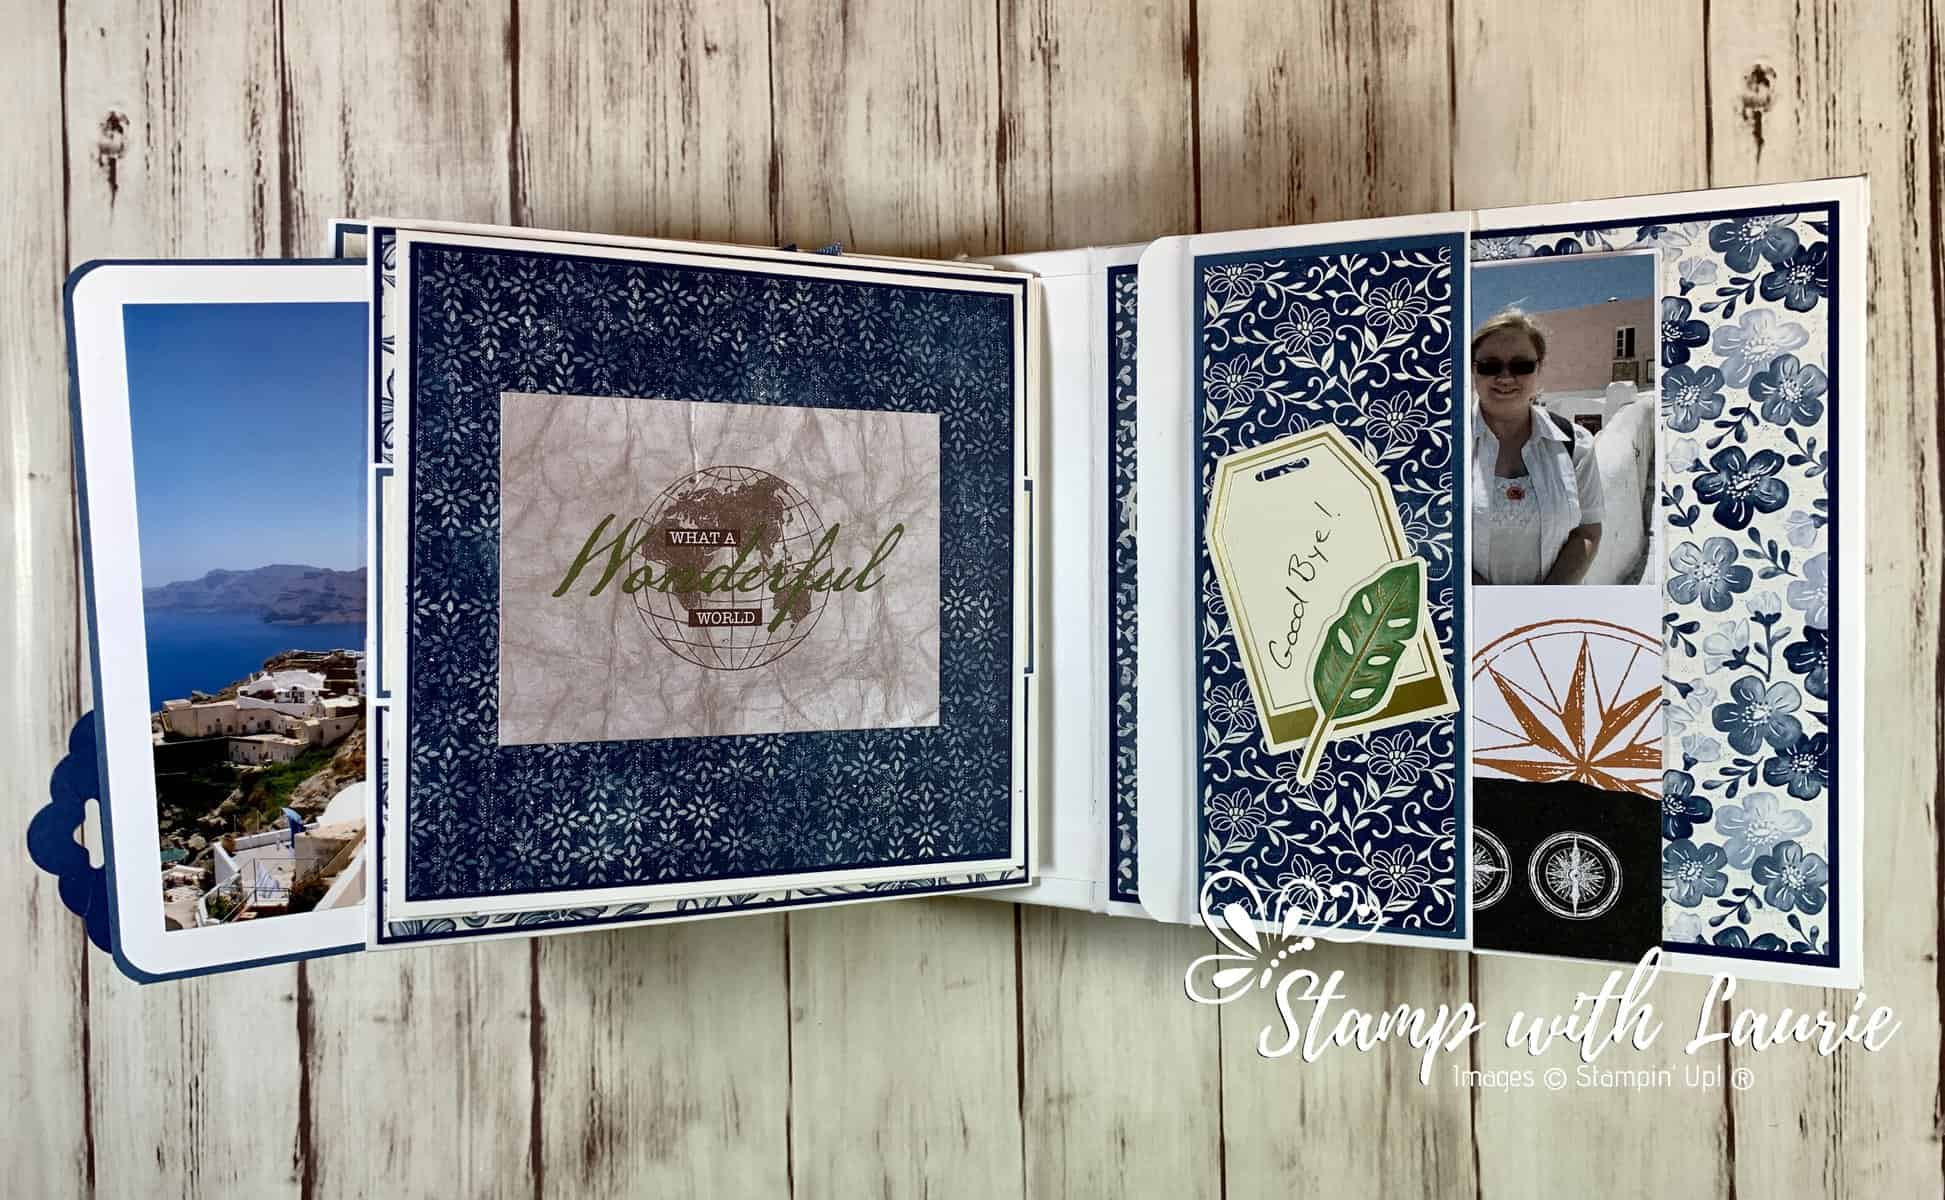
Page 8
Page 8 – Picture Folder
Back Cover
Back Cover Opened

Supplies:

Stamps/Bundles/Dies: Boho Indigo Product Medley, Field Tiles Dies (152707)

Paper: Night of Navy (100867), Misty Moonlight (153081), Basic White 12″ x 12″ (159231), World of Good Memories and More (153600), World of Good Designer Series Paper (152491)

Accessories: Basic Black Stampin’ Write Marker (100082), Misty Moonlight 2020-2022 In Color Ribbon (153624), Snail Mail Twine Combo Pack (154579), Decorative Beads, Bead Shop, Crafts (Dollar Store), Vintage Romance Journal and Album Knobs, Recollections (Michael’s Arts & Crafts), Daintyfied Lunar Charm (Michael’s Arts & Crafts), Scallop Tag Topper Punch, Paper Snips (103579), Bone Folder (102300), Stampin’ Dimensionals (104430), Stampin’ Seal (152813), Glue Dots (103683), Multipurpose Liquid Glue (110755), Envelope Punch Board (for rounding the pull outs), Aleene’s Tacky Glue, Cardboard, Flexible Plastic Envelope

My Photo Album
My Mini Interactive Photo Album with me in my Greek Outfit Ready to Present

For Further Information:

PDF with measurements by Cal Summers:
https://stampwithlaurie.com/small-square-mini/

Videos by Cal Summers:
https://www.youtube.com/watch?v=jPGYq2KRELI
https://www.youtube.com/watch?v=twYJqHW9nUc
https://www.youtube.com/watch?v=TbhHUfQOdtE
https://www.youtube.com/watch?v=TlXFJomClmQ

She also has two Facebook Groups that you can join:
https://www.facebook.com/calsummersworkshops/
https://www.facebook.com/groups/paperscissorsstory/

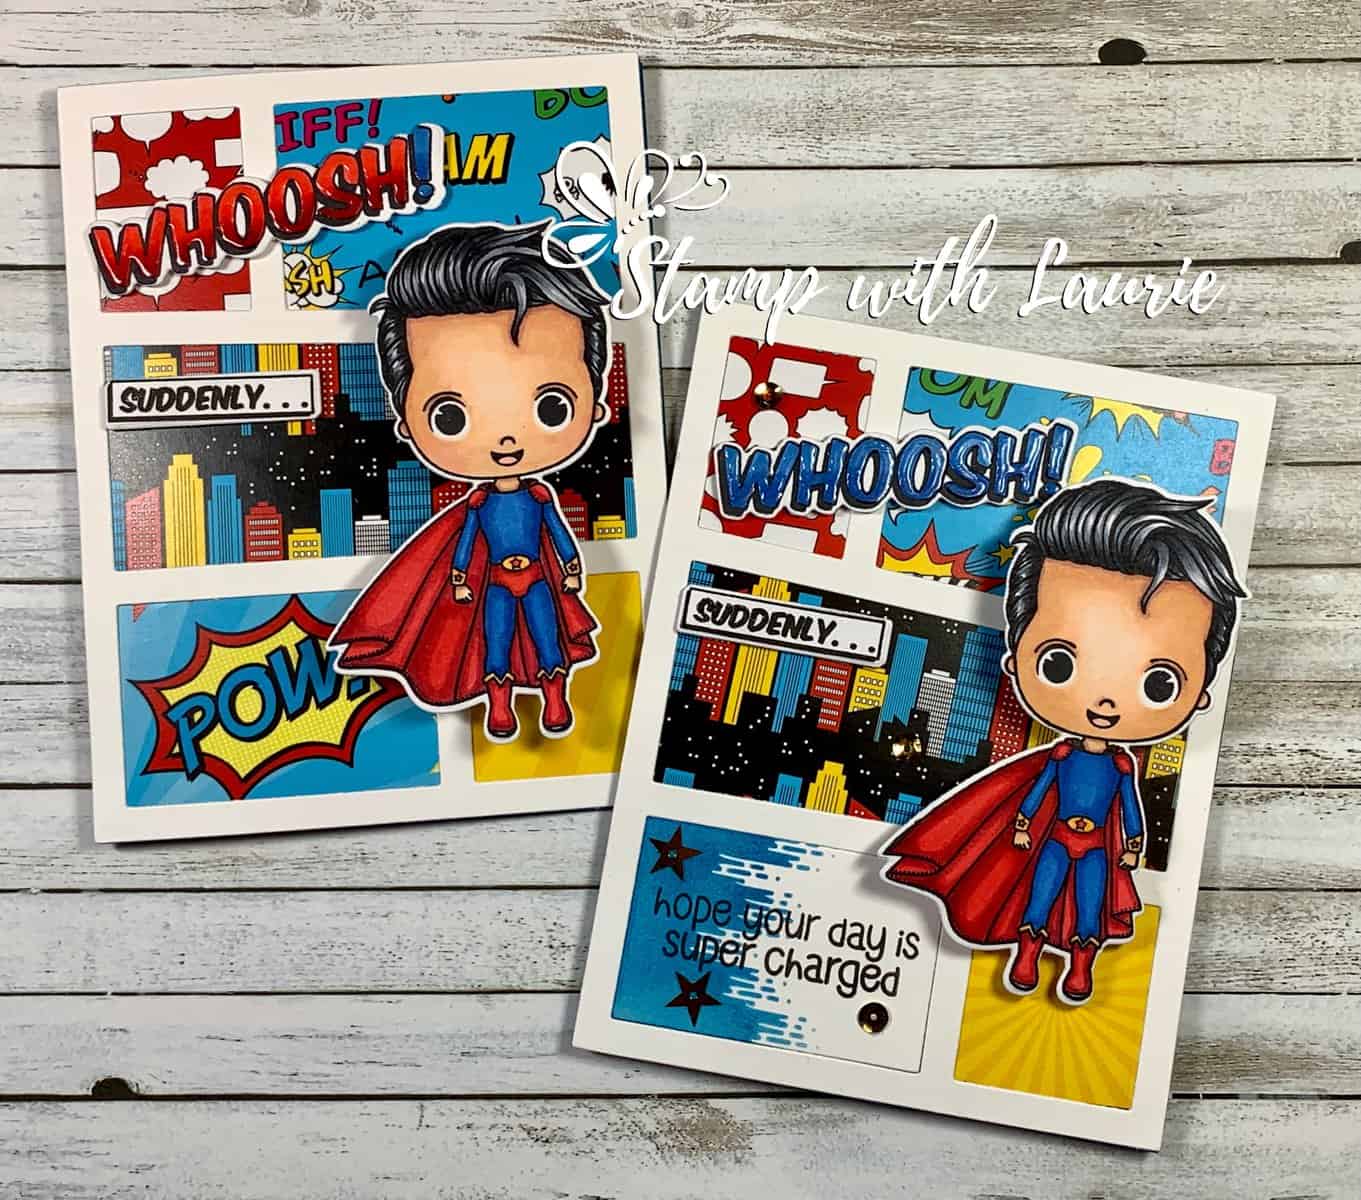
My Super Birthday Cards

My Super Birthday Cards

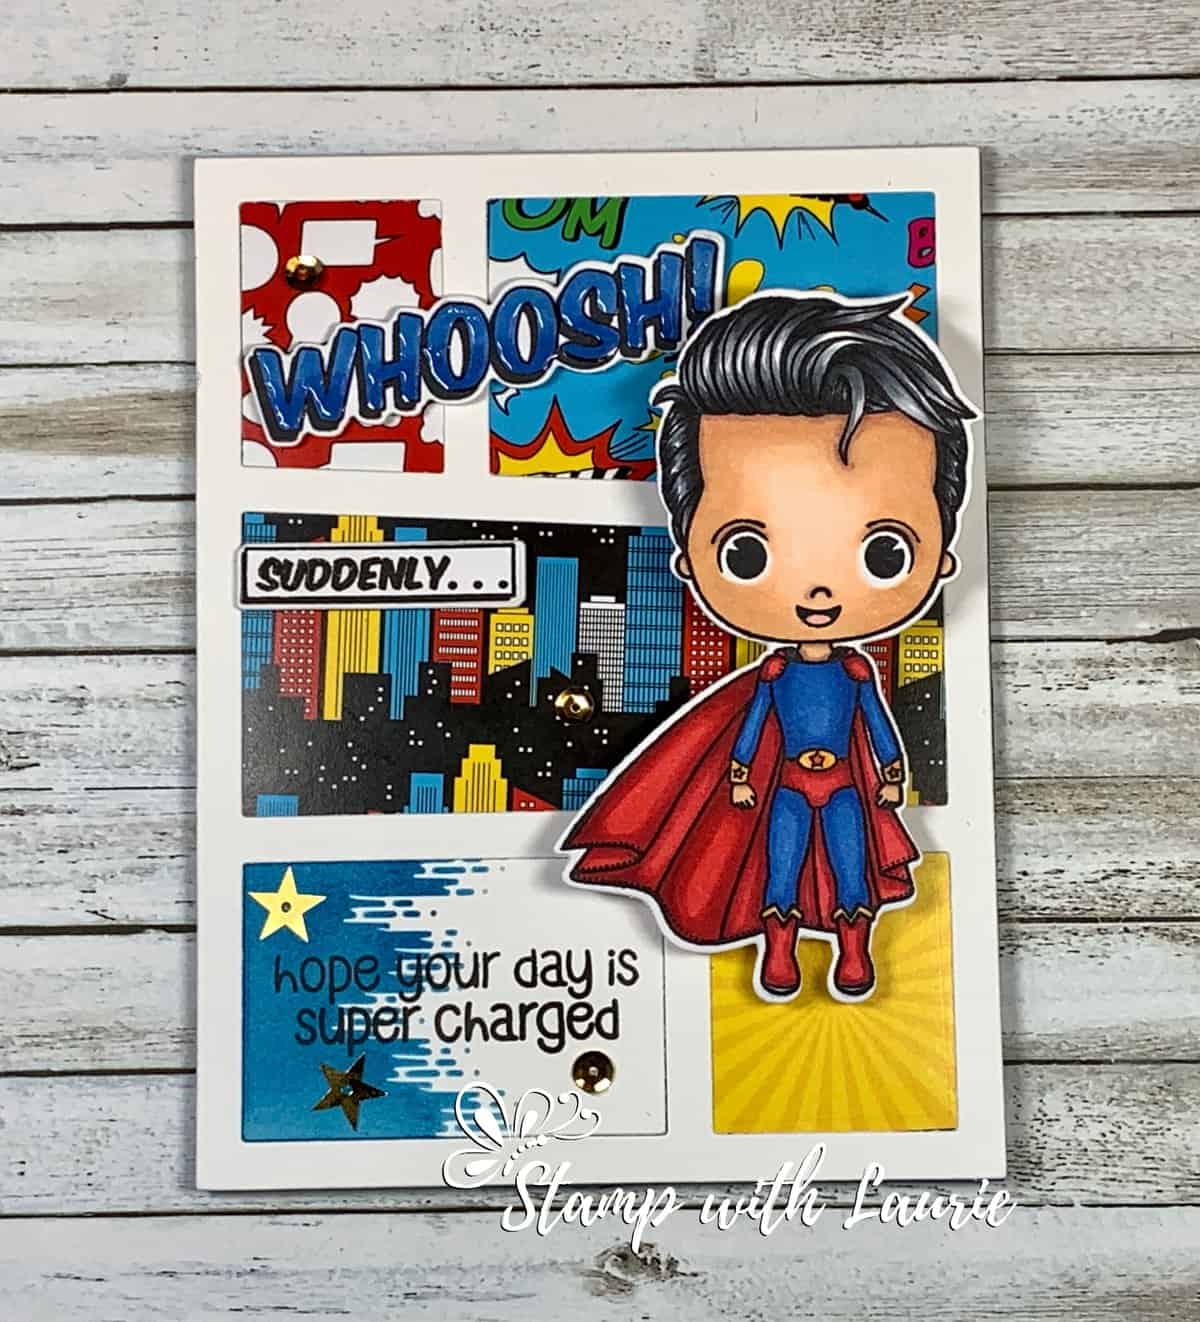
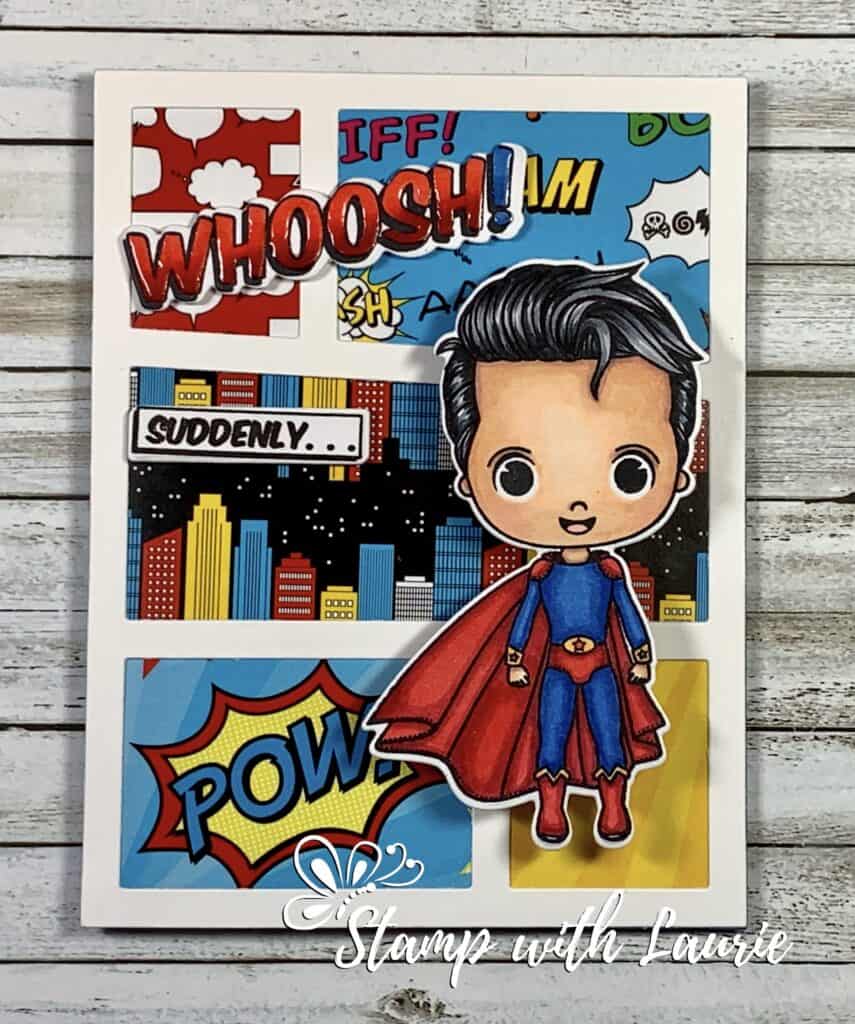
Hello Crafty Friends! Yesterday was a little boy’s birthday and a few weeks ago was a big boy’s birthday. The big boy collects comics especially Superman and the little boy sent me a card with a Superman stamp on the envelope. So, I pulled out my Save The Day Grab and Go Box by Stamp Anniething to make My Super Birthday Cards.

The Details of My Cards

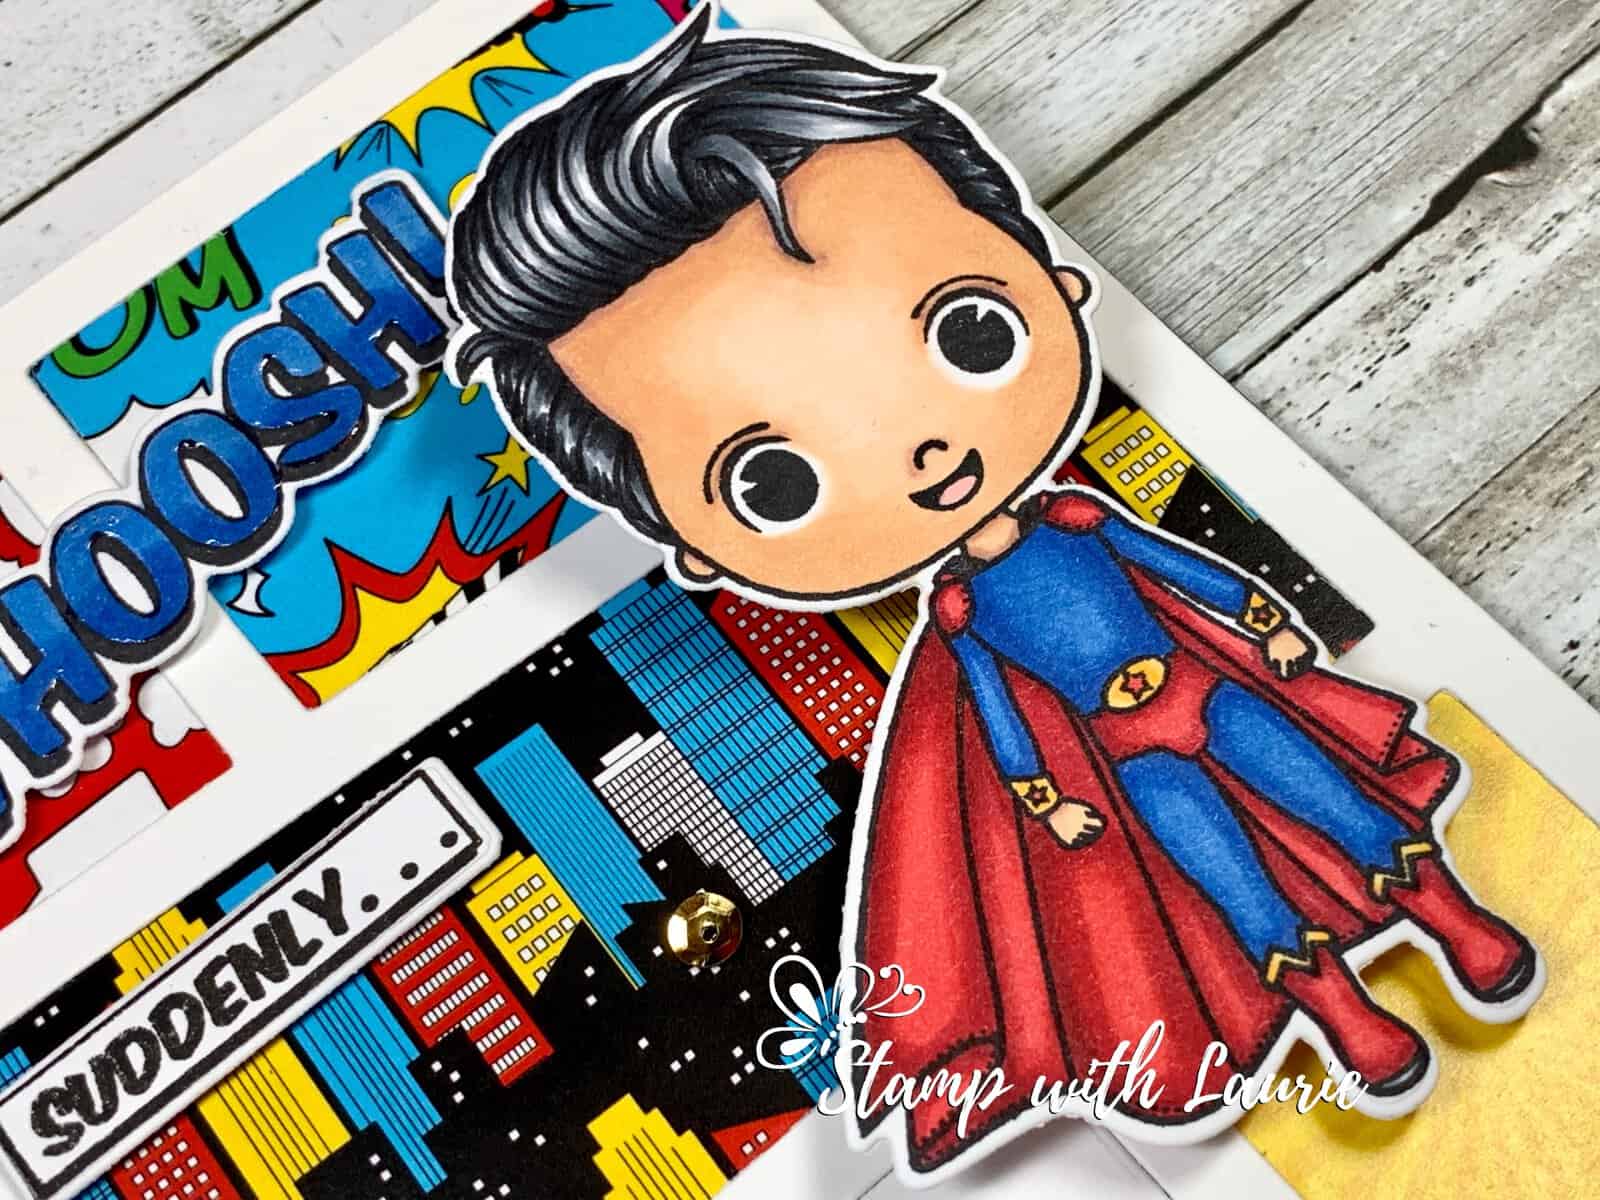
I love that this Grab and Go Box has everything you need to make your card including paper, adhesive, card bases and more! I stamped my super heroes twice and used my Copic Markers to colour them. Then I die cut them out using the matching die included in the box.

My Super Birthday Card - Version 1
My Super Birthday Card – Version 1

My cards were quick ones to make since I mainly used the Save the Day paper sheets and the Comic Mat Die that come with the box. For one card, I pulled out the Background Scene Stencil and did some inking directly onto the white panel that was cut out from the Comic Mat Die. Next, I stamped the sentiment in black and just placed it back into the empty slot on the mat. The other panels were filled with different papers. I love the “Suddenly” just like in the old comics! I stamped the Whoosh!, coloured them with my Copic markers and then added Glossy Accents to make them pop. A few sequins add to the sparkle of the card.

My Super Birthday Card - Version 2
My Super Birthday Card – Version 2

For my other card, I decided to use the “POW” from the paper since the big birthday boy would get a kick out of it from the old TV shows that we use to watch.

One final piece was that I put my super heroes onto Action Wobbles. How fun is that! The recipient can have them wobble on the card! Check it out!

Video of Wobble in Action

————————–

Copic Markers:

Skin: E000/E00/E21/E11/E04/R20
Hair: C9/C7/C5/C3
Blues: B18/B26/B24
Reds: R39/R37/R35
Yellows: Y32/Y38

Close Up of My Card
Close Up of My Card

————————–

Card Recipe for My Super Birthday Cards:

Save The Day Grab and Go Box, Stamp Anniething
Paper Basics – Stamper’s Select White Cardstock, Papertrey Ink
#1 Stamp, Save The Day Grab and Go Box, Stamp Anniething
#7 Stamp, Save The Day Grab and Go Box, Stamp Anniething
#8 Stamp, Save The Day Grab and Go Box, Stamp Anniething
Metal Die Outlines, Save The Day Grab and Go Box, Stamp Anniething
6” x 6” Paper Sheets, Save The Day Grab and Go Box, Stamp Anniething
Comic Mat Die, Save The Day Grab and Go Box, Stamp Anniething
Background Scene Stencil, Save The Day Grab and Go Box, Stamp Anniething
Tuxedo Black Memento Ink Pad, Stampin’ Up!
Pacific Point, Stampin’ Up!
Blending Brushed, Stampin’ Up!
Action Wobbles, My Stash
Metallic Sequin Assortments, Stampin’ Up!
Glossy Accents, Ranger
Thick Whisper White Card Stock, Stampin’ Up!

Finished card size: 5.5” x 5.5”

————————–

To view my Copic cards, please click here.

Hope you like My Super Birthday Cards using the
Save The Day Grab and Go Box from Stamp Anniething!

Thank you for stopping by!

Hugs,
Laurie