Go Boldly Birthday Card 

Boldly Go Birthday Card - a space birthday card with Star Trek Next Generation characters on it.
Go Boldly Birthday Card

Hello Crafty Friends! It’s Laurie here to share my Go Boldly Birthday Card using The Next Space Explorers Stamp Set by Kindred Stamps! It was my brother’s birthday recently and he loved Star Trek Next Gen growing up! He loved it so much that one year we even had a Next Gen murder mystery birthday party for him! Lol!

The Details of My Go Boldly Birthday Card

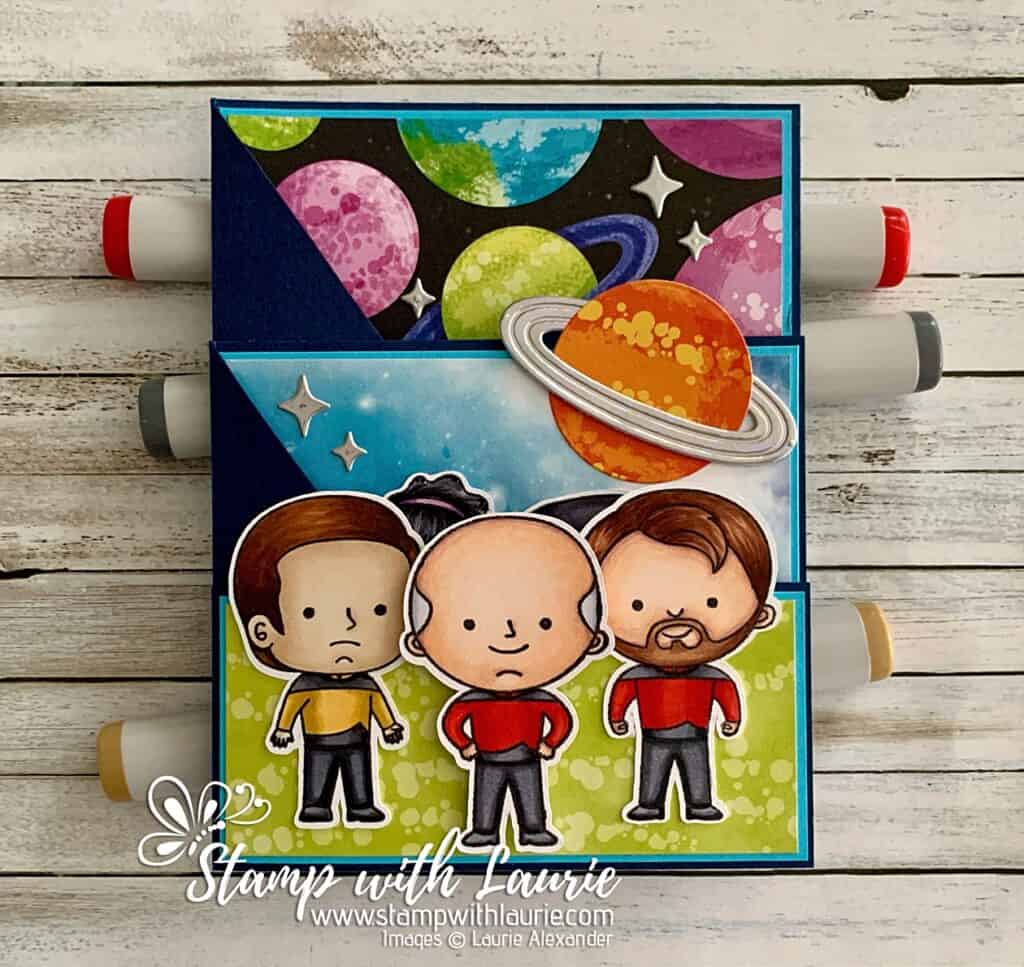
For my card, I wanted to include all the characters on his card. So, I went with a fun fold that is like a booklet where you open each page to a new layout! I have included a video at the end to show it in action.
First Page of Booklet Card with two more characters
First Page of Booklet Card

But first, I coloured all the characters with my Copic markers and cut them out with my Brother Scan n’ Cut. Once that was done, I built my booklet using the template that I have included at the end of this post. 

Next, was decorating the pages. The Stargazing Designer Series Paper by Stampin’ Up! was perfect for my space theme. I even used the Reach for the Stars Dies by Stampin’ Up! to create my ringed planet with Holographic DSP for the rings.

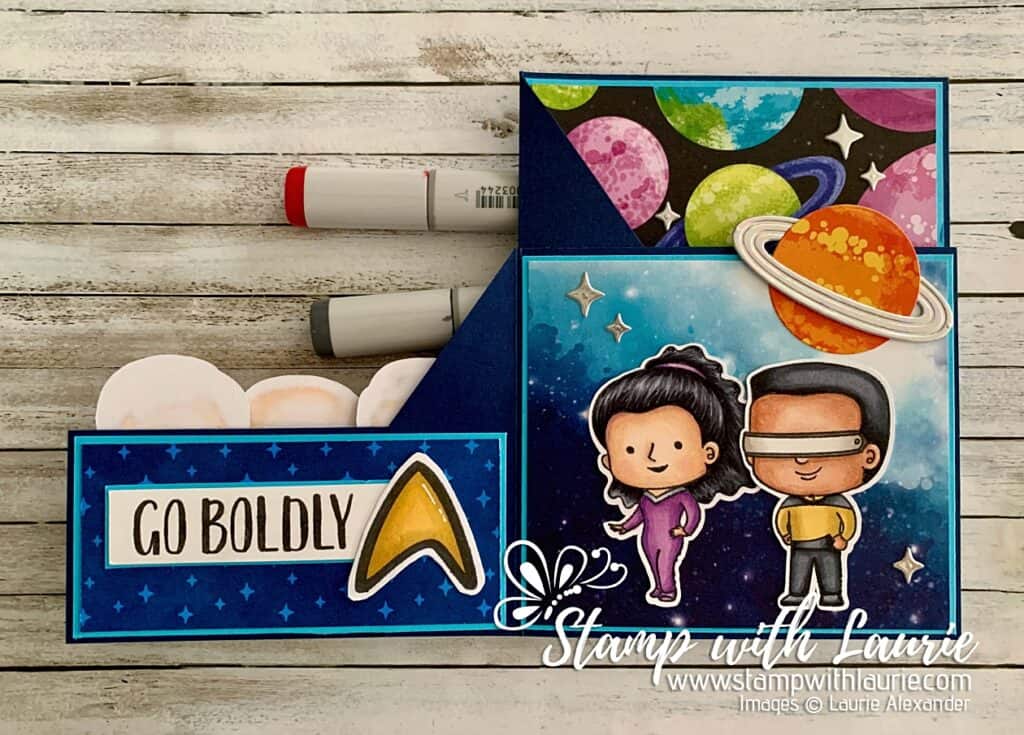
Second Page of Booklet with a final character
Second Page of Booklet Card

I used two sentiments from The Next Space Explorers stamp set and one with the Star Trek Symbol from the Space Explorers stamp set to fill the pages facing the characters.

Since the card was so bulky already, the only embellishments I added were a scattering of Holographic die cut stars throughout the booklet.

————————–

Copic Markers:

Captain Jean-Luc Picard
Skin
: E000/E00/E21/E11/E04
Hair: C3/C1/C0
Reds: R29/R27/R24 
Blacks: C9/C6/C4

Commander William Riker
Skin
: E000/E00/E21/E11/E04
Hair: E29/E27/E25/E23
Reds: R29/R27/R24 
Blacks: C9/C6/C4

Lieutenant Commander Data
Skin
: E42/E41
Hair: E49/E59/E57/E55
Golds: Y28/Y26/Y21 
Blacks: C9/C6/C4
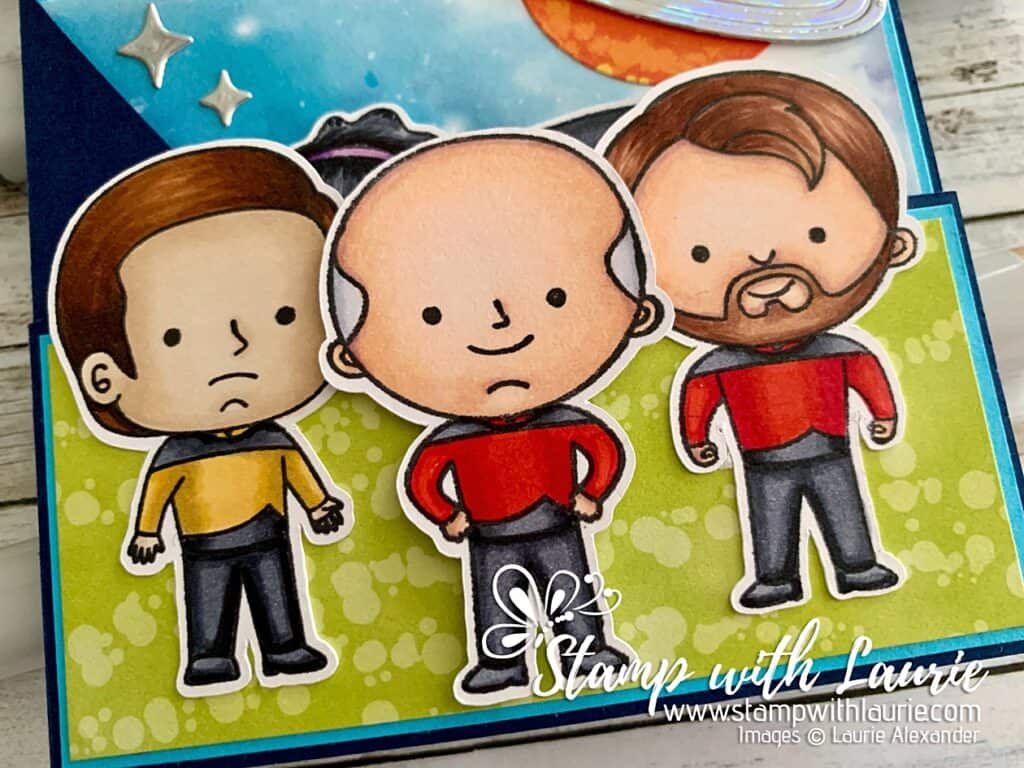
Close Up of Characters on Cover

Counselor Deanna Troi
Skin
: E000/E00/E21/E11/E04/R20
Hair: C9/C6/C4
Outfit: V17/V15/V12
Grays: C4/C3/C1

Chief Engineer Geordi La Forge
Skin
: E15/E13/E11
Hair: C9/C6/C4
Golds: Y28/Y26/Y21 
Blacks: C9/C6/C4
Visor: W6/W4/W2/W0
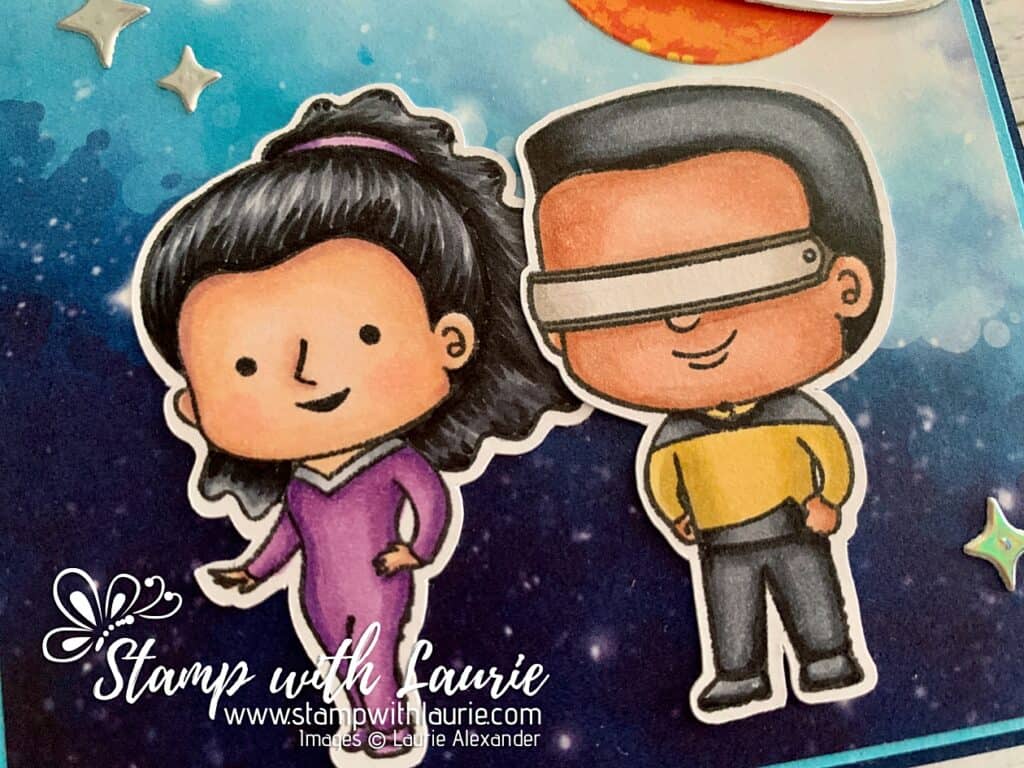
Close Up of Two Characters on Inside of Card
Close Up of Characters on First Page

Lieutenant Worf
Skin
: E15/E13/E11
Hair: C9/C6/C4
Golds: Y28/Y26/Y21 
Blacks: C9/C6/C4
Bat’leth: W6/W4/W2/W0/E27
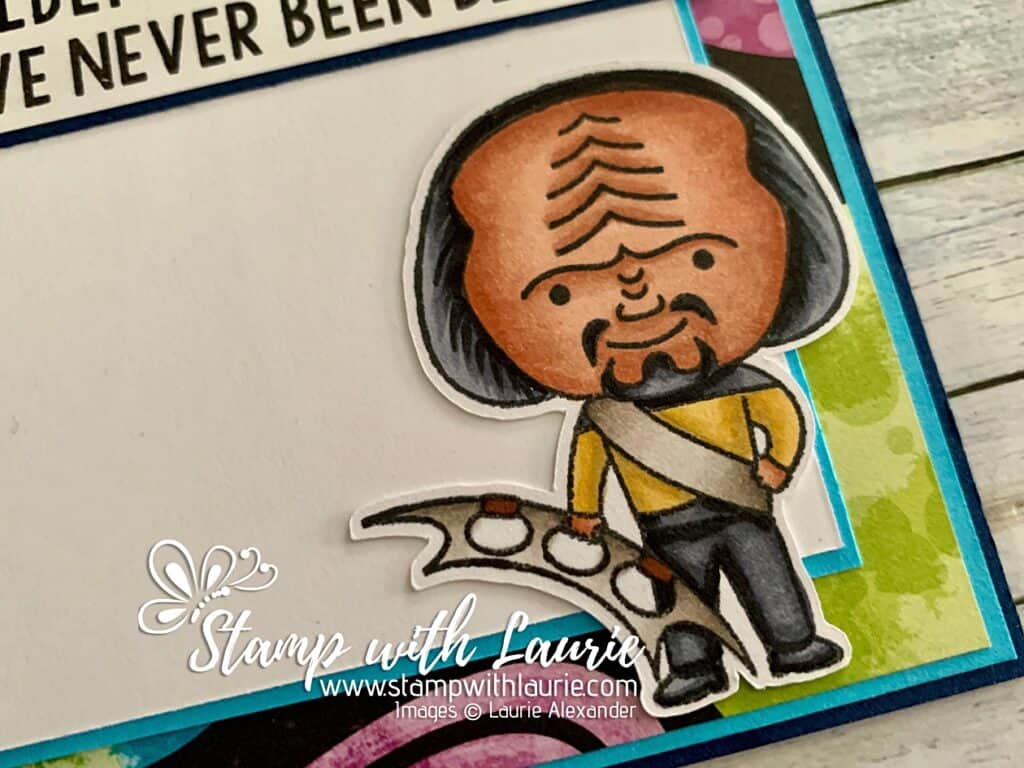
Close Up of Character on Second Page

Star Trek Symbol
Golds: Y28/Y26/Y21
White Gelly Roll Pen
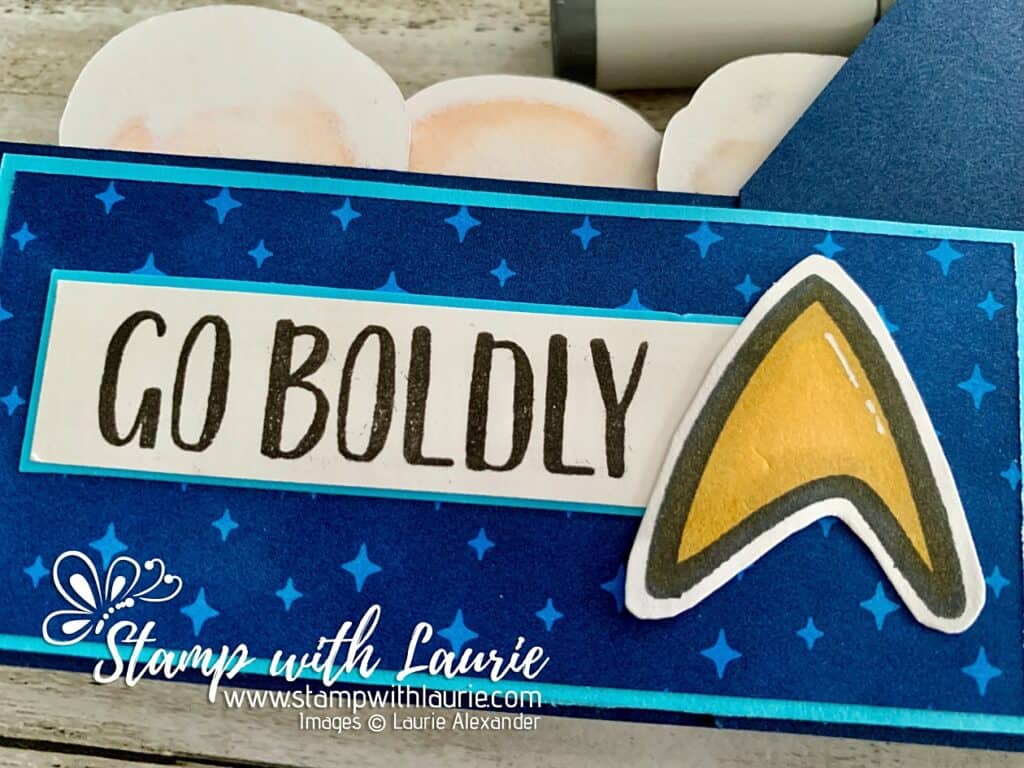
Close Up of Star Trek Symbol

————————–

Card Recipe for My Go Boldly Birthday Card:

The Next Space Explorers, Kindred Stamps
Space Explorers, Kindred Stamps
Paper Basics – Stamper’s Select White Cardstock, Papertrey Ink
Reach for the Stars Dies, Stampin’ Up!
Stargazing Designer Series Paper, Stampin’ Up!
Holographic Trio Specialty Designer Series Paper, Stampin’ Up!
Tuxedo Black Memento Ink, Stampin’ Up!
Brother Scan n’ Cut
White Gelly Roll Pen, Sakura
Paper Snips, Stampin’ Up!

Night of Navy and Tahitian Tide, Card Stock Stampin’ Up!

Finished card size: 5 ½” x 4 ¼”

————————–

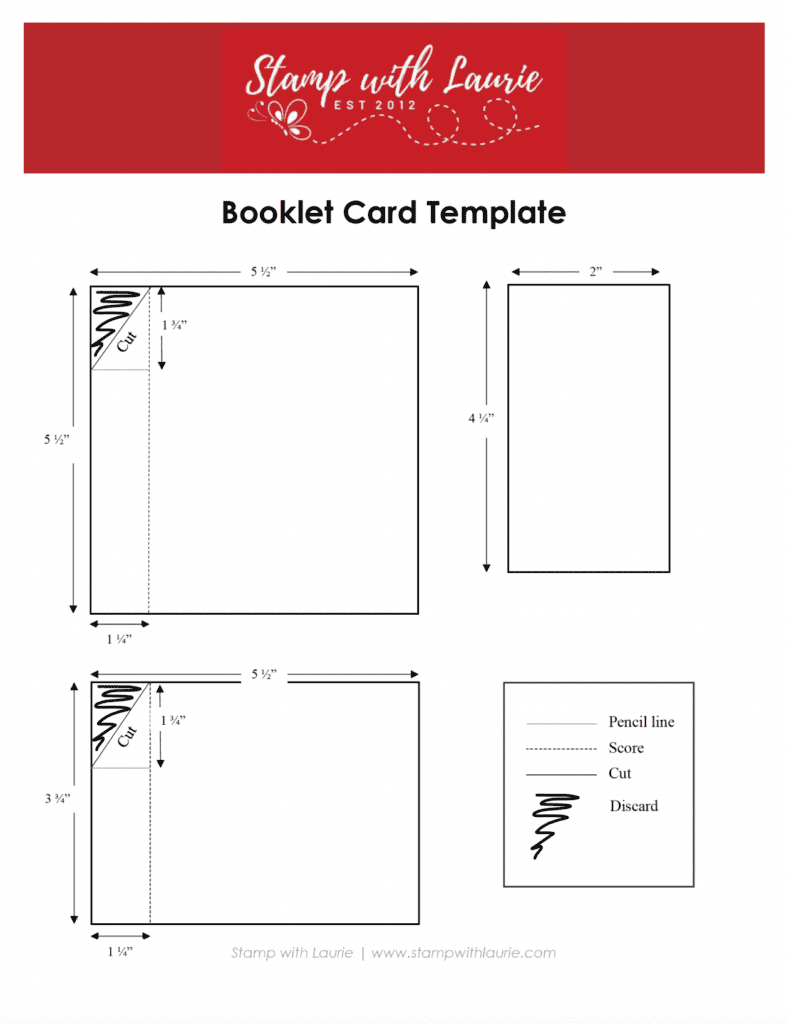
Downloadable Booklet Card Template

To download a PDF of the Booklet Card Template, please click here or on the picture.

Downloadable Booklet Card Template

For more of my Kindred Stamps cards, please click here.

Hope you like my Go Boldy Birthday Card using the
The Next Space Explorers Stamp Set by Kindred Stamps!

Thank you for stopping by!

Hugs,
Laurie

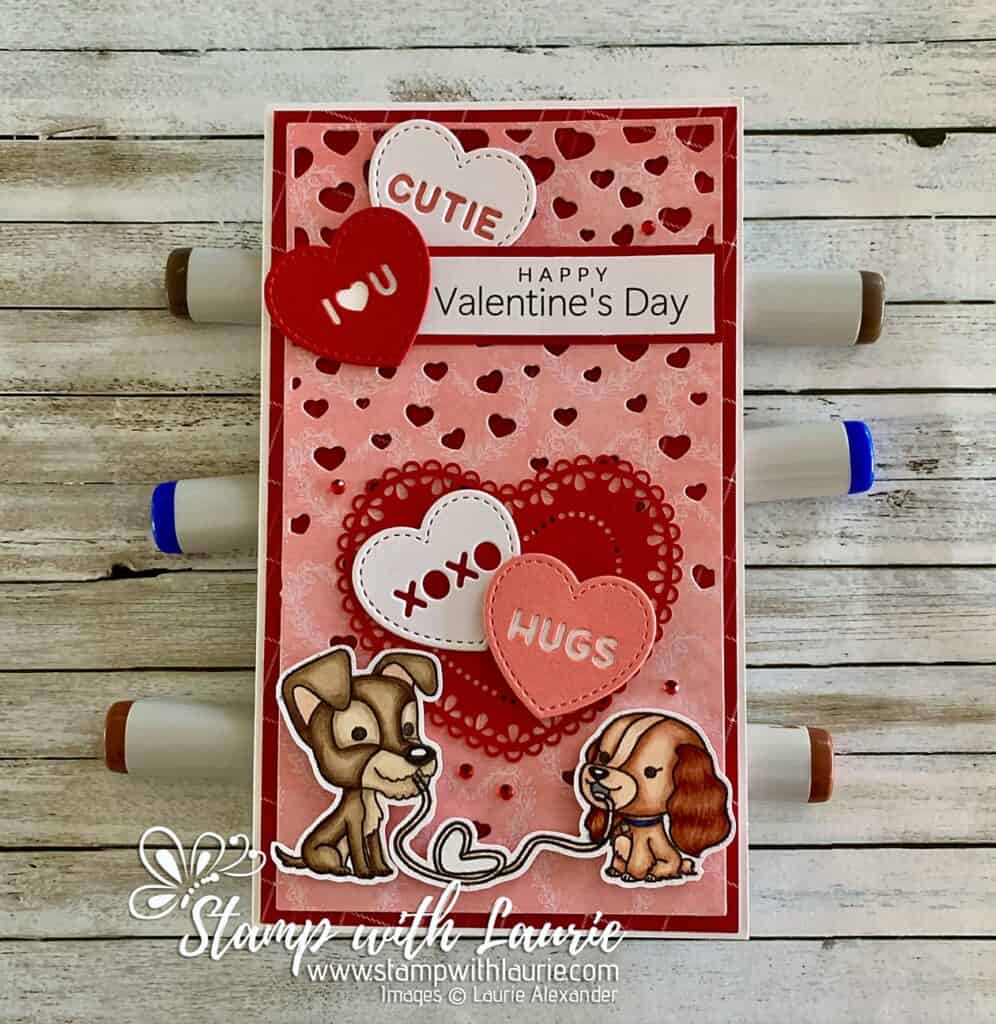
My Puppy Valentine Card

My Puppy Valentine Card - A Valentine Card with two puppies enjoying spaghetti
My Puppy Valentine Card

Hello Crafty Friends! It’s Laurie here! Happy Valentine’s Day! I am sharing My Puppy Valentine Card using Puppy Love Stamp Set by Kindred Stamps that I used for my Hubby’s Valentine card! We love Disney and the Lady and the Tramp movie is a favourite of ours! So, when I saw this stamp set, I knew I would use it for his card.

The Details of My Puppy Valentine Card

For my card, I decided to make a mini slimline card to match my Falling Hearts Etched Metal Die by Photo Play. So, I used the Flirty Flamingo hearts paper from the Most Adored Specialty Designer Series Paper by Stampin’ Up! with this die. This DSP is free during Sale-a-Bration 2024 and is perfect for those Valentine cards with its hearts and gold accents! I also used a solid Real Red plaid piece from this DSP as a base peeking through the hearts and extended it beyond the die cut Falling Hearts to create a mat.

Since I had the Candy Hearts Dies out already out from my other cards, I decided to use them again! Two hearts were clustered around the sentiment from Conie Fong Art & Design and the other two hearts with a heart doily above the puppies.

The only embellishments that I added were some Red Rhinestones scattered to add sparkle.

Copic Markers:

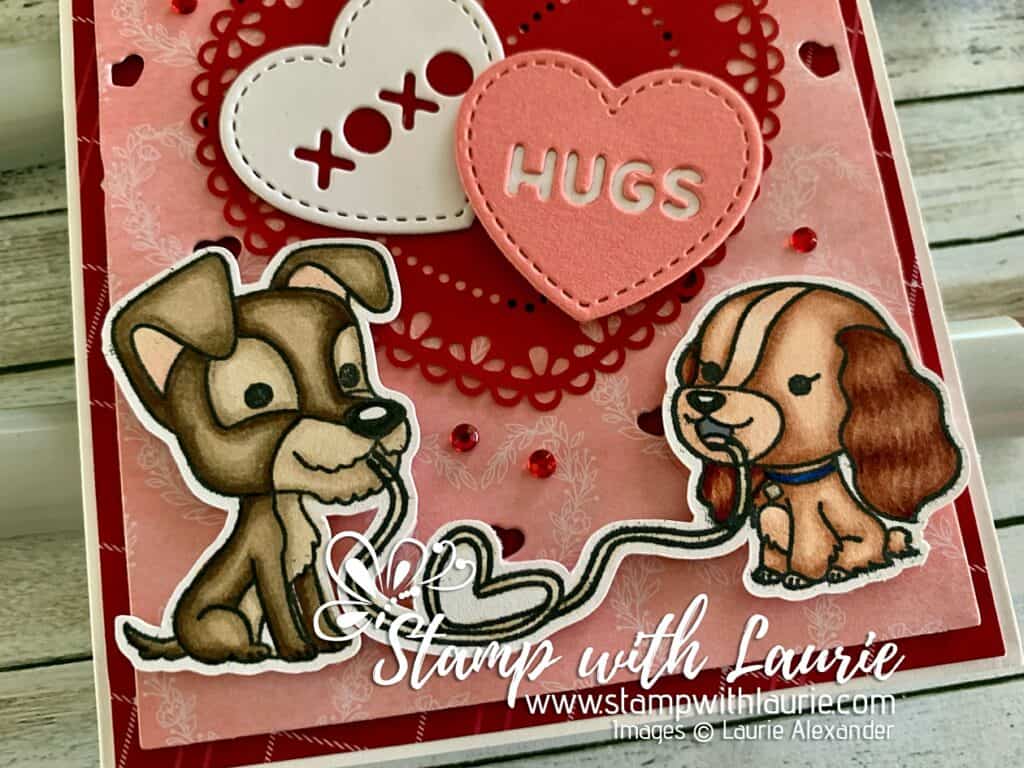
Boy Dog: E47/E44/E43/E42/E41
Girl Dog: E18/E17/E15/E13E11E00/B28/C3
Spaghetti: E42/E41

Close Up of Puppies
Close Up of Puppies

————————–

Card Recipe for My Puppy Valentine Card:

Puppy Love, Kindred Stamps
Paper Basics – Stamper’s Select White Cardstock, Papertrey Ink
Bella and Benji Kiss, Conie Fong Art & Design (Sentiment)
Most Adored Specialty Designer Series Paper, Stampin Up!
Falling Hearts Etched Metal Die, Photo Play
Candy Hearts Dies, Lawn Fawn
Heart Doilies, Stampin’ Up!
Red Rhinestone Basic Jewels, Stampin’ Up!
Silver Gelly Roll Pen, Sakura
Black Gelly Roll Pen, Sakura
Real Red, Flirty Flamingo and Basic White Card Stock, Stampin’ Up!

Finished card size: 6 5/8” x 3 7/8”

————————–

To view my other Kindred Stamps projects, please click here.

Hope you like My Puppy Valentine Card using Puppy Love by Kindred Stamps!

Thank you for stopping by!

Hugs,
Laurie
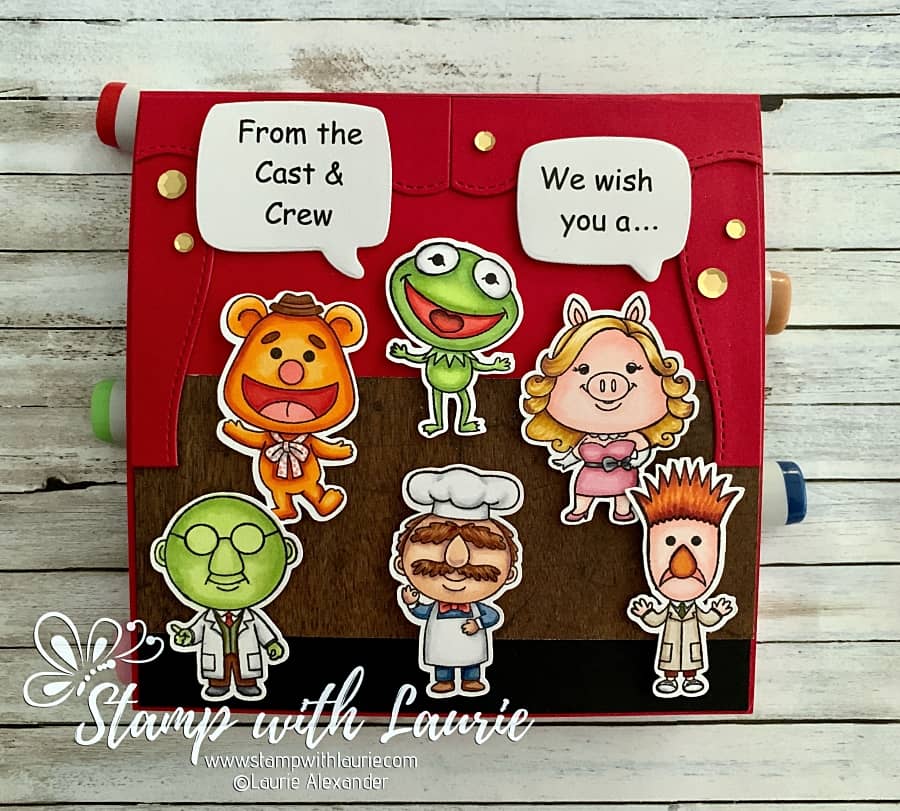
It’s Showtime Birthday Card 

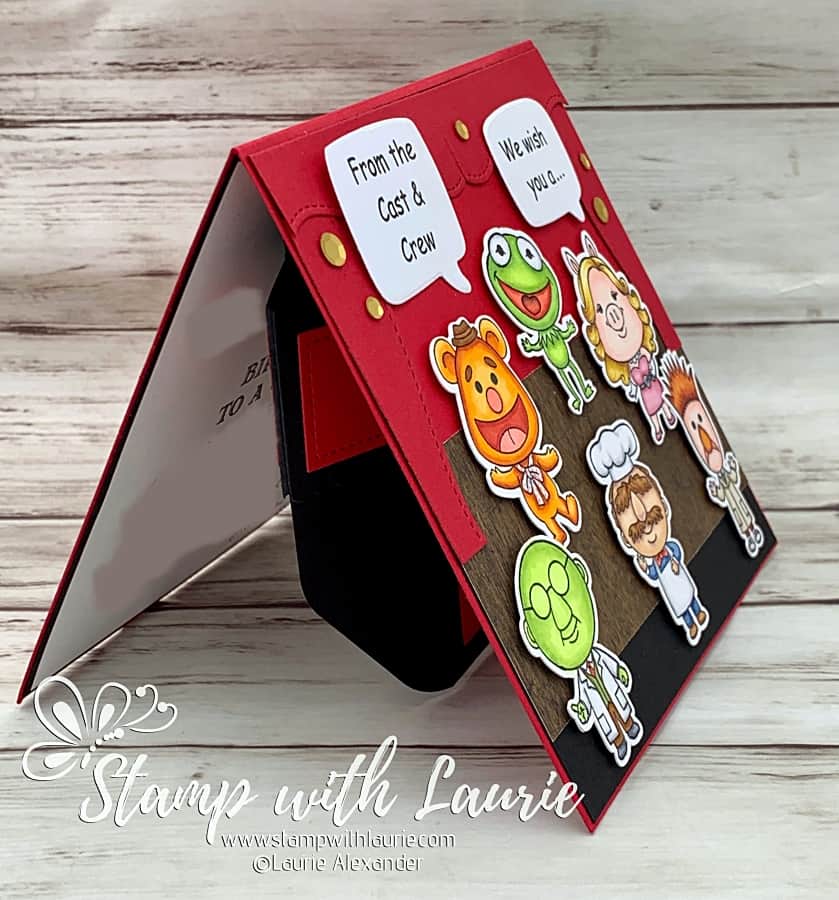
It's Showtime Birthday Card - A Birthday Card with the Muppets on a Stage
It’s Showtime Birthday Card

Hello Crafty Friends! It’s Laurie here to share my It’s Showtime Birthday Card using the Showtime Stamp Set by Kindred Stamps! It was my Hubby’s birthday this past weekend and this is the fun pop-up card that I made him! 

The Details of My It’s Showtime Birthday Card

My hubby and I both grew up watching the Muppets and when I saw this stamp set, I knew he would get a kick out of it, especially the grumpy old men! They were always his favourite!

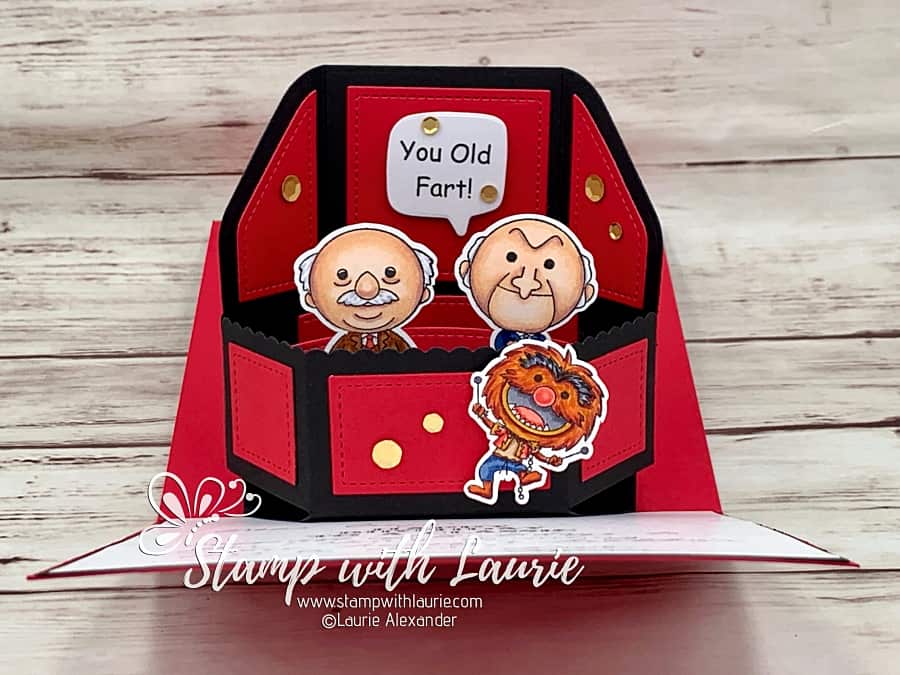
For my card, I decided to create a stage on the front with the Cast & Crew wishing him a Happy Birthday and then a fun pop up of the theatre box on the inside.

Side View of Card

But first, I coloured all the characters with my Copic markers and cut them out. Once that was done, I built my stage. Since I didn’t have curtain dies, I used the Platform Pop-Up Hillside Inserts Dies to create one. They fit together perfectly for my curtains! I added a floor to the stage with some wood grain DSP. 

The text for the word bubbles was created on my computer, printed out and die cut with the Conversations Bubbles dies.

Inside of Card show Theatre Pop-up Box
Inside of Card showing Theatre Pop-up Box

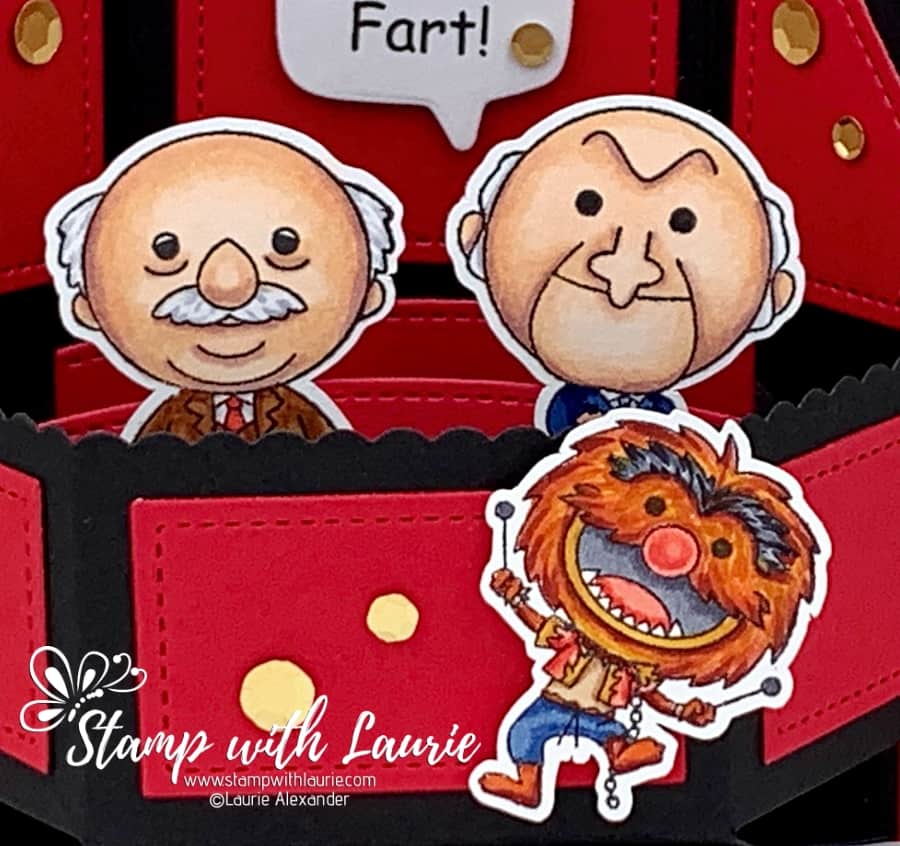
For the inside of my card, I used the Platform Pop-Up and Add-On dies to create my theatre box that the grumpy old men sit in it on the show. I had to trim their legs off to make them fit. Lol! I couldn’t resist adding Animal to the inside as well since he is another favourite of my Hubby, and I can see him climbing the box with his crazy antics! Lol!

Since the card was so bulky already, the only embellishments I added were a scattering of gold sequins.

————————–

Copic Markers:

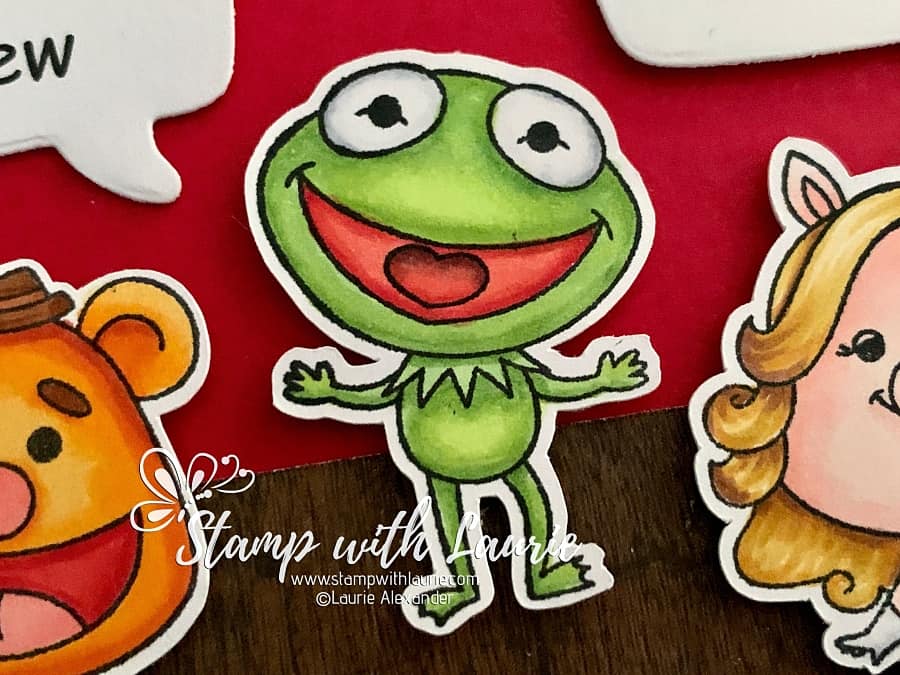
Kermie
Skin: YG17/YG13/YG03/YG01
Mouth: R27/R24/R22 
Tongue: R22/C6/C4
Eyes: C3/C1/0

Close Up of the Frog
Close Up of Kermit the Frog

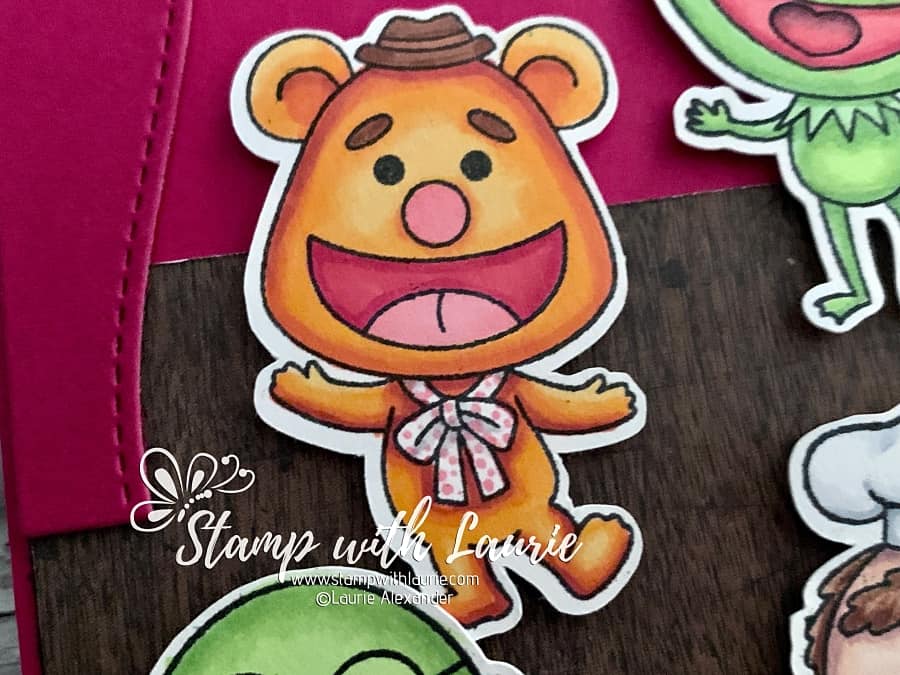
Fozzie Bear
Fur: R08/YR68/Y38/YR31
Mouth: R27/R24/R22
Nose: R27
Eyebrows: E37
Hat: E37/E35/E34
Tie: C3/C1/0/R22

Close Up of the Bear
Close Up of Fozzie Bear

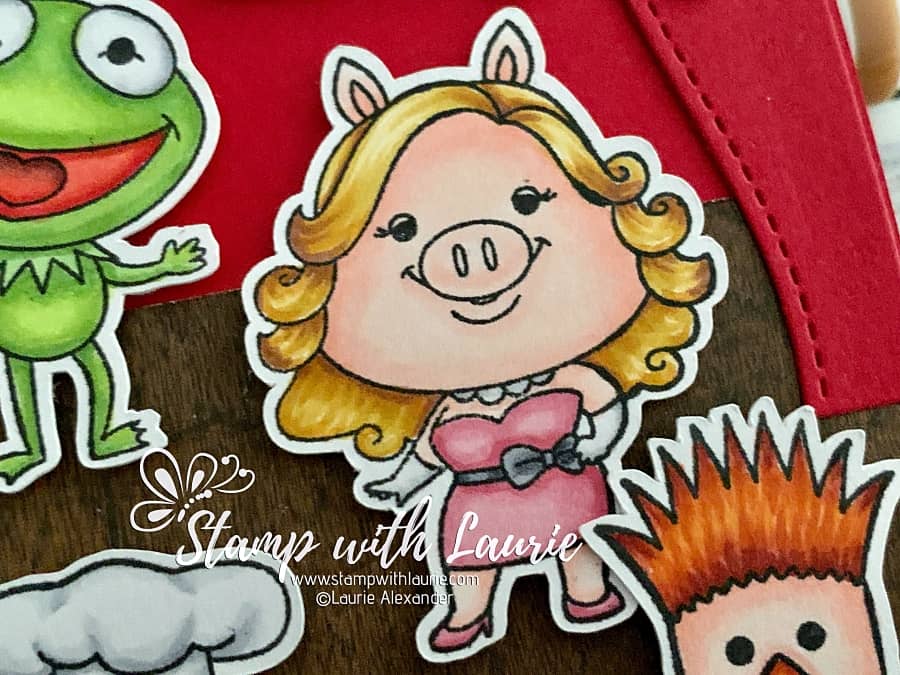
Miss Piggy
Skin: R20/R11/R000
Hair: E25/YR24/Y26/Y21
Dress/Shoes: R85/R83/R81
Belt: C6/C4/C3
Gloves/Pearls: C3/C1/0

Close Up of Pig
Close Up of Miss Piggy

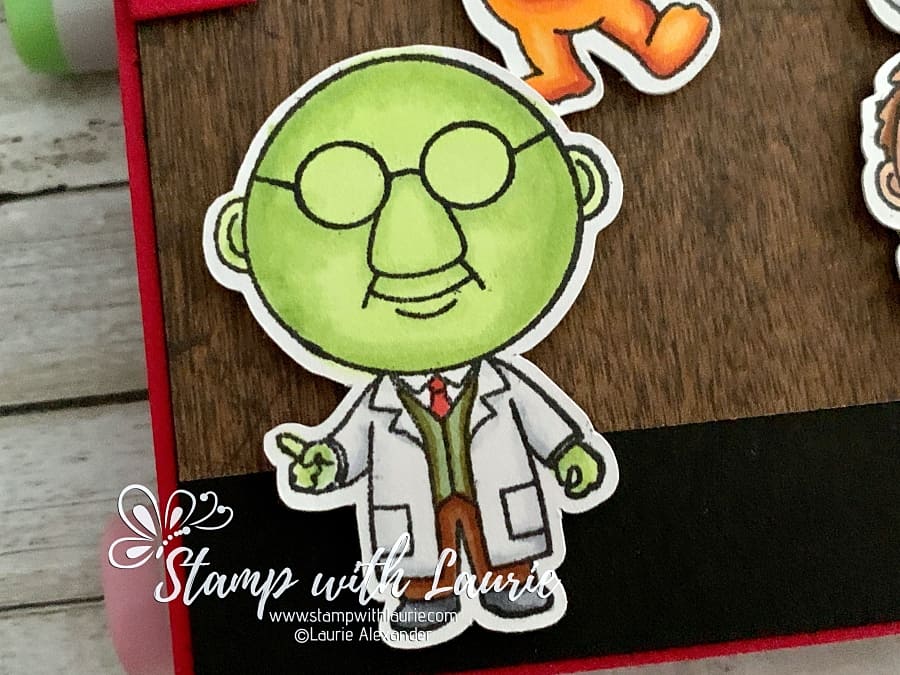
Dr. Bunsen Honeydew
Skin: YG13/YG03/YG01
Medical Coat/Shirt: C3/C1/0
Pants: E39/E37/E35
Vest: YG97/YG93
Shoes: C6/C4
Tie: R22

Close Up of Doctor
Close Up of Dr. Bunsen Honeydew

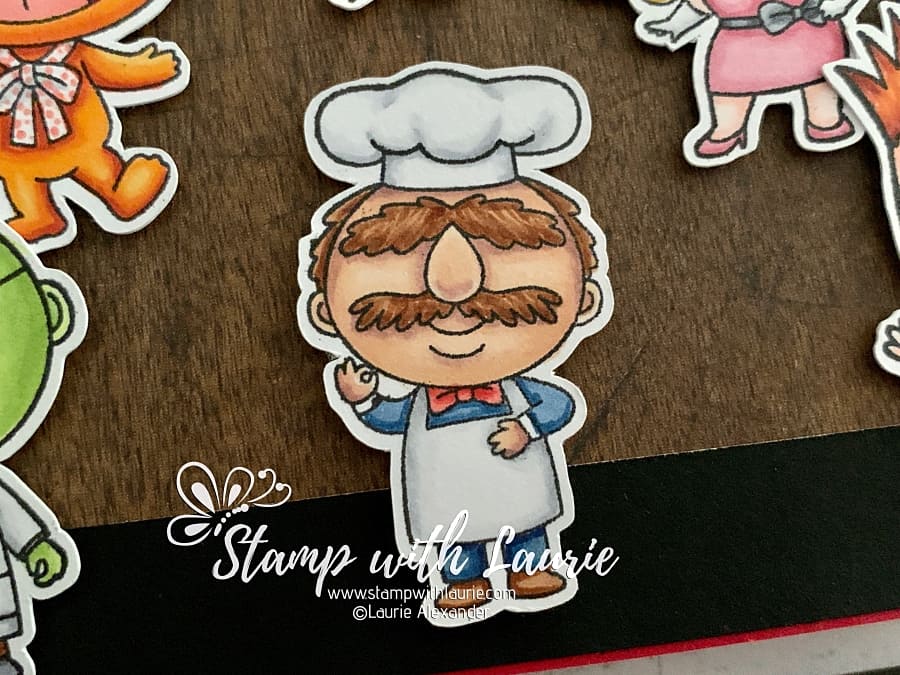
Swedish Chef
Skin: E04/E11/E21/E00/E000
Hair: E37/E35/E34
Apron: C3/C1/0
Shirt/Pants: B39/B37/B34
Tie: R27/R24/R22
Shoes: E37/E34

Close Up of Chef
Close Up of Swedish Chef

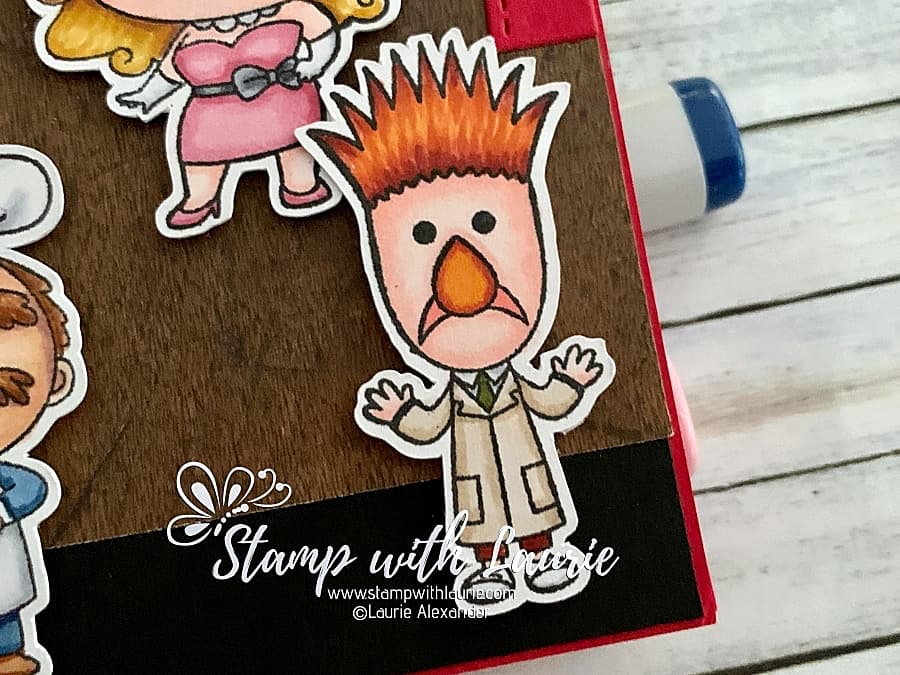
Beaker
Skin: R20/R11/R000
Hair: E18/E08/YR18/YR14
Mouth: R22
Nose: E18/E08/YR18
Medical Coat: E43/E41/E40
Shirt/Shoes: C3/C1
Tie: YG97

Close Up of Medical Lab Assistant
Close Up of Beaker

Waldorf
Skin
: E04/E11/E21/E00/E000
Hair/Shirt: C3/C1
Suit: E39/E37/E35/E34
Tie: R27/R24

Statler
Skin
: E04/E11/E21/E00/E000
Hair/Shirt: C3/C1/0
Suit: B39/B37/B34
Tie: B34

Animal
Fur
: E18/E08/YR18/YR14
Eyebrows: C9/C6/C4
Mouth/Tongue: R29/R22/C6/C4/YR24
Nose: R27/R24/R22
Shirt: E43/E25
Jacket: R27/R24/R22/YR24
Pants: B37/B34

Close Up of two old men in theatre box with another muppet climbing the box.
Close Up of Waldorf, Statler and Animal

————————–

Card Recipe for My It’s Showtime Birthday Card:

Showtime Stamp Set, Kindred Stamps
Paper Basics – Stamper’s Select White Cardstock, Papertrey Ink
Platform Pop-Up Dies, Lawn Fawn
Add-On Platform Pop-Up Dies, Lawn Fawn
Hillside Inserts Platform Pop-Up Dies, Lawn Fawn
Conversations Bubbles Dies, Stampin’ Up!
Wood Textures Designer Series Paper, Stampin’ Up!
Guy Greetings Stamp Set, Stampin’ Up!
Tuxedo Black Memento Ink, Stampin’ Up!
Neutrals Adhesive-Backed Sequins, Stampin’ Up!
Paper Snips, Stampin’ Up!
Basic Black and Real Red, Card Stock Stampin’ Up!

Finished card size: 5 ½” x 5 ½”

It’s Showtime Birthday Card in Action

————————–

For more of my Copic cards, please click here.

Hope you like My Showtime Birthday Card using the
Showtime Stamp Set by Kindred Stamps!

Thank you for stopping by!

Hugs,
Laurie
My Galaxy Part II Card 

A Valentine card with a galaxy boy and girl fighter
My Galaxy Part II Card

Hello Crafty Friends! It’s Laurie here to share My Galaxy Part II Card using the Galactic Fighter and the Galactic Sidekicks Stamp Sets by Kindred Stamps!

A friend of mine asked for me to create a custom Star Wars Valentine card for her Hubby who is a huge Star Wars fan! So, I made two for her selection. I showed the platform card that she picked, but here is the other card that I made. Since she picked the other card, I gave this one to my Hubby instead.

The Details of My Card

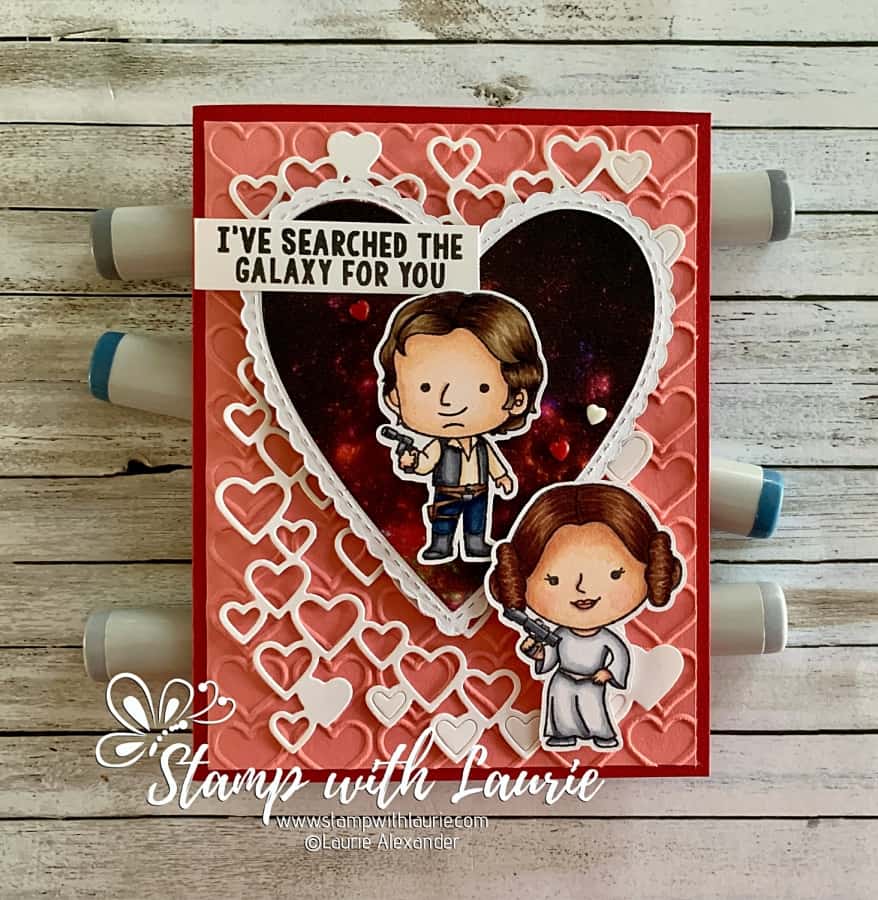
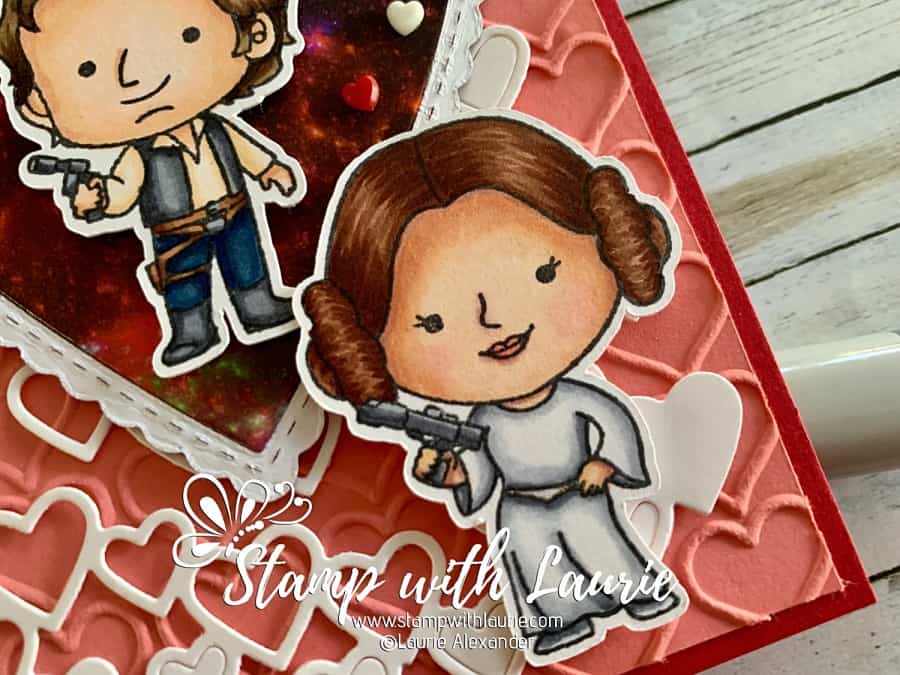
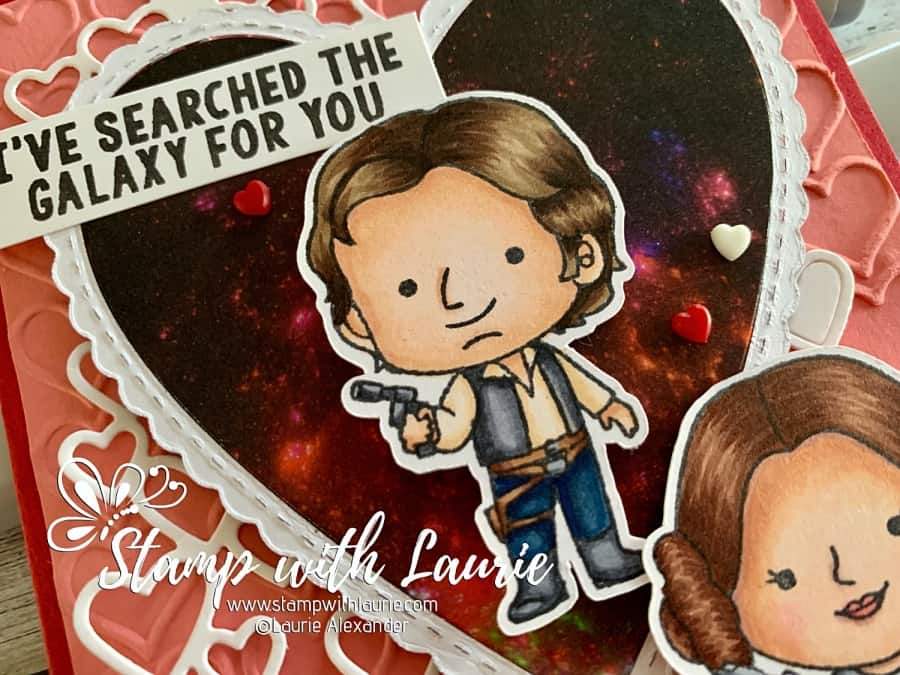
I thought a big heart with Hans Solo in it would be a fun Valentine card or even an anniversary card! So, I die cut a heart from the Whimsy Nebula paper that had reds in it. The white scallop border is just the back of the Nebula paper, but it added a nice contrast to the Nebula.

Since it was a Valentine card, you can never have too many hearts! So, I added die cut white hearts on top of embossed pink hearts for the background! The only embellishments were resin hearts on the nebula paper surrounding Hans Solo.

My Other Cards

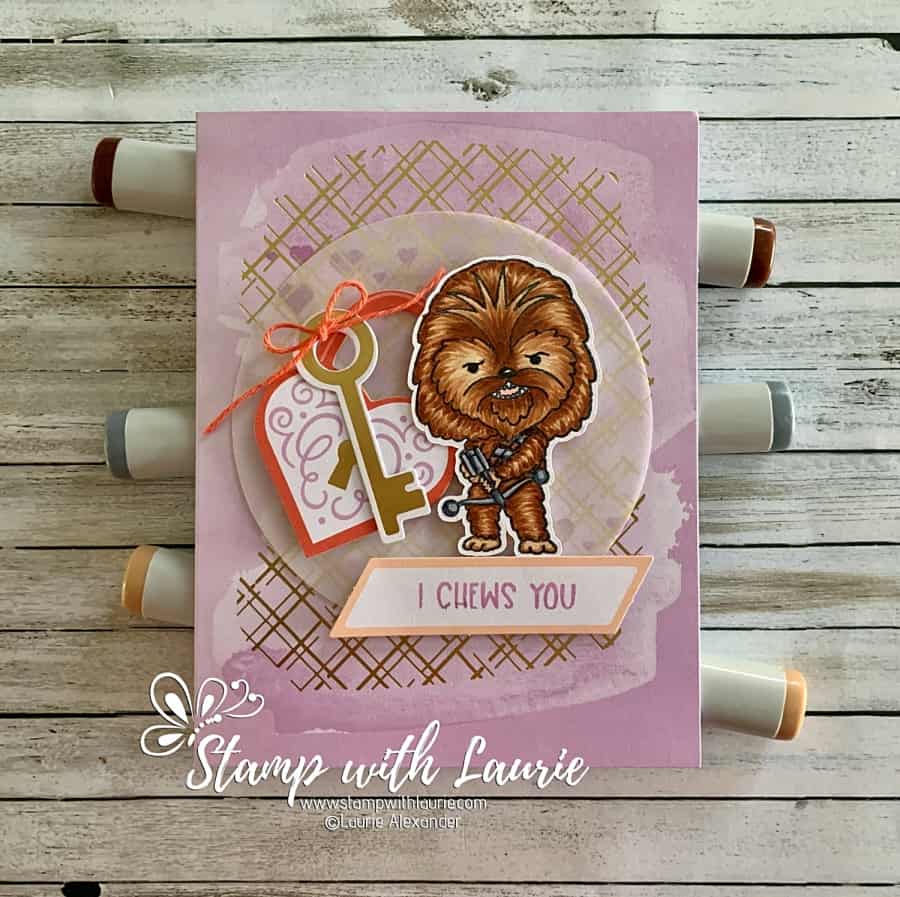
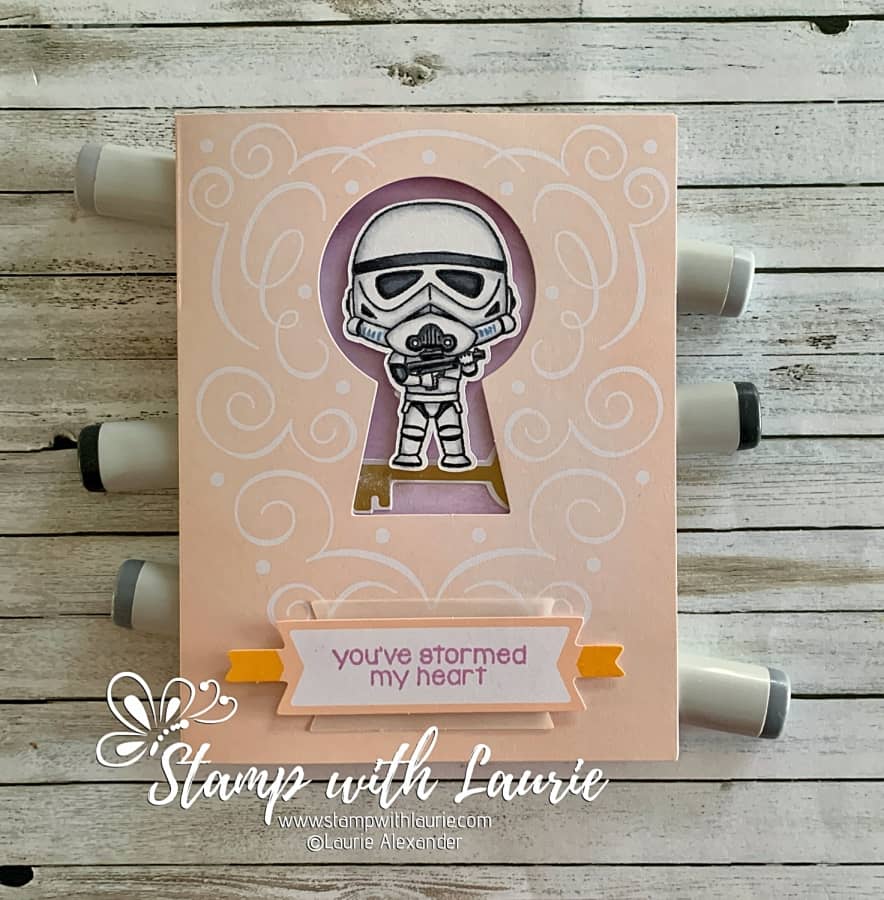
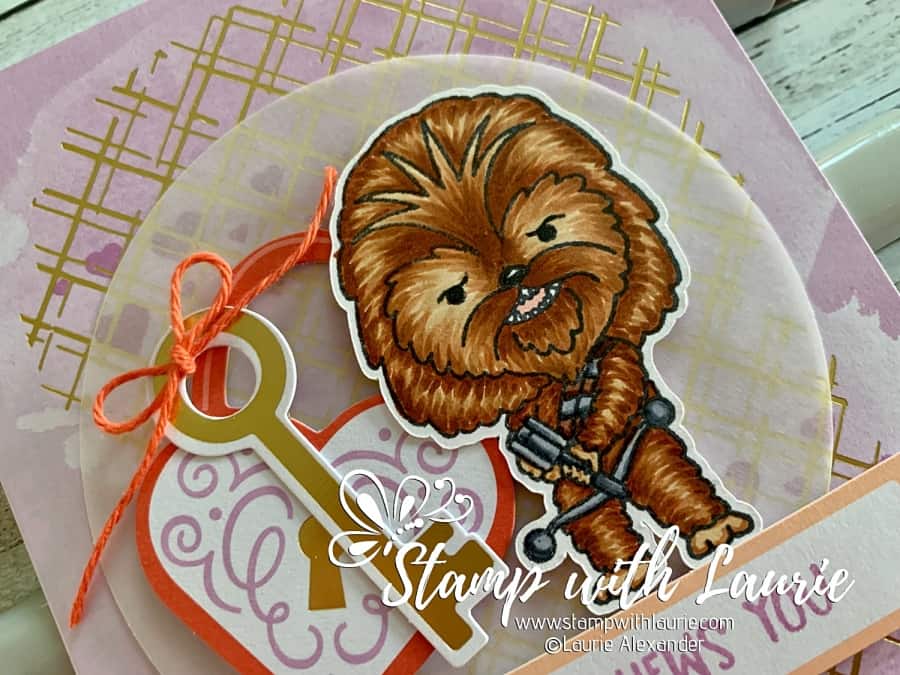
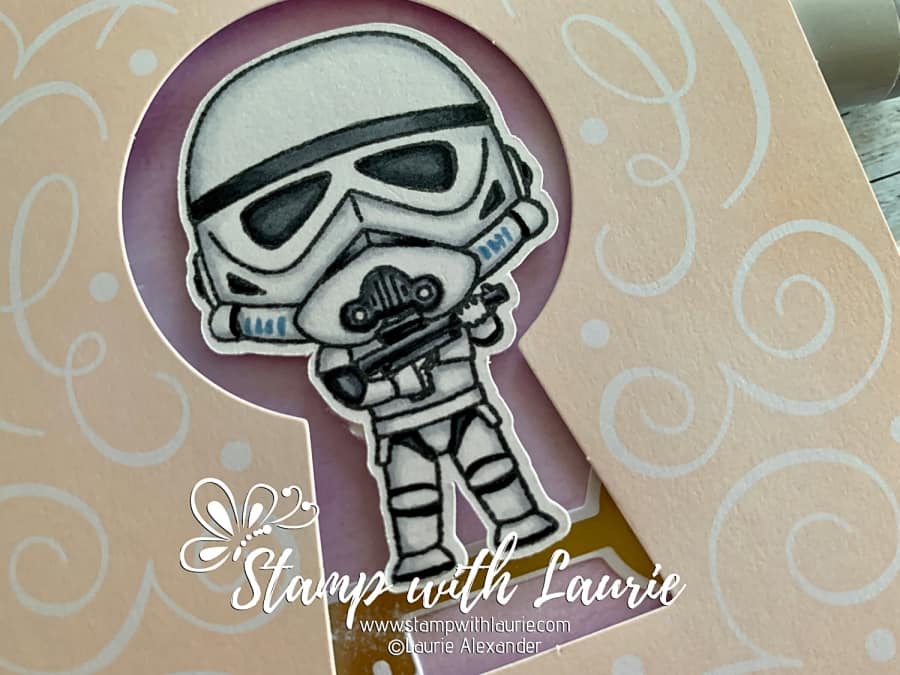
I also had so much fun colouring these stamps that I made two other cards using the Stampin’ Up! January Paper Pumpkin Key to my Heart. I had just made a few of the cards from the Paper Pumpkin Kit and it was sitting on my desk. So, it was easy enough to add the characters to the cards and use the sentiments from the Galactic Sidekicks Stamp Set.

Valentine Card with Chewie
Valentine Card with Storm Trooper

————————–

Copic Markers:

Leia
Skin: E000/E00/E21/E11/E04/R20
Hair: E29/E27/E25
Lips: R22
Dress: C3/C1/0
Gun: C7/C5/C3

Close Up of Leia
Close Up of Leia

Hans Solo

Skin: E000/E00/E21/E11/E04
Hair: E49/E47/E43/E42
Shirt: E53/E51/E50
Pants: B39/B99/B97/B37
Vest/Boots/Gun: C7/C5/C3
Holster: E27/E25/E23/C5/C3

Close Up of Hans Solo

Chewie

Fur: E39/E37/E35/E33/E31
Crossbolt: C7/C5/C3
Sash: E29/E25/E5/E3

Close Up of Chewie
Close Up of Chewie

Trooper

C9/C7/C5/C3/C1/0/B34

Close Up of Storm Trooper

————————–

Card Recipe for My Galaxy Part II Card:

Galactic Fighter Stamp Set and the Galactic Sidekicks Stamp Set, Kindred Stamps
Paper Basics – Stamper’s Select White Cardstock, Papertrey Ink
Tuxedo Black Memento Ink
Nebula 8.5” x 3.5” Designer Paper, Whimsy Stamps
Be Mine Stitched Framelits Dies, Stampin’ Up!
Detailed Hearts Dies, Stampin’ Up!
Happy Heart Textured Impressions Embossing Folder, Stampin’ Up!
Resin Hearts Embellishments, Stampin’ Up!
Silver Gelly Roll Pen, Sakura
Real Red, Flirty Flamingo, and Basic White Card Stock, Stampin’ Up!

Finished card sizes: 5 ½” x 4 ¼”

————————–

To view my other Kindred Stamps cards, please click here.

To view my Star Wars platform card, please click here or on the photo.

A 3D card that has a droid and man and woman
My Galaxy Platform Card

Hope you like My Galaxy Part II Card using Galactic Fighter and the Galactic Sidekicks Stamp Sets by Kindred Stamps!

Thank you for stopping by!

Hugs,
Laurie
My Galaxy Platform Card 

A 3D card that has a droid and man and woman
My Galaxy Platform Card

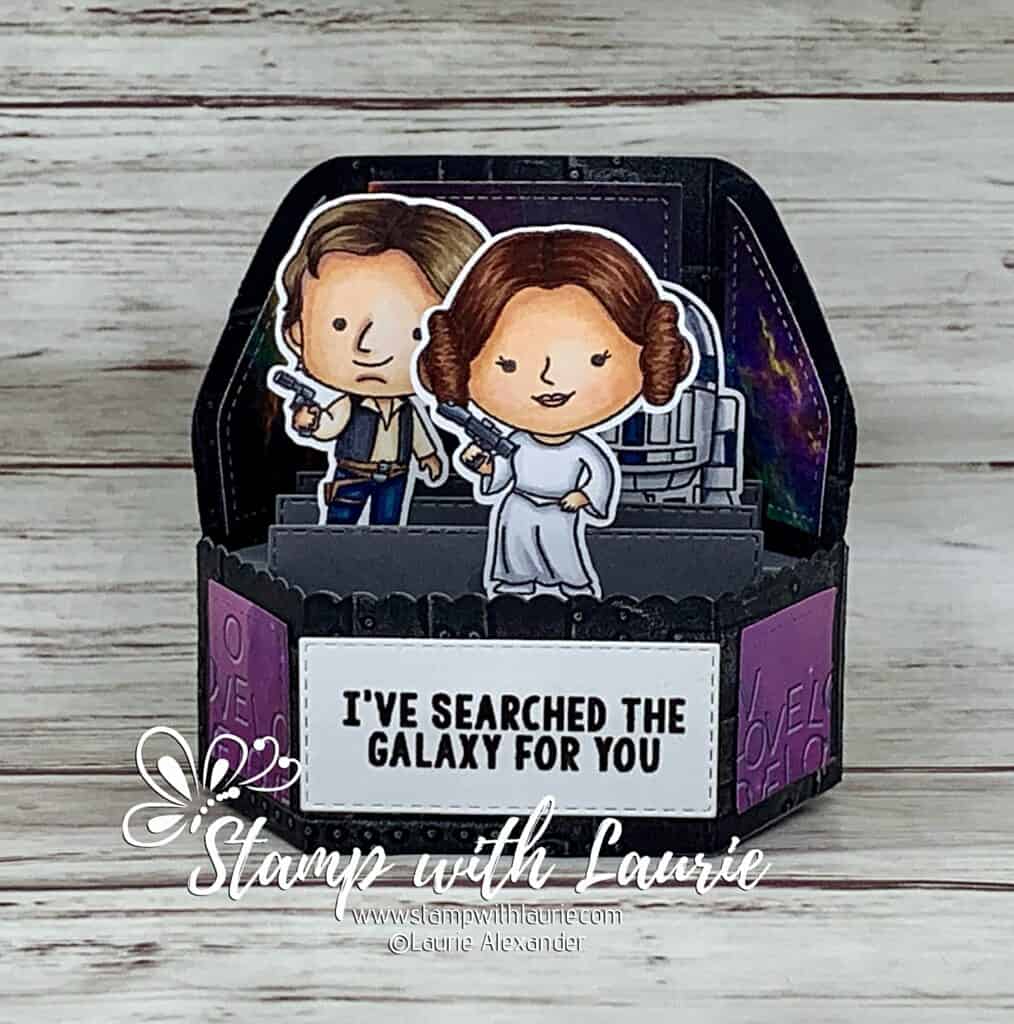
Hello Crafty Friends! It’s Laurie here to share My Galaxy Platform Card using the Galactic Fighter and the Galactic Sidekicks Stamp Sets by Kindred Stamps!

A friend of mine asked for me to create a custom Star Wars Valentine card for her Hubby who is a huge Star Wars fan! As you might know, I have many different Star Wars stamps, but I decided to use Kindred Stamps since I just received them recently and their stamps are the right size for platform cards!

I had fun making another platform card for my brother’s birthday (I will link to it at the end of this post) that I decided to make one as an option from which my friend could choose. I also made a regular A2 card as another possibility and will post that another day.

The Details of My Card

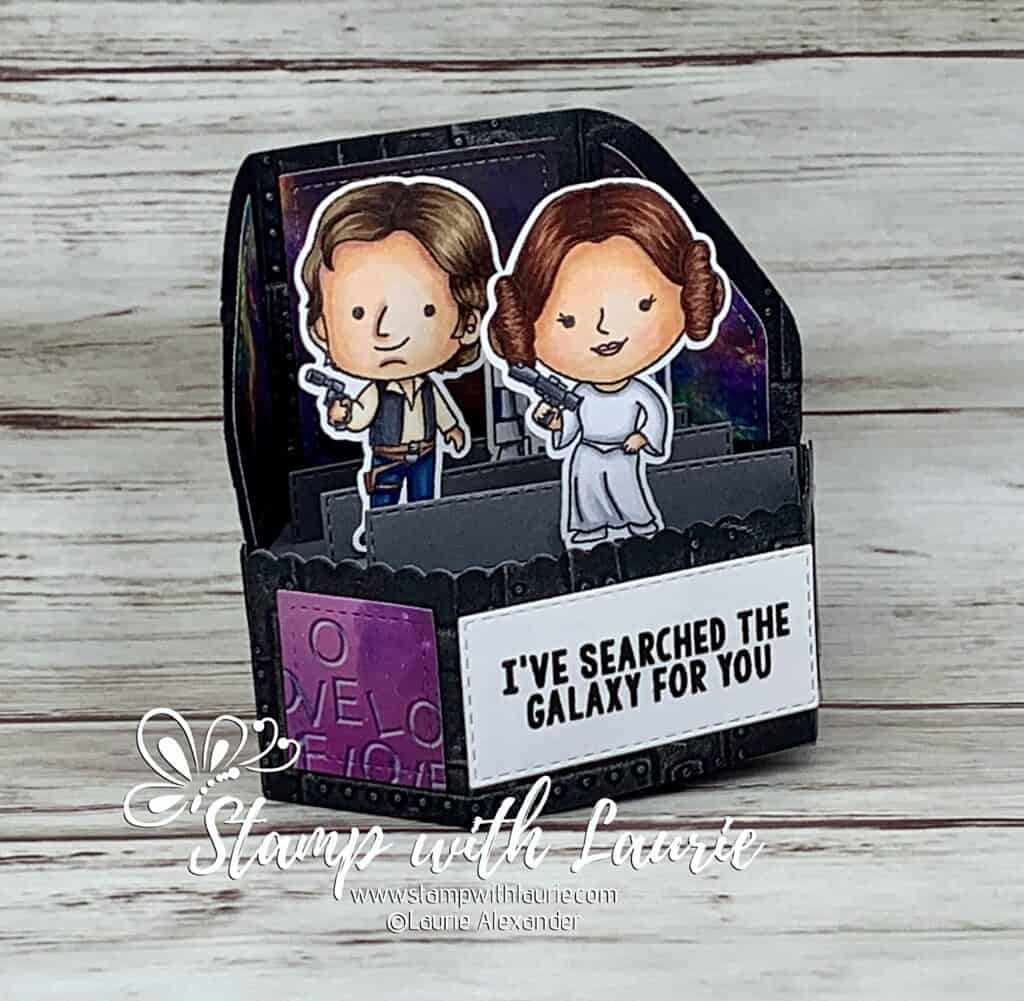
My friend asked for Leia, Hans Solo and R2D2. So, I coloured them with my Copic markers in their traditional colours. When I showed her the stamp set, she loved the sentiment “I’ve searched the galaxy for you”.

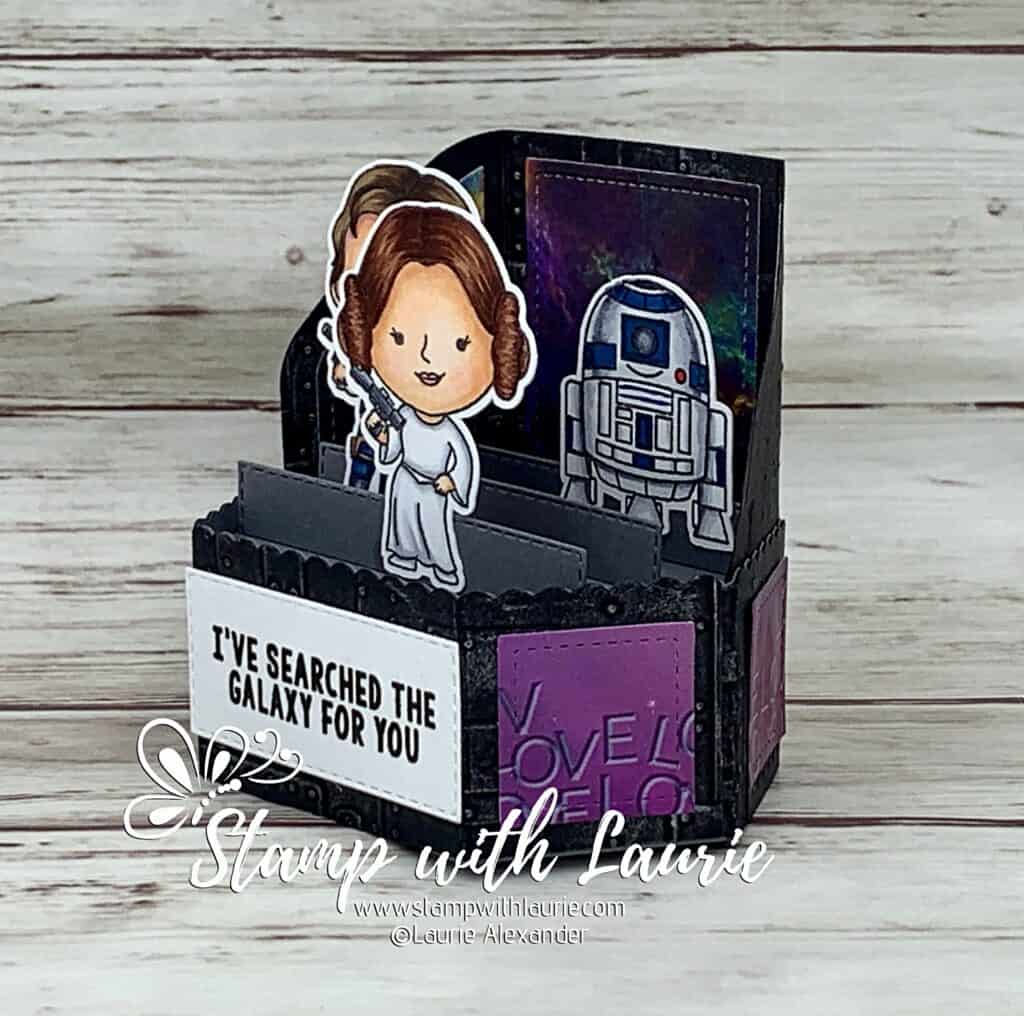
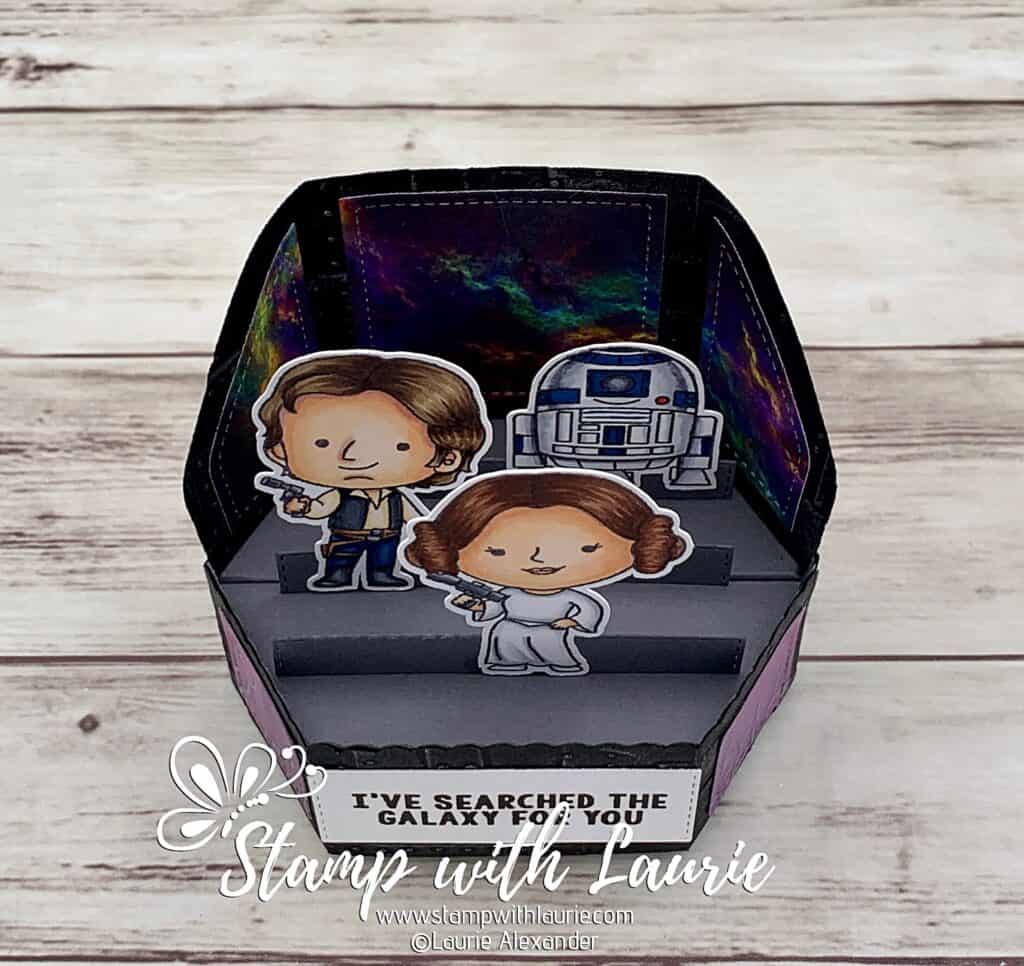
I thought it would be fun for the platform to represent the Millennium Falcon’s bridge. So, I used the Foundry Embossing Folder to emboss the Basic Black die cut that wrapped around the card. Next, I rubbed Brushed Iron Wax to make all the details stand out. Perfect for a look of metal that had been cobbled together since the ship had been battered together so many times. Lol! I made the base Basic Gray like a metal floor and used the stitched rectangle die from the Add On to create stability for the pop-up characters.

Since this was supposed to be the Millennium Falcon’s bridge, I used a pretty Nebula paper from Whimsy Stamps for the windows behind R2D2.

The Stamp AnnieThing Galactic paper had the perfect Valentine theme with the word LOVE against a galaxy of twinkling stars. And it matched my Nebula paper!

I added a few red resin hearts to the sentiment but forgot to take another photo. So, you will just have to imagine that! Lol!

————————–

Copic Markers:

Leia
Skin: E000/E00/E21/E11/E04/R20
Hair: E29/E27/E25
Lips: R22
Dress: C3/C1/0
Gun: C7/C5/C3

Side View of Leia and Hans Solo

Hans Solo
Skin: E000/E00/E21/E11/E04
Hair: E49/E47/E43/E42
Shirt: E53/E51/E50
Pants: B39/B99/B97/B37
Vest/Boots/Gun: C7/C5/C3
Holster: E27/E25/E23/C5/C3

Side View of Woman and droid
Side View of Leia and R2D2

R2D2
B99/B37/C7/C5/C3/C1/R27

————————–

Card Recipe for My Galaxy Platform Card:

Galactic Fighter Stamp Set and the Galactic Sidekicks Stamp Set, Kindred Stamps
Paper Basics – Stamper’s Select White Cardstock, Papertrey Ink
Tuxedo Black Memento Ink
Galactic Love 6” x 6” Paper Pad, Stamp AnnieThing
Nebula 8.5” x 3.5” Designer Paper, Whimsy Stamps
Platform Pop-Up Dies, Lawn Fawn
Platform Pop-Up Add-On Dies, Lawn Fawn
3-D Texture Fades Embossing Folder – Foundry by Tim Holtz, Sizzix
Brushed Iron Metallique Wax, Art Alchemy
Resin Hearts Embellishments, Stampin’ Up!
Basic Black, and Basic Gray Card Stock, Stampin’ Up!

Finished card size: 5 ¼” x 3-5/8”

Top View Of Platform Card

————————–

To view my other Kindred Stamps cards, please click here.

To view my other platform card, please click here or on the photo.

A pop-up card with Super Mario Brothers
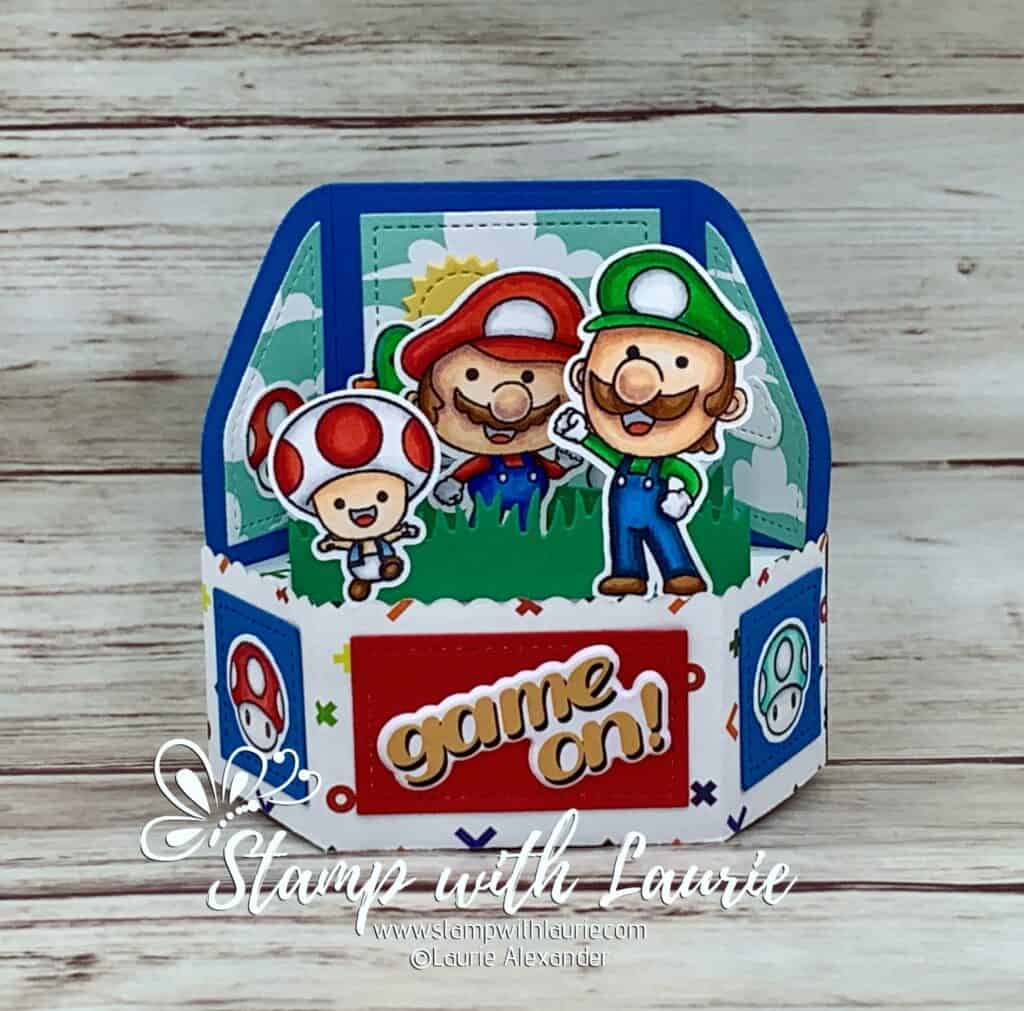
Game on Platform Card

Hope you like My Galaxy Platform Card using Galactic Fighter and the Galactic Sidekicks Stamp Sets by Kindred Stamps!

Thank you for stopping by!

Hugs,
Laurie
Game on Platform Card 

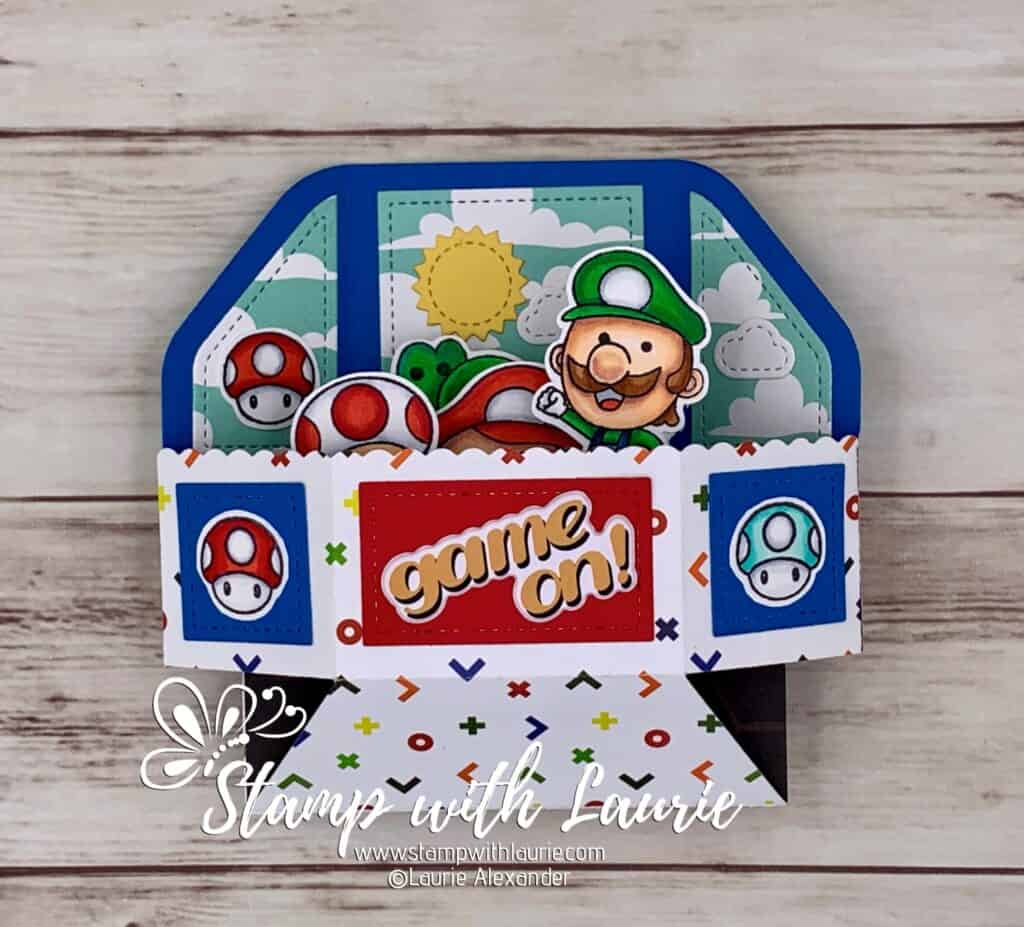
A pop-up card with Super Mario Brothers
Game on Platform Card

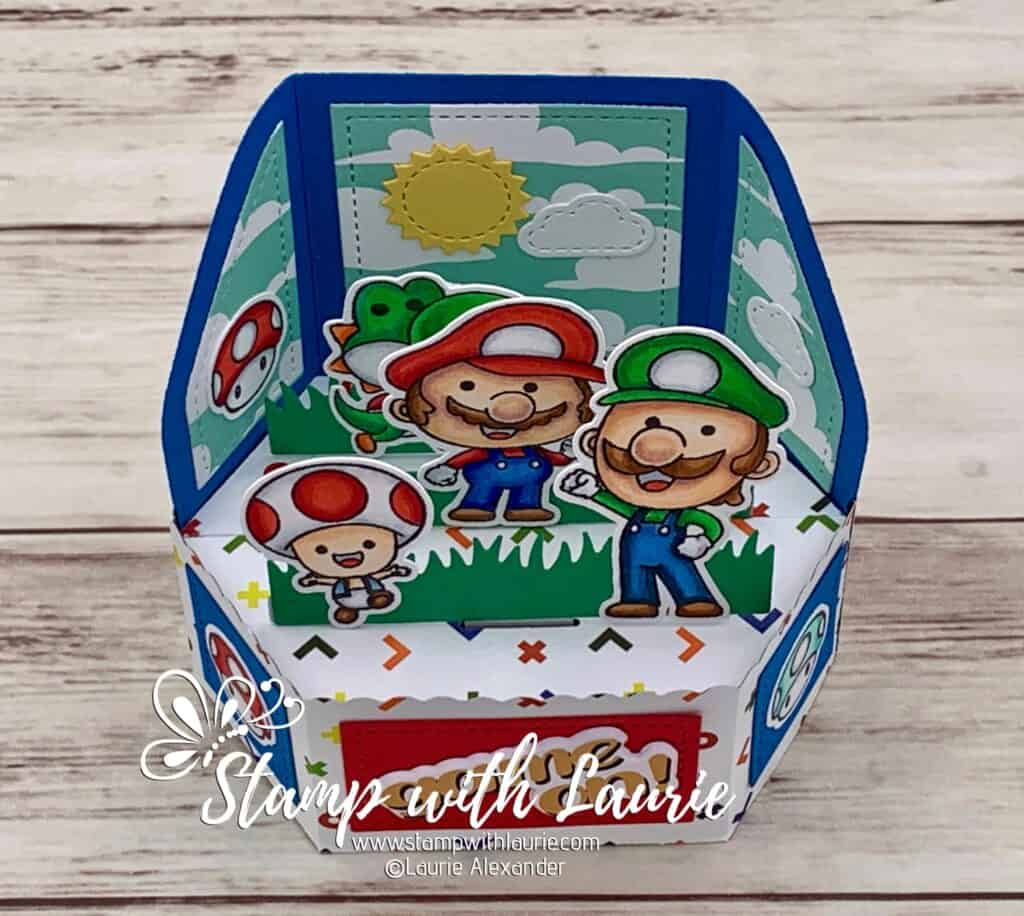
Hello Crafty Friends! It’s Laurie here to share my Game on Platform Card using the Game on Limited Edition Box by Kindred Stamps!

One of my brother’s recently had a birthday and he loved playing Super Mario Brothers when he was growing up. I also bought the Lawn Fawn Platform Pop-Up Dies and the Platform Pop-Up Add-On Dies recently. So, I thought a platform card using his favourite characters would be a fun card to send him!

The Details of My Card

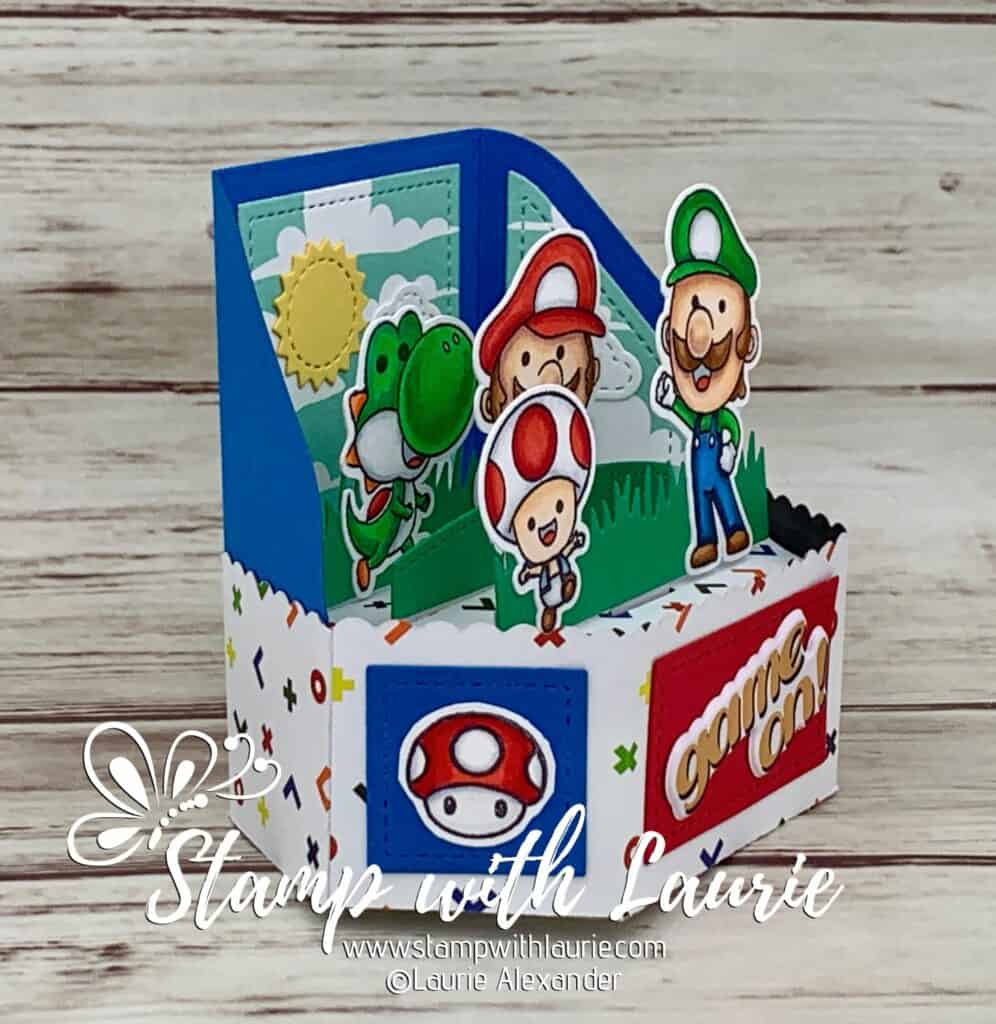
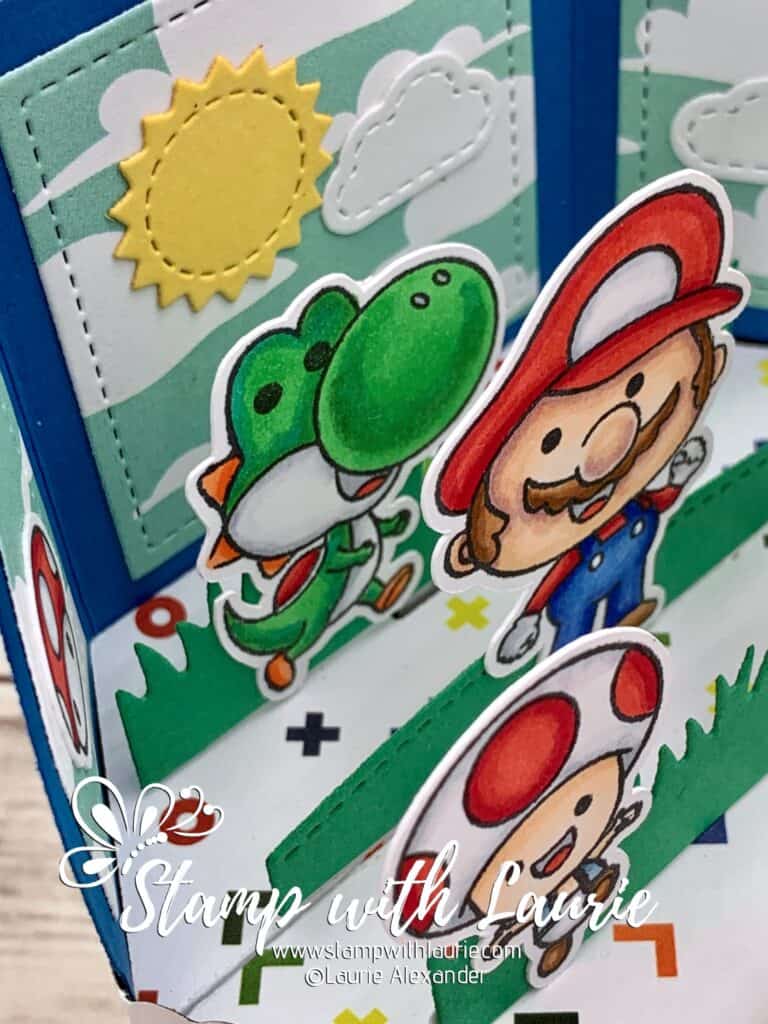
I coloured several characters with my Copic markers in the bright primary colours from the game. Then, I assembled the platform dies and add-on dies to create my scene. The dies come with everything you need to create a scene. I used the grass and hill dies from the platform and added the sun and clouds dies from the Add-on. Once my platform was completed, I just had to add my characters.

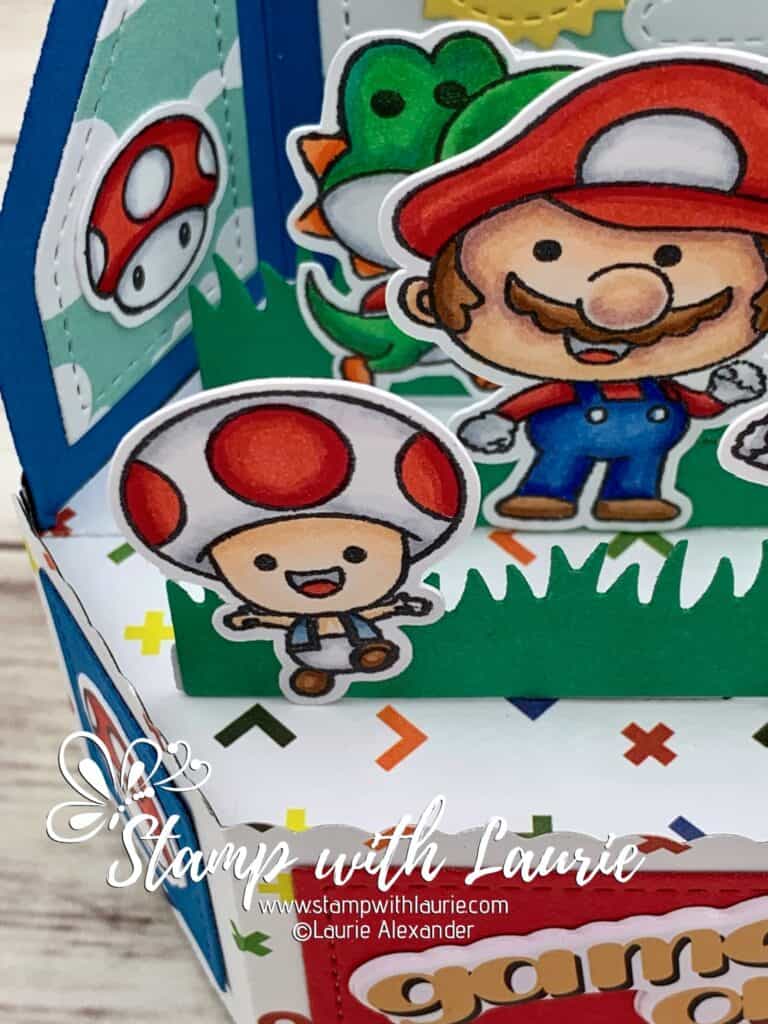
Side View of Platform Card with Super Mario Brothers
Side View of Platform Card

The only embellishment I used was a “game on” puffy sticker on the front.

I love how the platform folds down for mailing and fits perfectly in a 5 ½” x 5 ½” envelope!

————————–

Copic Markers:

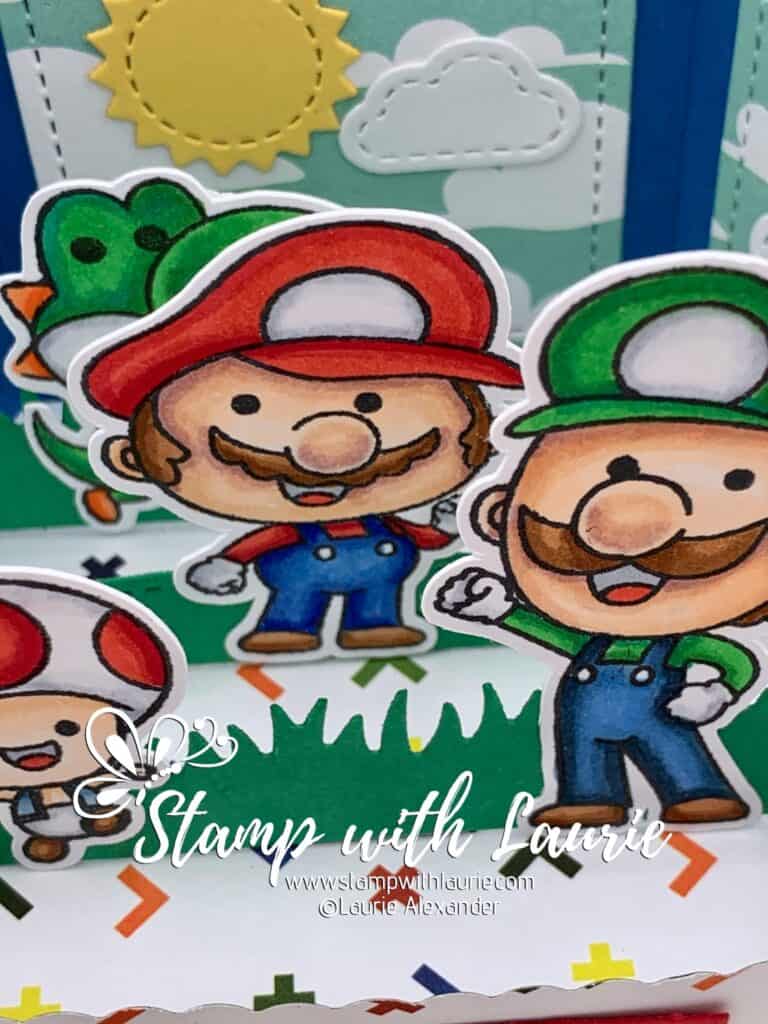
Mario
Skin: E000/E00/E21/E11/E04
Hair: E37/E35/E33
Hat/Top: R29/R27/R24
Pants: B29/B26/B24
Shoes: E37/E35/E33
Whites: C3/C1/0

Close Up of Mario
Close Up of Mario

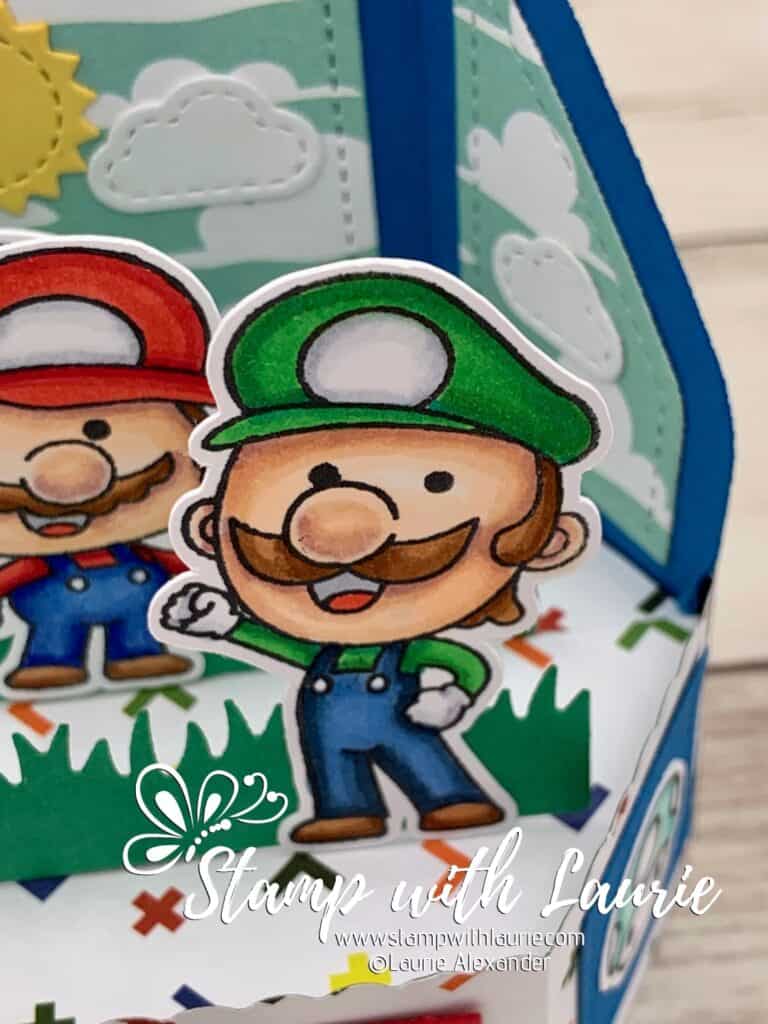
Luigi
Skin: E000/E00/E21/E11/E04
Hair: E347/E35/E33
Hat/Top: G07/YG09/G16
Pants: B29/B26/B24
Shoes: E37/E35/E33
Whites: C3/C1/0

Close Up of Luigi
Close Up of Luigi

Toad
Skin: E000/E00/E21
Hat: R29/R27/R24/C3/C1/0
Pants: C3/C1/0
Top: B95/B93/B91
Tongue/Mouth: R27/C3
Shoes: E37/E35/E33

Close Up of Toad
Close Up of Toad

Yoshi
Greens: G07/YG09/G16
Whites: C3/C1/0
Oranges: YR07/YR02/YR00
Reds: R29/R24
Tongue/Mouth: R27/C3

Close Up of Yoshi
Close Up of Yoshi

Mushrooms
Blue/Greens: BG13/BG11/BG10
Reds: R29/R24/R24
Whites: C3/C1/0

Platform Folded Flat

————————–

Card Recipe for My Game on Platform Card:

Game on Limited Edition Box, Kindred Stamps
Paper Basics – Stamper’s Select White Cardstock, Papertrey Ink
Tuxedo Black Memento Ink
Game Over 12” x 12” Paper, Photo Play
Myths & Magic Designer Series Paper, Stampin’ Up!
Platform Pop-Up Dies, Lawn Fawn
Platform Pop-Up Add-On Dies, Lawn Fawn
Family Fun Puffy Stickers, Simple Stories
Pacific Point, Real Red and Cucumber Crush Card Stock, Stampin’ Up!

Finished card size: 5 ¼” x 3-5/8”

Top View of Platform

————————–

To view my other Kindred Stamps cards, please click here.

Hope you like my Game on Platform Card the Game on Limited Edition Box by Kindred Stamps!

Thank you for stopping by!

Hugs,
Laurie
Love You More Than Lasagna

A birthday card with a cat  wishing a dog Happy Birthday.
Love You More Than Lasagna Card

Hello Crafty Friends! It’s Laurie here to share my Love You More Than Lasagna Card! My brother recently had a birthday, and I decided to make a slimline card for him using the Friends Furever Stamp Set by Kindred Stamps!

When he was growing up, he loved anything Garfield! He even had a Garfield stuffy that he carried everywhere with him! I also think he loved lasagna more than Garfield! Lol! The inside sentiment of my card says, “I love you more than Lasagna!”.

The Details of My Card

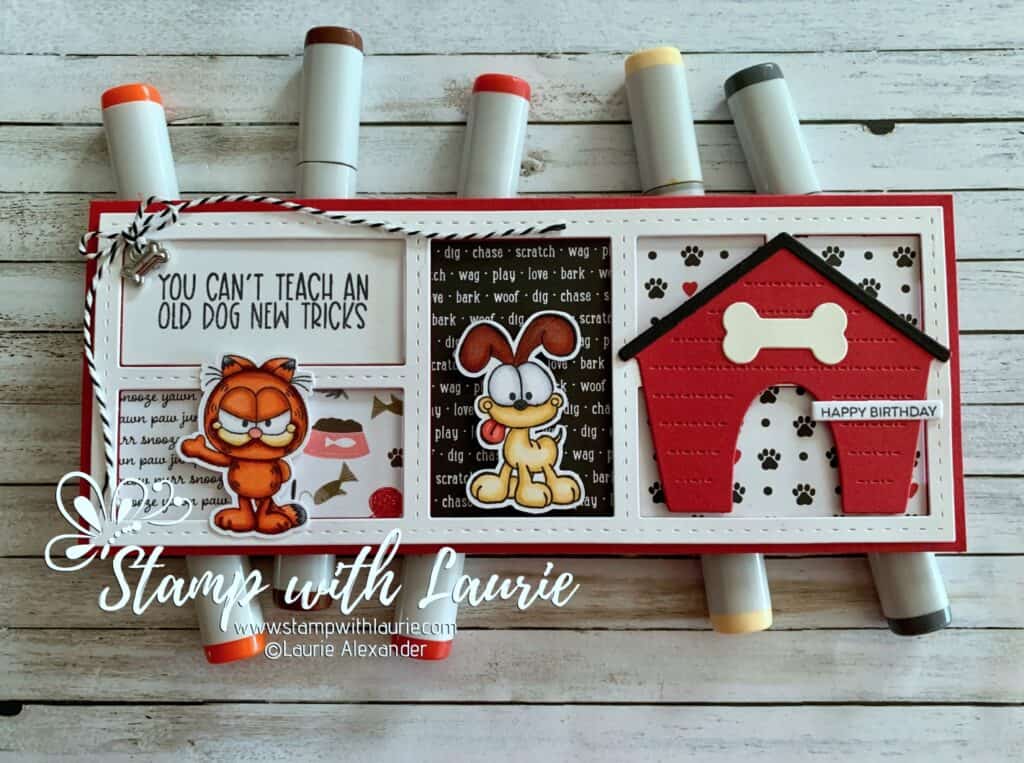
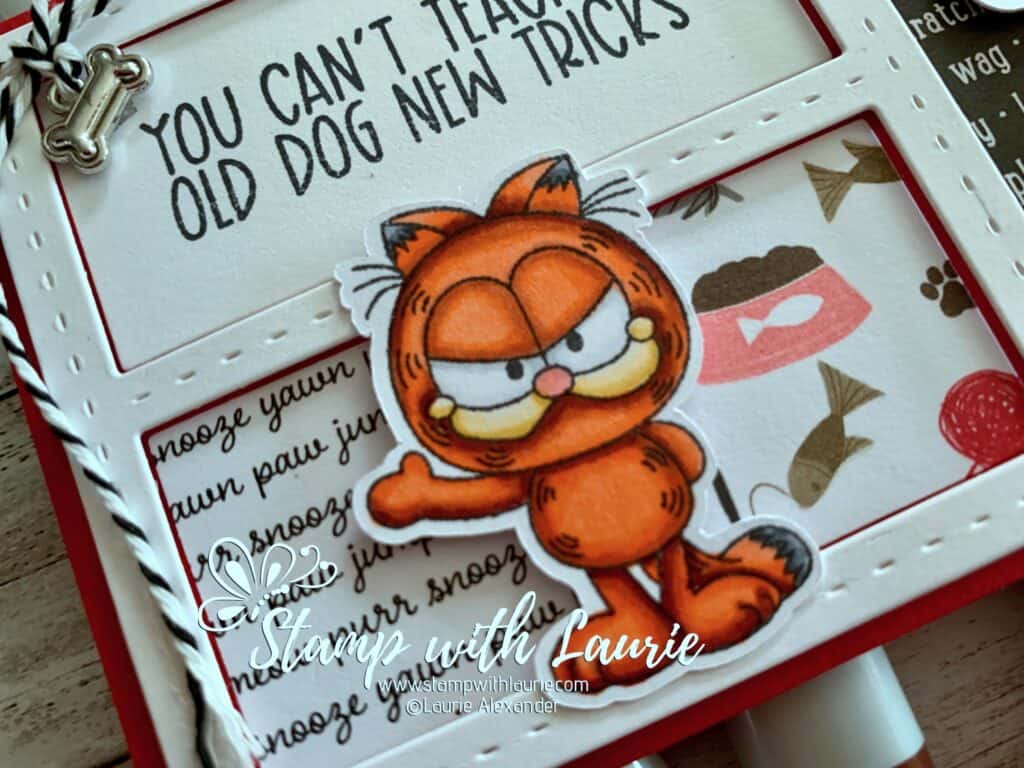
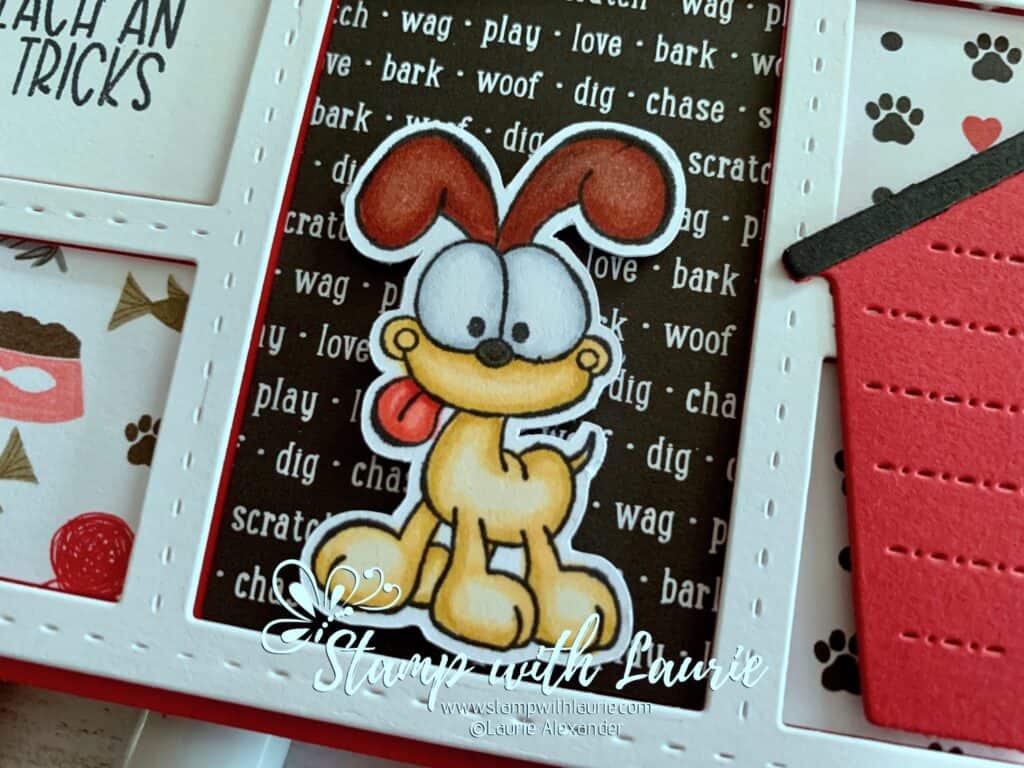
I coloured Garfield and Odie with my Copic markers just like in the comics! In fact, I decided to use the Slimline Windows Dies for my card since it looked like a comic strip. I placed Garfield in the windows that have cat DSP behind him, and Odie has dog DSP behind him. The doghouse dies were from a limited-edition Kindred Stamps box. The doghouse fitted perfectly on my slimline card! 

The sentiment “You can’t teach an old dog new tricks” was from the stamp set. My brother would get that kind of humour coming from Garfield regarding Odie. Since this was a birthday card, I added the Happy Birthday sentiment to the doghouse.

The only embellishments were the dog bone trinket and Baker’s Twine. I kept the Baker’s Twine long and glued it strategically in certain places to frame the corner and help the eye flow to the other windows.

————————–

Copic Markers:

Garfield
Fur: E18/E15/YR07/YR02
Face: Y26/Y21/YR30
Tail/Ears: C7/C3
Nose: R22
Eyes: C3/C1/0

Close Up of cat
Close Up of Garfield

Odie
Fur: Y26/Y21/YR30
Ears: E19/E18/E7
Tongue: R27/R24/R22
Eyes: C3/C1/0

Close Up of Dog
Close Up of Odie

————————–

Card Recipe for My Love You More Than Lasagna Card:

Friends Furever Stamp Set, Kindred Stamps
Paper Basics – Stamper’s Select White Cardstock, Papertrey Ink
Tuxedo Black Memento Ink
Playful Pets Designer Series Paper, Stampin’ Up!
Slimline Windows Dies, Whimsy Stamps
Doghouse Die, The Great Limited-Edition Box, Kindred Stamps
Sentiment Strips Etched Metal Dies, Photo Play
Wish Photopolymer Stamps, Photo Play
Playful Pets Trinkets, Stampin’ Up!
White/Black Baker’s twine, Stampin’ Up!
Cherry Cobbler, Basic White, Basic Black and
Very Vanilla Card Stock, Stampin’ Up!

Finished card size: 8.5” x 3.5”

————————–

To view my other Kindred Stamps cards, please click here.

Hope you like my card using Friends Furever Stamp Set by Kindred Stamps!

Thank you for stopping by!

Hugs,
Laurie
Birthday…Happy Birthday Card

A file folder card
Birthday…Happy Birthday Card

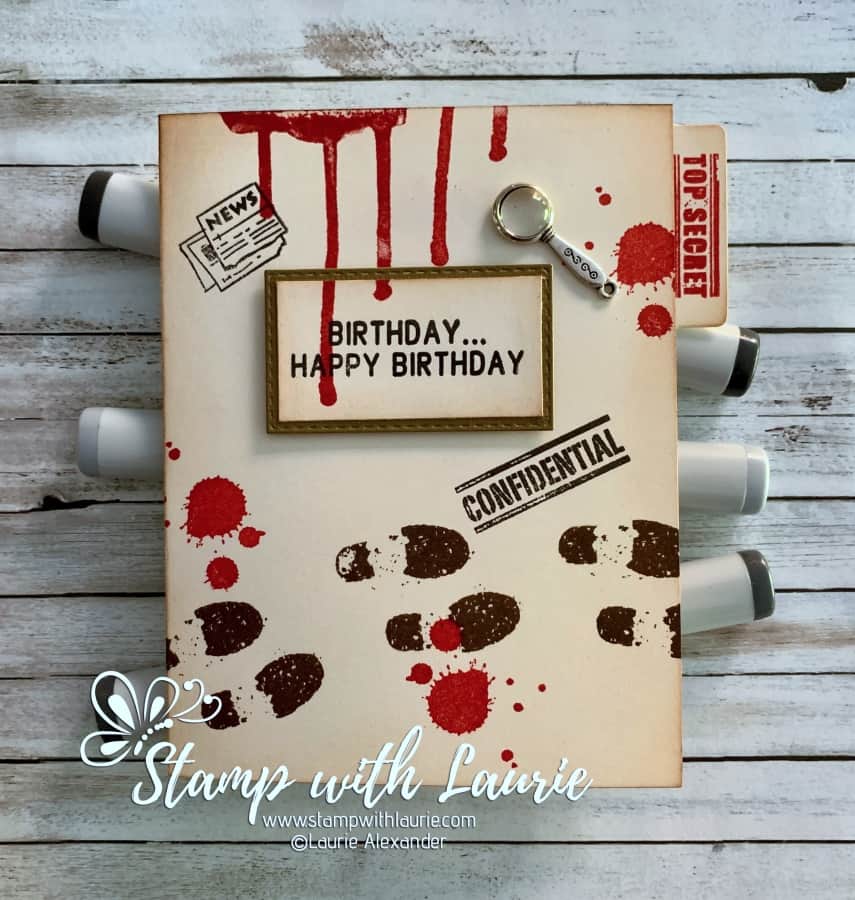
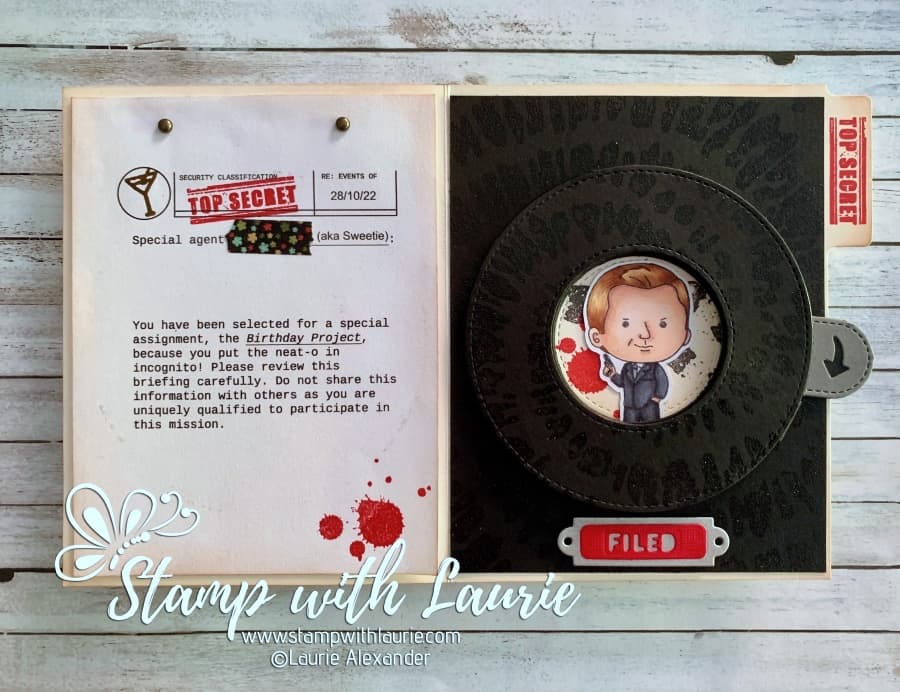
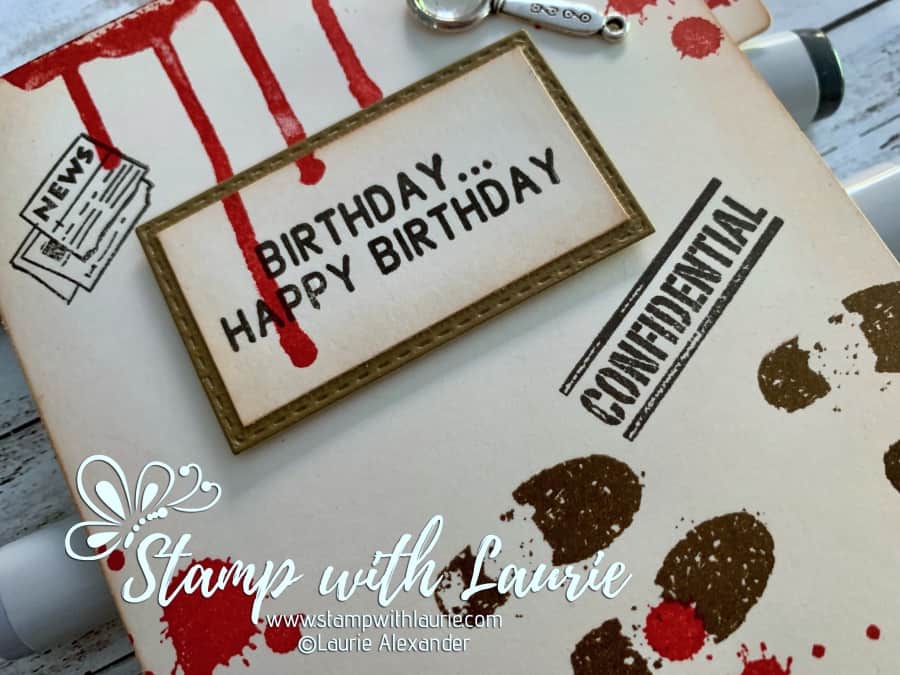
Hello Crafty Friends! It’s Laurie here to share my Birthday…Happy Birthday Card using Secret Agent by Kindred Stamps! My Hubby is a big fan of the James Bond movies and when I saw this stamp set, I knew it would be hit for his birthday card!

The Kindred Stamps Design Team had several inspirational cards that inspired me to create my own version of a file folder with the Magic Iris. I knew that I wanted to use both elements on my card.

The Details of My Card

I had a lot of fun creating my file folder and it had to be a certain size to fit the Magic Iris. So, it is a little wider than a regular A2 card base since the folder tab sticks out. The File Folder Edgelit Dies by Stampin’ Up! are retired, but I have made a file folder with my Envelope Punch Board in the past as well. There is also a file folder in the Specimens Edgelit Dies, but I needed a larger one to fit the iris.

Close Up of Sentiment on Card

For the front of the folder, I decided to make it look like it’s been through the wars with blood running down the front (just like the opening of the movies! Lol!), blood splatter, mysterious footprints, and a few spy paraphernalia items! I even had the blood run onto the sentiment piece. The “Confidential” and “Top Secret” stamps come with the set and were perfect for my theme! To make it even more rough, I blended some Vintage Photo Ink on the edges of the folder and the sentiment. 

Inside My Card

Inside of Card
Inside of Card

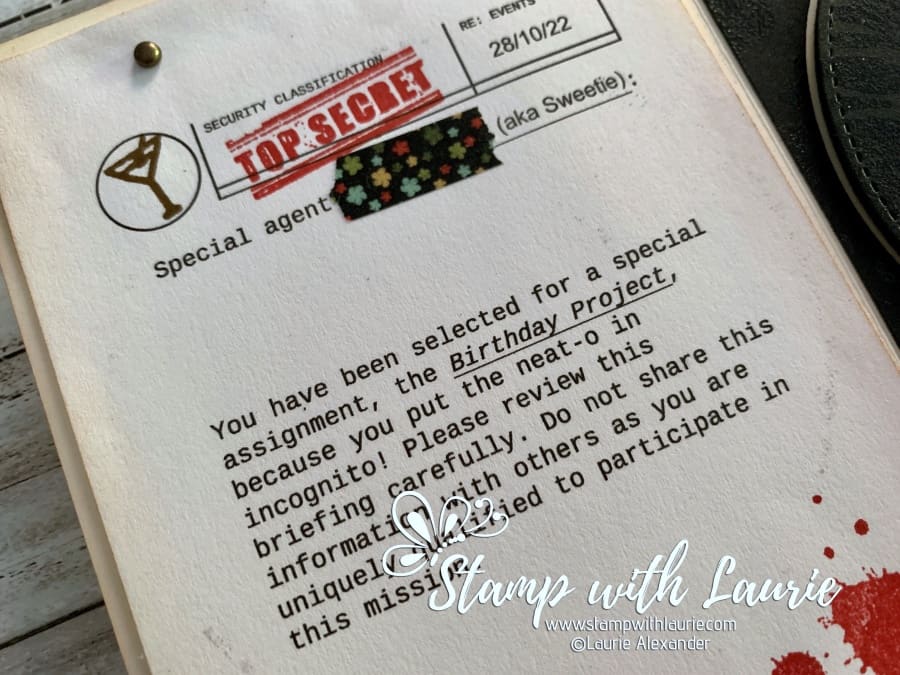
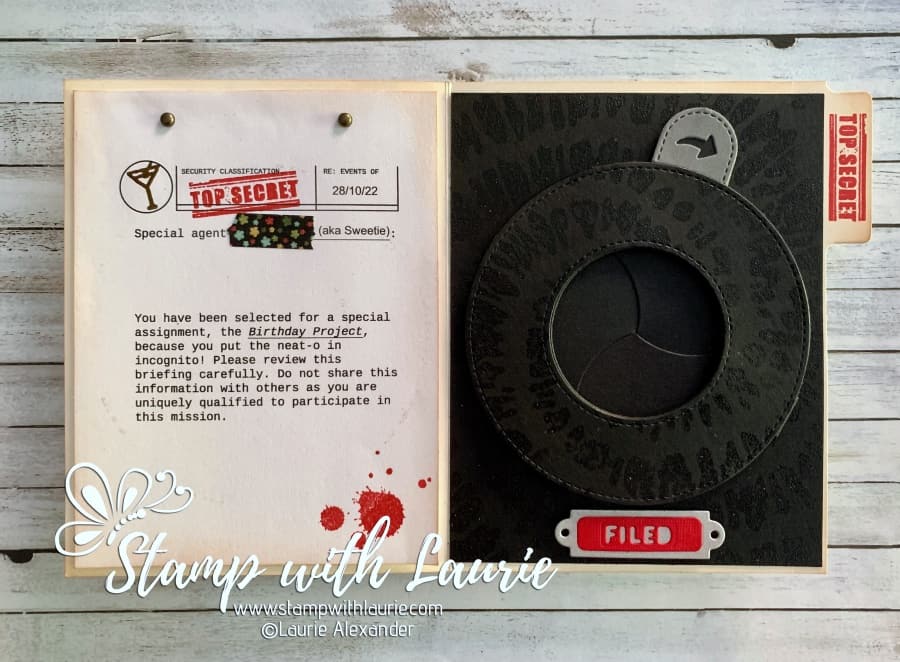
Amanda Stevens, a Design Team Member for Kindred Stamps, created a file folder PDF that you can download for both birthday and Father’s Day. Here is the link to her YouTube channel that lists the files. I used the birthday mission part for the inside of my card. Love that you can customize it to suit your needs! I added My Hubby’s birthday date and his “also known as” (aka) handle “Sweetie” to the file. Lol! The piece of washi tape was his secret agent’s name that had been “redacted”! The stamp set even comes with a martini glass and I couldn’t resist using it! Again, I distressed the brief with ink and add some blood splatters before gluing it at the top and adding some metallic dots like the brief was clipped to the folder.

Close Up of Birthday Brief

For the other side, I decided to use the Magic Iris to mimic the opening of the movies when Bond enters. I embossed in black the Spiral Dye Stamp Set onto the black cardstock from which I die cut the front of the Iris. The part that wasn’t used for the iris, I glued down to continue the spiral on the page. I had die cut the “Filed” tab and had planned to add it to the front of the folder, but in the end, I placed it under the Iris to give the black a bit of colour.

Magic Iris Open Showing Secret Agent

————————–

Copic Markers:

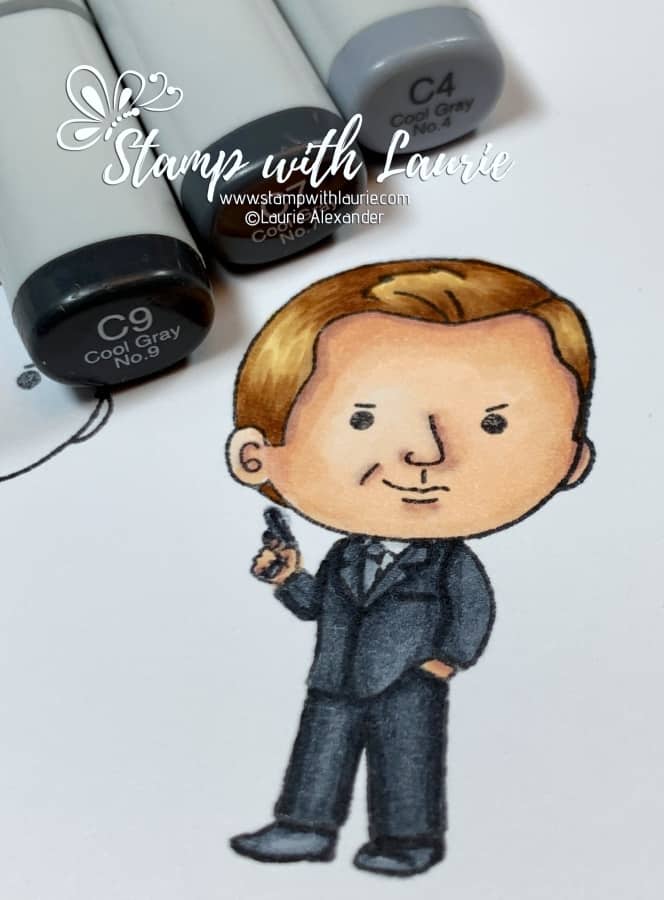
Skin: E04/E11/E21/E00/E000
Hair: YR31/E37/E35/E33
Suit: C9/C7/C4
Shoes: C7/C6/C4
Tie/Gun: C3/C1
Shirt: C1/0

Close Up of Secret Agent

————————–

Card Recipe for My Birthday…Happy Birthday Card:

Secret Agent, Kindred Stamps
Paper Basics – Stamper’s Select White Cardstock, Papertrey Ink
Galvanized Metallic Sheet, Stampin’ Up!
Magic Iris Dies, Lawn Fawn
File Folder Edgelit Dies, Stampin’ Up!
Specimen Thinlits Dies, Sizzix
Spiral Dye Stamp Set, Stampin’ Up!
Gorgeous Grunge Stamp Set, Stampin’ Up!
Ghoulish Grunge Stamp Set, Stampin’ Up!
Daring Adventure Stamp Set, Stampin’ Up!
It’s a Mystery!, Kraftin’ Kimmie Stamps
Rustic Metallic Adhesive Dots, Stampin’ Up!
Magnifying glass charms antique silver tone, Nicole de Bruin Charms
Washi Tape, Stampin’ Up!
Real Red Classic Ink Pad, Stampin’ Up!
Early Espresso Classic Ink Pad, Stampin’ Up!
VersaFine, Onyx Black, Tsukineko
Tim Holtz Vintage Photo Distress Ink Pad, Ranger
Blending Brushes, Stampin’ Up!
Very Vanilla, Basic Black, Basic Gray
and Real Red, Card Stock Stampin’ Up!

Finished card size: 4.5” x 5.5”

Birthday…Happy Birthday Card in Action

————————–

For more of my Kindred Stamps cards, please click here.

Hope you like my Birthday…Happy Birthday Card using the
Secret Agent by Kindred Stamps!

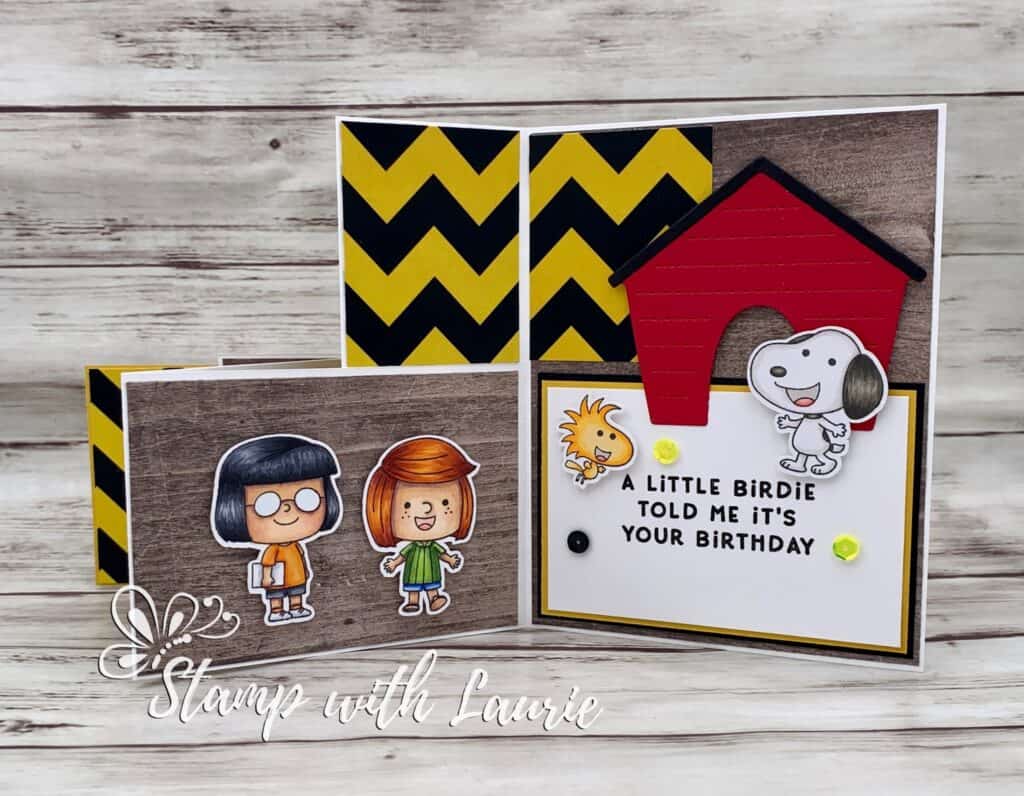
Good Grief! It’s Your Birthday!

Charlie Brown wishing a Happy Birthday
Good Grief! It’s Your Birthday!

Hello Crafty Friends! It’s Laurie here to share my Good Grief! It’s Your Birthday Card using The Great Box Limited Edition Box by Kindred Stamps! It’s my brother’s birthday today. I remember us watching the antics that the Charlie Brown Gang got up to in the cartoons. 

The Details of My Card

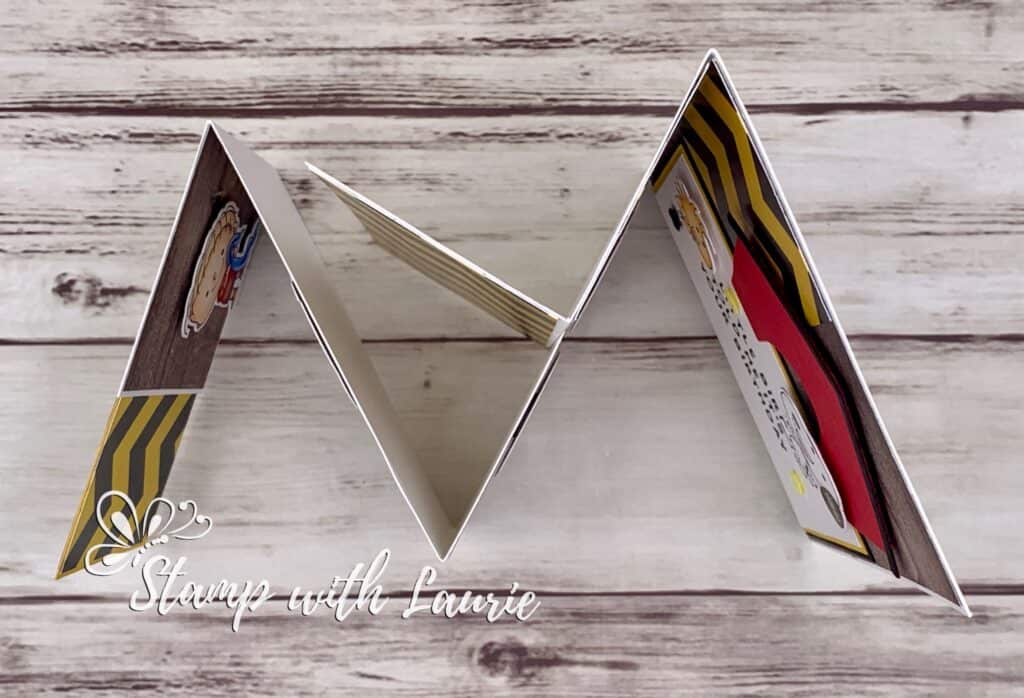
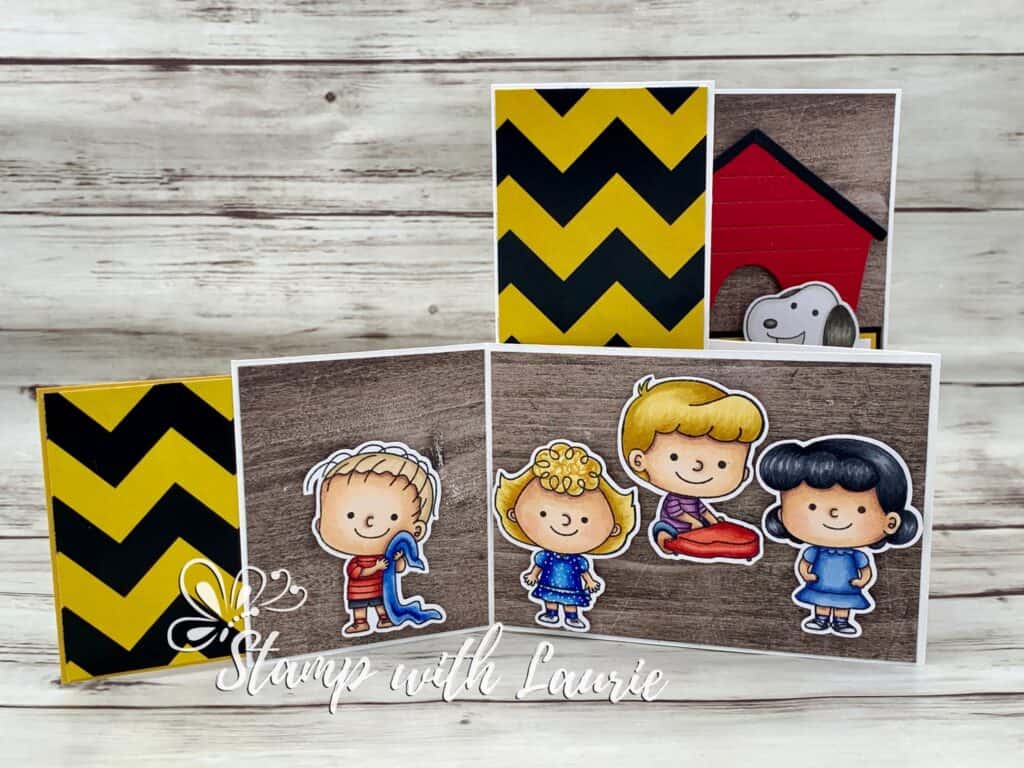
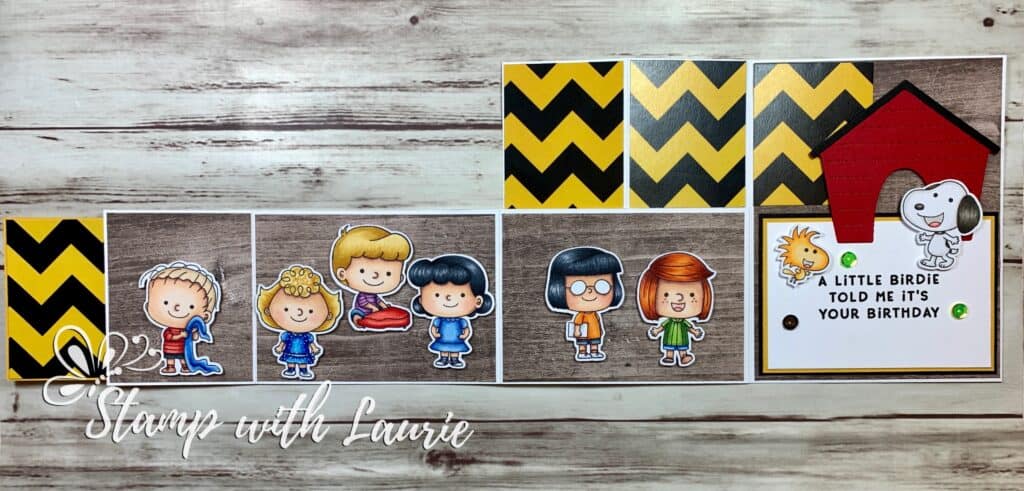
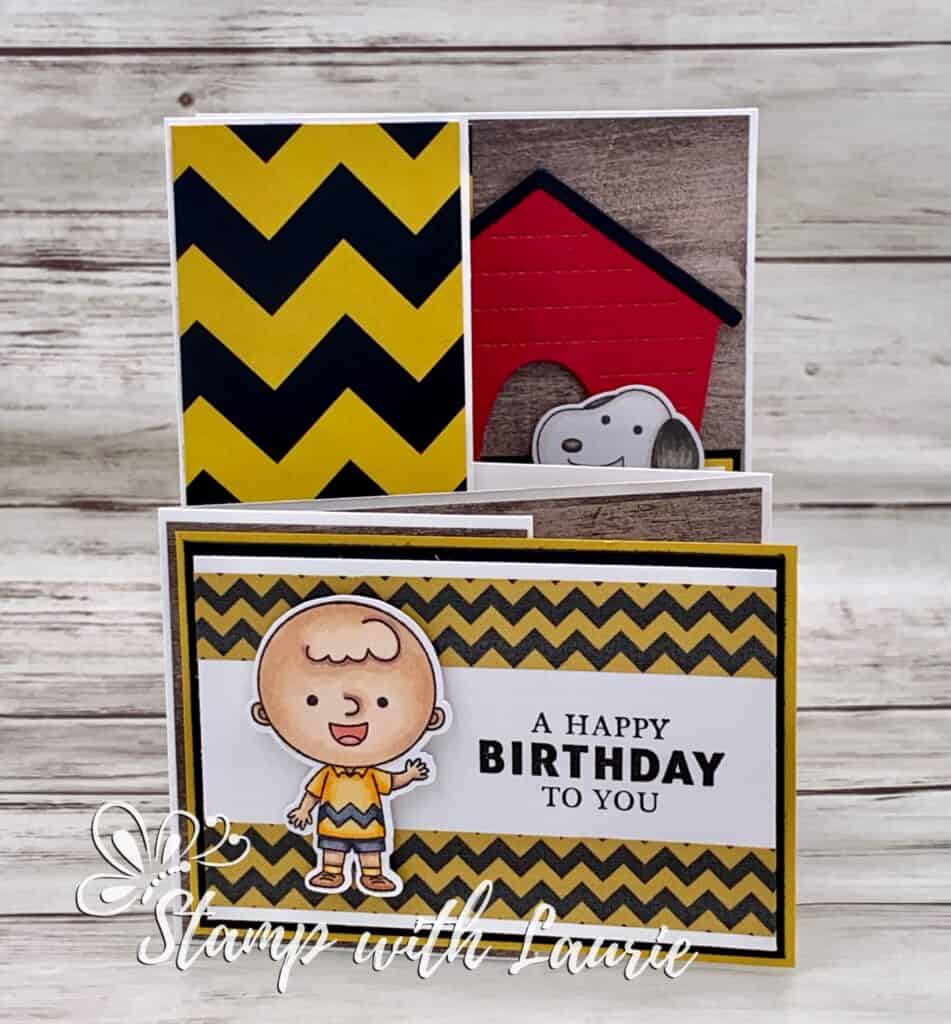
For my card, I decided to create a scene, but to fit all my characters, I went with a fun pop out card.

Top Side View of Card
Top View of Card Showing Folds

My inspiration was where they all go on stage and start dancing! I always loved that part! So, I used some wood Designer Series Paper to create the floor to my stage.

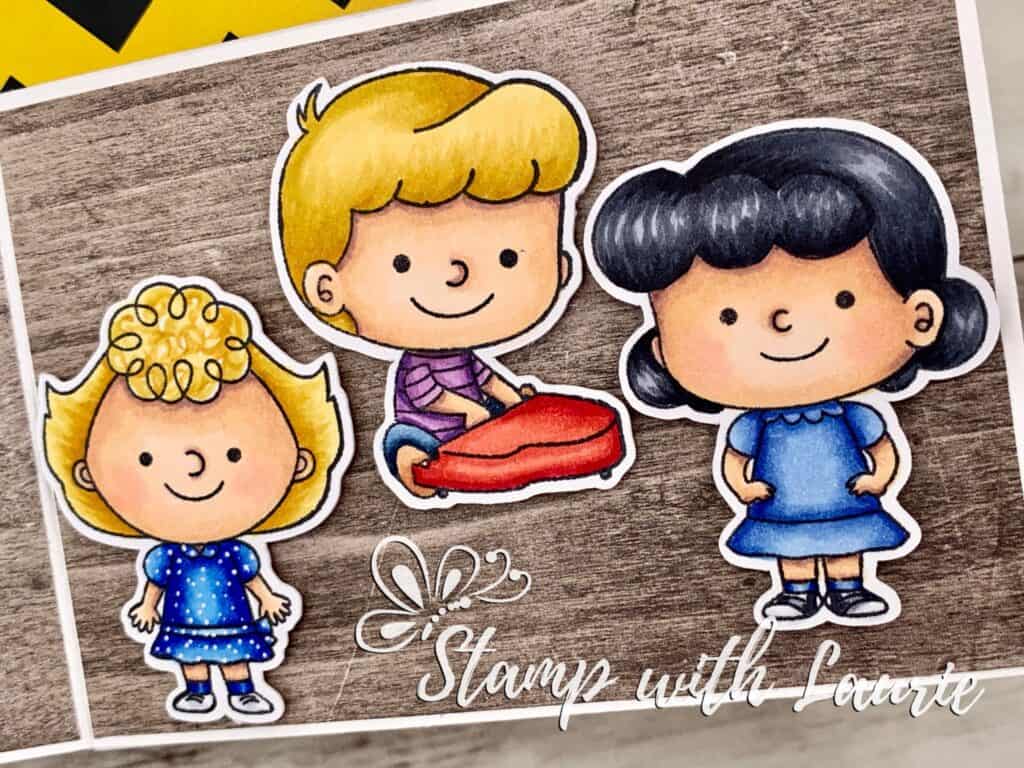
Linus, Sally, Schroder and Lucy
Linus, Sally, Schroder and Lucy on Stage

Once I coloured with my Copic markers my characters, I built my stage. The card folds out like a book, so you see more characters as it unfolds until you have it fully open.

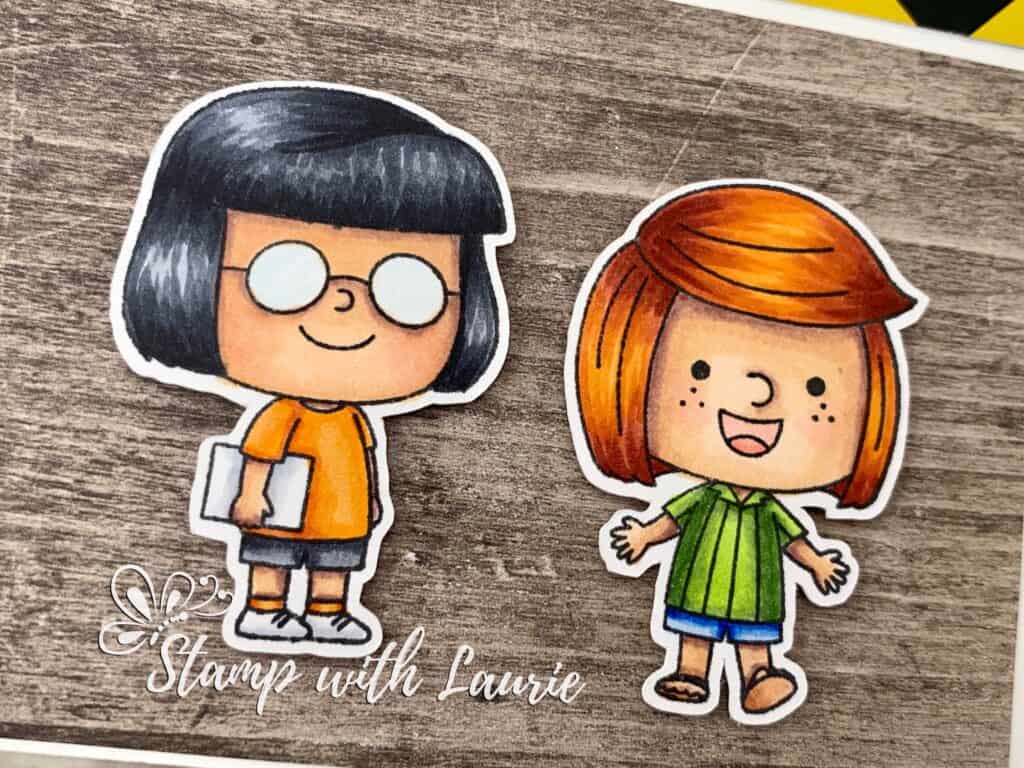
Marcie, Peppermint Patty, Woodstock and Snoopy on Stage

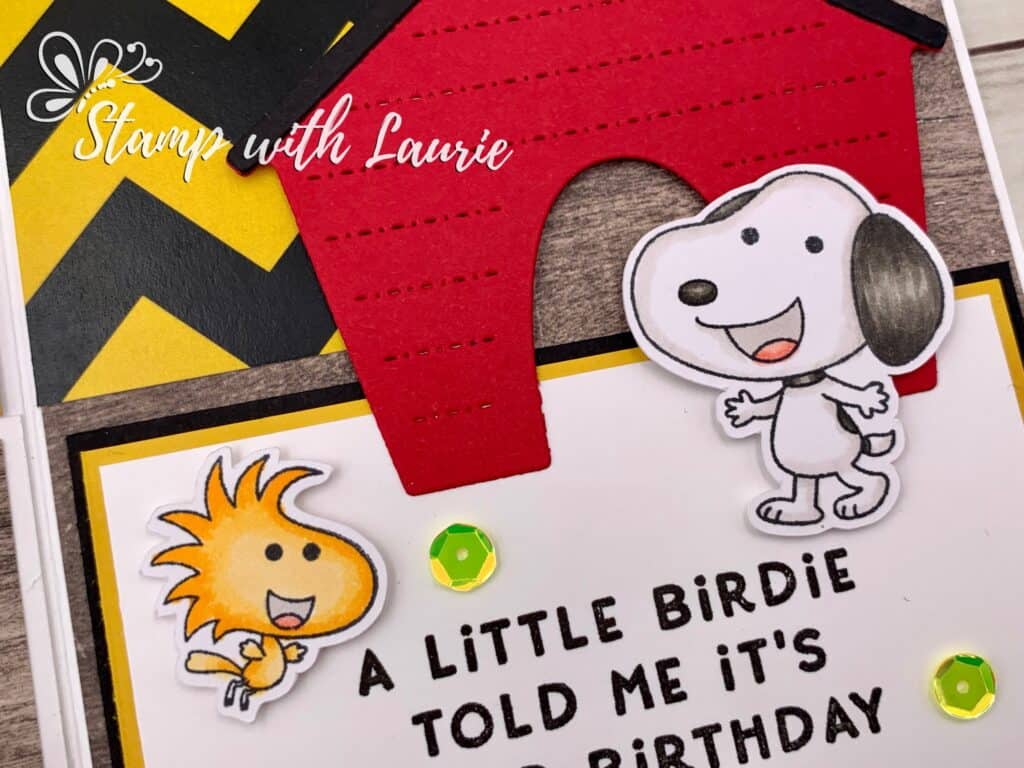
For most of my card I used The Great Box Limited Edition Box. Don’t you love the doghouse with Snoopy and Woodstock dancing around the sentiment! The Charlie Brown chevron pattern paper was perfect for the backdrop of my card! Almost like curtains to the stage.

Inside Card Laid Flat

————————–

Copic Markers:

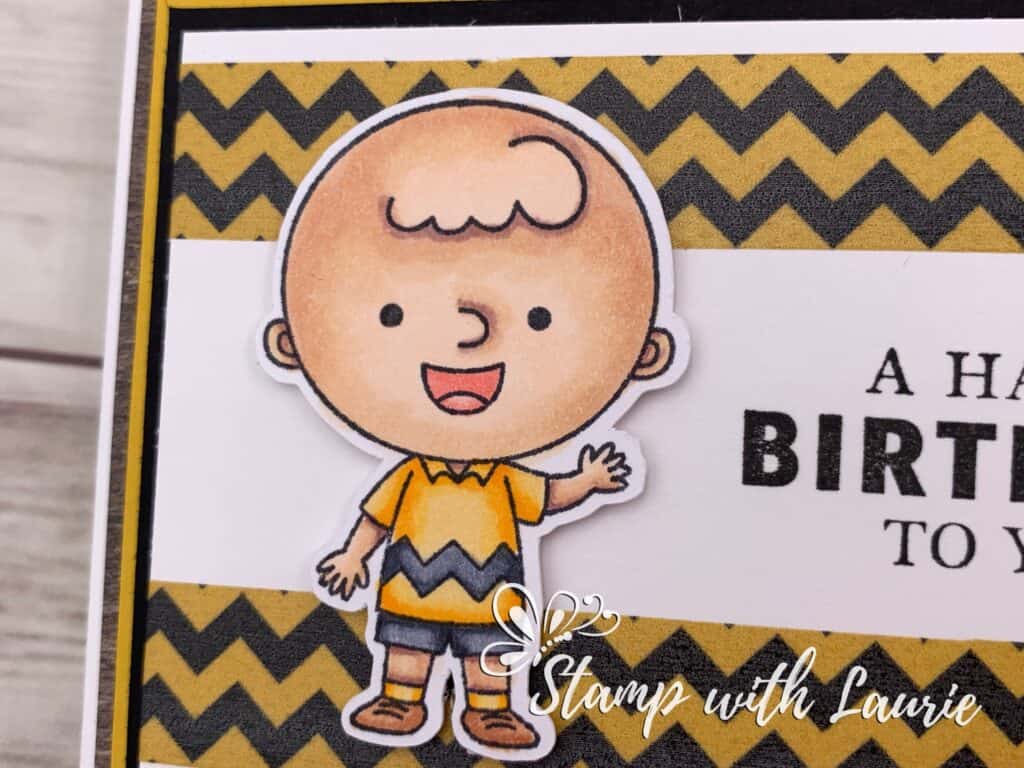
Charlie Brown
Skin: E04/E11/E21/E00/E000
Tongue/Mouth: R20/R22
Shirt: Y38/Y35/Y32/C7/C6/C4
Shorts: C7/C6/C4
Shoes: E11/E15
Socks: Y38/Y35/Y32

Close Up of Charlie Brown

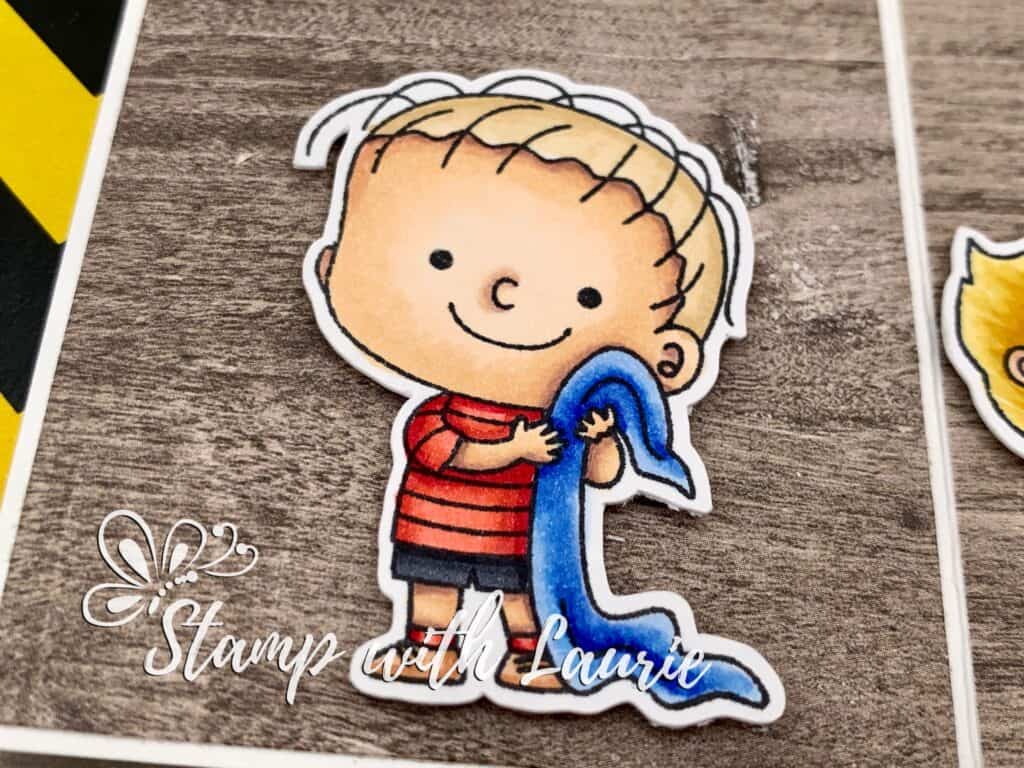
Linus
Skin: E04/E11/E21/E00/E000
Hair: E31/E30
Shirt/Socks: R29/R27/R24/R22
Shorts: C9/C7/C6
Shoes: E11/E15
Blanket: B28/B24/B21

Close Up of boy holding a blanket
Close Up of Linus

Sally
Skin: E04/E11/E21/E00/E000/R20
Hair: YR24/Y26/Y21
Dress: B29/B28/B24/B21/White Gelly Roll Pen
Shoes: C3/C1/0

Schroder
Skin: E04/E11/E21/E00/E000
Hair: YR24/Y26/Y21
Shirt: V12/V15/V17
Pants: B99/B97/B95/B93
Shoes: E11/E15
Piano: R29/R27/R24/R22/C6

Lucy
Skin: E04/E11/E21/E00/E000/R20
Hair: C9/C7/C6C4
Dress: B26/B28/B21
Shoes: C7/C6/C4/C3/0

Close Up of boy playing piano and two girls listening
Close Up of Sally, Schroder and Lucy

Marcie
Skin: E04/E11/E21/E00/E000
Hair: C9/C7/C6/C4
Top/Socks: YR18/YR16/YR14/YR12
Shorts: C7/C6/C4
Shoes: C3/C1
Glasses: B000/0

Peppermint Patty
Skin: E04/E11/E21/E00/E000
Tongue/Mouth: R20/R22
Hair: E18/E08/YR16/YR14
Top: YG03/YG63/YG67
Shorts: B21/B24/B28
Shoes: E11/E15

Close up girl in glasses and another girl
Close Up of Marcie and Peppermint Patty

Woodstock
Feathers: Y38/Y35/Y32/
Tongue/Mouth: R20/R22/W2

Snoopy
Fur: W8/W6/W4/W2/0
Tongue/Mouth: R20/R22/W2

Close Up of bird and dog infront of doghouse
Close Up of Woodstock and Snoopy

————————–

Card Recipe for My Good Grief! It’s Your Birthday! Card:

The Great Box Limited Edition Box, Kindred Stamps
(The Great Paper Pad, Great Box Stamp Set,
Doghouse Die, Sequins and Washi Tape)
Paper Basics – Stamper’s Select White Cardstock, Papertrey Ink
Wood Textures Designer Series Paper, Stampin’ Up!
Handsomely Suited Stamp Set, Stampin’ Up!
White Gelly Roll Pen
Tuxedo Black Memento Ink, Stampin’ Up!
Basic White Thick, Basic Black, Crushed Curry
and Real Red, Card Stock Stampin’ Up!

Finished card size: 4.25” x 5.5”

My Card in Action

————————–

For more of my Copic cards, please click here.

Hope you like My Good Grief! It’s You Birthday! Card using the
The Great Box Limited Edition Box by Kindred Stamps!

Front of My Card with a boy on it wishing a Happy Birthday
Front of My Card

Thank you for stopping by!

Hugs,
Laurie
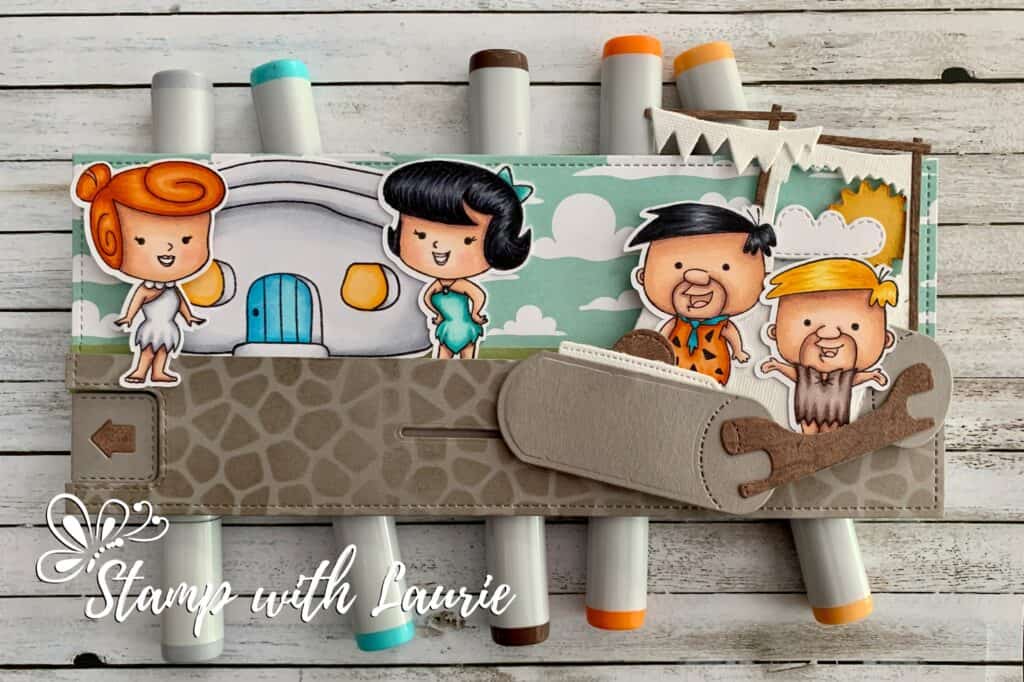
My Neighbourly Birthday Wish for You

The Flintstones
My Neighbourly Birthday Wish for You

Hello Crafty Friends! It’s Laurie here to share my Neighbourly Birthday Wish For You using the Prehistoric Family Limited Edition Box by Kindred Stamps! It’s my brother’s birthday today and we grew up on The Flintstones! So, I thought a fun slider card for his birthday would be right up his alley!

The Details of My Card

For my card, I decided to create a full scene, but to fit all my characters, I went with a slimline card. Once I coloured my characters, I built my prehistoric card. So, much fun! There is a great video on the Kindred Stamps website on how to do this. I found that my card was a bit top heavy, and the awning kept getting caught. So, I add 3 strategical placed washers underneath the wheels. Voila! Fixed!

Of course, if you have a car, you need a road! So, I used the stencil that came with the kit, a blender brush and ink to create my road. Then, I die cut the Gray Granite with the Lawn Fawn stitched rectangle since I wanted the stitching to frame my whole scene. Once that was done, I created my mechanism using the Heffy Doodle Pull Tab Dies and hid it behind the road. The clouds DSP was also die cut with the stitched rectangle to finish the frame of my scene. Once my scene was created, I added my characters finishing my prehistoric family!

————————–

Copic Markers:

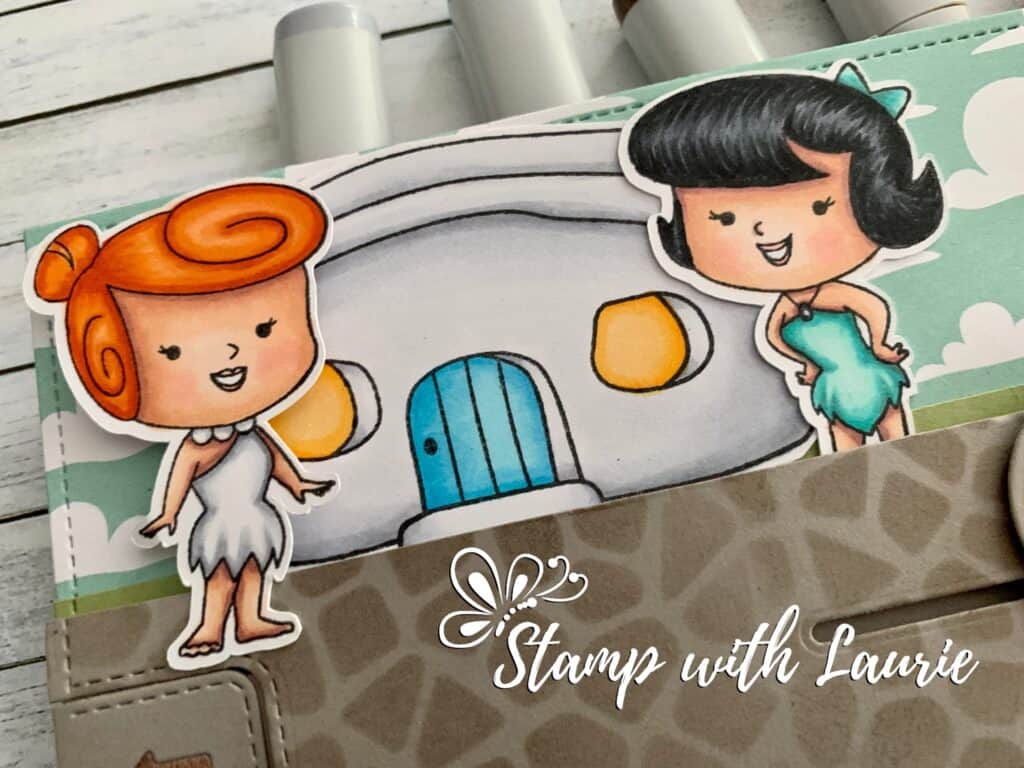
Wilma
Skin: E04/E11/E21/E00/E000
Hair: YR00/YR18/YR16/YR14/YR12
Dress/Pearls: C3/C1/C00/0

Wilma and Betty
Wilma and Betty

Betty
Skin: E04/E11/E21/E00/E000
Hair: T10/T8/T6/T4
Dress: BG10/BG18/BG15/BG13/BG11
Necklace: C1/C7

House
Stone: C0/C1/C3
Door: B00/B02/B04
Windows: Y32/Y35/Y38

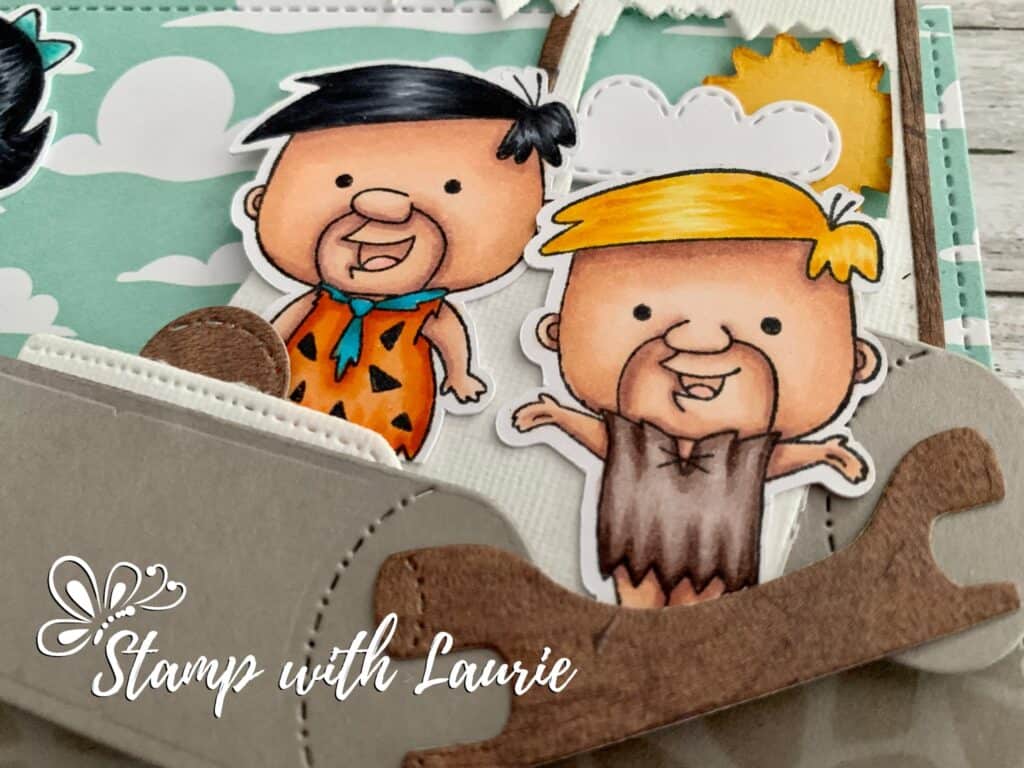
Fred and Barney
Fred and Barney

Fred
Skin: E04/E11/E21/E00/E000
Hair: C9/C7/C6
Outfit: YR00/YR18/YR16/YR14/YR12/C7
Tie: BG18/BG05

Barney
Skin: E04/E11/E21/E00/E000
Hair: Y000/Y19/Y17/Y15/Y13
Outfit: E79/E77/E74/E71/E70

————————–

Card Recipe for My Neighbourly Birthday Wish for You:

Prehistoric Family Limited Edition Box, Kindred Stamps
(Build A Prehistoric Car Die, Prehistoric House Stamp,
Prehistoric Family Stamp Set and Flag Stone Stencil)
Paper Basics – Stamper’s Select White Cardstock, Papertrey Ink
Myth & Magic Designer Series Paper, Stampin’ Up!
In Good Taste Designer Series Paper, Stampin’ Up!
Linen Specialty Paper, Stampin’ Up!
Large Slimline with Sliders Dies, Lawn Fawn (Stitched Rectangle)
Slimline Pull Tab Dies, Heffy Doodle (Slider Mechanism)
Spring Showers Dies, Lawn Fawn (Cloud)
Rainbow Builder Dies, Stampin’ Up! (Sun)
Tuxedo Black Memento Ink, Stampin’ Up!
Gray Granite Classic Ink Pad, Stampin’ Up!
Crushed Curry Classic Ink Pad, Stampin’ Up!
Blender Brushes, Picket Fence
3 Metal Washers to Balance Car
Gray Granite and Crushed Curry Card Stock, Stampin’ Up!

Finished card size: 3.5” x 8.5”

Video of Slider Card in Action

————————–

For more of my Copic cards, please click here.

Hope you like My Neighbourly Birthday Wish For You using the
Prehistoric Family Limited Edition Box by Kindred Stamps!

Thank you for stopping by!

Hugs,
Laurie
My Mythical Birthday Card

Birthday Card
My Mythical Birthday Card

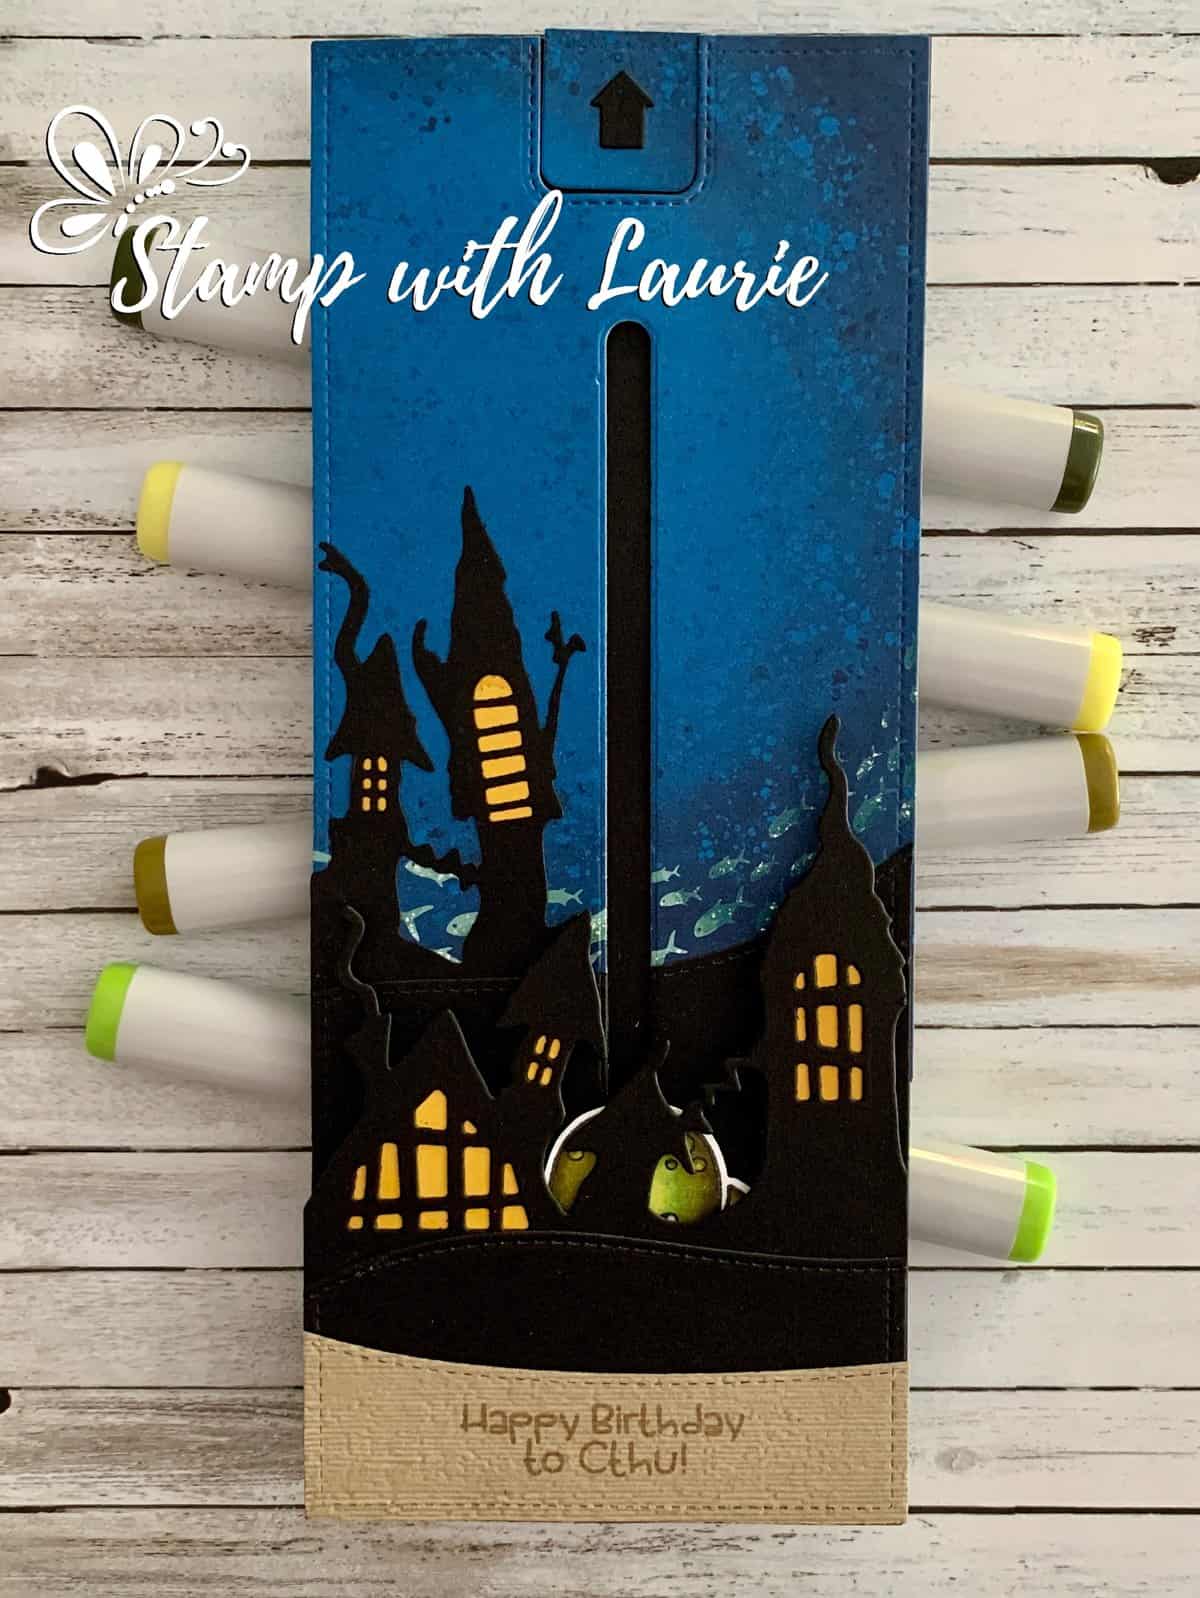
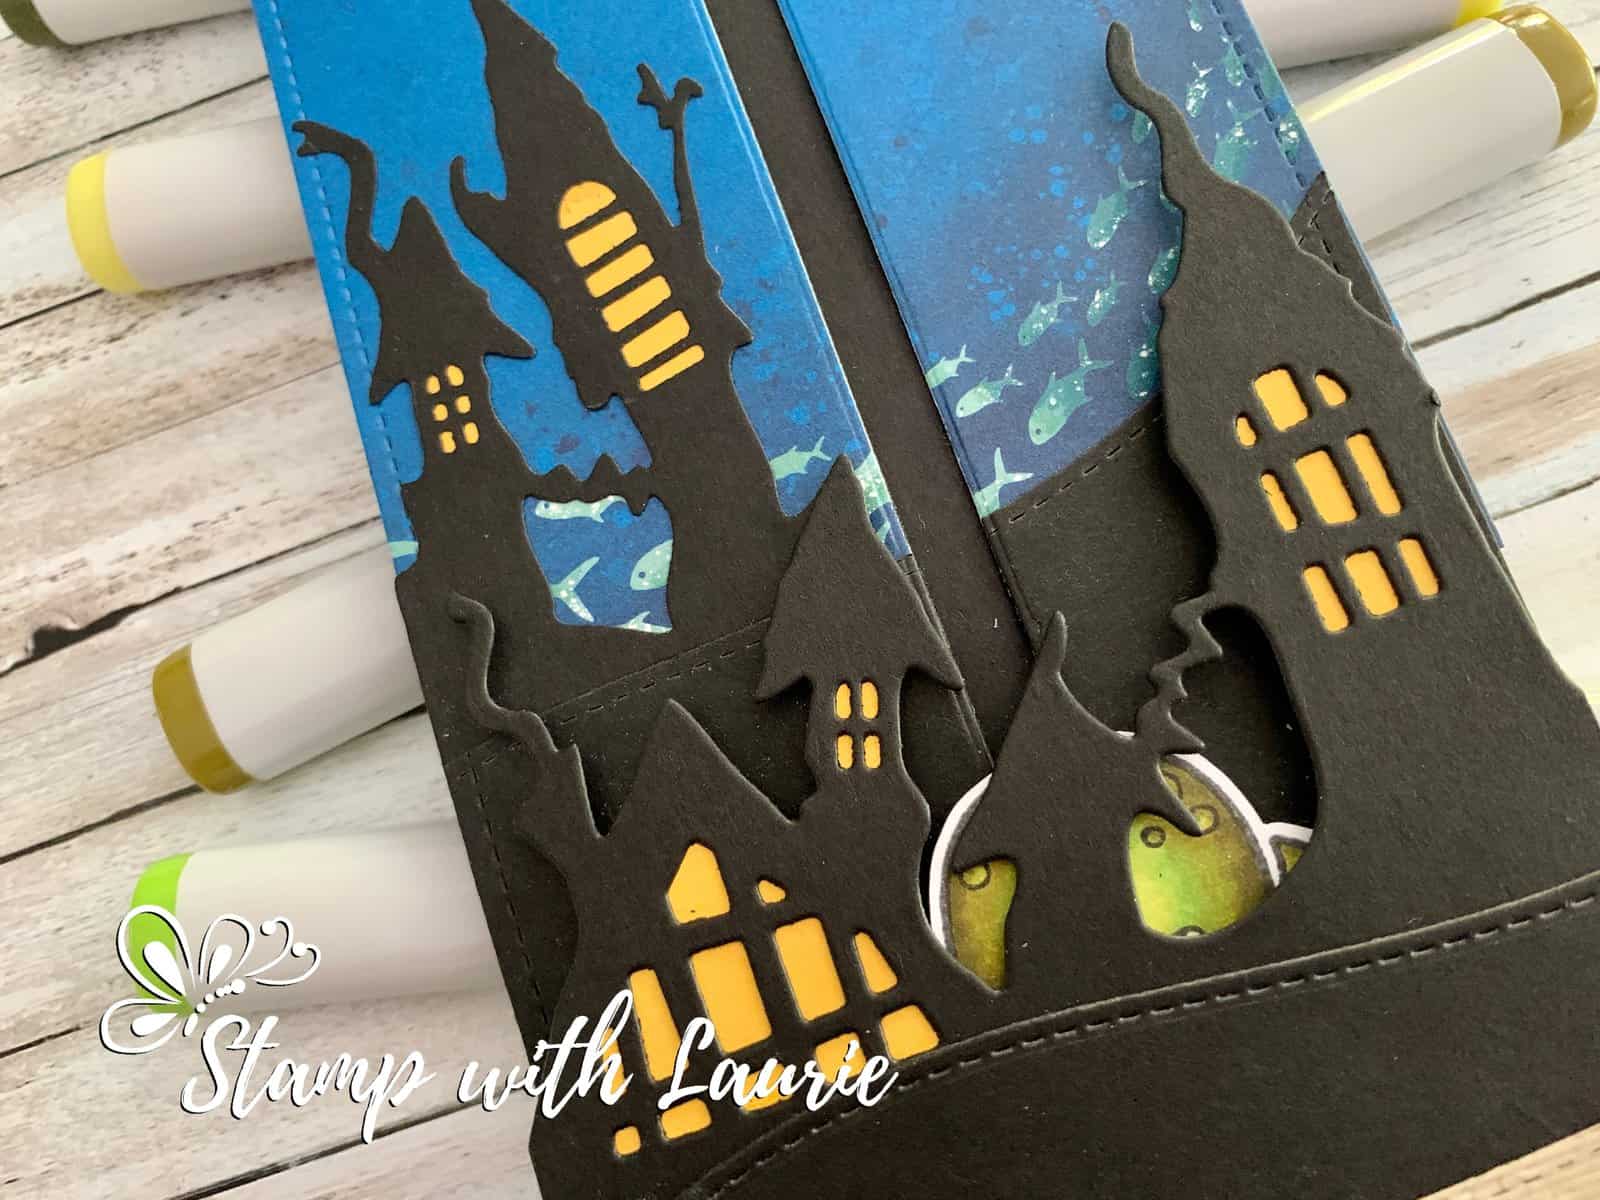
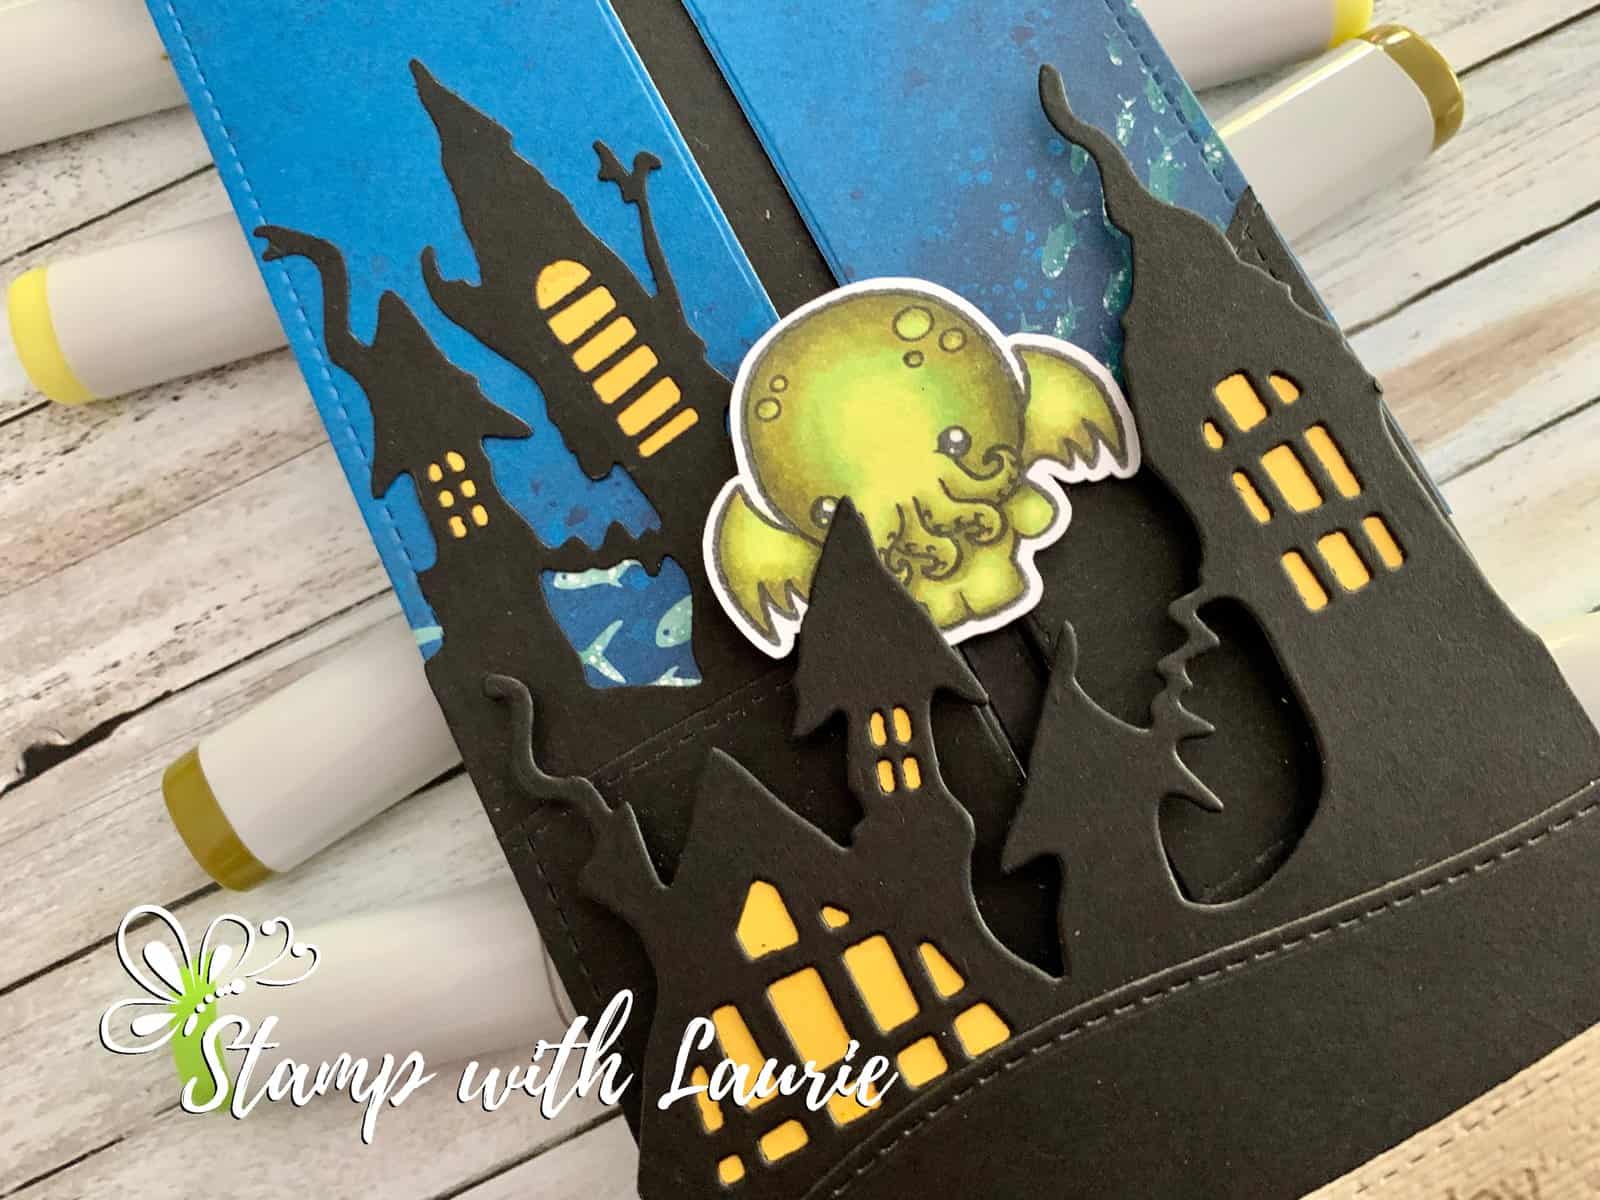
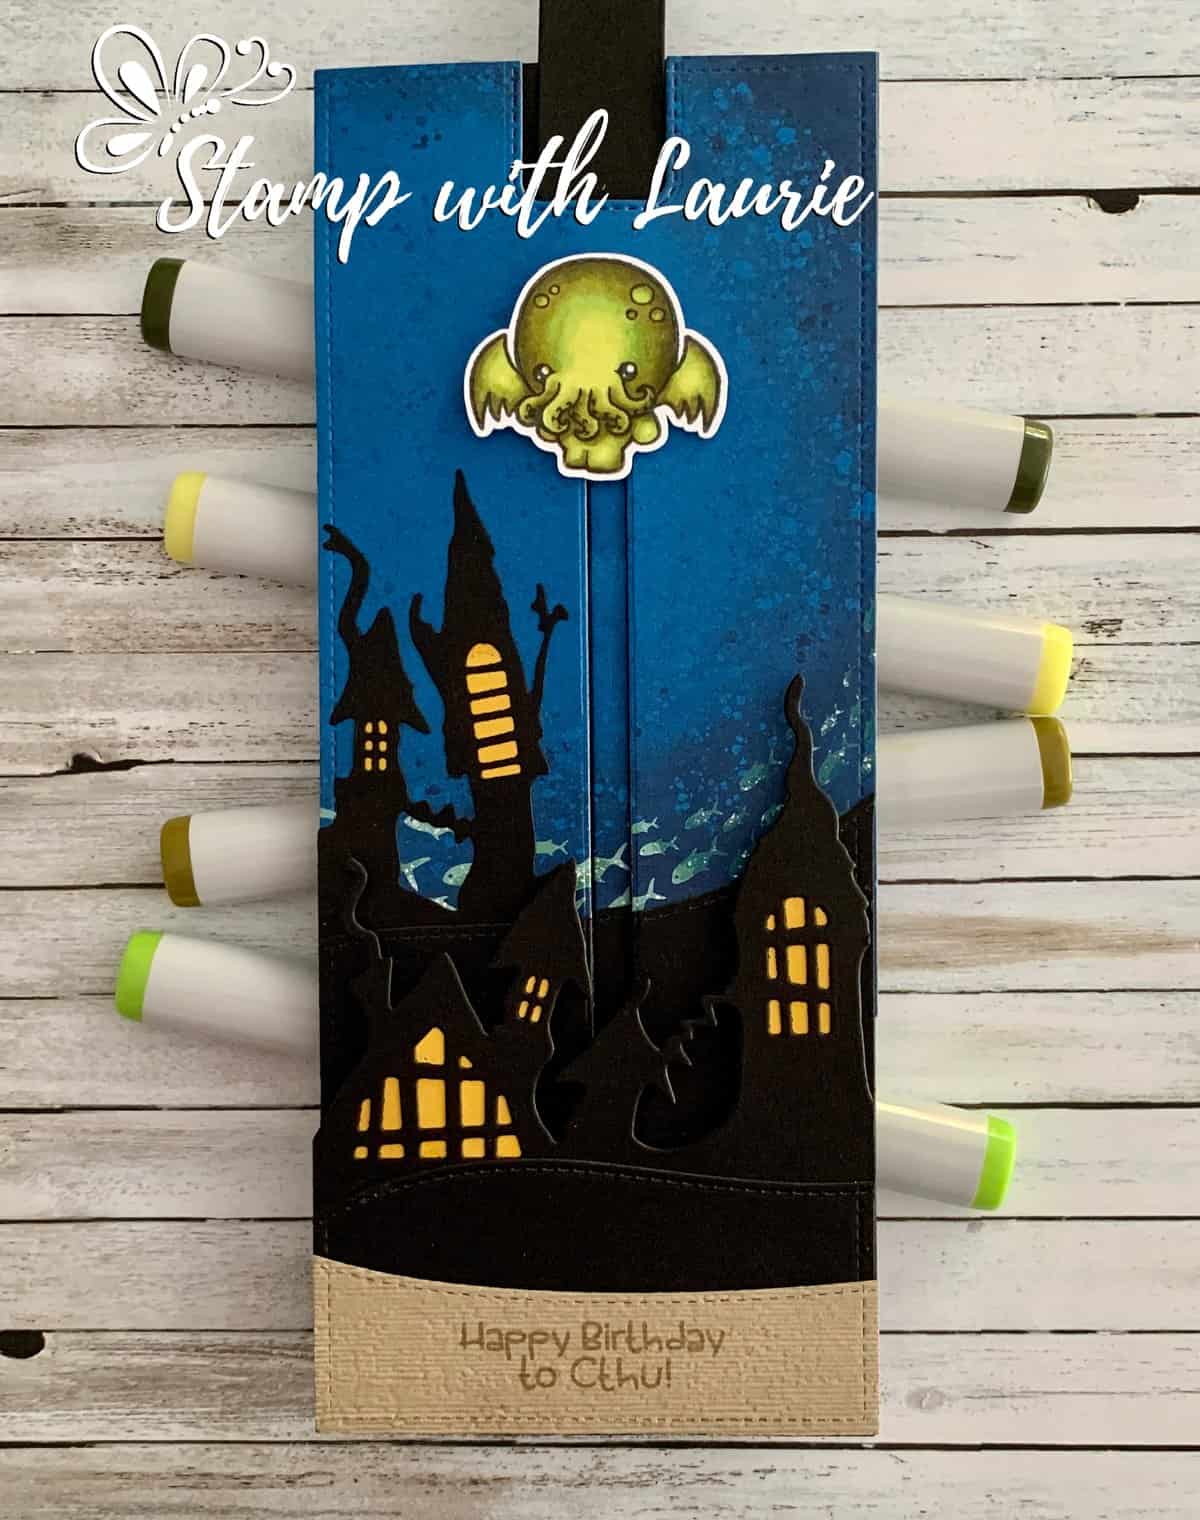
Hello Crafty Friends! It’s Laurie here to share my Mythical Birthday Card using the Mythical Cthulu Stamp Set by Kindred Stamps! This card was delivered to a little boy whose birthday is today. He loves anything mythical and especially Cthulhu which is a fictional cosmic entity created by writer H. P. Lovecraft.

Close Up of R'lyeh
Close Up of R’lyeh

For my card, I decided that a slimline slider card would be so cool with Cthulhu rising from the watery depths of the ruined city of R’lyeh (some Cthulhu Mythos for you)! I always create interactive cards for the little boy’s and his brother’s birthdays and get the best reactions from them! His reaction to this card was “Laurie’s cards are always good, but this is the best card ever!”. This just made my day!

Cthulhu Rising From R'lyeh
Cthulhu Rising From R’lyeh

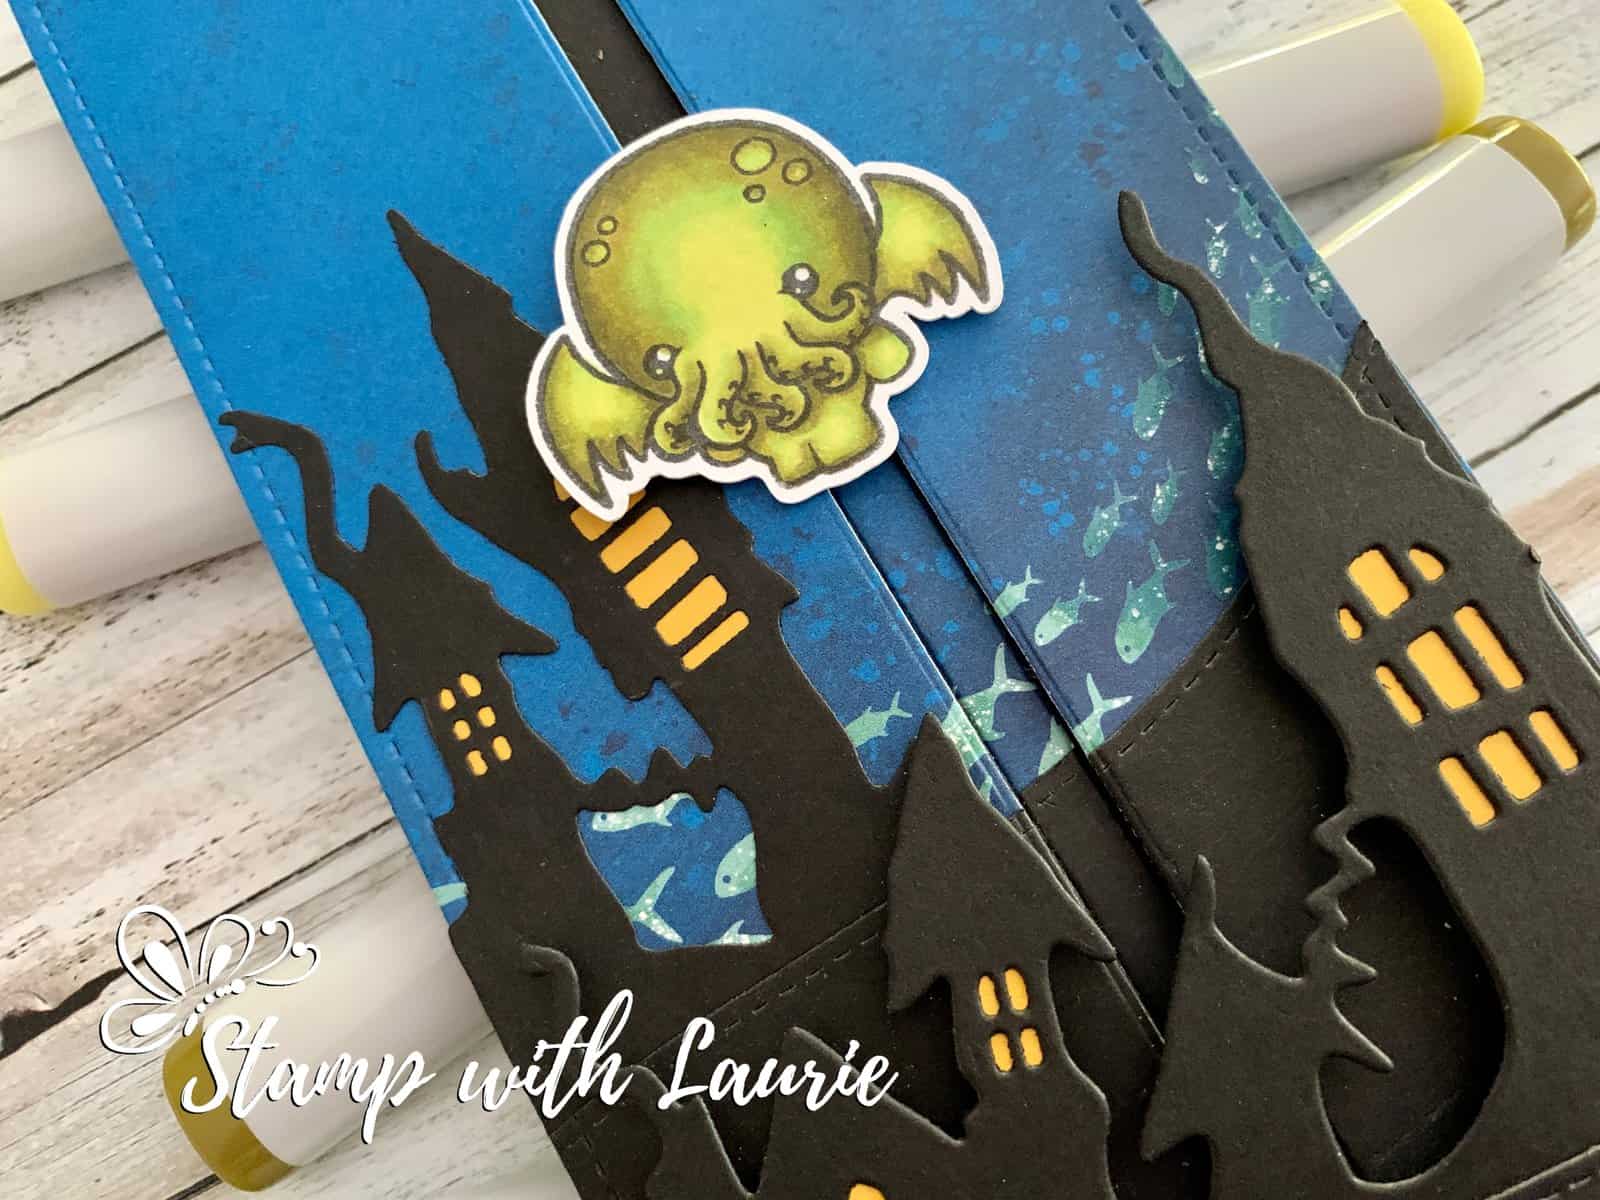
I only used four Copic markers to colour Cthulhu. To make the Scary Town Die fit my slimline shape, I cut it in two. I then added some stitched hills to create my multi-level town. Since this was supposed to be at the bottom of the Pacific Ocean, I added some sand with Crumb Cake Card Stock and use the embossing folder to give it texture. What better place to stamp the sentiment that came with the stamp set: “Happy Birthday to Cthu!”.

I had debated about using my Distress Inks to create my water background, but I found this DSP that was perfect for my scene. It even had fish!

Close Up of Cthulhu Rising From R'lyeh
Close Up of Cthulhu Rising From R’lyeh

To make my slider mechanism work, I used a ton of dimensionals, especially the Foam Adhesive Strips by Stampin’ Up! I even created a video with the slider card in action.

Video of Slider Card in Action.

————————–

Copic Markers:

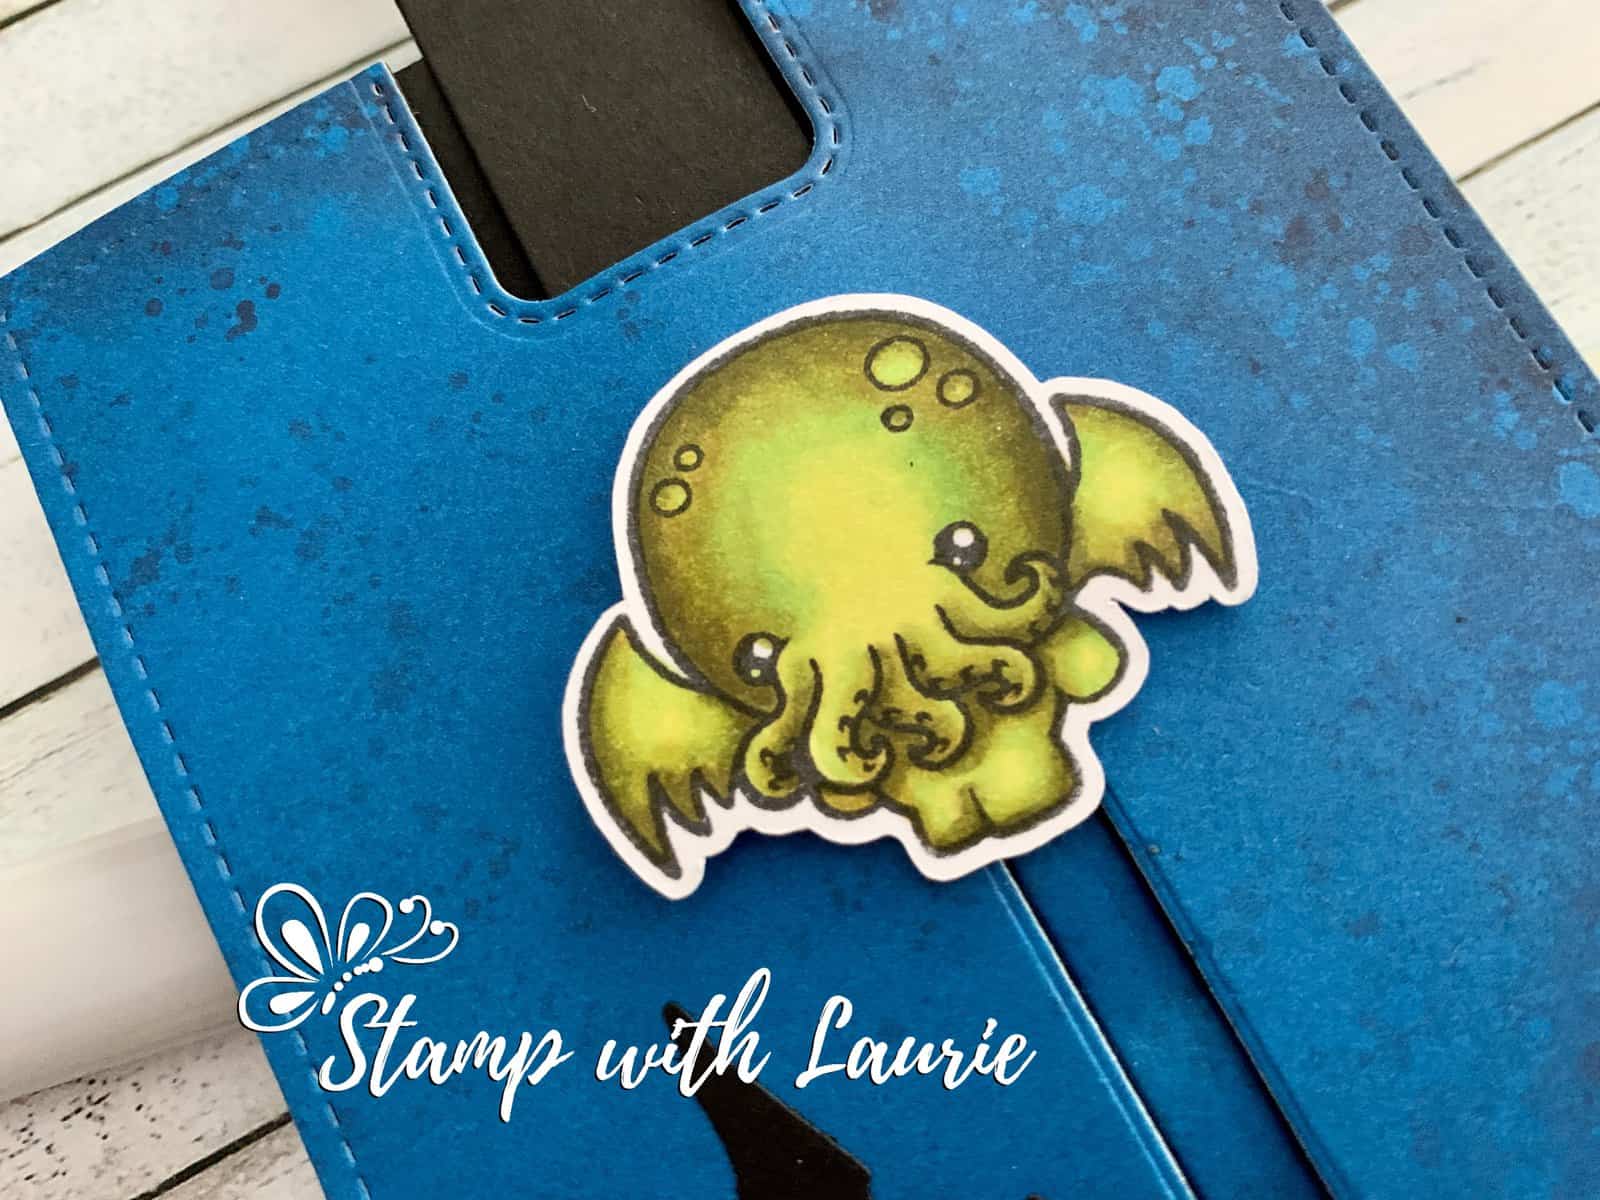
Cthulhu: YG21/YG23/YG95/YG99

Close Up of Cthulhu
Close Up of Cthulhu

————————–

Card Recipe for My Mythical Birthday Card:

Mythical Cthulu, Kindred Stamps
Paper Basics – Stamper’s Select White Cardstock, Papertrey Ink
Whale of a Time 6” x 6” Designer Series Paper, Stampin’ Up!
Slimline Pull Tabs Dies, Heffy Doodle
Large Slimline with Sliders Dies, Lawn Fawn
Scary Town Die, Stamp AnnieThing
Slimline Stitched Hillside Border Dies, Lawn Fawn
Subtle 3D Embossing Folder, Stampin’ Up!
Crumb Cake Ink Pad, Stampin’ Up!
Foam Adhesive Strips, Stampin’ Up!
Black Stampin’ Dimensionals, Stampin’ Up!
Basic Black, Crumb Cake and Crushed Curry Card Stock, Stampin’ Up!

Finished card size: 3.5” x 8.5”

Cthulhu At The Top of Slider

————————–

For more of my Copic cards, please click here.

Hope you like My Mythical Birthday Card using the
Mythical Cthulu Stamp Set by Kindred Stamps!

Thank you for stopping by!

Hugs,
Laurie
As You Wish Card

My As You Wish Card
My As You Wish Card

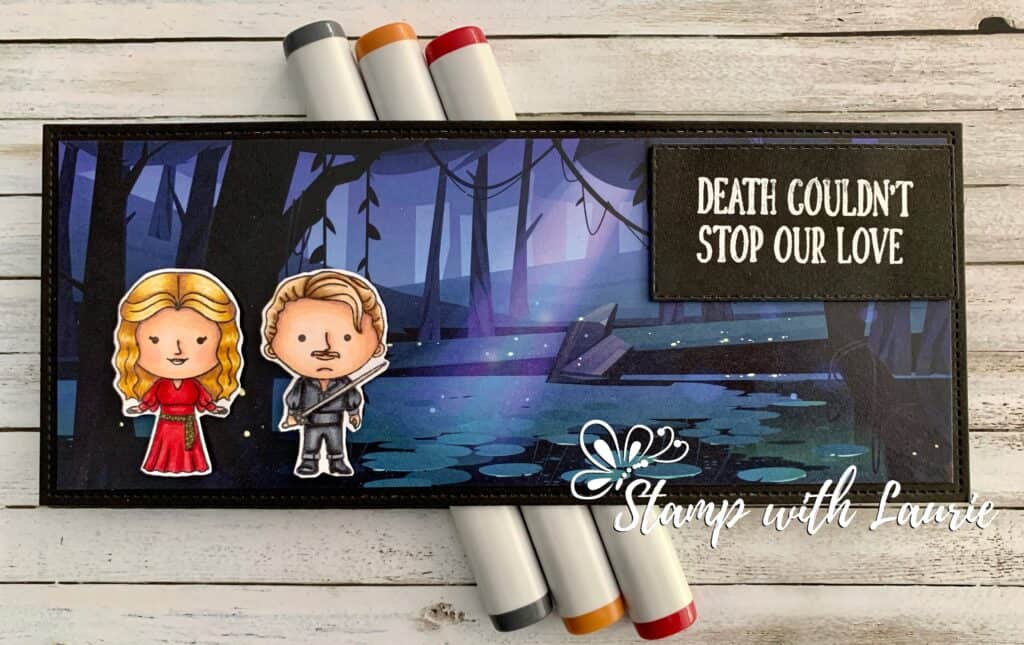
Hello Crafty Friends! It’s Laurie here to share my As You Wish Card using the Twoo Luv Stamp Set by Kindred Stamps! Princess Bride is one of my favourite movies ever! So, when I saw Kindred Stamps has this stamp set, I couldn’t resist buying it! 

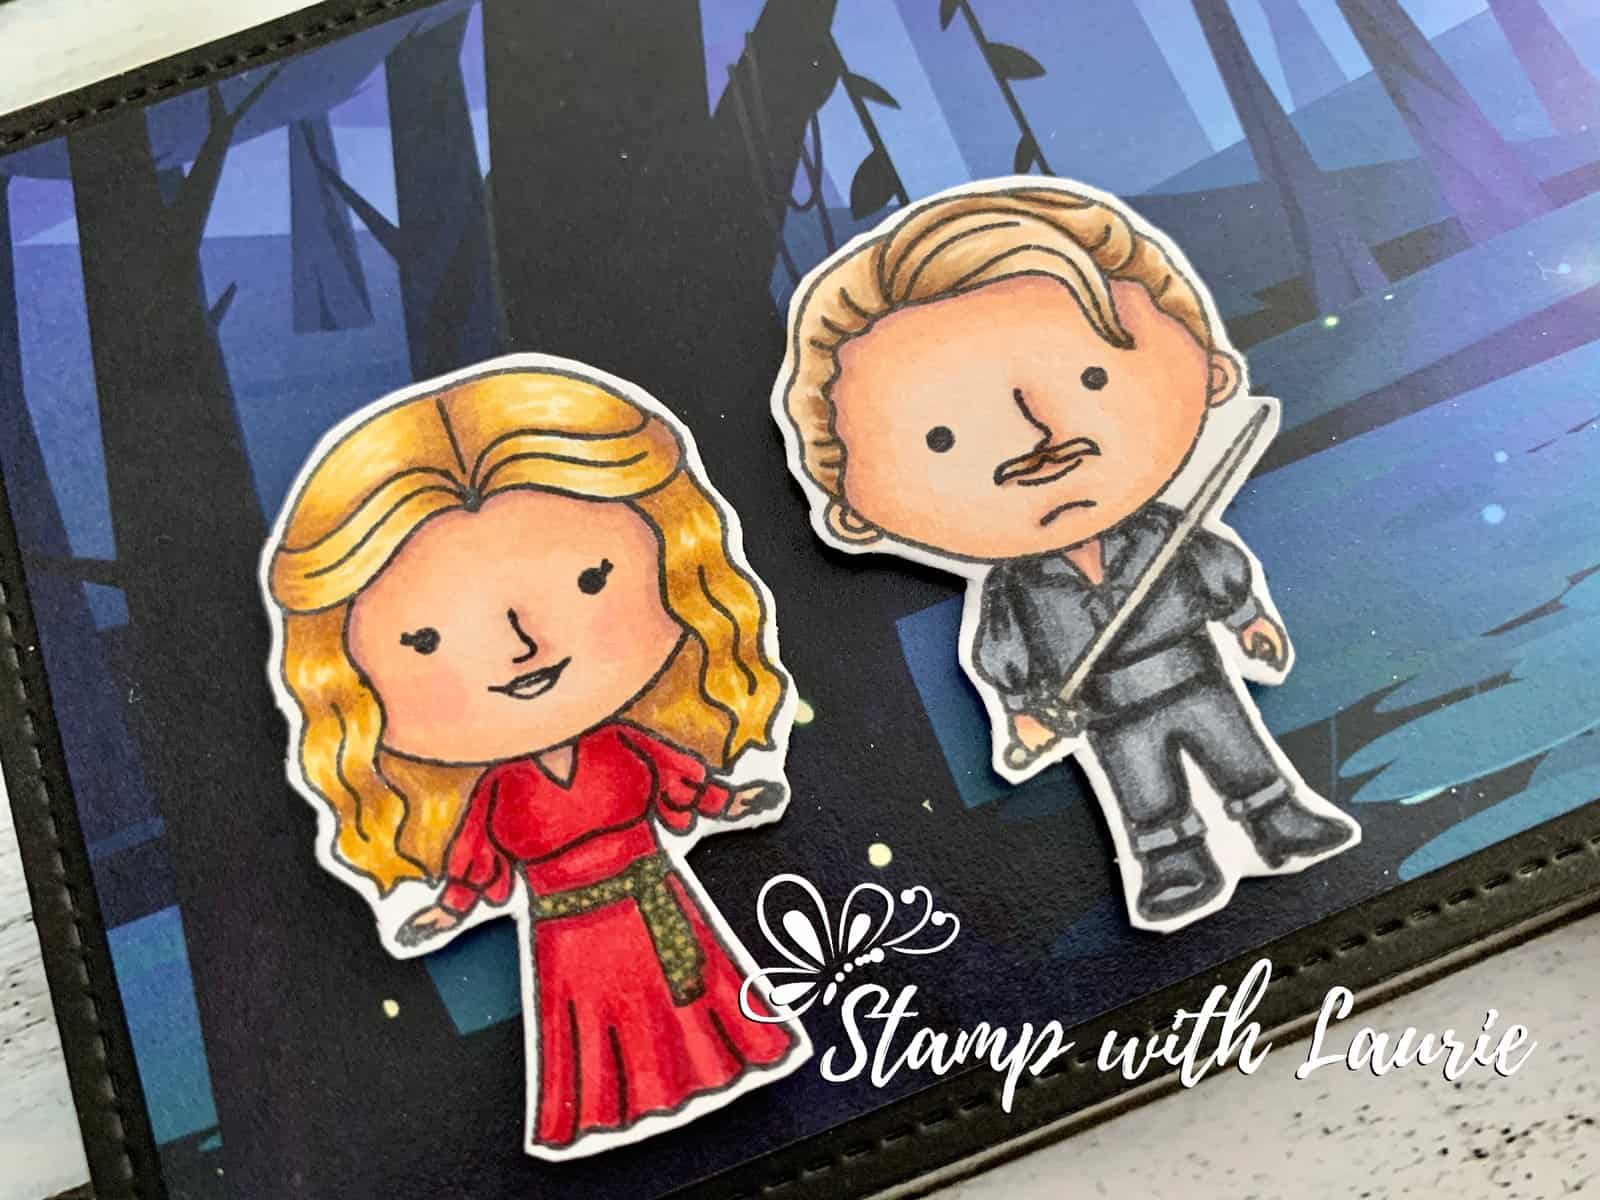
This is another super-fast card to make since the stamps colour up so quickly and the background paper is from the Enchanted Forest Paper Pack by Whimsy Stamps. I used my Copic markers to colour my characters to match the characters in the movie. I thought this slimline paper was perfect to represent the ‘Fire Swamp’ in the movie where Westley and Buttercup meet the R.O.U.S.’s (Rodents of Unusual Size)! The only other thing that needed to be added was the sentiment which I embossed in white on black cardstock. Easy-peasy!

————————–

Copic Markers:

Pirate (Westley)
Skin: E04/E11/E21/E00/E000
Hair: E57/E55/E43/E53/E50
Outfit: C9/C7/C5/C4
Sword: W6/W4/W2

Close Up of My Card
Close Up of My Card

Princess (Buttercup)
Hair: E25/YR24/Y26/Y21
Skin: E04/E11/E21/E00/E000/R20
Dress: R35/R37/R39/Gold Wink of Stella

————————–

Card Recipe for My As You Wish Card:

Twoo Luv, Kindred Stamps
Paper Basics – Stamper’s Select White Cardstock, Papertrey Ink
Slimline Paper Pack – Enchanted Forest, Whimsy Stamps
Large Slimline with Sliders Dies, Lawn Fawn
Stitched Rectangle Dies, Stampin’ Up!
Tuxedo Black Memento Ink, Stampin’ Up!
VersaMark Ink, Stampin’ Up!
White Embossing Powder, Stampin’ Up!
Heat Tool, Stampin’ Up!
Black Stampin’ Dimensionals, Stampin’ Up!
Basic Black Card Stock, Stampin’ Up!

Finished card size: 3.5” x 8.5”

————————–

To view my other Kindred Stamps, please click here.

For more of my Copic cards, please click here.

Hope you like my As You Wish Card using the Twoo Luv Stamp Set by Kindred Stamps!

Buttercup: Westley, what about the R.O.U.S.’s?
Westley: Rodents of Unusual Size? I think they don’t exist.

Thank you for stopping by!

Hugs,
Laurie
My Witcher Birthday Card

A Birthday Card
My Witcher Birthday Card

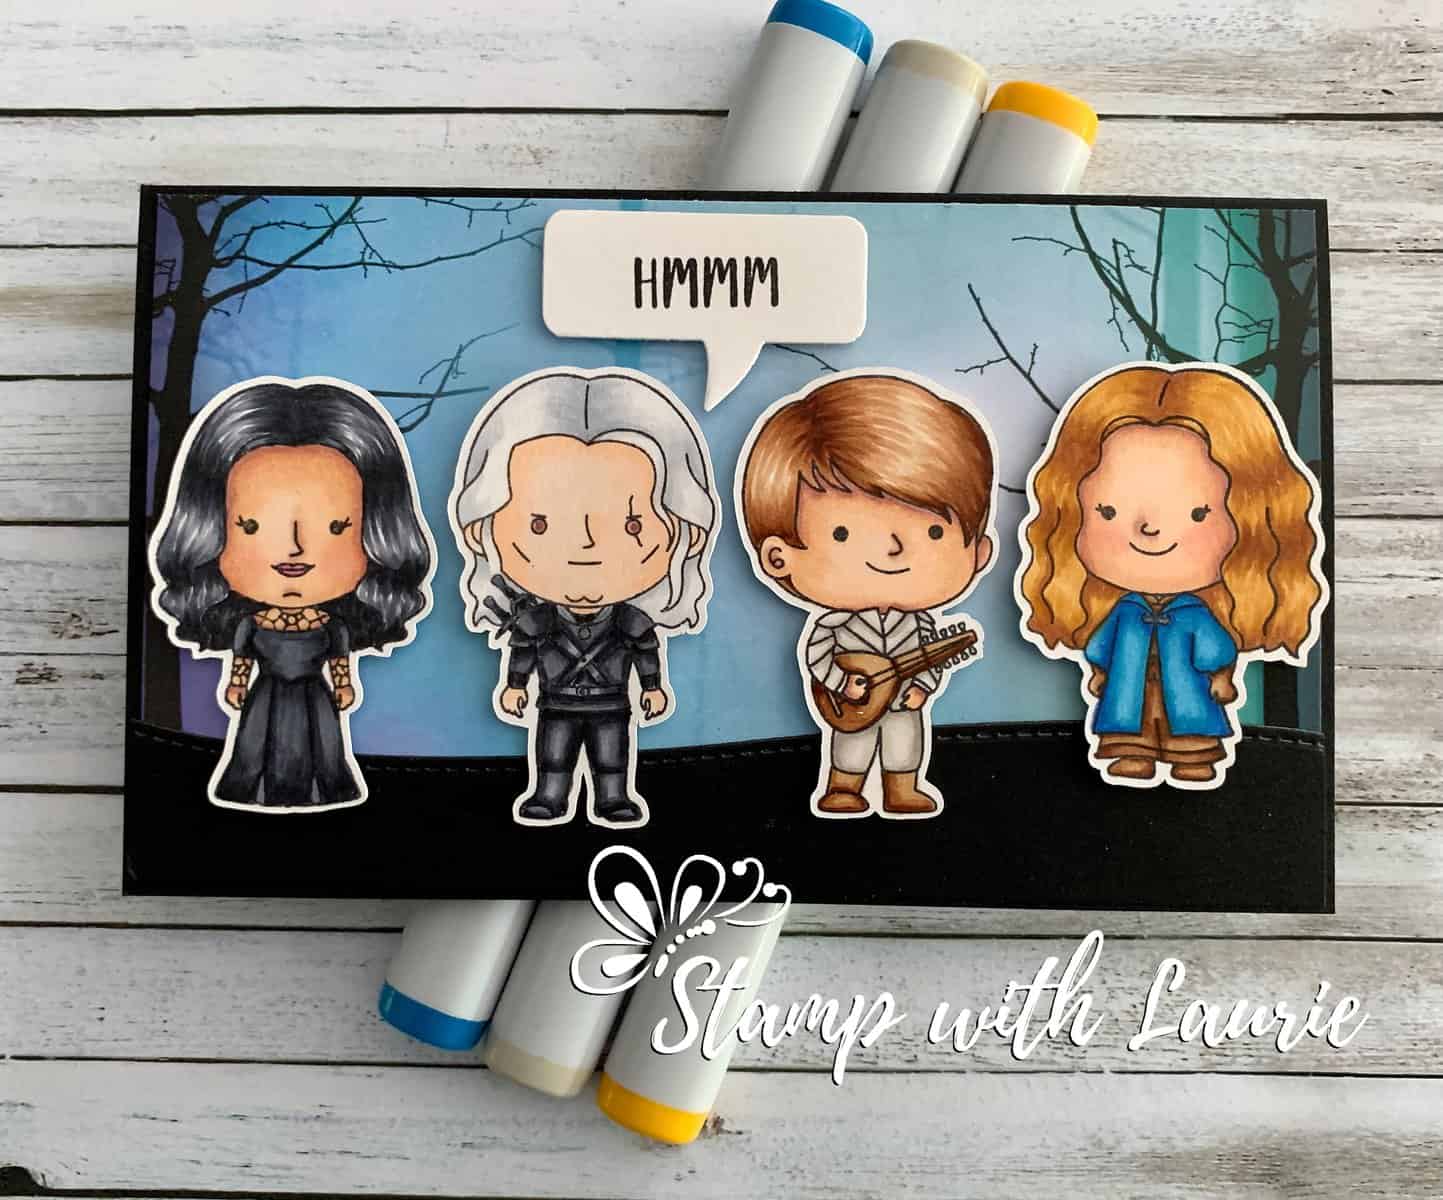
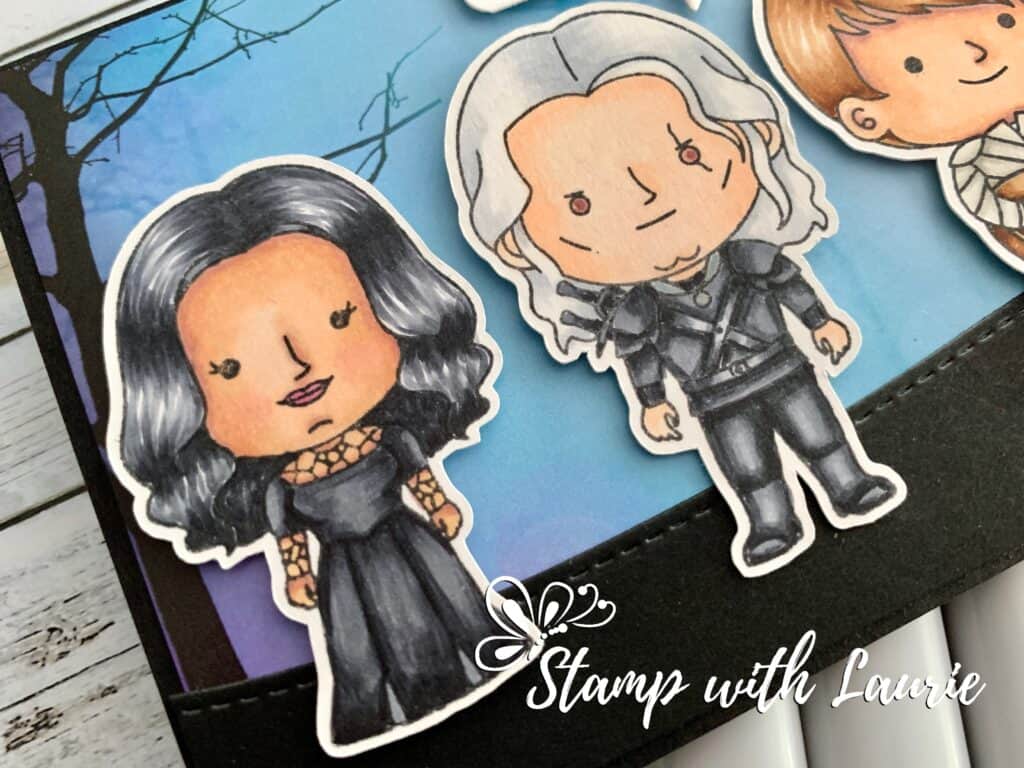
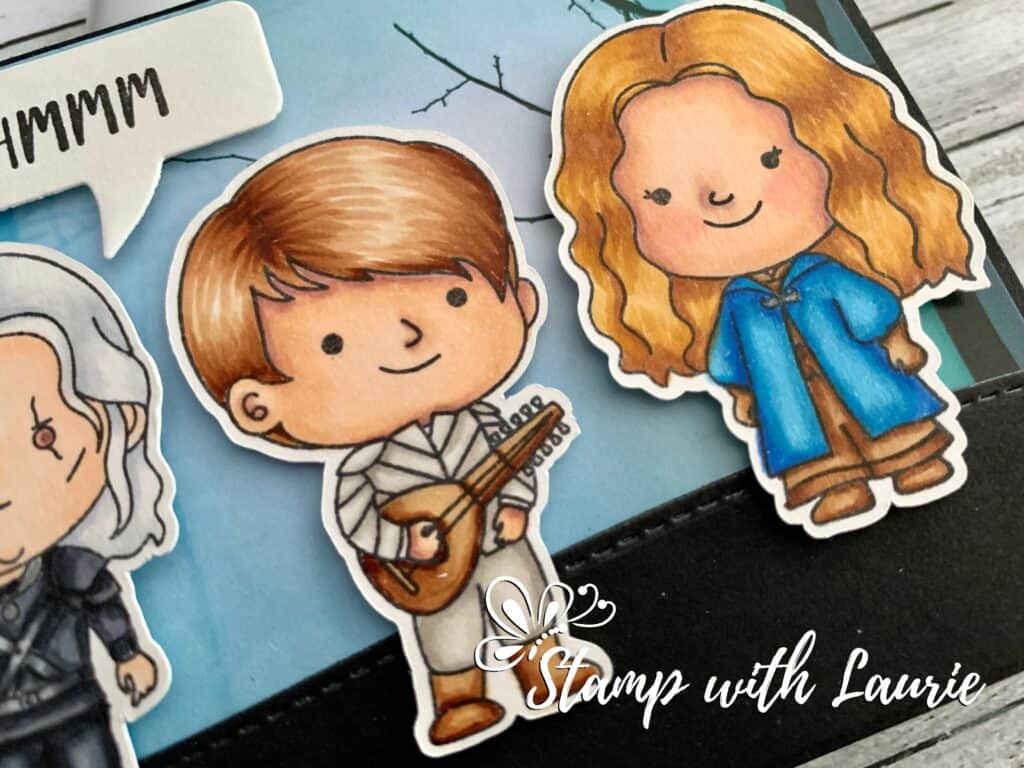
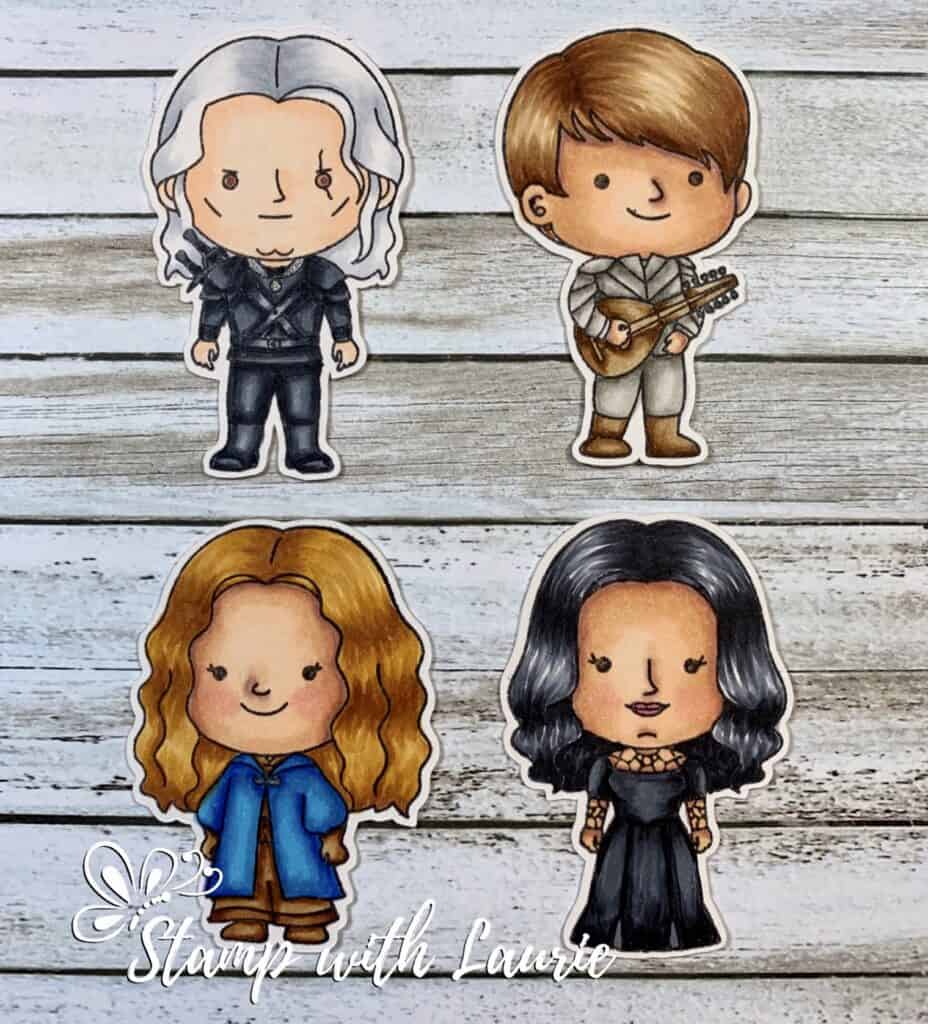
Hello Crafty Friends! It’s Laurie here to share my Witcher Birthday Card! Today is my big brother’s birthday and I know that The Witcher TV Series is right up his alley. So, I combined all 4 characters from the Monster Hunter Stamp Set by Kindred Stamps onto my mini slimline card.

I coloured the whole Monster gang with my Copic markers for a colouring challenge a while ago. I used the Bard for another card (I will link it at the end of the post). So, I had to recolour him. I love Kindred Stamps! They are such a fast colour!

For my card, I created a scene using only a few things. I love the Lavinia SceneScapes Paper! They have such amazing eerie scenes that can be used for square 6” x 6” card or cut down to fit my mini slimline card. I used the Stitched Hillside dies to create the ground. Finally, I used the Word Bubble dies to finish my scene.

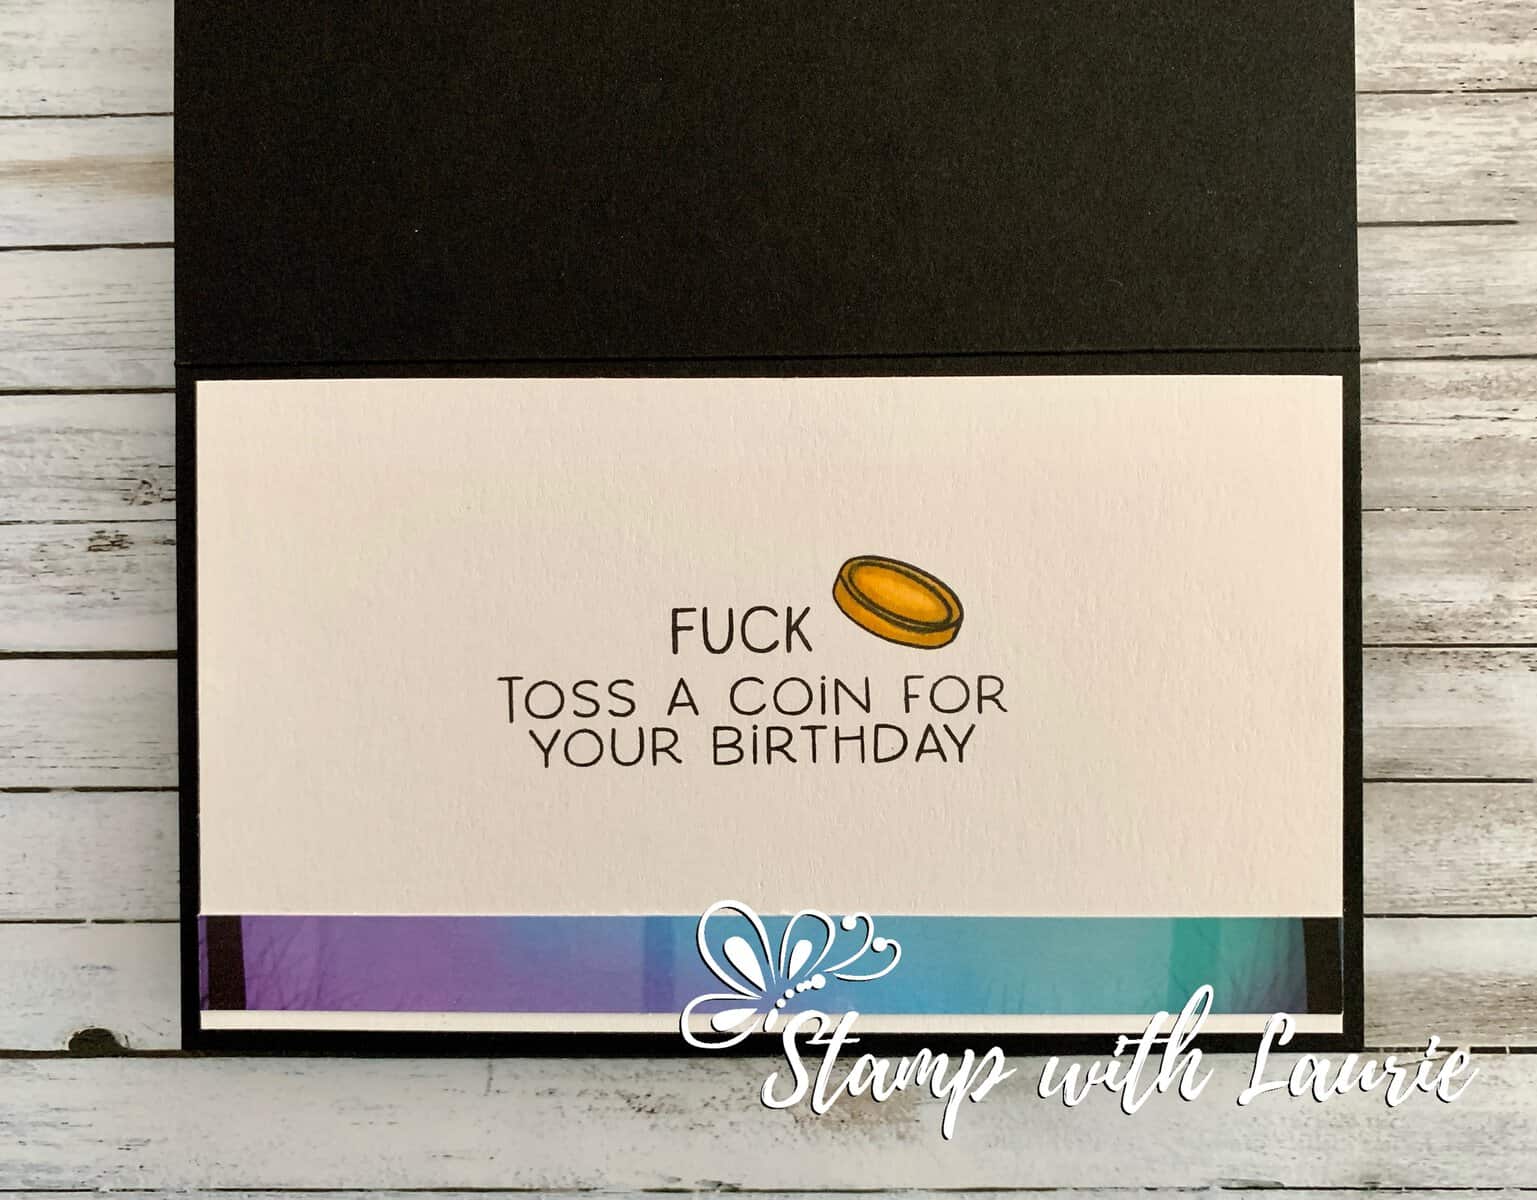
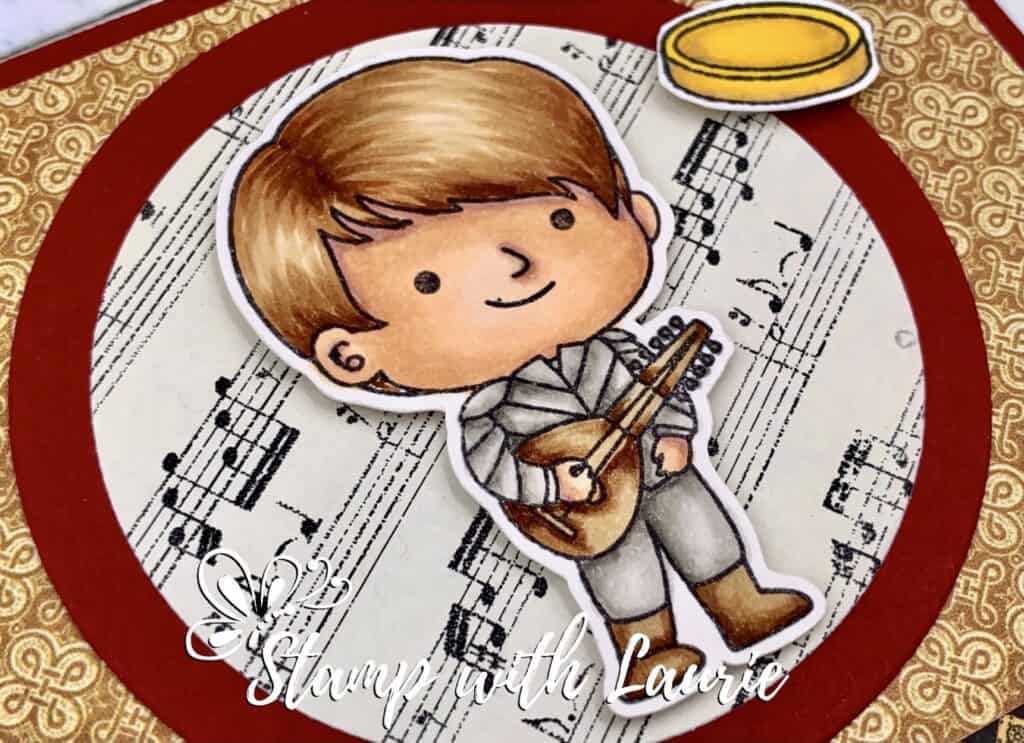
I even decorated the inside of my card with a coin from the stamp set that I coloured with my Copic markers and a strip of the leftover paper. If you watched the Witcher, you know that he swears…a lot. So, I included a couple of more colourful sentiments inside my card that I knew my brother would recognize.

————————–

Copic Markers:

Close Up to Two of my Characters on my Card
Close Up of the Mercenary and the Witch

Witch (Yennefer)
Skin: E000/E000/E00/RV34
Hair/Outfit: C9/C7/C5/C4

Mercenary (Geralt of Rivia)
Skin: E000/E000/E00
Hair: C2/C1/0
Outfit: C9/C7/C5/C4/C3
Eyes: E04/RV34/RV32/Y00

Close Up of Two of the Characters  on my Card
Close Up of the Bard and the Girl

Bard (Jaskier)
Skin: E000/E000/E00
Hair: E30/E31/E33/E35/E37
Outfit: W3/W1/W0
Lute/Boots: E31/E35/E3

Girl (Ciri)
Skin: E000/E000/E00
Hair: E99/YR24/YR23
Boots/Gloves/Dress: E37/E35/E31
Cloak: B12/B14/B16/B18

Inside of My Card
Inside of My Card

Gold Coin: Y17/Y19/Y28

————————–

Card Recipe for My Witcher Birthday Card:

Monster Hunter Stamp Set, Kindred Stamps
Paper Basics – Stamper’s Select White Cardstock, Papertrey Ink
Tuxedo Black Memento Ink
Turquoise Glow, SceneScapes 6” x 6” Prints, Lavinia Stamps
Slimline Stitched Hillside Borders, Lawn Fawn
Word Bubble Framelits Dies, Stampin’ Up!
Black Stampin’ Dimensionals, Stampin’ Up!
Basic Black and Whisper White Card Stock, Stampin’ Up!

Finished card size: 3.5” x 6”

————————–

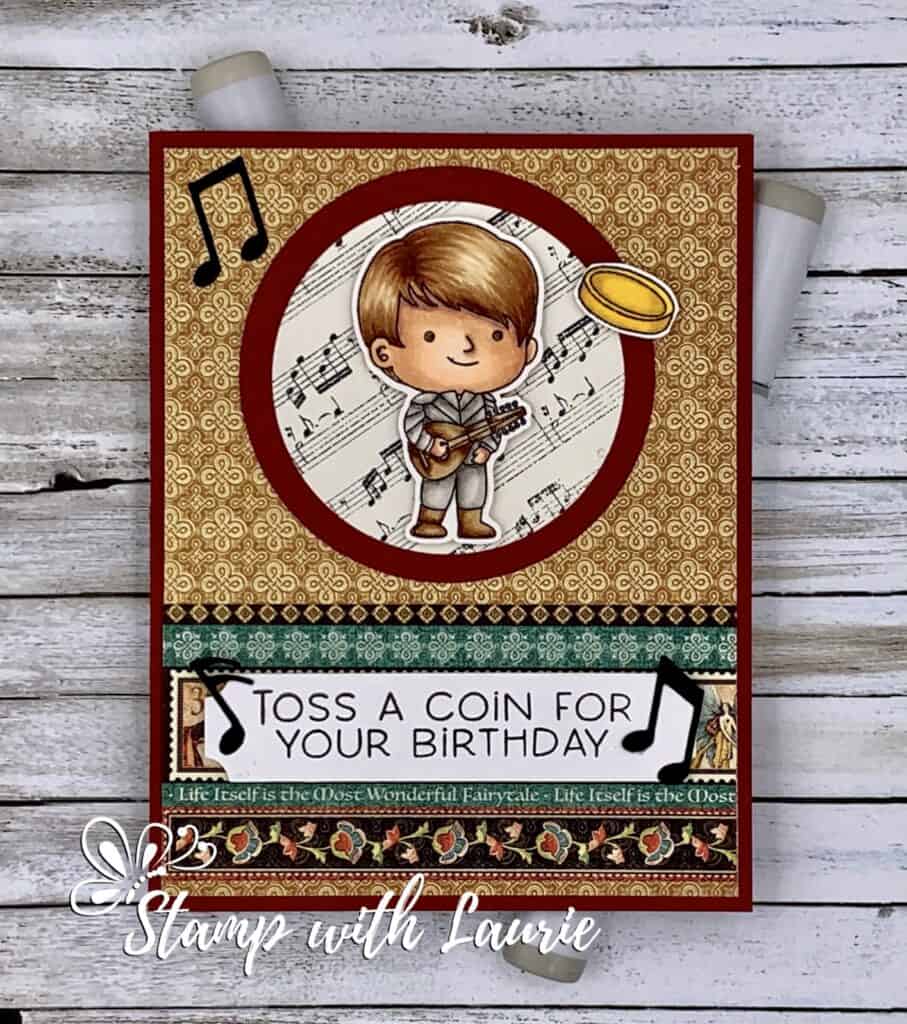
Here is My Toss a Coin Birthday Card. To read more about it, please click here.

My Toss a Coin Birthday Card

For more of my Copic cards, please click here.

For my other Slimline card, please click here.

Hope you like my Witcher Birthday Card using Monster Hunter Stamp Set by Kindred Stamps!

Thank you for stopping by!

Hugs,
Laurie
Toss A Coin Birthday Card

My Toss A Coin Card
My Birthday Card

Hello Crafty Friends! It’s Laurie here to share my Toss A Coin Birthday Card! Today is a good friend’s birthday and I thought the bard from the Monster Hunter Stamp Set by Kindred Stamps would be perfect for him! He is the best bard role player ever! Plus loves the Witcher TV show!

I coloured the whole Monster gang with my Copic markers for a colouring challenge a while ago. But I knew that I wanted to give Jonathan the bard guy for his birthday. I love the sentiment “Toss a coin for your birthday”! The Enchanted Forest Graphic 45 Paper gave my card the fantasy feel that I was looking for, and of course, you have to have music paper and notes for a bard!

Now, I just need to get the other characters onto a card as well!

————————–

Copic Markers:

Bard (Jaskier)
Skin: E000/E000/E00
Hair: E30/E31/E33/E35/E37
Outfit: W3/W1/W0
Lute/Boots: E31/E35/E37
Coin: Y17/Y19/Y28

Close up of My Toss A Coin Card
Close up of My Birthday Card

Mercenary (Geralt of Rivia)
Skin: E000/E000/E00
Hair: C2/C1/0
Outfit: C9/C7/C5/C4/C3
Eyes: E04/RV34/RV32/Y00

Witch (Yennefer)
Skin: E000/E000/E00/RV34
Hair/Outfit: C9/C7/C5/C4

The Gang from The Monster Hunter Stamp Set

Girl (Ciri)
Skin: E000/E000/E00
Hair: E99/YR24/YR23
Boots/Gloves/Dress: E37/E35/E31
Cloak: B12/B14/B16/B18

————————–

Card Recipe for My Toss A Coin Birthday Card:

Monster Hunter Stamp Set, Kindred Stamps
Paper Basics – Stamper’s Select White Cardstock, Papertrey Ink
Tuxedo Black Memento Ink
Enchanted Forest 8” x 8” Paper Pack, Graphic 45
Vintage Essentials 12” x 12” Paper Stack, DCWV Inc.
Layering Circle Dies, Stampin’ Up!
Project Life Cards and Labels Framelits Dies, Stampin’ Up!
Music Notes Die
Cherry Cobbler and Whisper White Card Stock, Stampin’ Up!

Finished card size: 4.25” x 5.5”

————————–

To view my other Copic cards, please click here.

Hope you like my Toss A Coin Birthday Card using the Monster Hunter Stamp Set by Kindred Stamps!

Thank you for stopping by!

Hugs,
Laurie
Have A Spooktacular Birthday Card

My Have a Spooktacular Birthday Card

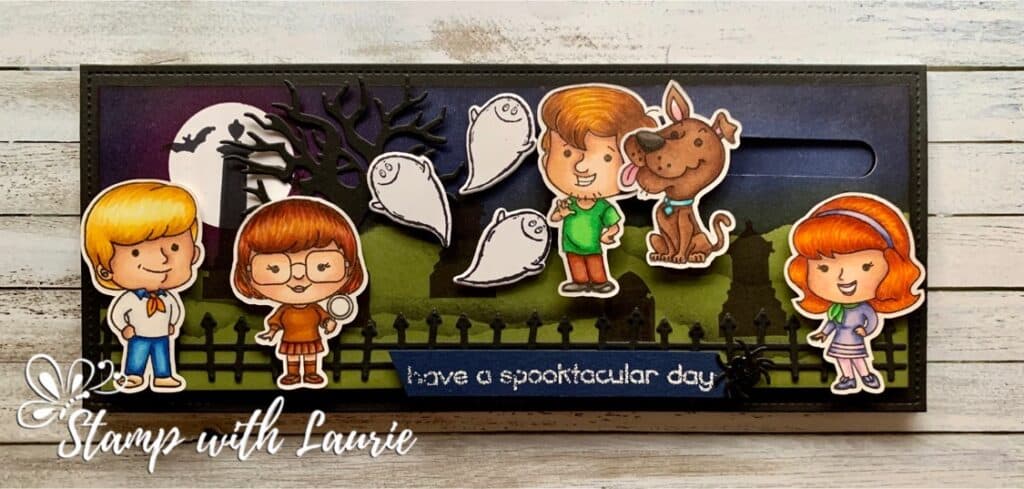
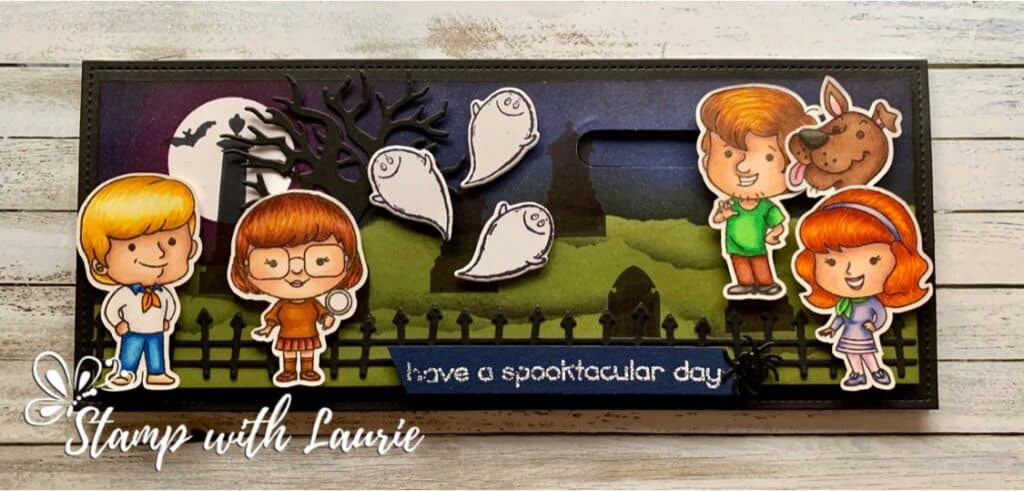
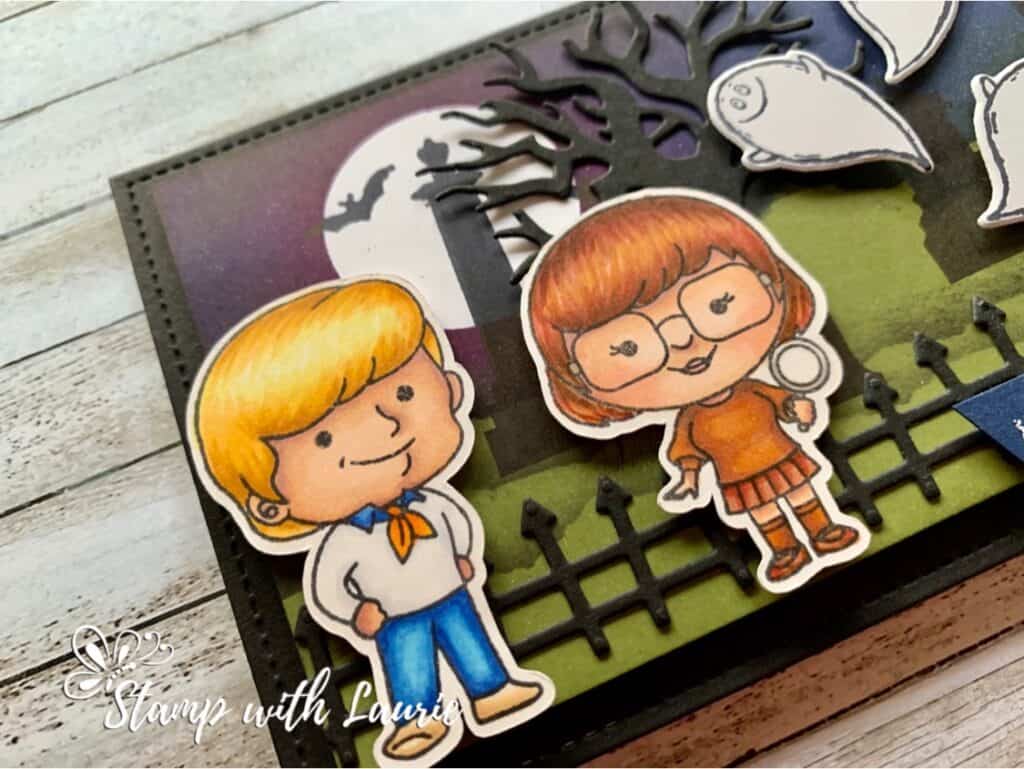
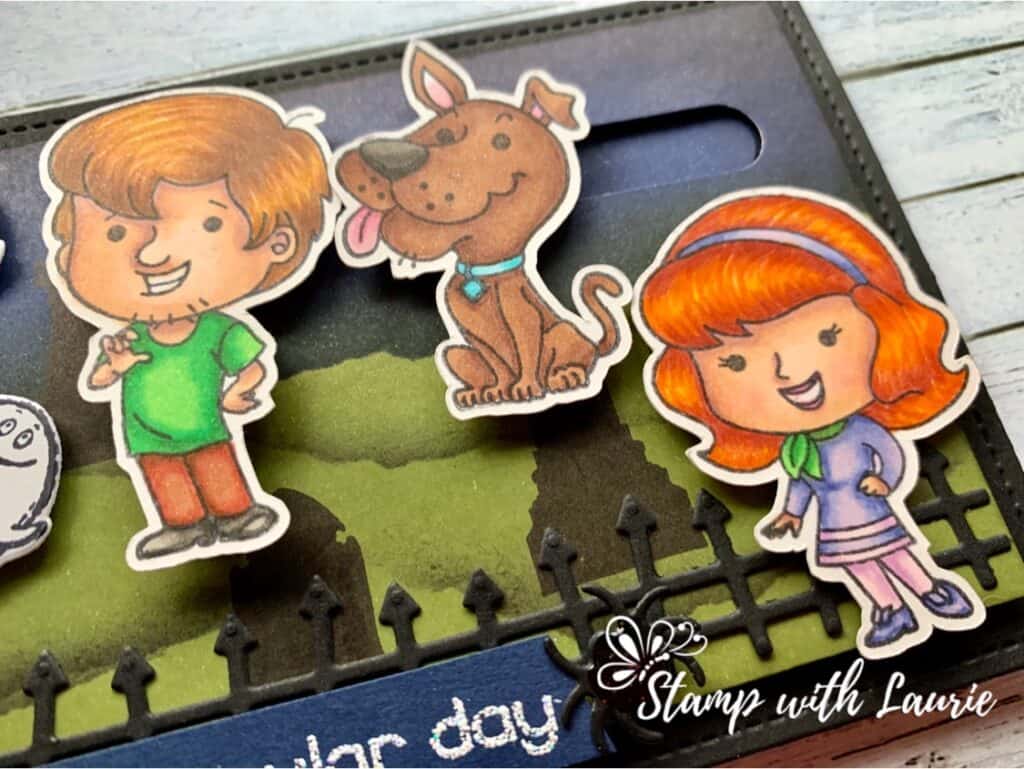
Hello Crafty Friends! It’s Laurie here with my Have a Spooktacular Birthday Card. Today is my Hubby’s birthday! He’s been hinting at a Scooby Doo card since I made one for my brother back in May (I have posted it at the end) or a Halloween card. So, I made him both! I coloured with my Copic markers the Teen Detectives from Kindred Stamps for the 30 Day Coloring Challenge in June in anticipation of this card. My card is a slimline card since they are all the rage right now.
Instructions for
Have a Spooktacular Birthday Card

I had a ton of fun creating the spooky graveyard scene with lots of sponging and masking! The moon and the ground were masked while sponging Rich Razzleberry around the moon, Night of Navy for the sky and Memento at the edges of the sky. Next, I sponged the ground in Old Olive. Since it is a lighter colour then Night of Navy, I didn’t have to bother masking the sky. I added some hills by using the same masks and lightly sponging some black ink on different angles. Once I removed the masks, I stamped the grave stones and bats in black ink.

My Have a Spooktacular Birthday Card
My Have a Spooktacular Birthday Card with Shaggy and Scooby Running Away

I added a slider mechanism for Shaggy and Scooby since they are always running away from the scary monsters in the series! LOL! And in this case, it is the cute ghosts that are immerging from the graveyard! The Large Slimline with Sliders Dies comes with sliders, but I found that they were too long for what I wanted. So, I created my own using the retired Classic Label Punch by Stampin’ Up! I punched one and a half times overlapping in the area I wanted the slider to be. I used some pennies and dimensionals to create my sliders.

A die cut spooky fence, tree and spider with Shimmery Crystal Effects to make it glitter add to the Spooktacular scene!
————————–

Copic Markers:

Fred
Skin: E000/E00/E21/E11/E04
Hair: YR24/Y35/Y13/Y11/Y00
Scarf: YR09/YR16/Y17
Shoes: E50/E53/E55
Pants/ shirt collar: B18, B26, B24, B12, B41 
Sweater: C0/C1/0

Velma
Skin: E000/E00/E21/E11/E04/R20
Hair: E57/E37/E08/E15/YR27
Skirt: E37/E08/E15
Shirt: E57/E15/YR27
Magnifier: W4/0

Close Up of Fred and Velma

Shaggy
Skin: E50/E51/E53
Hair: E57/E25/E99/YR27/YR24
Shirt: G07/YG09/YG06
Pants: E37/E08,/E15
Shoes: W8/W6/W4

Daphne
Skin: E50/E51/E53/R20
Lips: RV34
Hair: E08/YR18/YR07/YR04/Y17
Scarf: G07/YG09/YG05
Dress/Shoes/Headband: BV04/BV00/BV02
Stripes/Tights: V12/V01/RV00

Scooby
Fur: E27/E25/E23/W9
Collar: BG45/BG01
Tongue/Ears: RV34/RV32
Nose: W9/W7/W5/0

Close Up of Shaggy, Scooby and Daphne

————————–

Card Recipe for
Have a Spooktacular Birthday Card:

Teen Detectives, Kindred Stamps
Paper Basics – Stamper’s Select White Cardstock, Papertrey Ink
Large Slimline with Sliders, Lawn Fawn
Spooky Fence Die-Namics, My Favorite Things
Halloween Scene Edgelits, Stampin’ Up!
Wicked Dies, Stampin’ Up!
Cauldron Framelits Dies, Stampin’ Up!
Caldron Bubble Stamp Set
Spooky Village Stamp Set, Lawn Fawn
Graveyard Gate Stamp Set, Stampin’ Up!
Classic Label Punch, Stampin’ Up!
Glossy Accents
Shimmery Crystal Effects, Stampin’ Up!
VersaMark Ink
Shimmery White Stampin’ Emboss Powder, Stampin’ Up!
Rich Razzleberry Classic Stampin’ Pad, Stampin’ Up!
Night of Navy Classic Stampin’ Pad, Stampin’ Up!
Tuxedo Black Memento Ink Pad, Stampin’ Up!
Old Olive Classic Stampin’ Pad, Stampin’ Up!
Stampin Sponges, Stampin’ Up!
Basic Black, Night of Navy, and Whisper White Card Stock
2 Pennies for slider
Finished card size: 8.5” x 3.5”

————————–

My other Teen Detectives Card that I made for my brother. I used the same colours of the characters for both cards.

————————–

You tried to hide your birthday & you would have gotten away with it if it wasn’t for those pesky kids!.

To view my other Copic cards, please click here.

Hope you like my Have a Spooktacular Birthday Card using Teen Detectives by Kindred Stamps!

Thank you for stopping by!

Hugs,
Laurie