Home for the Holidays Alternatives

Home for the Holidays Alternatives - two Christmas cards with village scenes on them
Home for the Holidays Alternative Cards

Hello Crafty Friends! Laurie here again! I am sharing my Home for the Holidays Alternatives using the Home for the Holidays Paper October 2023 Pumpkin Kit by Stampin’ Up! When I saw this kit, I knew that I wanted to make some alternative cards! In fact, I had so much fun that I made 5 of them! Lol! I went into detail for two of them and have posted the others along with a downloadable Faux-Step Template at the end of this post.

The Details of My Home for the Holidays Alternatives

For my cards, I thought a faux-step card would be perfect way to use the detailed pre-cut village scenes! Plus, it allowed me to move the faux step to where I thought it worked best on each card!

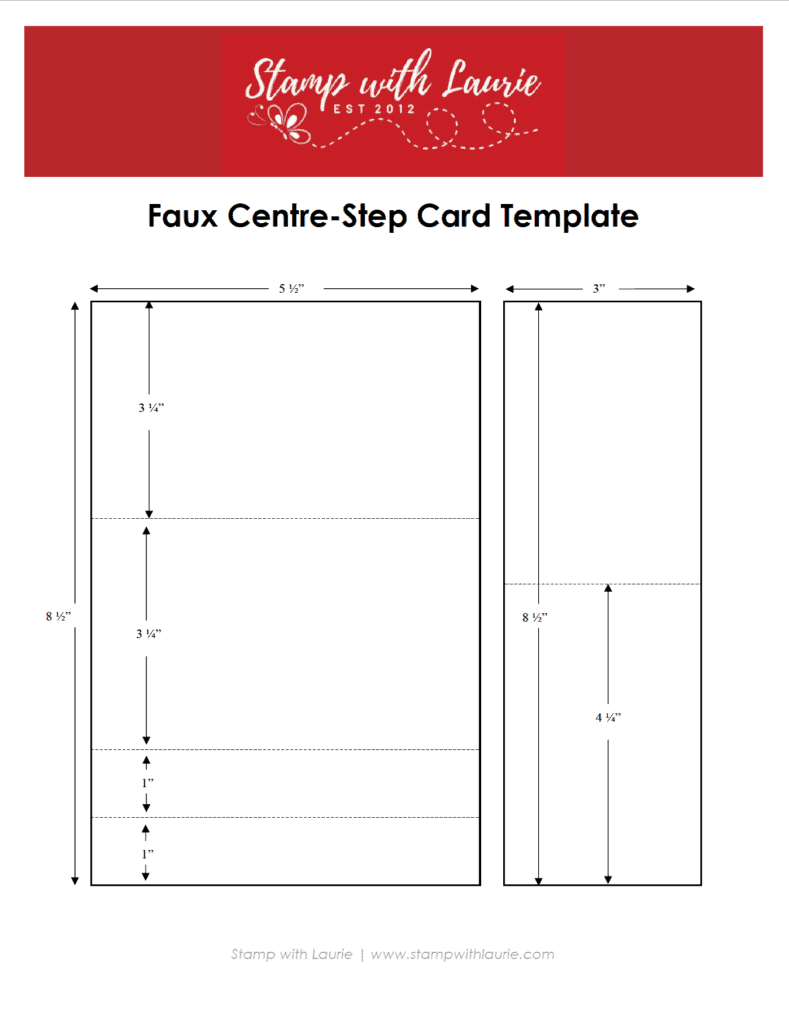
So, I cut one of the card bases from the Paper Pumpkin Kit creating a 3” piece and a 2 ½” piece. Thus, allowing me to make two cards from this one card base! Next, I used my Paper Trimmer to cut a Thick Basic White and a Night of Navy card bases using the template at the end of this post for measurements.

Basic White Alternative Card

For the Basic White card, I used the back of an envelope from the Warm Wishes Cards & Envelopes to cut a piece of the red diagonal stripes for behind my scene. I love how it makes the scene pop! Next, I placed the faux step in the centre since you can see the trees on it through the village.
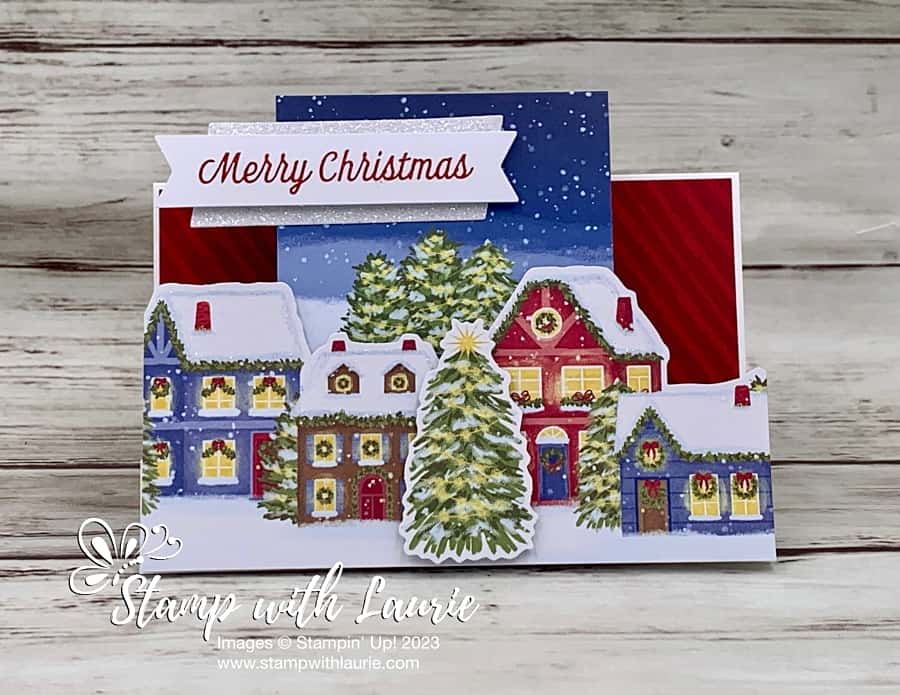
First Christmas card with village scene on it
Basic White Alternative Card

The rest of the card was built according to the placement in the instructions. I just made sure that the dimensionals for the village were on the narrow band at the bottom and my sentiment was attached to the faux step.
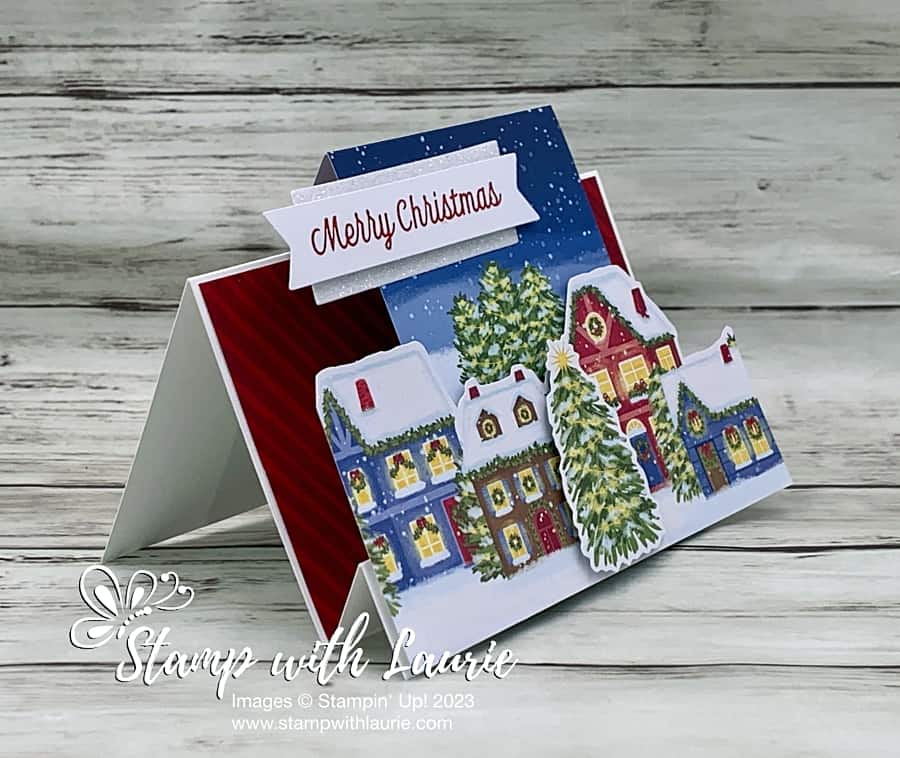
Side View of Card
Side View of First Card

Night of Navy Alternative Card

For my Night of Navy card, I used one of the cards from the 5” x 7” Warm Wishes Cards & Envelopes. I love that the night scene continues onto the back of the cards! This allowed me to cut a 5-3/8” piece of the night sky with the trees making sure that I did not include the moon in my piece (we did not need two moons on the final card! Lol!). However, this left a scored line on my final card. So, to cover the score line, I placed the faux step to the right. It also helped to balance out the smaller pre-cut village that I used.

In addition to this, I added a strip of snow from my cut-up Warm Wishes Card on the final card base under my village.
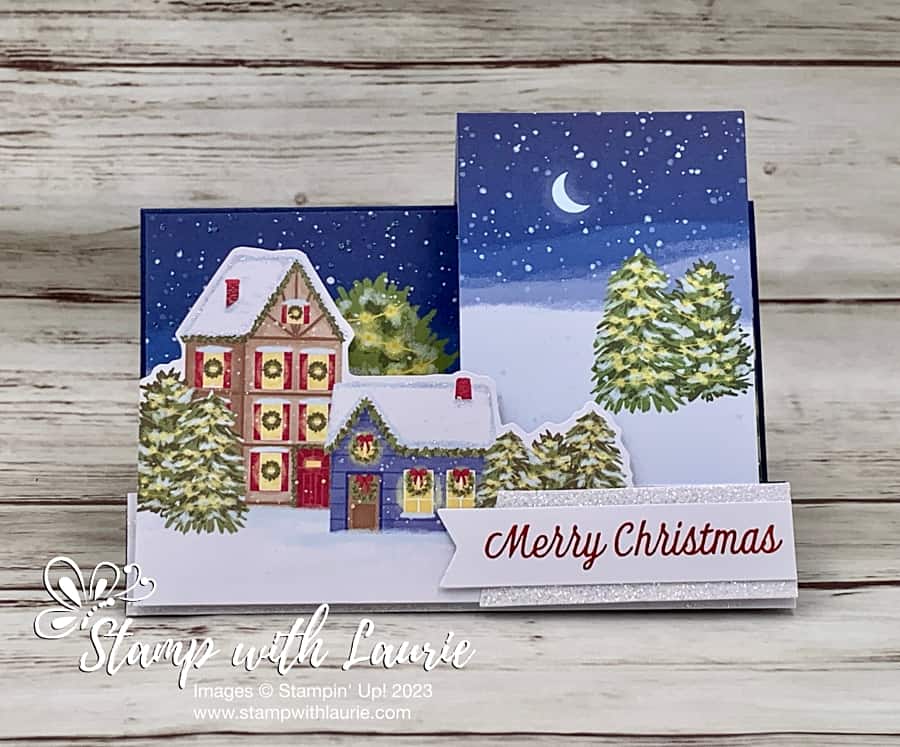
Second Christmas Card with village scene
Night of Navy Alternative Card

Since the smaller pre-cut village ended short on my card, I decided to place the glittery strip and stamped sentiment to the left covering the void. I used my paper snips to trim them down.
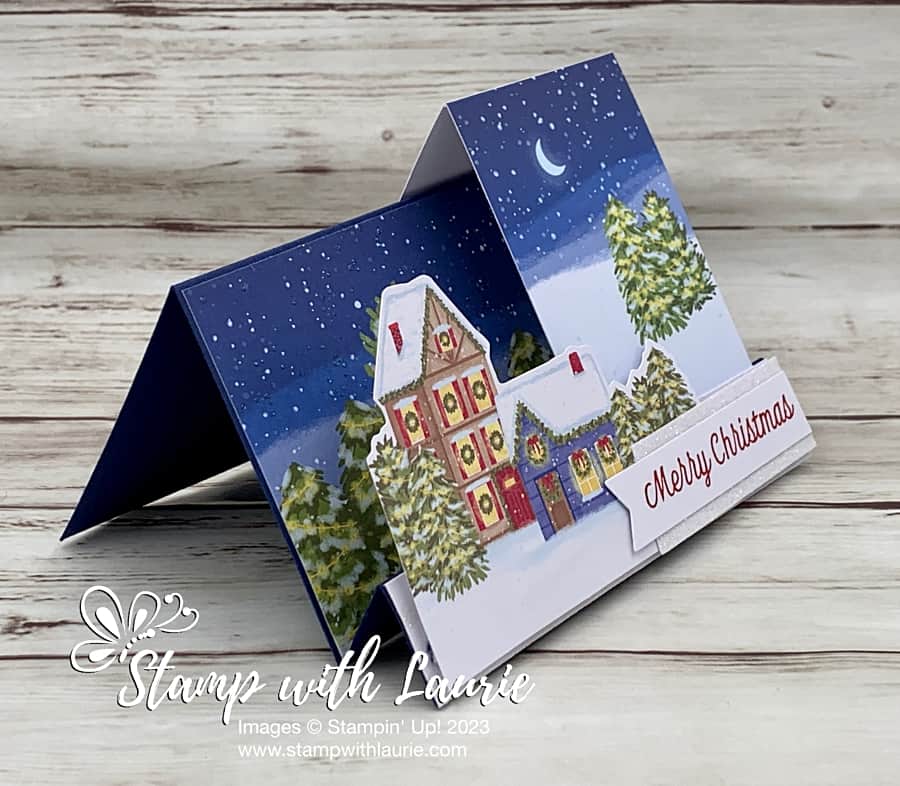
Side View of Second Card

The final thing was to add the glitter glue that came in the Kit to the snowy villages for both cards.

Supplies:

Stamps/Bundles/Dies: Home for the Holidays Paper Pumpkin Refill (163969)

Inks: Real Red Spot (in Kit)

Paper: Thick Basic White (159229), Night of Navy (100867), Warm Wishes Cards & Envelopes (163985)

Accessories: Paper Trimmer (152392), Paper Snips (103579), Bone Folder (102300), Stampin’ Dimensionals (In Kit), Stampin’ Seal (152813), Mini Glue Dots (In Kit)

Measurements: 

  • Thick Basic White/Night of Navy Card Bases:
    • 8 ½” x 5 ½” cut/scored according to template below
  • Home for the Holidays (1 card):
    • 3” vertical cut and folded (leaving 2 ½” piece for other card)
  • Warm Wishes Cards & Envelopes:
    • 5-3/8” x 3” (2 pieces – one envelope and one card)
    • 5 ½” x 1” (strip of snow)

More Information on My Home for the Holidays Alternatives

Downloadable Faux Centre-Step Template

To download a PDF of the Faux Centre-Step Template, please click here or on the picture.

Downloadable Faux Centre-Step Template

These are three other alternative cards that I made using the Paper Pumpkin Kit and the matching Warm Wishes Cards and Envelopes.

Other My Home for the Holidays Alternatives

Bridge Card Instructions

Card base cut at 1-1/8” from either end leaving 3 ¼” centre piece. Inside diagonal red pieces are from a Warm Wishes Envelope and measure 4” x 1”.
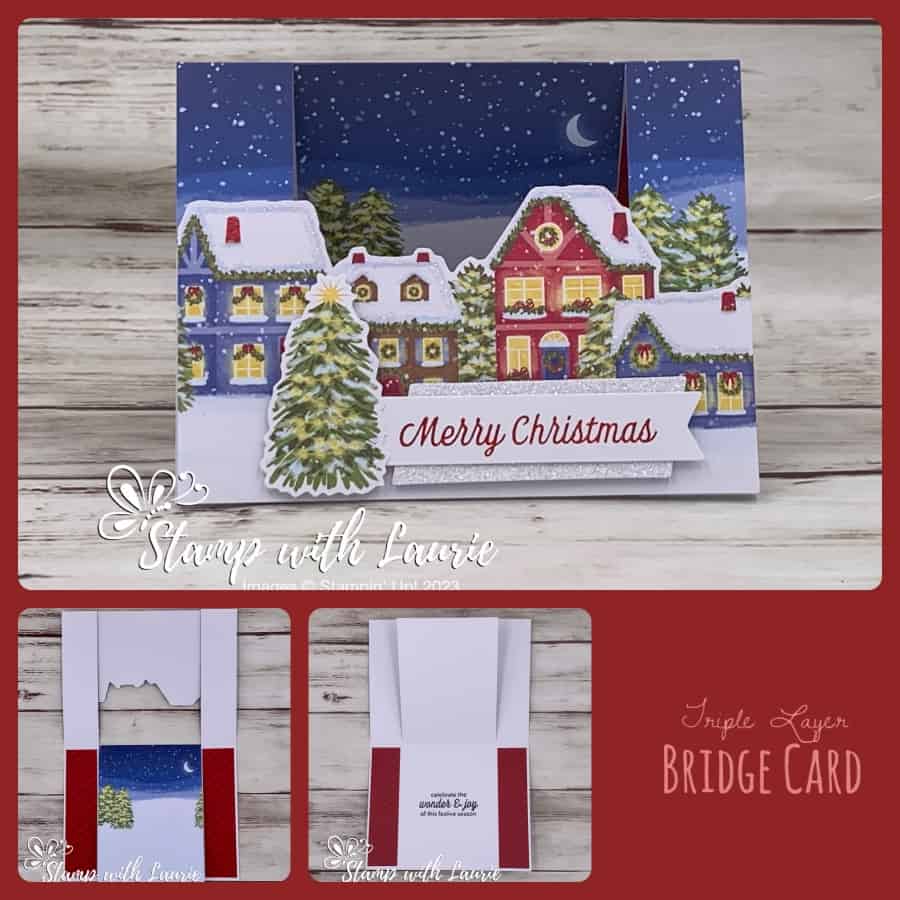
Another alternative card with a fun fold
Triple Layer Alternative Bridge Card

Easel Card Instructions

I made the card according to the kit’s instructions, but I scored a fold into the card base at 1-1/2” up from the bottom. I used a 1/2” x 5 1/4″ strip of sky from a card from the Warm Wishes Cards for a ledge for my houses to rest against.
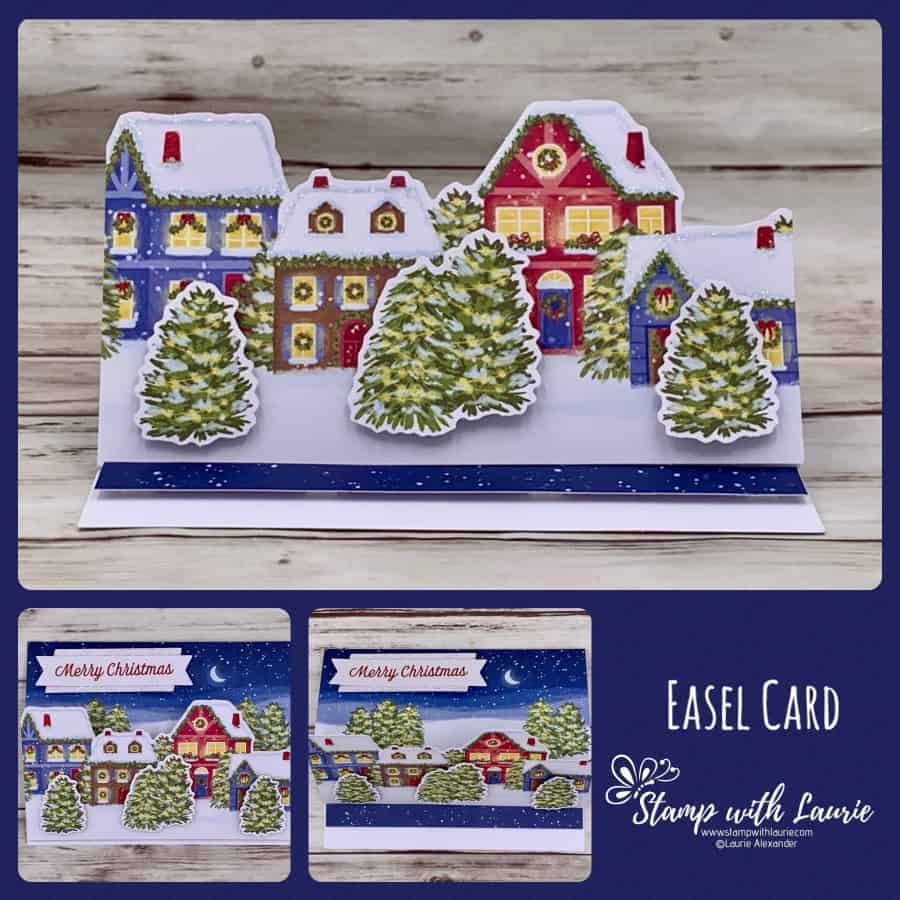
Another Alternative fun fold card
Alternative Easel Card

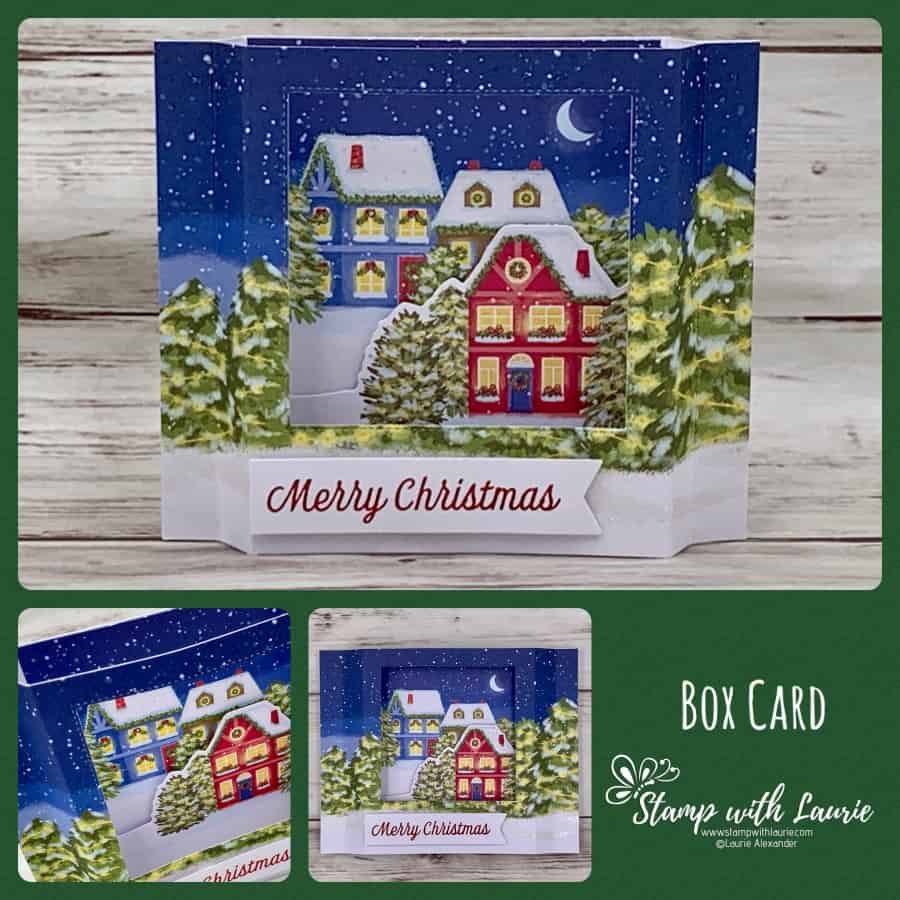
Box Card Instructions

I used back of a card base and a piece of Warm Wishes Card measuring at at 5 1/2” x 4 1/4” scored both pieces at 1/2”, 1” on each horizontal side for both pieces. For centre scene inside card, I cut front of one card 3 1/8” x 4 1/4” tall.
Another alternative fun fold card
Alternative Box Card

More of my alternative Paper Pumpkin cards, please click here.

More of my Stampin’ Up! cards, please click here.

You will find the items listed above in my online store.

Tri-Fold Shutter Card

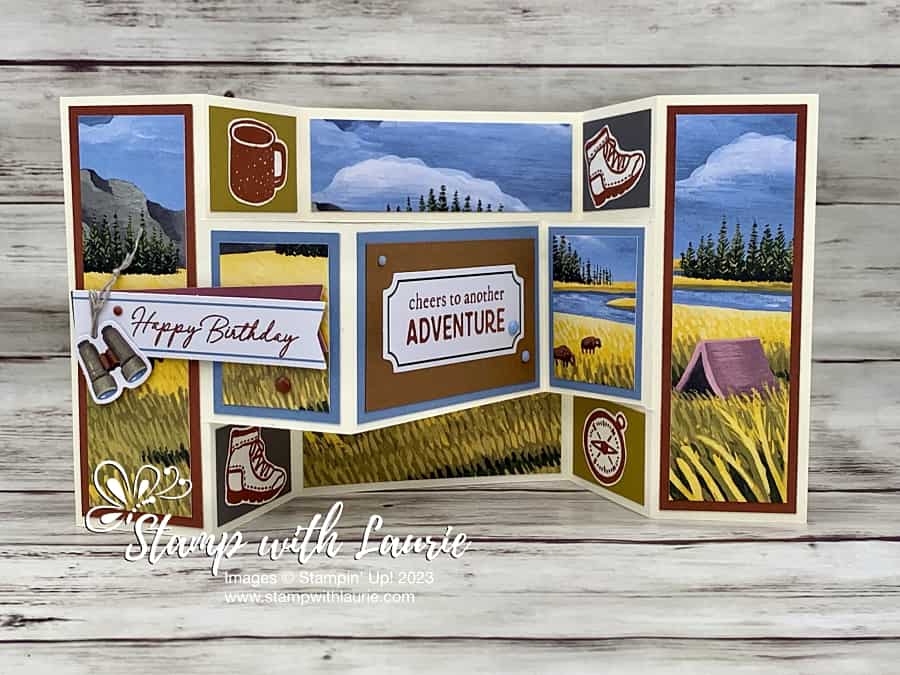
Tri-Fold Shutter Card: A fun fold birthday card with a camping theme.
Tri-Fold Shutter Card

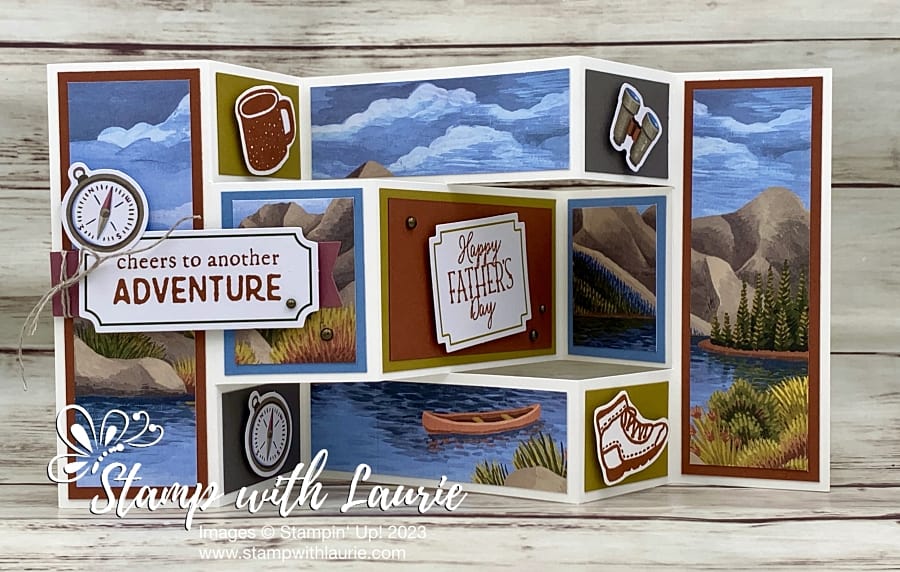
Hello Crafty Friends! Laurie here again! I am sharing my alternative Tri-Fold Shutter Card using the May 2023 Exploring In Color Paper Pumpkin Kit. I made one of these for Father’s Day (I will post it at the end) using the same kit but using a different card. It was a huge hit! So, I thought I would make one as a birthday card for a teenager who loves to camp! 

The Details of My Card

For my fun-fold card, I used a full card base front and back from the Paper Pumpkin Kit. Loved that the card bases were printed with a continual scene from front to back! Therefore, with some careful measuring, this made it easy to create my card! 

Front of Card Folded To A2 Card Size

Since the PP card base is 5 ½” tall (same as my card base), I trimmed ¼” off top and bottom to make it fit onto my card base with mats. I didn’t mat the two centre scene strips since they were so thin already. They also have the fold from the PP card base in them, but you really don’t notice it.

Next, the stamped images were from the stamp set that came in the kit. I made the boots look like they were walking. Lol! Since the stamped pieces filled the space so nicely, I didn’t need to mat them.

Card Laid Flat
Card Laid Flat

Finally, the only things that I added to my card was the card base, some In Color card stock and Adhesive-Backed Solid Gems. The linen thread, binoculars and sentiment pieces were all from the kit.

Supplies:

Stamps: May 2023 Exploring In Color Paper Pumpkin Kit, Gone Fishing Stamp Set (For Father’s Day Card) (161535)

Inks: Copper Clay Spot (In Kit)

Paper: Very Vanilla 12” x 12” Cardstock (144239), Copper Clay (161721), Boho Blue (161724), Wild Wheat (161725), Pebbled Path (161722)

Accessories: Adhesive-Backed Solid Gems (161300), Rustic Metallic Adhesive-Backed Dots (For Father’s Day Card) (159082), Linen Thread (In Kit), Bone Folder (102300), Stampin’ Dimensionals (In Kit), Stampin’ Seal (152813), Mini Glue Dots (In Kit)

Measurements: 

  • Very Vanilla:
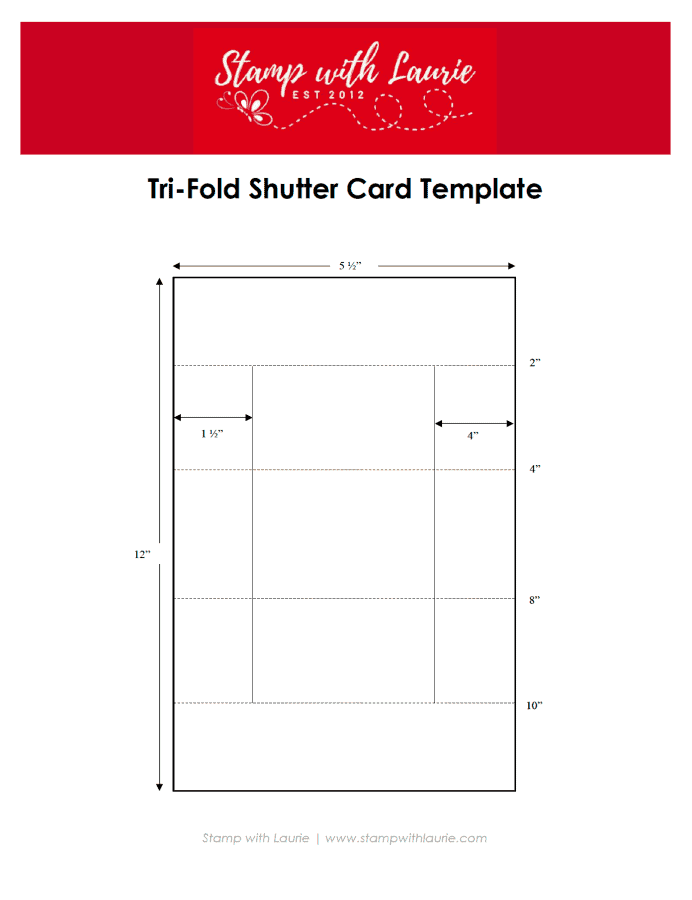
    • 12” x 5 ½” (cut/scored according to template below
  • Copper Clay: (3 pieces)
    • 1 ¾” x 5 ¼” (2 pieces)
    • 2” x 3 ½”
  • Boho Blue:
    • 2 ¼” x 1 ¾” (2 pieces)
    • 2 ¼” x 3 ¾”
  • Wild Wheat:
    • 1 ¼” x 1 ¾” (2 pieces)
  • Pebbled Path (3 pieces):
    • 1 ¼” x 1 ¾” (2 pieces)
  • Card Pieces:
    • 1” x 5” (2 pieces) (long vertical pieces)
    • 1 ¼” x 3 ¾” (2 pieces) (long horizontal pieces)
    • 2” x 1 ½” (2 pieces)

More Information on My Tri-Fold Shutter Card

Lastly, here is my Father’s Day Card using the May Exploring In Color Paper Pumpkin Kit. Same measurements as above, but a Basic White card base, different Paper Pumpkin card from the kit and Rustic Metallic Adhesive-Backed Dots. The sentiment is from the Gone Fishing Stamp Set.

My Father's Day Card
My Father’s Day Card

Downloadable Tri-Fold Shutter Card Template

To download a PDF of the Tri-Fold Shutter Template, please click here or on the picture.

Tri-Fold Shutter Template

For more of my Stampin’ Up! cards, please click here.

You will find the items listed above in my online store.
A Toast for Your Birthday!

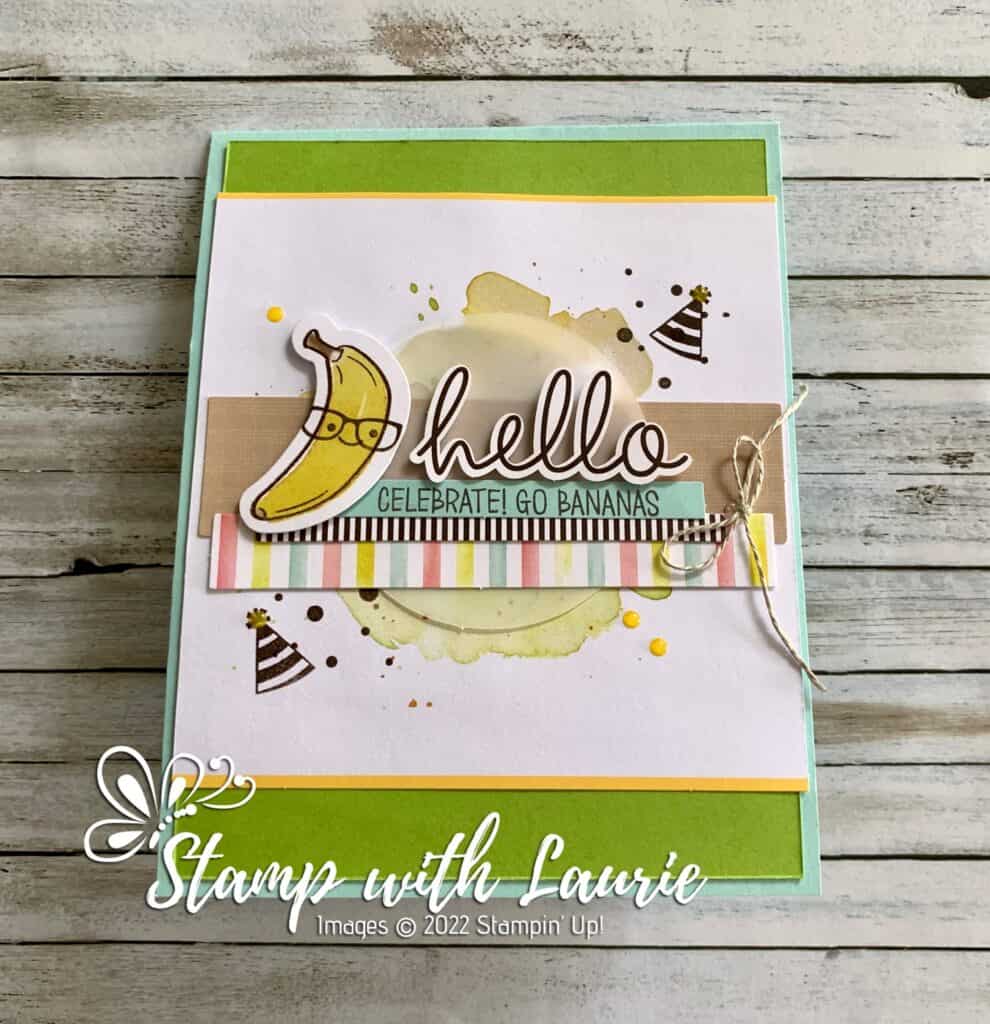
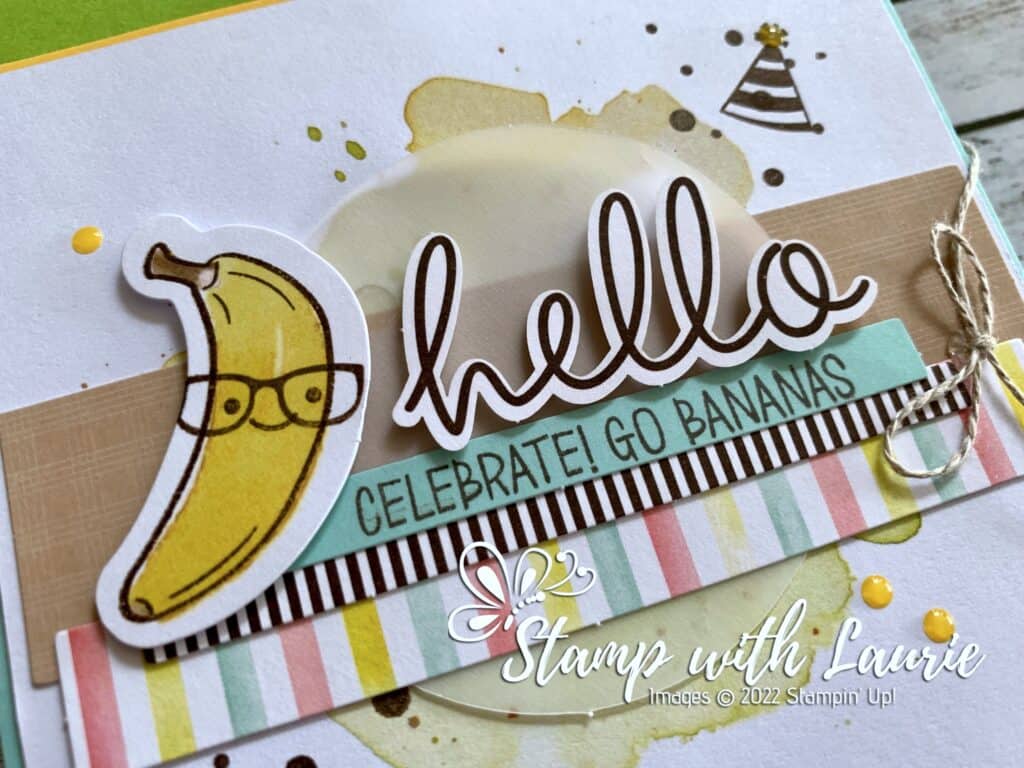
A card with a banana in glasses saying Celebrate! Go Bananas!
A Toast for Your Birthday!

Hello Crafty Friends! Laurie here again! I am sharing A Toast for Your Birthday! using the Lots of Pun Paper Pumpkin Past Kit. I had so much fun playing with this Paper Pumpkin Kit! I made some alternative cards (see at end of post for photos) when it was first released in January, but I had some leftover bits and decided to make a fun fold card. The only things I added was some card stock, adhesive and a toast sentiment! Everything else is from the kit.

Video of Pop & Twist Card in Action

This card is for a 12-year-old boy whose birthday is today! Every year I create an interactive card for him. Last year I created a card with the Give a Whirl Dies and in the past years, I created a Never-Ending Card, a Slider card, a wobble card and so on. He always says that I make the best cards EVER! Got to love that!

Details of My Pop & Twist Card

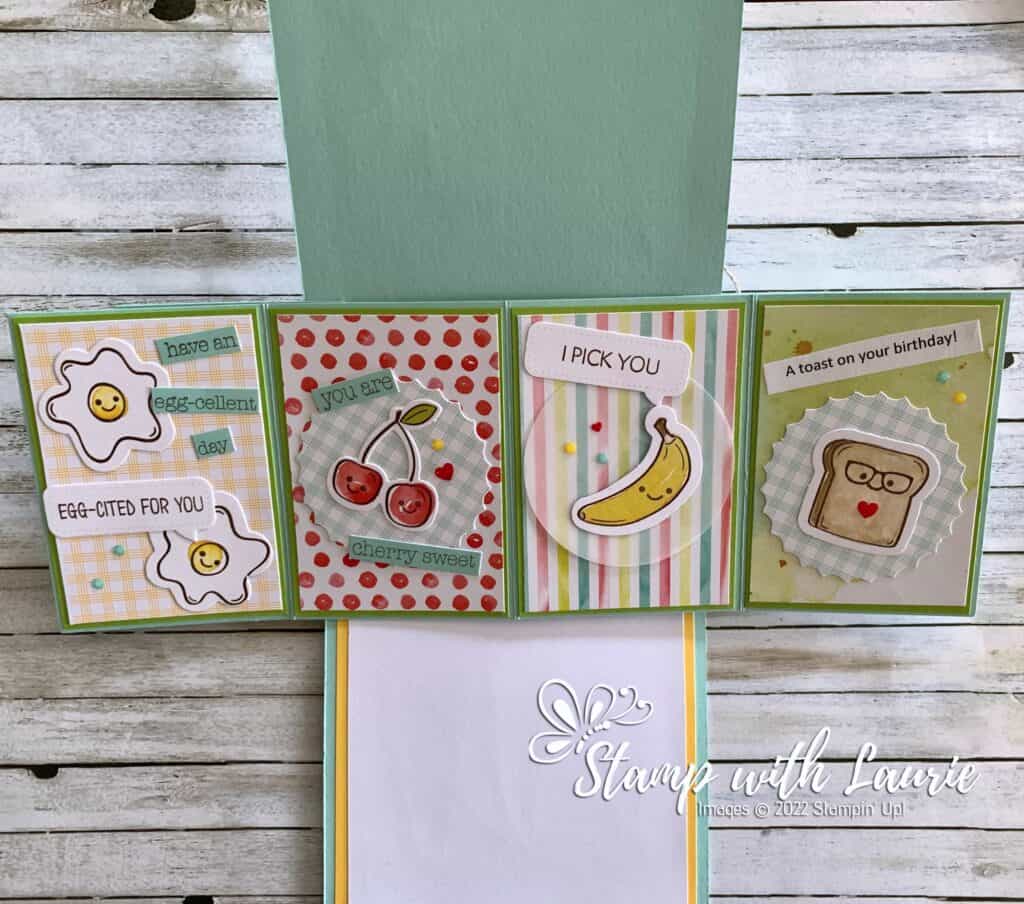
For my card, I decided to create a Pop & Twist card. I love how when you open the card, the images on the inside fold out and pop up!

The front of the card is one of the designs from the kit. I just cut it to fit a portrait card. I added a couple of stamped party hats from the stamp set that is included in the kit. A mat of Granny Apple Green was added behind the focal point.

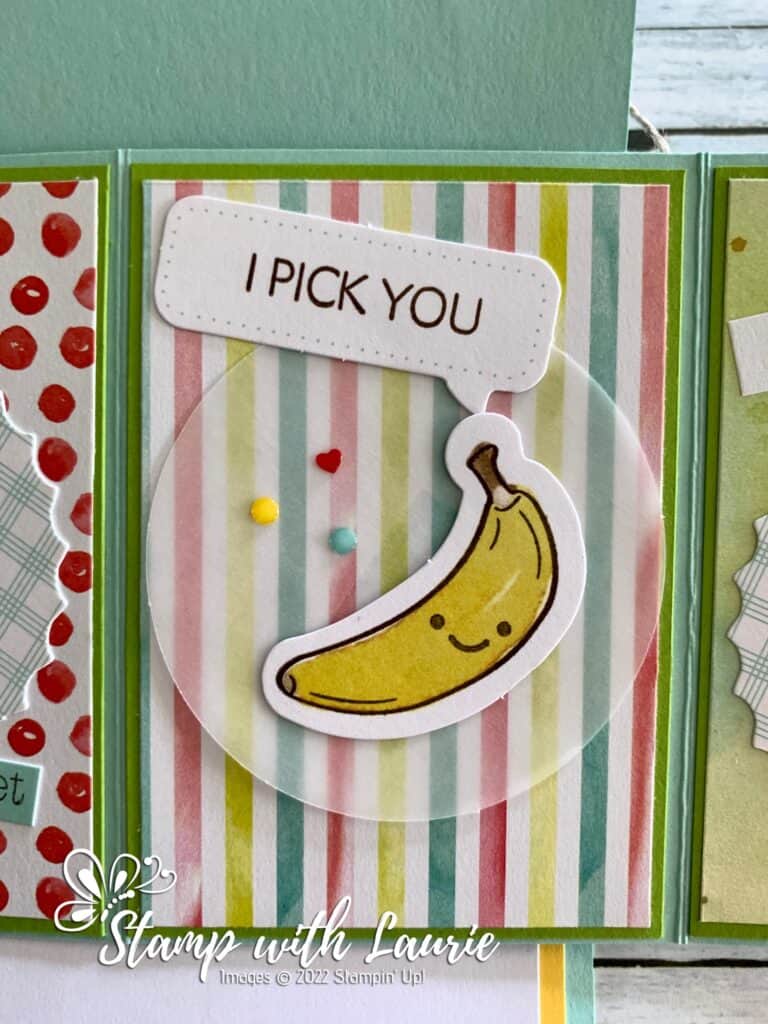
Close Up of Banana on card
Close Up of Card Front

The inside is where I got creative! There are four panels and I thought that incorporating each of the die cuts (eggs, cherries, banana, and toast) that came with the kit, would work well!

Pop-Up Inside Card
Pop-Up Inside Card

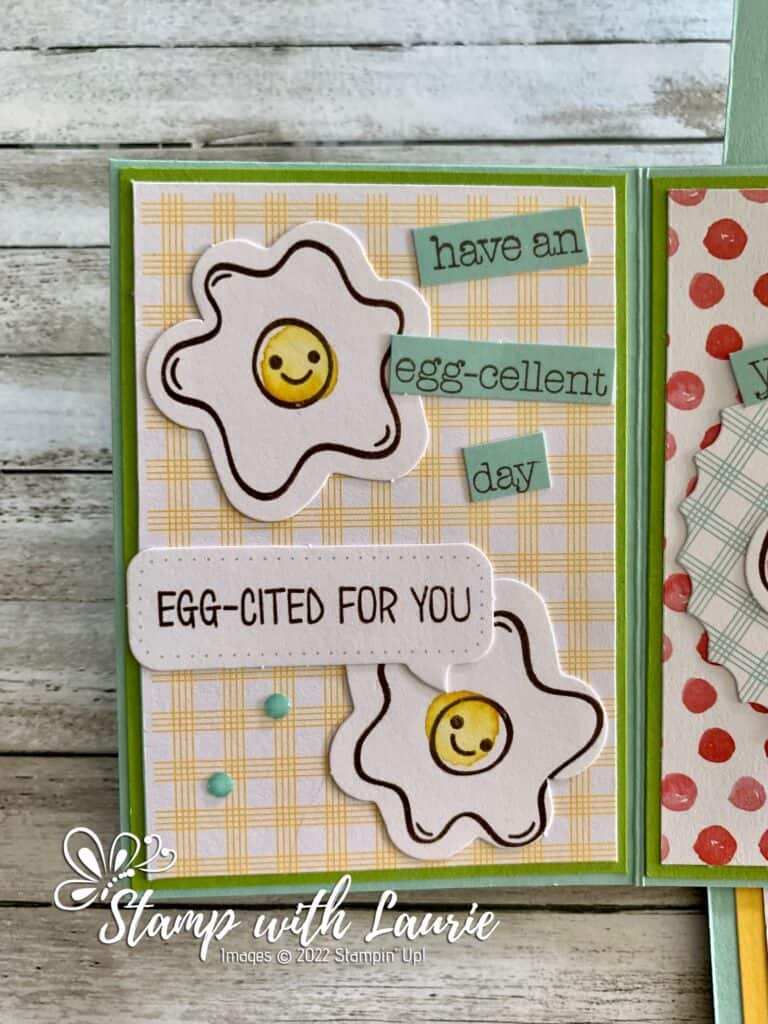
First Panel

For the first panel, I used an egg theme. I love the pun “have an egg-cellent day” and couldn’t resist using “egg-cited for you” too! Just too fun! I used one of the card bases that I cut down with a Granny Apple green mat to fit my panel.

First Panel with Eggs on it
First Panel of Pop-Up Inside of Card

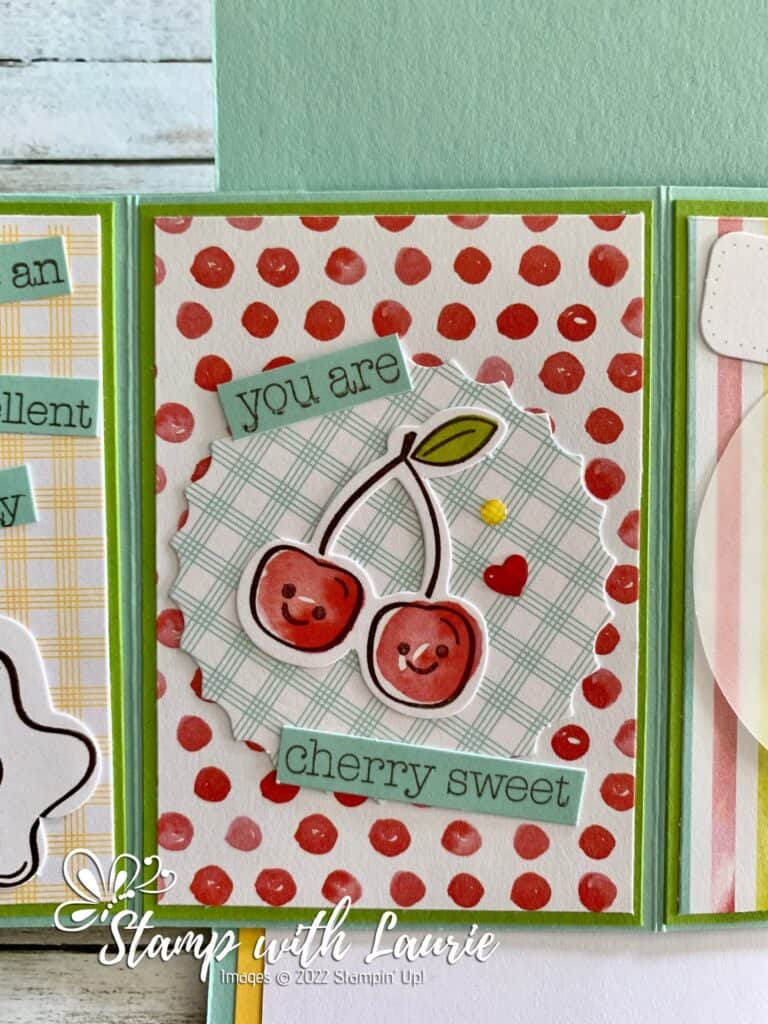
Second Panel

The next panel had the theme of cherries. So, I used the inside of one of the envelopes for the background pattern. I thought the red dots went perfectly with those sweet cherries! This is one of the things I love about the kits! The envelopes are printed both on the outside and the inside. So, once you cut them open, you can reverse the coordinating patterns to suit your design.

Second Panel on Pop Out Inside Card
Second Panel on Pop-Up Inside Card

Third Panel

For the third panel the theme was the banana. Again, I used the inside of an envelope for the background. The speech bubbles are so fun!

Third Panel on Pop-Up Inside Card

Fourth Panel

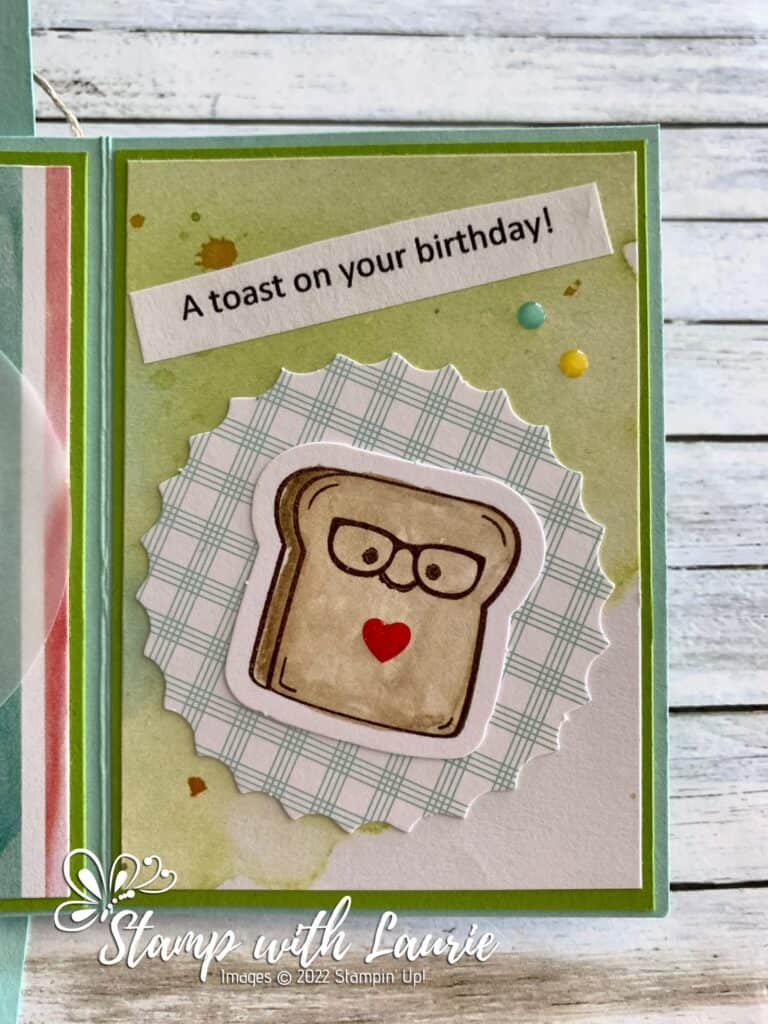
For the last panel, the theme was the toast. I didn’t have an appropriate sentiment. So, I printed one off on my computer to suit the birthday theme. I used the inside of an envelope once again for my background piece. Aren’t the glasses on the toast fun!

Fourth Panel on Pop-Up Inside Card

I added a scattering of the Enamel stickers that came with the kits on all the panels.

Product Details of the Lots of Pun Paper Pumpkin Past Kit

Make cards to “loaf” with the Lots of Pun Paper Pumpkin Past Kit! Restock on cute ‘n’ colorful die-cut snacks and one-of-a-kind patterns and designs. Keep the laughs rolling and those knees slapping with everything you need to make fun ‘n’ fresh cards all year long. Don’t miss out on this egg-cellent opportunity to craft with the Lots of Pun Paper Pumpkin Kit!

Kit includes:

9 printed card bases: 3 each of 3 designs
9 printed envelopes
Precut paper pieces
Precut vellum pieces
Enamel stickers
Twine
Adhesive

Completed card size: 4-1/4″ x 5-1/2″

Product colors: Crumb Cake, Daffodil Delight, Early Espresso, Granny Apple Green,
Pool Party, Poppy Parade

Supplies:

Stamps/Bundles/Dies: Lots of Pun Paper Pumpkin Past Kit (159304)

Inks: Early Espresso Spot (From Kit)

Paper: Pool Party (122924), Granny Apple Green (146990), Printer Paper for toast sentiment

Accessories: Paper Snips Scissors (103579), Bone Folder (102300), Dimensionals (from kit), Stampin’ Seal (152813), Mini Glue Dots (from kit)

Measurements: 

  • Pool Party:
    • Card Base: 4 ¼” x 11” scored a 5 ½”
    • Panel Strip: 10” x 3 ½” scored on long side at 2 ½”, 5” & 7 ½” 
    • Pop Out Mechanism: 8” x 3 ½” scored on short side at 1 ¾”
      • Mark long side at 2 ¼” & 5 ¾” (both sides) and score diagonally
  • Granny Apple Green:
    • 5 ¼” x 4”
    • Panel Mats: (4) 3-3/8” x 2-3/8” 
  • Inside Panels (Envelopes & Card Front): (4) 3 ¼”x 2 ¼” 
  • Daffodil Delight (Outside of Envelope for Inside Card Mat): 5 ¼” x 4”
  • Basic White (For Inside Card): 5” x 3 ¾”

My Other Alternative Cards

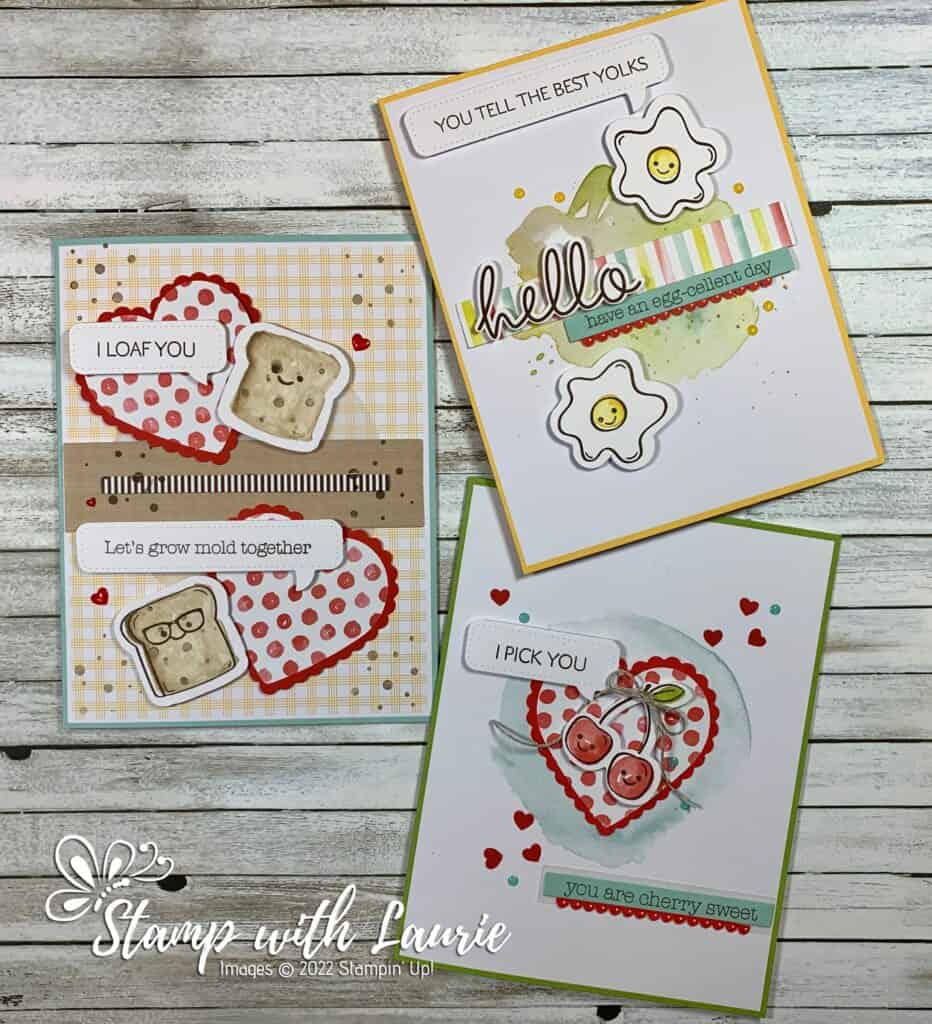
My Alternative Cards
My Alternative Cards Using Lots of Pun Paper Pumpkin Past Kit

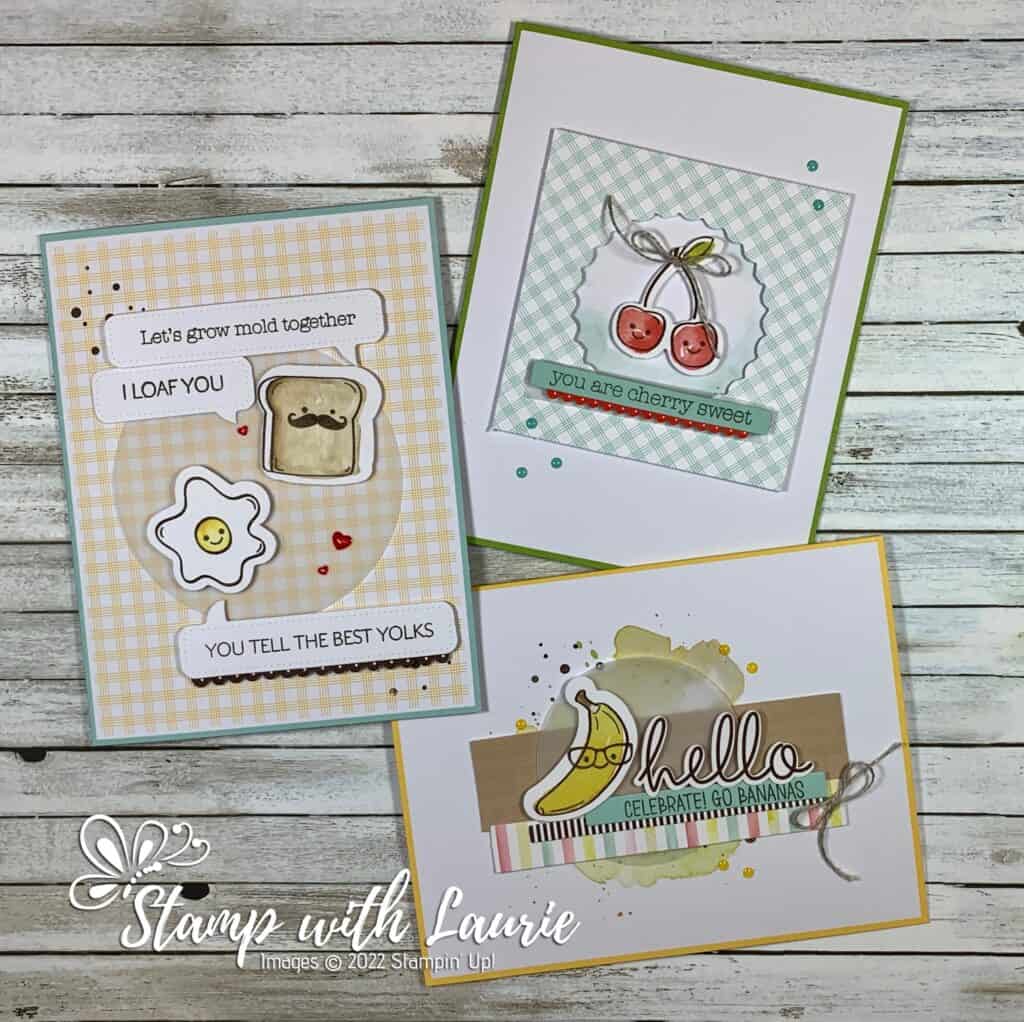
The Cards from the Kit

Cards From the Lots of Pun Paper Pumpkin Past Kit

For More Information

For more of my Stampin’ Up! cards, please click here.

To view my Paper Pumpkin Alternatives for other kits, please click here.

To order the Lots of Pun Paper Pumpkin Past kit, please click here.

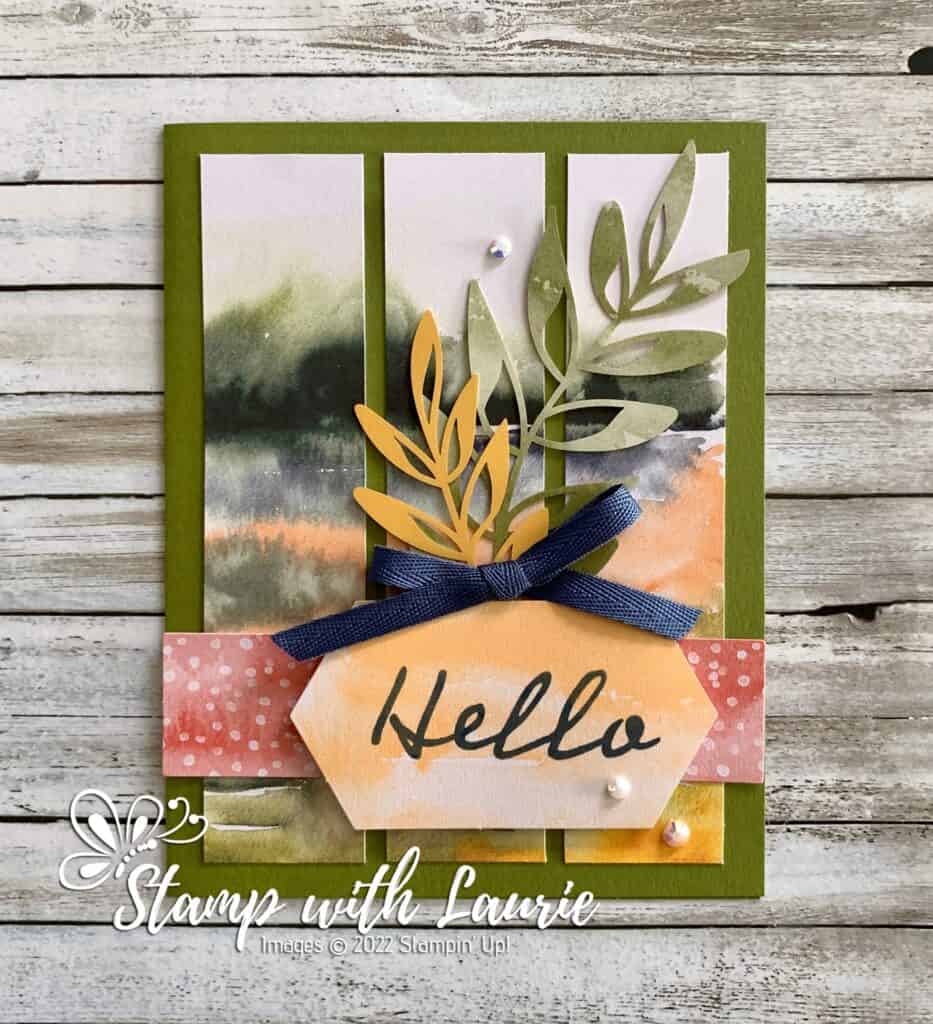
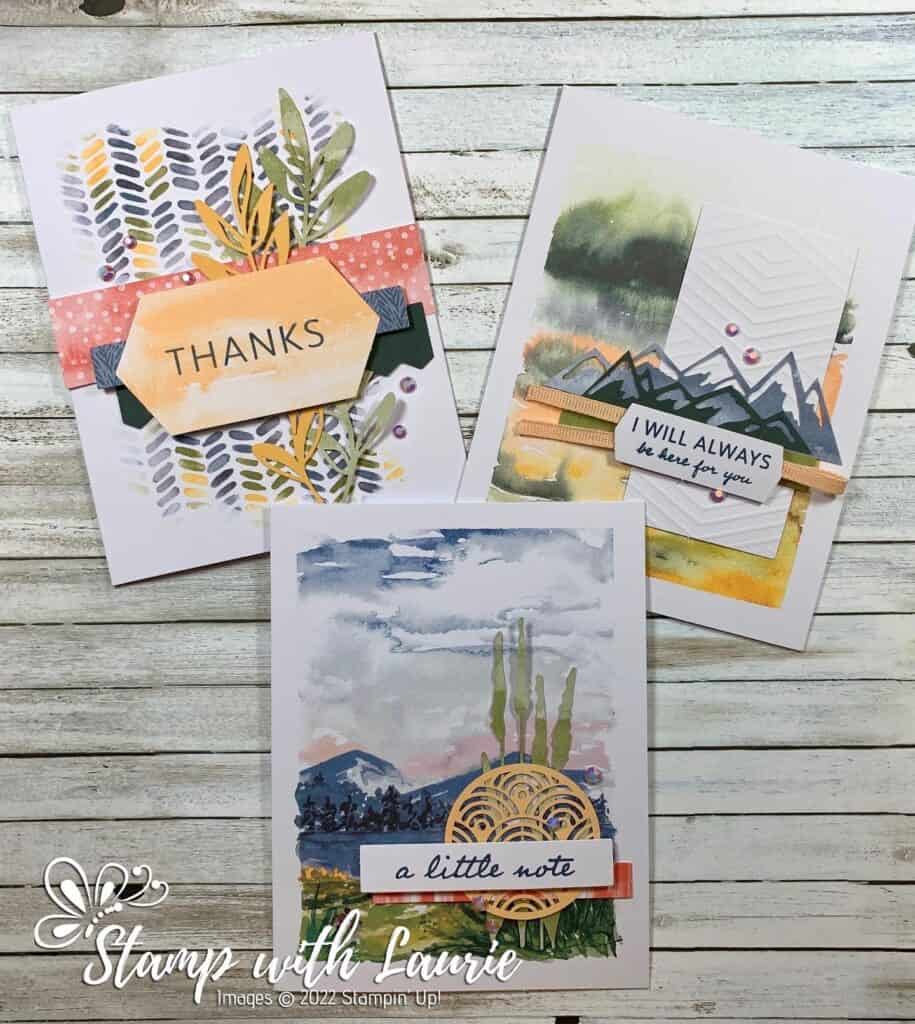
Beyond the Horizon Alternative Cards

Alternative Cards using the March 2022 Paper Pumpkin
Beyond the Horizon Alternative Cards

Hello Crafty Friends! Laurie here again! I am sharing my Beyond the Horizon Alternative Cards using the March 2022 Beyond the Horizon Paper Pumpkin. I loved this kit! It was perfect for all those masculine cards that you need to make. And I loved that it coordinated with the New Horizons Suite Collection!

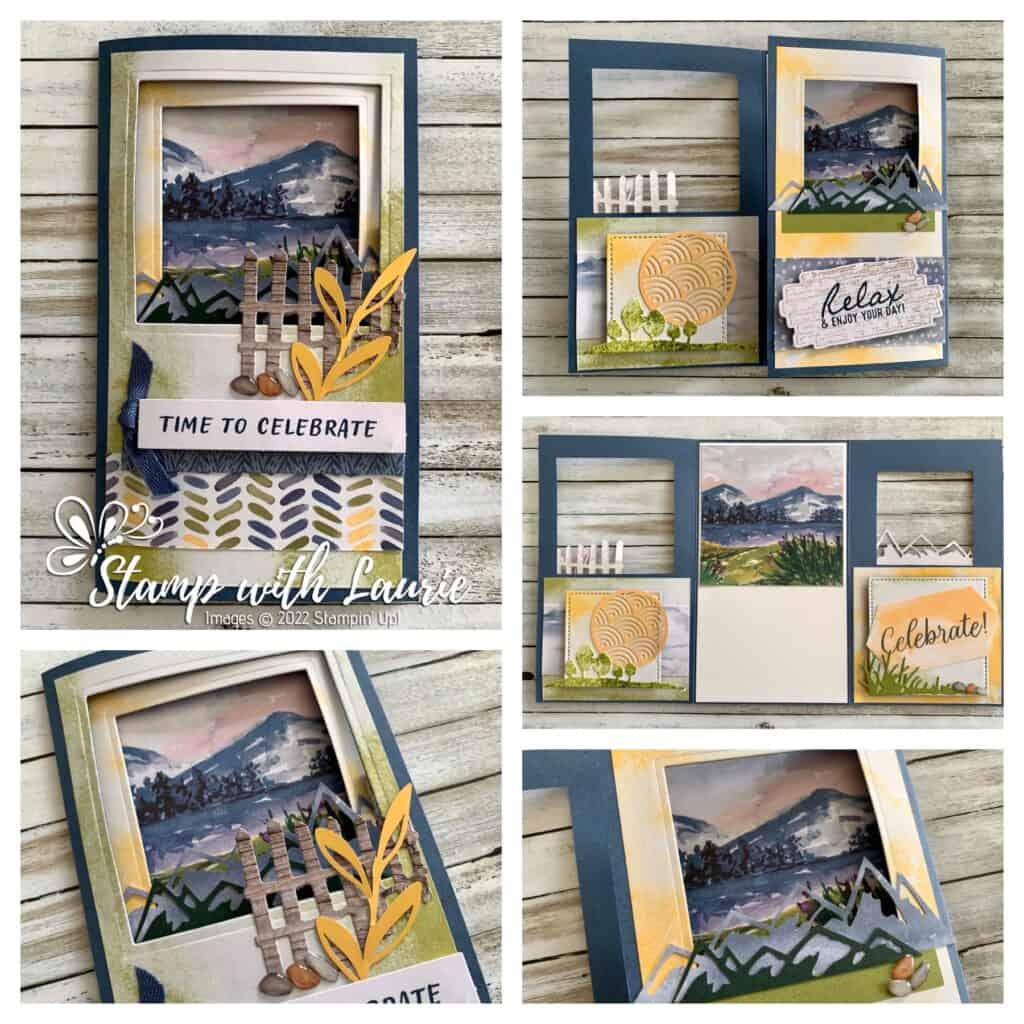
I loved this Kit so much, that I created several alternative cards! I have gone into detail for my Mini Slimline Tri-Fold Window. At the end of this post, I have photos of all the other alternative cards with brief descriptions.

Details of My Mini Slimline Tri-Fold Window Card

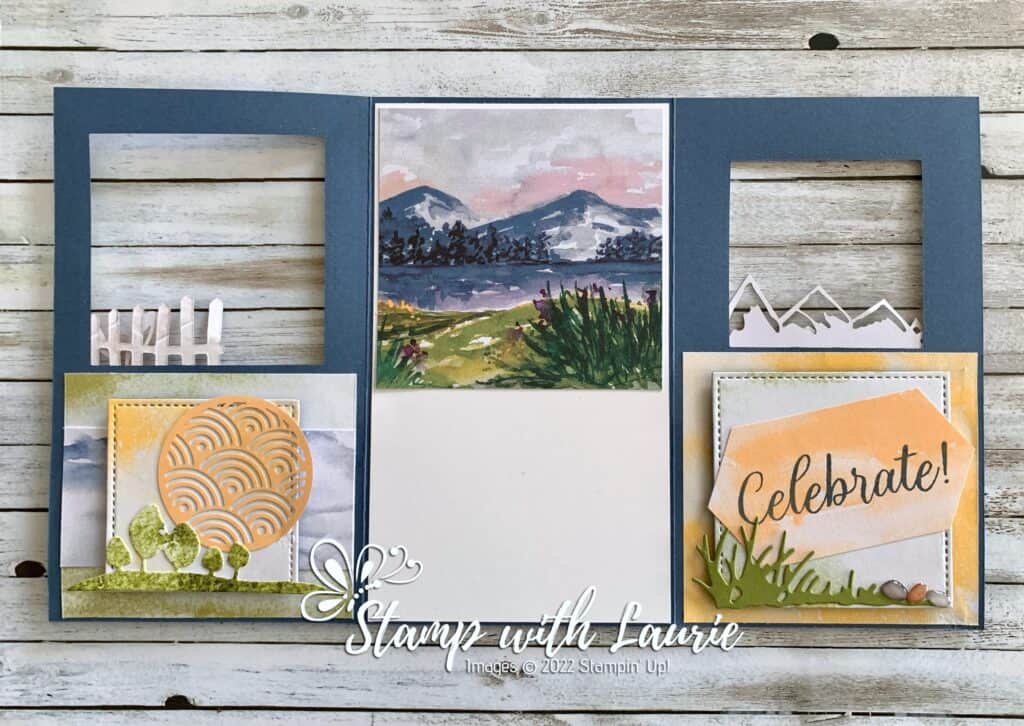
For my first card, I decided to create a mini slimline Tri-Fold Window Card by combining the Paper Pumpkin Kit and the New Horizons Suite Collection. I thought it would be neat to see the beautiful water coloured scene peeking out of the windows between the mountain die cuts that came with the kit!

How to Cut the Card Base

The Misty Moonlight card base is 6” x 10.5” and scored at 3.5” and 7” along the long side to create 3 panels. I used the 2 largest retired Stitched Squares to create my windows for the scene. The largest Square on the outside panel and the next size down on the inside panel.

The Front Panel

Front of Tri-Fold Card

I cut apart 2 envelopes to use for my background pieces in Old Olive and Bumblebee. The Old Olive piece was on the front panel and the Bumblebee was on the right inside panel.

Tip: since the envelopes are thinner than card stock, you can glue them down and cut both the panel and the envelope at the same time.

The envelopes are printed on both sides. So, I was able to flip over leftover pieces where I needed another design such as the cross hatching on the front panel and the Misty Moonlight dotted piece. 

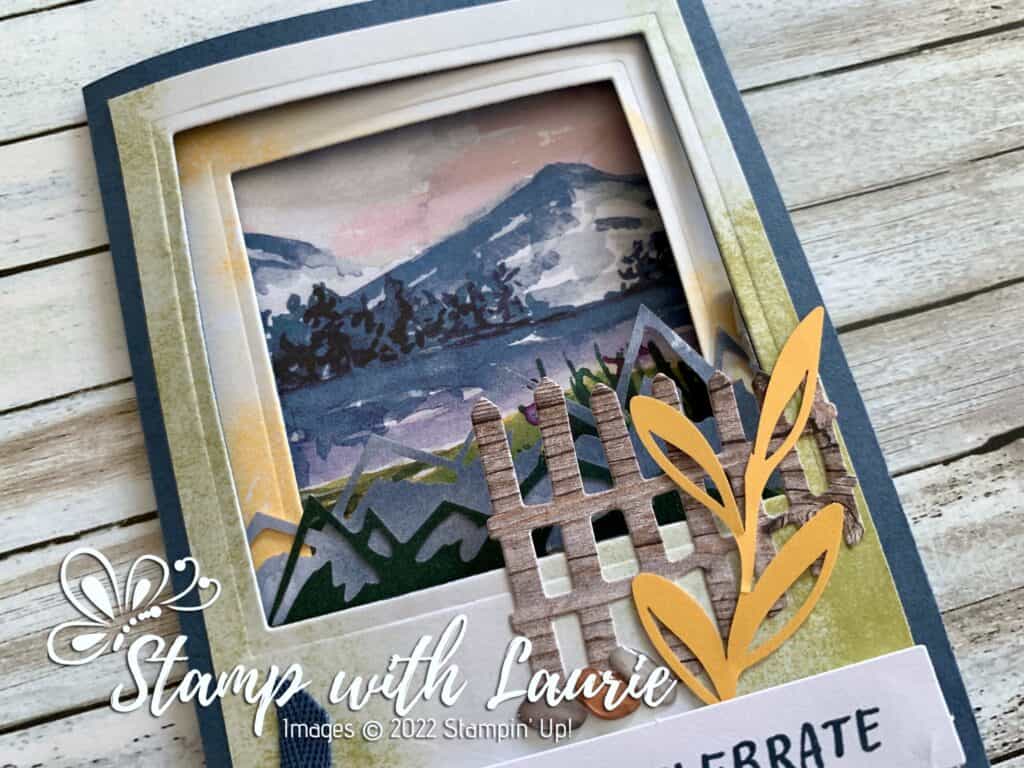
I used a small piece of the In Good Taste DSP for my fence to give it a wooden look. Don’t you just love the Pebbles Enamel Shapes! I couldn’t resist using them on three of my panels!

Close Up of Scene Through The Windows

The Right Inside Panel

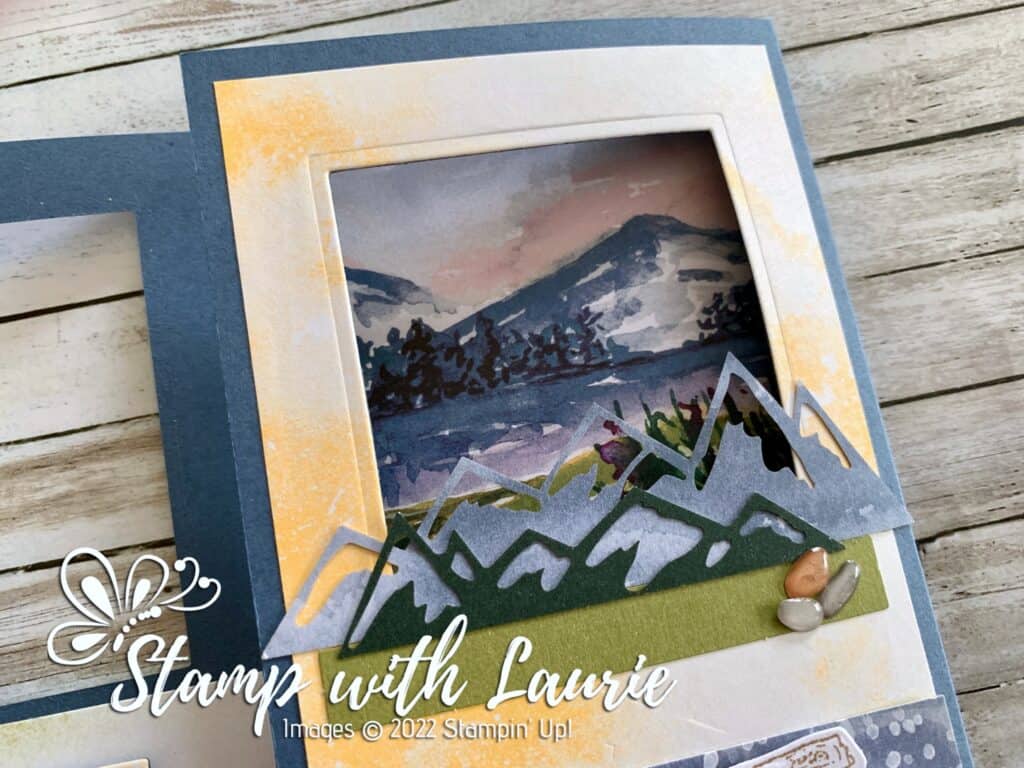
I thought that the mountain dies that came in the Kit would be perfect to layer on the bottom of the Bumblebee window. Almost like you are looking through mountains at the scene.

Right Inside Panel

For this panel, I stamped the sentiment in Misty Moonlight onto a die cut Crumb Cake wood piece. Then I and layered it in front of a scrap of the dotted Misty Moonlight envelope.

Mountain Die Cuts with Scene

The Inside Panels

For the inside panels, I used leftover pieces of the envelopes under the windows and layered the leftover stitched squares on top.

For the left panel, I created a scene using the die cut trees from the Collection and the circle from the kit. Don’t you think the circle looks like a sun! I even used the trimmed top of the water-coloured piece for my sky behind the stitched square. I don’t throw anything out just in case I can use it.

Inside With All Panels Open

For the inside panel on the right, I used the sentiment from the floral stamp set that was the gift in the kit. I added some grasses and those pebbles again.

For the center piece, I added a Basic White mat to frame the water-coloured piece allowing an area to write.

Supplies:

Stamps/Bundles/Dies: New Horizons Suite Collection (157782)

Inks: Crumb Cake Classic Stampin’ Pad (147116), Misty Moonlight Spot (From Kit)

Paper: Misty Moonlight (153081), Basic White (159276), Old Olive (100702), In Good Taste Designer Series Paper (152494), New Horizons 6″ x 6″ Designer Series Paper (157768)

Accessories: 1/8″ Cotton Ribbon Combo Pack Paper (158140), Pebbles Enamel Shapes (158141), Retired Stitched Rectangles, Bone Folder (102300), Stampin’ Dimensionals (104430), Stampin’ Seal (152813), Mini Glue Dots (103683)

My Other Alternative Cards

Second Alternative Card

Second Alternative Card

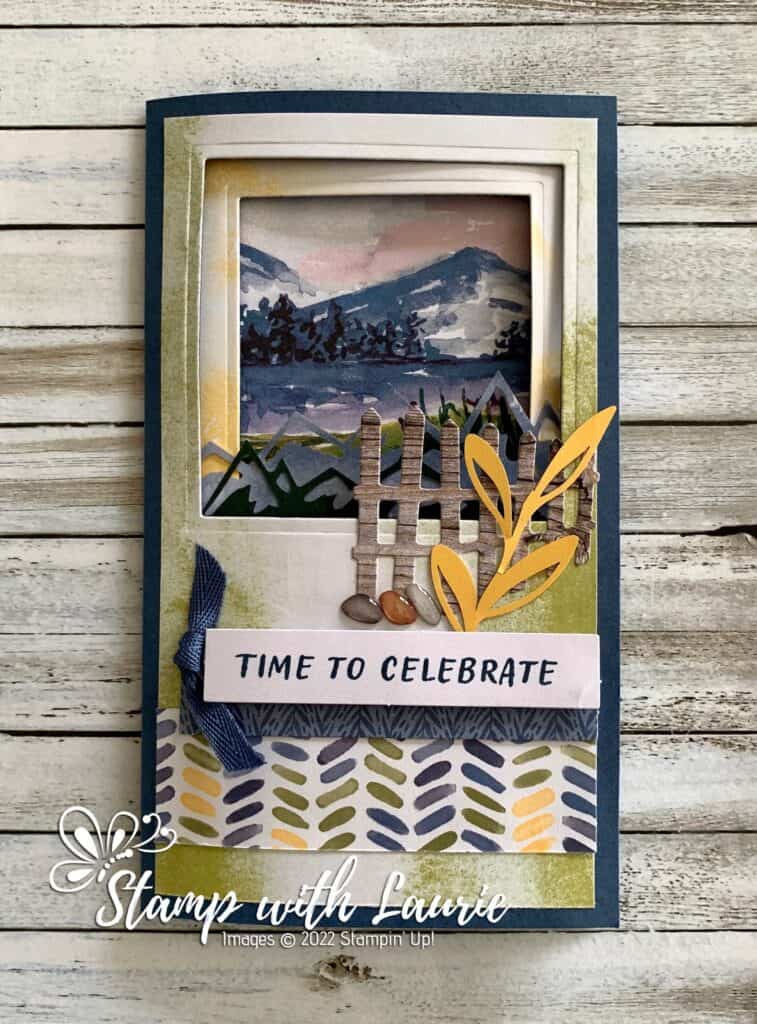
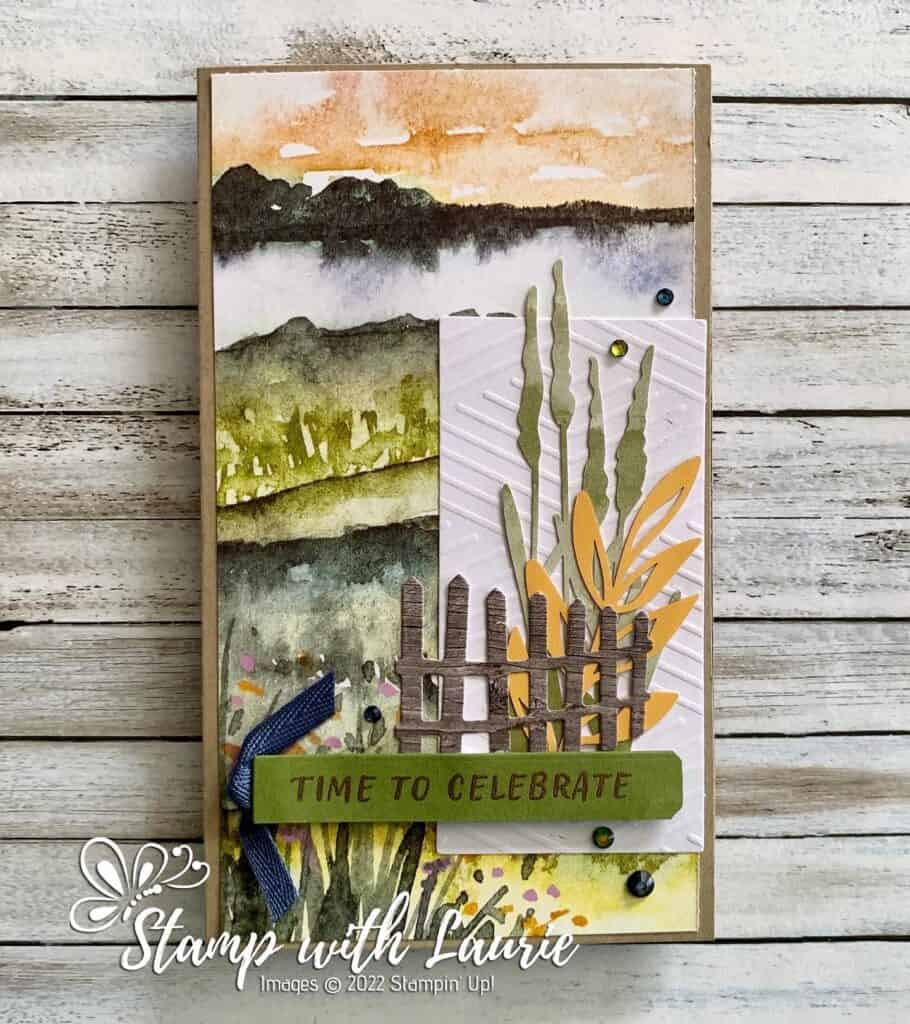
This one of my alternative cards using the March Paper Pumpkin that I made for my Father-in-law’s birthday! It is based on the mini slimline design that they show on the back of the instruction sheet, but, of course, with a few tweaks from me.

I decided to use In Good Taste DSP for my fence to give it a wood texture. Since the card was for my FIL, I decided to use Old Olive card stock for the Time to Celebrate sentiment with the Lovely Labels Pick a Punch. A simple knot suited my FIL’s taste more than a bow. I used my Stampin’ Blends in Dark Old Olive and Dark Misty Moonlight to colour some rhinestones to match the New Horizons DSP.

Third Alternative Card

Third Alternative Card

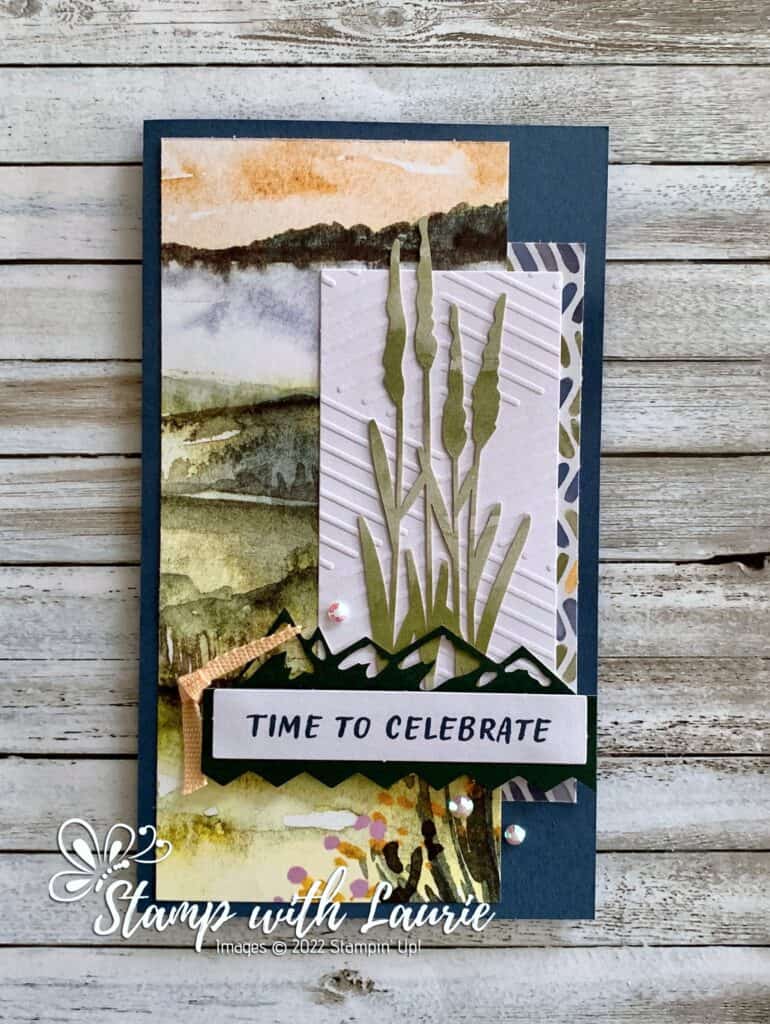
I based this alternative on a mini slimline card, but I used the remainder of the New Horizon Designer Series Paper from the previous card. Since the DSP didn’t fill the background, I added a leftover piece of envelope behind the white embossed piece. I decided to use the Shaded Spruce die cut mountains that matched the jagged piece from the kit to create a base for my sentiment. For embellishments, I used the ribbon and the rhinestones from the Kit.

Fourth Alternative Card

Fourth Alternative Card

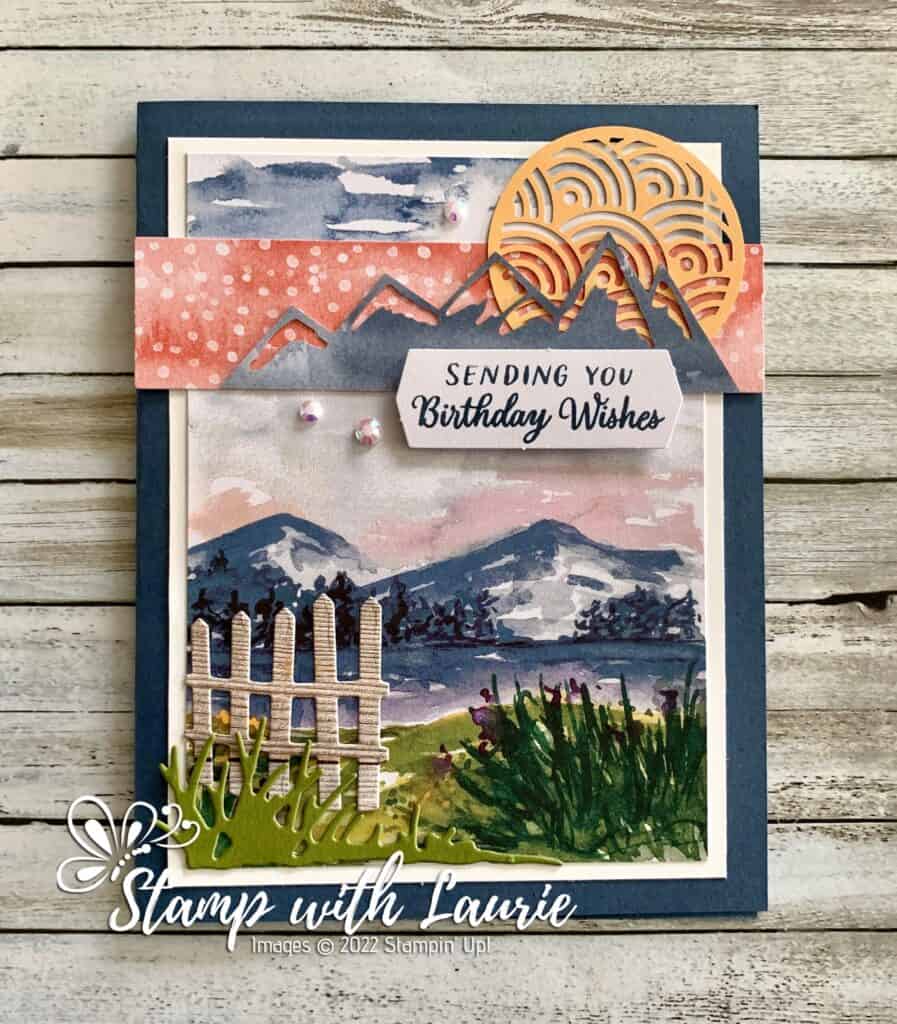
For this alternative, I decide to make a full A2 card using Misty Moonlight for the card base. I framed the scene with a Basic White frame, but if you were carefully with your trimming, you could use the card front with no frame. Then I add the wooden fence with die cut grass in front to balance the die cut mountains, circle and sentiment.

Fifth Alternative Card

Fifth Alternative Card

For my last alternative, I decided to cut apart one of the card fronts and added them to an Old Olive card base. I layered the sentiment on some leftover pieces from the Kit. I then added Misty Moonlight ribbon and rhinestones for my embellishments.

The Cards from the Kit

The Cards That the Kit Makes

More Information on my Beyond the Horizon Alternative Cards:

For more of my Stampin’ Up! cards, please click here.

To view my Paper Pumpkin Alternatives for other kits, please click here.