My Mother’s Day Card

My Design Team Card for Mother's Day using Kangaroo Digital Stamp by Rachelle Anne Miler Creative Studios
My Mother’s Day Card

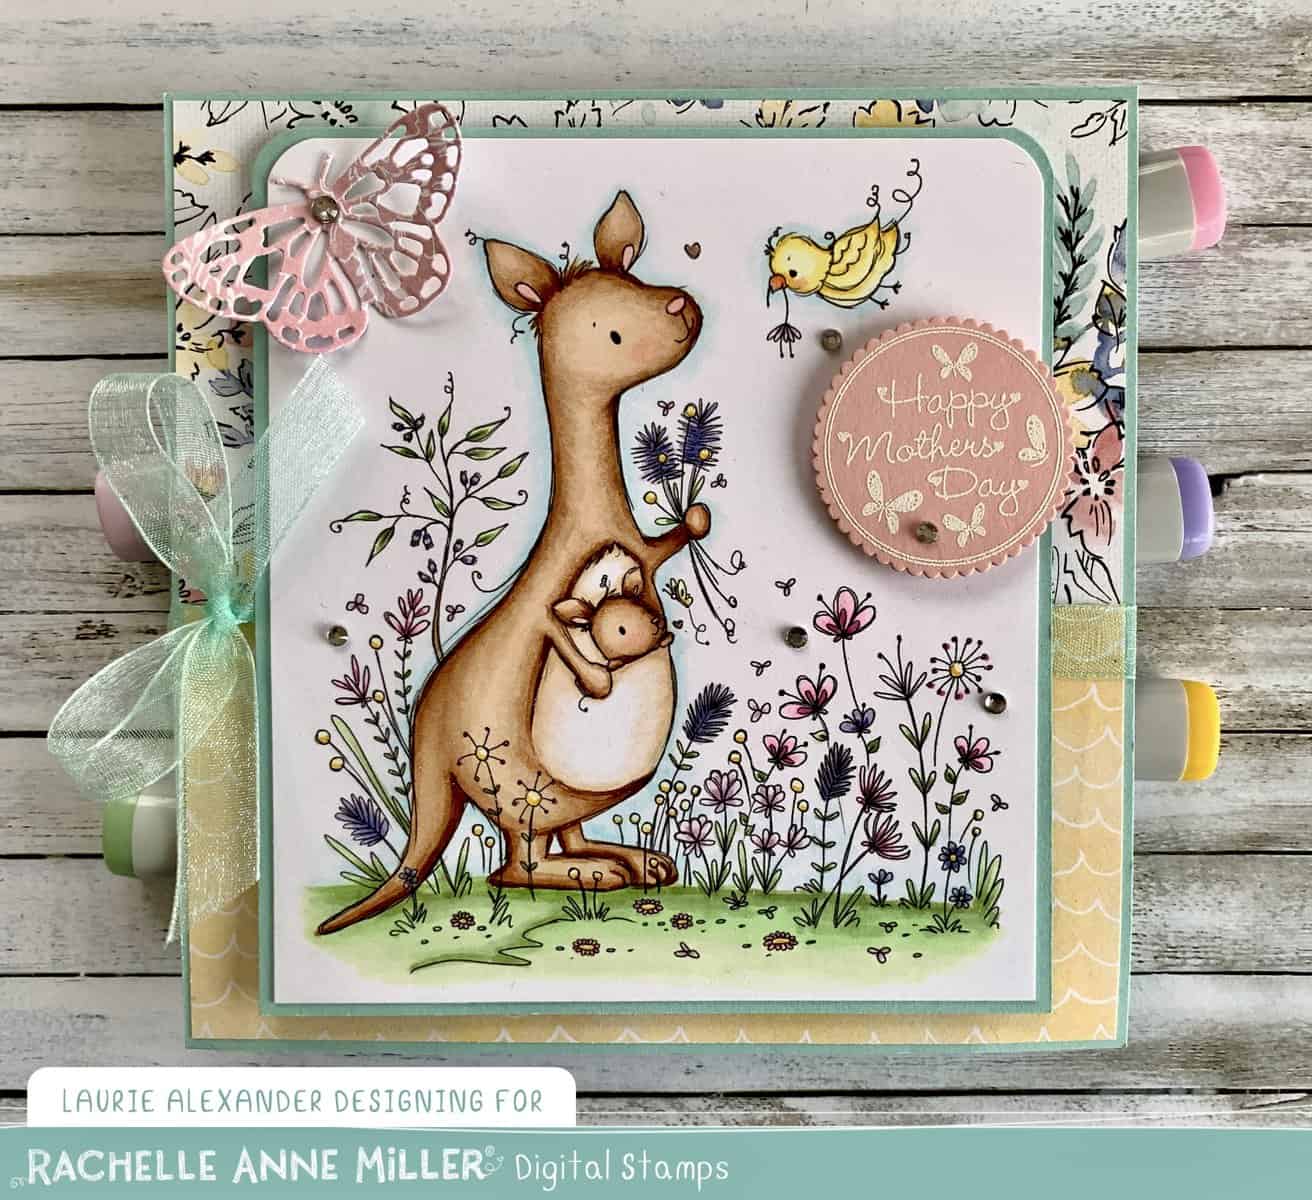
Hello Crafty Friends! It’s Laurie here with My Mother’s Day Card using the digital stamp called ‘Kangaroo’ Digital Stamp by Rachelle Anne Miller Creative Studios. Mother’s Day is just around the corner and this stamp is perfect for that special mom!

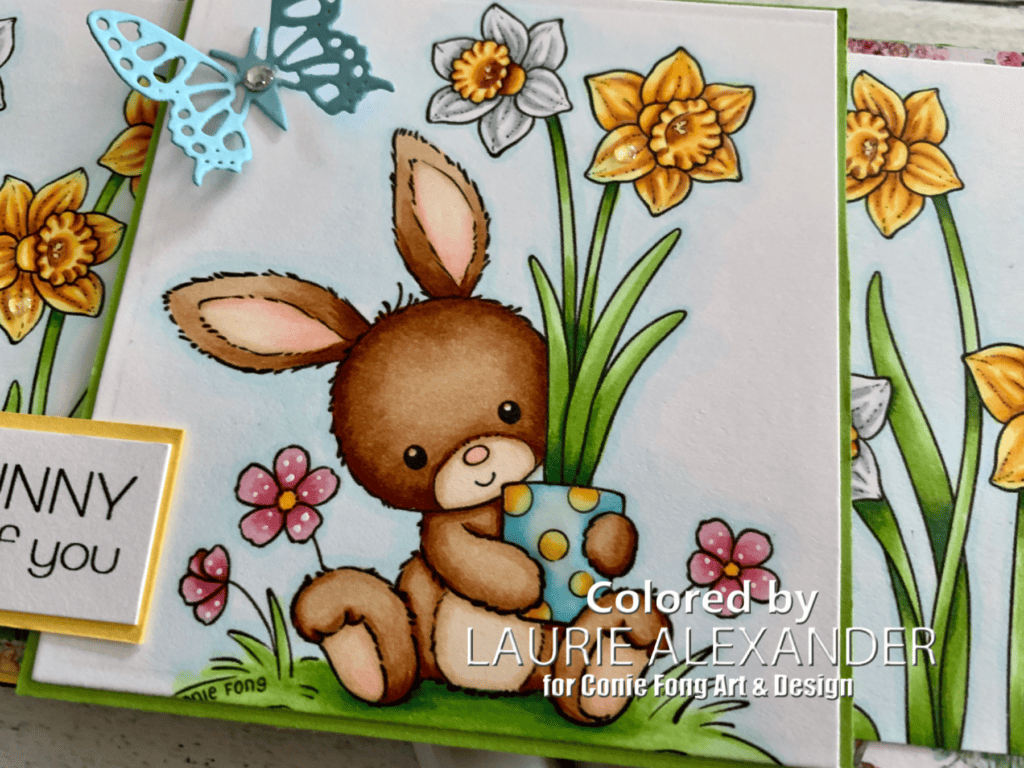
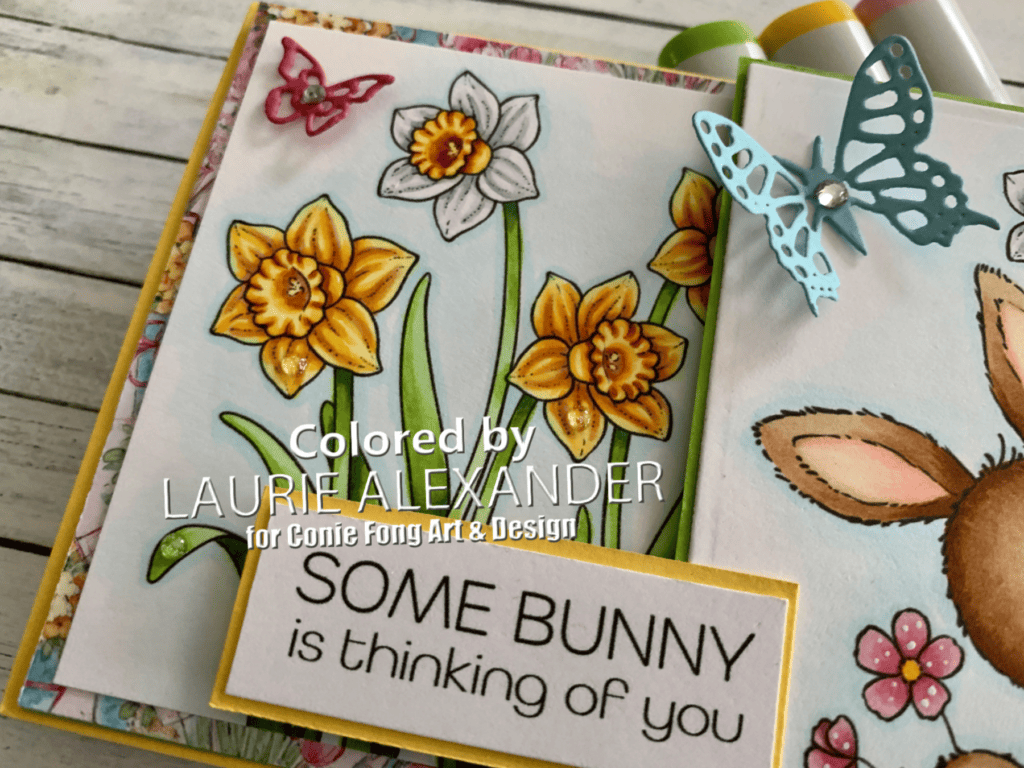
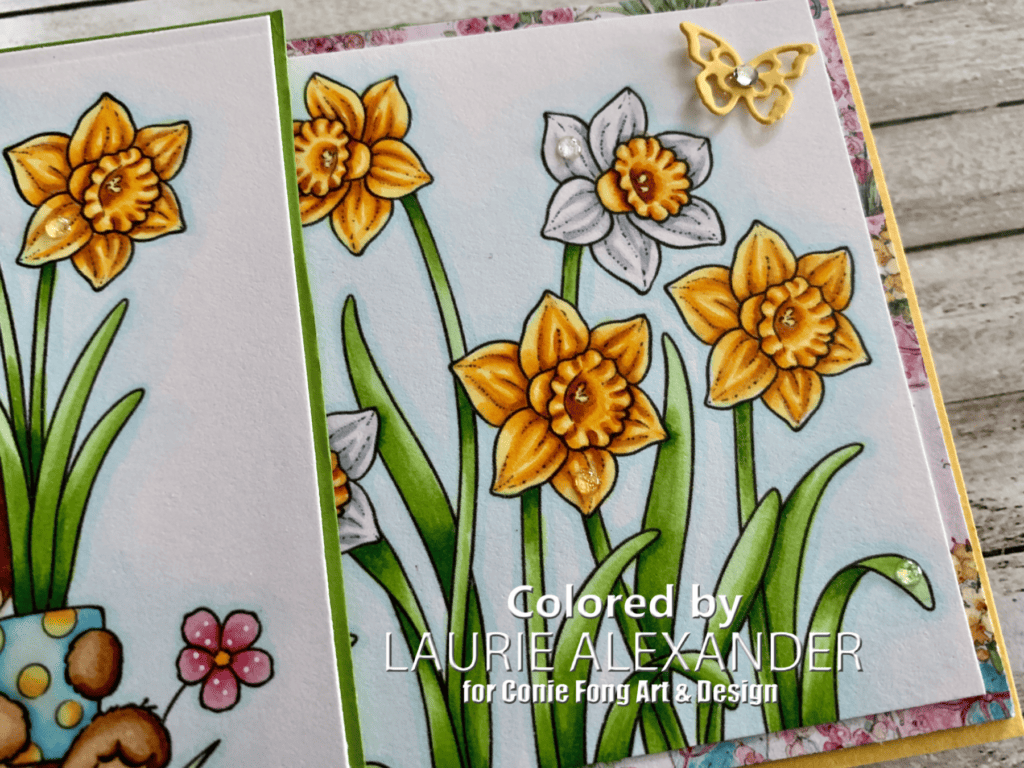
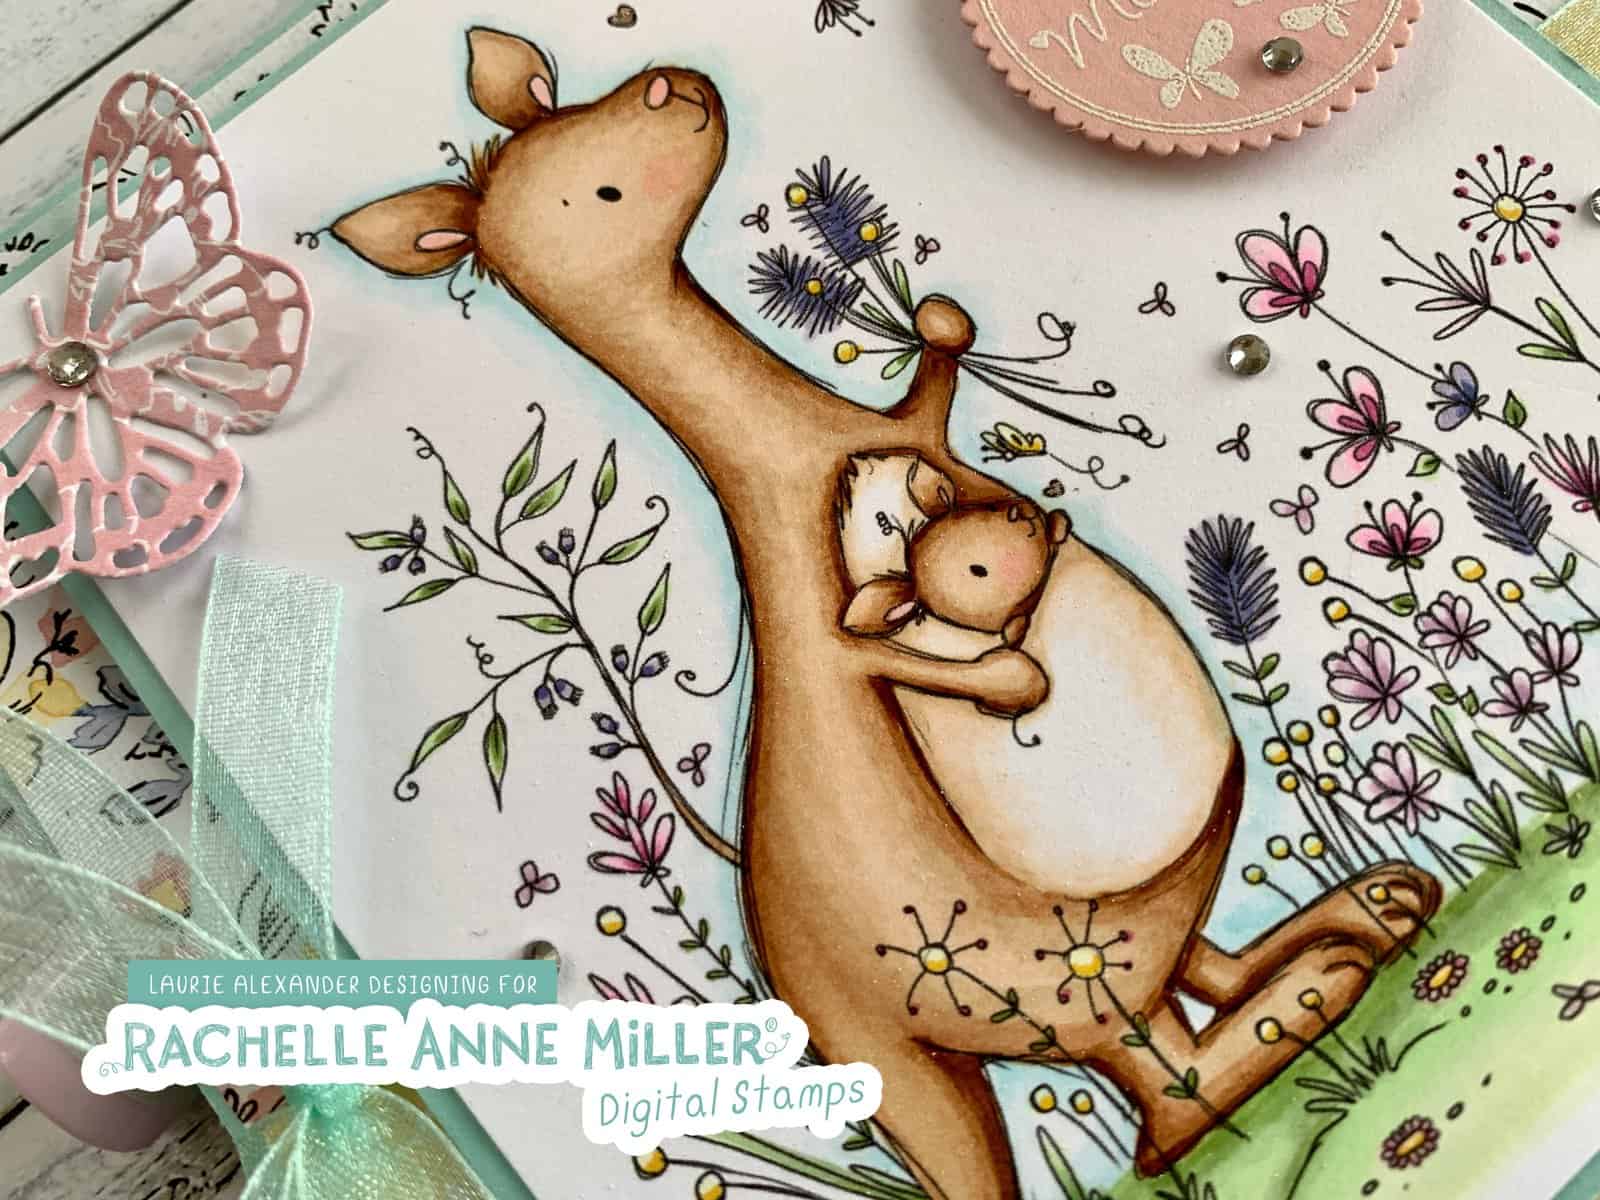
I coloured this sweet digital stamp with my Copic markers in Spring like colours. Don’t you just love how the little Roo is hanging out of his mummy’s pouch! Sneak peek…the Designer Series Paper I used is from the new Stampin’ Up! Annual Catalogue that starts in May 2021! It was sitting on my desk with it’s pretty colours just begging to be used! Lol! The butterfly from the Brilliant Wings Dies was die cut from the DSP as well. The Pool Party Sheer Ribbon  tied in a pretty bow went perfectly with the DSP! The sentiment was embossed in white and then die cut with a scallop die from the Layering Circle Dies. A scattering of rhinestones, Wink of Stella and Clear Star Gelly Roll Pen add some sparkle to the card.

————————–

Copic Markers:

Kangaroos: E30/E31/E33/E35/E37/R20
Bird: Y00/Y11/Y15/YR02/YR04
Dark Purples: BV04/BV02/BV00
Light Purples: V0000/V000/V01
Pinks: RV55/RV02/RV00
Yellows
: Y00/Y15
Grass: G43/G21/G20/YG11
Sky: BG0000/BG000

Close Up of My Design Team Card for Mother's Day using Kangaroo Digital Stamp by Rachelle Anne Miler Creative Studios
Close Up of My Mother’s Day Card

————————–

Card Recipe for My Mother’s Day Card:

‘Kangaroo’ Digital Stamp, Rachelle Anne Miller Creative
Paper Basics – Stamper’s Select White Cardstock, Papertrey Ink
Spring Trinkets Stamp Set, Kraftin’ Kimmie Stamps
Hand Penned Designer Series Paper, Stampin’ Up!
Brilliant Wings Dies, Stampin’ Up!
Layering Circles Dies, Stampin’ Up!
VersaMark Ink, Stampin’ Up!
White Stampin’ Emboss Powder, Stampin’ Up!
Rhinestone Basic Jewels, Stampin’ Up!
Pool Party Sheer Ribbon, Stampin’ Up!
Clear Wink of Stella, Stampin’ Up!
Clear Star Gelly Roll Pen
Pool Party and Blushing Bride Card Stock, Stampin’ Up!

Finished card size: 5.5” x 5.5”

————————–

To view my other Rachelle Anne Miller Creative Studios cards, please click here.

Hope you like my Design Team Card using ‘Kangaroo’ Digital Stamp!
Thank you for stopping by!

Hugs,
Laurie

Happy Easter Card

My Happy Easter Card

Happy Easter Everyone! Today I am sharing my Happy Easter Card that I made using a combination of two stamp sets by Stampin’ Up!, Springtime Joy and Arrange a Wreath. I love how these two sets go so well together and make a perfect Easter card!

Isn’t the lamb and bunny from the Springtime Joy Stamp Set so sweet! Perfect for this time of year!

The Arrange a Wreath Bundle is so versatile and has so many card possibilities such as Easter, Christmas, Thanksgiving, Valentines, Spring and Birthday. I love all the dies that come with it so that you can decorate your wreath for each occasion!

The Hydrangea Hill Designer Series Paper has the perfect colours for an Easter card! I was spoiled for choices but went with the Highland Heather piece!

Supplies:

Stamps/Bundles/Dies: Springtime Joy Stamp Set (154403), Arrange a Wreath Bundle (154109), Stitched Nested Labels Dies (149638), Stitched So Sweetly Dies (151690)

Inks: Old Olive Classic Stampin’ Pad (147090), Daffodil Delight Classic Stampin’ Pad (147094), Highland Heather Classic Stampin’ Pad (147103), Petal Pink Classic Stampin’ Pad (147108), Tuxedo Black Memento Ink Pad (132708)

Paper: Highland Heather (146986), Daffodil Delight (119683), Old Olive (100702), Petal Pink (146985), Basic White (159276), Basic White Thick (159229), Hydrangea Hill Designer Series Paper (154570)

Accessories: Highland Heather Stampin’ Blends Combo Pack (154887), Daffodil Delight Stampin’ Blends Combo Pack (154883), Old Olive Stampin’ Blends Combo Pack (154892), Petal Pink Stampin’ Blends Combo Pack (154893), Smoky Slate Stampin’ Blends Combo Pack (154904), Stampin’ Blends Color Lifter (144608), Subtle 3D Embossing Folder (151775), Wink of Stella Glitter Bruch (141897), Pearl Basic Jewels (144219), Gorgeous Grape 3/8″ Sheer Ribbon (154572), Paper Snips (103579), Bone Folder (102300), Stampin’ Dimensionals (104430), Stampin’ Seal (152813), Glue Dots (103683)

Close Up of My Happy Easter Card

Measurements: 

  • Basic White Thick: 5 ½” x 8 ½” scored at 4 ¼”
  • Hydrangea Hill Designer Series Paper: 5 ¼” x 4”
  • Daffodil Delight: 2 15/16” x 4 1/8”
    • Scraps
  • Petal Pink: 3 7/16” x 3 5/8”
    • Scraps
  • Old Olive: 3 ½” x 3 ½”
  • Highland Heather: Scraps
  • Basic White: 2 3/8” x 1 ¼” (Sentiment)
    • Scraps
  • Gorgeous Grape 3/8″ Sheer Ribbon: 5”

For Further Info:

Hope you like my Happy Easter Card using the Springtime Joy Stamp Set and Arrange A Wreath Bundle.

You will find the items listed above in my online store.

My Some Bunny Card

My Design Team Card
My Some Bunny Card

Hello Crafty Friends! It’s Laurie here! I am sharing My Some Bunny Card as my Design Team Card for Conie Fong Art & Design. This card uses 3 different digital stamps including Bunny Daffodil Bundle which includes 9 stamps and Daffodil Flowers Bundle which includes 7 stamps.

I thought it would be cute to create a slimline card and use the Fields of Daffodils with the sweet Bunny Daffodil in front almost like he has picked those flowers just for you!

Sweet Bunny from Bunny Daffodil Digital Stamp

I decided to colour my daffodils in both yellows and white/yellows to give a variation to my field of daffodils. Daffodils can come in many different colours, but these are the colours that I have in my garden. My favourite is the white with yellow centres! To fit my field onto the slim line base, I cut it in half so that there is a slight gap which you can’t see behind the bunny. So, it looks like a continual field of daffodils! I did the same thing with the 6” pretty paper that you can just see peeking out as a border around the daffodils. This saves paper and you can’t see the gap hidden behind the bunny. A win-win situation! A couple of die cut butterflies with rhinestones and some epoxy water drops is all the embellishments that this card needed.

————————–

Copic Markers:

Bunny: E37/E35/E34/E31/E31/R20
Yellow Daffodils (Outside Petals): E13/Y17/Y15/Y11
Yellow Daffodils (Inside Petals): E15/YR16/Y17/Y15/Y11
White Daffodils (Outside Petals): C3/C1/C0/
White Daffodils (Inside Petals): E18/YR18/YR16/Y15/Y11
Leaves: YG11/YG23/YG25/G28
Pot: B02/B01/B000/B0000/Y17/Y15/Y11/Glossy Accents
Pink Flowers: R56/R85/R81/R81/Y17/White Gelly Roll Pen
Sky: B000/B0000/0

Left Side of my Field of Daffodils Panel

————————–

Card Recipe for My Some Bunny Card:

Bunny Daffodil Bundle and Daffodil Flowers Bundle, Conie Fong Art & Design
Paper Basics – Stamper’s Select White Cardstock, Papertrey Ink
Annabelle’s Garden 6” x 6” Paper Pack, Wild Rose Studios
Butterfly Beauty Dies, Stampin’ Up!
Glitter and Clear Epoxy Shapes, Stampin Up!
Rhinestone Basic Jewels, Stampin’ Up!
White Gelly Roll Pen, Sakura
Glossy Accents, Ranger
Daffodil Delight, Granny Apple Green, Balmy Blue
and Rose Red Card Stock, Stampin’ Up!

Finished card size: 8.5” x 3.5”

Right Side of my Field of Daffodils Panel

————————–

To view my other Conie Fong Art & Design cards, please click here.
To view my other Slim Line Cards, please click here.

Hope you like my Design Team card using
Bunny Daffodil Bundle and Daffodil Flowers Bundle for Conie Fong Art & Design!

Thank you for stopping by!

Hugs,
Laurie

Hydrangea Thank You Card

My Hydrangea Thank You Card

Today is I am sharing my Hydrangea Thank You Card that I made for a swap using the beautiful Hydrangea Haven Bundle by Stampin Up! I love how the watercolour hydrangea pops out of the DSP and the Stitched Nested frame!

I swooned over the Hydrangea Hill Designer Series Paper when I saw it! All my favourite colours are in it like Gorgeous Grape, Highland Heather and Mossy Meadow to name just a few! So, I decide that I wanted to use some of the colours in the DSP for my hydrangea flower head and leaves.

The Process of the Watercolour Technique

Prepare to get all inky! For my card, I pulled out my Stampin’ Up! Ink Refills of Gorgeous Grape, Highland Heather, Misty Moonlight and Seaside Spray to use on my watercolour paper. I drop a couple of drips of each colour onto my work space and added a few spritzes of the Frost White Shimmer Paint (that was premixed with rubbing alcohol) and then a few spritzes of water. I then dragged my watercolour paper through the ink picking up the colours.

The Process of the Hydrangea Watercolour Technique
The Process of the Watercolour Technique

Once the ink was dried on the flower heads, I used my Blending Brush to add a bit more Gorgeous Grape to the raised petals to give it a bit more dimension.

I did the same steps for the stem and leaves using Old Olive and Mossy Meadow.

Here is a video that I presented to fellow demonstrators showing this technique:

Video Demonstrating The Watercolour Technique

I love this look since you can get different variations in the flowers. Here is an example of both light and dark flower heads.

Two Versions of the Hydrangea Watercolour Technique

A scattering of the pretty Pastel Pearls and the Misty Moonlight/silver Baker’s Twine are all the embellishments this card need. 

Supplies:

Stamps/Bundles/Dies: Hydrangea Haven Bundle (156251), Stitched Nested Labels Dies (149638)

Inks: Gorgeous Grape Classic Stampin’ Pad (147099)

Paper: Highland Heather (146986), Gorgeous Grape (146987), Basic White (159276), Mossy Meadow (133676), Hydrangea Hill Designer Series Paper (154570), Fluid 100 Watercolour Paper (149612)

Accessories: Gorgeous Grape Classic Stampin’ Ink Refill (147164), Highland Heather Classic Stampin’ Ink Refill (147167), Misty Moonlight Classic Stampin’ Ink Refill (153124), Seaside Spray Classic Stampin’ Ink Refill (150092), Old Olive Classic Stampin’ Ink Refill (100531), Mossy Meadow Classic Stampin’ Ink Refill (133651), Frost White Shimmer Paint (147046), Stampin’ Spritzer (126185), Pastel Pearls (154571), Flowers For Every Season Ribbon Combo Pack (153620), Blending Brushes (153611), Bone Folder (102300), Stampin’ Dimensionals (104430), Stampin’ Seal (152813), Glue Dots (103683), Rubbing Alcohol, Water

Close Up of My Hydrangea Thank You Card

Measurements: 

  • Highland Heather: 5 ½” x 8 ½” scored at 4 ¼”
  • Gorgeous Grape: 5 ¼” x 4”
  • Basic White: 1” x ¾”
  • Hydrangea Hill Designer Series Paper: 2 ¾” x 4 ¾”
  • Watercolour Paper: 2 pieces:
    • 1 7/8” x 2” (flower head)
    • 2 ¾” x 3”
  • Misty Moonlight/Silver Baker’s Twine: 5”

For Further Info:

Hope you like my Hydrangea Thank You Card.

For more of my Stampin’ Up! cards, please click here.

You will find the items listed above in my online store.