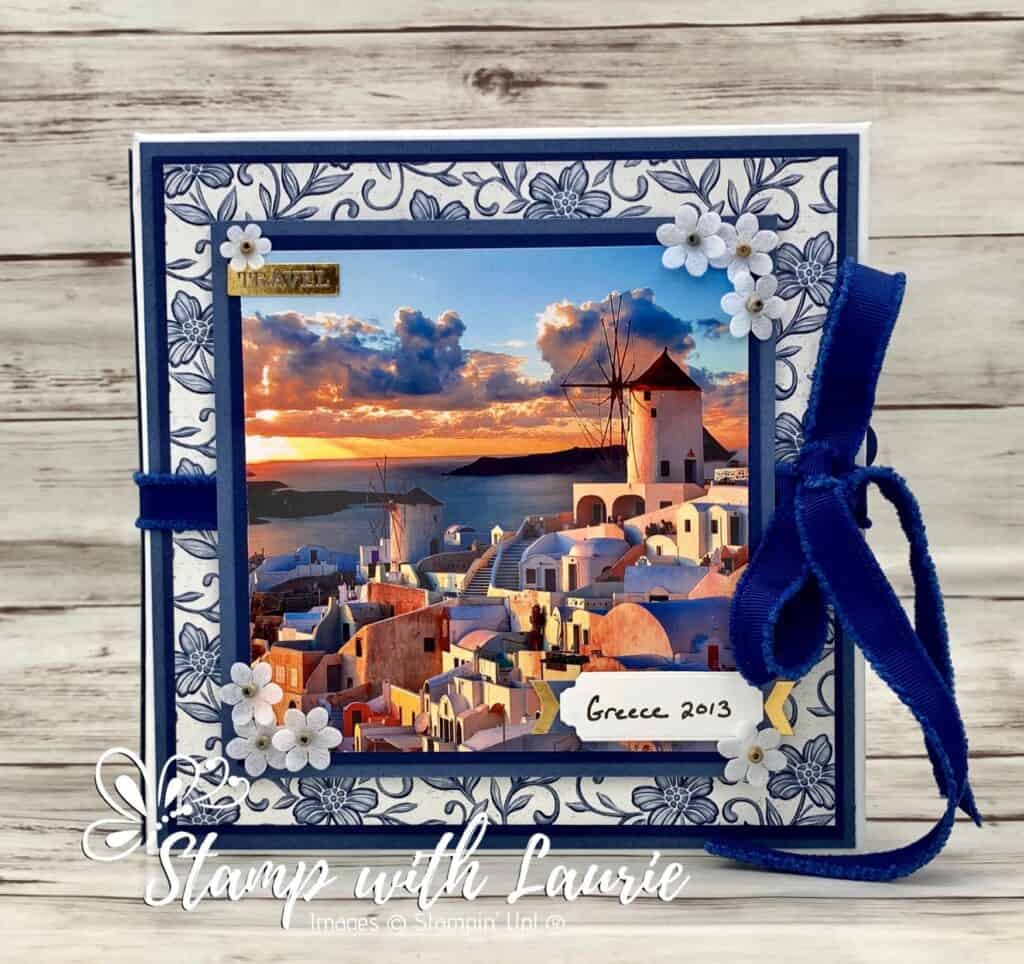
My Mini Interactive Photo Album

Cover of Mini Interactive Photo Album

Today is I am sharing something different than a card. I was asked by a fellow demonstrator to create a project with a Greek theme for a Demonstrator Playdate. I decided instead of creating a card that I would make a photo album from scratch of a past trip that my husband and I went on which started in Paris went on to Venice to catch a cruise visiting Dubrovnik, Corfu, Santorini, Athens, Katakolon and back to Venice. So, I am sharing my Mini Interactive Photo Album using photos from that trip.

Video of my Mini Interactive Photo Album

Video of my Mini Interactive Photo Album
Music Copyright – Moose Ca Ca, My Big Fat Greek Wedding

I had wanted to create one of these interactive albums for a long time. So, I googled how to create one and found a four part series of videos by Cal Summers with a PDF with the measurements. I will include links to her PDF and videos at the end of this post.

The Details of My Album

This kind of album is perfect for any 6” x 6” Designer Series Paper. But, since the colours of the Greek flag are blue and white, I decided to use the Boho Indigo Product Medley. The pretty little paper flowers that come in the Medley were perfect to decorate my cover. I used the World of Good Memories and More Cards and stickers with their travel theme to decorate my album along with the cut outs from the Boho Indigo Medley. The Scallop Tag Topper Punch was used for my tags and pull outs.

What is so nice about this album is that it is flexible to suit your needs. It uses the same 4 page designs twice giving you 8 pages that you can place in whatever order you like.
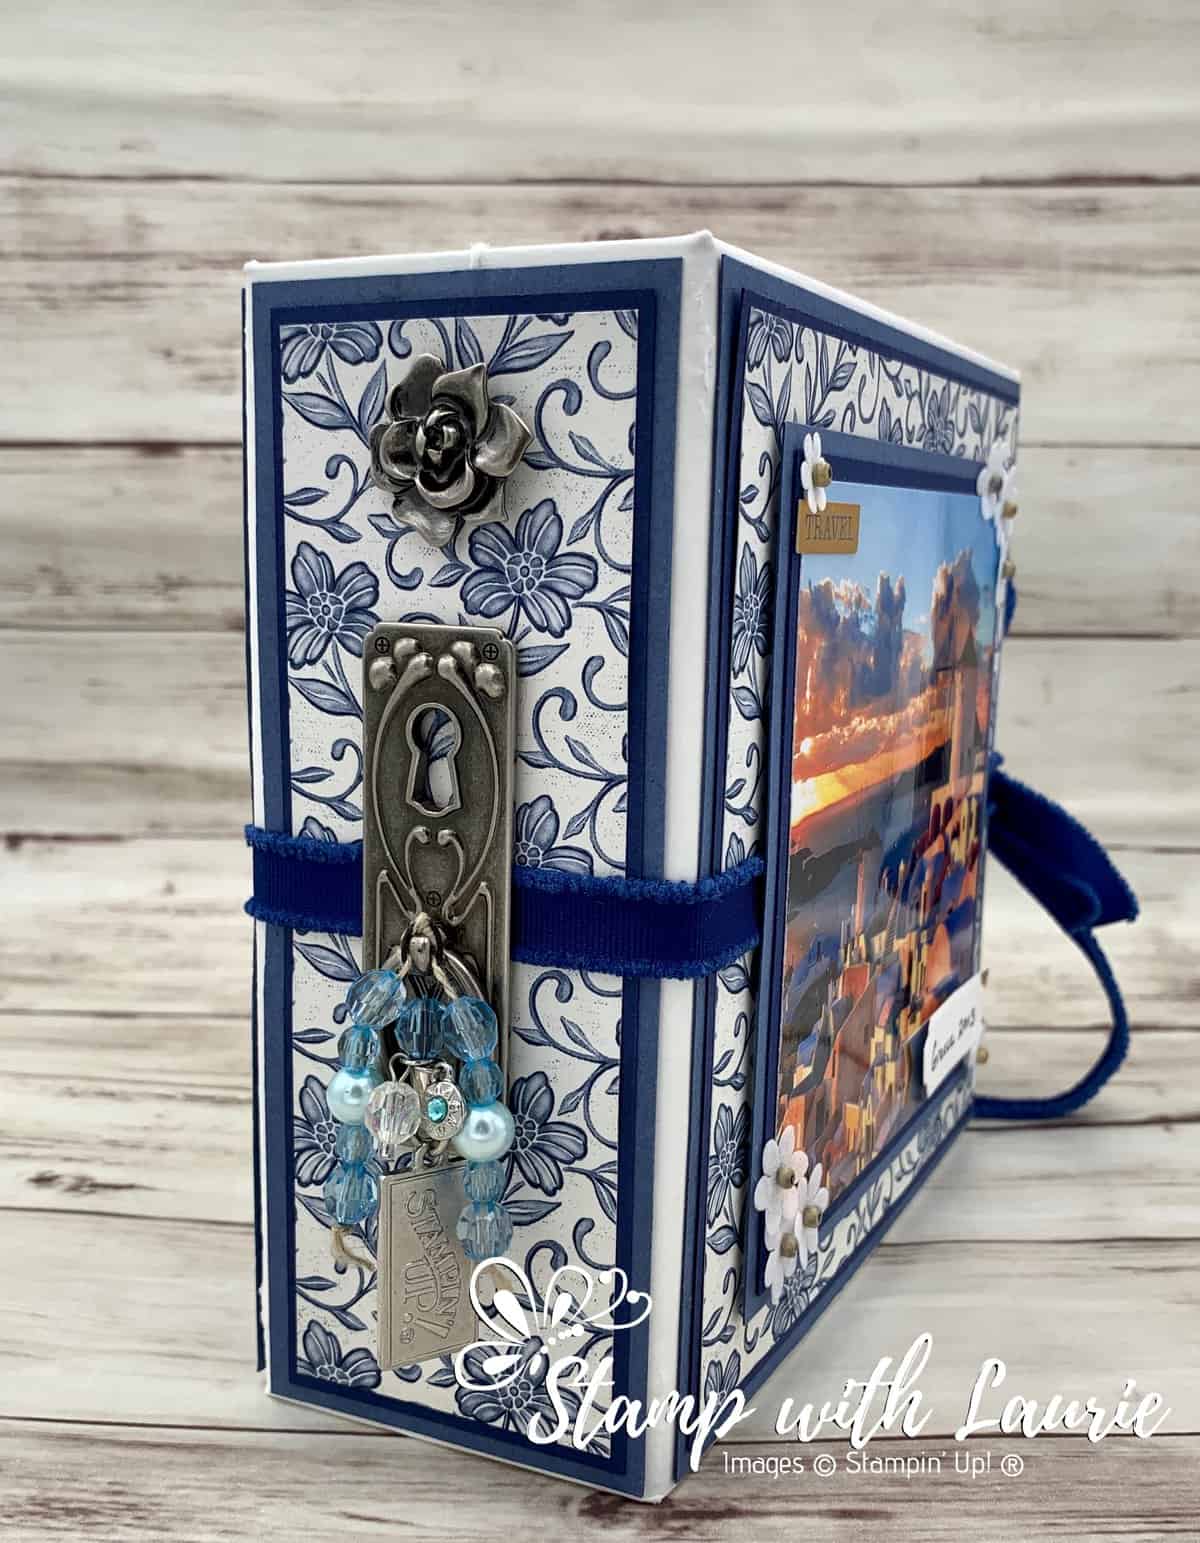
Spine of My Mini Album
Spine of My Mini Interactive Photo Album

I decorated my spine with a vintage metal key hole/latch with a rose that I bought from Michael’s Arts & Crafts a while back. The beads were from the dollar store and threaded on Whisper White Baker’s Twine from the Snail Mail Twine Combo Pack. I added a pretty charm with a blue stone to represent “Greece” and a Stampin’ Up! charm that I had from a key chain.

I also created a beaded bookmark with a key and Misty Moonlight Ribbon for the inside of my album.
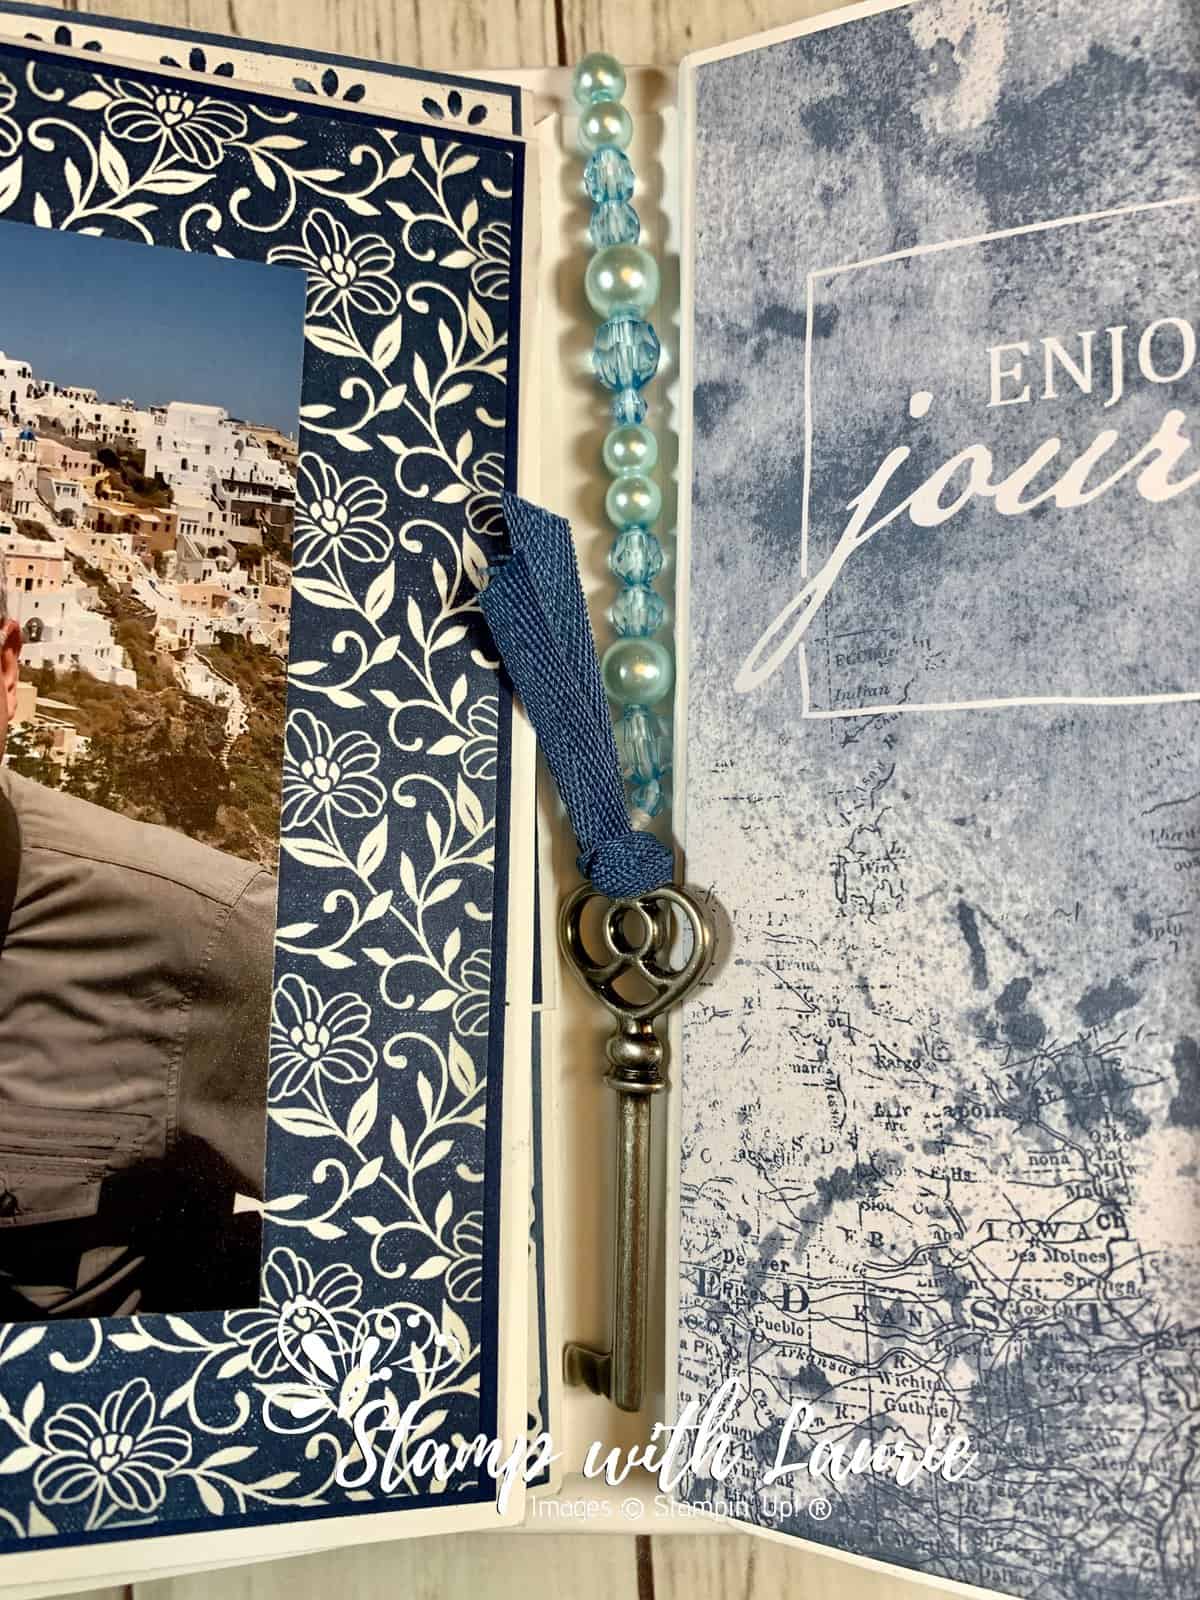
Bookmark
Beaded Bookmark

Finally I decorated the back of the cover with the World of Good Designer Series Paper that has the golden globes on it. 
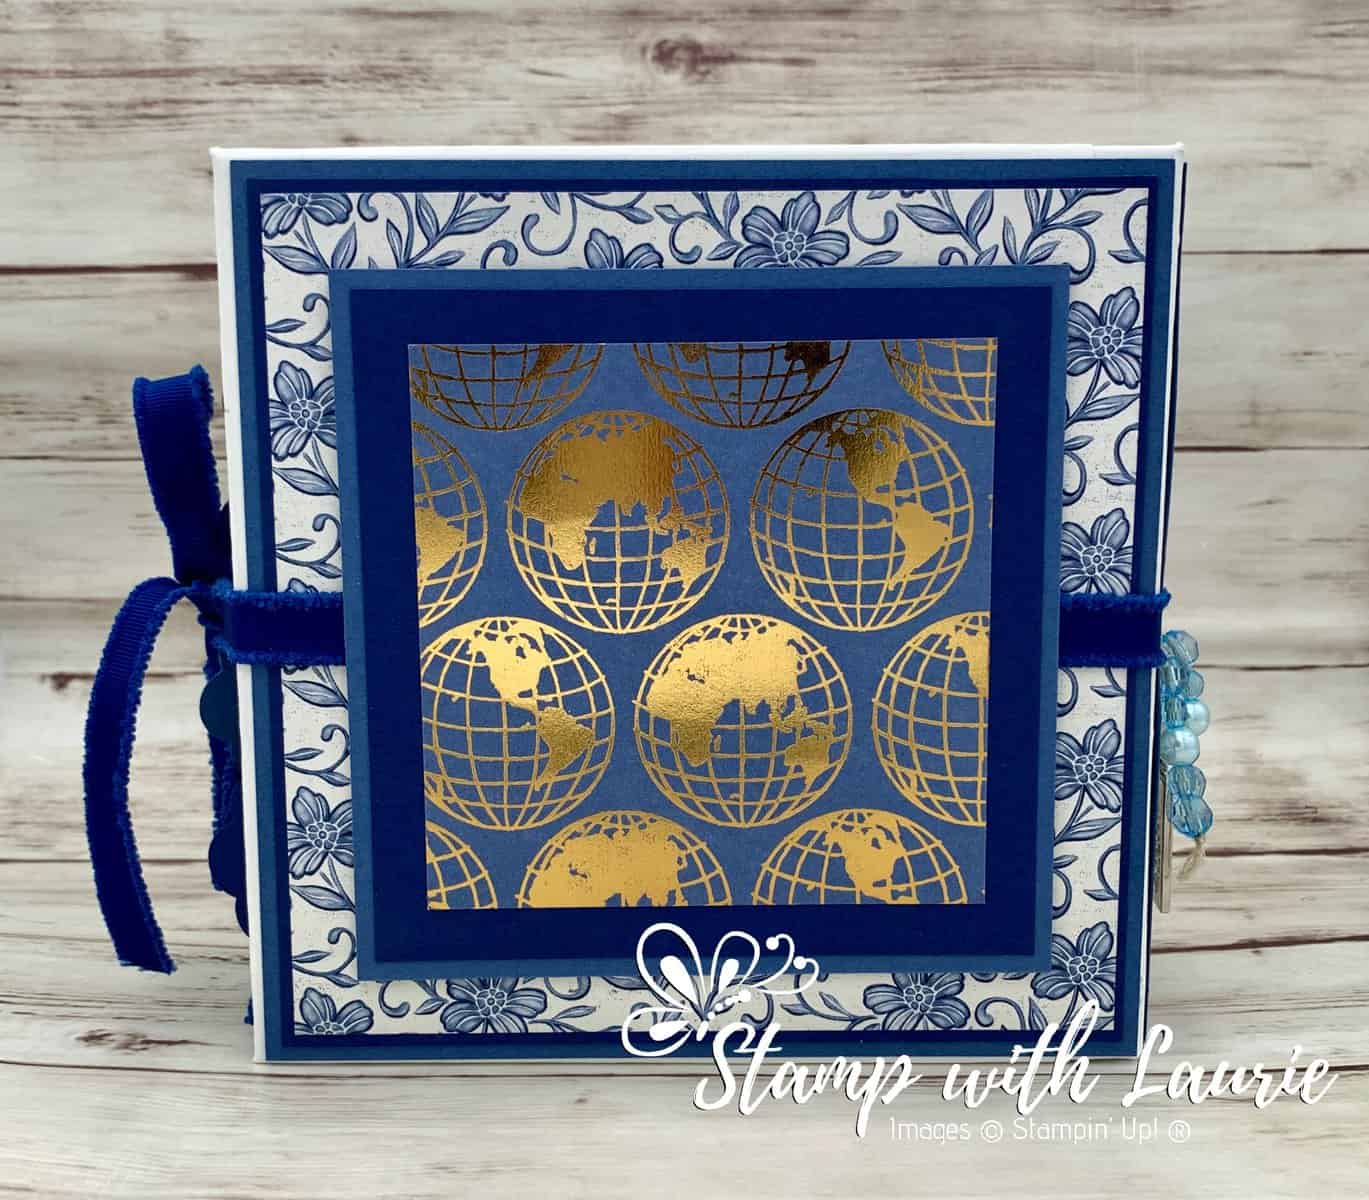
Back Cover
Back Cover of My Album

Some Tips

For my covers, I used the cardboard found with the instruction for the Paper Pumpkin Kits. I tend to keep them just in case I can recycle them somehow.

I didn’t have any Tyvek. So I used a used plastic mailing envelope that I cut down to the correct size. As long as it will not stretch or rip and is flexible, it should work.

Make sure that you secure the ribbon to tie your album closed to the cover before you add the decorative elements on the covers and spine. Lol!

Photos of the Inside of my Album
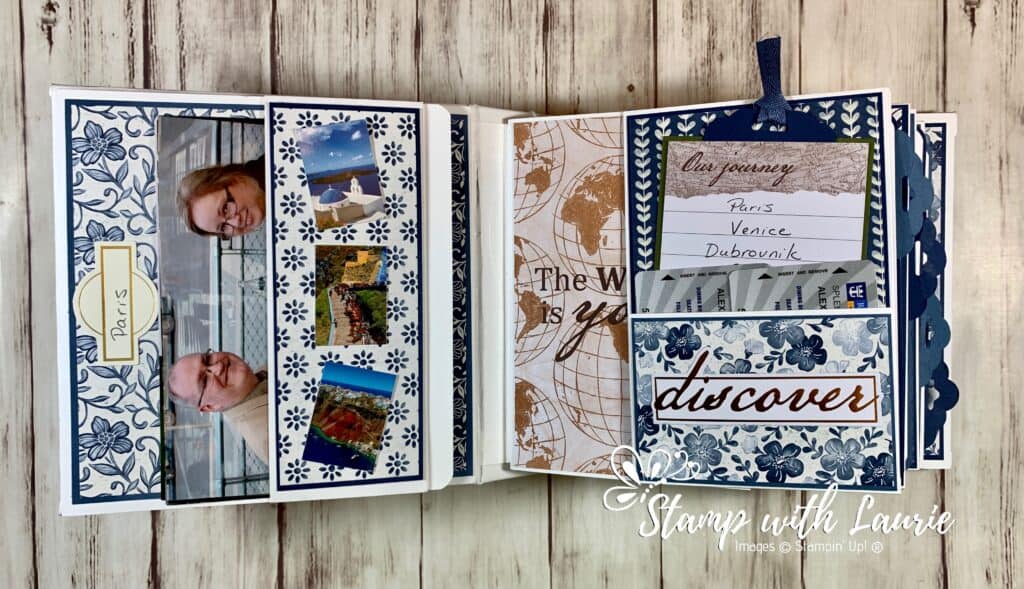
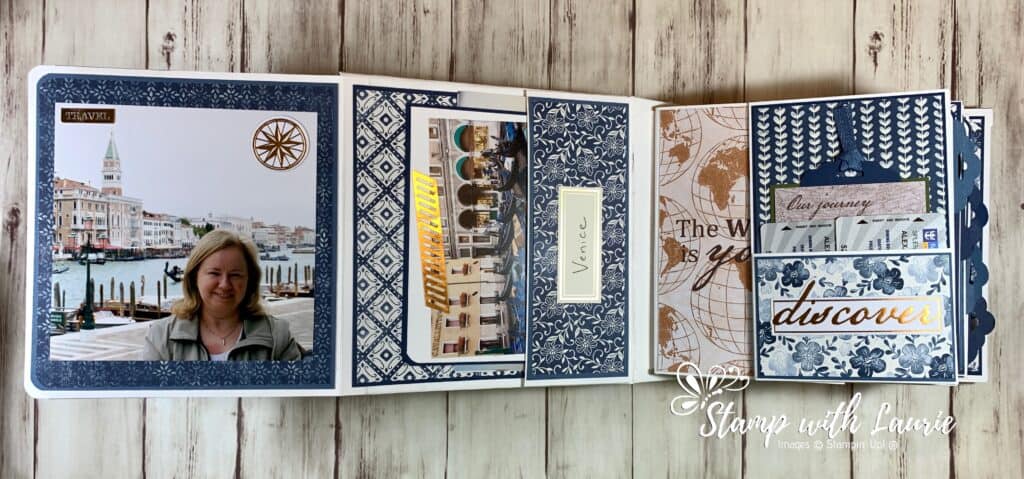
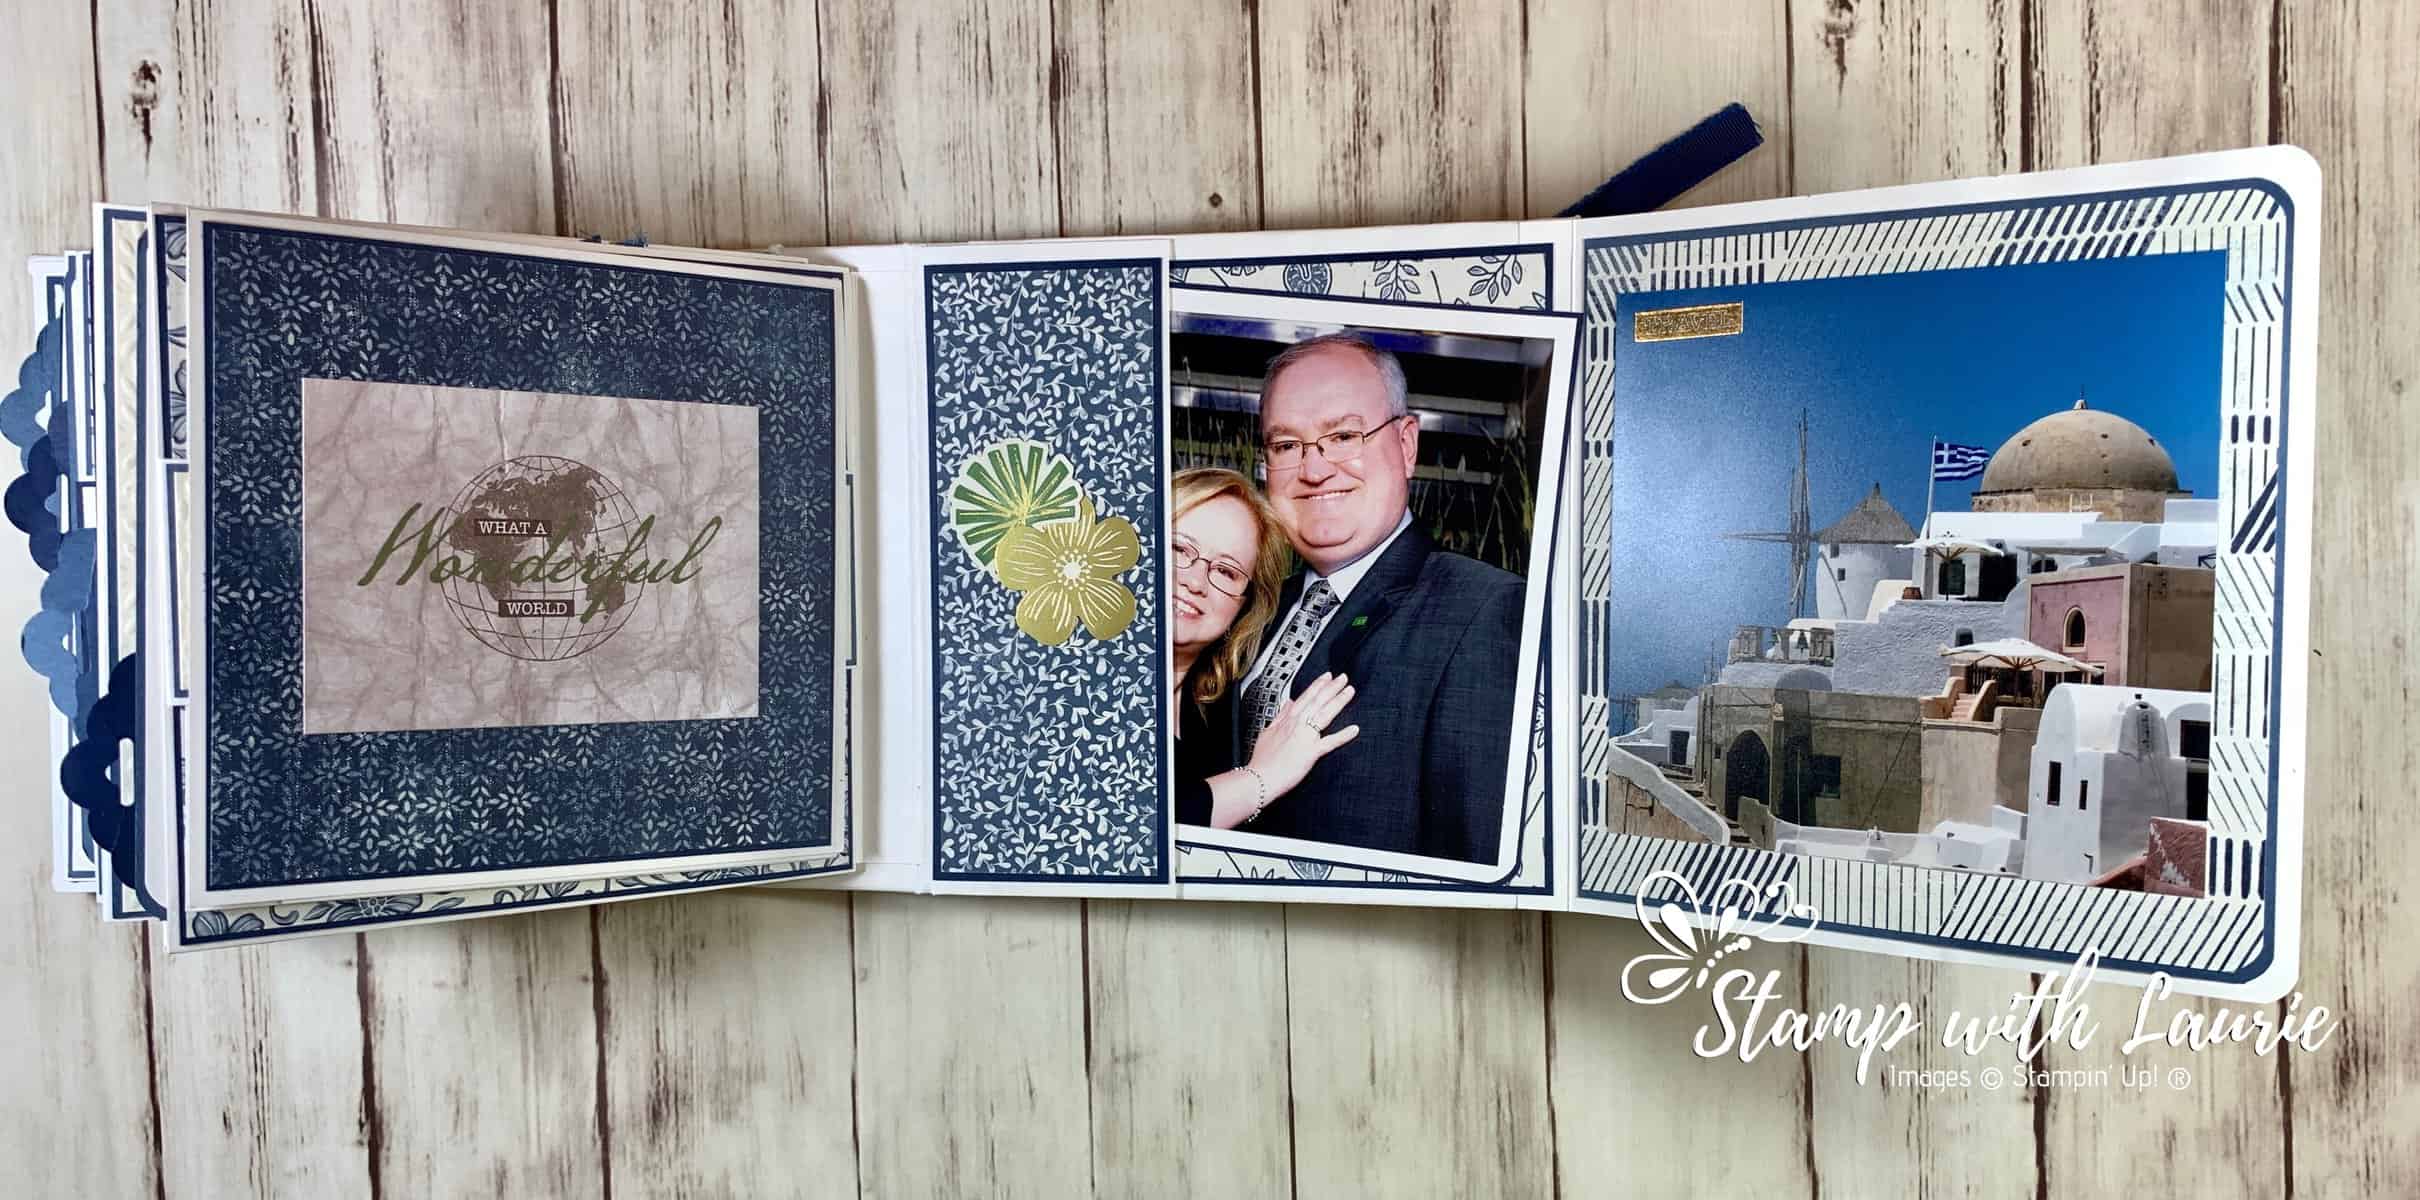
Inside Cover and Page 1
Paris – Spread of Inside Cover and Page 1
Inside Front Cover
Venice – Inside Front Cover
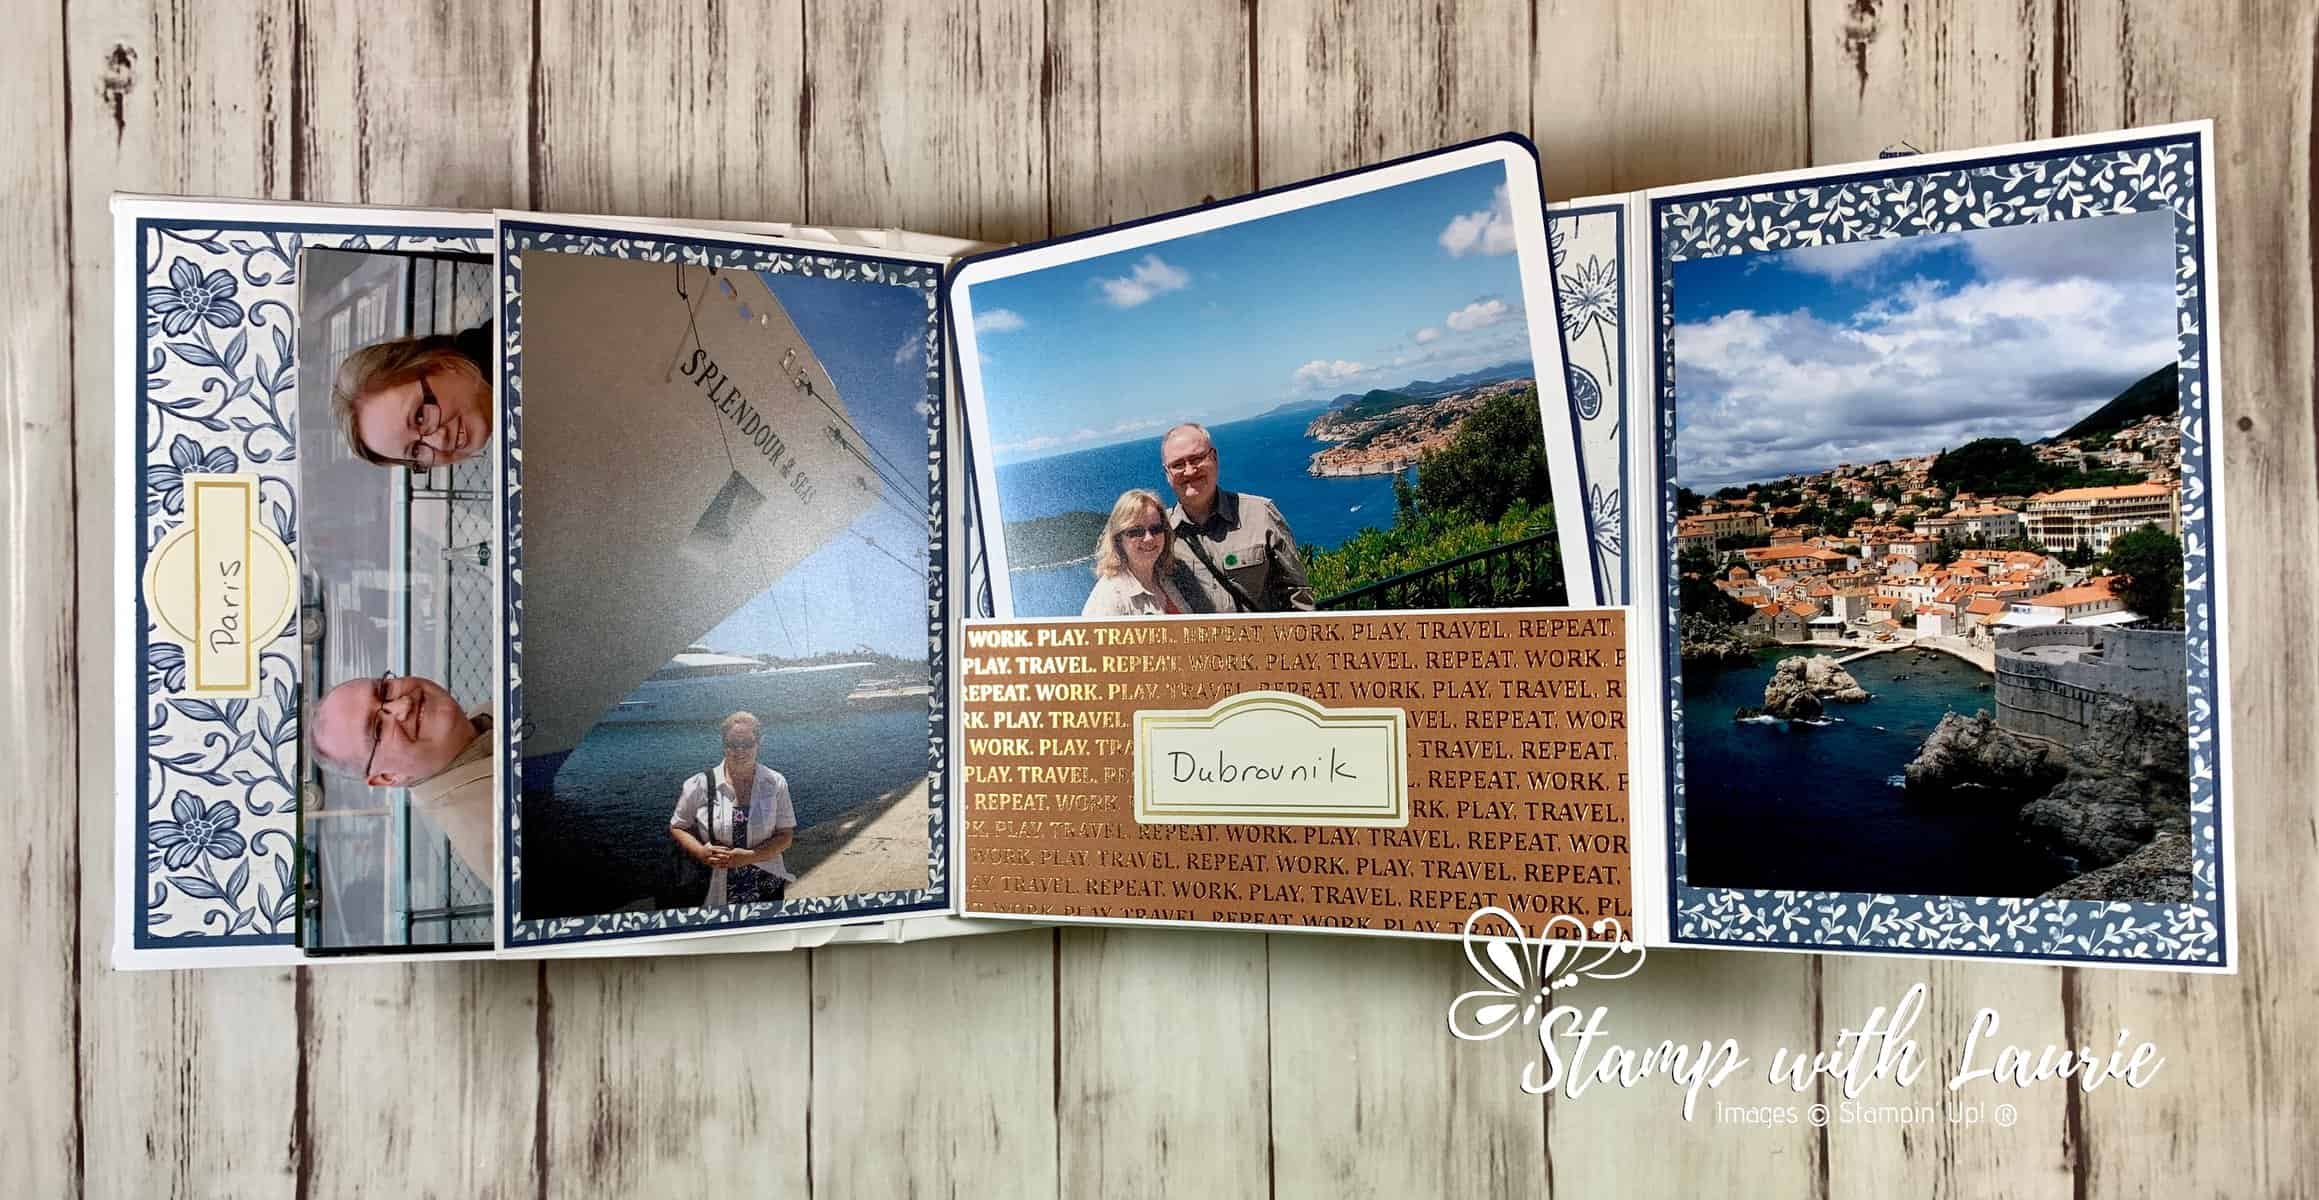
Page 1
Dubrovinik – Page 1
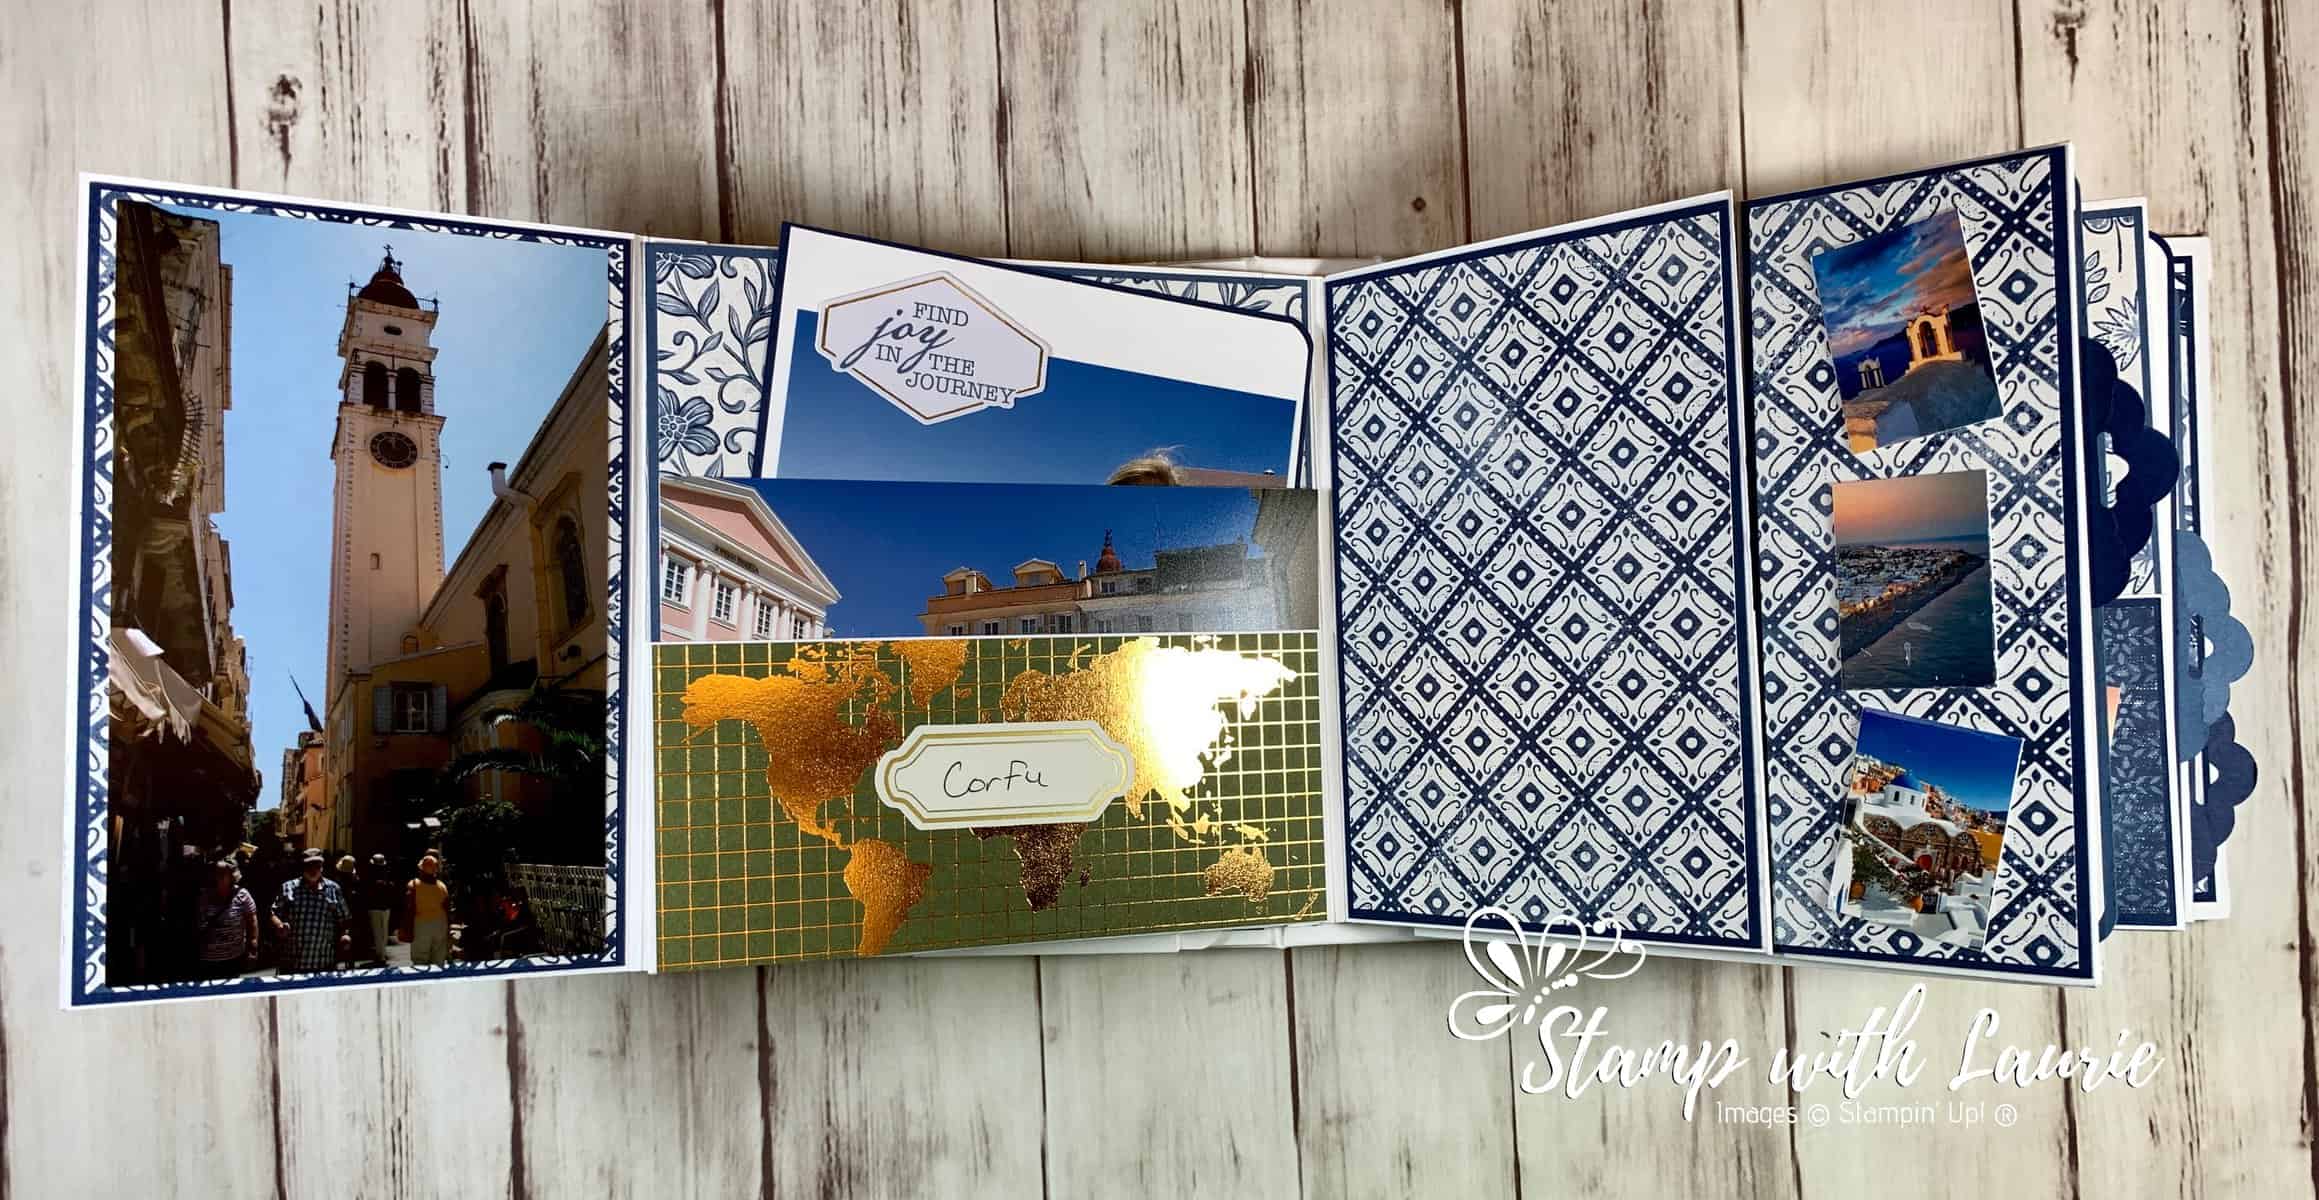
Page 2 and 3 Spread
Page 2 and 3 Spread
Page 1
Corfu – Page 2
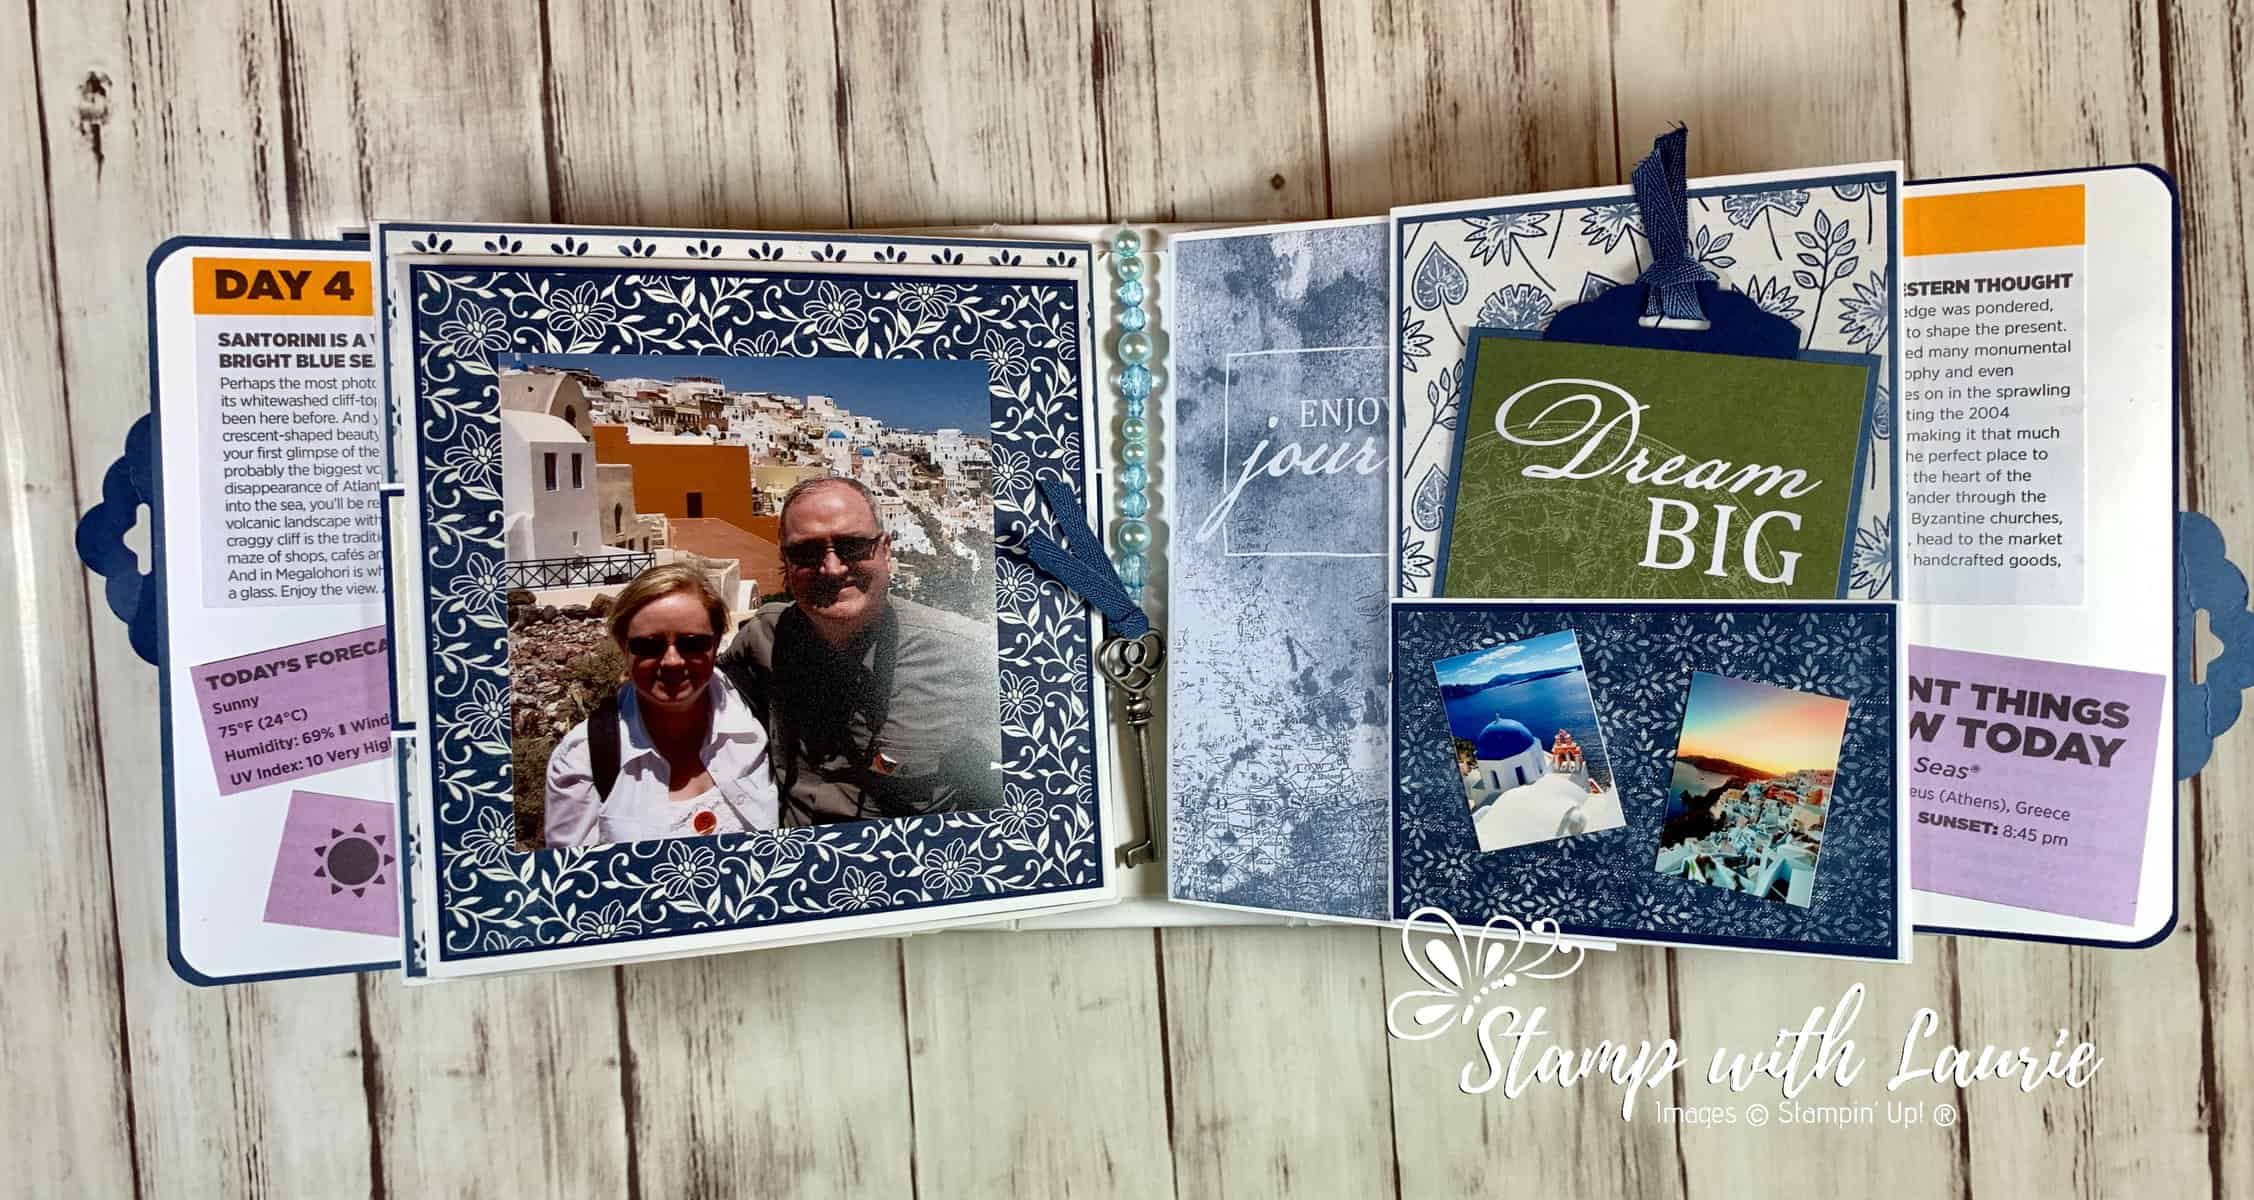
Page 4 and 5 Spread
Page 4 and 5 Spread
Page 4
Page 4 – Picture Folder
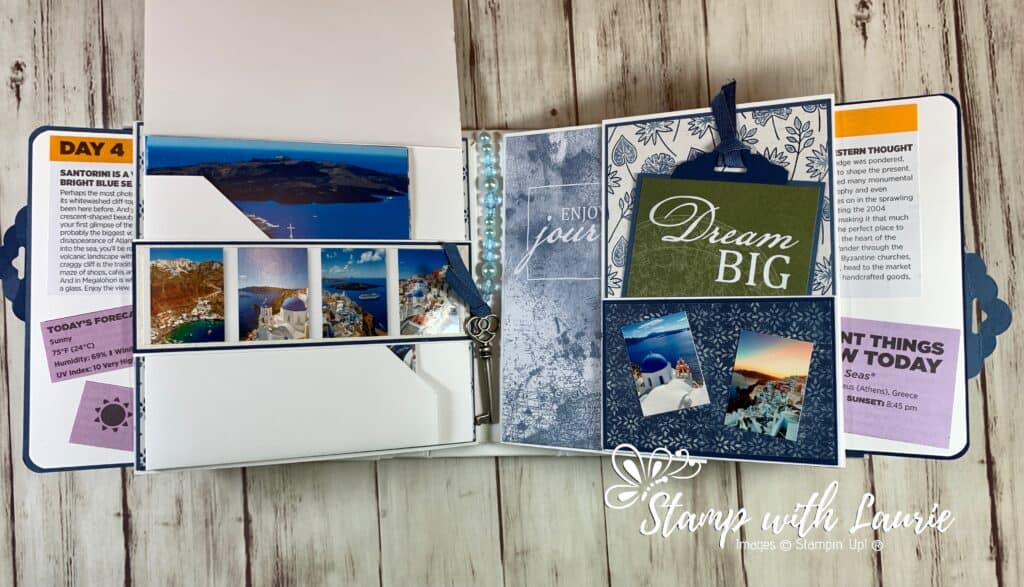
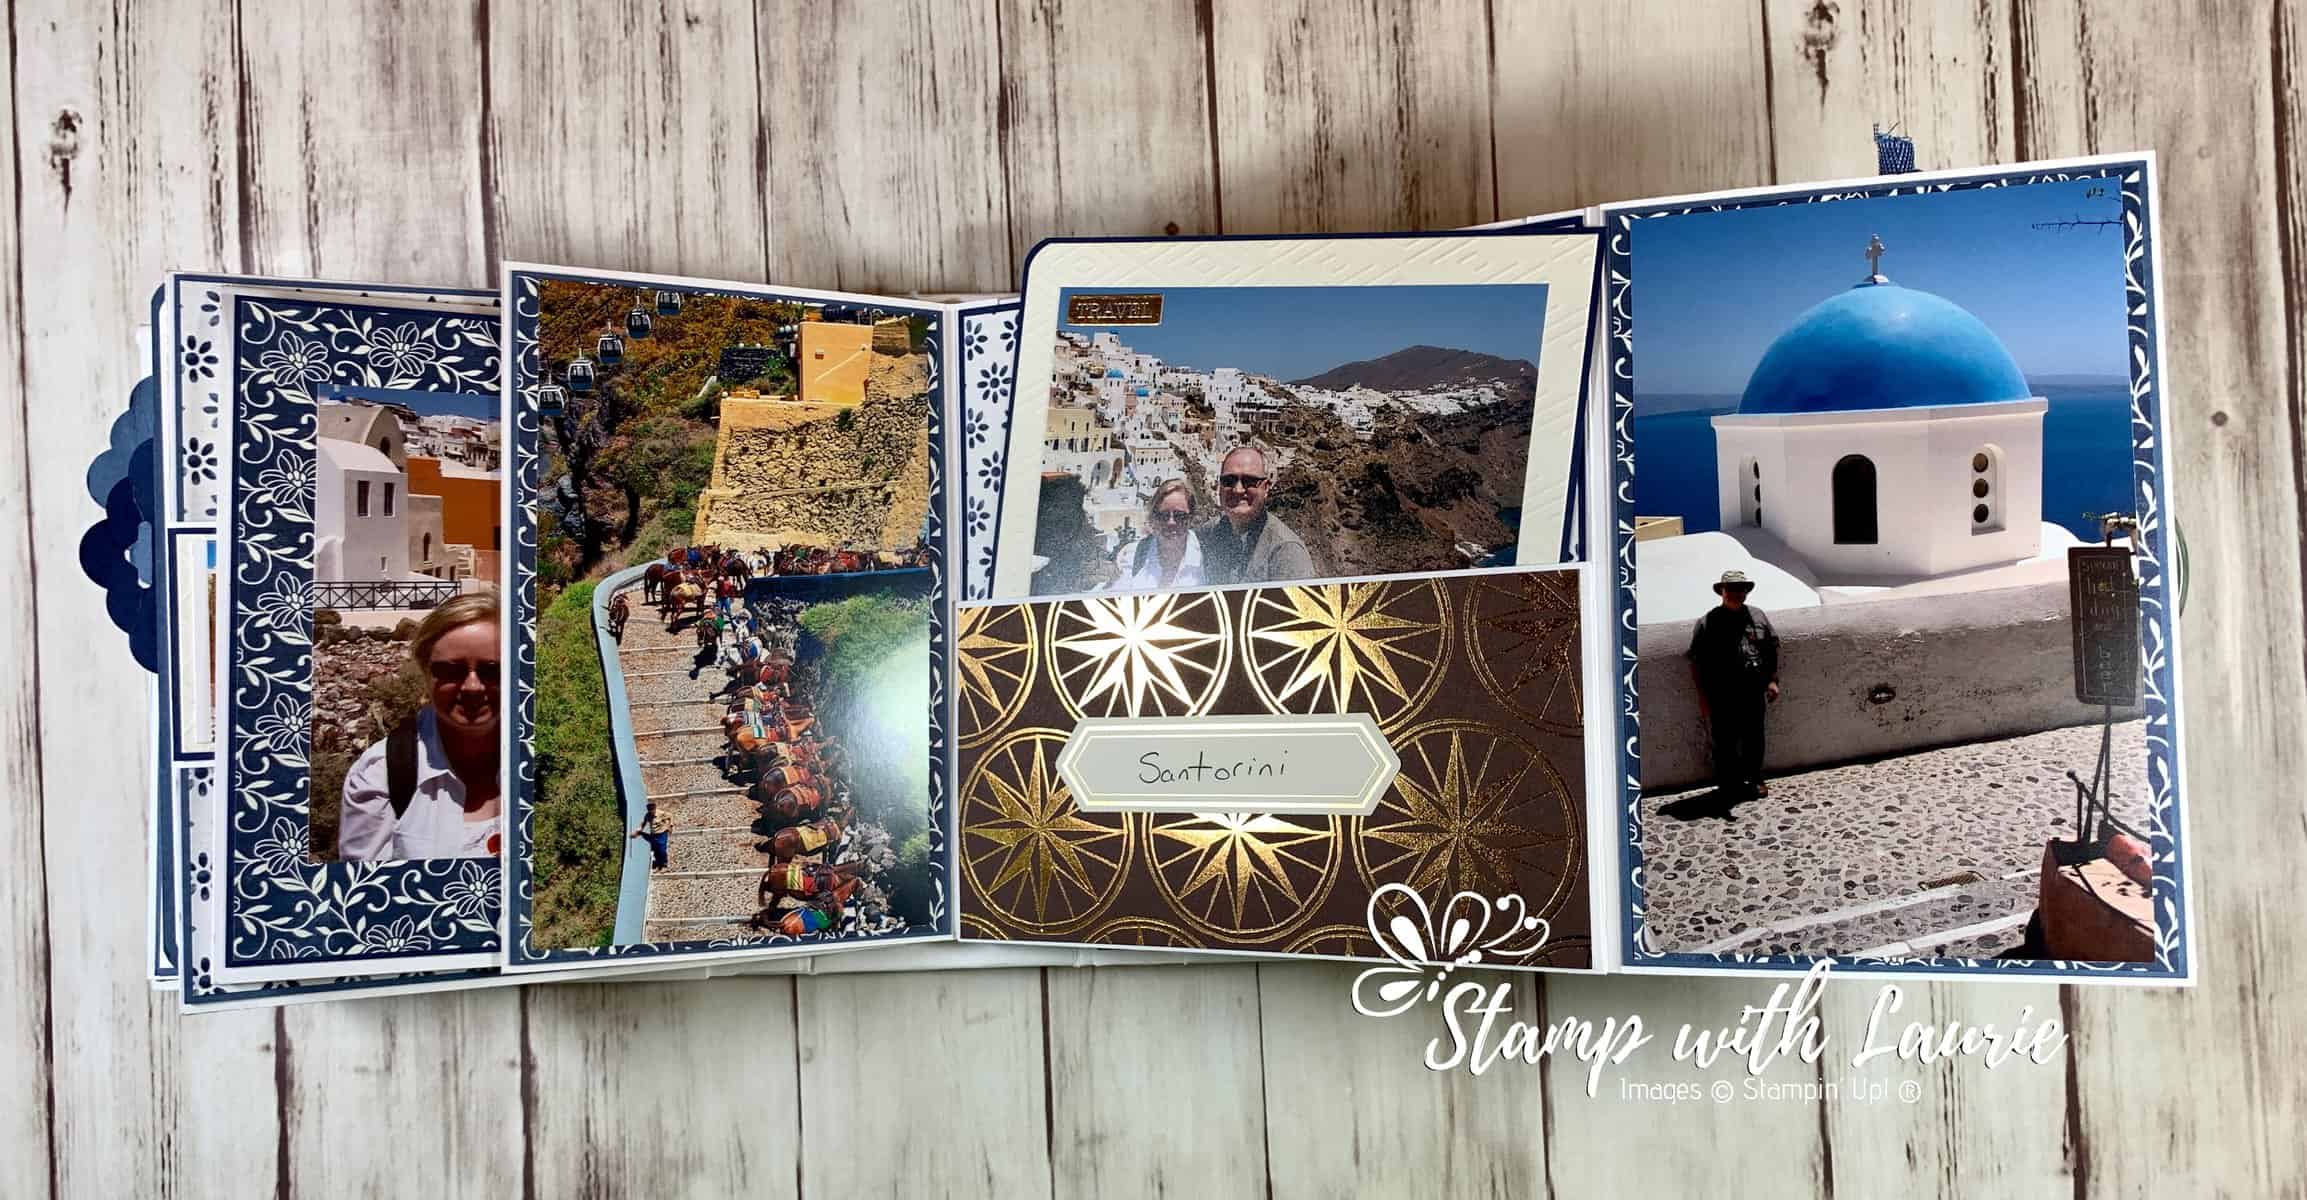
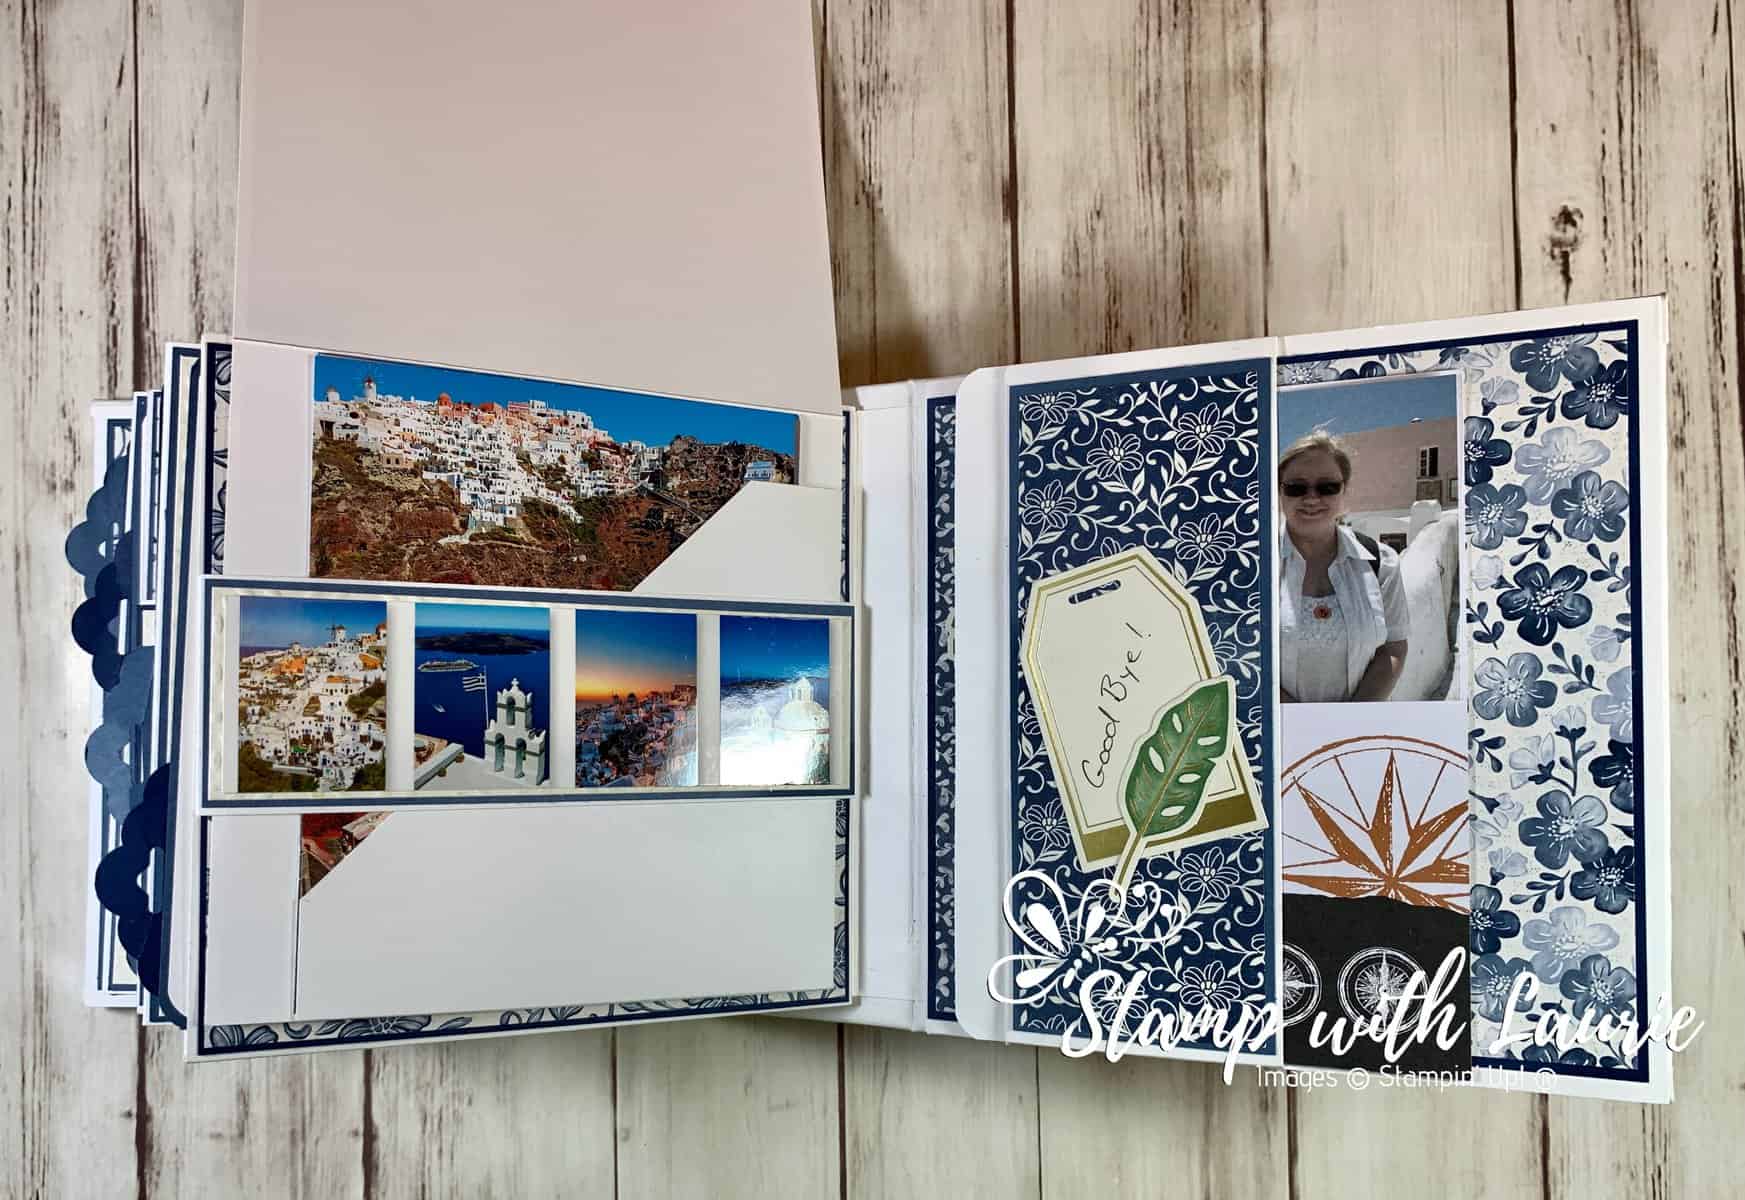
Page 5 - Santorini
Santorini – Page 5
Page 6 and 7 Spread
Page 6 and 7 Spread
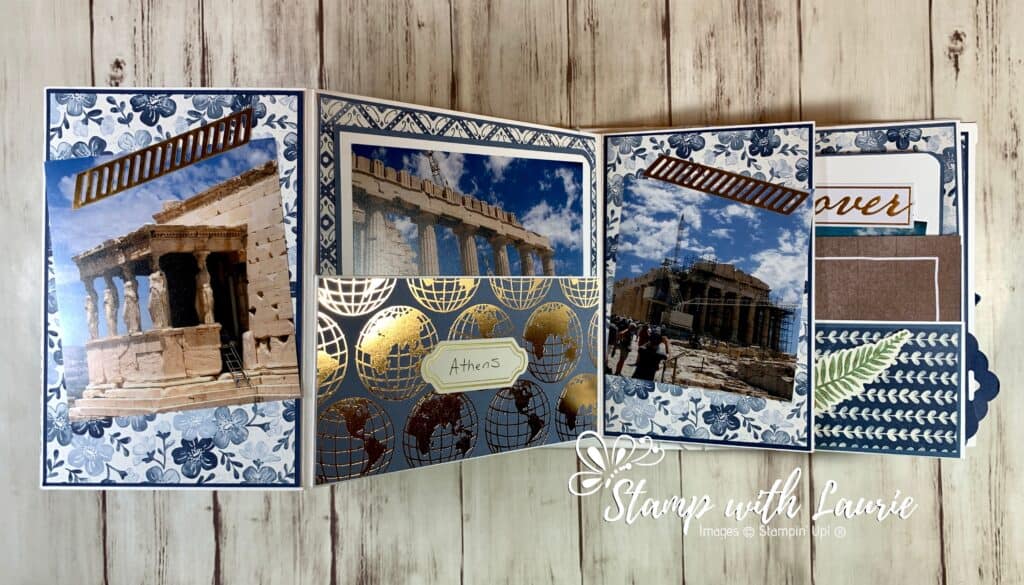
Page 6 - Athens
Athens – Page 6
Page 7
Page 7
Spread
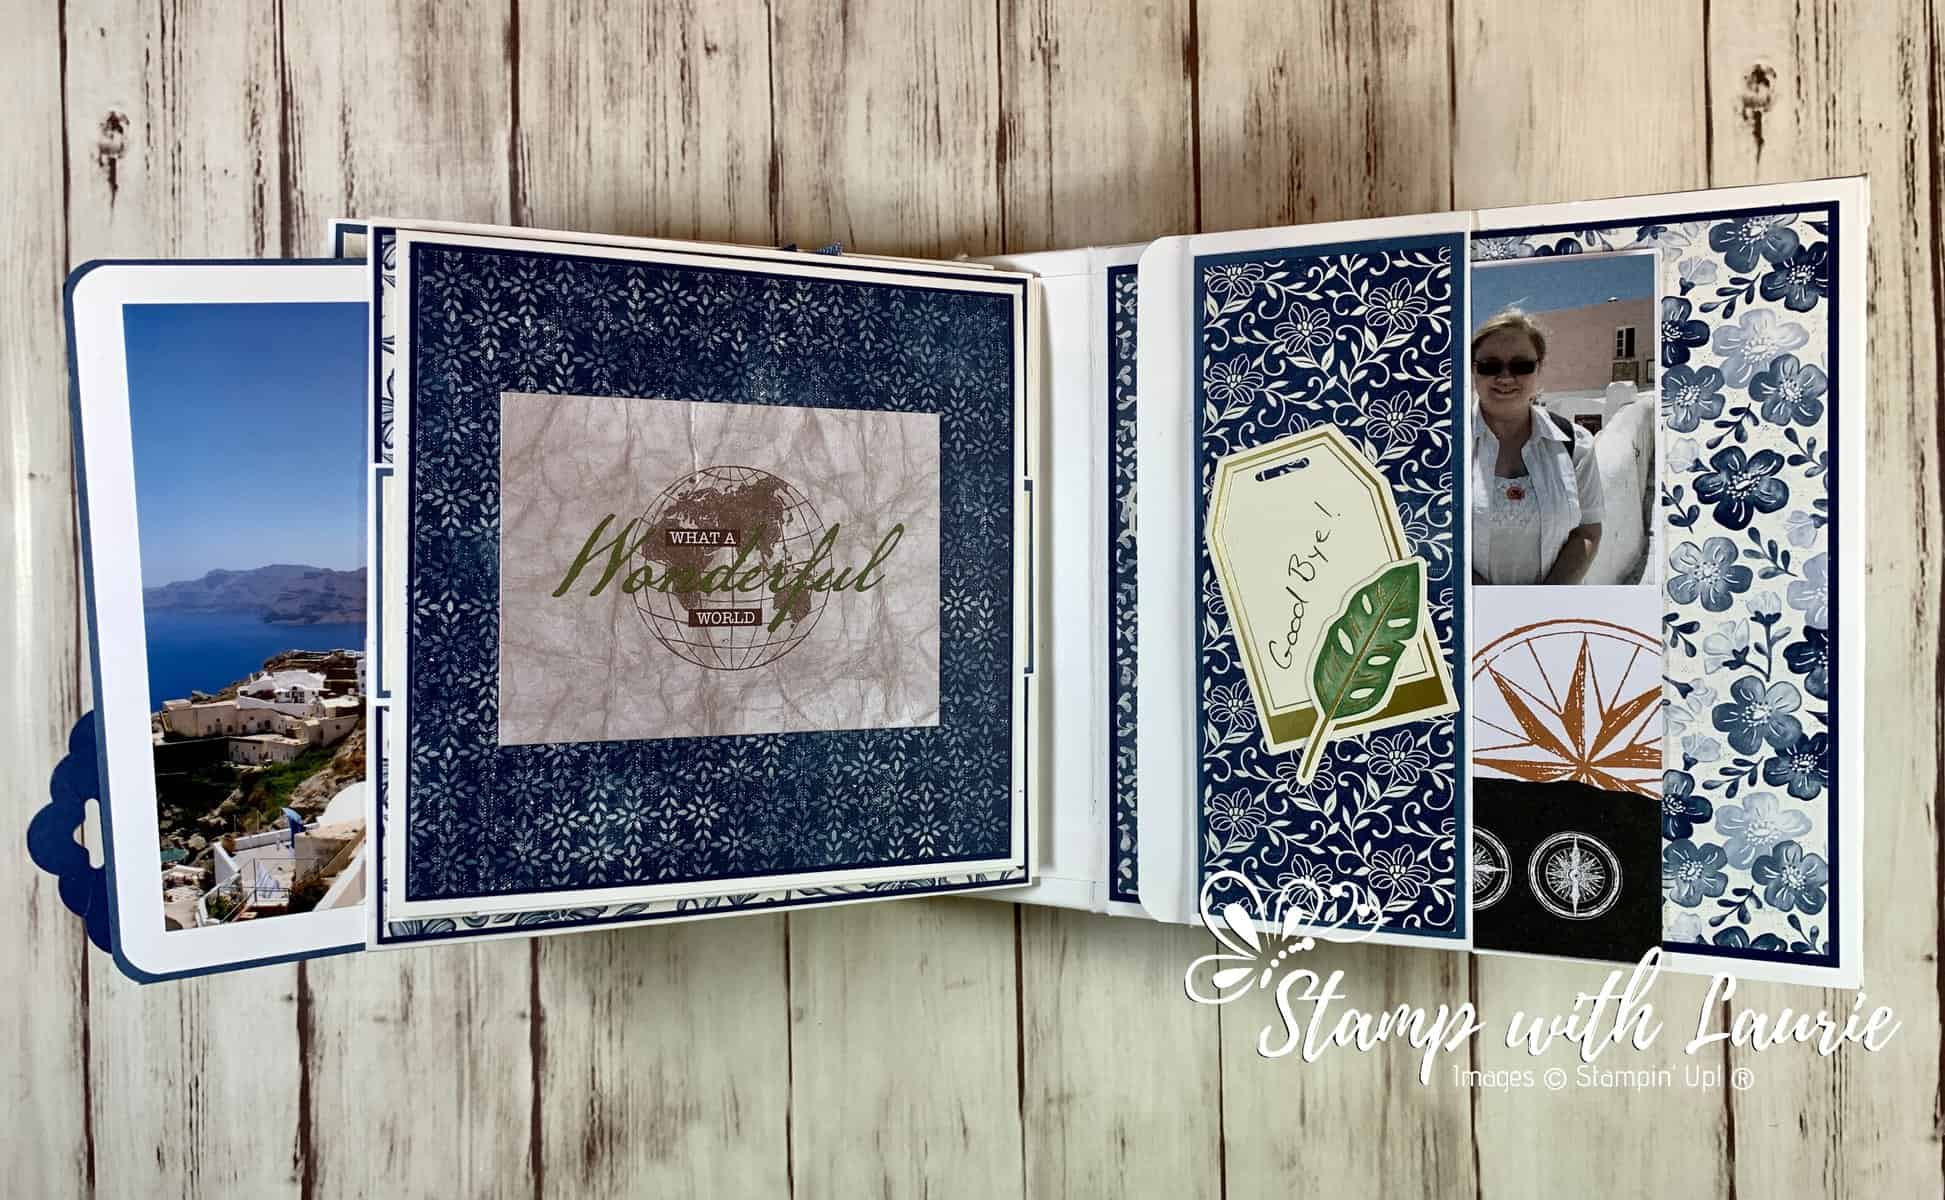
Spread of Page 8 and Inside Back Cover
Page 8
Page 8 – Picture Folder
Back Cover
Back Cover Opened

Supplies:

Stamps/Bundles/Dies: Boho Indigo Product Medley, Field Tiles Dies (152707)

Paper: Night of Navy (100867), Misty Moonlight (153081), Basic White 12″ x 12″ (159231), World of Good Memories and More (153600), World of Good Designer Series Paper (152491)

Accessories: Basic Black Stampin’ Write Marker (100082), Misty Moonlight 2020-2022 In Color Ribbon (153624), Snail Mail Twine Combo Pack (154579), Decorative Beads, Bead Shop, Crafts (Dollar Store), Vintage Romance Journal and Album Knobs, Recollections (Michael’s Arts & Crafts), Daintyfied Lunar Charm (Michael’s Arts & Crafts), Scallop Tag Topper Punch, Paper Snips (103579), Bone Folder (102300), Stampin’ Dimensionals (104430), Stampin’ Seal (152813), Glue Dots (103683), Multipurpose Liquid Glue (110755), Envelope Punch Board (for rounding the pull outs), Aleene’s Tacky Glue, Cardboard, Flexible Plastic Envelope
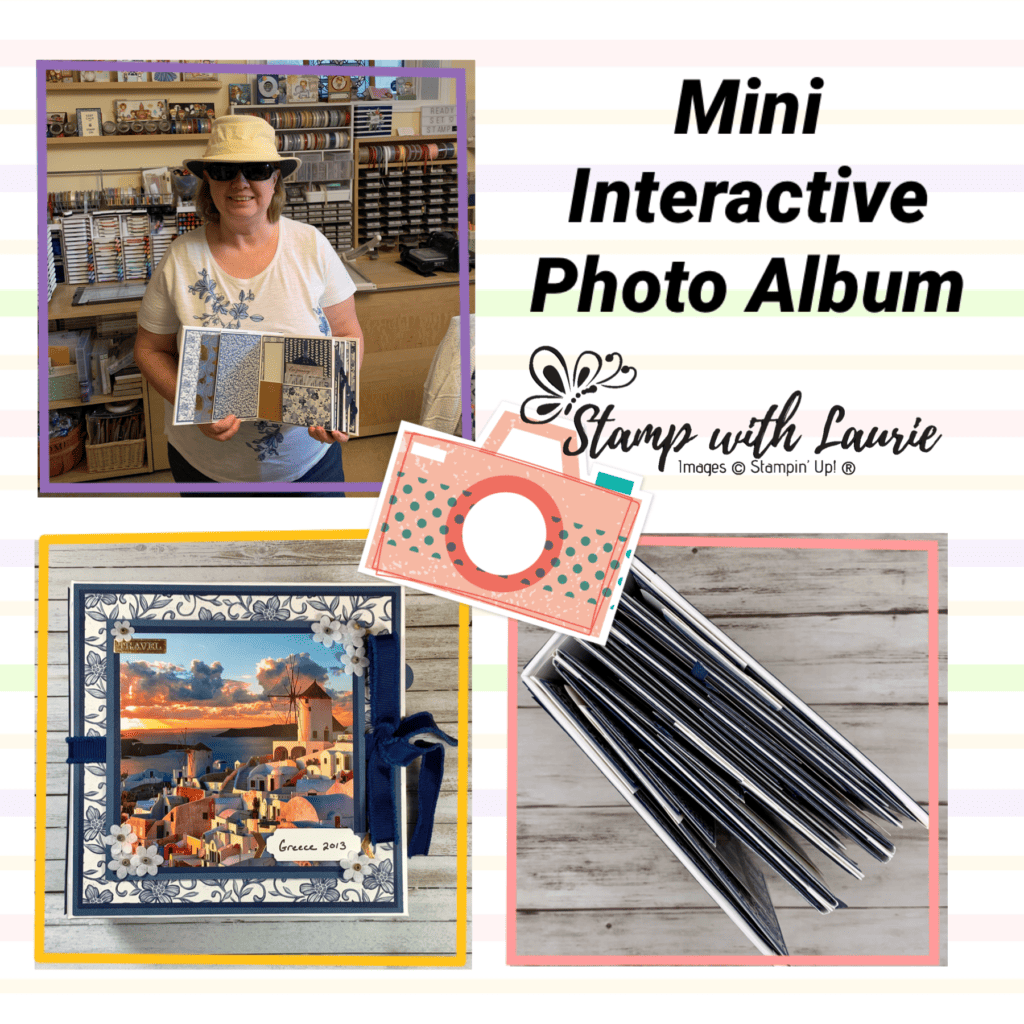
My Photo Album
My Mini Interactive Photo Album with me in my Greek Outfit Ready to Present

For Further Information:

PDF with measurements by Cal Summers:
https://stampwithlaurie.com/small-square-mini/

Videos by Cal Summers:
https://www.youtube.com/watch?v=jPGYq2KRELI
https://www.youtube.com/watch?v=twYJqHW9nUc
https://www.youtube.com/watch?v=TbhHUfQOdtE
https://www.youtube.com/watch?v=TlXFJomClmQ

She also has two Facebook Groups that you can join:
https://www.facebook.com/calsummersworkshops/
https://www.facebook.com/groups/paperscissorsstory/

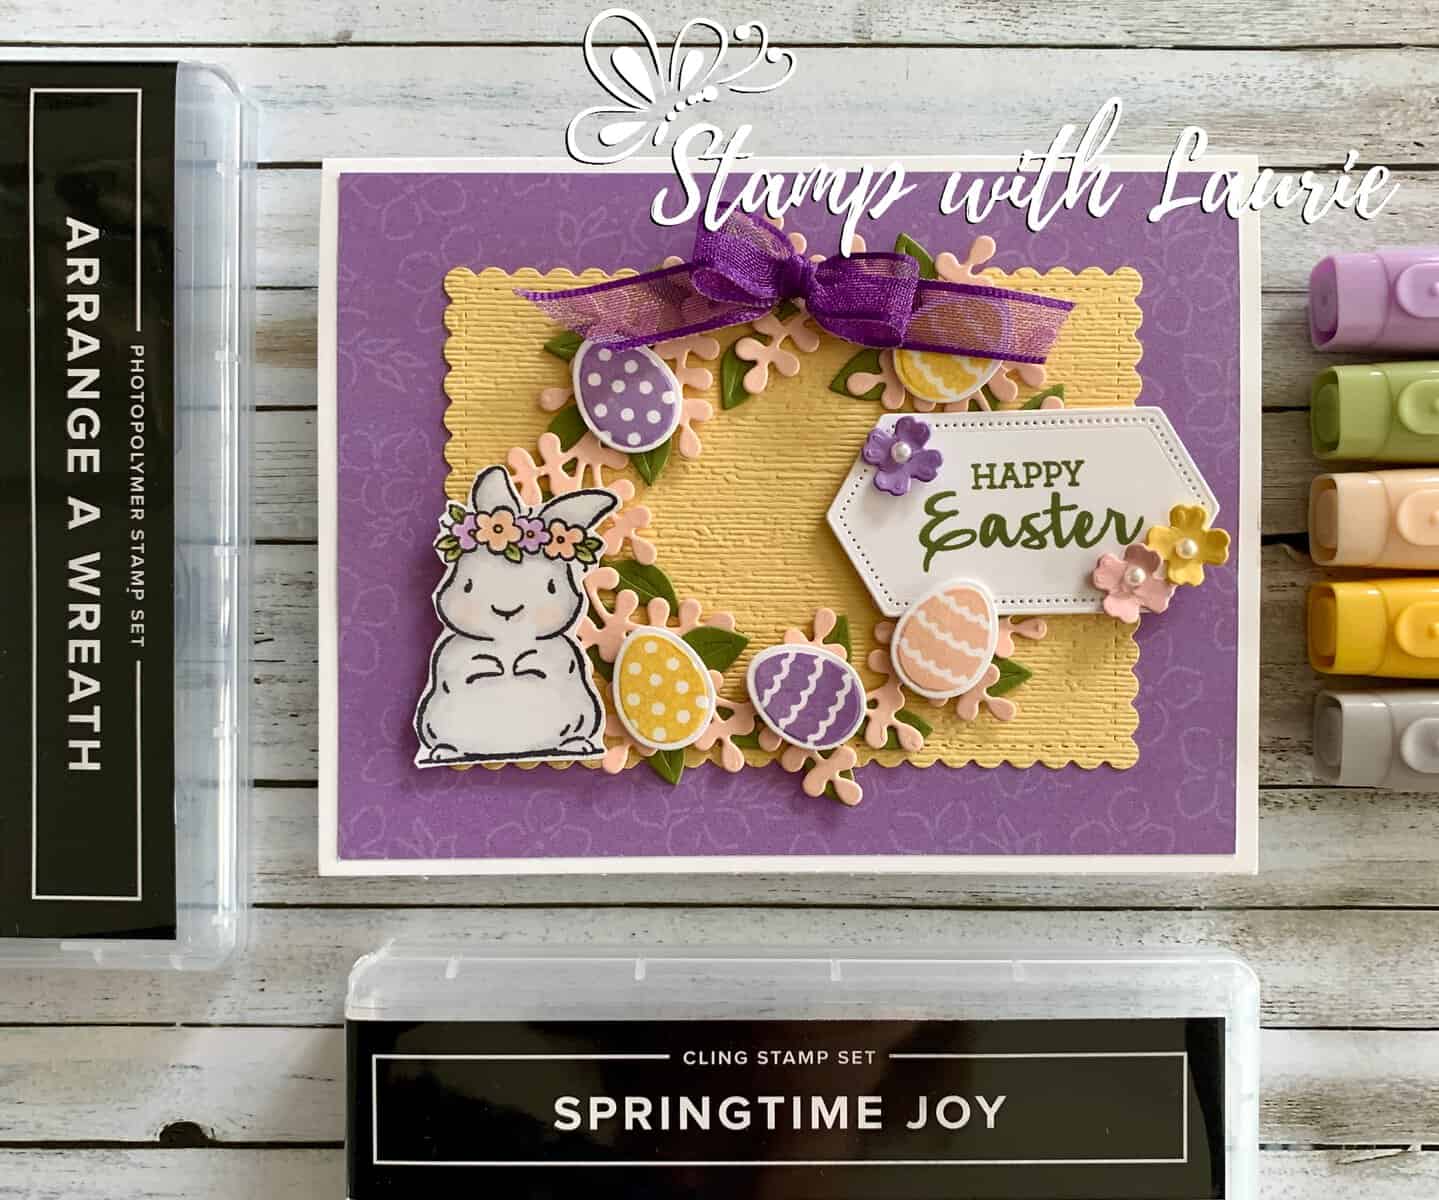
Happy Easter Card

My Happy Easter Card

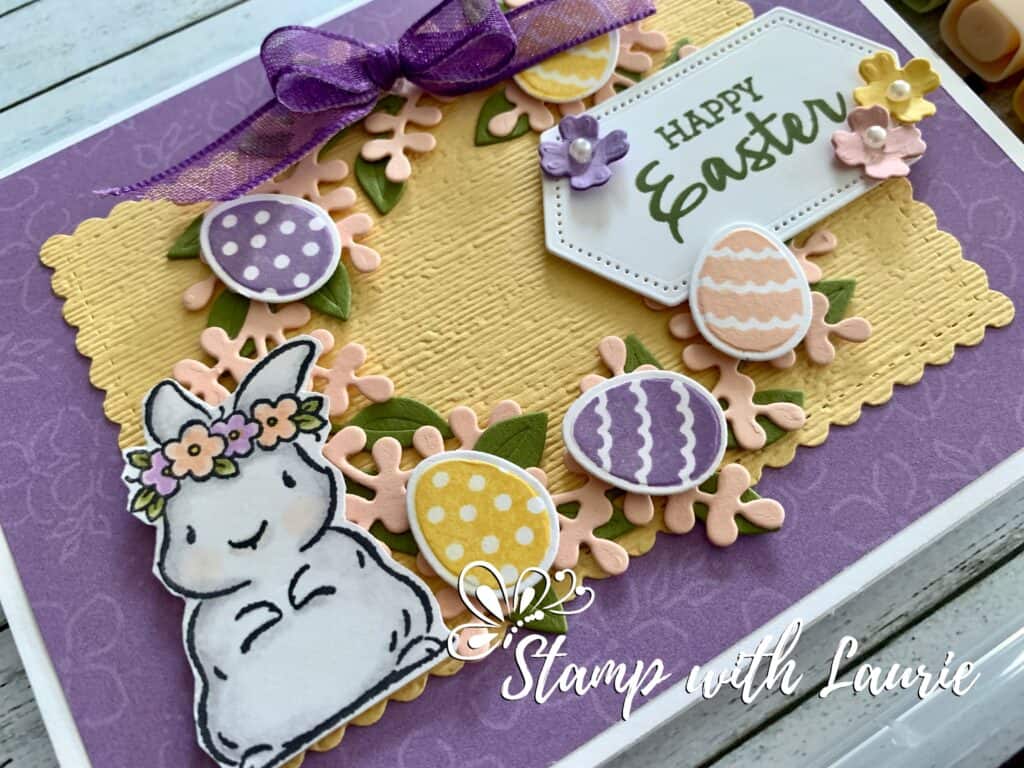
Happy Easter Everyone! Today I am sharing my Happy Easter Card that I made using a combination of two stamp sets by Stampin’ Up!, Springtime Joy and Arrange a Wreath. I love how these two sets go so well together and make a perfect Easter card!

Isn’t the lamb and bunny from the Springtime Joy Stamp Set so sweet! Perfect for this time of year!

The Arrange a Wreath Bundle is so versatile and has so many card possibilities such as Easter, Christmas, Thanksgiving, Valentines, Spring and Birthday. I love all the dies that come with it so that you can decorate your wreath for each occasion!

The Hydrangea Hill Designer Series Paper has the perfect colours for an Easter card! I was spoiled for choices but went with the Highland Heather piece!

Supplies:

Stamps/Bundles/Dies: Springtime Joy Stamp Set (154403), Arrange a Wreath Bundle (154109), Stitched Nested Labels Dies (149638), Stitched So Sweetly Dies (151690)

Inks: Old Olive Classic Stampin’ Pad (147090), Daffodil Delight Classic Stampin’ Pad (147094), Highland Heather Classic Stampin’ Pad (147103), Petal Pink Classic Stampin’ Pad (147108), Tuxedo Black Memento Ink Pad (132708)

Paper: Highland Heather (146986), Daffodil Delight (119683), Old Olive (100702), Petal Pink (146985), Basic White (159276), Basic White Thick (159229), Hydrangea Hill Designer Series Paper (154570)

Accessories: Highland Heather Stampin’ Blends Combo Pack (154887), Daffodil Delight Stampin’ Blends Combo Pack (154883), Old Olive Stampin’ Blends Combo Pack (154892), Petal Pink Stampin’ Blends Combo Pack (154893), Smoky Slate Stampin’ Blends Combo Pack (154904), Stampin’ Blends Color Lifter (144608), Subtle 3D Embossing Folder (151775), Wink of Stella Glitter Bruch (141897), Pearl Basic Jewels (144219), Gorgeous Grape 3/8″ Sheer Ribbon (154572), Paper Snips (103579), Bone Folder (102300), Stampin’ Dimensionals (104430), Stampin’ Seal (152813), Glue Dots (103683)

Close Up of My Happy Easter Card

Measurements: 

  • Basic White Thick: 5 ½” x 8 ½” scored at 4 ¼”
  • Hydrangea Hill Designer Series Paper: 5 ¼” x 4”
  • Daffodil Delight: 2 15/16” x 4 1/8”
    • Scraps
  • Petal Pink: 3 7/16” x 3 5/8”
    • Scraps
  • Old Olive: 3 ½” x 3 ½”
  • Highland Heather: Scraps
  • Basic White: 2 3/8” x 1 ¼” (Sentiment)
    • Scraps
  • Gorgeous Grape 3/8″ Sheer Ribbon: 5”

For Further Info:

Hope you like my Happy Easter Card using the Springtime Joy Stamp Set and Arrange A Wreath Bundle.

You will find the items listed above in my online store.

Peony Thank You Card

My Peony Thank You Card

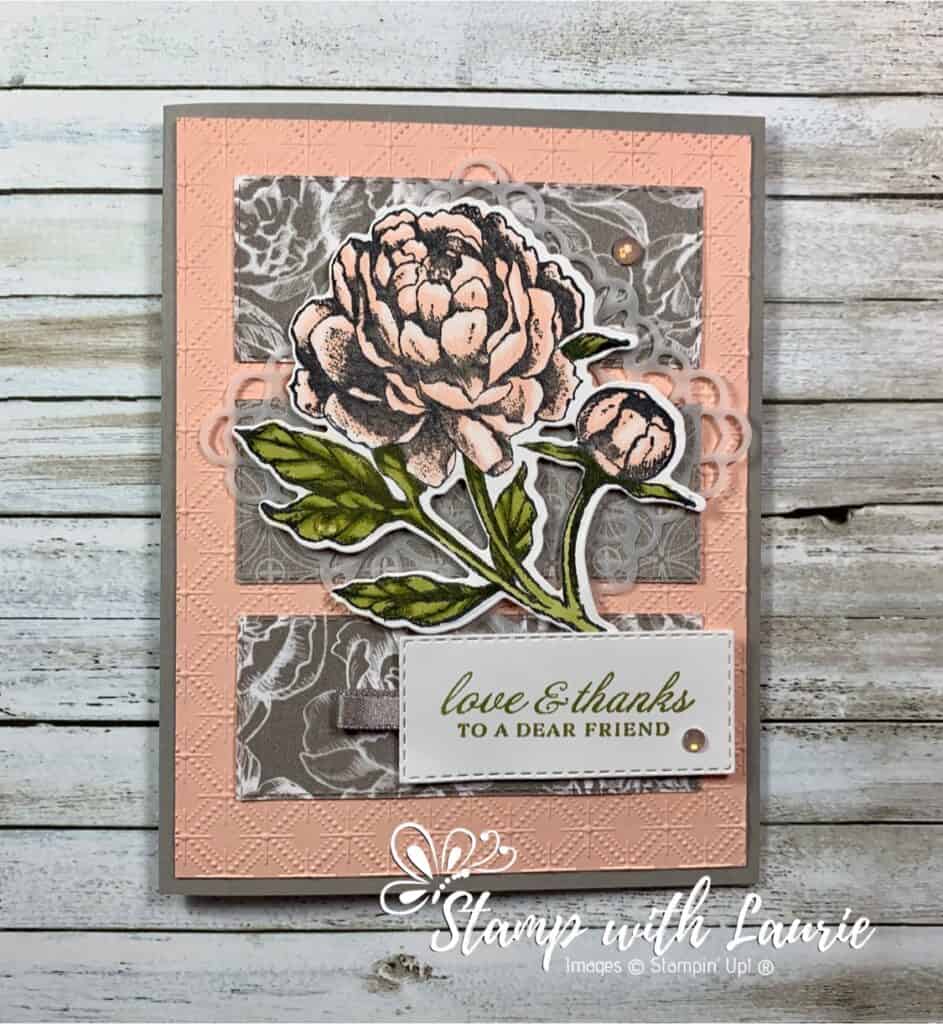
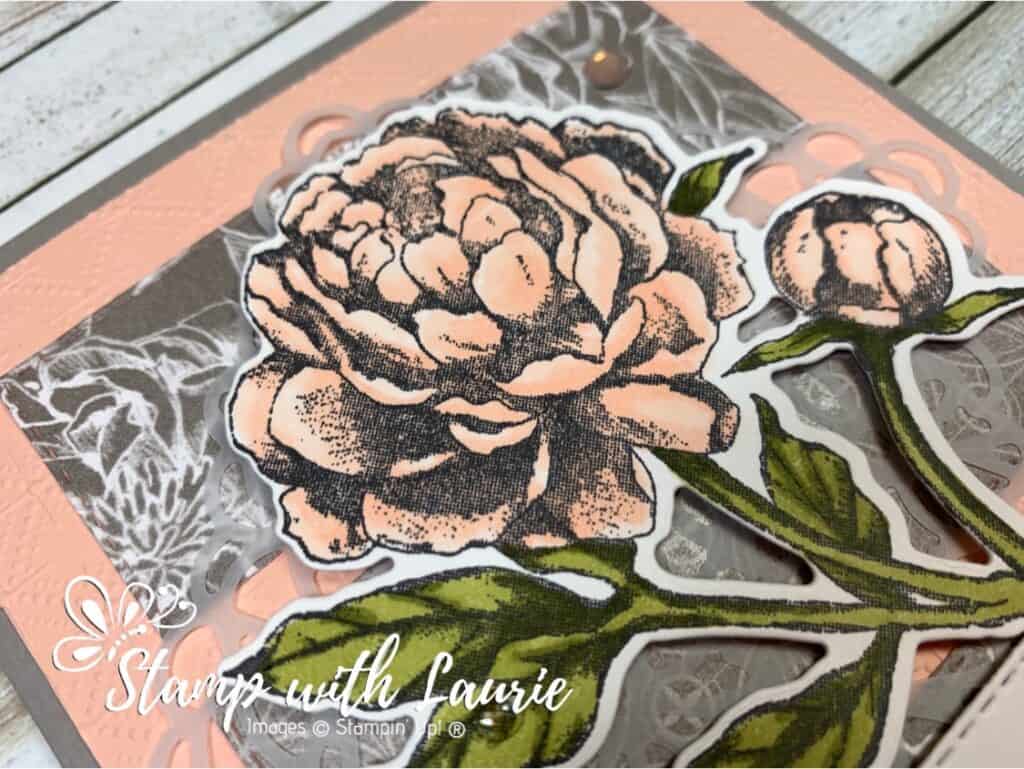
Today is I am sharing my Peony Thank You Card that I made for a swap using the beautiful Peony Garden Suite Collection. I love peonies and when I saw this collection, I knew that I had to buy it! It is getting lots of love! So far, I have made 4 cards with it! I am sharing two of those cards here.

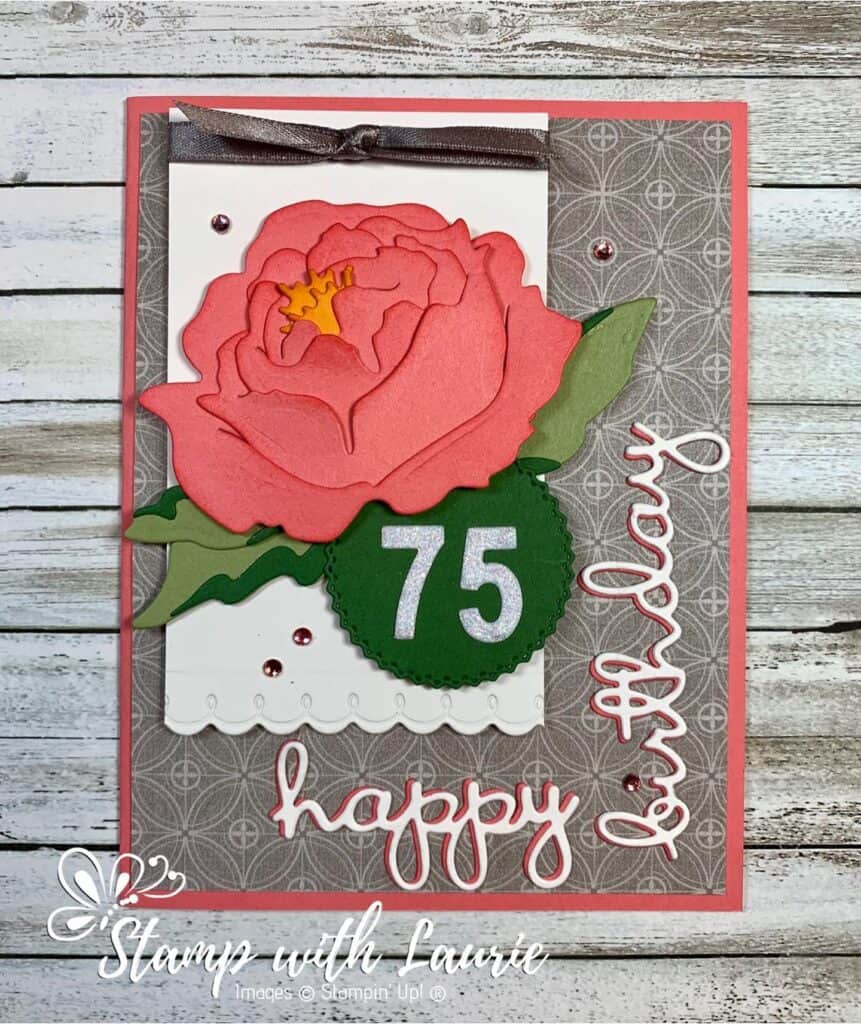
For my card, I pulled out my Stampin’ Up! Blends in Petal Pink and Old Olive to colour this gorgeous flower. I love how you can use the matching dies to cut out the blooms, but there are also dies that build a 3D peony bloom as well! I made the card below for my Mom’s 75th birthday using the 3D bloom and it was gorgeous!

Birthday Card with the 3D Peony Bloom
My Mom’s Birthday Card with the 3D Peony Bloom

I love the softness of the Peony Garden Designer Series Paper and that was from where I pulled my colour scheme of Petal Pink and Gray Granite with a touch of Old Olive.

I used the pretty Dainty Diamonds 3D Embossing Folder on the Petal Pink card stock. For embellishments, I used the Gray Granite Ribbon, a Square Vellum Doily and a scattering of Elegant Faceted Gems.

Supplies:

Stamps/Bundles/Dies: Prized Peony Bundle (154056), Stitched Rectangles Dies (151820)

Inks: Tuxedo Black Memento Ink Pad (132708), Old Olive Classic Stampin’ Pad (147090)

Paper: Gray Granite (146983), Petal Pink (146985), Basic White (159276), Peony Garden Designer Series Paper (152483)

Accessories: Dainty Diamonds 3D Embossing Folder (152702), Old Olive Stampin’ Blends Combo Pack (154892), Petal Pink Stampin’ Blends Combo Pack (154893), Gray Granite Ribbon (152463), Elegant Faceted Gems (152464), Square Vellum Doilies (152484), Bone Folder (102300), Stampin’ Dimensionals (104430), Stampin’ Seal (152813), Glue Dots (103683)

Measurements: 

  • Gray Granite: 5 ½” x 8 ½” scored at 4 ¼”
  • Petal Pink: 5 ¼” x 4”
  • Basic White: 2 pieces
    • 2 3/8” x 1” (sentiment)
    • 2 ¾” x 3 ½”
  • Peony Garden Designer Series Paper: 3 pieces at 3 ¼” x 1 ¼”
  • Gray Granite Ribbon: 2”
Close Up of My Peony Thank You Card

For Further Info:

Hope you like my Peony Thank You Card.

For more information on my colouring, here are some videos of my colouring techniques:

1 – PartWhiskey Business Card using Blending Different Colours Technique
Video Tutorial: Blending Different Colours Together

2 – PartCountry Harvest Card using Light to Dark Technique
Video Tutorial: Light to Dark/Dark to Light Colouring

3 – PartBeautiful Poppy Birthday Card using Smooth Colouring Technique
Video Tutorial: Smooth Colouring

4 – PartLet’s Gather Together Card using Tip to Tip Blending Technique
Video Tutorial: Tip to Tip Colouring

5 – PartSo Grateful Cardinal Card using Flicking Colouring Technique
Video Tutorial: Flicking Colouring

6 – PartLet’s Celebrate You Card using Flicking of Different Colours Technique
Video Tutorial: Flicking of Different Colours Technique

My Colouring Notes:
https://stampwithlaurie.com/wp-content/uploads/2020/08/Stampin-Up-Blends-2020.pdf

You will find the items listed above in my online store.

My Roll With It Shaker Card

My Roll With It Shaker Card

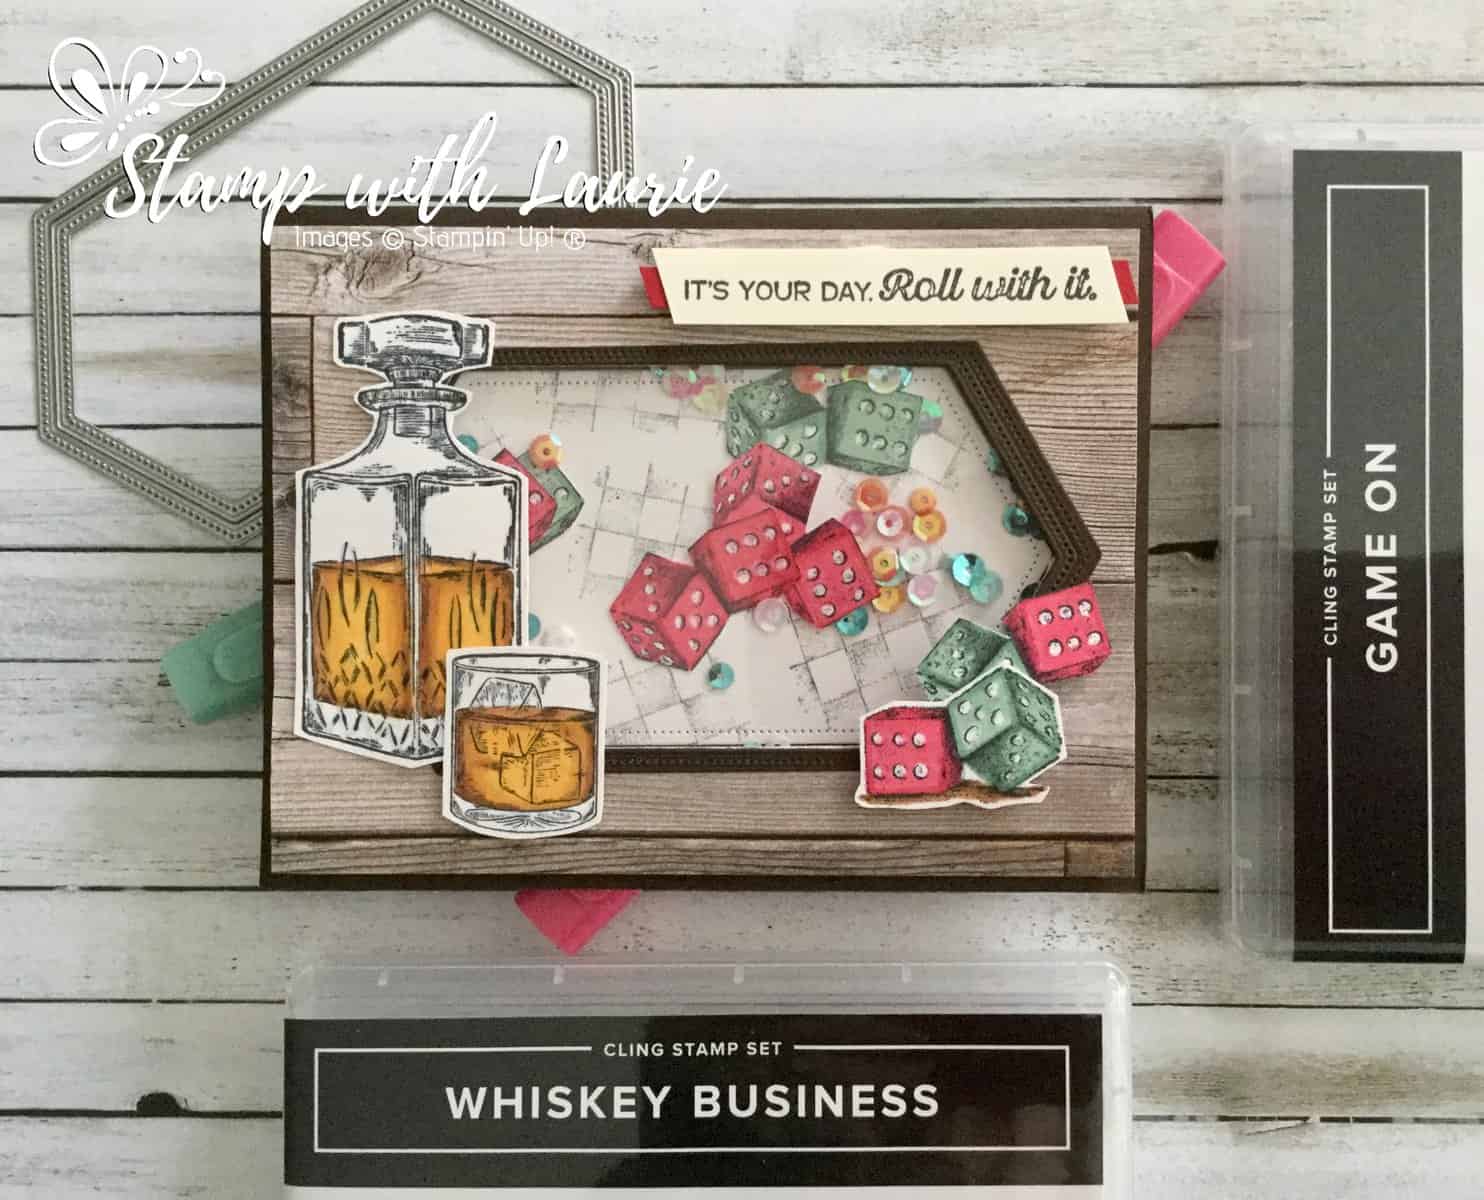
Tomorrow is my Hubby’s birthday! So, today I am sharing with you my Roll With It Shaker Card that I plan to give to him. I thought a shaker card would be so fun! It is using two stamp sets, Whiskey Business and Game On, that are perfect for him! We love to play games and have game time with our friends and family on a regular basis! Now he can shake the card and his dice will always come up 6 and 5! LOL! I even coloured the dice with the Real Red and Just Jade Stampin’ Blends to match the ones that he uses. In addition to gaming, he loves his single malt scotch and is always trying different types.

Details of My Roll With It Shaker Card

For my card, I wanted to create a masculine feel. So, the In Good Taste Designer Series Paper with Early Espresso card stock was perfect for it! I use the two largest Stitched Nested Labels to create my window frame. I stamped the checkerboard in Memento Black off twice before I randomly stamped it a third time on my Whisper White background piece. Once I did this, I created my shaker part with Foam Adhesive Strips, a piece of Window Sheet, a pinch of Woven Threads Sequins and my “dice”.

For the dice and the scotch, I stamped them on Whisper White with Memento Black. I then used my Stampin’ Blends to colour them. The dice were Real Red Dark/Light and Just Jade Dark/Light with Cinnamon Cider Dark/Light for the ground. The Scotch was Cinnamon Cider Dark/Light and Mango Melody Dark with Balmy Blue Light and Color Lifter for the glass. Once these were coloured, I fussy cut them out.

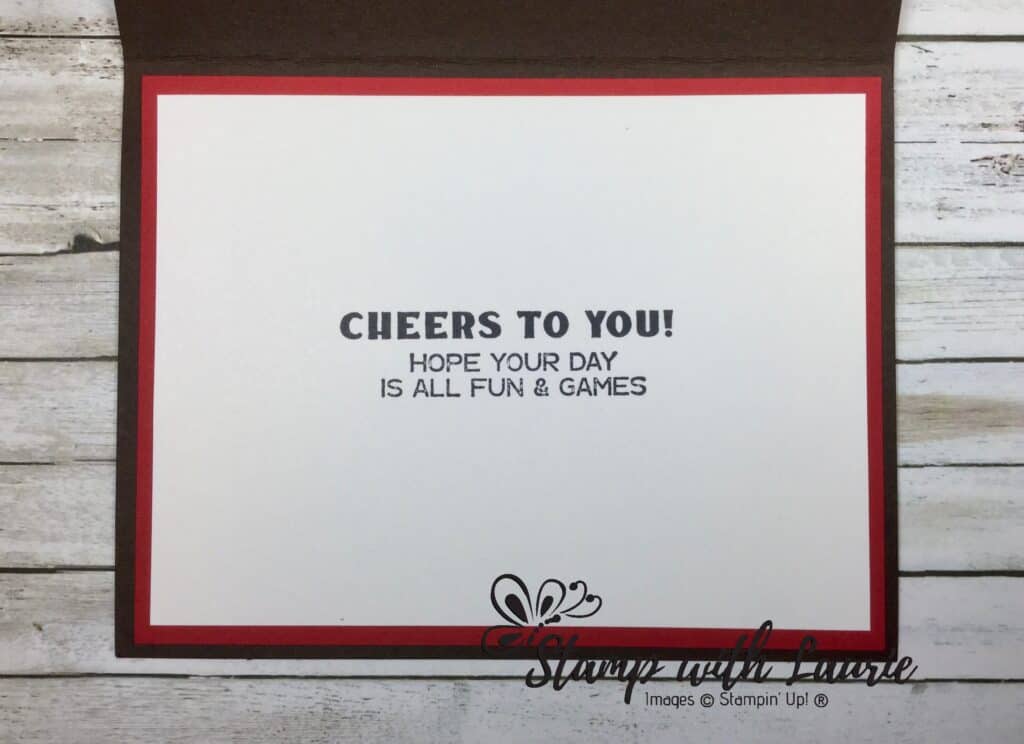
The sentiment stamped in Memento Black from Game On with a splash of Real Red behind it was perfect for my card! The finishing touch was decorating the inside by combining the two stamp sets again to create my sentiment.

Inside of Close Up of Dice from My Roll With It Shaker Card

My Roll With It Shaker Card in Action

My Roll With It Shaker Card in Action

Here is a video that I presented to some fellow demonstrators that shows how to colour with Stampin’ Blends the decanter from the Whiskey Business Stamp Set.

My Whiskey Business Colouring Tutorial

Supplies:

Stamps: Whiskey Business Stamp Set (152550), Game On Stamp Set (152646)

Dies: Stitched Nested Labels Dies (149638)

Inks:Tuxedo Black Memento Ink Pad (132708)

Paper: Real Red (102482), Early Espresso (119686), Whisper White (100730), Window Sheets (142314), In Good Taste Designer Series Paper(152494)

Accessories: Woven Threads Sequin Assortment(149498), Cinnamon Cider Stampin’ Blends Combo Pack (153105), Mango Melody Stampin’ Blends Combo Pack (154888), Balmy Blue Stampin’ Blends Combo Pack (148544), Stampin’ Blends Color Lifter (144608), Paper Snips (103579), Bone Folder (102300), Stampin’ Seal (152813), Stampin’ Dimensionals (104430), Foam Adhesive Strips (141825), Mini Glue Dots (103683)

Measurements: 

  • Early Espresso: 2 pieces of each
    • 8 ½” x 5 ½”; scored at 4 ¼”
    • 5” x 2 5/8” (shaker frame)
  • Whisper White: 4 pieces of each
    • 5” x 3” (background piece)
    • Scraps (dice, decanter, glass)
    • 3” x ½” (sentiment)
    • 4 ¾” x 4” (Inside of card)
  • Real Red: 2 pieces of each:
    • 5” x 4 ¼” (Inside of card)
    • Scrap
  • Window Sheet: 5” x 3”
  • In Good Taste Designer Series Paper: 5” x 4 ¼”

For Further Info:

Hope you like my Roll With it Shaker Card!

For another Whiskey Business Card, check out this link.

You will find the items listed above in my online store.

My Cardinal Anniversary Card

My Cardinal Anniversary Card

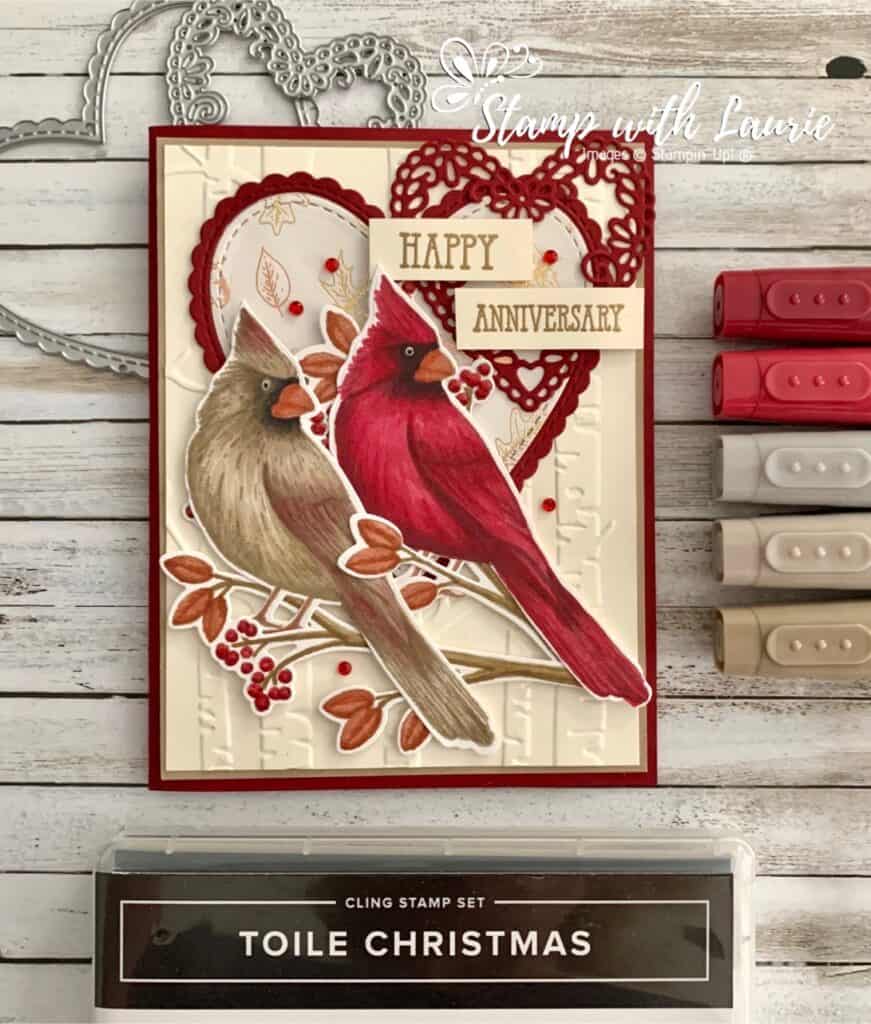
Today I am sharing with you my Cardinal Anniversary Card using the Toile Christmas Stamp Set and matching Christmas Cardinal Dies by Stampin’ Up! I was asked by a good friend to create a custom anniversary card for her to give to her husband. She mentioned that he loves cardinals and she would like one on the card. So, I decided to that two cardinals, a male and female, would be perfect for an anniversary card. Did you know that cardinals mate for life!

I decided to create a Fall scene with the Woodland Embossing Folder and the Gilded Autumn Specialty Designer Series Paper since they were married in October. I love the copper and gold gilded leaves on the paper! To tie in the gold accents, I embossed the sentiment from the Well Said Stamp Set in gold. For an anniversary card, I had to pull in the hearts with the Stitched Be Mine Dies! Some Red Rhinestone Basic Jewels and Shimmery Crystal Effects on the berries add a bit of sparkle to the card.

I used a number of techniques to colour my birds such as the No-Lines, Flicking and Tip-to-Tip. I included more information below, as well as some colouring videos at the end of this post.

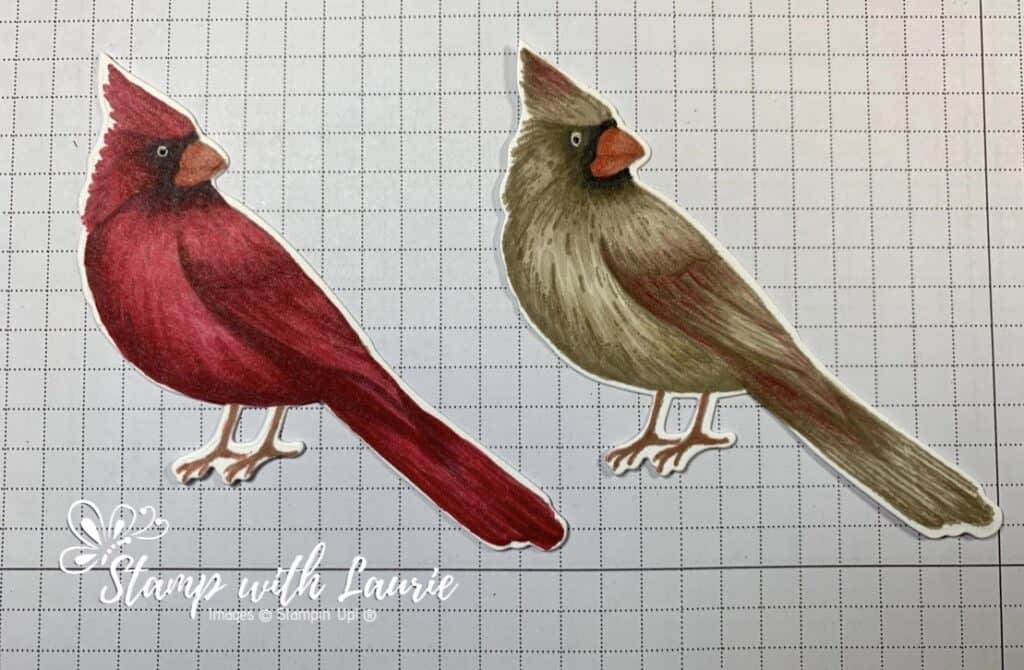
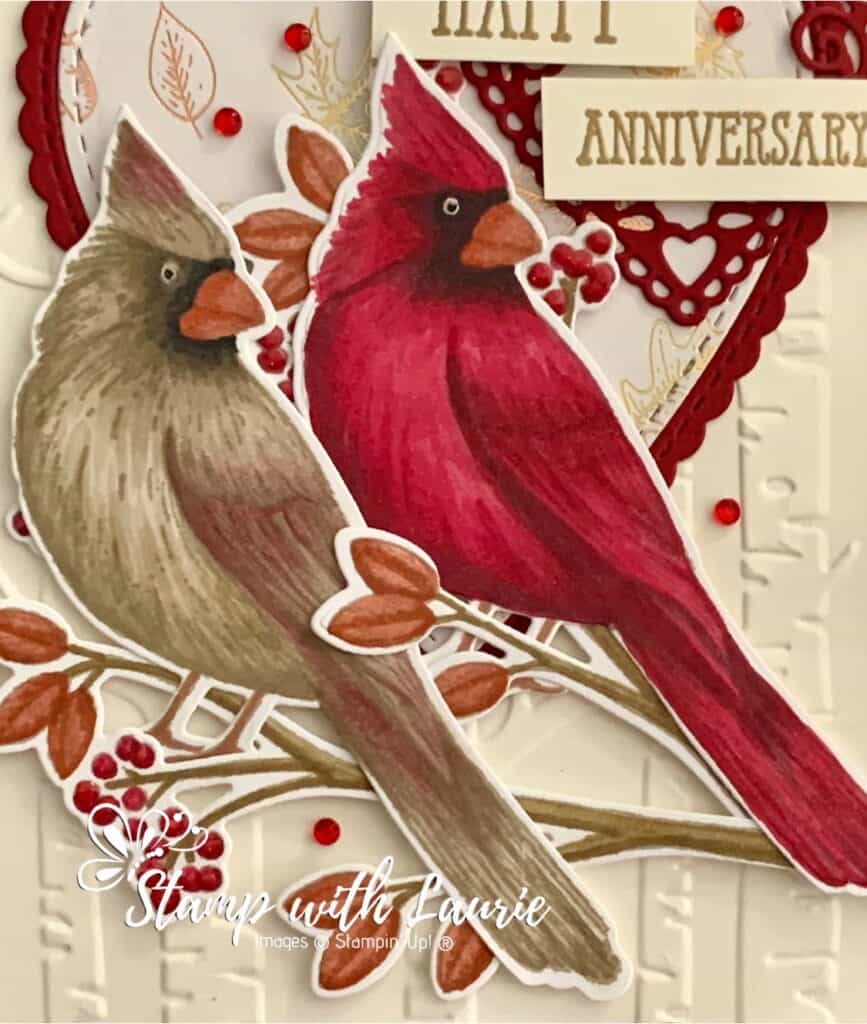
For the male cardinal, I used Cherry Cobbler Light/Dark Blends and the Dark Smokey Slate Blend to darken the shadows in strategic locations, such as his tail, his breast and wing, giving the bird depth. For the female cardinal, I used Crumb Cake Light/Dark Blends and Light Crumb Cake/Dark Cherry Cobbler Blends.

My Cardinals Coloured with Stampin' Blends
My Cardinals Coloured with Stampin’ Blends

No-Lines Technique

I coloured these beautiful cardinals with the no-lines technique. This technique uses a light colour to stamp the image. For the cardinals, I used the Sahara Sand Classic Stampin’ Pad. The lighter colour gives you a guideline for your colouring without the harsh black lines and makes the image more real and vibrant.

Flicking Technique

Once stamped, I used a flicking technique with my Blends to create a lot of texture. This technique is achieved by applying ink in quick, single strokes. The key to this inking technique is to flick the marker tip across the page to create a single stroke that goes from dark to light.

  1. Holding the marker loosely, start a downward movement towards the paper
  2. As the marker tip touches the paper, quickly move across the paper, bringing your hand up and away from the paper. This will apply more ink at the beginning of the stroke and less at the end.
  3. You may need to turn the paper to accommodate the angle that is most comfortable for you.

Flicks can be left unblended to create texture such as for hair or feathers (like this card). Or, they can be blended out to create smooth shading.

The Tip-to-Tip Technique

To combine two different coloured blends on the female cardinal, I used the Tip to Tip Blending Technique. This gives you a smooth transition of colors and doesn’t end up looking all blotchy where the colors meet. I’ve chosen the Light Crumb Cake Blend and the Dark Cherry Cobbler Blend for the female cardinal.

  1. Brush the tip of the Light Crumb Cake Blend over the tip of the Dark Cherry Cobbler Blend to pick up some color. The Crumb Cake Blend then acts as your brush to apply a mix of both colors.
  2. As you apply the Crumb Cake Blend, the Cherry Cobbler will eventually run out and only Crumb Cake is left. This creates a smooth transition between the two colours. I kept working these blends together until I was happy with the amount of Cherry Cobber I had on the bird.
  3. Don’t worry about your markers being contaminated—all you need to do is run them over some scrap paper a few times and the nibs will clean themselves.
Close Up of my Cardinal Anniversary Card

Supplies:

Stamps: Toile Christmas Cling Stamp Set (150469), Well Said Stamp Set (148796)

Dies:  Christmas Cardinal Dies (150640), Stitched Be Mine Dies (151814)

Inks: Tuxedo Black Memento Ink Pad (132708), Sahara Sand Classic Stampin’ Pad (147117), VersaMark (102283)

Paper: Cherry Cobbler (119685), Crumb Cake (120953), Very Vanilla (101650), Whisper White (100730), Gilded Autumn Specialty Designer Series Paper (153520)

Accessories: Woodland Embossing Folder (152881), Cherry Cobbler Stampin’ Blends Combo Pack (154880), Smoky Slate Stampin’ Blends Combo Pack (154904), Cajun Craze Stampin’ Blends Combo Pack (154879), Crumb Cake Stampin’ Blends Combo Pack (154882), Soft Suede Stampin’ Blends Combo Pack (154906), Gold Stampin’ Emboss Powder (109129), Red Rhinestone Basic Jewels (146924), Shimmery Crystal Effects (150892), Bone Folder (102300), Stampin’ Seal (152813), Stampin’ Dimensionals (104430), Mini Stampin’ Dimensionals (144108), Mini Glue Dots (103683)

Measurements: 

  • Cherry Cobbler:
    • 8 ½” x 5 ½”; scored at 4 ¼”
    • 3 ½” x 3 ¾” (large heart)
    • 2 ¼” x 2 3/8” (small heart)
  • Crumb Cake: 5 ¼ x 4”
  • Very Vanilla: 5 1/8” x 3 7/8” and scraps for sentiment
  • Gilded Autumn Specialty Designer Series Paper: 3” x 3¼”
  • Whisper White: 2 pieces of each
    • 2 x 4 ½” (cardinal)
    • 2 ½” x 4 ¼” (branch)

Instructions:

  1. Fold the Cherry Cobbler card stock in half.
  2. Stamp the cardinals and branches in Sahara Sand on Whisper White card stock.
  3. Colour the cardinal using the flicking technique described above in Cherry Cobbler Light/Dark and Dark Smokey Slate for the male.
  4. For the female, use Crumb Cake Light/Dark and the Tip-to-Tip Technique with Crumb Cake/Cherry Cobbler.
  5. Use Basic Black Light/Dark for the masks on their faces and Cajun Craze Light/Dark for their beaks and feet.
  6. Colour the branches in Cajun Craze Light/Dark for the leaves, Cherry Cobbler Light/Dark for the berries and Soft Suede Light/Dark for the branch part.
  7. Using the Christmas Cardinal Dies, die cut the cardinal and branches.
  8. Add Shimmery Crystal Effects to the berries on the branches and set aside to dry.
  9. Emboss the Very Vanilla piece with the Woodland Embossing Folder.
  10. Stamp the sentiment in VersaMark on the scraps of Very Vanilla and heat emboss with Gold Stampin’ Emboss Powder. Trim to fit.
  11. Die cut in Cherry Cobbler the large scallop heart and the small filigree heart from the Stitched Be Mine Dies.
  12. Die cut the Gilded Autumn Specialty Designer Series Paper with the heart that layers into the scallop heart.
  13. Using Stampin’ Seal adhere the Crumb Cake piece to the card base.
  14. .Adhere the embossed Very Vanilla piece with Stampin’ Seal to the Crumb Cake.
  15. Attached the Cherry Cobbler scallop heart to the Very Vanilla piece towards the top and aahere the DSP to the centre of it.
  16. Using Multipurpose Liquid Glue, adhere the filigree heart to the scallop heart in the top right-hand corner overlapping the card base.
  17. Using glue dots, adhere the branches to the cardinals.
  18. Pop the cardinals and branches up with dimensionals.
  19. Pop up the sentiment with dimensionals.
  20. Scatter 5 Red Rhinestone Basic Jewels on the card.

For Further Info for My Cardinal Anniversary Card:

Hope you like my Cardinal Anniversary Card!

My Colouring Notes from my Colouring presentation:
https://stampwithlaurie.com/wp-content/uploads/2020/08/Stampin-Up-Blends-2020.pdf

Part 1Whiskey Business Card using Blending Different Colours Technique
Video Tutorial: Blending Different Colours Together

Part 2Country Harvest Card using Light to Dark Technique
Video Tutorial: Light to Dark/Dark to Light Colouring

Part 3Beautiful Poppy Birthday Card using Smooth Colouring Technique
Video Tutorial: Smooth Colouring

Part 4Let’s Gather Together Card using Tip to Tip Blending Technique
Video Tutorial: Tip to Tip Colouring

Part 5So Grateful Cardinal Card using Flicking Colouring Technique
Video Tutorial: Flicking Colouring

Part 6Let’s Celebrate You Card using Flicking of Different Colours Technique
Video Tutorial: Flicking of Different Colours Technique

You will find the items listed above in my online store.

Let’s Celebrate You Card

My Let's Celebrate You Card
My Let’s Celebrate You Card

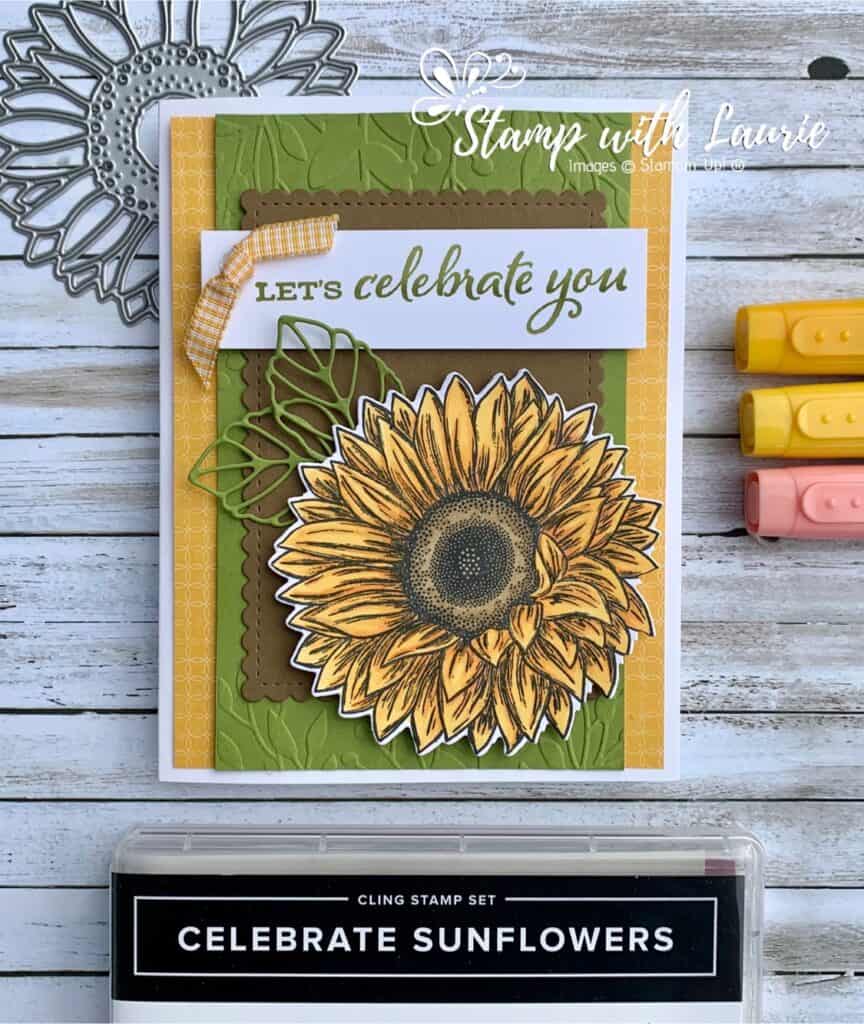
For Technique Tuesday, I am sharing my Let’s Celebrate You Card that is demonstrated in my last colouring video from my presentation to fellow demonstrators. I love this big bold sunflower image with the matching dies from the Celebrate Sunflowers Bundle! I created another card using this set in an earlier post and used the same technique. Just in case you wanted to check it out, I added a link to it at the end of this post.

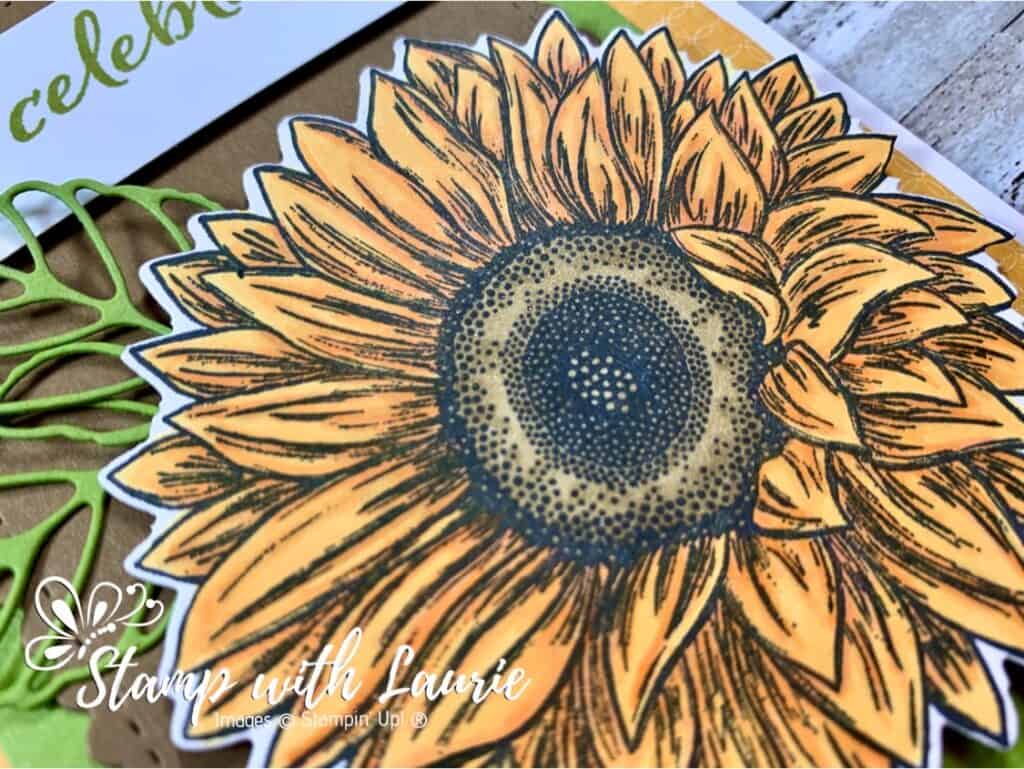
This advanced colouring technique uses 3 colours to creates more dimension and texture to what you are colouring. For the sunflower, I used three markers, Mango Melody Light and Dark and Calypso Coral Light, for the petals. I used the Calypso Coral in the darkest of shadows that are indicated by the artist drawn lines. For the flower centre, I use Soft Suede Light and Dark, but for the Dark Suede, I dotted the marker to create texture that the artist has indicated with their dots. In this video, I demonstrate this colouring technique:

My Video Demonstrating the Flicking of Different Colours Technique

Supplies:

Stamps/Bundle: Celebrate Sunflowers Bundle (154065)

Inks: Tuxedo Black Memento Ink Pad (132708), Old Olive Classic Stampin’ Pad (147090)

Paper: Whisper White Thick (140272 ), Old Olive (100702), Soft Suede (115318), Whisper White (100730), Flowers For Every Season 6″ X 6″ Designer Series Paper (152486)

Accessories: Stitched So Sweetly Dies (151690), Greenery Embossing Folders (152716), Bumblebee ¼” Gingham Ribbon (153658), Mango Melody Stampin’ Blends Combo Pack (154888), Calypso Coral Stampin’ Blends Combo Pack (154881), Old Olive Stampin’ Blends Combo Pack (154892), Soft Suede Stampin’ Blends Combo Pack (154906), Stampin’ Blends Color Lifter (144608 ), Paper Snips (103579), Bone Folder (102300), Mini Glue Dots (103683), Stampin’ Seal (152813), Stampin’ Dimensionals (104430)

Measurements: 

  • Whisper White Thick: 8 ½” x 5 ½”; scored at 4 ¼”
  • Old Olive – 3 pieces:
    • 3 ¼” x 5 ¼”
    • Scraps for leaves
  • Soft Suede: 4 ¼” x 3”
  • Whisper White – 3 pieces:
    • 1” x 3 ½” (sentiment)
    • 3 ½” x 3 ½” (sunflower)
  • Flowers For Every Season Designer Series Paper: 5 ¼” x ¾”
  • Bumblebee Gingham Ribbon: 4”
Close Up of My Let's Celebrate You Card
Close Up of My Let’s Celebrate You Card

Instructions for Let’s Celebrate You Card: 

  1. Fold the Whisper White Thick card stock in half to create the card base.
  2. Emboss the Old Olive card stock with the leaves from the Greenery Embossing Folders.
  3. Stamp the large sunflower image in Tuxedo Black Memento Ink Pad on the Whisper White piece.
  4. Colour the petals with the Stampin’ Blends listed above using the Flicking of Different Colours Technique that is used in the video
  5. Die cut the sunflower with the corresponding Celebrate Sunflowers Bundle.
  6. Die cut the leaves from the scraps of Old Olive using the Celebrate Sunflowers Bundle.
  7. Stamp with sentiment in Old Olive on the Whisper White piece.
  8. Die cut the Soft Suede with the largest scalloped rectangle from the Stitched So Sweetly Dies.
  9. Using Stampin’ Seal, adhere the Flowers For Every Season DSP on to the card base.
  10. Adhere with Stampin’ Seal, the embossed piece in the centre of the Whisper White card base overlapping the Flowers For Every Season DSP.
  11. Using Stampin’ Seal, adhere the scalloped rectangle in the center of the embossed piece.
  12. Affix the leaves to the back of the sunflower using glue dots.
  13. Using dimensionals, add the sentiment to the card.
  14. Using dimensionals, add the sunflower to the card.
  15. Tie the Bumblebee Gingham Ribbon in a knot and adhere it using a glue dot.

Here is the other card in which I used the same technique:

My Sunflower Congratulation Card

For more details, you can find the post here: https://stampwithlaurie.com/my-congratulations-card/

For Further Info:

Hope you like my Let’s Celebrate You Card!

My Colouring Notes from my presentation:
https://stampwithlaurie.com/wp-content/uploads/2020/08/Stampin-Up-Blends-2020.pdf

Part 1Whiskey Business Card using Blending Different Colours Technique
Video Tutorial: Blending Different Colours Together

Part 2Country Harvest Card using Light to Dark Technique
Video Tutorial: Light to Dark/Dark to Light Colouring

Part 3Beautiful Poppy Birthday Card using Smooth Colouring Technique
Video Tutorial: Smooth Colouring

Part 4Let’s Gather Together Card using Tip to Tip Blending Technique
Video Tutorial: Tip to Tip Colouring

Part 5So Grateful Cardinal Card using Flicking Colouring Technique
Video Tutorial: Flicking Colouring

Part 6: Let’s Celebrate You Card using Flicking of Different Colours Technique
Video Tutorial: Flicking of Different Colours Technique

You will find the items listed above in my online store.

So Grateful Cardinal Card

My So Grateful Cardinal Card

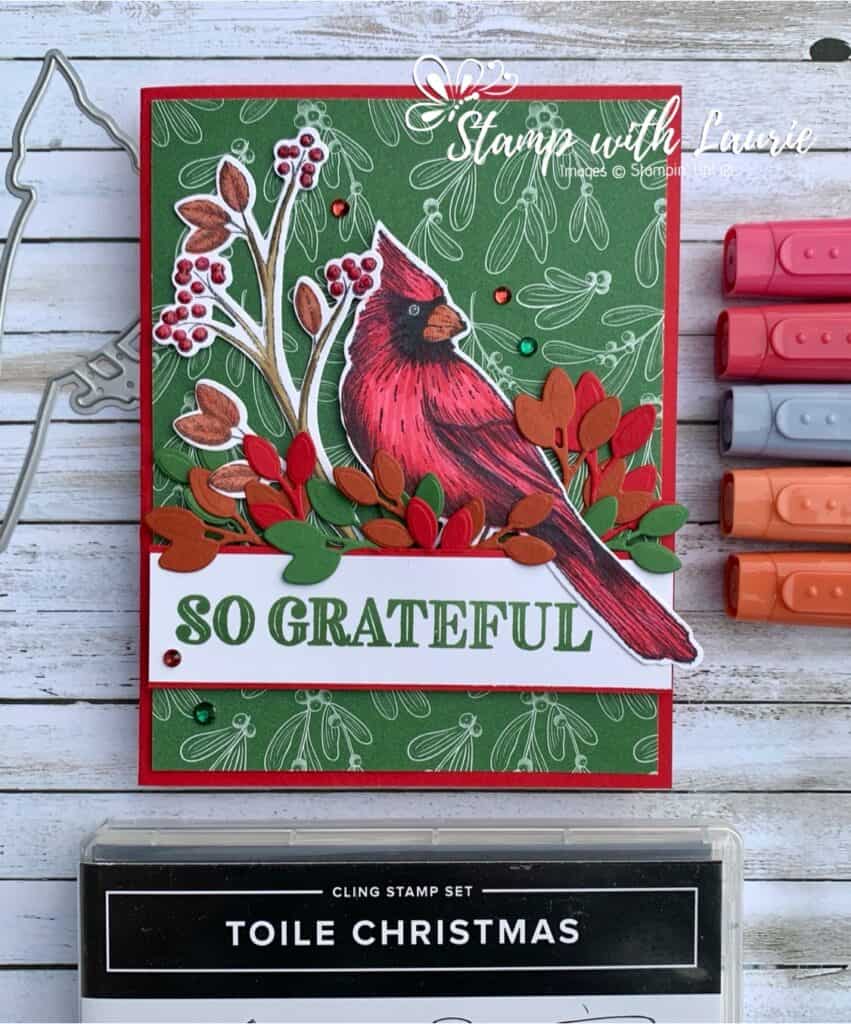
Yesterday was the First Day of Autumn! So I decided to welcome it with my So Grateful Cardinal Card from the Toile Christmas Stamp Set. This stamp set is perfect for Christmas but can also be used for a beautiful fall or Thanksgiving card! I love this time of year with all the beautiful colours as the leaves change!

For part 5 of my colouring videos with Stampin’ Blends, I am demonstrating the flicking colouring technique. The other parts are listed below at the end of this document along with my Notes from a presentation that I did on using Stampin’ Blends.

Flicking Technique

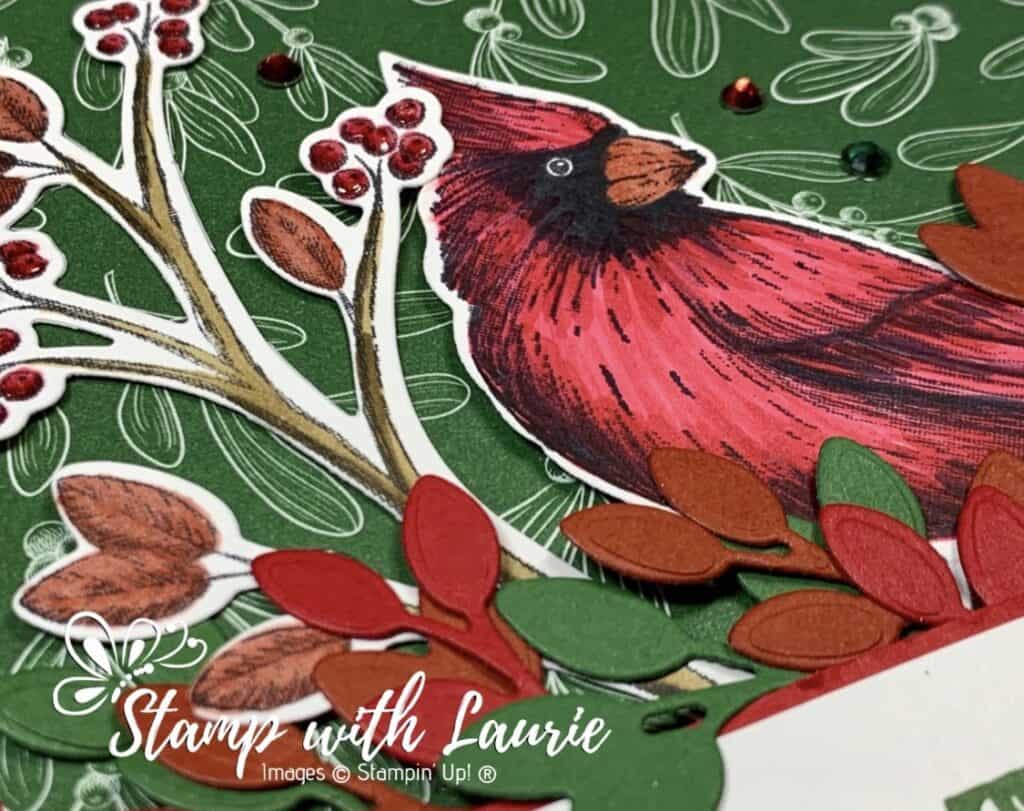
This technique is achieved by applying ink in quick, single strokes. The key to this inking technique is to flick the marker tip across the page to create a single stroke that goes from dark to light.

  1. Holding the marker loosely, start a downward movement towards the paper
  2. As the marker tip touches the paper, quickly move across the paper, bringing our hand up and away from the paper. This will apply more ink at the beginning of the stroke and less at the end.
  3. You may need to turn the paper to accommodate the angle that is most comfortable for you.

Flicks can be left unblended to create texture such as for hair or feathers (like the cardinal). Or, they can be blended out to create smooth shading.

Video of My So Grateful Cardinal Card

For further demonstration of the flicking technique, please view:
Part 2Country Harvest Card using Light to Dark Technique
Video Tutorial: Light to Dark/Dark to Light Colouring

Supplies:

Stamps: Toile Christmas (cling 150469), Ornate Thanks (Photopolymer 149471)

Inks: Tuxedo Black Memento Ink Pad (132708), Garden Green Classic Stampin’ Pad (147089)

Paper: Real Red (102482), Garden Green (102584), Whisper White (100730), Cajun Craze (119684), ‘Tis the Season 6″ x 6″ Designer Series Paper (153489)

Accessories: Toile Christmas Bundle (cling 152367), Real Red Combo Pack Stampin’ Blends (147935), Basic Black Combo Pack Stampin’ Blends (147942), Cajun Craze Combo Pack Stampin’ Blends (147931), Soft Suede Combo Pack Stampin’ Blends (154906), Shimmery Crystal Effects (150892), Holiday Rhinestone Basic Jewels (150457), Bone Folder (102300), Stampin’ Seal (152813), Stampin’ Dimensionals (104430), Mini Glue Dots (103683)

Close Up of My So Grateful Cardinal Card

Measurements: 

  • Real Red: 8 ½” x 5 ½”; scored at 4 ¼” 
  • ‘Tis the Season Designer Series Paper: 5 ¼” x 4”
  • Whisper White: 3 pieces
    • 1” x 4” (sentiment)
    • 2 ¼” x 4 ½” (cardinal)
    •  2 1/8” x 4” (branch) 
  • Real Red: 1 ¼” x 4”
  • Scraps of Real Red, Garden Green and Cajun Craze for leaves

Instructions:

  1. Stamp the cardinal in Tuxedo Black Memento on Whisper White.
  2. Using the Blends colour the cardinal in a flicking motion described in the video.
  3. Die cut the cardinal using the matching cardinal die from the Toile Christmas Bundle.
  4. Use the third largest nested die to cut the Real Red CS.
  5. Stamp the sentiment in Garden Green on the Whisper White card stock.
  6. Using the scraps, die cut 3 branches of each colour.
  7. Fold the piece of Real Red card stock in half to form the card base.
  8. Attach the ‘Tis the Season Designer Series Paper to the front of the card base.
  9. Using glue dots, adhere the branches to the back of the Real Red CS.
  10. Attach the sentiment to the Real Red piece.
  11. Attach the sentiment piece with dimensionals to the front of the card.
  12. Tuck in cardinal and branch and adhere with dimensionals.
  13. Add 5 Holiday Rhinestone Basic Jewels in various colours scattered on the front.

For Further Info:

Hope you like my So Grateful Cardinal Card!

My Colouring Notes from my presentation:
https://stampwithlaurie.com/wp-content/uploads/2020/08/Stampin-Up-Blends-2020.pdf

Part 1Whiskey Business Card using Blending Different Colours Technique
Video Tutorial: Blending Different Colours Together

Part 2Country Harvest Card using Light to Dark Technique
Video Tutorial: Light to Dark/Dark to Light Colouring

Part 3Beautiful Poppy Birthday Card using Smooth Colouring Technique
Video Tutorial: Smooth Colouring

Part 4Let’s Gather Together Card using Tip to Tip Blending Technique
Video Tutorial: Tip to Tip Colouring

Part 5: So Grateful Cardinal Card using Flicking Colouring Technique
Video Tutorial: Flicking Colouring

Part 6: Let’s Celebrate You Card using Flicking of Different Colours Technique
Video Tutorial: Flicking of Different Colours Technique

You will find the items listed above in my online store.

My Beautiful Poppy Birthday Card

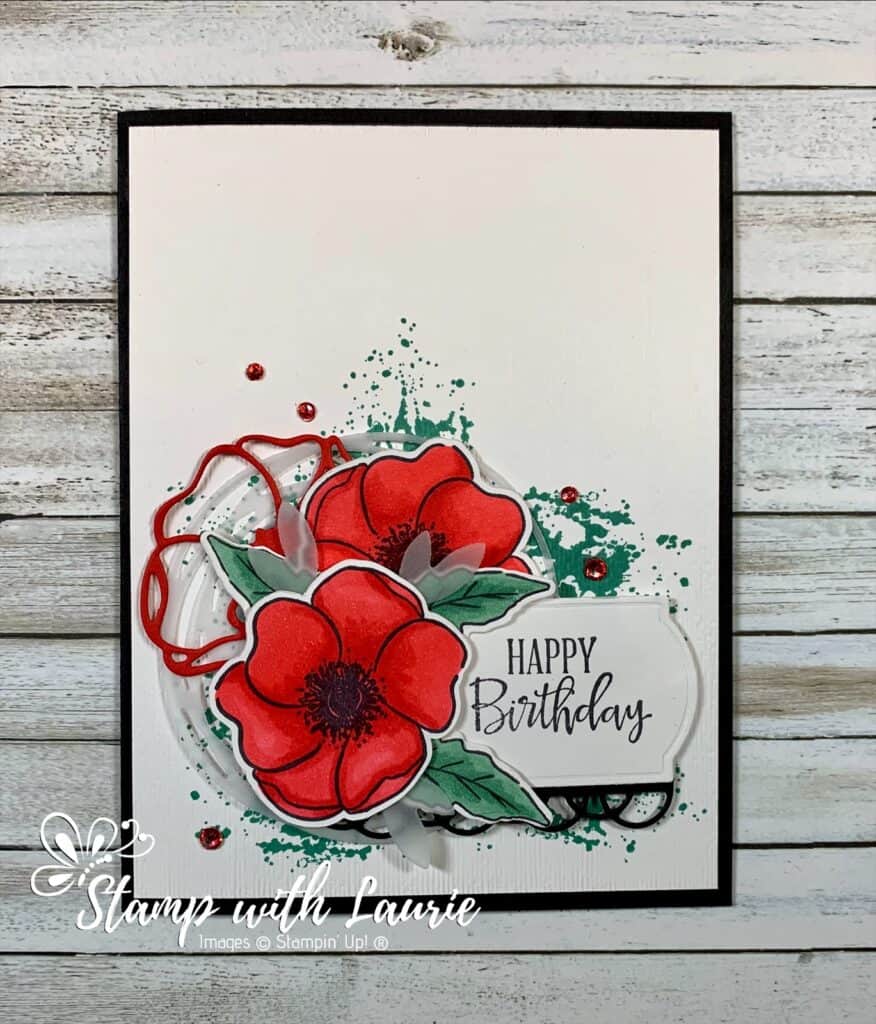
My Poppy Birthday Card
My Beautiful Poppy Birthday Card

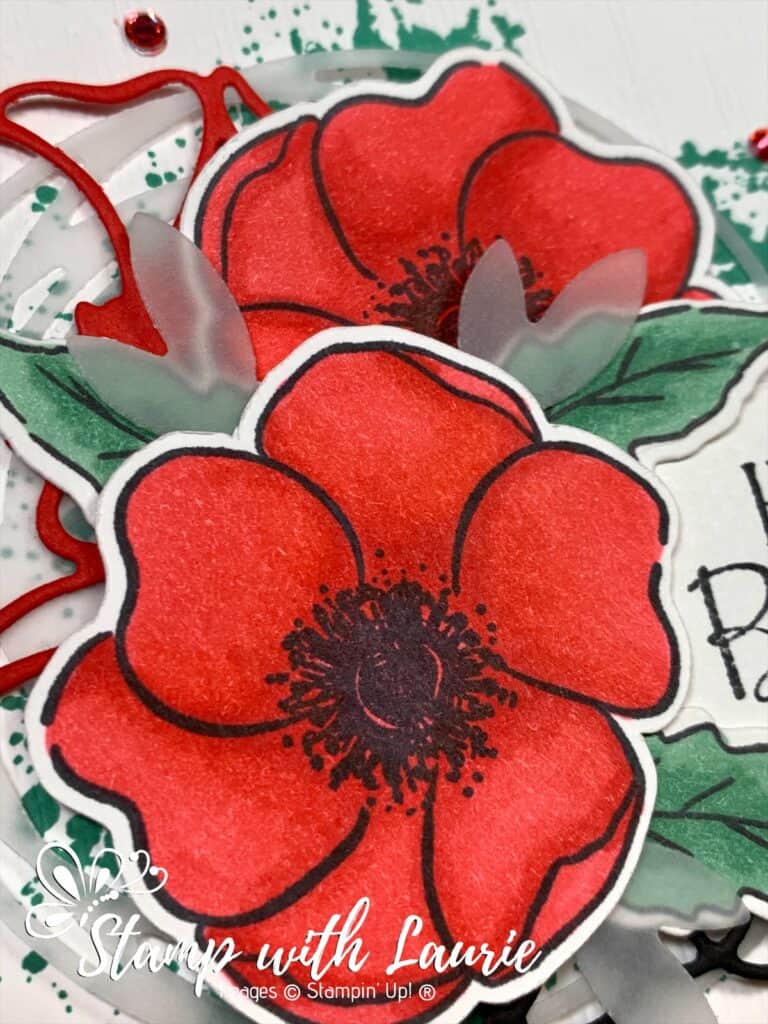
For Technique Tuesday, I am sharing my smooth colouring technique for my beautiful Poppy Birthday Card using the Painted Poppies Bundle. I used both this bundle and the Poppy Moment Dies for this stunning card. They compliment each other so well! Of course, I had to use Poppy Parade Stampin’ Blends to colour my poppies! I wanted to make the colouring the main focal point, but couldn’t resist using the Subtle 3D Embossing Folder on the Whisper White card stock once I stamped the Just Jade splotches. To add a bit of subtle dimension, I used Vellum for some of the leaves and the circular accent that grounds the piece. The Basic Rhinestones were coloured with the Dark Poppy Parade Stampin’ Blend to match my card.

For part 3 of my colouring videos with Stampin’ Blends, I am demonstrating the smooth colouring technique. The other 2 parts are listed below at the end of this document. One of the most exciting things about Blends, as the name suggests, is their blending capabilities. 

Smooth Colouring Technique

  • Apply a smooth layer in small circles of the lightest colour to your image. If you have a large area to cover, work in sections to keep the ink moist. This wet ink will help with the blending.
  • Add the dark colour where the shadows will be using a flicking motion to help with the blending process and reduce the amount of ink needed for a smooth blend.
  • Use the light colour to blend along the area where the dark and the light colours meet
  • You may need to go over it a few times to get it blended how you like.
  • Blends have the ability to lay down smooth, even colour without streaks
  • Colour in small circles keeping the leading edge wet and allow the ink to blend to create a seamless look
  • Make sure you saturate the entire area so that you eliminate any light or mottled areas
  • Check the back of your paper to make sure that the ink is saturating evenly
My Poppy Birthday Card Colouring Tutorial

Supplies:

Stamps: Painted Poppies Bundle (153827)

Inks: Tuxedo Black Memento Ink Pad (132708), Just Jade Classic Stampin’ Pad (153115)

Paper: Basic Black (121045), Whisper White (100730), Poppy Parade (119793), Vellum (101856)

Accessories: Poppy Moments Dies (151594), Subtle 3D Embossing Folder (151775 ), Rhinestone Basic Jewels (144220), Poppy Parade Stampin’ Blends Combo Pack (154958), Just Jade Stampin’ Blends Combo Pack (153107), Stampin’ Blends Color Lifter (144608 ), Paper Snips (103579), Bone Folder (102300), Mini Glue Dots (103683), Stampin’ Seal (152813), Stampin’ Dimensionals (104430)

Measurements: 

  • Basic Black: 8 ½” x 5 ½”; scored at 4 ¼”
    • Scraps for scallop die
  • Whisper White: 4” x 5 ¼”
    • 1 ½” x 2 ¾” (sentiment)
    • 2 pieces: 2” x 2” (for poppies)
    • Scraps for 3 leaves
  • Poppy Parade: 2 ¼” x 1 ½”
  • Vellum: 3” x 3” (circular accent)
    • Scraps for 3 leaves
Close Up of My Beautiful Poppy Birthday Card

Instructions for My Poppy Birthday Card: 

  1. Fold the Basic Black card stock in half to create the card base.
  2. Stamp the poppies and leaves in Tuxedo Black Memento Ink on Whisper White
  3. Colour the poppies and leaves with the Stampin’ Blends listed above using the video for reference when colouring the poppies
  4. Die cut the poppies and leaves with the corresponding dies from the Painted Labels Dies
  5. Using the Poppy Moments Dies, die cut the poppy outline in Poppy Parade
  6. Die cut a scrap of Basic Black card stock with the scallop border dies from the Painted Labels Dies
  7. Die cut a scrap of Vellum with the small leaves with the stem from the Poppy Moments Dies
  8. Using the Painted Labels Dies, die cut the circular accent in Vellum
  9. Stamp the sentiment in Tuxedo Black Memento Ink on Whisper White and die cut it out with the appropriate Painted Labels Dies
  10. Stamp the splotch in Just Jade in the bottom half of the Whisper White piece
  11. Emboss this piece with the Subtle Embossing Folder and adhere to the card base
  12. Using glue dots, adhere the Vellum circle to the card base
  13. Adhere the Basic Black scallop border to the sentiment and attach to the card base with dimensionals
  14. Using glue dots, adhere the Basic Black poppy center to the poppy frame and adhere to the Vellum circle with glue dots.
  15. Slip one of the poppies behind the sentiment and adhere with glue dots
  16. Adhere with glue dots, the leaves to the other poppy and place on card base with dimensionals
  17. Colour the Basic Rhinestones with the Dark Poppy Parade Stampin’ Blend and add to the card

For Further Info:

Hope you like my Poppy Birthday Card!

My Colouring Notes from my presentation:
https://stampwithlaurie.com/wp-content/uploads/2020/08/Stampin-Up-Blends-2020.pdf

Part 1: Whiskey Business Card using Blending Different Colours Technique
Video Tutorial: Blending Different Colours Together

Part 2: Country Harvest Card using Light to Dark Technique
Video Tutorial: Light to Dark/Dark to Light

Part 3: Beautiful Poppy Birthday Card using Smooth Colouring Technique
Video Tutorial: Smooth Colouring

Part 4: Let’s Gather Together Card using Tip to Tip Blending Technique
Video Tutorial: Tip to Tip Colouring

Part 5So Grateful Cardinal Card using Flicking Colouring Technique
Video Tutorial: Flicking Colouring

Part 6: Let’s Celebrate You Card using Flicking of Different Colours Technique
Video Tutorial: Flicking of Different Colours Technique

You will find the items listed above in my online store.

My Country Harvest Card

My Country Home Card
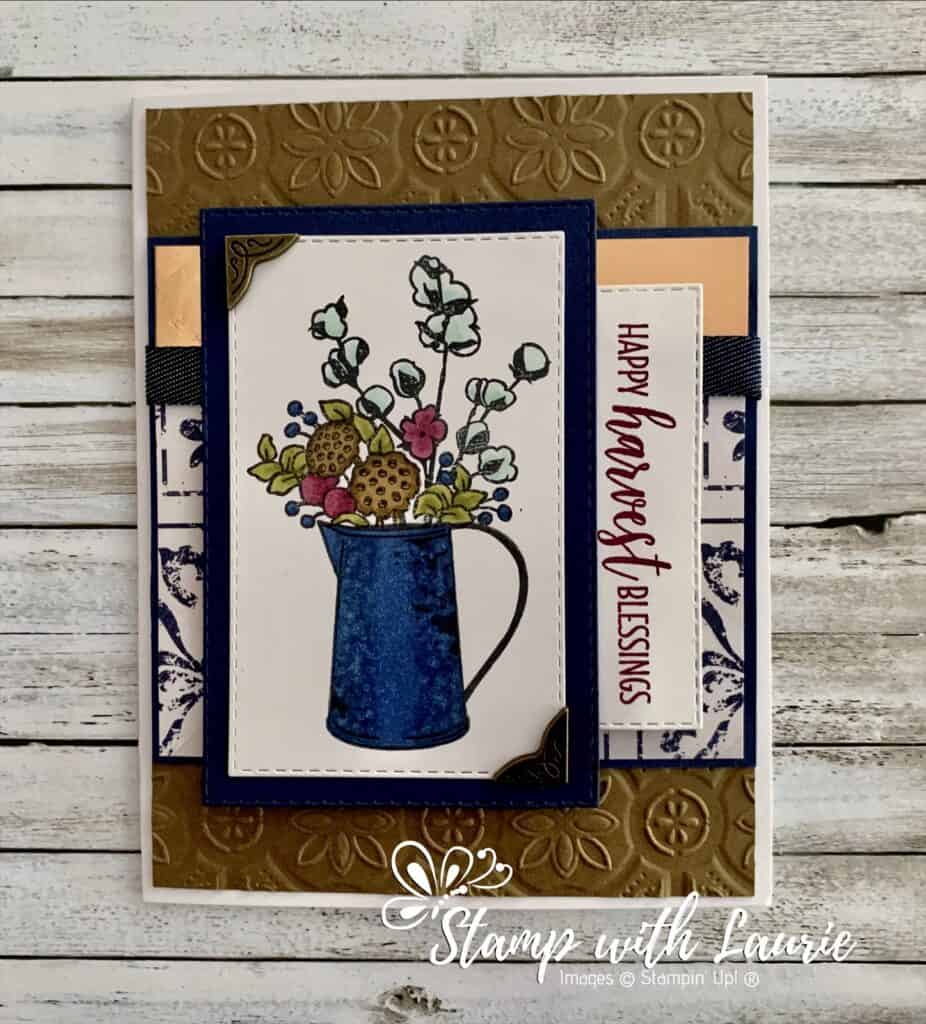
My Country Harvest Card

I am happy to share my Country Harvest Card that is using my colouring techniques that I recently presented to fellow demonstrators. For my card, I knew I wanted to use an oldie, but a goodie, the Tin Tile 3D Embossing Folder! The In Good Taste Designer Series Paper has a photographic image of tiles that I thought would tie in nicely with the embossing folder and the country theme of my card. To further the country theme, I used the Denim Ribbon to transition between the DSP and the Brass Foil piece. I used the Brass Foil as an accent, but you could use one of the new Brushed Metallic Cardstock instead. To finish the card, I used two Antiqued Corners to set off the coloured image.

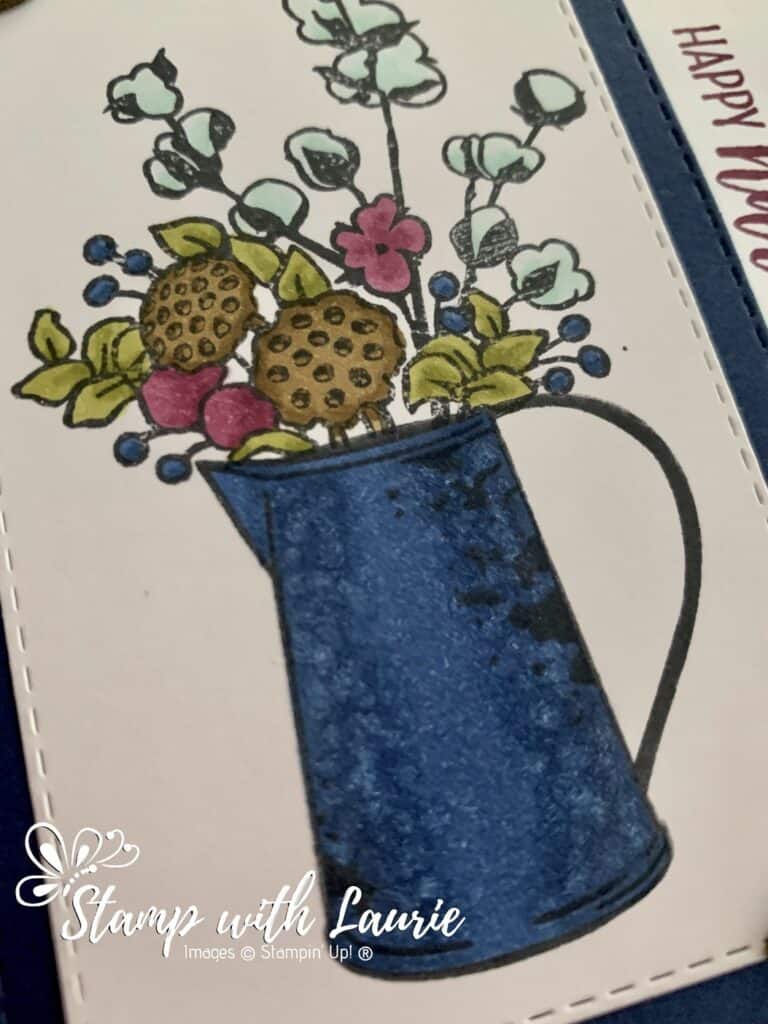
For Part 2 of my colouring with Stampin’ Blends from my presentation, I am showing the difference between colouring light to dark versus dark to light. For this demonstration, I used the jug from the Country Home Photopolymer Stamp Set. Some people prefer adding ink from light to dark creating a saturation of ink for easy blending. Others prefer to add ink from dark to light creating a lighter coloured image since you use less ink. The two most common ways to add ink are circling and flicking. Each technique produces a particular appearance and knowing how to use them will add depth and variation to your projects.

My Colouring Video Presentation Showing Light to Dark/Dark to Light Colouring

Supplies:

Stamps: Country Home Photopolymer Stamp Set (147678)

Inks: Tuxedo Black Memento Ink Pad (132708), Rich Razzleberry Classic Stampin’ Pad (147091)

Paper: Whisper White Thick (140272 ), Soft Suede (115318), Whisper White (100730), Night of Navy (100867 ), Brass Foil Sheets (153057), In Good Taste Designer Series Paper (152494)

Accessories: Stitched Rectangles Dies (151820), Tin Tile 3D Embossing Folder (151801), Antiqued Corners & Slides Elements (152471), Denim Ribbon (149590), Night of Navy Stampin’ Blends Combo Pack (144040), Rich Razzleberry Stampin’ Blends Combo Pack (144602), Soft Suede Stampin’ Blends Combo Pack (154906), Old Olive Stampin’ Blends Combo Pack (154892 ), Pool Party Stampin’ Blends Combo Pack (144605 ), Stampin’ Blends Color Lifter (144608 ), Paper Snips (103579), Bone Folder (102300), Mini Glue Dots (103683), Stampin’ Seal (152813), Stampin’ Dimensionals (104430)

Measurements: 

  • Whisper White Thick: 8 ½” x 5 ½”; scored at 4 ¼” 
  • Soft Suede: 4” x 5 ¼”
  • Night of Navy – 2 pieces: 3 ½” x 4”
    • 2 ¾” x 4” (stitched rectangle)
  • In Good Taste Designer Series Paper: 2 ½” x 3 7/8
  • Brass Foil Sheets: ¾” x 3 7/8
  • Whisper White – 2 pieces: 3” x 1 ¼” (sentiment)
    • 2 ½” x 3 ¾”
  • Denim Ribbon: 5”
Close Up of My Country Home Card
Close Up of My Country Harvest Card

Instructions:

  1. Fold the Whisper White Thick card stock in half to create the card base.
  2. Stamp the jug and flowers in Tuxedo Black Memento Ink on the larger piece of Whisper White
  3. Colour the flowers and jug with the Stampin’ Blends listed above using the video for reference when colouring the jug
  4. Die cut the jug and flowers with the fifth largest Stitched Rectangles Die
  5. Die cut the Night of Navy card stock with the fourth largest Stitched Rectangles Die
  6. Adhere this Night of Navy piece to the coloured image
  7. Emboss the Soft Suede with the Tin Tile 3D Embossing Folder
  8. Stamp the sentiment in Rich Razzleberry and die cut it out with the third smallest Stitched Rectangles Die
  9. Adhere the Soft Suede to the card base with Stampin’ Seal
  10. Adhere the Brass Foil piece and the In Good Taste Designer Series Paper to the larger Night of Navy piece with Stampin’ Seal
  11. Wrap the Denim Ribbon around the Night of Navy piece and adhere to back.
  12. Adhere this Night of Navy piece to the Soft Suede with Stampin’ Seal
  13. Using dimensionals, adhere the coloured image piece to the card base
  14. Tuck the sentiment to the side of this stitched piece and adhere it with dimensionals
  15. Affix the Antiqued Corners & Slides Elements with glue dots

For Further Info:

Hope you like my Country Harvest Card!

My Colouring Notes from my presentation:
https://stampwithlaurie.com/wp-content/uploads/2020/08/Stampin-Up-Blends-2020.pdf

Part 1Whiskey Business Card using Blending Different Colours Technique
Video Tutorial: Blending Different Colours Together

Part 2: Country Harvest Card using Light to Dark Technique
Video Tutorial: Light to Dark/Dark to Light 

Part 3Beautiful Poppy Birthday Card using Smooth Colouring Technique
Video Tutorial: Smooth Colouring

Part 4: Let’s Gather Together Card using Tip to Tip Blending Technique
Video Tutorial: Tip to Tip Colouring

Part 5So Grateful Cardinal Card using Flicking Colouring Technique
Video Tutorial: Flicking Colouring

Part 6: Let’s Celebrate You Card using Flicking of Different Colours Technique
Video Tutorial: Flicking of Different Colours Technique

You will find the items listed above in my online store.

My Whiskey Business Card

My Whiskey Business Card

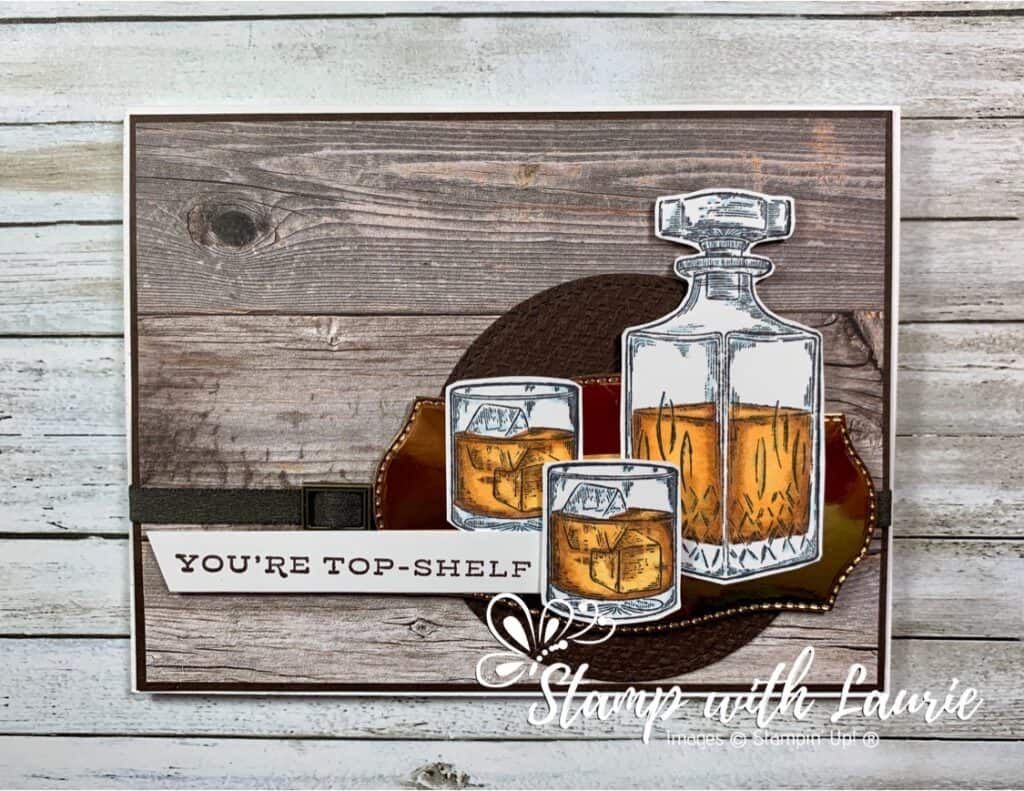
I was honoured to be asked to virtually demonstrate in a Facebook Live my Blends Colouring Techniques to some fellow demonstrators. So, I thought I would share for Technique Tuesdays some of my colouring techniques from the live video each week highlighting a card that I presented. The first card that I am highlighting this week is my Whiskey Business Card. I hope you will check back each week and maybe learn something new!

This card is perfect for that man in your life who loves his whiskey! This can be a Father’s Day card, a birthday card, a congratulations card…so many options. For this card, I wanted to create an old-world library kind of feel with the whiskey on a brass platter waiting for someone to help themselves. The World of Good Designer Series Paper with the wood image lends itself very well to that feel. The Early Espresso Faux Suede Ribbon and the buckle from the Antiqued Corners & Slides Elements both add to this feel as well.

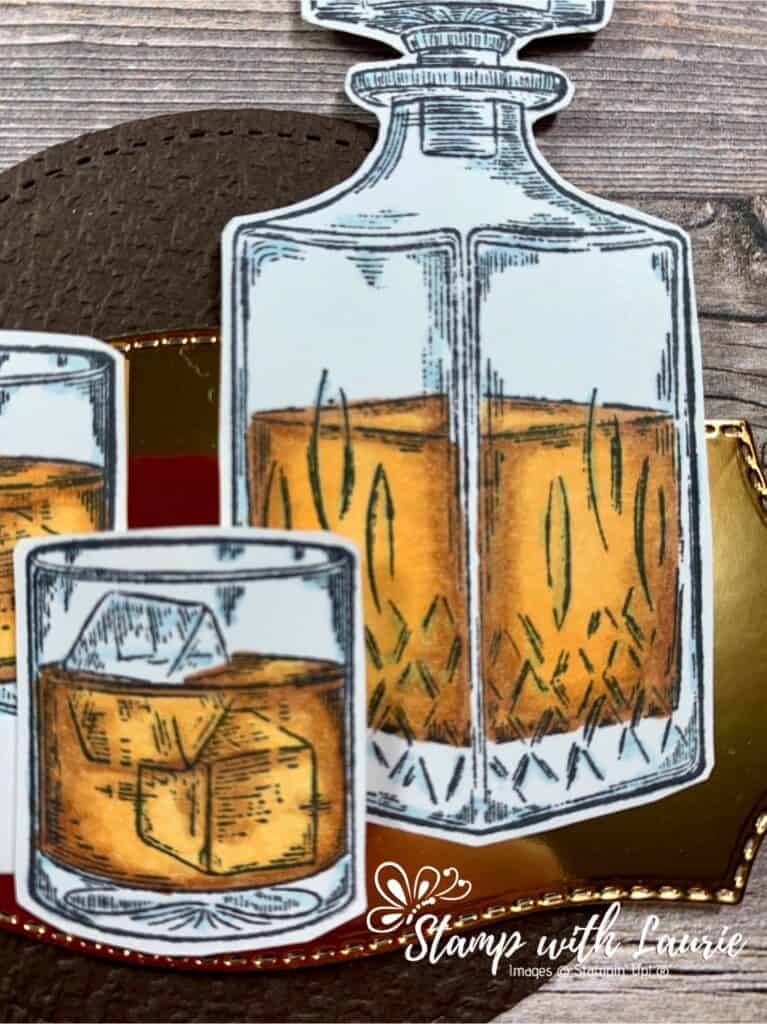
Close Up of My Colouring for My Whiskey Business Card

Supplies:

Stamps: Whiskey Business Stamp Set (154091)

Inks: Tuxedo Black Memento Ink Pad (132708)

Paper: Whisper White Thick (140272 ), Early Espresso (119686), Whisper White (100730), Brass Foil Sheets (153057), World of Good Designer Series Paper (152491)

Accessories: Stitched Shapes Dies (152323), Tasteful Labels Dies (152886), Tasteful Textile 3D Embossing Folder (152718), Antiqued Corners & Slides Elements (152471), Early Espresso Faux Suede Ribbon (152472), Cinnamon Cider Stampin’ Blends Combo Pack (153105), Mango Melody Stampin’ Blends Combo Pack (154888), Balmy Blue Stampin’ Blends Combo Pack (148544), Stampin’ Blends Color Lifter (144608 ), Paper Snips (103579), Bone Folder (102300), Adhesive Sheets (152334 ), Multipurpose Liquid Glue (110755 ), Mini Glue Dots (103683), Stampin’ Seal (152813), Stampin’ Dimensionals (104430)

Measurements: 

  • Whisper White Thick: 8 ½” x 5 ½”; scored at 4 ¼” 
  • Early Espresso: 2 pieces
    • 1/8” x 5 3/8” (for mat)
    • 3 ¼” x 3 ¼” (for circle)
  • World of Good Designer Series Paper: 4” x 5 ¼”
  • Brass Foil Sheets: 3 ¾” x 2”
  • Whisper White – 2 pieces: 3 ¼” x ½” (sentiment)
    • Scrap large enough to stamp glasses and tumbler
  • Early Espresso Faux Suede Ribbon: 6”

Instructions:

  1. Fold the Whisper White Thick card stock in half to create the card base.
  2. Stamp the whiskey decanter and glasses in Tuxedo Black Memento Ink Pad on the scrap of Whisper White
  3. Die cut the Early Espresso card stock with the largest Stitched Circle Die
  4. Emboss the stitched circle with the Tasteful Textile 3D Embossing Folder
  5. Die cut the Brass Foil piece with the appropriate Tasteful Labels Dies
  6. Colour the whiskey decanter and glasses with Cinnamon Cider and Dark Mango Melody for the liquid and Light Balmy Blue and Color Lifter for the glass according to the video:
Whiskey Business Colouring Tutorial Video
  1. Fussy cut the decanter and glasses out
  2. Stamp the sentiment in Tuxedo Black Memento Ink Pad on the Whisper White piece. Trim one end on an angle
  3. Adhere the World of Good Designer Series Paper to the Early Espresso mat
  4. Thread the buckle onto the Early Espresso Faux Suede Ribbon and affix the ribbon to the card
  5. Adhere this piece to the card base with Stampin’ Seal
  6. Slip the embossed stitched circle under the ribbon and adhere with Multipurpose Liquid Glue
  7. Using dimensionals, adhere the brass “platter so that it straddles the ribbon
  8. Adhere the decanter and one glass using Stampin’ Seal on the “platter”
  9. Use dimensionals for the remaining glass
  10. Affix the sentiment under the raised glass with a glue dot and a dimensional at the other end of sentiment

For Further Info:

Hope you like my Whiskey Business Card!

My Colouring Notes from my presentation:
https://stampwithlaurie.com/wp-content/uploads/2020/08/Stampin-Up-Blends-2020.pdf

Part 1: Whiskey Business Card using Blending Different Colours Technique
Video Tutorial: Blending Different Colours Together

Part 2: Country Harvest Card using Light to Dark Technique
Video Tutorial: Light to Dark/Dark to Light 

Part 3Beautiful Poppy Birthday Card using Smooth Colouring Technique
Video Tutorial: Smooth Colouring

Part 4: Let’s Gather Together Card using Tip to Tip Blending Technique
Video Tutorial: Tip to Tip Colouring

Part 5So Grateful Cardinal Card using Flicking Colouring Technique
Video Tutorial: Flicking Colouring

Part 6: Let’s Celebrate You Card using Flicking of Different Colours Technique
Video Tutorial: Flicking of Different Colours Technique

You will find the items listed above in my online store.

Life Is A Beautiful Journey

A Beautiful Journey Card using the World of Good Suite
Life is A Beautiful Journey Card using the World of Good Suite

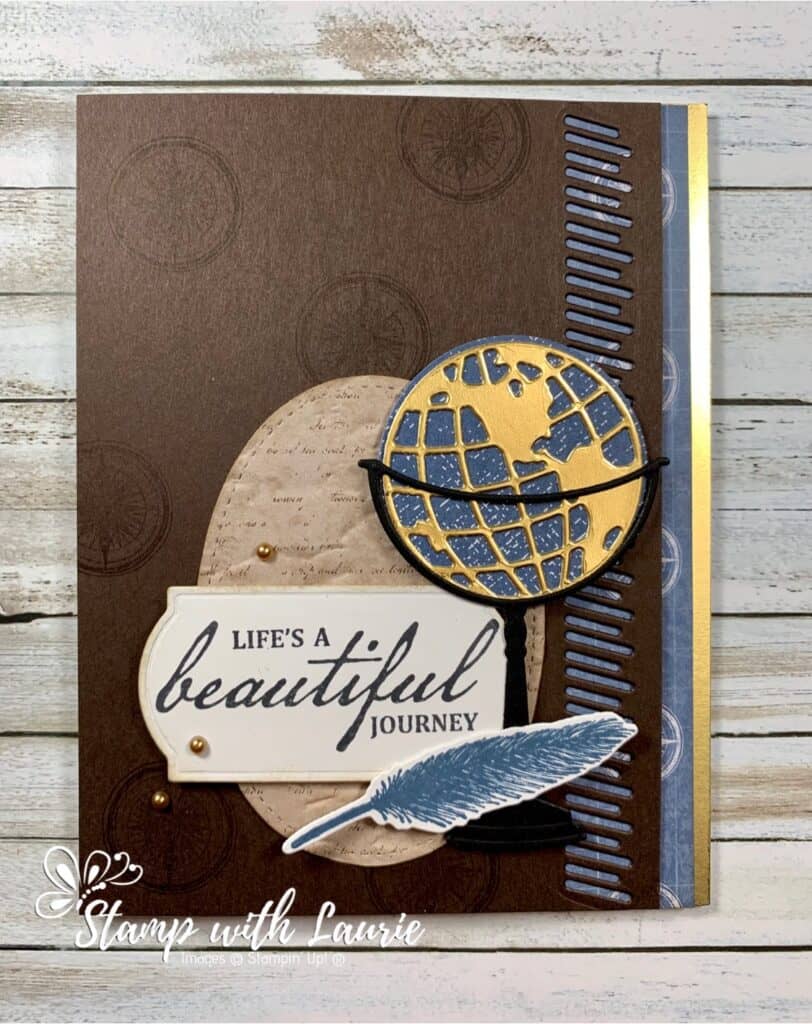
Today I am sharing My Life Is A Beautiful Journey Card that I created for a swap that uses products from the new Stampin’ Up! Annual Catalogue and the World of Good Suite. This card is a perfect masculine card especially for a retirement or a graduation!

I love how the pops of Misty Moonlight ink and the World of Good Designer Series Paper add a nice touch of colour to this very neutral card. I used Gold Foil Sheets instead of the Brass Foil Sheets only because they were on backorder at the time. The Brass ones would look just as nice! I wanted to add a bit of an old paper look by sponging Crumb Cake around the sentiment’s edges and on the DSP after it was embossed with the Old World Paper 3D Embossing Folder. I was so happy to find out that the Metallic Pearls had carried over and I used them as the perfect accent to finish the card.

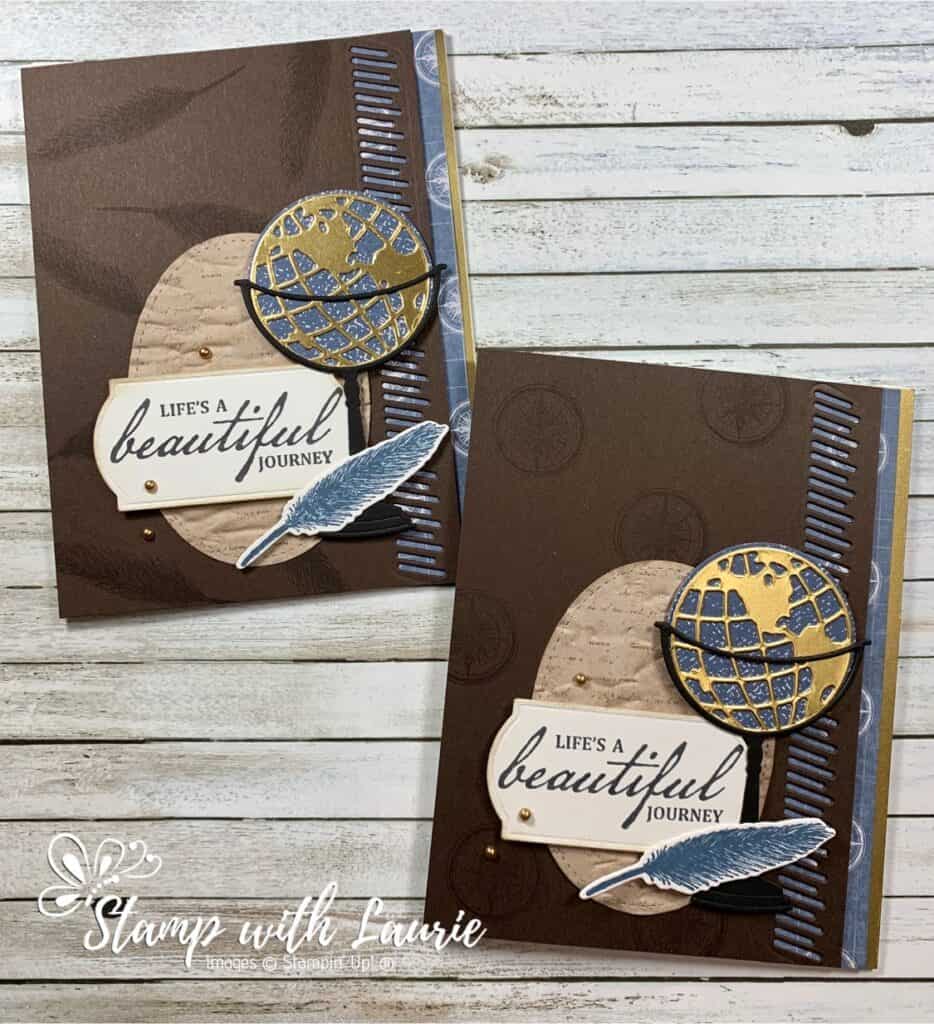
A Beautiful Journey Alternative Card using the World of Good Suite
Life is A Beautiful Journey Alternative Card using the World of Good Suite

I had so much fun playing with this Suite that I created another card using the feather stamp as the background. Which one do you like best?

Supplies for My Life Is A Beautiful Journey Card:

Stamps: Beautiful World Bundle (154091)

Inks: Tuxedo Black Memento Ink Pad (132708), Early Espresso Classic Stampin’ Pad (147114), Crumb Cake Classic Stampin’ Pad (147116), Misty Moonlight Classic Stampin’ Pad (153118)

Paper: Whisper White Thick (140272 ), Early Espresso (119686), Whisper White (100730), Basic Black (121045), Gold Foil Sheets (132622), World of Good Designer Series Paper (152491), 2020–2022 In Color 6″ x 6″ Designer Series Paper (153070)

Accessories: World Map Dies (152712), Old World Paper 3D Embossing Folder (153200), Painted Label Dies (151605), Stitched Shapes Dies (152323 ), Metallic Pearls (146282), Stamping Sponges (141337), Bone Folder (102300), Adhesive Sheets (152334 ), Multipurpose Liquid Glue (110755 ), Mini Glue Dots (103683), Stampin’ Seal (152813), Stampin’ Dimensionals (104430)

Measurements for My Life is a Beautiful Journey Card: 

  • Whisper White Thick: 8 ½” x 5 ½”; scored at 4 ¼” 
  • Early Espresso: 3 7/8” x 5 ½”
  • World of Good Designer Series Paper – 2 pieces
    • 5 ½” x 1” (for border)
    • 3 ½” 2 ½” (for stitched Oval)
  • 2020–2022 In Color 6″ x 6″ Designer Series Paper: 2” x 2”
  • Gold Foil Sheets – 2 pieces: 5 ½” x ½” (for border)
    • 2” x 2” (for world)
  • Basic Black : 3” x 2 ¼”
  • Whisper White – 2 pieces: 2 ¾” x 1 ½” (sentiment)
    • Scrap for feather

Instructions for My Life Is A Beautiful Journey Card:

  1. Fold the Whisper White Thick card stock in half to create the card base.
  2. Stamp the compass image in Early Espresso randomly on the Early Espresso card stock
  3. Die cut the border die from the World Map Dies on the right side of the Early Espresso card stock
  4. Die cut the piece of the World of Good Designer Series Paper that looks like old paper with the largest Stitched Oval Die
  5. Emboss the stitched oval with the Old World Paper 3D Embossing Folder
  6. Sponge Crumb Cake Ink over the embossed oval and around the edges to make it look older
  7. Stamp the sentiment in Tuxedo Black Memento Ink Pad on the Whisper White card stock and die cut it with the appropriate Painted Label Die
  8. Sponge Crumb Cake Ink around the edges of the sentiment piece to make it look older
  9. Using Adhesive Sheets, adhere the Gold Foil Sheet to it and then die cut the world from the World Map Dies
  10. Die cut the 2020–2022 In Color 6″ x 6″ Designer Series Paper using the circle from the World Map Dies
  11. Peel off the Adhesive Sheets and adhere the world to this circle
  12. Die cut the Basic Black card stock with the pedestal from the World Map Dies
  13. Using glue dots, adhere the globe to the pedestal
  14. Using Stampin’ Seal, adhere the Gold Foil strip to the card base
  15. Adhere the World of Good Designer Series Paper to the card base with Stampin’ Seal allowing the Gold Foil to show
  16. Adhere the Early Espresso piece to the card base with Stampin’ Seal
  17. Using Stampin’ Seal, adhere the Stitched Oval to the card base on the lower right
  18. Using dimensionals, adhere the sentiment, globe and feather
  19. Randomly add 3 Metallic Pearls

For Further Info:

Hope you like My Life Is A Beautiful Journey Card!

Check out the Stampin’ Up! video on the World of Good Suite:
https://www.youtube.com/watch?v=ukzbjrCgmvo&feature=youtu.be

Amazing how beautiful and packed full of coordinating products the WORLD OF GOOD SUITE in the Stampin’ Up! Annual Catalog is. The Beautiful World cling stamp set has globe imagery and sentiments that have to do with adventure. The sentiments are designed to work on the outside and the inside of your card project. The World Map dies cut out the imagery from the stamp set. The World of Good Specialty DSP has a 16th Century map style feel with gold foiling. The star maps on the DSP represent both Northern and Southern Hemispheres. Get the perfect weathered looking paper with the Old World Paper 3D embossing folder. Using this embossing folder will make it faster and easier to get an aged look on your paper, without the unwanted tearing.

To add to the travel and adventure theme Stampin’ Up! has included the Old World Memories and more card pack. When adding the final touches to your project you will love the antiqued brushed embellishments and the Early Espresso ribbon.

You will find the items listed above in my online store at: https://www.stampinup.ca/products/in-good-taste-suite-collection-(english)?demoid=2103981

My Congratulations Card

My Congratulation Card

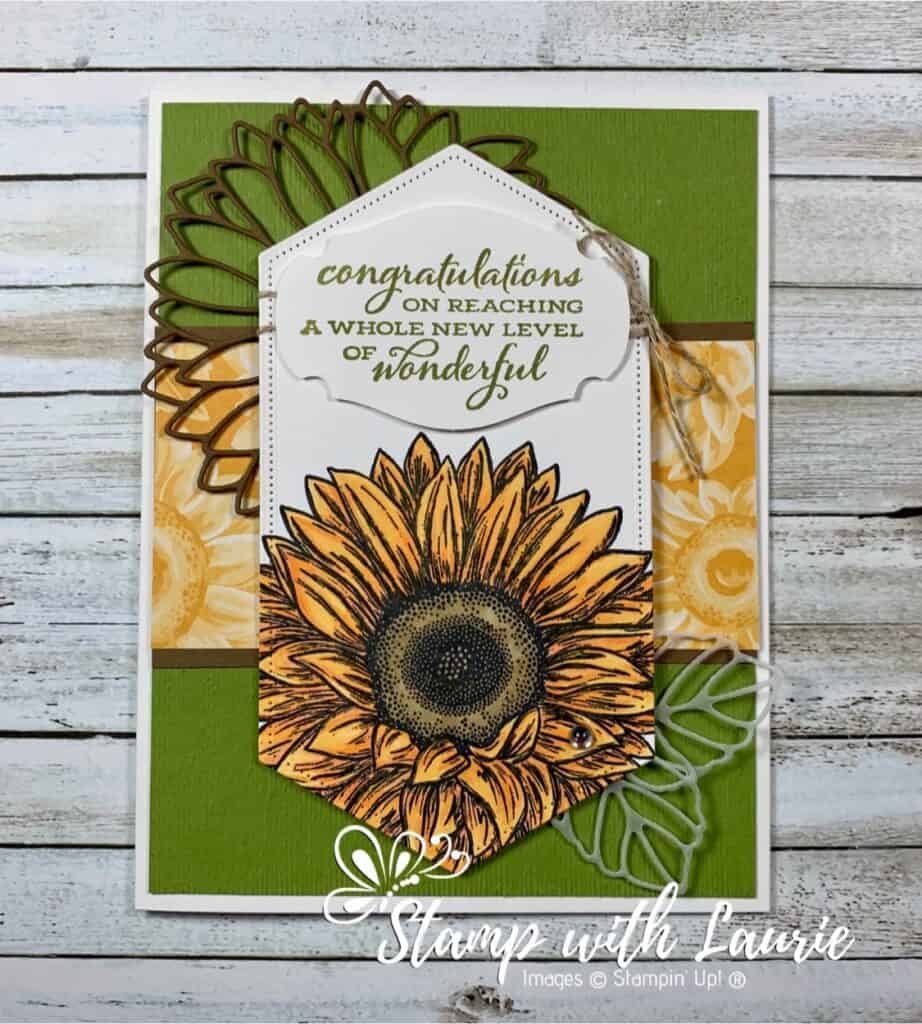
Today I am sharing a Congratulations Card that I created for a swap that used products from the new Annual Catalogue. This card with its sentiment would be perfect for all those recent graduates! I love the new Celebrate Sunflowers Stamp Set, especially the large sunflower!

Close Up of My Congratulation Card

For the sunflower, I used three markers, Mango Melody Light and Dark and Calypso Coral Light, for the petals. By adding a third colour, it creates more dimension and texture to what you are colouring. I used the Calypso Coral in the darkest of shadows that are indicated by the artist drawn lines. For the flower centre, I use Soft Suede Light and Dark, but for the Dark Suede, I dotted the marker to create texture that the artist has indicated with their dots. Let’s get started!

Supplies:

Stamps: Celebrate Sunflowers Bundle (154065)

Inks: Tuxedo Black Memento Ink Pad (132708), Pear Pizzazz Classic Stampin’ Pad (147104)

Paper: Whisper White Thick (140272 ), Pear Pizzazz (131201), Soft Suede (115318), Whisper White (100730), Vellum (101856), Flowers For Every Season 6″ X 6″ Designer Series Paper (152486)

Accessories: Stitched Nested Labels Dies (149638), Subtle 3D Embossing Folder (151775), Story Label Punch (150076), Mango Melody Stampin’ Blends Combo Pack (154888), Calypso Coral Stampin’ Blends Markers Combo Pack (144045), Linen Thread (104199), Frosted & Clear Epoxy Droplets (147801), Bone Folder (102300), Paper Snips (103579), Mini Glue Dots (103683), Stampin’ Seal (152813), Stampin’ Dimensionals (104430)

Measurements: 

  • Whisper White Thick: 8 ½” x 5 ½”; scored at 4 ¼” 
  • Pear Pizzazz: 4 x 5 ¼”
  • Soft Suede – 2 pieces:
    • 2 ¼” x 4” (behind the DSP)
    • 3 ¼” x 3 ¼” (for the outline of sunflower die)
  • Whisper White – 2 pieces:
    • 5 ¼” x 3” 
    • 3” x 2” (sentiment)
  • Flowers For Every Season Designer Series Paper: 2” x 4”
  • Vellum – 2 pieces: scraps

Instructions for Congratulations Card:

  1. Fold the Whisper White Thick card stock in half to create the card base.
  2. Emboss the Pear Pizzazz card stock with the Subtle 3D Embossing Folder.
  3. Stamp the large sunflower image from the bundle in the bottom-centre of the Whisper White piece.
  4. Colour the sunflower using the Blends using the technique that I mentioned in the text above.
  5. Die cut the sunflower out using the largest die from the Stitched Nested Labels Dies.
  6. Stamp the sentiment in Pear Pizzazz on the other piece of Whisper White and punch it out using the Story Label Punch.
  7. Die cut the square Soft Suede Card Stock with the outline of the sunflower die from the Celebrate Sunflowers Bundle.
  8. Die cut 2 leaves in vellum from the same bundle.
  9. Adhere the embossed Pear Pizzazz piece to the card base.
  10. Adhere the Soft Suede strip to the Flowers For Every Season Designer Series Paper and centre on the card base.
  11. Wrap the Linen Thread around the Stitched Nested piece and tie in a bow on the right side.
  12. Using glue dots, adhere the leaves to the bottom right corner of the Stitched Nested piece.
  13. Using glue dots, adhere the Soft Suede sunflower piece to the Stitched Nested piece.
  14. Attach the sunflower piece using dimensionals to the card base.
  15. Attached the sentiment using dimensionals.
  16. Take one Frosted & Clear Epoxy Droplets and add it to a petal of the sunflower to make it look like dew.

For Further Info:

Hope you like my Congratulations Card!

You will find the items listed above in my online store at:  https://www.stampinup.com/ecweb/products/1010001/flowers-for-every-season?dbwsdemoid=2103981.