Happiness is Homegrown Card 

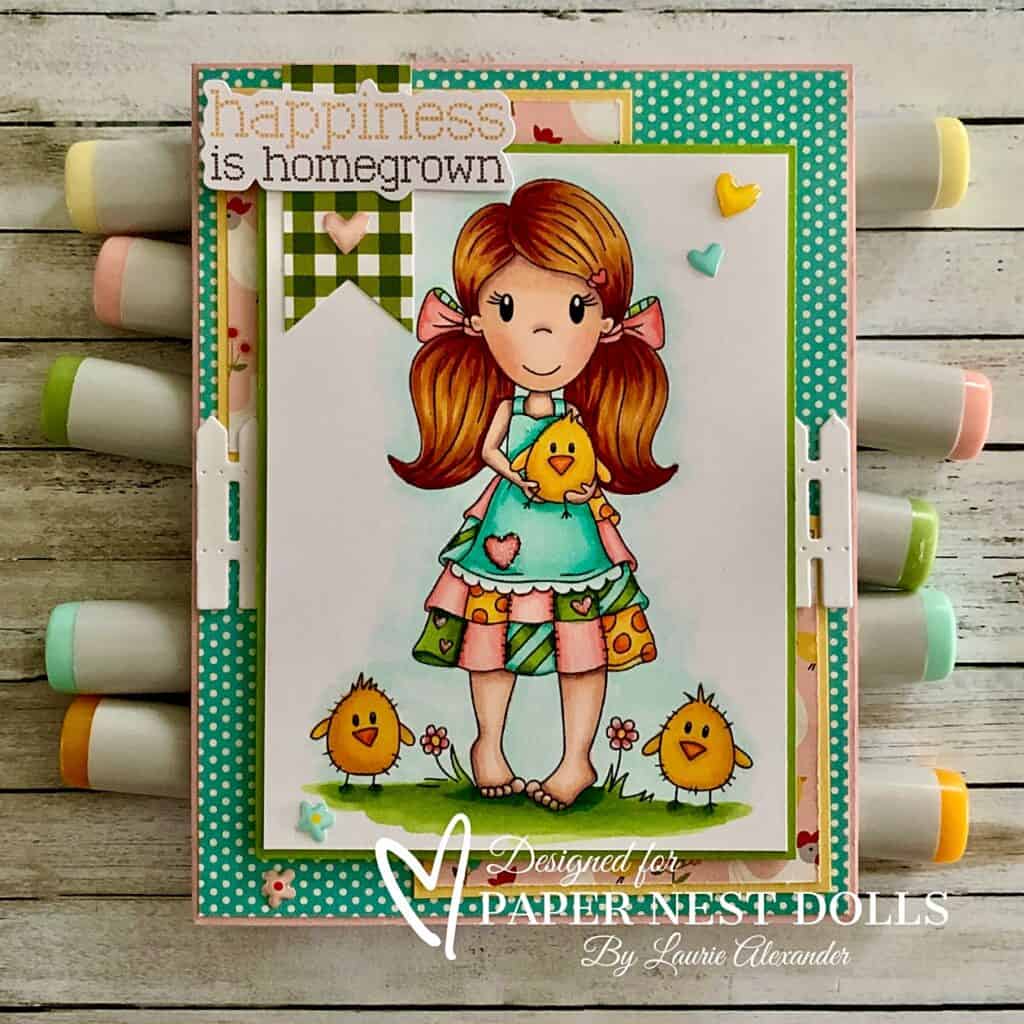
Happiness is Homegrown Card - a Spring card with a girl holding a chick
Happiness is Homegrown Card

Hello Crafty Friends! It’s Laurie here! Spring has finally arrived here! So, I am sharing my Happiness is Homegrown Card as my Design Team Inspiration Card for Paper Nest Dolls using Little Chick Emma

The Details of My Happiness is Homegrown Card

Don’t you just love Emma in her patchwork dress! So, sweet! I coloured this cutie with my Copic markers in Spring colours to match my papers.

For my card, I decided to use the Simple Stories paper since it had a farm theme, and I loved the soft colours! I had some scraps with chickens left over from a previous project, but not a lot. So, I created two squares and placed them in opposite corners on the blue/green polka dotted card base. Great way to use scraps!

Next, I added a die cut white fence to add some interest to the background.

The sentiment and banner were from the matching Simple Stories Bits & Pieces. The needlepoint look was perfect for Emma with her patchwork dress! An adhesive-backed pink heart on the banner mirrored the pinks in Emma’s dress.

Finally, for embellishments, I added more adhesive-backed hearts and flowers in addition to Star Dust Stickles to the hearts on Emma’s dress.

————————–

Copic Markers

Skin: E04/E11/E21/E00/E000/R20
Hair: E18/E15/YR23/Y21
Pinks: R22/R21/R11/R00 
Blues: BG13/BG11/BG10
Greens: YG63/YG61/YG03
Yellows: Y38/Y35/Y18 
Chicks/Polka Dot Patches: Y38/Y35/Y18/Y15/YR09/YR04
Flowers: R22/R11/Y18
Sky: BG10/0
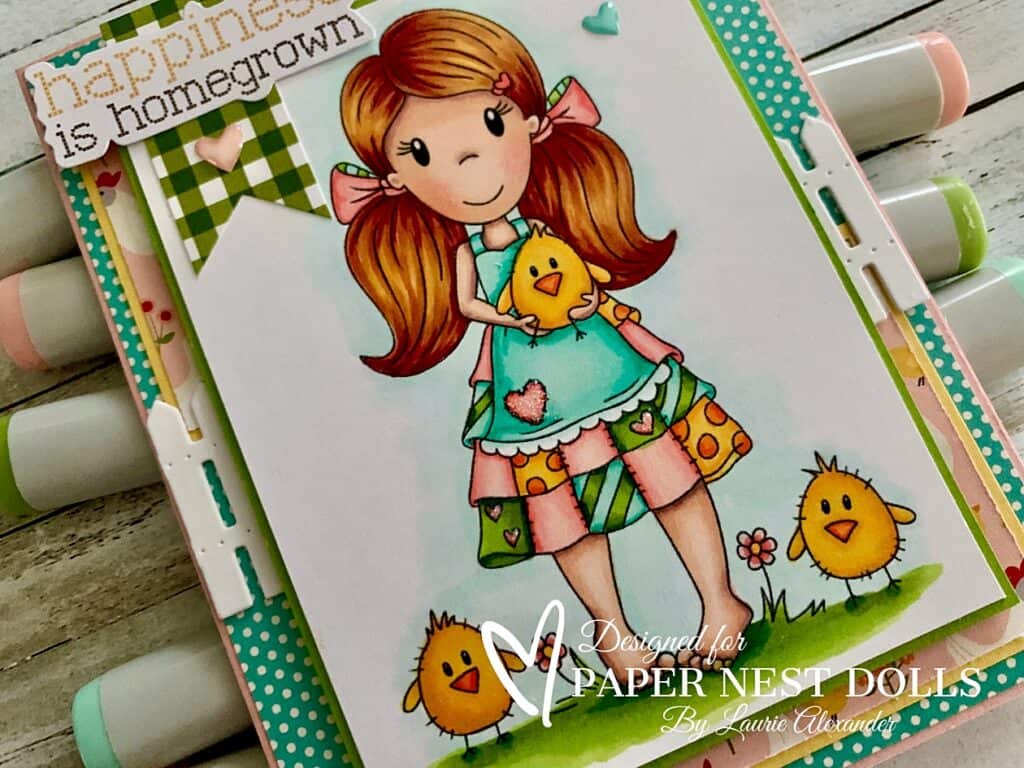
Close up of Girl holding Chick
Close up of Little Chick Emma

————————–

Card Recipe for My Happiness is Homegrown Card

Little Chick Emma, Paper Nest Dolls
Paper Basics – Stamper’s Select White Cardstock, Papertrey Ink
Homegrown 6” x 8” Paper Pad, Simple Stories
Homegrown Bits & Pieces, Simple Stories
Picket Fence Die-namics, My Favorite Things
Adhesive-Backed Hearts & Flowers, Stampin’ Up!
Star Dust Stickles, Ranger

Finished card size: 5 ½” x 4 ¼”

Stamp Size: 4”

————————–

To view my other Paper Nest Dolls cards, please click here.

Hope you like my Design Team Inspiration Card using Little Chick Emma by Paper Nest Dolls!

Thank you for stopping by!

Hugs,
Laurie

My Happy Easter Tag 

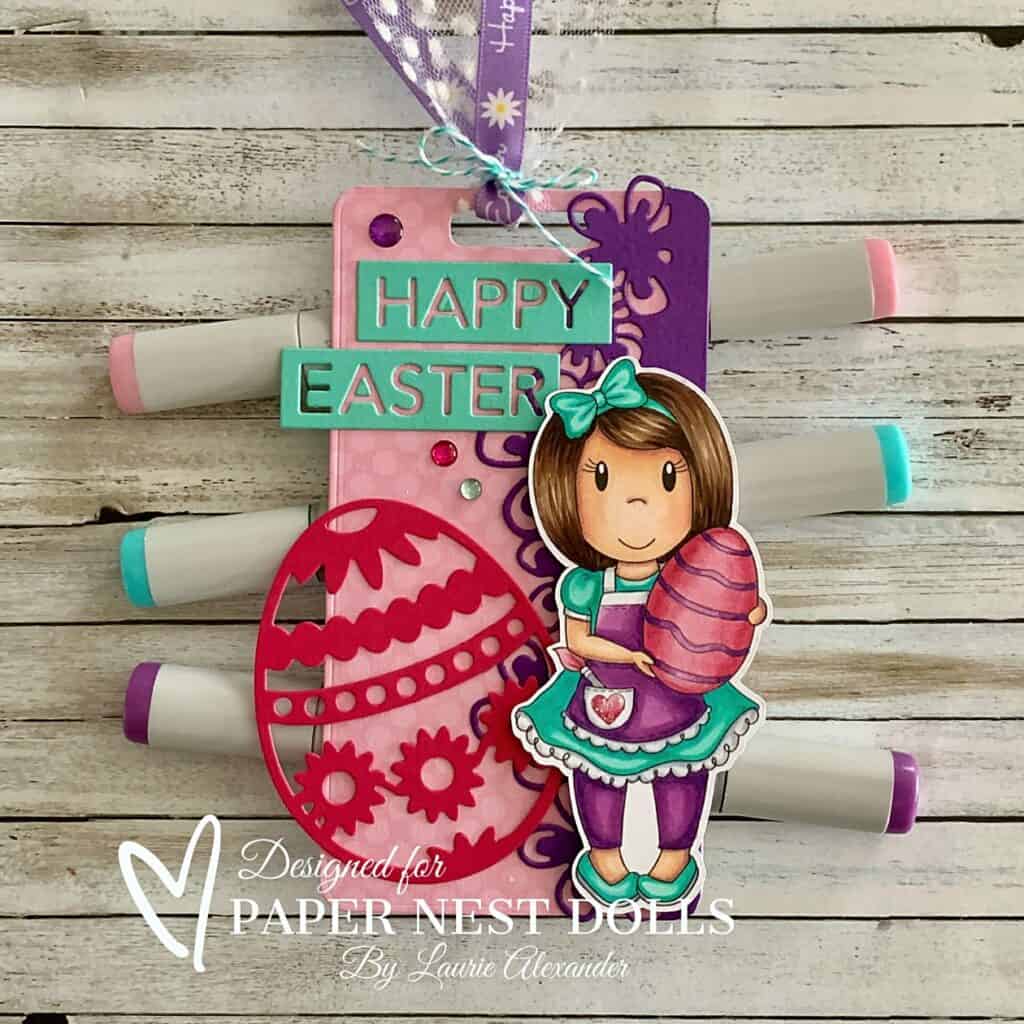
My Happy Easter Tag - An Easter tag with a girl holding an Easter egg she [ainted
My Happy Easter Tag

Hello Crafty Friends! It’s Laurie here! Who’s ready for Easter? There is always time for one last Easter tag! So, I am sharing My Happy Easter Tag as my Design Team Inspiration for Paper Nest Dolls using Egg Coloring Lulu

The Details of My Happy Easter Tag

I coloured this cutie with my Copic markers in Easter colours to match my Easter paper and card stock.

For my tag, I decided to use several Easter dies including a pink Easter Egg and the reverse Happy Easter words. I also added a purple floral border behind Lulu to make her pop and give some visual interest behind her. I used paper snips to trim the edges of the border piece to fit my round corners of my tag.

Next, I went with a Polka Dot Tulle ribbon since it reminded me of Easter tulle. The Happy Easter ribbon in purple was a perfect colour for the theme of my card! I used some Bermuda Bay Baker’s Twine to tie this all together.

Finally, to add some sparkle, I used Star Dust Stickles on Lulu’s heart on her smock and Wink of Stella on her egg. As well, a scattering of Glossy Dots that matched my colour scheme were placed around the sentiment.

————————–

Copic Markers

Skin: E04/E11/E21/E00/E000/R20
Hair: E49/E47/E44/E42
Pinks: R85/R83/R81 
Blue/Greens: BG15/BG13/BG11
Purples: V17/V15/V12
Whites: C3/C1/0
Shoes
: BG15/BG13/BG11/C3/C1

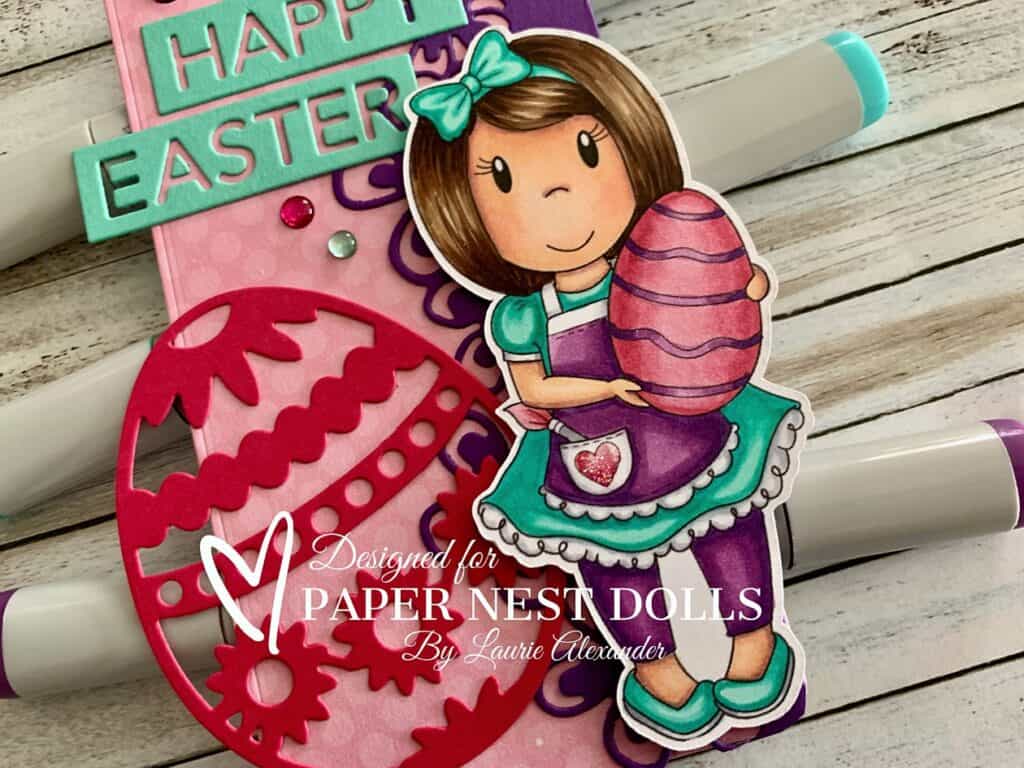
Close Up of Girl Holding Easter Egg
Close Up of Egg Coloring Lulu

————————–

Card Recipe for My Happy Easter Tag

Egg Coloring Lulu, Paper Nest Dolls
Paper Basics – Stamper’s Select White Cardstock, Papertrey Ink
Hoppy Easter 12” x 12” Paper, Doodlebug Inc.
Bracket & Tag Dies, Photo Play
Easter Eggs #2, Frantic Stamper Inc.
Reverse-Cut Spring Words Dies, Frantic Stamper Inc.
Polka Dot Tulle Ribbon, Stampin’ Up!
Easter Collection Ribbon, Celebrate It, Michaels Arts & Crafts
Bermuda Bay Baker’s Twine, Stampin’ Up!
Glossy Dots Assortments, Stampin’ Up!
Star Dust Stickles, Ranger
Clear Wink of Stella, Stampin’ Up!
Paper Snips, Stampin’ Up!

Finished Tag size: 2-7/8” x 5 -3/8”

Stamp Size: 4”

————————–

To view my other Paper Nest Dolls cards, please click here.

Hope you like my Design Team Inspiration Card using Egg Coloring Lulu by Paper Nest Dolls!

Thank you for stopping by!

Hugs,
Laurie
My Easter Egg Hunt Card 

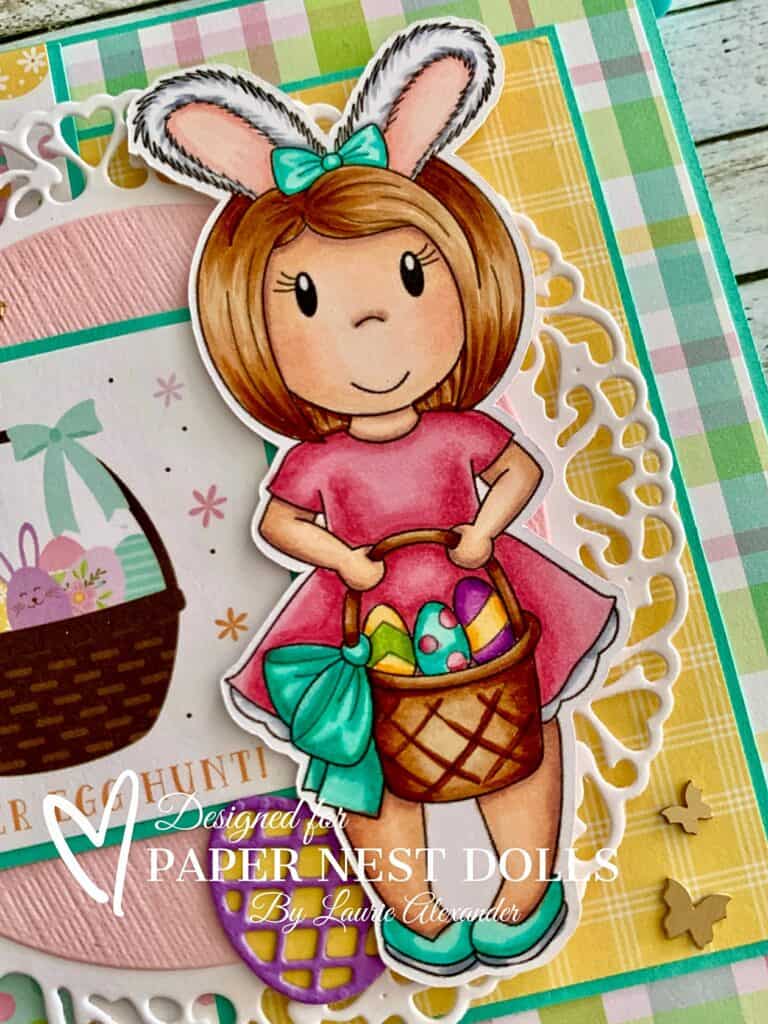
Easter Egg Hunt Card - and Easter card with a girl collecting Easter eggs
My Easter Egg Hunt Card

Hello Crafty Friends! It’s Laurie here! Easter is just around the corner. So, I am sharing My Easter Egg Hunt Card as my Design Team Inspiration Card for Paper Nest Dolls using Lulu with Easter Basket

The Details of My Easter Egg Hunt Card

I coloured this cutie with my Copic markers in Easter colours to match my Easter paper. I just love these soft colours!

For my card, I decided to use the gorgeous Tulip Dies as a backdrop for Lulu. I just bought these dies and was eager to use them! So, I went with white card stock and a soft pink that has some texture on it so as not to detract from Lulu. The sentiment “Easter Egg Hunt” was from the Welcome Easter Paper Pad and perfect for my theme.

To decorate my card, I added die cut Easter eggs that matched the colours of Lulu’s eggs in her basket. Next, I added several Brass Butterflies floating from the focal point.

Finally, to add some sparkle, I used Wink of Stella on Lulu’s eggs, hair bow and basket bow.

————————–

Copic Markers

Skin: E04/E11/E21/E00/E000/R20
Hair: E37/E35/E33/E31
Pinks: R85/R83/R81 
Blue/Greens: BG15/BG13/BG11
Shoes: BG15/BG13/BG11/C3/C1
Bunny Ears/Dress Trim: C3/C1/R000/RV42
Yellows: Y38/Y35/Y32 
Greens: YG63/YG61/YG03
Purples: V17/V15/V12

Close Up of Girl with Easter Eggs in Basket
Close Up of Lulu with Easter Basket

————————–

Card Recipe for My Easter Egg Hunt Card

Lulu with Easter Basket, Paper Nest Dolls
Paper Basics – Stamper’s Select White Cardstock, Papertrey Ink
Welcome Easter 6” x 6” Paper Pad, Echo Park Paper Co.
Tulip Doily Creatables Dies, Marianne Design
Basket Builder Framelits, Stampin’ Up!
Brushed Brass Butterflies, Stampin’ Up!
Clear Wink of Stella, Stampin’ Up!

Finished card size: 5 ¼” x 5 ¼”

Stamp Size: 4”

————————–

To view my other Paper Nest Dolls cards, please click here.

Hope you like my Design Team Inspiration Card using Lulu with Easter Basket by Paper Nest Dolls!

Thank you for stopping by!

Hugs,
Laurie
My Kitty Love Card 

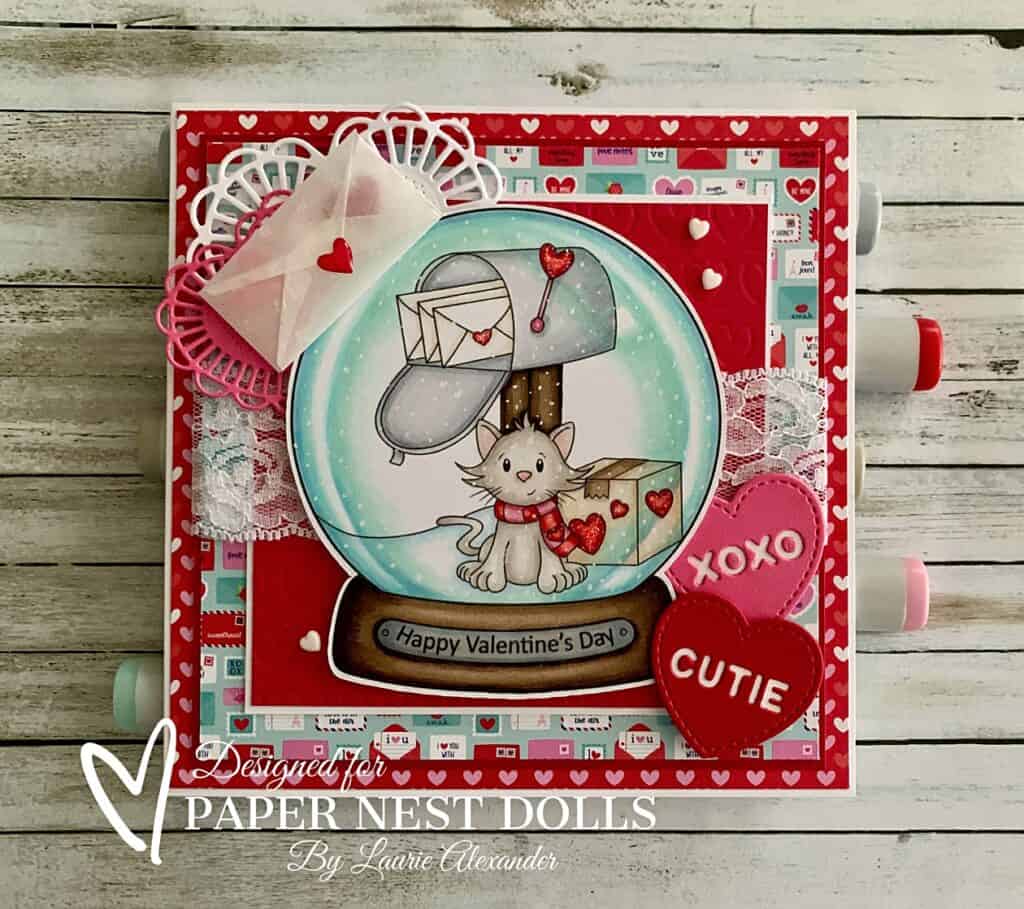
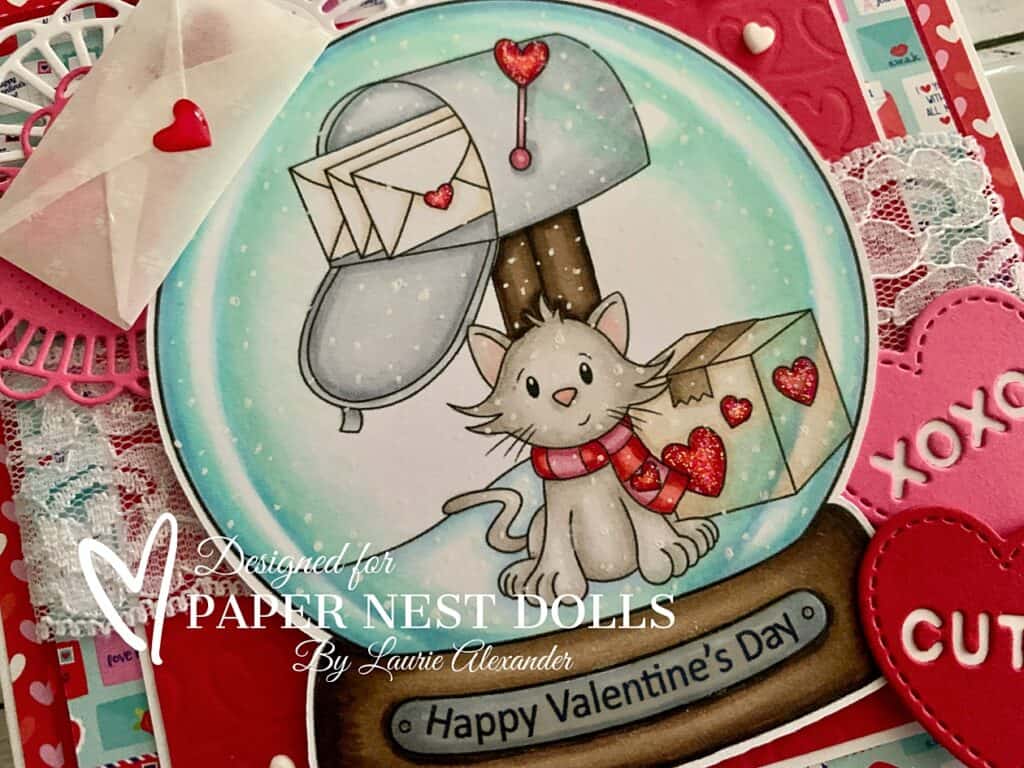
My Kitty Love Card - a Valentine Card with a cat beside a mailbox filled with letters
My Kitty Love Card

Hello Crafty Friends! It’s Laurie here! I am sharing My Kitty Love Card as my Design Team Inspiration Card for Paper Nest Dolls using the New Release Kitty Love with the Snow Globe Bundle!

The Details of My Kitty Love Card

For my card, I decided to combine the Snow Globe Bundle with the Kitty Love stamp since the kitty fits so perfectly in the snow globe! I used Microsoft Word to size and insert the kitty into the globe. In addition, I used Word to add Happy Valentine’s Day to the plaque on the base.

I haven’t coloured a snow globe before and wanted to challenge myself. So, I used the 3.0 Mini Class Bundle from Kit and Clowder as a reference and used my Copic markers to colour the image. It was a lot of fun getting the shine on the glass! Once it was coloured, I added Glossy Accents to the plaque on the globe base and Stickles to all the hearts.

I decided to use the French Kiss Doodlebug Paper since it had hearts, envelopes, and happy mail on it. Perfect for my card! To ground the snow globe, I used a solid piece of red paper that was already embossed with hearts to add to my Valentine theme.

Next, I added some die cut hearts in opposite corners for balance. A die cut glassine envelope with die cut hearts inside and an adhesive-backed heart to seal it was added to mirror the letters in the mailbox.  

For embellishments, I used a piece of white lace trim and white resin hearts.

————————–

Copic Markers

Cat: W3/W2/W1/W0/R20
Scarf: R29/R27/R24/R22/R85/R83/R81
Mailbox: C3/C2/C1/C0/R29/R27/R24/R85/R81
Post: E49/E47/E44/E43
Letters: E41/E40/R29/R27/R24
Globe Base: E49/E47/E44/E43/C3/C2/C1
Box: E44/E43/E42/E41/E40/R29/R27/R24
Glass: B91/B00/BG10/0
Snow: BG60/BG000/0

Close Up of Kitty
Close Up of Kitty

————————–

Card Recipe for My Kitty Love Card

Kitty Love and Snow Globe Bundle, Paper Nest Dolls
Paper Basics – Stamper’s Select White Cardstock, Papertrey Ink
French Kiss 6” x 6” Paper Pad, Doodlebug Designs Inc.
Valentine’s Day 5” x 7” Paper Pad, Recollections, Michaels Arts & Crafts
Sending Love Glassine Sheets, Stampin’ Up!
Sending Love Dies, Stampin’ Up!
Candy Hearts Dies, Lawn Fawn
Two of Hearts Dies, Cheery Lynn Designs
Resin Hearts Embellishments, Stampin’ Up!
Adhesive-Backed Hearts & Flowers, Stampin’ Up!
1 ½” Lace Ribbon, Celebrate It, Michaels Arts & Crafts
White Gelly Roll Pen, 
Glossy Accents, Ranger
Star Dust Stickles, Ranger
Basic White, Real Red and Polished Pink Card Stock, Stampin’ Up!

Finished card size: 5 ½” x 5 ½”

Stamp Size: 3 ¾”

————————–

To view my other Paper Nest Dolls cards, please click here.

Hope you like my Kitty Love Card using Kitty Love and Snow Globe Bundle by Paper Nest Dolls!

Thank you for stopping by!

Hugs,
Laurie

My Spooky Season Card

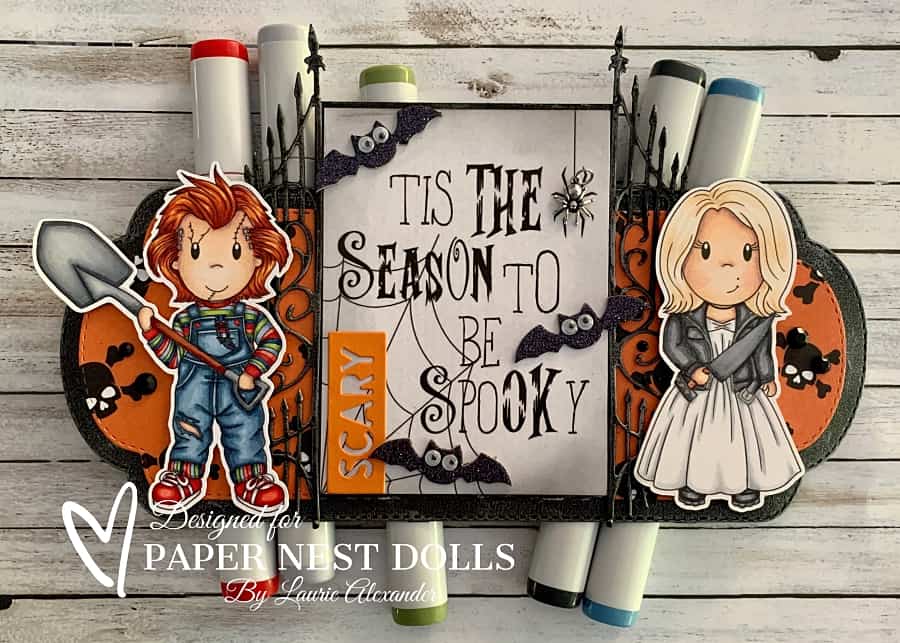
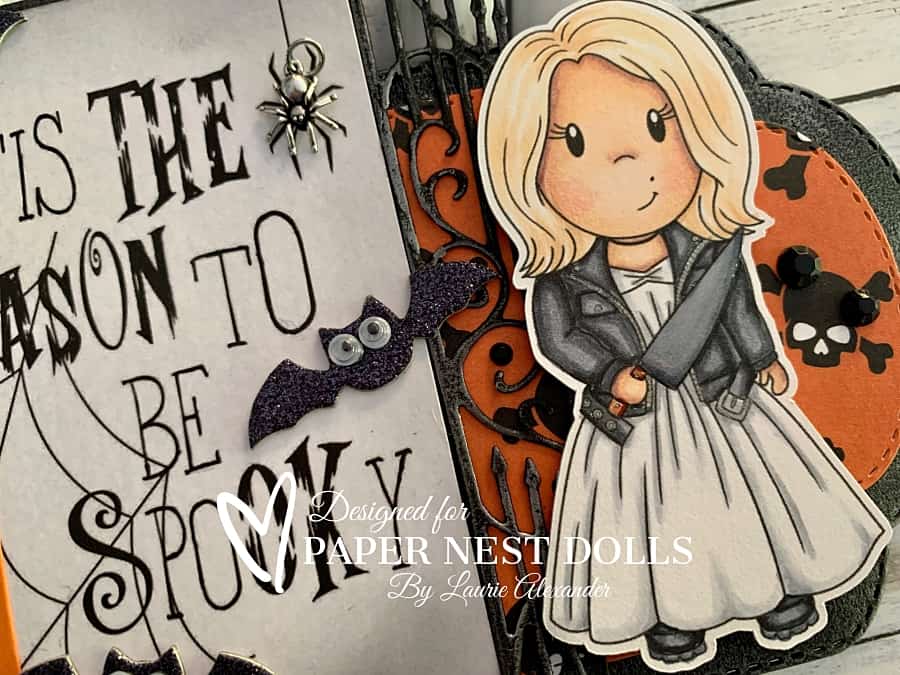
My Spooky Season Card - A Halloween Card with A boy holding shovel and girl holding a knife.
My Spooky Season Card

Hello Crafty Friends! Happy Halloween! It’s Laurie here! I am sharing My Spooky Season Card using Scary Doll Owen and Scary Doll Emma by Paper Nest Dolls as my Design Team Inspiration Card. I couldn’t resist squeaking in one final Halloween card!

The Details of My Spooky Season Card

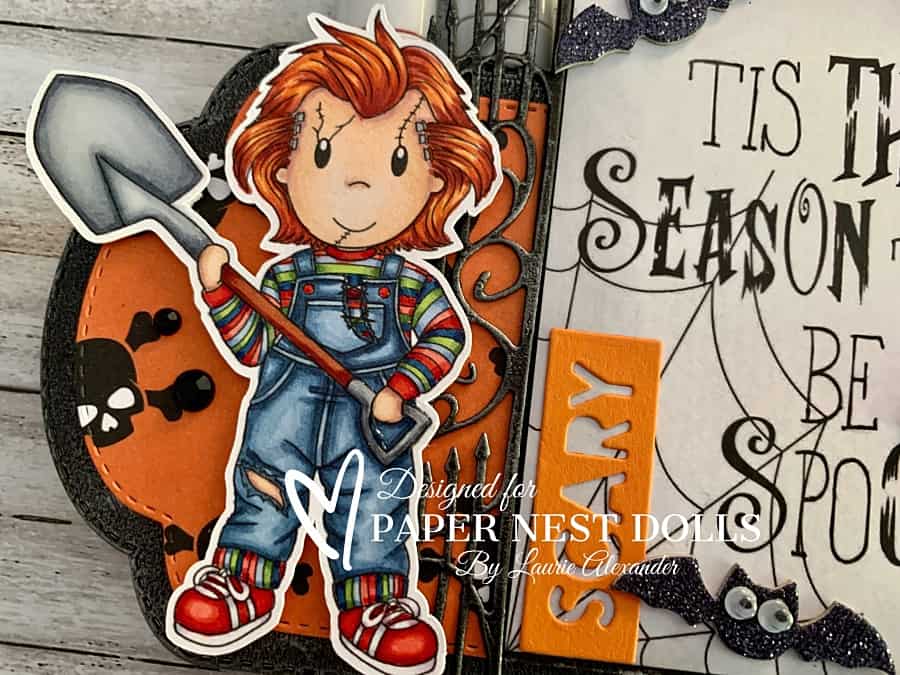
For my card, I had to do some research! I’m not a big horror fan. So, I had to google what these characters were and colour them according to the photos online. Lol! I used my Copic markers to colour them and added Glossy Accents to the shovel and the knife. Also, I added silver gelly roll pen to all the metallic trim on Emma’s jacket.

Since I had two stamps to place on my card, I decided to create a slimline card, but I thought it would be fun to use the tag “Tis the Season to be Spooky”. So, I brushed Black Soot along the edges to give it a distressed feel. Next, I added a black mat to the tag and rubbed Brushed Iron wax on the mat, the die cut gates, and the mat of my card to tie them all in together. Once I did that, I placed my sentiment sticking above the card with an iron gate on either side of it with my characters layered in front.

I love the oval dies that I used for the black mat and the Skull and cross bone paper! Such a fun and interesting shape!

For embellishments, I used several bats and black rhinestone stickers, as well as a spider trinket that I placed over the printed spider on the tag. The only other thing that I added was the reverse “Scary” word to the tag. It summed up my card perfectly!

————————–

Copic Markers:

Scary Doll Owen
Skin
: E000/E00/E21/E11/E04
Hair: E18/E08/YR18/YR14
Overalls: B99/B97/B95/B93/B91
Reds: R29/R27/R24/R22
Stripes: B95/B91/YG63/YG61/YG03/B39/B37/R29/R27/R24/R22
Shoes: R29/R27/R24/R22/C3/C1/0
Shovel: C6/C4/C3/C1/E18/E15

Close Up of Boy holding Shovel
Close Up of Scary Doll Owen

Scary Doll Emma
Skin
: E000/E00/E21/E11/E04/R20
Hair: E53/E51/E50
Jacket: C9/C7/C6/C4
Dress: C3/C1/0
Boots: C9/C6/C4
Knife: C6/C4/C3/C1/E18/E15

Close Up of Girl holding Knife
Close Up of Scary Doll Emma

————————–

Card Recipe for My Spooky Season Card:

Scary Doll Owen and Scary Doll Emma, Paper Nest Dolls
Paper Basics – Stamper’s Select White Cardstock, Papertrey Ink
Fright Night 12” x 12” Collection Pack, Photo Play Paper
#9 Slim Stitched Box Oval Dies, Photo Play Paper
Tim Holtz Gate Keeper Thinlits Dies, Sizzix
Reverse Cut Halloween Words, Frantic Stamper Inc.
Brushed Iron Metallique Wax, Art Alchemy
Black Soot Ink, Ranger
Blending Brush, Stampin’ Up!
Bat Stickers, Recollections, Michaels Arts & Crafts
Black Rhinestone Stickers, Recollections, Michaels Arts & Crafts
Spider Trinket, Stampin’ Up!
Glossy Accents, Ranger
Silver Gelly Roll Pen, Sakura

Basic Black and Pumpkin Pie Card Stock, Stampin’ Up!

Finished card size: 3 ½” x 8 ½”

————————–

To view my other Paper Nest Dolls projects, please click here.

To view my other Halloween cards, please click here.

Hope you like my Design Team Inspiration Card using Scary Doll Owen and Scary Doll Emma for Paper Nest Dolls!

Thank you for stopping by!

Hugs,
Laurie
Scary Cute Halloween Card 

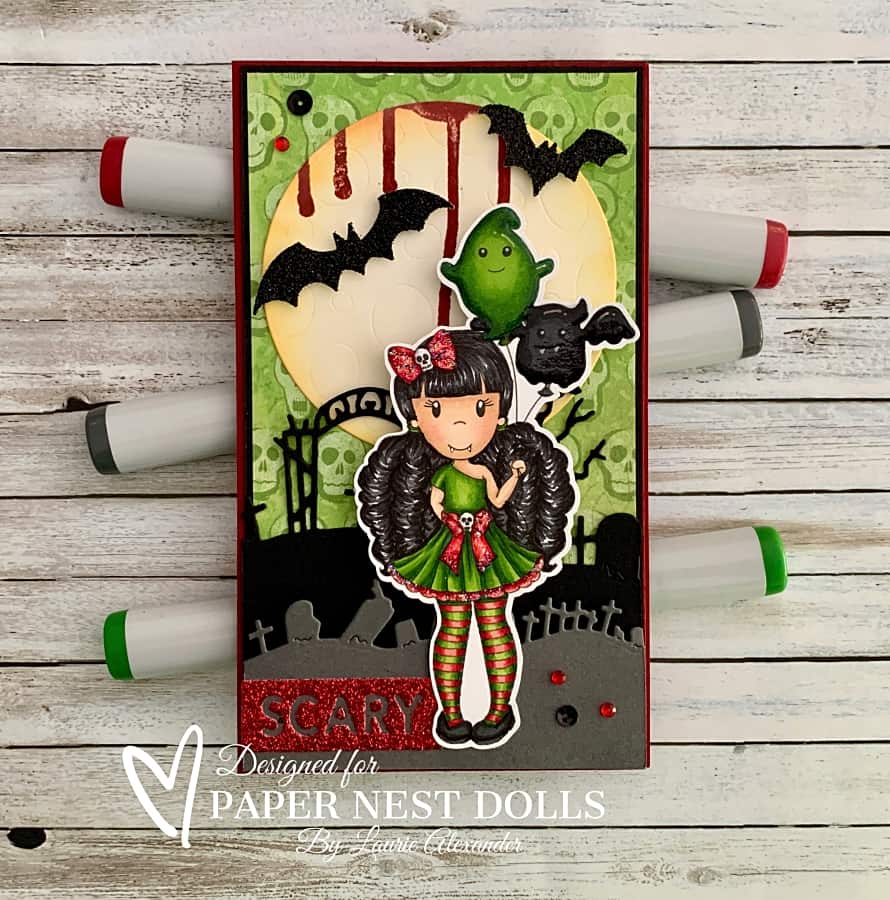
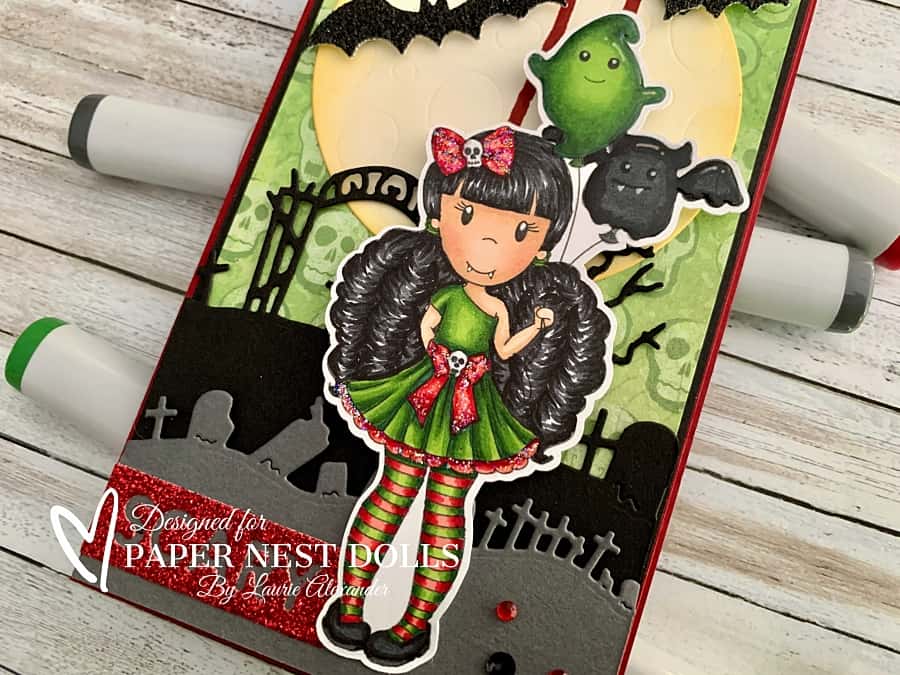
Scary Cute Halloween Card - a Halloween card with a girl dressed as a vampire with two balloons
Scary Cute Halloween Card

Hello Crafty Friends! It’s Laurie here! I am sharing my Scary Cute Halloween Card using Vampire Ellie by Paper Nest Dolls as my Design Team Inspiration Card.

The Details of My Colouring

For my card, I had so much fun colouring Vampire Ellie with my Copic markers! I knew that I wanted to give her black hair and decided to go with a ghoulish green and red since she is a vampire. I made her skin a bit lighter by not using E04 for my shadows to give her a deathly pallor. Lol!

For the balloons, I went with an ectoplasm green like in Ghostbusters and a black for the bat. I used my white gelly roll pen to make bat’s fangs stand out and for the highlights on both balloons. The balloons also had glossy accents add to them to make them look like real balloons. Star Dust Stickles were added to the red bows and red trim of her dress. 

The Details of My Scary Cute Halloween Card

I decided to create a mini slimline card since I wanted to create a spooky graveyard scene with my dies. Of course, if you have a vampire, you must have a moon dripping blood! Lol! So, I stamped the blood drips first before die cutting the moon out. That way the craters on the moon die did not cause voids in the stamped dripping blood. Next, I brushed Fossilized Amber Distress Oxide Ink around the edges of my moon to make it glow.

Then, I die cut the graveyard in Basic Black and Basic Gray to help differentiate the two layers. Don’t you love how the spooky sky and moon show through the gate to the graveyard!

For the sky, I went with some spooky green skulls paper to match my colouring. Plus, they reminded me of all the ghosts in the graveyard.

A couple of black glimmer bats add some sparkle to the sky. The “Scary” sentiment was die cut from red glimmer paper to match my red colouring.

Finally, the finishing touch was a scattering of red rhinestones and black sequins to match my colour scheme.

————————–

Copic Markers:

Skin: E000/E00/E21/E11/R20
Hair: N10/N8/N6
Greens: G29/YG67/YG17/YG03
Reds: R39/R37/R35R32
Shoes/Bat Balloon: N10/N8/N6
Skulls: C3/0

Close Up of girl in vampire costume
Close Up of Vampire Ellie

————————–

Card Recipe for My Scary Cute Halloween Card:

Vampire Ellie, Paper Nest Dolls
Paper Basics – Stamper’s Select White Cardstock, Papertrey Ink
Kelly Panacci Halloween Designer Mat Pad, K & Company
Red Glimmer Paper, Stampin’ Up!
Black Glimmer Paper, Stampin’ Up!
Boneyard Edgers Dies, Frantic Stamper Ins.
Full Moon Dies, Lawn Fawn
Reverse Cut Halloween Words, Frantic Stamper Inc.
Bat Punch, Stampin’ Up!
Fossilized Amber Distress Oxide Ink, Ranger
Blending Brush, Stampin’ Up!
Ghoulish Grunge Stamp Set, Stampin’ Up!
Cherry Cobber Ink Pad, Stampin’ Up!
Metallic Sequin Assortment, Stampin’ Up!
Red Rhinestone Basic Jewels, Stampin’ Up!
Glossy Accents, Ranger
Star Dust Stickles, Ranger
White Gelly Roll Pen, Sakura

Basic Black, Very Vanilla and Basic Gray Card Stock, Stampin’ Up!

Finished card size: 3 ½” x 6”

————————–

To view my other Paper Nest Dolls projects, please click here.

Hope you like my Design Team Inspiration Card using Vampire Ellie for Paper Nest Dolls!

Thank you for stopping by!

Hugs,
Laurie