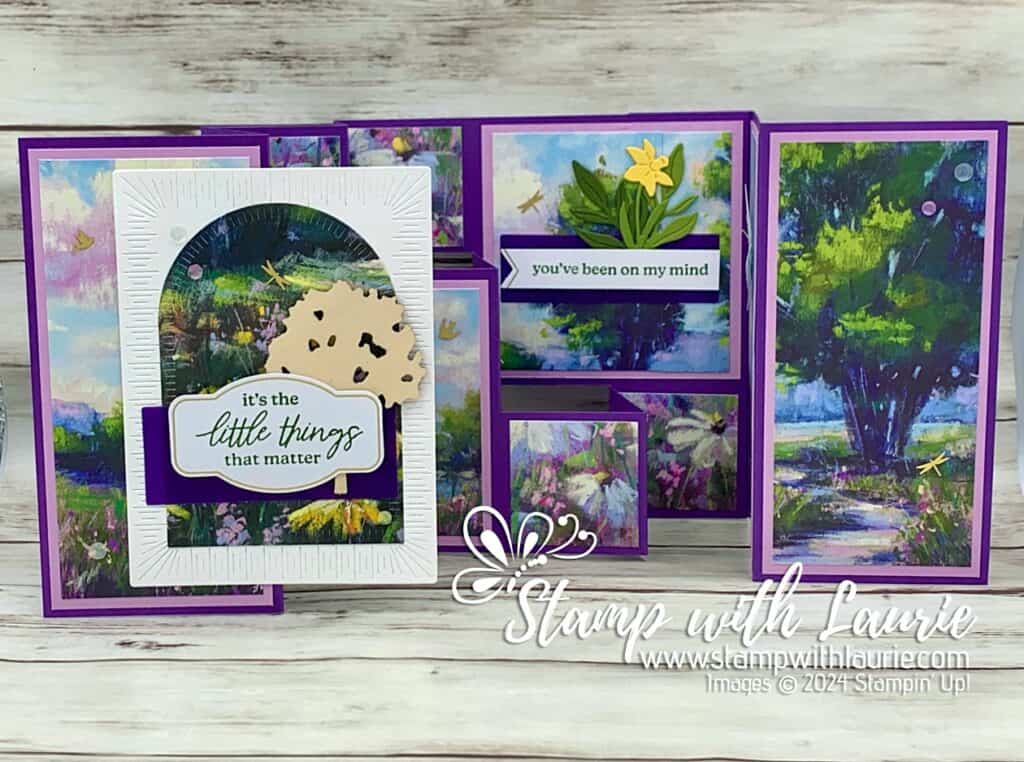
Fancy Fold Step Card 

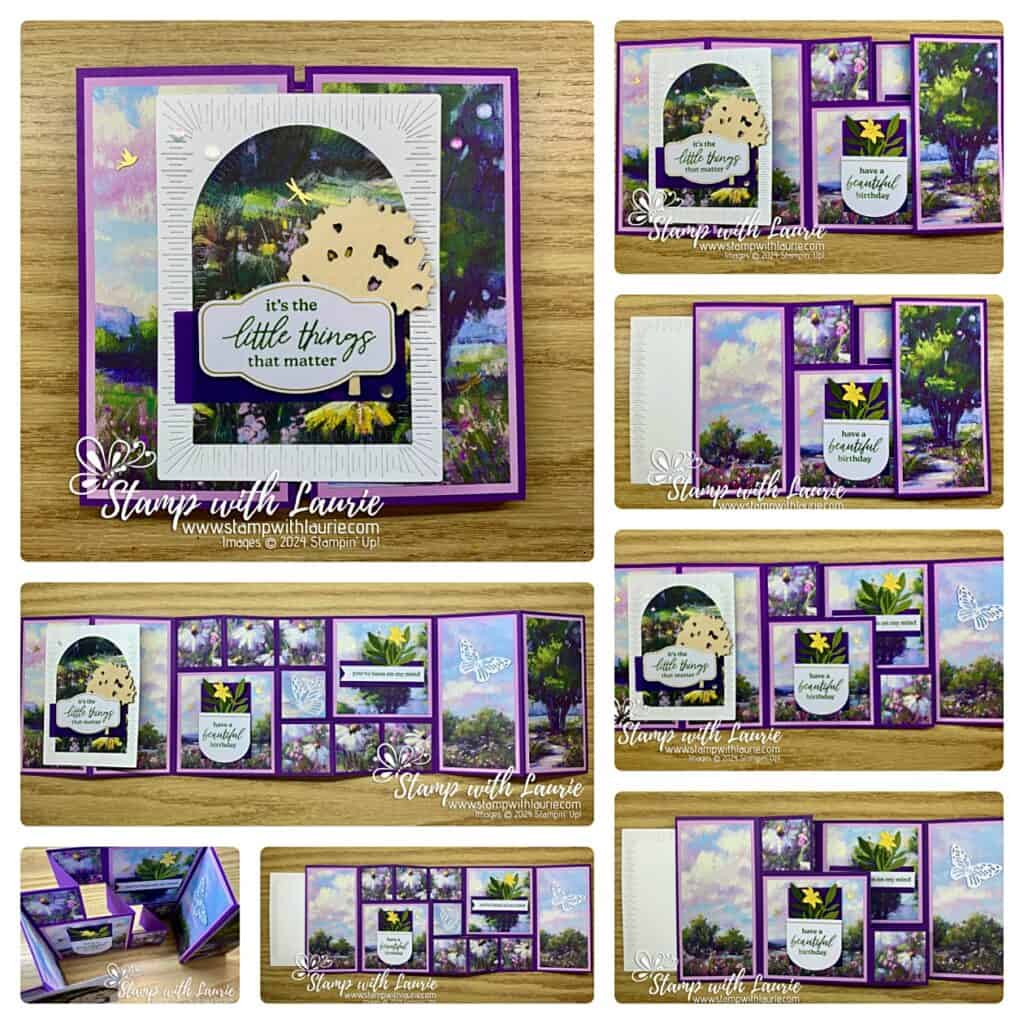
Fancy Fold Step Card - a birthday card that has lots of folds
Fancy Fold Step Card

Hello Crafty Friends! Laurie here again! I am sharing my alternative Fancy Fold Step Card using the March 2024 Memorable Meadows Paper Pumpkin. I have made this fun fold several times for different recipients, and it’s always Wowed them!

This Kit makes 9 cards of which I made three. I always like to make one set of the cards in the kit and then play with it to see what alternatives I can design.

Three cards made by a Kit
Cards from March 2024 Memorable Meadows Paper Pumpkin Kit

I made a total of nine cards with six being alternatives. I had a lot of fun playing with this kit! My alternatives included a bridge card, a faux-centre step card, a z-fold card, a fancy fold step card and two others.
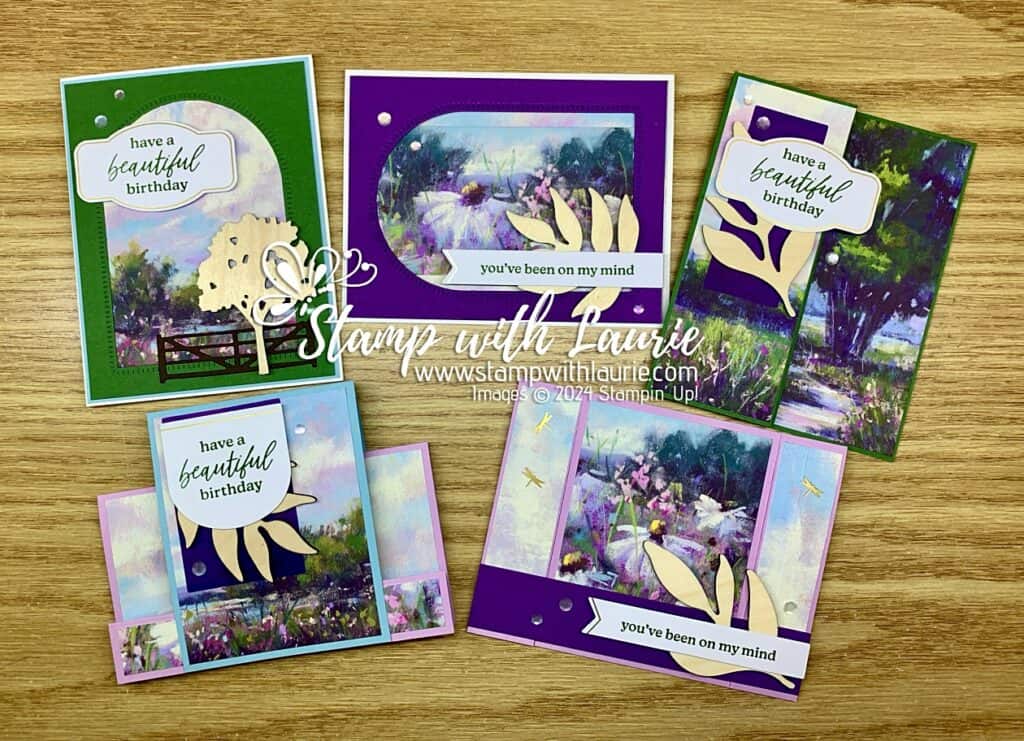
My Other Alternative Cards

The Details of My Fancy Fold Step Card

For this fun-fold card, I used 3 card bases front and back from the Paper Pumpkin Kit. I loved that the card bases were printed with a continual scene from front to back! With some careful measuring, this made it easy to create my card.

Front of Card

To decorate the front of my card, I used the arch from the Garden Meadow Dies and one of the sheets from the Meandering Meadows 6” x 6” Designer Series Paper that had some Daffodil Delight on it. I knew I wanted to use the daffodil die from The Love of Spring Dies to decorate my inside. So, I wanted to bring this colour throughout my card. The Radiating Stitches Die was a perfect backdrop for my arched focal point!
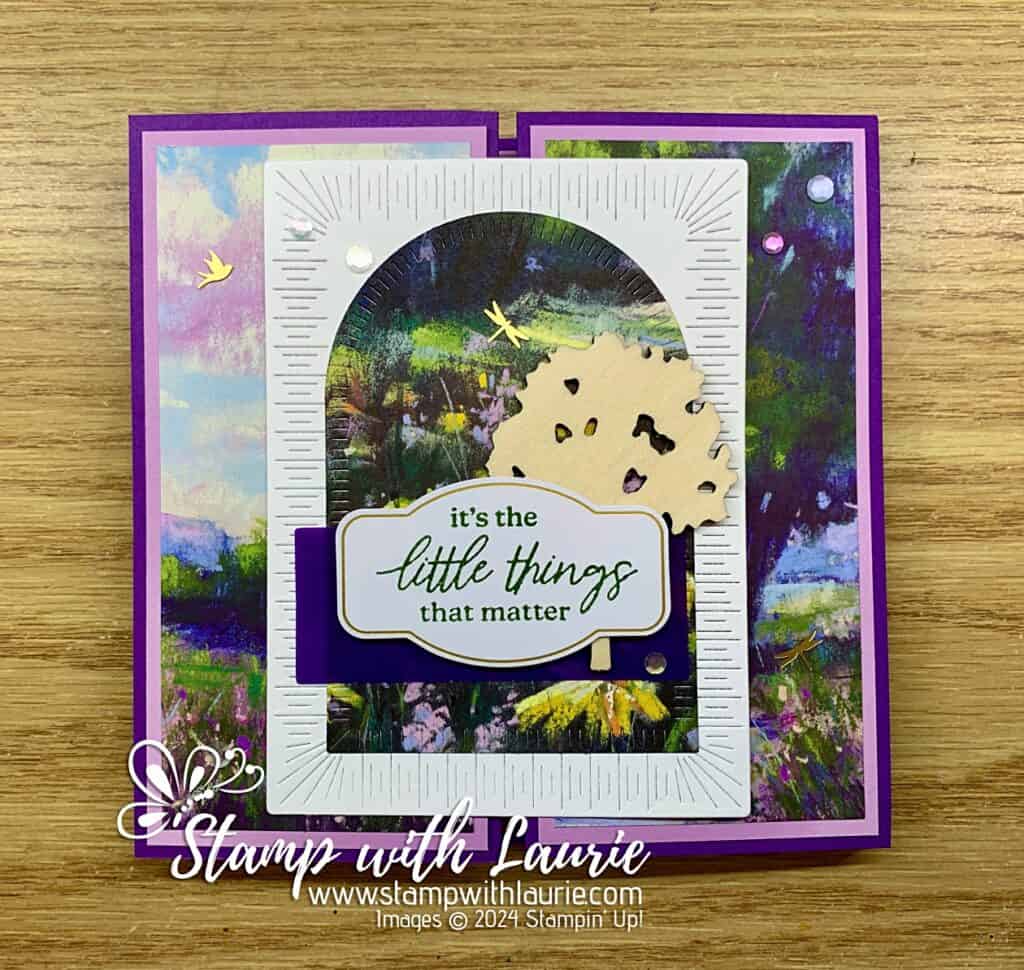
Front of My Card
Front of My Card

I used the Adhesive-backed iridescent embellishments, the wooden tree, and some Adhesive-Backed Dragonflies & Birds to decorate my card front.

Inside of card

For the larger panels, I used the same card base for the panels that when folded are side by side. For example, I used the larger tree card base for the two front panels that are shown when the card is close. Then, I used the smaller panoramic card base for the two large inside panels. I trimmed the left and right card base sides at 2 ½” wide making sure I used the matching panels when they were adhered. I saved the scored pieces for the large squares. Luckily, the decorations hid the score lines well.
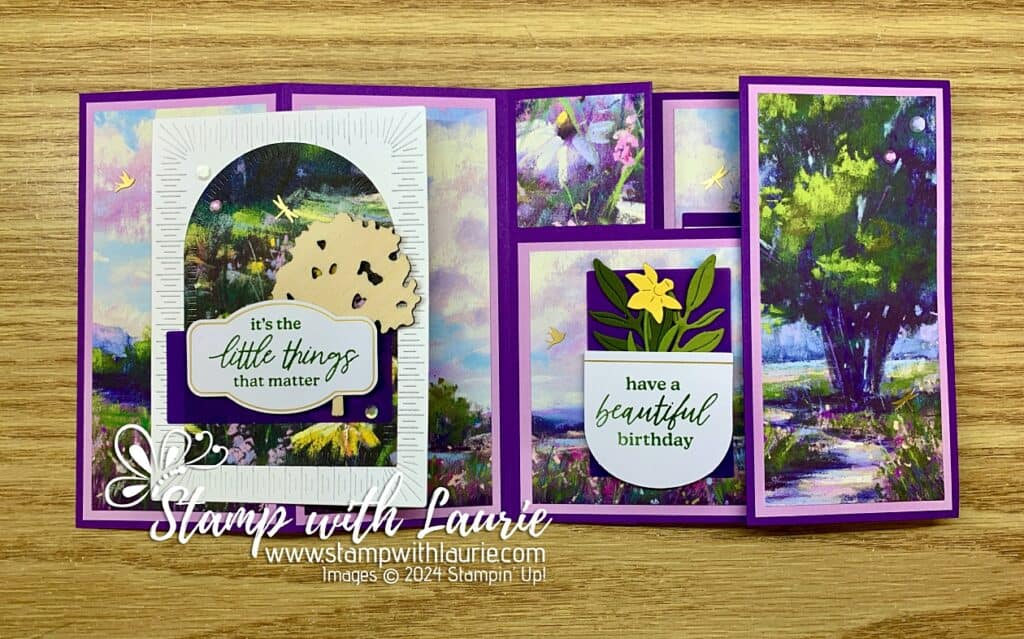
First Opening of Inside of Card

Next, I used the daisy card base for six of the small squares. I did not mat these since the squares are already so small. Again, I made sure to cut them so that they matched when laid down in a row. The centre square was left over from the scraps.
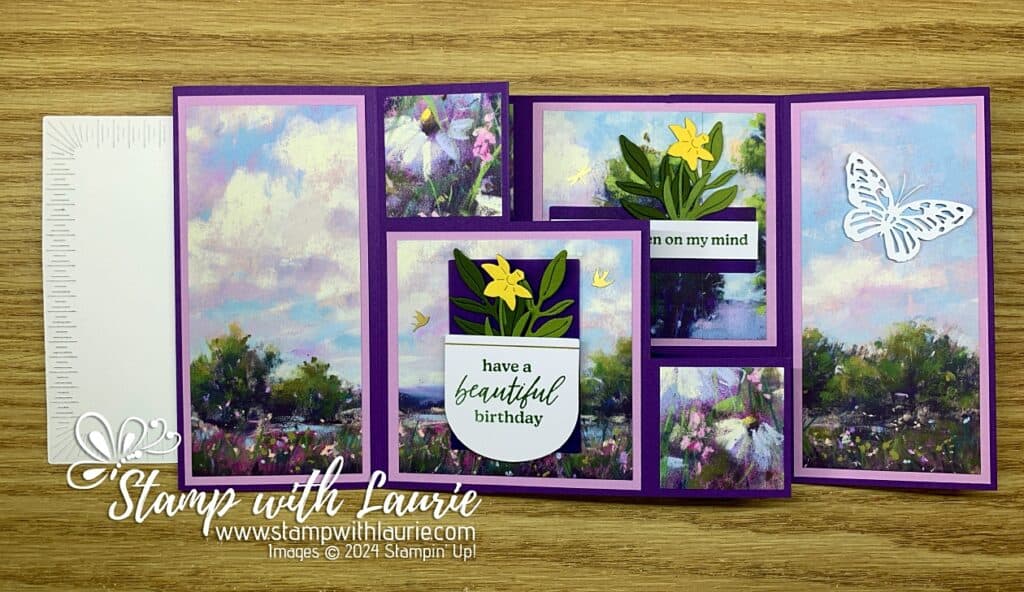
Second Opening of Inside of Card

To decorate my card, I stamped the sentiments in Garden Green on the different precut pieces with gold foil. I layered the leaves and daffodils behind the two inside my card using the vellum pieces that come in the kit to accent them.
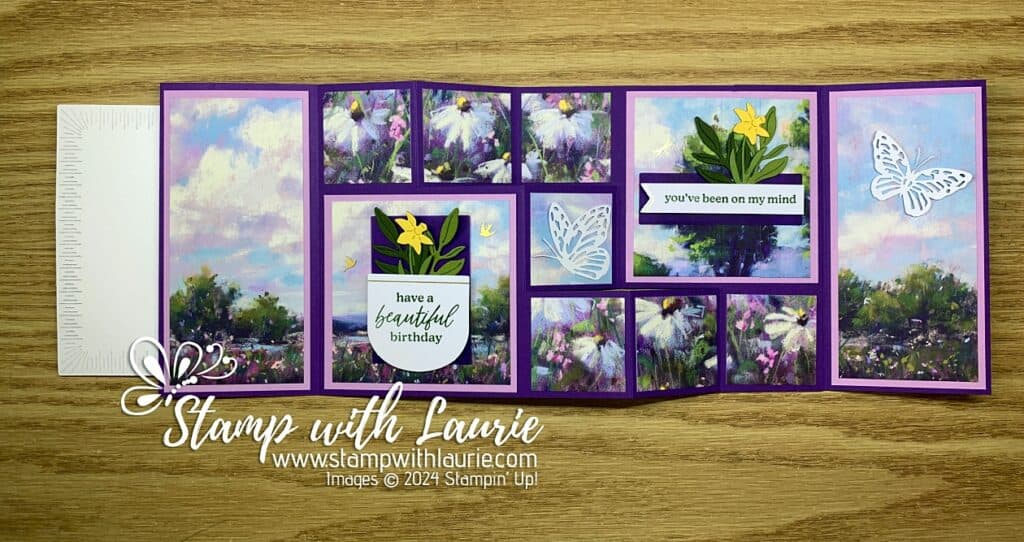
Third Opening of Inside of Card

More adhesive-backed iridescent embellishments, Adhesive-Backed Dragonflies & Birds and two Paper Butterfly Accents were used to decorate the inside.
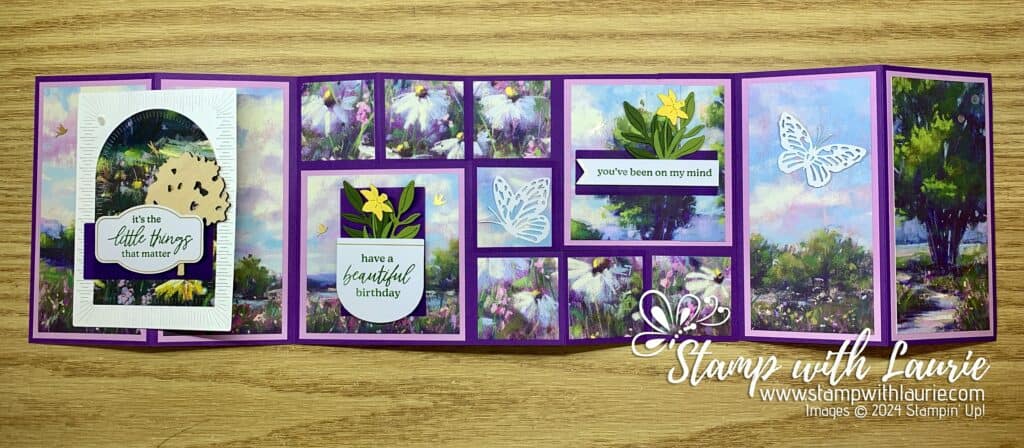
Card Fully Opened
Card Fully Opened

Supplies:

Stamps/Dies/Bundles: March 2024 Memorable Meadows Paper Pumpkin, The Love of Spring Dies (164396), Garden Meadow Dies (162740), Radiating Stitches Dies (161595)

Inks: Garden Green Spot (In Kit)

Paper: Gorgeous Grape (146987), Fresh Freesia (155613), Basic White (159276), Old Olive (100702), Mossy Meadow (133676), Daffodil Delight (119683), Meandering Meadows 6” x 6” Designer Series Paper (162735)

Accessories: Adhesive-backed iridescent embellishments (in Kit), Pressed wood embellishments (in Kit), Adhesive-Backed Dragonflies & Birds (162743), Paper Butterfly Accents (162612), Bone Folder (102300), Stampin’ Dimensionals (In Kit), Stampin’ Seal (152813), Mini Glue Dots (In Kit)
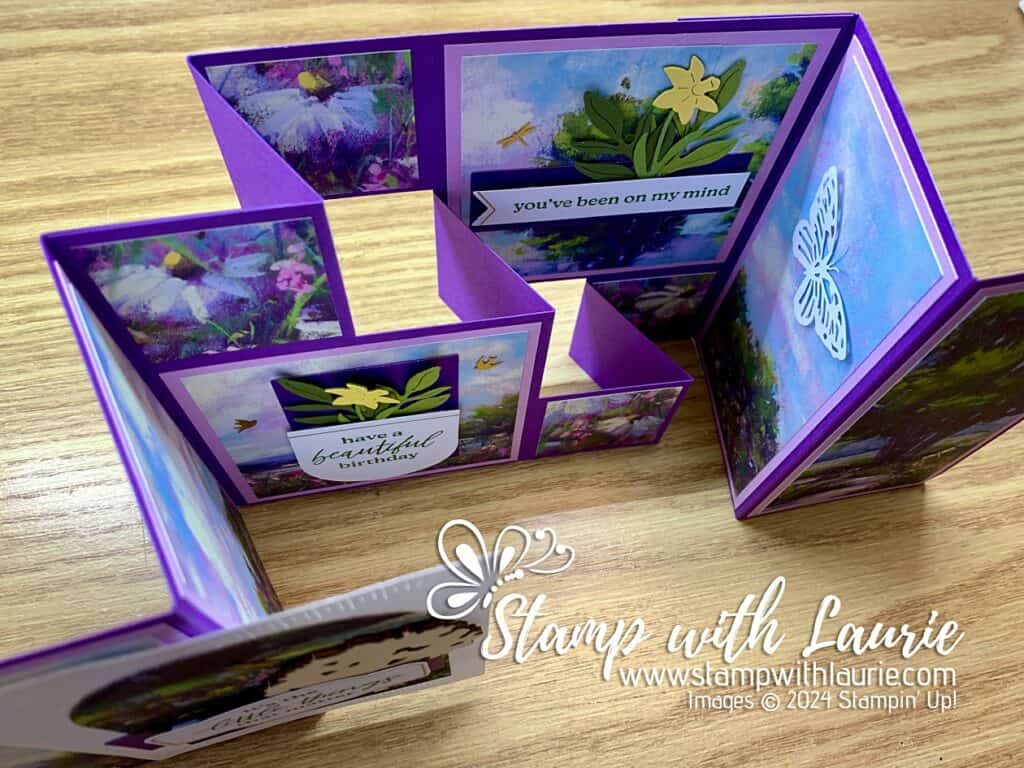
Top View of Card
Top View of Card

Measurements: 

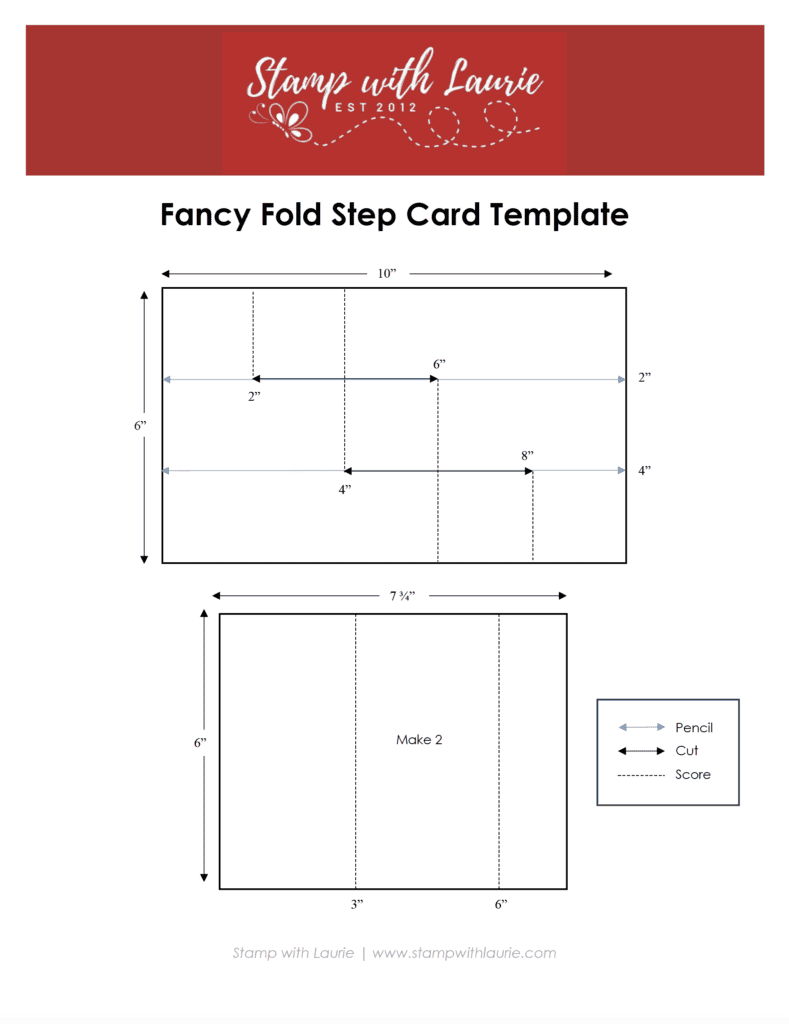
  • Gorgeous Grape cut/scored according to template below (3 pieces):
    • 7 ¾” x 6” (2 pieces)
    • 10” x 6”
  • Fresh Freesia: (6 pieces)
    • 2 ¾” x 5 ¾” (4 pieces)
    • 3 ¾” x 3 ¾” (2 pieces)
  • Basic White:
    • 4” x 5 ½”
  • Old Olive:
    • Scraps for leaves (2 pieces)
  • Mossy Meadow:
    • Scraps for leaves (2 pieces)
  • Daffodil Delight:
    • Scraps for flowers (2 pieces)
  • Meandering Meadows 6″ x 6″ Designer Series Paper:
    • 3” x 4 ½” (for arch on front of card)
  • Memorable Meadows Paper Pumpkin:
    • 2 ½” x 5 ½” (4 pieces)
    • 3 ½” x 3 ½” (2 pieces)
    • 1 ¾” x 1 ¾” (7 pieces)
Collage of Different Layers

More Information on My Fancy Fold Step Card

Here is a video of my card in action.

Fancy Fold Step Card Instructions & Template

To download a PDF of the Fancy Fold Step Card Instructions & Template, please click here or on the picture.

Fancy Fold Step Card Instructions & Template

Finished card size: 6” x 6”

For more of my Stampin’ Up! cards, please click here.

You will find the items listed above in my online store.

My Easter Egg Hunt Card 

Easter Egg Hunt Card - and Easter card with a girl collecting Easter eggs
My Easter Egg Hunt Card

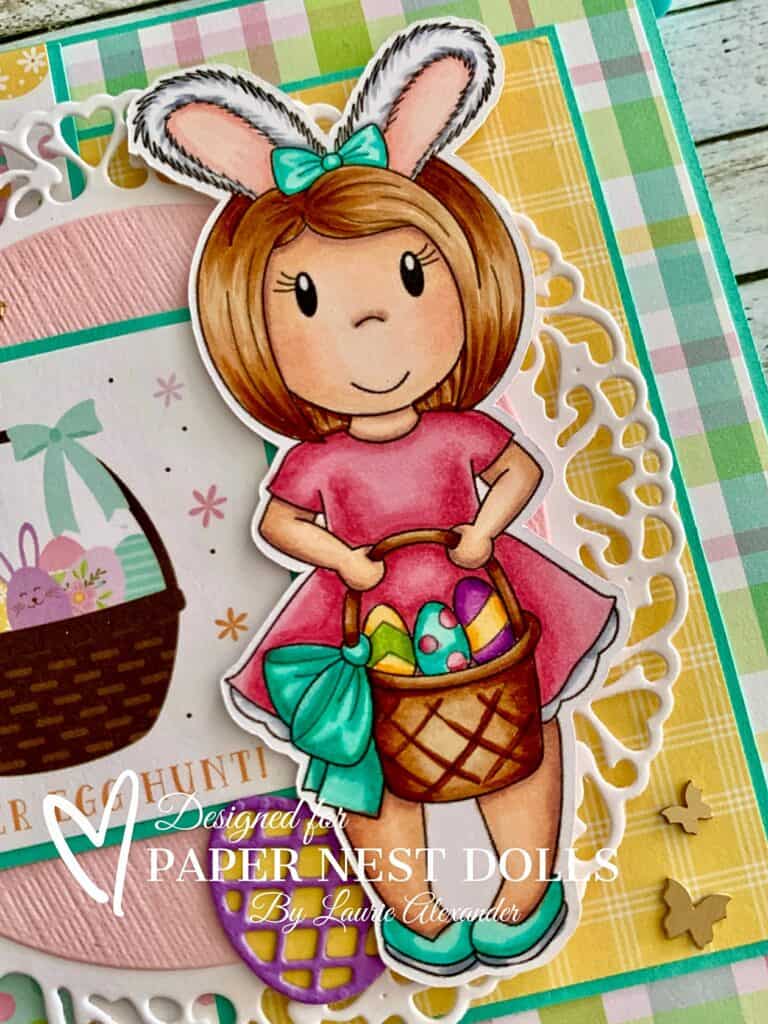
Hello Crafty Friends! It’s Laurie here! Easter is just around the corner. So, I am sharing My Easter Egg Hunt Card as my Design Team Inspiration Card for Paper Nest Dolls using Lulu with Easter Basket

The Details of My Easter Egg Hunt Card

I coloured this cutie with my Copic markers in Easter colours to match my Easter paper. I just love these soft colours!

For my card, I decided to use the gorgeous Tulip Dies as a backdrop for Lulu. I just bought these dies and was eager to use them! So, I went with white card stock and a soft pink that has some texture on it so as not to detract from Lulu. The sentiment “Easter Egg Hunt” was from the Welcome Easter Paper Pad and perfect for my theme.

To decorate my card, I added die cut Easter eggs that matched the colours of Lulu’s eggs in her basket. Next, I added several Brass Butterflies floating from the focal point.

Finally, to add some sparkle, I used Wink of Stella on Lulu’s eggs, hair bow and basket bow.

————————–

Copic Markers

Skin: E04/E11/E21/E00/E000/R20
Hair: E37/E35/E33/E31
Pinks: R85/R83/R81 
Blue/Greens: BG15/BG13/BG11
Shoes: BG15/BG13/BG11/C3/C1
Bunny Ears/Dress Trim: C3/C1/R000/RV42
Yellows: Y38/Y35/Y32 
Greens: YG63/YG61/YG03
Purples: V17/V15/V12

Close Up of Girl with Easter Eggs in Basket
Close Up of Lulu with Easter Basket

————————–

Card Recipe for My Easter Egg Hunt Card

Lulu with Easter Basket, Paper Nest Dolls
Paper Basics – Stamper’s Select White Cardstock, Papertrey Ink
Welcome Easter 6” x 6” Paper Pad, Echo Park Paper Co.
Tulip Doily Creatables Dies, Marianne Design
Basket Builder Framelits, Stampin’ Up!
Brushed Brass Butterflies, Stampin’ Up!
Clear Wink of Stella, Stampin’ Up!

Finished card size: 5 ¼” x 5 ¼”

Stamp Size: 4”

————————–

To view my other Paper Nest Dolls cards, please click here.

Hope you like my Design Team Inspiration Card using Lulu with Easter Basket by Paper Nest Dolls!

Thank you for stopping by!

Hugs,
Laurie

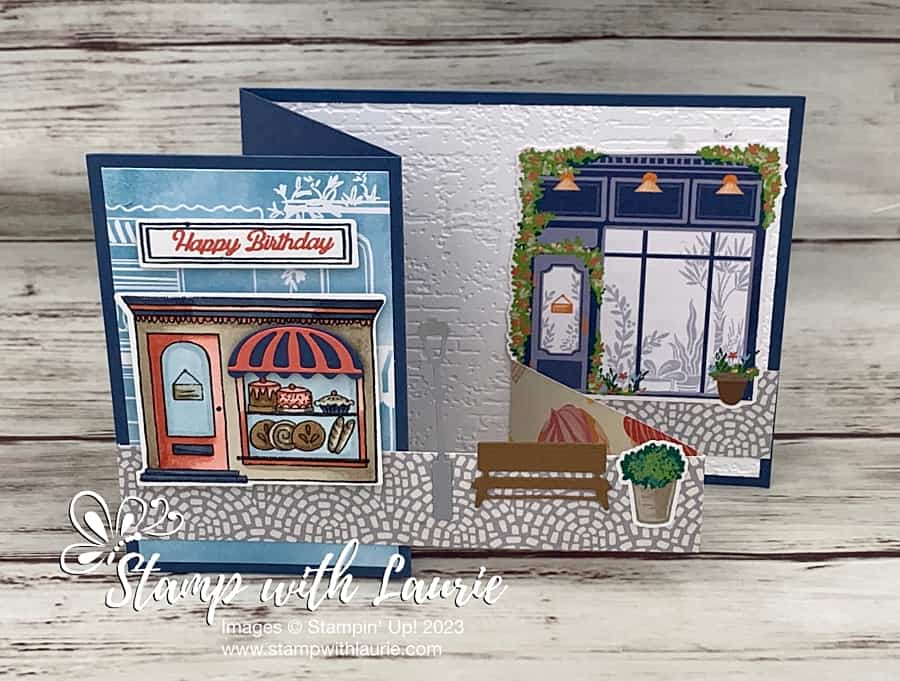
Birthday Shopping Card

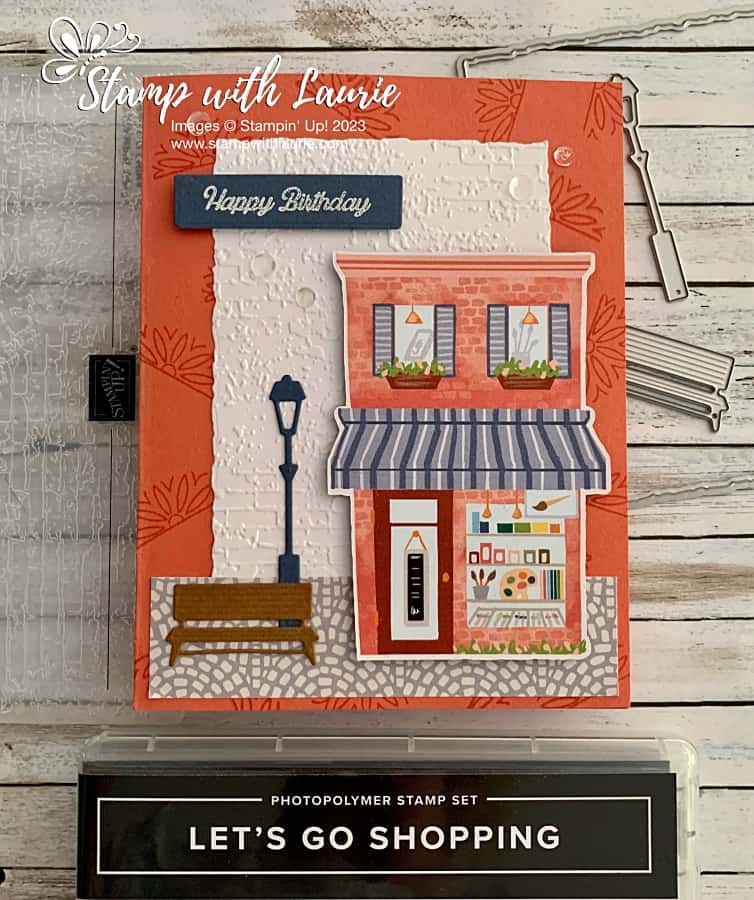
Birthday Shopping Card - a birthday card with a street scene of an art supply store.
Birthday Shopping Card

Hello Crafty Friends! Laurie here again! I am sharing my Birthday Shopping Card using the Les Shoppes Suite Collection by Stampin’ Up! It’s a friend’s birthday this week and she is very artistic. So, I thought a birthday card shopping for art supplies would be perfect for her!

The Details of My Birthday Shopping Card

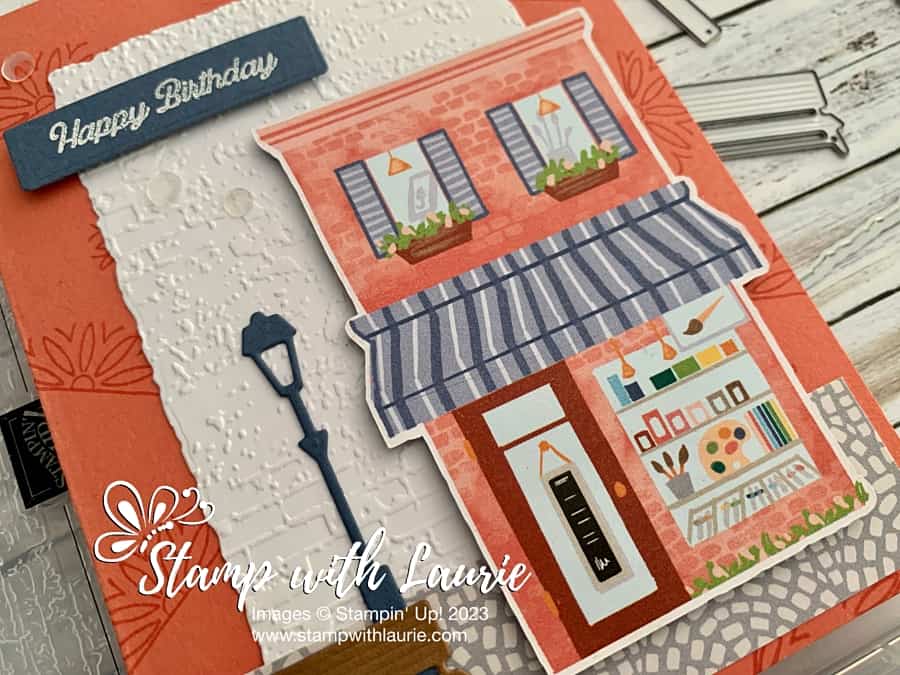
For my card, I decided to create a shopping scene. So, I fussy cut with my paper snips the building with the art supplies, but you could use any of the buildings in the Designer Series Paper. Next, I stamped the awning stamp randomly on the Calypso Coral card base in Calypso Coral for a slight tone-on-tone. The Basic White piece was die cut by the 3rd largest Deckled Rectangles Dies and embossed with the Exposed Brick 3D Embossing Folder to add some interest.

Since I was creating a street scene, I thought the die cut lamppost and bench would be fun accents beside the shop. A strip of the cobbled DSP created the perfect grounding for my scene.

The sentiment was stamped in Versamark and heat embossed in white on Misty Moonlight card stock and then die cut out. 

The finishing touch was a scattering of Loose Silver Sequins that are included in the Collection.

Close Up of the street scene on the birthday card

Close Up of Card

Supplies:

Stamps/Bundles/Dies: Les Shoppes Suite Collection (161337), Deckled Rectangles Dies (159173)

Inks: VersaMark Ink (102283), Calypso Coral (147101)

Paper: Calypso Coral (122925), Basic White (159276), Misty Moonlight (153118), Pecan Pie (161717), Les Shoppes 12″ x 12″ Designer Series Paper (in Collection)

Accessories: Exposed Brick 3D Embossing Folder (161600), Basics Embossing Powder (155554), Heat Tool (129053), Loose Silver Sequins (in Collection), Paper Snips (103579), Bone Folder (102300), Stampin’ Dimensionals (104430), Stampin’ Seal (152813), Mini Glue Dots (103683)

Measurements: 

  • Calypso Coral”
    • 8 ½” x 5 ½” scored at 4 ¼”
  • Basic White:
    • 3 ¼” x 4 ½”
  • Pecan Pie:
    • Scrap for Bench
  • Misty Moonlight (2 pieces):
    • Scrap for Sentiment
    • Scrap for Light Post
  • Les Shoppes 12″ x 12″ Designer Series Paper (2 pieces):
    • 4” x 1”
    • The Art Shop or another building

More Information on My Birthday Shopping Card

I have made another card using this Suite. It was a fun z-fold card. If you wish to learn more about it, please click here or on the photo.

Open card displaying the boulevard
Open Z Fold Displayed

For more of my Stampin’ Up! cards, please click here.

You will find the items listed above in my online store.
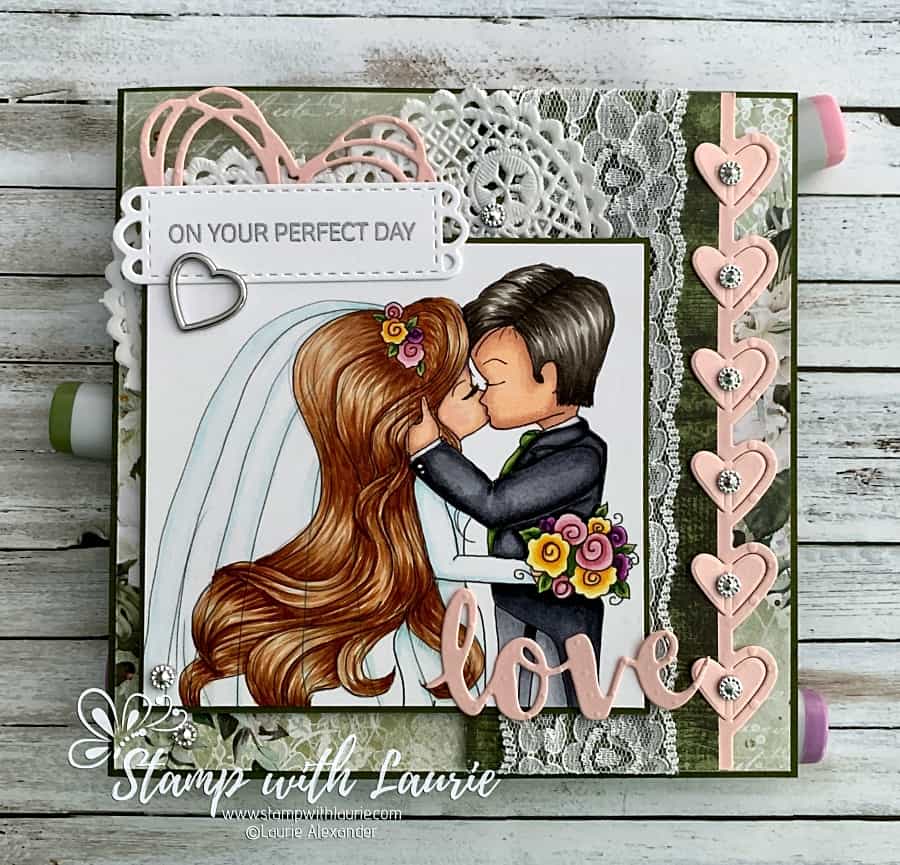
The Perfect Day Card 

The Perfect Day Card - A wedding card with bride and groom kissing
The Perfect Day Card

Hello Crafty Friends! It’s Laurie here! I am sharing The Perfect Day Card using the digital stamp After the Vows by Tiddly Inks Stamps. This past weekend we attended a wedding, and this was the card I made for the happy couple to celebrate their love!

The Details of My Card

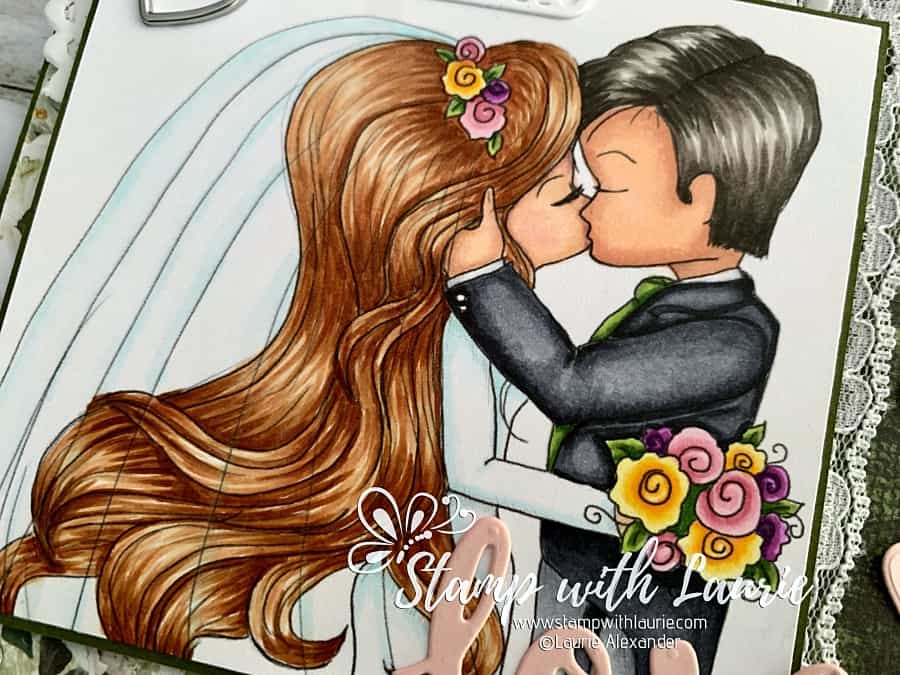
The digital stamp comes with the couple in full length, but I thought a close-up of the couple kissing would be a lovely focal point. So, I coloured the couple with my Copic markers in tones befitting my couple. The bride has gorgeous flowing locks of hair, and this stamp was perfect to represent her! I added a light coating of white pencil over the veil to differentiate where the veil was on her hair. Unfortunately, it is hard to see in the photo. Finally, I added Clear Wink of Stella to the bride’s veil to give it shimmer. For the groom, I coloured the skin and hair to look like the groom’s Pilipino heritage. This was the first time colouring this skin tone and I was quite happy with how it turned out!

For my card, I decided to create lots of pretty layers with the lace ribbon, heart doily and die cut hearts. The beautiful Craft O’Clock paper was the perfect backdrop with lace, flowing script, worn wood planks and flowers on it!

The sentiment was stamped in VersaMark ink and heat embossed with silver embossing powder to match the sparkly rhinestones and then die cut out. The die cut “love” sentiment was the epitome of what brought these two together to be married.

Finally, I couldn’t resist adding one more heart in the form of the sliver heart charm under the sentiment.

————————–

Copic Markers

Guy
Skin: E04/E11/E21/E00/E000
Hair: W9/W7/W4/W3
Suit: C9/C7/C6/C4
Shirt: C3/C1/0
Tie: YG67/YG63/YG03

Close up of Bride and Groom

Girl
Skin: E04/E11/E21/E00/E000/R20
Hair: E39/E37/E35/E33/E31
Dress/Veil: B00/B000/0/Wink of Stella on Veil/Prismacolor White Pencil Crayon
Pink Flowers: R85/R83/R81
Yellow Flowers: E15/Y17/Y15/Y11
Purple Flowers: V09/V06/V04
Leaves: YG67/YG63/YG03

————————–

Card Recipe for The Perfect Day Card

After the Vows, Tiddly Inks Stamps 
Paper Basics – Stamper’s Select White Cardstock, Papertrey Ink
Greenery Invitation 6” x 6” Paper Pad, Craft O’Clock
Your Perfect Day Stamp Set, Stampin’ Up!
Sunshine Wishes Thinlits Dies, Stampin’ Up!
Love Notes Framelits Dies, Stampin’ Up!
Meadow Dies, Stampin’ Up!
VersaMark Ink, Tsukineko
Silver Embossing Powder, Stampin’ Up!
Heat Tool, Stampin’ Up!
1 ½” Lace Ribbon, Celebrate It, Michaels Arts & Crafts
White Heart Lace Doily, Celebrate It, Michaels Arts & Crafts
Heart Charms, Stampin’ Up!
Rhinestone Stickers, Craft Dollarama
Clear Wink of Stella, Stampin’ Up!
Prismacolor White Pencil Crayon
Powder Pink and Mossy Meadow Cardstock

Finished card size: 5 ½” x 5 ½”

————————–

To view my other Copic Marker cards, please click here.

Hope you like my card using the digital stamp After the Vows by Tiddly Inks Stamps.

Thank you for stopping by!

Hugs,
Laurie

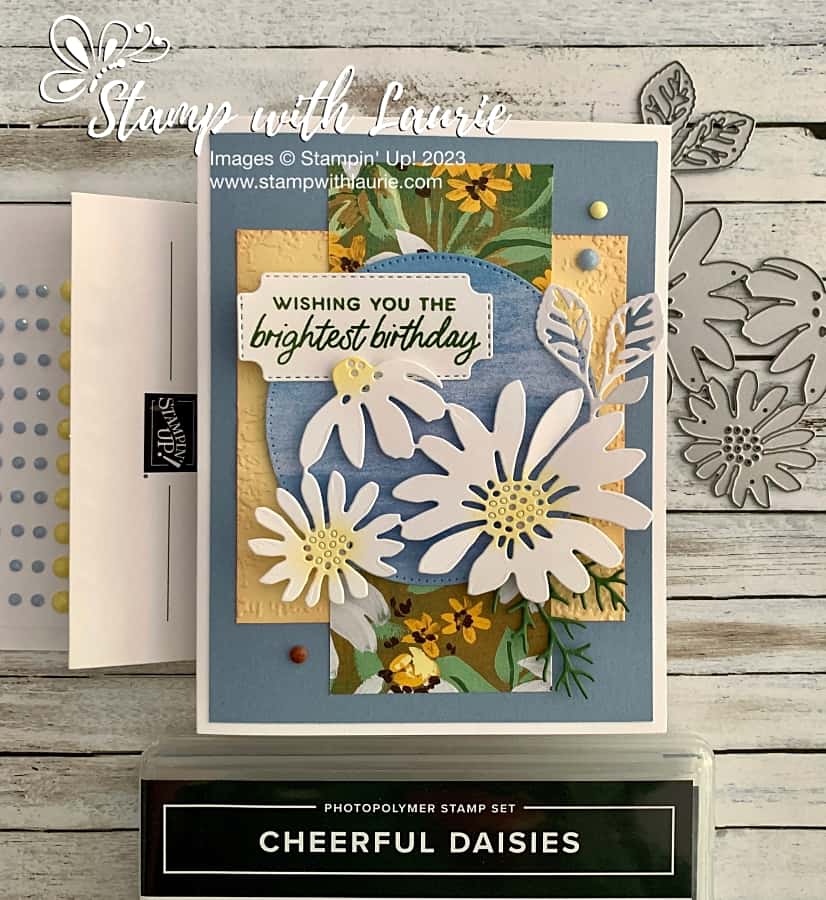
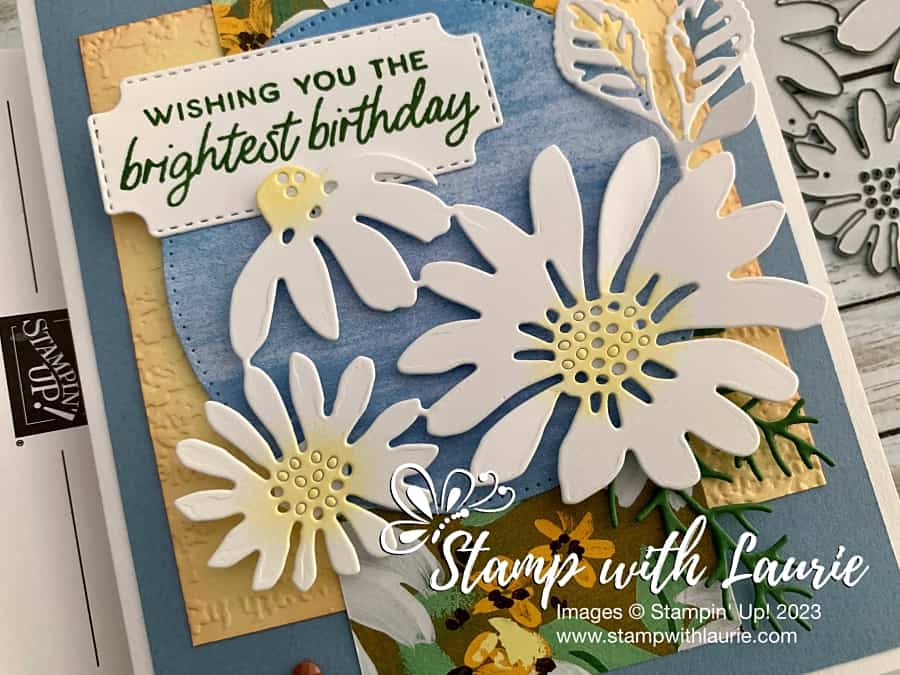
Field of Daisies Birthday Card 

Field of Daisies Birthday Card - a birthday card that has daisies on it
Field of Daisies Birthday Card

Hello Crafty Friends! Laurie here again! I am sharing my Field of Daisies Birthday Card using the Fresh As a Daisy Suite by Stampin’ Up! This Suite includes the Cheerful Daisies Stamp Set, the Cheerful Daisies Dies, Fresh As a Daisy 12” x 12” Designer Series Paper and Adhesive-Backed Solid Gems.

The Details of My Card

My card was for a swap, and I decided to use the Fresh As a Daisy Suite for it. I love how the big daisy die is one piece making it easy to cut out a garden of happy daisies in seconds!

Once I die cut the daisies from Basic White cardstock, I used my sponge daubers to dab some Lemon Lolly in their centres to give them depth. I also dabbed some Pecan Pie to the edges of the Lemon Lolly piece on which I used the Timeworn Type Embossing Folder.

Next, to add to my focal point, I added a stitched circle of the DSP behind my daisies, almost like a blue sky in a field of dasies. From this, I added the sentiment stamped in Garden Green and some Garden Green die cut greenery.

To tie in my colour scheme, I added a piece of DSP between my focal point and the Lemon Lolly piece.

The only embellishments that I used were the Adhesive-Backed Solid Gems that came in the Suite.

Supplies:

Stamps/Bundles/Dies: Fresh As a Daisy Suite (161301), Stylish Shaped Dies (159183)

Inks: Garden Green (147089), Lemon Lolly (161666), Pecan Pie (161665)

Paper: Thick Basic White (159229), Boho Blue (161724), Lemon Lolly (161720), Basic White (159276), Garden Green (102584), Fresh As a Daisy 12” x 12” Designer Series Paper (in Suite)

Accessories: Timeworn Type 3D Embossing Folder (156505), Sponge Daubers (133773), Adhesive-Backed Solid Gems (in Suite), Bone Folder (102300), Stampin’ Dimensionals (104430), Stampin’ Seal (152813), Mini Glue Dots (103683)

Close up of daisies on card
Close up of Focal Point

Measurements: 

  • Thick Basic White:
    • 8 ½” x 5 ½” scored at 4 ¼”
  • Boho Blue:
    • 4” x 5 ¼”
  • Basic White: (2 pieces)
    • Sentiment: 2 ¼” x 1”
    • Daisies: 3 ¾” x 3”
  • Lemon Lolly:
    • 3 ½” x 3 ½”
  • Garden Green:
    • Scrap
  • Fresh As a Daisy 12” x 12” Designer Series Paper (2 pieces):
    • 2” x 4 ¾”
    • 3” x 3”

More Information on My Field of Daisies Birthday Card

For more of my Stampin’ Up! cards, please click here.

You will find the items listed above in my online store.

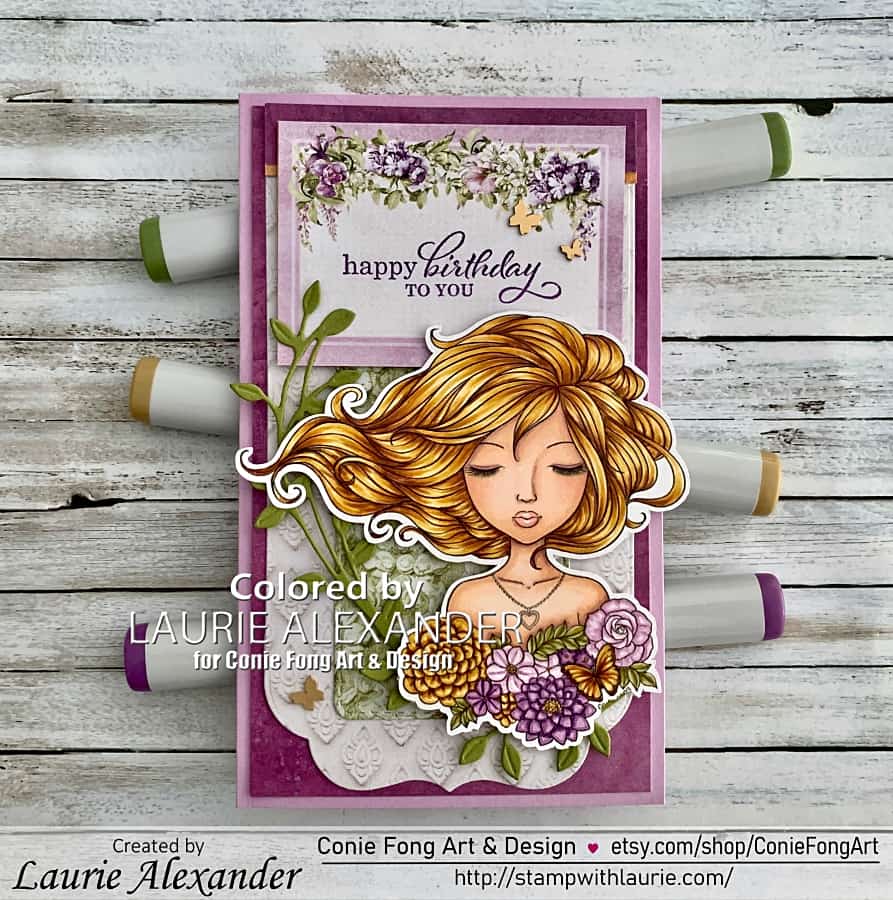
My Serene Birthday Card

My Serene Birthday Card - A birthday card with a girl holding flowers
My Serene Birthday Card

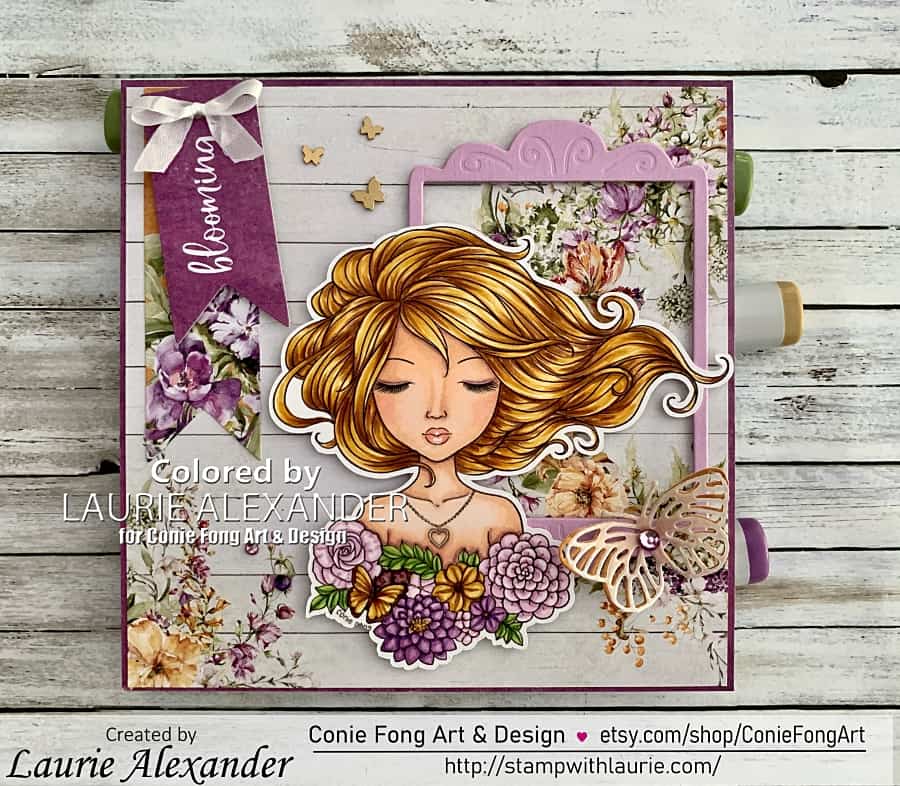
Hello Crafty Friends! It’s Laurie here! I am sharing my second card using Serenity by Conie Fong Art & Design called My Serene Birthday Card. The Design Team members are celebrating Girls/Ladies this weekend with all things feminine! So, I picked this beautiful image to celebrate, and I coloured her twice! I will post my other card at the end.

The Details of My Card

For My Serene Birthday Card, I decided to create a mini slimline card to show that you can create different sized cards with the same image. I made my card size a little larger than a normal mini slimline to fit all my elements, but it can still fit in a No. 10 envelope.

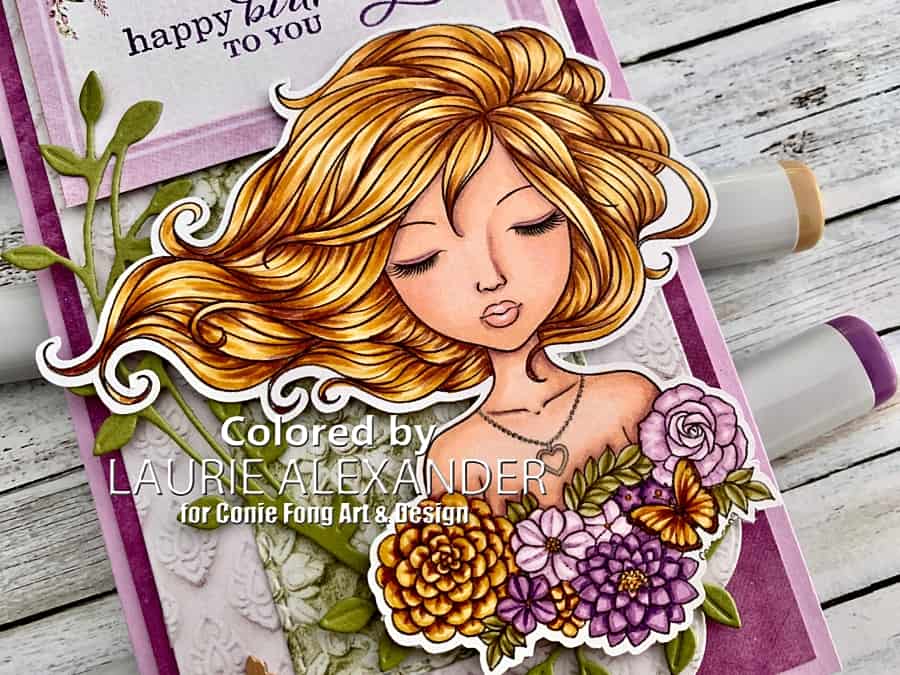
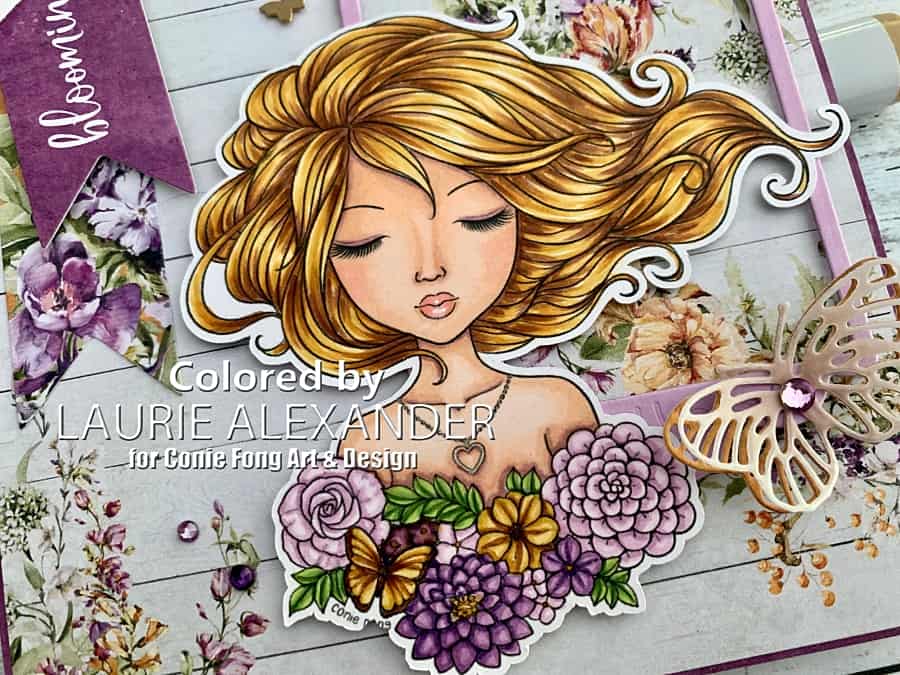
I used the Secret Garden paper again for my colour choices in her colouring with a slight variation on her flowers from my first card. Clear Star Gelly Roll Pen was used for her necklace and Wink of Stella for the butterfly’s wings to add some shimmer.

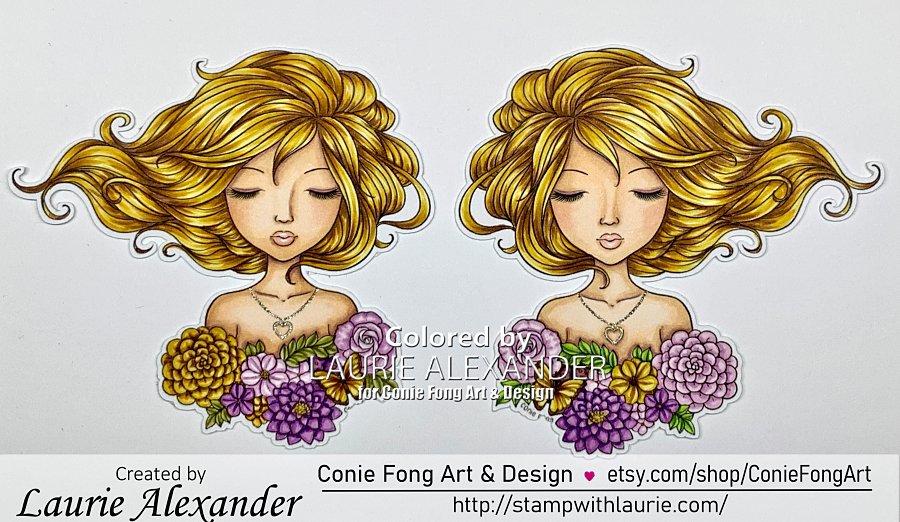
Two different coloured versions of the lady
Serenity

Next, I went with the Photo Play dies for my background. One of the dies is shaped like a tag, but I wanted to use it for the green piece behind her. So, I snipped off the tag part and hid that part beneath the sentiment piece. The two top horizontal banners were remnants from my first card, and I didn’t want them to go to waste. Plus, they gave a finished edge to the top while tying in the colour scheme.

For the next step, I stamped the sentiment in Gorgeous Grape onto a tag cut out from the P13 paper pad.

I thought the leafy vine going from my girl to the sentiment tied everything together so nicely while adding interest.

Finally, I added a scattering of brass butterflies for embellishments.

————————–

Copic Markers:

Skin: E000/E00/E21/E11/E04/R20
Hair: E25/YR24/Y26/Y21
Eyeshadow: V12
Lips: R21/R20/White Gelly Roll Pen
Greens: YG97/YG95/YG93
Purples: V17/V15/V12
Light Purples: V12/V01/V0000
Yellows/Butterfly: E25/YR24/Y26/Y21/Clear Wink of Stella

Close Up of lady holding flowers
Close Up of Serenity

————————–

Card Recipe for My Serene Birthday Card:

Serenity, Conie Fong Art & Design
Paper Basics – Stamper’s Select White Cardstock, Papertrey Ink
Secret Garden 6” x 6” Paper Pad, P13
Bracket/Speech Bubble Dies, Photo Play
Dainty Delight Dies, Stampin’ Up!
Gorgeous Grape Ink Pad, Stampin’ Up!
Best Year Stamp Set, Stampin’ Up!
Brushed Brass Butterflies, Stampin’ Up!
White Gelly Roll Pen, Sakura
Clear Star Gelly Roll Pen, Sakura
Clear Wink of Stella, Stampin’ Up!

Fresh Freesia Card Stock, Stampin’ Up!

Finished card size: 3 ¾” x 6 ¼”

————————–

To view my other Conie Fong Art & Design projects, please click here.

Here is my other card using this stamp. Please click here or on the photo for more information on my card.

A card with a Lady holding flowers
My Serenity Blooms Card

Hope you like my Design Team Inspiration Card using Serenity for Conie Fong Art & Design!

Thank you for stopping by!

Hugs,
Laurie

My Serenity Blooms Card 

My Serenity Blooms Card - A card with a Lady holding flowers
My Serenity Blooms Card

Hello Crafty Friends! It’s Laurie here! I am sharing My Serenity Blooms Card as my Design Team Inspiration Card for Conie Fong Art & Design using Serenity. The Design Team are celebrating Girls/Ladies this weekend with all things feminine! So, I picked this beautiful image to celebrate!

The Details of My Card

When you buy this digital stamp, you will receive two stamps with the girl’s hair flowing left or right. I couldn’t resist colouring them both with the same colour scheme, but with a variation on their flowers. So, I made one card for today and the other card will follow later.

Two different coloured versions of the lady
Two Versions of Serenity

For My Serenity Blooms Card, I decided to use the Secret Garden paper and decorative tags by P13 for my colour choices. I just love the gorgeous colours of them! I picked the paper with a wreath off to the side for my background and matted it with a matching purple paper from the P13 paper pad.

Next, I decided to add a die cut frame behind her to create some visual interest, but I thought it would be fun to have her off-centred from it. As a result, the wreath was flowing through my frame and they created a nice backdrop for my colouring.

The Decorative Tags are a perfect match to the paper, and I decided to use two of them to tie in my colour scheme. I added a bow to the top to cover the hole and finish the tags off.

For the next step, the Clear Star Gelly Roll Pen was used for her necklace and Wink of Stella for the butterfly’s wings to add some shimmer.

Finally, for embellishments, I added a scattering of brass butterflies and rhinestones coloured with my Copic markers to match my colour scheme.

————————–

Copic Markers:

Skin: E000/E00/E21/E11/E04/R20
Hair: E25/YR24/Y26/Y21
Eyeshadow: V12
Lips: R21/R20/White Gelly Roll Pen
Greens: YG67/YG63/YG03
Purples: V17/V15/V12
Light Purples: V12/V01/V0000
Butterfly: E25/YR24/Y26/Y21/Clear Wink of Stella

Close Up of Lady
Close Up of Serenity

————————–

Card Recipe for My Serenity Blooms Card:

Serenity, Conie Fong Art & Design
Paper Basics – Stamper’s Select White Cardstock, Papertrey Ink
Secret Garden 6” x 6” Paper Pad, P13
Secret Garden Decorative Tags, P13
Vellum Cardstock, Stampin’ Up!
Fabolous Frames Dies, Stampin’ Up!
Brilliant Wings Dies, Stampin’ Up!
White Crinkle Seam Binding Ribbon, Stampin’ Up!
Brushed Brass Butterflies, Stampin’ Up!
Basic Rhinestone Jewels, Stampin’ Up
White Gelly Roll Pen, Sakura
Clear Star Gelly Roll Pen, Sakura
Clear Wink of Stella, Stampin’ Up!

Fresh Freesia Card Stock, Stampin’ Up!

Finished card size: 5 ½” x 5 ½”

————————–

To view my other Conie Fong Art & Design projects, please click here.

Hope you like my Design Team Inspiration Card using Serenity for Conie Fong Art & Design!

Thank you for stopping by!

Hugs,
Laurie

My Poinsettia Christmas Card 

My Poinsettia Christmas Card - A Christmas Card with a lady with Christmas flowers in her hair
My Poinsettia Christmas Card

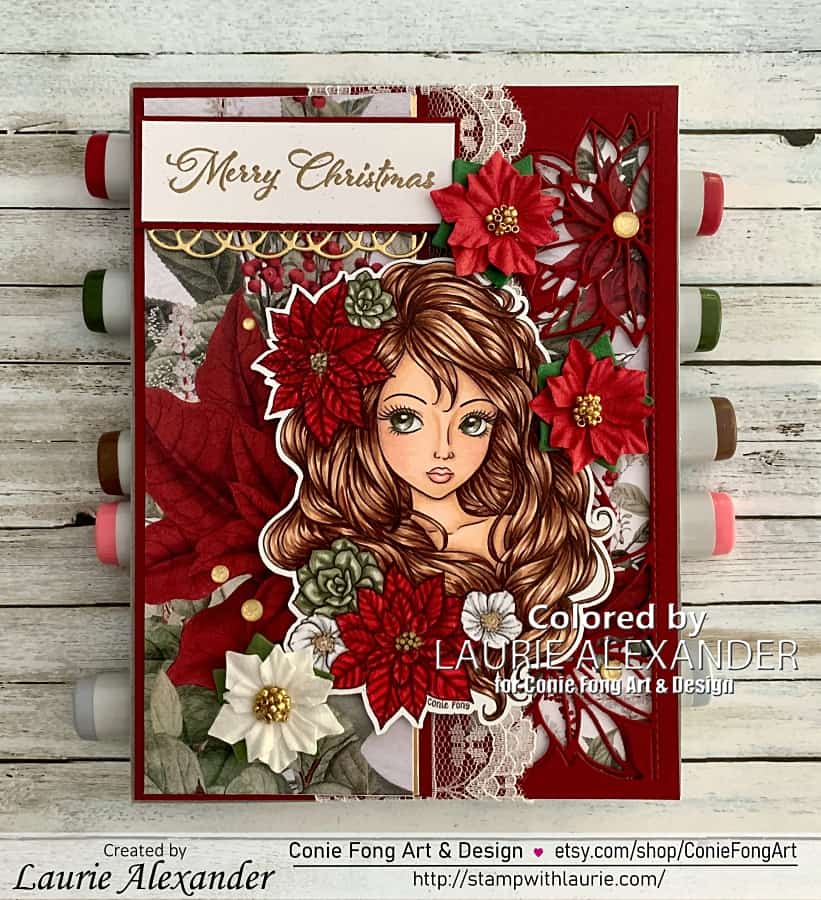
Hello Crafty Friends! It’s Laurie here! I’m squeezing in one final Christmas in July card for you today! I am sharing My Poinsettia Christmas Card as my Design Team Inspiration Card for Conie Fong Art & Design using the beautiful Christmas Leilani

The Details of My Card

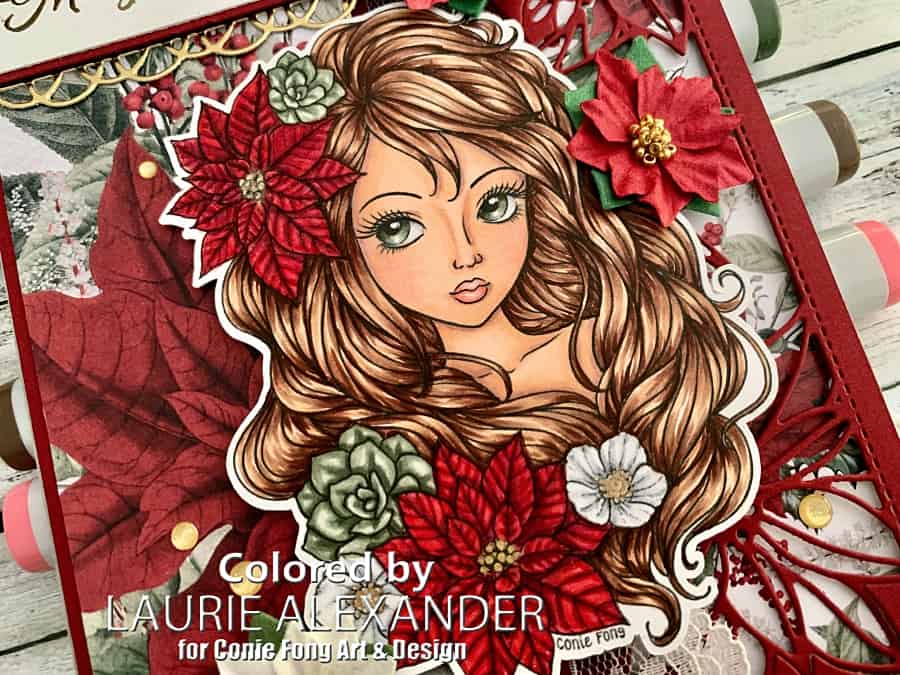
I loved colouring with my Copic markers Leilani, especially all that gorgeous hair! I matched my colouring of the flowers to the beautiful Poinsettia Garden Paper Collection by Paper Roses that I just purchased on a road trip with friends! So, I went with a deep red for the poinsettias, a blue/green for the succulents and white for the other flowers. Tip: for contrast with the reds, add C5 to the deepest shadows to make the individual petals pop.

Once she was coloured, I knew that I wanted to use the pretty Poinsettia Border Die also by Paper Roses. This was purchased on the same road trip as the paper. I loved how the die is so delicate while allowing the Paper Roses smaller poinsettia paper to peek through.

Next, I added a border of pretty lace to mark my transition between the die and the other side of the card. I used a piece of the Paper Roses paper with larger poinsettias on it as a backdrop for Leilani. Since this is a Christmas card, I thought a gold edge to it would tie in nicely to the other gold accents.

The sentiment was heat embossed in gold and matted with Cherry Cobbler. To continue the gold theme, I added a gold die cut filigree below it.

Then the paper poinsettias were added around her. The gold centres mirror the gold Gelly Roll Pen that I used on the poinsettias in my colouring.

Finally, the finishing touch was a couple of gold glitters dots placed around my focal point of Leilani.

————————–

Copic Markers:

Skin: E000/E00/E21/E11/E04/R20
Hair: E29/E27/E25/E23/E21
Eyes: BG99/BG96/BG93/BG90/C3/C1/0
Lips: R32/R20
Poinsettias: R39/R37/R35/C5/ Gold Gelly Roll Pen
White Flowers: C3/C1/0/Gold Gelly Roll Pen
Green Succulents: BG99/BG96/BG93/BG90

Close Up of Lady
Close Up of Leilani

————————–

Card Recipe for My Poinsettia Christmas Card:

Christmas Leilani, Conie Fong Art & Design
Paper Basics – Stamper’s Select White Cardstock, Papertrey Ink
Poinsettia Garden 12” x 12” Paper Collection, Paper Roses
Poinsettia Garden – Watercolours 12” x 12” Paper Collection, Paper Roses 
Gold Foil Sheet, Stampin’ Up!
Poinsettia Border Die, Paper Roses
Cherish the Season Stamp Set, Stampin’ Up!
Painted Labels Dies, Stampin’ Up!
VersaMark Ink, Stampin’ Up!
Gold Embossing Powder, Stampin’ Up!
Heat Tool, Stampin’ Up!
2” Lace Ribbon, Celebrate It, Michael’s Arts & Crafts
Poinsettia Paper Flowers, Christmas Paper Crafts, Hobby Lobby 
Gold Glitter Enamel Dots, Stampin’ Up!
Clear Wink of Stella, Stampin’ Up!
Gold Gelly Roll Pen, Sakura
Glossy Accents, Ranger
Cherry Cobbler Card Stock, Stampin’ Up!

Finished card size: 6 ½” x 5”

————————–

To view my other Conie Fong Art & Design projects, please click here.

Hope you like my Design Team Inspiration Card using Christmas Leilani for Conie Fong Art & Design!

Thank you for stopping by!

Hugs,
Laurie

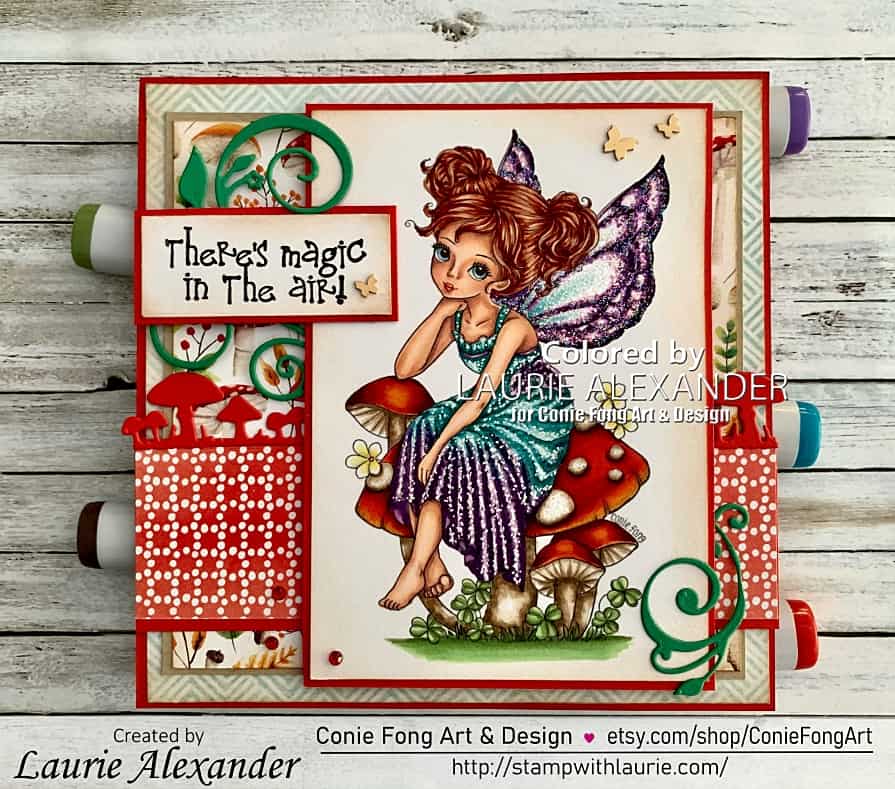
Magic in the Air Card 

A Card with a Fairy Sitting on a mushroom
Magic in the Air Card

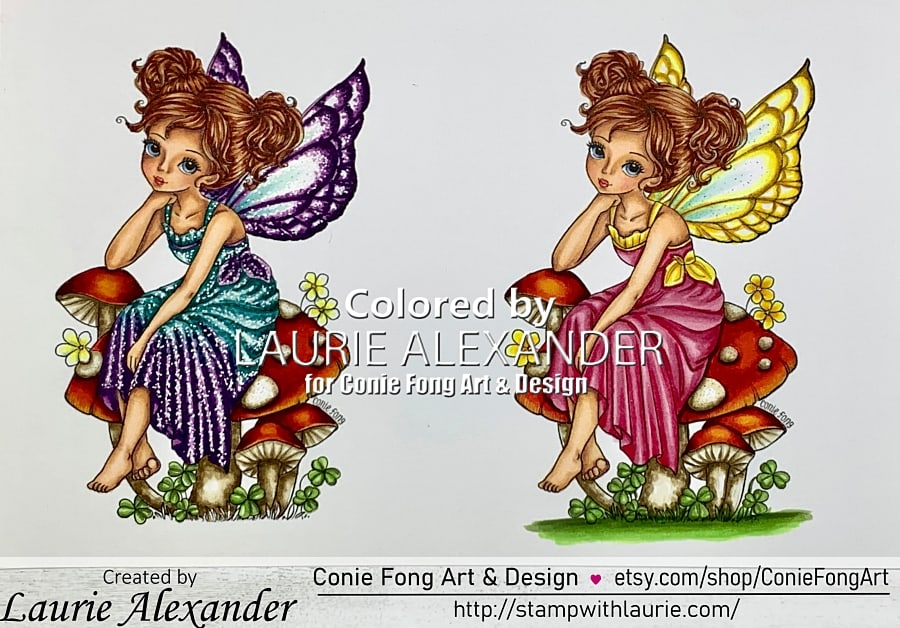
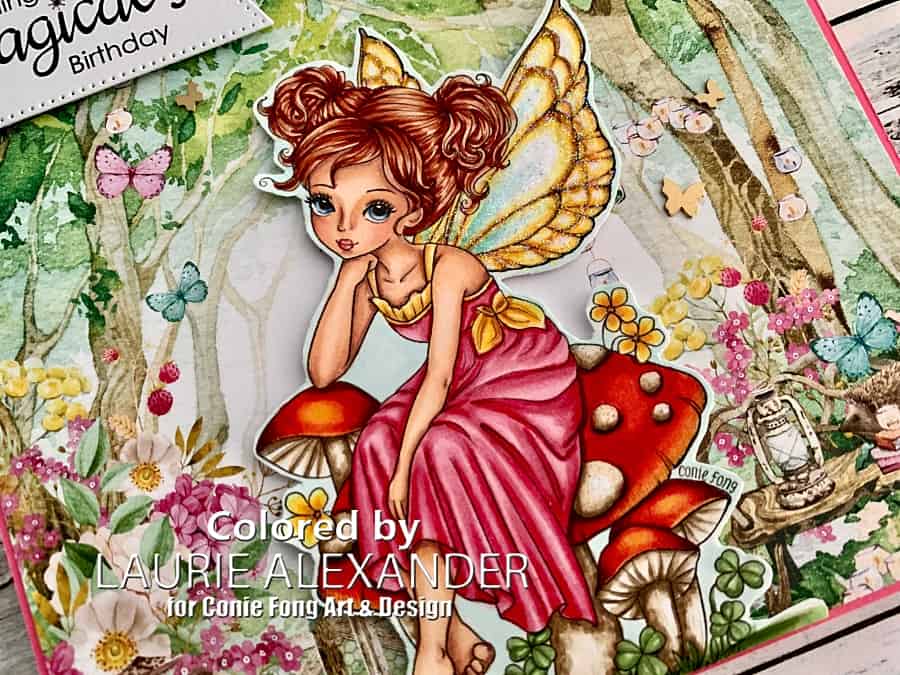
Hello Crafty Friends! It’s Laurie here! I am sharing my Magic in the Air Card as my Design Team Inspiration Card for Conie Fong Art & Design using Sitting Pretty on Mushroom. I coloured this beautiful image twice this month using the Kit and Clowder Whimsical Wonders Class as inspiration. This is my second card, but I will include a link to the other card at the end of this post.

The Details of My Card

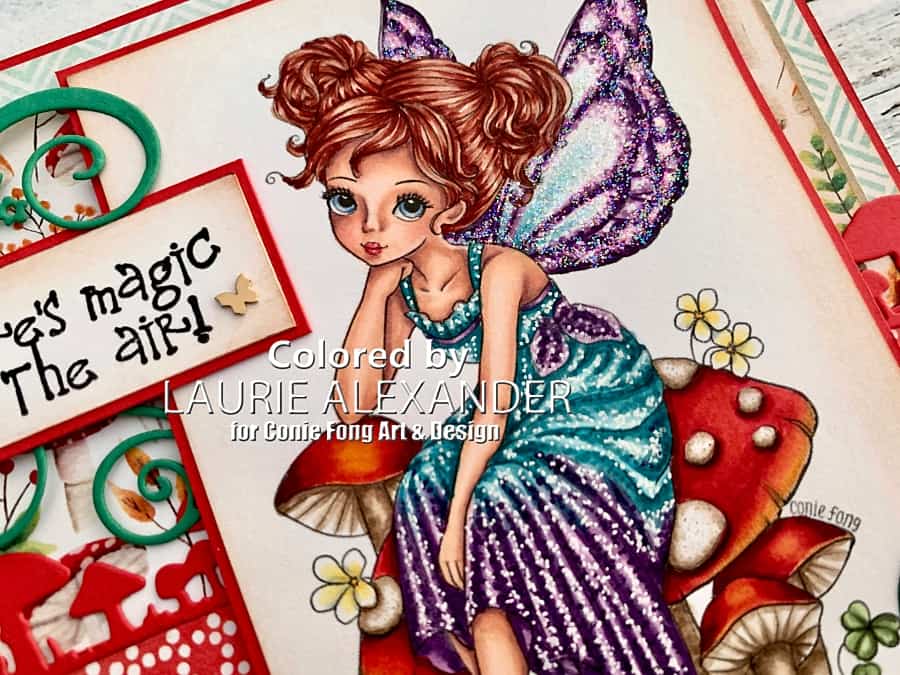
For my card, I used the alternative colour choice from the Kit and Clowder class and gave her a sparkly dress using a White Gelly Roll Pen and lots of dots!

Two Fairies Coloured
My Colouring of Sitting Pretty on Mushroom

Once she was coloured, I pulled out some DSP with mushrooms on it to match her mushrooms. A mushroom border die in Poppy Parade also added to this theme.

Some greenery flourishes were added behind the sentiment and in the opposite corner for a splash of colour. I love how the swirls come from below to overlap the image adding depth and interest.

The sentiment was from Rosabelle by Kraftin’ Kimmie Stamps. Perfect sentiment for a fairy, don’t you think?

I brushes some Vintage Photo ink to the edges of the image, sentiment and DSP to give it an earthy feel to match the distressing in places on the Pool Party piece of DSP.

I added for embellishments brass butterflies beside the sentiment and fairy with red rhinestones in the other corner.

For shimmer, I added stickles to her wings! Every fairy should have sparkly wings!

Close Up of Fairy
Close Up of Fairy

————————–

Card Recipe for Magic in the Air Card:

Sitting Pretty on Mushroom, Conie Fong Art & Design
Paper Basics – Stamper’s Select White Cardstock, Papertrey Ink
Painted Seasons Designer Series Paper, Stampin’ Up!
Rosabelle, Kraftin’ Kimmie Stamps
VersaFine Ink Pad Onyx Black, Tsukineko
Mushroom Border Die, C.C. Designs
Elegant Flourish Small Die, Paper Roses
Brushes Brass Butterflies, Stampin’ Up!
Red Rhinestone Basic Jewels, Stampin’ Up!
Vintage Photo Distress Ink, Ranger
Blending Brushes, Stampin’ Up!
Star Dust Stickles, Ranger

Poppy Parade, Crumb Cake, Call Me Clover Card Stock, Stampin’ Up!

Finished card size: 5 ½” x 5 ½”

————————–

This is the other card that I created using the Sitting Pretty on Mushroom. To view it, please click here or on the photo.

A birthday card with a fairy sitting on mushrooms
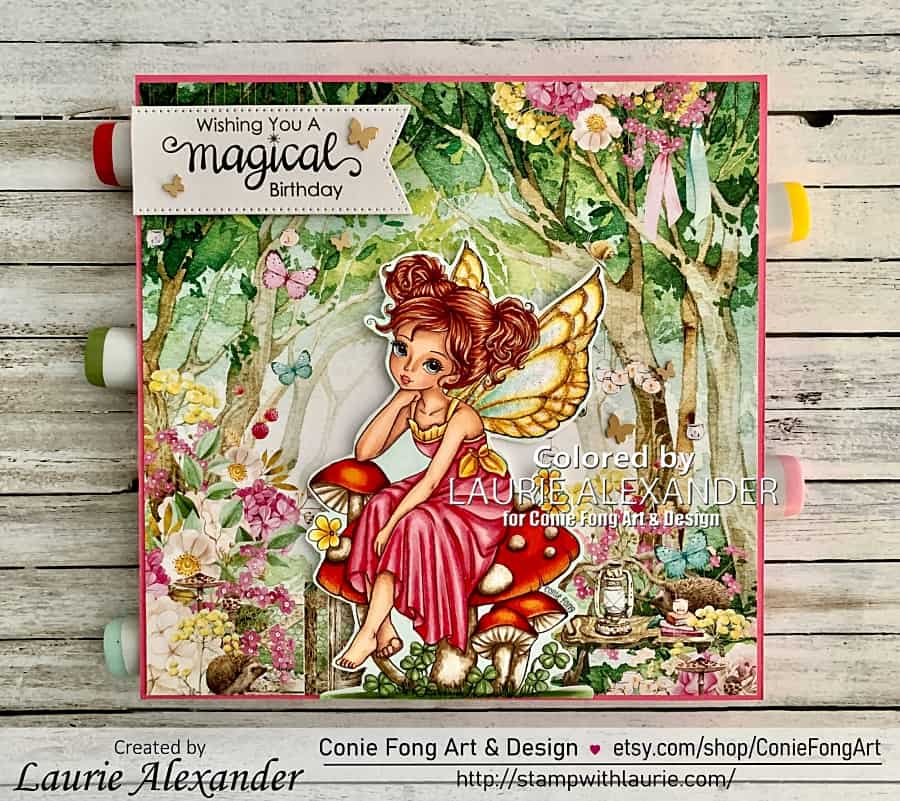
My Fairy Wishes Card

To view my other Conie Fong Art & Design projects, please click here.

Hope you like my Design Team Inspiration Card using Sitting Pretty on Mushroom for Conie Fong Art & Design!

Thank you for stopping by!

Hugs,
Laurie

My Fairy Wishes Card

A birthday card with a fairy sitting on mushrooms
My Fairy Wishes Card

Hello Crafty Friends! It’s Laurie here! I am sharing My Fairy Wishes Card as my Design Team Inspiration Card for Conie Fong Art & Design using Sitting Pretty on Mushroom

The Details of My Card

The Conie Fong Art & Design Team are celebrating fairies today. I decided to create a clean and simple card that highlighted my colouring with my Copic markers. I re-watched my Kit & Clowder Whimsical Wonders Class that used this stamp to inspire my colouring with slight variations in colours.

For my card, I used one sheet of the Mintay paper with a beautiful background to keep my card CAS. It even looked like a fairy glen with its butterflies, trees, and hedgehogs! Perfect place for a fairy to live!

The sentiment was from Dandelion Wishes by Conie Fong Art & Design as well. I thought it suited the theme of my card!

The only embellishments that I added were brass butterflies around the sentiment and beside the fairy.

For shimmer, I added stickles to her wings! Every fairy should have sparkly wings! I also added Clear Wink of Stella to the yellow flowers.

Close Up of Fairy Sitting on Mushroom

————————–

Card Recipe for My Fairy Wishes Card:

Sitting Pretty on Mushroom, Conie Fong Art & Design
Dandelion Wishes, Conie Fong Art & Design
Paper Basics – Stamper’s Select White Cardstock, Papertrey Ink
Better Times 6” x 6” Paper Pad, Mintay Papers
Brushed Brass Butterflies, Stampin’ Up!
Stylish Shapes Dies, Stampin’ Up!
Clear Wink of Stella, Stampin’ Up!
Star Dust Stickles, Ranger
.05 Multi Liner, Copic
Polished Pink Card Stock, Stampin’ Up!

Finished card size: 6” x 6”

————————–

Blog Challenges

I am entering this card into the following challenges:
Worldwide Crafters and Colorists Challenge #5 – First Prize Winner
Passion for Markers – Week 692–make it square
Crafting Happiness Challenges: June: 143-Anything Goes
613 Avenue Create: June 2023-Anything Goes – Top Rocker
A Perfect Time To Craft Open Challenge for June, #6-2023
Sweet Stampin’ – Things With Wings
Paper Dragonfly Creative Challenges- Challenge #18 Anything Goes
Morgan’s ArtWorld Challenge #6 Anything Goes – Runner Up

————————–

To view my other Conie Fong Art & Design projects, please click here.

Hope you like my Design Team Inspiration Card using Sitting Pretty on Mushroom for Conie Fong Art & Design!

Thank you for stopping by!

Hugs,
Laurie

Happy Mother’s Day Card

A Mother's Day Card with a girl holding a peony
Happy Mother’s Day Card

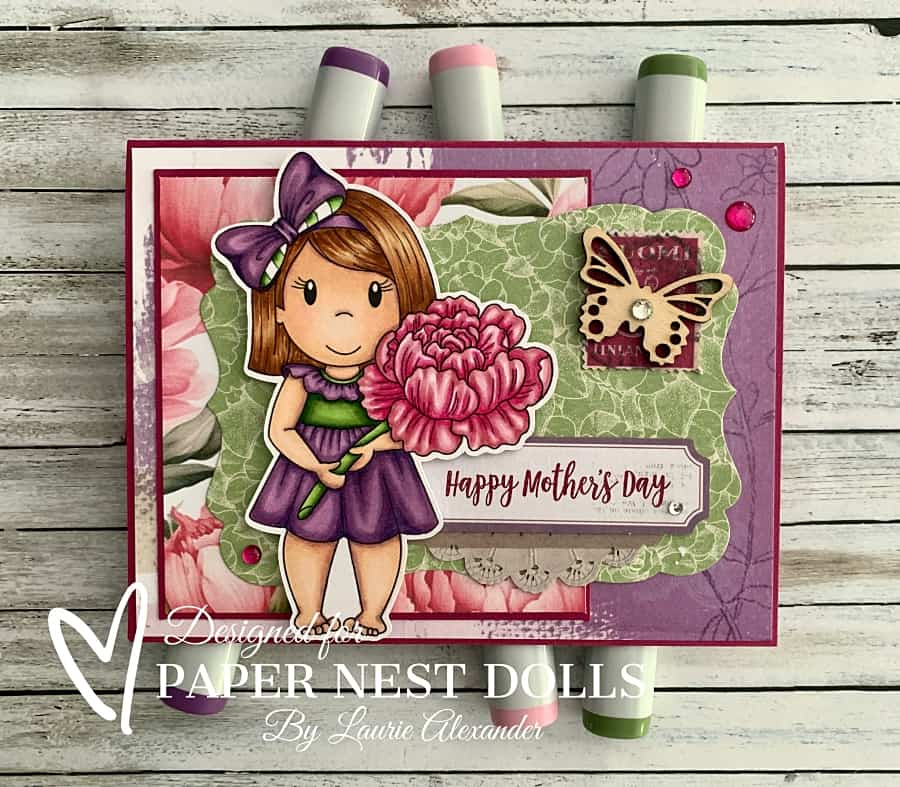
Hello Crafty Friends! It’s Laurie here! I am sharing my Happy Mother’s Day Card as my Design Team Inspiration Card for Paper Nest Dolls using Lulu with Peony. I decided to make a Mother’s Day card since tomorrow is Mother’s Day, but Lulu would be great for so many other cards like birthday, thinking of you, and more!

The Details of My Card

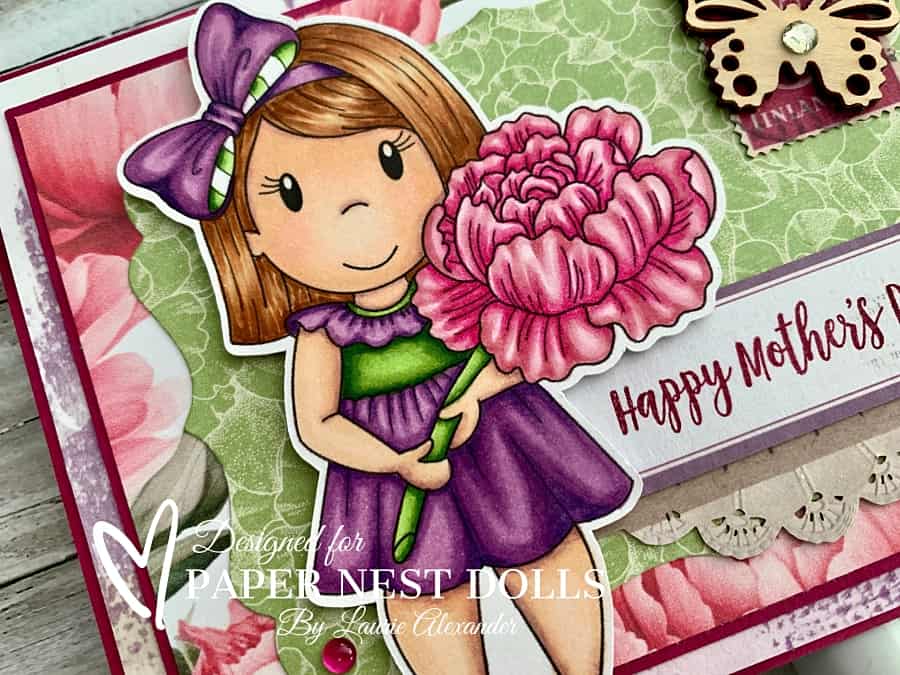
For my card, I decided to colour the peony a hot pink colour using my RV Copic markers. We have peonies in our garden that are this gorgeous colour and I just love them! I went with purples and greens for Lulu since these colours go so well with the peony colour!

When I looked through my papers, I didn’t have any peonies the particular colour. So, I went online and found some digital papers to match my colouring. This is a great resource for papers that you may wish to find. It’s amazing how many digital papers are available!

The other papers were pulled from my stash to match the purple and green of Lulu’s dress. I already had the Graphic 45 die cut green piece leftover from another project. So, I decided it would work for this card to give Lulu a nice backdrop from the peony paper.

The sentiment was stamped in Berry Burst onto a tag that came from the Artistry Collector’s Edition Vol 2. The doily under the sentient and stamp also came from that Collection. I love it when you get a collection that has all these fun elements that match the papers!

I added a wooden butterfly layered on top of the stamp to add interest. The rhinestones and glossy dots added some sparkle to the card. Clear Wink of Stella was added to her bow and to the peony for shimmer.

————————–

Copic Markers

Skin: E04/E11/E21/E00/E000/R20
Hair: E37/E35/E33/E31
Peony: RV09/RV04/R83/R81/RV000 
Purples: V17/V15/V12
Greens: YG67/YG63/YG11

Close Up of girl holding peony
Close Up of Lulu

Card Recipe for My Happy Mother’s Day Card

Lulu with Peony, Paper Nest Dolls
Paper Basics – Stamper’s Select White Cardstock, Papertrey Ink
Mystique Paper, Vintage Artistry Collector’s Edition Vol 2, 49 and Market
Tag, Stamp and Doily, Artistry Collector’s Edition Vol 2, 49 and Market
Botanical Tea 8” x 8” Paper Pad, Graphic 45
Watercolor Peonies Digital Paper, PrintsDigitalDecor
Labels Eight Dies, Nestabilities, Spellbinders
Berry Burst Ink Pad, Stampin’ Up!
Dressed to Impress Stamp Set, Stampin’ Up!
Glossy Dots Assortment, Stampin’ Up!
Butterfly Elements, Stampin’ Up!
Basic Rhinestone Jewels, Stampin’ Up!
Clear Wink of Stella, Stampin’ Up!

Finished card size: 5 ½” x 4 ¼”

Stamp Size: 4”

————————–

To view my other Paper Nest Dolls cards, please click here.

Hope you like my Design Team Inspiration Card using Lulu with Peony by Paper Nest Dolls!

Thank you for stopping by!

Hugs,
Laurie

Seashell Wishes Card

A birthday card with a girl listening to a seashell
Seashell Wishes Card

Hello Crafty Friends! It’s Laurie here! I am sharing my Seashell Wishes Card as my Design Team Inspiration Card for Conie Fong Art & Design using the beautiful new release Seashell Rosealea

The Details of My Card

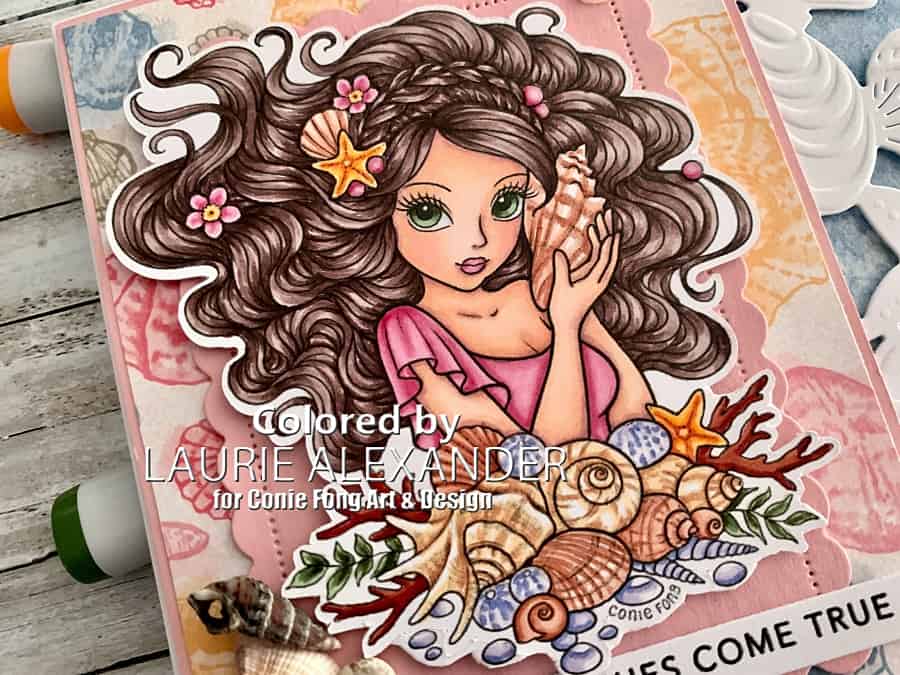
When I saw the new release for Conie Fong, I couldn’t wait to get started colouring her, especially that hair! So gorgeous! So, I used my Copic markers to colour her up. I decided to go with natural tones for the shells since I wanted her to shine. A scattering of the coloured blue shells tied in my blue colour scheme from the DSP. 

Once she was coloured, I placed Rosealea onto a Blushing Bride die cut scallop base to help anchor her and distinguish her from the shells DSP.

The DSP was perfect for my cards with its shells in different colours and blue watery sheets! I thought the white shells die against the blue DSP really popped! To add to the dimension of the die cut shells, I used my Embossing Mat to make the details really stand out.

I thought it would be fun to add real shells to my card! So, I used some from the Dollar Store. Tip: use Glossy Accents to create a strong adhesive hold. I also used Glossy accents on the pink pearls in her hair. 
To add an iridescent look, I used a scattering of Flat Adhesive-Backed Pearls and Clear Wink of Stella on the flowers in her hair.

The finishing touch was a stamped die cut sentiment making this a perfect birthday card!

————————–

Copic Markers:

Skin: E000/E00/E21/E11/E04/R20
Hair: E79/E77/E74/E71
Eyes: G99/G94/G21/C3/C1/0
Lips: R83/R81
Pinks: R85/R83/R81
Starfishes: YR18/YR04/Y38/Y35
Shells 1: E15/E13/E11
Shells 2: E33/Y32
Blue Shells: BV000/BV13
Coral: E19/E18/E15
Flowers: R85/R53/R81/YR24/Y21

Close Up of Girl listening to seashell
Close Up of Seashell Rosealea

————————–

Card Recipe for My Seashell Wishes Card:

Seashell Rosealea, Conie Fong Art & Design
Paper Basics – Stamper’s Select White Cardstock, Papertrey Ink
Sand & Sea Designer Series Paper, Stampin’ Up!
Scalloped Contours Dies, Stampin’ Up!
Joy! Crafts Shell Border Die
Embossing Mat, Stampin’ Up!
Manual Die Cutting Machine 
Simple Strips – Birthday, Taylored Expressions
Simple Strips Die, Taylored Expressions
VersaFine Ink, Onyx Black, Tsukineko
Flat Adhesive-Backed Pearls, Stampin’ Up!
Shells from Dollar Store 
Clear Wink of Stella, Stampin’ Up!
Glossy Accents, Ranger
Blushing Bride and Thick Basic White Card Stock, Stampin’ Up!

Finished card size: 5 ½” x 5 ½”

————————–

Blog Challenges

I am entering this card into the following challenges:
Crafting Happiness Challenges: May: 142 Anything Goes
Your Scrapbook Place: May Challenge – Beccy’s Place – Top 3 Winner
613 Avenue Create: May 2023-Anything Goes – Won Top Rocker and Front Porch

————————–

To view my other Conie Fong Art & Design projects, please click here.
Hope you like my Design Team Inspiration Card using Seashell Rosealea for Conie Fong Art & Design!

Thank you for stopping by!

Hugs,
Laurie

My Brewtiful Day Card

Card with a girl holding a coffee cup
My Brewtiful Day Card

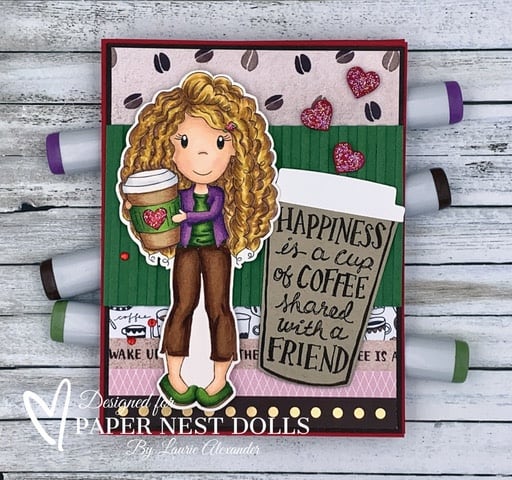
Hello Crafty Friends! It’s Laurie here! I am sharing My Brewtiful Day Card as my Design Team Inspiration Card for Paper Nest Dolls using Avery with Coffee (Without Glasses).

The Details of My Card

For my card, I used the Brewtiful paper to create horizontal bands with the coffee theme. The green corrugated band that draws the eye to Avery mirrors the one on Avery’s coffee cup.
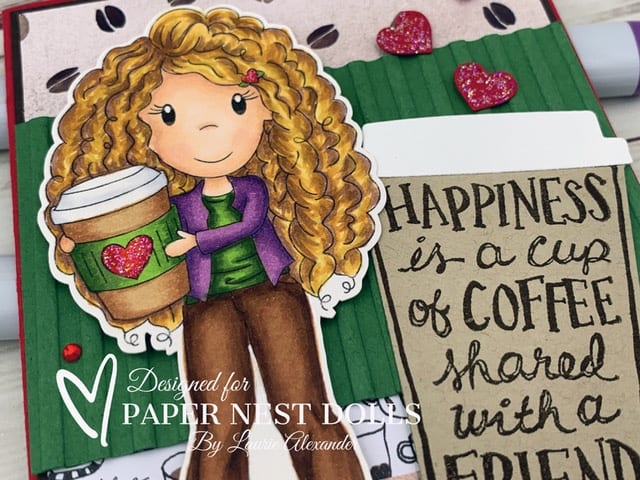
I had fun colouring this cutie with my Copic markers especially those curls! I went with espresso-coloured (since we are talking about coffee! Lol) pants, bright green for her top and purple for her sweater.

Don’t you just love the hearts on the coffee cup and in her hair! To mirror these hearts, I added some hearts over the coffee, especially since we know Avery loves her coffee!

And talk about coffee! Wouldn’t you just love a coffee as big as the die cut coffee cup! The sentiment was stamped in Early Espresso ink (another homage to coffee) on the coffee cup!

Star Dust Stickles was added to the hearts. The only other embellishment was a scattering of red rhinestones for a bit of sparkle.

————————–

Copic Markers

Skin: E04/E11/E21/E00/E000/R20
Hair: E25/YR24/Y26/Y21
Hearts: R39/R37/R35/Star Dust Stickles
Top/Coffee Sleeve: YG67/YG63/YG03
Sweater: V12/V15/V17
Pants: E29/E27/E25/E23
Shoes: YG67/YG63/YG03/ E35/E33/E31
Coffee Cup: E35/E33/E31
Coffee Lid: B000/0

Close up of girl holding coffee cup
Close Up of Avery

————————–

Card Recipe for My Brewtiful Day Card

Avery with Coffee (Without Glasses), Paper Nest Dolls
Paper Basics – Stamper’s Select White Cardstock, Papertrey Ink
Brewtiful Day 12” x 12” Paper Pad, Craftsmart, Michael’s Arts & Crafts
Early Espresso Ink Pad, Stampin’ Up!
Coffee Café Photopolymer Stamp Set, Stampin’ Up!
Coffee Cups Framelits Dies, Stampin’ Up!
Give it A Whirl Dies, Stampin’ Up!
Corrugated Embossing Folder, Stampin’ Up!
Red Rhinestone Basic Jewels, Stampin’ Up!
Star Dust Stickles, Ranger
Real Red, Early Espresso, Crumb Cake, Garden Green and Basic White Card Stock

Finished card size: 5 ½” x 4 ¼”

Stamp Size: 4 ½”

————————–

To view my other Paper Nest Dolls cards, please click here.

Hope you like my Design Team Inspiration Card using Avery with Coffee (Without Glasses) by Paper Nest Dolls!

Thank you for stopping by!

Hugs,
Laurie

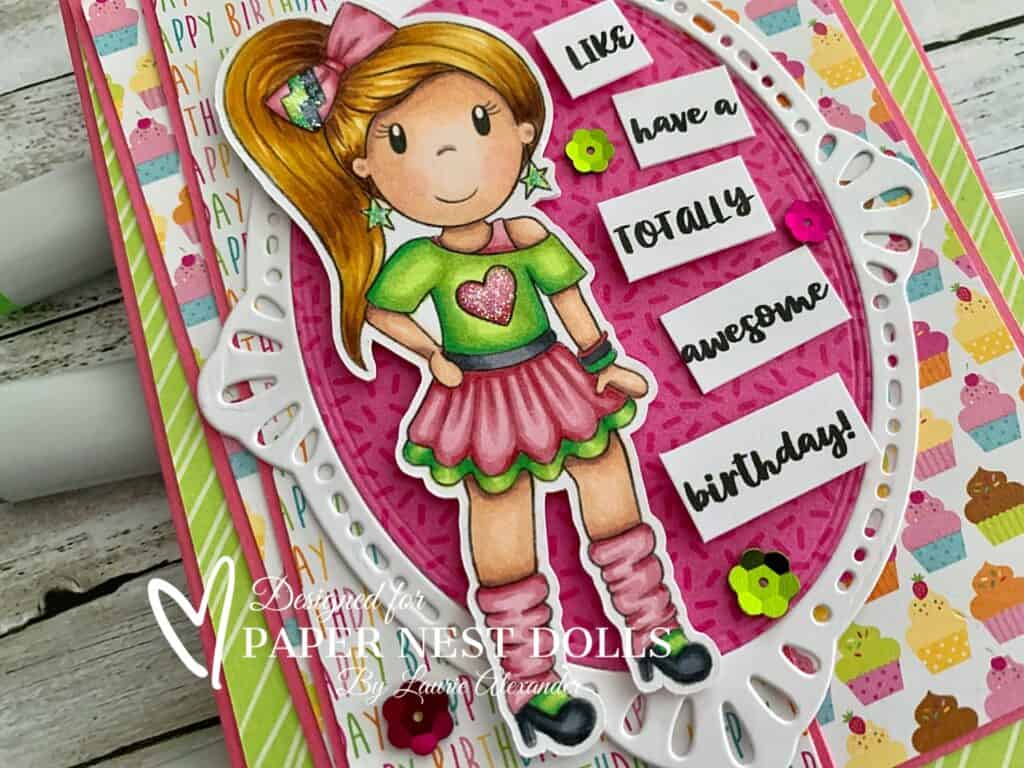
Like TOTALLY Awesome Birthday

A Birthday Card with a girl dressed in 80's clothing
Like TOTALLY Awesome Birthday

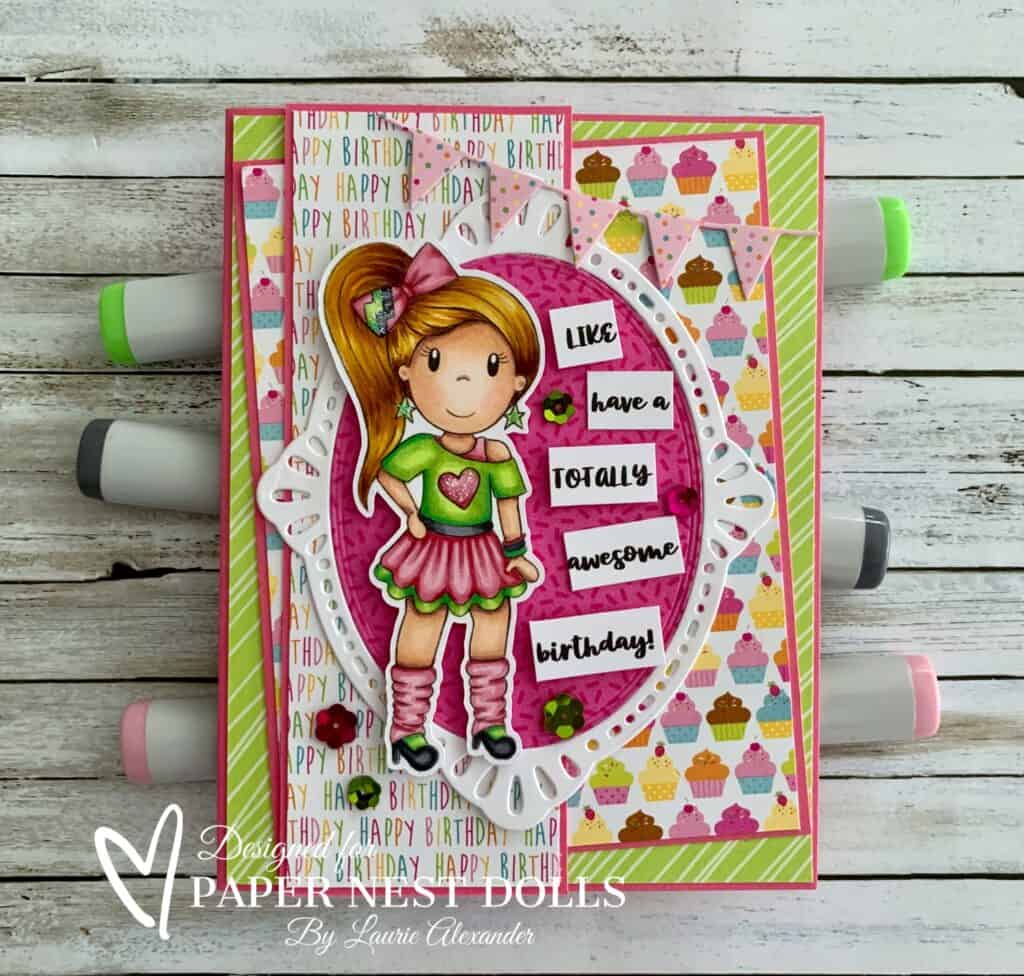
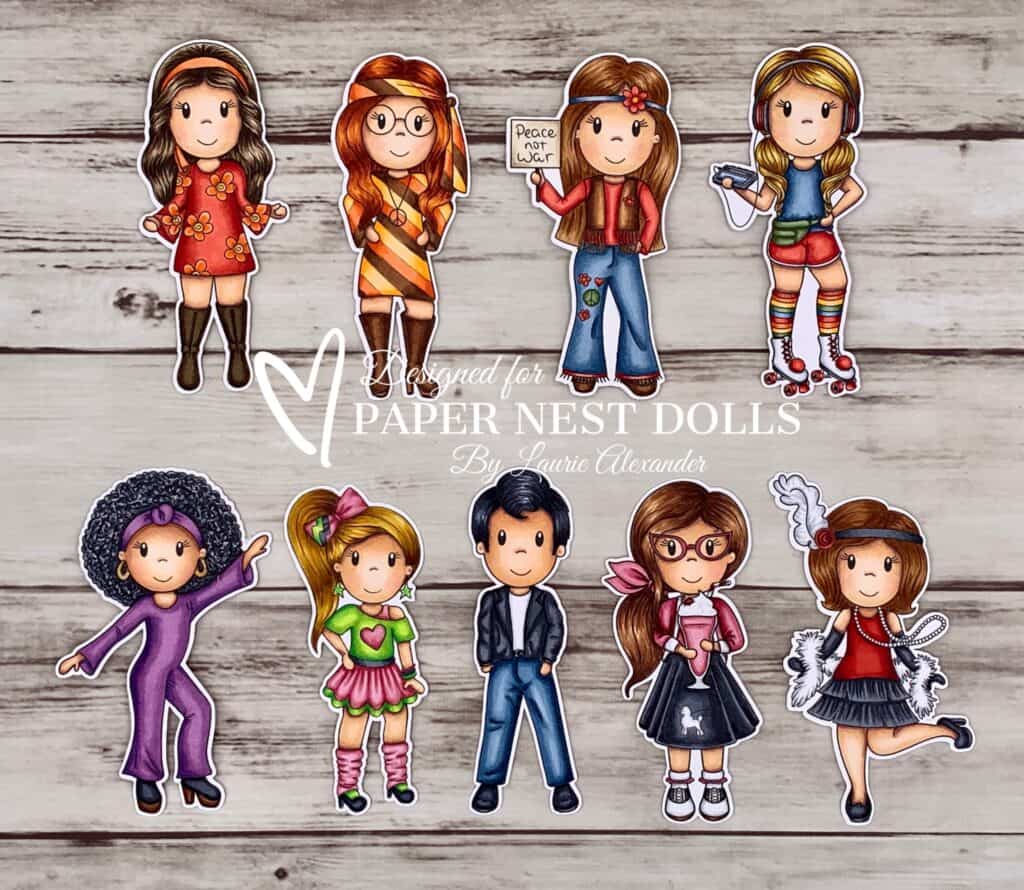
Hello Crafty Friends! It’s Laurie here! I am sharing my Like TOTALLY Awesome Birthday as my Design Team Inspiration Card for Paper Nest Dolls using Decade Collection 80’s Girl Ellie. There are ten dolls in the Decade Collection that come in both rubber and digital stamps. You can find all the digital versions here.

Decade Doll Collection by Paper Nest Dolls

The Details of My Card

For my card, I decided to go with the bright neon colours of the 80’s. I usually don’t use these colours, but it was fun to go outside my comfort zone! I even used Copic markers that I haven’t used before! This might be dating me, but do you remember leg warmers and “Gag me with a Spoon” (said with my best Valley Girl voice)? Lol!

Doodlebug paper is always so bright and colourful that I decided to go with the Hey Cupcake paper. Perfect for my birthday theme in these bright colours! I also wanted a bright neon green and went with a piece of Parakeet Party DSP.

The Framed Florets Dies gave me a perfect backdrop for Ellie and I couldn’t resist using the bright pink sprinkles paper behind her to make her pop.

The sentiment was printed out on my computer. I used a fun script called Mystical Woods Smooth Script at 12pt which I cut apart so that I could run it beside Ellie. I popped up “Like”, TOTALLY” and “birthday” to give visual interest and to highlight these words since they are what my card is all about!

To add to the birthday theme, I added a banner that was die cut from the Doodlebug paper.

I found some bright sequins in my stash that went beautifully with my bright neon colours. Star Dust Stickles was added to the heart on her top, her earrings and the accents on her bow.

————————–

Copic Markers

Skin: E15/E13/E11/E00/E000/R20
Hair: E25/YR24/Y26/Y21
Pinks: R85/R83/R81
Greens: YG09/YG06/YG03/YG01
Blacks: C7/C6/C4
Bracelets: YG09/R85/C6
Earrings: YG09/YG01

Close Up of 80's Girl Ellie
Close Up of 80’s Girl Ellie

————————–

Card Recipe for My Like TOTALLY Awesome Birthday Card

Decade Collection 80’s Girl Ellie, Paper Nest Dolls
Paper Basics – Stamper’s Select White Cardstock, Papertrey Ink
Hey Cupcake 6” x 6” Paper Pad, Doodlebug Design Inc.
Butterfly Kisses 6” x 6” Designer Series Paper, Stampin’ Up!
Framed Florets Dies, Stampin’ Up!
Flag Banner Dies, from my Stash
Sequins, from my Stash
Star Dust Stickles, Ranger
Polished Pink and Basic White Card Stock, Stampin’ Up!

Finished card size: 5 ½” x 4 ¼”

Stamp Size: 4”

————————–

To view my other Paper Nest Dolls cards, please click here.

My Other Cards in the Decade Collection

For more information on my cards, please click the photos.

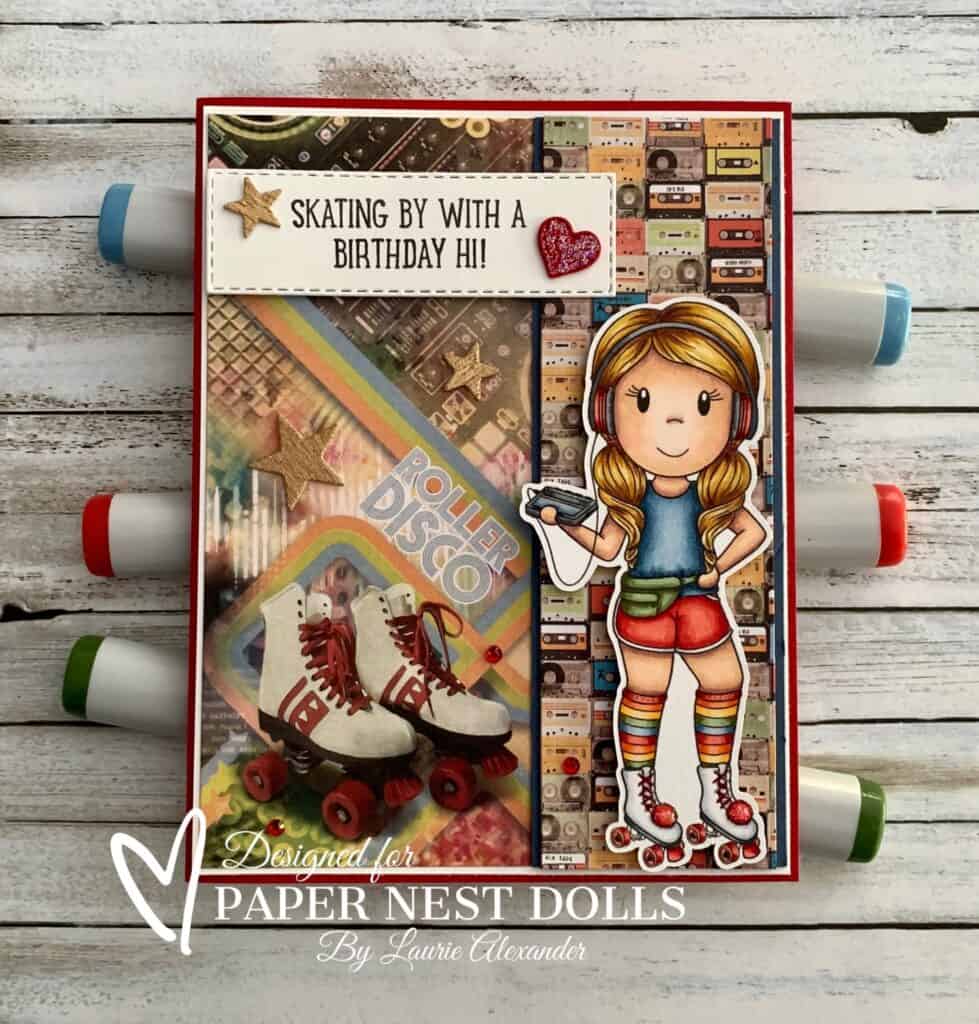
Grad with a girl in roller skates on it
Roller Disco Babe
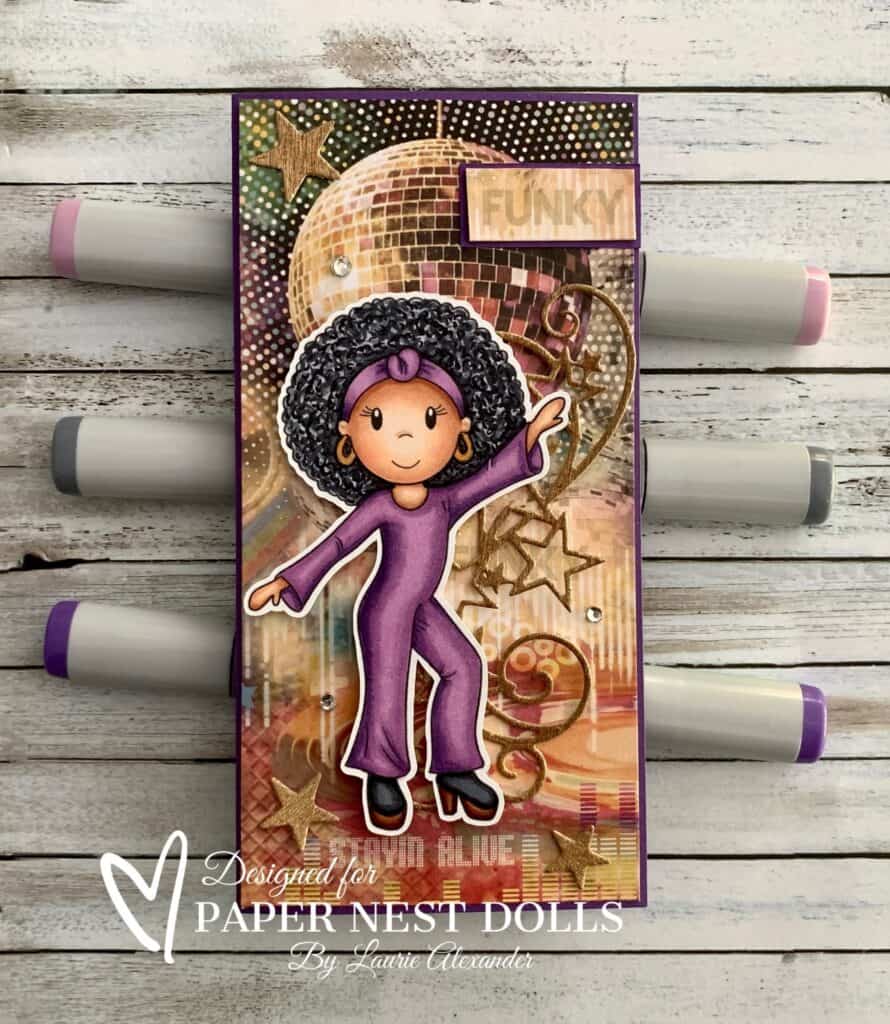
A card with a Disco Dancer on it
Stayin Alive Disco Card
Hippie Girl on a card
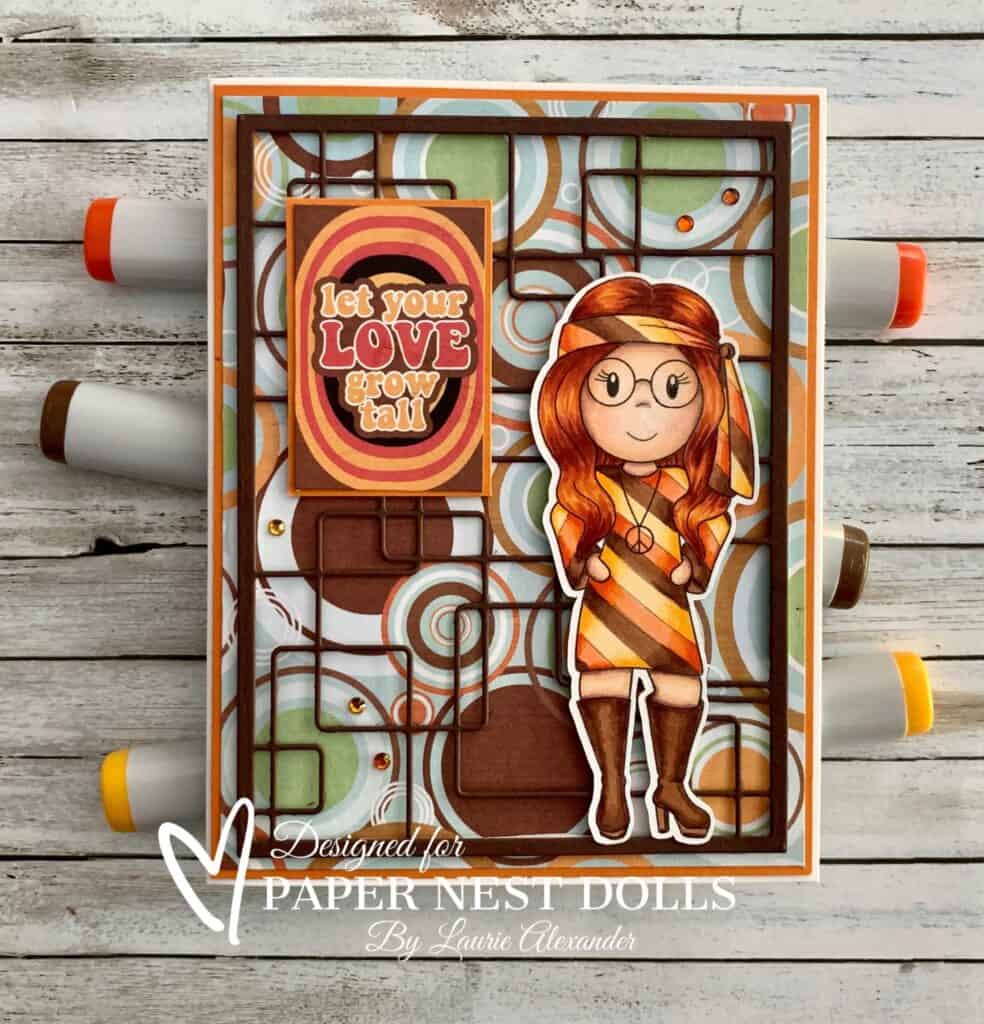
My Groovy Love Card
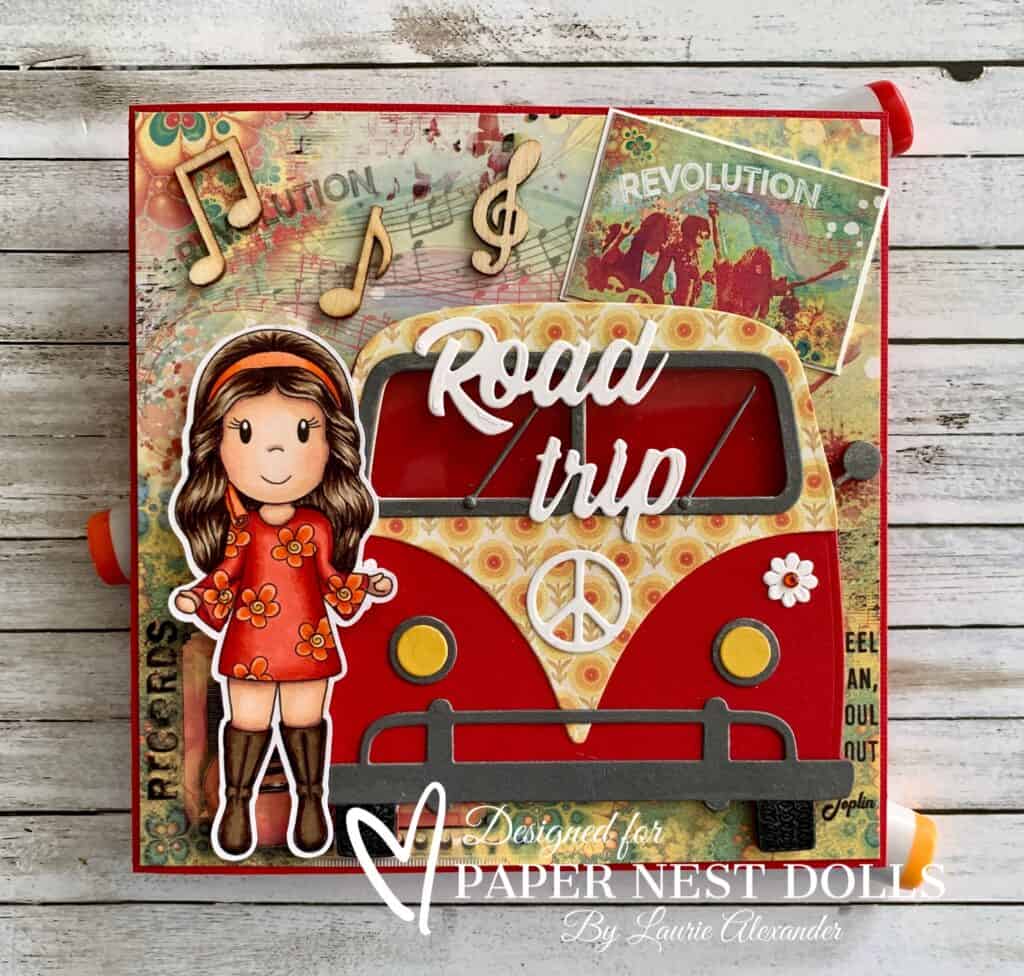
Card with a Girl from Seventies and a retro bus on it
My Road Trip Card
Card with a Hippie Girl
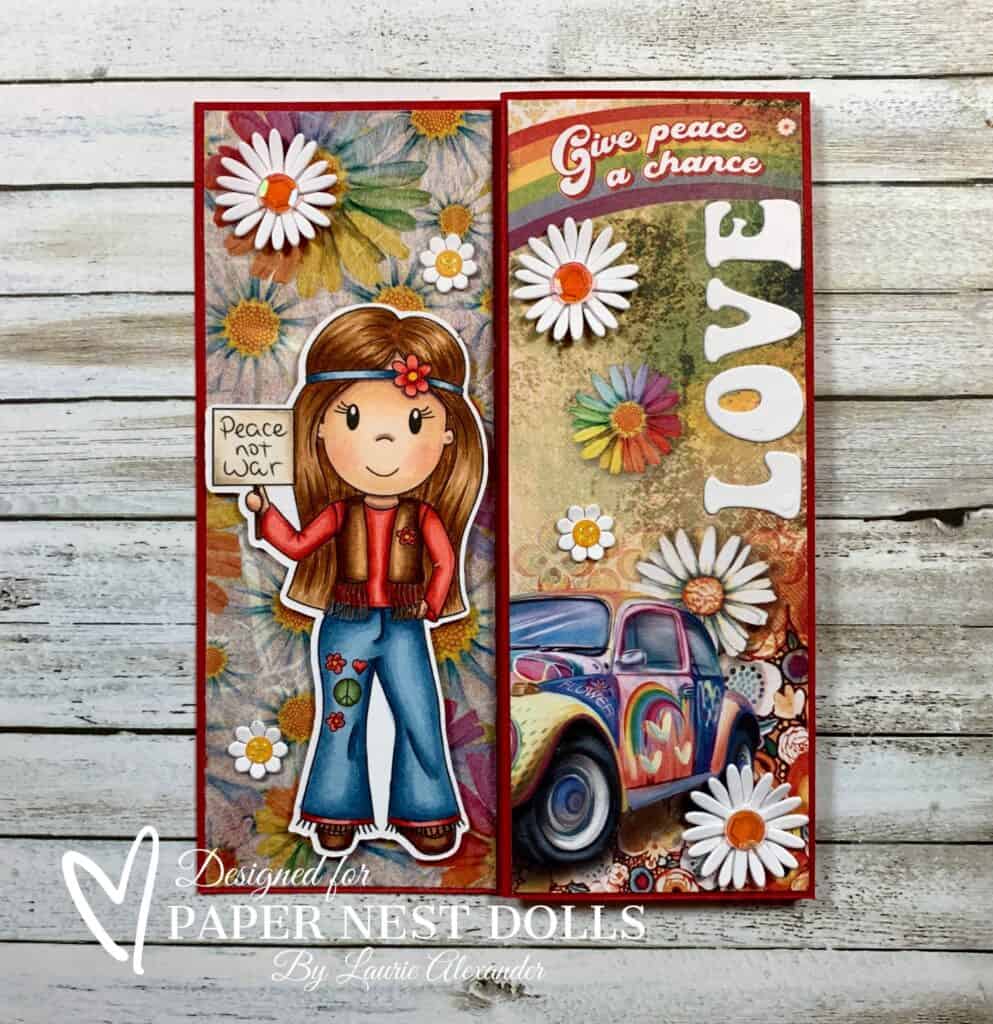
Peace Not War Card
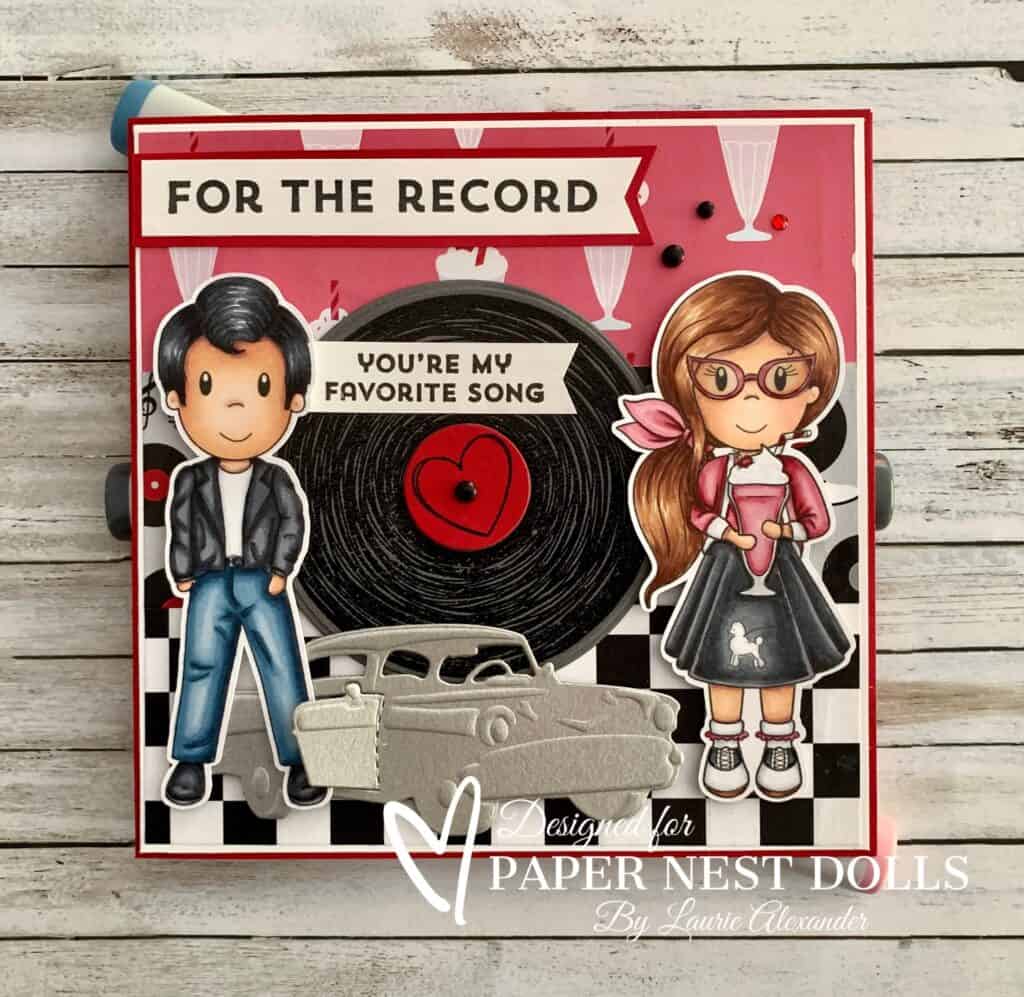
Card with 50s greaser and girl with poodle skirt
My Grease Lightning Card
A birthday card with a girl in a flapper dress.
Have a Flappable Birthday

Hope you like my Design Team Inspiration Card using
Decade Collection 80’s Girl Ellie by Paper Nest Dolls!

Thank you for stopping by!

Hugs,
Laurie

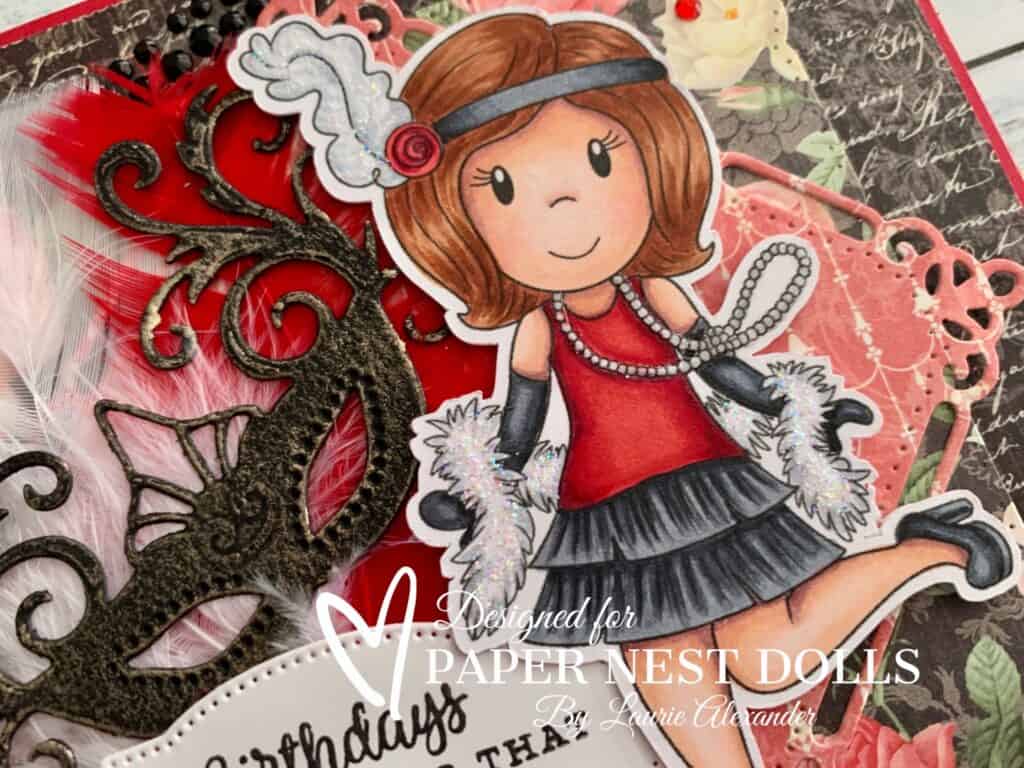
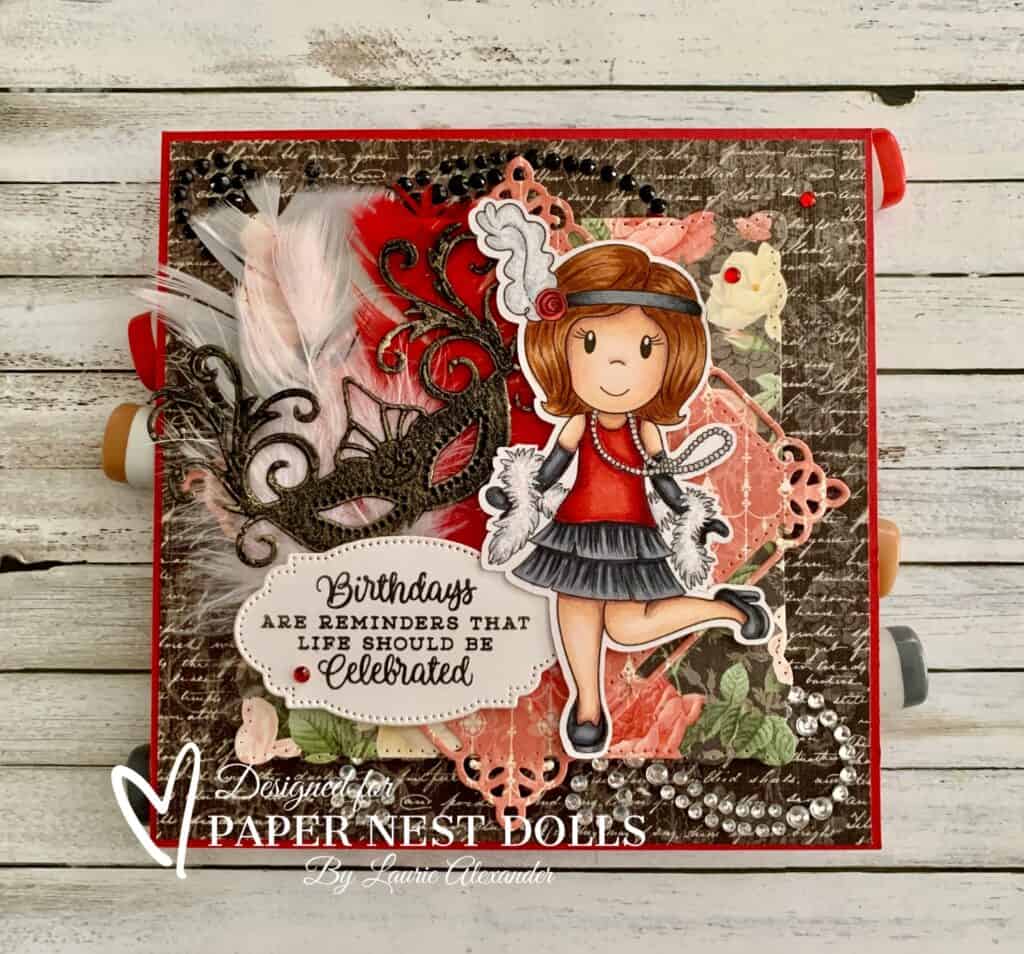
Have a Flappable Birthday 

A birthday card with a girl in a flapper dress.
Have a Flappable Birthday

Hello Crafty Friends! It’s Laurie here! I am sharing Have a Flappable Birthday as my Design Team Inspiration Card for Paper Nest Dolls using Decade Collection Flapper Girl Emma. There are ten dolls in the Decade Collection that come in both rubber and digital stamps. You can find all the digital versions here.

Decade Doll Collection by Paper Nest Dolls

The Details of My Card

For my card, I used my Copic markers to colour Flapper Emma’s outfit in a very striking colour scheme of red and black to create a Roaring 20s theme. I love this Era with all it’s gorgeous outfits, Art Deco, and the dance/music scene!

The Mon Amour Papercrafting Paper by Graphic 45 had women with vintage style clothing on it, but I decided to go with the more neutral designs since I wanted the embellishments and Emma to shine. I felt that the Marvelous Squares Dies created an Art Deco feel with their die cuts adding to my Roaring Twenties theme.

Since Emma had a boa on, I decided to add some real feathers in white and red to tie in my colour scheme. Also, since it’s Mardi Gras week, I thought a mask would be a fun accent to add in front of the feathers. To bring out the details of the mask, I rubbed some white gold wax across it.

Don’t you love the sentiment! Perfect for my card since the Roaring 20s was all about living life to the fullest!

To add some sparkle, I used black and clear rhinestone sticker flourishes in opposite corners and a scattering of red rhinestones. I also added Star Dust Stickles to Emma’s boa and her headpiece. Glossy Accents was added to her pearls.

————————–

Copic Markers

Skin: E15/E13/E11/E00/E000/R20
Hair: E39/E37/E35/E33
Reds: R59/R29/R27/R24
Blacks: C9/C7/C6/C4

Close Up of girl in flapper dress
Close Up of Flapper Girl Emma

————————–

Card Recipe for My Have a Flappable Birthday Card

Decade Collection Flapper Girl Emma, Paper Nest Dolls
Paper Basics – Stamper’s Select White Cardstock, Papertrey Ink
Mon Amour Papercrafting Paper, Graphic 45
Nestabilities Majestic Elements Marvelous Squares Die, Spellbinders
Venetian Accents Shapeabilities Dies, Spellbinders 
White Gold Metallique Wax, Art Alchemy
Potted Geraniums Bundle, Stampin’ Up!
Black Onyx Versafine Ink, Tsukineko
White Feathers, Creatology, Michaels Arts & Crafts
Red Feathers, Creatology, Michaels Arts & Crafts
Red Rhinestone Basic Jewels, Stampin’ Up!
Recollection Bling Stickers, Michaels Arts & Crafts 
Star Dust Stickles, Ranger
Glossy Accents, Ranger
Real Red and Basic Black Card Stock, Stampin’ Up!

Finished card size: 5 ¼” x 5 ¼”

Stamp Size: 4”

————————–

To view my other Paper Nest Dolls cards, please click here.

My Other Cards in the Decade Collection

For more information on my cards, please click the photos.

Card with a girl in roller skates on it
Roller Disco Babe
A card with a Disco Dancer on it
Stayin Alive Disco Card
Hippie Girl on a card
My Groovy Love Card
Card with a Girl from Seventies and a retro bus on it
My Road Trip Card
Card with a Hippie Girl
Peace Not War Card
Card with 50s greaser and girl with poodle skirt
My Grease Lightning Card

Hope you like my Design Team Inspiration Card using
Decade Collection Flapper Girl Emma by Paper Nest Dolls!

Thank you for stopping by!

Hugs,
Laurie