Wish Upon a Star Card

My Wish Upon a Star Design Team Card
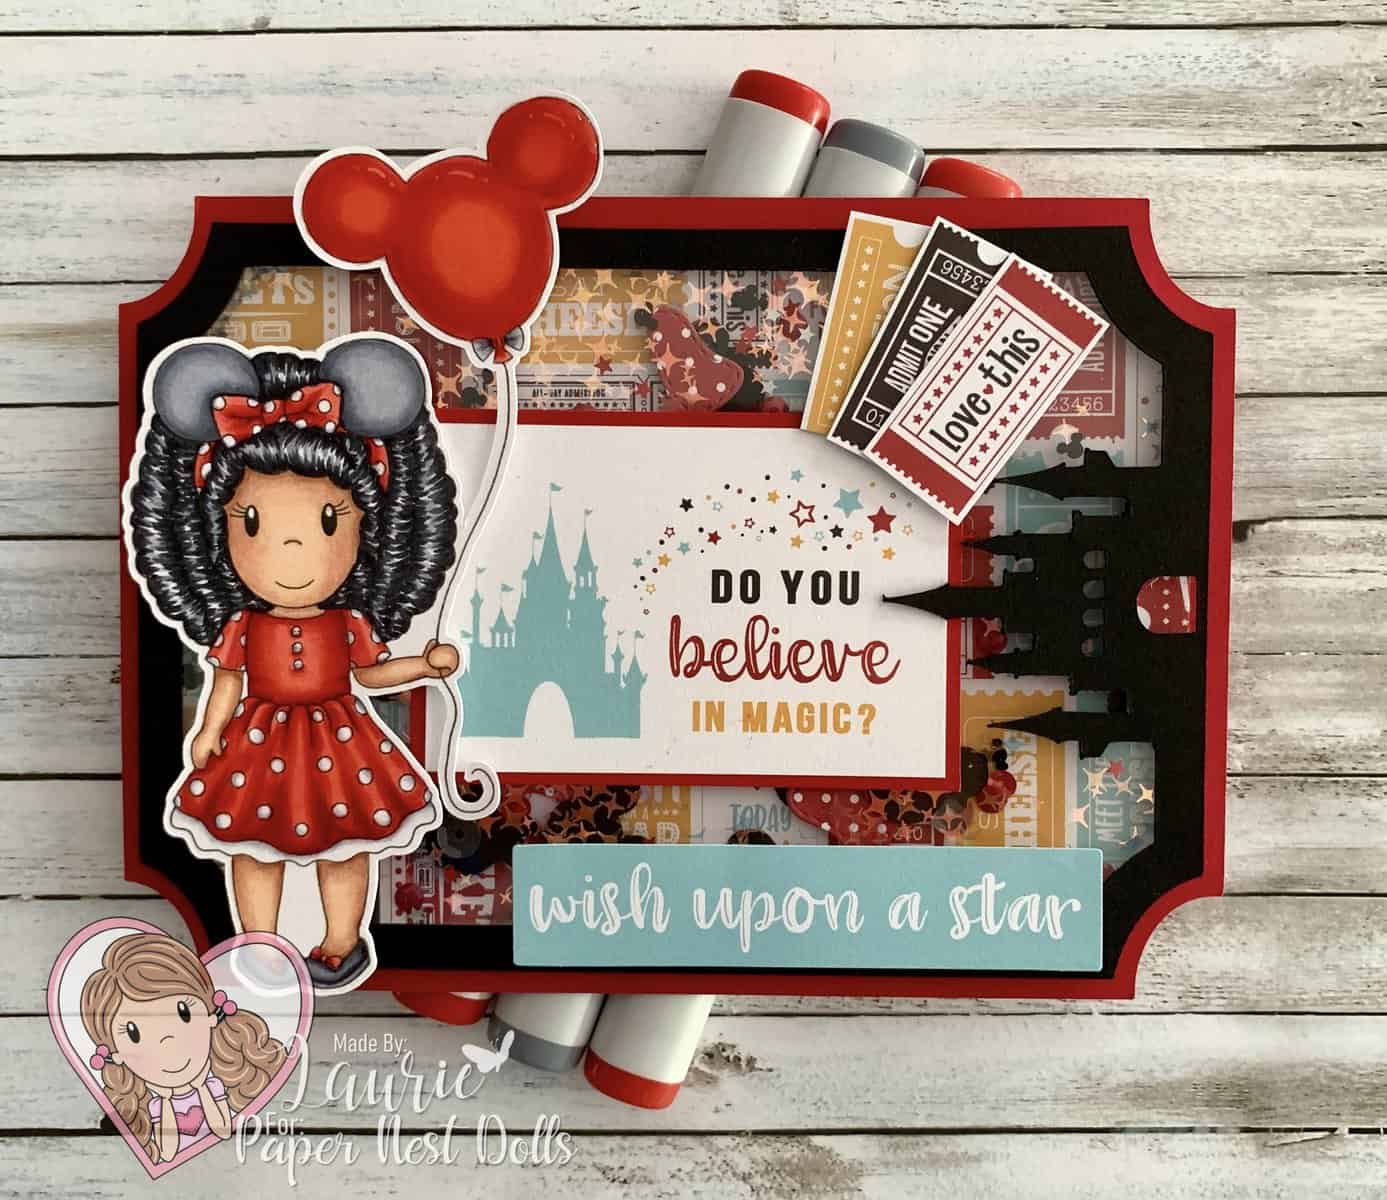
My Wish Upon a Star Card

Hello Crafty Friends! It’s Laurie here! I am sharing my Wish Upon a Star Card as my Design Team Inspiration Card for Paper Nest Dolls using the sweet digital stamp Minnie Amara. You can buy this stamp in either rubber or digital if you join the Paper Nest Dolls Stamp Club. I am a big Disney fan and when I saw that you can get the cutest Disney inspired stamp by Paper Nest Dolls, I just had to join it! 
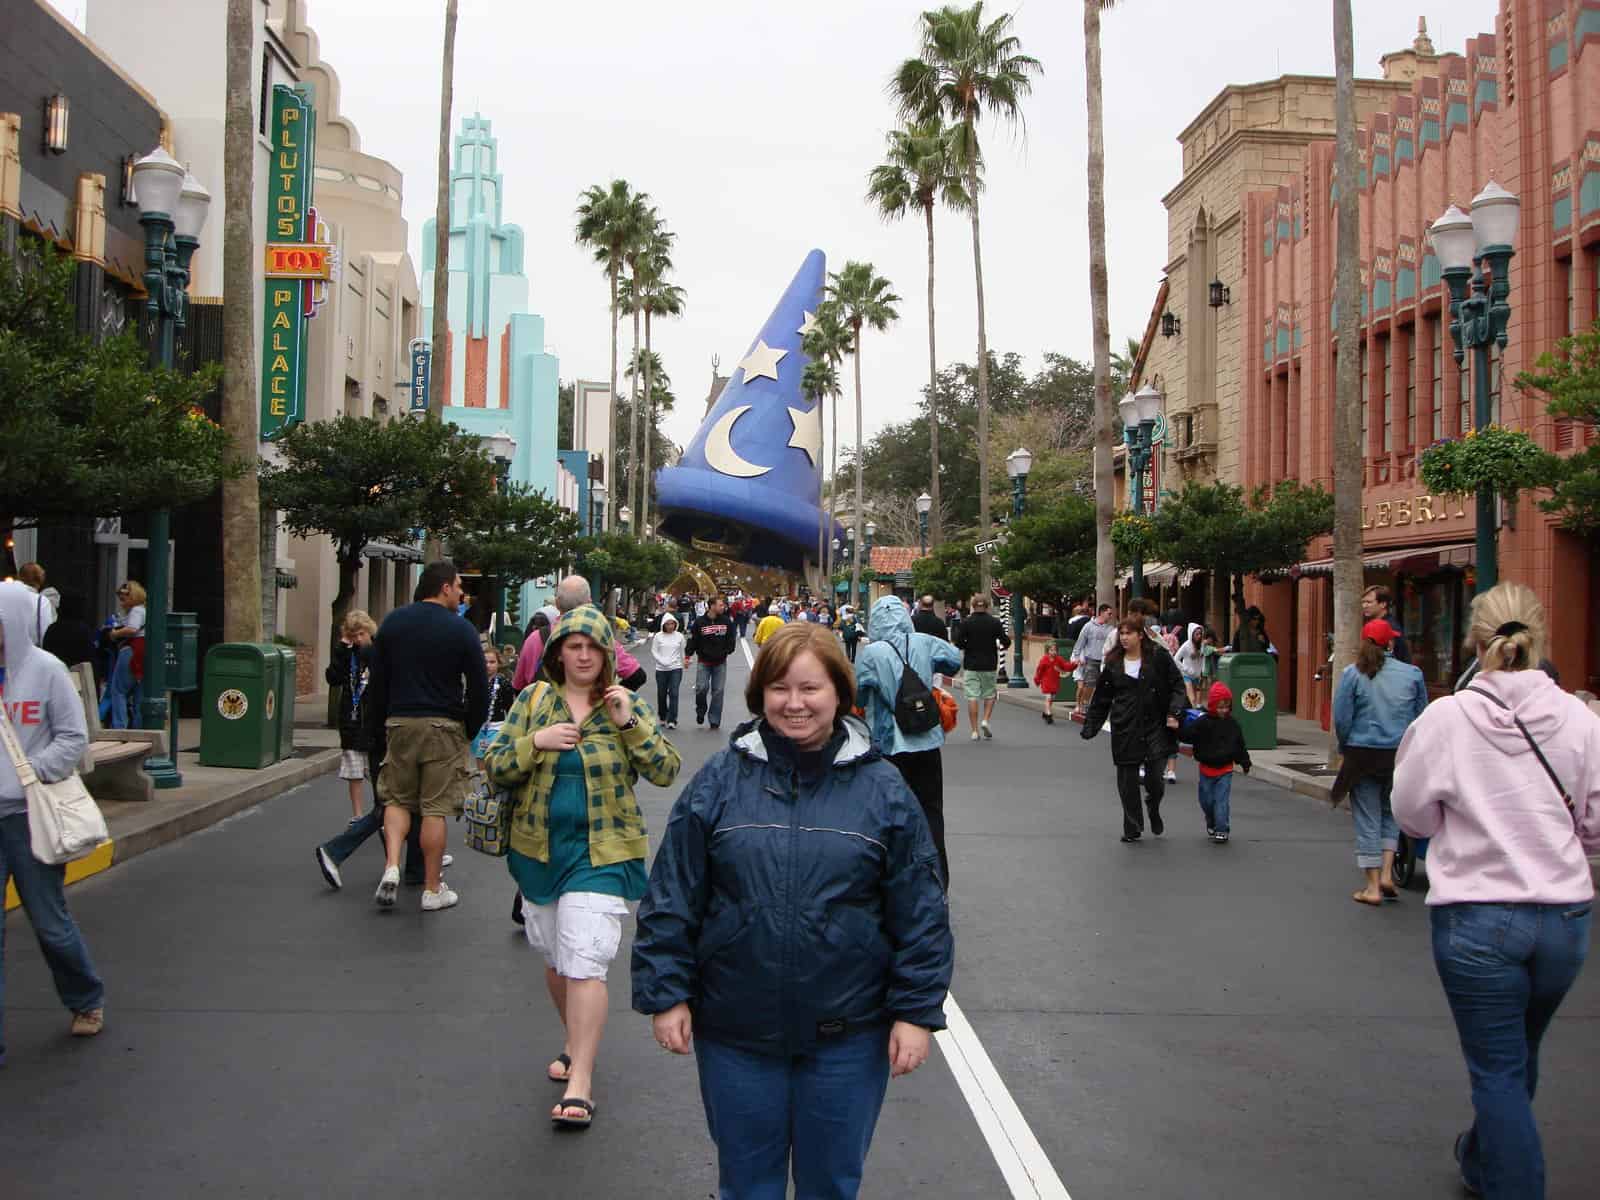
Disney World 2018
Me at Disney World 2018

I had a lot of fun colouring Minnie Amara with my Copic Markers even though I found it challenging to colour her skin and hair.

The Details of My Card

For my card, I thought a shaker card in the shape of an admission ticket would be so fun! I used my Silhouette Cameo to find a ticket shape and downloaded the file. This shape came with a number of other ticket designs, but I loved the Magic Kingdom Castle shape at one end. Since I didn’t have any Disney confetti, I downloaded a Mickey head SVG file and cut some out on my Silhouette Cameo. I die cut the Stitched Minnie Bows from Stamp AnnieThing’s Magical Celebrations Grab and Go Box using a piece of paper from the paper pads with a red background and white dots that matched my colouring. I also threw in some red, black and gold sequins and stars that I had in my stash. Did you know that Paper Nest Dolls has Krafty Bling which includes a Magical Mix and Mouse Ears. I will have to get some for my next card!

I love the Magical Adventure 2 and Wish Upon a Star paper pads by Echo Park. Perfect for my Disney themed card! I fussy cut a couple of tickets from the paper that was leftover when I used it for the base of my shaker window. The Do You Believe was a tag in the paper pad and the wish upon a star was from the matching Ephemera.

————————–

Copic Markers:

Skin: E15/E13/E11/E00/E000/R20
Hair: C3/C5/C7/C9
Dress: R29/R24/R24/R22/C3/C0/0/Clear Wink of Stella on Hair Bow
Shoes: C7/C5/C3/R22/R24/R27/Clear Wink of Stella on Bows
Mouse Ears: C7/C5/C3/C2
Balloon: R29/R27/R24/R22/C2/C3/C5/White Gelly Roll Pen/Glossy Accents
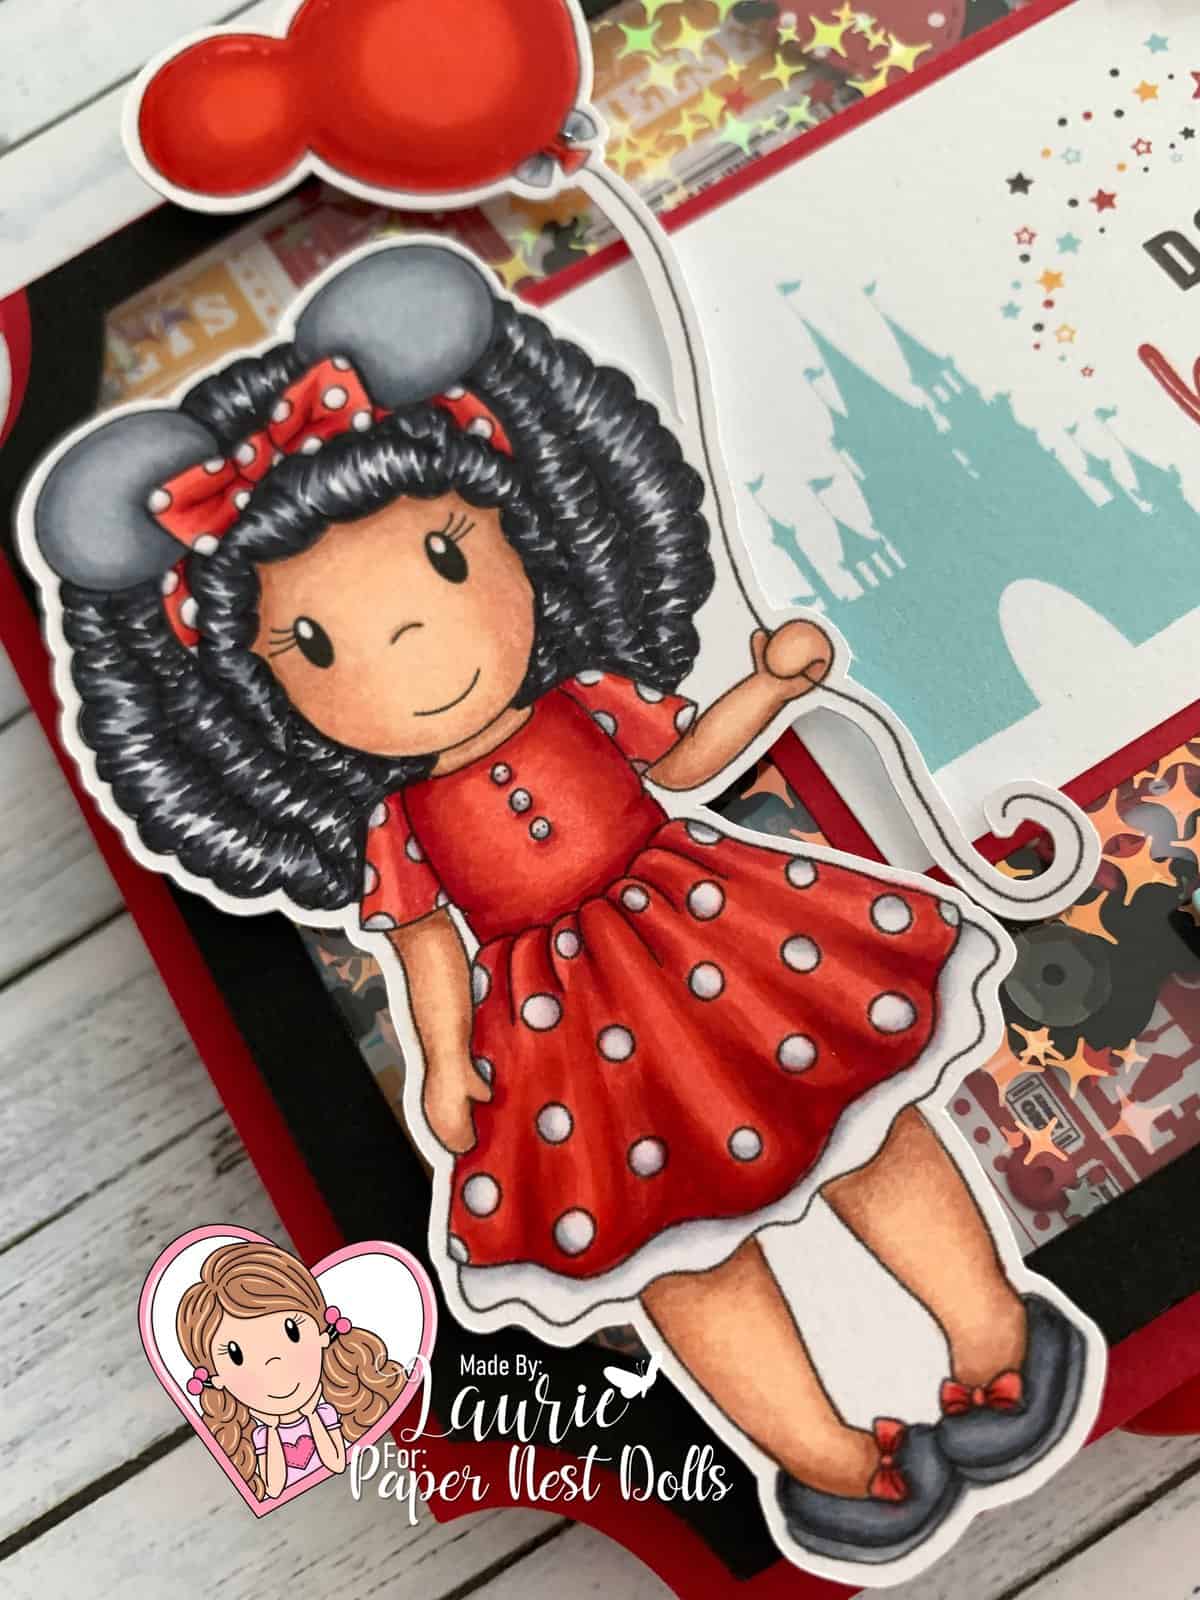
Close Up of My Design Team Card

————————–

Card Recipe Wish Upon a Star Card:

Minnie Amara, Stamp Club, Paper Nest Dolls
Paper Basics – Stamper’s Select White Cardstock, Papertrey Ink
Wish Upon a Star Paper Pad, Echo Park
Magical Adventure 2 Paper Pad, Echo Park
Magical Adventure 2 Ephemera Die Cut Cardstock Pieces, Echo Park
Window Sheet, Stampin’ Up!
5″x7″ ticket magic memories album page set, Design #88951, Silhouette Design Store
Mickey Mouse SVG, Elinas Crystal Corner, Etsy
Stitched Minnie Bow Die, Grab and Go Box, Stamp AnnieThing
Foam Adhesive Strips, Stampin’ Up!
Pirates Premium Sequins, 28 Lilac Lane Buttons Galore & More
Glossy Accents, Ranger
Clear Wink of Stella, Stampin’ Up!
White Gelly Roll Pen
Real Red and Basic Black Card Stock, Stampin’ Up!

Finished card size: 4 ½” x 6 ½”

————————–

To view my other Paper Nest Dolls cards, please click here.

Hope you like my Design Team card using
Minnie Amara by Paper Nest Dolls!

Thank you for stopping by!

Hugs,
Laurie

Stack of Sweet Wishes Card

My Design Team Card for Copic for Alle
My Stack of Sweet Wishes Card

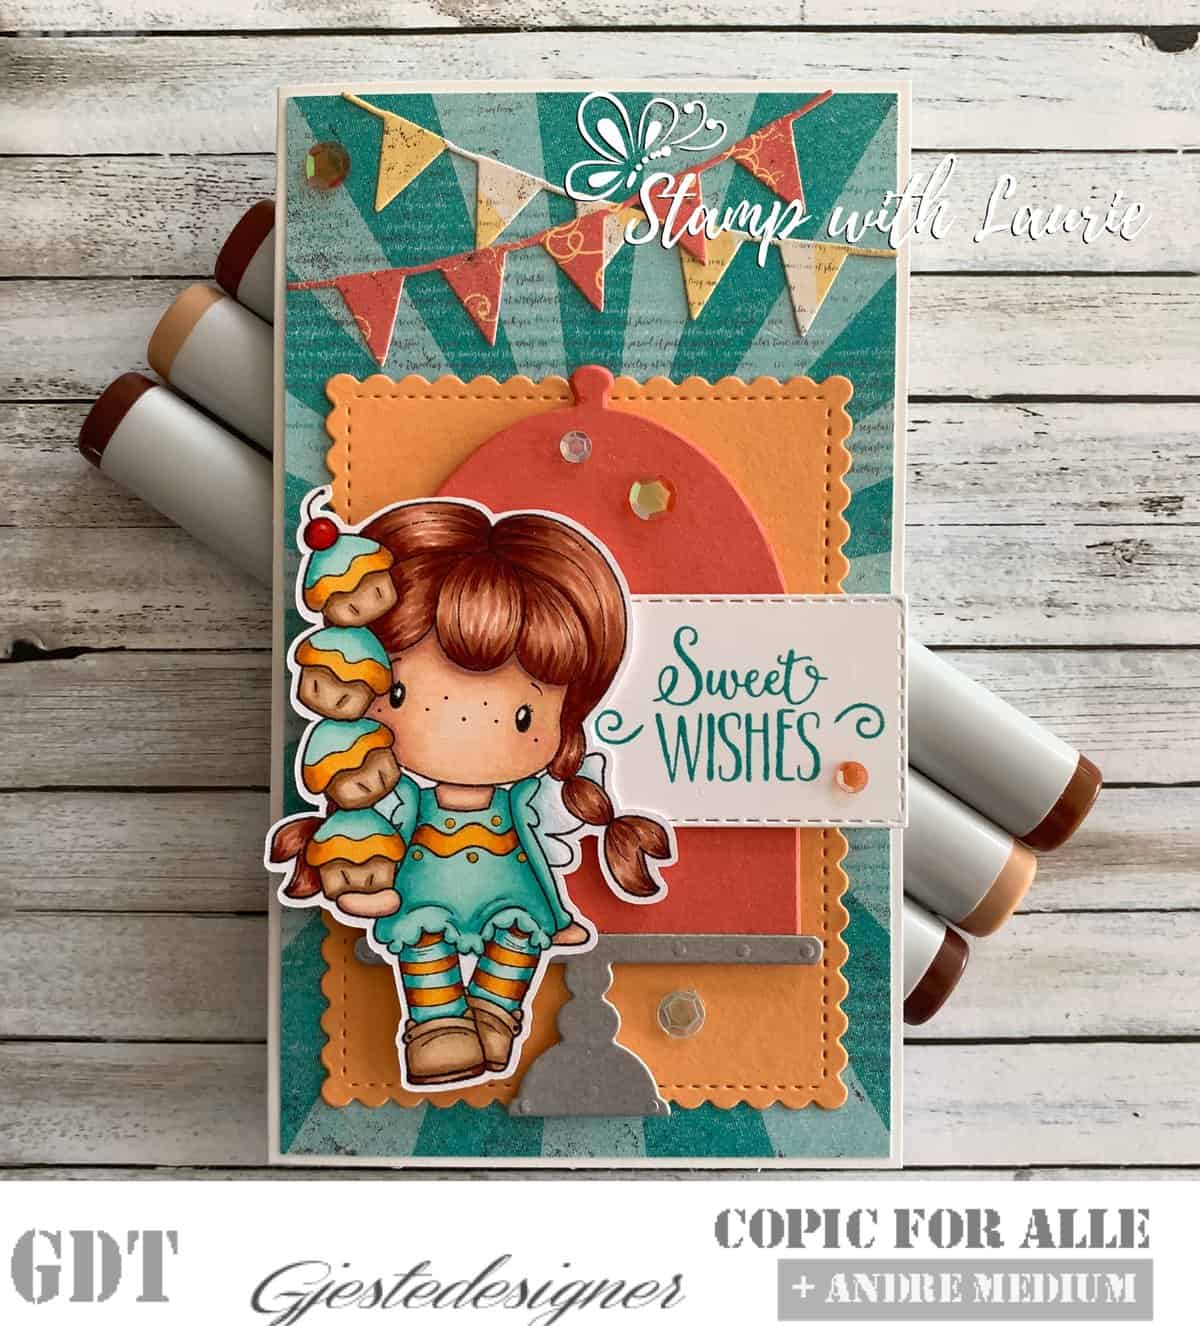
Hello Crafty Friends! It’s Laurie here! I am sharing my Stack of Sweet Wishes Card as my Guest Design Team Card for Copic for ALLE. I was so excited to be asked to be on their GDT again for the month of May. Their Color Challenge for May is using E (Earth Tone) Copic markers. I use Es in so much of my colouring. They really are a staple for me!

For my card, I pulled out Swiss Pixie Cupcake Birgitta by C.C. Designs Rubber Stamps. A friend, Nathalie, asked me to show her some colouring techniques and I thought this image would be a good one for us to colour together.

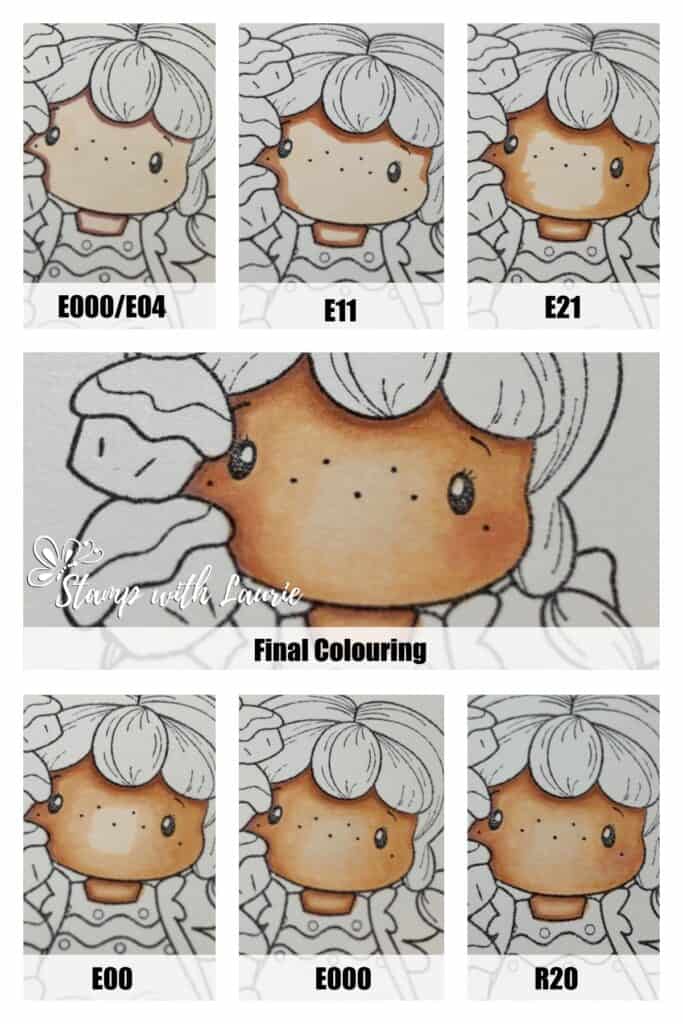
I showed her skin blending using E Copic Markers (E000/00/21/11/04/R20). Here is a collage of the skin colouring steps:

Skin Colouring with Copic Markers

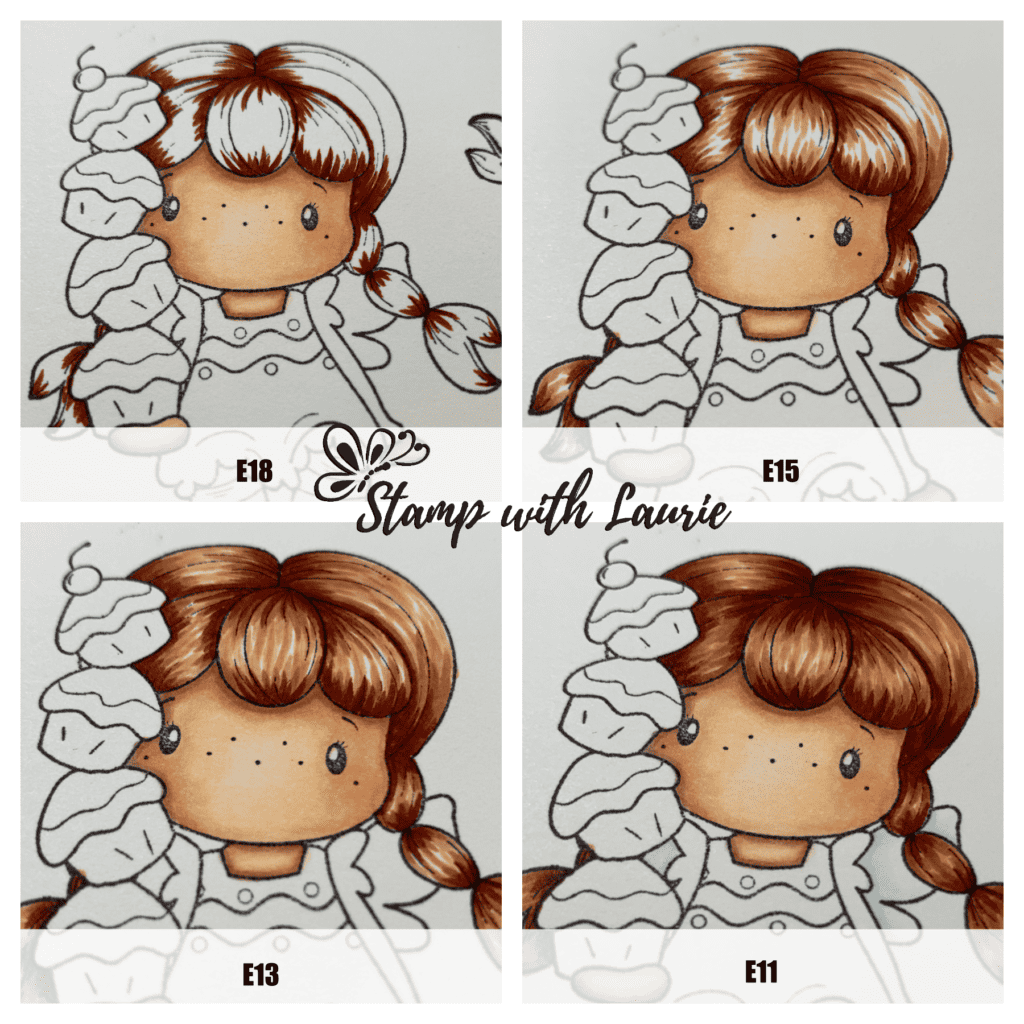
Next we worked on her hair using E Copic Markers (E18/E15/E13/E11). This is the collage for the step to colour the hair:

Hair Colouring with Copic Markers

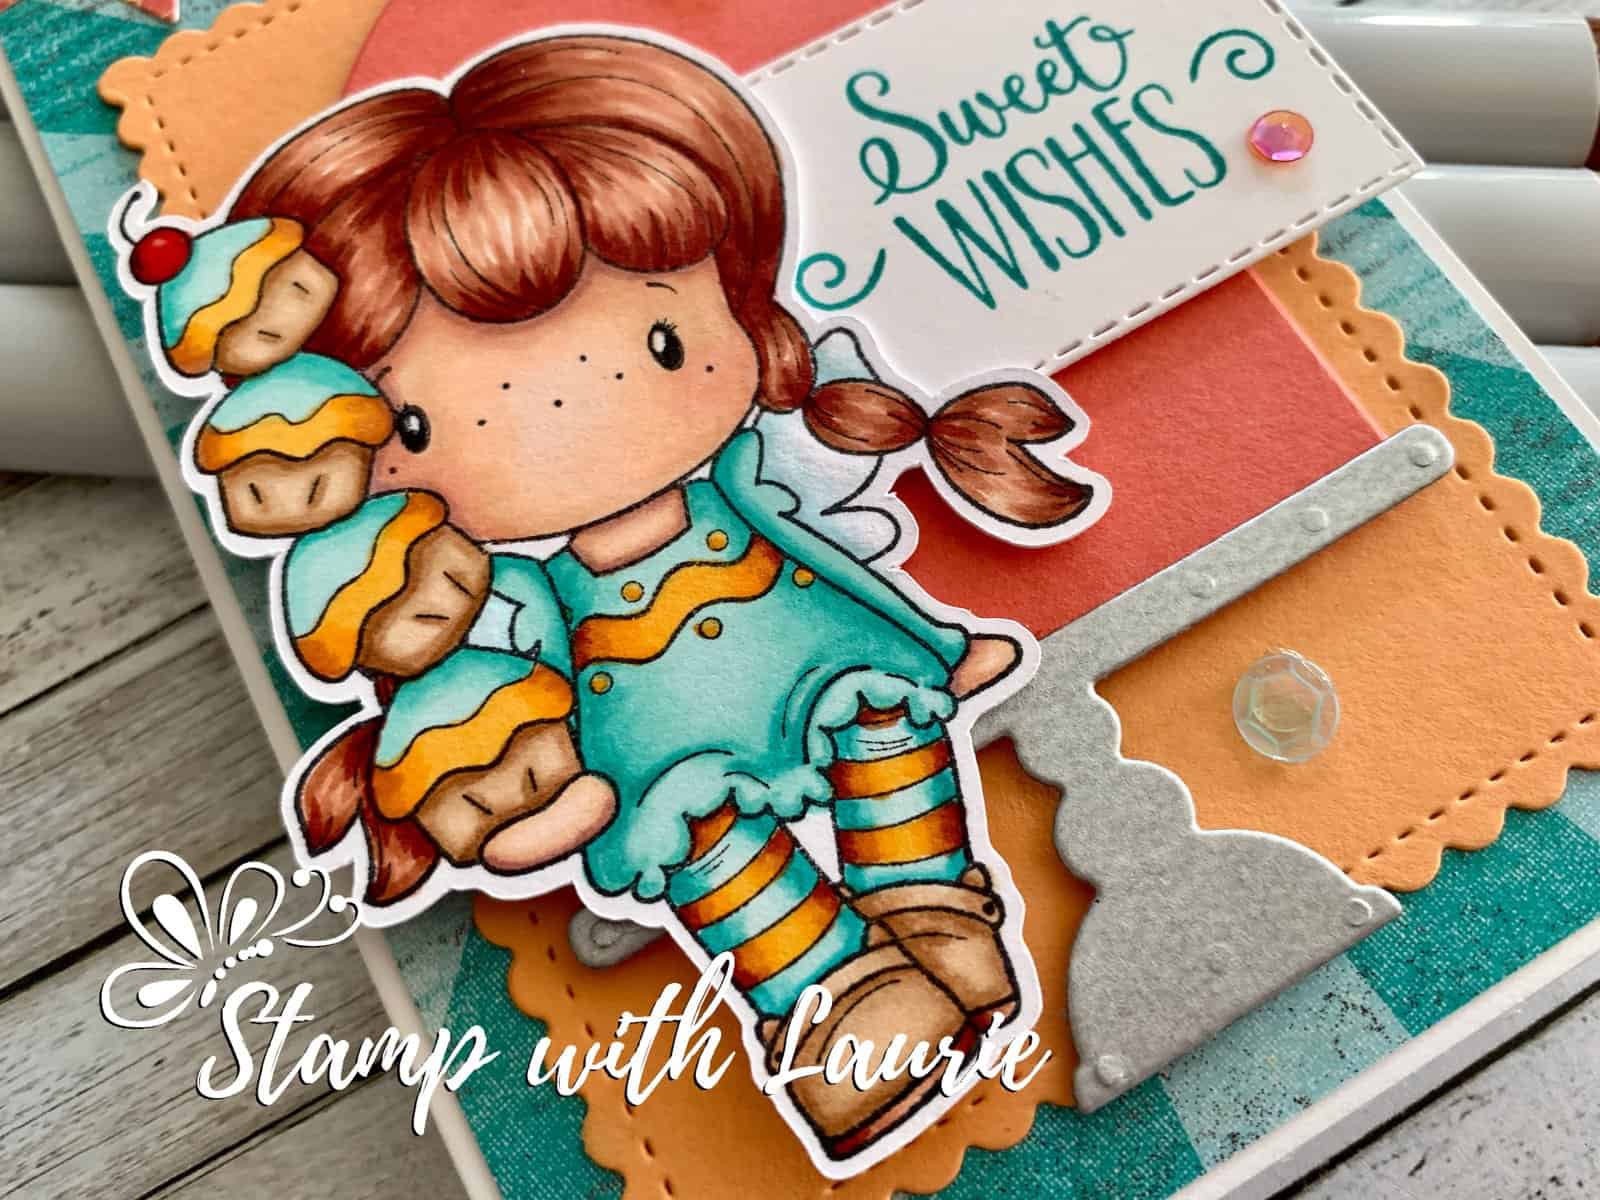
For my card, I created a mini slimline card for my sweet Birgitta! Since she is sitting, I placed her on a cake pedestal. I thought it would be a fun way to show her off. I use Galvanized Metallic paper for the pedestal. The flag banners were cut from the DSP so that they would match the other elements. A scattering of sequins adds some birthday festiveness to the card!

————————–

Copic Markers:

Skin: E000/00/21/11/04/R20
Hair: E18/E15/E13/E11
Wings: BG10/0/ Clear Wink of Stella
Dress: BG15/BG13/BG11/BG10
Orange: Y359/Y38/E15/E18
Shoes/Cupcake Wrappers: E35/E33/E31/E30
Cherry: E24/E27/E29/Glossy Accents

Close up of My Stack of My Design Team Card
Close up of My Stack of Sweet Wishes Card

————————–

Card Recipe for My Stack of Sweet Wishes Card:

Swiss Pixie Cupcake Birgitta, C.C. Designs Rubber Stamps
Paper Basics – Stamper’s Select White Cardstock, Papertrey Ink
Cupcake and Carousels Design Series Paper Stack, Stampin’ Up!
Flag Banner Dies, From my Stash
Stitched So Sweetly Dies Stampin’ Up!
Hello Cupcake Stamp Set, Stampin’ Up!
Call Me Cupcakes Framelits, Stampin’ Up!
Artistry Blooms Adhesive-Backed Sequins, Stampin’ Up!
Galvanized Metallic Paper, Stampin’ Up!
Glossy Accents, Ranger
Clear Wink of Stella
Calypso Coral, Peekaboo Peach and Whisper White Card Stock, Stampin’ Up!

Finished card size: 3.5” x 6”

————————–

To view my other Copic Marker cards, please click here.

Hope you like my Guest Design Team Card for Copic for ALLE!

If you wish to join in their Challenge, here is a link to it:
https://www.facebook.com/media/set/?set=oa.737302593747392&type=3

Thank you for stopping by!

Hugs,
Laurie
My Secret Garden Card

My Secret Garden Design Team Card
My Secret Garden Card

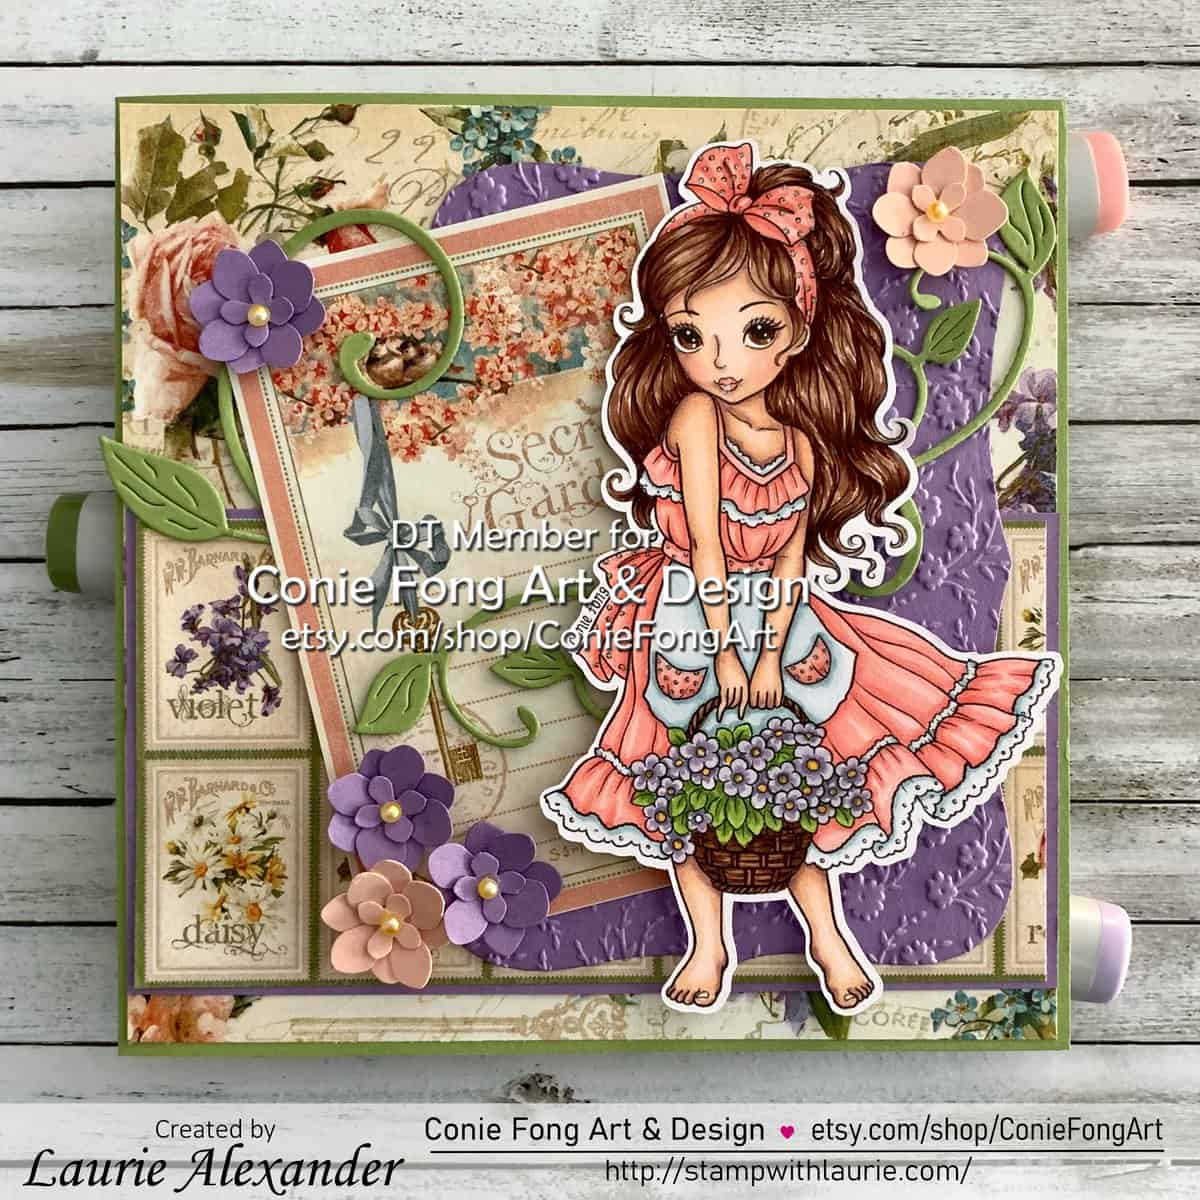
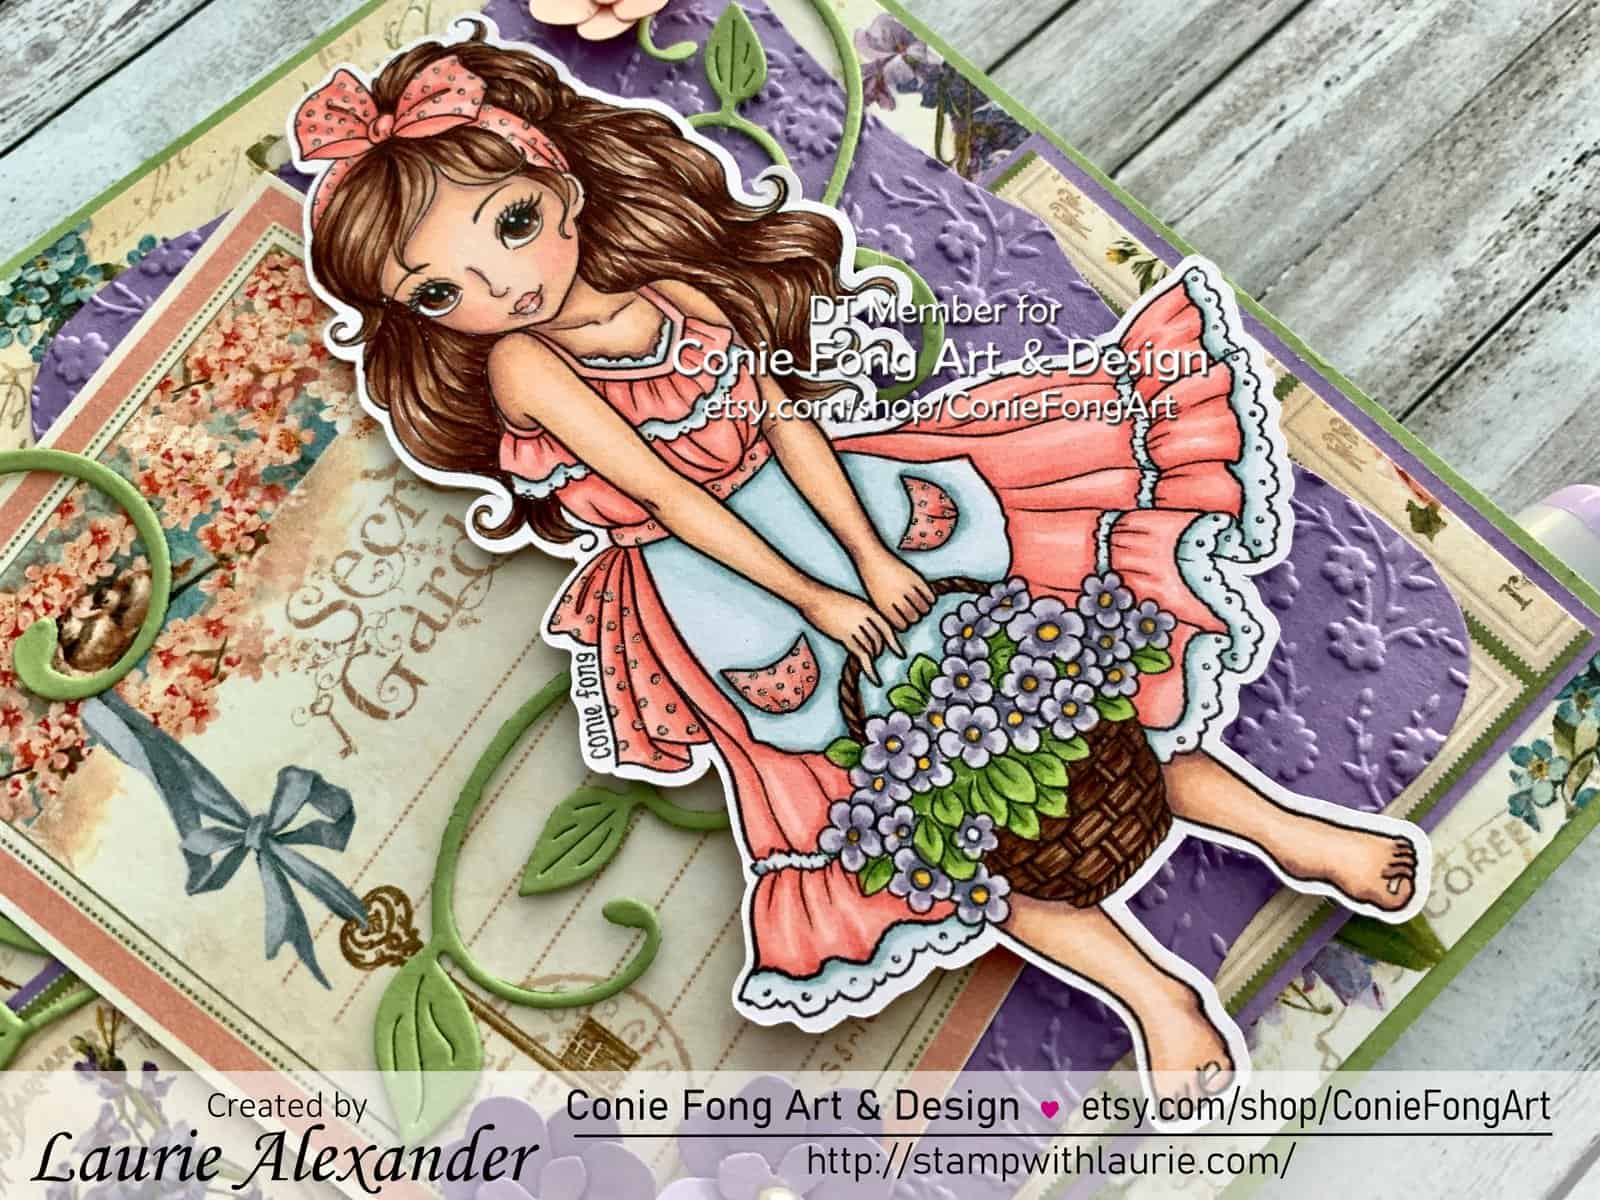
Hello Crafty Friends! It’s Laurie here! I am sharing my Secret Garden Card as my Design Team Card for Conie Fong Art & Design. This pretty digital stamp is called Sweet Annabelle. She is perfect for Mother’s Day, a birthday, thinking of you and so many other card occasions!

I love the Secret Garden Paper that I have in my stash and have been keeping it for a special card. So, I decided to use it for my card and coloured Annabelle with my Copic Markers in softs pinks, blues and purples to match. I added Clear Star Gelly Roll Pen to the dots on her apron and on her hair bow for a little bit of sparkle.

For the card base, I embossed a die cut piece of Highland Heather with the Ornate Floral 3D Embossing Folder to give Annabelle a subtle floral backdrop. From that I layered the leaves so that they are wrapped around the tag that came with the paper pad. A few hydrangeas made with a punch tie in the colours of my colouring. For the pearl flower centres, I coloured them with my Y17 Copic markers to match the flowers in her basket.

————————–

Copic Markers:

Skin: E000/00/21/11/04/R20
Hair: E29/E27/E25/E23
Dress: R22/R21/R20
Apron/Lace: BG70/BG72
Eyes: E23/E25/E27
Flowers: V28/V25/V20/Y17
Leaves: YG03/YG63/YG67
Basket: E23/E25/E27
Pearl Flower Centres: Y17

Close Up of My Secret Garden Design Team Card
Close Up of My Secret Garden Card

————————–

Card Recipe for My Secret Garden Card:

Sweet Annabelle, Conie Fong Art & Design
Paper Basics – Stamper’s Select White Cardstock, Papertrey Ink
Secret Garden 8” x 8” Paper Pad, Graphic 45
Labels Eight Dies, Nestabilities, Spellbinders
Ornate Floral 3D Embossing Folder, Stampin’ Up!
Fanciful Flourish, Cheery Lynn Designs
Hydrangea Punch 3 in 1 Flowers Trio Flower, Martha Stewart EK Success
Pearl Basic Jewels, Stampin’ Up!
Clear Star Gelly Roll Pen
White Gelly Roll Pen
Pear Pizzazz, Highland Heather and Petal Pink Card Stock, Stampin’ Up!

Finished card size: 5.5” x 5.5”

————————–

To view my other Conie Fong Art & Design cards, please click here.

Hope you like my Design Team card using
Sweet Annabelle for Conie Fong Art & Design!

Thank you for stopping by!

Hugs,
Laurie
April Showers Card

My April Showers Card
Avery in Rain Poncho

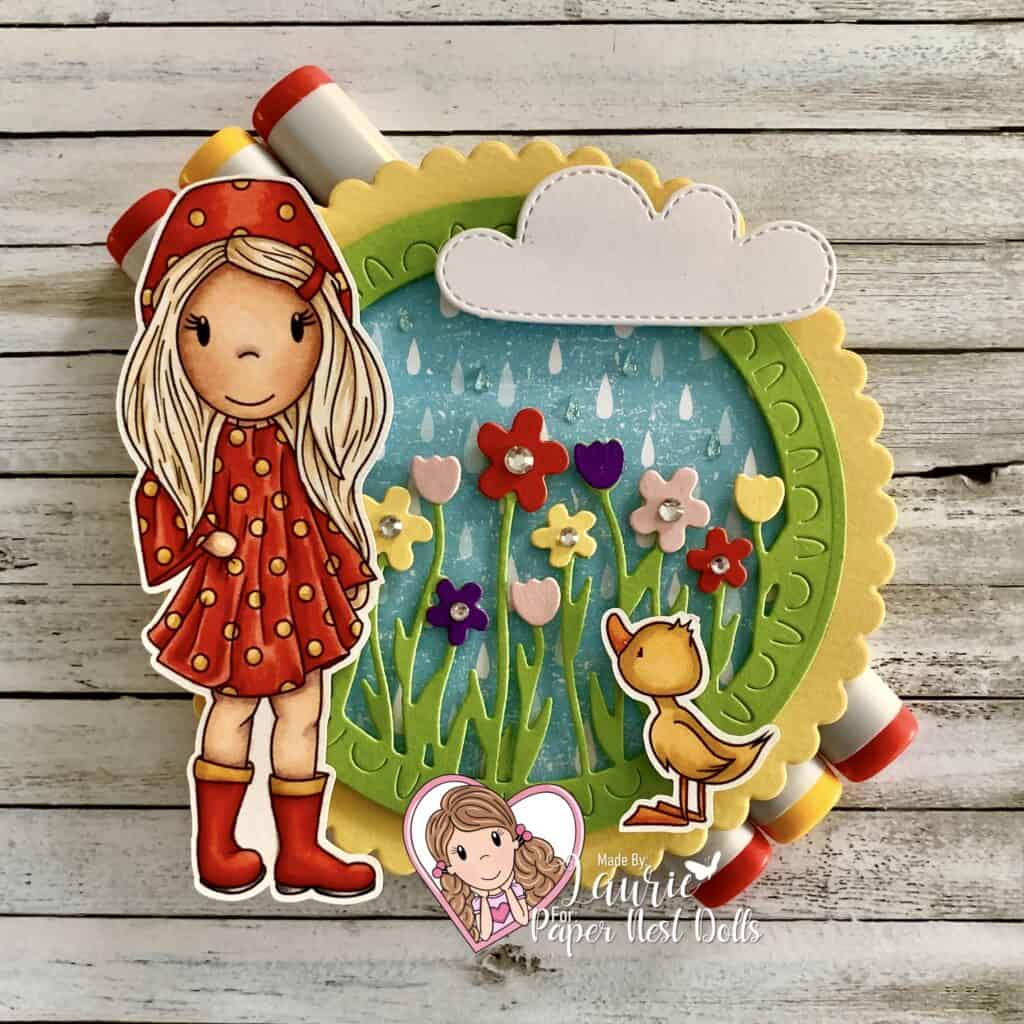
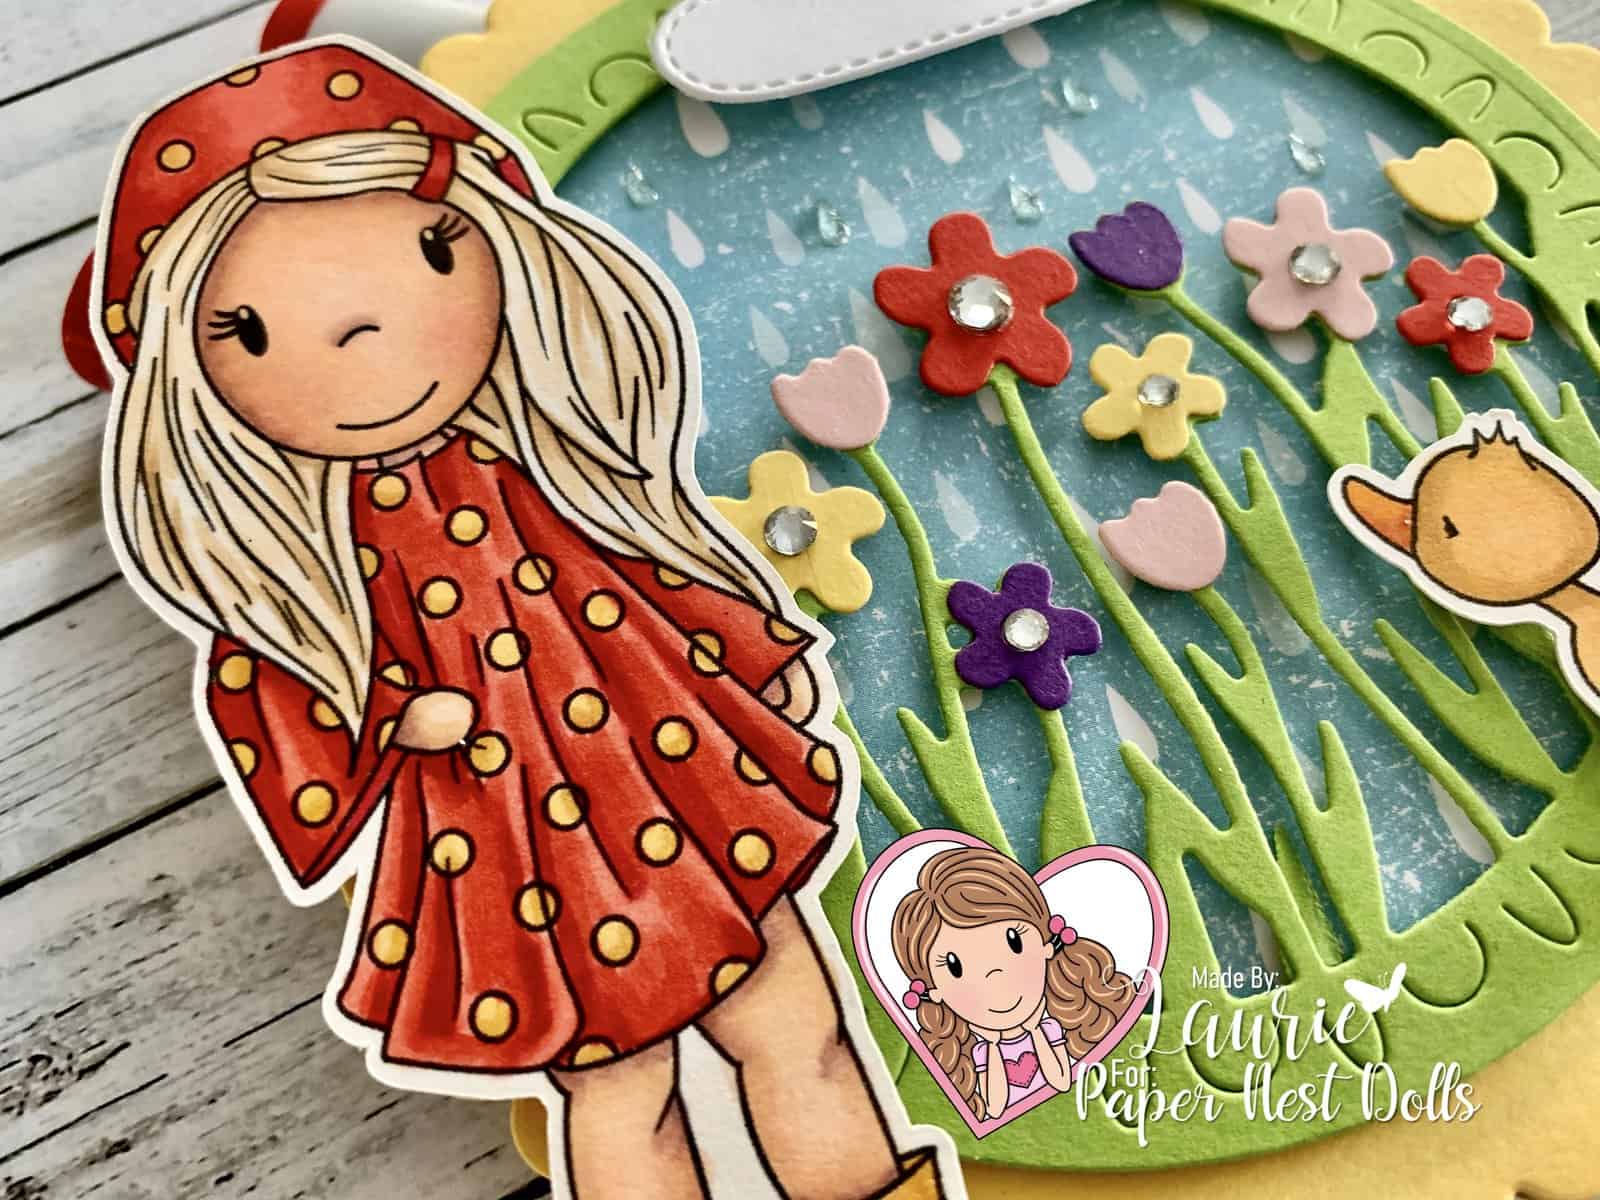
Hello Crafty Friends! It’s Laurie here! I am sharing my April Showers Card as my Design Team Inspiration Card for Paper Nest Dolls using the cute digital stamp Avery in Rain Poncho.

April showers really does bring May flowers! May is here and the flowers are blooming! So, I couldn’t resist colouring Avery in her sweet rain poncho and her little friend with my Copic markers! I have had her coloured for a long time sitting on my desk waiting to be placed on the perfect card and I thought Spring is the perfect time for her!

For my card, I decided to create a circular card instead of my typical square/rectangle ones. A circular card suited the Sending Flowers Dies with its vignette of tulips and flowers in the bright spring colours. The Pleased as Punch DSP with the raindrops was perfect for my background of my card. I added a few more raindrops with the Glitter and Clear Epoxy Shapes to make the rain sparkle. More sparkle was added with the rhinestones in the flowers centers. I added Glossy Accents to her boots since all goloshes are wet from splashing in puddles!

————————–

Copic Markers:

Skin: E04/E11/E21/E00/E000/R20
Hair: E41/E42/E43
Reds: R22/R24/R27/R29
Yellows: Y32/Y35/Y38
Duck: Y32/Y35/Y38/YR02/YR04

Close Up of My April Showers Card
Close Up of Avery in Rain Poncho

————————–

Card Recipe for April Showers Card:

Avery in Rain Poncho, Paper Nest Dolls
Sweet Sentiment Premium Coloring Paper
Pleased as Punch Designer Series Paper, Stampin’ Up Cardboard, From My Stash 
Spring Showers Dies, Lawn Fawn
Sending Flowers Dies, Stampin’ Up!
Layering Circles Collection Framelits, Stampin’ Up!
Glitter and Clear Epoxy Shapes, Stampin Up!
Rhinestone Basic Jewels, Stampin’ Up!
Glossy Accents, Ranger
Daffodil Delight, Granny Apple green, Poppy Parade,
Gorgeous Grape and Blushing Bride Card Stock, Stampin’ Up!

Finished card size: 5” x 5”

————————–

April showers brings May flowers!

To view my other Paper Nest Dolls Design Team cards, please click here.

Hope you like my Design Team Inspiration Card using
Avery in Rain Poncho by Paper Nest Dolls!

Thank you for stopping by!

Hugs,
Laurie
My Sweet Maisy Card

My Design Team Card
My Sweet Maisy Card

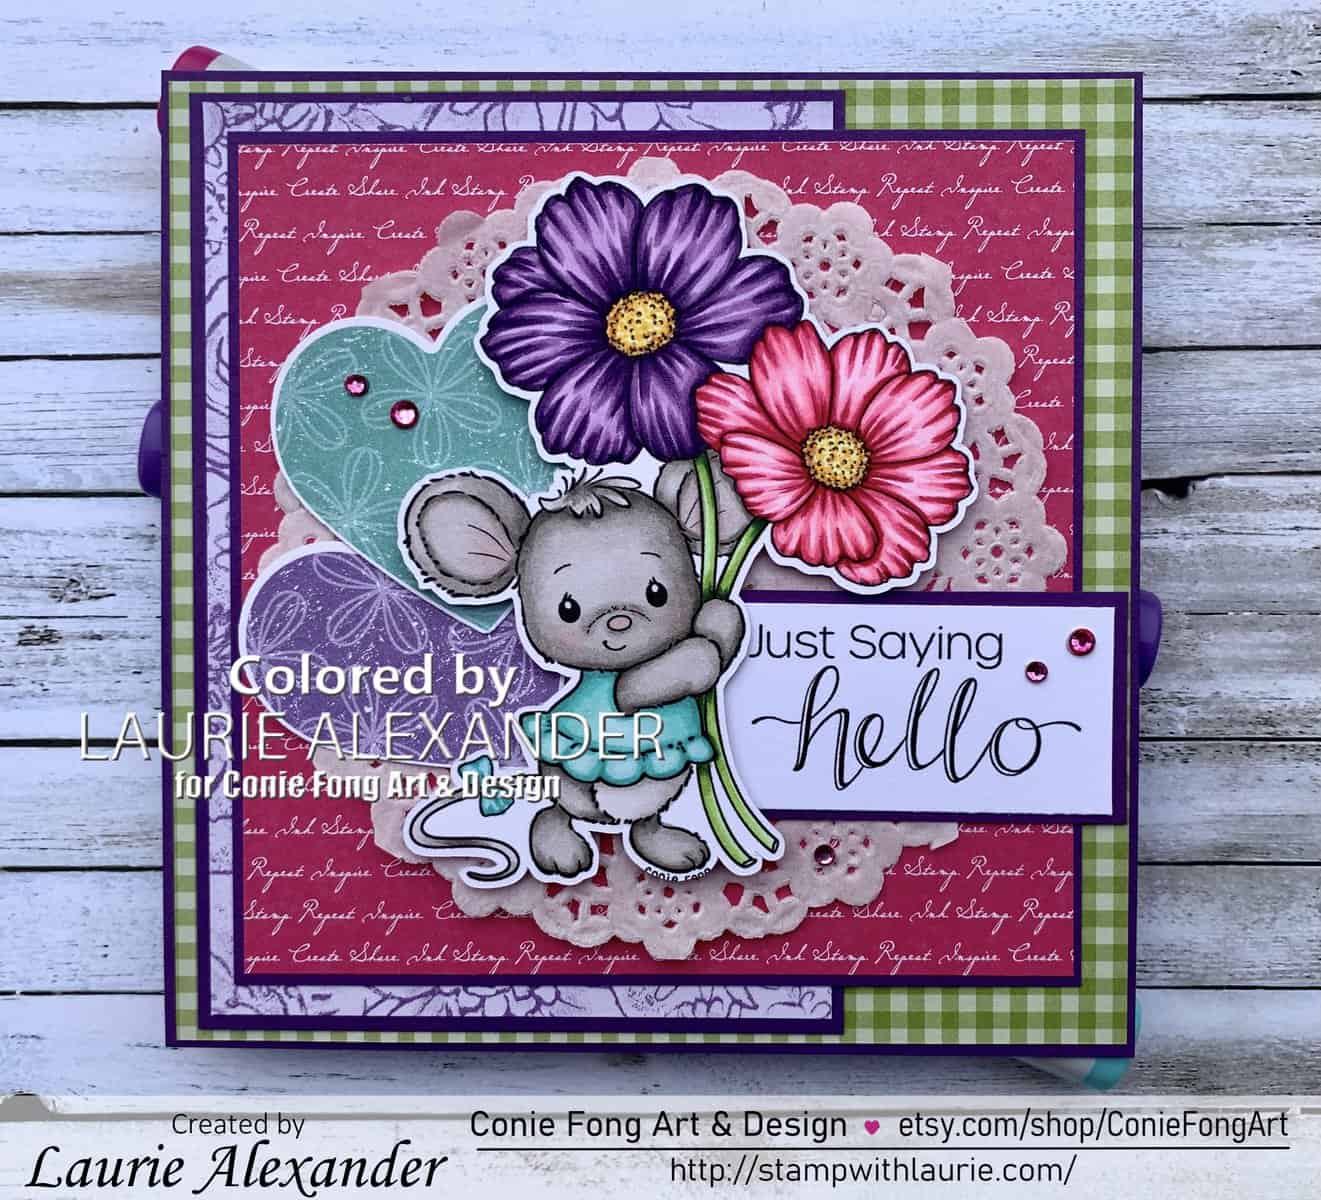
Hello Crafty Friends! It’s Laurie here! I am sharing My Sweet Maisy Card as my Design Team Card for Conie Fong Art & Design. This digital stamp bundle is called Maisy and Cory Mice Bundle and comes with six images including two mice and 4 sentiments.

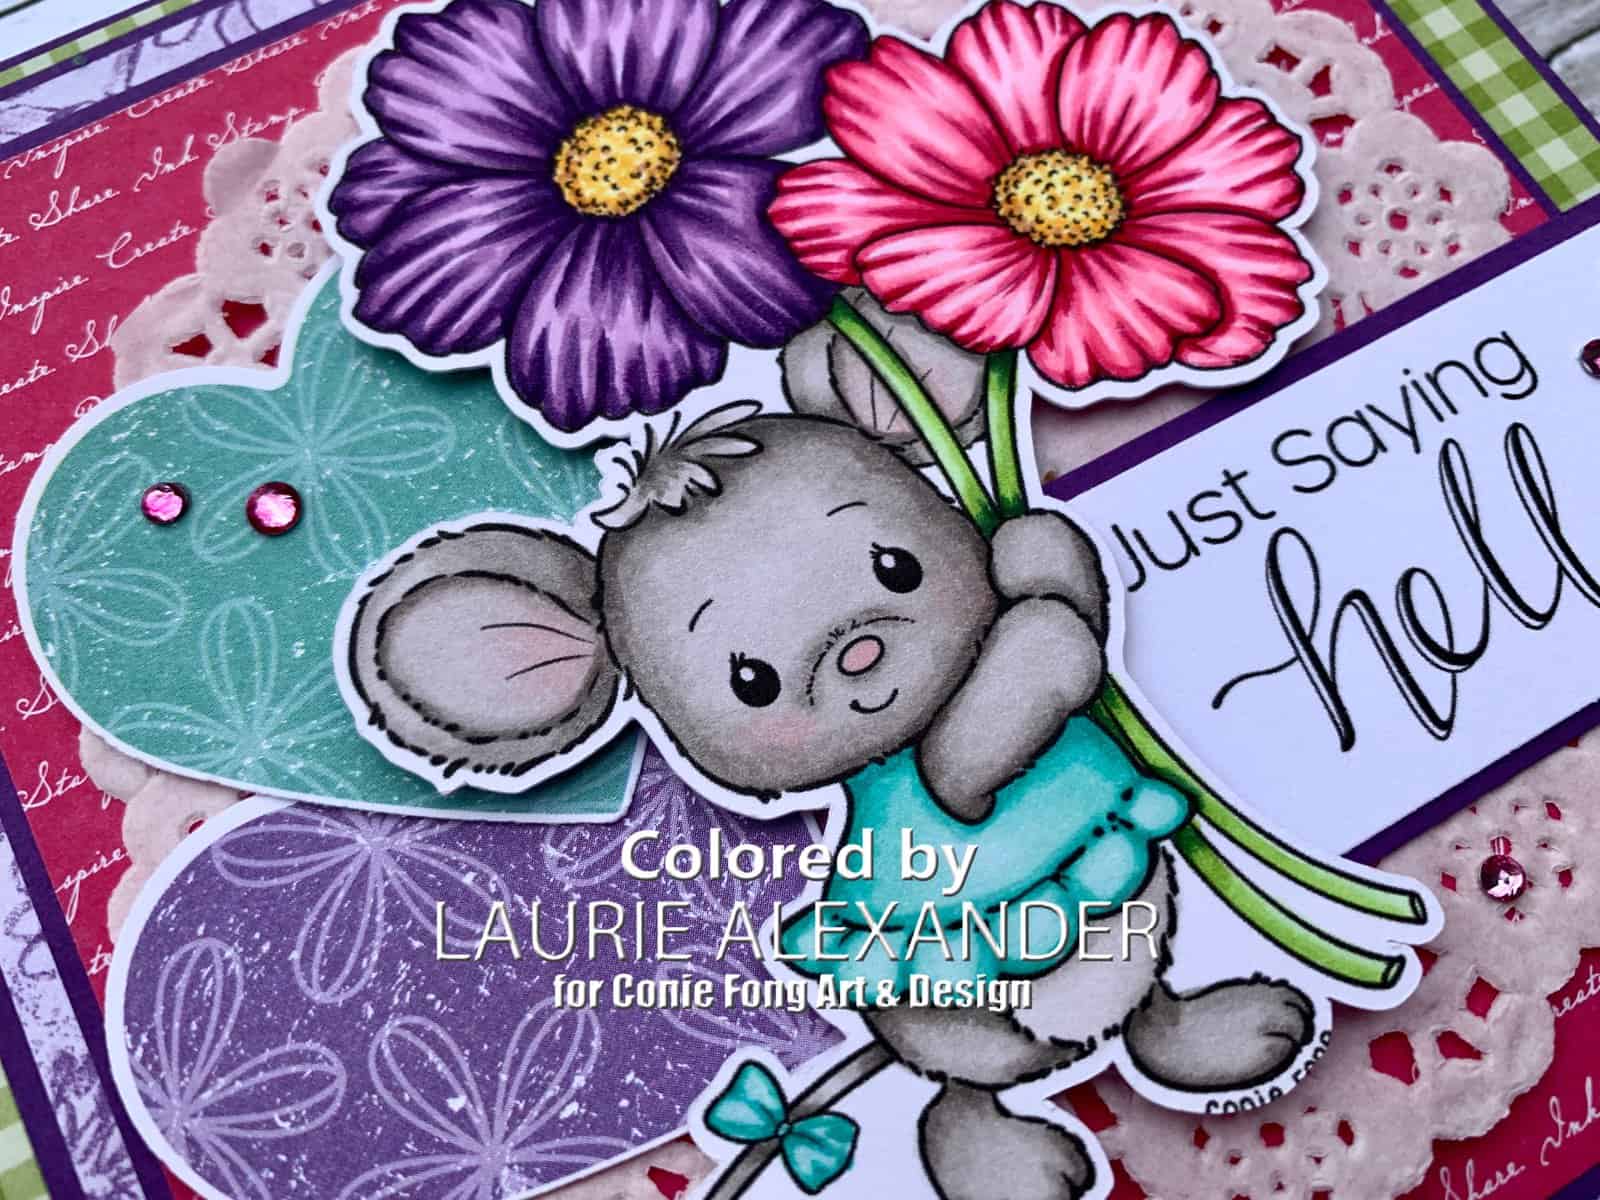
I just coloured Maisy with my Copic markers for my card thinking it would make a sweet Mother’s Day card. My cosmos flowers came out vibrant and bright to create a nice cheery card. I used Granny Apple Green and Melon Mambo Designer Series paper from the Brights Collection by Stampin’ Up! to match my bright and cheery colours. The doily I found loose in my stash and thought it created a perfect backdrop for Maisy. The hearts were punched out from the Please as Punch Designer Series Paper to be layered behind Maisy. I love the sentiments that come with the bundle and thought that “Just saying hello” could be used for so many different occasions. To add some bling to my card, I wanted to use some rhinestones but tie in the pink. So, I coloured them with my RV 19 Copic marker. Voila! Instant matching embellishments!

————————–

Copic Markers:

Maisy’s Fur: W5/W3/W1/0/R20
Maisy’s Dress: BG15/BG13/BG11/BG10
Purple Cosmo Flower: V09/V17/V15/V12
Pink Cosmo Flower: RV29/RV25/RV23/RV21
Flower Centers: E13/Y15/Y11/Y22
Stems: YG11/YG23/YG25/G28
Rhinestones: RV19

Close Up of My Design Team Card

————————–

Card Recipe for My Sweet Maisy Card:

Maisy and Cory Mice Bundle, Conie Fong Art & Design
Paper Basics – Stamper’s Select White Cardstock, Papertrey Ink
Brights 6” x 6” Designer Series Paper, Stampin’ Up!
Pleased as Punch Designer Series Paper, Stampin’ Up!
Botanical Butterfly Designer Series Paper, Stampin’ Up!
4.5” Doily, from my Stash
Heart Punch Pack, Stampin Up!
Rhinestone Basic Jewels, Stampin’ Up!
Clear Wink of Stella, Stampin’ Up!
Gorgeous Grape Card Stock, Stampin’ Up!
Finished card size: 5.5” x 5.5”

————————–

To view my other Conie Fong Art & Design cards, please click here.

Hope you like my Design Team card using
Maisy and Cory Mice Bundle for Conie Fong Art & Design!

Thank you for stopping by!

Hugs,
Laurie
Happy Earth Day Card

My Design Team Card
My Happy Earth Day Card

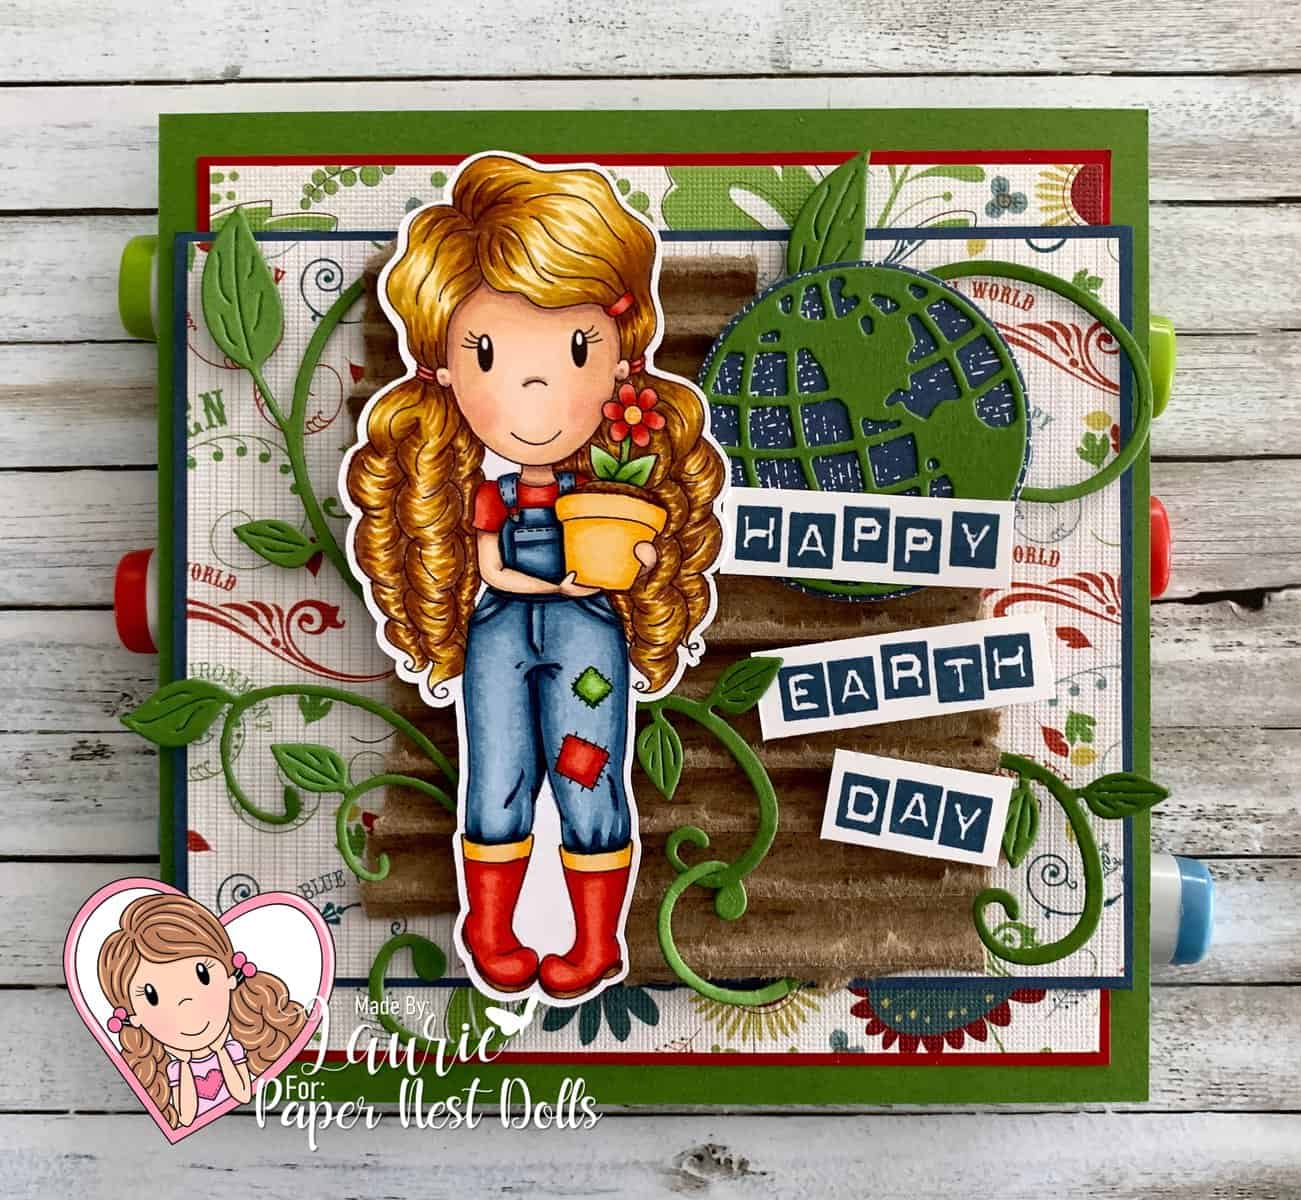
Hello Crafty Friends! It’s Laurie here! I am sharing my Happy Earth Day Card as my Design Team Inspiration Card for Paper Nest Dolls using the cute digital stamp Ellie With Flower Pot.

For those that don’t know what Earth Day is, it is an annual celebration that honours the achievements of the environmental movement and raises awareness of the need to protect Earth’s natural resources for future generations. Earth Day is celebrated on April 22.

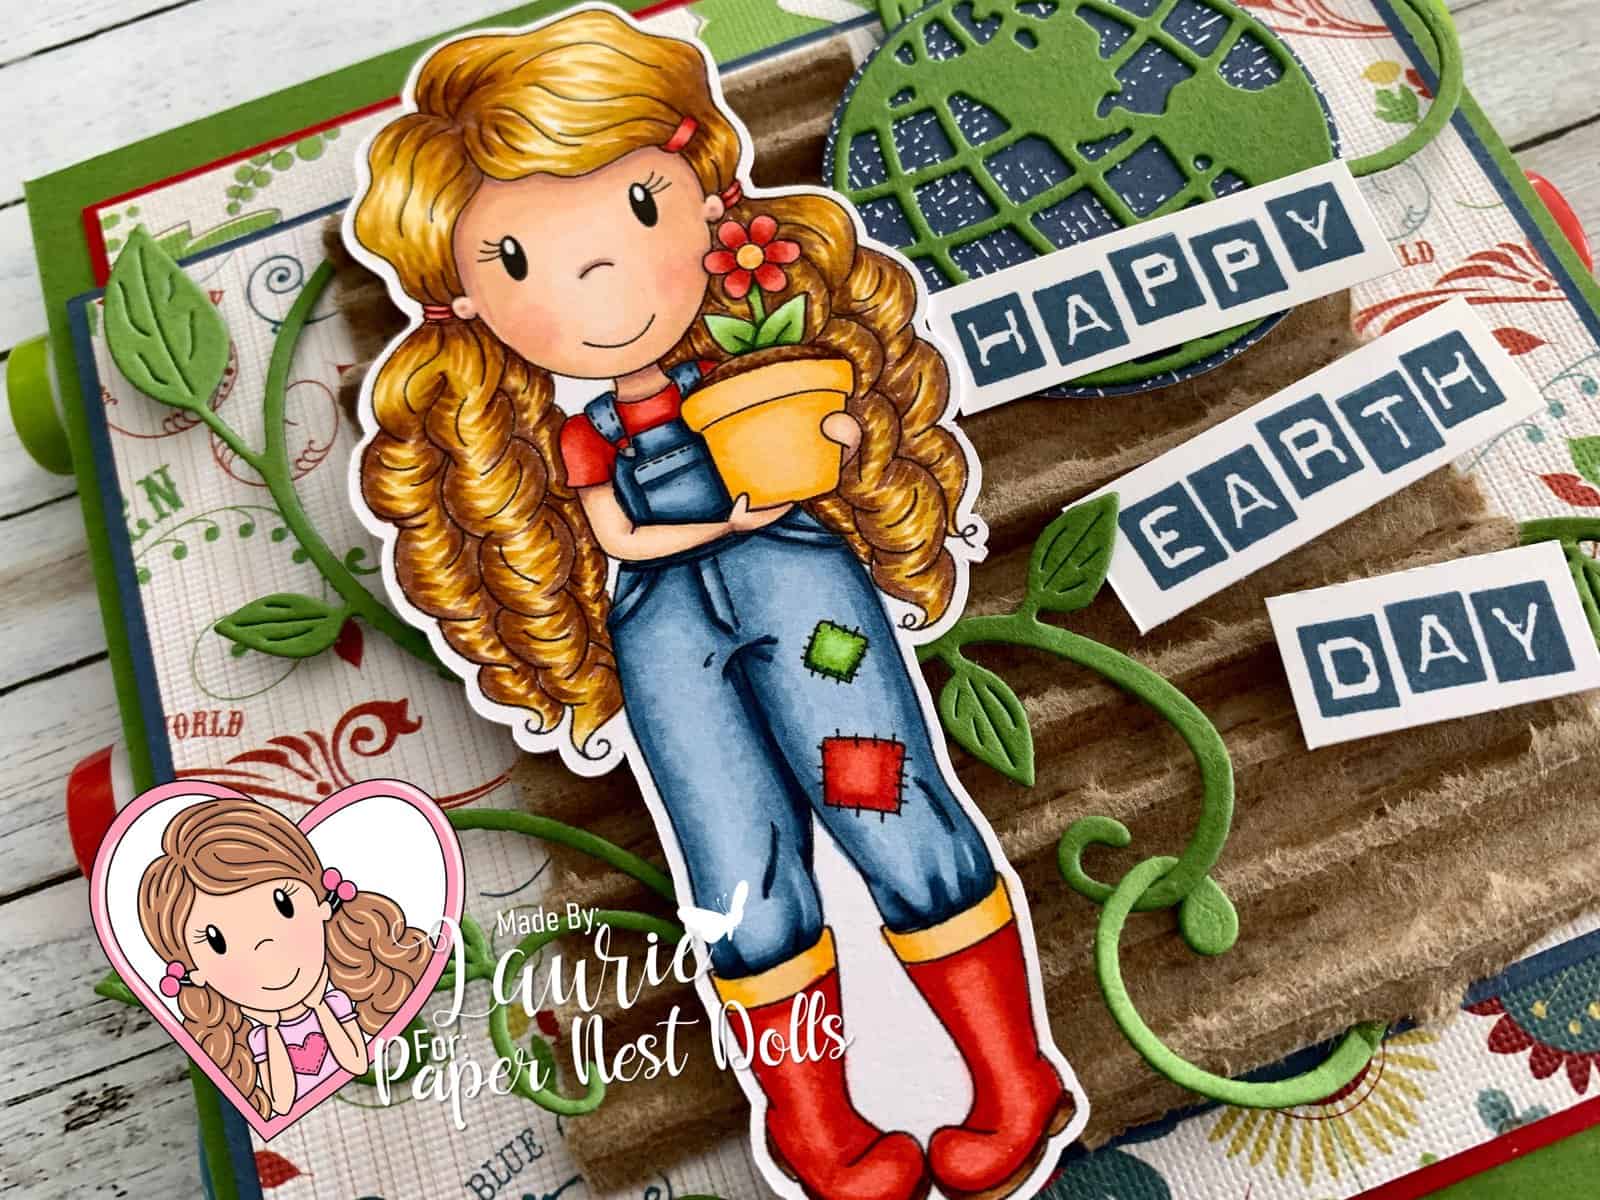
The world is our home and every year I like to support Earth Day in my own little way! I thought Ellie With Flower Pot was perfect for my Earth Day Card! So, I coloured her with my Copic markers.

Since this is an Earth Day card, I used recycled paper including some cardboard that I repurposed. The Green Stack is 70% recycled paper. The piece behind Ellie has such words as Wonderful World, Go Green, Blue Skies, Environment, Earth, Green Trees, etc. Perfect for an Earth Day card! The cardboard was some that I had kicking around the house. I pulled it apart and kept the middle corrugated part that I tore to fit my card. I just loved using all these recycled bits for my card!

The world dies and leafy vines really add to the Earth Day theme. For the sentiment, I stamped each letter individually in a haphazard way. I love the rustic feel of the blocked letters!

————————–

Copic Markers:

Skin: E04/E11/E21/E00/E000/R20
Hair: Y21/Y26/YR24/E25
Jeans: B99/B97/B95/B93/B91
Reds: R22/R24/R27
Yellows: Y32/Y32/Y38
Soil: E37/E35/E33
Leaves: YG11/YG23/YG/25/G28

Close Up of My Design Team Card

————————–

Card Recipe for Happy Earth Day Card:

Ellie With Flower Pot, Paper Nest Dolls
Paper Basics – Stamper’s Select White Cardstock, Papertrey Ink
The Green Stack 70 % Recycled Paper, DCWV
2020-22 In Color 6” x 6” Designer Series Paper, Stampin’ Up!
Cardboard, From My Stash 
Labeler Alphabet, Stampin’ Up!
World Map Dies, Stampin’ Up!
Fanciful Flourish, Cheery Lynn Designs
Real Red, Missy Moonlight, Gumball Green and Whisper White Card Stock, Stampin’ Up!

Finished card size: 5.5” x 5.5”

————————–

“The environment is where we all meet; where all have a mutual interest; it is the one thing all of us share.”
—Lady Bird Johnson

To view my other Copic Marker cards, please click here.

Hope you like my Design Team card using
Ellie With Flower Pot by Paper Nest Dolls!

Thank you for stopping by!

Hugs,
Laurie
My Mother’s Day Card

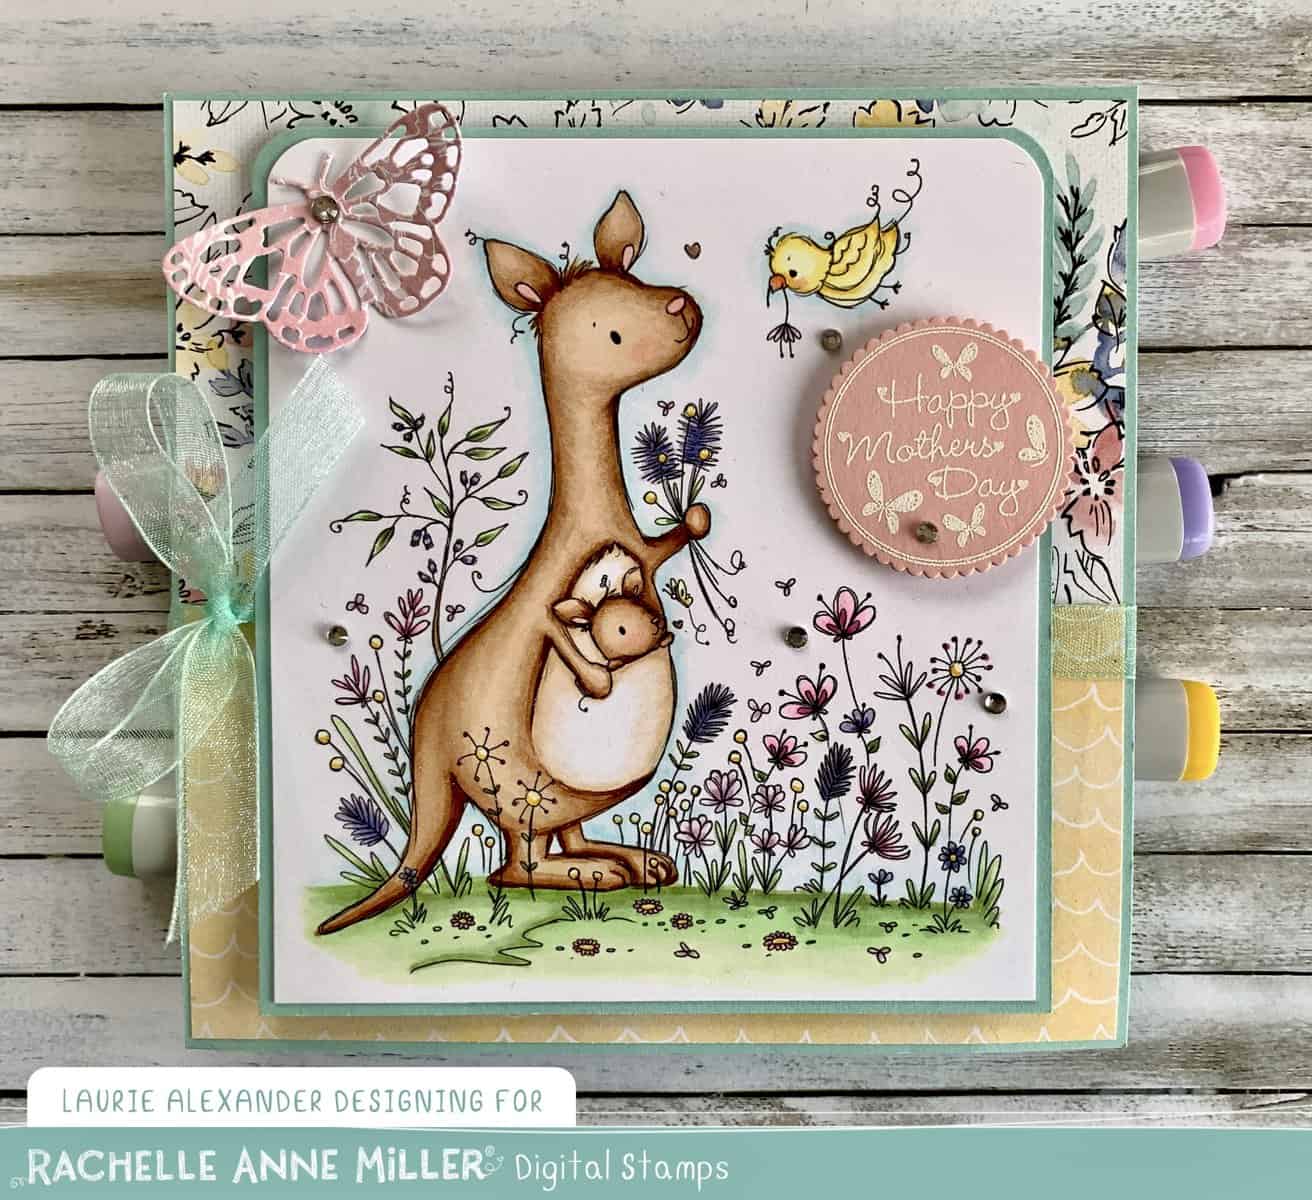
My Design Team Card for Mother's Day using Kangaroo Digital Stamp by Rachelle Anne Miler Creative Studios
My Mother’s Day Card

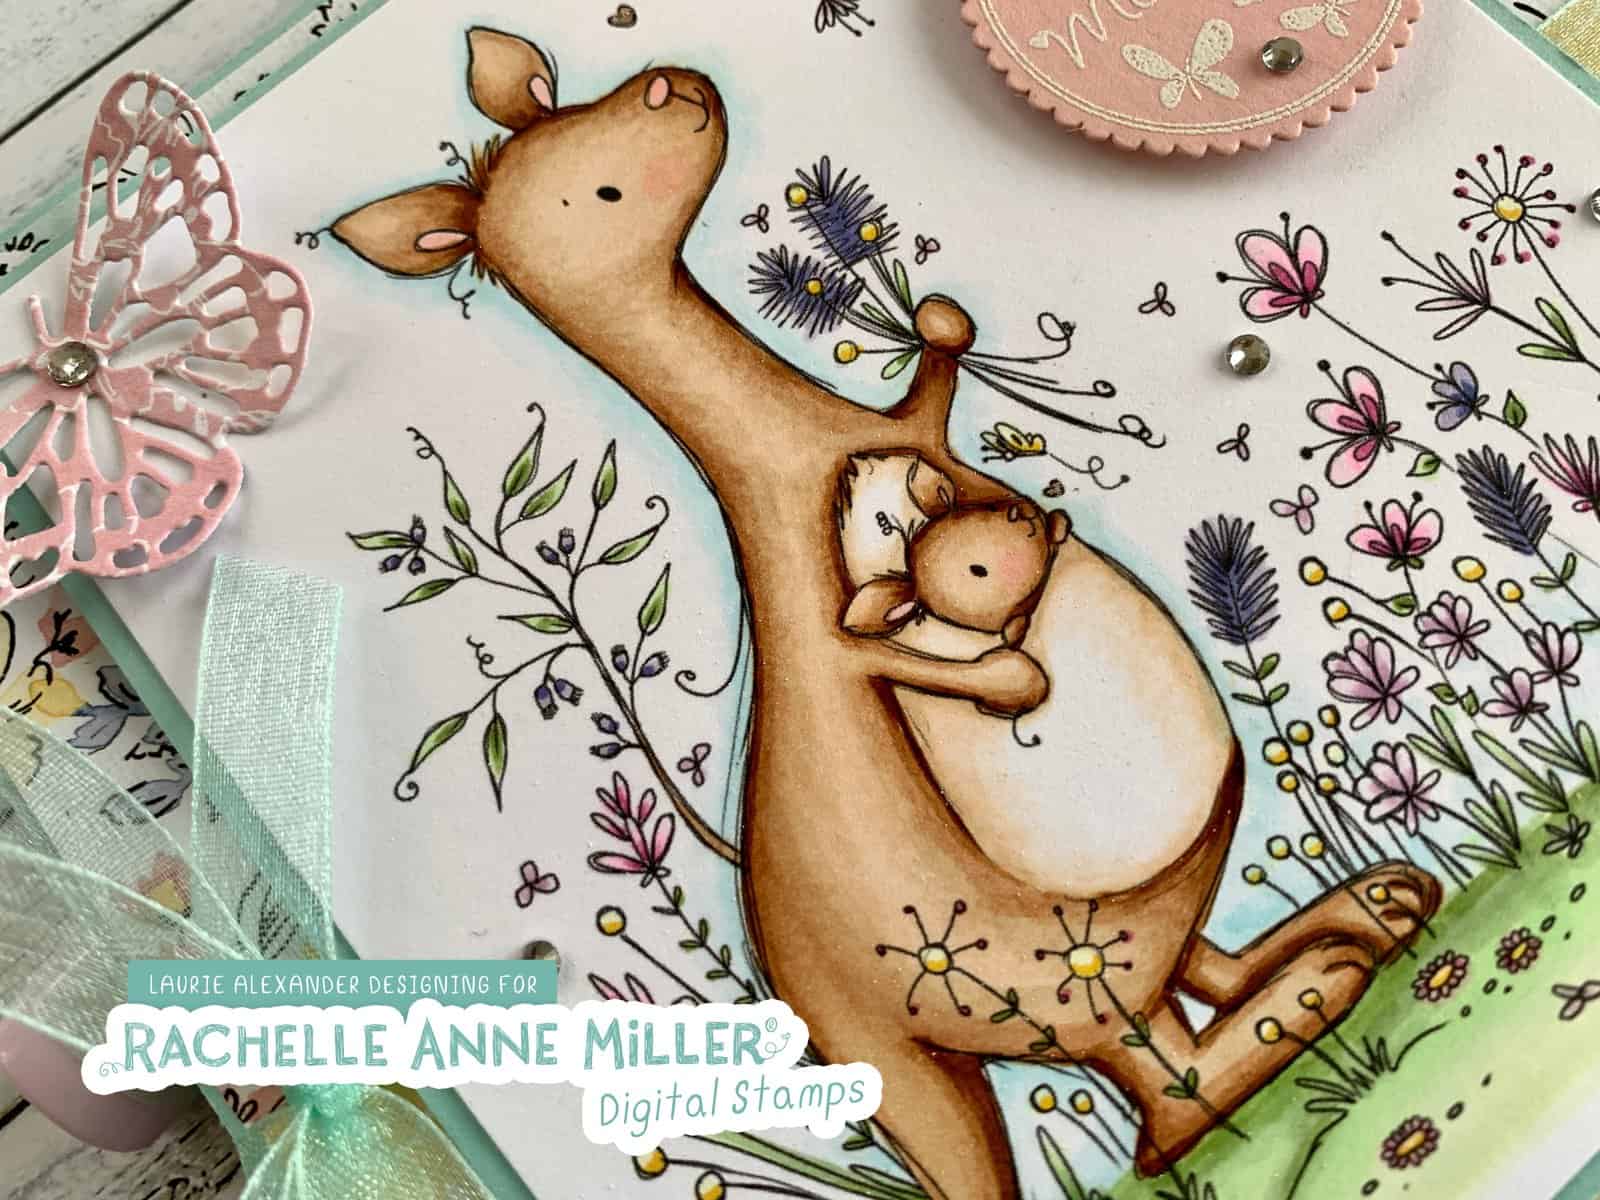
Hello Crafty Friends! It’s Laurie here with My Mother’s Day Card using the digital stamp called ‘Kangaroo’ Digital Stamp by Rachelle Anne Miller Creative Studios. Mother’s Day is just around the corner and this stamp is perfect for that special mom!

I coloured this sweet digital stamp with my Copic markers in Spring like colours. Don’t you just love how the little Roo is hanging out of his mummy’s pouch! Sneak peek…the Designer Series Paper I used is from the new Stampin’ Up! Annual Catalogue that starts in May 2021! It was sitting on my desk with it’s pretty colours just begging to be used! Lol! The butterfly from the Brilliant Wings Dies was die cut from the DSP as well. The Pool Party Sheer Ribbon  tied in a pretty bow went perfectly with the DSP! The sentiment was embossed in white and then die cut with a scallop die from the Layering Circle Dies. A scattering of rhinestones, Wink of Stella and Clear Star Gelly Roll Pen add some sparkle to the card.

————————–

Copic Markers:

Kangaroos: E30/E31/E33/E35/E37/R20
Bird: Y00/Y11/Y15/YR02/YR04
Dark Purples: BV04/BV02/BV00
Light Purples: V0000/V000/V01
Pinks: RV55/RV02/RV00
Yellows
: Y00/Y15
Grass: G43/G21/G20/YG11
Sky: BG0000/BG000

Close Up of My Design Team Card for Mother's Day using Kangaroo Digital Stamp by Rachelle Anne Miler Creative Studios
Close Up of My Mother’s Day Card

————————–

Card Recipe for My Mother’s Day Card:

‘Kangaroo’ Digital Stamp, Rachelle Anne Miller Creative
Paper Basics – Stamper’s Select White Cardstock, Papertrey Ink
Spring Trinkets Stamp Set, Kraftin’ Kimmie Stamps
Hand Penned Designer Series Paper, Stampin’ Up!
Brilliant Wings Dies, Stampin’ Up!
Layering Circles Dies, Stampin’ Up!
VersaMark Ink, Stampin’ Up!
White Stampin’ Emboss Powder, Stampin’ Up!
Rhinestone Basic Jewels, Stampin’ Up!
Pool Party Sheer Ribbon, Stampin’ Up!
Clear Wink of Stella, Stampin’ Up!
Clear Star Gelly Roll Pen
Pool Party and Blushing Bride Card Stock, Stampin’ Up!

Finished card size: 5.5” x 5.5”

————————–

To view my other Rachelle Anne Miller Creative Studios cards, please click here.

Hope you like my Design Team Card using ‘Kangaroo’ Digital Stamp!
Thank you for stopping by!

Hugs,
Laurie
My Angelic Slimline Card

My Angelic Slimline Card

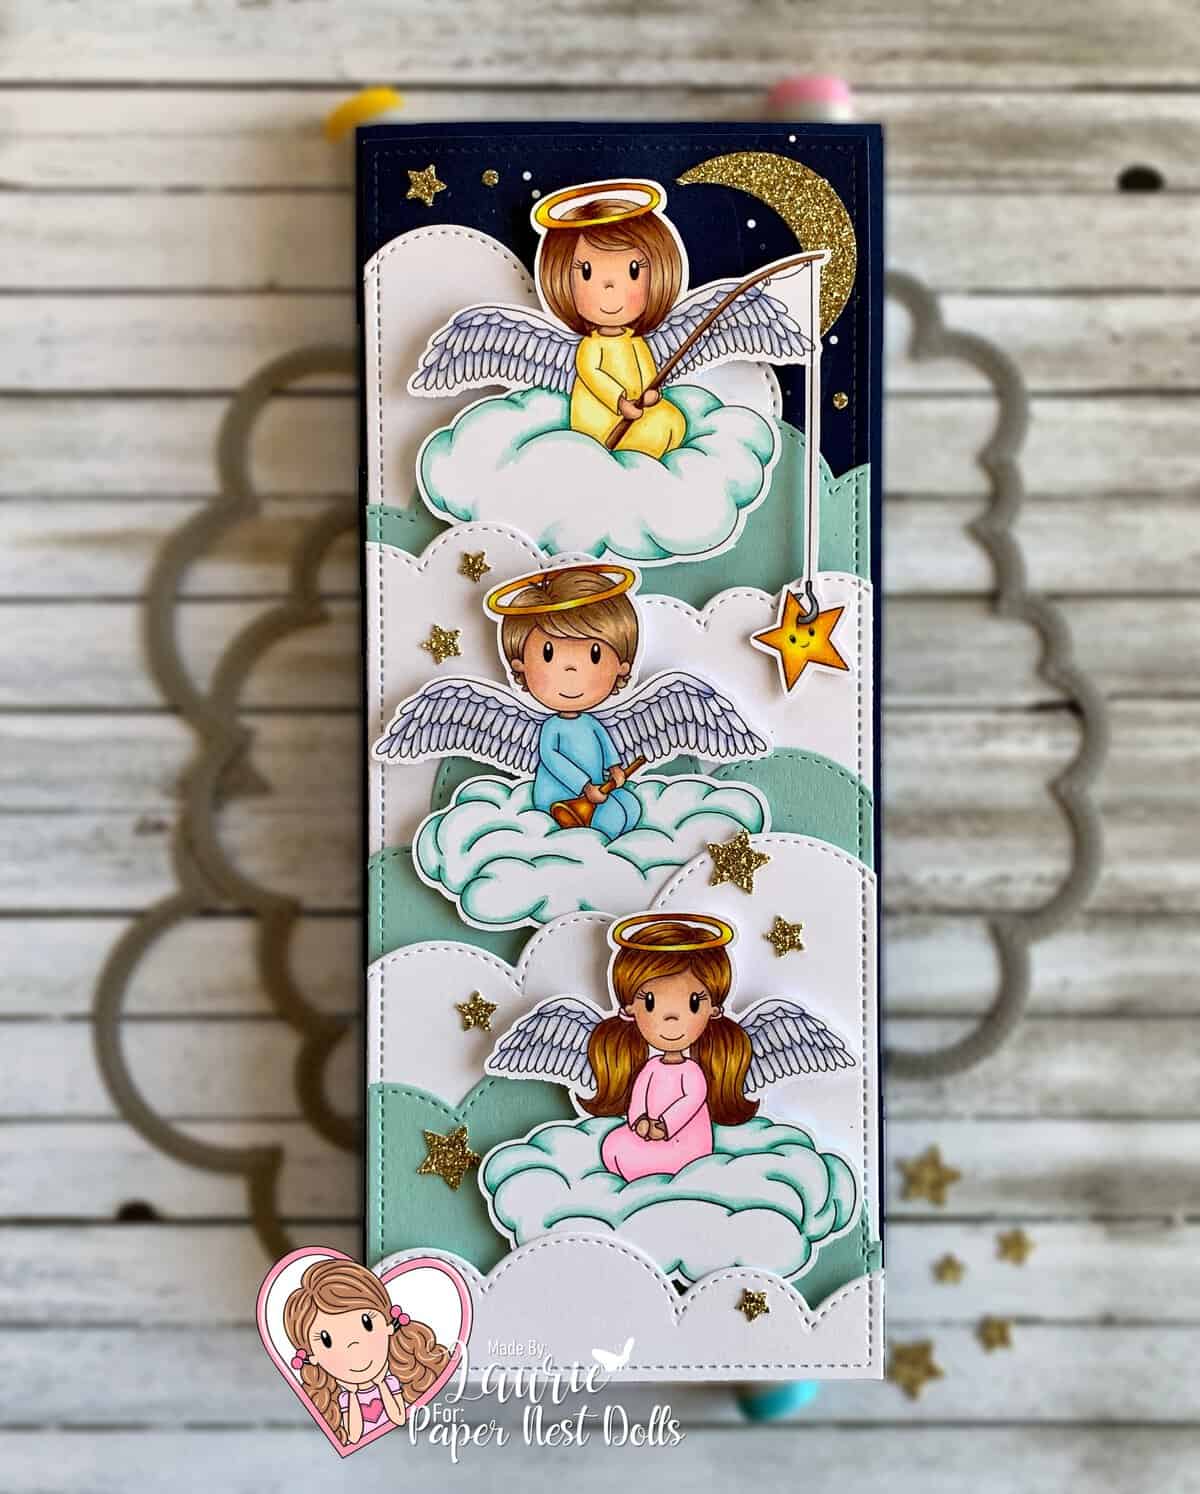
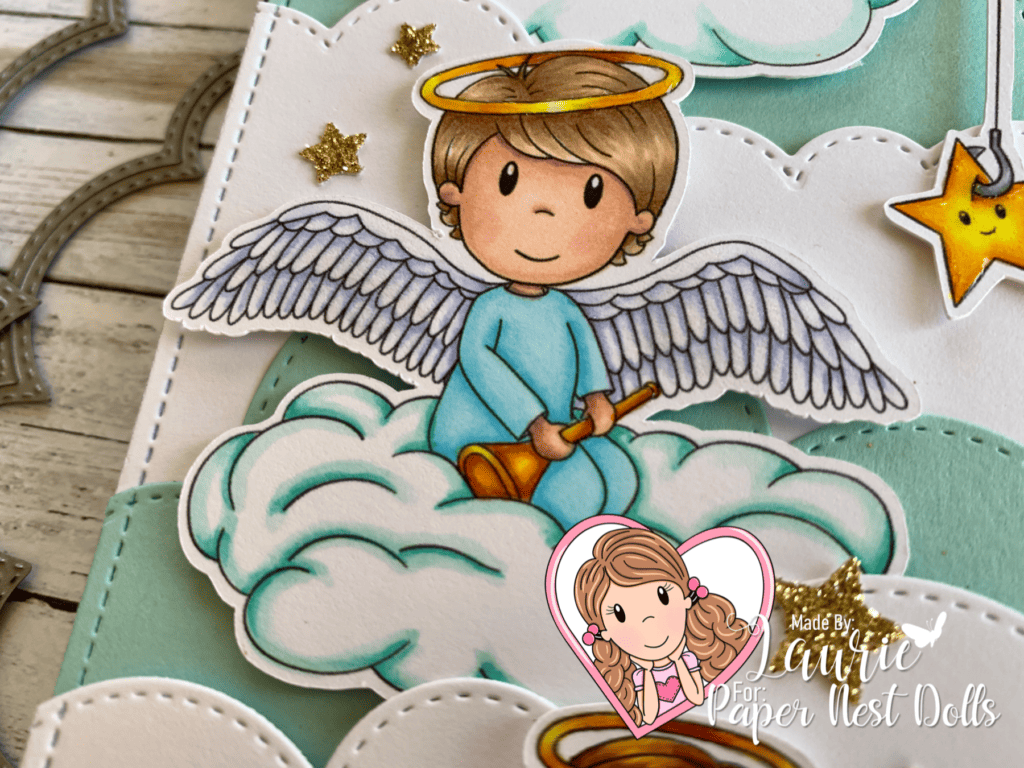
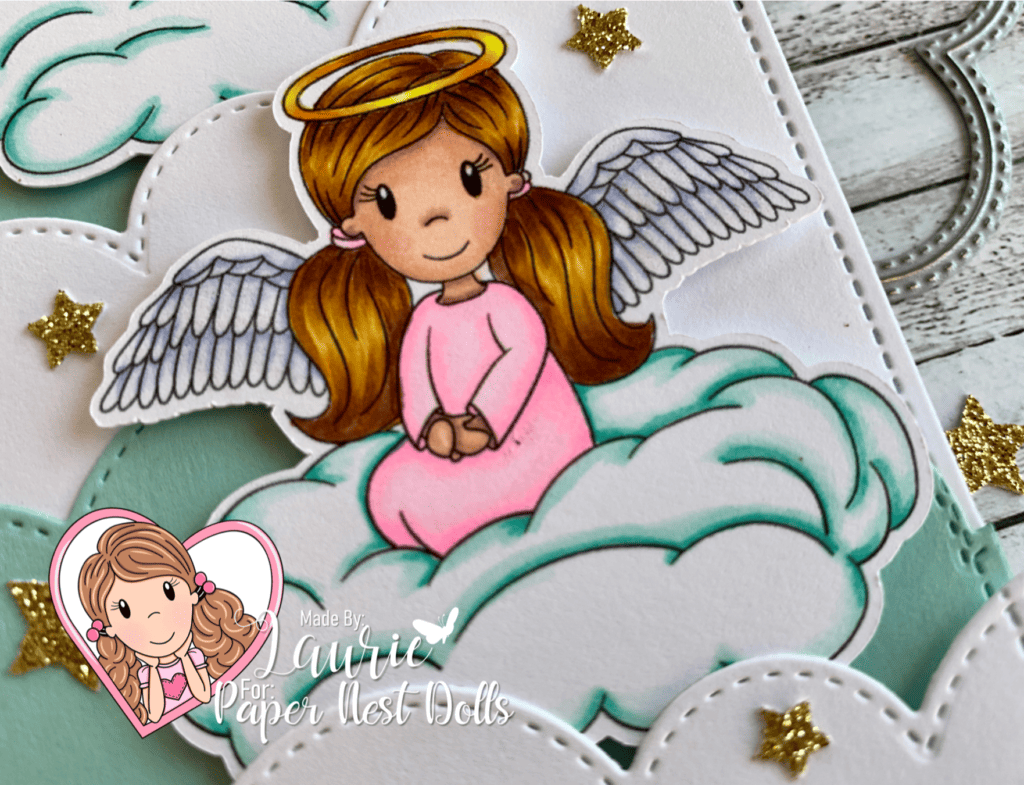
Hello Crafty Friends! It’s Laurie here! I am sharing My Angelic Slimline Card using Angel Emma Catching StarsAngel Owen on a Cloud and Angel Ellie on a Cloud all by Paper Nest Dolls. I thought that all three stamps together would make a fun slimline card!

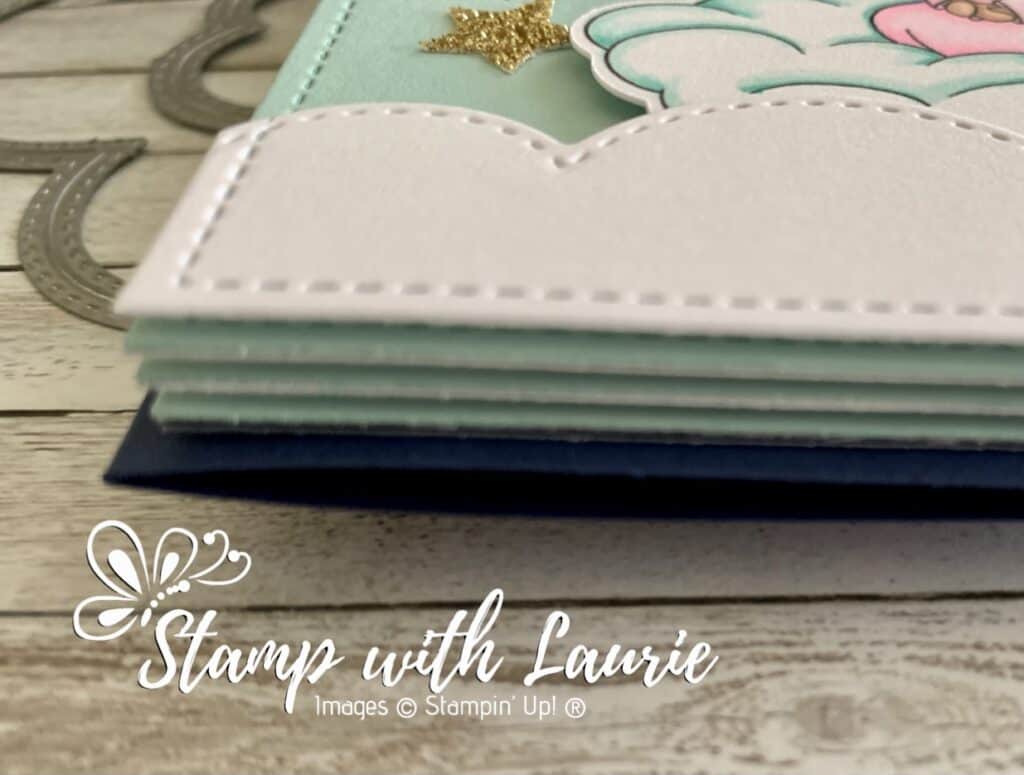
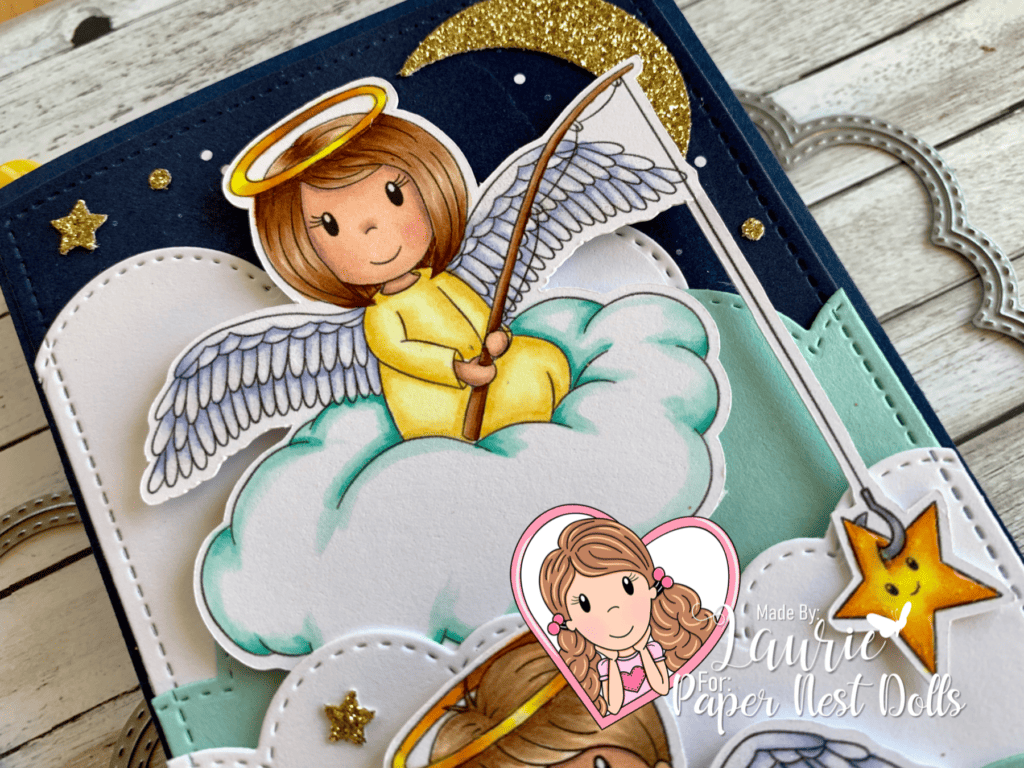
It was so much fun colouring these sweet angels in bright Spring-like colours! Can you see I’m longing for Spring! Lol! I used glossy accents on all the gold bits and Clear Wink of Stella on their wings since angel wings should sparkle! For my clouds, I alternated white and blue measuring each layer so that they all stack on each other with lots of dimensionals. Since I decided to create a night sky behind them, I added a glimmery moon and a scattering of stars throughout my scene.

The Layers of My Card

————————–

Copic Markers:

Angel Emma Catching Stars
Skin: E000/E00/E21/E11/E04/R20
Hair: E37/E35/E34/E31
Robe: Y00/Y11/Y15
Halo/Star: E15/Y38/Y35/Y06/Glossy Accents
Wings: B63/B60/0/Clear Wink of Stella
Fishing Pole: E37/E35/E34
Hook: C5/C3
Clouds: BG13/BG11/BG10/0

Angel Emma Catching Star

Angel Owen on Cloud
Skin: E000/E00/E21/E11/E04/R20
Hair: E57/E43/E55/E53/E50
Robe: B000/B00/B01/B02
Halo/Trumpet: E15/Y38/Y35/Y06/Glossy Accents
Wings: B63/B60/0/Clear Wink of Stella
Clouds: BG13/BG11/BG10/0

Angel Owen on Cloud
Angel Owen on Cloud

Angel Ellie on Cloud
Skin: E000/E00/E21/E11/E04/R20
Hair: E25/YR24/Y26/Y21
Robe: RV000/RV00/RV02
Halo: E15/Y38/Y35/Y06/Glossy Accents
Wings: B63/B60/0/Clear Wink of Stella
Clouds: BG13/BG11/BG10/0

Angel Ellie on Cloud

————————–

Card Recipe for My Angelic Slimline Card:

Angel Emma Catching StarsAngel Owen on a Cloud and
Angel Ellie on a Cloud, Paper Nest Dolls
Paper Basics – Stamper’s Select White Cardstock, Papertrey Ink
Twinkle Twinkle Designer Series Paper, Stampin’ Up
Large Slimline with Sliders Dies, Lawn Fawn
Stitched Cloud Edges Die-namics, My Favorite Things
Twinkle Builder Punch, Stampin’ Up!
Gold Glimmer Paper, Stampin’ Up!
Glossy Accents, Ranger
Clear Wink of Stella, Stampin’ Up!
Night of Navy, Pool Party and Basic White Card Stock, Stampin’ Up!

Finished card size: 3.5” x 8.5”

You can also find these stamps in rubber in the store:
Angel Emma Catching Stars
Angel Owen on a Cloud
Angel Ellie on a Cloud

————————–

To view my other Paper Nest Dolls cards, please click here.

Hope you like My Angelic Slimline Card using Angel Emma Catching Stars,
Angel Owen on a Cloud and Angel Ellie on a Cloud by Paper Nest Dolls!

Thank you for stopping by!

Hugs,
Laurie
Somebunny Sweet Easter Card

My Somebunny Sweet Easter Card

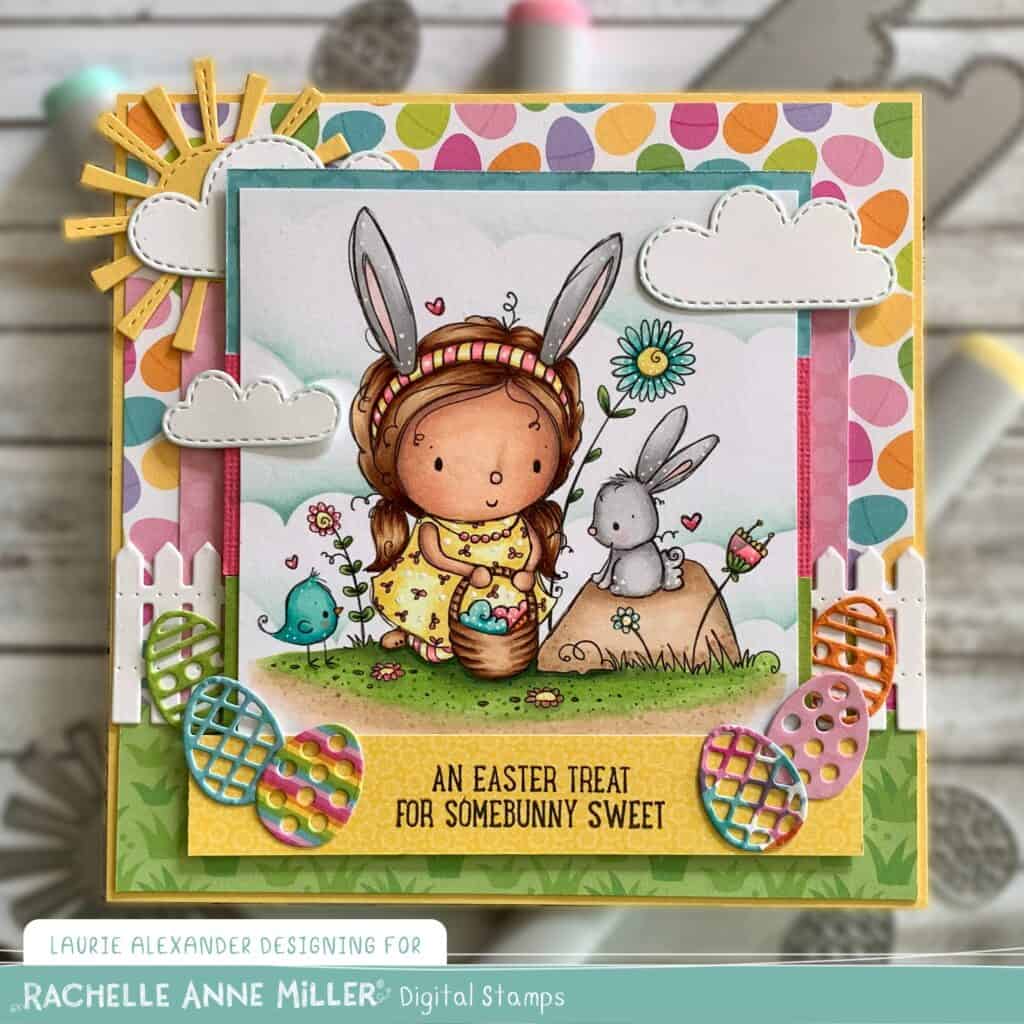
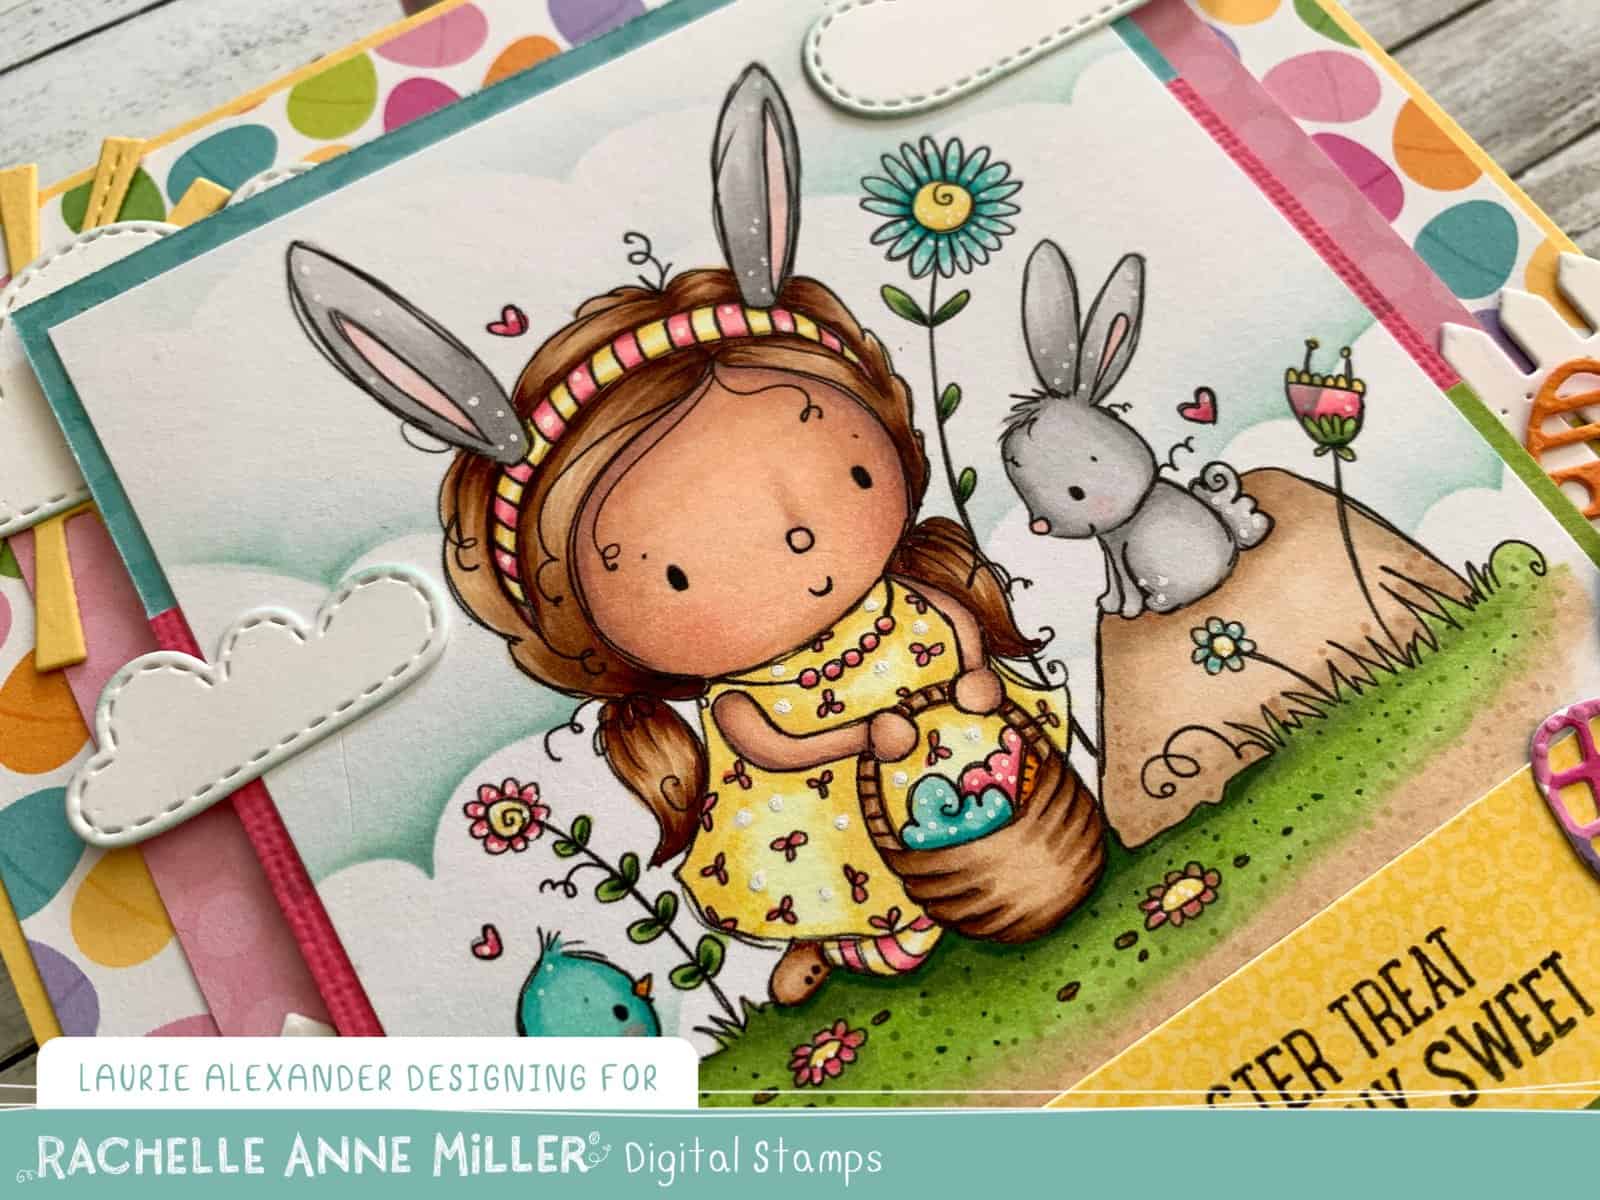
Hello Crafty Friends! It’s Laurie here with my Somebunny Sweet Easter Card using the digital stamp called ‘Easter Bunny Girl’ Digital Stamp by Rachelle Anne Miller Creative Studios. What a sweet image for Easter!

I had so much fun colouring my Easter scene with my Copic markers! The Doodlebug paper with those Easter eggs and grass images were perfect for my card! To make my die cut Easter eggs so colourful, I even cut them out of the paper. Don’t you just love them! So cute! I had some scraps of paper left from a previous project. So, I put them together to create a tri-coloured frame behind my coloured image. Great way to use up scraps! I added a white picket fence and clouds with a sun to make my scene so happy since Easter is a happy time for kids big and small!

————————–

Copic Markers:

Skin: E000/E00/E21/E11/E04/R20
Hair: E37/E35/E34/E31/YR31
Dress: Y000/Y11/Y13/Y15/RV14
Blues: BG11/BG13/BG49
Pinks: RV21/RV13/RV14
Yellows
: Y000/Y11/Y13/Y15
Basket/Shoe: E30/E33/E35/E37
Bunny Ears: Y000/Y13/Y15/RV21/RV13/RV14/T0/T1/T2
Bird: BG11/BG13/BG49/R20
Beak/Carrot in Basket: Y38/YR04
Bunny: T0/T2/T3/R20
Rock: E30/E31/0
Grass: YG03/YG63/YG67/E30/E31

Close Up of My Design Team Card

————————–

Card Recipe for
My Somebunny Sweet Easter Card:

‘Easter Bunny Girl’ Digital Stamp, Rachelle Anne Miller Creative
Paper Basics – Stamper’s Select White Cardstock, Papertrey Ink
Hoppy Easter 12” x 12” Paper, Doodlebug Design Inc.
Springtime 6” x 6” Paper Pad, Doodlebug Design Inc.
Lawn Fawn Spring Showers Dies
Basket Builder Framelits Dies, Stampin’ Up!
Basket Bunch Stamp Set, Stampin’ Up!
Onyx Black VersaFine Instant Dry Pigment Ink, Tsukineko
Clouds Stencil, C.C. Designs
Blender Brushes, Picket Fence
Pool Party Classic Ink, Stampin’ Up!
Stamping Sponges, Stampin’ Up!
White Gelly Roll Pen
So Saffron and Whisper White Card Stock, Stampin’ Up!

Finished card size: 5.5” x 5.5”

————————–

To view my other Rachelle Anne Miller Creative Studios cards, please click here.

Hope you like my Somebunny Sweet Easter Card using ‘Easter Bunny Girl’ Digital Stamp!
Thank you for stopping by!

Hugs,
Laurie
Happy St. Patrick’s Day

Happy St. Patrick's Day Card
Happy St. Patrick’s Day Card

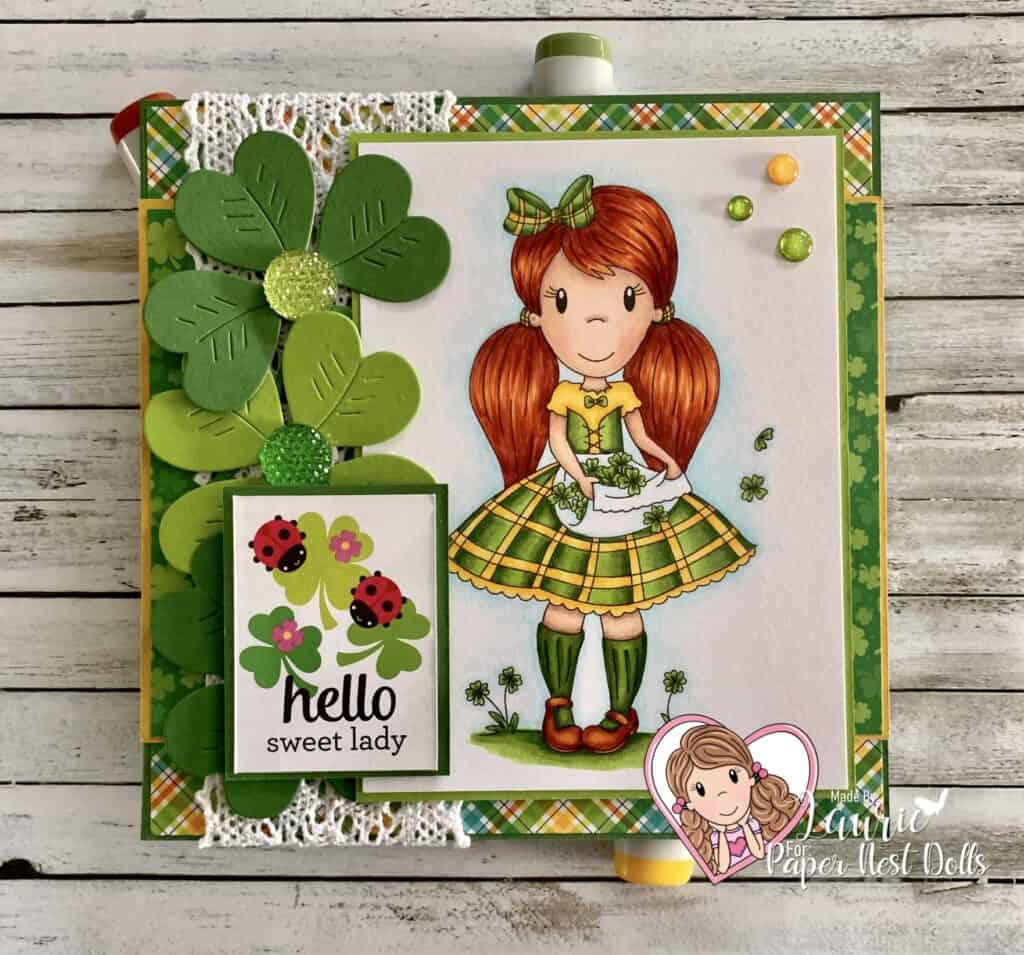
Hello Crafty Friends! It’s Laurie here! St. Patrick’s Day is next week, and I thought I would use Ellie with Clovers by Paper Nest Dolls for my Happy St. Patrick’s Day Card.

I do not have a lot of St. Patrick’s Day stuff in my stash, but I always create a card since my cousin is Irish and I like to send her a card.

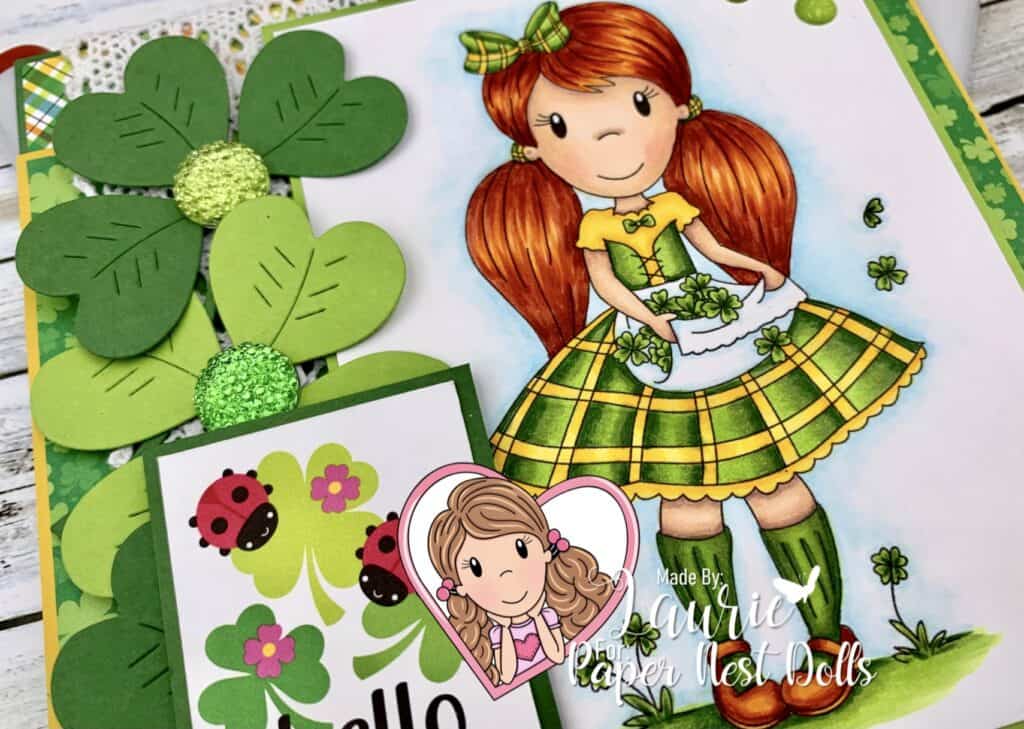
I coloured Ellie with my Copic markers in traditional green and yellow tones. I also gave her red hair since my cousin has a couple of red heads in her family. Some crocheted lace was added since Ireland is known for their beautiful lace. Three four leaf clovers with gems create a nice border to set off the tag from the Doodlebug Paper. A couple of glitter sprinkles finish my card off.

————————–

Copic Markers:

Skin: E000/E00/E21/E11/E04/R20
Hair: E18/E08/YR18/YR14
Greens: YG03/YG63/YG67
Yellows: Y15/Y19/Y17
Apron: B00/0
Sky: B00/B000/B0000/0

Close Up of My Design Team Card

————————–

Card Recipe for Happy St. Patrick’s Day Card:

Ellie with Clovers, Paper Nest Dolls
Paper Basics – Stamper’s Select White Cardstock, Papertrey Ink
Lots O’Luck 6” x 6” Paper Pad, Doodlebug Designs Inc.
Four Leaf Clover, Frantic Stamper Inc.
Crochet Lace, Craft (Dollar Store)
Summer Glitter Assortment Sprinkles, Doodlebug Designs Inc.
Glitter Gems Stickers, Michaels Arts & Crafts
Garden Green, Crushed Curry and
Granny Apple Green Card Stock, Stampin’ Up!

Finished card size: 5.5” x 5.5”

————————–

To view my other Paper Nest Dolls cards, please click here.

Hope you like my Happy St. Patrick’s Day Card
using Ellie with Clovers by Paper Nest Dolls!

Happy St. Patrick’s Day Everyone!

Thank you for stopping by!

Hugs,
Laurie
My Puppy Love Card

My Puppy Love Card
My Puppy Love Design Team Card

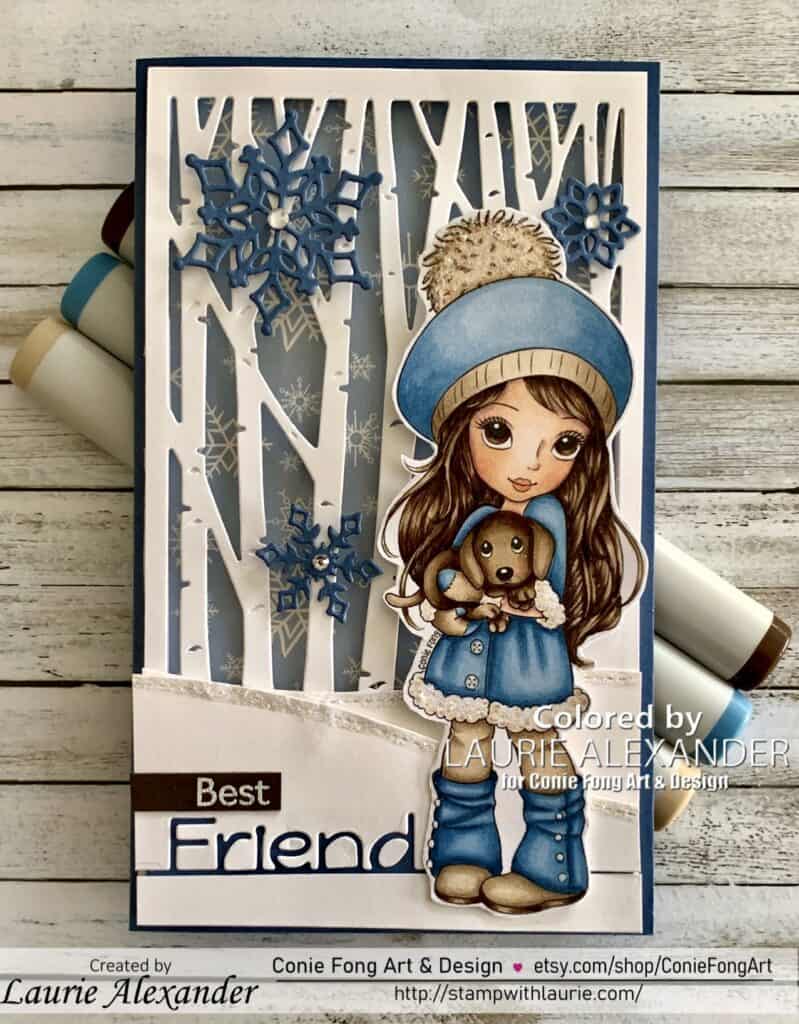
Hello Crafty Friends! It’s Laurie here! I am sharing My Puppy Love Card as my first official Design Team Card for Conie Fong Art & Design. I am so excited that I have been asked to become a permanent Design Team Member! Yippee!

For my card, I used the sweet Puppy Cuddles and coloured with my Copic markers her hair colour to match her puppy’s fur. You know what they say…you look like your dog. Lol! 

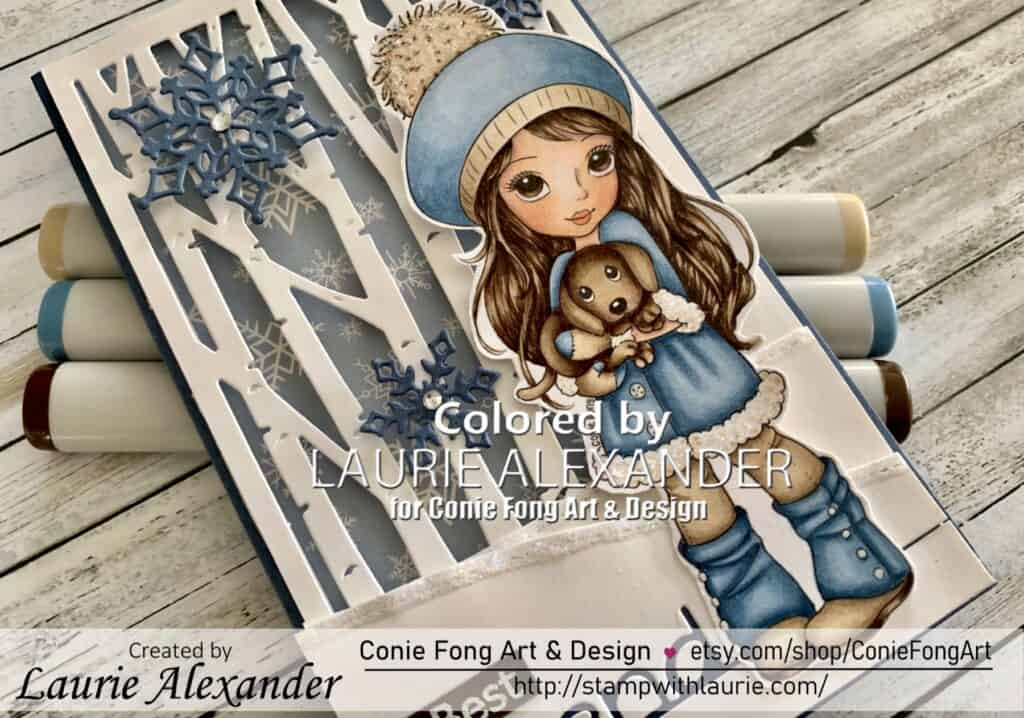
Since it is still snowy here is Canada, I thought I would create one last winter card as a mini slim line card. I have been having so much fun with slim line cards and thought it would be fun to create my first mini card for her! The birch trees were the perfect size for my slim line card with a couple of snow banks to fill in the space at the bottom. I decided that the Friend die would be neat die cut from the snow bank. I added the white embossed “Best” on Early Espresso to match the colour of her dog and to complete my Best Friend sentiment since all dogs are Man’s Best Friend!

————————–

Copic Markers:

Skin: E000/E00/E21/E11/E04/R20
Hair: E49/E43/E42/E41
Eyes: E47/E44/E43
Blues: B91/B93/B95/B97
Browns: E44/E43/E42/E41
Pom Pom on Hat: E43/E42/E41/Star Dust Stickles
Boots: E44/E43/E42/E41
Soles of Boots: E49/E47/E42
Puppy: E47/E44/E43/E42/R20

Close Up of My Design Team Card
Close Up of My Design Team Card for Conie Fong Art & Design

————————–

Card Recipe for My Puppy Love Card:

Puppy Cuddles, Conie Fong Art & Design
Paper Basics – Stamper’s Select White Cardstock, Papertrey Ink
Warm & Cozy 6” x 6” Paper, Echo Park
Woodland Collection Birch Tree Forest, Sue Wilson
Friend Saying, CC Designs
Freezin’ Friends Dies, Stampin Up!
Snowfall Thinlits Dies, Stampin’ Up!
Art Gallery Stamp Set, Stampin’ Up!
Rhinestone Basic Jewels, Stampin’ Up!
VersaMark Ink Pad, Stampin’ Up!
White Stampin’ Emboss Powder, Stampin’ Up!
Foam Adhesive Strips, Stampin’ Up!
White Gelly Roll Pen, Sakura
Clear Gelly Roll Pen, Sakura
Star Dust Stickles, Ranger
Misty Moonlight, Early Espresso and
Whisper White Card Stock, Stampin’ Up!

Finished card size: 6” x 3.5”

————————–

To view my other Conie Fong Art & Design cards, please click here.

To view my other Slim Line cards, please click here.

Hope you like my first Design Team card using
Puppy Cuddles for Conie Fong Art & Design!

Thank you for stopping by!

Hugs,
Laurie
Always Be A Mermaid Card

My Always Be A Mermaid Card
My Always Be A Mermaid Design Team Card

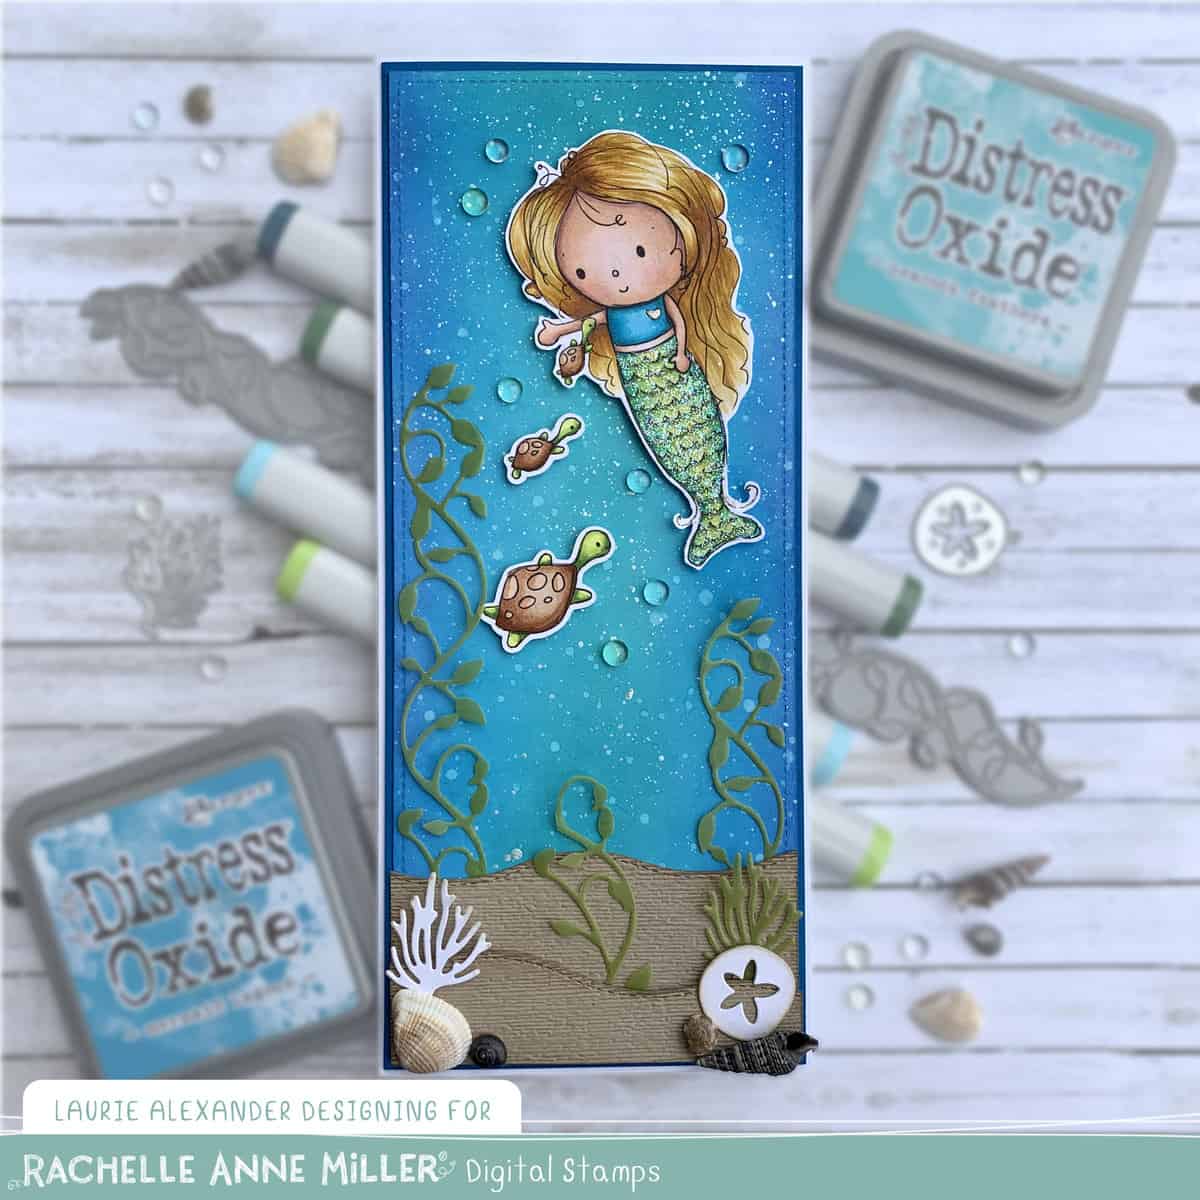
Hello Crafty Friends! It’s Laurie here with my Always Be A Mermaid Card using the stamp called ‘Mermaid’ Digital Stamp by Rachelle Anne Miller Creative Studios. I love this sweet mermaid and her little friends!

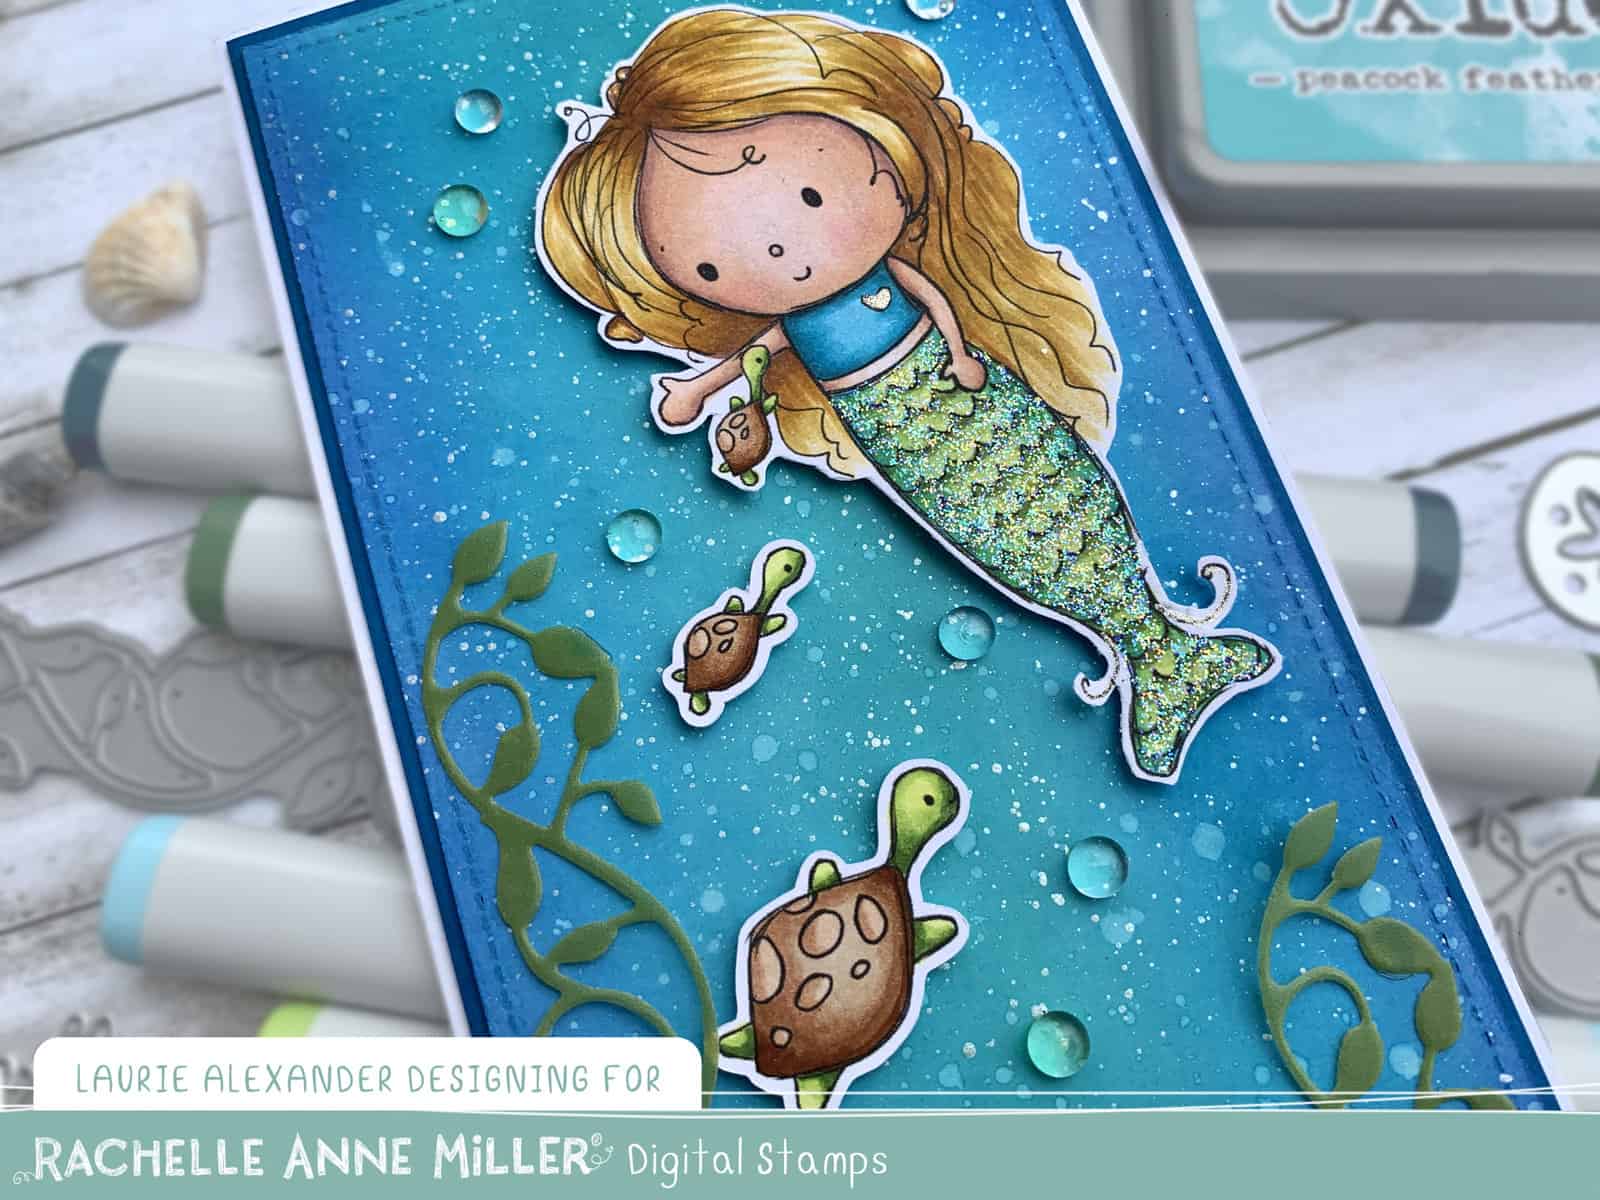
For my card, I knew that I wanted to create a slim line card for her with a pretty watery background! I coloured her with my Copic markers. I especially had fun with her tail and used two different colour combinations to give it a mermaid look. And then, I added Stickles since you know mermaids have sparkly tails! Once I coloured her and her friends, I fussy cut them out.

My Watery Background Technique

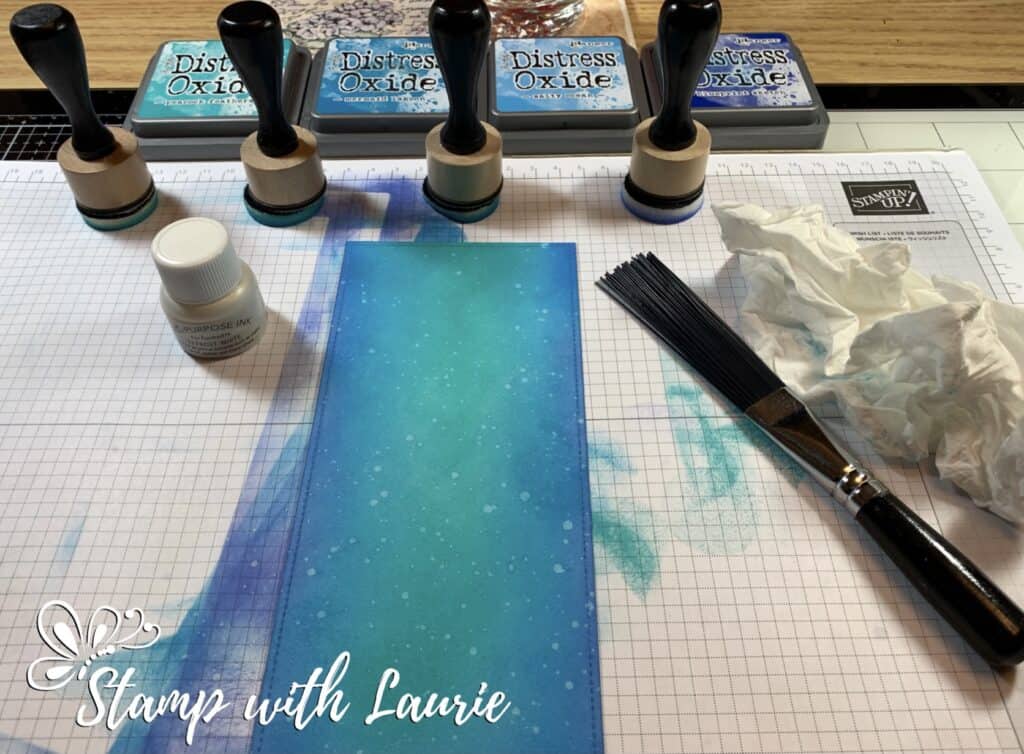
For my water, I pulled out my Distress Oxides and worked from light in the centre (Peacock Feathers and Mermaid Lagoon) where I wanted to highlight her to the darkest at the edges (Salty Ocean and Broken China). Once I did that, I splattered water on the panel and removed the water droplets with a paper towel to give some dimension. Next, I splattered the panel with the Frost White shimmer paint and let everything dry.

Some dies from my stash, a scattering of clear dew drops, and real shells are added to finish my watery scene.

————————–

Copic Markers:

Skin: E000/00/21/11/04/R20
Hair: E25/YR24/Y26/Y21
Top: BG01/BG05/BG09/R20
Tail: YG00/YG23/YG67/BG01/BG09
Turtles: YG00/YG23/YG67/E37/E35/E33/E31/E30

Close Up of My Card
Close Up of My Design Team Card

————————–

Card Recipe for My
Always Be A Mermaid Card:

‘Mermaid’ Digital Stamp, Rachelle Anne Miller Creative
Paper Basics – Stamper’s Select White Cardstock, Papertrey Ink
Perennial Essence 12” x 12” Vellum Cardstock, Stampin’ Up!
Large Slimline with Sliders Dies, Lawn Fawn
Memory Box Delicate Vine Border Die!
Breaking Waves Border Dies, Heffy Doodle
Under the Sea Framelits, Stampin’ Up!
Subtle 3D Embossing Folder, Stampin’ Up
Crumb Cake Classic Ink, Stampin’ Up!
Stamping Sponges, Stampin’ Up!
Spring Bloom Dew Drops, The Robin’s Nest
Clear Gelly Roll Pen
Star Dust Stickles, Ranger
Shells from Dollar Store

For the Water:
Hot Press 140 lbs Watercolor Paper, Fabriano
Peacock Feathers Distressed Oxide, Ranger
Mermaid Lagoon Distressed Oxide, Ranger
Salty Ocean Distressed Distressed Oxide, Ranger
Broken China Distress Oxide Ink, Ranger
Ranger Mini Ink Blending Tool
Tim Holtz Distress Splatter Brush, Ranger
Splashes of water and paper towel to remove water droplets
Frost White Shimmer Paint, Stampin’ Up!

Pacific Point, Whisper White and Crumb Cake Card Stock, Stampin’ Up!

Finished card size: 8.75” x 3.75”

————————–

To view my other Rachelle Anne Miller Creative Studios cards, please click here.

Hope you like my Always Be A Mermaid Card using ‘Mermaid’ Digital Stamp by Rachelle Anne Miller Creative Studios!

Thank you for stopping by!

Hugs,
Laurie
Level Up Birthday Card

My Level Up Birthday Card

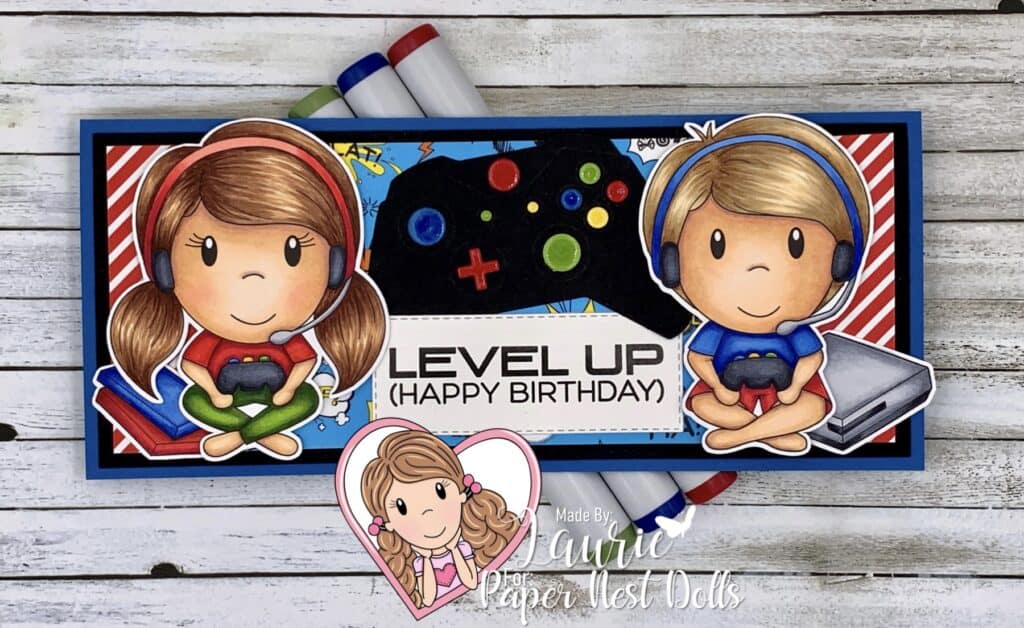
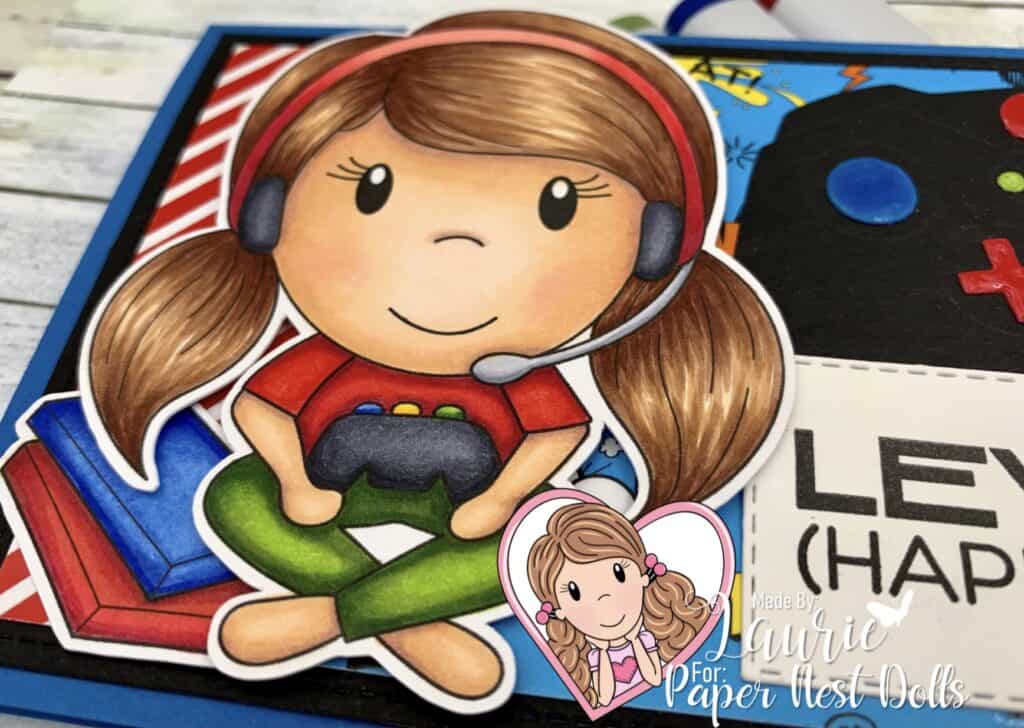
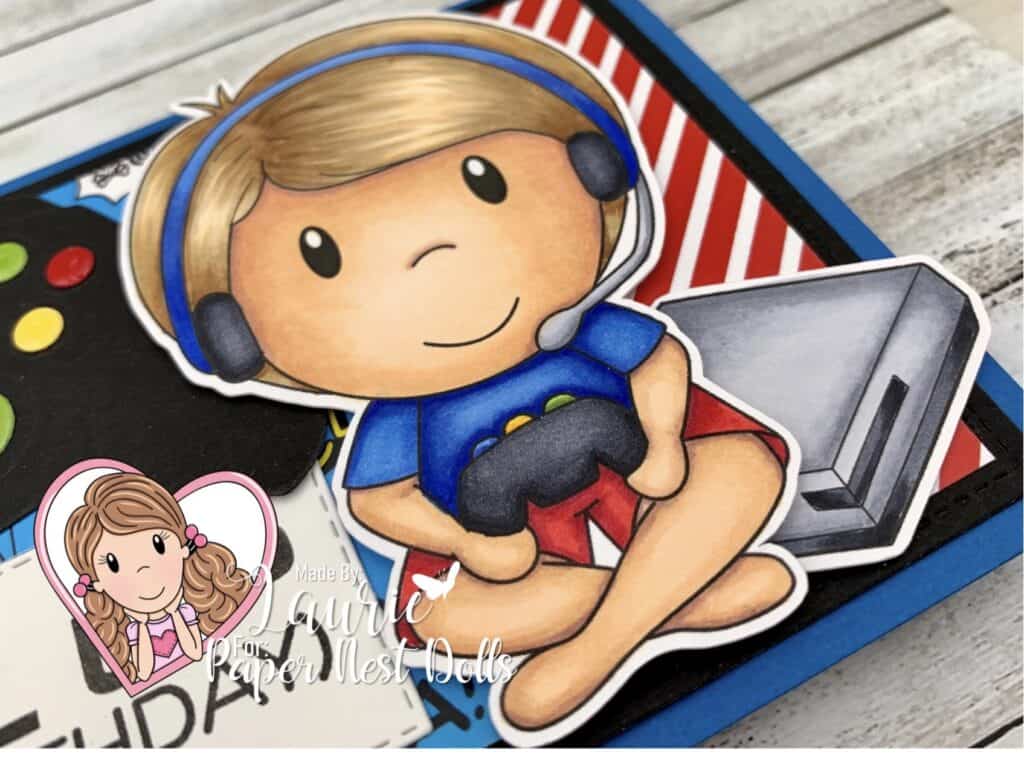
Hello Crafty Friends! It’s Laurie here sharing my Level Up Birthday Card for the Design Team of Paper Nest Dolls using Build Your Own Nest (Gamers). It comes with 3 digital images including a gamer boy, a gamer girl and a game console/games. 

This set of digital stamps is perfect to create your own “room” using the Build Your Own Nest (Family Room). For my card, I decided that I wanted to highlight these cute gamers and their game box and games. So, I created a slim line card just for them.

I coloured them with my Copic markers in bright primary colours to match the paper that I picked. The Saved the Day paper has comic book noises like splat, boom, bam, etc. which I thought was perfect noises for video games, especially if they are playing super heroes! The game controller dies from My Favorite Things definitely had to be added to my card. I added glossy accents to the buttons on my controller to give them dimension. I had such a hard time choosing the sentiment for my card but decided on Level Up (Happy Birthday). Such a great sentiment for my card!

————————–

Copic Markers:

Girl Gamer
Skin: E000/00/21/11/04/R20
Hair: E29/E27/E25/E23/E21
Shirt: R39/R37/R35/R32
Leggings: YG03/YG63/YG67/G99
Ear Phones: C9/C7/C6/C5/R39/R37/R35
Mic: C1/C3/C5
Game Controller: C9/C7/C6/C5/B24/B26/YG03/YG67/Y15/Y38
Games: B18/B26/B24/R37/R35/R32

Girl Gamer

Boy Gamer
Skin: E000/00/21/11/04/R20
Hair: E57/E43/E55/E53/E50
Shirt: B18/B26/B24
Shorts: R39/R37/R35/R32
Ear Phones: C9/C7/C6/C5/B18/B26/B24
Mic: C1/C3/C5
Game Controller: C9/C7/C6/C5/B24/B26/YG03/YG67/Y15/Y38
Game Box: C9/C7/C6/C5/C4/C3/C1

Boy Gamer

————————–

Card Recipe for Level Up Birthday Card:

Build Your Own Nest (Gamers), Paper Nest Dolls
Paper Basics – Stamper’s Select White Cardstock, Papertrey Ink
Saved the Day Paper Pad, Stamp Anniething
Level Up Stamp Set, My Favorite Things
Game Controller Die-namics, My Favorite Things
Large Slimline with Sliders Dies, Lawn Fawn
Stitched Rectangle Dies, Stampin’ Up!
Onyx Black, VersaFine Instant Dry Pigment Ink, Tsukineko 
Glossy Accents
Pacific Point, Basic Black, Real Red, Granny Apple Green
and Daffodil Delight Card Stock, Stampin’ Up!

Finished card size: 3.5” x 8.5”

————————–

To view my other Paper Nest Dolls cards, please click here.

Hope you like my Level Up Birthday Card using Build Your Own Nest (Gamers) by Paper Nest Dolls!

Thank you for stopping by!

Hugs,
Laurie
Dance for Joy Card

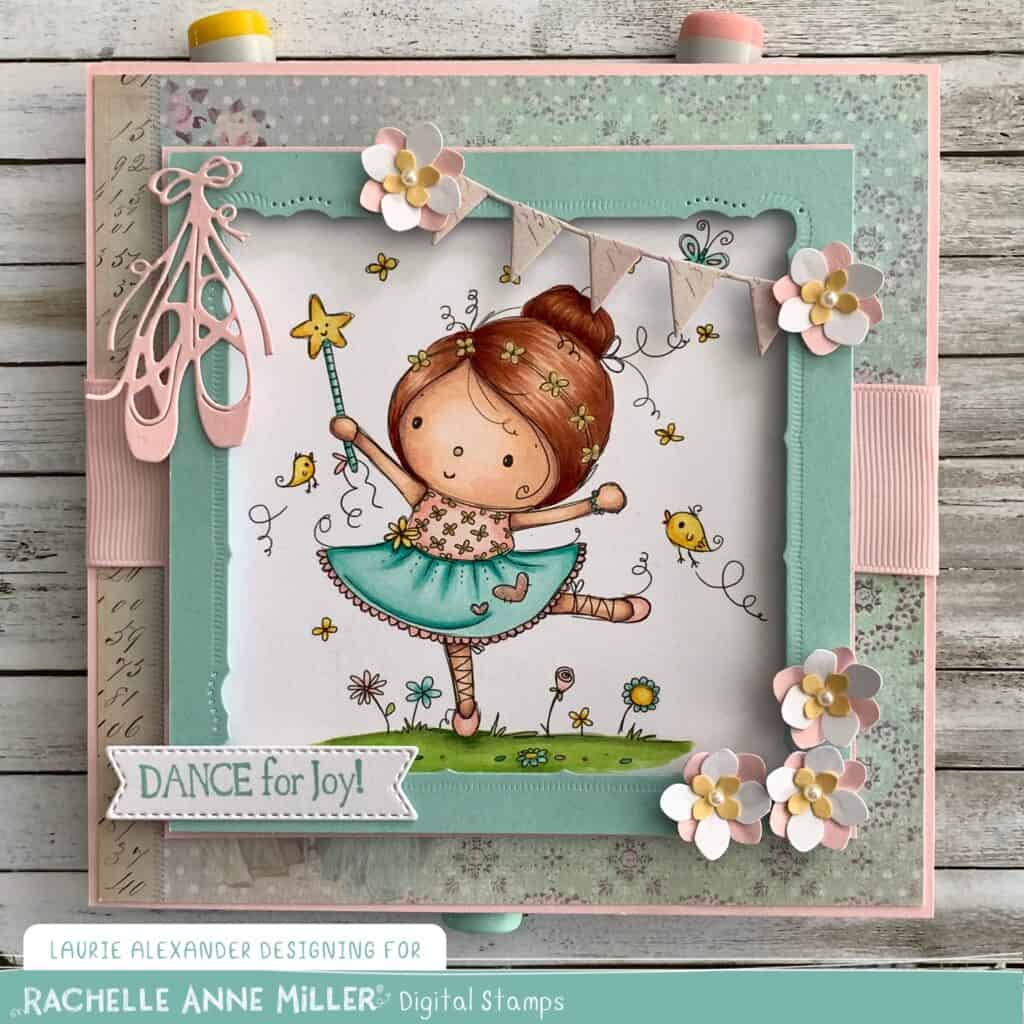
My Dance for Joy Card
Dance for Joy Card

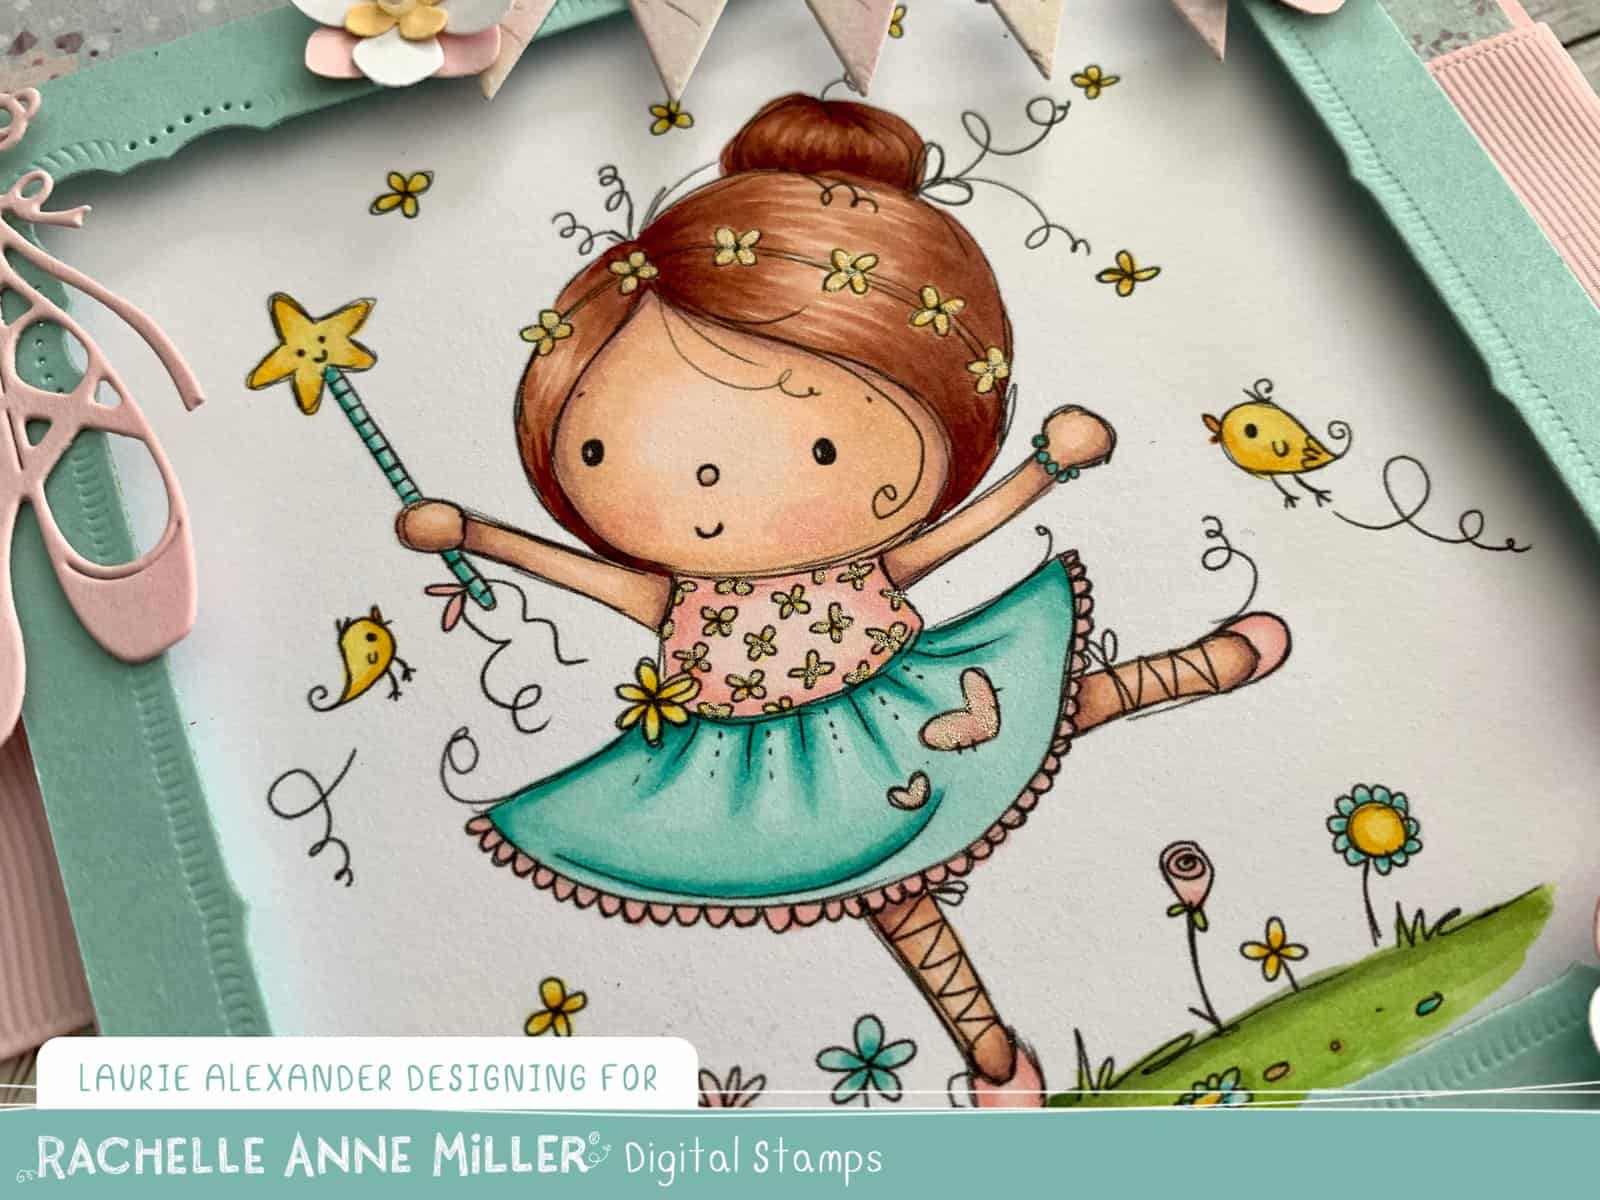
Hello Crafty Friends! It’s Laurie here with my Dance for Joy Card using the digital PNG stamp called ‘Ballerina Princess’ Digital Stamp by Rachelle Anne Miller Creative Studios as my Design Team Inspiration. Don’t you love this sweet little girl who just loves to dance!

For my card, I knew that I wanted to create a really girly card with soft pinks, blues and yellows. So, the 5thAvenue Paper was perfect for my card! Once I coloured her with my Copic markers, I added glitter to her top, flowers in her hair and the star on her wand with a Clear Gelly Roll Pen.

I created a frame for my little Ballerina like she was hung on a wall in a place of honour. I used the Hydrangea Punch to build my flowers to match my colours and added a pearl in the centre since pearls are very girly! The flag banner was die cut from the 5th Avenue Paper Pad and flanked by my flowers. Of course you have to have pink ballerina shoes for a ballerina! The sentiment sums up my card perfectly!

————————–

Copic Markers:

Skin: E000/00/21/11/04/R20
Hair: E18/E17/E15/E12/E11
Pinks: R00/R20/R21
Blues: BG10/BG11/BG13
Yellows: Y11/Y15/Y19
GrassYG03/YG63/YG67

Close Up of My Card
Close Up of My Card

————————–

Card Recipe for My Dance for Joy Card:

‘Ballerina Princess’ Digital Stamp, Rachelle Anne Miller Creative
Paper Basics – Stamper’s Select White Cardstock, Papertrey Ink
Melissa Frances, 5th Avenue 6” x 6” Paper Pad
Marvelous Squares Dies, Spellbinders Nestabilities
Little Happiness Ballet Shoes, Joy Crafts
Tasteful Labels Dies, Stampin’ Up!
Flag Banner Dies, From my Stash
HYDRANGEA Punch 3 in 1 Flowers Trio Flower, Martha Stewart EK Success
Pink Pirouette 1.25” Grosgrain Ribbon, Stampin’ Up!
Pearl Basic Jewels, Stampin’ Up!
Pool Party Classic Stampin’ Pad, Stampin’ Up!
Clear Star Gelly Roll Pen
Pink Pirouette, So Saffron and Pool Party Card Stock, Stampin’ Up!

Finished card size: 6” x 6”

————————–

To view my other Rachelle Anne Miller Creative Studios cards, please click here.

Hope you like my Dance for Joy Card using ‘Ballerina Princess’ Digital Stamp by Rachelle Anne Miller Creative Studios!
Thank you for stopping by!

Hugs,
Laurie
My Birthday Cutie Card

My Birthday Cutie Card

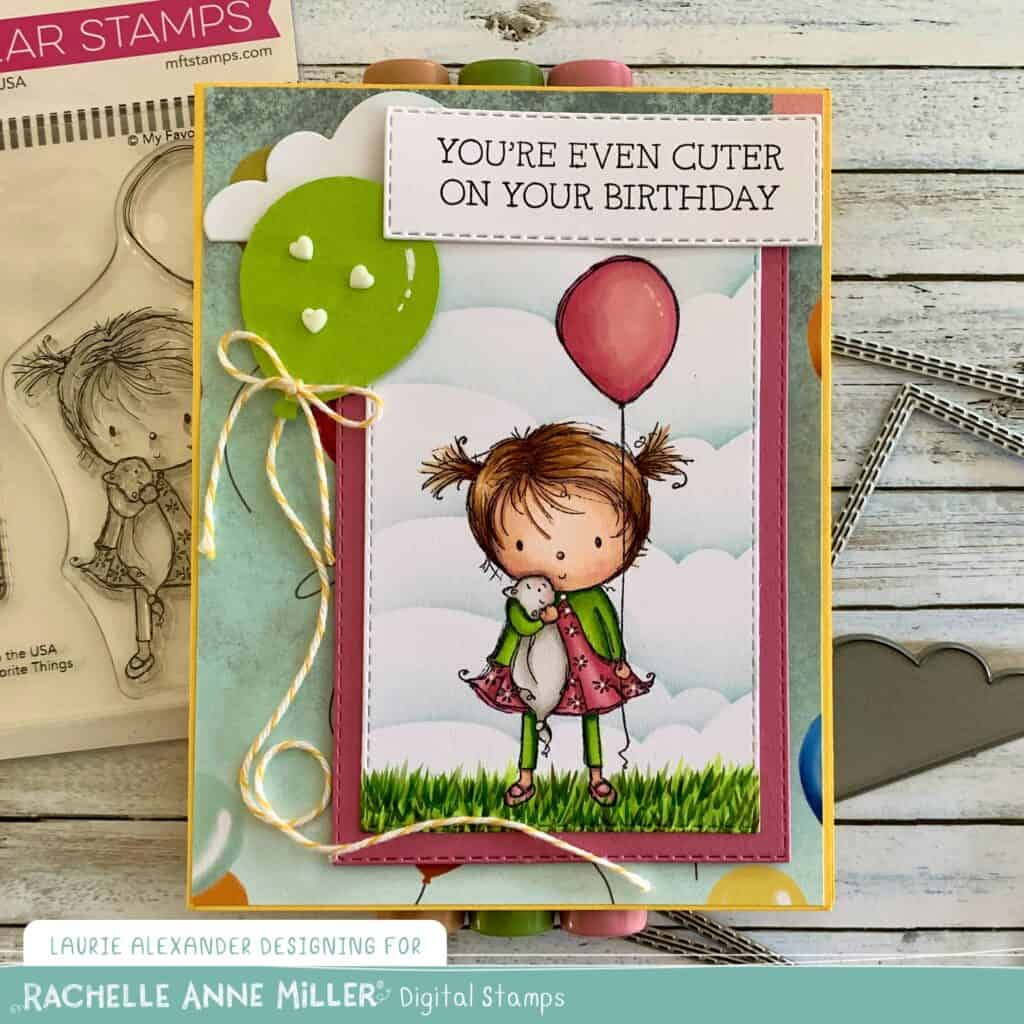
Hello Crafty Friends! It’s Laurie here with My Birthday Cutie Card. This is the second card that I have created using the new released clear stamps by My Favorite Things who have teamed up with Rachelle Anne Miller Creative Studios! This card is using Birthday Cutie. There are also matching RAM Birthday Cutie Die-namics! Love that you can now stamp and die cut your favourite RAM stamps!
————————–

Copic Markers:

Skin: E000/00/21/11/04/R20
Hair: E30/E31/E33/E35/E37
Dress: RV11/RV32/RV34/E04/White Gelly Roll Pen
Balloon: RV11/RV32/RV34/White Gelly Roll Pen/Glossy Accents
Sweater/Leggings: YG039/YG639/YG67
Grass: G039/YG639/YG67/G99
Cat Blankie: W3/W1/W0/R20

Close Up of My Birthday Cutie Card
Close Up of My Card

————————–

Card Recipe for My Birthday Cutie Card:

Birthday Cutie, My Favorite Things, Rachelle Anne Miller Creative
Paper Basics – Stamper’s Select White Cardstock, Papertrey Ink
Tuxedo Black Ink Pad, Memento
Birthday Memories Designer Series Paper, Stampin’ Up!
Cloud Stencil, C.C. Designs
Flat Bottom Clouds Die-namics, My Favorite Things
Stitched Rectangle Dies, Stampin’ Up!
Balloon Bouquet Punch, Stampin’ Up!
Resin Hearts Embellishments, Stampin’ Up!
Crushed Curry Baker’s Twine, Stampin’ Up!
Soft Sky Classic Stampin’ Pad, Stampin’ Up!
Blender Brushes, Picket Fence
White Gelly Roll Pen, Sakura
Glossy Accents, Ranger
Daffodil Delight, Granny Apple Green and
Primrose Petals Card Stock, Stampin’ Up!

Finished card size: 5.5” x 4.25”

————————–

To view my other card that I made using the You’re My Jam Clear Stamp from My Favourite Things and Rachelle Anne Miller Creative Studios, please click here.

Hope you like my Card!
Thank you for stopping by!

Hugs,
Laurie