A Christmas Bluebird Card

A Christmas Card with a Bluebird Holding a Berry Branch
A Christmas Bluebird Card

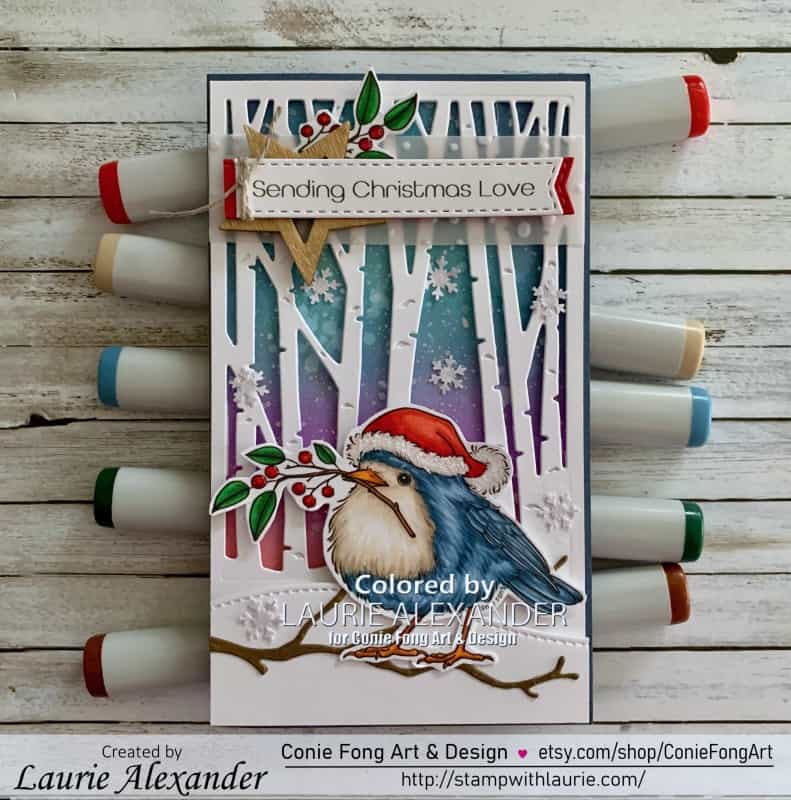
Hello Crafty Friends! It’s Laurie here again! I am sharing A Christmas Bluebird Card as my Design Team Inspiration for Conie Fong Art & Design using the beautiful Red Robin With Berries. The sentiment is from Christmas Mailbox Gnome and Sentiment Bundle.

The Details of My Card

For my card, I decided that I wanted to colour the bird with my Copic markers in blues instead of the traditional Robin colours. I thought it would be a fun way to show the versatility of the stamp. I had a lot of fun creating the texture of his feathers! Since some bird’s feathers take on a darker winter colour, I went with a tan colour for his white bib.

How to Create the Sky

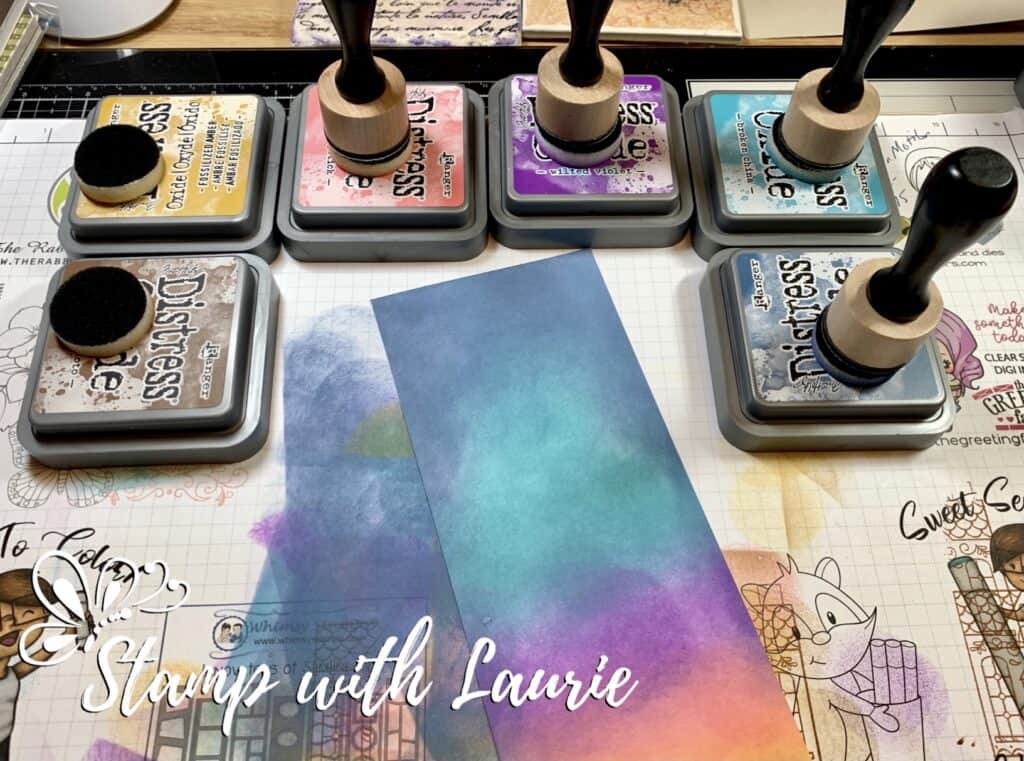
For the sky, I had a background leftover from another card just sitting on my desk. So, I thought it would be a great way to use it! I just had to trim it down to fit my card. For my sky, I used my Distress Oxide Inks and my Mini Blending Tool starting with Fossilized Amber at the base of the paper, followed by Worn Lipstick, Wilted Violet, Broken China and Faded Jeans.
Distress Inks
Distress Inks Used to Create Sky

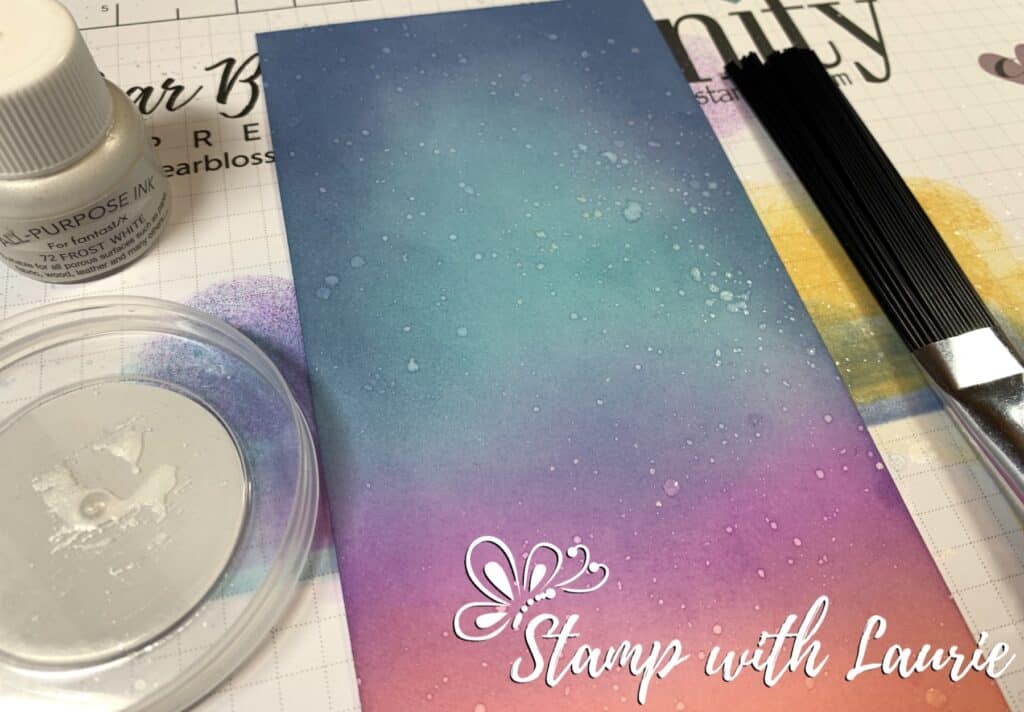
Once the colours were blended, I used my Splatter Tool dipped in Frost White Shimmer Paint and then in water to create snow.
Snow For Sky
Snow For Sky

Next, I layered the birch tree die on top. I love this die! It is perfect for mini slimline cards which are all the rage right now! I added a stitched snowy bank at the base of the card since the birch die doesn’t reach the bottom of the card. The snowy bank was the perfect platform for my die cut branch that the bird is perched on.

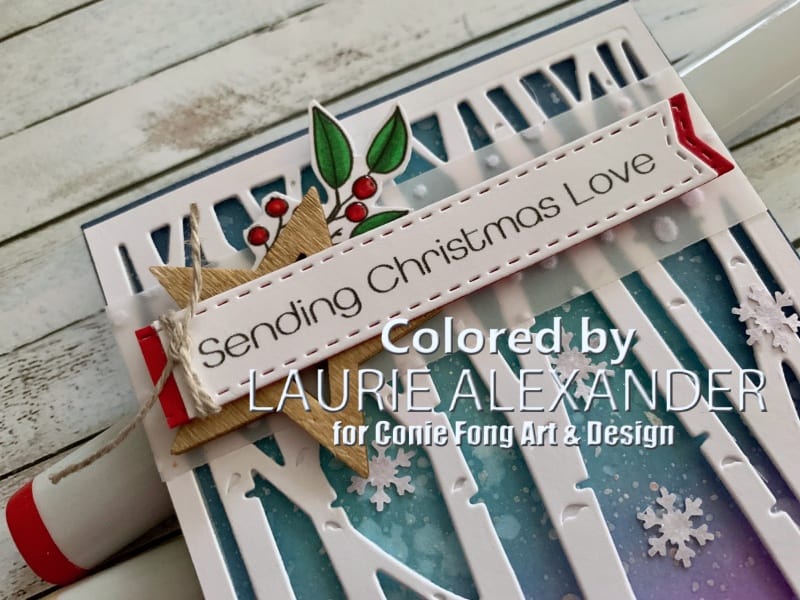
I wanted to tie in the bird’s berries and leaves with my sentiment. So, I printed another bird, but only coloured the berries and leaves and fussy cut them out. I then layered it behind the wooden star and sentiment. A strip of vellum that looks like snow anchors the sentiment piece. A piece of linen thread adds to the rustic wooden star.
Christmas Sentiment
Sentiment from from Christmas Mailbox Gnome and Sentiment Bundle

To finish the card, I added some punched white glimmer snowflakes, glossy accents on the berries and Stardust Stickles on the hat trim.

————————–

Copic Markers:

Blue Feathers: B97/B95/B91
White Feathers: W1/E43/E41
Beak/Feet: E15/YR15
Hat: R29/R27/R24/R22/W1/Stardust Stickles
Leaves: G29/G28/YG09
Berries: R59/R29/R22/Glossy Accents
Branch: E15
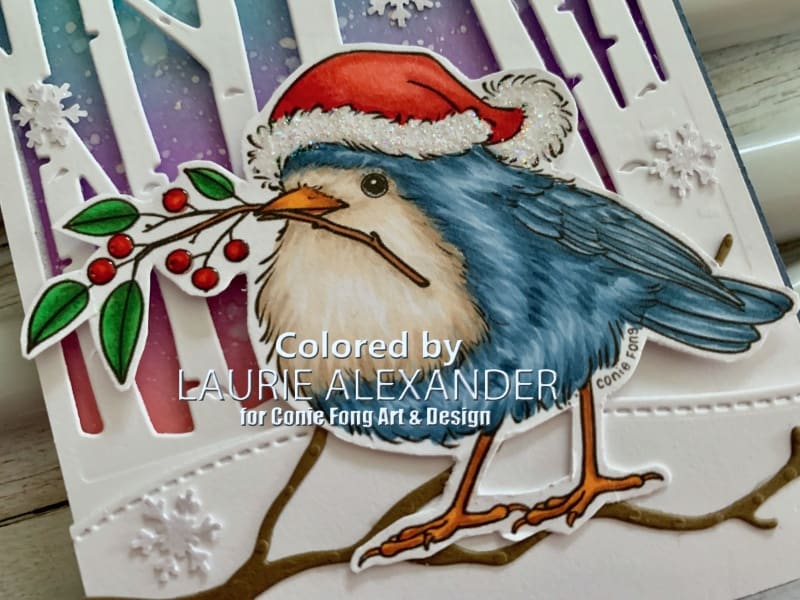
Close Up of Bluebird holding berries
Close Up of Red Robin With Berries

————————–

Card Recipe for A Christmas Bluebird Card:

Red Robin With Berries, Conie Fong Art & Design
Paper Basics – Stamper’s Select White Cardstock, Papertrey Ink
Snowflake Specialty Vellum, Stampin’ Up!
White Glimmer Paper, Stampin’ Up!
Woodland Collection Birch Tree Forest, Sue Wilson
Slimline Stitched Hillside Border Dies, Lawn Fawn
Notebook/Banners Etched Metal Dies, Photo Play
Snowflake Border Punch, Martha Stewart
Linen Thread, Stampin’ Up!
Wooden Star, From my Stash
Mini Ink Blending Tool, Ranger
Fossilized Amber Distress Oxide Ink, Ranger
Worn Lipstick Distress Oxide Ink, Ranger
Wilted Violet Distress Oxide Ink, Ranger
Broken China Distress Oxide Ink, Ranger
Faded Jeans Distress Oxide Ink, Ranger
Frost White Shimmer Paint, Stampin’ Up!
Tim Holtz Distress Splatter Brush, Ranger
Glossy Accents, Ranger
Stardust Stickles, Ranger
Misty Moonlight, Soft Suede and Real Red Card Stock, Stampin’ Up!

Finished card size: 6-1/8″ x 3-5/8″

————————–

Awards Won:

The Most Beautiful Christmas Projects Online for December 2022
The Paper Crafting Magazine
World Wide Open Design Team Challenge #11 – ATG
December 2022 Card of the Month – Creative Scrapbooker Magazine
2022 Card of the Year – Creative Scrapbooker Magazine
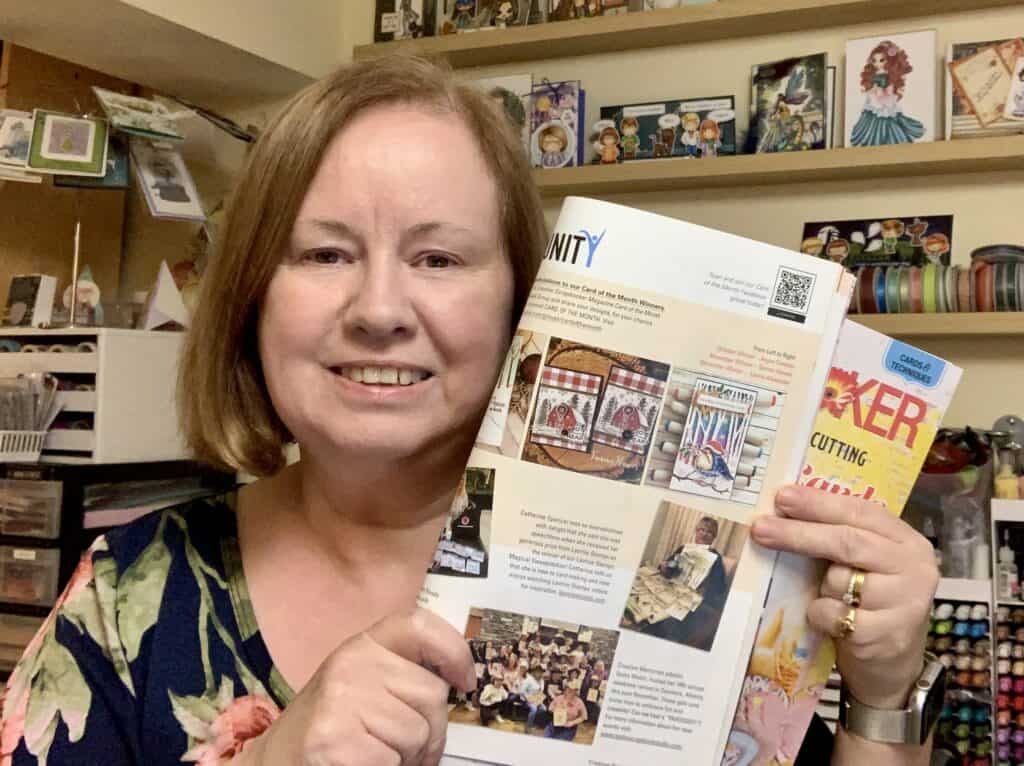
Published in the Spring issue of the Creative Scrapbooker Magazine!

————————–

To view my other Conie Fong Art & Design projects, please click here.

Hope you like A Christmas Bluebird Card as my Design Team Inspiration
using Red Robin With Berries for Conie Fong Art & Design!

Thank you for stopping by!

Hugs,
Laurie

My Fa La La Card 

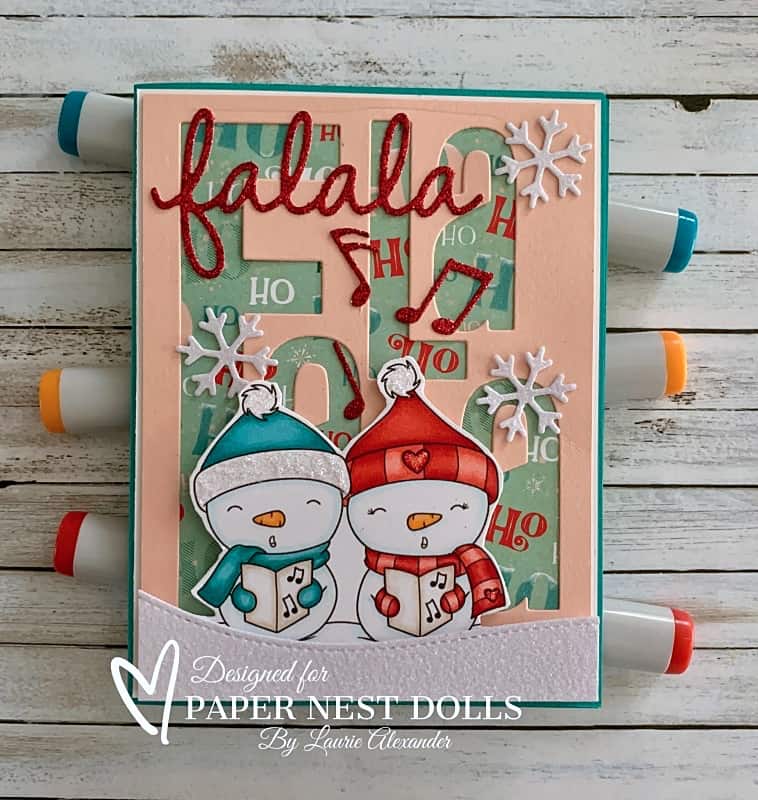
A Card with Snow People Singing Fa La La on it
My Fa La La Card

Hello Crafty Friends! It’s Laurie here! I am sharing My Fa La La Card as my Design Team Inspiration Card for Paper Nest Dolls using Snow Globe Bundle. This Bundle includes a clear snow globe with a selection of images and labels for the holiday season. I love the versatility of this bundle since you can interchange the images in the globe or use the images by themselves.

The Details of My Card

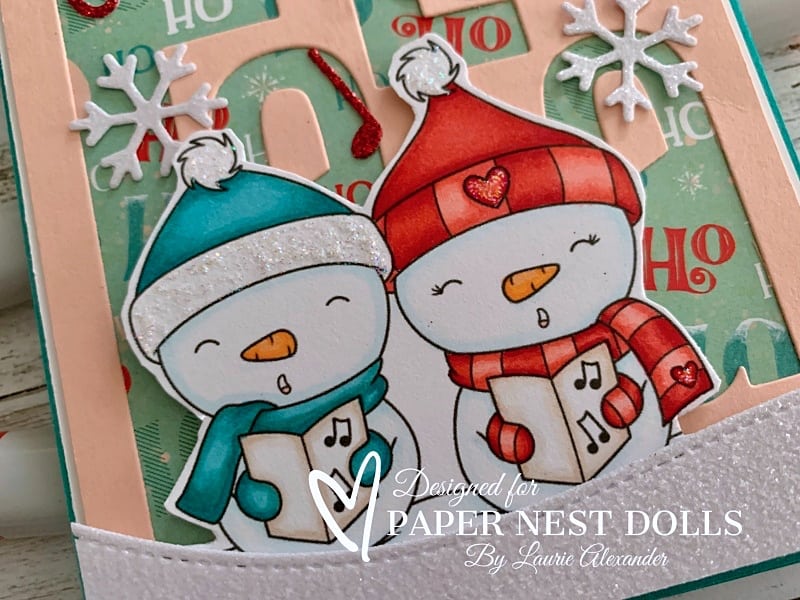
For my card, I decided to use the singing snow people without the globe. They are just too cute, and I had the perfect Fa La La die for them. In fact, I had two Fa La La dies. Lol! The cover plate behind them and the red glimmer falala.

I pulled the colours of the DSP to colour my snow people in a red and a blue/green. I used my favourite technique for their snow bodies where I use two light makers along the edges and then use my colourless blender to soften the transition between the colour and the paper. The same technique was used for their song books.

Since these cuties are singing, I had to add some musical notes floating up from them! Some glimmery snowflakes and snowbank add even more sparkle to my card. The finishing touch was Star Dust Stickles on their hat trim and the hearts.

————————–

Copic Markers:

Reds: R29/R24/R24/R22
Blue/Greens: BG09/BG57/BG53
Whites: BG0000/BG000/0
Carrots: YR12/Y38/YR12
Song Books: E42/E40/0

Close Up of Snow People on the Card
Close Up of Snow People

————————–

Card Recipe for My Fa La La Card:

Snow Globe Bundle, Paper Nest Dolls
Paper Basics – Stamper’s Select White Cardstock, Papertrey Ink
Santa Express Design Series Paper, Stampin’ Up!
Real Red & White Glimmer Paper, Stampin’ Up!
Slimline Stitched Hillside Borders, Lawn Fawn
Frosted Flurries Dies, Stampin’ Up!
Fa La La Cover Die, The Stamp Market
Music Notes Die, From my Stash
Star Dust Stickles, Ranger
Basic White, Bermuda Bay and Petal Pink Card Stock, Stampin’ Up!

Finished card size: 5 ½” x 4 ¼”
Stamp Size: 3” Tall

————————–

To view my other Paper Nest Dolls cards, please click here.

Hope you like my Design Team card for Paper Nest Dolls!

Thank you for stopping by!

Hugs,
Laurie
My Wintery Christmas Barn

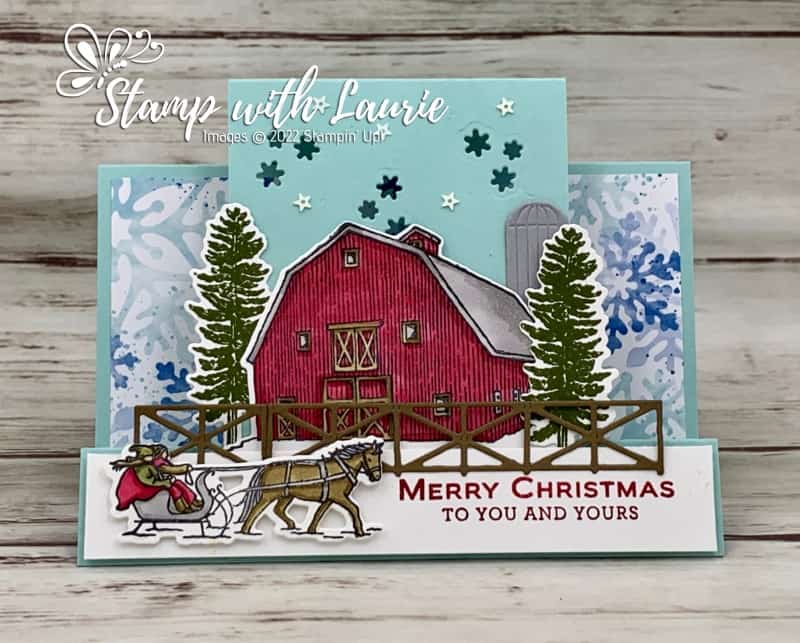
Christmas Card with a Horse Sled infant of a Barn
My Wintery Christmas Barn

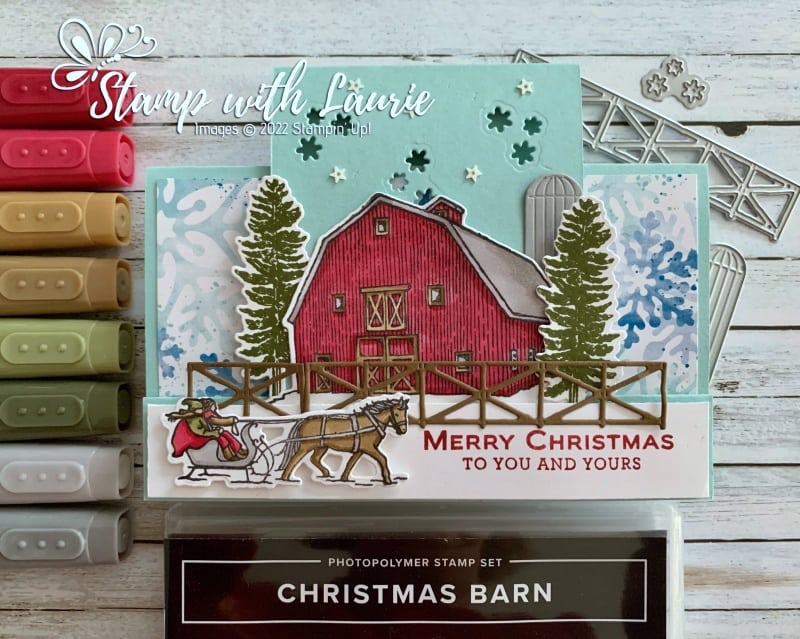
Hello Crafty Friends! Laurie here again! I am sharing My Wintery Christmas Barn using the Christmas Barn Bundle by Stampin’ Up! which includes the Christmas Barn Stamp Set and the Barn Dies.

The Details of My Card

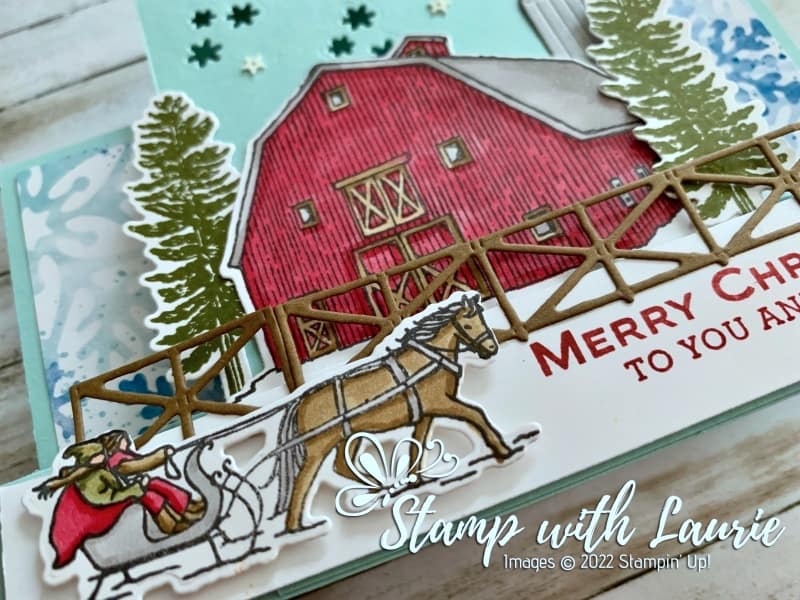
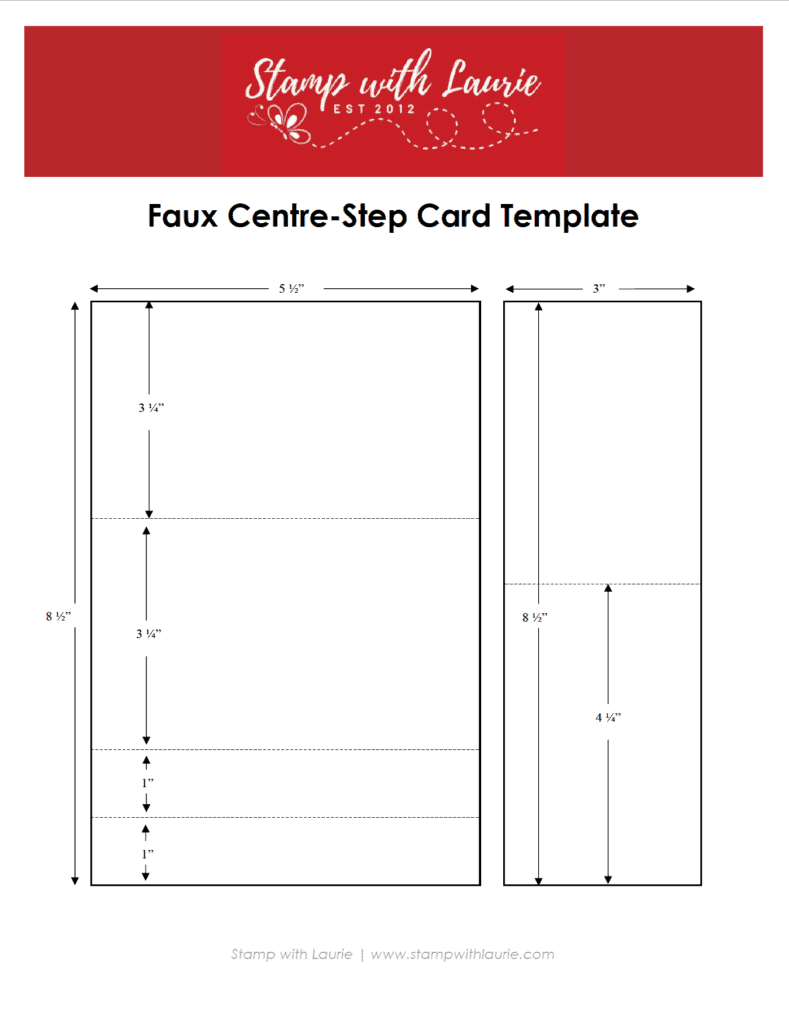
For my card, I decided to make a faux centre-step card to allow enough room for the barn to fit on the centre panel. I created my faux centre-step card using my template with all my measurements that I have included at the end of this post. Some die cut snowflake were added at the top of the centre panel to create some interest before adhering it to the card base. You could add DSP as another option.

Side View of Card
Side View Of Faux Centre-Panel Card

My Stampin’ Blends were used to colour the elements to create my winter wonderland scene. I have included some links to past colouring tutorials using Stampin’ Blends at the end of this post.

Once I die cut them out, I stamped the sentiment in Cherry Cobbler on the Basic White strip on the right side to allow room for the sled. I popped this piece up so that I could tuck in the barn and trees behind it. Before adding the sled, I trimmed the fence to fit and glued it in place.

Close Up of Barn on Card
Close Up of Barn

I thought the Storybook Gnomes Designer Series Paper was perfect with its large snowflakes to add to my winter wonderland theme and you can see it through the die cut snowflakes on the centre panel! All the embellishments needed was to add the Sparkle & Shine Sequins to create a flurry of more snowflakes!

Supplies:

Stamps/Bundles/Dies: Christmas Barn Bundle (159749)

Inks: Cherry Cobbler Classic Stampin’ Pad (147083), Mossy Meadow Classic Stampin’ Pad (147111), Tuxedo Black Memento Ink Pad (132708)

Paper: Basic White (159276), Pool Party (122924), Soft Suede (115318), Smoky Slate (131202), Storybook Gnomes Designer Series Paper (159615)

Accessories: Cherry Cobbler Stampin’ Blends Combo Pack (154880), Mossy Meadow Stampin’ Blends Combo Pack (154890), Soft Suede Stampin’ Blends Combo Pack (154906), Smoky Slate Stampin’ Blends Combo Pack (154904), Sparkle & Shine Sequins (158137), Bone Folder (102300), Stampin’ Dimensionals (104430), Stampin’ Seal (152813), Mini Glue Dots (103683)

My Wintery Christmas Barn Card Standing Up

Measurements: 

  • Pool Party: (2 pieces)
    • 8 ½” x 5 ½” cut/scored according to template below
    • 8 ½” x 3” cut/scored according to template below
  • Basic White: (5 pieces)
    • Sentiment: 7/8” 5-3/8”
    • Barn: 3 ½” x 2 ¼”
    • Trees: 2 ½” x 1” (2 pieces)
    • Sled: 2 ½” x 1”
  • Soft Suede:
    • Scraps
  • Storybook Gnomes Designer Series Paper:
    • 3” x 5 ¼”

More Information on My Wintery Christmas Barn:

Downloadable Faux Centre-Step Template

To download a PDF of the Faux Centre-Step Template, please click here or on the picture.

Downloadable Faux Centre-Step Template

How to Use Stampin’ Blends
https://stampwithlaurie.com/wp-content/uploads/2020/08/Stampin-Up-Blends-2020.pdf

Part 1Whiskey Business Card using Blending Different Colours Technique
Video Tutorial: Blending Different Colours Together

Part 2Country Harvest Card using Light to Dark Technique
Video Tutorial: Light to Dark/Dark to Light Colouring

Part 3Beautiful Poppy Birthday Card using Smooth Colouring Technique
Video Tutorial: Smooth Colouring

Part 4Let’s Gather Together Card using Tip to Tip Blending Technique
Video Tutorial: Tip to Tip Colouring

Part 5So Grateful Cardinal Card using Flicking Colouring Technique
Video Tutorial: Flicking Colouring

Part 6Let’s Celebrate You Card using Flicking of Different Colours Technique
Video Tutorial: Flicking of Different Colours Technique

No-Lines Technique CardsMy Cardinal Anniversary Card and My Cardinal Card

How to Create a Scene: https://youtu.be/6w4fkxgA9rg

For more of my Stampin’ Blends cards, please click here.

To view my other Centre-Step cards, please click here.

For more of my Stampin’ Up! cards, please click here.

You will find the items listed above in my online store.

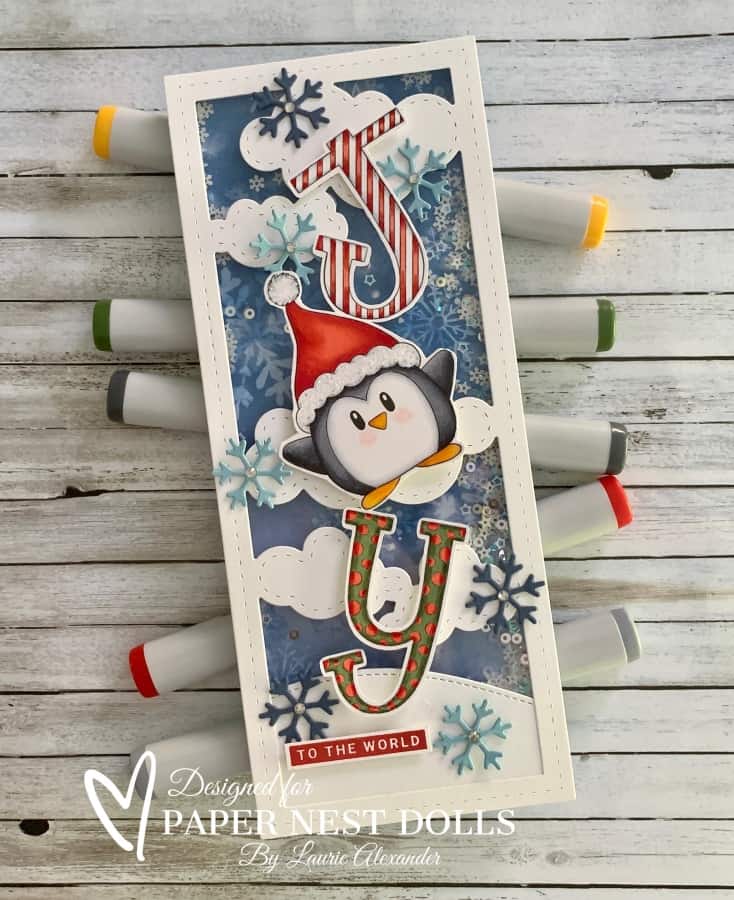
Joy to the World Card

A card with a penguin balancing the word Joy
Joy to the World Card

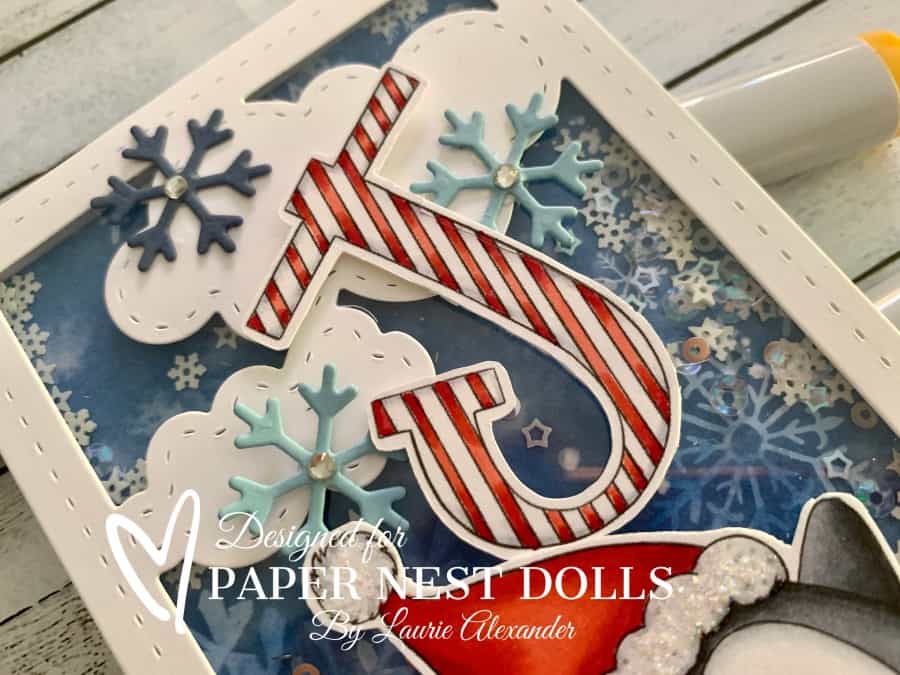
Hello Crafty Friends! It’s Laurie here! I am sharing my Joy to the World Card as my Design Team Inspiration Card for Paper Nest Dolls using Penguin Joy.

The Details of My Card

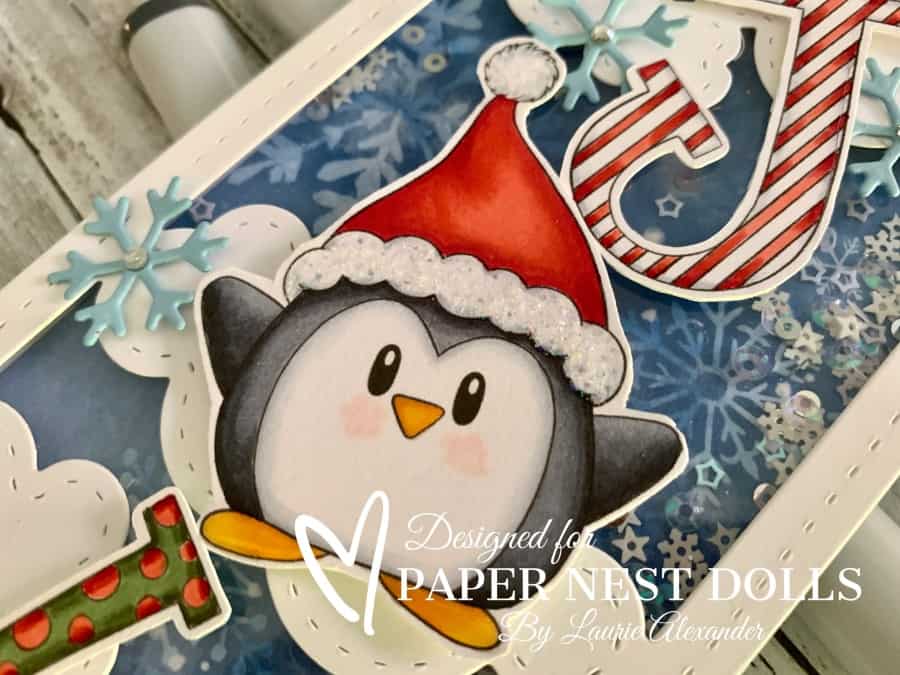
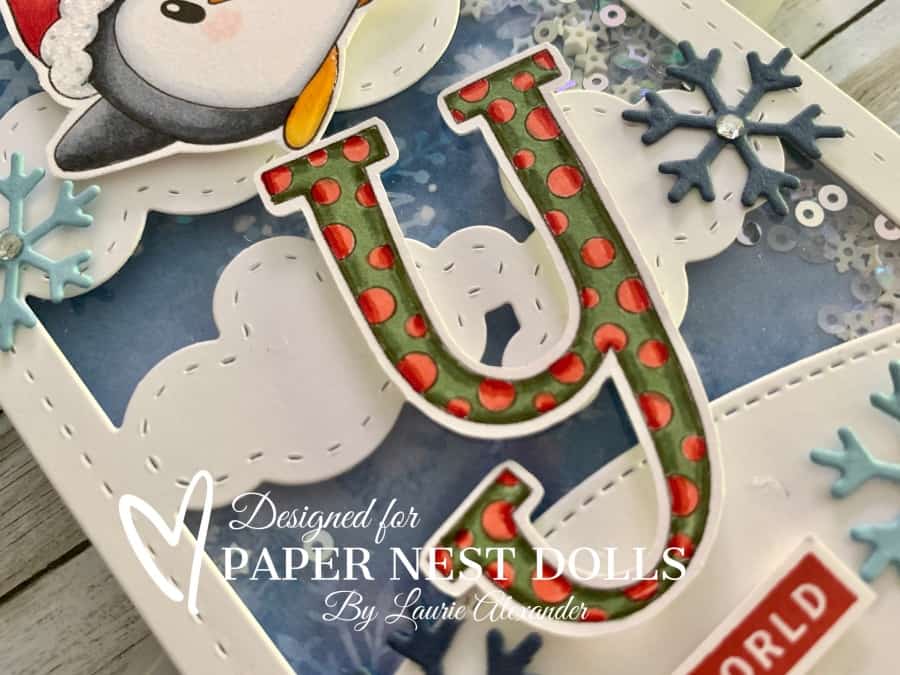
The Penguin Joy digital stamp comes horizontal, but I thought it would be fun to fussy cut them out and place them vertical like the penguin is balancing the letters. Then, I decided to create a slimline shaker card! Who doesn’t love a fun shaker card!

The slimline cloud die was perfect backdrop for my scene! I just had to add a snowbank that the penguin could balance on and that I could stamp my sentiment. Of course, I had to have some die cut snowflakes falling like on the DSP and to mirror the snowflake sequins. To add more shimmer, I adhered rhinestones to the centre of the die cut snowflakes.

————————–

Copic Markers:

Letter J:
Reds: R29/R24/R24/R22
Whites: C3/C1/C0

Letter J from Joy
Letter J from Penguin Joy

Penguin:
Black Feathers: C9/C7/C5/C4
White Feathers: C3/C1/C0/R20
Hat: R29/R24/R24/R22
Hat Trim: C3/C1/C0/Star Dust Stickles
Beak/Feet: YR12/Y38/Y35/Glossy Accents

Penguin from Penguin Joy

Letter Y:
Reds: R29/R24/R24/R22
Greens: G99/G94/G21

Letter Y from Penguin Joy

————————–

Card Recipe for My Joy to the World Card:

Penguin Joy, Paper Nest Dolls
Paper Basics – Stamper’s Select White Cardstock, Papertrey Ink
Snowflake Splendor Design Series Paper, Stampin’ Up!
Window Sheet, Stampin’ Up!
Slimline Cloud Die Set, Whimsy Stamps
Slimline Stitched Hillside Borders, Lawn Fawn
Frosted Flurries Dies, Stampin’ Up!
Peace & Bright Stamp Set, Stampin’ Up!
Snowflake Sequins, Stampin’ Up!
Rhinestone Basic Jewels, Stampin’ Up!
Glossy Accents, Ranger
Star Dust Stickles, Ranger
Foam Adhesive Strips, Stampin’ Up!
Basic White, Balmy Blue and Misty Moonlight Card Stock, Stampin’ Up!

Finished card size: 3 ½” x 8 ½””

Stamp Size: 3” Tall

————————–

To view my other Paper Nest Dolls cards, please click here.

Hope you like my Design Team card for Paper Nest Dolls!

Thank you for stopping by!

Hugs,
Laurie
Molly’s Christmas Stocking Card

Christmas card with a girl holding a Christmas stocking filled with gifts
Molly’s Christmas Stocking Card

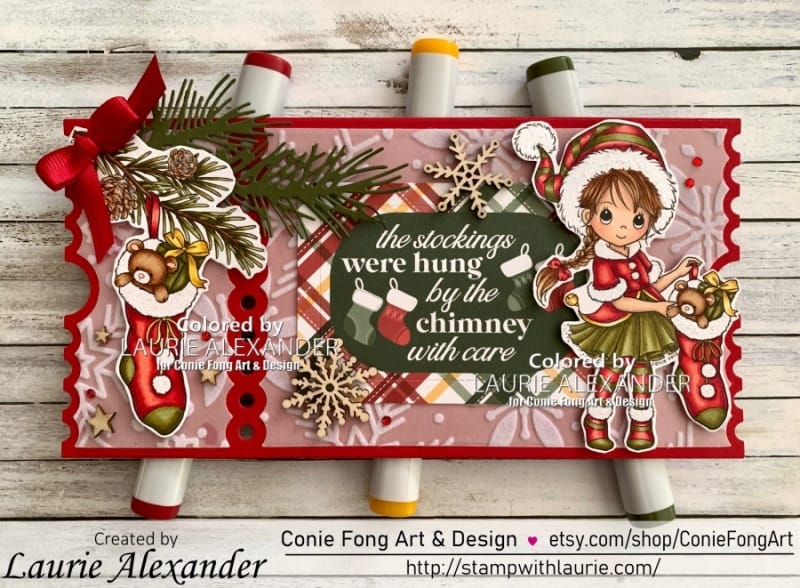
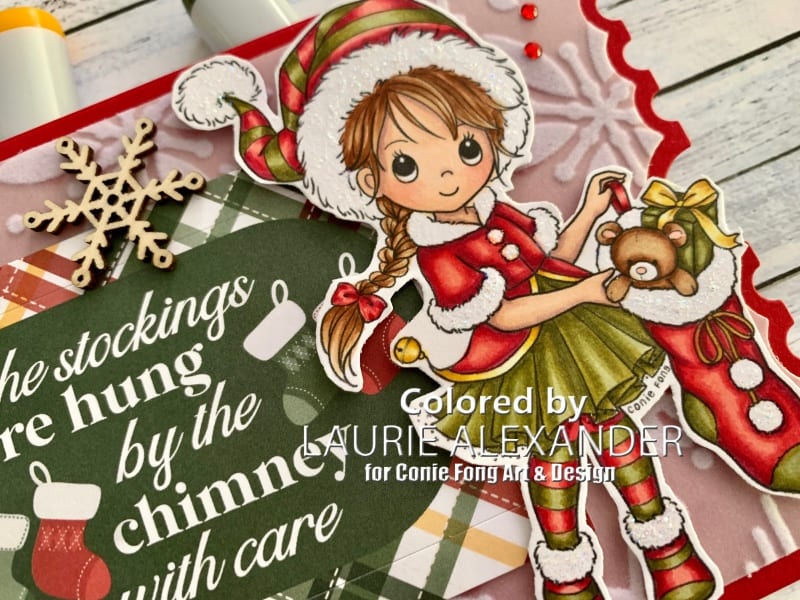
Hello Crafty Friends! It’s Laurie here! I am sharing Molly’s Christmas Stocking Card as my Design Team Inspiration Card for Conie Fong Art & Design using Molly’s Christmas Stocking Bundle and Christmas Stocking Bundle

Molly’s Christmas Stocking Bundle includes 4 Images:

  • Image 1 & 2: Molly’s Christmas Stocking JPG / PNG format 
  • Image 3 & 4: Molly’s Christmas Stocking – Without Wings JPG / PNG format

Christmas Stocking Bundle includes 6 images:

  • Image 1 & 2: Christmas Stocking JPG/ PNG format
  • Image 3 & 4: Pinecone Branch Right JPG / PNG format
  • Image 5 & 6: Pinecone Branch Left JPG / PNG format

The Details of My Card

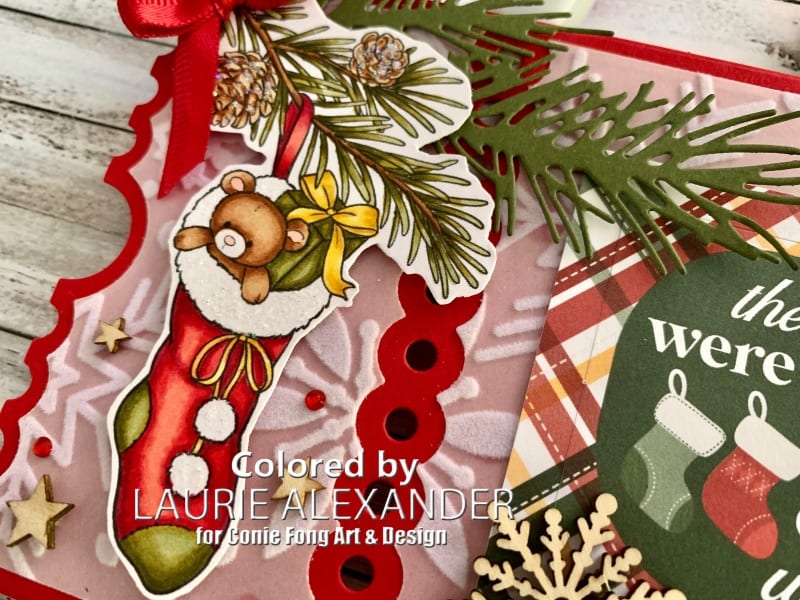
I recently bought this slimline die that looks like a ticket stub and thought it would work perfectly for the two stamps that I coloured with my Copic markers! I place the Christmas Stocking on the smaller side and Molly on the larger side with the sentiment from Echo Park Frames & Tags set.

For the stocking side, I die cut a pine branch and “hung” the stocking with some ribbon. For Molly’s side, the sentiment suited perfectly the theme of my card. I added some wooden stars and snowflake embellishments to match the Snowflake Specialty Vellum. A scattering of Red Rhinestones tied in my colour scheme. The finishing touch was Star Dust Stickles on Molly’s and the stockings’ white trim and on the pinecones. Can never have too much sparkle for a Christmas card!

————————–

Copic Markers:

Skin: E000/E00/E21/E11/E04/R20
Hair: E37/E35/E33/E31
Reds: R39/R37/R35/R32
Greens: YG99/YG97/YG95/YG93
Yellows: YR23/Y15/Y11

Close Up of Girl holding Christmas stocking
Close Up of Molly

————————–

Card Recipe for Molly’s Christmas Stocking Card:

Molly’s Christmas Stocking Bundle and Christmas Stocking Bundle,
Conie Fong Art & Design
Paper Basics – Stamper’s Select White Cardstock, Papertrey Ink
Snowflake Specialty Vellum, Stampin’ Up!
Santa Claus Lane Frames & Tags, Echo Park Paper Co.
Cutting Die Slimline Essentials, Studio Light
Pine Branch Die, Impression Obsession
Snowflake Elements, Stampin’ Up!
Wooden Star Shapes, From my Stash
Real Red Mixed Satin Ribbon, Stampin’ Up!
Red Rhinestone Basic Jewels, Stampin’ Up!
Star Dust Stickles, Ranger
Real Red Card Stock, Stampin’ Up!

Finished card size: 4-1/8” x 8 ¼”

Close Up of Christmas Stocking

————————–

I am entering this card in the following challenges:
World Wide Open Design Team Challenge #10 – ATG
Path of Positivity Challenge #105 – ATG/Celebrate Something Special about
YOUR FAVOURITE SEASON Little Patch of Crafty Friends – ATG (1 of 3)
The Outlawz Festive Fridays Challenge – ATG (1 of 3)
Through The Craft Room Door – ATG 1 of 4)  

To view my other Conie Fong Art & Design projects, please click here.

Hope you like my Design Team Inspiration Card using Molly’s Christmas Stocking Bundle and Christmas Stocking Bundle for Conie Fong Art & Design!

Thank you for stopping by!

Hugs,
Laurie
Birthday…Happy Birthday Card

A file folder card
Birthday…Happy Birthday Card

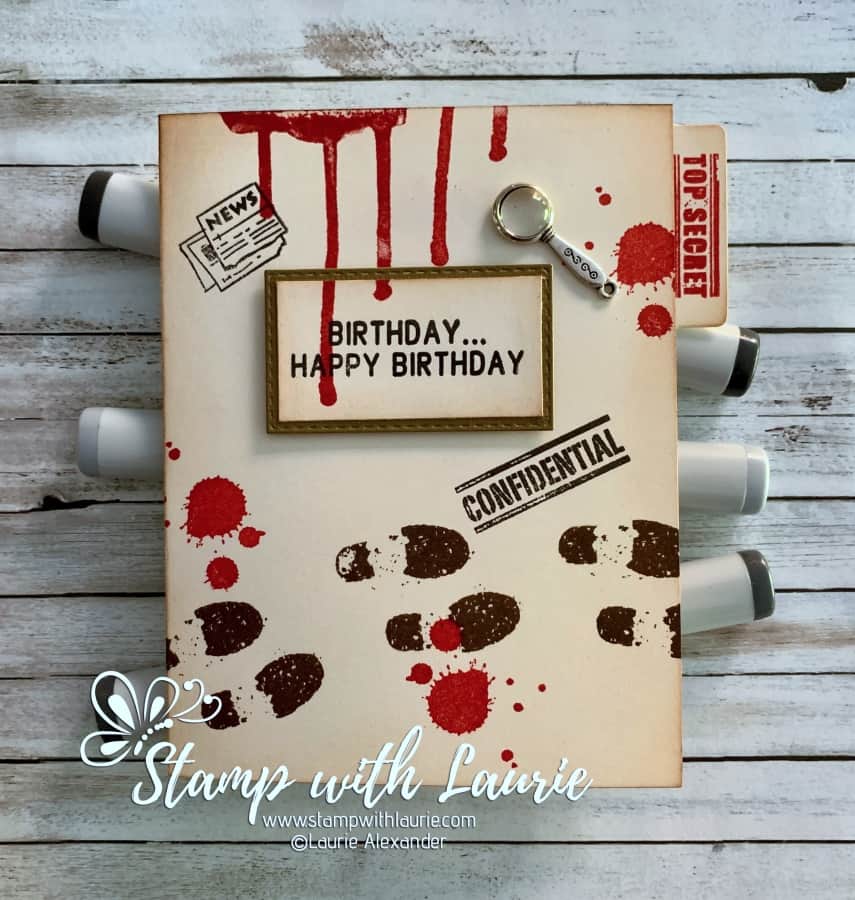
Hello Crafty Friends! It’s Laurie here to share my Birthday…Happy Birthday Card using Secret Agent by Kindred Stamps! My Hubby is a big fan of the James Bond movies and when I saw this stamp set, I knew it would be hit for his birthday card!

The Kindred Stamps Design Team had several inspirational cards that inspired me to create my own version of a file folder with the Magic Iris. I knew that I wanted to use both elements on my card.

The Details of My Card

I had a lot of fun creating my file folder and it had to be a certain size to fit the Magic Iris. So, it is a little wider than a regular A2 card base since the folder tab sticks out. The File Folder Edgelit Dies by Stampin’ Up! are retired, but I have made a file folder with my Envelope Punch Board in the past as well. There is also a file folder in the Specimens Edgelit Dies, but I needed a larger one to fit the iris.

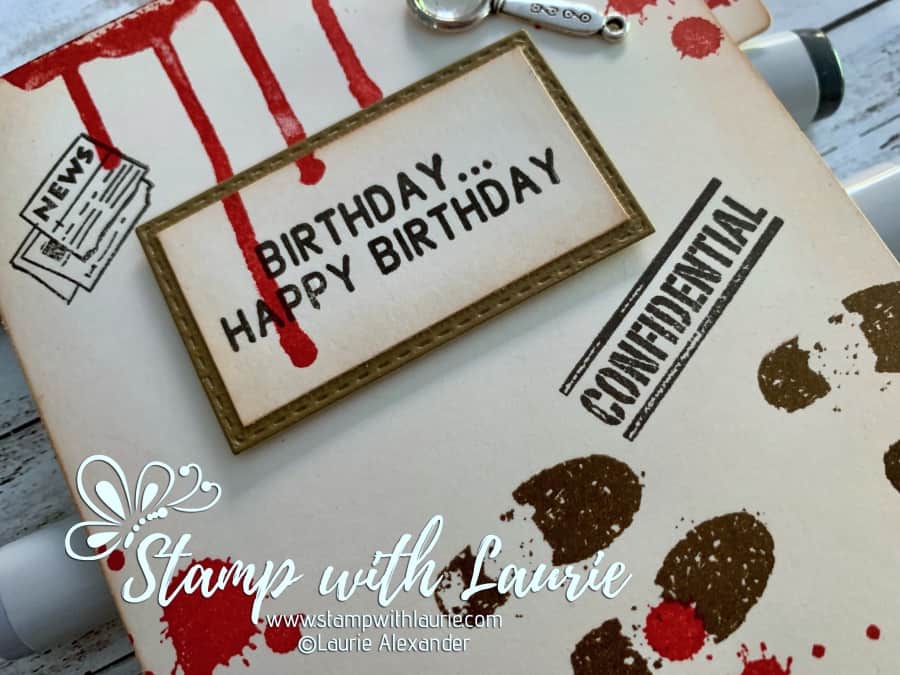
Close Up of Sentiment on Card

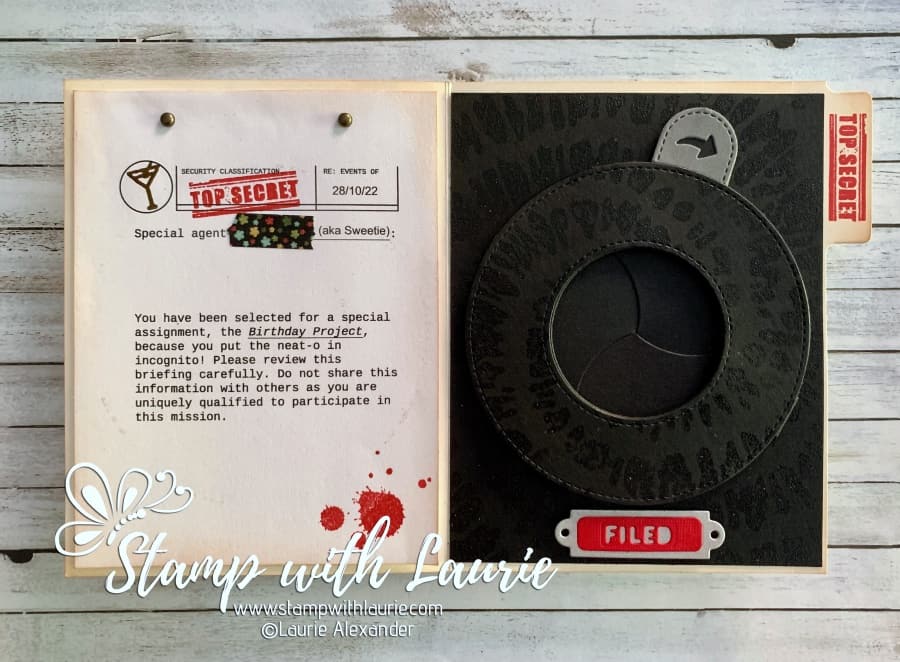
For the front of the folder, I decided to make it look like it’s been through the wars with blood running down the front (just like the opening of the movies! Lol!), blood splatter, mysterious footprints, and a few spy paraphernalia items! I even had the blood run onto the sentiment piece. The “Confidential” and “Top Secret” stamps come with the set and were perfect for my theme! To make it even more rough, I blended some Vintage Photo Ink on the edges of the folder and the sentiment. 

Inside My Card

Inside of Card
Inside of Card

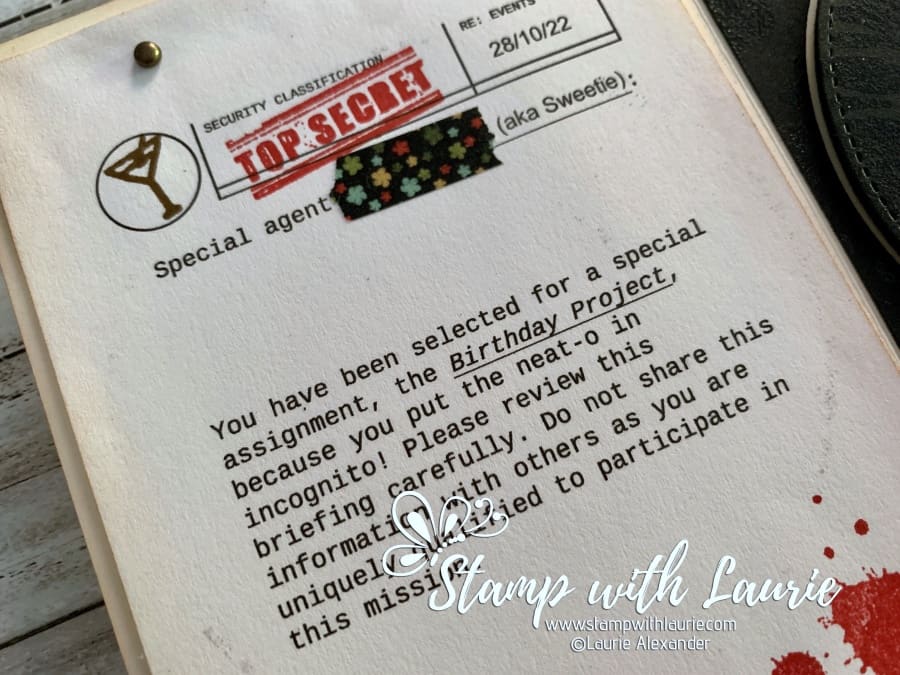
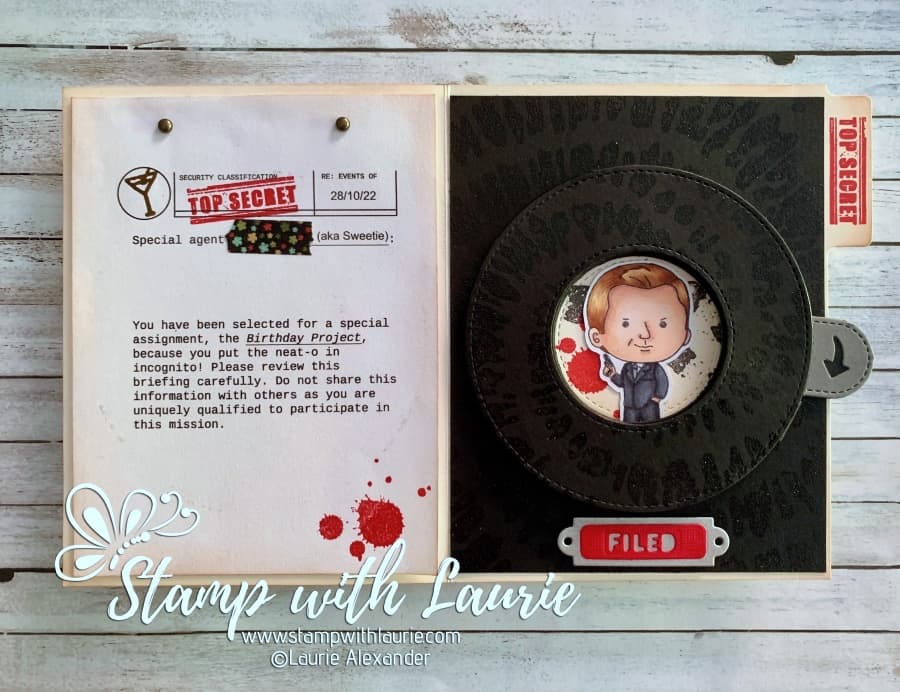
Amanda Stevens, a Design Team Member for Kindred Stamps, created a file folder PDF that you can download for both birthday and Father’s Day. Here is the link to her YouTube channel that lists the files. I used the birthday mission part for the inside of my card. Love that you can customize it to suit your needs! I added My Hubby’s birthday date and his “also known as” (aka) handle “Sweetie” to the file. Lol! The piece of washi tape was his secret agent’s name that had been “redacted”! The stamp set even comes with a martini glass and I couldn’t resist using it! Again, I distressed the brief with ink and add some blood splatters before gluing it at the top and adding some metallic dots like the brief was clipped to the folder.

Close Up of Birthday Brief

For the other side, I decided to use the Magic Iris to mimic the opening of the movies when Bond enters. I embossed in black the Spiral Dye Stamp Set onto the black cardstock from which I die cut the front of the Iris. The part that wasn’t used for the iris, I glued down to continue the spiral on the page. I had die cut the “Filed” tab and had planned to add it to the front of the folder, but in the end, I placed it under the Iris to give the black a bit of colour.

Magic Iris Open Showing Secret Agent

————————–

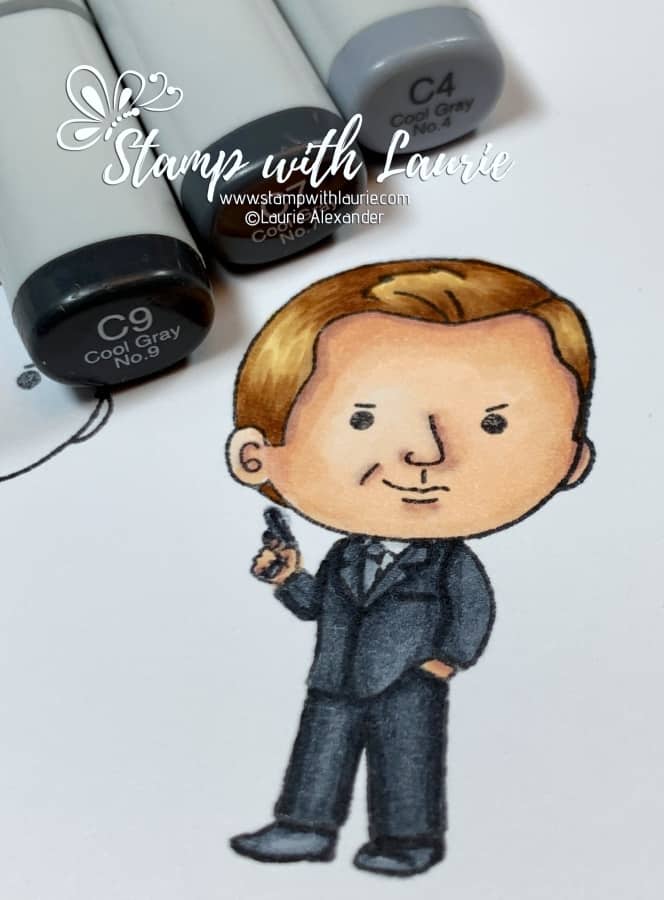
Copic Markers:

Skin: E04/E11/E21/E00/E000
Hair: YR31/E37/E35/E33
Suit: C9/C7/C4
Shoes: C7/C6/C4
Tie/Gun: C3/C1
Shirt: C1/0

Close Up of Secret Agent

————————–

Card Recipe for My Birthday…Happy Birthday Card:

Secret Agent, Kindred Stamps
Paper Basics – Stamper’s Select White Cardstock, Papertrey Ink
Galvanized Metallic Sheet, Stampin’ Up!
Magic Iris Dies, Lawn Fawn
File Folder Edgelit Dies, Stampin’ Up!
Specimen Thinlits Dies, Sizzix
Spiral Dye Stamp Set, Stampin’ Up!
Gorgeous Grunge Stamp Set, Stampin’ Up!
Ghoulish Grunge Stamp Set, Stampin’ Up!
Daring Adventure Stamp Set, Stampin’ Up!
It’s a Mystery!, Kraftin’ Kimmie Stamps
Rustic Metallic Adhesive Dots, Stampin’ Up!
Magnifying glass charms antique silver tone, Nicole de Bruin Charms
Washi Tape, Stampin’ Up!
Real Red Classic Ink Pad, Stampin’ Up!
Early Espresso Classic Ink Pad, Stampin’ Up!
VersaFine, Onyx Black, Tsukineko
Tim Holtz Vintage Photo Distress Ink Pad, Ranger
Blending Brushes, Stampin’ Up!
Very Vanilla, Basic Black, Basic Gray
and Real Red, Card Stock Stampin’ Up!

Finished card size: 4.5” x 5.5”

Birthday…Happy Birthday Card in Action

————————–

For more of my Kindred Stamps cards, please click here.

Hope you like my Birthday…Happy Birthday Card using the
Secret Agent by Kindred Stamps!