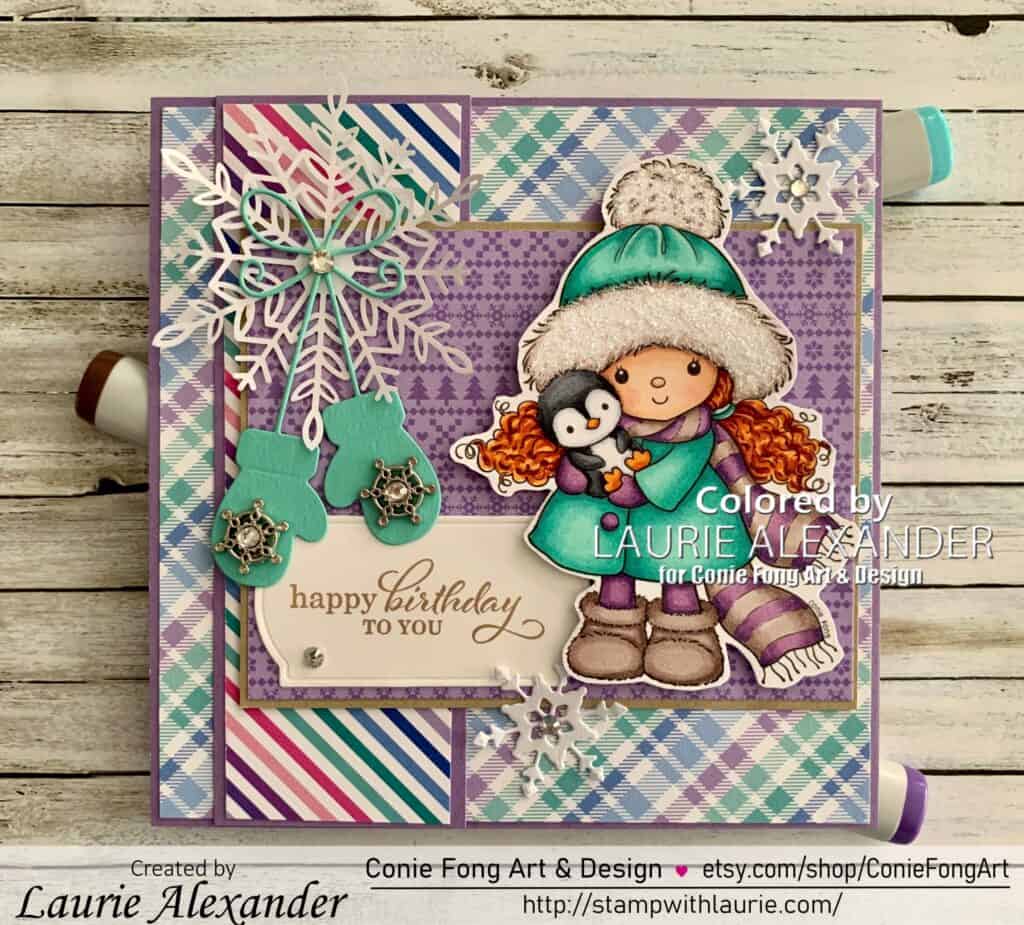
My Birthday Celebration Card 

My Birthday Celebration Card - Birthday card celebrating a winter birthday with a girl
My Birthday Celebration Card

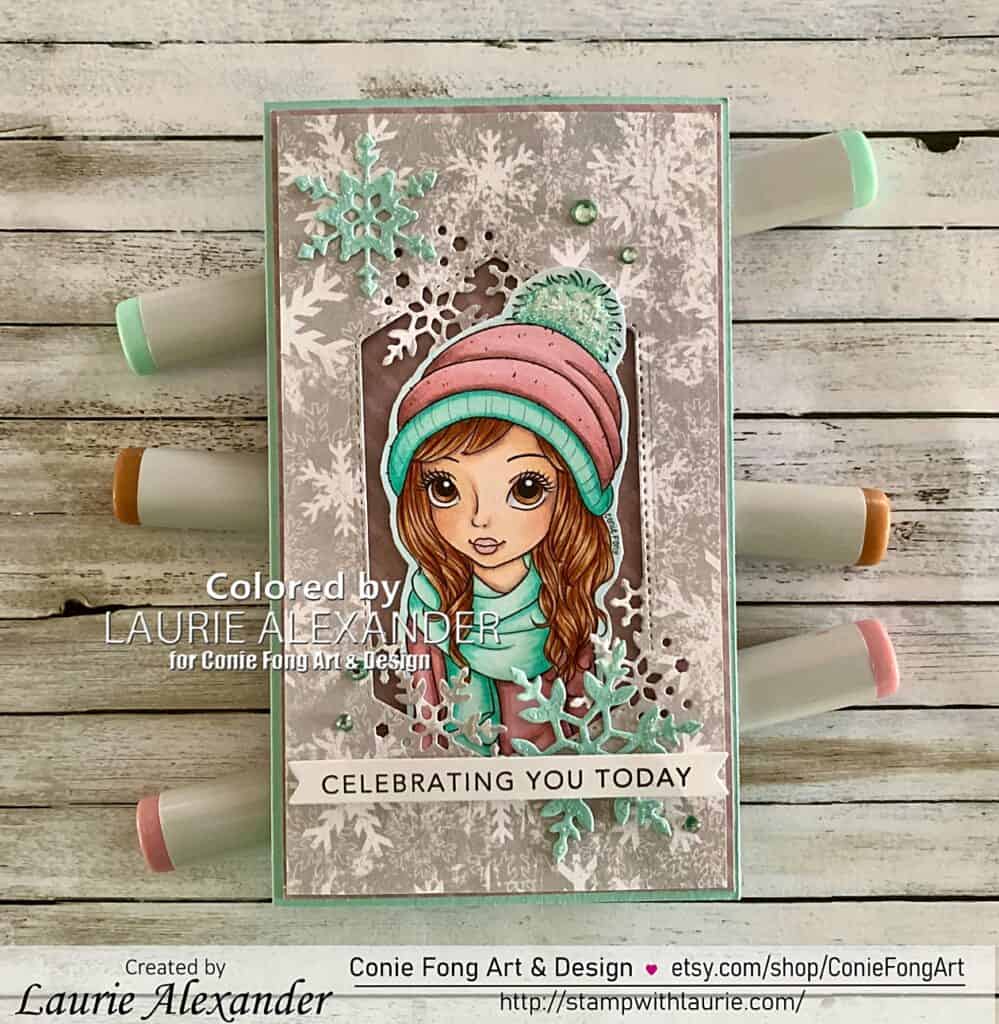
Hello Crafty Friends! It’s Laurie here! I am sharing My Birthday Celebration Card as my Design Team Inspiration Card for Conie Fong Art & Design using the sweet Winter Wendy. It was my birthday a while back and I decided to colour this cutie and make a card to celebrate it!

The Details of My Birthday Celebration Card

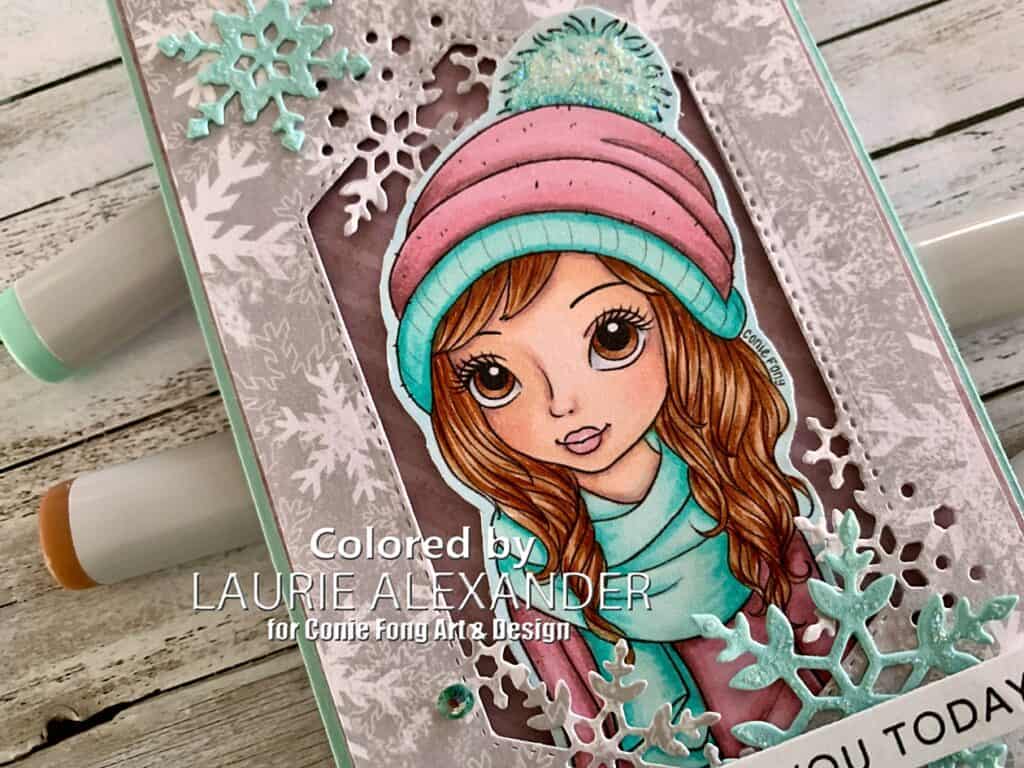
Since I used this stamp for my birthday card, I decided to colour Wendy to look like me when I had long hair. So, I pulled out my Copic markers and gave her brown hair and eyes. I picked the colours for her clothes from my paper choice. The pink was a bit tricky to colour, but I discovered by adding E04 to the RVs, it allowed the shadows of the pinks to match my paper.

For my card, I decided to create a mini slimline to match the shape of the large snowflake die. I thought it would be fun having her pop out of this die cut snowflake opening with its matching snowy paper. I added a few die cut Pool Party snowflakes to bring out the blue/green in my colouring. 

The sentiment “Celebrating You Today” summed up my birthday theme perfectly! It was stamped in black and die cut with the matching flag die.

To add sparkle, I coloured rhinestones with my Copic markers to match my colour choice. I also used Star Dust Stickles on the Pool Party snowflakes and on her pompom.

————————–

Copic Markers:

Skin: E04/E11/E21/E00/E000/R20
Hair: E39/E37/E35E/33
Blue/Green: BG13/BG11/BG10
Pink: E04/RV34/RV32/RV10
Rhinestones: BG13
Close Up of Girl on Birthday Card
Close Up of Winter Wendy

————————–

Card Recipe for My Birthday Celebration Card:

Winter Wendy, Conie Fong Art & Design
Paper Basics – Stamper’s Select White Cardstock, Papertrey Ink
Simple Vintage Winter Woods 6” x 8” Paper Pad, Simple Stories
So Many Snowflakes Dies Stampin’ Up!
Mini Strips – Let’s Celebrate Stamp, Taylored Expressions 
Mini Strips – Flags Dies, Taylored Expressions
Versafine Black Ink, Tsukineko
Rhinestone Basic Jewels, Stampin’ Up!
Star Dust Stickles, Ranger
White Gelly Roll Pen, Sakura
Pool Party Card Stock, Stampin’ Up!

Finished card size: 6” x 3 ½”

————————–

To view my other Conie Fong Art & Design projects, please click here.

Hope you like my Design Team Inspiration Card using Winter Wendy for Conie Fong Art & Design!

Thank you for stopping by!

Hugs,
Laurie

Season to be Freezin’ Card 

Season to be Freezin’ Card - a winter card with a Yeti holding a tree
Season to be Freezin’ Card

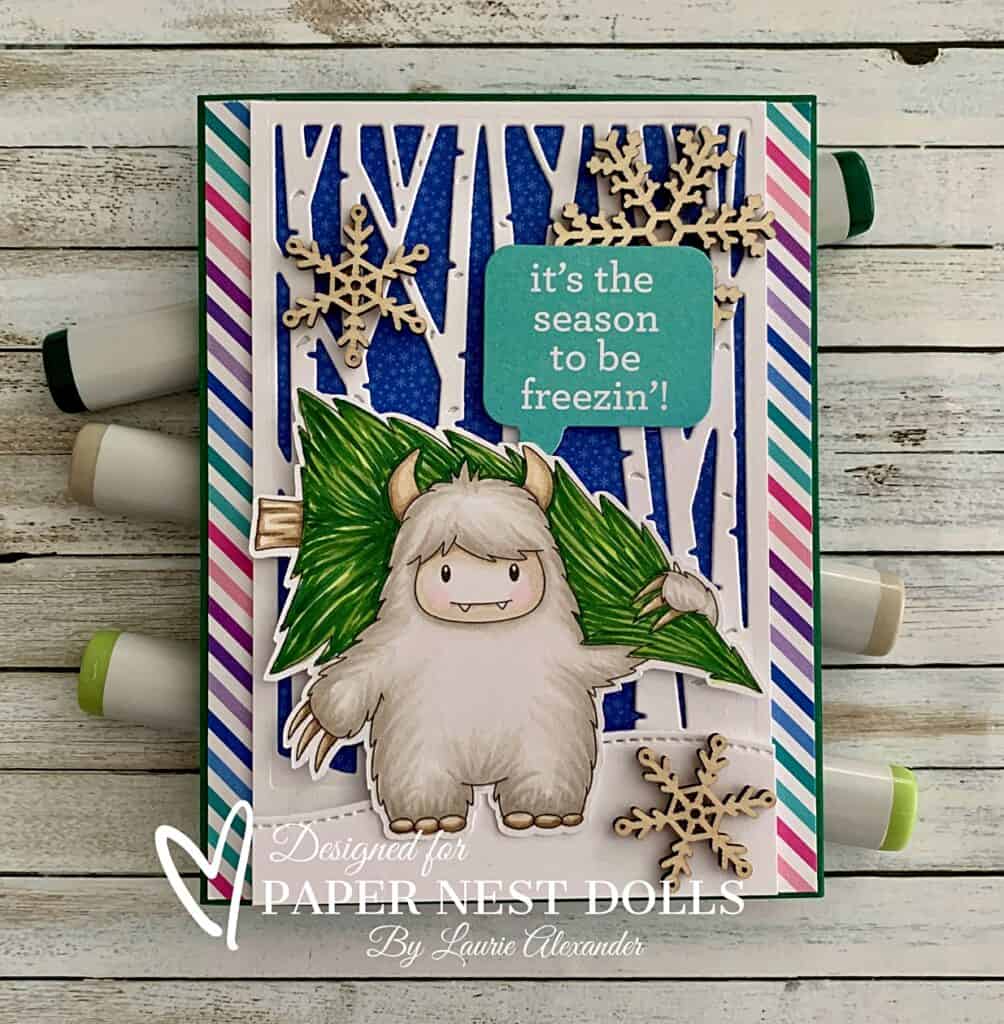
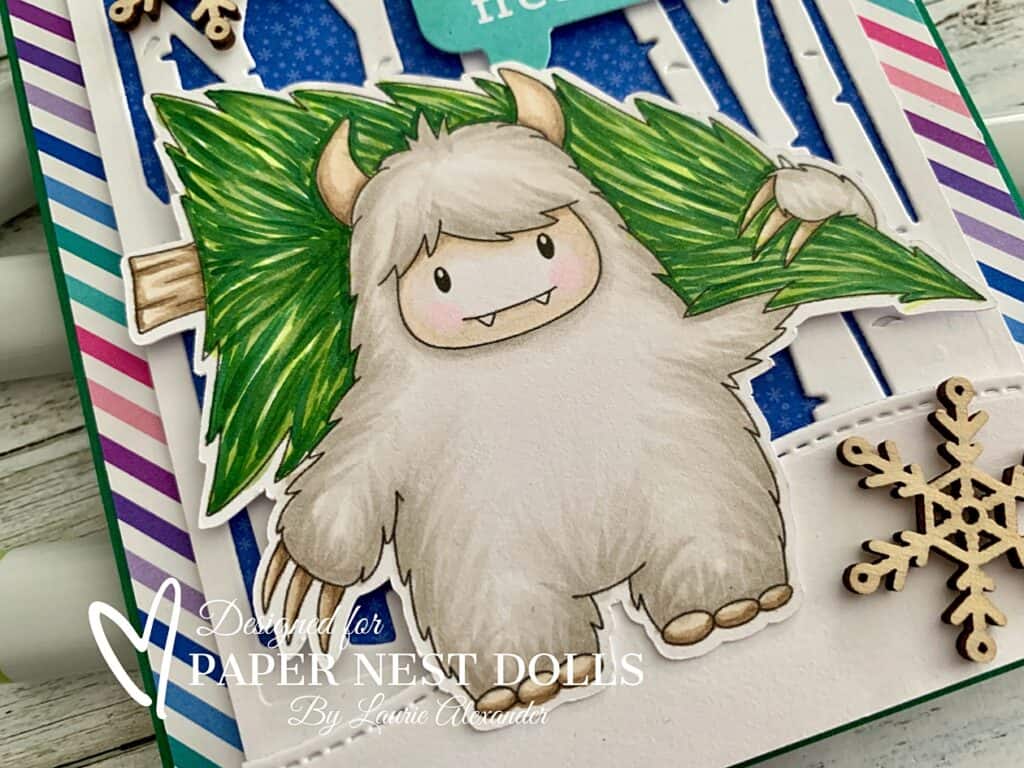
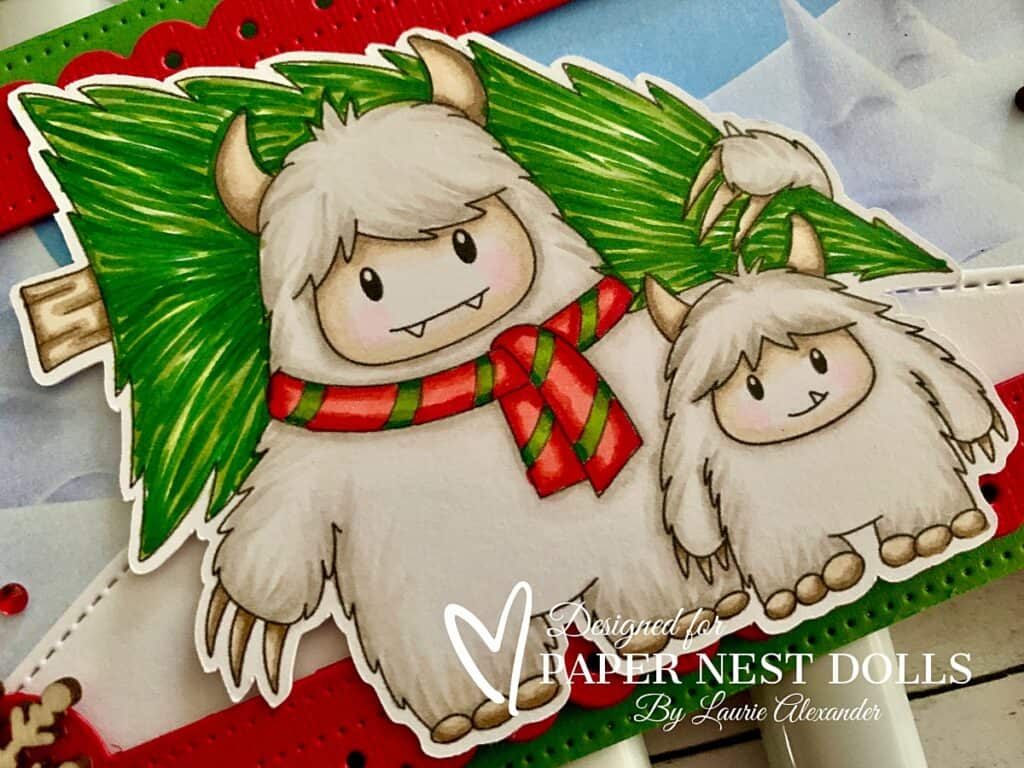
Hello Crafty Friends! It’s Laurie here! I am sharing my Season to be Freezin’ Card as my Design Team Inspiration Card for Paper Nest Dolls using Yeti with Tree. Paper Nest Dolls has several Yeti stamps to the point you could have a whole Yeti family! I just love these cuties so much that I made another card with the Yeti Father and Son for Christmas and have included a link at the end of this post to it.

The Details of My Season to be Freezin’ Card

For my Yeti, I had coloured him with my Copic markers before Christmas but didn’t get a chance to get him onto a card. So, I decided to create a winter themed card for him. I coloured his fur texture with individual strokes in the shadows and left the highlights white. The tree was also coloured with individual strokes to create lots of texture.

The Doodlebug paper that I used, had Yetis on it, but I went with more neutral papers to create my wintery scene. The sentiment was from the matching Chit Chat and was perfect for my wintery theme.

Next, I added a birch tree die cut for my wintery scene and, to add interest, I used a Stitched Hillside Die to complete my scene.

For embellishments, I used some wooden snowflakes that I had in my stash for that rustic look.

————————–

Copic Markers

Fur: W3/W1/W0/0
Face: E43/E42/E41/E40/RV00/0
Horns/Nails/Tree Trunk: E44/E43/E42/E41
Tree: G29/YG63/YG03

Close Up of Yeti carrying a Tree
Close Up of Yeti with Tree

————————–

Card Recipe for My Season to be
Freezin’ Card

Yeti with Tree, Paper Nest Dolls
Paper Basics – Stamper’s Select White Cardstock, Papertrey Ink
Winter Wonderland 6” x 6” Paper Pad, Doodlebug Designs Inc.
Winter Wonderland Chit Chat, Doodlebug Designs Inc.
Slimline Stitched Hillside Border Dies, Lawn Fawn
Woodland Collection Birch Tree Forest, Sue Wilson
Wooden Snowflake Embellishments, Stampin’ Up!
Shaded Spruce Card Stock, Stampin’ Up!

Finished card size: 5 ½” x 4 ¼”

Stamp Size: 3”

————————–

To view my other Paper Nest Dolls cards, please click here.

My Yeti for the Holidays?

For more information on my card, please click here or on the photo.

Yeti for the Holidays Card - A Christmas Card with a Yeti Father and Son getting a Christmas Tree.
Yeti for the Holidays Card

Hope you like my Season to be Freezin’ Card using
Yeti with Tree by Paper Nest Dolls!

Thank you for stopping by!

Hugs,
Laurie
Warmest Winter Wishes Card 

Warmest Winter Wishes Card - a winter birthday card with baby seals in the Arctic.
Warmest Winter Wishes Card

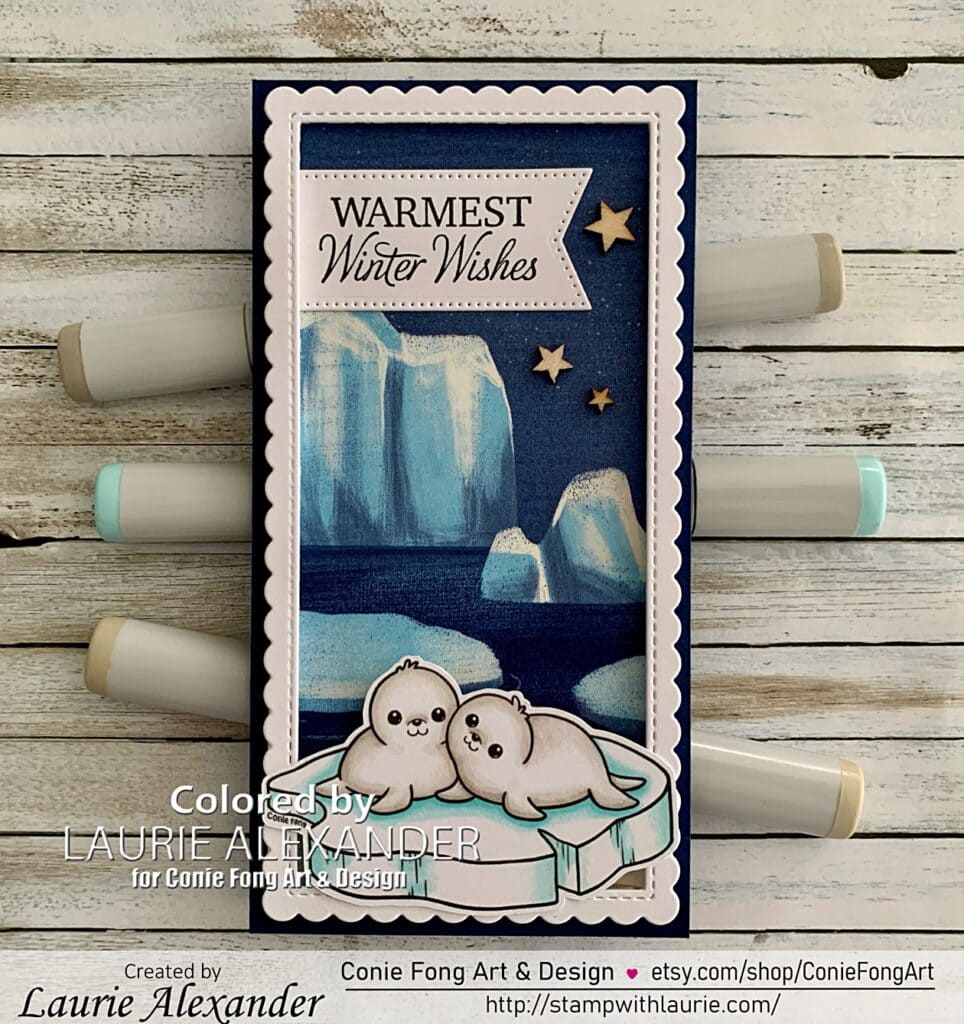
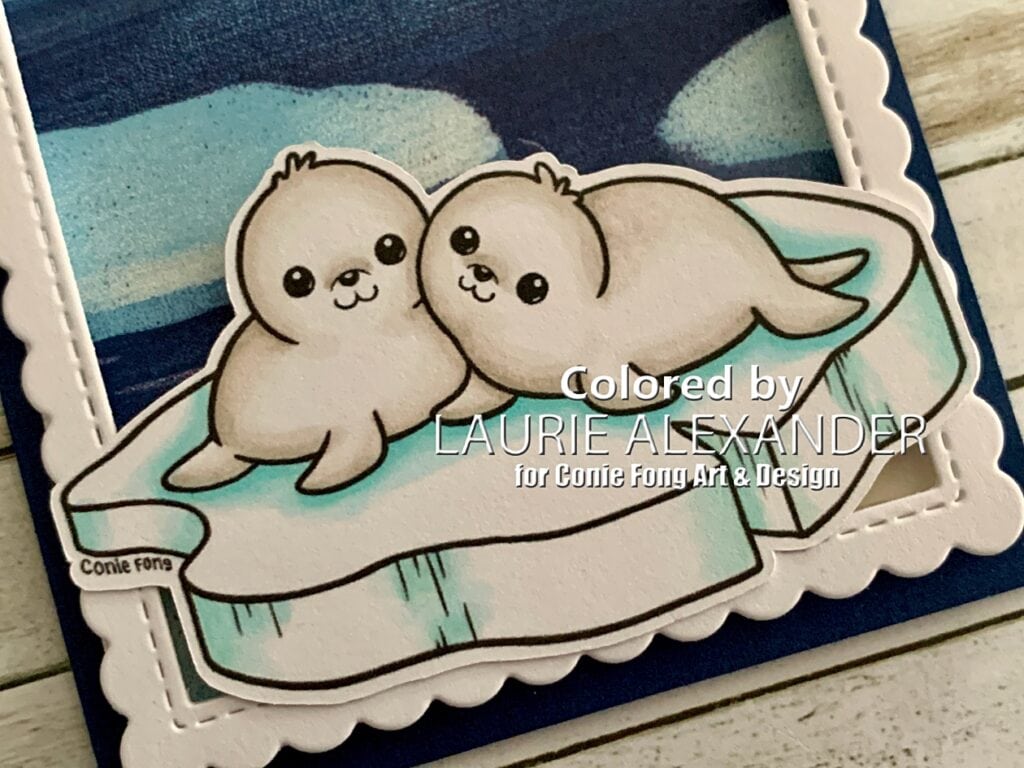
Hello Crafty Friends! It’s Laurie here! I am sharing my Warmest Winter Wishes Card as my Design Team Inspiration Card for Conie Fong Art & Design using the Baby Seals On Iceberg from her drawing tutorial on You Tube. Conie Fong has started a Draw with Conie YouTube channel where you can draw along with her: https://www.youtube.com/@DrawWithConie. Don’t forget to subscribe to her channel while you are there for more tutorials that come out each week!

You can share your drawings in her Draw with Conie Facebook Group: https://www.facebook.com/groups/339082068864209/

The Details of My Warmest Winter Wishes Card

For my card, I kept my card design simple in line with the simple drawing of the seals. The seals were coloured with very few Copic markers leaving a lot of uncoloured white space. Really, I just coloured the shadows for them and the ice flow and used my Colorless Blender to soften the edges of the colour to the white.

I had the perfect Designer Series Paper from Stampin’ Up! to create a mini slimline card for these cuties! It had a winter artic scene with icebergs and ice flow, but it had polar bears on it! So, I strategically cut my DSP so that the bears would be hidden by the placement of my seals. Lol!

Next, I used a white mini slimline scallop die cut to frame my scene having it pop from all the blues. This also gave a support for my seals so that it looked like the seals are floating out of the scene.

The sentiment was stamped on white, and die cut with a stitched flag die. Again, I liked how it popped against the dark blue sky. The final touch was a few wooden stars that I had in my stash.

————————–

Copic Markers:

Seals: W3/W1/W0/0
Ice Flow: B01/B00/B000/0

Close Up of Baby Seals

————————–

Card Recipe for My Warmest Winter
Wishes Card:

Baby Seals On Iceberg, Conie Fong Art & Design
Paper Basics – Stamper’s Select White Cardstock, Papertrey Ink
Beary Christmas Designer Series Paper, Stampin’ Up!
Versafine Onyx Black Ink, Tsukineko
Essentials Mini Slimline Stitched Scallop Rectangle Die, Pink Fresh Studio
Stylish Shapes Dies, Stampin’ Up!
Free Skate Stamp Set, Stampin’ Up!
Foam Adhesive Strips, Stampin’ Up!
Wooden Star Elements. From My Stash
Night of Navy and Basic White Card Stock, Stampin’ Up!

Finished card size: 6 ¼” x 3 ¼”

————————–

To view my other Conie Fong Art & Design projects, please click here.

Hope you like my Design Team Inspiration Card using Baby Seals On Iceberg for Conie Fong Art & Design!

Thank you for stopping by!

Hugs,
Laurie
My Beary Christmas Cards 

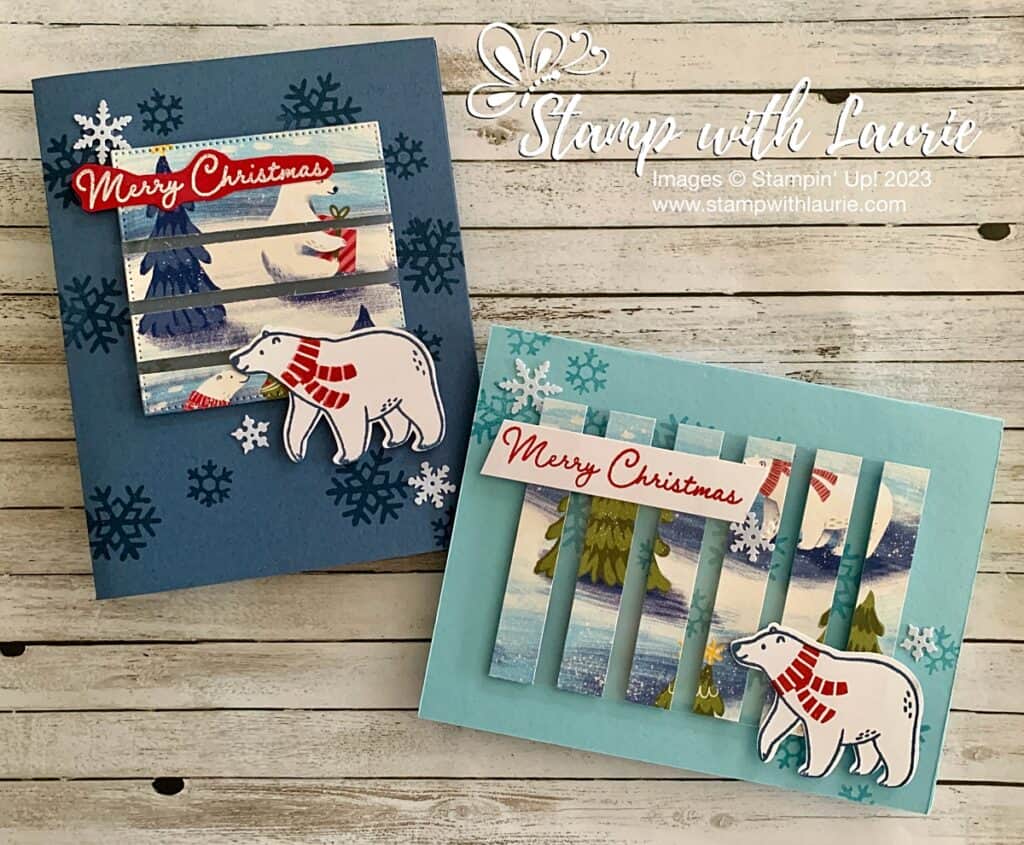
My Beary Christmas Cards  - two Christmas card with a Polar Bear and a wintery scene
My Beary Christmas Cards

Hello Crafty Friends! Laurie here again! I am sharing My Beary Christmas Cards using the Beary Cute Bundle by Stampin’ Up! which includes the Beary Cute Stamp Set and coordinating Beary Cute Punch. This bundle is retiring. So, make sure you get it before it’s too late!

The Details of My Beary Christmas Cards

For my cards, I decided to make a floating element using one of the scenes from the Beary Christmas Designer Series Paper. I had so much fun that I created two different cards with the same elements. For one, I used Misty Moonlight and the other, Balmy Blue card stock bases. A floating element uses acetate or window sheet on which you adhere strips of DSP leaving gaps between the pieces. Then you use dimensionals under the DSP to make it look like the element is floating.

The scene strips were cut at ½” width and lined up in order on my window sheet for placement before adhering them down. I started with the two end pieces and then the centre ones working out to the ends. Tip: use grid paper for an even gap between pieces. Since the DSP was ½ wide, it allowed me to place my dimensionals behind the paper. Thus, hiding them to complete my floating element.

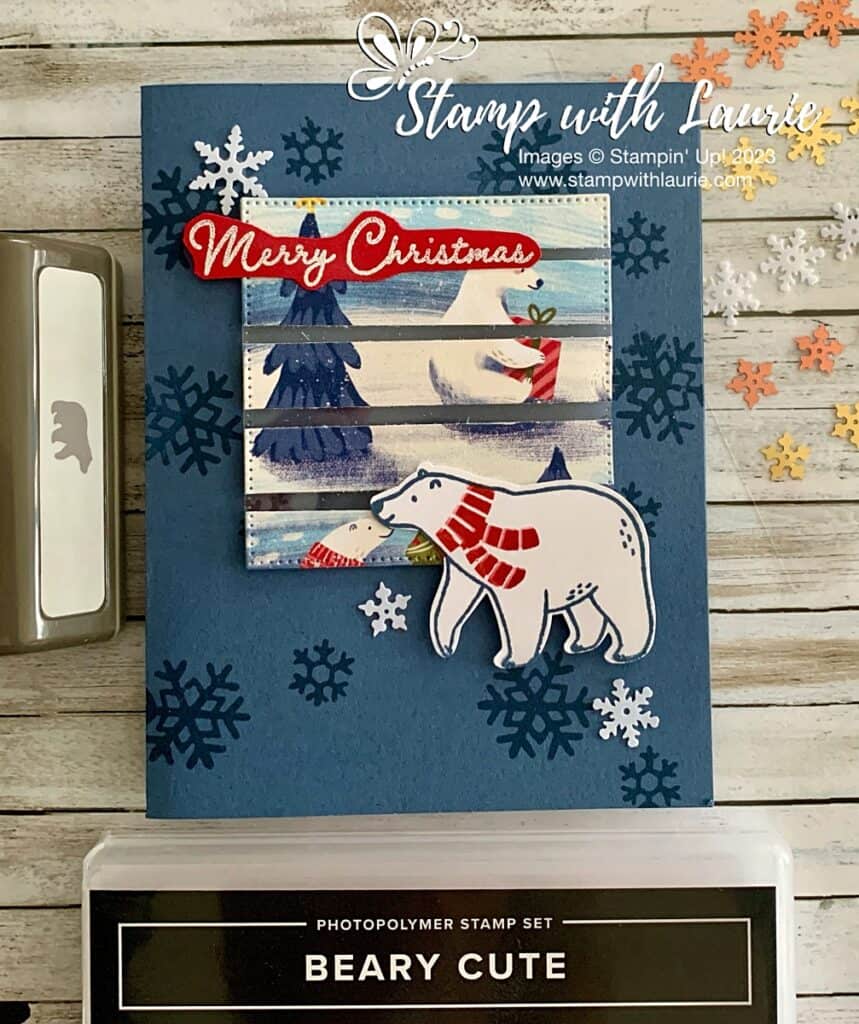
Misty Moonlight Card

I made the Misty Moonlight card portrait and used the largest square from the Stylish Shapes Dies to die cut my square once I had adhered the 5 DSP scene pieces to the Window Sheet.

Misty Moonlight Card with a Polar Bear on it.
Misty Moonlight Card

I stamped snowflakes in Misty Moonlight for a tone-on-tone around my central focal point.

The sentiment was white embossed on some Real Red card stock and then fussy cut with my Paper Snips.

The polar bear was stamped in Misty Moonlight and Real Red for his scarf before it was punched out.

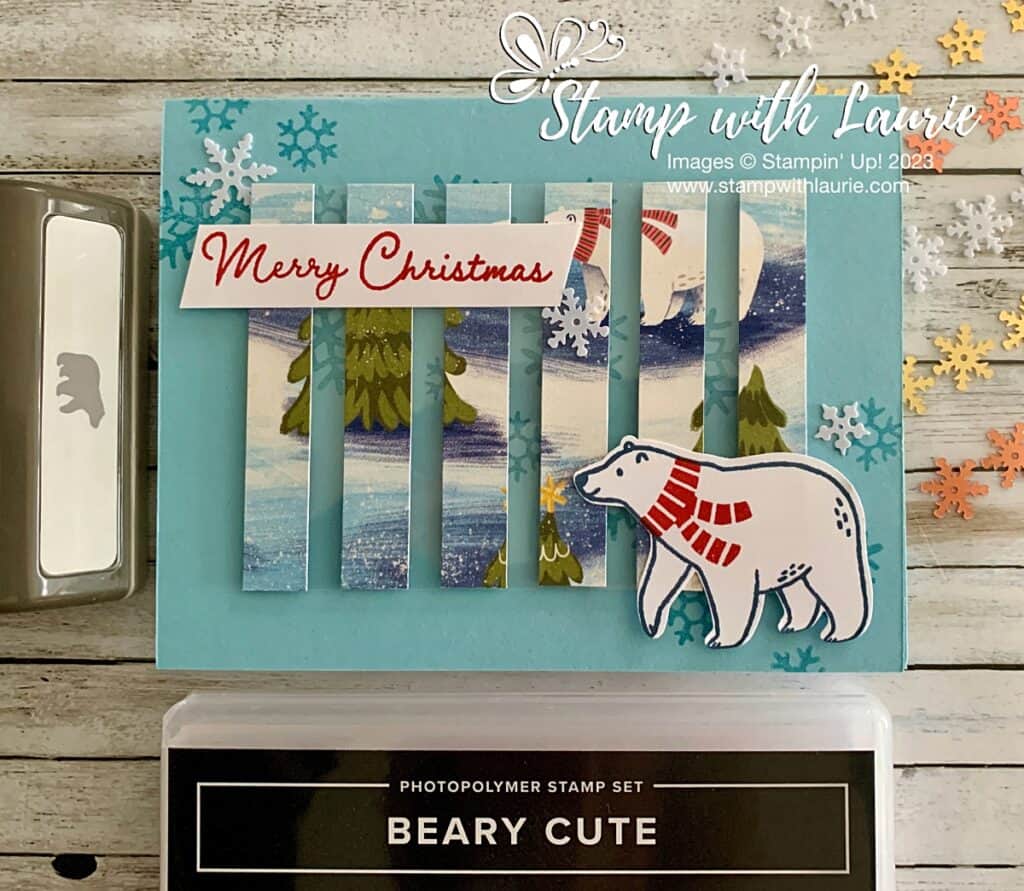
Balmy Blue Card

For my Balmy Blue card, I decided that I wanted to use more of the DSP. So, I made the floating element larger with 6 pieces of DSP and wider gaps. I stamped the Balmy Blue snowflakes at an angle through the centre of the card. This allowed the snowflakes to show through the Window Sheet!

Balmy Blue Card with a Polar Bear on it
Balmy Blue Card

The sentiment was stamped in Real Red and snipped on an angle with my Paper Snips.

For both cards, I used the white snowflakes from the Adhesive-Backed Snowflake Assortment as my embellishments.

Supplies:

Stamps/Bundles/Dies: Beary Cute Bundle (162023), Stylish Shapes Dies (159183)

Inks: Misty Moonlight Classic Stampin’ Pad (153118), VersaMark Ink (102283), Balmy Blue Classic Stampin’ Pad (147105), Real Red Classic Stampin’ Pad (147084)

Paper: Misty Moonlight (153081), Balmy Blue (146982), Window Sheets (142314), Real Red (102482), Basic White (159276), Beary Christmas Designer Series Paper (162015)

Accessories: Adhesive-Backed Snowflake Assortment (162129), Basics Embossing Powder (155554), Embossing Additions Tool Kit (159971), Heat Tool (129053), Paper Snips (103579), Grid Paper (130148), Bone Folder (102300), Stampin’ Dimensionals (104430), Mini Glue Dots (103683), Mulitpurpose Liquid Glue (110755)

Measurements: 

  • Misty Moonlight/Balmy Blue:
    • 8 ½” x 5 ½” scored at 4 ¼”
  • Window Sheet:
    • 3” x 3” (for Misty Moonlight Card)
    • 3” x 4 1/8” (for Balmy Blue Card)
  • Real Red:
    • Scrap
  • Basic White: (3 pieces)
    • 2” x 2 ½” (Polar Bears)
    • Scrap (Sentiment)
  • Beary Christmas Designer Series Paper:
    • 3” x 2 ½” (for Misty Moonlight Card)
    • 3” x 3” (for Balmy Blue Card)

More Information on My Beary Christmas Cards:

For more of my Stampin’ Up! cards, please click here.

You will find the items listed above in my online store

Yeti for the Holidays?

Yeti for the Holidays? - A Christmas Card with a Yeti Father and Son getting a Christmas Tree.
Yeti for the Holidays?

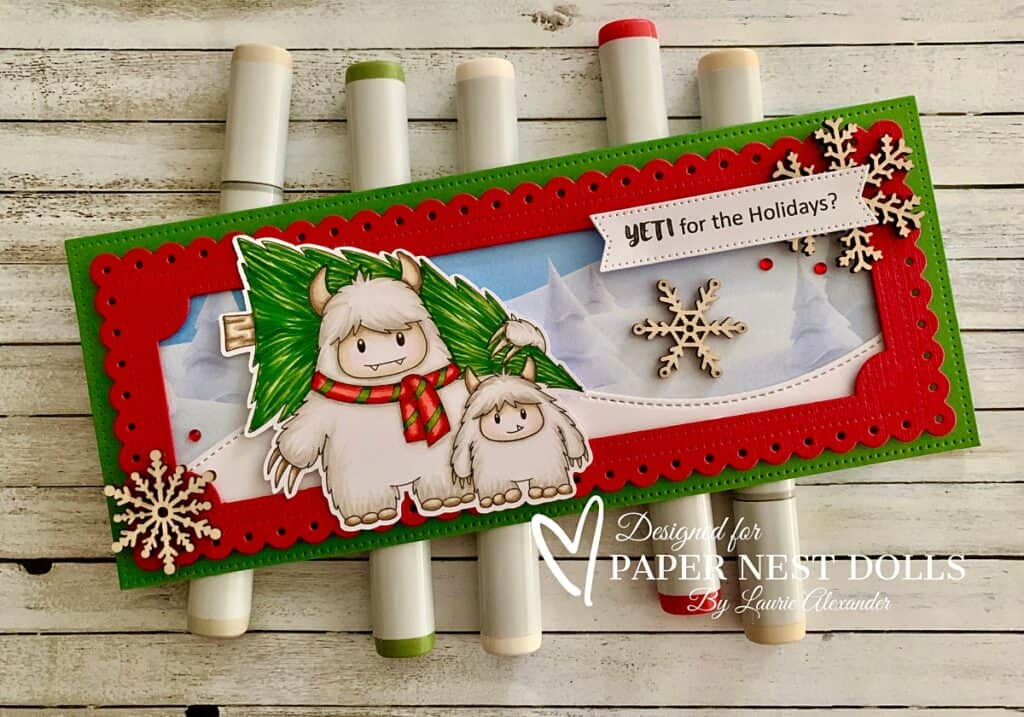
Hello Crafty Friends! It’s Laurie here! I am sharing my Yeti for the Holidays? as my Design Team Inspiration Card for Paper Nest Dolls using Yeti Father and Son. I just love these cuties. There is a Yeti Mom and Baby that you could add to this card for the whole family! Lol!

The Details of My Yeti for the Holidays?

I had a lot of fun colouring these two with my Copic markers! I decided to create a fur texture with individual strokes in the shadows and left the highlights white. The tree was also coloured with individual strokes to create texture. The Father Yeti’s tie pulled together my colour scheme of red and green.

For my card, I wanted to use the Whimsy paper with these cuties. This paper is perfect for those wintery scenes! In fact, I used it for another card that I made a few years ago and will post it at the end.

So, I created a slimline card using the Dotted Slimline Dies by Studio Katia. I used all three dies that came in the set to create my card. I thought it would be fun having the yetis stepping out of the wintery scene with their Christmas tree.

To complete my wintery scene and to add interest, I used a Stitched Hillside Die to add an extra layer to the scene. I made sure that my “snowbank” did not cover up the snow-covered trees on the background.

Next, I typed and printed my sentiment out on my computer. There are so many great sentiments out there that it was hard to pick one! Lol! The sentiment was die cut out with another stitched die.

For embellishments, I used some wooden snowflakes that I had in my stash for that rustic look and a scattering of red rhinestones to add sparkle.

————————–

Copic Markers

Fur: W3/W1/W0/0
Faces: E43/E42/E41/E40/RV00/0
Horns/Nails/Tree Trunk: E44/E43/E42/E41
Reds: R29/R27/R24/R22
Greens: G29/YG63/YG03

Close Up of Yeti Father and Son Stamp
Close Up of Yeti Father and Son

————————–

Card Recipe for My Yeti for the Holidays?

Yeti Father and Son, Paper Nest Dolls
Paper Basics – Stamper’s Select White Cardstock, Papertrey Ink
Frozen Slimline Designer Paper Pack, Whimsy Stamps
Dotted Slimline Dies, Studio Katia
Slimline Stitched Hillside Border Dies, Lawn Fawn
Stylish Shapes Dies, Stampin’ Up!
Wooden Snowflake Embellishments, Stampin’ Up!
Red Rhinestone Jewels, Stampin’ Up!
Garden Green and Real Red Card Stock, Stampin’ Up!

Finished card size: 8 ½” x 3 ½”

Stamp Size: 3”

————————–

To view my other Paper Nest Dolls cards, please click here.

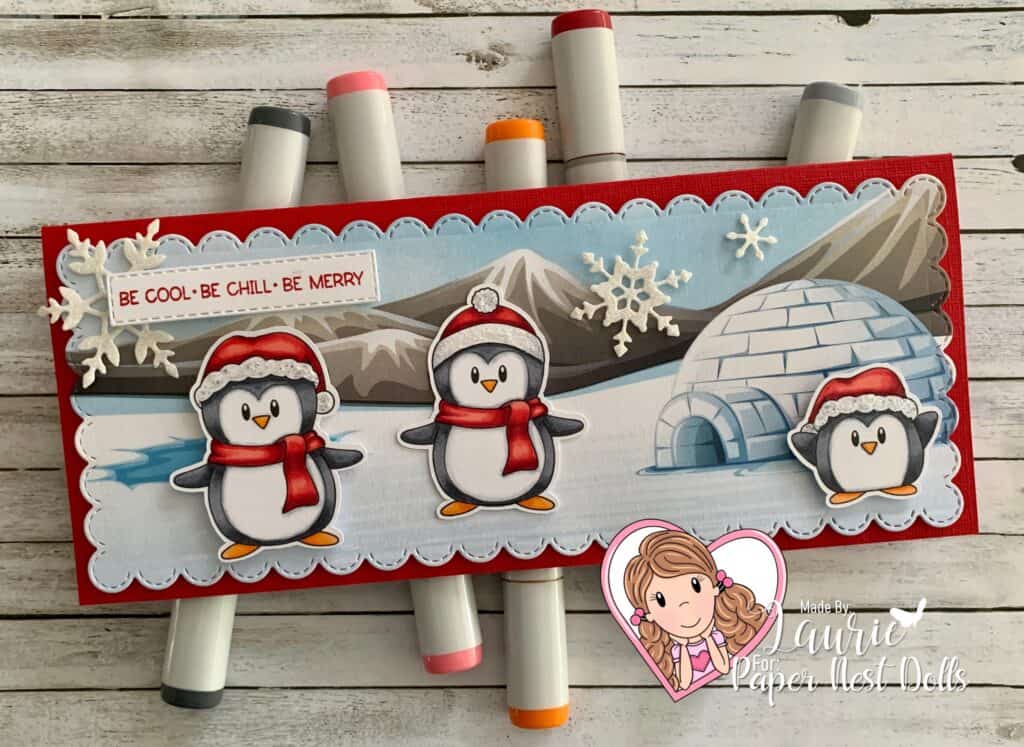
My Merry Penguins Card

For more information on my other card, please click here or on the photo.

My Design Team card with 3 Penguins on it.
My Merry Penguins Card

Hope you like my Yeti for the Holidays? Card using
Yeti Father and Son by Paper Nest Dolls!

Thank you for stopping by!

Hugs,
Laurie
Sending Snowflake Wishes 

A winter birthday card with a winter fairy holding a snowball
Sending Snowflake Wishes Card

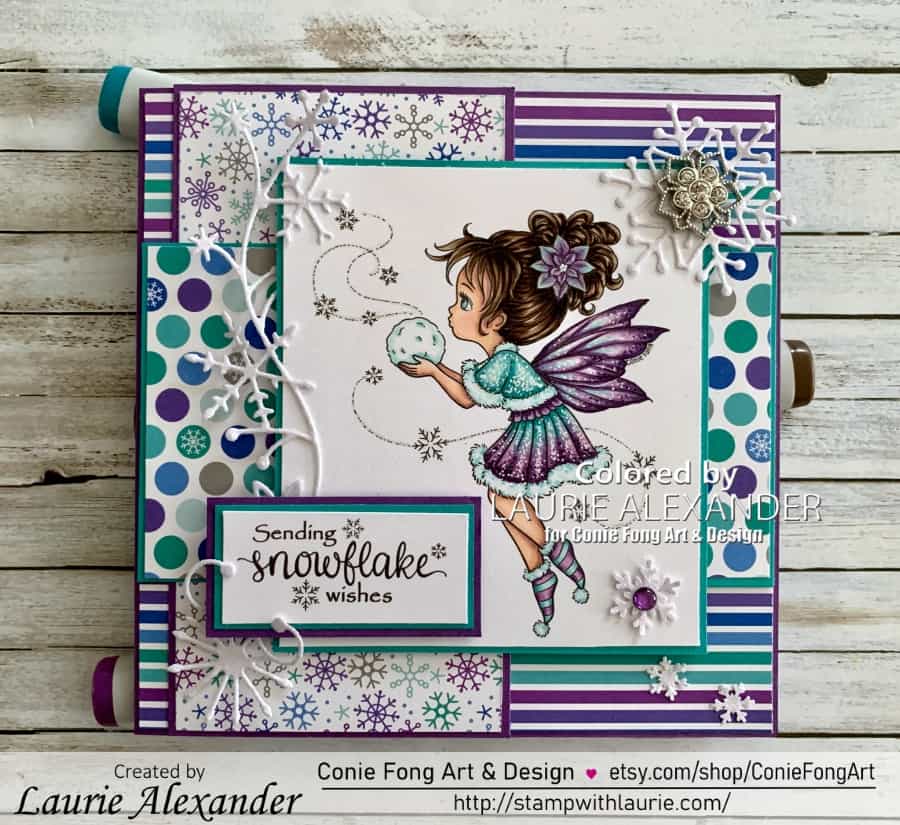
Hello Crafty Friends! It’s Laurie here! I am sharing my Sending Snowflake Wishes as my Design Team Inspiration Card for Conie Fong Art & Design using Snowflake Wishes. This digital purchase includes 5 stamps:

  • Image 1 and 2: Snowflake Wishes (girl facing left and right) (JPEG format)
  • Image 3: Poinsettia Flower (PNG format)
  • Sentiment 1: Wishing You A Magical Christmas (PNG format)
  • Sentiment 2: Sending Snowflake Wishes (PNG format)

The Details of My Card

For my card, I decided to create a winter birthday card for a good friend’s birthday that is next week. Since she is an amazing colourist, I wanted my colouring to be top notch! So, I went with a two-tone sparkly outfit something that was totally out of my comfort zone, but I knew she will appreciate it!

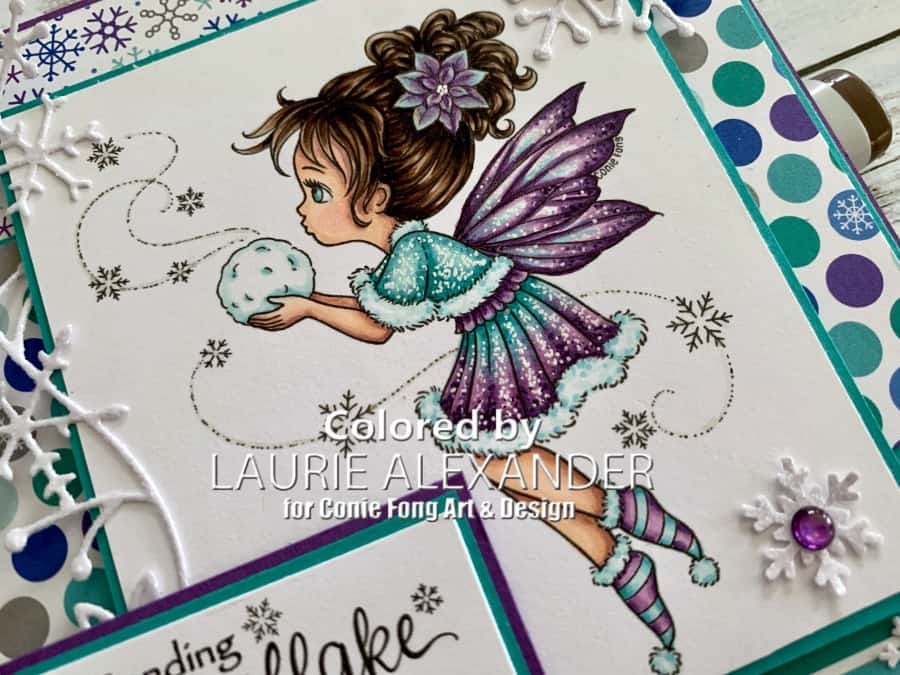
I love sparkle and it’s so easy to create with a white gel pen! Just make lots of small dots in the highlighted area and less in the shadows. Before using the white gel pen, I also added dots with my Copic markers.

The Doodlebug paper was perfect for the purple and blue/greens that I used and matched my wintery theme! 

I wrapped the glimmery snowflake border die around the side of my focal point and sentiment like it’s tying it all together! A scattering of more glimmery snowflakes adds to my theme. I couldn’t resist adding the Frosted Finishes Embellishment to the largest snowflake to give my card even more sparkle.

The finishing touches was Clear Wink of Stella on her wings, snowball, and flower in her hair. I also used Clear Star Gelly Roll Pen on the snowflake trail and the snowflakes on the stamp.

Tips

When you colour two-tones, you need to make sure that the colours are close on the colour wheel to allow the blending at the transition point. I went with purple and blue/green since I knew my friend loves those colours and they suited my wintery birthday theme. The colouring of the transition doesn’t have to be perfect since the sparkle will hide any imperfections. Also, make sure to blend the lightest colour marker into the other lightest colour at the transition point. For instance, where they met, I blended BG 10 into V12 and vice versa to create a smooth transition.

————————–

Copic Markers:

Skin: E000/E00/E21/E11/E04/R20
Hair: E49/E47/E44/E43/E42
Eyes: BG53/BG10/C3/C1/0
Purples: V09/V17/V15/V12
Blue/Greens: BG49/BG57/BG53/BG10
Snowball: BG53/BG10/0/Clear Wink of Stella

Close Up of Fairy holding snowball
Close Up of Snowflake Wishes Stamp

————————–

Card Recipe for My Sending Snowflake Wishes Card:

Snowflake Wishes, Conie Fong Art & Design
Paper Basics – Stamper’s Select White Cardstock, Papertrey Ink
Frosty Friends 6” x 6” Paper Pad, Doodlebug Design Inc.
White Glimmer Paper, Stampin’ Up!
Snowflake Border Punch, Martha Stewart
Snowflake Corner Punch, Martha Stewart
Chic Dies, Stampin’ Up!
Frostyville Border Die, Memory Box
Glossy Dots Assortment, Stampin’ Up!
Frosted Finishes Embellishments, Stampin’ Up!
Clear Wink of Stella, Stampin’ Up!
White Gelly Roll Pen, Sakura
Clear Star Gelly Roll Pen, Sakura
Gorgeous Grape and Bermuda Bay Card Stock, Stampin’ Up!

Finished card size: 5 ½” x 5 ½”

————————–

To view my other Conie Fong Art & Design projects, please click here.

Hope you like my Design Team Inspiration Card using Snowflake Wishes for Conie Fong Art & Design!

Thank you for stopping by!

Hugs,
Laurie
Wintertime Wishes Card

A card with a girl holding a snowflake banner
Wintertime Wishes Card

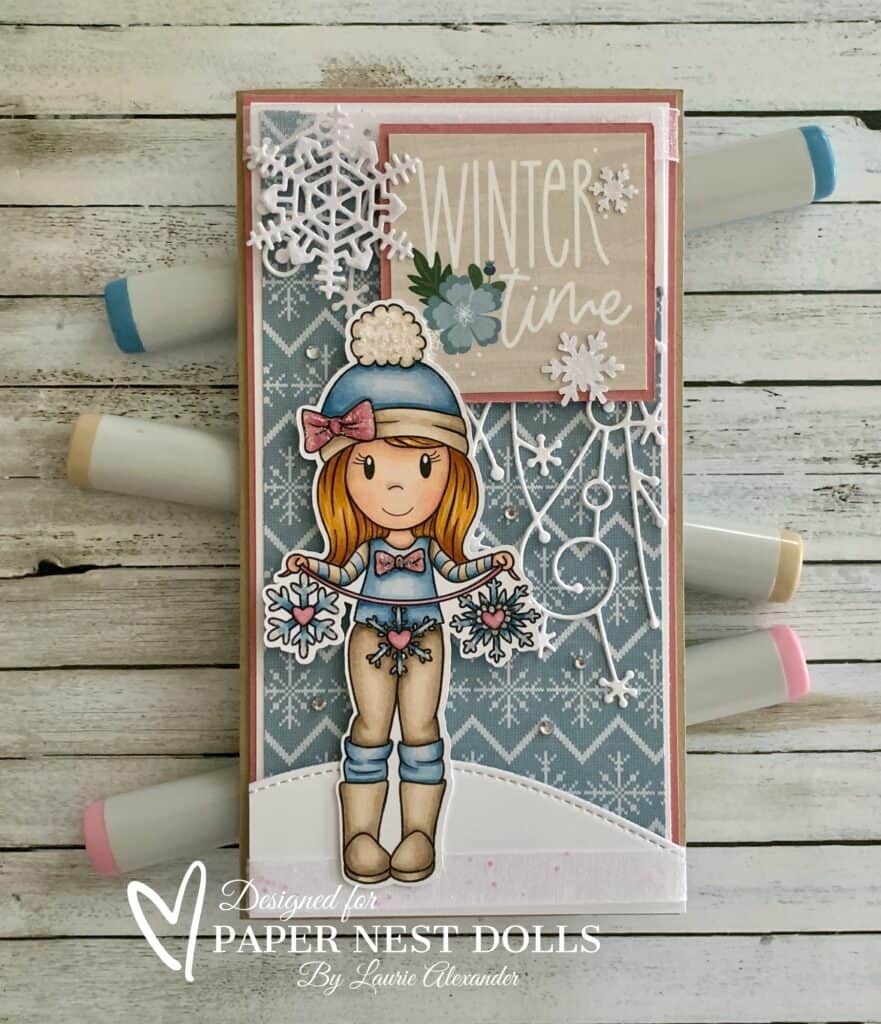
Hello Crafty Friends! It’s Laurie here! I am sharing my Wintertime Wishes Card as my Design Team Inspiration Card for Paper Nest Dolls using the sweet Emma with Snowflake Banner. She is perfect for a winter birthday or Valentine’s Day with her heart banner!

The Details of My Card

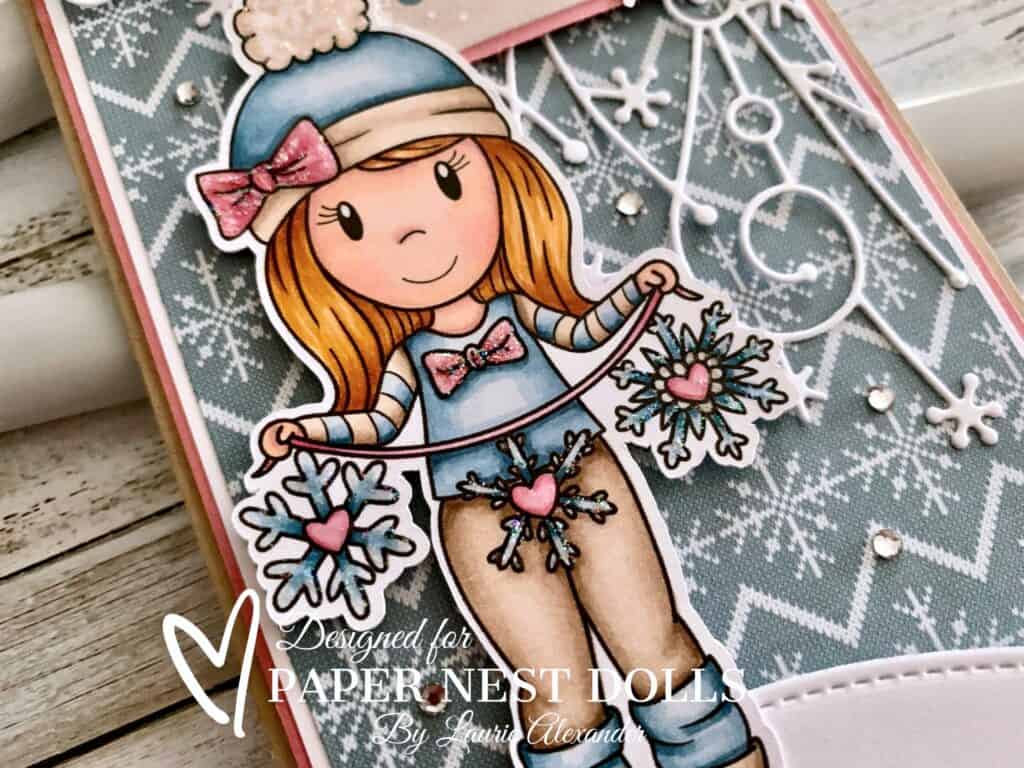
For my card, I coloured Emma with my Copic markers in one of my favourite colour combos of pinks, blues, and tans! I added Glossy Accents to the hearts on her snowflake banner and Stardust Stickles to her hat pompom, bows and the snowflakes.

The Snowed In Paper was perfect for my card since the knitted snowflake pattern created a cozy warm feel and suited my snowflake theme. Even the “Wintertime” sentiment was from the Paper Pad.

I had the Frostyville Corner Die from Memory Box in my stash and thought it would work for a mini slimline card. I love how it peeks put from under the sentiment creating interest over the knitted snowflake paper! A few more glimmery snowflakes from punches and a die were added for sparkle. To ground Emma, I added a stitched snowbank and ran some Glittered Organdy Ribbon over it to add more sparkle. I also added the ribbon across the top of the so that the sentiment hangs from it.

The finishing touch was a scattering of rhinestones on the knitted paper to add even more sparkle!

————————–

Copic Markers:

Skin: E000/E00/E21/E11/E04/R20
Hair: E99/YR24/YR23
Blues: B91/B93/B95/B97
Browns: E41/E42/E43/E44
Pinks: R81/R83/R85

Close Up of girl with Snowflake Banner
Close Up of Emma with Snowflake Banner

Card Recipe for Wintertime Wishes Card:

Emma with Snowflake Banner, Paper Nest Dolls
Paper Basics – Stamper’s Select White Cardstock, Papertrey Ink
Snowed In 6” x 6” Paper Pad, Echo Park
White Glimmer Paper, Stampin’ Up!
Slimline Stitched Hillside Border Dies, Lawn Fawn
Frostyville Corner Die, Memory Box
Seasonal Layers Thinlits Dies, Stampin’ Up!
Snowflake Border Punch, Martha Stewart
Snowflake Corner Punch, Martha Stewart
Glittered Organdy Ribbon, Stampin’ Up!
Rhinestone Basic Jewels, Stampin’ Up!
Glossy Accents, Ranger
Star Dust Stickles, Ranger
Basic White, Rococo Rose, and Crumb Cake Card Stock, Stampin’ Up!

Finished card size: 6 ½” x 3 ½”

Stamp Size: 4 ½” Tall

————————–

To view my other Paper Nest Dolls cards, please click here.

Hope you like my Design Team card for Paper Nest Dolls!

Thank you for stopping by!

Hugs,
Laurie
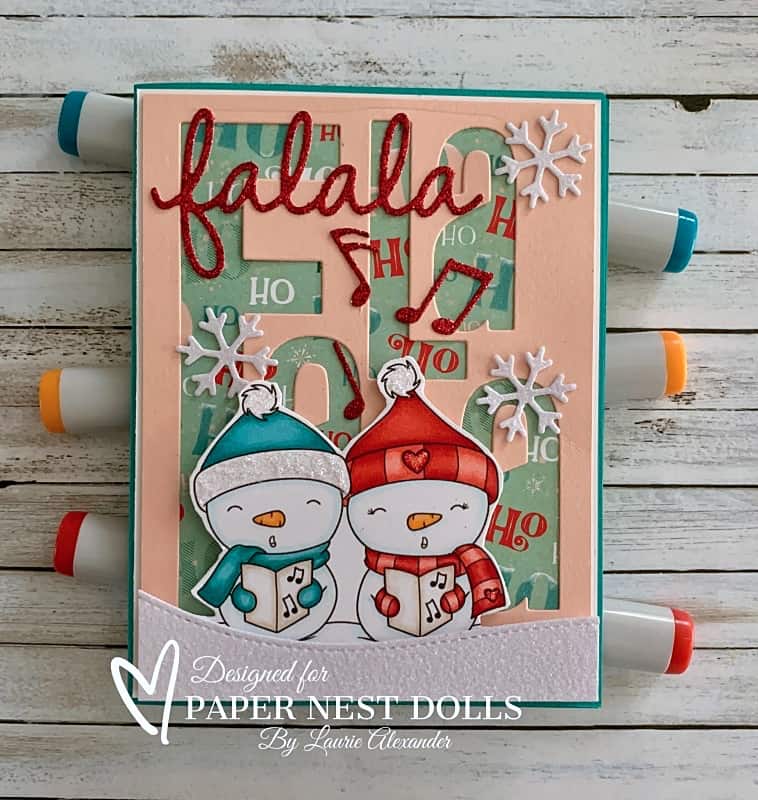
My Fa La La Card 

A Card with Snow People Singing Fa La La on it
My Fa La La Card

Hello Crafty Friends! It’s Laurie here! I am sharing My Fa La La Card as my Design Team Inspiration Card for Paper Nest Dolls using Snow Globe Bundle. This Bundle includes a clear snow globe with a selection of images and labels for the holiday season. I love the versatility of this bundle since you can interchange the images in the globe or use the images by themselves.

The Details of My Card

For my card, I decided to use the singing snow people without the globe. They are just too cute, and I had the perfect Fa La La die for them. In fact, I had two Fa La La dies. Lol! The cover plate behind them and the red glimmer falala.

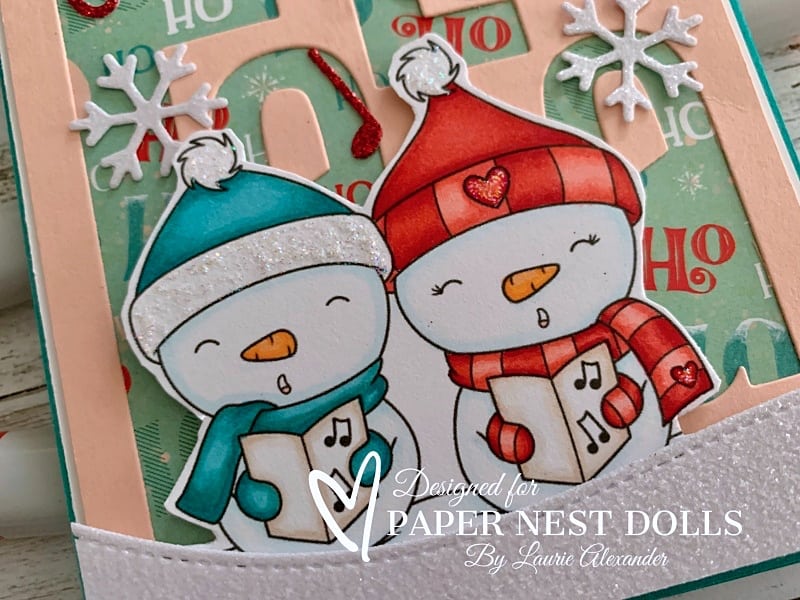
I pulled the colours of the DSP to colour my snow people in a red and a blue/green. I used my favourite technique for their snow bodies where I use two light makers along the edges and then use my colourless blender to soften the transition between the colour and the paper. The same technique was used for their song books.

Since these cuties are singing, I had to add some musical notes floating up from them! Some glimmery snowflakes and snowbank add even more sparkle to my card. The finishing touch was Star Dust Stickles on their hat trim and the hearts.

————————–

Copic Markers:

Reds: R29/R24/R24/R22
Blue/Greens: BG09/BG57/BG53
Whites: BG0000/BG000/0
Carrots: YR12/Y38/YR12
Song Books: E42/E40/0

Close Up of Snow People on the Card
Close Up of Snow People

————————–

Card Recipe for My Fa La La Card:

Snow Globe Bundle, Paper Nest Dolls
Paper Basics – Stamper’s Select White Cardstock, Papertrey Ink
Santa Express Design Series Paper, Stampin’ Up!
Real Red & White Glimmer Paper, Stampin’ Up!
Slimline Stitched Hillside Borders, Lawn Fawn
Frosted Flurries Dies, Stampin’ Up!
Fa La La Cover Die, The Stamp Market
Music Notes Die, From my Stash
Star Dust Stickles, Ranger
Basic White, Bermuda Bay and Petal Pink Card Stock, Stampin’ Up!

Finished card size: 5 ½” x 4 ¼”
Stamp Size: 3” Tall

————————–

To view my other Paper Nest Dolls cards, please click here.

Hope you like my Design Team card for Paper Nest Dolls!

Thank you for stopping by!

Hugs,
Laurie
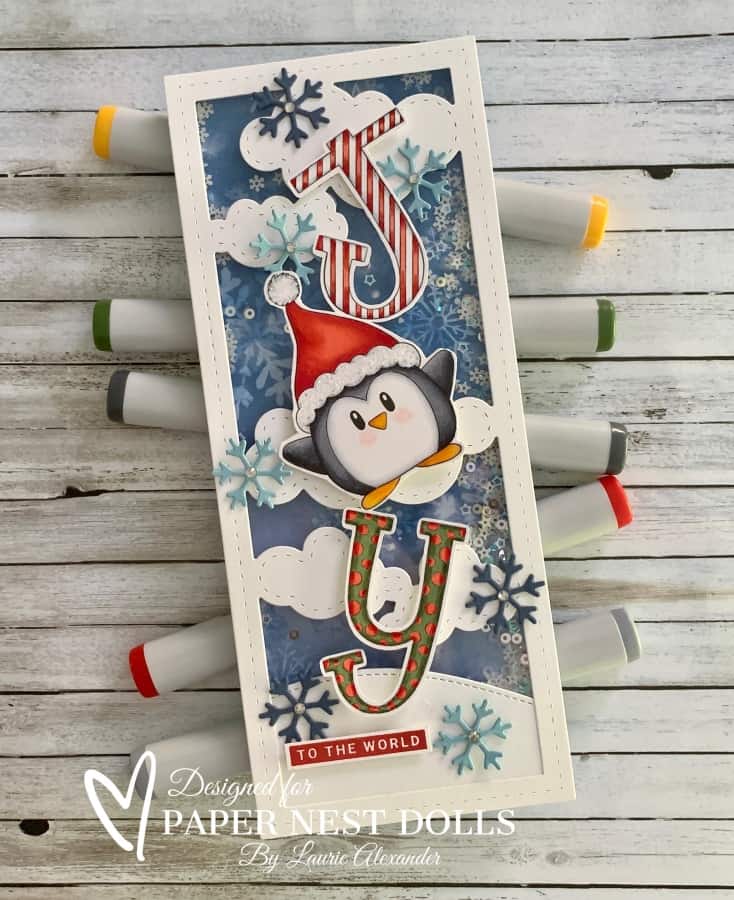
Joy to the World Card

A card with a penguin balancing the word Joy
Joy to the World Card

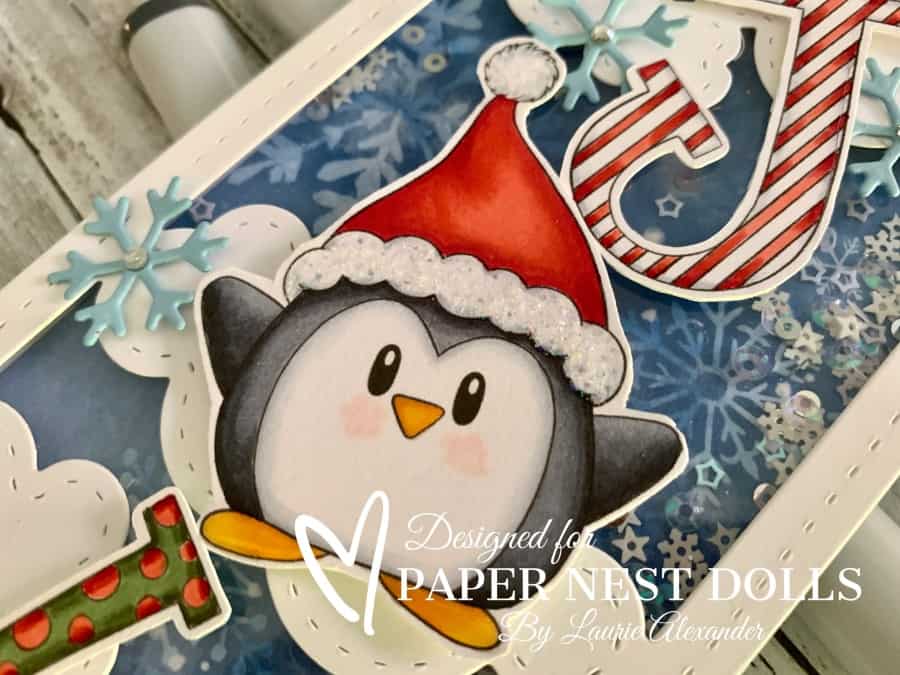
Hello Crafty Friends! It’s Laurie here! I am sharing my Joy to the World Card as my Design Team Inspiration Card for Paper Nest Dolls using Penguin Joy.

The Details of My Card

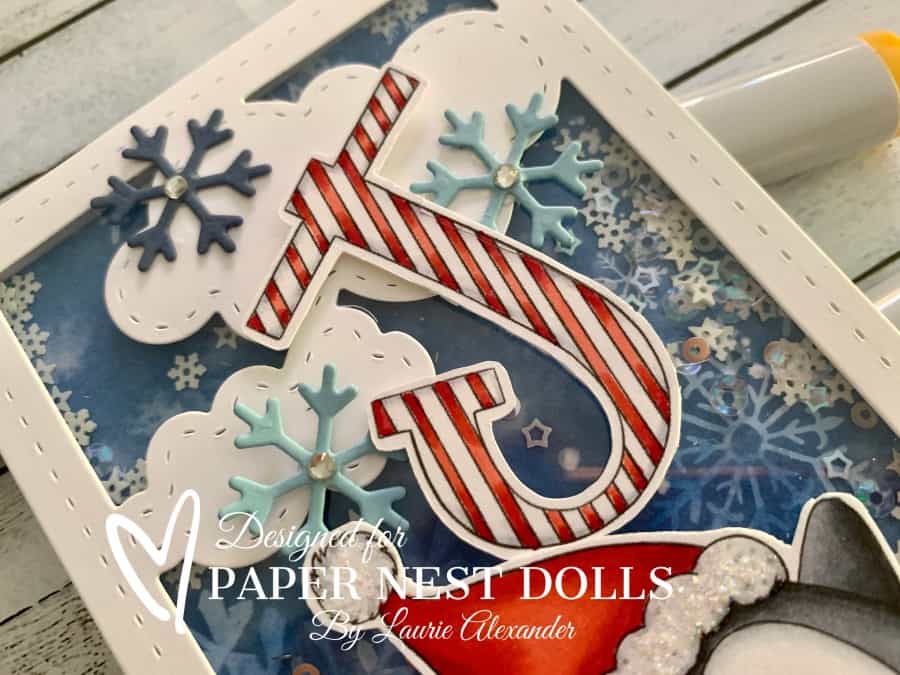
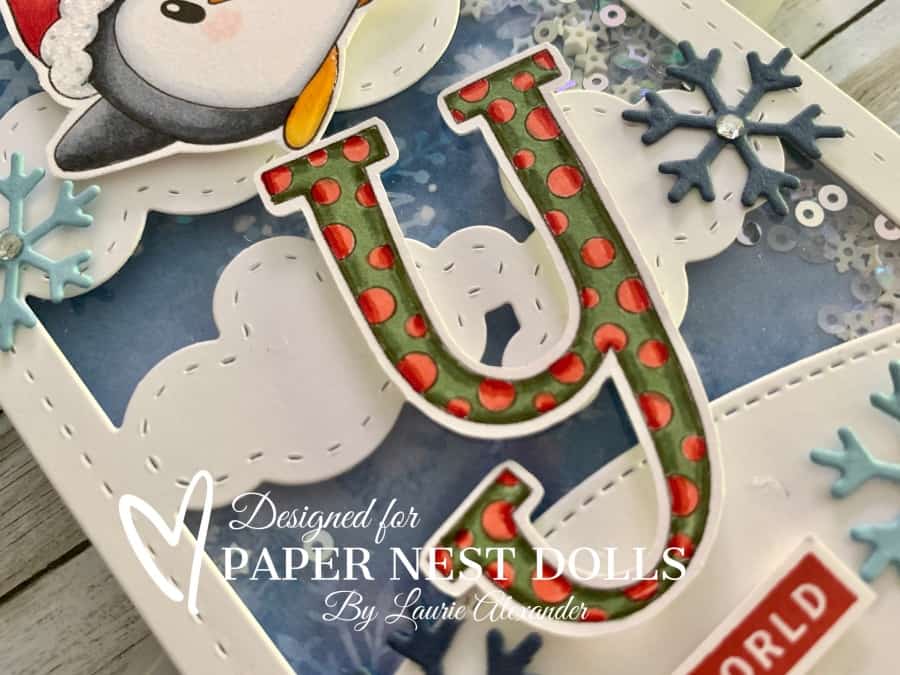
The Penguin Joy digital stamp comes horizontal, but I thought it would be fun to fussy cut them out and place them vertical like the penguin is balancing the letters. Then, I decided to create a slimline shaker card! Who doesn’t love a fun shaker card!

The slimline cloud die was perfect backdrop for my scene! I just had to add a snowbank that the penguin could balance on and that I could stamp my sentiment. Of course, I had to have some die cut snowflakes falling like on the DSP and to mirror the snowflake sequins. To add more shimmer, I adhered rhinestones to the centre of the die cut snowflakes.

————————–

Copic Markers:

Letter J:
Reds: R29/R24/R24/R22
Whites: C3/C1/C0

Letter J from Joy
Letter J from Penguin Joy

Penguin:
Black Feathers: C9/C7/C5/C4
White Feathers: C3/C1/C0/R20
Hat: R29/R24/R24/R22
Hat Trim: C3/C1/C0/Star Dust Stickles
Beak/Feet: YR12/Y38/Y35/Glossy Accents

Penguin from Penguin Joy

Letter Y:
Reds: R29/R24/R24/R22
Greens: G99/G94/G21

Letter Y from Penguin Joy

————————–

Card Recipe for My Joy to the World Card:

Penguin Joy, Paper Nest Dolls
Paper Basics – Stamper’s Select White Cardstock, Papertrey Ink
Snowflake Splendor Design Series Paper, Stampin’ Up!
Window Sheet, Stampin’ Up!
Slimline Cloud Die Set, Whimsy Stamps
Slimline Stitched Hillside Borders, Lawn Fawn
Frosted Flurries Dies, Stampin’ Up!
Peace & Bright Stamp Set, Stampin’ Up!
Snowflake Sequins, Stampin’ Up!
Rhinestone Basic Jewels, Stampin’ Up!
Glossy Accents, Ranger
Star Dust Stickles, Ranger
Foam Adhesive Strips, Stampin’ Up!
Basic White, Balmy Blue and Misty Moonlight Card Stock, Stampin’ Up!

Finished card size: 3 ½” x 8 ½””

Stamp Size: 3” Tall

————————–

To view my other Paper Nest Dolls cards, please click here.

Hope you like my Design Team card for Paper Nest Dolls!

Thank you for stopping by!

Hugs,
Laurie
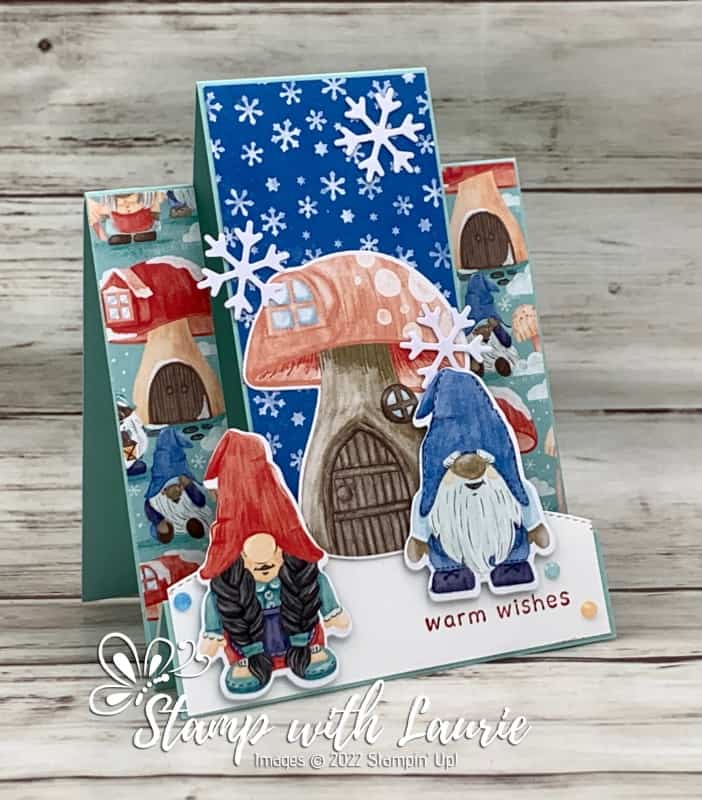
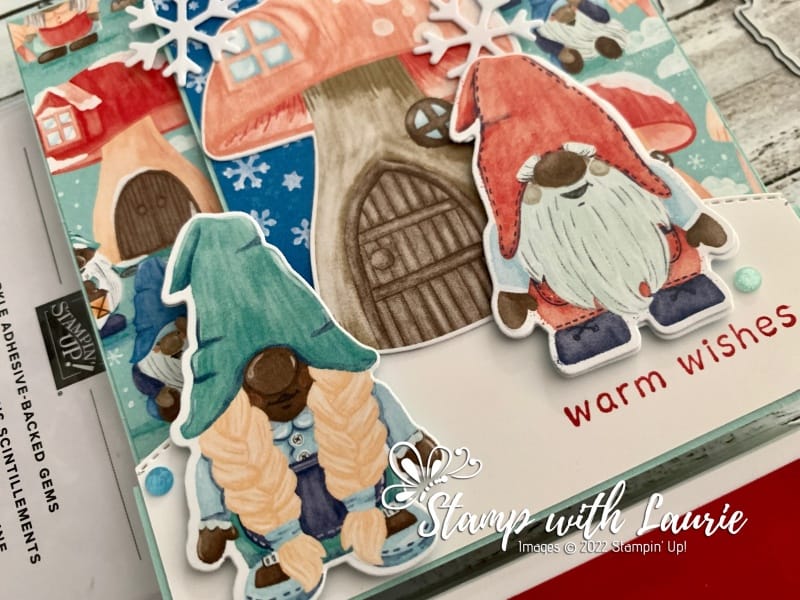
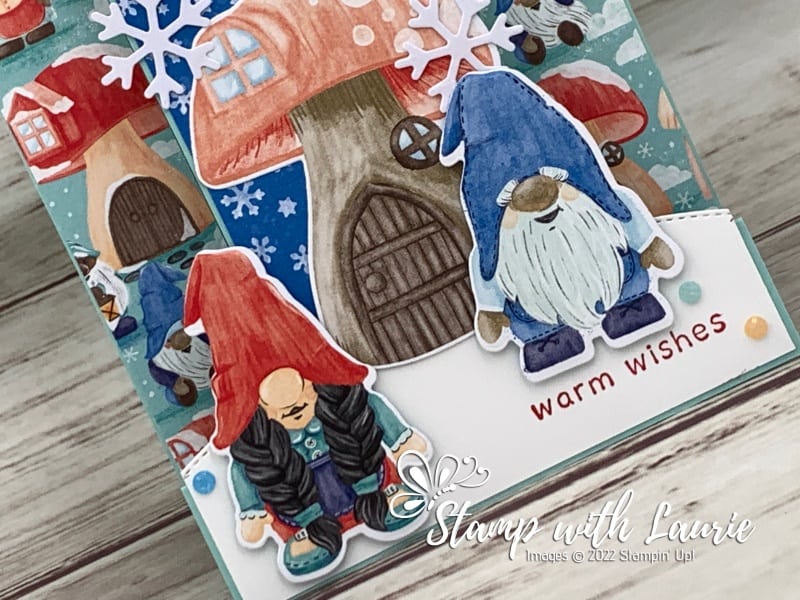
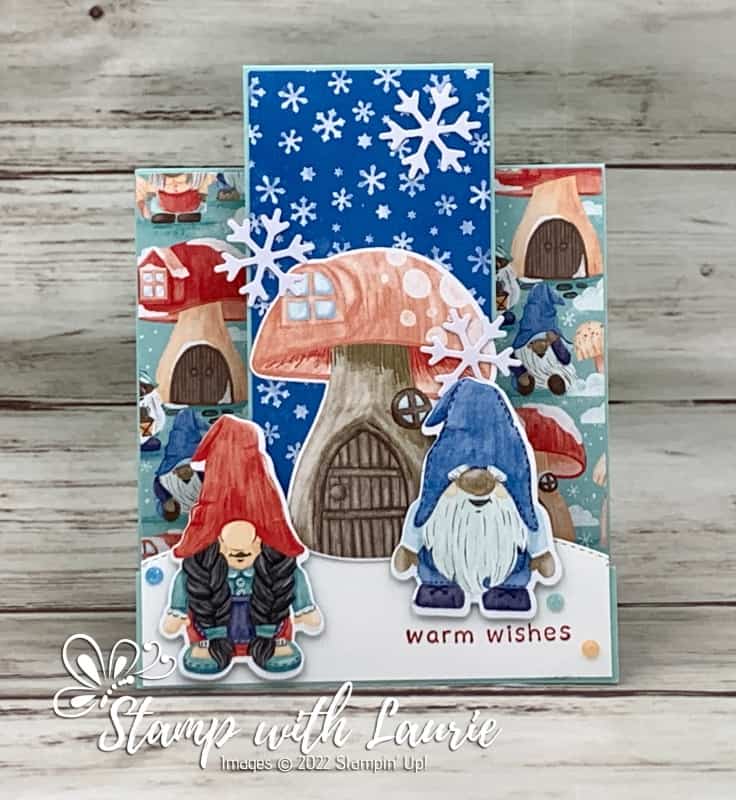
My Gnomeo Centre-Step Card

Card with Gnomes on it
My Gnomeo Centre-Step Card

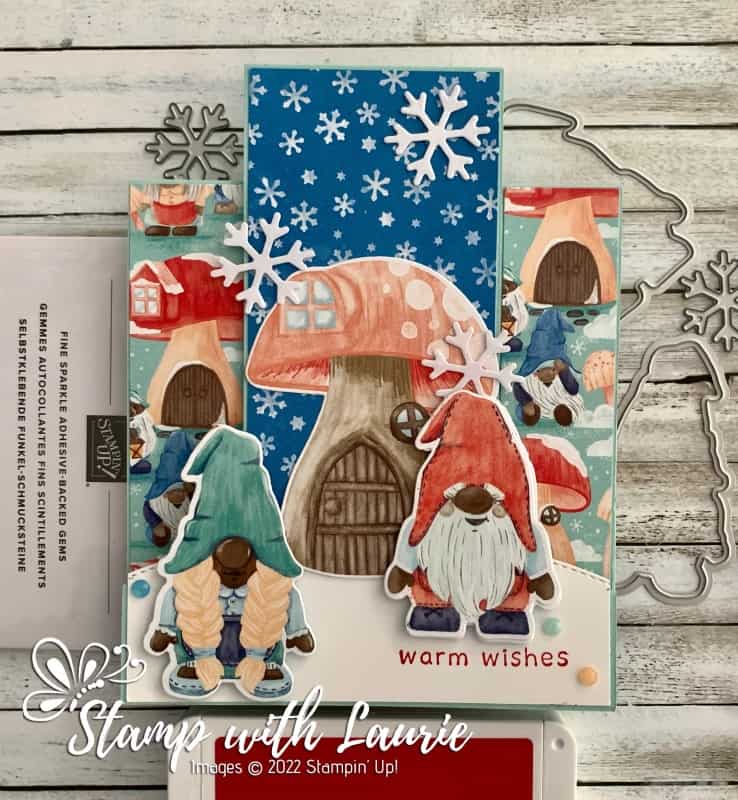
Hello Crafty Friends! Laurie here again! I am sharing My Gnomeo Centre-Step Card using the Kindest Gnomes Bundle and the matching Storybook Gnomes 12″ x 12″ Designer Series Paper by Stampin’ Up! The Kindest Gnomes Bundle includes the Kindest Gnomes Stamp Set and the Gnomes Dies.

The Details of My Card

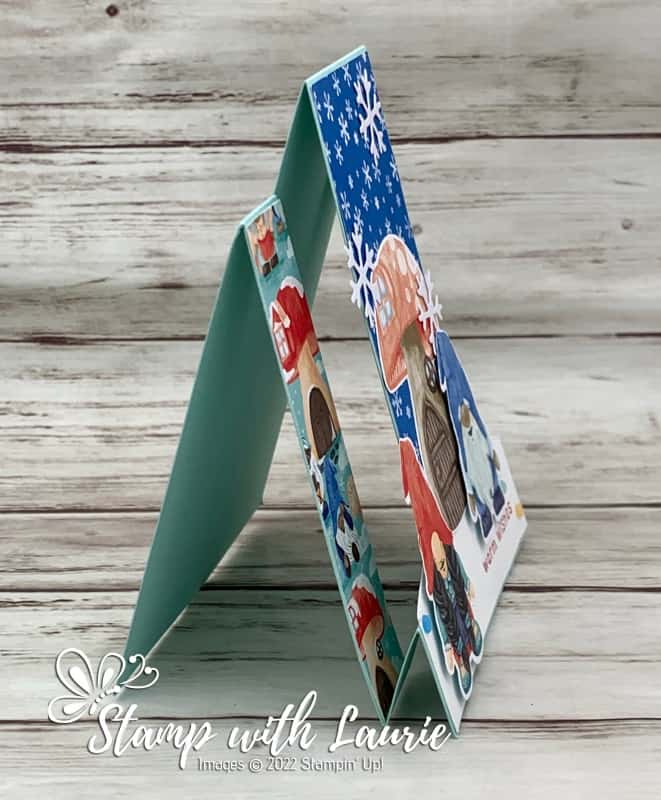
For my card, I decided to make a centre-step card to allow me to create a scene with the DSP. Almost everything was using the DSP. I love how the Gnomes Dies cut out some of the characters and the mushroom house on the DSP! I also love how multicultural the gnomes are with different skin tones.

Side View of Centre-Step Card

Tip: Don’t throw away any leftover sheets of the Wonderful Snowflakes once you have used all the snowflakes. I used a small die to cut the snowflakes that I used on my card. This gives the snowflakes an iridescent look.

For the snowbank, I used the rounded die from the Basic Borders Dies. The only stamping was the sentiment in Real Red on the snowbank making this a fun and easy card!

For embellishments, I used a scattering of Fine Sparkle Adhesive-Backed Gems on the snowbank around the characters. 

Centre-Step Card
Centre-Step Card

Supplies:

Stamps/Bundles/Dies: Kindest Gnomes Bundle (159626), Basic Borders Dies (155558), Frosted Flurry Dies (159811)

Inks: Real Red Classic Stampin’ Pad (147084)

Paper: Basic White (159276), Pool Party (122924), Storybook Gnomes Designer Series Paper (159615)

Accessories: Wonderful Snowflakes (156340), Fine Sparkle Adhesive-Backed Gems (159967), Bone Folder (102300), Stampin’ Dimensionals (104430), Stampin’ Seal (152813), Mini Glue Dots (103683)

Close Up of Gnomes
Close Up of Gnomes

Measurements: 

  • Pool Party: 
    • 11” x 4 ¼” cut/scored according to template below
  • Basic White:
    • 1 ½” x 4 1/8”
  • Storybook Gnomes Designer Series Paper:
    • 7/8” x 4 3/8” (2 pieces)
    • 2 1/8” x 4 3/8” (snowflakes)
    • Die cut 2 gnomes and Mushroom House
Close Up of Different Gnomes from the DSP

More Information on My Gnomeo Centre-Step Card:

Downloadable Centre-Step Template
To download a PDF of the Centre-Step Template, please click here or on the picture.

Horizontal Centre-Step Card
Horizontal Centre-Step Card Template

For more of my Stampin’ Up! cards, please click here.

To view my other Centre-Step cards, please click here.

For more of my cards, please join my Facebook Group or my Instagram.

You will find the items listed above in my online store.

Same Card with Different Gnomes

My Snowy Birthday Card

Card with Penguin holding present
My Snowy Birthday Card

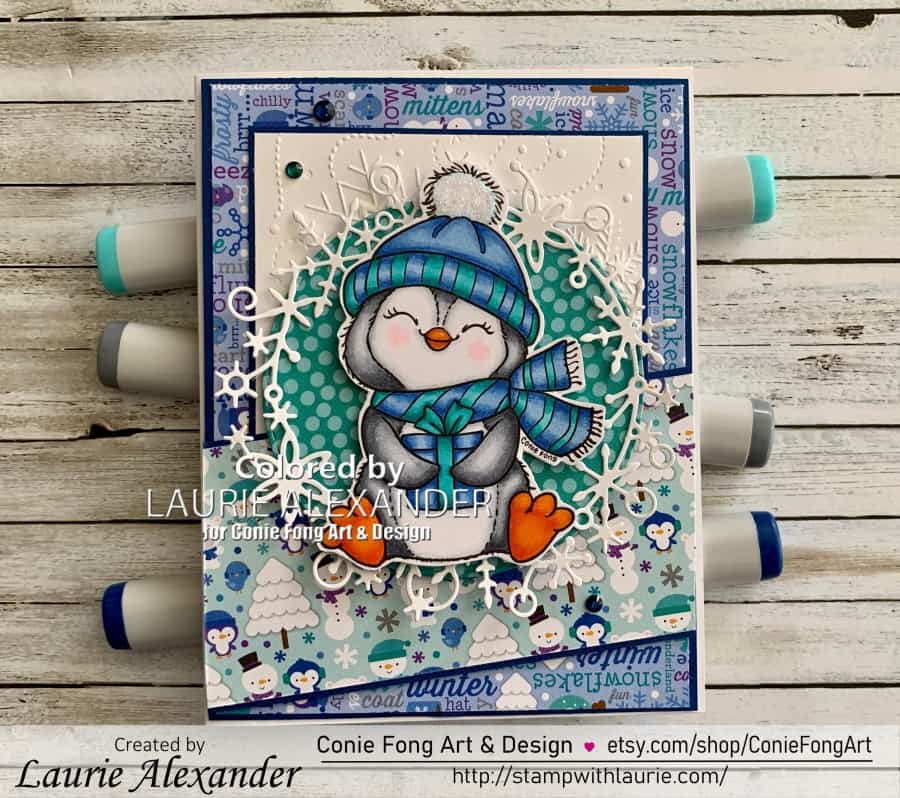
Hello Crafty Friends! It’s Laurie here! I am sharing My Snowy Birthday Card as my Design Team Inspiration for Conie Fong Art & Design using Snowy With Present. This cutie is a free digital stamp in the Conie Fong Art & Design Group on Facebook. You can find him here with some other freebies: https://www.facebook.com/media/set/?set=oa.439587832883062&type=3.

The Details of My Card

This cutie can be used for so many things like Christmas, Valentine, Baby, Anniversary, Birthday, basically any kind of celebration! I have several winter birthdays and I decided that he would be perfect for one of my birthday cards.

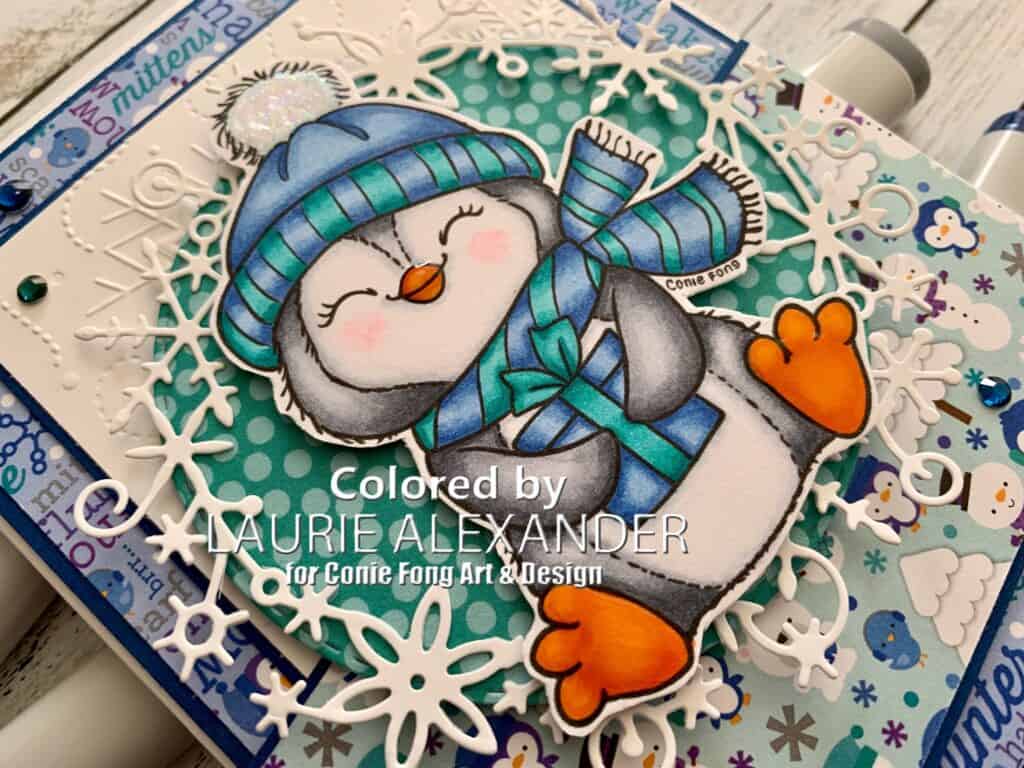
I coloured him with my Copic markers to match my paper. The Doodlebug Paper was perfect for my wintery theme, and it had the cutest penguins on it! To add to my wintery theme, I embossed some white card stock with snowflakes and added a snowflake wreath to frame my focal point. A couple of rhinestones tied in the colour scheme and added sparkle.

————————–

Copic Markers:

Fur: C7/C5/C3/C1
Beak/Feet: YR68/YR16/YR15/Glossy Accents
Blues: B26/B23/B12
Blue/Greens: BG49/BG15/BG45

Close up of Penguin with present on card
Close Up of Snowy With Present

————————–

Card Recipe for My Snowy Birthday Card:

Snowy With Present, Conie Fong Art & Design
Paper Basics – Stamper’s Select White Cardstock, Papertrey Ink
Frosty Friends 6” x 6” Paper Pad, Doodlebug Design Inc.
Frostyville Wreath Die, Memory Box
Stitched Layering Circle Dies, Memory Box 
Wintery 3D Embossing Folders, Stampin’ Up!
Noble Peacock Rhinestones, Stampin’ Up!
White Gelly Roll Pen
Star Dust Stickles, Ranger
Glossy Accents, Ranger
Blueberry Bushel and Basic White Card Stock, Stampin’ Up!

Finished card size: 5.5” x 4.25”

————————–

To view my other Conie Fong Art & Design projects, please click here.

Hope you like my Design Team Inspiration Card using
Snowy With Present for Conie Fong Art & Design!

Thank you for stopping by!

Hugs,
Laurie
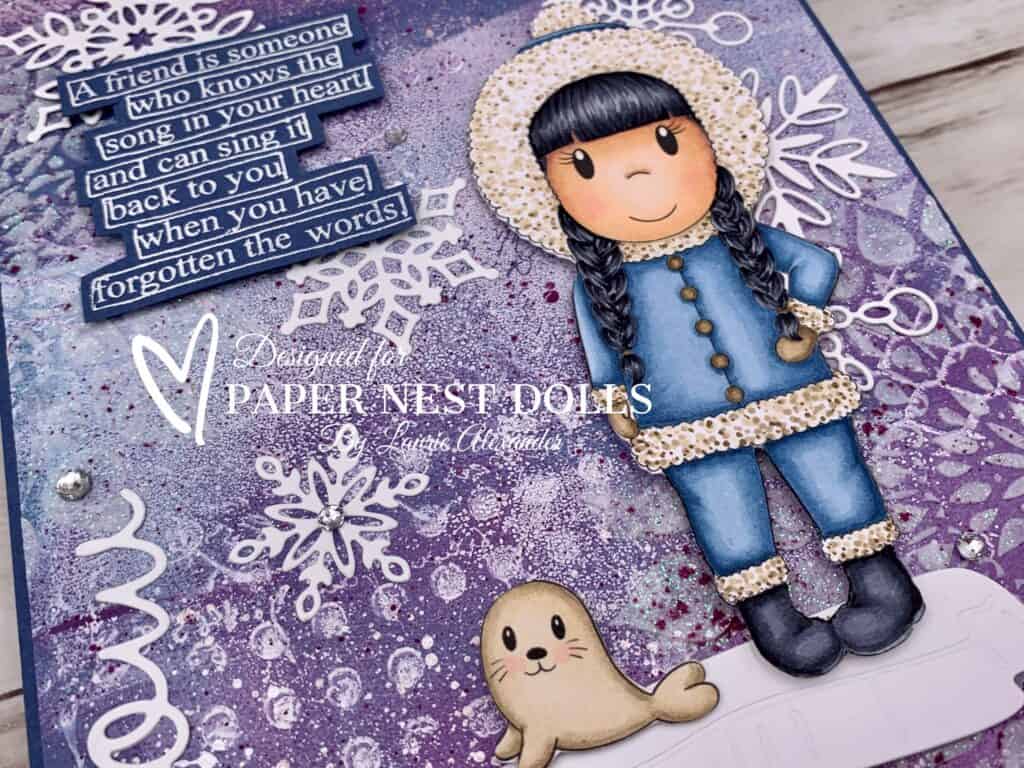
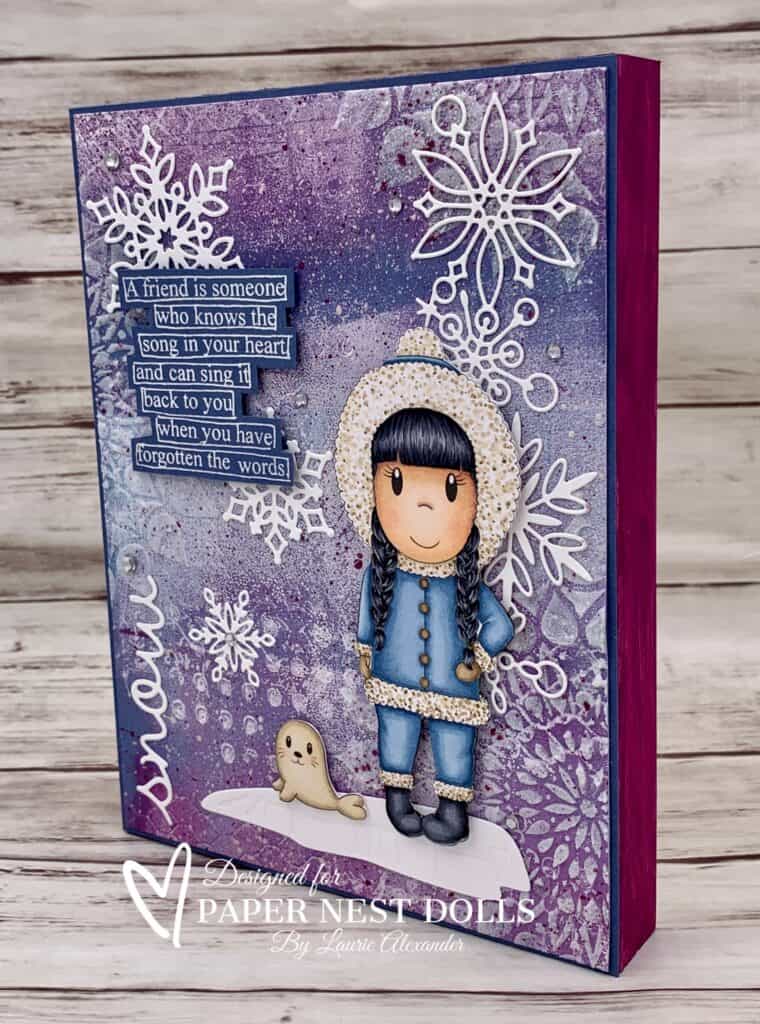
My Winter Wonderland Mixed Media Piece

Mixed Media Piece using Eskimo Ellie by Paper Nest Dolls
My Winter Wonderland Mixed Media Piece

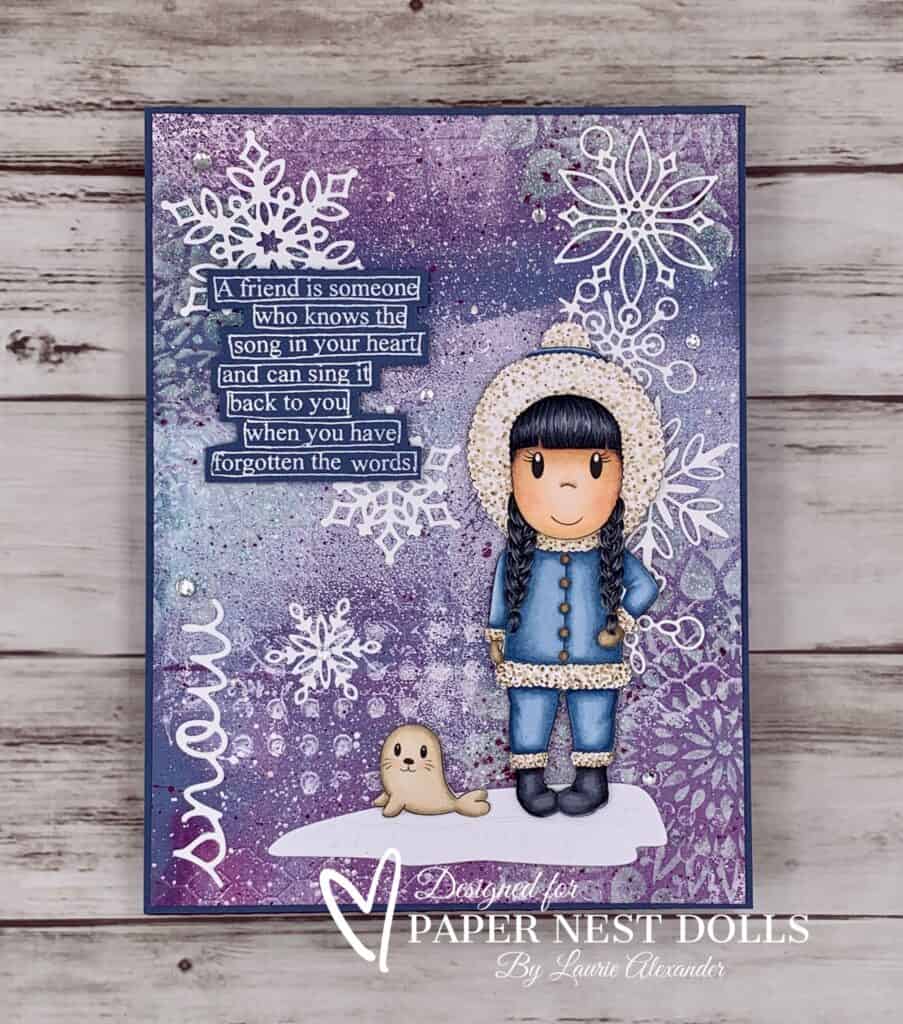
Hello Crafty Friends! It’s Laurie here! I am sharing My Winter Wonderland Mixed Media Piece using Eskimo Ellie by Paper Nest Dolls for my Design Team Inspiration Project. We are still in the depths of winter here is Canada. So, I thought I would make something pretty to brighten the last of the winter days.

The Details of My Project

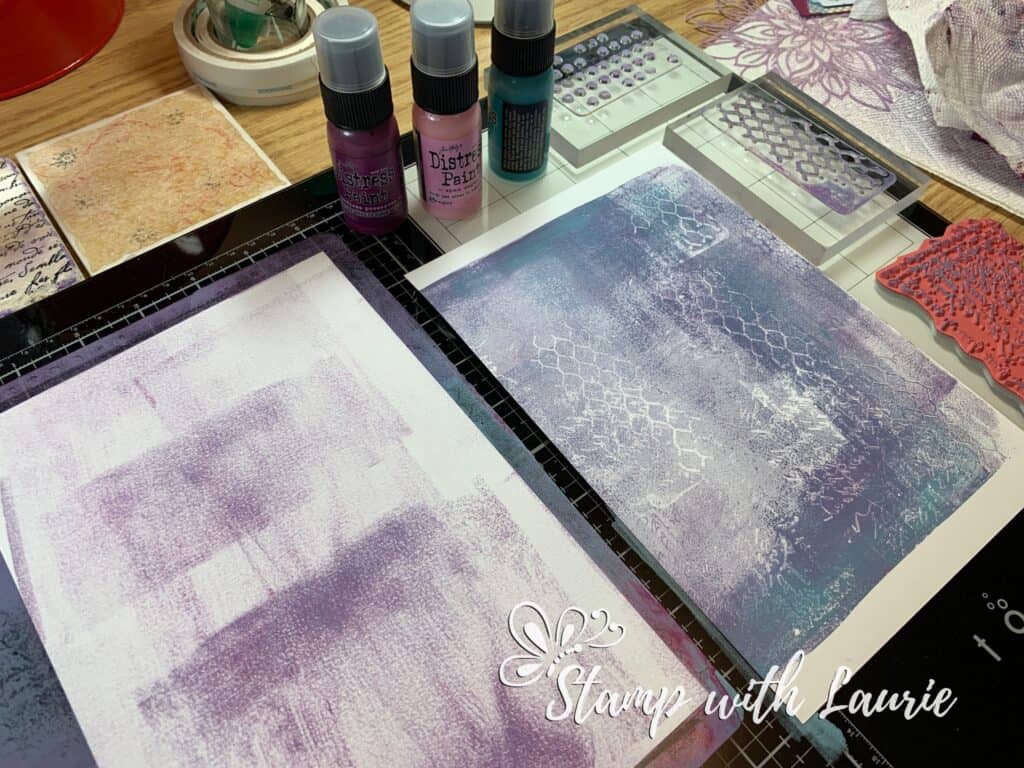
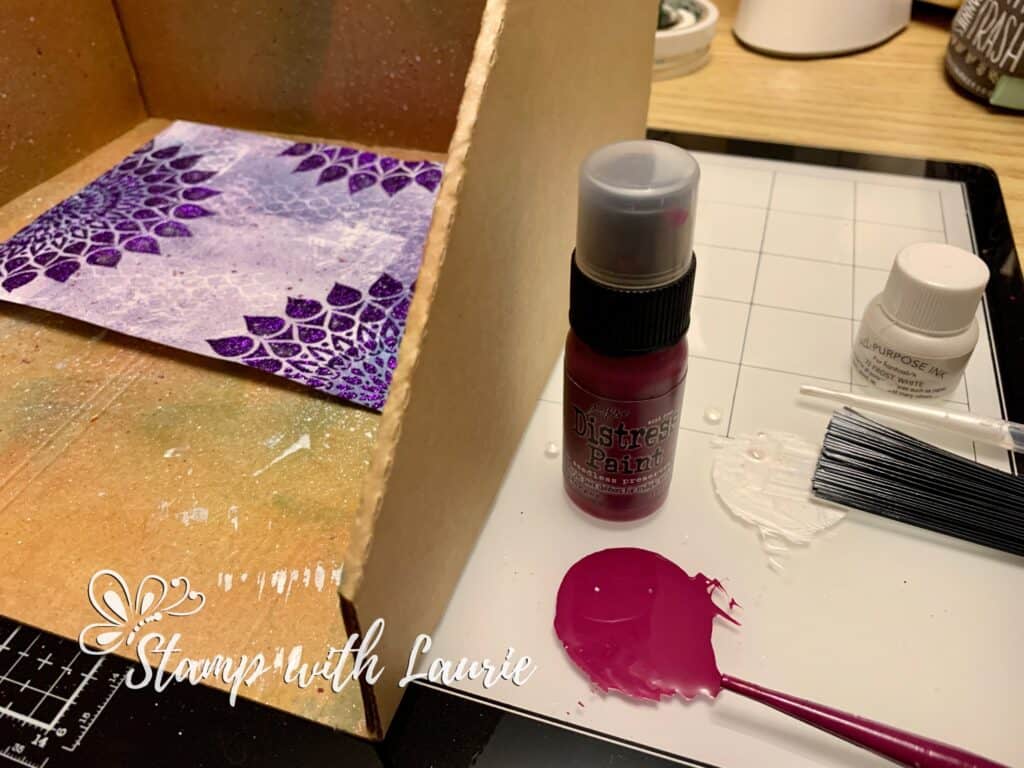
I decided to create a Mixed Media piece. Something that I haven’t done before but have always wanted to create. So, I pulled out my 8” x 10” Gel Printing Plate, my Distress Paints and brayer and went to town. Once I had paint laid down and before it dried, I stamped several different stamps to add interest to my background piece. I placed my mixed media paper over the gel plate and pulled several prints from it.

Prints from Gel Press
My Prints from Gel Press

Once everything was dried, I added some shimmery embossing paste using a stencil. I then splattered some paint all over with my splatter brush.

Splattering Paint
Splattering Paint in my Splatter Box

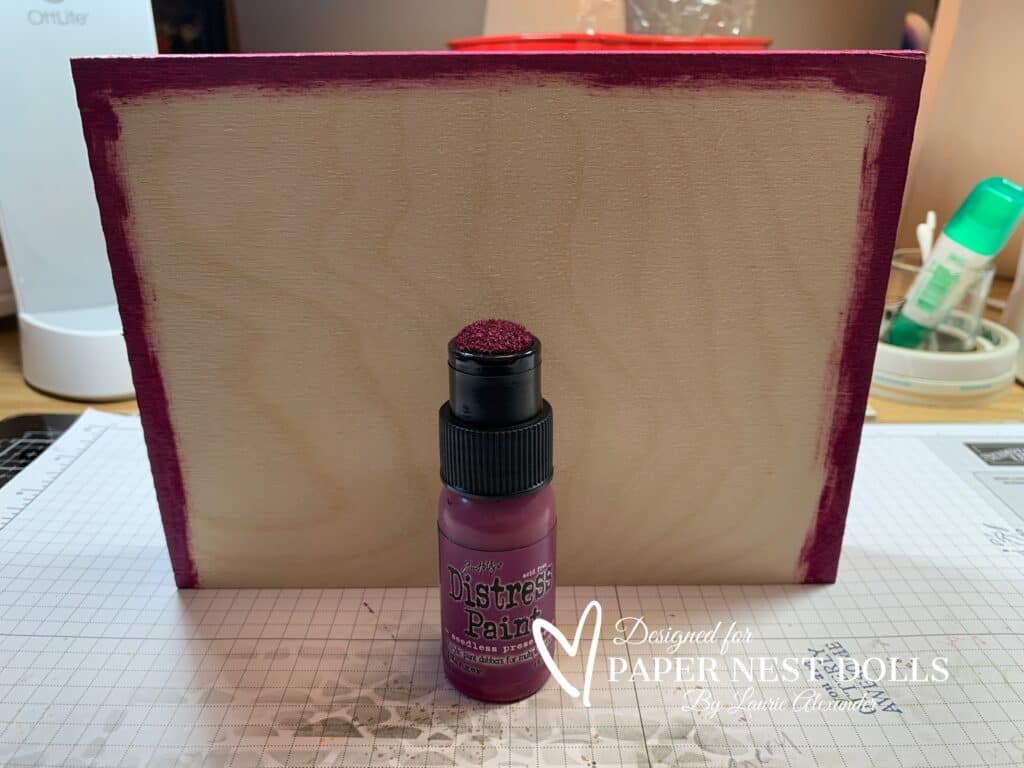
At this point, I painted the sides of the wood frame with Seedless Preserves to bring out that colour from the print.

Painted Frame
Painted Frame with Seedless Preserves

I trimmed down my print, framed it with a matching blue card stock and glued it to my dried frame. Then, I added my “snow” and snowflake dies. Next came, the white embossed sentiment which used the same blue card stock as the frame. I fussy cut my Copic coloured images and used a die cut iceberg to help ground them. A scattering of rhinestones added more shimmer to the piece.

————————–

Eskimo Ellie

Skin: E04/E11/E21/E00/E000/R20
Hair: C10/C7/C5/C4
Jacket: B97/B95/B93/B91
Trim: E44/E43/E42/E41
Mitts: E44/E43/E42
Boots: C10/C7/C5/C4
Seal: E43/E42/E41

Close Up of Eskimo Ellie and Friend

————————–

Supplies for My Winter Wonderland Mixed Media Piece:

Eskimo Ellie, Paper Nest Dolls
Paper Basics – Stamper’s Select White Cardstock, Papertrey Ink
Mixed Media Paper, Canson
8” x 10” Gel Printing Plate, Gelli Arts
Peacock Feathers Distress Paint, Tim Holtz, Ranger
Seedless Preserves Distress Paint, Tim Holtz, Ranger
Spun Sugar Distress Paint, Tim Holtz, Ranger
Frost White All-Purpose Ink, Tsukineko
Shimmery White Embossing Paste, Stampin’ Up!
Ledger Script CMS241, Tim Holtz Collection, Stampers Anonymous
Distressed Textures Stamp #10105756, BoBunny
Distressed Textures Stamp #10105762, BoBunny
The Right Words DS016, Dylusions
Water Mandala Stencil, Sweet Sentiment
Snowflake Border Die, Frostyville, Memory Box
Polar Bears Dies, Stampin’ Up!
Snowfall Thinlits Dies, Stampin’ Up!
Seasonal Frames Thinlits Dies, Stampin’ Up!
Versamark Ink, Stampin’ Up!
Basics Embossing Powder, Stampin’ Up!
Heat Gun, Stampin’ Up!
Tim Holtz Distress Splatter Brush, Ranger
Splatter Booth
Brayer, Recollections, Michaels Arts & Crafts
Palette Knives, Stampin’ Up!
Paper Snips, Stampin’ Up!
Exacto Knife
6” x 8” Wood Painting Panel, Currys
Rhinestone Basic Jewels, Stampin’ Up!
Misty Moonlight and Basic White Card Stock, Stampin’ Up!

Finished piece size: 6” x 8”

Side View of Mixed Media Piece
Side View of My Mixed Media Piece

To view my other Paper Nest Dolls projects, please click here.

Hope you like My Winter Wonderland Mixed Media Piece using Eskimo Ellie by Paper Nest Dolls!

Thank you for stopping by!

Hugs,
Laurie
My Wintery Birthday Wishes Card

A winter card with a girl holding a penguin
Wintery Birthday Wishes Card

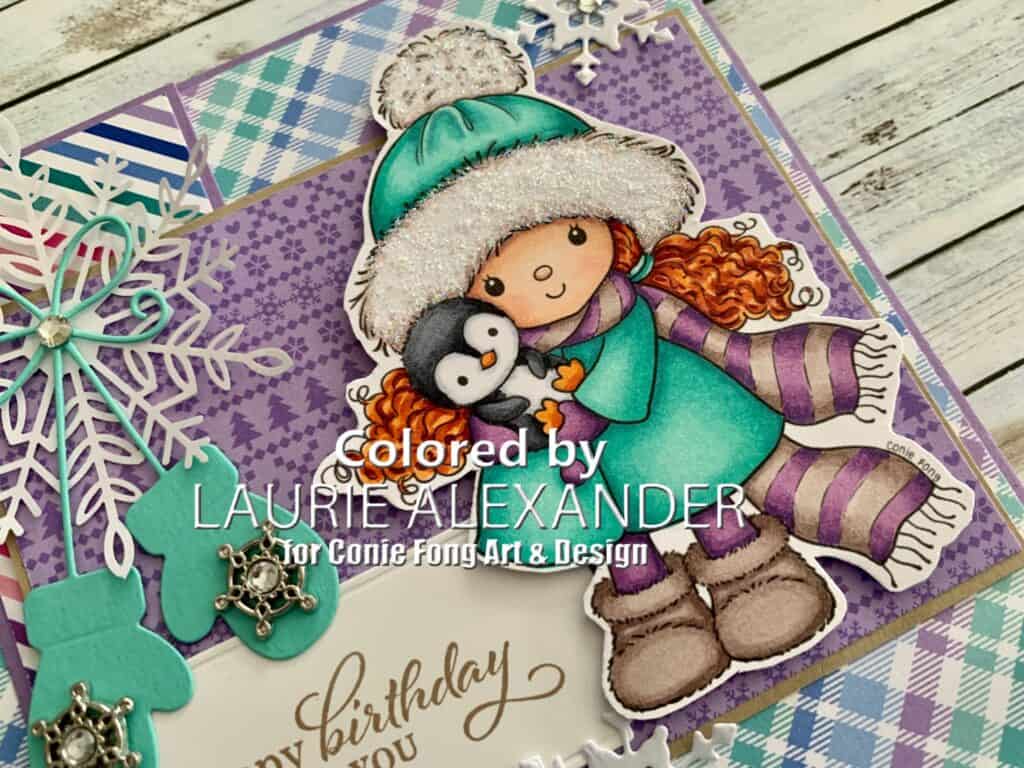
Hello Crafty Friends! Happy New Year! It’s Laurie here! I am sharing My Wintery Birthday Wishes Card as my first 2022 Design Team Inspiration Card for Conie Fong Art & Design using the sweet Emily with Penguin. She comes with 6 stamps including a choice of curly hair or braids and 2 sentiments that consist of Believe in the magic of Christmas and Sending Christmas Joy in PNG and JPG.

Details of My Card

For my card, Emily comes with Christmas sentiments, but I thought she would make a sweet winter birthday card! I have six birthdays, including mine, this month alone! So, I needed to get busy making birthday cards! 

I love the soft pastel colours of the Doodlebug paper! So, I used that beautiful palette to colour the digital stamp with my Copic marker. The large Wonderful Snowflake has a beautiful iridescent foil card stock look to it. Once I punched out the large snowflake, I used the leftover scraps of the foil card stock to die cut my smaller snowflakes to match it. By adding a few rhinestones to the centre of the snowflakes, I created even more shimmer. Aren’t those mittens just the cutest! Perfect for a winter card! And to add a bit of sparkle to them, I added some embellishments that look like snowflakes! Finally, I couldn’t resist using Stickles to Emily’s trim on her hat for even more sparkle! A birthday sentiment was all the card needed!

————————–

Copic Markers:

Skin: E000/E00/E21/E11/E04
Hair: E18/E08/YR18/YR14
Blues: BG57/BG13/BG23/BG11
Purples: V12/V15/V17
Browns: E74/E71/E70
Penguin: C9/C7/C5/C3/C1/C0/0
Penguin Feet/Beak: YR14/YR18

Close Up of Digital Stamp
Close Up of Emily with Penguin

————————–

Card Recipe for My Wintery Birthday Wishes Card:

Emily with Penguin, Conie Fong Art & Design
Paper Basics – Stamper’s Select White Cardstock, Papertrey Ink
Winter Wonderland 6” x 6” Paper Pad, Doodlebug Designs Inc.
Best Year Yet Stamp Set, Stampin’ Up!
So Many Snowflakes Dies, Stampin’ Up!
Painted Labels Dies, Stampin’ Up!
Wonderful Snowflakes, Stampin’ Up!
Precious Mittens Die, Memory Box
Winter Wonderland Embellishments, Stampin’ Up!
Rhinestone Basic Jewels, Stampin’ Up!
Star Dust Stickles, Ranger

Finished card size: 5.5” x 5.5”

————————–

To view my other Conie Fong Art & Design projects, please click here.

Hope you like my Design Team Inspiration Card using
Emily with Penguin for Conie Fong Art & Design!

Thank you for stopping by!

Hugs,
Laurie
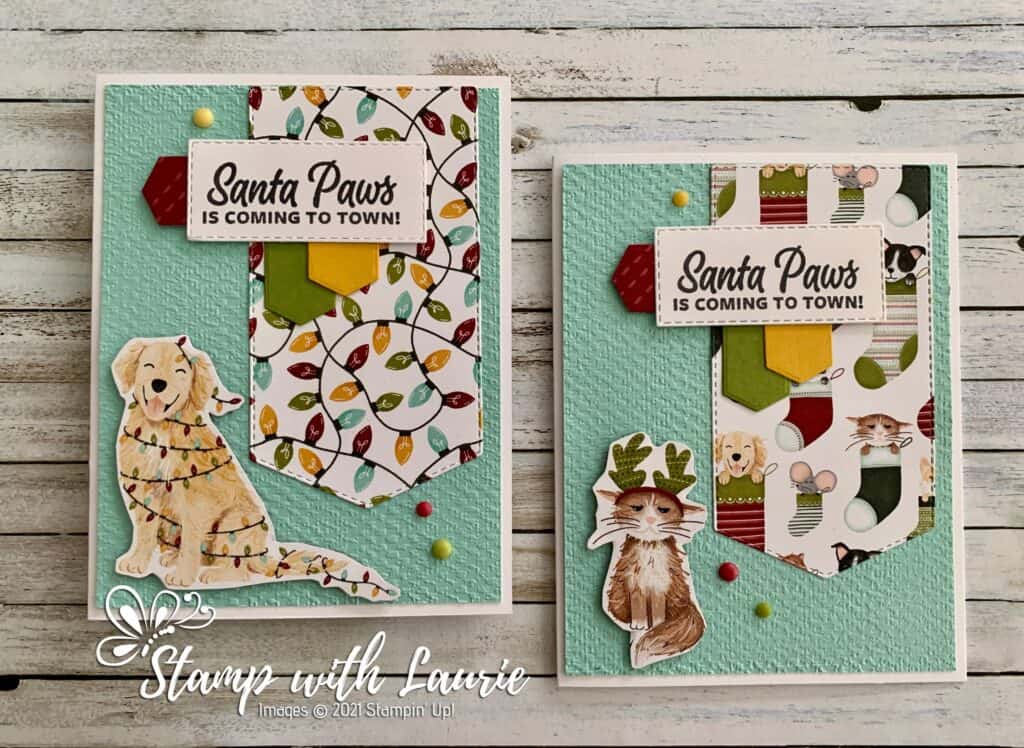
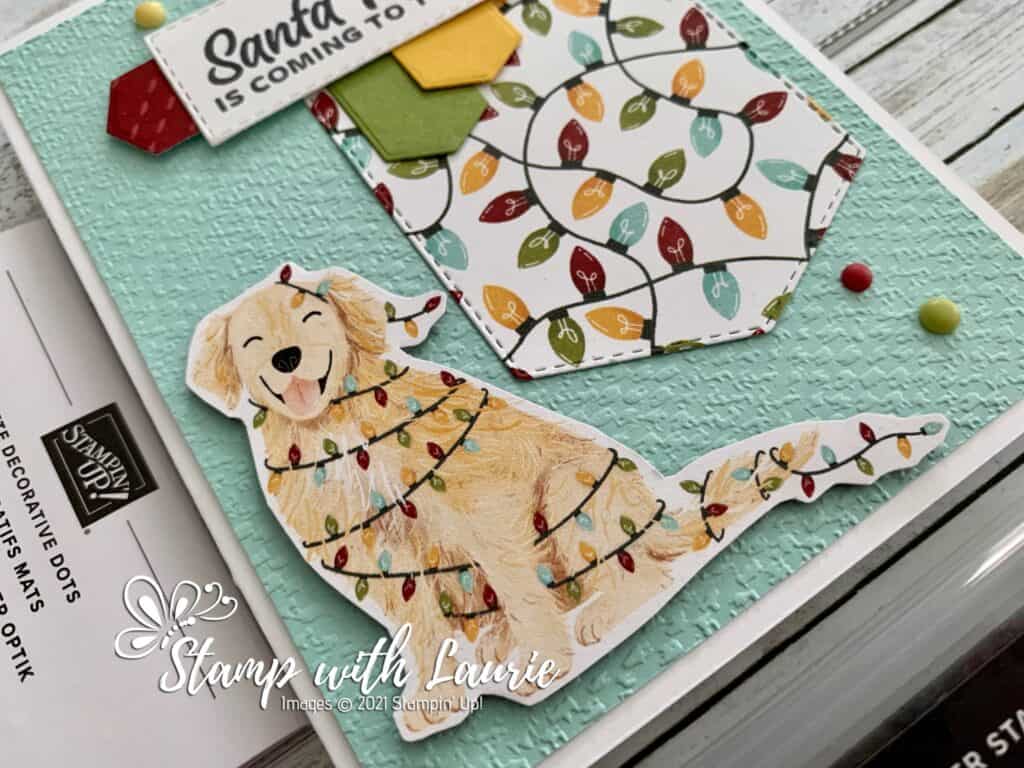
Santa Paws is Coming to Town

Card with Dog wrapped in Lights called Santa Paws is Coming to Town
Santa Paws is Coming to Town Card

Hello Crafty Friends! Laurie here again! I am sharing my Santa Paws is Coming to Town Card using the Sweet Little Stocking Bundle and the Sweet Stocking Designer Series Paper by Stampin’ Up! This bundle and DSP are retiring soon. Get yours while you can!
The Details of My Card

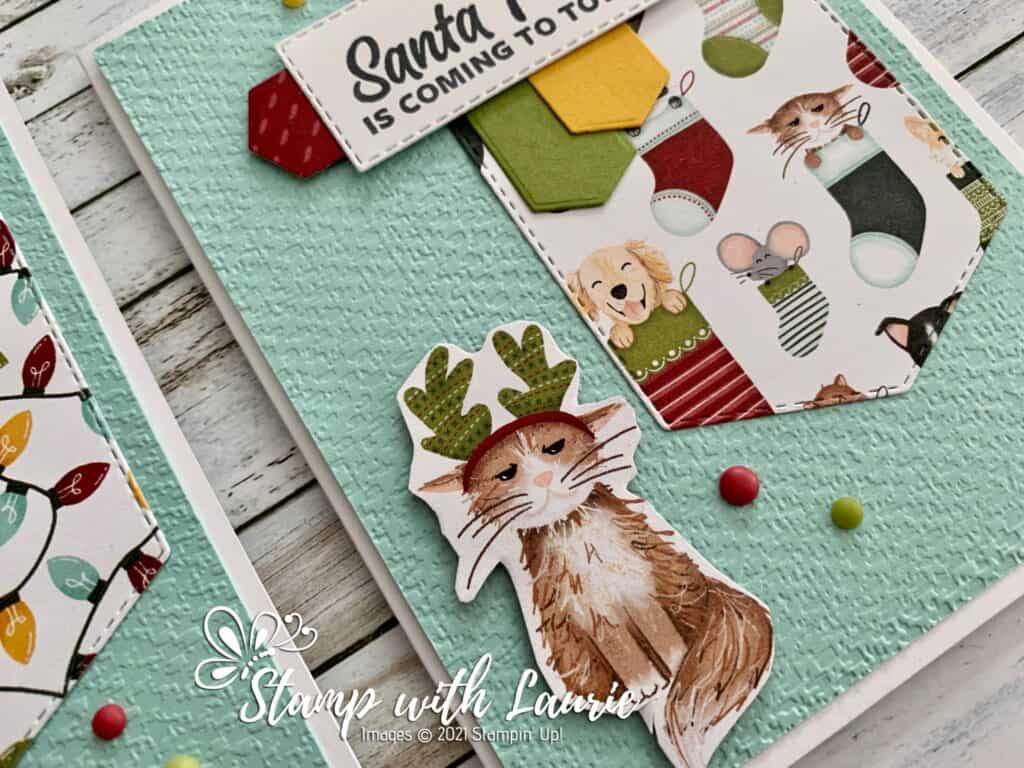
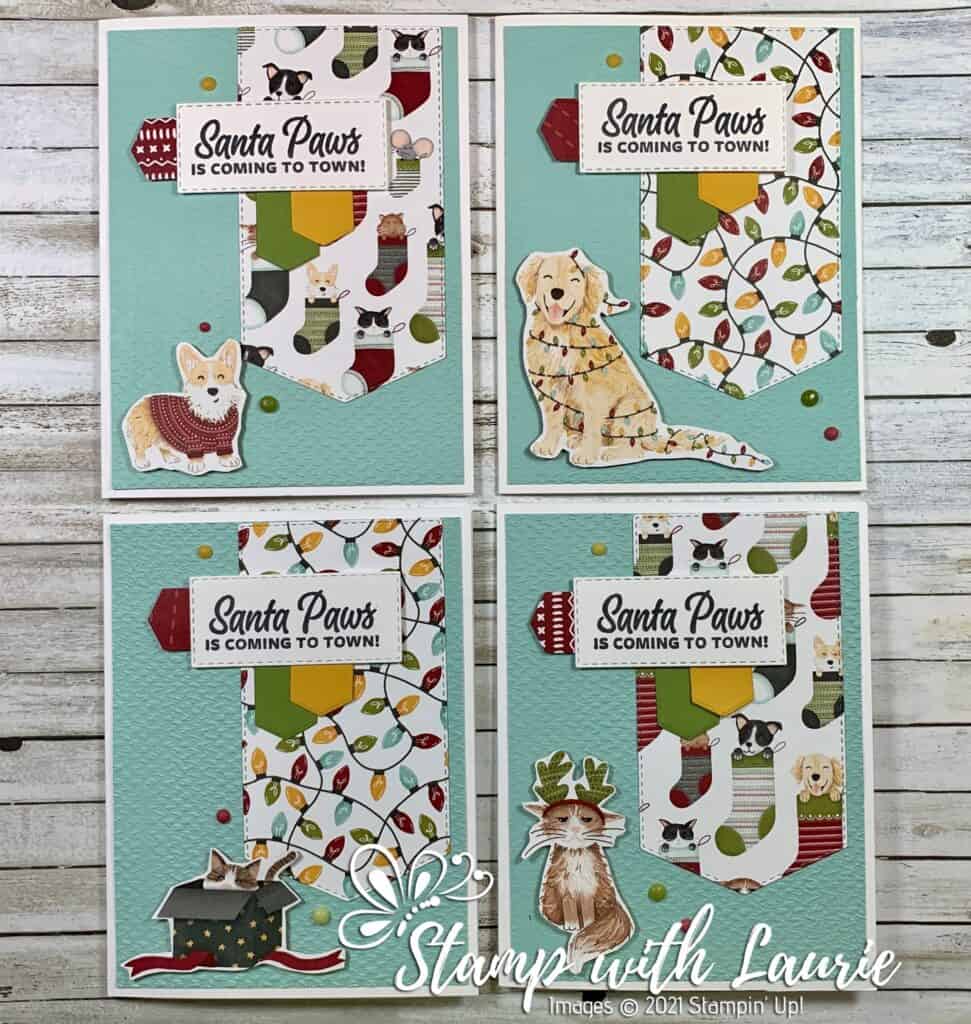
When I saw the super cute Sweet Stocking Designer Series Paper, I just knew that I wanted to fussy cut the animals out for my card. So, I made this card all about the DSP! Don’t you just love the cat’s expression with the reindeer ears or the golden retriever with the lights wrapped around him! So fun! Lol!

Two Different Cards with a Golden Retriever on one and a Cat with Reindeer Ears on the other card
Two Cards with a Golden Retriever and a Cat with Reindeer Ears

I decided that my Pool Party card stock needed a subtle look without distracting from the cute DSP. So, I used the Tasteful Textile 3D Embossing Folder to add it. I thought it would be fun to create a flag with the matching DSP and then add the smaller flags in matching card stock and DSP off the sentiment. A scattering of the Matte Decorative Dots tied in the colours I used for my flags.

Close Up of Dog on Card
Close Up of Golden Retriever on Card

Supplies:

Stamps/Bundles/Dies: Sweet Little Stockings Bundle (156798), Stitched Rectangles Dies (151820)

Inks: Tuxedo Black Memento Ink Pad (132708)

Paper: Basic White Thick Cardstock (159229), Basic White (159276), Pool Party (122924), Bumblebee (153077), Old Olive (100702), Sweet Stockings Designer Series Paper (156281)

Accessories: Matte Decorative Dots (156289), Tasteful Textile 3D Embossing Folder (152718), Paper Snips (103579), Bone Folder (102300), Stampin’ Dimensionals (104430), Stampin’ Seal (152813), Mini Glue Dots (103683)

Close Up of Cat on Card
Close Up of Cat with Reindeer Ears on Card

Measurements: 

  • Basic White Thick Cardstock: 5 ½” x 8 ½” scored at 4 ¼”
  • Pool Party: 4” x 5 ¼”
  • Basic White: 1” x 2 3/8” (Sentiment)
  • Sweet Stockings Designer Series Paper: 4 ¼” x 2 5/16” and scraps
  • Bumblebee: scraps
  • Old Olive: scraps
4 Cards with Different Animals

More Information on my Santa Paws is Coming to Town Card:

For more of my Stampin’ Up! cards, please click here.

Here is a video on the Sweet Stockings Suite:
https://www.youtube.com/watch?v=Bi-ZGtN4PE8

You will find the items listed above in my online store.

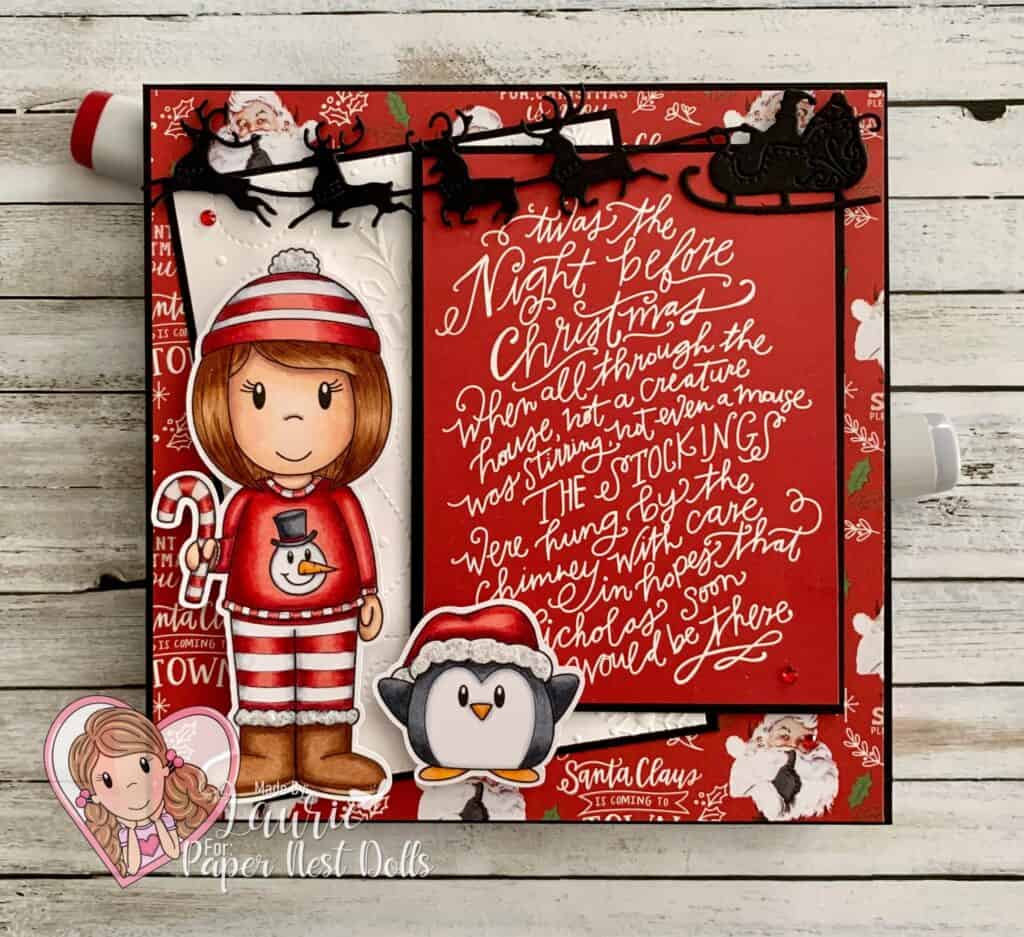
My Christmas Pyjamas Card

My Design Team Card called My Christmas Pyjamas Card with Emma in Snowman Sweater
My Christmas Pyjamas Card

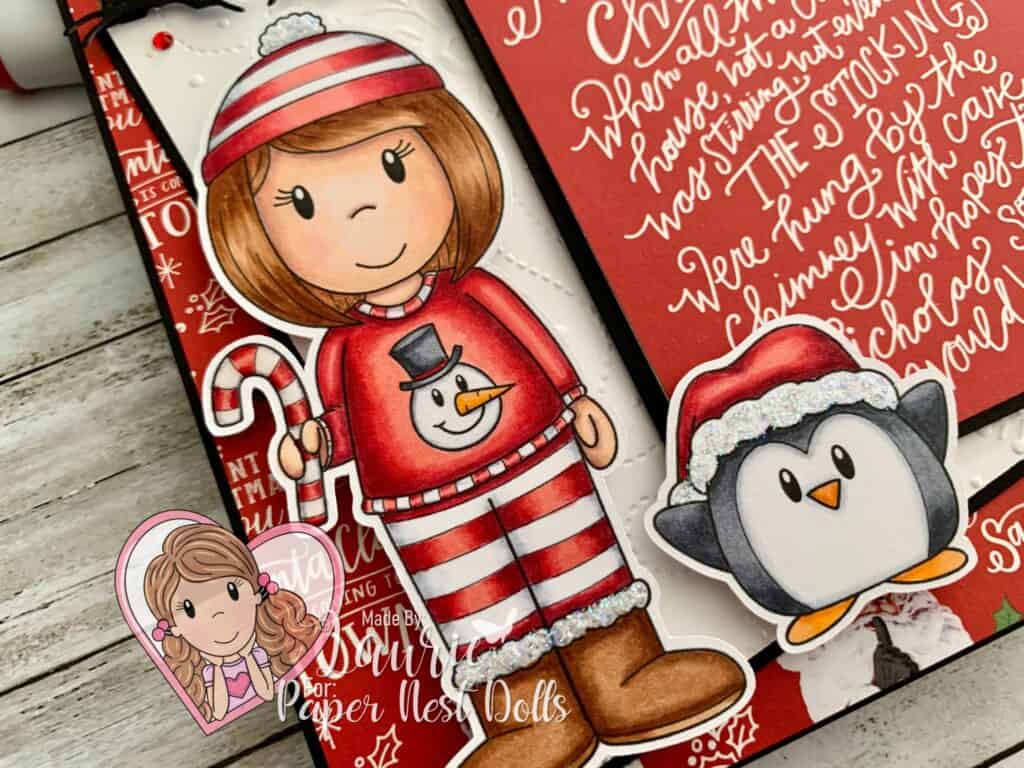
Hello Crafty Friends! It’s Laurie here! I am sharing My Christmas Pyjamas Card as my Design Team Inspiration Card for Paper Nest Dolls using the digital stamp called Emma in Snowman Sweater
For my card, I decided that this cutie reminded me of the matching Christmas PJs that are so popular! So, I coloured her and her little friend with my Copic Markers in matching red and white. I love that you can have both cuties together or use them separately to suit your card! 
Since they are wearing Christmas PJs, I went with paper that suited this theme. T’was the Night Before Christmas tag and Santa Claus is Coming to Town mirroring my red/white colouring scheme were perfect for my card! The only die cut I used was Santa and his reindeer flying overhead. I dry embossed snowflakes on Basic White card stock to set her off from the busy background. I also used Glossy Accents on the candy cane and Stardust Stickles on the trim of the hats and boots. The only thing left was to add a few red rhinestones for a bit of sparkle.

————————–

Copic Markers:

Skin: E000/00/21/11/04/R20
Hair: E33/E35/E37/E39
Reds: R39/R37/R35/R32
Leggings/Sweater Trim/Candy Cane: R37/R32/C3/0
Boots: E33/E35/E37/E39
Snowman: C7/C5/C4/R37/C3/0/YR04/Y38
Penguin Feathers: C7/C5/C4/C3/C0/0
Penguin Feet/Beaks: YR04/Y38/YR12

Close Up of my Card with Emma in Snowman Sweater
Close of Emma in Snowman Sweater

————————–

Card Recipe for My Christmas Pyjamas Card:

Emma in Snowman Sweater, Paper Nest Dolls
Paper Basics – Stamper’s Select White Cardstock, Papertrey Ink
North Pole Trading Co. 6” x 6” Paper Pad, Photo Play
Santa’s Sleigh and Reindeer Die Cut, Cheery Lynn Designs
Wintry 3D Embossing Folder, Stampin’ Up!
Red Rhinestone Basic Jewels, Stampin’ Up!
Stardust Stickles, Ranger (Hat/Boot Trim)
Glossy Accents, Ranger (Candy Cane)
Basic White and Basic White Card Stock, Stampin’ Up!

Finished card size: 5.5” x 5.5”

————————–

To view my other Paper Nest Dolls cards, please click here.

Hope you like my Design Team card using
Emma in Snowman Sweater by Paper Nest Dolls!

Thank you for stopping by!

Hugs,
Laurie