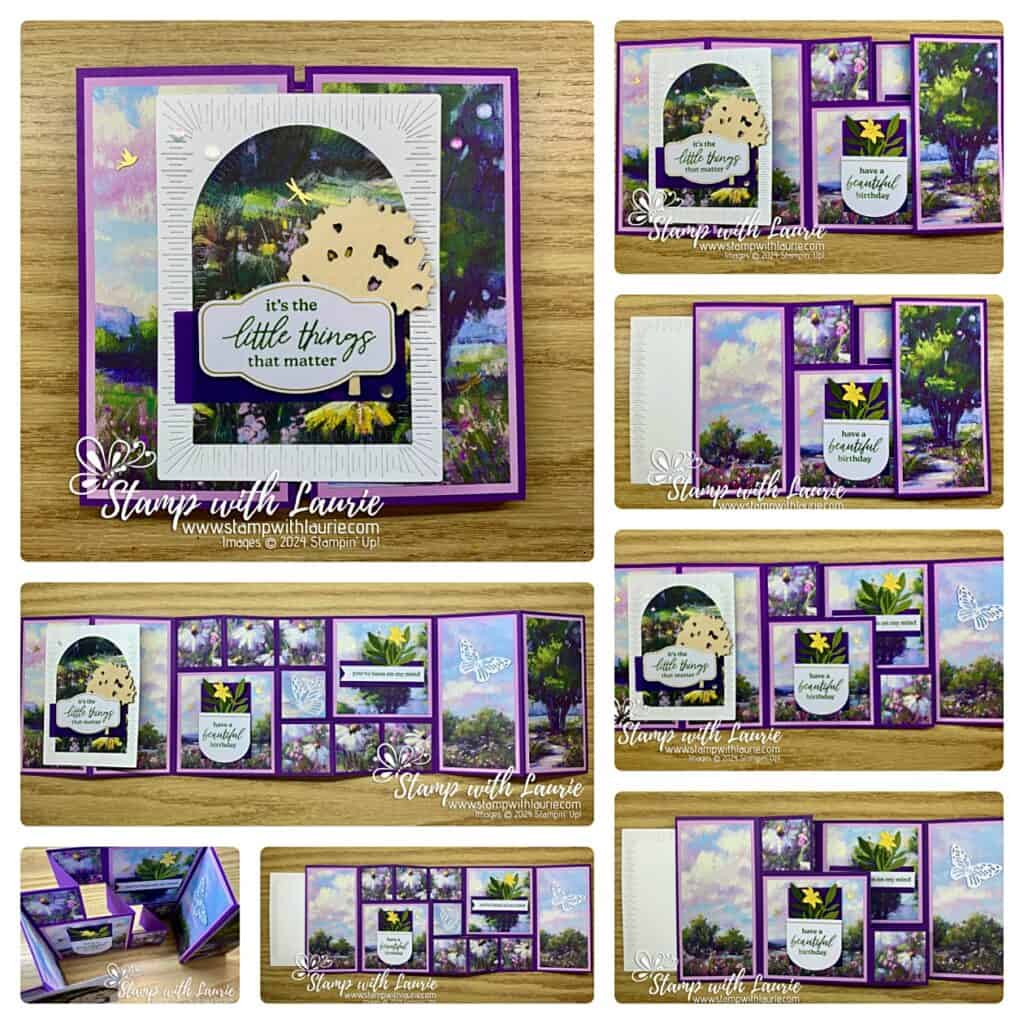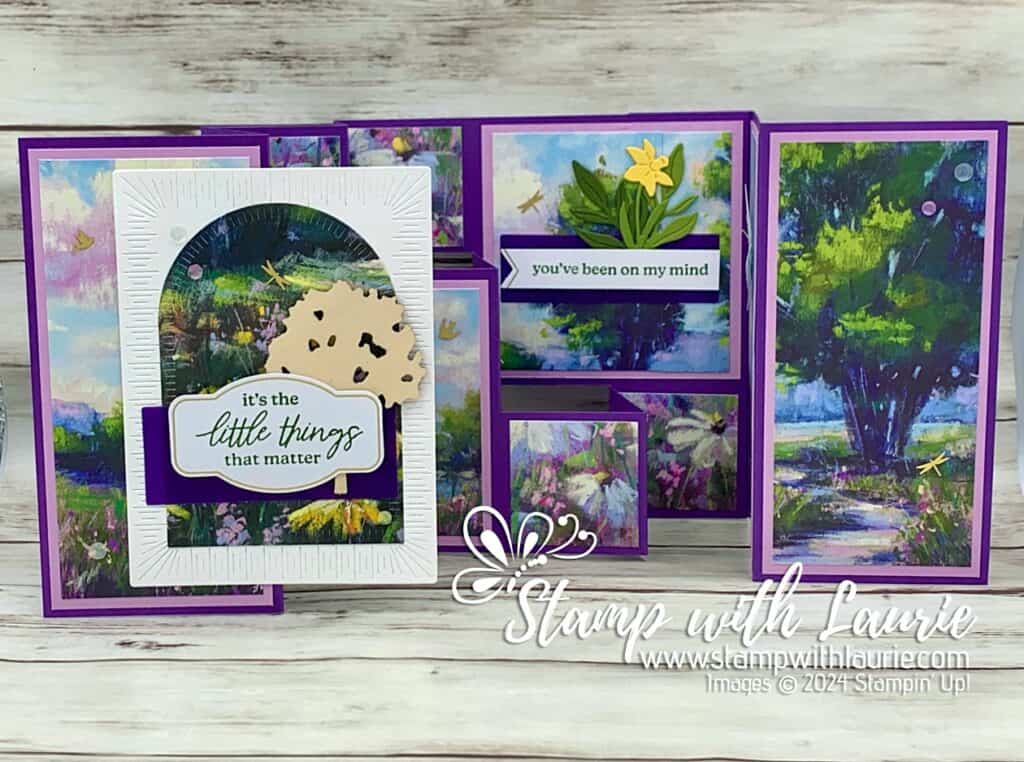
Fancy Fold Step Card 

Fancy Fold Step Card - a birthday card that has lots of folds
Fancy Fold Step Card

Hello Crafty Friends! Laurie here again! I am sharing my alternative Fancy Fold Step Card using the March 2024 Memorable Meadows Paper Pumpkin. I have made this fun fold several times for different recipients, and it’s always Wowed them!

This Kit makes 9 cards of which I made three. I always like to make one set of the cards in the kit and then play with it to see what alternatives I can design.

Three cards made by a Kit
Cards from March 2024 Memorable Meadows Paper Pumpkin Kit

I made a total of nine cards with six being alternatives. I had a lot of fun playing with this kit! My alternatives included a bridge card, a faux-centre step card, a z-fold card, a fancy fold step card and two others.
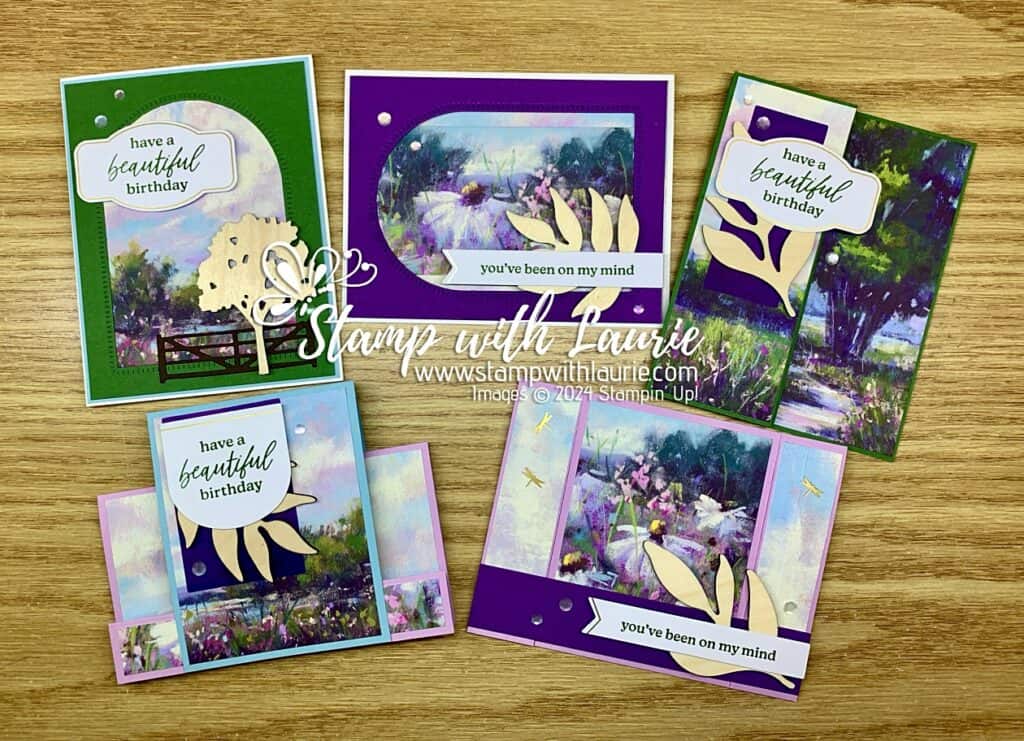
My Other Alternative Cards

The Details of My Fancy Fold Step Card

For this fun-fold card, I used 3 card bases front and back from the Paper Pumpkin Kit. I loved that the card bases were printed with a continual scene from front to back! With some careful measuring, this made it easy to create my card.

Front of Card

To decorate the front of my card, I used the arch from the Garden Meadow Dies and one of the sheets from the Meandering Meadows 6” x 6” Designer Series Paper that had some Daffodil Delight on it. I knew I wanted to use the daffodil die from The Love of Spring Dies to decorate my inside. So, I wanted to bring this colour throughout my card. The Radiating Stitches Die was a perfect backdrop for my arched focal point!
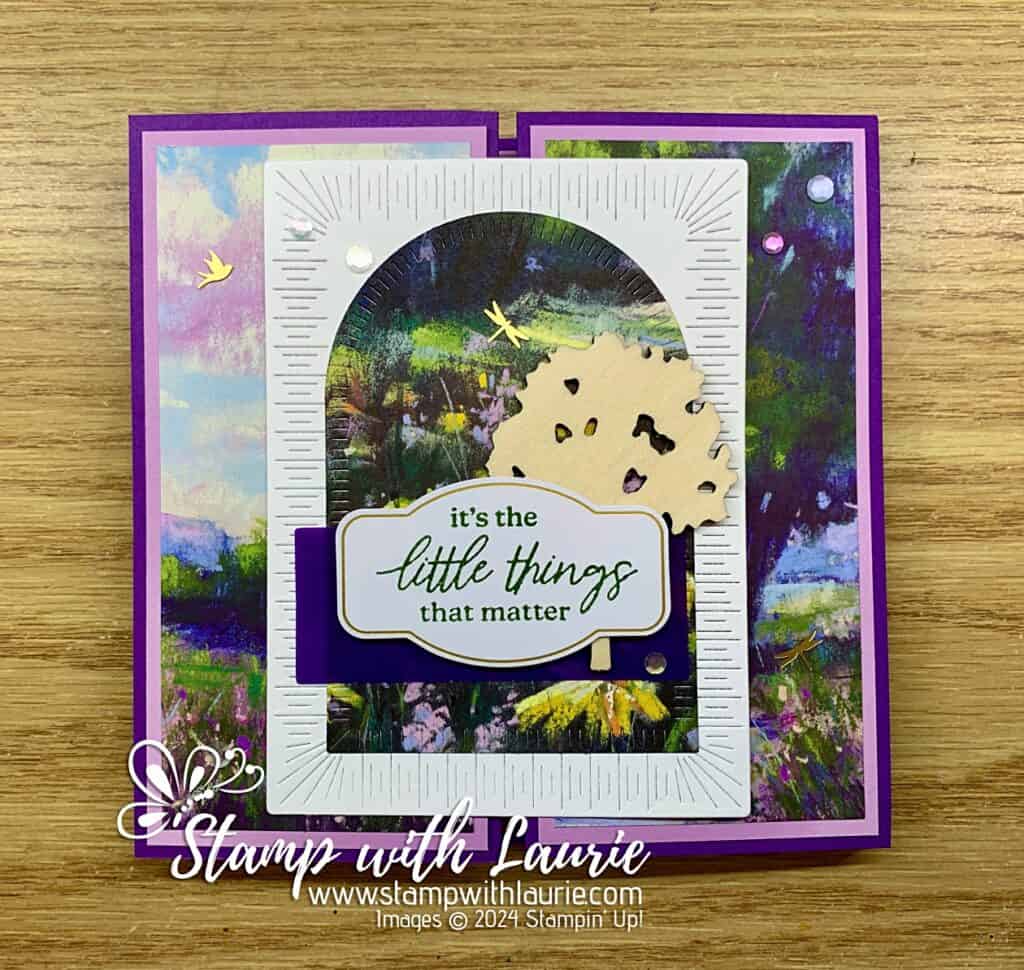
Front of My Card
Front of My Card

I used the Adhesive-backed iridescent embellishments, the wooden tree, and some Adhesive-Backed Dragonflies & Birds to decorate my card front.

Inside of card

For the larger panels, I used the same card base for the panels that when folded are side by side. For example, I used the larger tree card base for the two front panels that are shown when the card is close. Then, I used the smaller panoramic card base for the two large inside panels. I trimmed the left and right card base sides at 2 ½” wide making sure I used the matching panels when they were adhered. I saved the scored pieces for the large squares. Luckily, the decorations hid the score lines well.
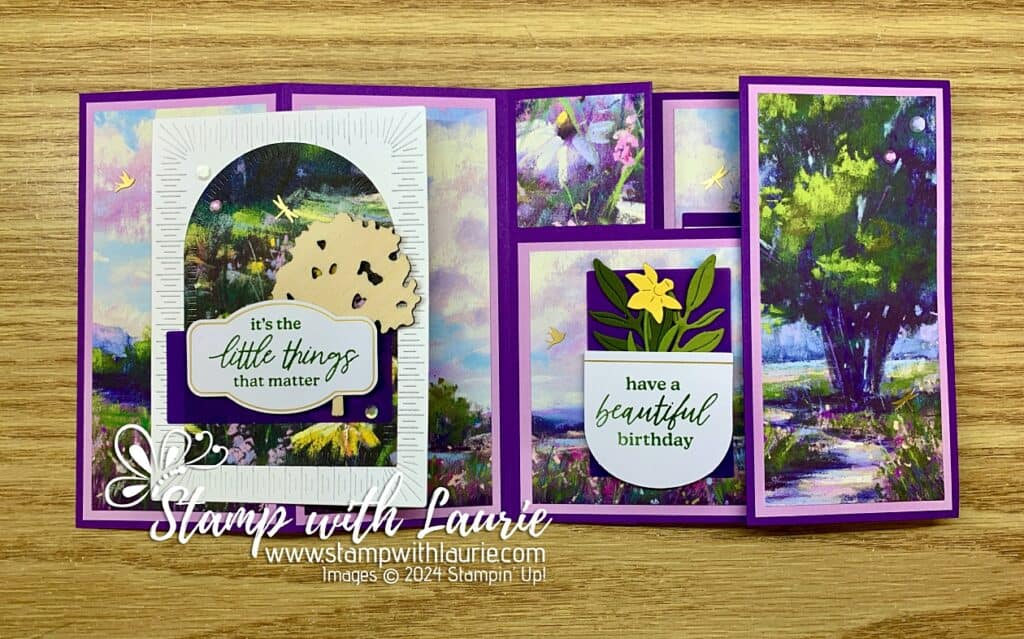
First Opening of Inside of Card

Next, I used the daisy card base for six of the small squares. I did not mat these since the squares are already so small. Again, I made sure to cut them so that they matched when laid down in a row. The centre square was left over from the scraps.
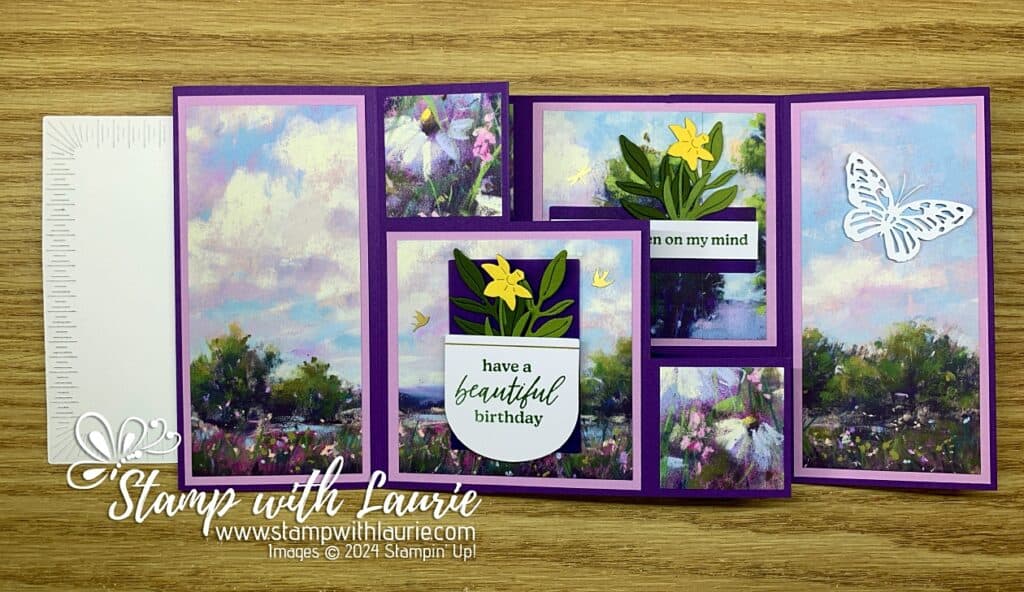
Second Opening of Inside of Card

To decorate my card, I stamped the sentiments in Garden Green on the different precut pieces with gold foil. I layered the leaves and daffodils behind the two inside my card using the vellum pieces that come in the kit to accent them.
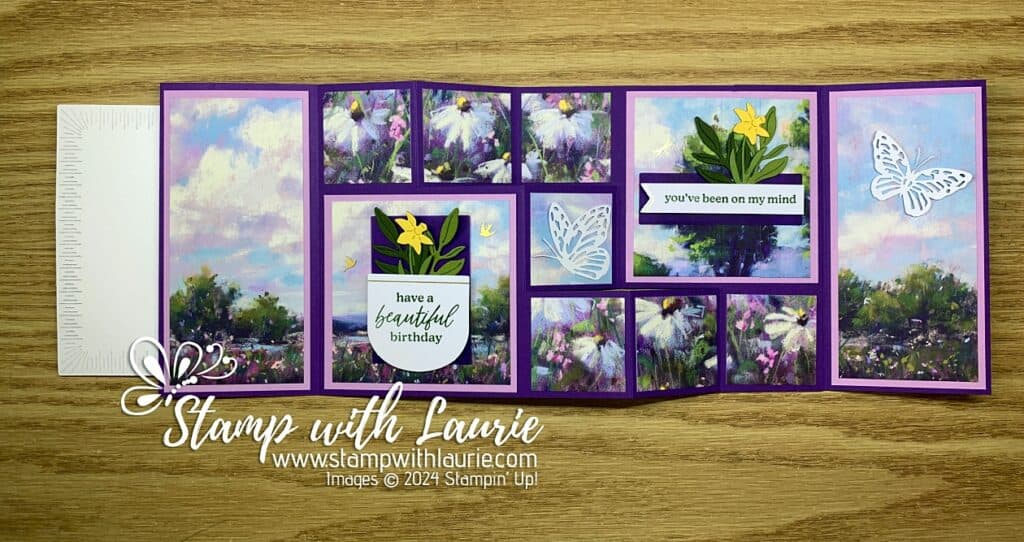
Third Opening of Inside of Card

More adhesive-backed iridescent embellishments, Adhesive-Backed Dragonflies & Birds and two Paper Butterfly Accents were used to decorate the inside.
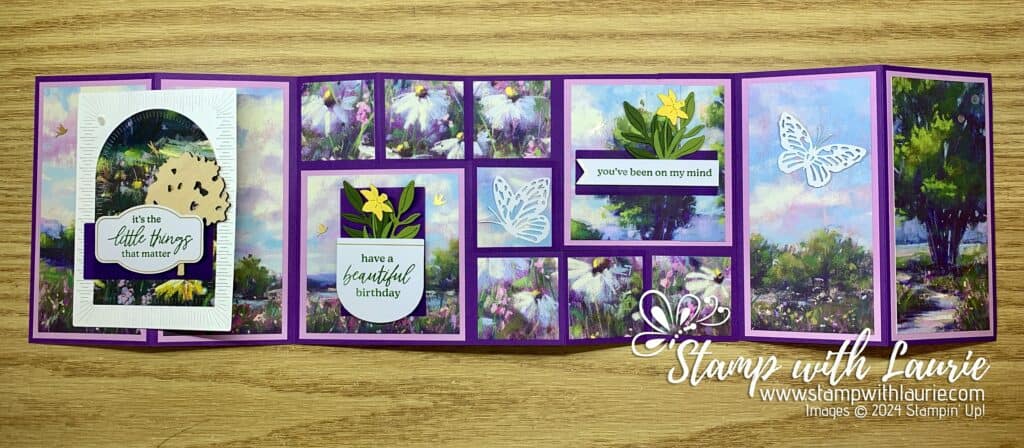
Card Fully Opened
Card Fully Opened

Supplies:

Stamps/Dies/Bundles: March 2024 Memorable Meadows Paper Pumpkin, The Love of Spring Dies (164396), Garden Meadow Dies (162740), Radiating Stitches Dies (161595)

Inks: Garden Green Spot (In Kit)

Paper: Gorgeous Grape (146987), Fresh Freesia (155613), Basic White (159276), Old Olive (100702), Mossy Meadow (133676), Daffodil Delight (119683), Meandering Meadows 6” x 6” Designer Series Paper (162735)

Accessories: Adhesive-backed iridescent embellishments (in Kit), Pressed wood embellishments (in Kit), Adhesive-Backed Dragonflies & Birds (162743), Paper Butterfly Accents (162612), Bone Folder (102300), Stampin’ Dimensionals (In Kit), Stampin’ Seal (152813), Mini Glue Dots (In Kit)
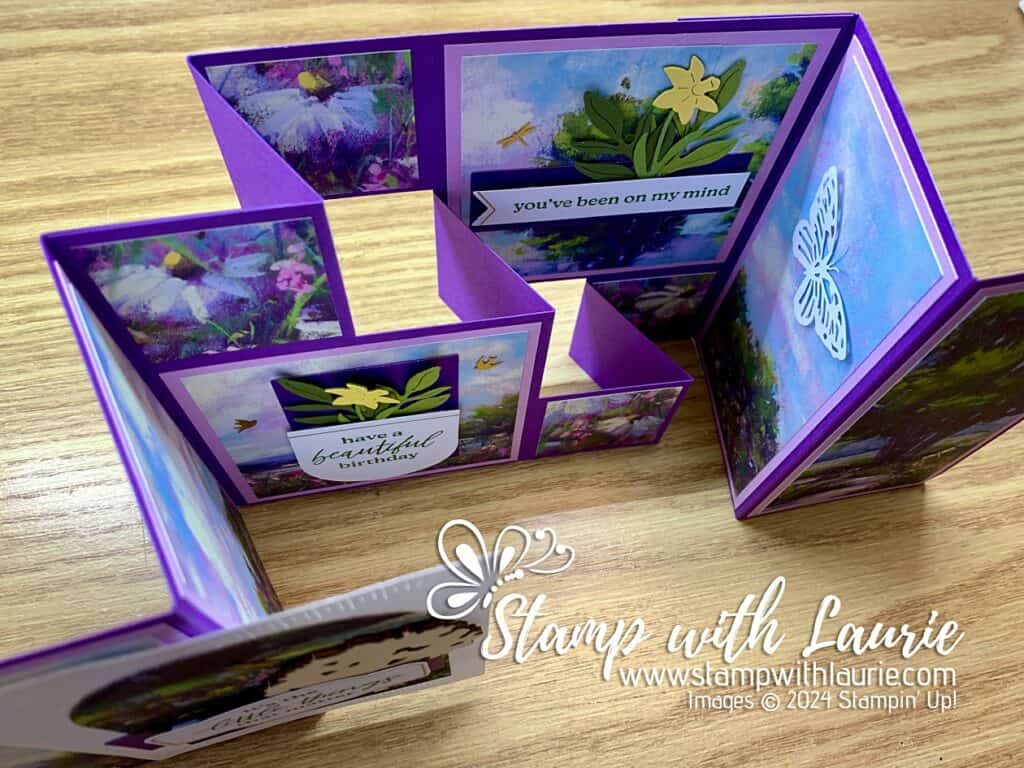
Top View of Card
Top View of Card

Measurements: 

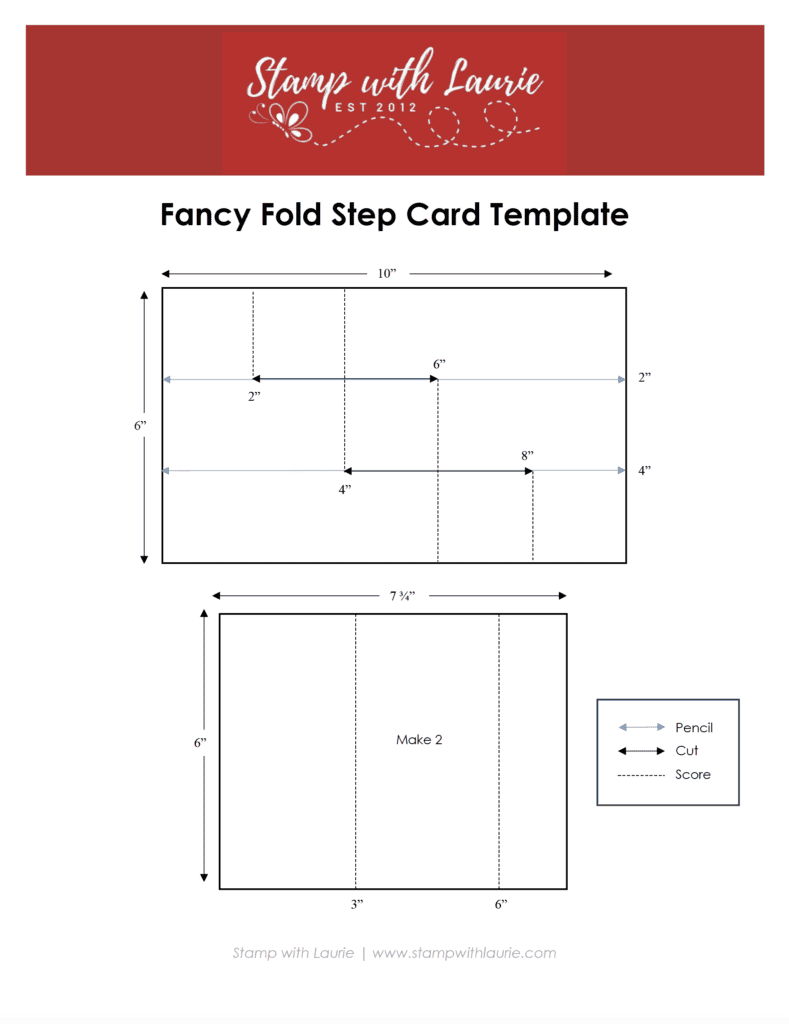
  • Gorgeous Grape cut/scored according to template below (3 pieces):
    • 7 ¾” x 6” (2 pieces)
    • 10” x 6”
  • Fresh Freesia: (6 pieces)
    • 2 ¾” x 5 ¾” (4 pieces)
    • 3 ¾” x 3 ¾” (2 pieces)
  • Basic White:
    • 4” x 5 ½”
  • Old Olive:
    • Scraps for leaves (2 pieces)
  • Mossy Meadow:
    • Scraps for leaves (2 pieces)
  • Daffodil Delight:
    • Scraps for flowers (2 pieces)
  • Meandering Meadows 6″ x 6″ Designer Series Paper:
    • 3” x 4 ½” (for arch on front of card)
  • Memorable Meadows Paper Pumpkin:
    • 2 ½” x 5 ½” (4 pieces)
    • 3 ½” x 3 ½” (2 pieces)
    • 1 ¾” x 1 ¾” (7 pieces)
Collage of Different Layers

More Information on My Fancy Fold Step Card

Here is a video of my card in action.

Fancy Fold Step Card Instructions & Template

To download a PDF of the Fancy Fold Step Card Instructions & Template, please click here or on the picture.

Fancy Fold Step Card Instructions & Template

Finished card size: 6” x 6”

For more of my Stampin’ Up! cards, please click here.

You will find the items listed above in my online store.

Go Boldly Birthday Card 

Boldly Go Birthday Card - a space birthday card with Star Trek Next Generation characters on it.
Go Boldly Birthday Card

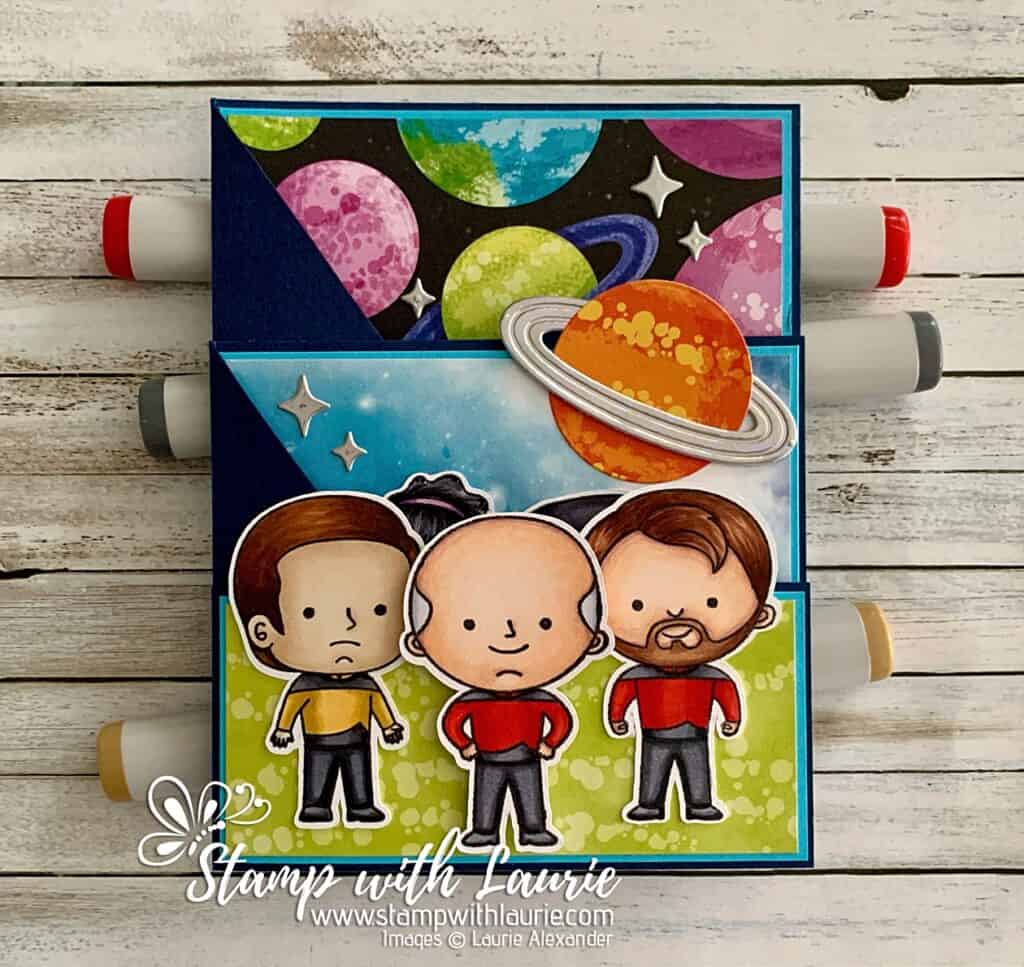
Hello Crafty Friends! It’s Laurie here to share my Go Boldly Birthday Card using The Next Space Explorers Stamp Set by Kindred Stamps! It was my brother’s birthday recently and he loved Star Trek Next Gen growing up! He loved it so much that one year we even had a Next Gen murder mystery birthday party for him! Lol!

The Details of My Go Boldly Birthday Card

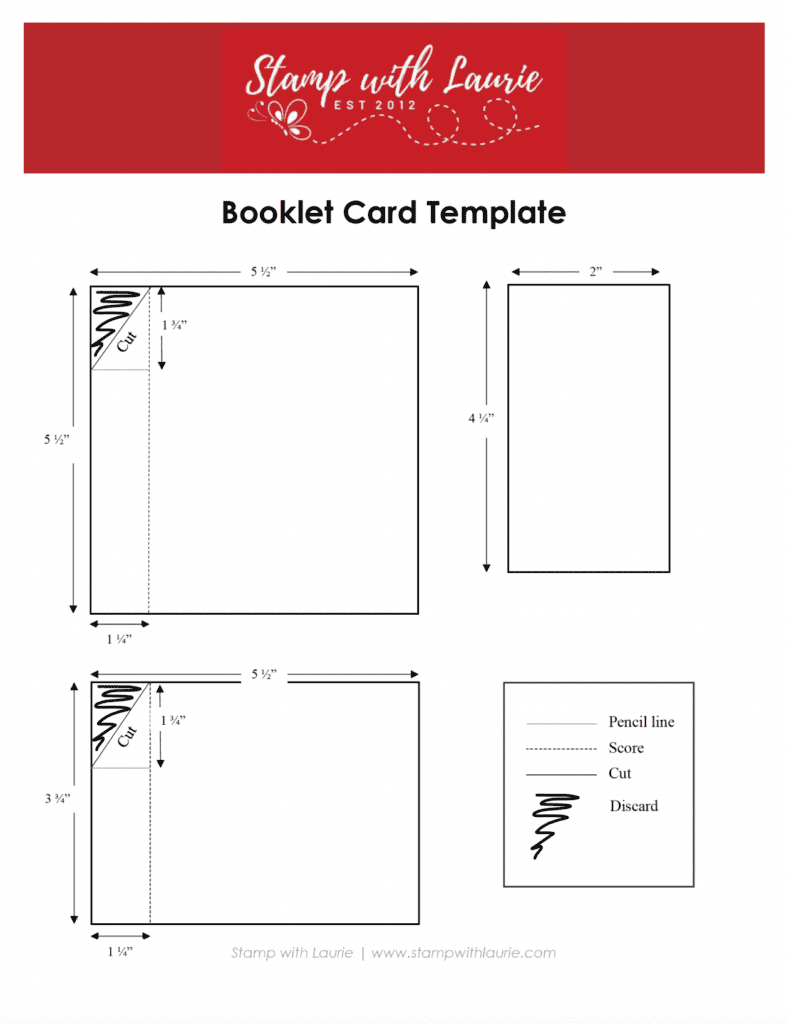
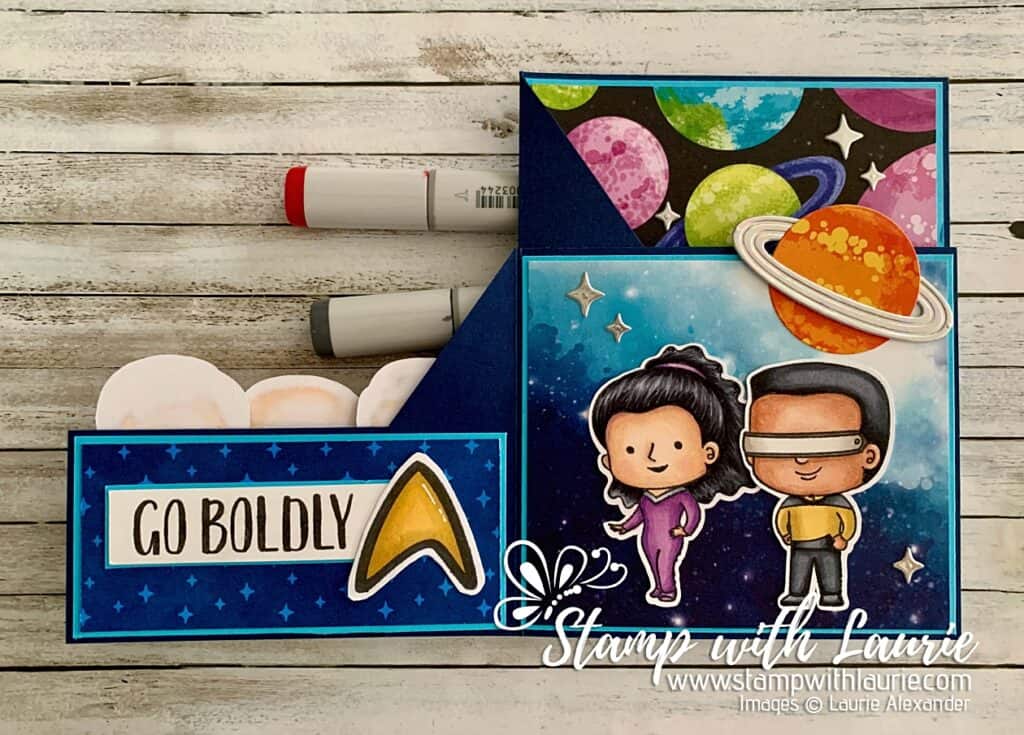
For my card, I wanted to include all the characters on his card. So, I went with a fun fold that is like a booklet where you open each page to a new layout! I have included a video at the end to show it in action.

First Page of Booklet Card with two more characters
First Page of Booklet Card

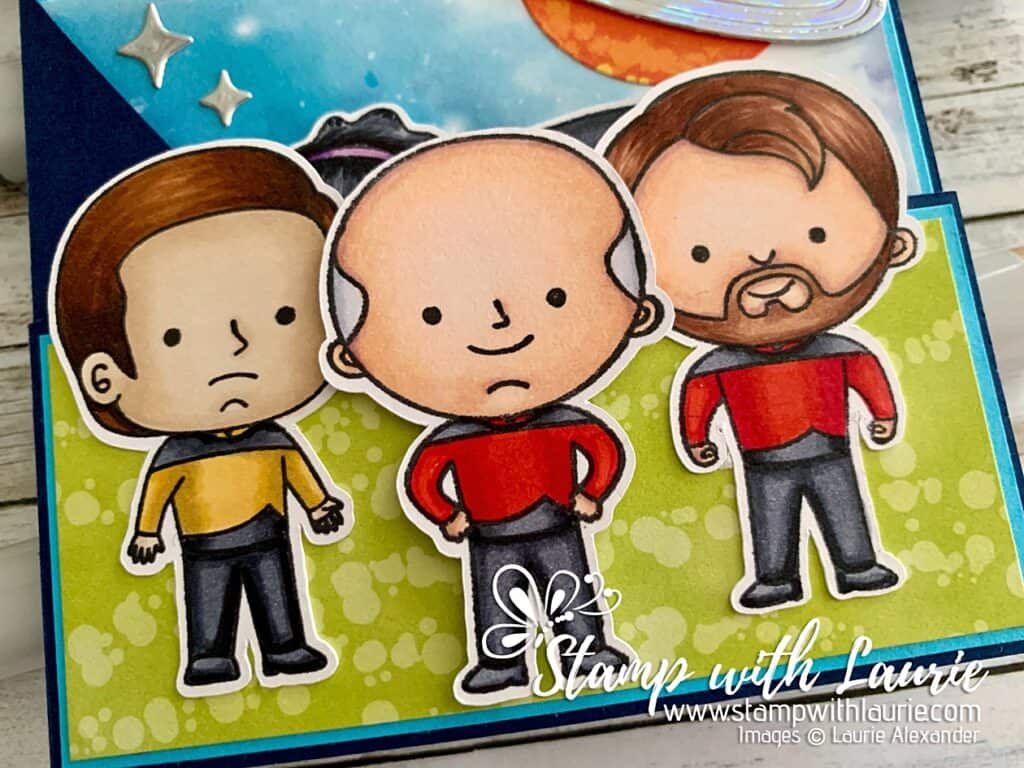
But first, I coloured all the characters with my Copic markers and cut them out with my Brother Scan n’ Cut. Once that was done, I built my booklet using the template that I have included at the end of this post. 

Next, was decorating the pages. The Stargazing Designer Series Paper by Stampin’ Up! was perfect for my space theme. I even used the Reach for the Stars Dies by Stampin’ Up! to create my ringed planet with Holographic DSP for the rings.

Second Page of Booklet with a final character
Second Page of Booklet Card

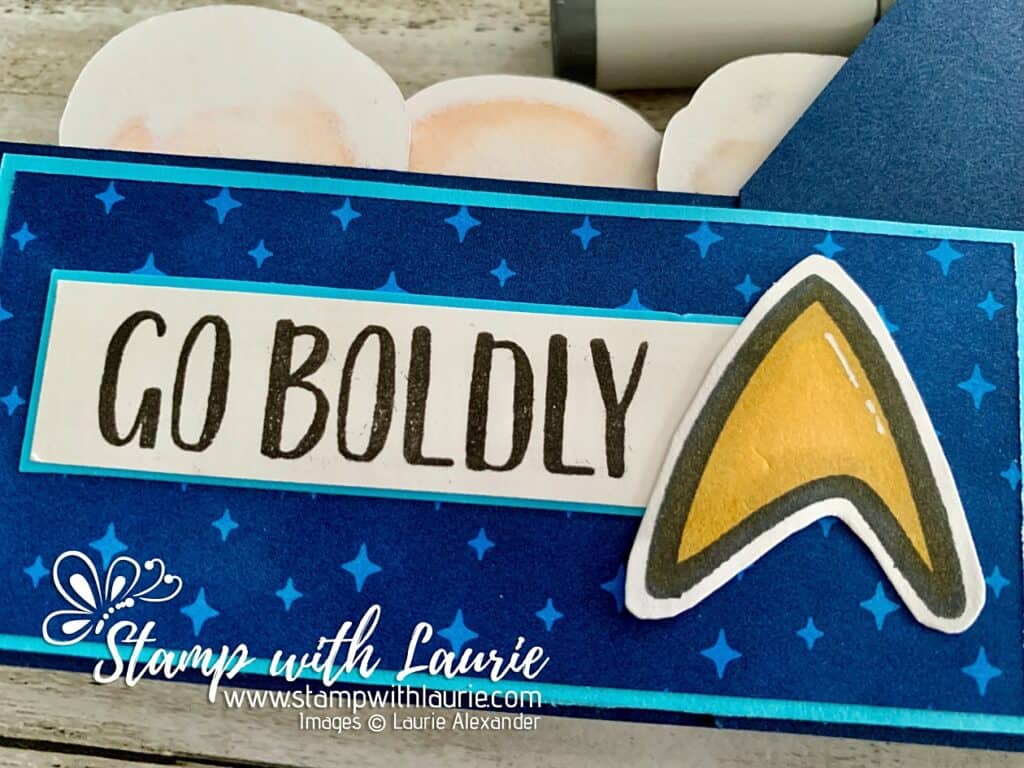
I used two sentiments from The Next Space Explorers stamp set and one with the Star Trek Symbol from the Space Explorers stamp set to fill the pages facing the characters.

Since the card was so bulky already, the only embellishments I added were a scattering of Holographic die cut stars throughout the booklet.

————————–

Copic Markers:

Captain Jean-Luc Picard
Skin
: E000/E00/E21/E11/E04
Hair: C3/C1/C0
Reds: R29/R27/R24 
Blacks: C9/C6/C4

Commander William Riker
Skin
: E000/E00/E21/E11/E04
Hair: E29/E27/E25/E23
Reds: R29/R27/R24 
Blacks: C9/C6/C4

Lieutenant Commander Data
Skin
: E42/E41
Hair: E49/E59/E57/E55
Golds: Y28/Y26/Y21 
Blacks: C9/C6/C4

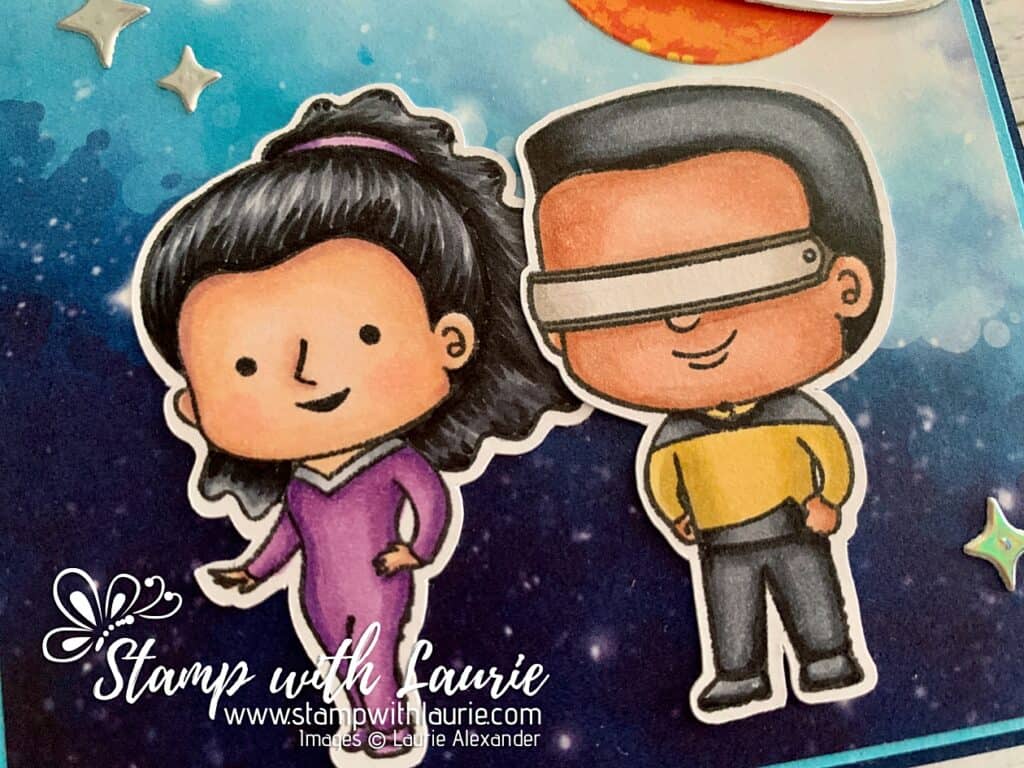
Close Up of Characters on Cover

Counselor Deanna Troi
Skin
: E000/E00/E21/E11/E04/R20
Hair: C9/C6/C4
Outfit: V17/V15/V12
Grays: C4/C3/C1

Chief Engineer Geordi La Forge
Skin
: E15/E13/E11
Hair: C9/C6/C4
Golds: Y28/Y26/Y21 
Blacks: C9/C6/C4
Visor: W6/W4/W2/W0

Close Up of Two Characters on Inside of Card
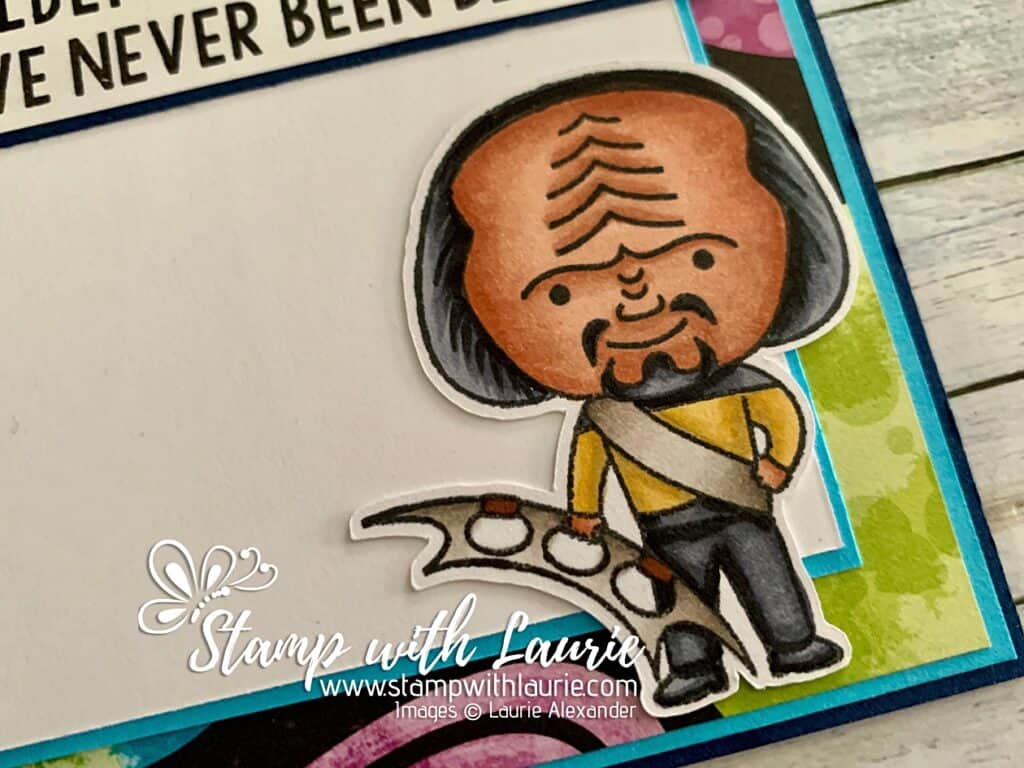
Close Up of Characters on First Page

Lieutenant Worf
Skin
: E15/E13/E11
Hair: C9/C6/C4
Golds: Y28/Y26/Y21 
Blacks: C9/C6/C4
Bat’leth: W6/W4/W2/W0/E27

Close Up of Character on Second Page

Star Trek Symbol
Golds: Y28/Y26/Y21
White Gelly Roll Pen

Close Up of Star Trek Symbol

————————–

Card Recipe for My Go Boldly Birthday Card:

The Next Space Explorers, Kindred Stamps
Space Explorers, Kindred Stamps
Paper Basics – Stamper’s Select White Cardstock, Papertrey Ink
Reach for the Stars Dies, Stampin’ Up!
Stargazing Designer Series Paper, Stampin’ Up!
Holographic Trio Specialty Designer Series Paper, Stampin’ Up!
Tuxedo Black Memento Ink, Stampin’ Up!
Brother Scan n’ Cut
White Gelly Roll Pen, Sakura
Paper Snips, Stampin’ Up!

Night of Navy and Tahitian Tide, Card Stock Stampin’ Up!

Finished card size: 5 ½” x 4 ¼”

————————–

Downloadable Booklet Card Template

To download a PDF of the Booklet Card Template, please click here or on the picture.

Downloadable Booklet Card Template

For more of my Kindred Stamps cards, please click here.

Hope you like my Go Boldy Birthday Card using the
The Next Space Explorers Stamp Set by Kindred Stamps!

Thank you for stopping by!

Hugs,
Laurie

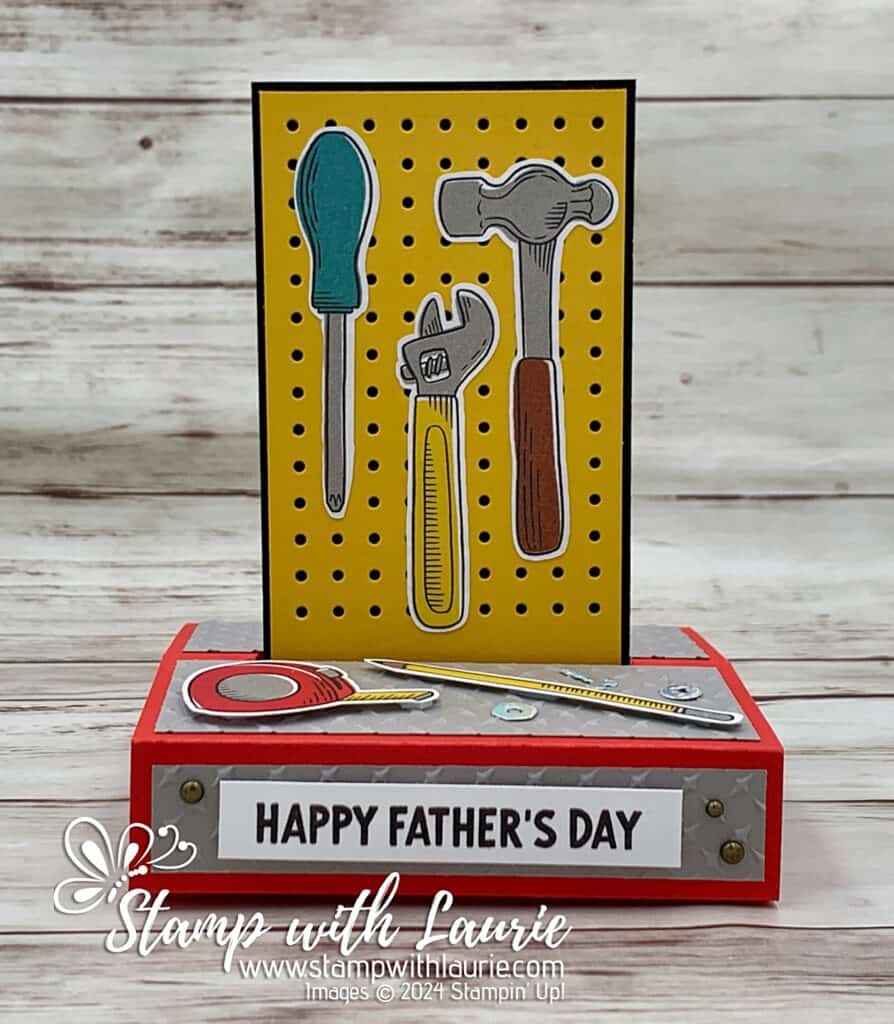
Tool Time Father’s Day Card

Tool Time Father’s Day Card -  a pop-up card with tools on a tool bench
Tool Time Father’s Day Card

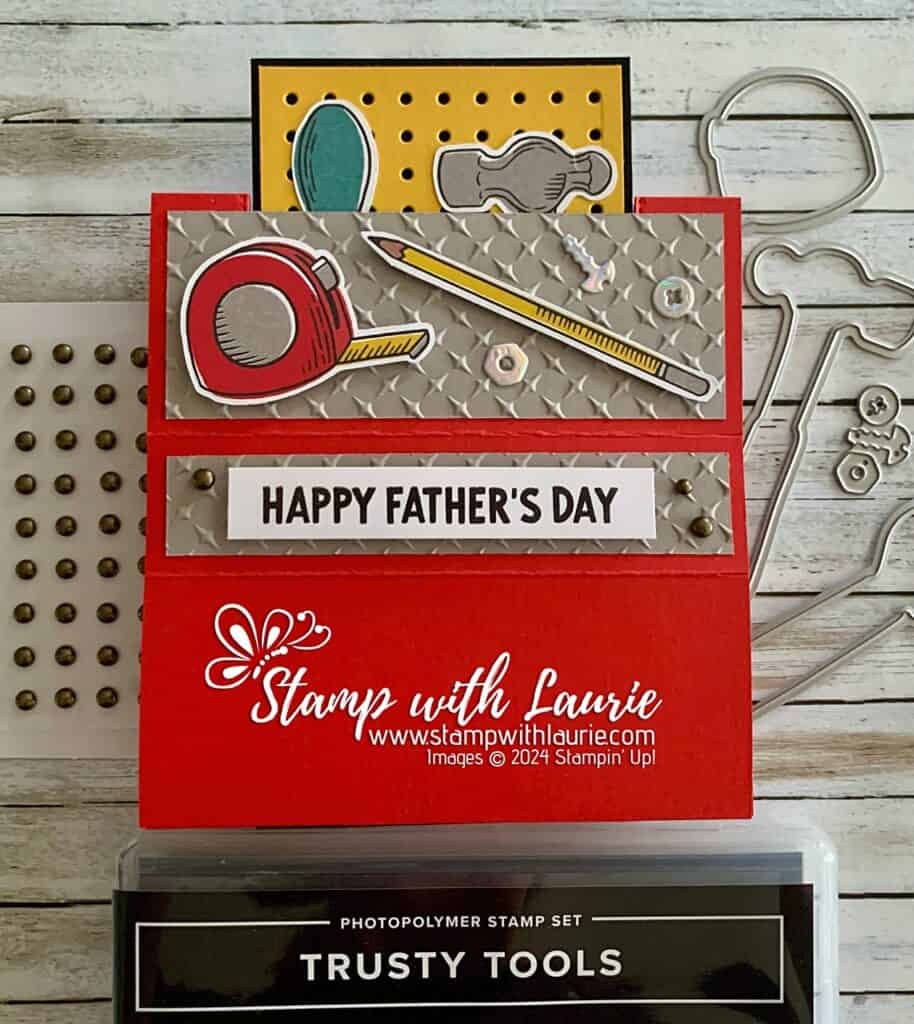
Hello Crafty Friends! Laurie here again! I am sharing my Tool Time Father’s Day Card using the Trusty Tools Bundle and the Trusty Toolbox 12” x 12” Designer Series Paper by Stampin’ Up! I love that the Trusty Tools Dies can cut out the tools from the Trusty Toolbox 12” x 12” Designer Series Paper which is free during Sale-a-Bration!

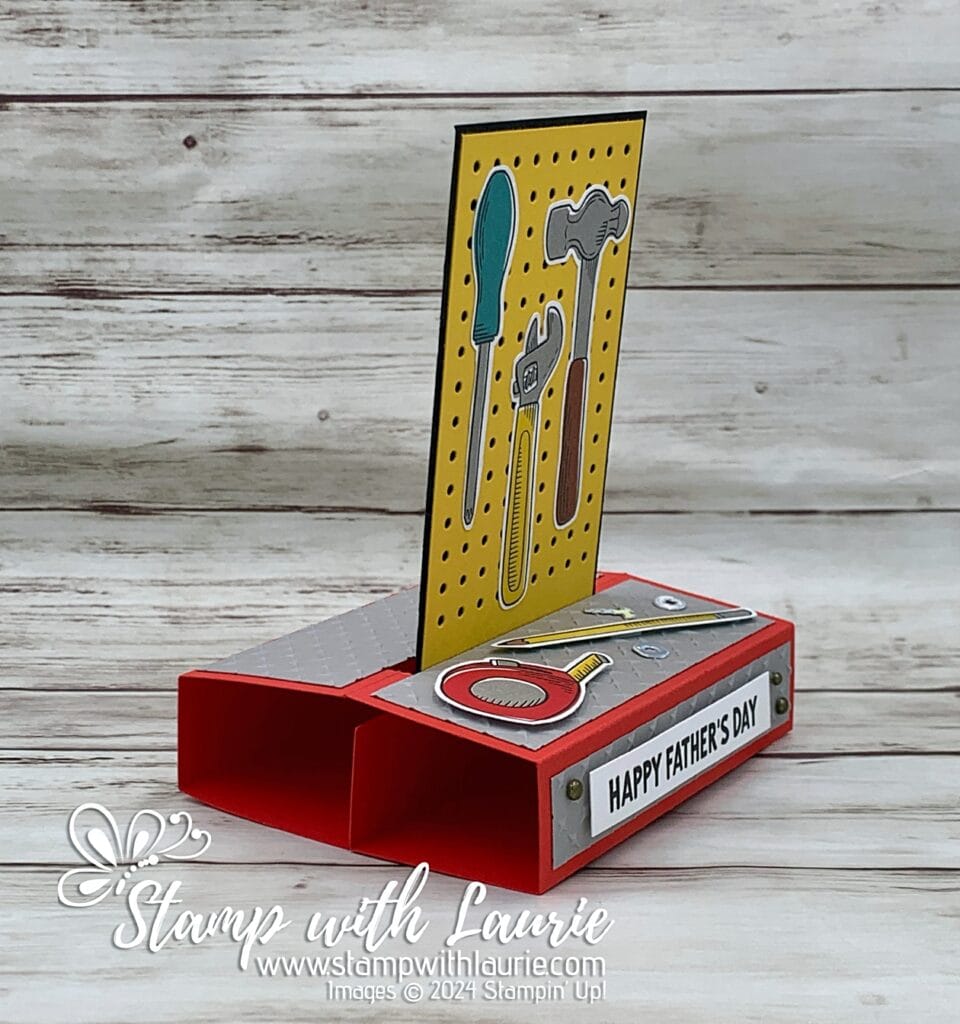
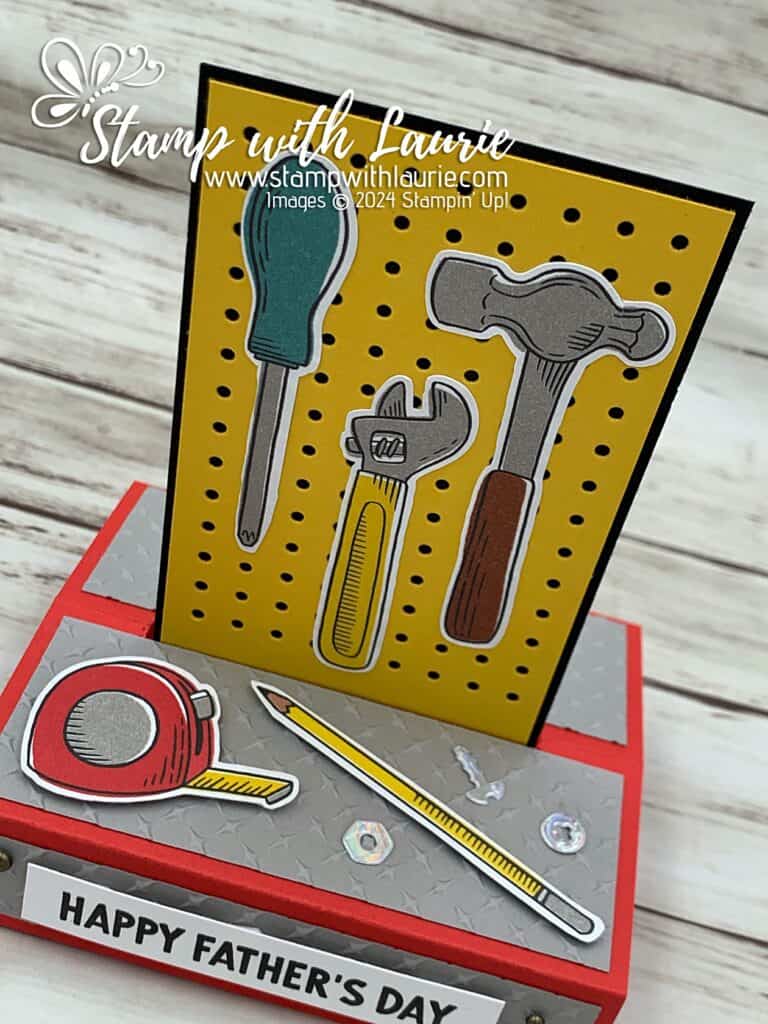
For my card, I decided to create a fun free standing pop-up card to display the die cut tools from the DSP on a pegboard! I made this card for a swap and used different tools from the DSP like the hammer, paint brush and wrenches while others, I fussy cut out. The thing that is great about these cards is that they fold flat to be mailed, but the recipient has that Wow! when they pop it up! 

Card Folded Flat for Mailing

The Details of My Tool Time Father’s Day Card

For my pegboard, the die didn’t run the full length of the Crushed Curry card stock. So, I placed the die at the top leaving a small border. Next, I used liquid glue to adhere it to the Basic Black piece with a Basic White piece on the back for the message. I stamped the nuts and screw in Gray Granite in the corners of the Basic White piece to add interest. For the tools, I adhered them with liquid glue, as well since I wanted the pegboard piece to be as a flat as possible to allow it to slide.

Next, I scored and cut the Poppy Parade piece according to the instructions below. I have created a template that you can download at the end of this post.

Side View Of Card
Side View Of Card

Once that was done, I inserted the pegboard through cut and lined it up with the bottom of the folded Pappy Parade piece. Then I adhere it in place and then glue the other side of the bottom to it. This will create the pop-up mechanism.

To decorate my “work table”, I used Gray Granite strips embossed with the Metal Plate Embossing Folder to make it look industrial. The pencil and measuring tape were fussy cut out and laid down like they were just set down. The silver piece of Holographic Trio Specialty Paper was perfect for my nuts and screw to give them a metallic look.

The sentiment was stamped in Black with a trio of Rustic Metallic Adhesive-Backed Dots to add to my masculine theme.

Top View of Tool Bench
Top View of Card

Supplies:

Stamps/Bundles/Dies: Trusty Tools Bundle (162723)

Inks: Tuxedo Black Memento Ink Pad (132708), Gray Granite Classic Stampin’ Pad (147118) 

Paper: Poppy Parade (119793), Gray Granite (146983), Crushed Curry (131199), Basic Black (121045), Basic White (159276), Holographic Trio Specialty Paper (161744), Trusty Toolbox Designer Series Paper (162978)

Accessories: Metal Plate 3D Embossing Folder (160766), Rustic Metallic Adhesive-Backed Dots (159082), Paper Trimmer (152392), Paper Snips (103579), Bone Folder (102300), Stampin’ Dimensionals (104430), Mini Stampin’ Dimensionals (144108), Stampin’ Seal (152813), Mini Glue Dots (103683), Multipurpose Liquid Glue (110755)

One of the Pop-Up Cards
Single Pop-Up Card

Measurements: 

  • Poppy Parade:
    • 11” x 4 ¼” scored at 1”, 2 ¾”, 3 ¾”, 5 ½”, 7 ¼”, 8 ¼” and 10”
    • Vertical cut at 5 ½” score that is ¾” from the top and ¾” from the bottom
  • Gray Granite (4 pieces): 
    • 4” x ¾” (2 pieces)
    • 4” x 1 ½” (2 pieces)
  • Basic Black: 2 ¾” x 5 ½”
  • Crushed Curry: 2 5/8” x 5 ¼”
  • Basic White (2 pieces):
    • 2 5/8” x 4
    • Scrap (Sentiment)
  • Holographic Trio Specialty Paper:
    • Scrap
  • Trusty Toolbox Designer Series Paper:
    • 3 tools, pencil and measurement tape

More Information on My Tool Time Father’s Day Card

Downloadable Free Standing Pop-Up Card Template

Downloadable Free Standing Pop-Up Card
Downloadable Free Standing Pop-Up Card Template

For more of my Stampin’ Up! cards, please click here.

You will find the items listed above in my online store.
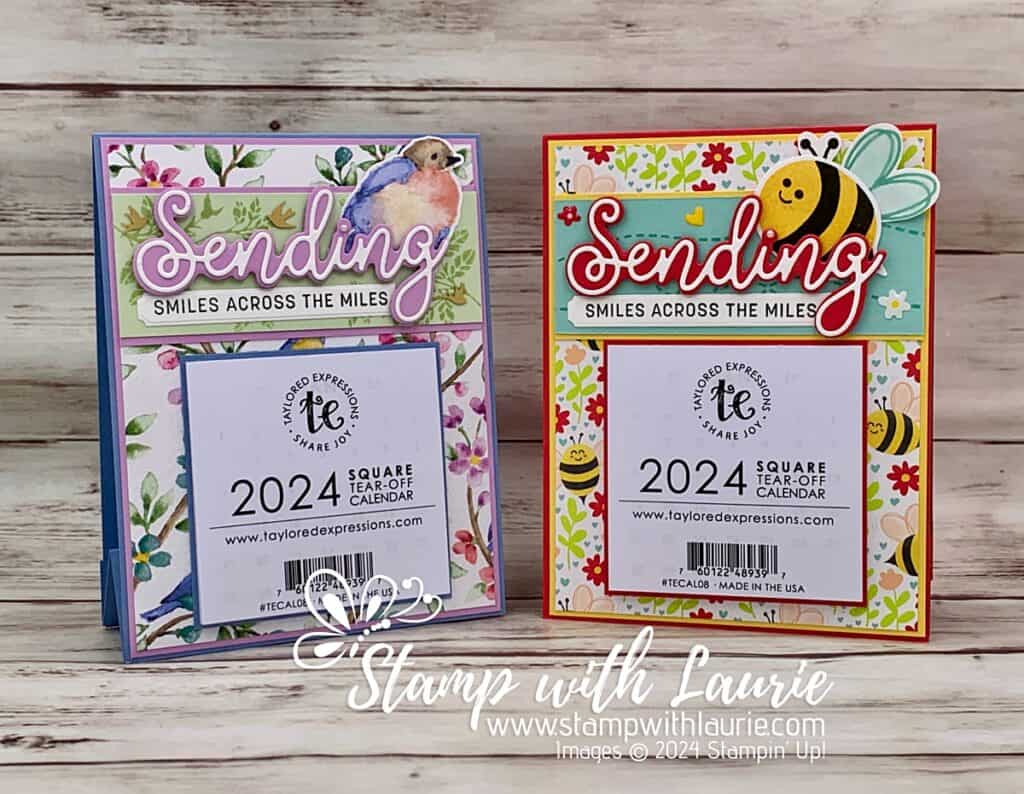
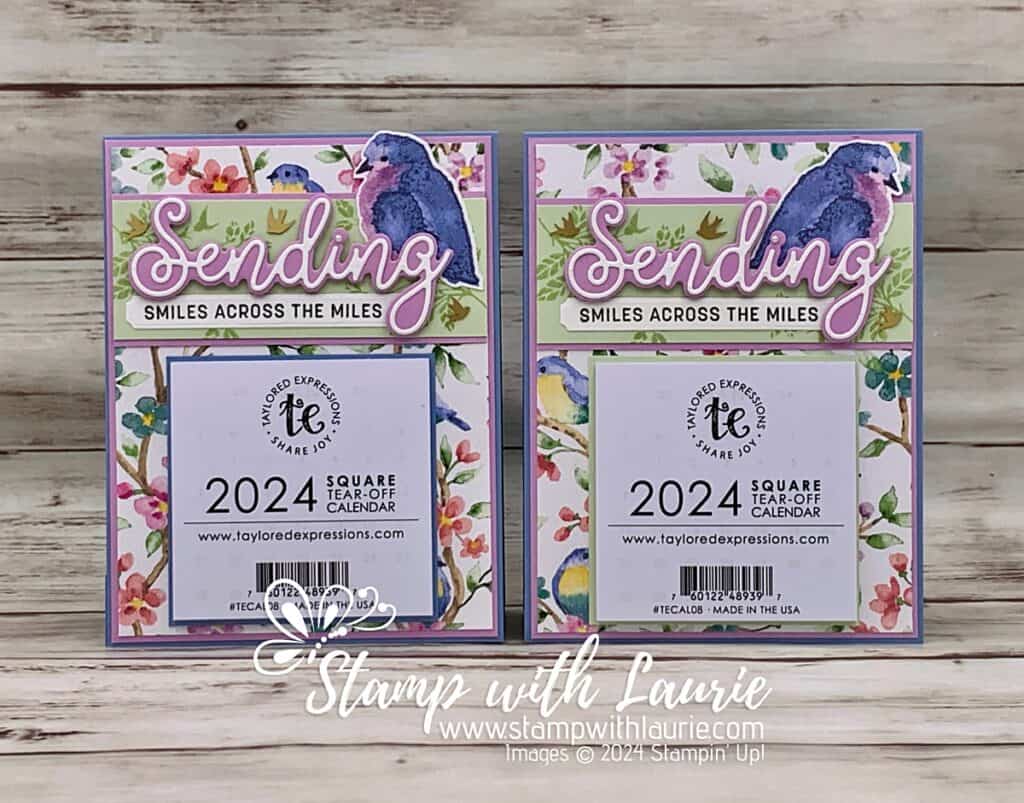
My Happy 2024 Calendars

Happy 2024 Calendars - two handmade calendars. One with a bee on it and one with a bird.
My Happy 2024 Calendars

Hello Crafty Friends! Laurie here again! I am sharing My Happy 2024 Calendars using the Bee My Valentine Bundle and the Flight & Airy Designer Series Paper by Stampin’ Up! I didn’t get done my Christmas cards this year due to catching Covid. So instead, I decided to send out calendars to some of my customers in the new year.

The Details of My Happy 2024 Calendars

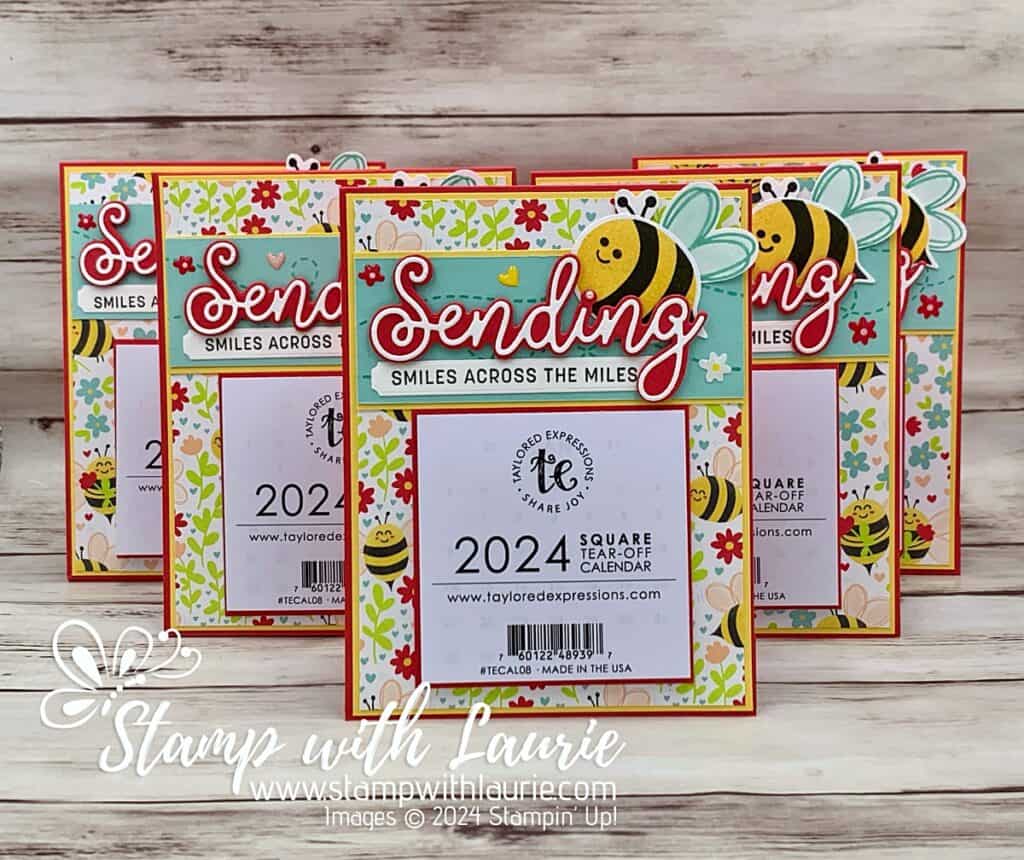
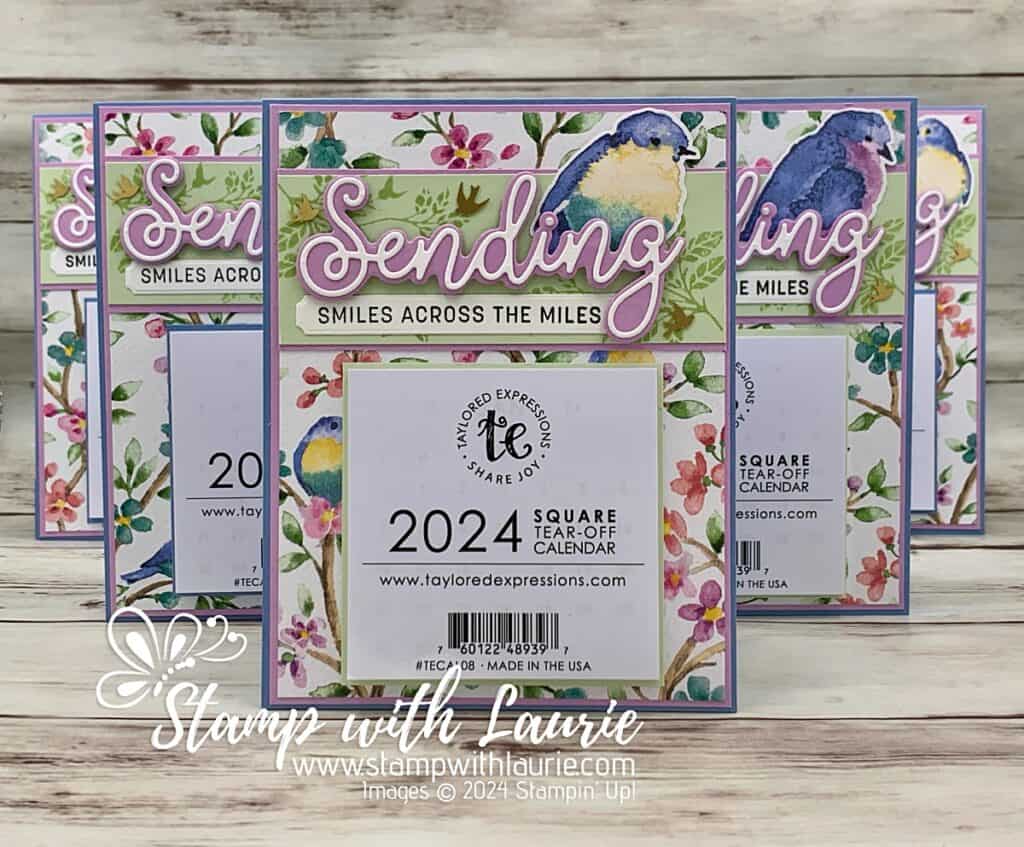
For my calendars, I decided to create two different calendars with the same design but using different products. I couldn’t resist using the beautiful Flight & Airy Designer Series Paper which is a Sale-a-bration freebie if you spend $60.00 CDN on qualifying orders. And don’t you just love those cute bees from the Bee My Valentine Bundle!

Five Bee Calendars
Bee Calendars

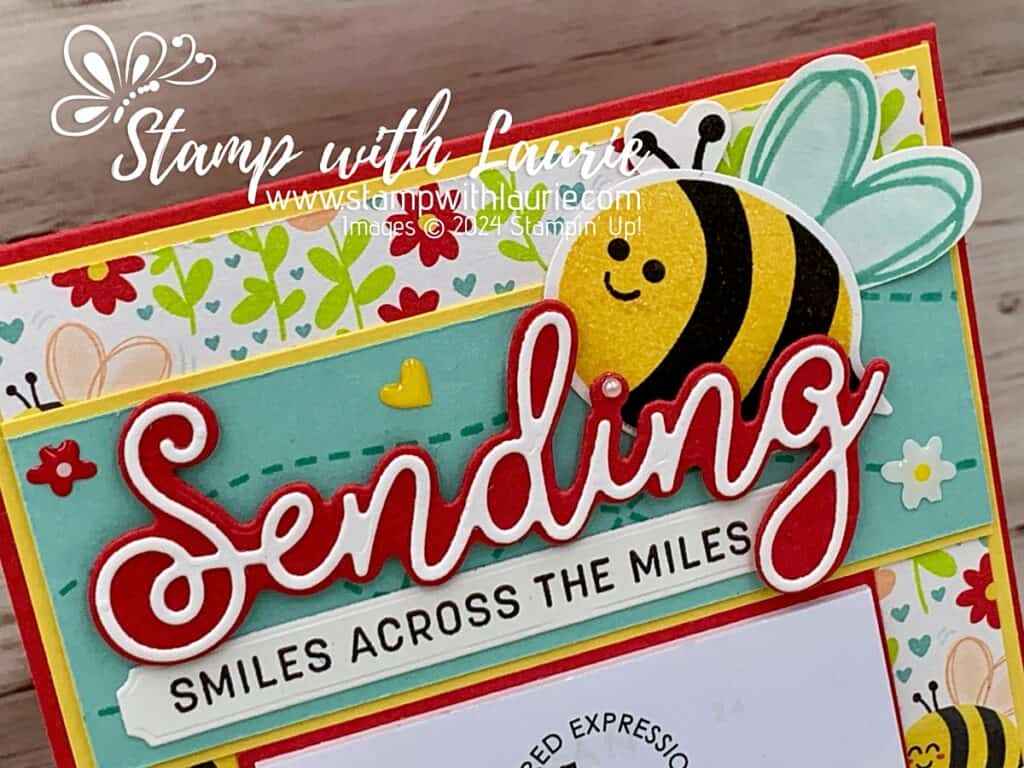
Since I planned to mail these out, the Sending Dies was perfect way to send “smiles across the miles”! To add some interest to the Pool Party and Soft Sea Foam card stocks behind my focal point, I did some tone-on-tone stamping. For the Pool Party one, I stamped a couple of times the bee trail in Pool Party. For the Soft Sea Foam, I stamped the leaves from the Softly Sophisticated Bundle twice in Soft Sea Foam. This bundle is also free with a $120 CDN on qualifying orders during Sale-a-bration.

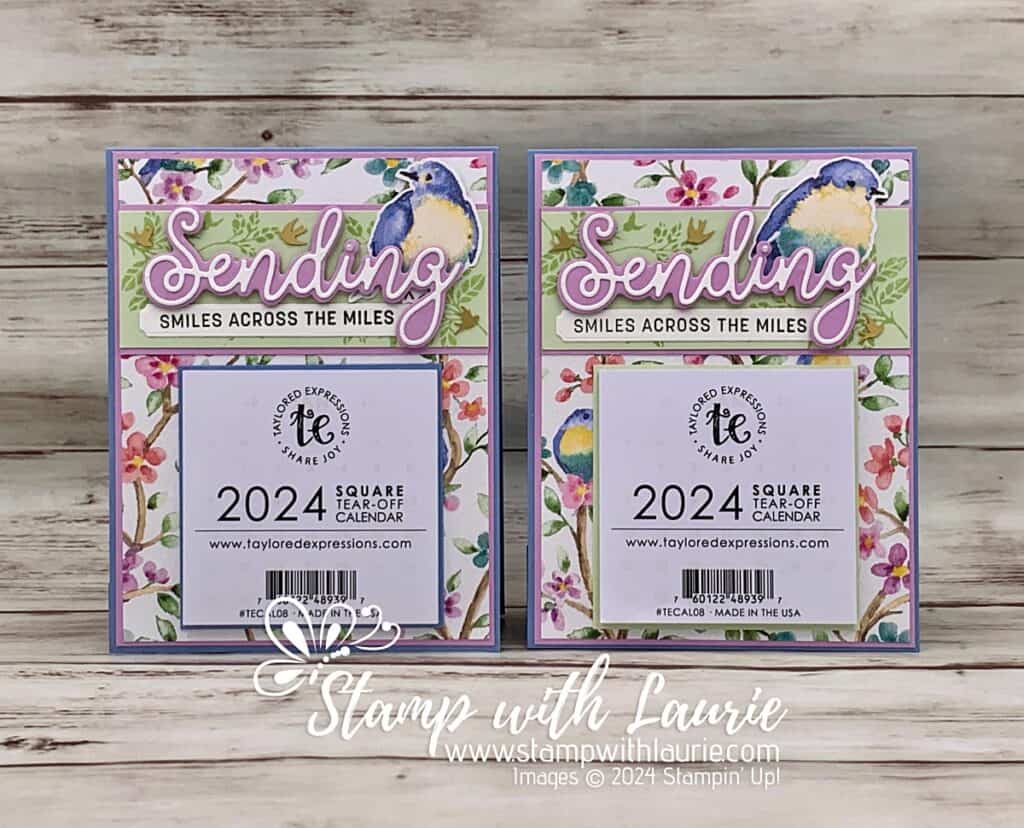
Five Bird Calendars
Bird Calendars

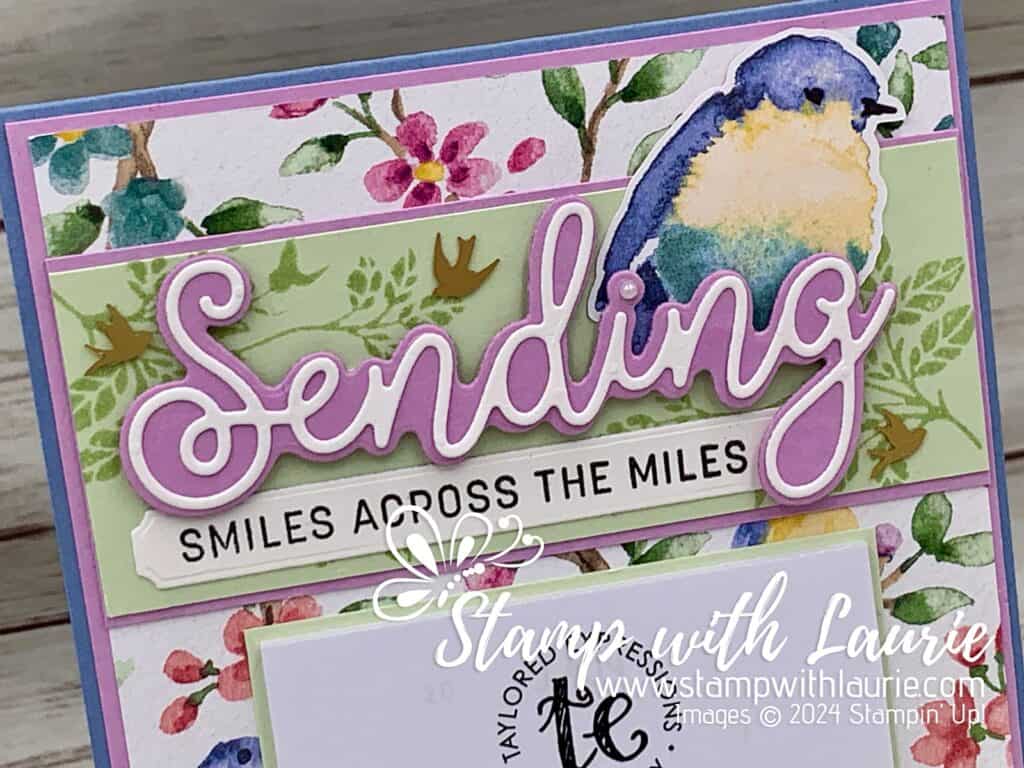
The bee was stamped and punched out with the matching builder punch. The birds were fussy cut from the Flight & Airy DSP. I used different birds for each calendar since there was such a selection from which to choose.

Two of the Bird Calendars

Next, I used the Adhesive-Backed Hearts & Flowers and Adhesive-Backed Dragonflies & Birds for embellishments. I also used a pearl for the “i” in “Sending”.

Close Up of Focal Point with Bird

The final thing was to use the technique where you press the ink pad lid when closed to get some ink. I did this with the Pool Party ink pad and picked it up with my Wink of Stella. This gave the bee wings a nice sparkle!

Close Up of Focal Point with Bee

Supplies:

Stamps/Bundles/Dies: Bee My Valentine Bundle (162554), Sending Smiles Stamp Set (158701), Sending Dies (159271), Softly Sophisticated Bundle (162947)

Inks: Pool Party Classic Stampin’ Pad (147107), Sea Foam Classic Stampin’ Pad (147102), Tuxedo Black Memento Ink Pad (132708), Daffodil Delight Classic Stampin’ Pad (147094), 

Paper: Real Red (102482), Balmy Blue (146982), Soft Sea Foam (146988), Pool Party (122924), Fresh Freesia (155613), Daffodil Delight (119683), Basic White (159276), Bee Mine Designer Series Paper (162546), Flight & Airy Designer Series Paper (162977)

Accessories: Adhesive-Backed Hearts & Flowers (162557), Iridescent Pearl Basic Jewels (158987), Adhesive-Backed Dragonflies & Birds (162743), Wink of Stella (141897), Paper Trimmer (152392), Paper Snips (103579), Bone Folder (102300), Stampin’ Dimensionals (104430), Mini Stampin’ Dimensionals (144108), Stampin’ Seal (152813), Mini Glue Dots (103683), Taylored Expression Calendars

Two Different Birds on Calendars

Measurements: 

  • Real Red/Balmy Blue (3 pieces):
    • 11” x 4 ¼” scored at 5 ½”
    • 4” x 4 ¼” scored at ¾”, 2” and 3 ¼” along 4” side
    • 3-7/8” x 3-7/8” (for behind calendar)
    • 1 ½” x 3 ½” (Sending die)
  • Daffodil Delight/Fresh Freesia: 
    • 4-1/8” x 5-3/8”
    • 4” x 2-5/8”
    • 1 ½” x 3 ½” (Sending die)
  • Pool Party/Soft Sea Foam: 4” x 2 ½”
  • Basic White:
    • 1 ½” x 3-3/8” (Sending die)
    • 3/8” x 3-3/8” (Sentiment)
    • 1 ¾” x 1-3/16” (Bee body)
    • Scraps for wings and antenna
  • Bee Mine Designer Series Paper:
    • 4” x 5 ¼”
  • Flight & Airy Designer Series Paper:
    • 4” x 5 ¼”
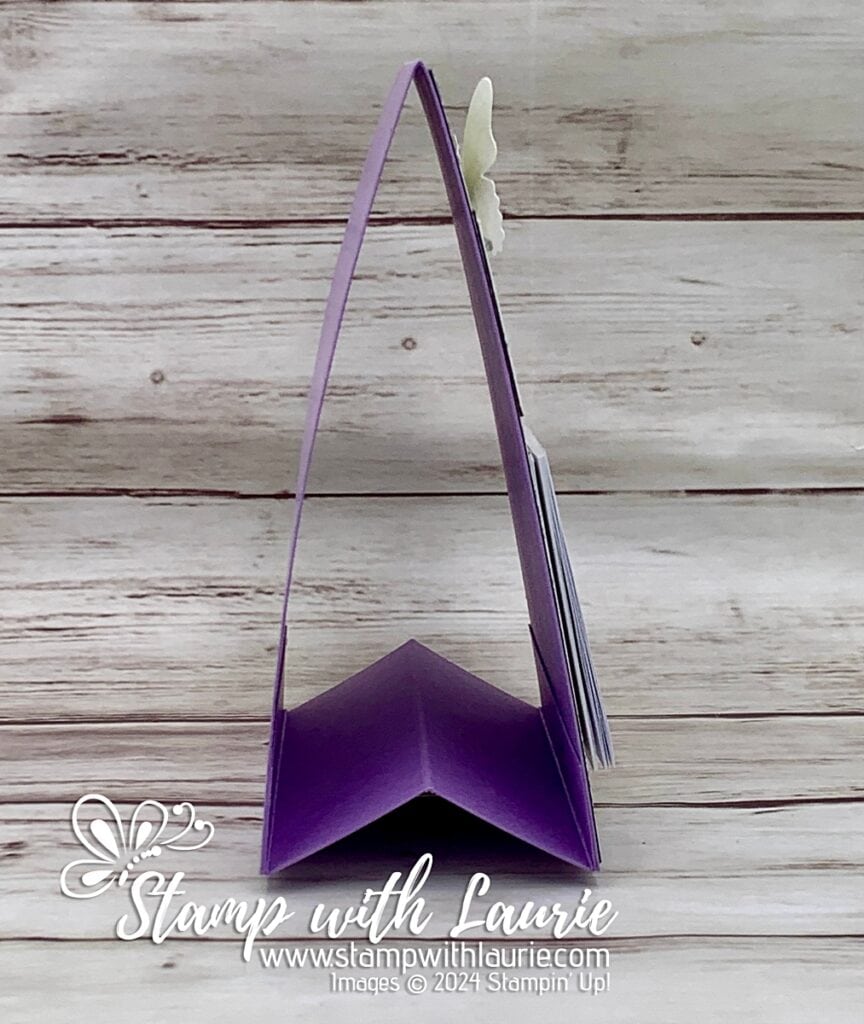
Side View of Calendar

More Information on My Happy 2024 Calendars

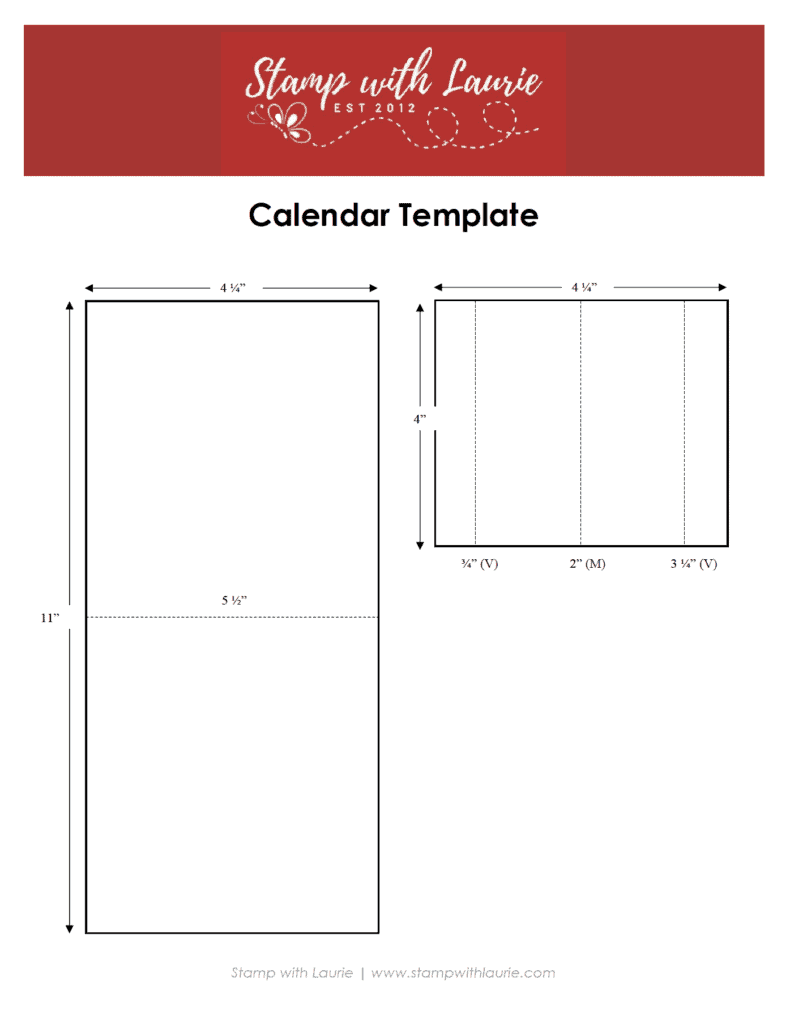
To download a PDF of the Calendar Template, please click here or on the picture.

Downloadable Calendar Template

For more of my Stampin’ Up! cards, please click here.

You will find the items listed above in my online store.
2023-25 In Color Bookmarks

Bookmarks
Stampin’ Up! 2023-25 In Color Bookmark

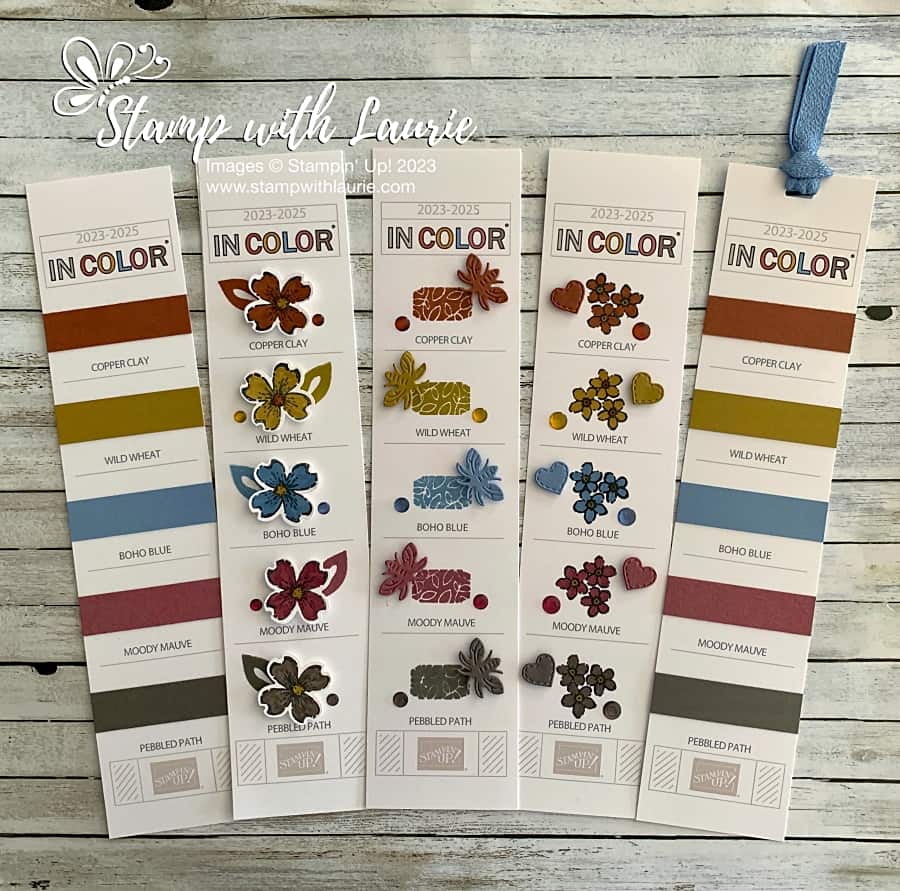
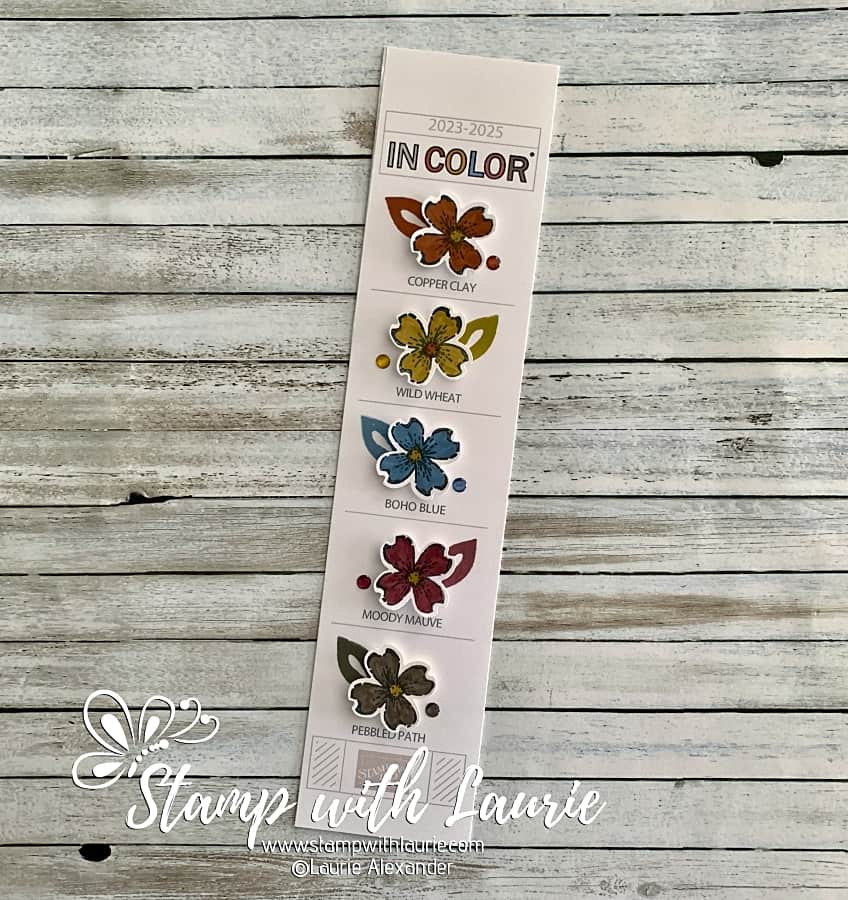
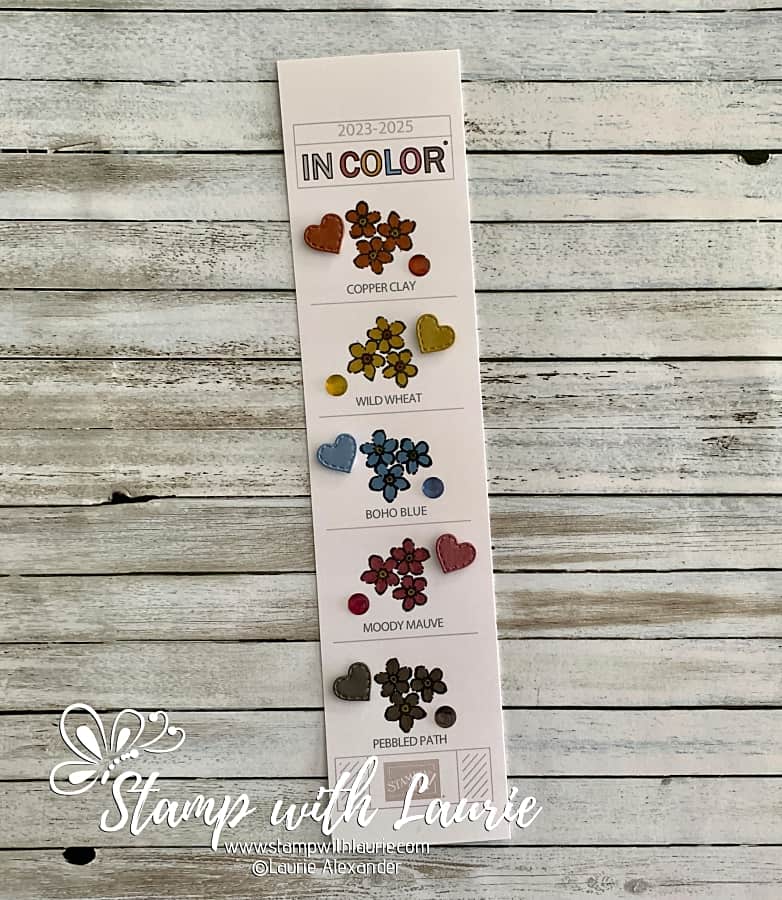
Every year I am asked to create a Stampin’ Up! In Color bookmark file. So, I am sharing my 2023-25 In Color Bookmarks using my PDF file that I created for this purpose. When you download the PDF files print them with the fit to page setting in the Adobe Acrobat on Basic White. All files are at the end of this post, as well as the files for the 2022-24 In Colors from last year.

Ink/Card Stock Bookmark

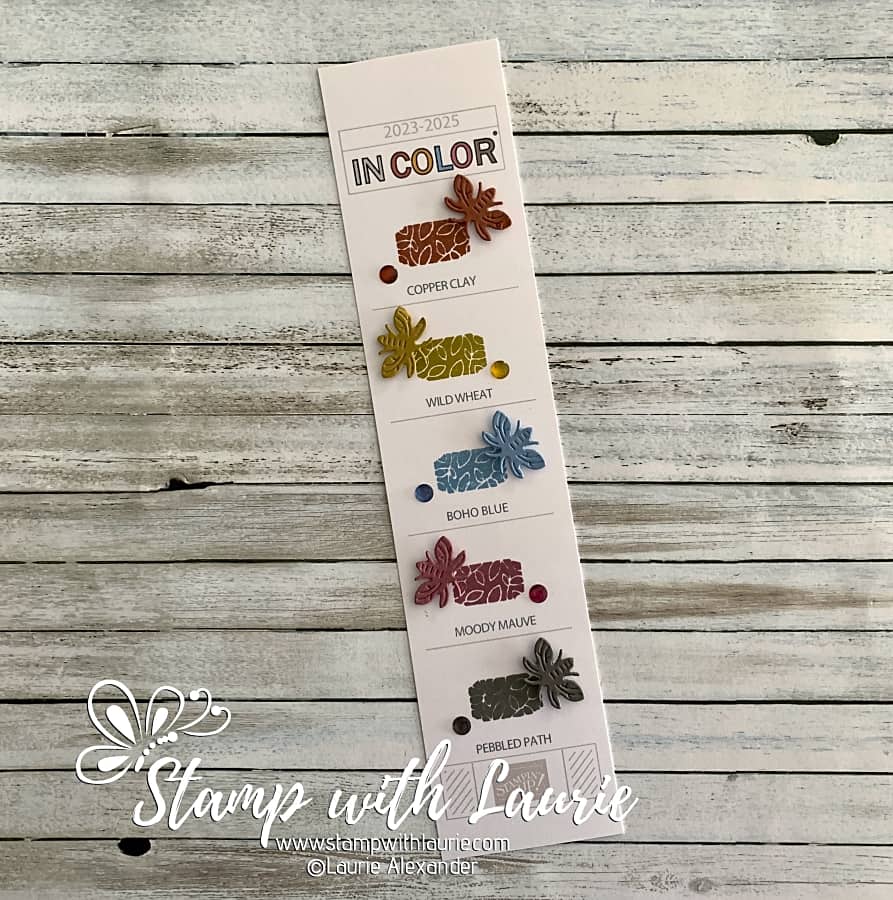
For this bookmark, I used the leaf stamp from the Alphabest Stamp Set to stamp my In Colors. Next, I die cut fireflies from the card stock. I thought it would be fun like the fireflies are flying around the leaves. To balance out the fireflies, I added the medium size In Color Dots.

Inks and Cardstock Bookmark
Ink and Cardstock Bookmark

Stampin’ Write Markers/Ink Bookmark

For my next bookmark, I stamped in Memento Ink the cluster of flowers from the Petal Park Bundle on Basic White. Using the Stampin’ Write Markers (you could also use Stampin’ Blends), I coloured the medium sized flower and punched it out using the Petal Park Builder Punch. Next, I stamped the leaf from Petal Park Stamp Set directly on the bookmark. I add the smallest In Color Dots.

2023-25 In Color Stampin' Write Markers Bookmark
Stampin’ Write Markers and Ink Bookmark

Card Stock/Stampin’ Write Markers Bookmark

For this bookmark, I used Stampin’ Write Markers, card stock and the largest In Color Dots to create them. I love the stitched hearts sharing my love for the new In Colors.

Cardstock and Stampin' Write Bookmark
Cardstock and Stampin’ Write Bookmark

Easy Card Stock Bookmarks

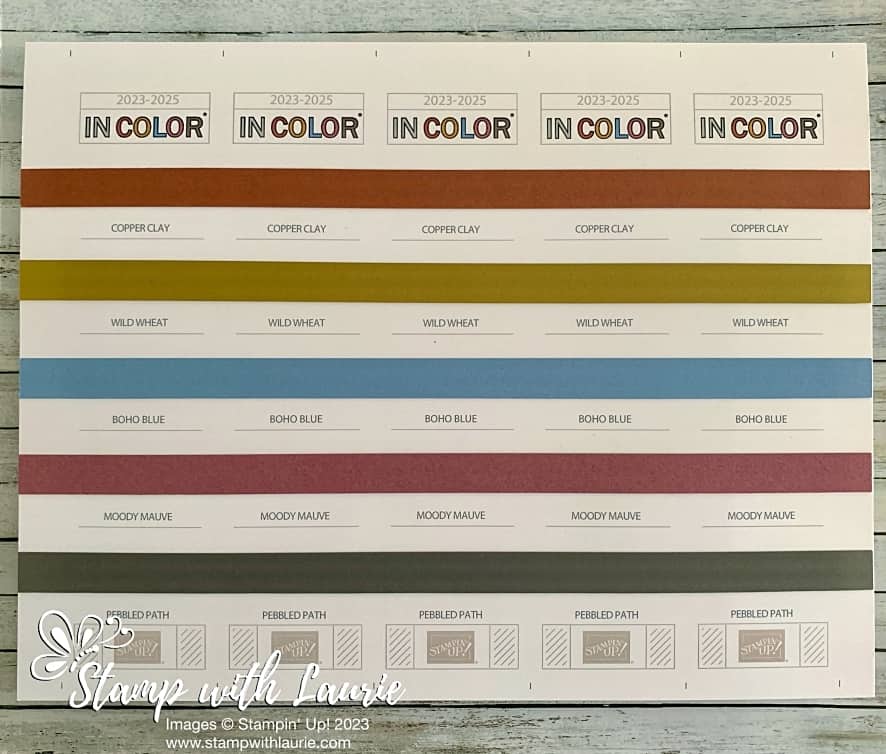
For my last set of bookmarks, I cut a ½” x 11” strip of card stock for each colour. I glue them directly to the print out before cropping the bookmarks down. I them cut them apart creating 5 bookmarks. Fast and easy!

Easy Card Stock Bookmarks

Color Families Chart

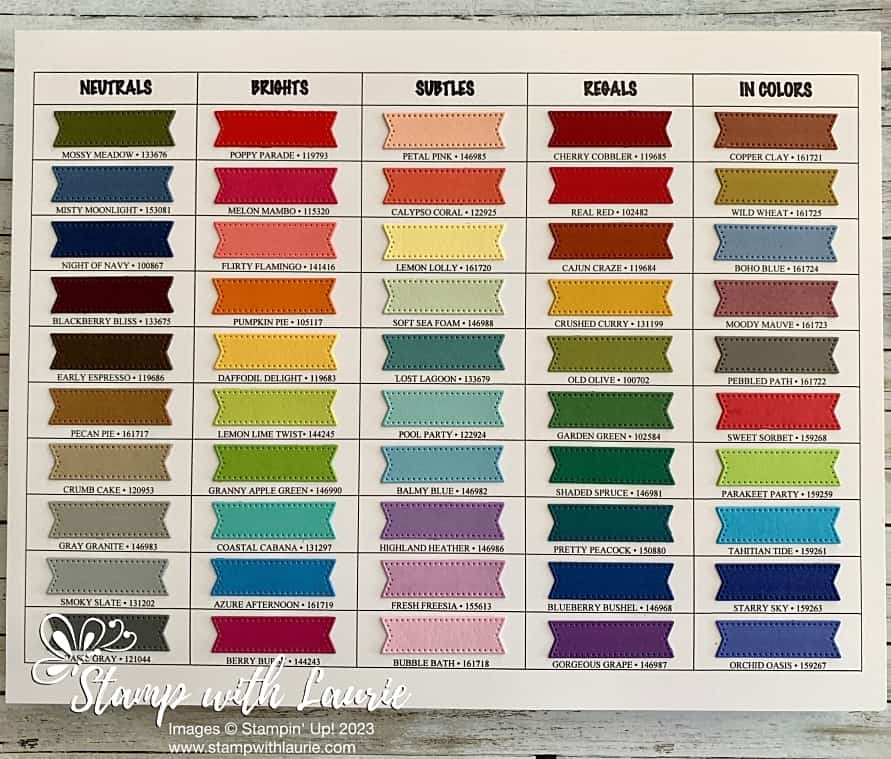
I also created a Color Families Chart listing all the colours including the new ones in a one sheet PDF. For my colour swatches I used the smallest stitched banner from the Stylish Shapes Dies. Please click here to download a copy.

A chart with colour swatches
Stamping’ Up! Color Families

Supplies:

Stamps: Petal Park Bundle (160577), Alphabest Stamp Set (158884)

Dies: Stylish Shapes Dies (159183), Lighting the Way Dies (160496), Give It a Whirl Dies (154336)

Inks: Copper Clay Classic Stampin’ Pad (161647), Wild Wheat Classic Stampin’ Pad (161651), Boho Blue Classic Stampin’ Pad (161650), Moody Mauve Classic Stampin’ Pad (161649), Pebbled Path Classic Stampin’ Pad (161648), Memento Ink (132708)

Paper: Basic White (159276), Copper Clay (161721), Wild Wheat (161725), Boho Blue (161724), Moody Mauve (161723), Pebbled Path (161722)

Accessories: 23-2025 In Color Dots (161620), Boho Blue Textured Ribbon (161631), In Color Stampin’ Write Markers (161695)

For Further Information on My 2023-25 In Color Bookmarks:

2023-2025 In Color Bookmark File

English Version
French Version
German Version

2022-2024 In Color Bookmark File

For my post with further details on how I decorated my 2022-2024 Bookmarks, please click here.

English Version
German Version
French Version

Stampin' Up! 2022-24 In Color Bookmark
Stampin’ Up! 2022-24 In Color Bookmark

For more of my Stampin’ Up!  cards and projects, please click here.

You will find the items listed above in my online store.

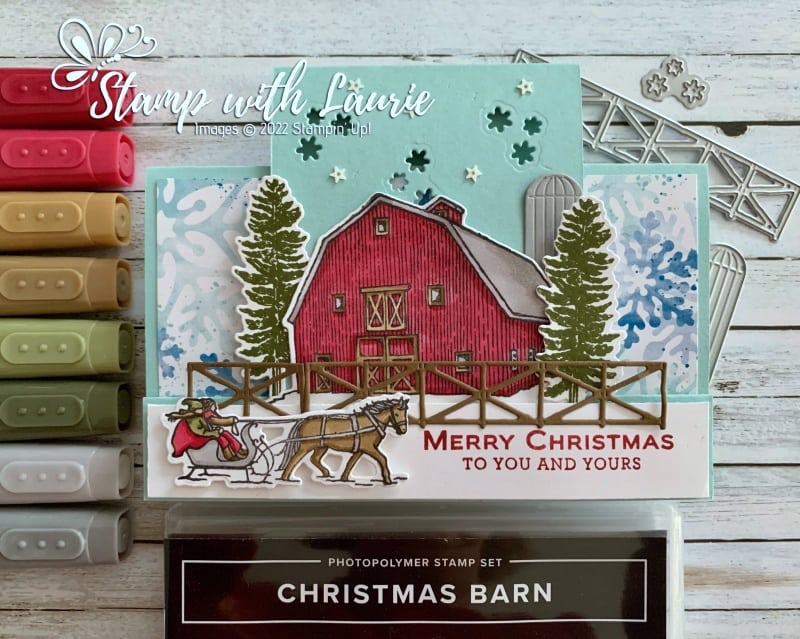
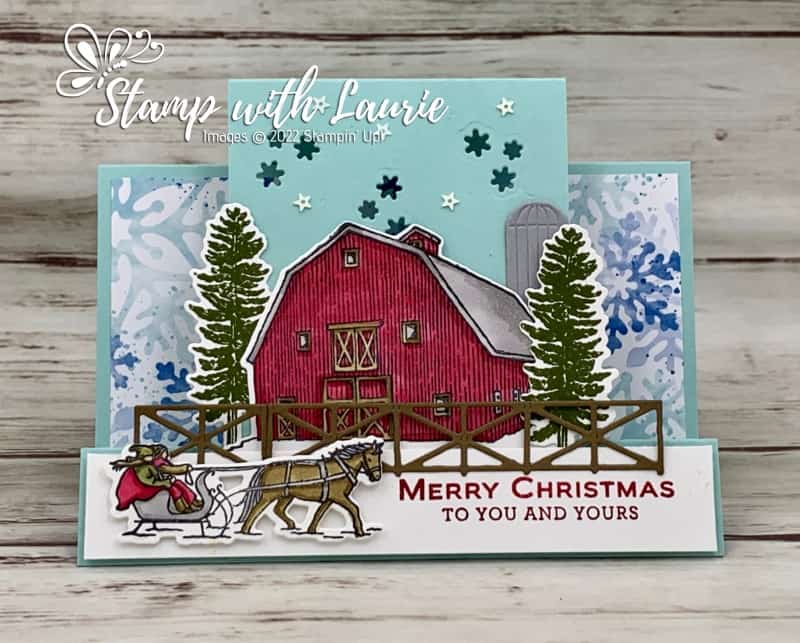
My Wintery Christmas Barn

Christmas Card with a Horse Sled infant of a Barn
My Wintery Christmas Barn

Hello Crafty Friends! Laurie here again! I am sharing My Wintery Christmas Barn using the Christmas Barn Bundle by Stampin’ Up! which includes the Christmas Barn Stamp Set and the Barn Dies.

The Details of My Card

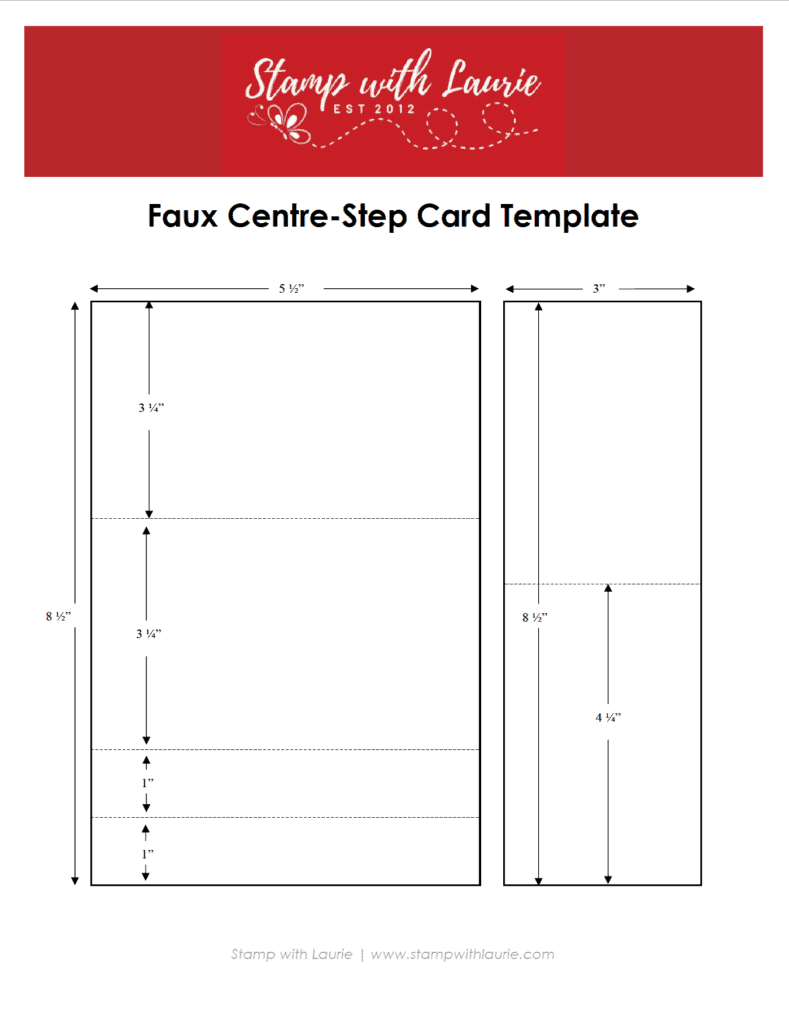
For my card, I decided to make a faux centre-step card to allow enough room for the barn to fit on the centre panel. I created my faux centre-step card using my template with all my measurements that I have included at the end of this post. Some die cut snowflake were added at the top of the centre panel to create some interest before adhering it to the card base. You could add DSP as another option.

Side View of Card
Side View Of Faux Centre-Panel Card

My Stampin’ Blends were used to colour the elements to create my winter wonderland scene. I have included some links to past colouring tutorials using Stampin’ Blends at the end of this post.

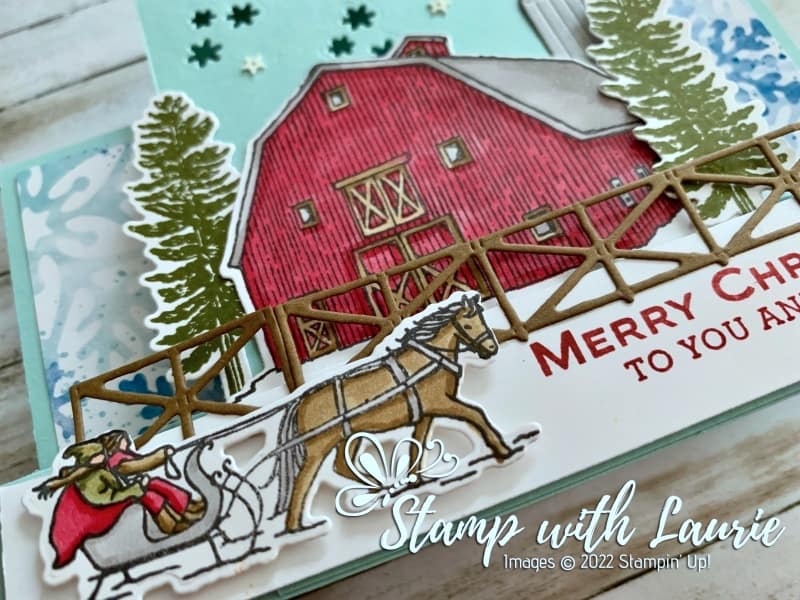
Once I die cut them out, I stamped the sentiment in Cherry Cobbler on the Basic White strip on the right side to allow room for the sled. I popped this piece up so that I could tuck in the barn and trees behind it. Before adding the sled, I trimmed the fence to fit and glued it in place.

Close Up of Barn on Card
Close Up of Barn

I thought the Storybook Gnomes Designer Series Paper was perfect with its large snowflakes to add to my winter wonderland theme and you can see it through the die cut snowflakes on the centre panel! All the embellishments needed was to add the Sparkle & Shine Sequins to create a flurry of more snowflakes!

Supplies:

Stamps/Bundles/Dies: Christmas Barn Bundle (159749)

Inks: Cherry Cobbler Classic Stampin’ Pad (147083), Mossy Meadow Classic Stampin’ Pad (147111), Tuxedo Black Memento Ink Pad (132708)

Paper: Basic White (159276), Pool Party (122924), Soft Suede (115318), Smoky Slate (131202), Storybook Gnomes Designer Series Paper (159615)

Accessories: Cherry Cobbler Stampin’ Blends Combo Pack (154880), Mossy Meadow Stampin’ Blends Combo Pack (154890), Soft Suede Stampin’ Blends Combo Pack (154906), Smoky Slate Stampin’ Blends Combo Pack (154904), Sparkle & Shine Sequins (158137), Bone Folder (102300), Stampin’ Dimensionals (104430), Stampin’ Seal (152813), Mini Glue Dots (103683)

My Wintery Christmas Barn Card Standing Up

Measurements: 

  • Pool Party: (2 pieces)
    • 8 ½” x 5 ½” cut/scored according to template below
    • 8 ½” x 3” cut/scored according to template below
  • Basic White: (5 pieces)
    • Sentiment: 7/8” 5-3/8”
    • Barn: 3 ½” x 2 ¼”
    • Trees: 2 ½” x 1” (2 pieces)
    • Sled: 2 ½” x 1”
  • Soft Suede:
    • Scraps
  • Storybook Gnomes Designer Series Paper:
    • 3” x 5 ¼”

More Information on My Wintery Christmas Barn:

Downloadable Faux Centre-Step Template

To download a PDF of the Faux Centre-Step Template, please click here or on the picture.

Downloadable Faux Centre-Step Template

How to Use Stampin’ Blends
https://stampwithlaurie.com/wp-content/uploads/2020/08/Stampin-Up-Blends-2020.pdf

Part 1Whiskey Business Card using Blending Different Colours Technique
Video Tutorial: Blending Different Colours Together

Part 2Country Harvest Card using Light to Dark Technique
Video Tutorial: Light to Dark/Dark to Light Colouring

Part 3Beautiful Poppy Birthday Card using Smooth Colouring Technique
Video Tutorial: Smooth Colouring

Part 4Let’s Gather Together Card using Tip to Tip Blending Technique
Video Tutorial: Tip to Tip Colouring

Part 5So Grateful Cardinal Card using Flicking Colouring Technique
Video Tutorial: Flicking Colouring

Part 6Let’s Celebrate You Card using Flicking of Different Colours Technique
Video Tutorial: Flicking of Different Colours Technique

No-Lines Technique CardsMy Cardinal Anniversary Card and My Cardinal Card

How to Create a Scene: https://youtu.be/6w4fkxgA9rg

For more of my Stampin’ Blends cards, please click here.

To view my other Centre-Step cards, please click here.

For more of my Stampin’ Up! cards, please click here.

You will find the items listed above in my online store.
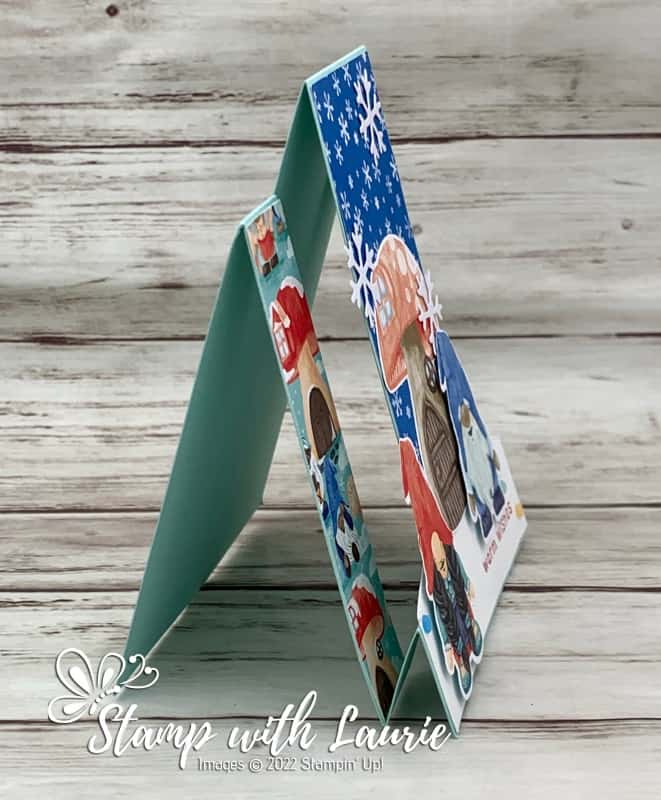
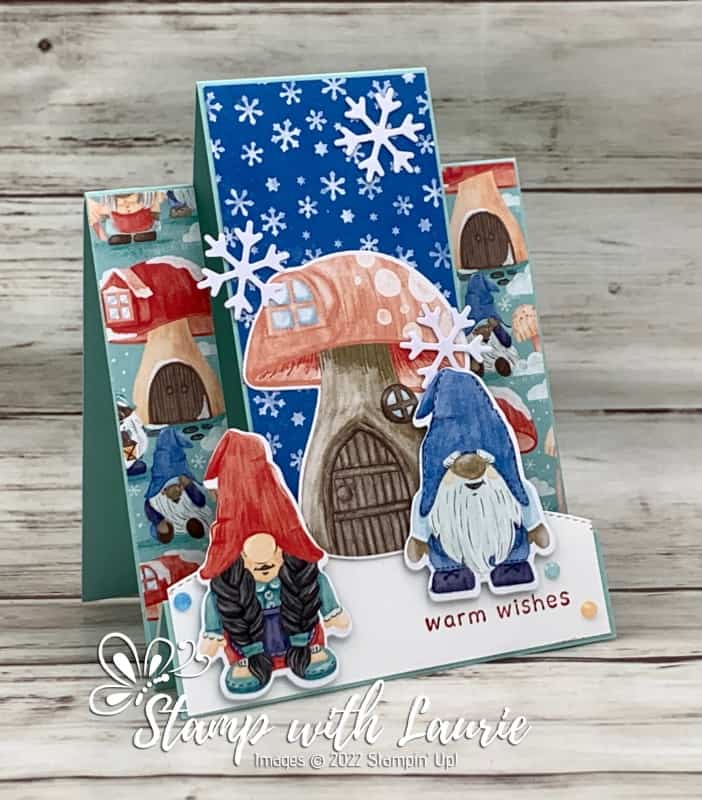
My Gnomeo Centre-Step Card

Card with Gnomes on it
My Gnomeo Centre-Step Card

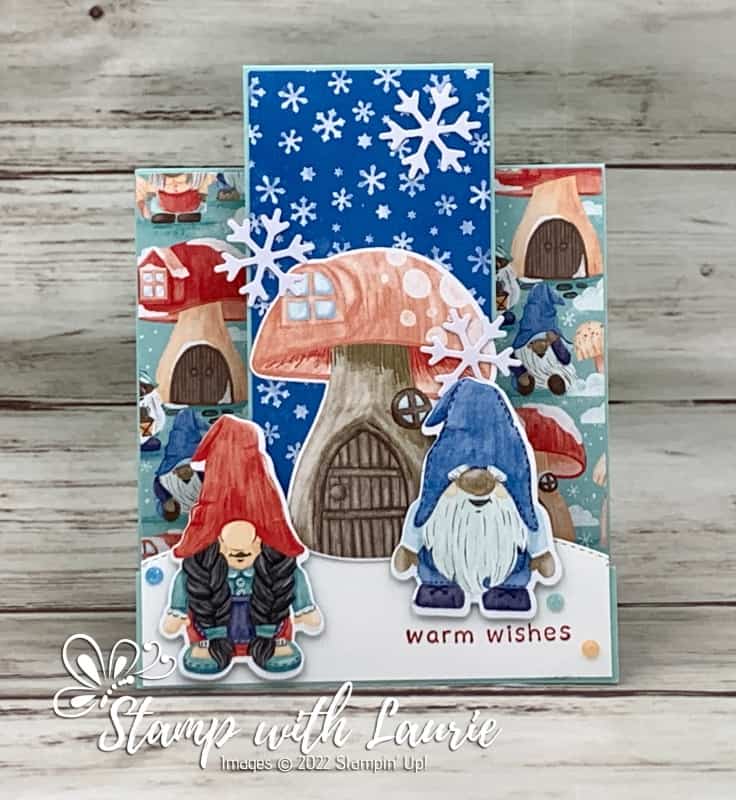
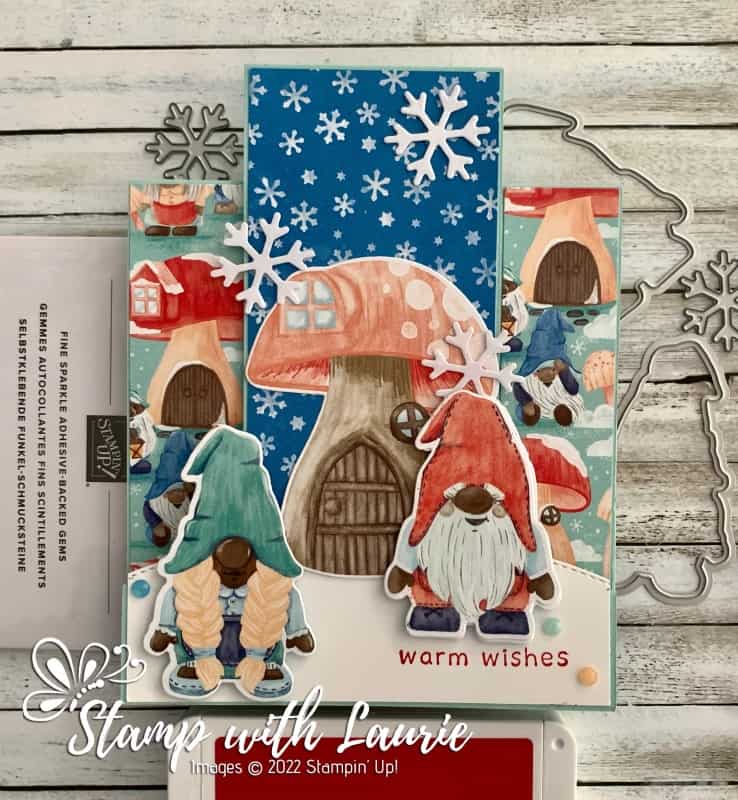
Hello Crafty Friends! Laurie here again! I am sharing My Gnomeo Centre-Step Card using the Kindest Gnomes Bundle and the matching Storybook Gnomes 12″ x 12″ Designer Series Paper by Stampin’ Up! The Kindest Gnomes Bundle includes the Kindest Gnomes Stamp Set and the Gnomes Dies.

The Details of My Card

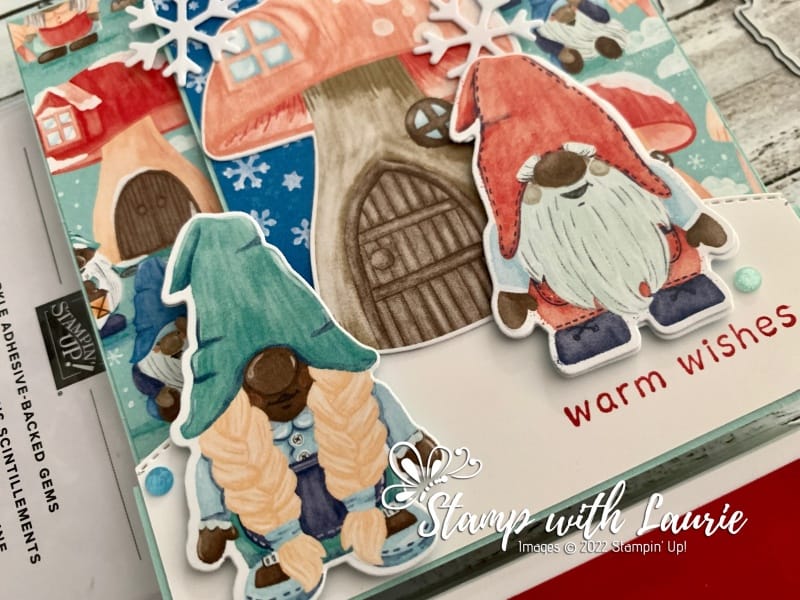
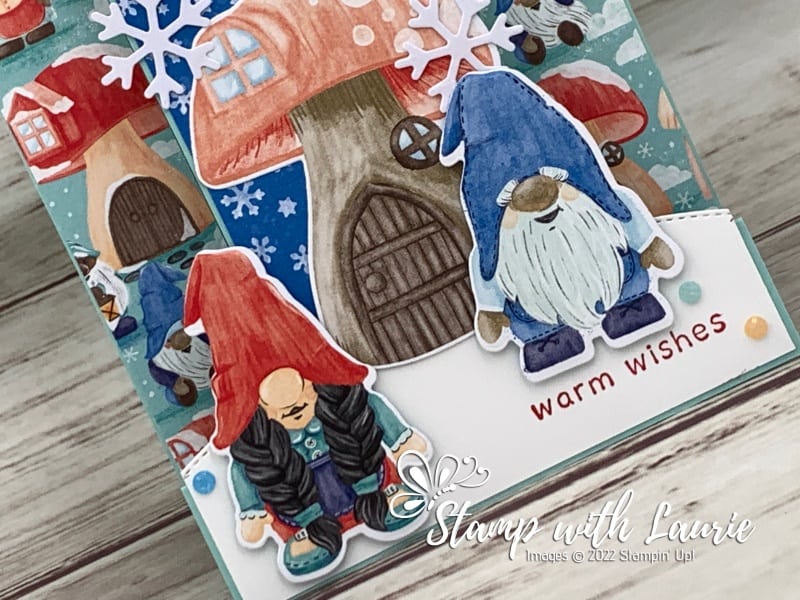
For my card, I decided to make a centre-step card to allow me to create a scene with the DSP. Almost everything was using the DSP. I love how the Gnomes Dies cut out some of the characters and the mushroom house on the DSP! I also love how multicultural the gnomes are with different skin tones.

Side View of Centre-Step Card

Tip: Don’t throw away any leftover sheets of the Wonderful Snowflakes once you have used all the snowflakes. I used a small die to cut the snowflakes that I used on my card. This gives the snowflakes an iridescent look.

For the snowbank, I used the rounded die from the Basic Borders Dies. The only stamping was the sentiment in Real Red on the snowbank making this a fun and easy card!

For embellishments, I used a scattering of Fine Sparkle Adhesive-Backed Gems on the snowbank around the characters. 

Centre-Step Card
Centre-Step Card

Supplies:

Stamps/Bundles/Dies: Kindest Gnomes Bundle (159626), Basic Borders Dies (155558), Frosted Flurry Dies (159811)

Inks: Real Red Classic Stampin’ Pad (147084)

Paper: Basic White (159276), Pool Party (122924), Storybook Gnomes Designer Series Paper (159615)

Accessories: Wonderful Snowflakes (156340), Fine Sparkle Adhesive-Backed Gems (159967), Bone Folder (102300), Stampin’ Dimensionals (104430), Stampin’ Seal (152813), Mini Glue Dots (103683)

Close Up of Gnomes
Close Up of Gnomes

Measurements: 

  • Pool Party: 
    • 11” x 4 ¼” cut/scored according to template below
  • Basic White:
    • 1 ½” x 4 1/8”
  • Storybook Gnomes Designer Series Paper:
    • 7/8” x 4 3/8” (2 pieces)
    • 2 1/8” x 4 3/8” (snowflakes)
    • Die cut 2 gnomes and Mushroom House
Close Up of Different Gnomes from the DSP

More Information on My Gnomeo Centre-Step Card:

Downloadable Centre-Step Template
To download a PDF of the Centre-Step Template, please click here or on the picture.

Horizontal Centre-Step Card
Horizontal Centre-Step Card Template

For more of my Stampin’ Up! cards, please click here.

To view my other Centre-Step cards, please click here.

For more of my cards, please join my Facebook Group or my Instagram.

You will find the items listed above in my online store.

Same Card with Different Gnomes

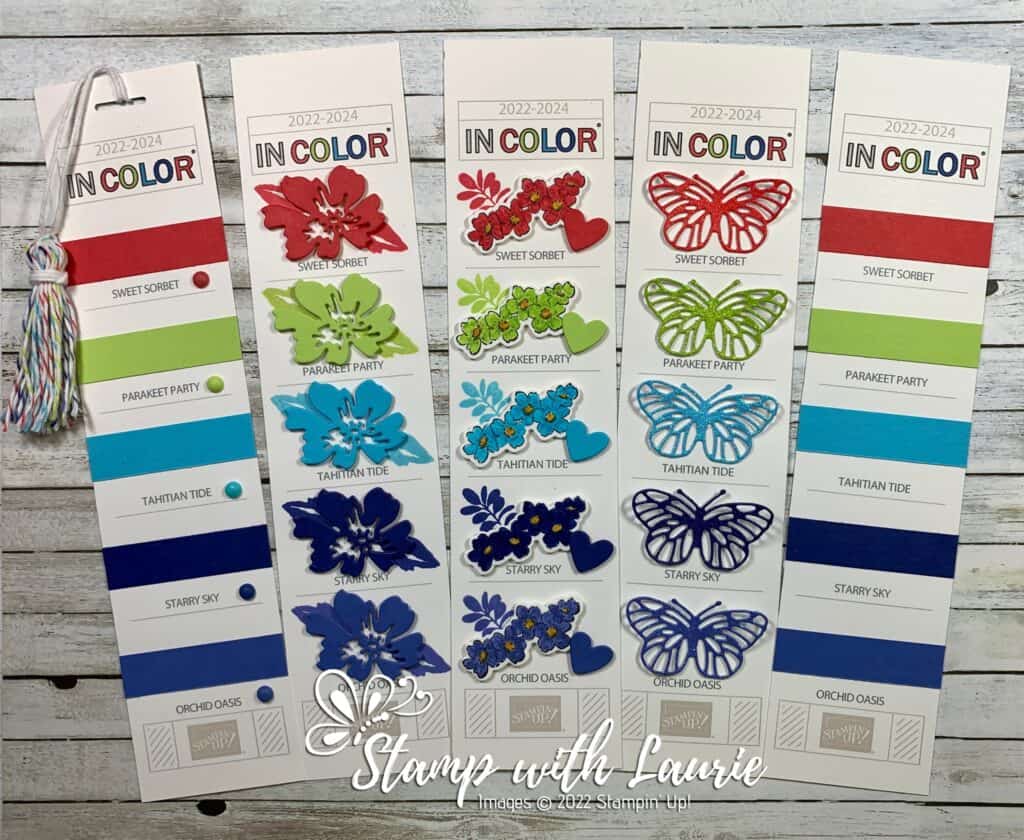
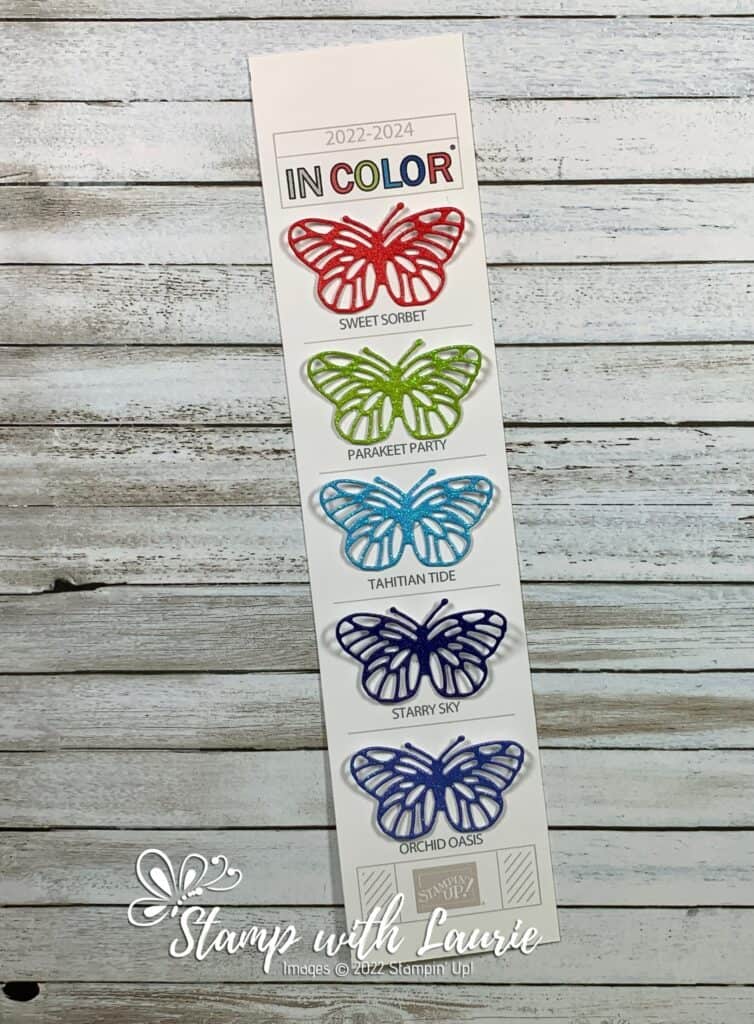
2022-24 In Color Bookmarks

Stampin' Up! 2022-24 In Color Bookmark
Stampin’ Up! 2022-24 In Color Bookmark

Every year I am asked to create a Stampin’ Up! In Color bookmark file. So, I am sharing my 2022-24 In Color Bookmarks using my Stampin’ Up! 2022-24 In Color Bookmark file that I created for this purpose. When you download the PDF files print them with the fit to page setting in the Adobe Acrobat on Basic White. All files are at the end of this post including a German and French version, as well as the files for the 2021-2023 In Colors from last year.

Inks and Cardstock Bookmark

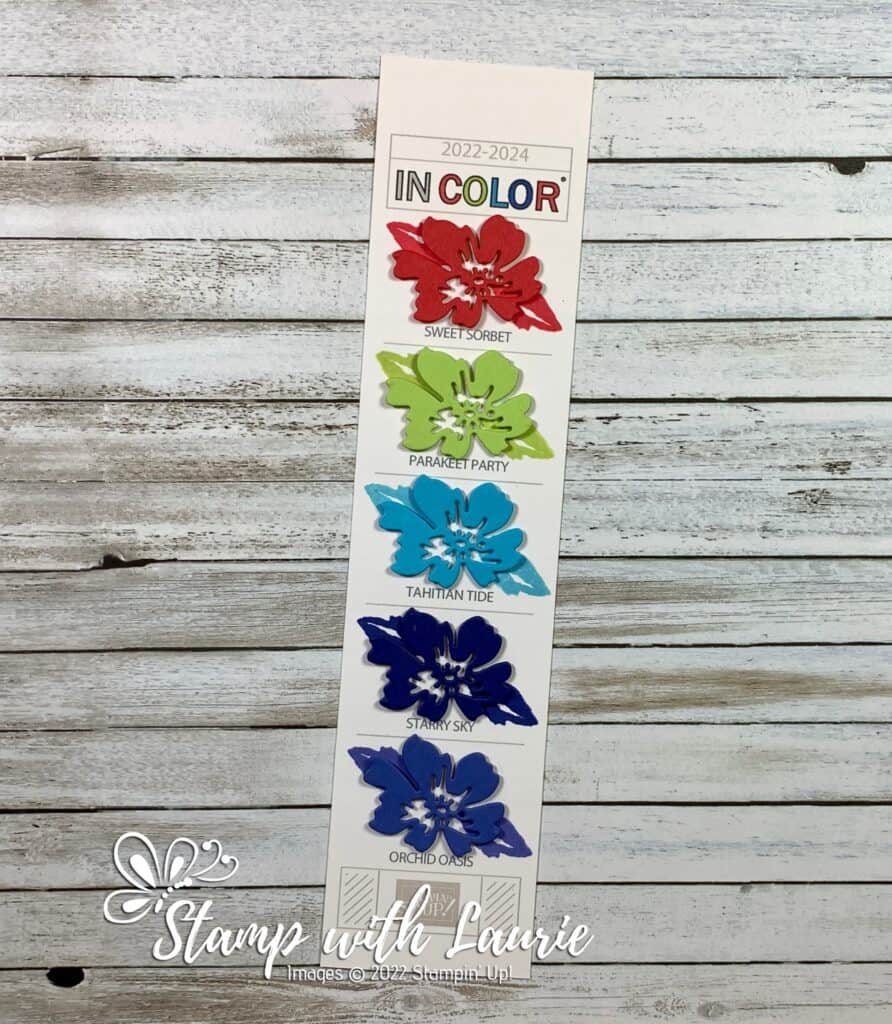
For this bookmark, I kept it simple with just ink and cardstock. First, I stamped one of the leaves from the Hand-Penned Petals Stamp Set and then I used a die cut flower from the Penned Flower Dies.

Inks and Cardstock Bookmark

2022-2024 In Color Stampin’ Write Bookmark

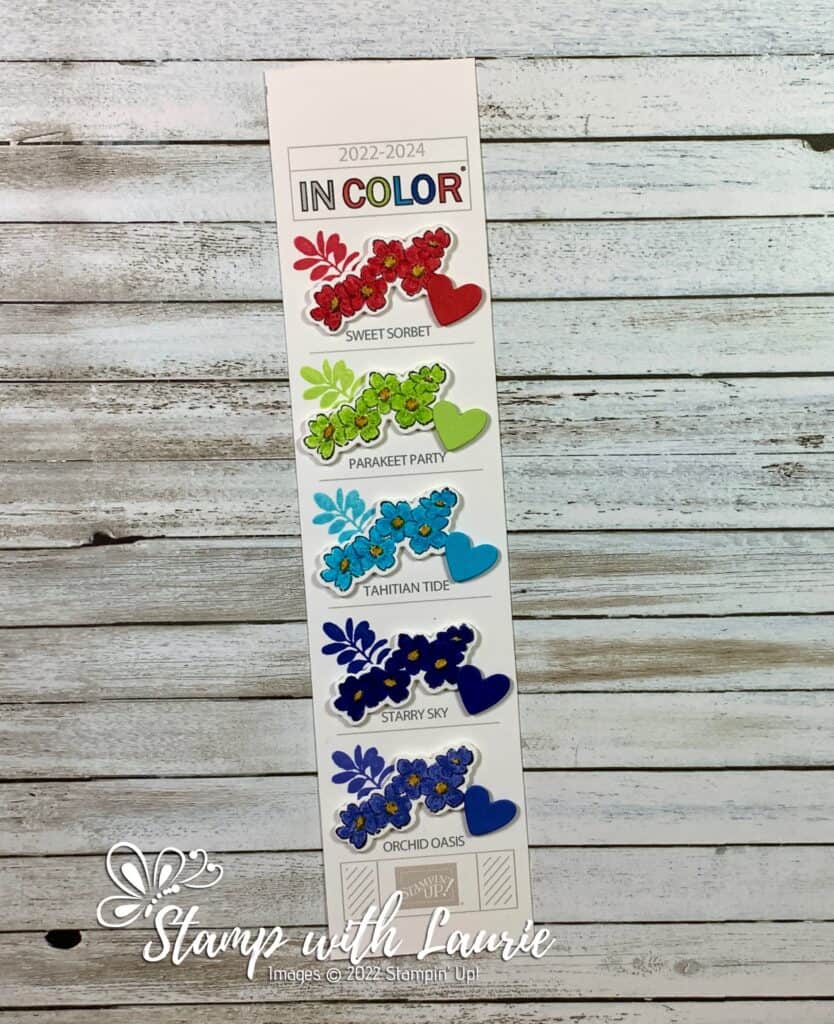
For my next bookmark, I stamped in Memento Ink the cluster of flowers from the Honeybee Home Stamp Set and coloured them in with the Stampin’ Write Markers. Next, I stamped the leaf from Uniquely Artistic Stamp Set. Finally, I die cut the heart with the Teacup Dies.

2022-24 In Color Stampin' Write Markers Bookmark
2022-24 In Color Stampin’ Write Markers Bookmark

Tassel Bookmark

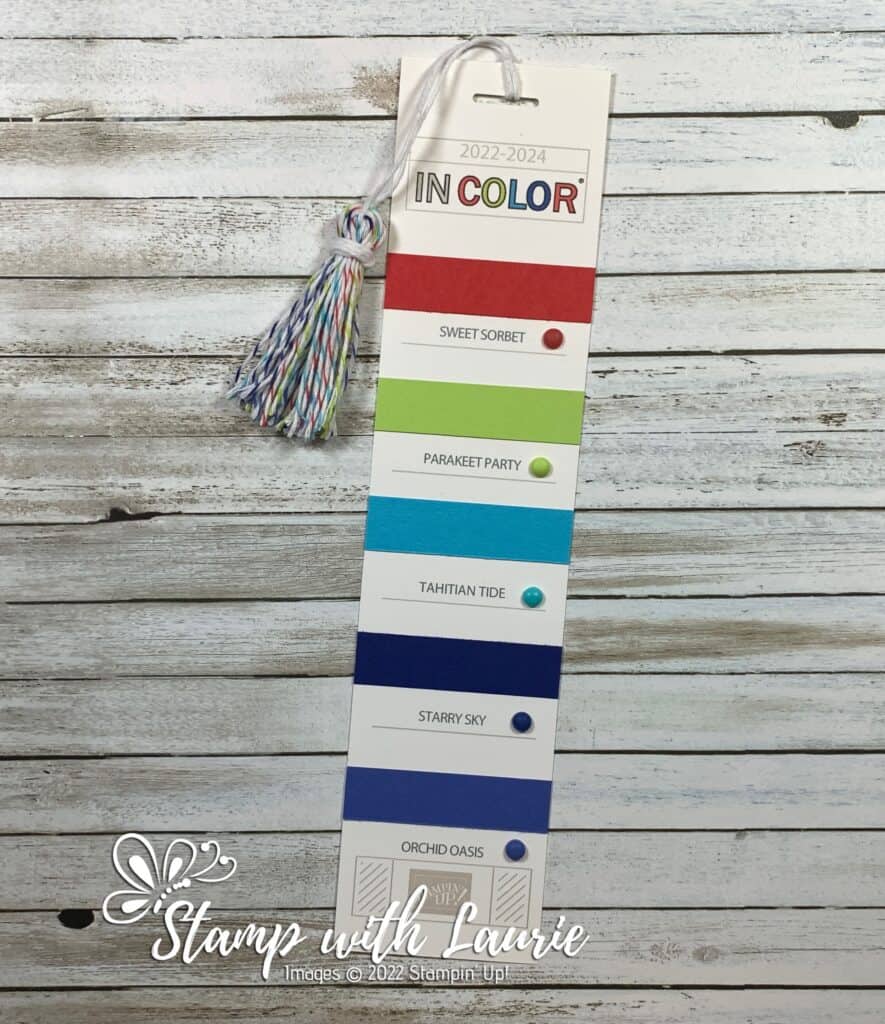
For my next bookmark, I thought it would be fun to create a tassel with the 2022-2024 In Color Baker’s Twine. I added 2022-2024 In Color Matte Decorative Dots to the corresponding colours.

Tassel Bookmark
Tassel Bookmark

Glimmer Bookmark

For this bookmark, I wanted the gorgeous 2022-2024 In Color Glimmer Paper to be front and centre. A simple, but wow bookmark!

Glimmer Bookmark
Glimmer Bookmark

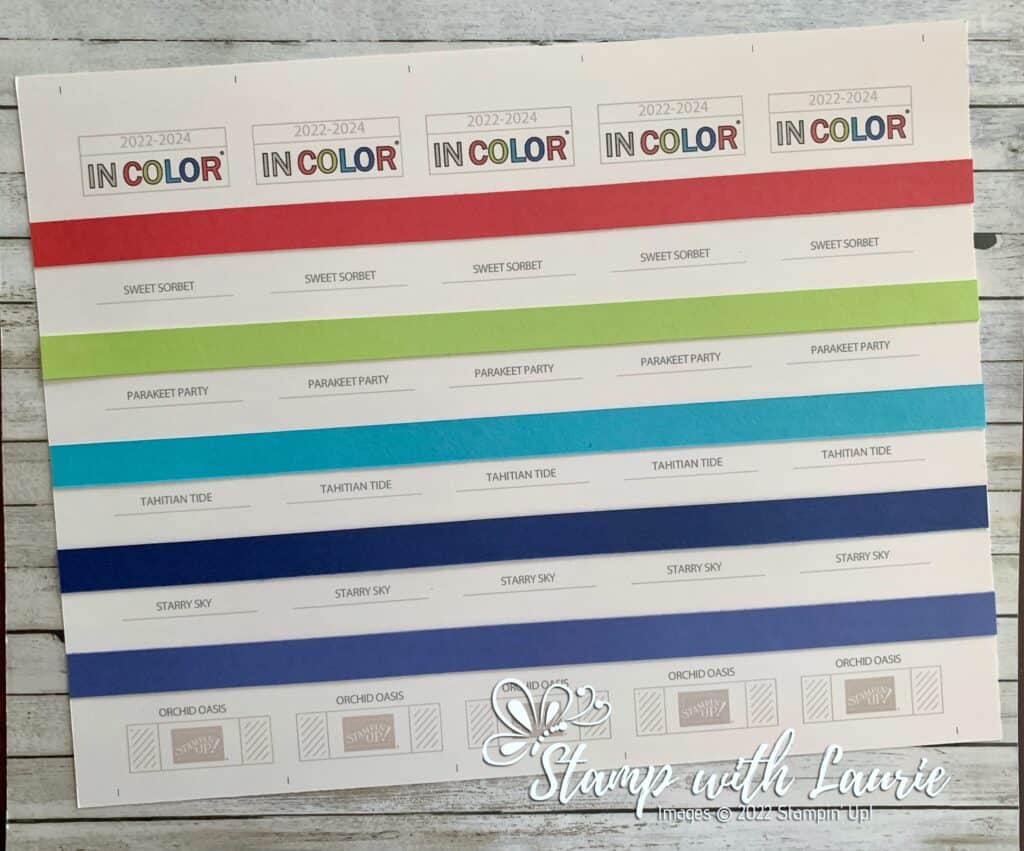
Easy Card Stock Bookmarks

For my last set of bookmarks, I cut a ½” x 11” strip of card stock for each colour. I glue them directly to the print out before cropping the bookmarks down. I them cut them apart creating 5 bookmarks. Fast and easy!

Easy Card Stock Bookmarks

Supplies:

Stamps: Hand-Penned Petals (155070), Honeybee Home Bundle (157952), Uniquely Artistic (158935)

Dies: Brilliant Wings Dies (155523), Penned Flowers Dies (155557), Teacup Dies (160186)

Inks: Sweet Sorbet Classic Stampin’ Pad (159216), Parakeet Party Classic Stampin’ Pad (159208), Tahitian Tide Classic Stampin’ Pad (159210), Starry Sky Classic Stampin’ Pad (159212), Orchid Oasis Classic Stampin’ Pad (159214), Memento Ink (132708)

Paper: Basic White (159276), Sweet Sorbet (159268), Parakeet Party (159259), Tahitian Tide (159261), Starry Sky (159263), Orchid Oasis (159267), 2022/2024 In Color Glimmer Paper (159246)

Accessories: 22-2024 In Color Matte Decorative Dots (159186), 2022-24 In Color Baker’s Twine (159195), In Color Stampin’ Write Markers (159219), Baker’s Twine Essentials Pack (155475)

For Further Information on My 2022-24 In Color Bookmarks:

2022-2024 In Color Bookmark File

English Version
German Version
French Version

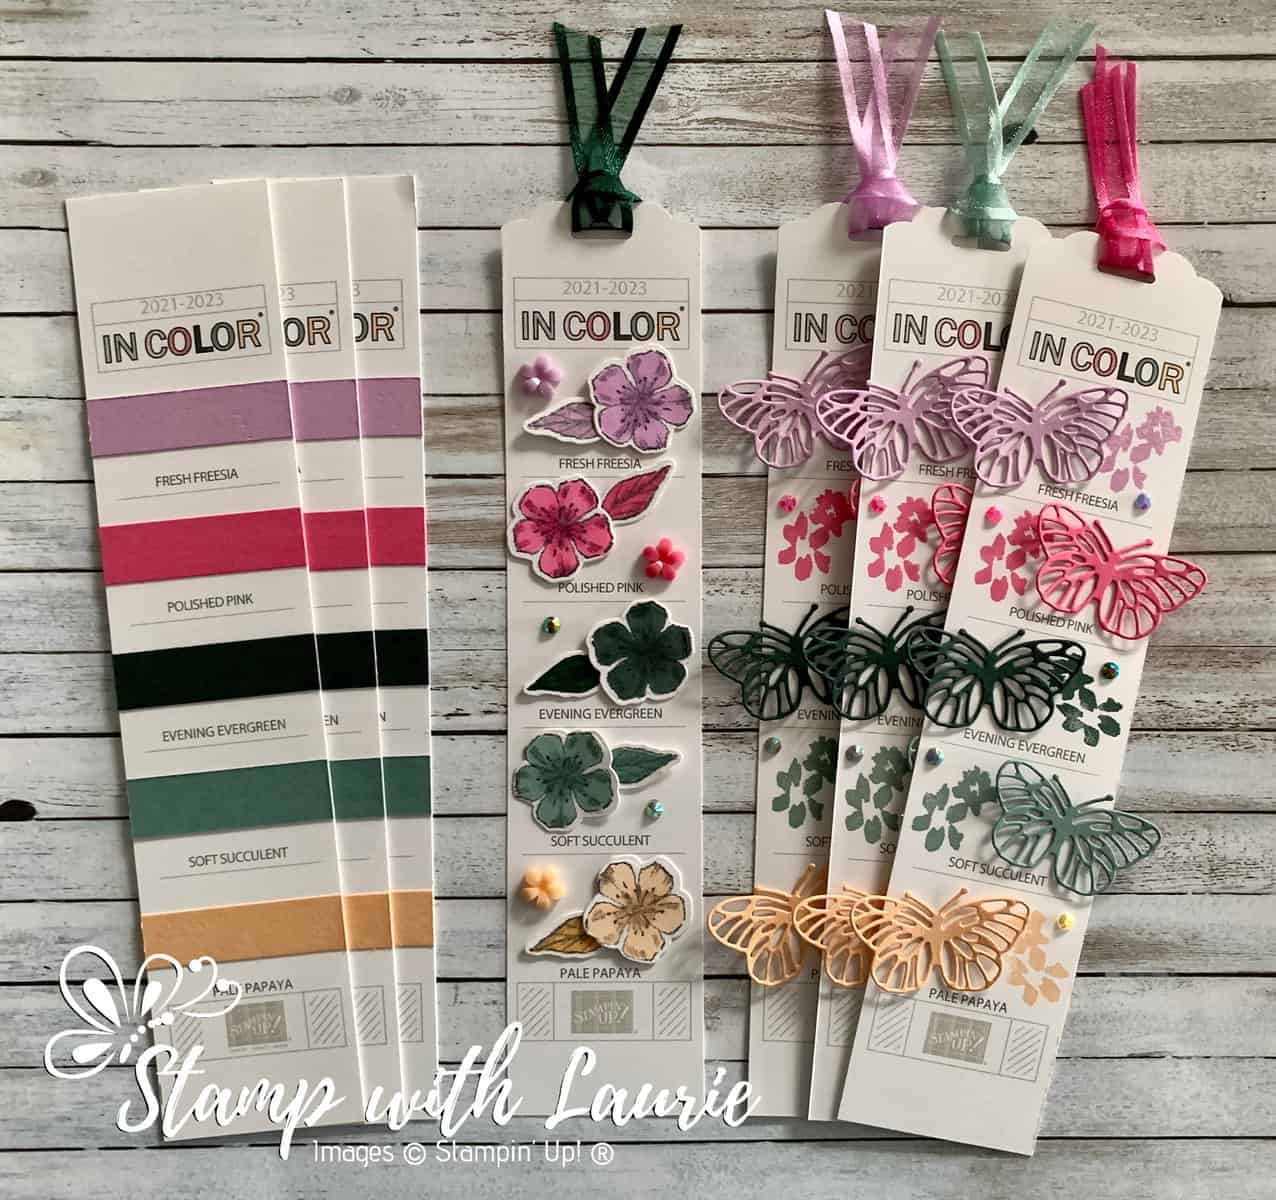
2021-2023 In Color Bookmark File

For my post with further details on how I decorated my 2021-2023 Bookmarks, please click here.

English Version
German Version
French Version

My 2021-2023 In Color Bookmarks

For more of my Stampin’ Up!  cards and projects, please click here.

You will find the items listed above in my online store.

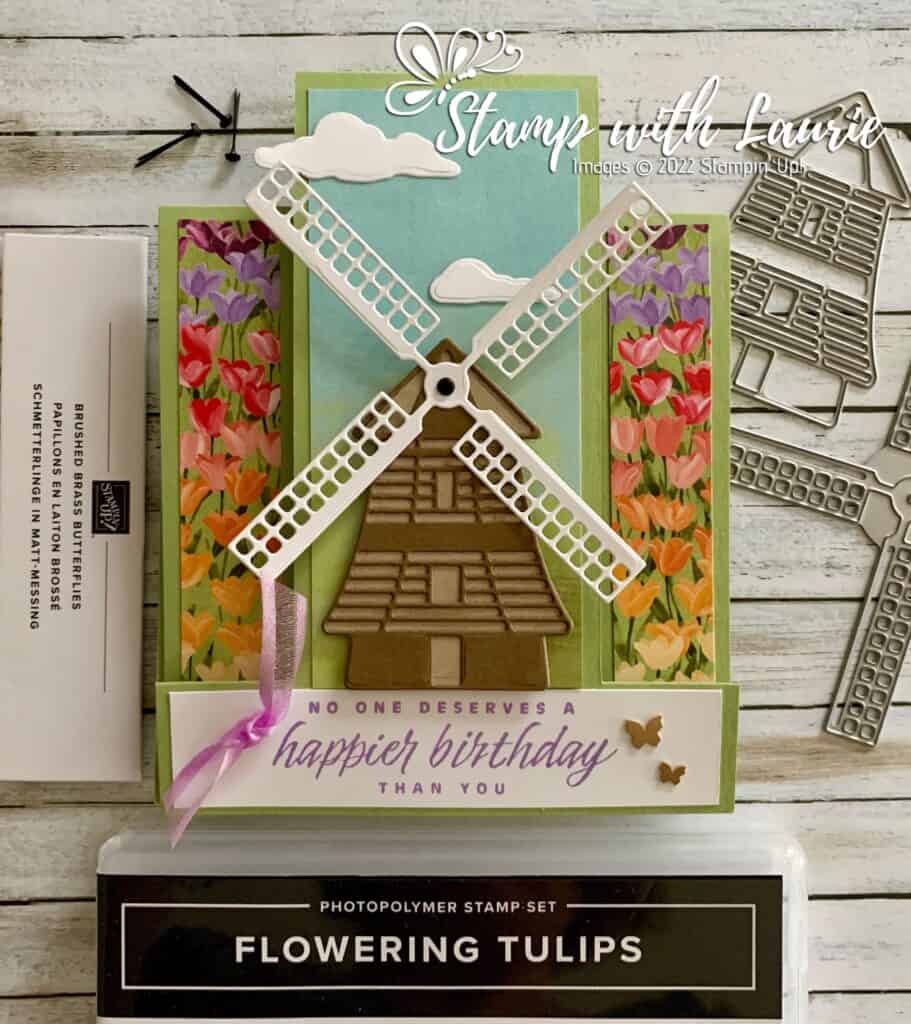
Flowering Fields Birthday Wishes Card

A Card with a Windmill on it
Flowering Fields Birthday Wishes Card

Hello Crafty Friends! Laurie here again! I am sharing my Flowering Fields Birthday Wishes Card using the Flowering Fields Stamp Set and the Windmill Fields Dies by Stampin’ Up!

The Details of My Card

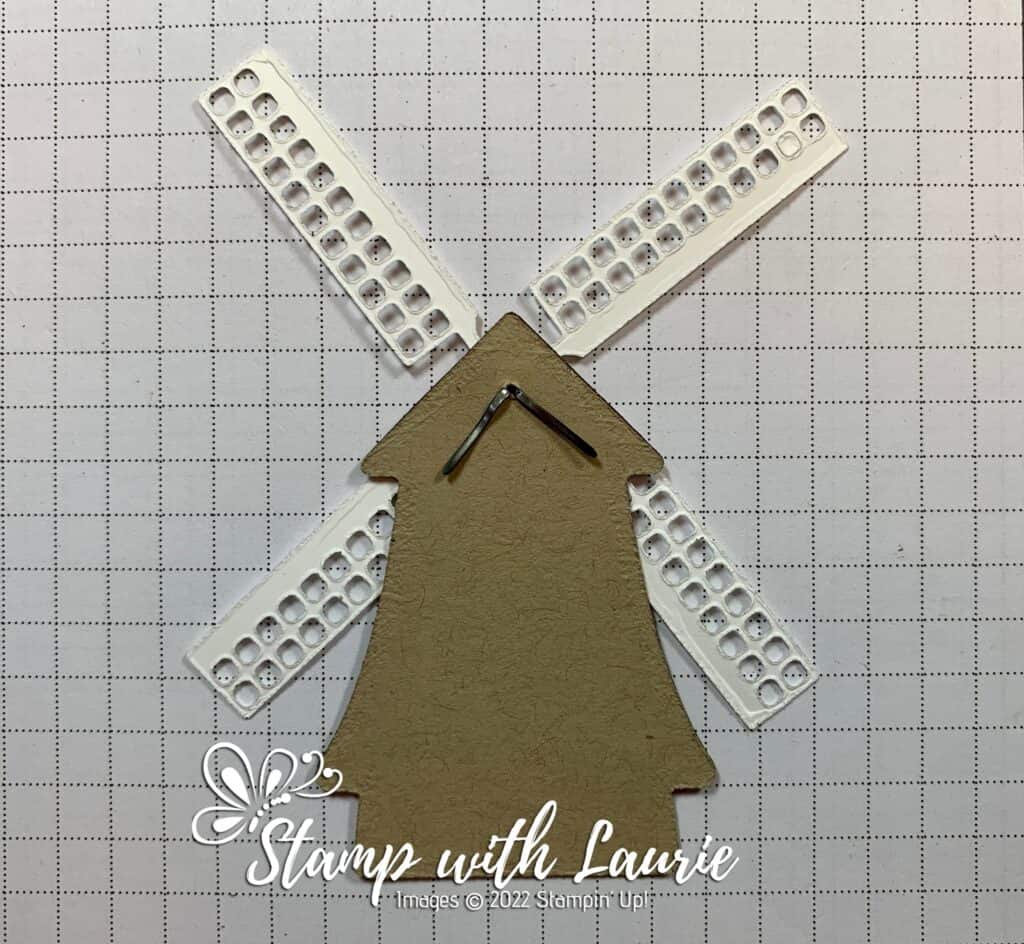
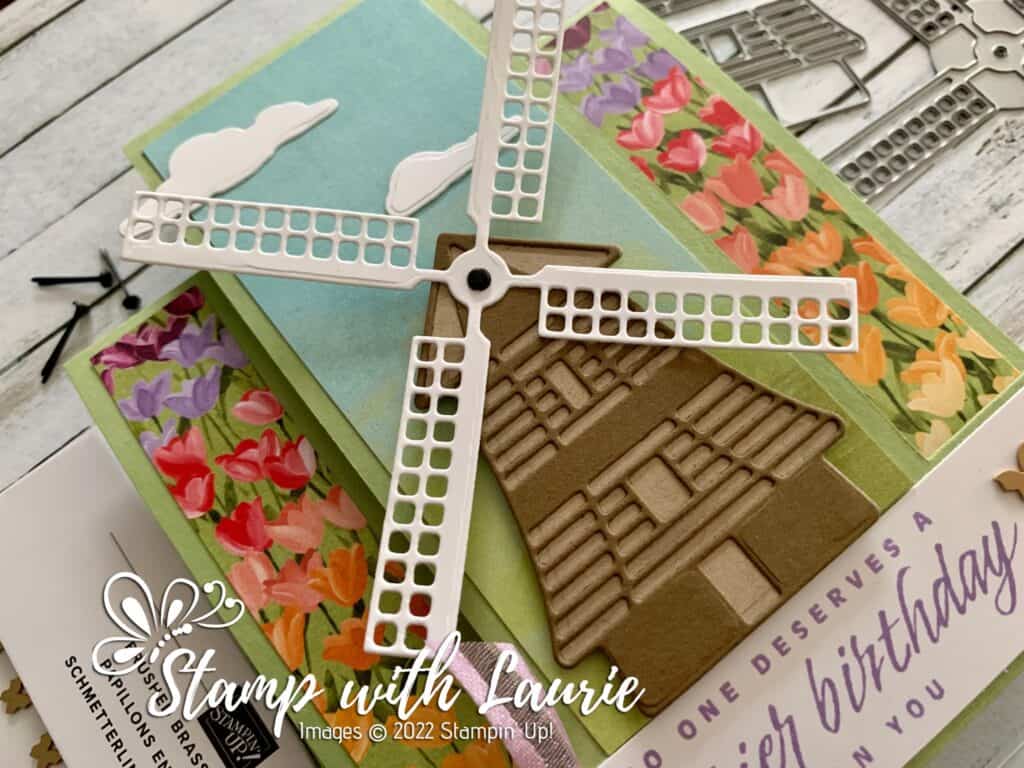
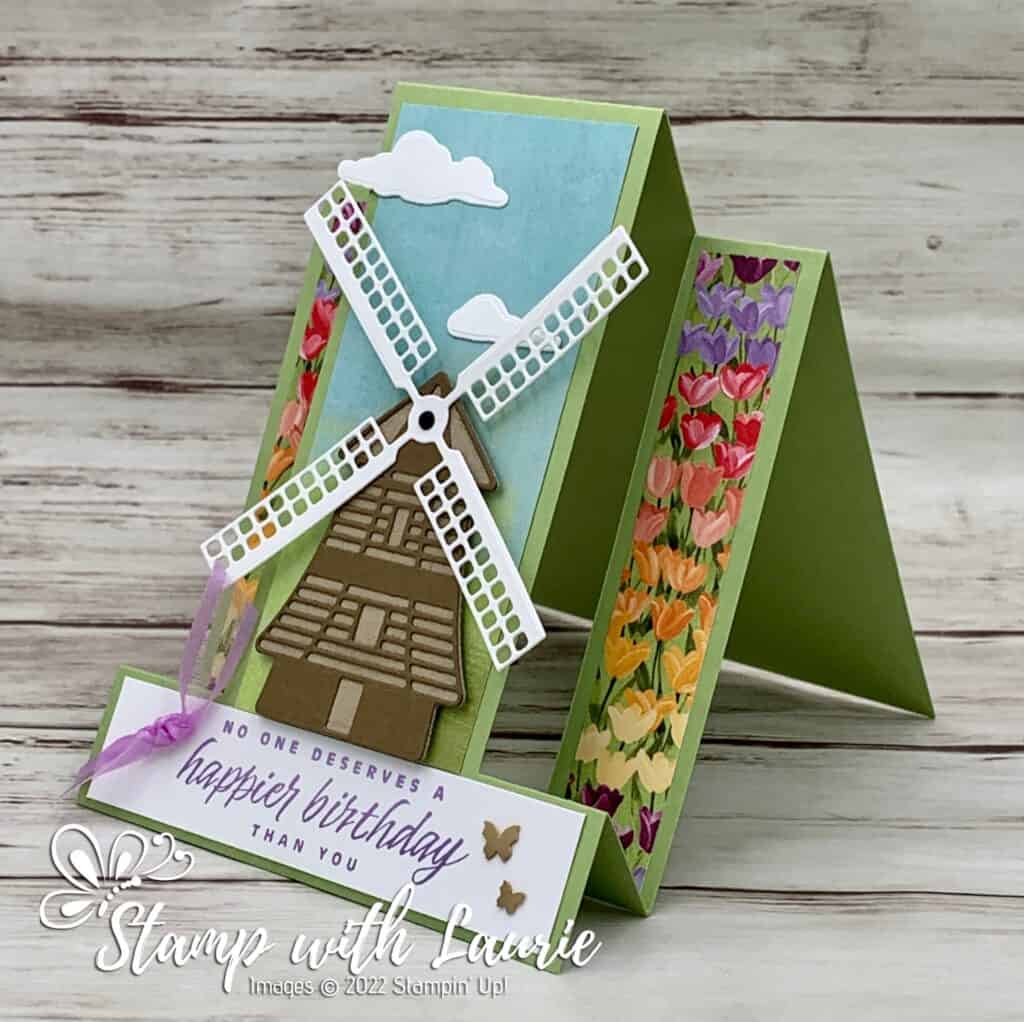
For my card, I thought it would be fun to create a Centre-Step Card, so it looks like the windmill is popping out of the tulip fields. Of course, if you have a windmill, wouldn’t it be fun to make it interactive! So, I added one of the round brads through the blades and into the windmill base.

Tip – to keep the brad from showing from behind the windmill on the card, folded down the arms at angle.

Position of Brads on Back of Windmill

The windmill was popped up with dimensionals to allow the back of the brad to have room. 

I love the beautiful Flowering Fields DSP and used it for the grass/sky piece behind the windmill and the tulip fields! I pulled the colours from the DSP for my sentiment and for the ribbon. A couple of the sweet butterflies balanced out the ribbon on the sentiment.

Supplies:

Stamps/Bundles/Dies: Flowering Tulips Stamp Set (157672), Windmill Fields Dies (157683)

Inks: Highland Heather Classic Stampin’ Pad (147103)

Paper: Pear Pizzazz (131201), Basic White (159276), Crumb Cake (120953), Soft Suede (115318), Flowering Fields 12″ x 12″ Designer Series Paper (157670)

Accessories: Brushed Brass Butterflies (158136), Fresh Freesia Open Weave Ribbon (155615), Round & Square Brads (155570), Bone Folder (102300), Stampin’ Dimensionals (104430), Stampin’ Seal (152813), Mini Glue Dots (103683)

Close of Up the Windmill

Measurements: 

  • Pear Pizzazz: 11” x 4 ¼” (see template)
  • Soft Suede: 2 ½” x 1 7/8”
  • Crumb Cake: 2 ½” x 1 7/8”
  • Basic White: 
    • 4” x 3” (Windmill Blades)
    • 4” x 7/8” (Sentiment)
    • Scraps (Clouds)
  • Flowering Fields Designer Series Paper:
    • 2 pieces: 4 ¼” x ¾”
    • 2” x 4 ½”
Side View of Centre-Step card
Side View of Centre-Step Card

More Information on my Flowering Fields Birthday Wishes Card:

For more of my Stampin’ Up! cards, please click here.

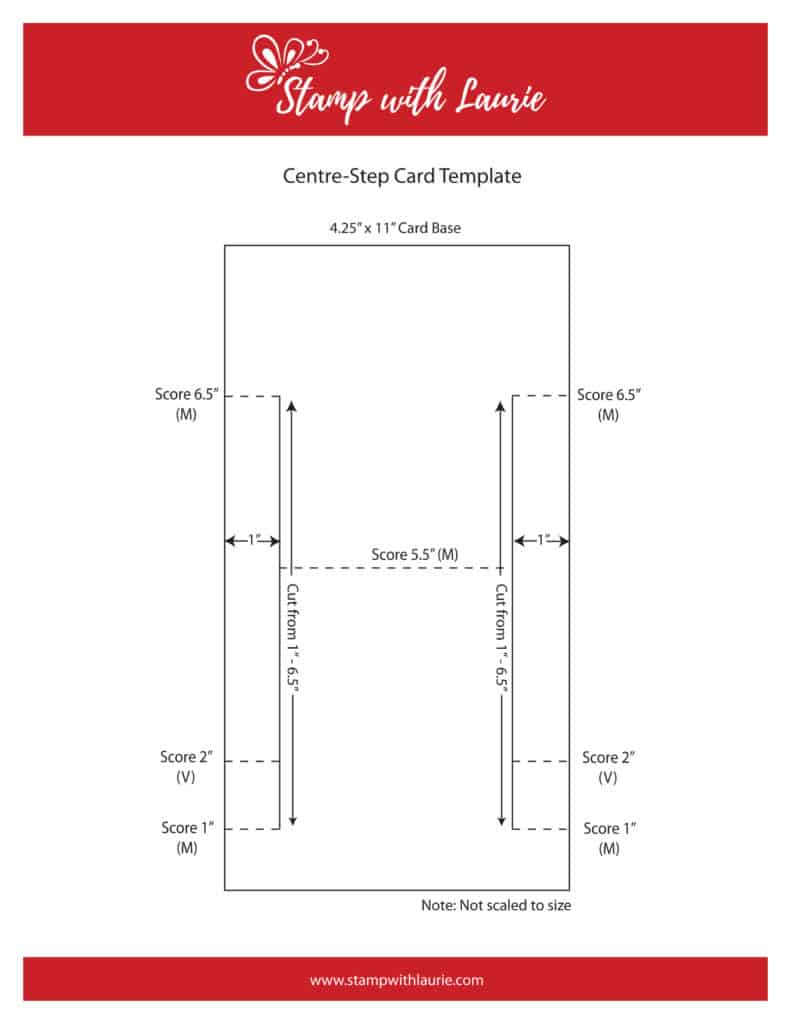
To download a PDF of the Centre-Step Template, please click here or on the picture.

Centre-Step Card Template

For a Stampin’ Up! video on the Flowering Fields Suite, please click here.

You will find the items listed above in my online store.

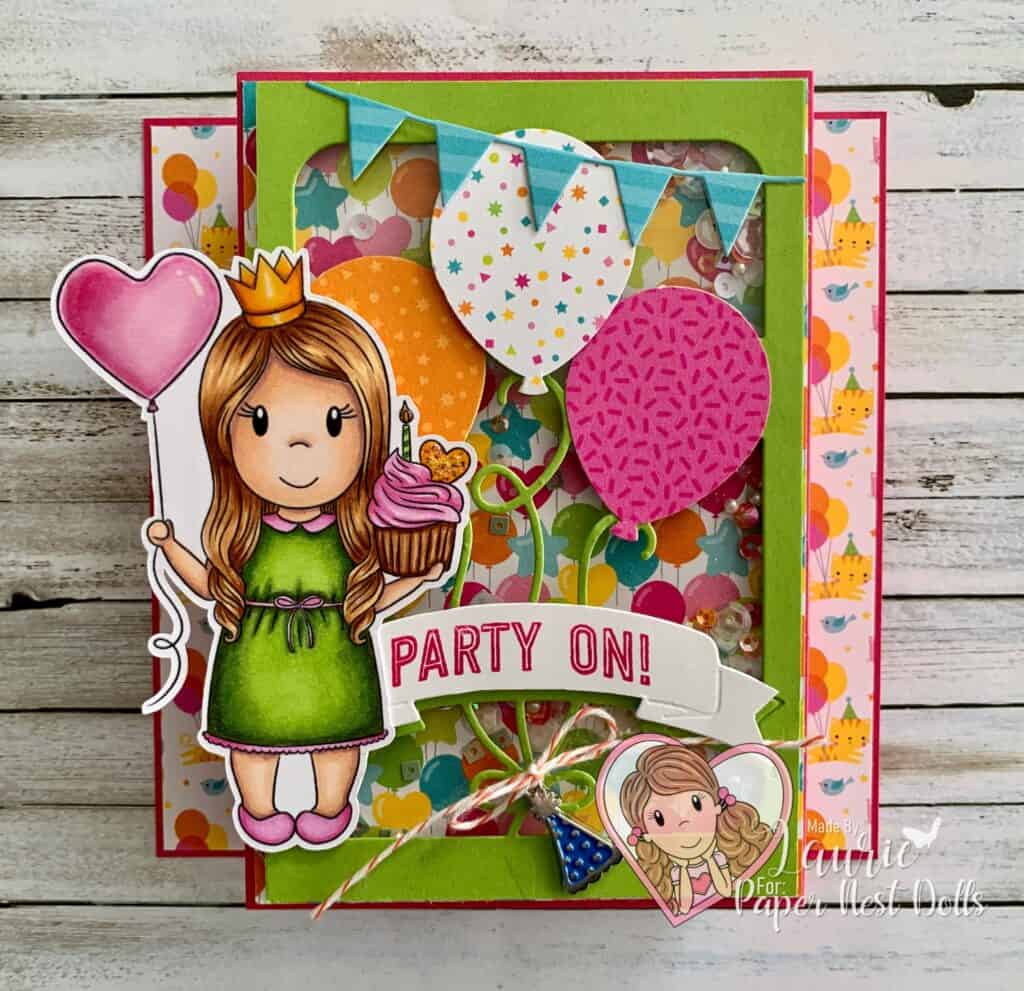
My “Party On!” Card

A Birthday Shaker Card
My Party On Card

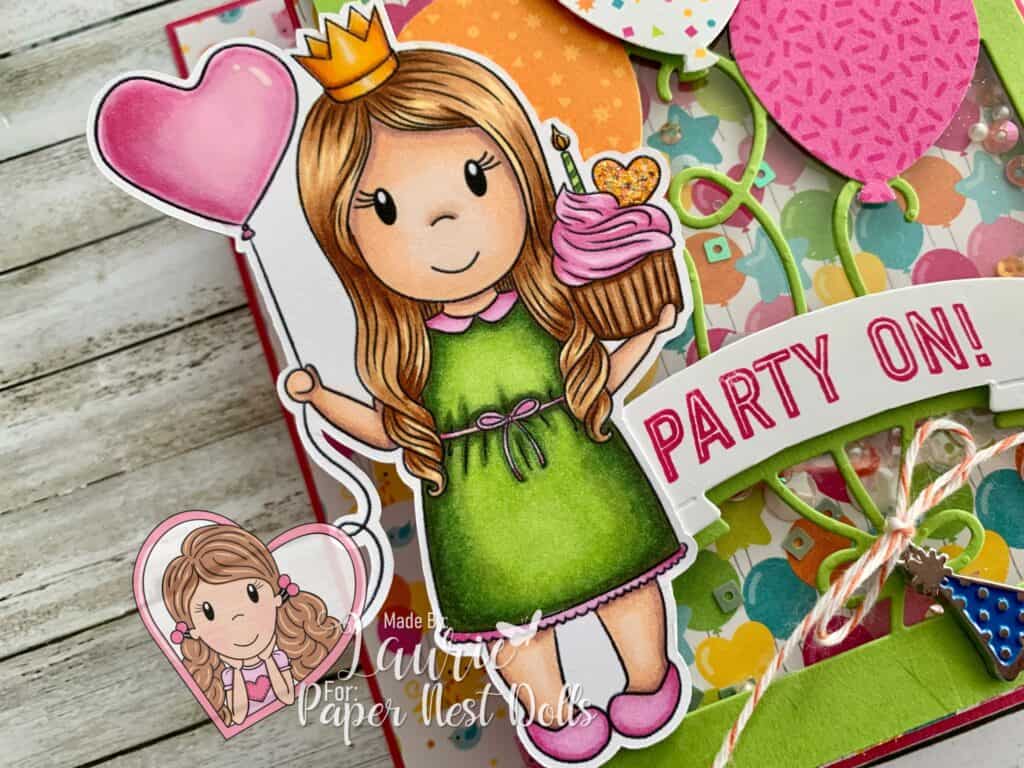
Hello Crafty Friends! It’s Laurie here! I am sharing My “Party On!” Card as my Design Team Inspiration Card using Party Princess Ellie by Paper Nest Dolls.

This past weekend Paper Nest Dolls turned 9 and reached over 6,000 members on their Facebook Group! Congratulations Paper Nest Dolls! Party Princess Ellie was a digital stamp that was given away for free to all attendees, but you can still get her until this Friday, Jan 21, 2022! Here is the link to the post on the PND Inspiration Facebook Page: https://www.facebook.com/photo/?fbid=4758734684247076&set=gm.3166875813548826.

Details of My Card

I am planning to give this card to my niece whose birthday is coming up. So, I coloured Ellie with my Copic markers to match her colouring and the Doodlebug paper. Don’t you just love the kitties with the balloons on the side panels!

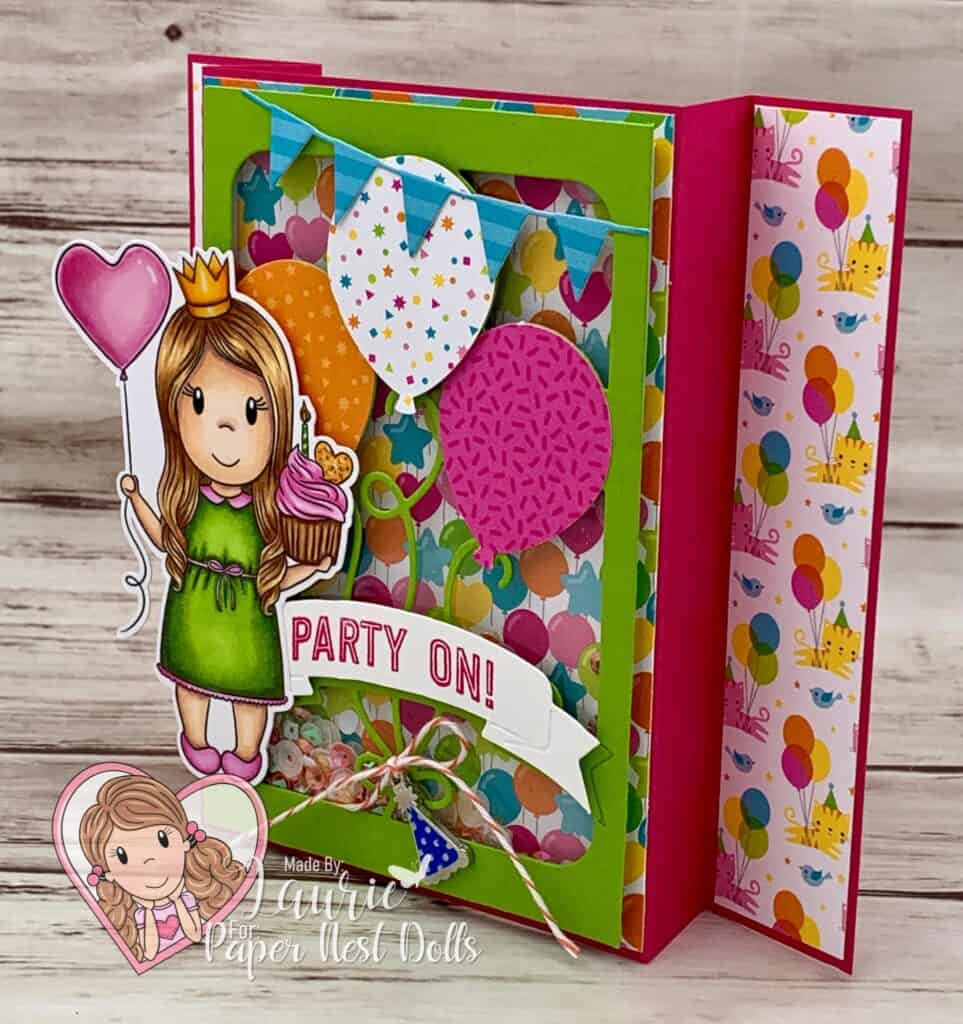
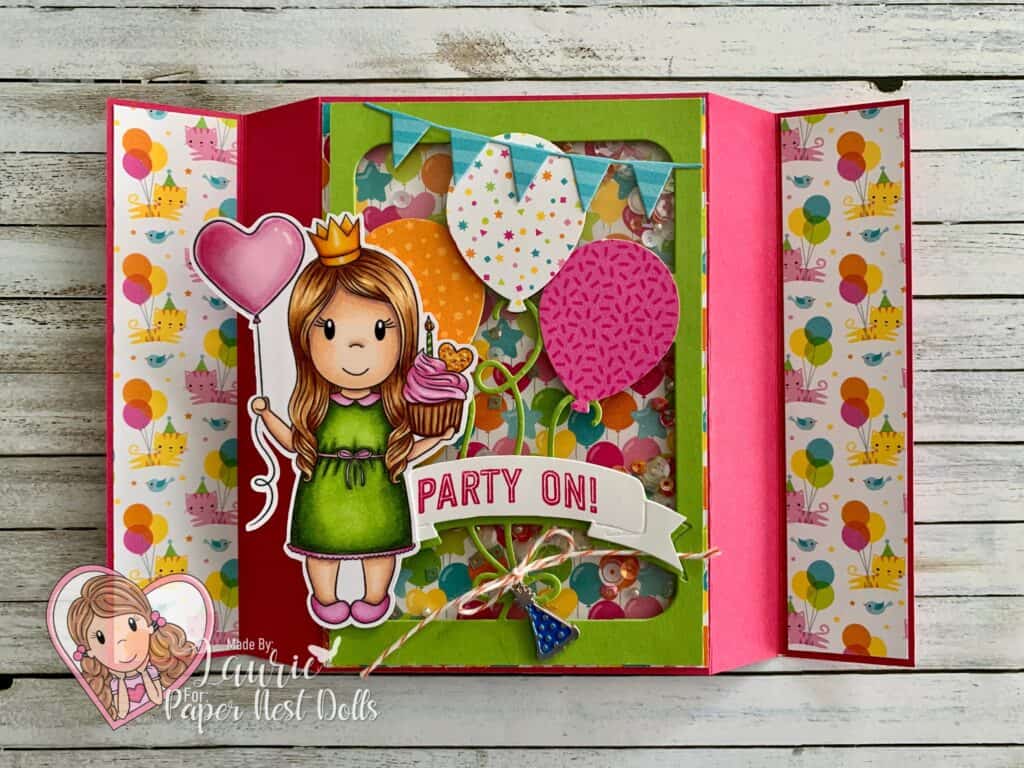
For my card, I decided that I wanted to create a fun fold called a free-standing triple panel shaker card! Say that three time fast! Lol! I also wanted to use some balloon dies that I thought would be perfect for a birthday card and go along with Ellie’s heart balloon. The Balloon dies are to make a pop-up window, but I thought a shaker card would be a fun interactive element instead!

Side View of Card
Side View of Card

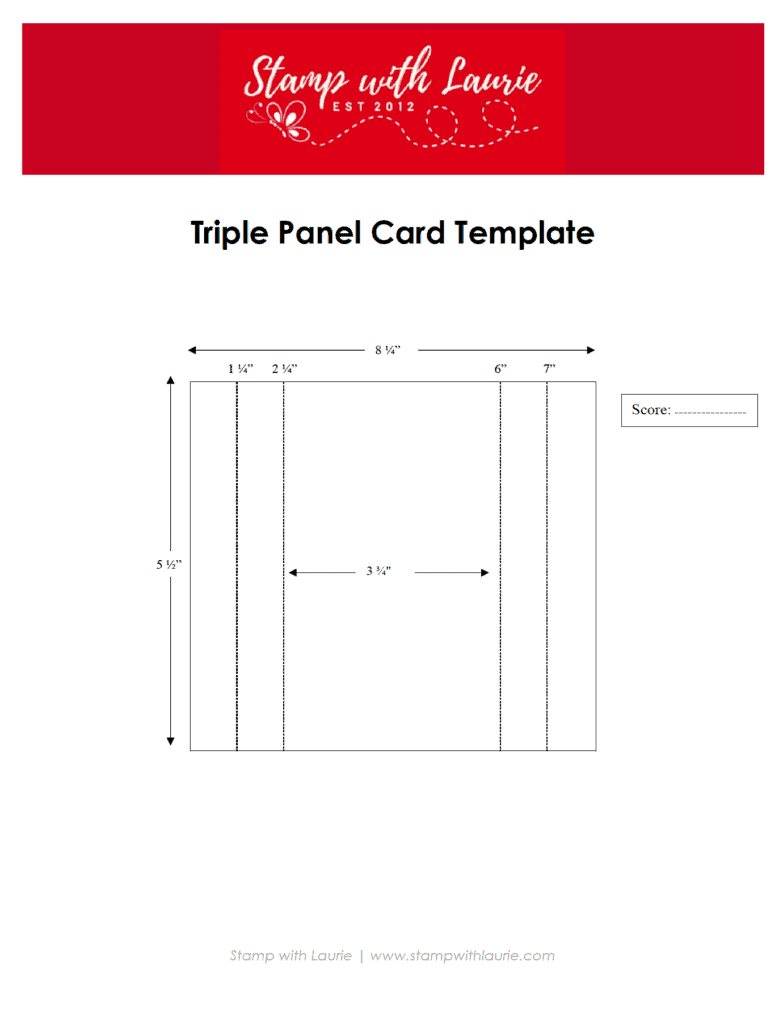
Instructions to Create a Free-Standing Triple Panel Card

  • Cardstock size: 8 ¼” x 5 ½”
  • With the 8 ¼” side along top, score: 1 ¼”, 2 ¼”, 6” and 7”
  • Fold the sides in a Z pattern

To download the Triple Panel Card Template, please click here or on the image.

Triple Panel Card Template
Card Laid Flat to Display Folds

————————–

Copic Markers

Skin: E04/E11/E21/E00/E000/R20
Hair: E37/E35/E33/YR31
Dress: G99/YG63/YG03
Pinks: RV55/RV63/RV52/Glossy Accents on Balloon
Cupcake Wrapper: E37/E35/E33
Crown: E15/Y38/Y35/Glossy Accents
Heart on Cupcake: Y38/Y35/RV55/Star Dust Stickles
Candle: YG67/YG03
Flame: Y38/Y35/Glossy Accents

Close Up of Party Girl with a Balloon
Close Up of Party Princess Ellie

————————–

Supplies for My “Party On!” Card:

Party Princess Ellie, Paper Nest Dolls
Paper Basics – Stamper’s Select White Cardstock, Papertrey Ink
Hey Cupcake 6” x 6” Paper Pad, Doodlebug Design Inc.
Window Sheet, Stampin’ Up!
Balloon Adventures, Stampin’ Up! (Sentiment)
Balloon Pop-Up Thinlits Dies, Stampin’ Up!
Flag Banner Dies, Memory Box
Balloon Bouquet Punch, Stampin’ Up!
Tangerine Tango Baker’s Twine, Stampin’ Up!
Party Animal Embellishments, Stampin’ Up!
Sprinkles Embellishments, Stampin’ Up!
Marshmallow Premium Sequins, 28 Lilac Lane, Buttons Galore & More
Foam Adhesive Strips, Stampin’ Up!
Glossy Accents, Ranger
Star Dust Stickles, Ranger
Granny Apple Green, Melon Mambo and Basic White Card Stock

Finished card size: 4 ¼” x 5 ½”

————————–

To view my other Paper Nest Dolls cards, please click here.

Hope you like My “Party On!” Card using Party Princess Ellie
by Paper Nest Dolls!

Thank you for stopping by!

Hugs,
Laurie

My Perfectly Wicked Interactive Card

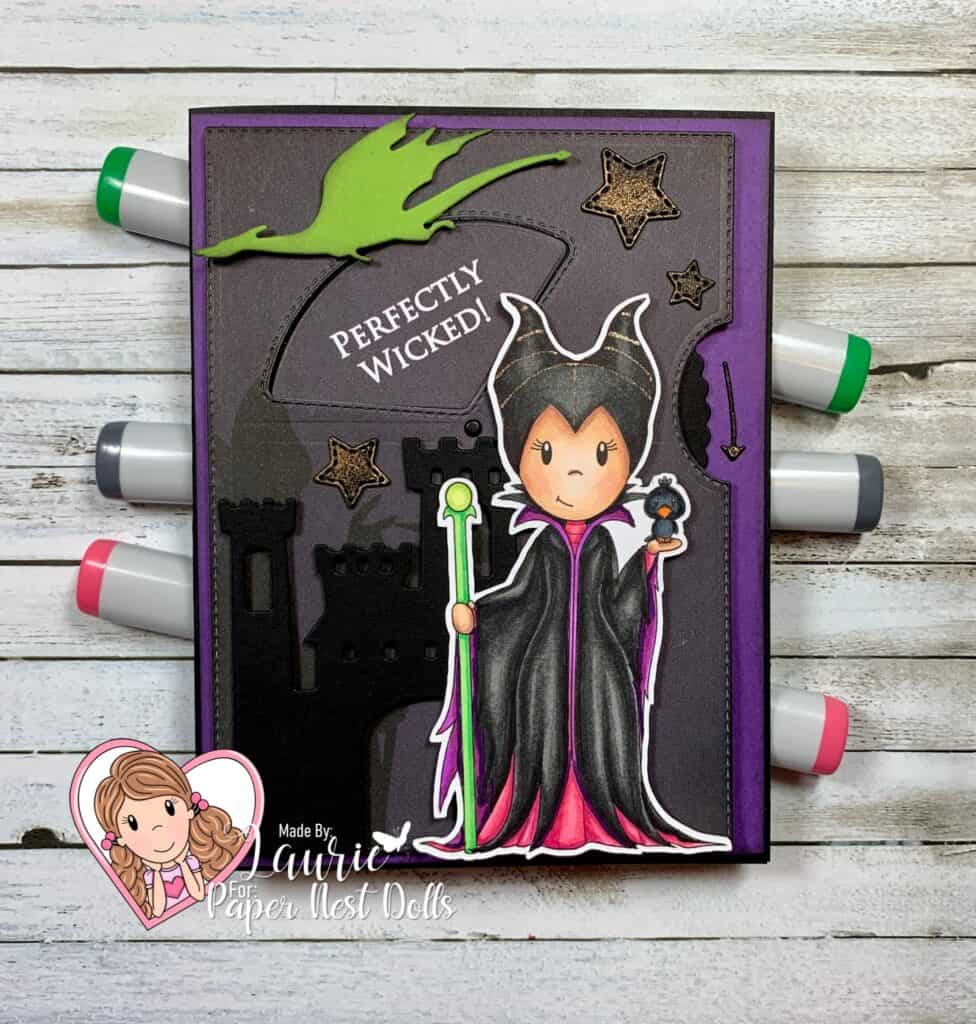
Perfectly Wicked Sentiment
My Perfectly Wicked Interactive Card

Hello Crafty Friends! It’s Laurie here! Today I am sharing My Perfectly Wicked Interactive Card as my Design Team Inspiration Card for Paper Nest Dolls using the Evil Fairy.

I was honoured to have been asked to present at the Paper Nest Dolls’ Party with the Villains Virtual Weekend Retreat that was this past weekend. I had so much fun creating my cards for the event that I made an extra one that I thought I would share with you today. The other cards that I presented at the Retreat will be posted at the end of this post.

To get in the mood and for inspiration, I just had to watch the movies both the live action and the cartoon! Any excuse to watch Disney is a good excuse in my books! Lol!

Video of my Card in Action

Movie of My Perfectly Wicked Interactive Card

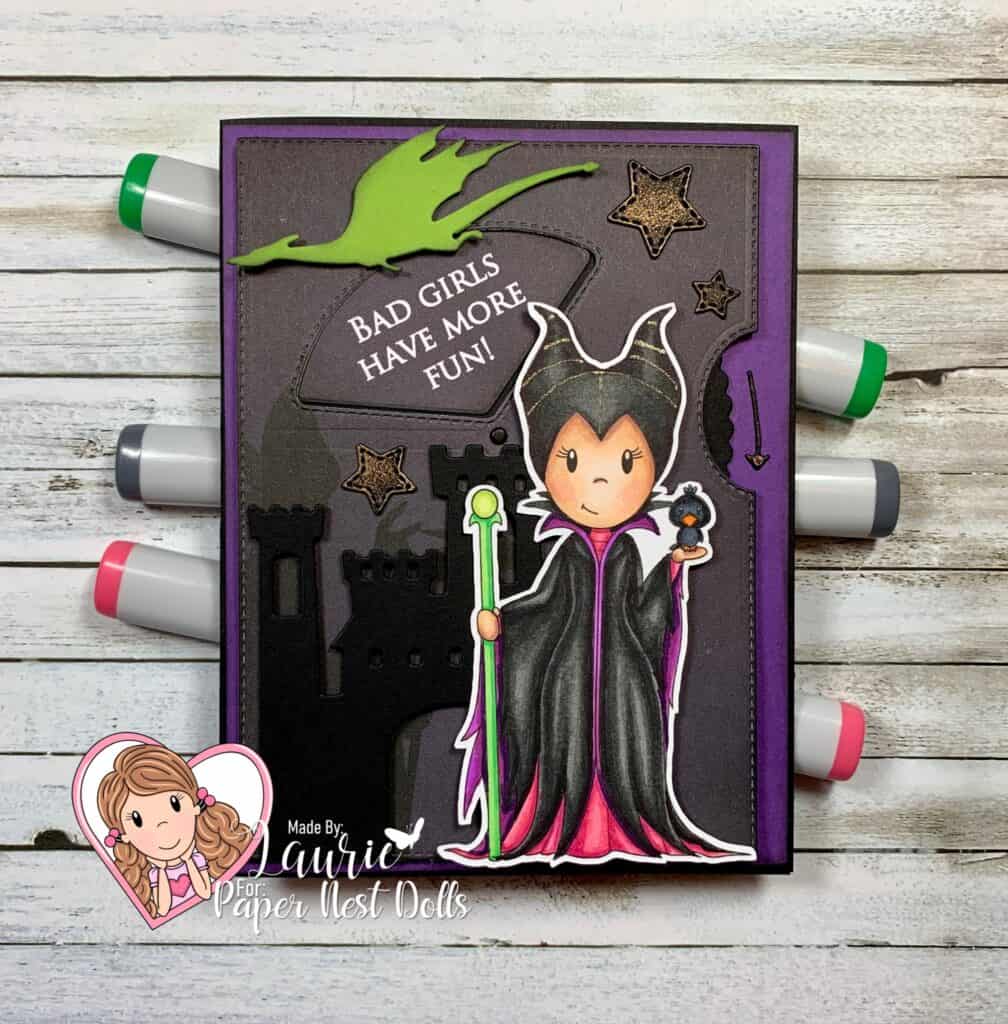
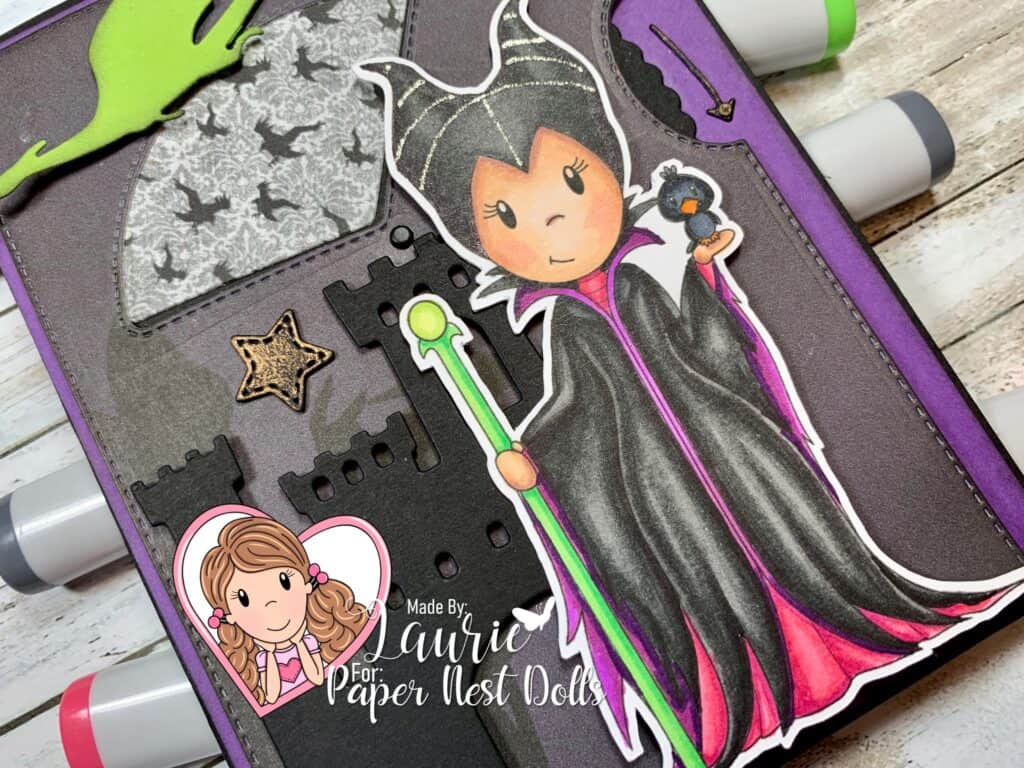
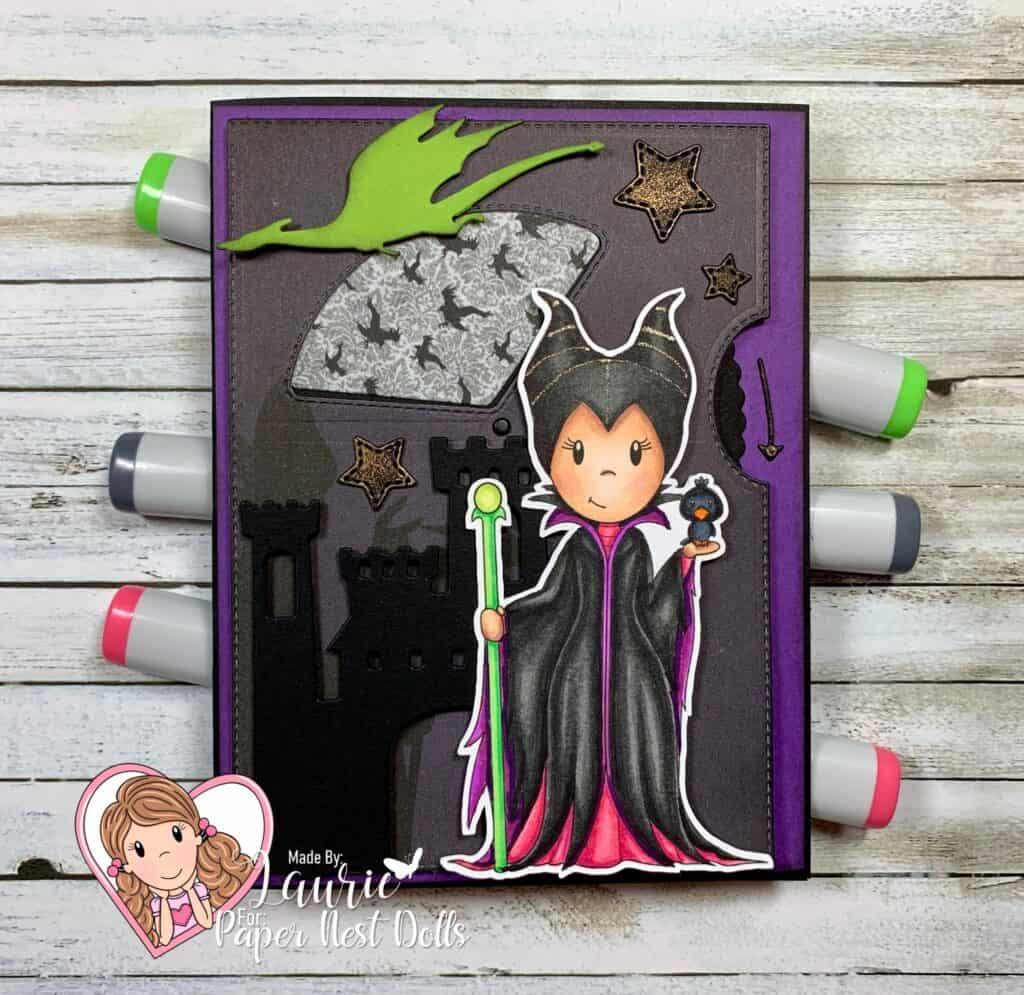
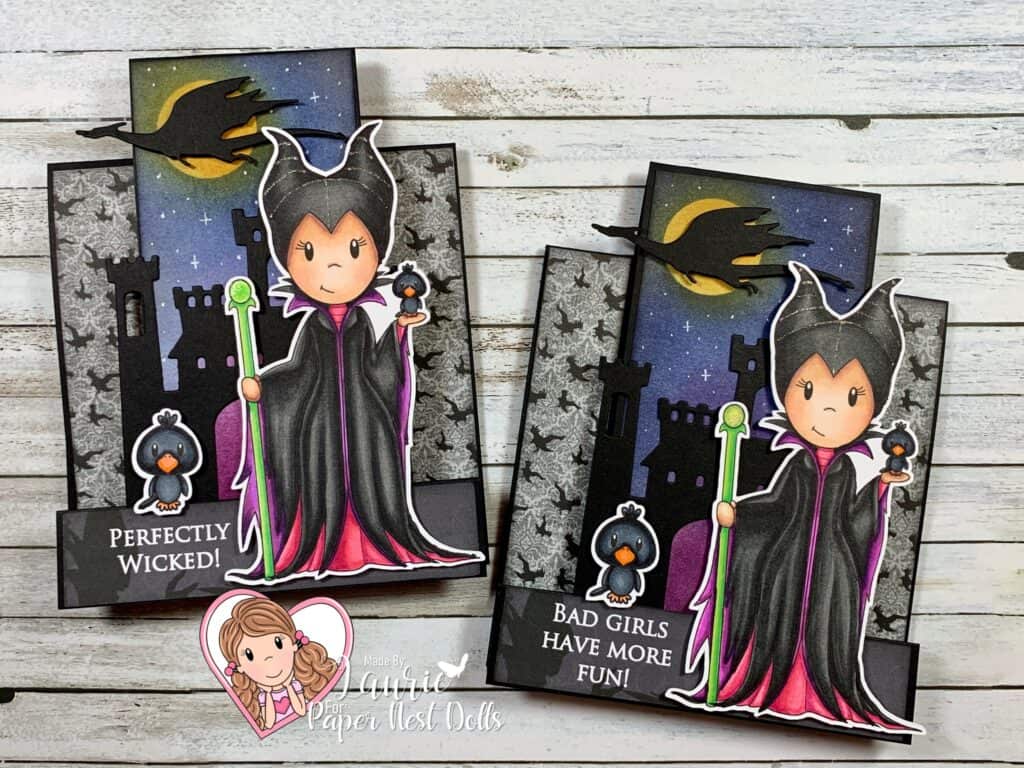
For this card, I coloured the Evil Fairy with my Copic Markers to match the Disney cartoon. I have been wanting to use the Give a Whirl Dies from Stampin’ Up! and thought it would be perfect for my card! It is so fun to spin that little dial and see all the fun sentiments! These sentiments… “Perfectly Wicked!” and “Bad Girls Have More Fun!” …were created in Word. I added one of the digital papers behind them to blend in with the paper that I used on my card base. Since the Evil Fairy turns into a dragon at the end of the movie, I couldn’t resist adding a bright green dragon with a dusting of Black Soot on its edges. A castle and a few stars that were brushed with the Aged Brass were the only other elements that I added to my card.

Bad Girls Have More Fun! Sentiment

————————–

Copic Markers:

Skin: E04/E11/E21/E00/E000/R20
Blacks: T10/T8/T7/T6/T5
Purple: V09/V06/V04
Dress: RV17/RV14/RV13
Staff: YG09/YG06/YG03/YG00
Crows: C9/C7/C6/C5/YR04/YR02

Close Up of The Stamp on My Card
Close Up of The Evil Fairy on My Card

————————–

Card Recipe for
My Perfectly Wicked Interactive Card:

Evil Fairy, Paper Nest Dolls
Maleficent Inspired 8.5×11 Digital Paper Pack, Monbonbon, Etsy
Build a Castle Dies, Whimsey Stamps
Give It A Whirl Dies, Stampin’ Up!
Black Soot Distress Ink, Ranger Ink
Mini Ink Blending Tool, Ranger Ink
Art Alchemy-Metallique Wax-Aged Brass, Prima Marketing
Clear Star Gelly Roll Pen
Gorgeous Grape, Granny Apple Green and Black Card Stock

Finished card size: 4.25” x 5.5”

My Design Team Card
My Perfectly Wicked Interactive Card

————————–

Cards from the Party with
The Villains Retreat Weekend

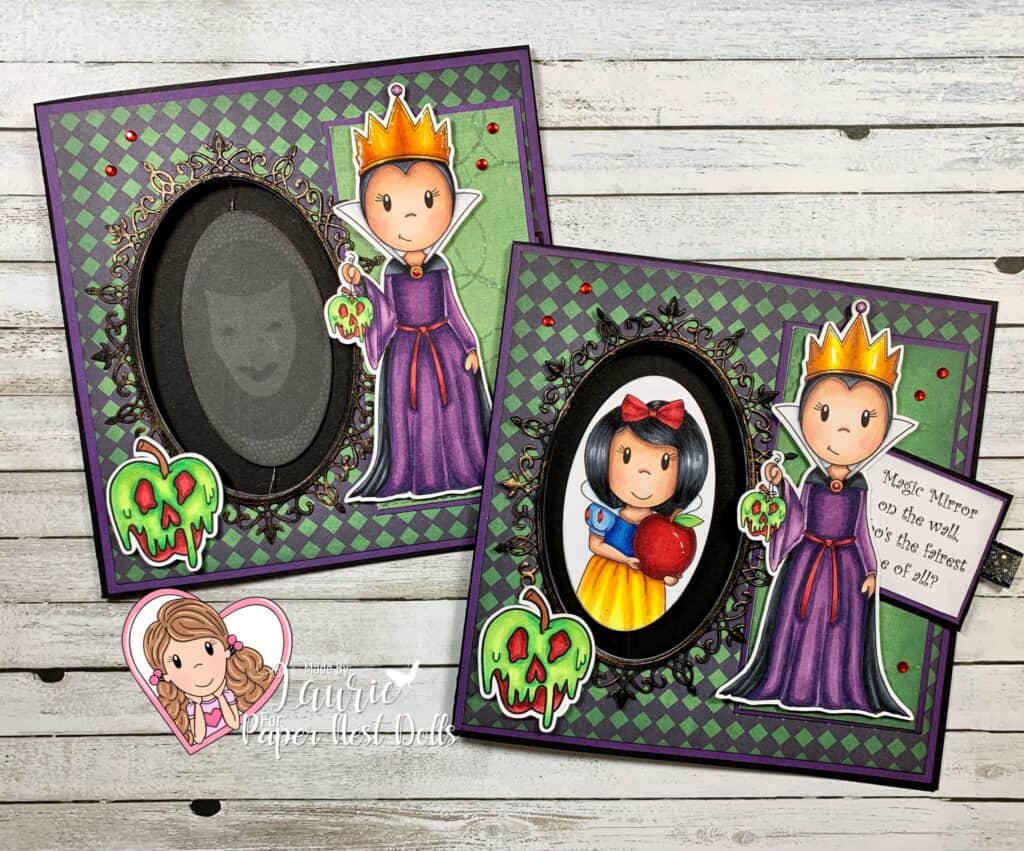
Spinner Card
Spinner Card Using Evil Queen and Princess with Apple by Paper Nest Dolls
Centre-Step Card
Centre-Step Card with Evil Fairy by Paper Nest Dolls

Downloadable Centre-Step Template
(Click Image)

Centre-Step Card Template

To view my other Paper Nest Dolls cards, please click here.

To view my other interactive cards, please click here.

Hope you like my Design Team card using
Evil Fairy by Paper Nest Dolls!

Thank you for stopping by!

Hugs,
Laurie

My Twisty Thank You Card

My Card Front
My Twisty Thank You Card

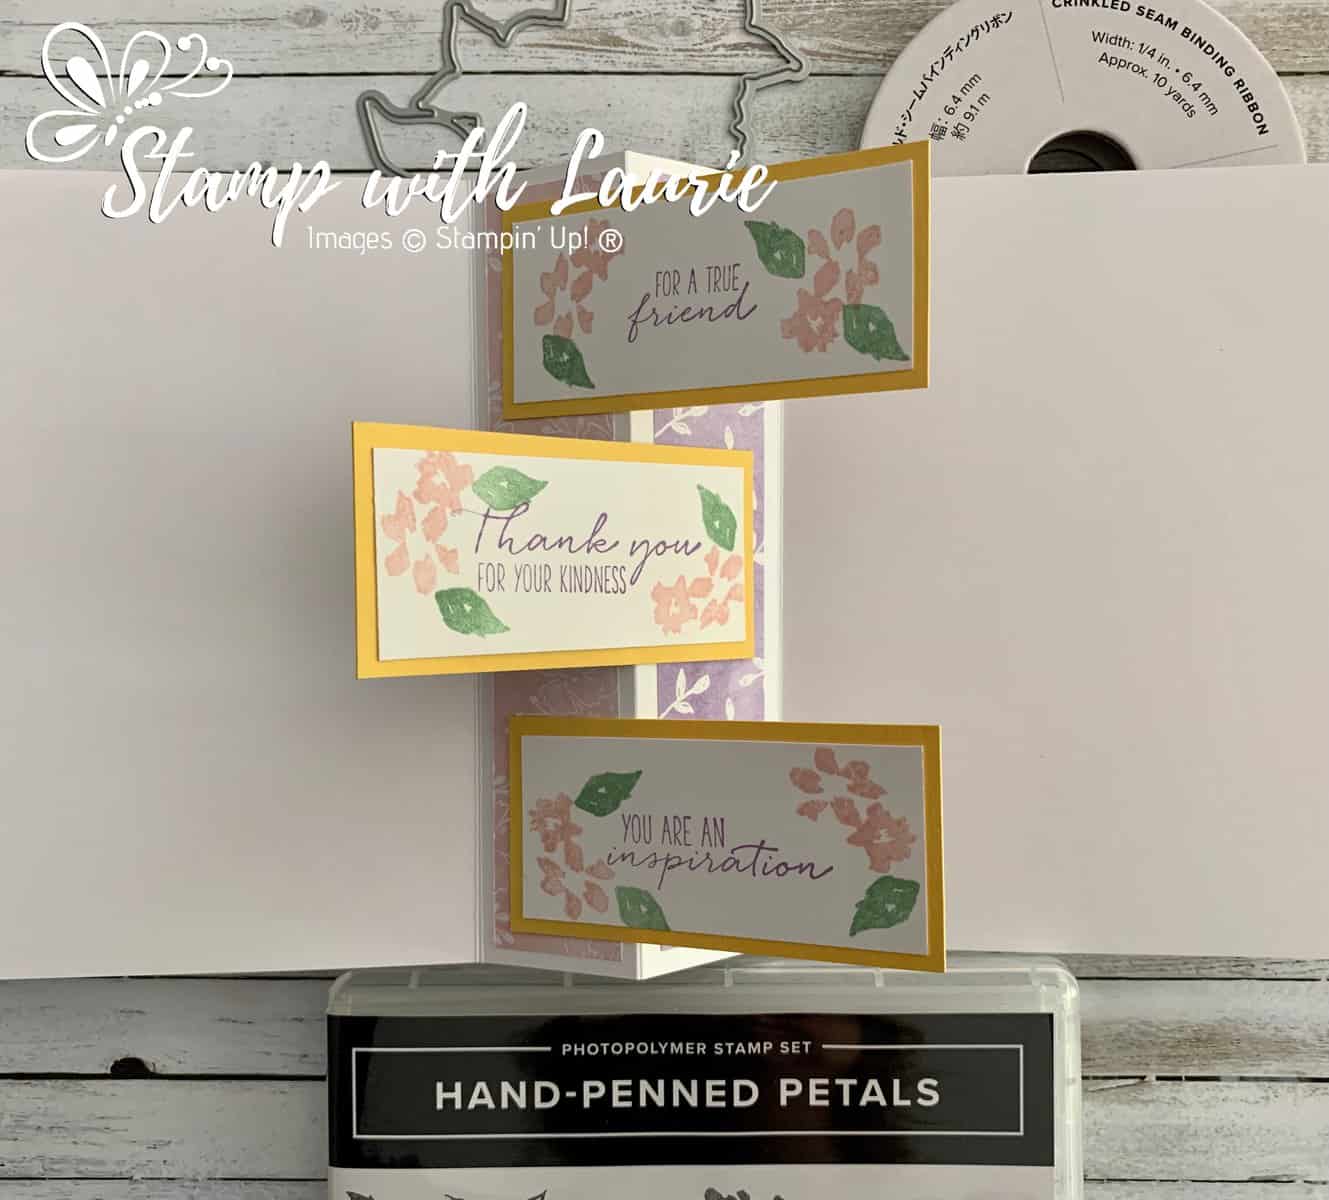
Hello Crafty Friends! I am excited to share My Twisty Thank You Card that I made using the beautiful Hand-Penned Designer Series Paper by Stampin’ Up! I made a similar card at a retreat and thought that it would be a perfect way to showcase this gorgeous DSP while providing an interactive fun fold!

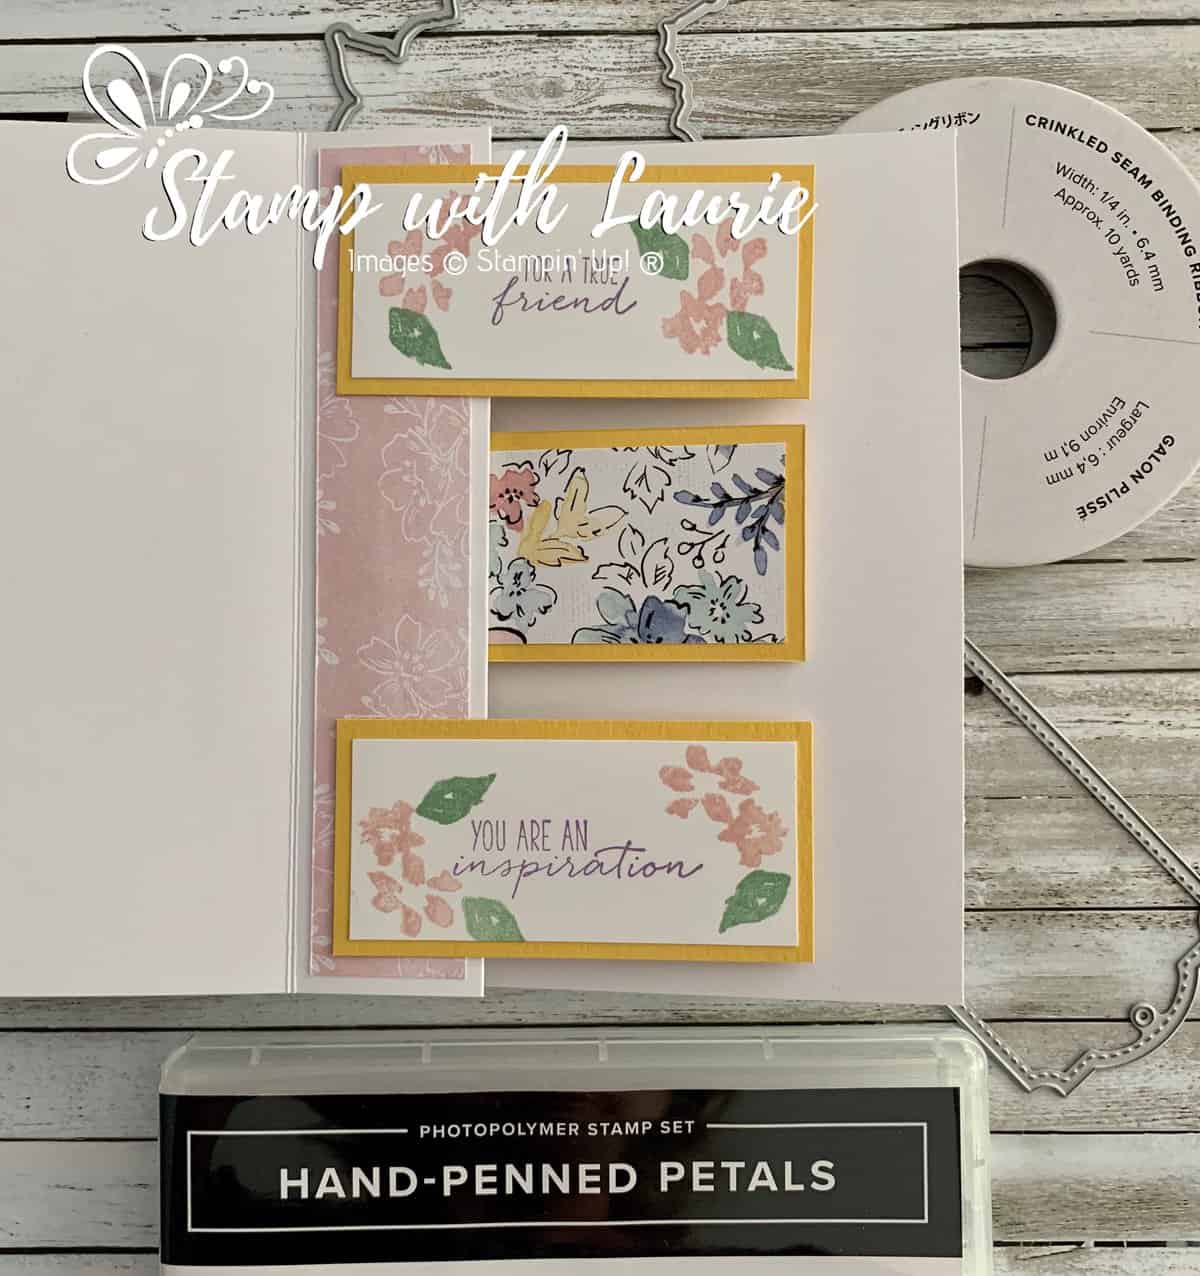
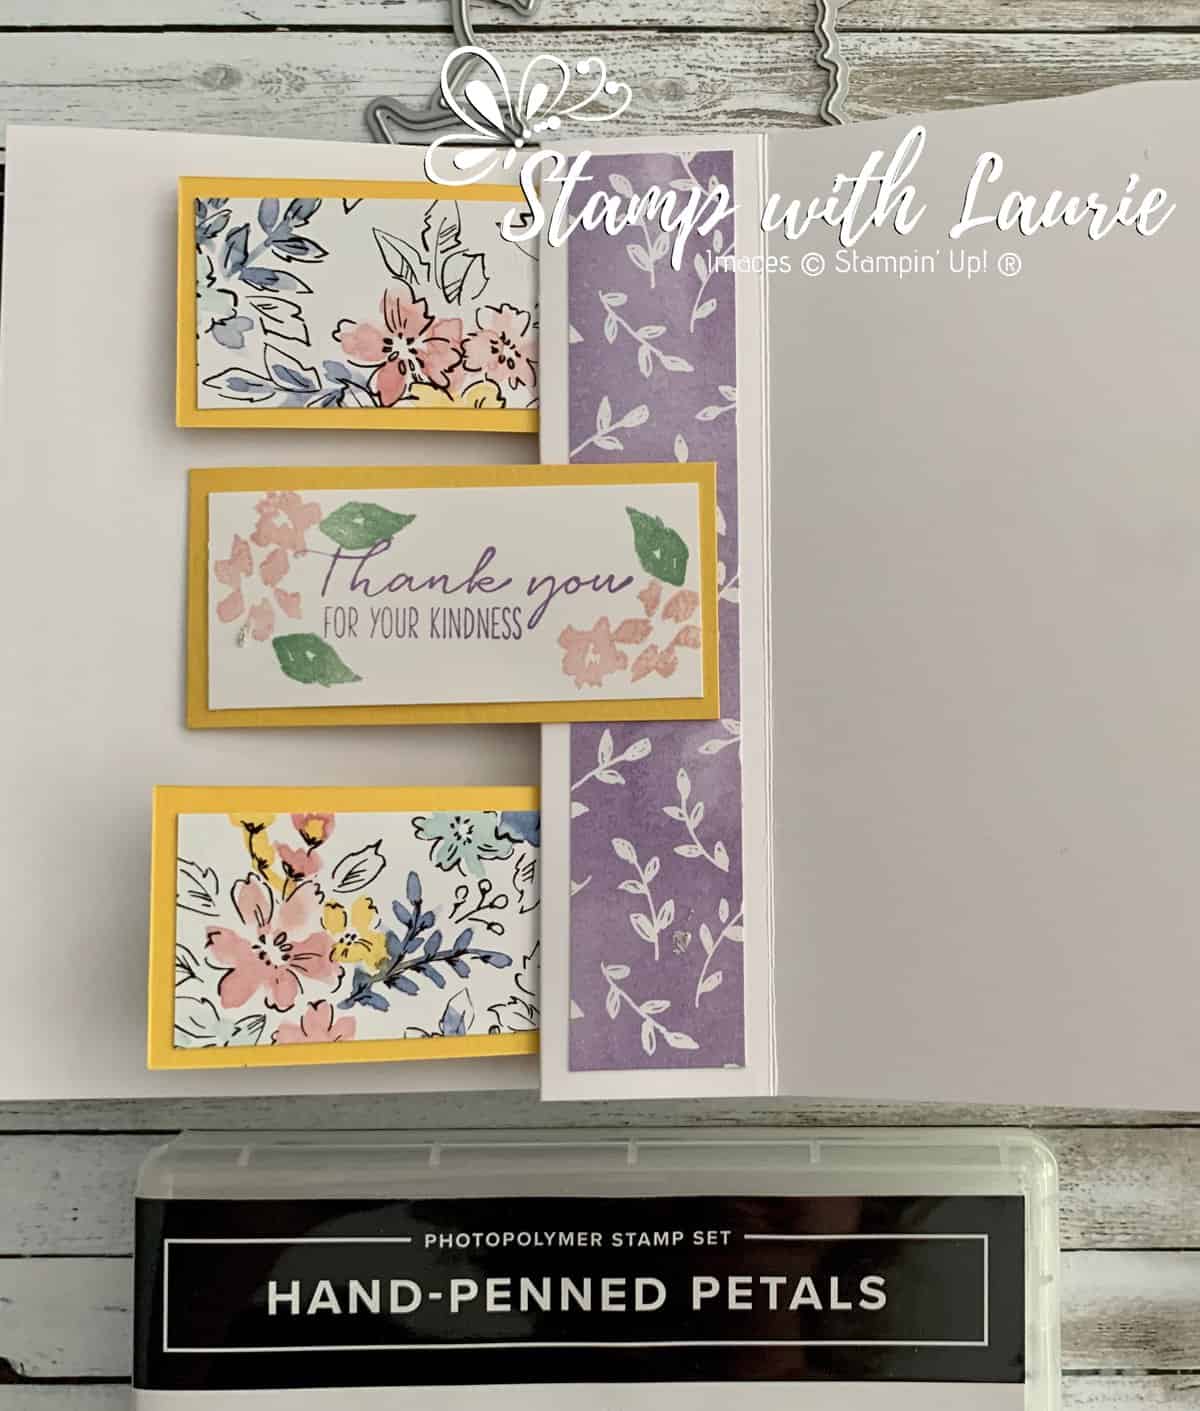
Don’t you just love that when you open the card you get the first set of sentiments and then you keep opening and the sentiments flip to see the other side of them. When the card is fully open, you get all three sentiments displayed.

My Twisty Thank You Card in Action

The Details of My Card

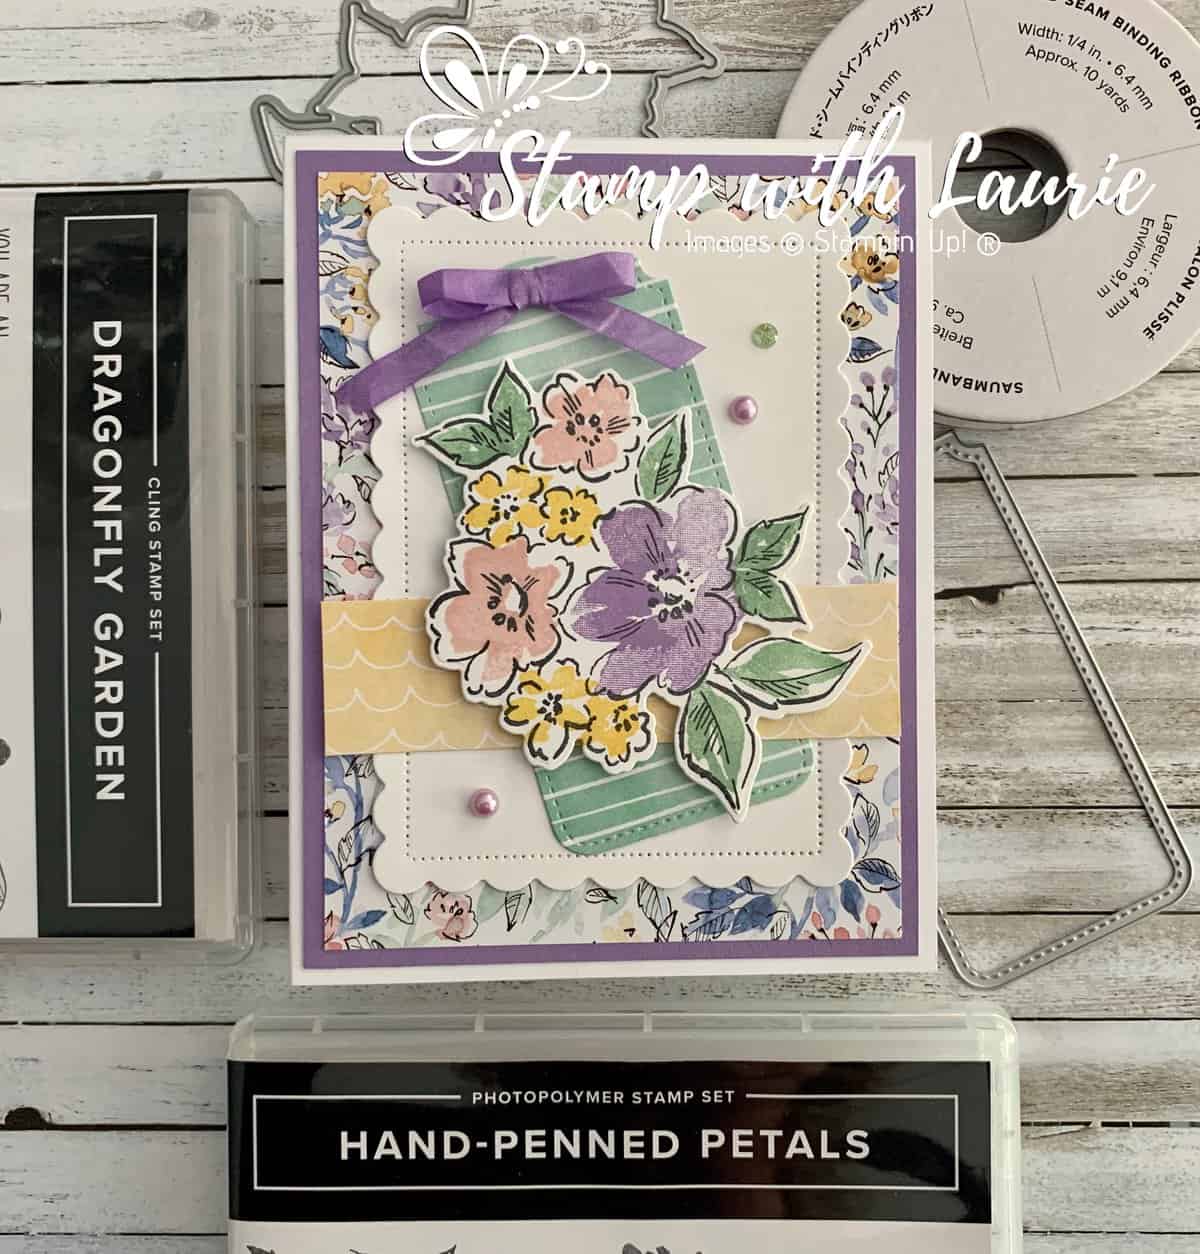
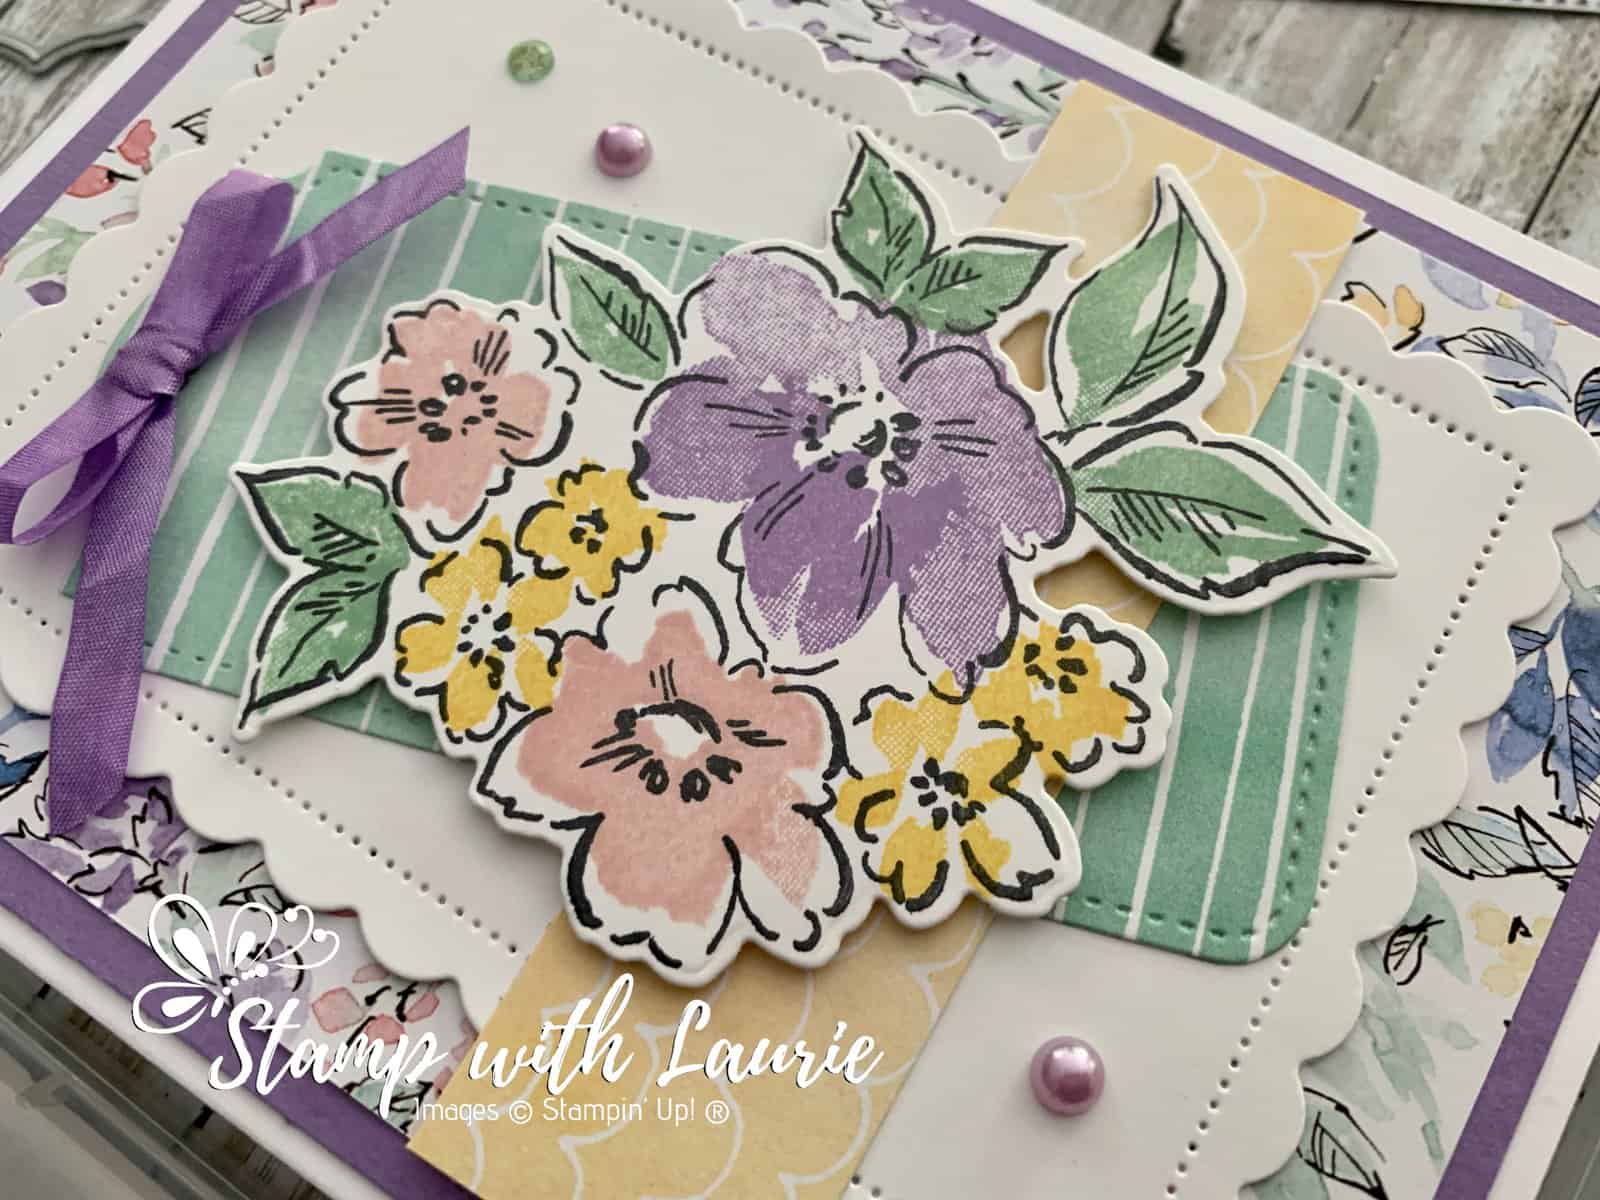
For my card, I used the Hand-Penned Petals Bundle which includes the Hand-Penned Petals Stamp Set and the matching Penned Flowers Dies by Stampin’ Up! Since I needed 3 sentiments that went together, I used the Dragonfly Garden Stamp Set as well. I have included my Twisty Card Template that you can download at the end of this post.

The Front of My Card

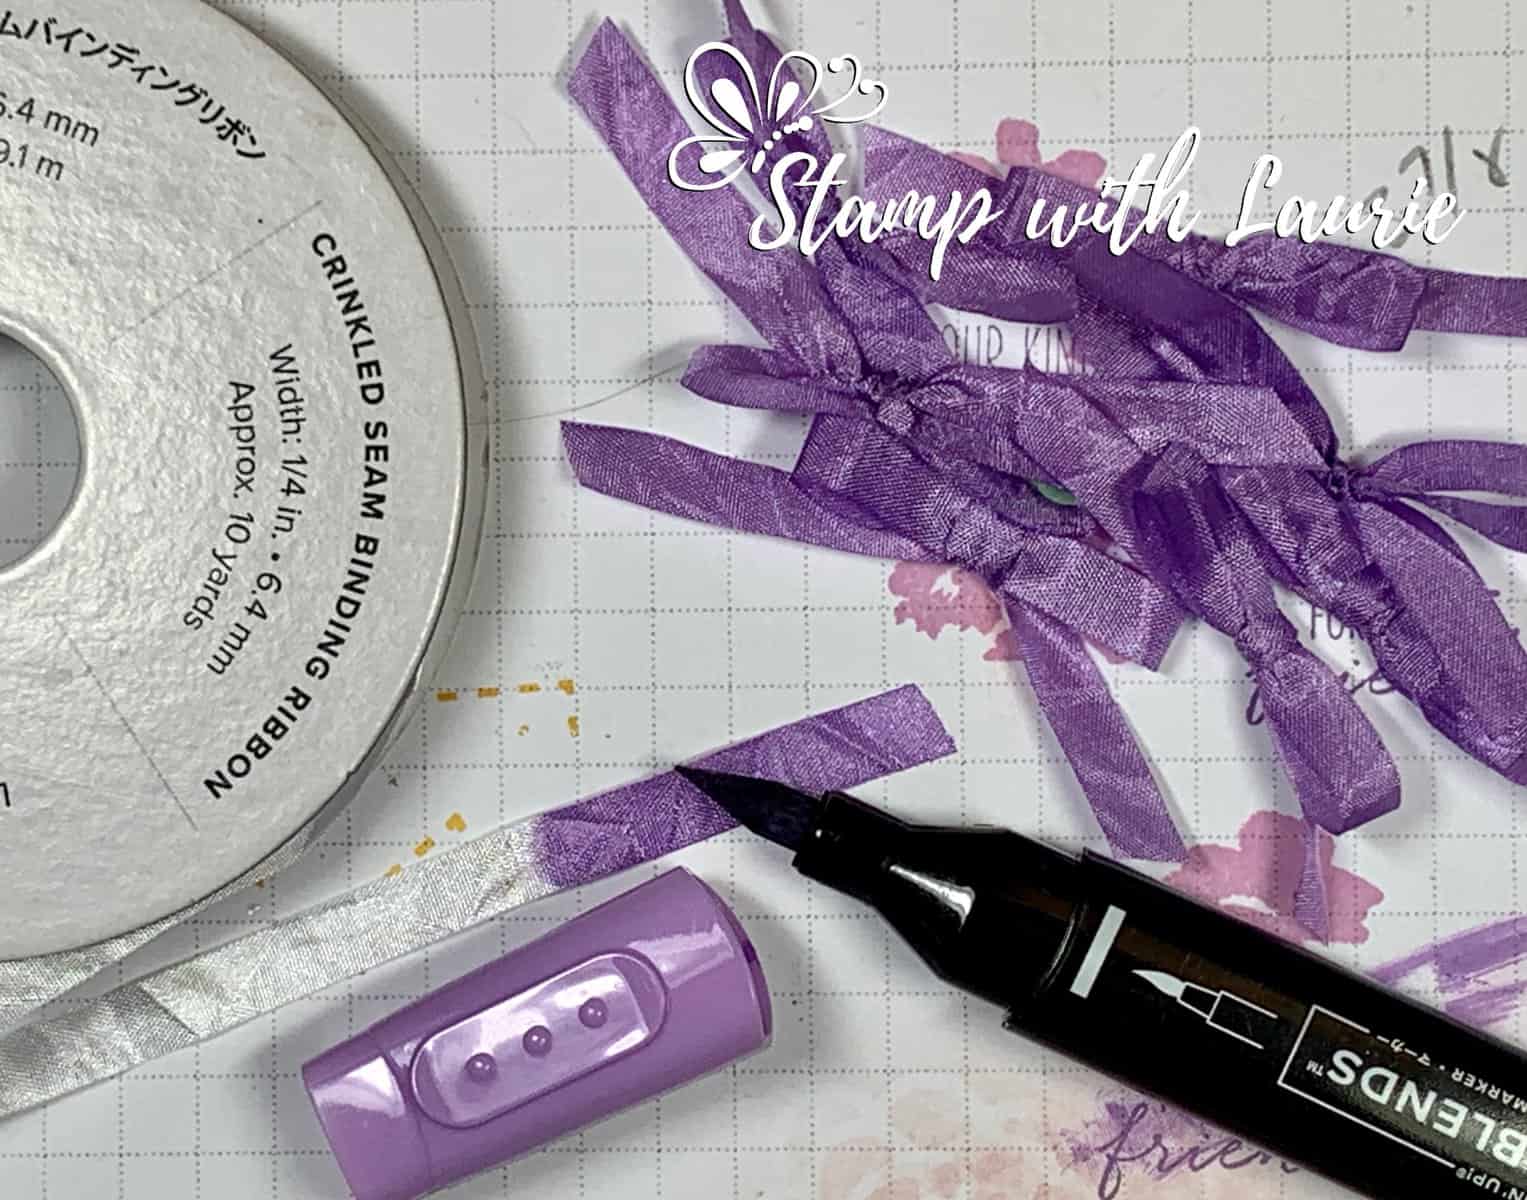
I stamped the colours of Highland Heather, Mint Macaron, Daffodil Delight and Blushing Bride for my flowers which matched the DSP and die cut them out with the matching dies. The Daffodil Delight piece of DSP helped to give a pop of colour to draw the eyes to the stamped flowers. I die cut the tag from the DSP as well. Love the Tailor Made Tags! They are so versatile! For my ribbon, I wanted it to match the colours of my card. So, I used my Dark Highland Heather Stampin’ Blend to colour the ribbon. This is a great way to add matching accents to your card!

Tip for using Markers on Ribbon
Tip for Colouring Ribbon with Stampin’ Blends

I found that the DSP is quite busy. So, to make my focal point stand out, I added a Basic White scallop cut piece underneath it to help ground it. A couple of Highland Heather pearls and a Mint Macaron Genial Gem tie in the colours of my card.

Close Up of My Card
Close Up of the Front of My Twisty Thank You Card

Inside of My Card

For the inside of my card, I added two of the neutral simple patterns to the inside folds and then attached the sentiment. I made sure that as you flip it, the sentiments made sense: “For a true friend” “You are an inspiration” Thank you for your kindness”. I added some DSP to the back of the sentiment pieces since you see the backs as they flip. Tip: adhere top and bottom sentiment pieces and then the middle to get even placement between the pieces.

Inside of my card
Inside of My Twisty Thank You Card

Supplies:

Stamps/Bundles/Dies: Hand-Penned Petals Bundle (155492), Dragonfly Garden Stamp Set (154411), Tailor Made Tags Dies (155563), Scalloped Contours Dies (155560)

Inks: Tuxedo Black Memento Ink Pad (132708), Highland Heather Classic Stampin’ Pad (147103), Mint Macaron Classic Stampin’ Pad (147106), Daffodil Delight Classic Stampin’ Pad (147094), Blushing Bride Classic Stampin’ Pad (147100)

Paper: Highland Heather (146986), Daffodil Delight (119683), Basic White (159276), Hand-Penned Designer Series Paper (158420)

Accessories: Whisper White Crinkled Seam Binding Ribbon (151326), Genial Gems (155500), Highland Heather Stampin’ Blends Combo Pack (154887), Pastel Pearls (154571), Bone Folder (102300), Stampin’ Dimensionals (104430), Stampin’ Seal (152813), Mini Glue Dots (103683)

The Flip Side
The Flip Side of the inside of My Card

Measurements: 

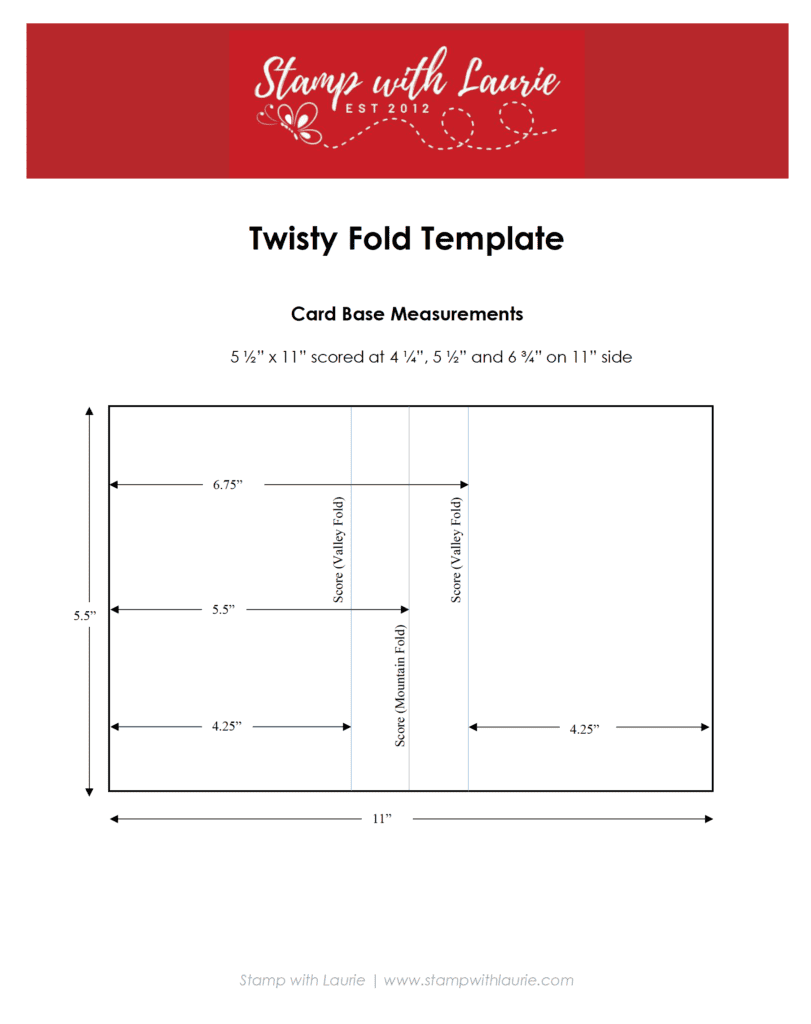
  • Basic White: 5 ½” x 11” scored at 4 ¼”, 5 ½” and 6 ¾”
  • Highland Heather: 4” x 5 ¼”
  • Hand-Penned Designer Series Paper: 3 ¾” x 5”
    • 1” x 3 ¾” (Daffodil Delight DSP)
    • 4” x 2” (Tag)
    • 1” x 5 ¼” (2 pieces)
    • 1 ¼” x 2 ¾” (3 pieces)
  • Basic White: 1 ¼” x 2 ¾” (3 pieces)
    • 3 ¼” x 4 ½” (Scalloped Contours Die)
    • 2 ¾” x 3 ½” (Penned Flowers Dies)
  • Daffodil Delight: 1 ½” x 3” (3 pieces)
  • Whisper White Crinkled Seam Binding Ribbon: 5”
Inside of Card
Sentiments Displayed When Card is Fully Opened

More Information on My Twisty Thank You Card:

Twisty Fold Template:

Twisty Fold Template Download

Hope you like my Twisty Thank You Card.

To download the Twisty Fold Template, please click here or on the image above.

For more of my Stampin’ Up! cards, please click here.

You will find the items listed above in my online store.

My Mandalorian Card

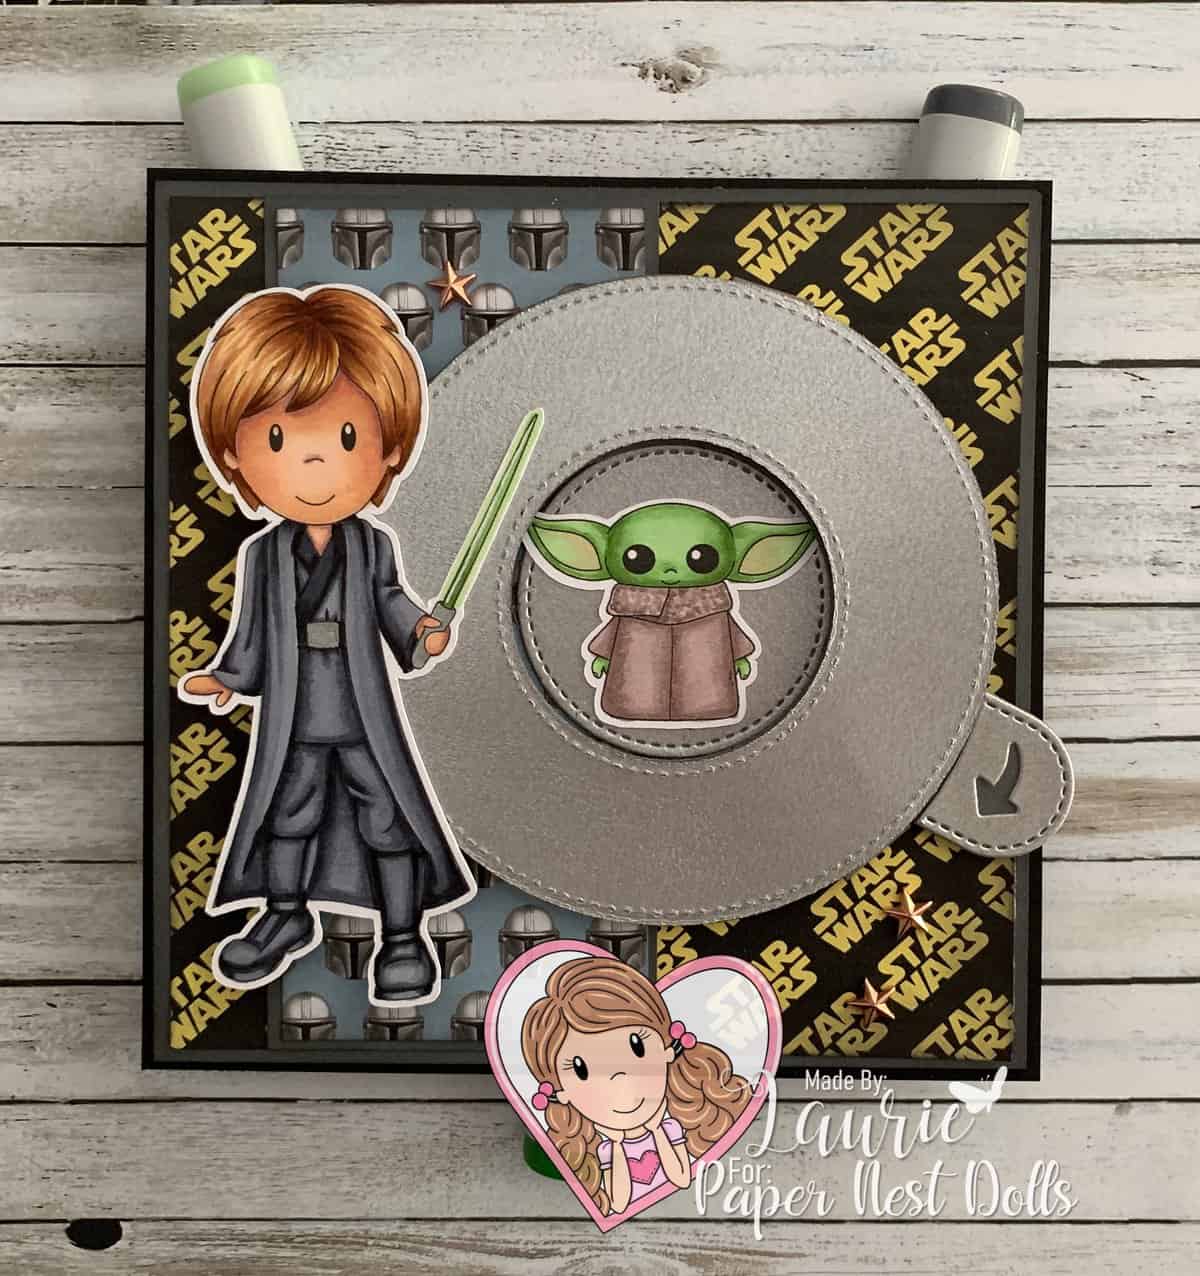
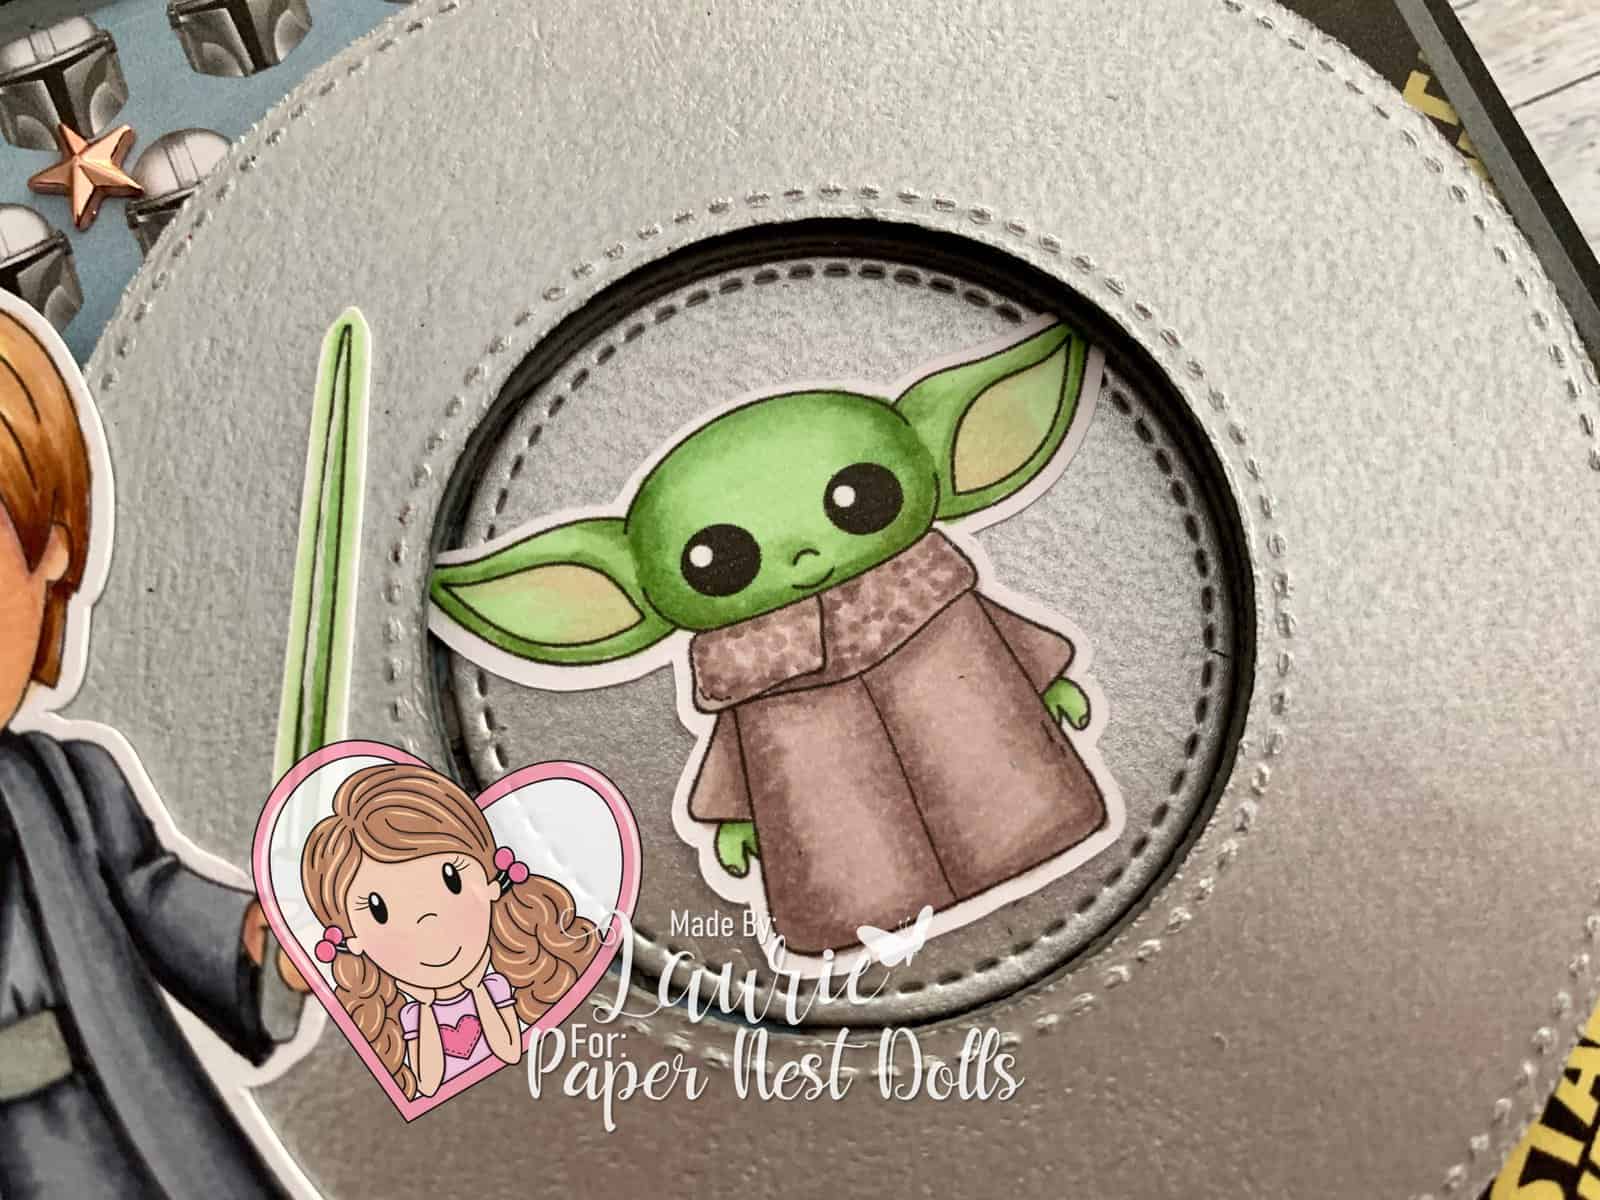
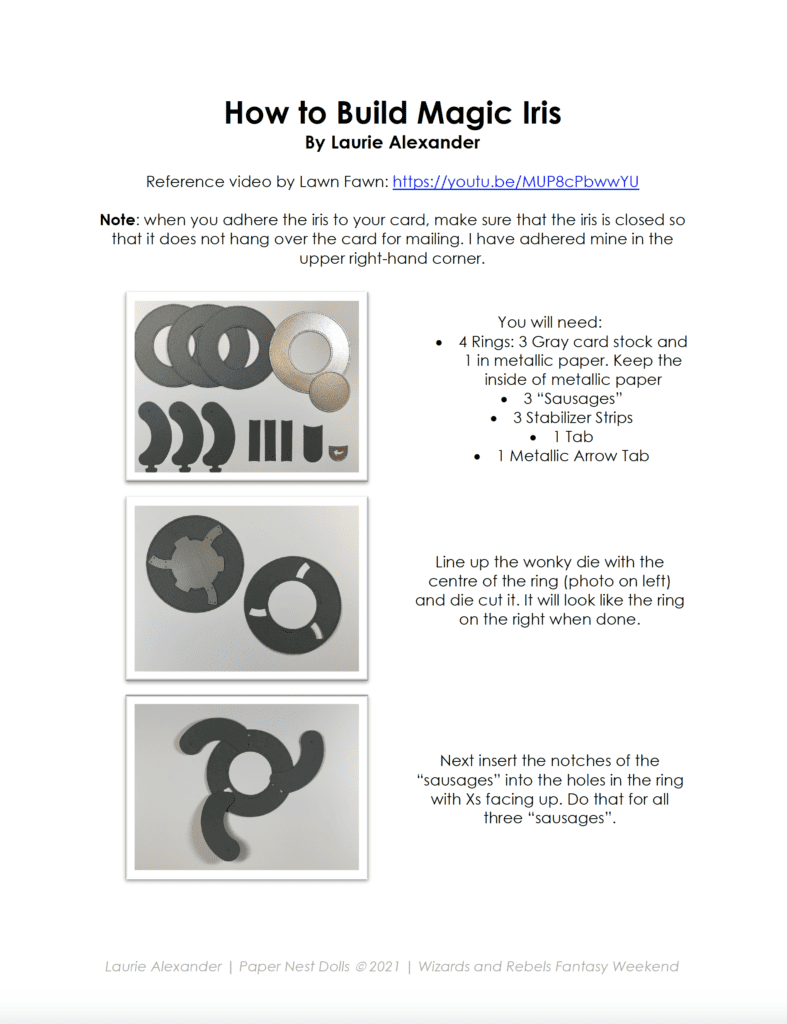
Hello Crafty Friends! It’s Laurie here! I was honoured to have been asked to present this card and my colouring for it at the Rebels and Wizards Online Event for Paper Nest Dolls that was this past weekend. My Mandalorian Card is using Rebel Hero and the new release Rebel Baby by Paper Nest Dolls and the Magic Iris Dies by Lawn Fawn. I have included a PDF with step by step instructions on how to build the Magic Iris at the end of this post.

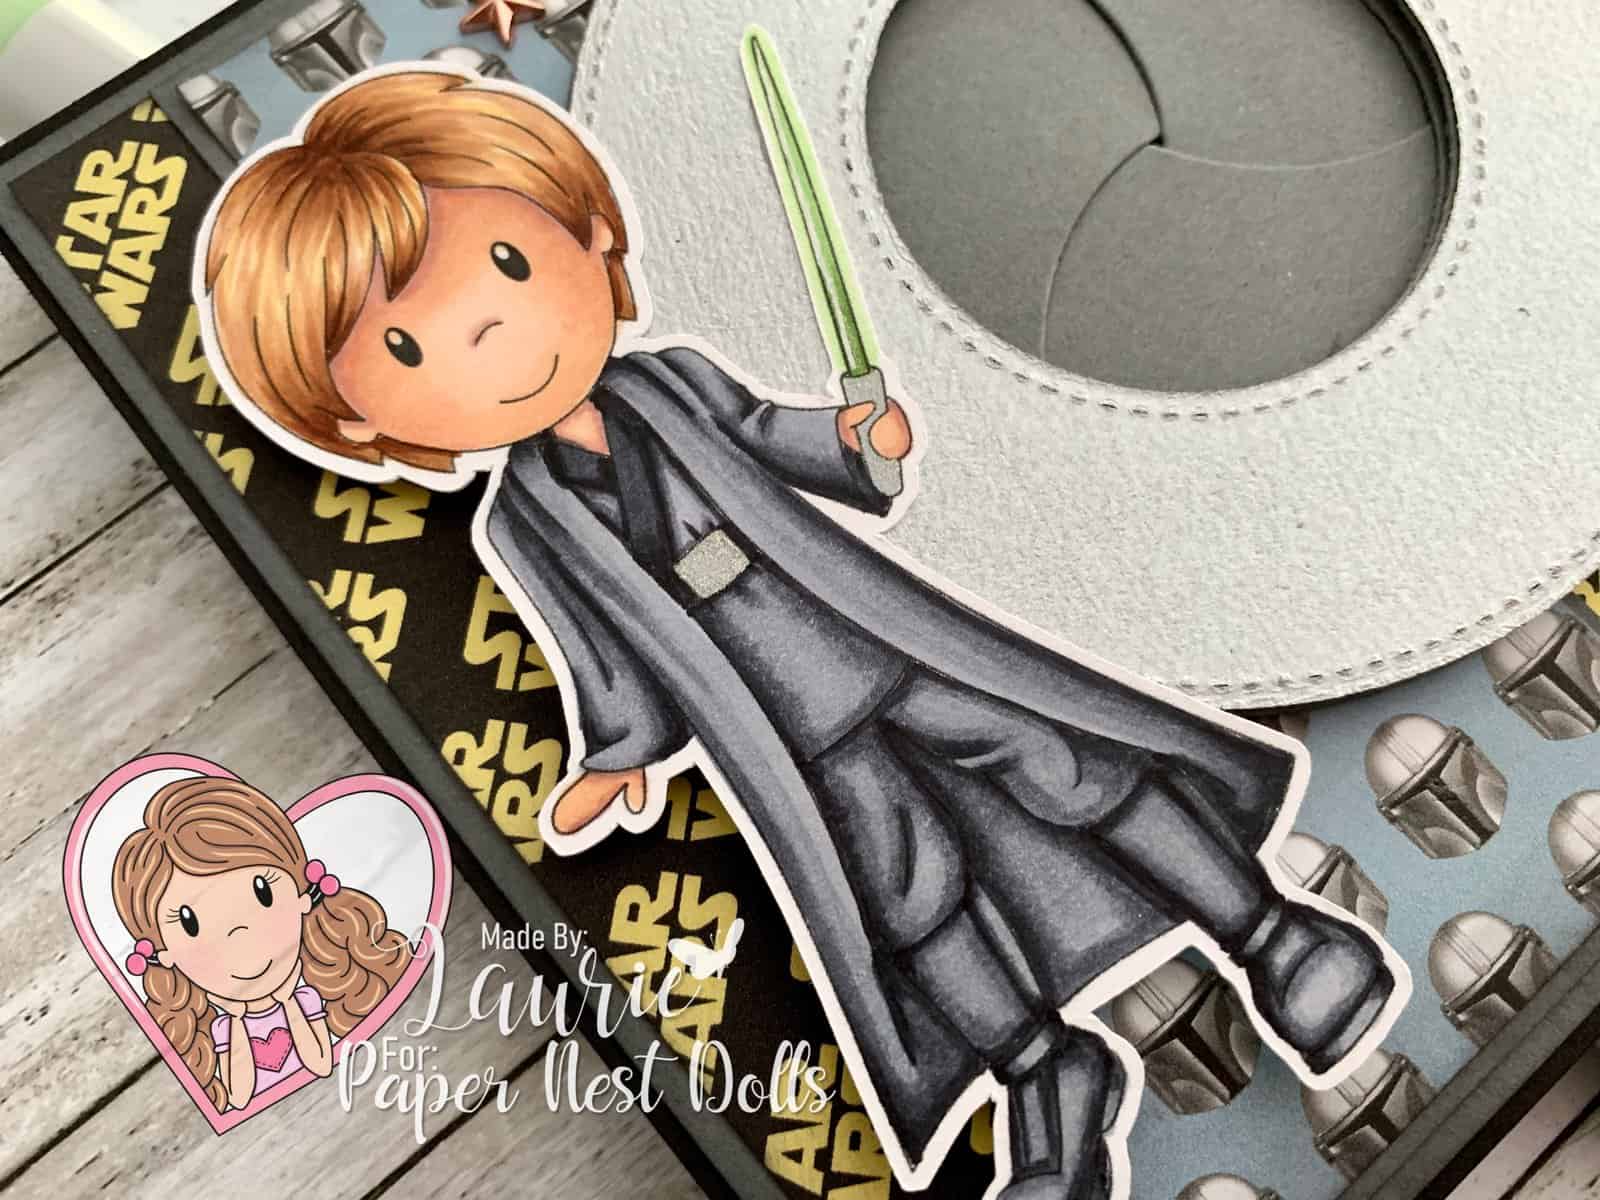
I just love Baby Yoda in the Mandalorian TV series. He is soooo cute! I even have a Baby Yoda stuffy that gets into all kinds of mischief. Lol! So, when I saw the new Rebel Baby digital stamp, I just had to make a card with him! My card was inspired by the last episode of season two where Luke comes to rescue Baby Yoda and his friends. I coloured Luke in dark clothes with a green light saver (or life saver as my Baby Yoda calls it! Lol!) as he appeared in this episode. The Rebel Baby is hidden behind the “door” and is revealed by the Magic Iris mechanism when the Jedi Hero opens it.

Magic Iris Opened
Magic Iris Door Open to Reveal Rebel Baby

Don’t you just love the digital paper that I used with the Mandalorian helmets and the original Star Wars logo! They were perfect for my card and were free from HaleGrafix. I sponged some Black Soot to the edges of it to give my card a gritty feel. I couple of star embellishments was all this card needed to finish it off.

————————–

Copic Markers:

Rebel Hero
Skin: E04/E11/E21/E00/E000/R20
Hair: YR31/E33/E35/E37
Robes: C9/C7/C6/C5/C3
Belt: C9/C7/C6/Silver Gelly Roll Pen
Light Saber: YG11/YG13/YG17/White, Silver and Clear Star Gelly Roll Pens

Close Up of Stamp
Close Up of Rebel Hero

Rebel Baby
Skin: YG11/YG13/YG17
Robes: E70/E71/E74

Close Up Jedi Baby on Card
Close Up of Rebel Baby

————————–

Measurements:

Black Card Base: 5.25” x 10 ½” scored at 5.25”
Gray Mat: 5 1/8” x 5 1/8”
Star Wars Paper: 4 7/8” x 4 7/8”
Gray Mat for Mando Helmets: 5” x 2 ¼”
Mando Helmets: 4 7/8” x 2 1/8”
Rebel Hero: 4” tall
Rebel Baby: 1 ¾” wide

Finished card sizes: 5.25” x 5.25”

————————–

Card Recipe for My Mandalorian Card:

Rebel Hero and Rebel Baby , Paper Nest Dolls
Paper Basics – Stamper’s Select White Cardstock, Papertrey Ink
FREE Printable Star Wars Digital Paper Pack, HaleGrafix
FREE Printable Star Wars Mandalorian Digital Paper Pack, HaleGrafix
Galvanized Metallic Sheet, Stampin’ Up!
Magic Iris Dies, Lawn Fawn
Star Designer Elements, Stampin’ Up!
Black Soot Distress Ink, Ranger
Mini Ink Blending Tool, Ranger
White Gelly Roll Pen
Silver Gelly Roll Pen
Clear Star Gelly Roll Pen
Basic Black and Basic Gray Card Stock, Stampin’ Up!

Movie of My Mandalorian Card in Action

————————–

Magic Iris Instructions Download

To view my other Paper Nest Dolls cards, please click here.

My presentation went so well, that I have been asked to present at
the Party with The Villains (Online) Event October 2nd and 3rd.
https://www.papernestdolls.com/product/online-party-with-the-villains-event/

Hope you like my card using Rebel Hero and Rebel Baby by Paper Nest Dolls!

Thank you for stopping by!

Hugs,
Laurie

My Hand-Penned Thank You Card

Thank You Card
Hand-Penned Thank You Card

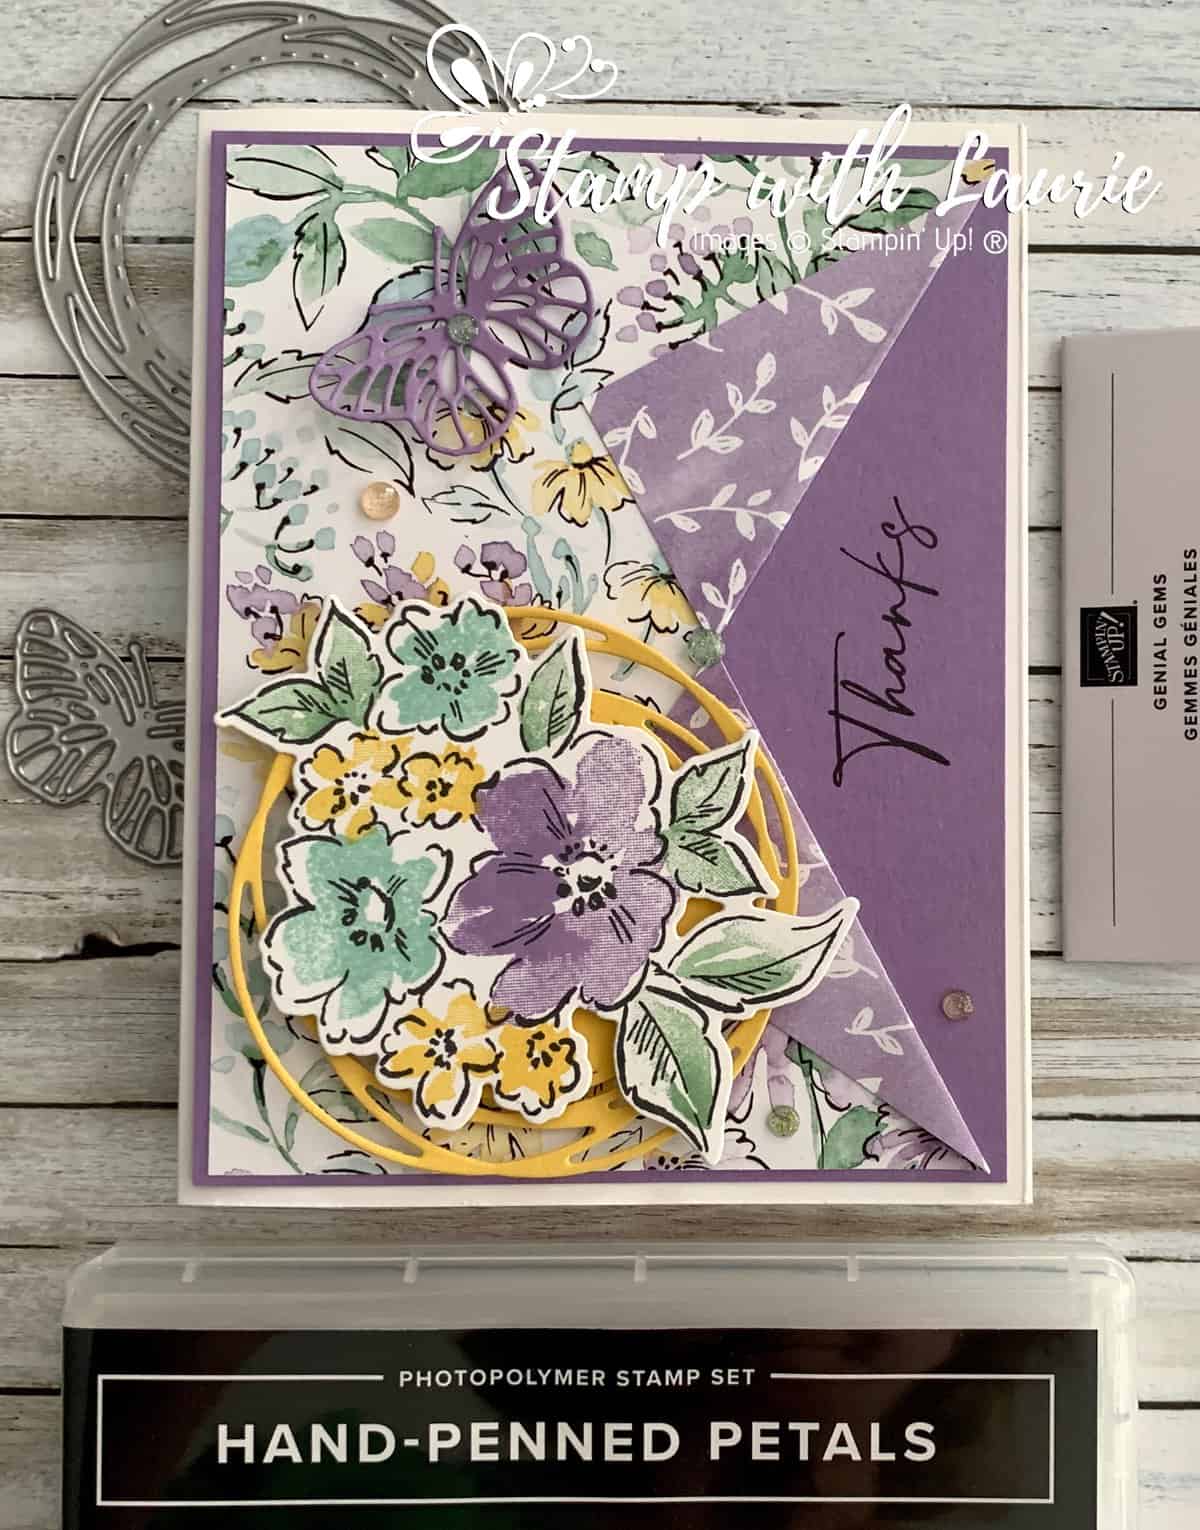
Today I am sharing my Hand-Penned Thank You Card that is using the Hand-Penned Suite Collection by Stampin’ Up! I love getting the Suite Collections since you know everything will go together perfectly!

The Hand-Penned Suite Collection includes: 

  • Hand-Penned Petals Stamp Set (10% off)
  • Penned Flowers Dies (10% off)
  • Hand-Penned Designer Series Paper
  • Genial Gems

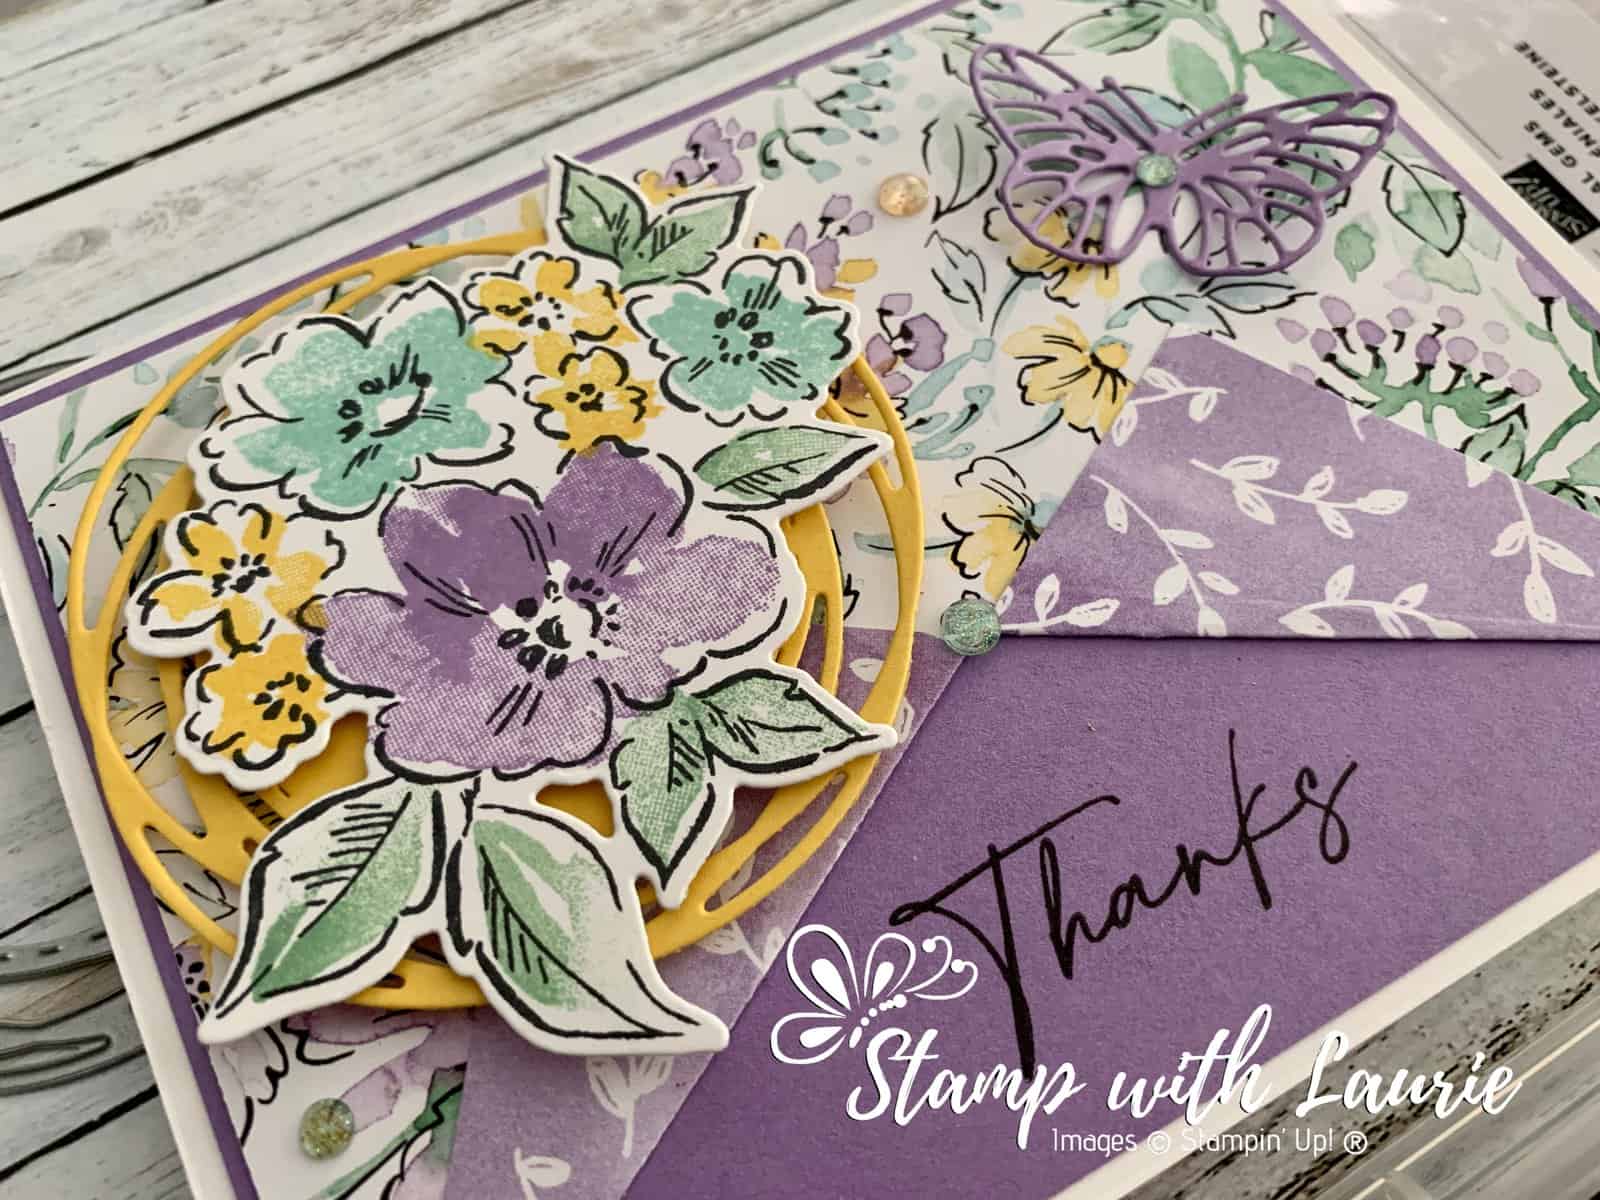
I thought that a Collar Fold would show off both sides of the beautiful Hand-Penned Designer Series Paper! So, I used my Collar Fold Template (found at the end of this post) to measure my DSP for the cutting and folding. Next, I used adhesive to glue the flaps down so that they didn’t interfere with the die cuts.

I wanted the “Thanks” sentiment to fit in the area between the folds resulting in a card that can be either vertical or horizontal. I found that I needed a background behind the stamped flowers to make them stand out from the DSP and the stitched circle from the Painted Labels Dies worked well for it. A butterfly was a perfect accent as if it is flitting from flower to flower on the DSP. The butterfly was die cut from the large piece of Highland Heather making sure that it was in a location that would be covered by the DSP which is a great way to save paper! A scattering of Genial Gems was all this card needed since I wanted the fold to be the focal point.

Close Up of My Thank You Card
Close Up of My Hand-Penned Thank You Card

Supplies:

Stamps/Bundles/Dies: Hand-Penned Suite Collection (155503), Painted Labels Dies (151605), Brilliant Wings Dies (155523)

Inks: Tuxedo Black Memento Ink Pad (132708), Highland Heather Classic Stampin’ Pad (147103), Pool Party Classic Stampin’ Pad (147107), Daffodil Delight Classic Stampin’ Pad (147094), Mint Macaron Classic Stampin’ Pad (147106)

Paper: Basic White Thick (159229), Highland Heather (146986), Daffodil Delight (119683), Basic White (159276), Hand-Penned Designer Series Paper (155499)

Accessories: Genial Gems (155500), Bone Folder (102300), Stampin’ Dimensionals (104430), Stampin’ Seal (152813), Mini Glue Dots (103683)

Measurements: 

  • Basic White Thick: 5 ½” x 8 ½” scored at 4 ¼”
  • Highland Heather: 4” x 5 
  • Hand-Penned Designer Series Paper: 3 7/8” x 5 1/8”
  • Basic White: 3 ½” x 3”
  • Daffodil Delight: 3” x 3”
Collar Fold Template

More Information on My Hand-Penned Thank You Card:

Hope you like my Hand-Penned Thank You Card.

To download the Collar Fold Template, please click here.

For more of my Stampin’ Up! cards, please click here.

You will find the items listed above in my online store.
My Father’s Day Card

My Father's Day Card
My Father’s Day Card

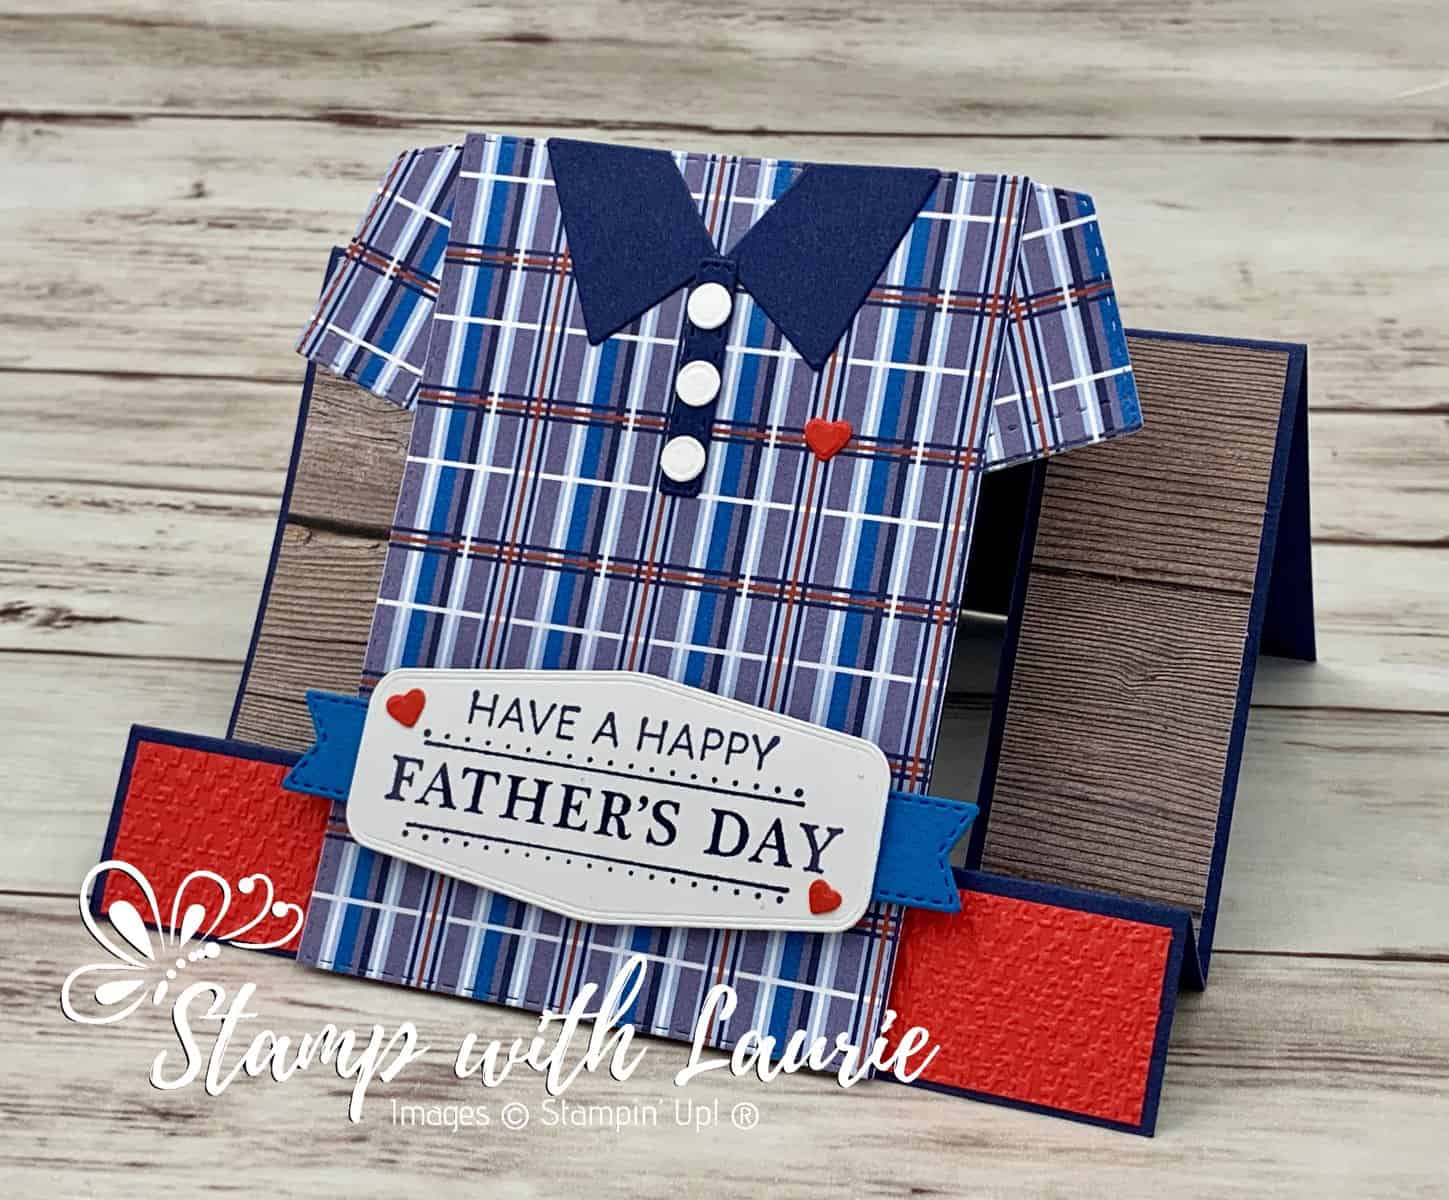
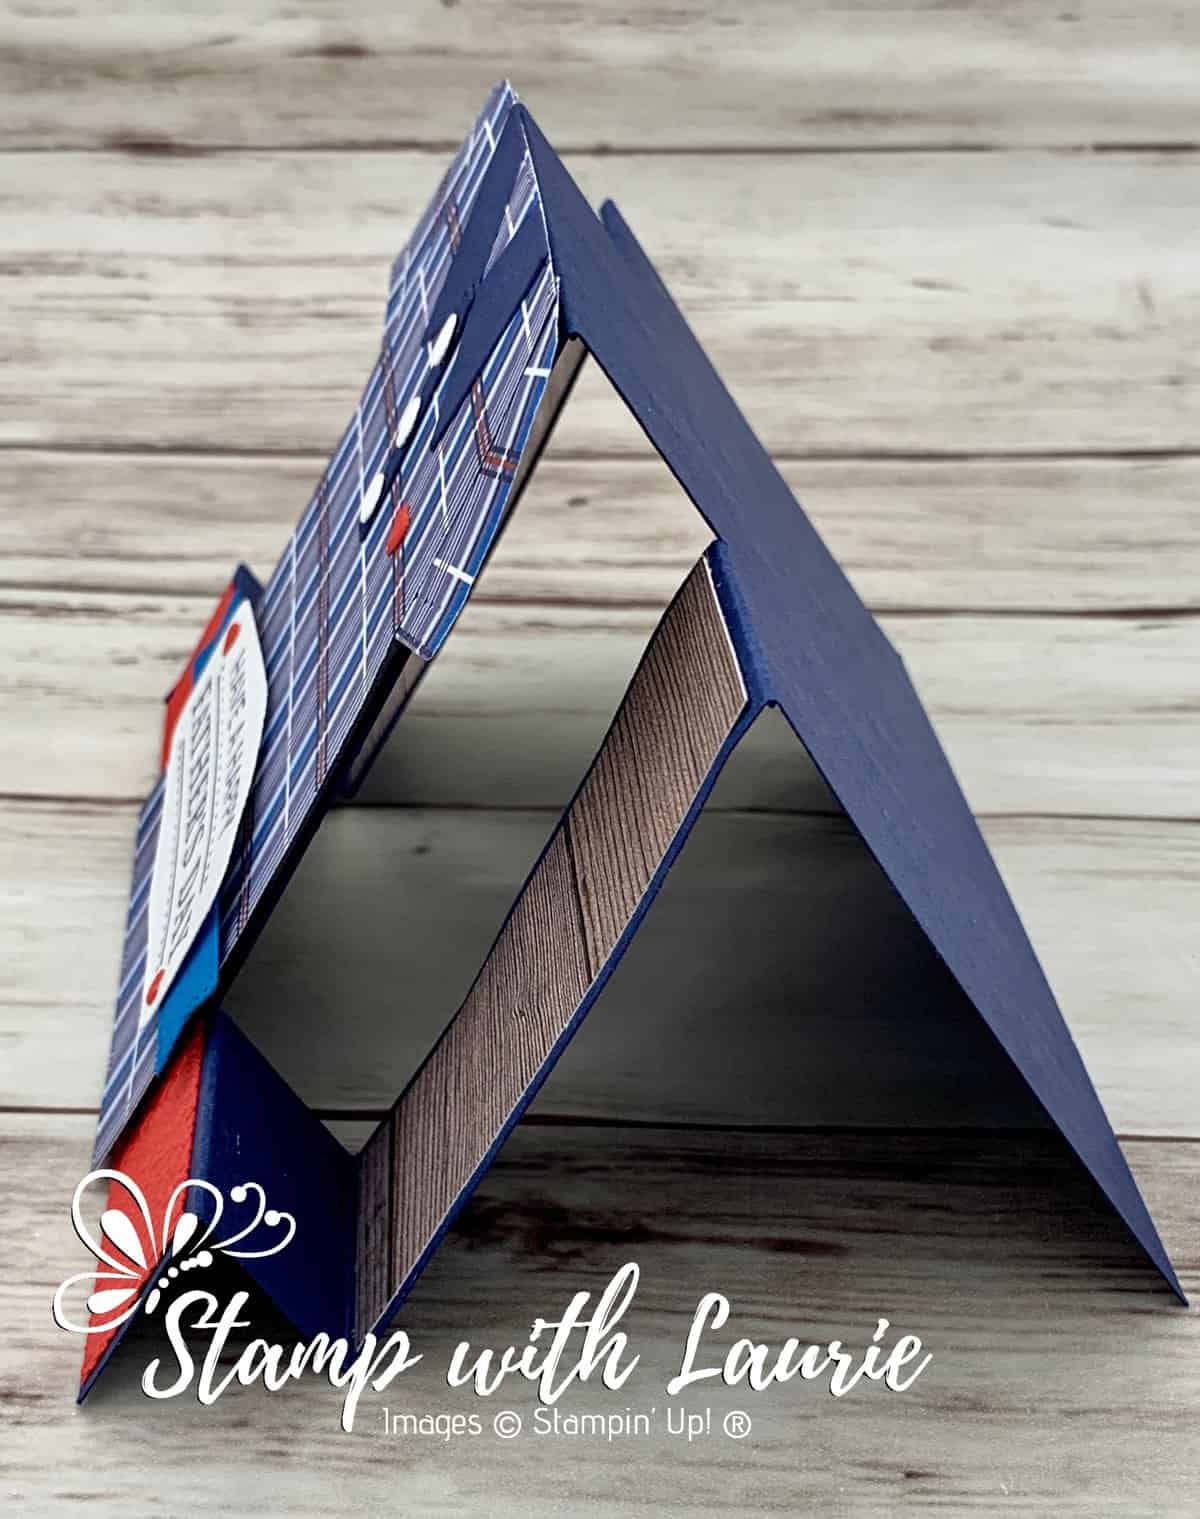
Today is I am sharing My Father’s Day Card that is using the Handsomely Suited Bundle by Stampin’ Up! I decided to create a Centre-Step Fun Fold card with the shirt on the centre panel. There is a link at the end of this post to a Horizontal Centre-Step Template.

The Details of My Card

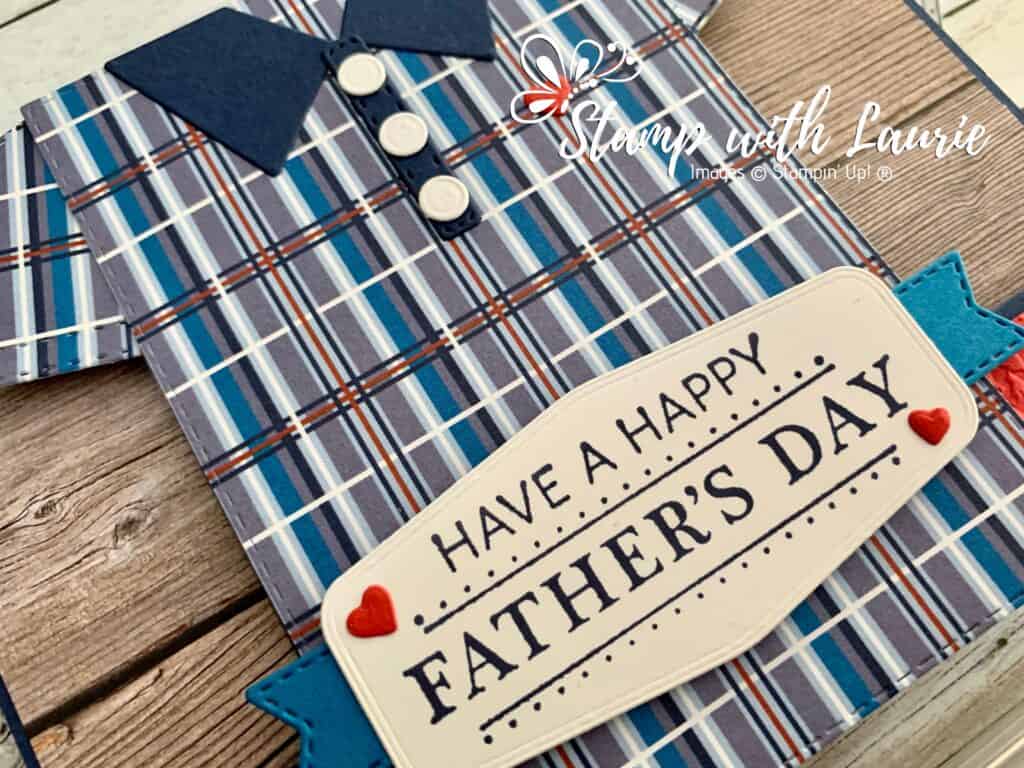
My Father-in-law isn’t a suit kind of guy, but he does wear golf shirts in blues. So, I created a short sleeve golf shirt using the Well Suited Designer Series Paper. For the sleeves, I used the pocket die and the shirt was die cut from the Stitched Rectangle Dies. I trimmed the stitched rectangle to 4 ¼” after it was die cut to fit an envelope. A number of his shirts are Lacoste with a small green allegator on the left side. Since I didn’t have any alligator dies, I used the hearts from the paws of the Pets Dies. I also figured that having a heart to represent his real heart was perfect for Father’s Day!

My Father's Day Card
My Father’s Day Card

For my sentiment, I didn’t think “Have a Happy Father’s Day Handsome” coming from both my husband and I would be appropriate for my father-in-law. So, I used the technique of covering the part of the sentiment that I didn’t want with scotch tape. Then, I inked the stamp up and removed the tape before stamping. Once the sentiment was stamped like this, I discovered that it fit perfectly in one of the dies from the Tasteful Labels Dies. The Pacific Point banner that flanks my sentiment was also from the Tasteful Labels Dies, but it wasn’t long enough to show on both sides of my sentiment. So, I cut in half giving the illusion that my banner is longer than it is.

For my other panels, I used the In Good Taste Designer Series Paper since he is a very handy man and likes to build things with wood. The Tasteful Textile 3D Embossing Folder was perfect for that material kind of look it gives my card. 

Tips for Cutting/Scoring Card Base

At 1 ¼” from the edge of the long side of card stock cut from 1” to 5 ¼” using the Paper Trimmer blade guide. Once I cut one side, I flipped the card stock over to cut the other side. Make sure that your new cut line will be parallel to the first one. Turn so that the long edge of card stock is horizontal and score side panels at 1”, 2” and 5 ¼” and 4 ¼” for the centre panel. To download a PDF file, please see the template link at the end of the post or click the image below.

Horizontal Centre-Step Card
Horizontal Centre-Step Card Template

Supplies:

Stamps/Bundles/Dies: Handsomely Suited Bundle (156240), Tasteful Labels Dies (152886), Stitched Rectangle Dies (151820)

Inks: Night of Navy Classic Stampin’ Pad (147110)

Paper: Night of Navy (100867), Pacific Point (111350), Poppy Parade (119793), Basic White (159276), Well Suited Designer Series Paper (154562), In Good Taste Designer Series Paper (152494)

Accessories: Tasteful Textile 3D Embossing Folder (152718), Bone Folder (102300), Stampin’ Dimensionals (104430), Stampin’ Seal (152813), Mini Glue Dots (103683), Multipurpose Liquid Glue (110755), Paper Trimmer (152392)

Close Up of My Card
Close Up of My Father’s Day Card

Measurements: 

  • Night of Navy: 5 ½” x 8 ½” (see template for score marks), scraps (collar, buttonholes)
  • Well Suited Designer Series Paper (3 pieces): 3” x 4 3/8” (trimmed to 4 ¼” after die cut to fit envelope), scraps for sleeves
  • In Good Taste Designer Series Paper (2 pieces): 1” x 3 1/8”
  • Basic White: 1 ¼” x 2 ¾”, scraps (buttons)
  • Pacific Point: ½” x 2 3/16”
  • Poppy Parade: 1” x 5 3/8”, scraps (hearts)
Side View of My Card
Side View of My Father’s Day Card

For Further Info:

Hope you like My Father’s Day Card. To download a PDF of this card, please click here.
For more of my Stampin’ Up! cards, please click here.
You will find the items listed above in my online store.