My Winter Sweethearts Card

My Design Team Card
My Winter Sweethearts Design Team Card

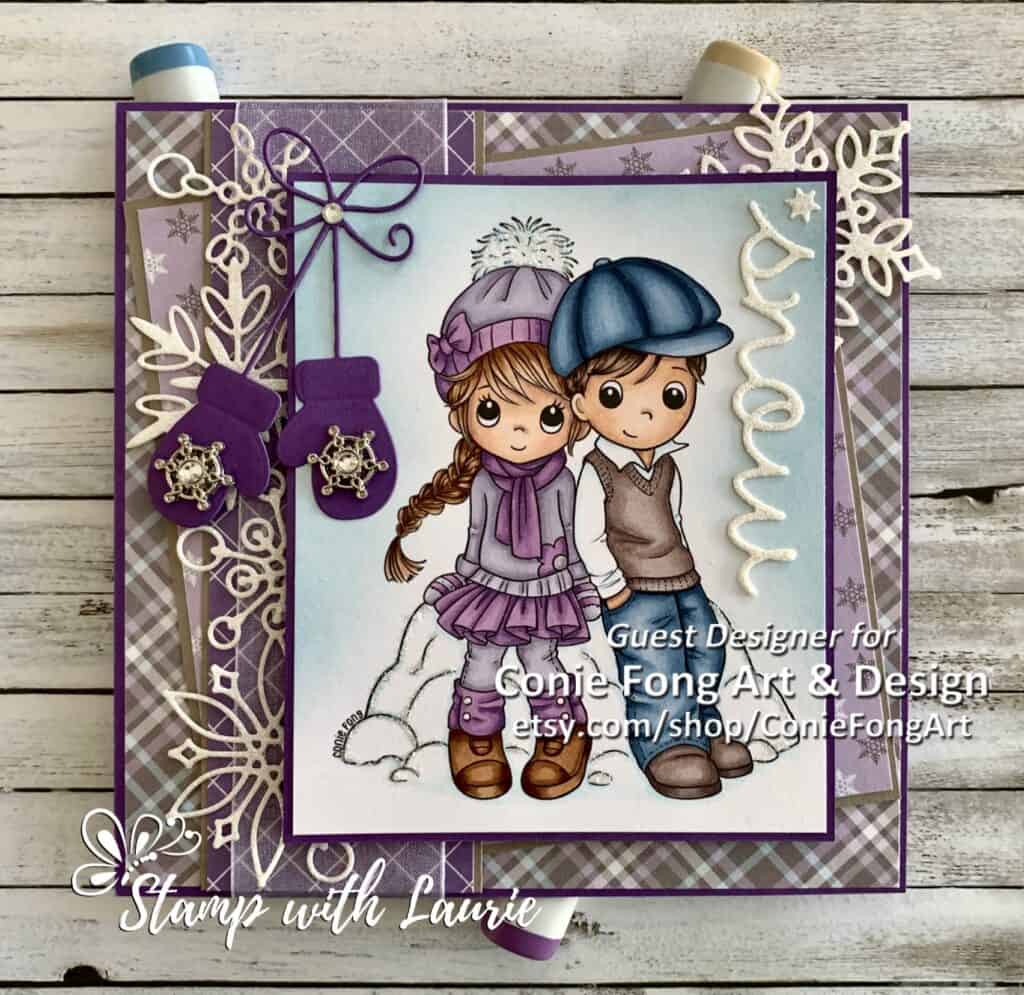
Hello Crafty Friends! It’s Laurie here! I am sharing My Winter Sweethearts Card as my last Guest Design Team Card for Conie Fong Art & Design. I am so excited that I have been asked to become a permanent Design Team Member with them starting in March! Yippee!

For my card, I used Winter Sweethearts and coloured them with my Copic markers to match my paper in purples and taupes. I coloured the girl in purples since it is one of my favourite colours. I coloured the boy with matching hat/jeans and boots/sweater since my hubby is all about matchy-matchy! LOL! Wouldn’t they make a great Valentine, Anniversary, Christmas, anything love card, but I made them my winter sweethearts!

————————–

Copic Markers:

Girl
Skin: E000/E00/E21/E11/E04/R20
Hair: E39/E35/E34/E33/E31
Sweater/Leggings/Scarf: V20/V22/V25/ Clear Gelly Roll Pen on Flower Centre
Dress/Leg Warmers: V12/V15/V17
Hat: V20/V22/V25/ V12/V15/V17/B000/0/Star Dust Stickles on Pompom
Boots: E37/E35/E33/White Gelly Roll Pen on Buttons
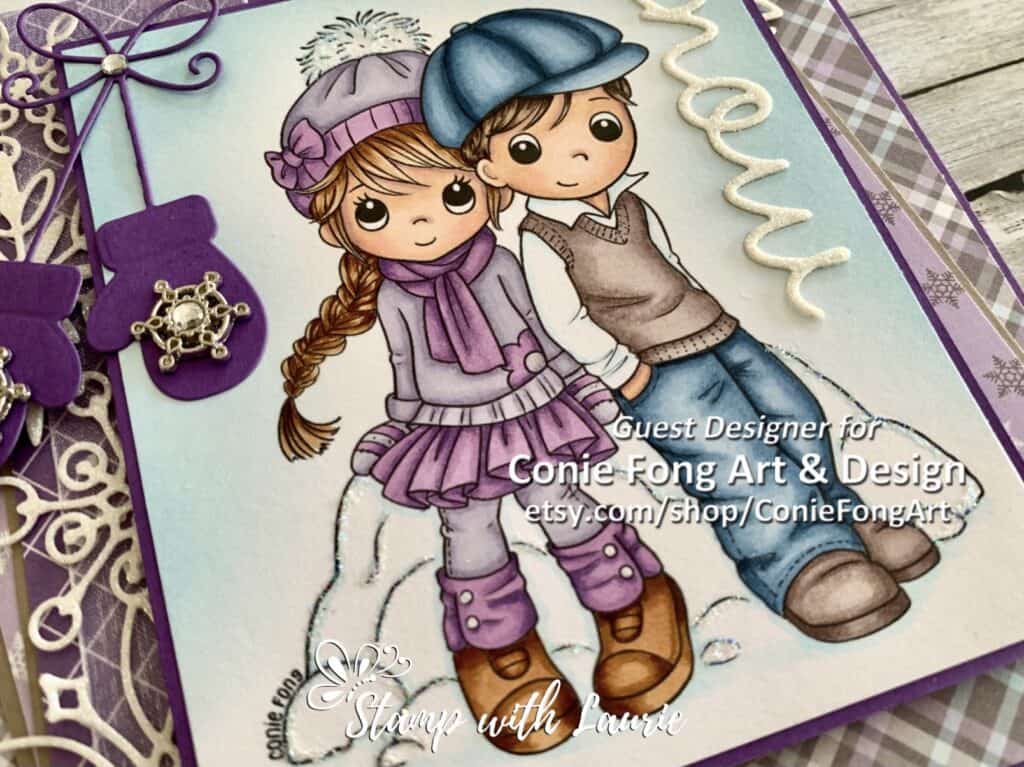
Close Up of My Design Team Card

Boy
Skin: E000/E00/E21/E11/E04/R20
Hair: E49/E47/E43/E42
Sweater/Boots: E70/E71/E74/E77
Shirt: B000/0
Jeans/Hat: B91/B92/B95/B97/B99

Snow: B000/0/Star Dust Stickles

————————–

Card Recipe for My Winter Sweethearts Card:

Winter Sweethearts, Conie Fong Art & Design
Paper Basics – Stamper’s Select White Cardstock, Papertrey Ink
Frosty 6” x 6” Paper Pad, Pink & Main
Dazzling Diamonds Glimmer Paper, Stampin’ Up!
Precious Mittens Die, Memory Box
Snowflake Border Die, From my Stash
Seasonal Frames Thinlits Dies, Stampin’ Up!
Snowfall Thinlits Dies, Stampin’ Up!
Balmy Blue Classic Stampin’ Pad, Stampin’ Up!
Blending Brushes, Stampin’ Up!
Celebrate It 1.5” Ribbon, Michaels Arts & Crafts
Winter Wonderland Embellishments, Stampin’ Up!
Rhinestone Basic Jewels, Stampin’ Up!
White Gelly Roll Pen, Sakura
Clear Gelly Roll Pen, Sakura
Star Dust Stickles, Ranger
Gorgeous Grape, Highland Heather and
Tip Top Taupe Card Stock, Stampin’ Up!

Finished card size: 5.75” x 5.75”

————————–

To view my other Conie Fong Art & Design cards, please click here.

Hope you like my Guest Design Team card using
Winter Sweethearts for Conie Fong Art & Design!

Thank you for stopping by!

Hugs,
Laurie

My Penguin Love Valentine Card

My Penguin Love Valentine Card

Hello Crafty Friends! Happy Valentine’s Day! It’s Laurie here! I am so excited to be joining Conie Fong Art & Design as a Guest Design Team Member again for February with my My Penguin Love Valentine Card! For my February GDT card, I am using 2 different stamps. The top penguin is called Penguin Heartstrings bottom penguin is called Penguin Bundle of Love. Aren’t they just the cutest!

Close Up of Penguin Heartstrings

I coloured both of these stamps with my Copic markers in the traditional Valentine colours of pink and red. I then, decided that I wanted both of them on the same card. So, I went with a slimline card with lots of hearts for Valentine’s Day! For the sentiment, I used markers to colour just the part of the stamp that I wanted and then “huffed” (technical term lol) on it to activate the ink. For a bit of sparkle, I added glossy accents to the penguins’ beaks, feet and the heart that the Penguin Bundle of Love is holding. I also added Star Dust Stickles to the heartstrings of the other penguin. One final touch is a scattering of Red Rhinestones.

————————–

Copic Markers:

Black Feathers: C9/C7/C6/C5
White Feathers: C3/C1/C00/0
Pinks: R81/R83/R85
Reds: 22/R24/R29
Beaks/Feet: Y38/YR12/YR04/glossy accents

Close Up of Penguin Bundle of Love

————————–

Card Recipe for Penguin Love Valentine Card:

Penguin Heartstrings and Penguin Bundle of Love, Conie Fong Art & Design
Paper Basics – Stamper’s Select White Cardstock, Papertrey Ink
Candy Conversations, Stampin’ Up!
From My Heart Designer Series Paper, Stampin’ Up!
Be Mine Stitched Dies, Stampin’ Up!
Large Slimline with Sliders Dies, Lawn Fawn
Two of Hearts Dies, Cheery Lynn Designs
Project Life Cards and Labels Framelits Dies, Stampin’ Up!
Real Red Stampin’ Write Marker, Stampin’ Up!
Tuxedo Black Memento Marker, Tsukineko
Red Rhinestone Basic Jewels, Stampin’ Up!
Glossy Accents, Ranger
Star Dust Stickles, Ranger
Real Red, Rose Red and Whisper White Card Stock, Stampin’ Up!

Finished card size: 3.5” x 8.5”

————————–

To view my other Conie Fong Art & Design cards, please click here.

Hope you like my Guest Design Team card using
Penguin Heartstrings and Penguin Bundle of Love for Conie Fong Art & Design!
Thank you for stopping by!

Hugs,
Laurie

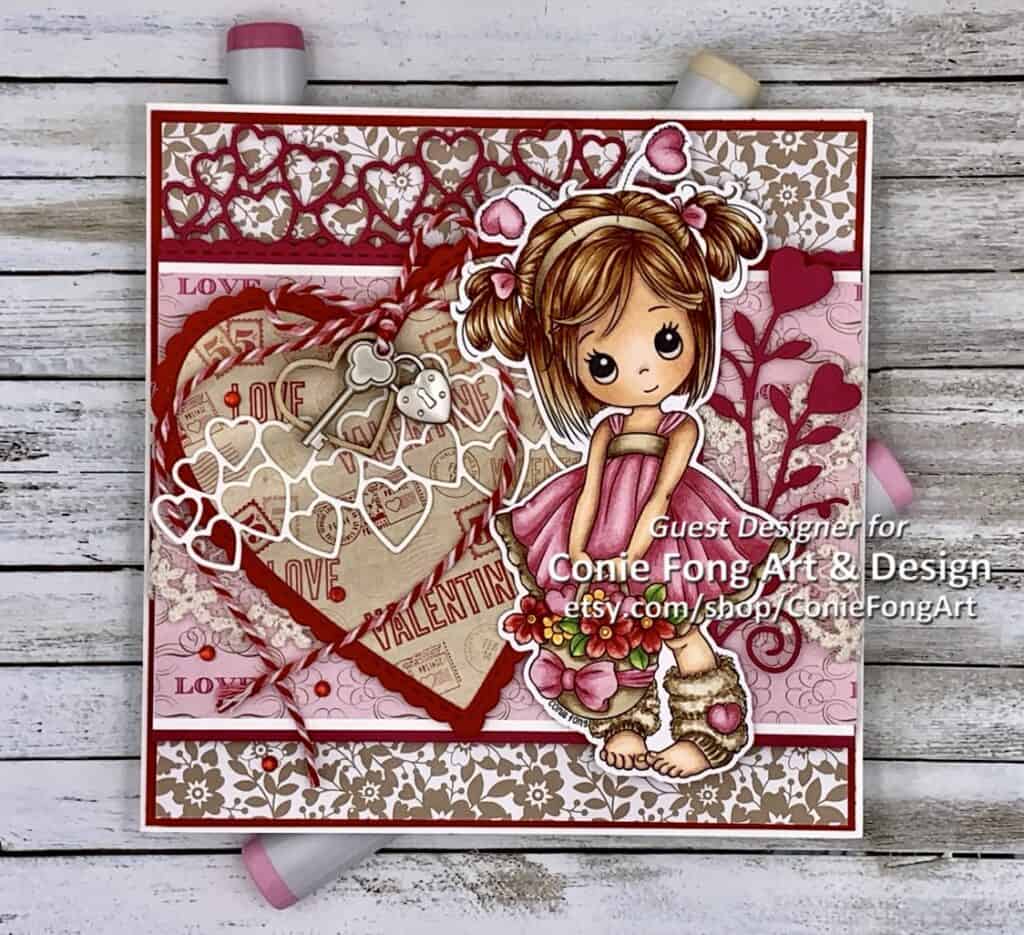
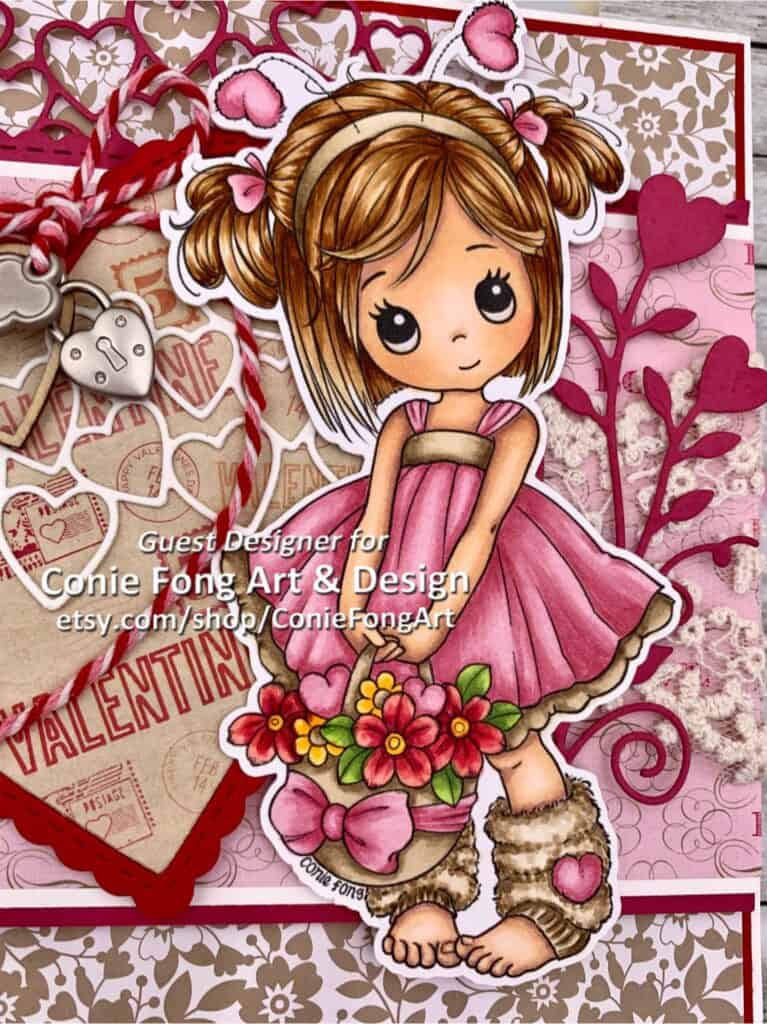
Molly’s Valentine Card

My Guest Design Team Card for Conie Fong Art & Design

Hello Crafty Friends! It’s Laurie here! I am so excited to be joining Conie Fong Art & Design as a Guest Design Team Member again for January! For my first GDT card for January, I created Molly’s Valentine Card using Molly’s Basket of Love – with headband. This stamp comes in a set of three digital stamps including Molly’s Basket of Love and Molly Fairy.

I have been wanting to colour this sweet image for a while and thought that with Valentine’s Day next month, she would be perfect! Since she is a Valentine card, I coloured her with my Copic markers in pinks, reds and browns to match my paper. I pulled out my Be Mine Stitched Dies for the large heart and the cluster of smaller ones. For embellishments, I went into my stash of Stampin’ Up! trinkets for the key and heart lock and tied them with red/pink/white twine to a wooden heart. The twine ends were shaped into a heart since you can never have too many hearts on a Valentine card! I just love the ribbon with its soft curves and lacey details. A scattering of red rhinestones and Clear Wink of Stella on all of Molly’s hearts and the bow on her basket, add a bit of sparkle.

————————–

Copic Markers:

Skin: E000/00/21/11/04/R20
Hair: E31/E33/E35/E37
Pinks: R81/R83/R85
Browns: E41/E42/E43/E44
Reds: R32/R35/R37/R39
Leaves: YG03/YG63/YG67
Yellow Flowers: Y35/9Y38

Close Up of My Guest Design Team Card for Conie Fong Art & Design

————————–

Card Recipe for Molly’s Valentine Card:

Molly’s Basket of Love – with headband, Conie Fong Art & Design
Paper Basics – Stamper’s Select White Cardstock, Papertrey Ink
4.75” x 6.75” In Key and Heart Mat Pad, Martha Stewart Holidays
Love Blossoms Designer Series Paper, Stampin’ Up!
Be Mine Stitched Dies, Stampin’ Up!
Love is Growing Die, Penny Black
Sending Love Embellishments, Stampin’ Up!
Key Trinkets Embellishments, Stampin’ Up!
Heart Trinkets Embellishments, Stampin’ Up!
Celebrate It Occasions Ribbon, Michaels
Red, Pink and White Baker’s Twine
Red Rhinestone Basic Jewels, Stampin’ Up!
Clear Wink of Stella, Stampin’ Up!
Real Red, Rose Red and Whisper White Card Stock, Stampin’ Up!

Finished card size: 5.5” x 5.5”

————————–

To view my other Copic Marker cards, please click here.

Hope you like my Guest Design Team card
using Molly’s Basket of Love – with headband for Conie Fong Art & Design!


Thank you for stopping by!

Hugs,
Laurie

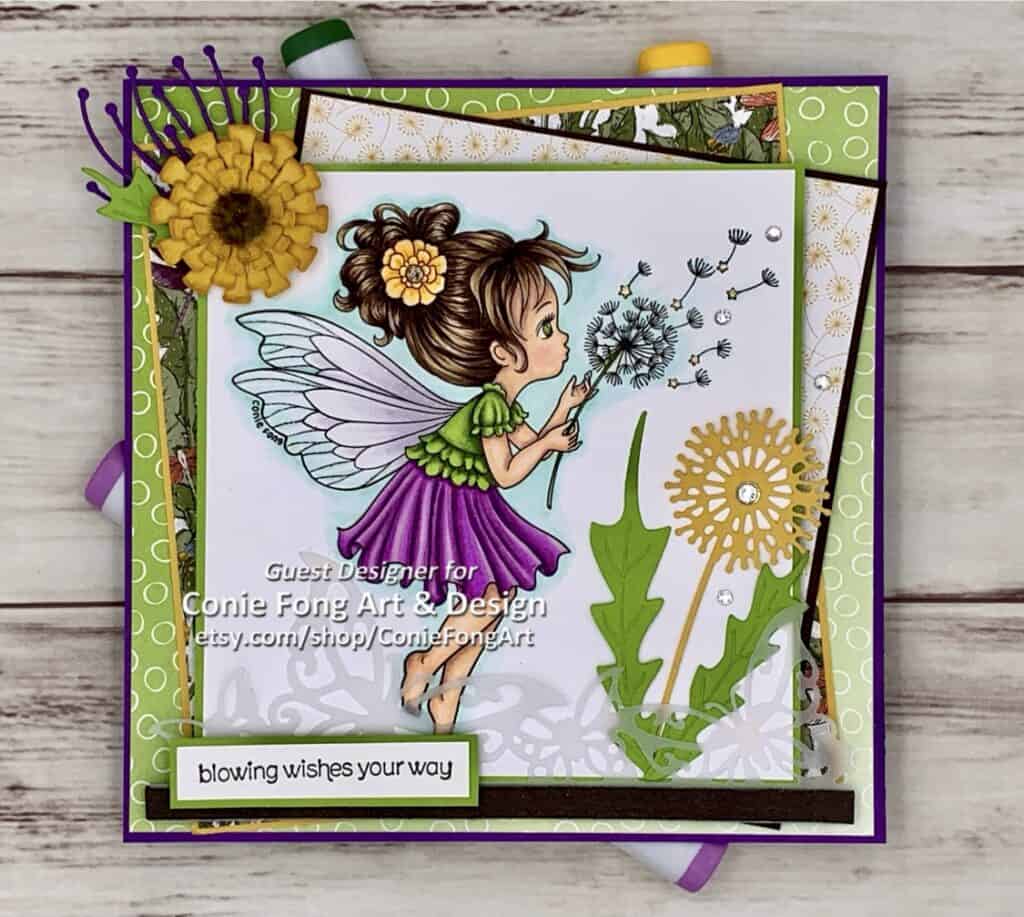
Blowing Wishes Your Way

My Guest Design Team Card for Conie Fong Art & Design
My Blowing Wishes Your Way Card for Conie Fong Art & Design

Happy New Year’s Eve! Hello Crafty Friends! It’s Laurie here! For my last card of 2020, I am sharing my Guest Design Team Inspiration for Conie Fong Art & Design using Dandelion Wishes. This sweet fairy is “blowing wishes your way” for a wonderful 2021!

I had so much fun colouring her with my Copics markers in bright and bonny colours for a change from the Christmas colours that I have been using lately! This digital stamp can be used for so many different occasions, but I decided that I wanted to create a New Year’s Eve card. I knew that I wanted to use some new Stampin’ Up! products that I received that tied in the dandelion theme nicely like the Designer Series Paper and the Dies!

————————–

Copic Markers:

Skin: E000/E00/E21/E11/E04/R20
Hair: E49/E47/E43/E42
Eyes: YG07/YG63/G99
Flower: Y38/Y35/Y32/E47/E43/Clear Star Gelly Roll Pen for Flower Centre
Greens: YG03/YG63/YG67/G99
Purples: V000/V01/V04/V06/V09
Wings: BG10/V20/0/Clear Star Gelly Roll Pen
Dandelion Stars: Y38/Y32/Clear Star Gelly Roll Pen
Sky: BG10/0

Close Up of My Guest Design Team Card for Conie Fong Art & Design

————————–

Card Recipe for Blowing
Wishes Your Way:

Dandelion Wishes, Conie Fong Art & Design
Paper Basics – Stamper’s Select White Cardstock, Papertrey Ink
Oh So Ombre 6” x 6” Designer Series Paper, Stampin’ Up!
Dandy Garden 6” x 6” Designer Series Paper, Stampin’ Up!
Vellum, Stampin’ Up!
Sweet Silhouettes Dies, Stampin’ Up!
Dandy Wishes Dies, Stampin’ Up!
Butterfly Edge, Joy! Crafts Dies
Basic Rhinestone Jewels, Stampin’ Up!
Perennial Essence Floral Centers, Stampin’ Up!
Faux Suede Trim, Stampin’ Up!
Wishes Your Way Stamp Set, Stampin’ Up!
Clear Star Gelly Roll Pen
Stamping Sponges, Stampin’ Up!
VersaFine Ink, Onyx Black, Tsukineko
Bumblebee and Early Espresso Ink, Stampin’ Up!
Gorgeous Grape, Bumblebee, Granny Apple Green
and Early Espresso Card Stock, Stampin’ Up!
Finished card size: 6” x 6”

————————–

To view my other Copic Marker cards, please click here.

Hope you like my last Guest Design Team card for 2020
using Dandelion Wishes for Conie Fong Art & Design!

Happy New Year Everyone! May it be a better one than 2020!

Thank you for stopping by!

Hugs,
Laurie

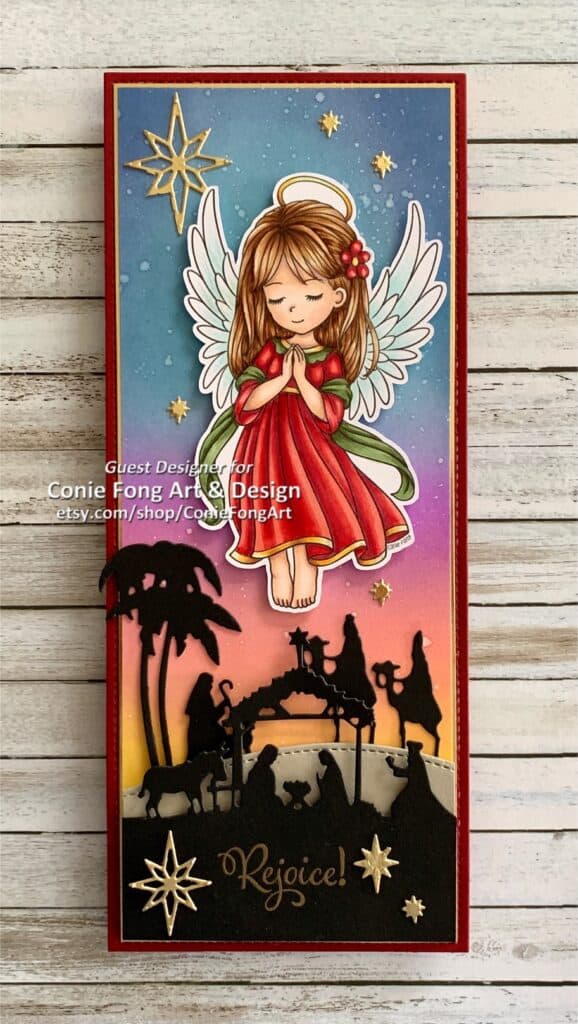
Let’s Rejoice Christmas Card

My Let's Rejoice GDT Card
My Let’s Rejoice Christmas Card

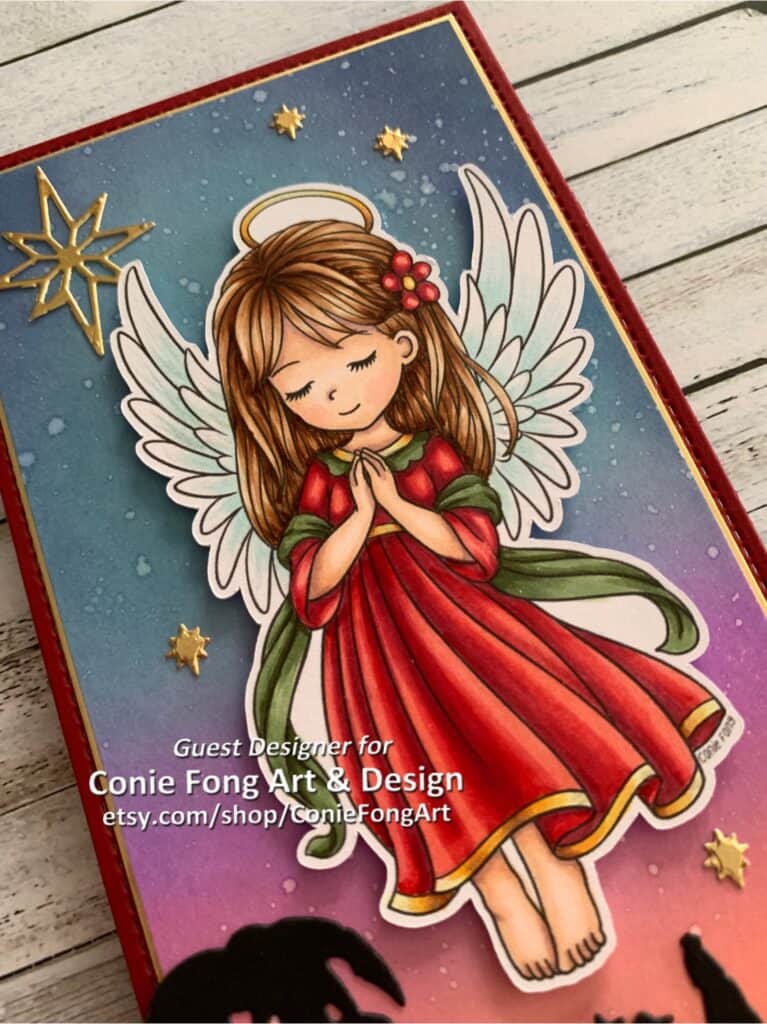
Hello Crafty Friends! It’s Laurie here again! I am sharing my Let’s Rejoice Christmas Card as my Guest Design Team Inspiration for Conie Fong Art & Design using the beautiful Angel Prayers. I created a slimline card for my Holy scene.

The Details of My Card

This digital stamp is perfect for so many occasions like birthday, sympathy, get well and thinking of you. However, for my card, I wanted her to be the Christmas Angel from the Nativity. So, I coloured her with my Copic Markers in Christmas colours.

I use the Clear Star Gelly Roll Pen on her wings and smooshed the lines with my finger before they dried. This gives the lines a softer look, but still allows a flowing movement of her wings. I also used the same pen on all the gold accents to make them shimmer. Finally, I added Clear Wink of Stella on her wrap. You can never have too much sparkle where an angel is concerned!

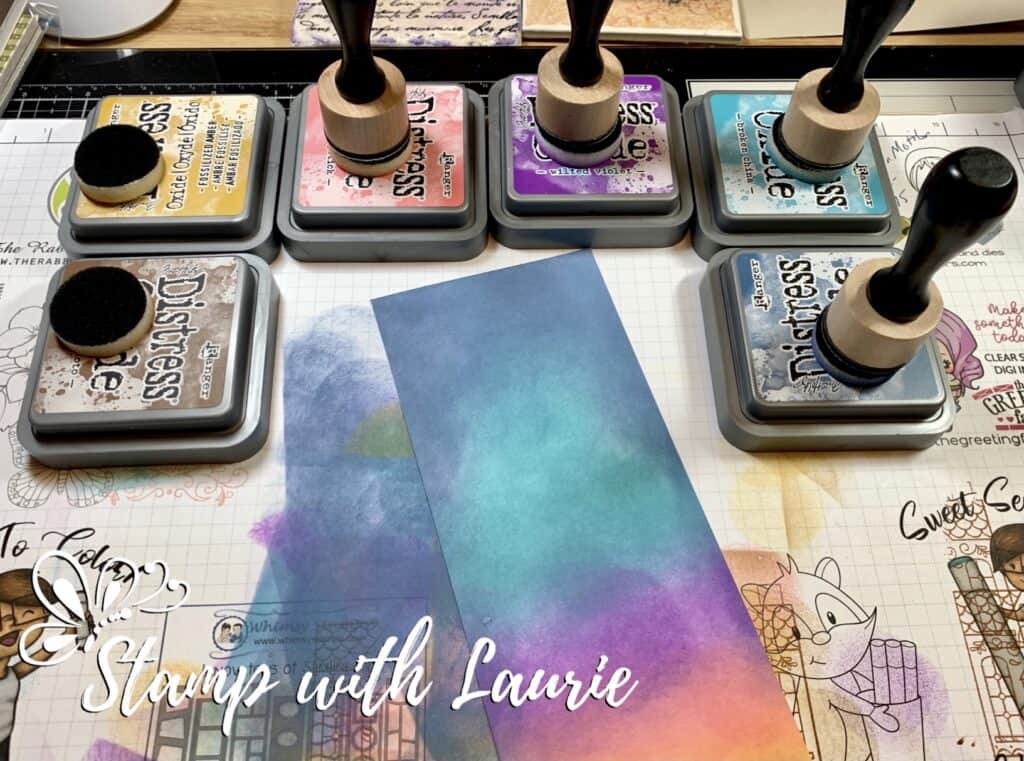
Instead of a night scene, I decided to create a sunrise with the dawning of the birth of Jesus Christ. For my sunrise, I used my Distress Oxide Inks and my Mini Blending Tool starting with Fossilized Amber at the base of the watercolor paper, followed by Worn Lipstick, Wilted Violet, Broken China and Faded Jeans.

Distress Oxide Blending of Sunrise Sky

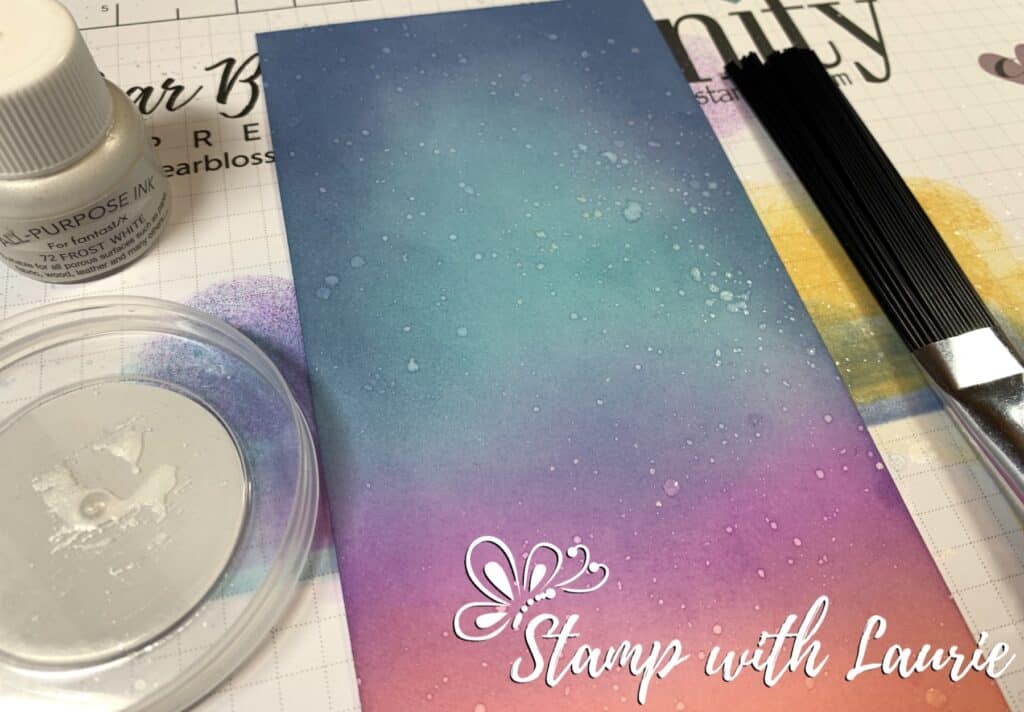
Once the colours were blended, I used my Splatter Tool dipped in Frost White Shimmer Paint and then in water to create the sky.

The Final Sunrise Sky with Shimmer Paint and Water Splatter

For my Nativity scene, the die I used comes as border. So, a few snips here and there and add my Sahara Sand dune to create my layered scene with lots of dimensionals between the layers.

The Gold Foil stars were from the Silent Night Dies from Creative Expressions. The North Star was snipped from the largest die in the set.

To finish the card, I used a Gold Foil mat followed by a Stitched Cherry Cobber mat.

————————–

Copic Markers:

Skin: E000/00/21/11/04/R20
Hair: E37/E35/E33/E31/E30
Reds: R39/R37/R35/R32
Greens: G21/G94/G99
Golds: E99/Y17/Y15/T00
Wings: BG10/BG000

Close Up of My Let's Rejoice Card
Close Up of My Let’s Rejoice Christmas Card

————————–

Card Recipe for Let’s Rejoice Christmas Card:

Angel Prayers, Conie Fong Art & Design
Paper Basics – Stamper’s Select White Cardstock, Papertrey Ink
Hot Press 140 lbs Watercolor Paper, Fabriano
Gold Foil Sheets, Stampin’ Up!
Large Slimline with Sliders Dies, Lawn Fawn
Slimline Stitched Hillside Border Dies, Lawn Fawn
Nativity Border Die, Taylored Expressions
Festive Collection – Silent Night Dies, Creative Expressions, Sue Wilson
Peaceful Nativity Stamp Set, Stampin’ Up!
VersaMark Ink, Stampin’ Up!
Gold Stampin’ Emboss Powder, Stampin’ Up!
Heat Tool, Stampin’ Up!
Mini Ink Blending Tool, Ranger
Fossilized Amber Distress Oxide Ink, Ranger
Worn Lipstick Distress Oxide Ink, Ranger
Wilted Violet Distress Oxide Ink, Ranger
Broken China Distress Oxide Ink, Ranger
Faded Jeans Distress Oxide Ink, Ranger
Frost White Shimmer Paint, Stampin’ Up!
Tim Holtz Distress Splatter Brush, Ranger
Clear Wink of Stella
Clear Star Gelly Roll Pen
Black Stampin’ Dimensionals, Stampin’ Up!
Cherry Cobbler, Basic Black and Sahara Sand Card Stock, Stampin’ Up!

Finished card size: 8.5” x 3.5”

————————–

To view my other Copic Marker cards, please click here.

Hope you like my Let’s Rejoice Christmas Card as my Guest Design Team Inspiration using Angel Prayers for Conie Fong Art & Design!


Thank you for stopping by!

Hugs,
Laurie
Sally’s Christmas Friends Card

Sally's Christmas Friends Card
Sally’s Christmas Friends Card

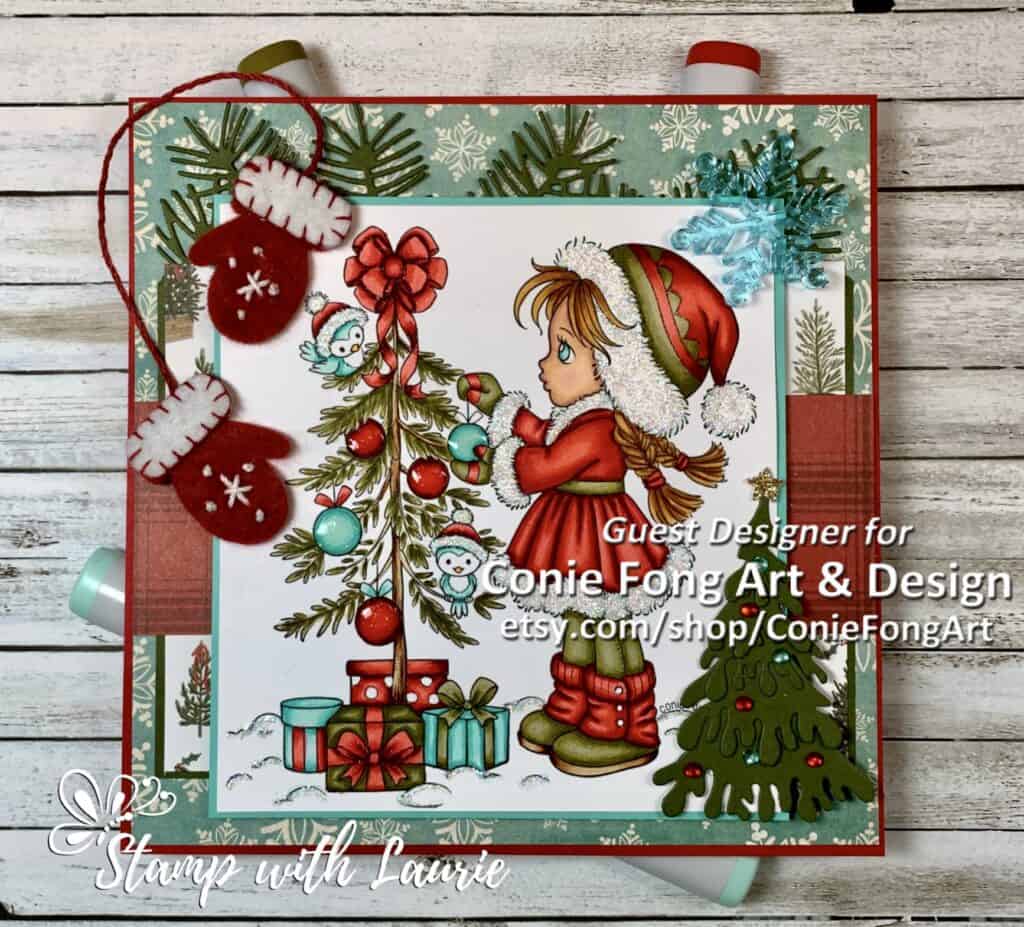
Hello Crafty Friends! It’s Laurie here again! I am sharing my second November Guest Design Team Card for Conie Fong Art & Design using the very festive Sally’s Christmas Friends.

I had so much fun colouring with my Copic Markers this sweet tree decorating scene of Sally and her two little helpers! We look forward to decorating our Christmas tree each year. Every time we travel, we buy an ornament for our tree. When we decorate the tree it brings back so many wonderful memories!

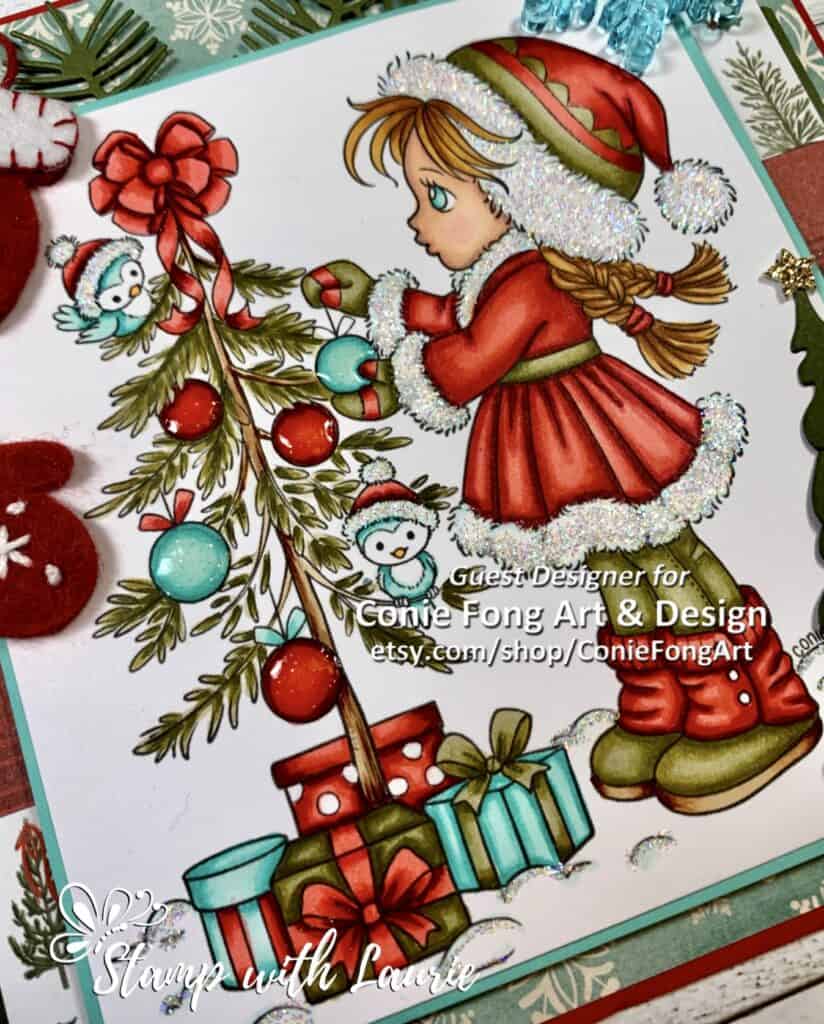
I added lots of sparkle with stickles to the white trim of Sally’s clothes, the birds’ hats and the snow. I also used Shimmery Crystal Effects on all the ornaments to give them a glossy shine! For the Clear Wink of Stella, I added it to all the ribbons including the tree topper! You can never have too much sparkle for a Christmas card!

I love the pops of blue from this otherwise traditional coloured card! It ties in nicely with the snowflakes from Lost & Found Christmas Paper Pad and the blue snowflake embellishment.

Don’t you love the felt mittens! I just had to pull them out of my stash for this card! For my ornaments on my tree die, I used red rhinestones and coloured clear ones with my Copics in the blue to match Sally’s tree. A gold glimmer paper star tops it with even more sparkle!

Close up of My Guest Design Team Card for Conie Fong's Art & Design
Close up of My Guest Design Team Card for Conie Fong Art & Design

————————–

Copic Markers:

Skin: E000/E00/E21/E11/E04/R20
Hair: E99/YR23/YR24
Reds: R22/R24/R29/R59
Greens: YG91/YG93/YG35/YG97/YG99
Tree: YG99/YG95/YG91/E37/E33/E31
Blue Ornaments/Birds: BG15/BG13/BG11/BG10
Birds Beaks: Y38
Whites: BG10/0/Stardust Stickles
Clear Rhinestones: BG13

————————–

Card Recipe for Sally’s Christmas Friends Card:

Sally’s Christmas Friends, Conie Fong Art & Design
Paper Basics – Stamper’s Select White Cardstock, Papertrey Ink
Lost & Found Christmas 6” x 6” Paper Pad, My Mind’s Eye
Farmhouse Christmas 6” x 6” Paper Pad, Carta Bella Paper Co.
Gold Glimmer Paper, Stampin’ Up!
Pine Needles Border Die, Memory Box
Small Snow Covered Tree Cutting Die, Dee’s Distinctively Dies
Confetti Stars Punch, Stampin’ Up!
Stitched Felt Winter Wishes mittens, Stampin’ Up!
Rhinestone Basic Jewels, Stampin’ Up!
Red Rhinestone Basic Jewels, Stampin’ Up!
Stardust Stickles
Shimmery Crystal Effects, Stampin’ Up!
Clear Wink of Stella
White Gelly Roll Pen
Mini Snowflakes, Crafts, Dollarama
Real Red and Mossy Meadow, Costal Cabana Card Stock, Stampin’ Up!
Finished card size: 6” x 6”

————————–

To view my other Copic Marker cards, please click here.

Hope you like my Guest Design Team Card
using Sally’s Christmas Friends for Conie Fong Art & Design!

Thank you for stopping by!

Hugs,
Laurie
My Molly’s Fairy Christmas Gift

My Molly’s Fairy Christmas Gift Card

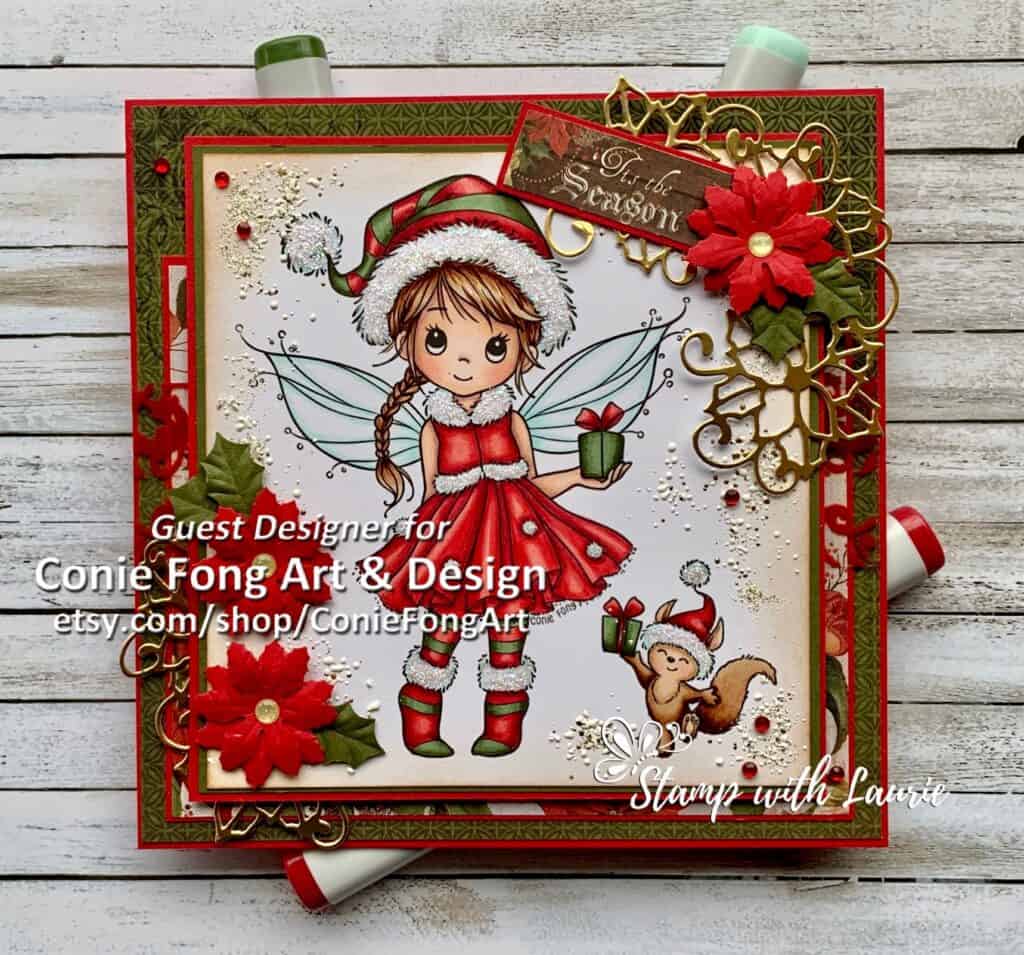
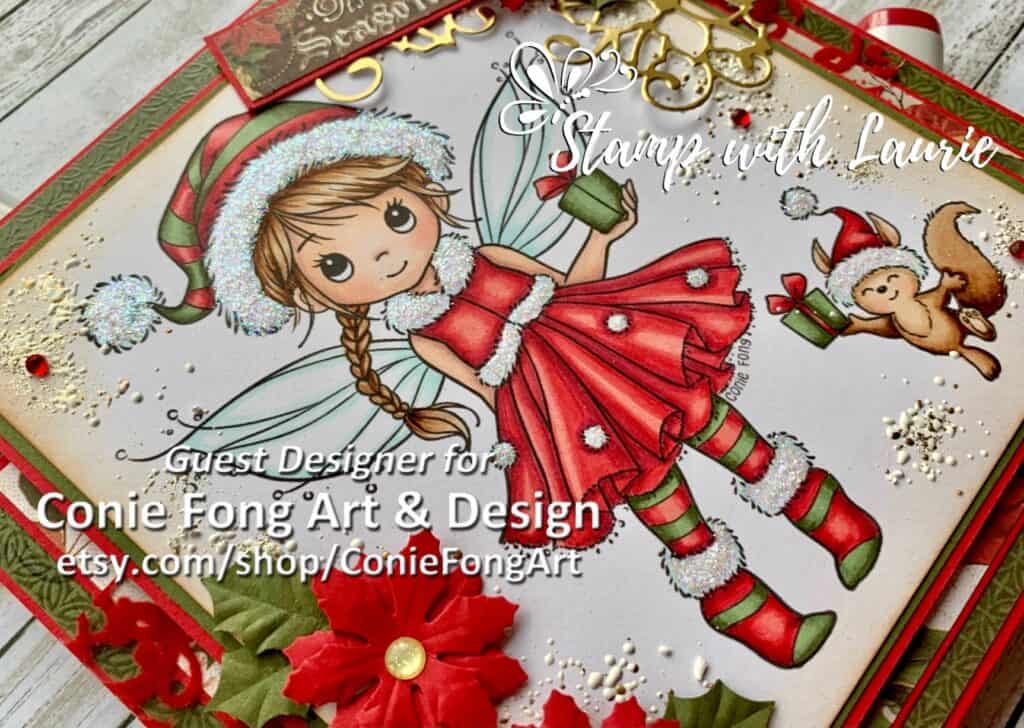
Hello Crafty Friends! It’s Laurie here with My Molly’s Fairy Christmas Gift card! I am so excited to be joining Conie Fong Art & Design as a Guest Design Team Member for the next two months!  I love her digital stamps! For my first GDT card, I am using the beautiful Molly’s Fairy Gift.

I had so much fun colouring Molly and her friend with my Copic markers! I wanted to create a shabby chic card, but with lots of sparkle and shimmer! This. was achieved by sponging the edges of my image with Vintage Photo ink and then heat setting some Shabby White Embossing Powder which has gold flecks in it. I further accented the flecks with gold foil die cut poinsettias and gold glitter enamel dots. To add more sparkle, I used red rhinestones and lots of Stardust Stickles! Don’t you just love the poinsettia punch flowers and leaves. They really add a nice dimension to the card! As my card says, Tis’ the Season!

Close Up of My Molly's Fairy Christmas Gift Card
Close Up of My Molly’ Fairy Christmas Gift Card

————————–

Copic Markers:

Skin: E000/00/21/11/04/R20
Hair: E31/E33/E35/E37
Reds: R32/R35/R37/R39
Greens: G31/G34/G99
Wings: BG10/BG11/0
Squirrel: E37/E35/E33/E31 (dark fur)
E31/E30/E33/R20 (light fur)
Whites: BG10/0

————————–

Card Recipe for My Molly’s Fairy Christmas Gift:

Molly’s Fairy Gift, Conie Fong Art & Design
Paper Basics – Stamper’s Select White Cardstock, Papertrey Ink
Letters to Santa 6 ½” Paper Pad, KaiserCraft
Candlelight Christmas Specialty Designer Series Paper, Stampin’ Up!
Gold Foil Paper, Stampin; Up!
Nellie’s Choice Floral Punch Poinsettia
Nellie’s Choice Floral Punch Holly Leaf
Festive Collection Poinsettia Cluster, Sue Wilson Dies
Shabby White Embossing Enamel 
Red Rhinestone Basic Jewels, Stampin’ Up!
Gold Glitter Enamel Dots, Stampin’ Up!
Stardust Stickles
Vintage Photo, Tim Holtz Distress Ink Pad
Stamping Sponges, Stampin’ Up!
Real Red and Mossy Meadow Card Stock, Stampin’ Up!
Finished card size: 6” x 6”

————————–

To view my other Copic Marker cards, please click here.

Hope you like my first Guest Design Team card
using Molly’s Fairy Gift for Conie Fong Art & Design!

Thank you for stopping by!

Hugs,
Laurie