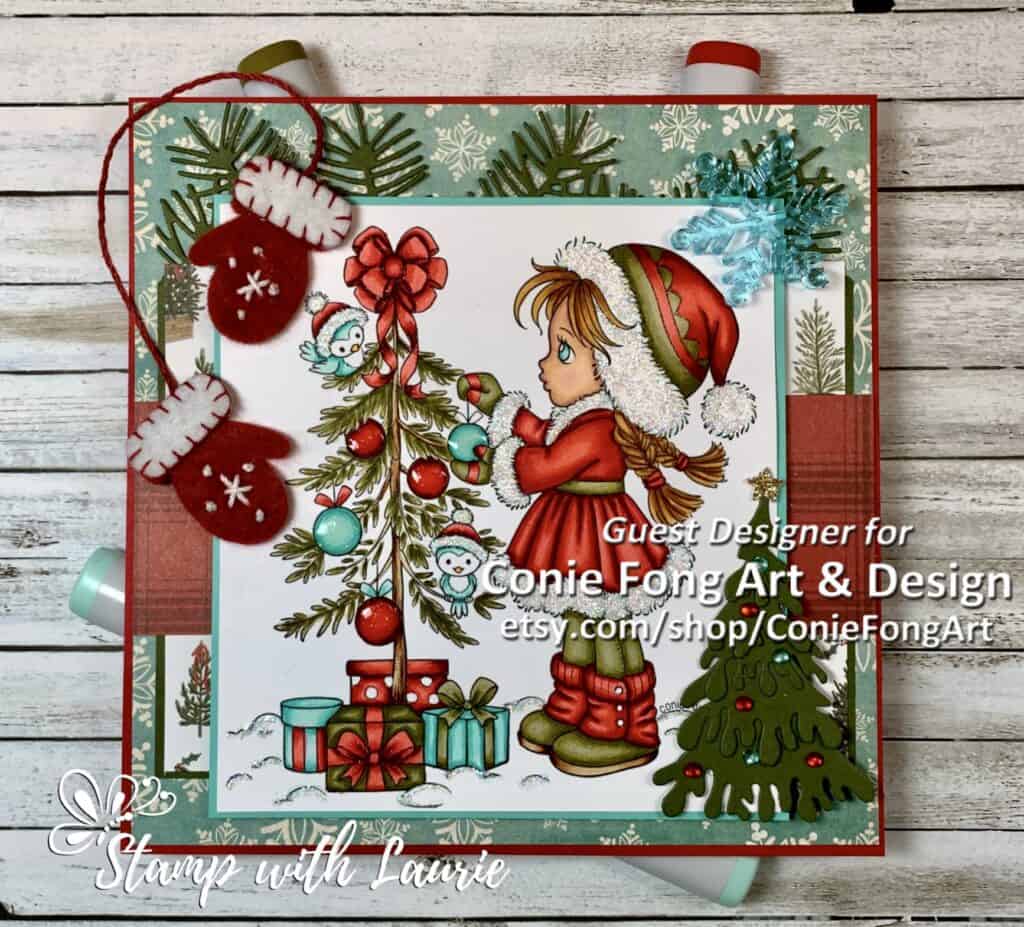
Sally’s Christmas Friends Card

Sally's Christmas Friends Card
Sally’s Christmas Friends Card

Hello Crafty Friends! It’s Laurie here again! I am sharing my second November Guest Design Team Card for Conie Fong Art & Design using the very festive Sally’s Christmas Friends.

I had so much fun colouring with my Copic Markers this sweet tree decorating scene of Sally and her two little helpers! We look forward to decorating our Christmas tree each year. Every time we travel, we buy an ornament for our tree. When we decorate the tree it brings back so many wonderful memories!

I added lots of sparkle with stickles to the white trim of Sally’s clothes, the birds’ hats and the snow. I also used Shimmery Crystal Effects on all the ornaments to give them a glossy shine! For the Clear Wink of Stella, I added it to all the ribbons including the tree topper! You can never have too much sparkle for a Christmas card!

I love the pops of blue from this otherwise traditional coloured card! It ties in nicely with the snowflakes from Lost & Found Christmas Paper Pad and the blue snowflake embellishment.

Don’t you love the felt mittens! I just had to pull them out of my stash for this card! For my ornaments on my tree die, I used red rhinestones and coloured clear ones with my Copics in the blue to match Sally’s tree. A gold glimmer paper star tops it with even more sparkle!
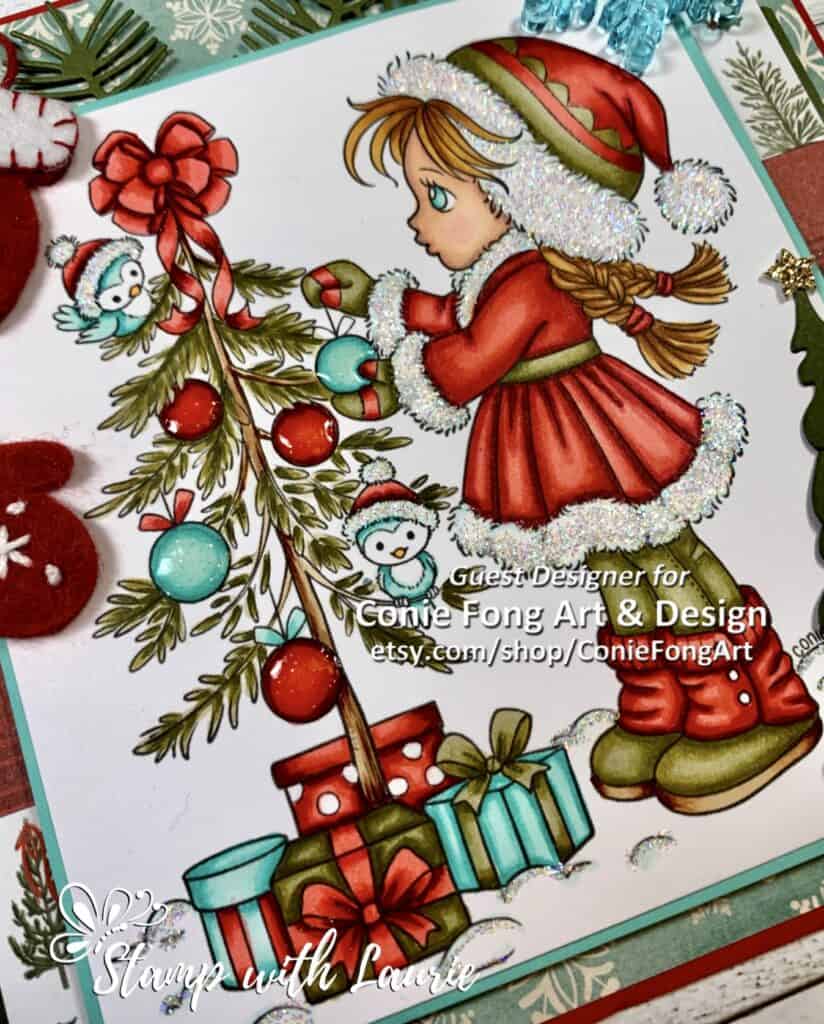
Close up of My Guest Design Team Card for Conie Fong's Art & Design
Close up of My Guest Design Team Card for Conie Fong Art & Design

————————–

Copic Markers:

Skin: E000/E00/E21/E11/E04/R20
Hair: E99/YR23/YR24
Reds: R22/R24/R29/R59
Greens: YG91/YG93/YG35/YG97/YG99
Tree: YG99/YG95/YG91/E37/E33/E31
Blue Ornaments/Birds: BG15/BG13/BG11/BG10
Birds Beaks: Y38
Whites: BG10/0/Stardust Stickles
Clear Rhinestones: BG13

————————–

Card Recipe for Sally’s Christmas Friends Card:

Sally’s Christmas Friends, Conie Fong Art & Design
Paper Basics – Stamper’s Select White Cardstock, Papertrey Ink
Lost & Found Christmas 6” x 6” Paper Pad, My Mind’s Eye
Farmhouse Christmas 6” x 6” Paper Pad, Carta Bella Paper Co.
Gold Glimmer Paper, Stampin’ Up!
Pine Needles Border Die, Memory Box
Small Snow Covered Tree Cutting Die, Dee’s Distinctively Dies
Confetti Stars Punch, Stampin’ Up!
Stitched Felt Winter Wishes mittens, Stampin’ Up!
Rhinestone Basic Jewels, Stampin’ Up!
Red Rhinestone Basic Jewels, Stampin’ Up!
Stardust Stickles
Shimmery Crystal Effects, Stampin’ Up!
Clear Wink of Stella
White Gelly Roll Pen
Mini Snowflakes, Crafts, Dollarama
Real Red and Mossy Meadow, Costal Cabana Card Stock, Stampin’ Up!
Finished card size: 6” x 6”

————————–

To view my other Copic Marker cards, please click here.

Hope you like my Guest Design Team Card
using Sally’s Christmas Friends for Conie Fong Art & Design!

Thank you for stopping by!

Hugs,
Laurie

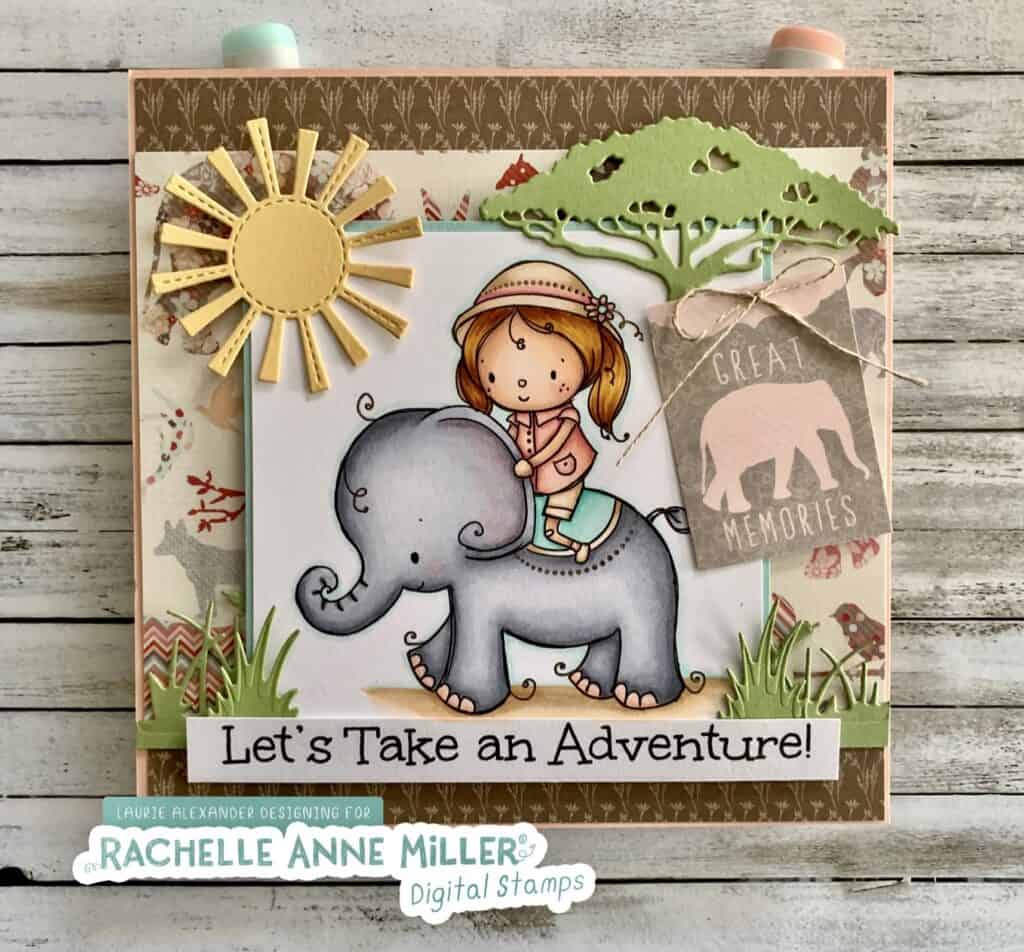
A Grand Adventure Card

My Life is a Grand Adventure Design Team Card
My Design Team Card

It’s Laurie here with A Grand Adventure Card for Rachelle Anne Miller Creative Studios using her cute Elephant Adventure Digital Stamp. This little girl looks like she is in for the ride of her life and making great memories as she does! One day, I hope to visit Africa and go on Safari with cameras. It’s on my Bucket List!

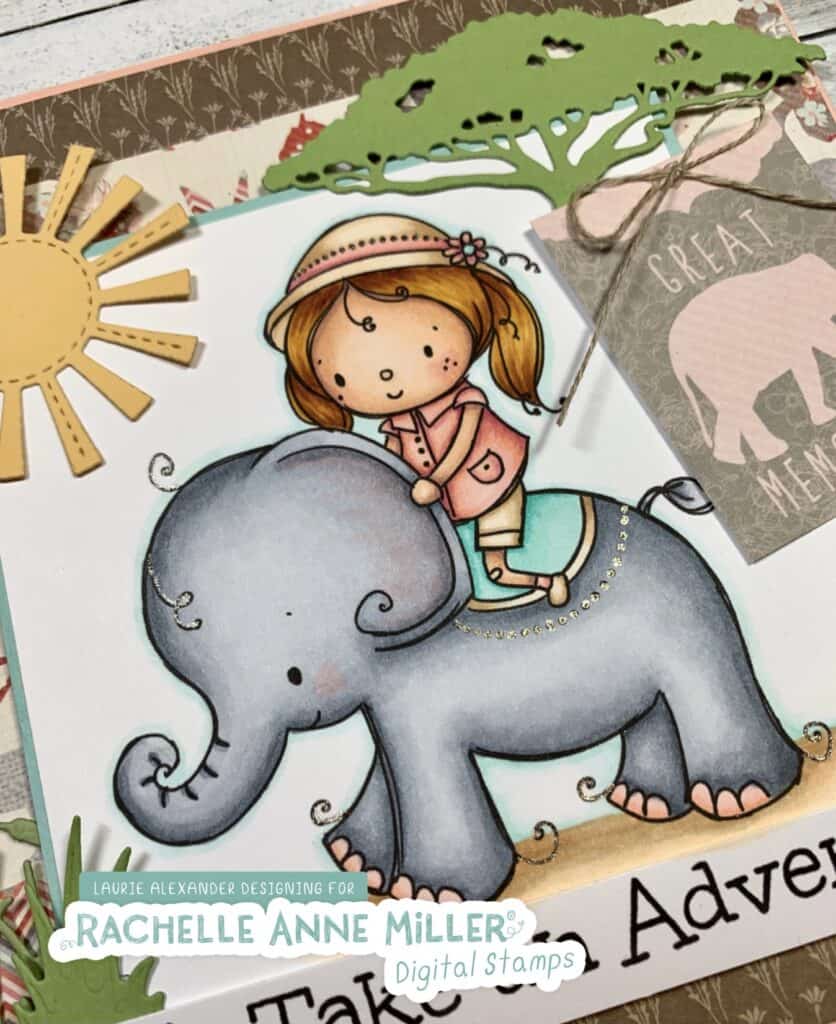
For my card, it may be hard to see, but the paper has elephants on it along with some other animals like giraffes, birds, hyaenas and more. So I knew I wanted to use that as my base for the card design. Even the Great Memories tag with the elephant came from that paper pack! The iconic Acacia Tree that is behind the tag came from the Safari Collection Dies and was perfect for my African theme!

————————–

Copic Markers:

Skin: E000/E00/E21/E11/E04/R20
Hair: E99/YR24/YR23
Top: R00/R11/E95/RV34
Pants: E55/E53/E50
Band-Aid: E50/E53
Elephant: C5/C3/C2/C1/C0/R20
Elephant Toes: R00/E95
Rug: BG13/BG11/BG10/E53/E55/E50
Sand: E55/E53/E50

Close Up of My Life is a Grand Adventure Design Team Card
Close Up of My Design Team Card

————————–

Card Recipe for A Grand Adventure Card:

Rachelle Anne Miller Creative Studios, Elephant Adventure Digital Stamp
Paper Basics – Stamper’s Select White Cardstock, Papertrey Ink
Sweet Pea 6 ½” Paper Pad, KaiserCraft
Friendly Silhouette Dies, Stampin’ Up!
Safari Collection Dies, Creative Expressions
Spring Showers Dies, Lawn Fawn
Linen Thread, Stampin’ Up!
Petal Pink, Pool Party, Pear Pizzaz, So Saffron Card Stock
Finished card size: 6” x 6”

————————–

To view my other Rachelle Anne Miller Creative Studios cards, please click here.

Hope you like A Grand Adventure Card with Elephant Adventure Digital Stamp by Rachelle Anne Miller Creative Studios!
Thank you for stopping by!

Hugs,
Laurie
My Gingerbread Fun Fold Card

My Gingerbread Fun Fold Card

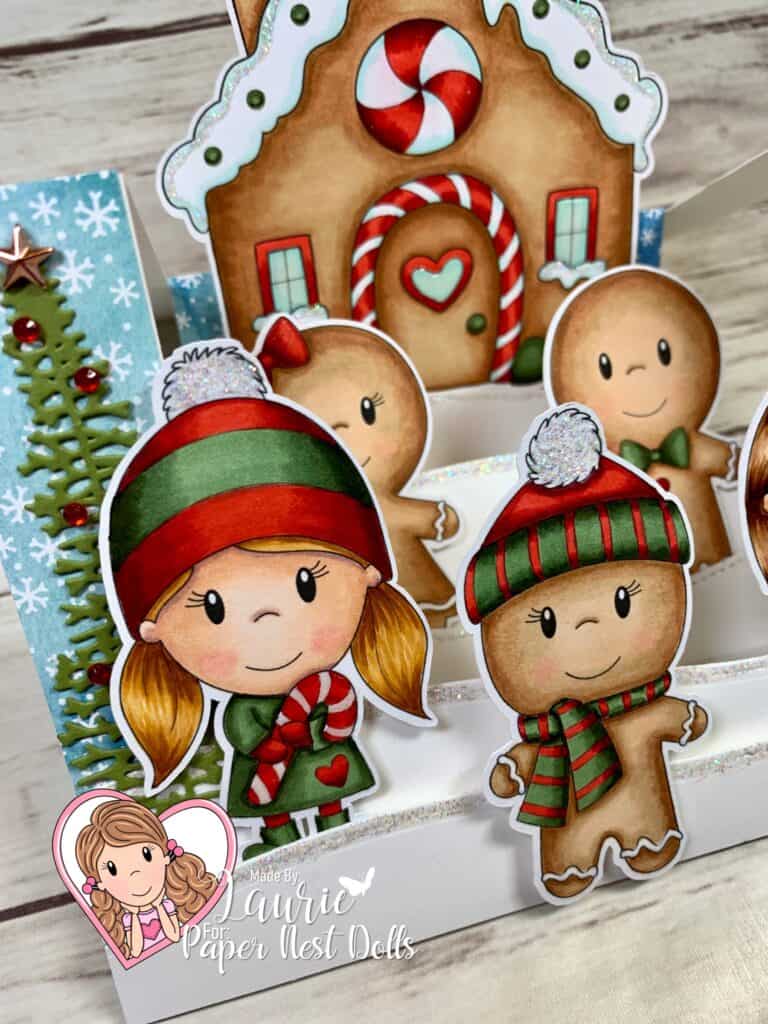
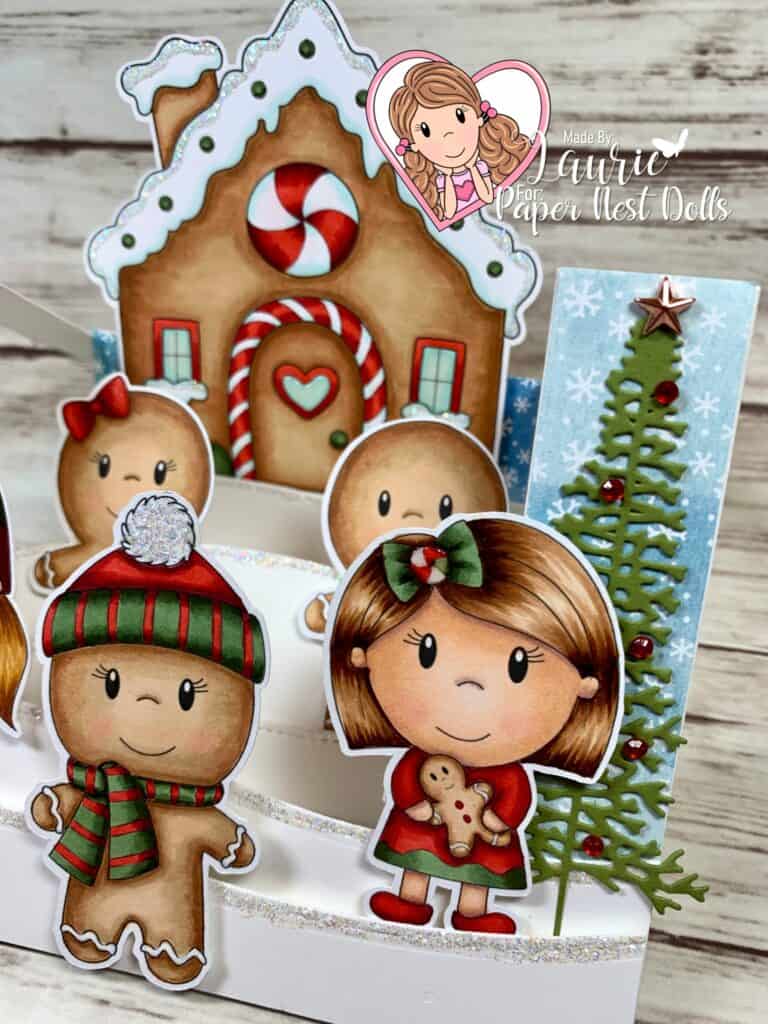
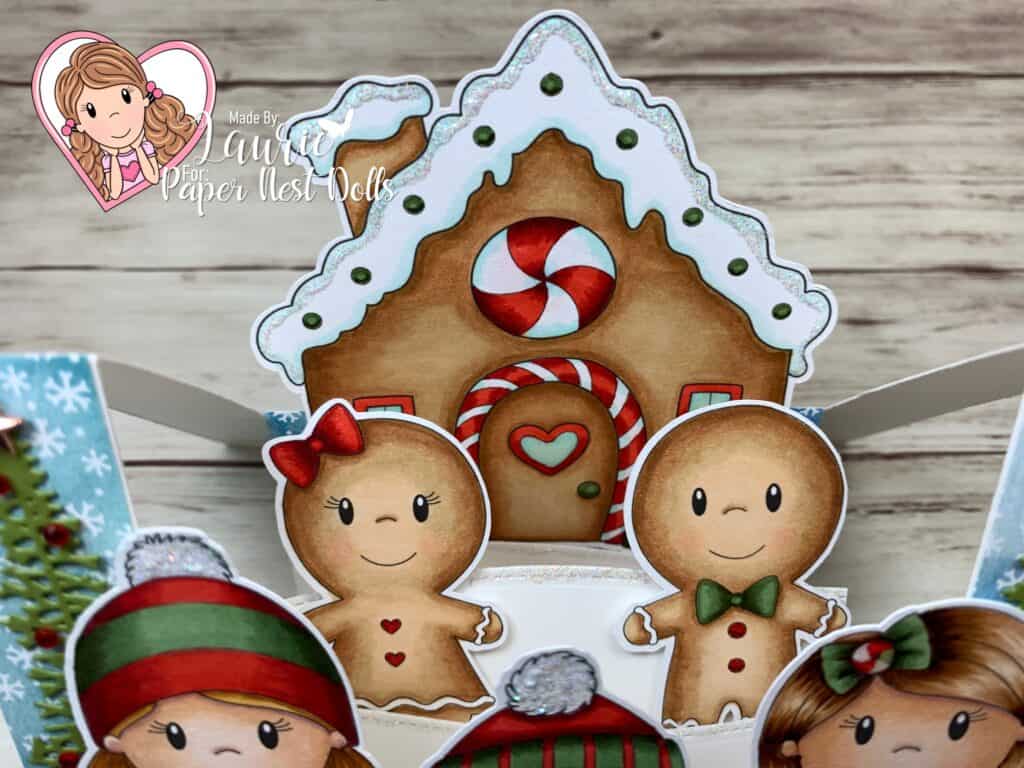
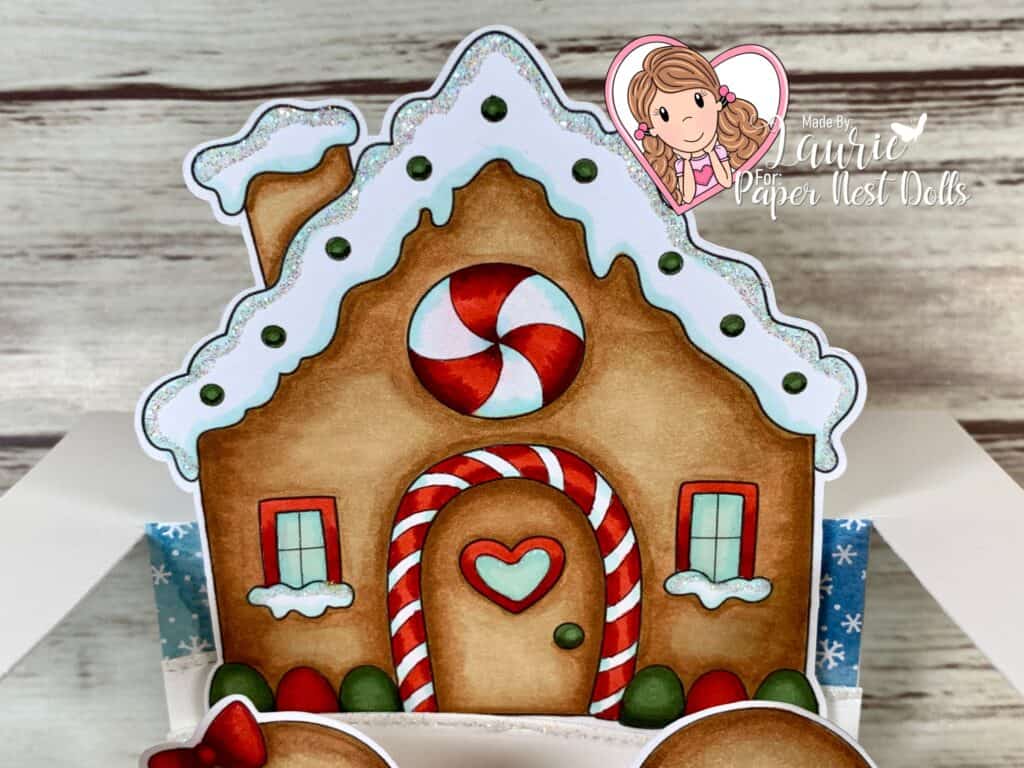
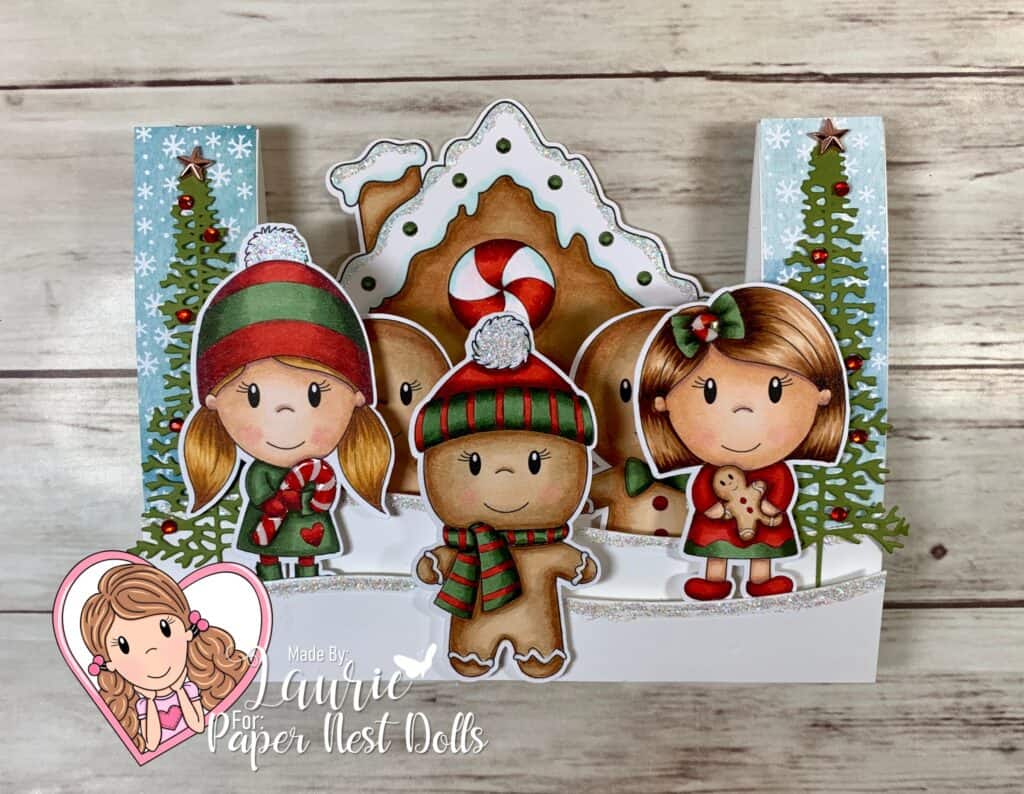
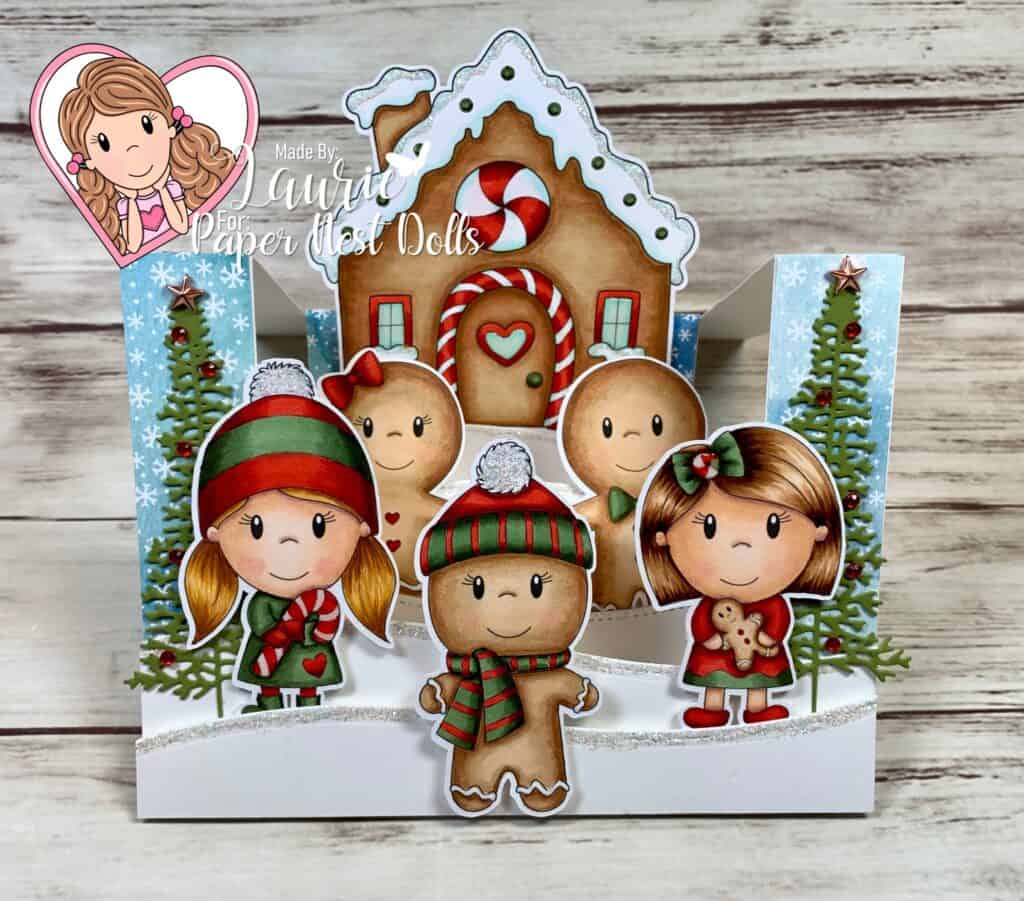
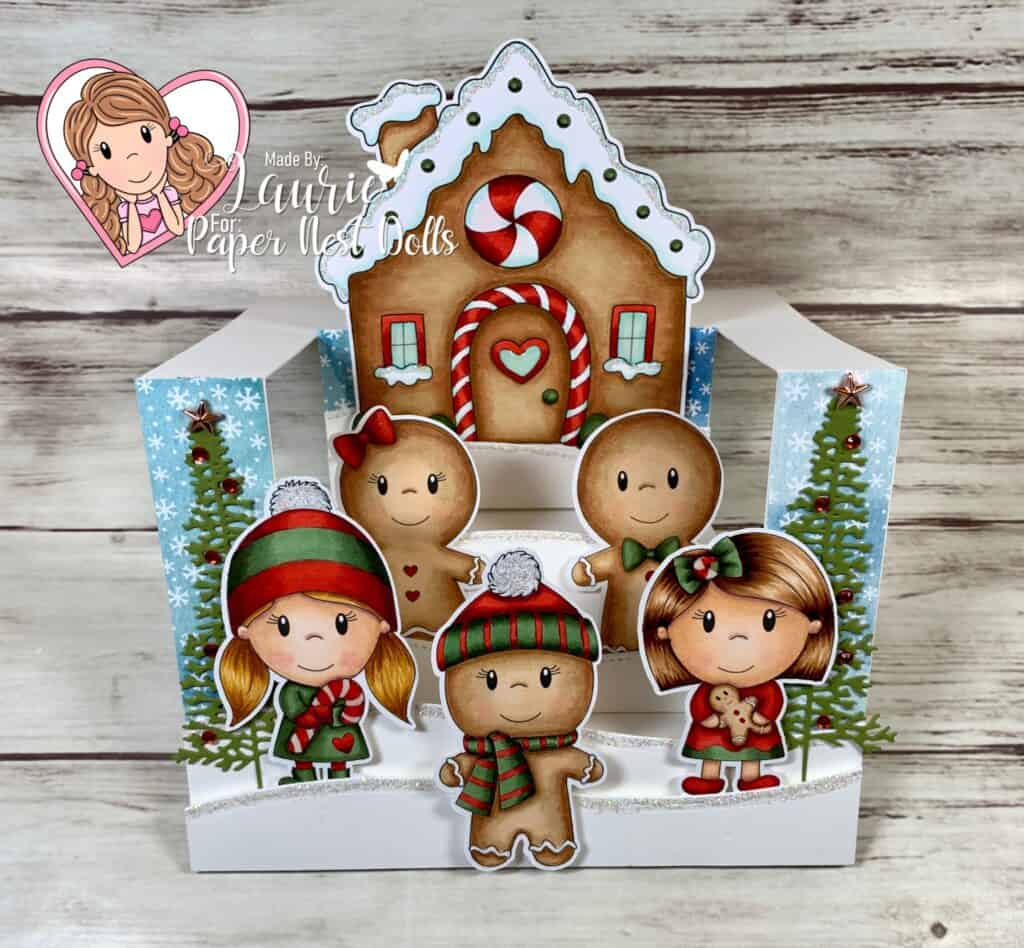
Hello Crafty Friends! It’s Laurie here sharing My Gingerbread Fun Fold Card for the Design Team of Paper Nest Dolls. I used a number of digital stamps to create my fun gingerbread card including Gingerbread HouseGingerbread BoyGingerbread GirlGingerbread Winter BoyTiny Emma with Cookie and Tiny Ellie with Candy Cane.

I had so much fun creating this wonderland of gingerbread. My idea was that I wanted to create a centre-step card and planned to use my colouring from the recent 30 Day Coloring Challenge to build my card. I’m so happy with how it turned out!

The Steps of My Gingerbread Fun Fold Card

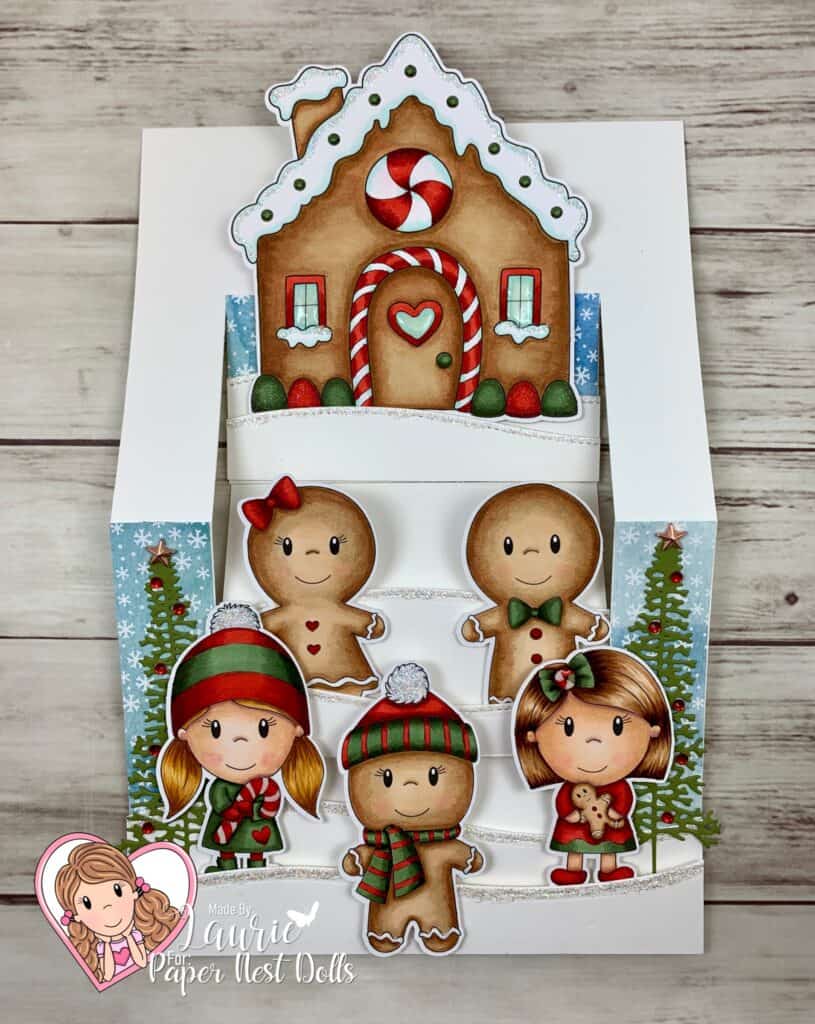
I created a ton of layers with the snow banks that all sparkle with Stardust Stickles and then layered my characters between them in the different folds. Of course, that is not all that sparkles! The windows of the house, Ellies’s candy cane and Emma’s peppermint candy bow all have glossy accents. I even added Clear Wink of Stella to the peppermint swirl on the house, the gum drops in front of the house, the Gingerbread Girl’s bow and hearts and the heart on Ellie’s dress! Can’t have a Christmas card without Christmas trees all dressed up for Christmas with stars and red Christmas lights! The Snowflake Splendor Designer Series Paper by Stampin Up! was perfect to create my snowy scene.

My Gingerbread Fun Fold Card Laid Flat

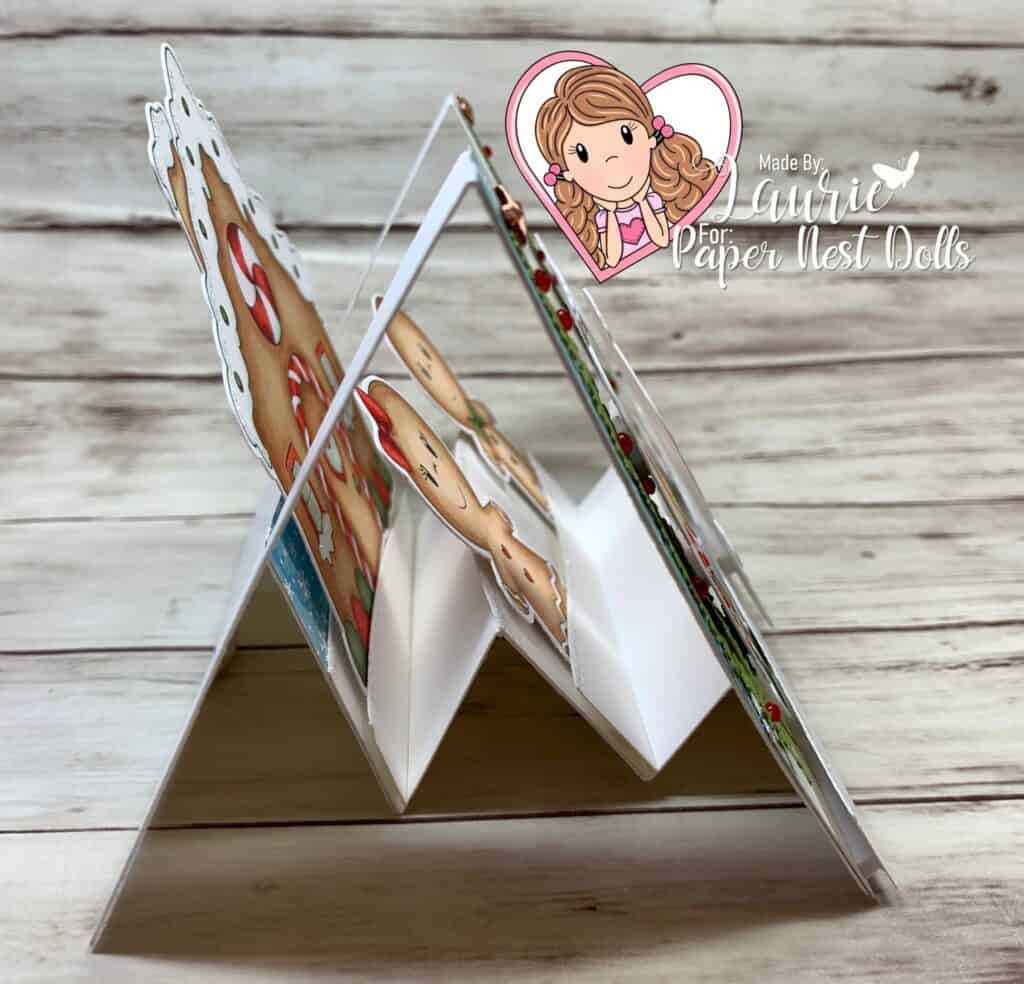
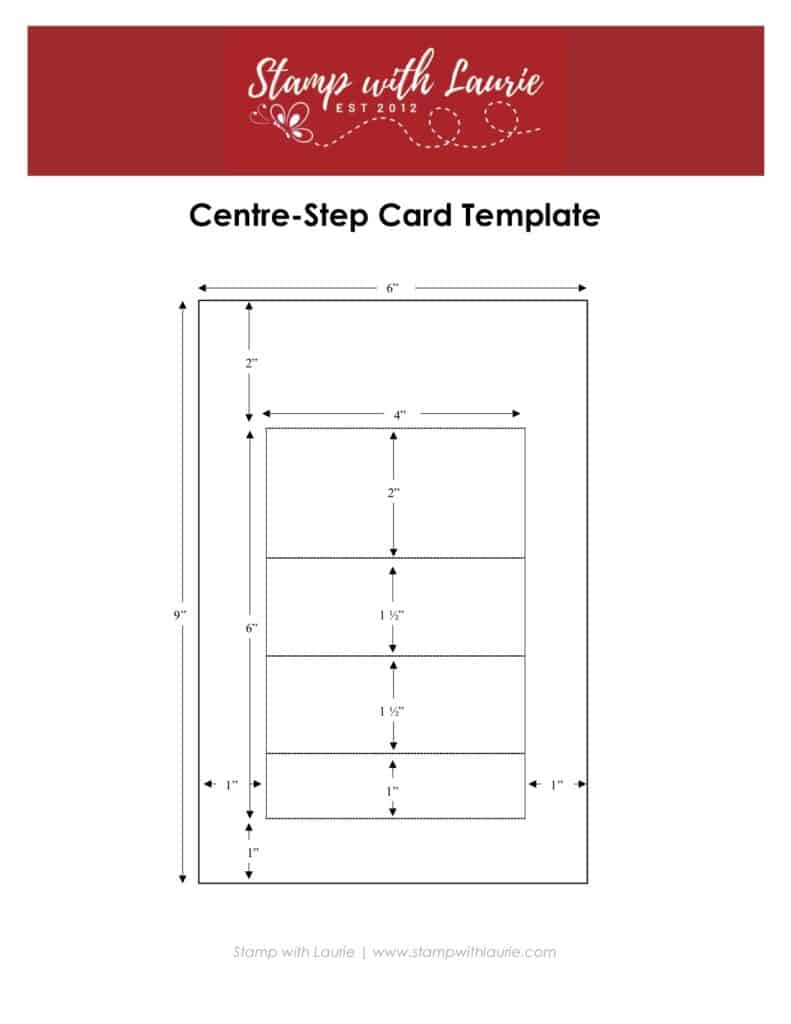
Here is a template that I created that gives you the measurements for the centre-step card that I made. There is also a link at the end of the post that you can download the PDF version.

My Centre-Step Template
Side of my Centre-Step Card

————————–

Copic Markers:

Tiny Ellie with Candy Cane
Skin: E000/00/21/11/04/R20
Hair: E99/YR23/YR24
Reds: R39/R29/R27/R24
Greens: G99/G94/G21
Candy Cane: R39/R27/R24/C1/0, Glossy Accents
Stardust Stickles on Pompom

Tiny Ellie with Candy Cane and Gingerbread Winter Boy

Gingerbread Winter Boy
Cookie: E35/E33/E31/E30/R20
Reds: R39/R29/R27/R24
Greens: G99/G94/G21
Stardust Stickles on Pompom

Tiny Emma with Cookie
Skin: E000/00/21/11/04/R20
Hair: E37/E35/E33/E30
Reds: R39/R29/R27/R24
Greens: G99/G94/G21
Candy Bow: R39/R27/R24/C1/0/G99/G94/G2
Gingerbread Cookie: E30/E33/E35/R29/R20
Glossy Accents on Peppermint Swirl in Bow

Tiny Emma with Cookie

Gingerbread Girl:
Gingerbread: E35/E33/E31/E30/R20
Reds: R39/R29/R27/R24
Clear Wink of Stella on Bow

Gingerbread Boy:
Gingerbread: E35/E33/E31/E30/R20
Reds: R39/R29/R27/R24
Greens: G99/G94/G21

Gingerbread Boy and Girl

Gingerbread House:
House: E35/E33/E31
Reds: R39/R29/R27/R24
Greens: G99/G94/G21
Snow: BG11/BG10/0
Glossy Accents on Windows
Clear Wink of Stella on Gum Drops/Peppermint Swirl
Stardust Stickles on Snow

Gingerbread House
Gingerbread House

————————–

Card Recipe for My Gingerbread Fun Fold Card:

Gingerbread HouseGingerbread BoyGingerbread GirlGingerbread Winter BoyTiny Emma with Cookie and Tiny Ellie with Candy Cane, Paper Nest Dolls
Sweet Sentiment Premium Coloring Paper
Majestic Mountain Dies, Stampin’ Up!
Freezin’ Friends Dies, Stampin Up!
Snowflake Splendor Designer Series Paper, Stampin Up!
Star Designer Elements, Stampin Up!
Red Rhinestone Basic Jewels, Stampin’ Up!
Stardust Stickles
Glossy Accents
Clear Wink of Stella
Thick Whisper White Card Stock, Stampin’ Up!
Finished card size: 6” x 4 ½”

Closed Card Laid Flat

————————–

To view my other Paper Nest Dolls cards, please click here.

To download the Centre-Step Template, click here.

Hope you like My Gingerbread Fun Fold Card
using Gingerbread HouseGingerbread BoyGingerbread GirlGingerbread Winter BoyTiny Emma with Cookie and Tiny Ellie with Candy Cane by Paper Nest Dolls!

Thank you for stopping by!

Hugs,
Laurie
My Sympathy Card

My Sympathy Card
My Sympathy Card

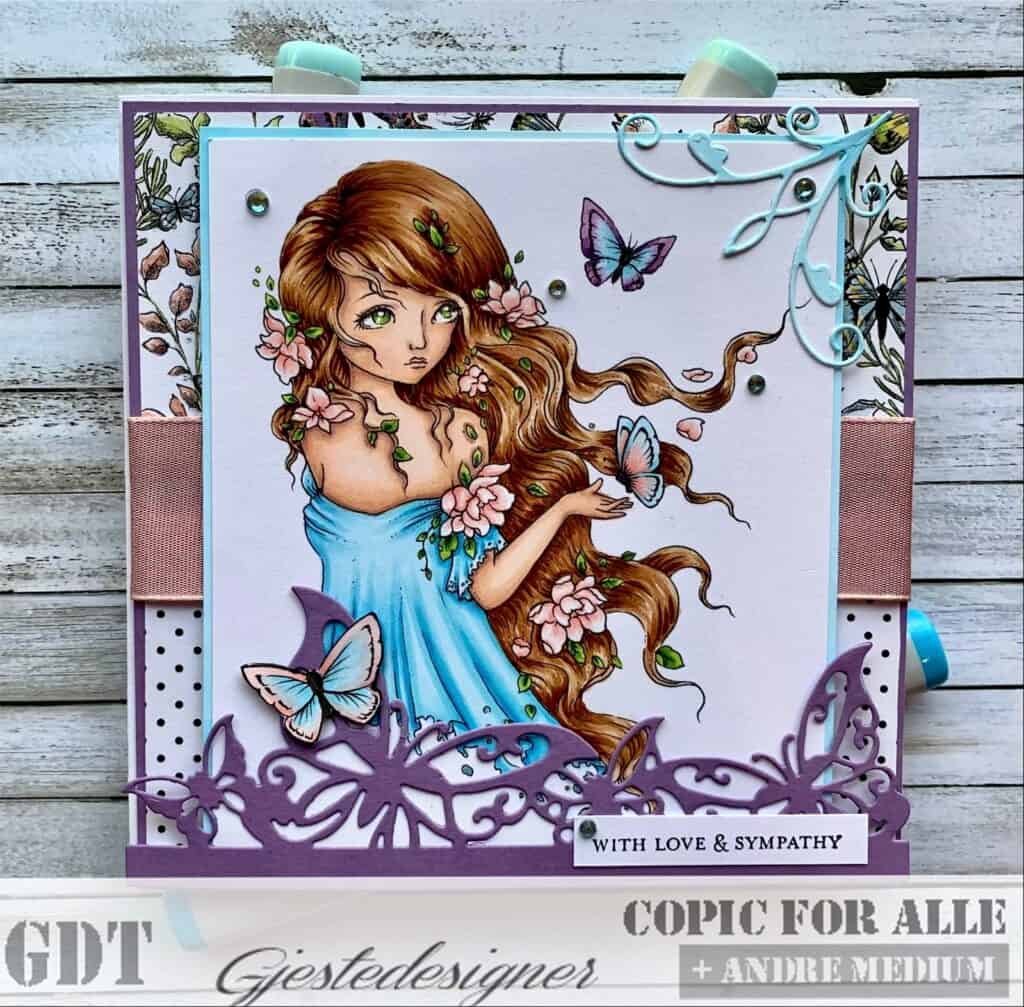
Hello Crafty Friends! It’s Laurie here! Today I am sharing my second November Guest Design Team Card for Copic for Alle and their Monthly Blue Color Challenge! For My Sympathy Card, I used the digital stamp So Long Yesterday by Ching-Chou Kuik. I thought she was perfect for a special sympathy card that I needed to make.

She was fun to colour with my Copic markers, especially all that hair! I knew that I wanted to highlight the butterflies in the stamp and DSP with the die. Unfortunately the die cut covered up one of the butterflies in the stamp, but easy enough to fix by fussy cutting it out and popping it up on the die cut.

Since the Challenge was Blue and I didn’t have card stock in the exact same colour that I coloured her dress, I coloured a Whisper White frame with my markers, as well as the corner die cut and the rhinestones to match. That is one thing that is nice with alcohol markers, you can colour more than just paper!

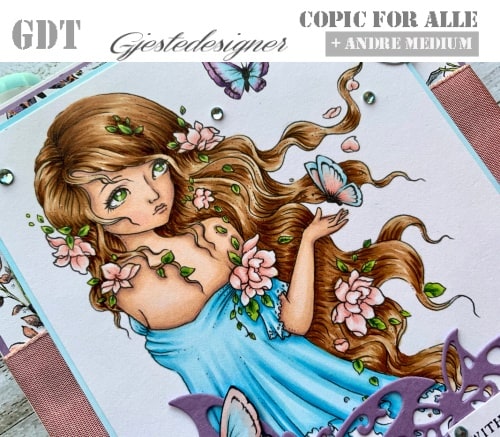
Close Up of My Sympathy Card

————————–

Copic Markers

Skin: E000/00/21/11/04/R20
Hair: E30/E31/E33/E35/E37
Dress: B000/B01/B02/B04
Leaves/Eyes: YG23/YG17/G29/
Flowers: R00/R11/R21/0
Butterflies: R00/R11/R21/B000/B01
Other Butterfly: V15/V17/B000/B01
Rhinestones: B02
Frame Edge: B000/B01

————————–

Card Recipe for My Sympathy Card

So Long Yesterday, Ching-Chou Kuik
Paper Basics – Stamper’s Select White Cardstock, Papertrey Ink
Itty Bitty Greeting Stamp Set, Stampin’ Up!
Versafine Ink Pad 
Botanical Butterflies Designer Series Paper, Stampin’ Up!
Butterfly Edge, Joy! Crafts Dies
Macarena Corner Die, Memory Box
Basic Rhinestone Jewels, Stampin’ Up!
Pink Pirouette 1 ¼” Ribbon, Stampin’ Up!
Highland Heather and Whisper White Card Stock, Stampin’ Up!
Finished card size: 5 ½” x 5 ½”

————————–

To view my other Copic Marker cards, please click here.

Hope you like my Guest Design Team card
for Copic for Alle’s Monthly Blue Color Challenge!

Thank you for stopping by!

Hugs,
Laurie
My Freezin’ Friends Card

My Freezin' Friends Card
My Freezin’ Friends Card

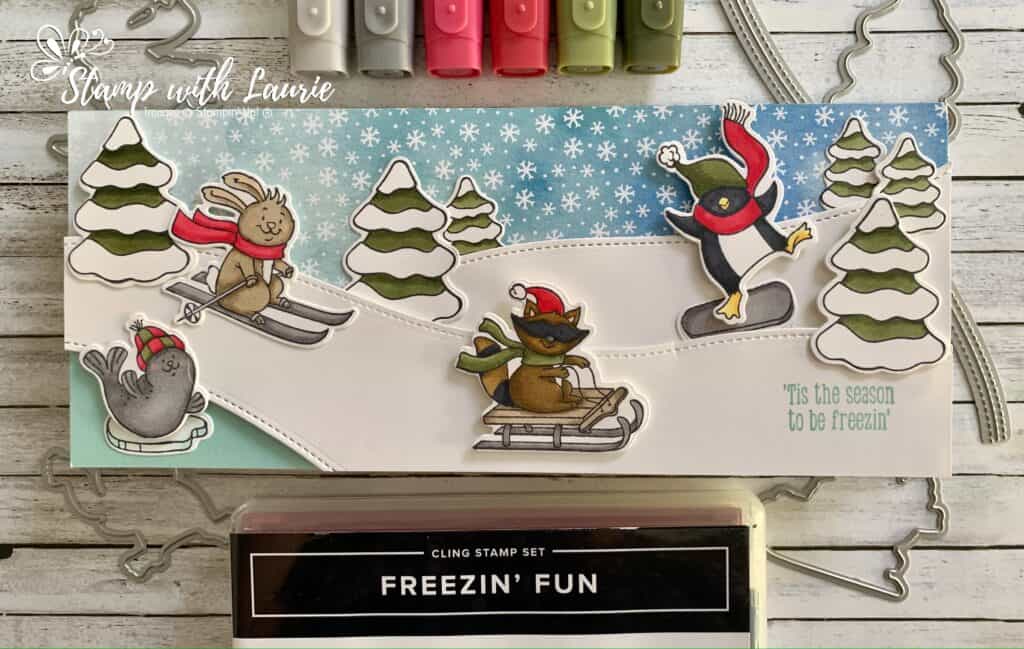
I am sharing My Freezin’ Friends Card using the Freezin’ Fun Bundle by Stampin Up! Aren’t these just the cutest critters frolicking in their winter wonderland!

I wanted to create a winter scene that used all the characters. So, I made a slimline card (3 ½” x 8 ½”) to fit them all on it. Next, I pulled out my Stampin’ Blends and coloured all the cute critters and trees in my Smooth Colouring Technique (see post here on this technique). I used the stitched hill die to create my snow hills. For the front snow hill, I cut the hill once and then lined up the die with the first cut to create a longer hill than the die usually makes. Since I place the seal on an ice floe, I thought he should be floating on a lake. So, I used the hill die to create the edge of the lake and place Pool Party card stock behind it to represent the water. The Snowflake Splendor Designer Series Paper was perfect for the sky!

Stampin’ Blends Recipe

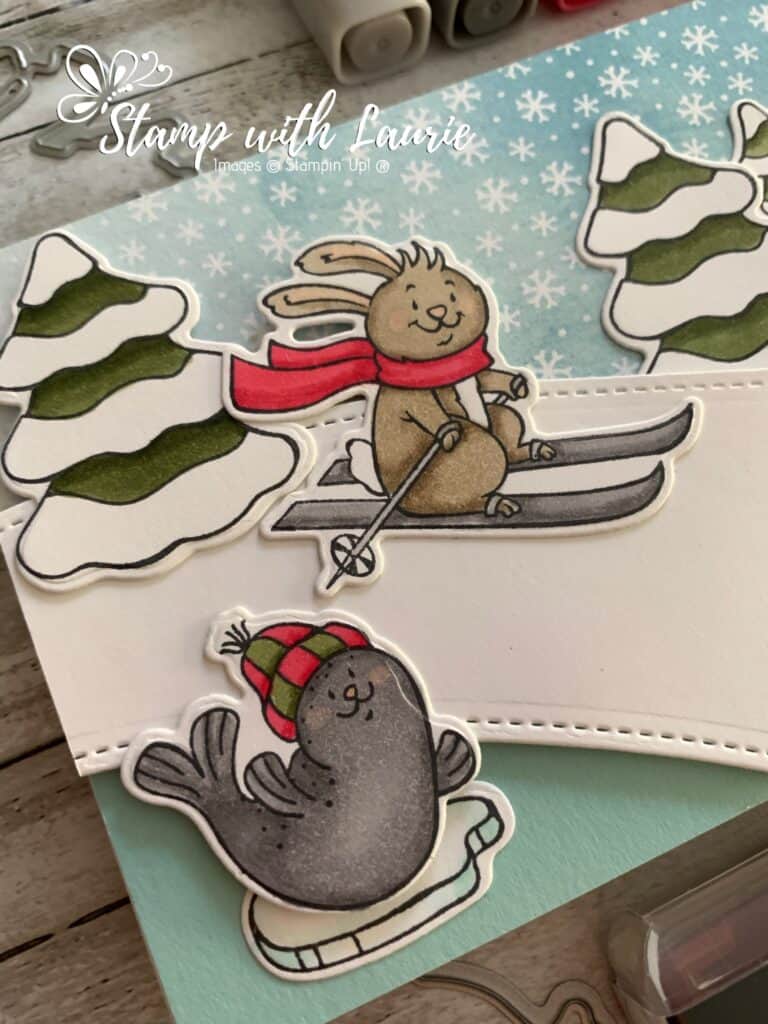
I use Crumb Cake, Real Red, Petal Pink and Smokey Slate Stampin’ Blends for the rabbit. For the seal, I used Smoky Slate, Petal Pink, Real Red and Mossy Meadow Stampin Blends. I use Pool Party Stampin’ Blends for the ice floe and Mossy Meadow for the trees.

Close Up of Rabbit and Seal
Close Up of Rabbit and Seal from My Freezin’ Friends Card

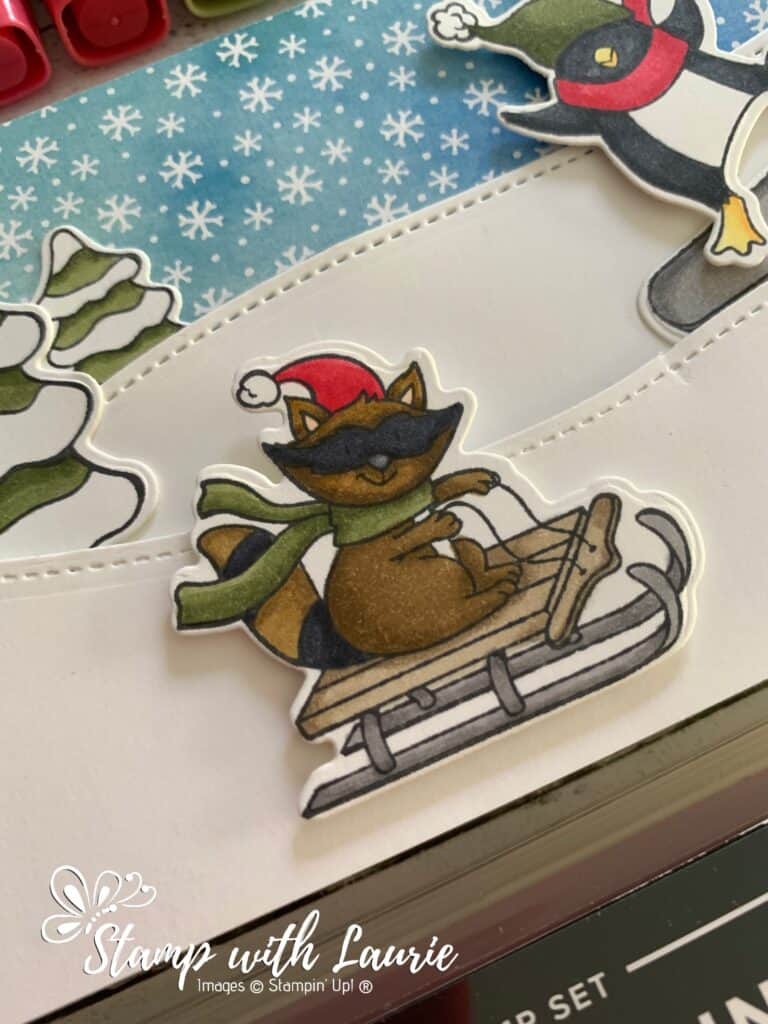
For the raccoon, I used Soft Suede, Basic Black, Real Red, Crumb Cake and Smokey Slate Stampin’ Blends.

Close Up of Raccoon
Close Up of Raccoon from My Freezin’ Friends Card

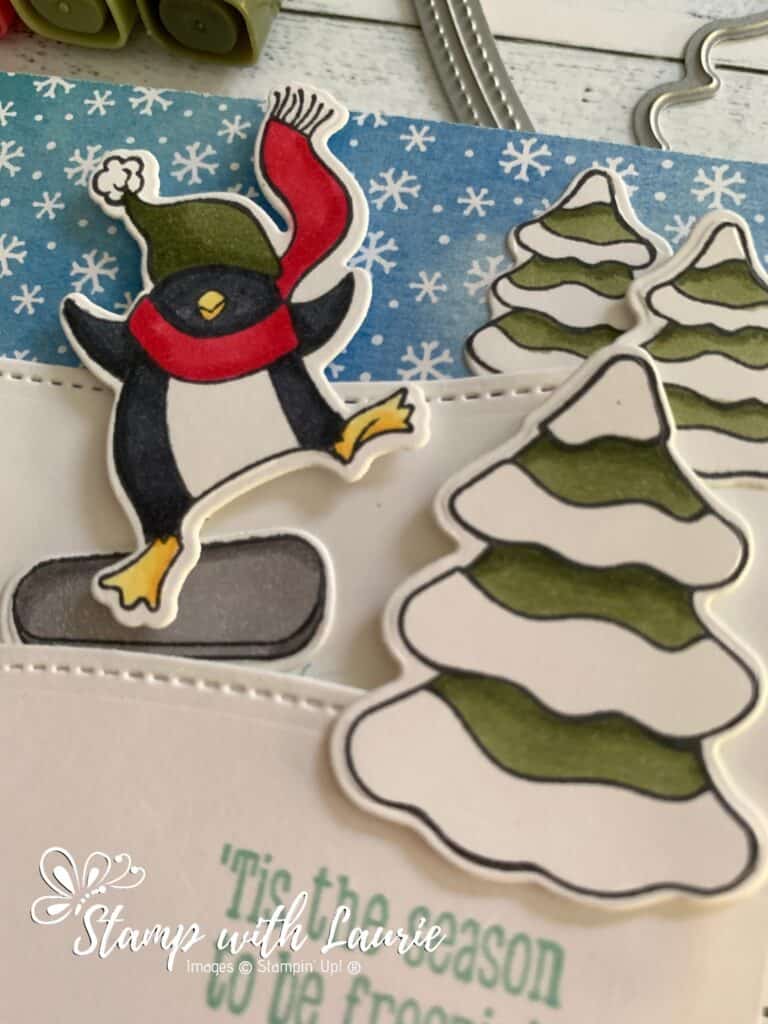
For the Penguin, I used Basic Black, Mossy Meadow, Real Red and Mango Melody Stampin’ Blends. His snowboard was Smokey Slate Stampin’ Blends.

Close up of the Penguin
Close of the Penguin from My Freezin’ Friends Card

Supplies:

Stamps/Bundles: Freezin’ Fun Bundle (155176)

Inks: Tuxedo Black Memento Ink Pad (132708), Pool Party Classic Stampin’ Pad (147107)

Paper: Whisper White Thick (140272), Whisper White (100730), Pool Party (122924), Snowflake Splendor Designer Series Paper (153512)

Accessories: Real Red Stampin’ Blends Combo Pack (154899), Mossy Meadow Stampin’ Blends Combo Pack (154890), Basic Black Stampin’ Blends Combo Pack (154843), Smoky Slate Stampin’ Blends Combo Pack (145058), Crumb Cake Stampin’ Blends Combo Pack (154882), Soft Suede Stampin’ Blends Combo Pack (154906), Mango Melody Stampin’ Blends Combo Pack (154888), Bone Folder (102300), Stampin’ Dimensionals (104430), Mini Stampin’ Dimensionals (144108), Stampin’ Seal (152813), Foam Adhesive Strips(141825), Glue Dots (103683)

Measurements: 

  • Whisper White Thick: 8 ½” x 7” scored at 3 ½”
  • Whisper White:
    • Hills: 8 ½” x 2 ½”
      • 3” x 6 ¼”
    • Rabbit: 1 ¾” x 2”
    • Seal: 1 1/8” x 1 3/8”
    • Racoon: 1 5/8” x 1 ¾”
    • Penguin: 1 ¼” x 1 ¾”
    • Trees: 3 large trees: 1 11/16” x 1 ¼”
      • 3 small trees: ¾” x 1”
    • Ice Floe: ½” x 1/8”
    • Snowboard: ½” x 1/8”
  • Pool Party: 1 ½” x 2 ¾”
  • Snowflake Splendor Designer Series Paper: 8 ½” x 2”

For Further Info:

Hope you like My Freezin’ Friends Card!

The smooth Colouring Technique: Beautiful Poppy Birthday Card using Smooth Colouring Technique
Video Tutorial: Smooth Colouring

You will find the items listed above in my online store.

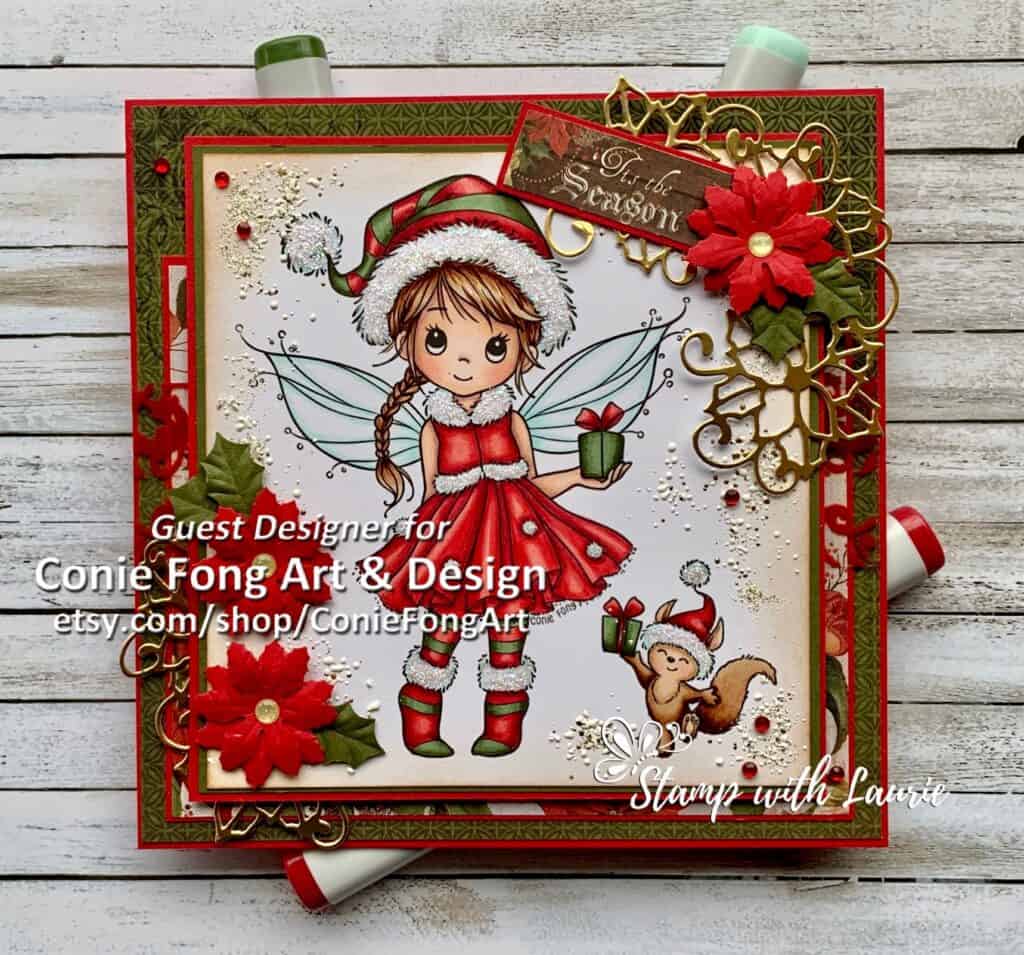
My Molly’s Fairy Christmas Gift

My Molly’s Fairy Christmas Gift Card

Hello Crafty Friends! It’s Laurie here with My Molly’s Fairy Christmas Gift card! I am so excited to be joining Conie Fong Art & Design as a Guest Design Team Member for the next two months!  I love her digital stamps! For my first GDT card, I am using the beautiful Molly’s Fairy Gift.

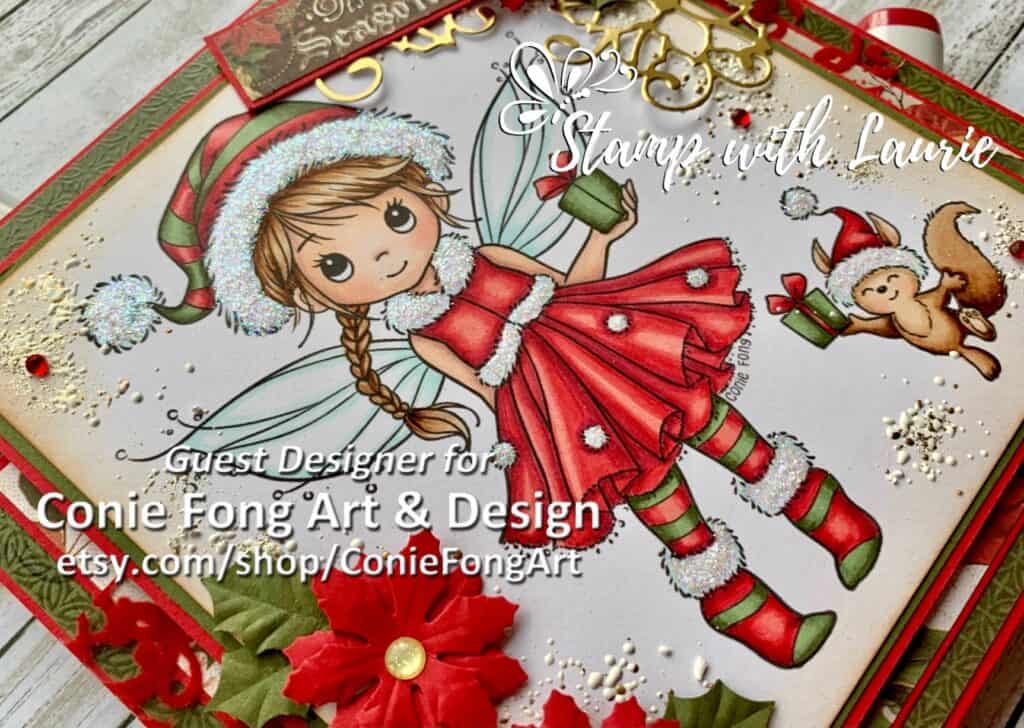
I had so much fun colouring Molly and her friend with my Copic markers! I wanted to create a shabby chic card, but with lots of sparkle and shimmer! This. was achieved by sponging the edges of my image with Vintage Photo ink and then heat setting some Shabby White Embossing Powder which has gold flecks in it. I further accented the flecks with gold foil die cut poinsettias and gold glitter enamel dots. To add more sparkle, I used red rhinestones and lots of Stardust Stickles! Don’t you just love the poinsettia punch flowers and leaves. They really add a nice dimension to the card! As my card says, Tis’ the Season!

Close Up of My Molly's Fairy Christmas Gift Card
Close Up of My Molly’ Fairy Christmas Gift Card

————————–

Copic Markers:

Skin: E000/00/21/11/04/R20
Hair: E31/E33/E35/E37
Reds: R32/R35/R37/R39
Greens: G31/G34/G99
Wings: BG10/BG11/0
Squirrel: E37/E35/E33/E31 (dark fur)
E31/E30/E33/R20 (light fur)
Whites: BG10/0

————————–

Card Recipe for My Molly’s Fairy Christmas Gift:

Molly’s Fairy Gift, Conie Fong Art & Design
Paper Basics – Stamper’s Select White Cardstock, Papertrey Ink
Letters to Santa 6 ½” Paper Pad, KaiserCraft
Candlelight Christmas Specialty Designer Series Paper, Stampin’ Up!
Gold Foil Paper, Stampin; Up!
Nellie’s Choice Floral Punch Poinsettia
Nellie’s Choice Floral Punch Holly Leaf
Festive Collection Poinsettia Cluster, Sue Wilson Dies
Shabby White Embossing Enamel 
Red Rhinestone Basic Jewels, Stampin’ Up!
Gold Glitter Enamel Dots, Stampin’ Up!
Stardust Stickles
Vintage Photo, Tim Holtz Distress Ink Pad
Stamping Sponges, Stampin’ Up!
Real Red and Mossy Meadow Card Stock, Stampin’ Up!
Finished card size: 6” x 6”

————————–

To view my other Copic Marker cards, please click here.

Hope you like my first Guest Design Team card
using Molly’s Fairy Gift for Conie Fong Art & Design!

Thank you for stopping by!

Hugs,
Laurie
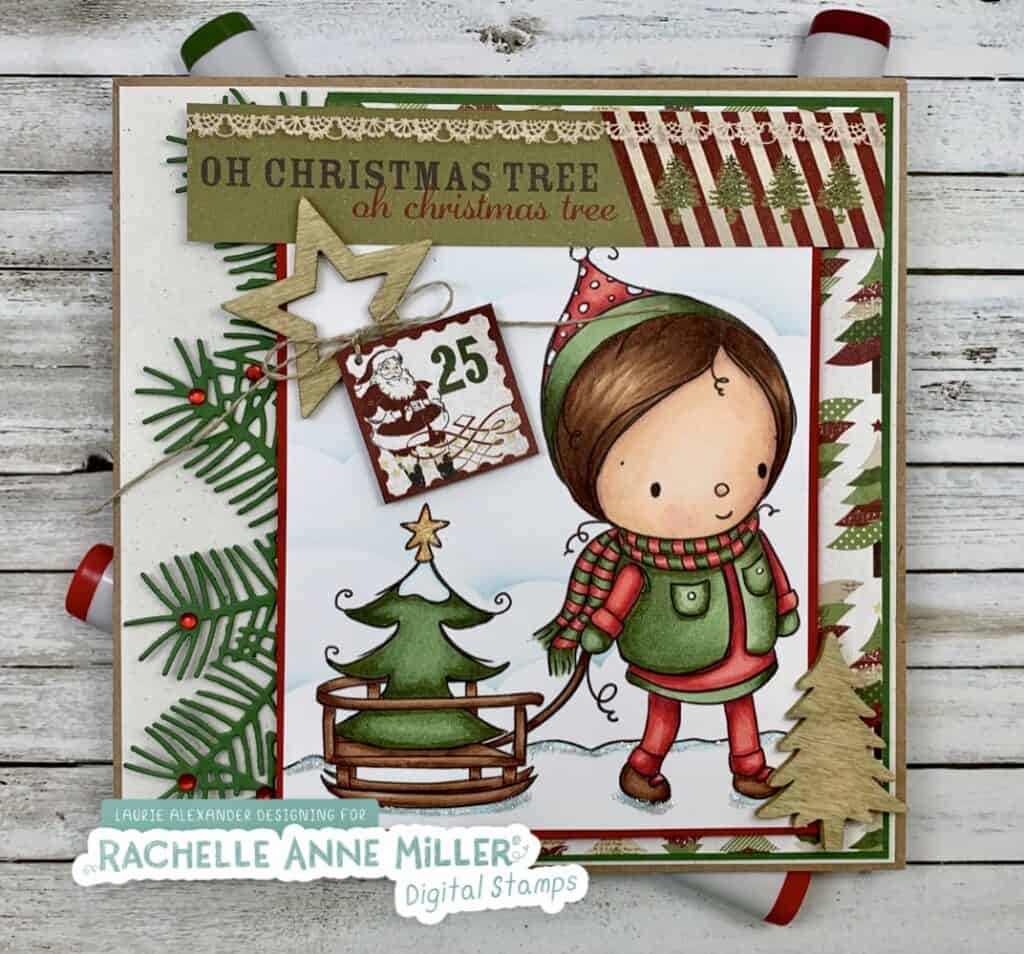
My Christmas Sled

My Christmas Sled Design Team Card

It’s Laurie here with My Christmas Sled Design Team Card for Rachelle Anne Miller Creative Studios using her The Little Sled Christmas Digital Stamp. Isn’t he just darling! When you were little, did your family go out tree hunting?

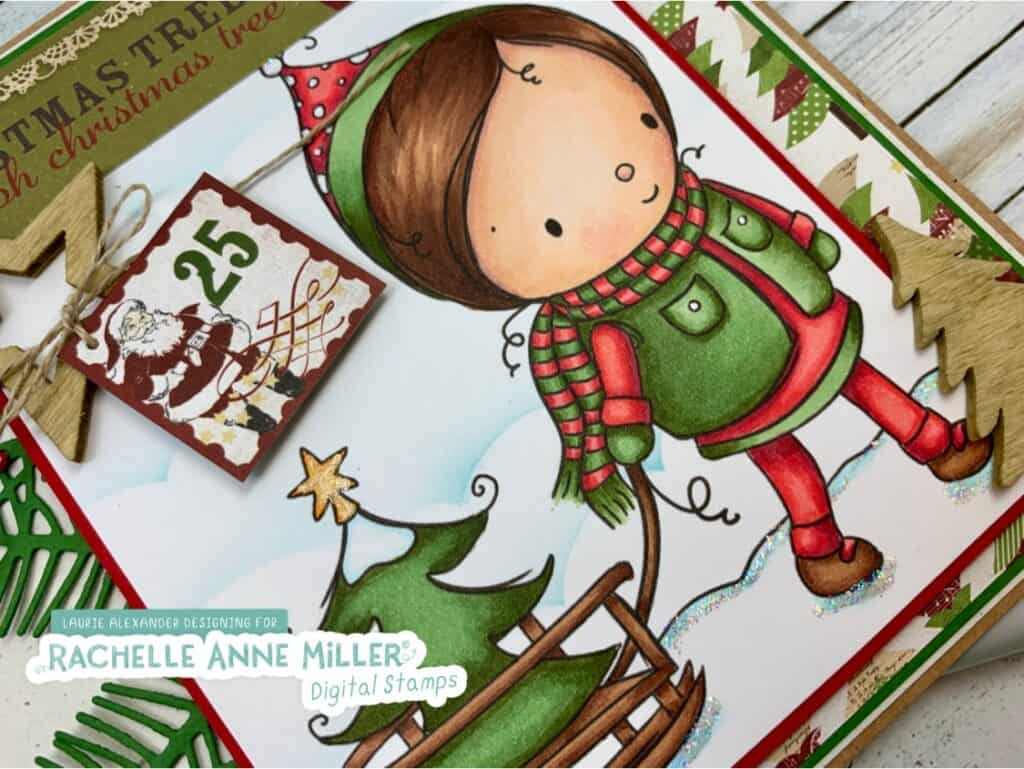
For my card, I wanted to create a natural feel since this little guy is picking out his Christmas tree in the snow. So I used things like the natural wooden star and tree, the linen thread, Natural White and Kraft Card Stock to add to my feel. Of course, you have to wear red and green when picking out your tree! I thought the papers, especially the O Christmas Tree flag at the top, were perfect for my card!

Close Up of My Christmas Sled Design Team Card
Close Up of My Design Team Card

————————–

Copic Markers:

Skin: E000/00/21/11/04/R20
Hair: E21/E23/E25/E27/E29
Red: R32/R35/R37/R39
Green: G21/G94/G99
Shoes/Sled: E27/E25/E23
Star: Y32/Y35/Y38/Clear Gelly Roll Pen
Snow: B000/B000/Stardust Stickles

————————–

Card Recipe for My Christmas Sled:

Rachelle Anne Miller Creative Studios, The Little Sled Christmas Digital Stamp
Sweet Sentiment Premium Coloring Paper
So This is Christmas 6 x 6 Paper Pad, Carta Bella
Lost & Found Christmas Embellishments Words, My Mind’s Eye
Pine Needles Border Die, Memory Box
Clouds Stencil, CC Designs
Red Rhinestone Basic Jewels, Stampin’ Up!
Wooden Star and Tree Embellishment, The Mercantile At The Crossroads
Linen Thread, Stampin’ Up!
Stardust Stickles
Blender Brushes, Picket Fence
Balmy Blue Classic Stampin’ Pad, Stampin’ Up!
Clear Gelly Roll Pen
White Gelly Roll Pen
Real Red Card Stock, Garden Green Card Stock, Kraft 12 x 12 Cardstock,
Naturals White Card Stock, Stampin’ Up!
Finished card size: 5 ¾” x 5 ¾”

————————–

Rachelle Anne Miller Digital Stamps Facebook Group has a Monthly Challenge where you can win stamps! This month is Anything Goes with Optional Twist: Give Thanks (Thank You, Thanksgiving, Gratitude). Check it out and maybe you will win!

To view my other Rachelle Anne Miller Creative Studios cards, please click here.

Hope you like my Design Team Card with The Little Sled Christmas Digital Stamp by Rachelle Anne Miller Creative Studios!
Thank you for stopping by!

Hugs,
Laurie
Boughs of Christmas Card

My Boughs of Christmas Card

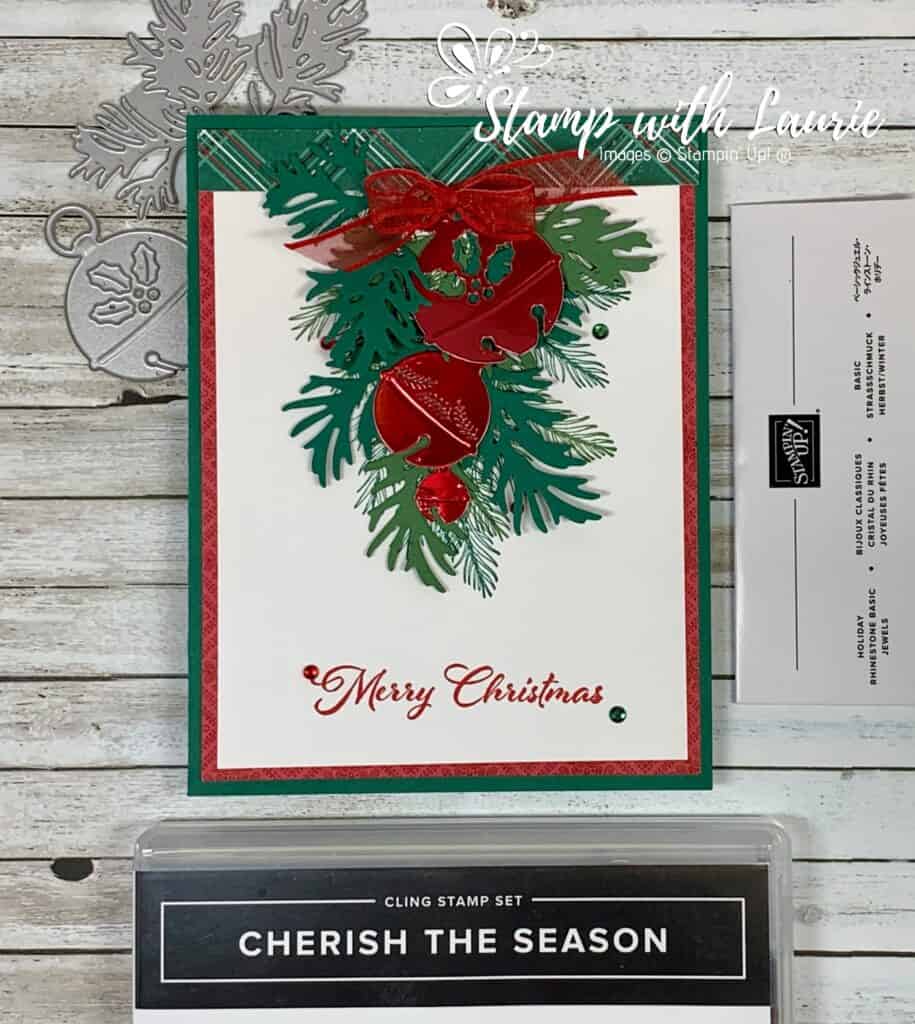
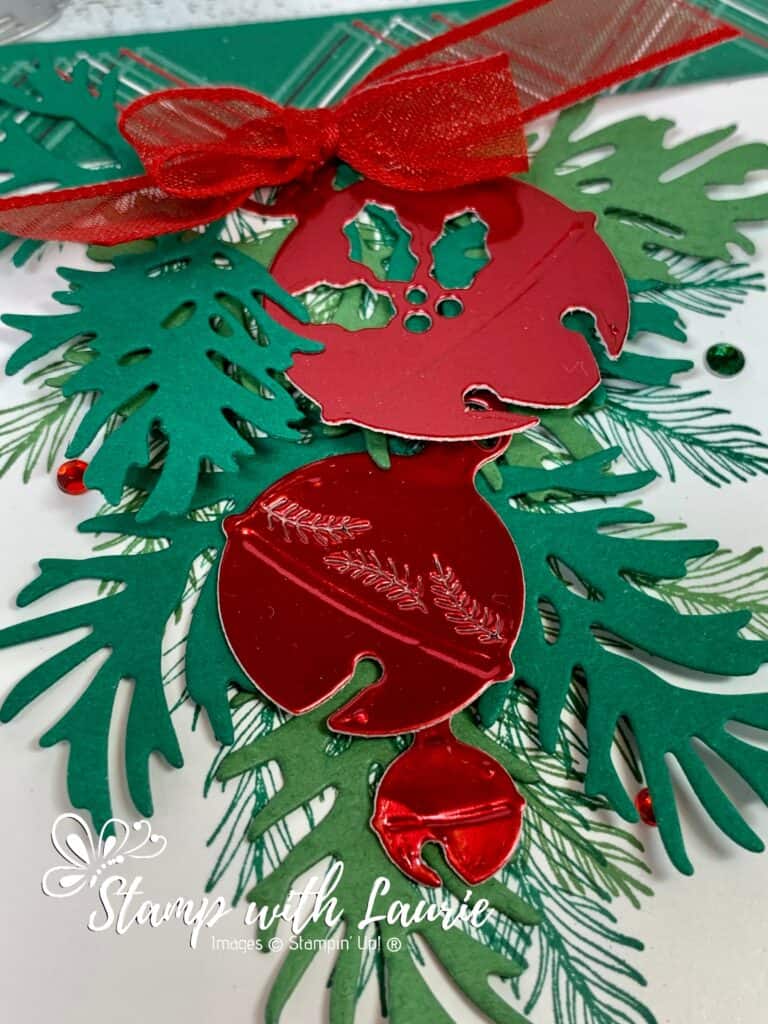
I am sharing my Boughs of Christmas Card using the Cherish the Season Bundle and the Beautiful Boughs Dies. Who wouldn’t love to receive a card with Christmas boughs and these gorgeous Red Foil bells! I love the details of the bells, especially the large one with the holly die cuts!

I pulled my colour scheme from the ‘Tis the Season 6″ x 6″ Designer Series Paper to design my card. The top DSP piece adds a header that hides all the branch ends and creates balance with the Real Red sentiment. I stamped the branches from the Cherish the Season Bundle in Garden Green and Shaded Spruce on the Whisper White card stock in the shape of my boughs. Then, I layered the die cut boughs in Garden Green and Shaded Spruce from the Beautiful Boughs Dies on top of so that my stamping just peeks out from underneath. The Red Foil bells are strategically placed by tucking them into the boughs.

The beautiful Real Red Sheer Ribbon is tied in a bow. Red Rhinestone Basic Jewels and Shaded Spruce rhinestones from the Holiday Rhinestone Basic Jewels add a bit of sparkle amongst the boughs.

Close Up of My Boughs of Christmas Card

Supplies:

Stamps: Cherish the Season Bundle (155154)

Dies: Beautiful Boughs Dies (150661)

Inks: Garden Green Classic Stampin’ Pad (147089), Shaded Spruce Classic Stampin’ Pad (147088), Real Red Classic Stampin’ Pad (147084)

Paper: Whisper White (100730), Shaded Spruce (146981), Garden Green (102584), Red & Green Foil Sheets (153510), ‘Tis the Season 6″ x 6″ Designer Series Paper (153489)

Accessories: Real Red 3/8″ Sheer Ribbon (153535), Red Rhinestone Basic Jewels (146924), Holiday Rhinestone Basic Jewels (150457), Paper Snips (103579), Bone Folder (102300), Stampin’ Seal (152813), Glue Dots (103683)

Measurements: 

  • Shaded Spruce: 8 ½” x 5 ½”; scored at 4 ¼”
  • Garden Green (2 pieces): 2” x 2 7/8”
    • 1” x 2”
  • Shaded Spruce (3 pieces): 2” x 2 7/8”
    • 1” x 2” (2 of these)
  • Red Foil Sheets (3 pieces):
    • 1 11/16” x 1 3/8”
    • 1 ¼” x 1”
    • 5/8” x ½”
  • ‘Tis the Season 6″ x 6″ Designer Series Paper: 5 ¼” x 4”
    • ½” x 4”
  • Real Red 3/8″ Sheer Ribbon: 7”

For Further Info:

Hope you like my Boughs of Christmas Card!

You will find the items listed above in my online store

My Sweetest Season Christmas Card

My Sweetest Season Christmas Card

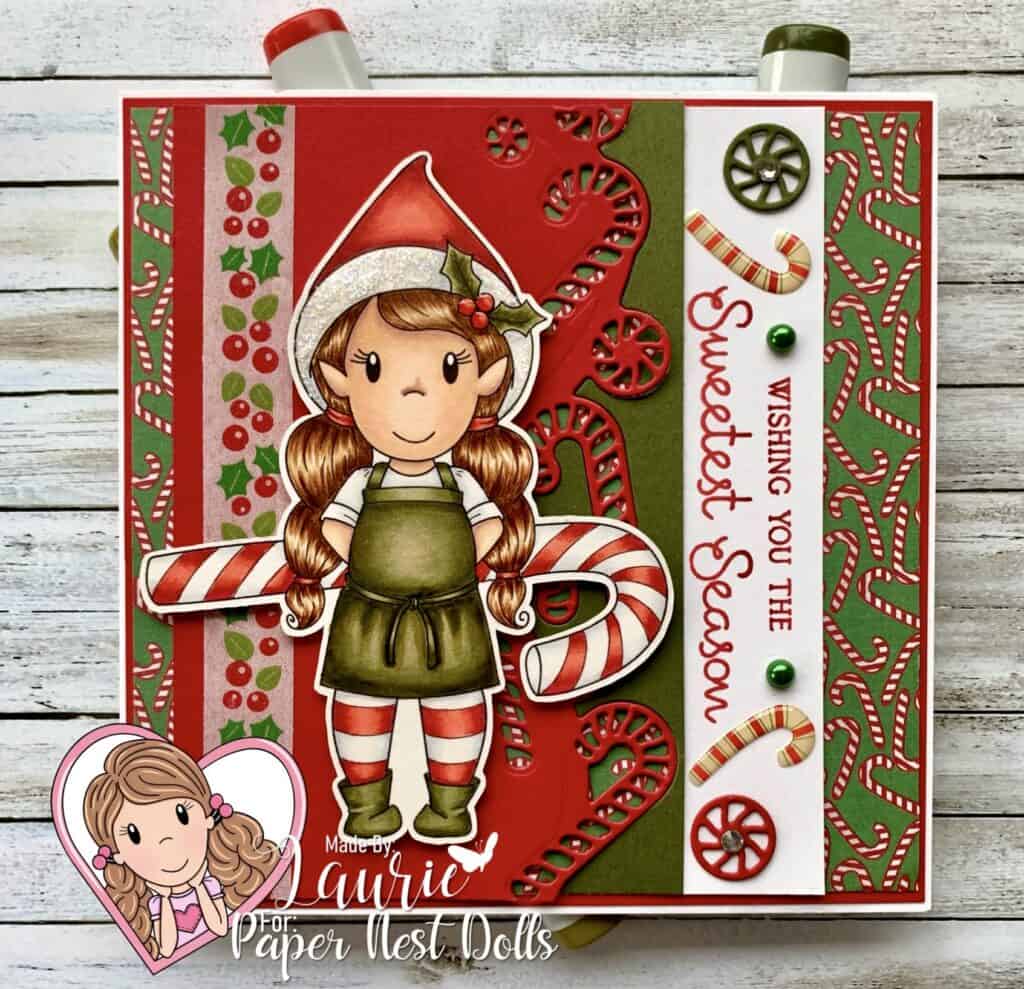
Hello Crafty Friends! It’s Laurie here sharing My Sweetest Season Christmas Card for the Design Team of Paper Nest Dolls. I used the cute Elf Avery with Candy Cane! Isn’t she just the sweetest digital stamp! Avery looks ever so pleased with her candy cane!

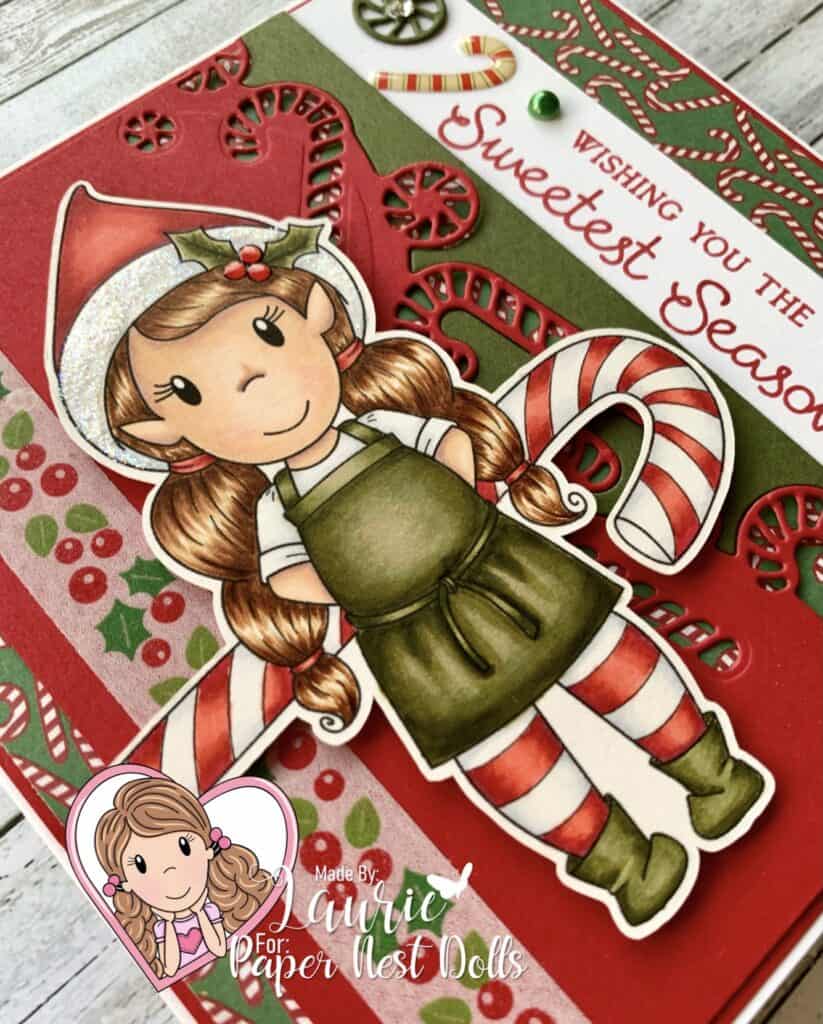
When I coloured Avery with my Copic Markers, I knew that I wanted to use the Sweetest Border Dies from Stampin’ Up! with the die cut candy canes. Perfect for my card and what better use than to have the candy cane paper showing through the die cuts. It took me a couple tries to get the red die cut and the green die cut to match up, but I thought it helped to create a  sweet background for Avery. I couldn’t resist using stickles on her hat trim and glossy accents on the berries to give her some sparkle. I loved the sentiment, but it was too long. So, I turned it on its side and added some embellishments from my stash.

Close Up of My Sweetest Season Christmas Card
Close Up of My Christmas Card

————————–

Copic Markers:

Skin: E000/00/21/11/04/R20
Hair: E21/E25/E27/E29
Reds: R22/24/27/29/C3
Greens: YG91/93/95/97/99
Whites: C1/C0/0

————————–

Card Recipe for My Sweetest Season Christmas Card:

Elf Avery with Candy Cane, Paper Nest Dolls
Sweet Sentiment Premium Coloring Paper
Sweetest Border Dies, Stampin’ Up!
Sweetest Time Photopolymer Stamp Set, Stampin Up!
Mint Twist 6 ½” Paper Pad, KaiserKraft
Jolly Holly Washi Tape, Doodlebug Design Inc.
Jolly Holiday Sprinkle Shapes, Doodlebug Design Inc.
Pearls, Green, KaiserKraft
Basic Rhinestones, Stampin’ Up!
Stardust Stickles
Glossy Accents
Real Red, Mossy Meadow and Whisper White Card Stock, Stampin’ Up!
Finished card size: 5 ½” x 5 ½”

————————–

To view my other Paper Nest Dolls cards, please click here.

Hope you like My Sweetest Season Christmas Card
using Elf Avery with Candy Cane by Paper Nest Dolls!

Thank you for stopping by!

Hugs,
Laurie
Holly Jolly Gnome Christmas

My Holly, Jolly Gnome Christmas Cards
My Holly Jolly Gnome Christmas Cards

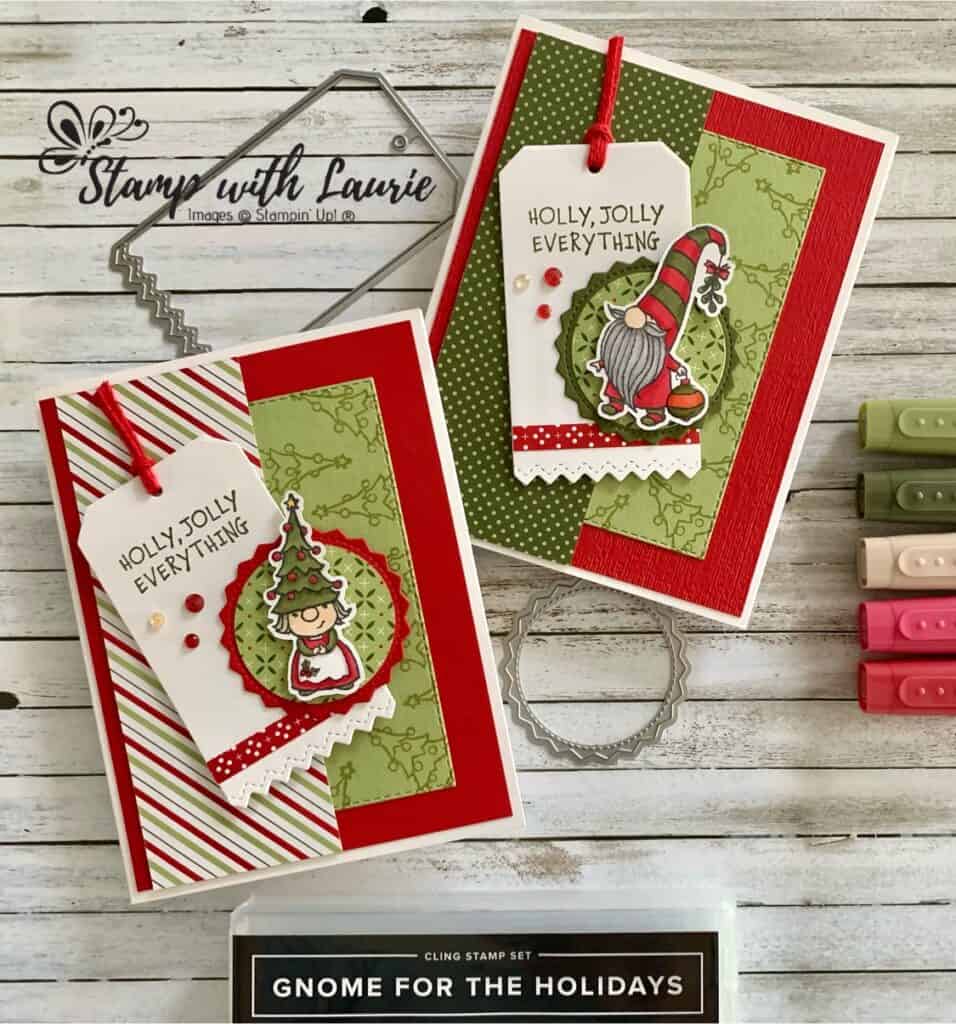
Halloween is over! Time for some Christmas cards! Today I am sharing with you my Holly Jolly Gnome Christmas cards using the Gnome For The Holidays Cling Stamp Set by Stampin’ Up! I love the gnomes from this set and the cute sentiments such as “There’s no place like GNOME for the Christmas season”! So, I made 2 variations of my card using two different gnomes.

For both cards, I combined the stamp set and the dies from the North Pole Wonder Dies to create a fun tag.

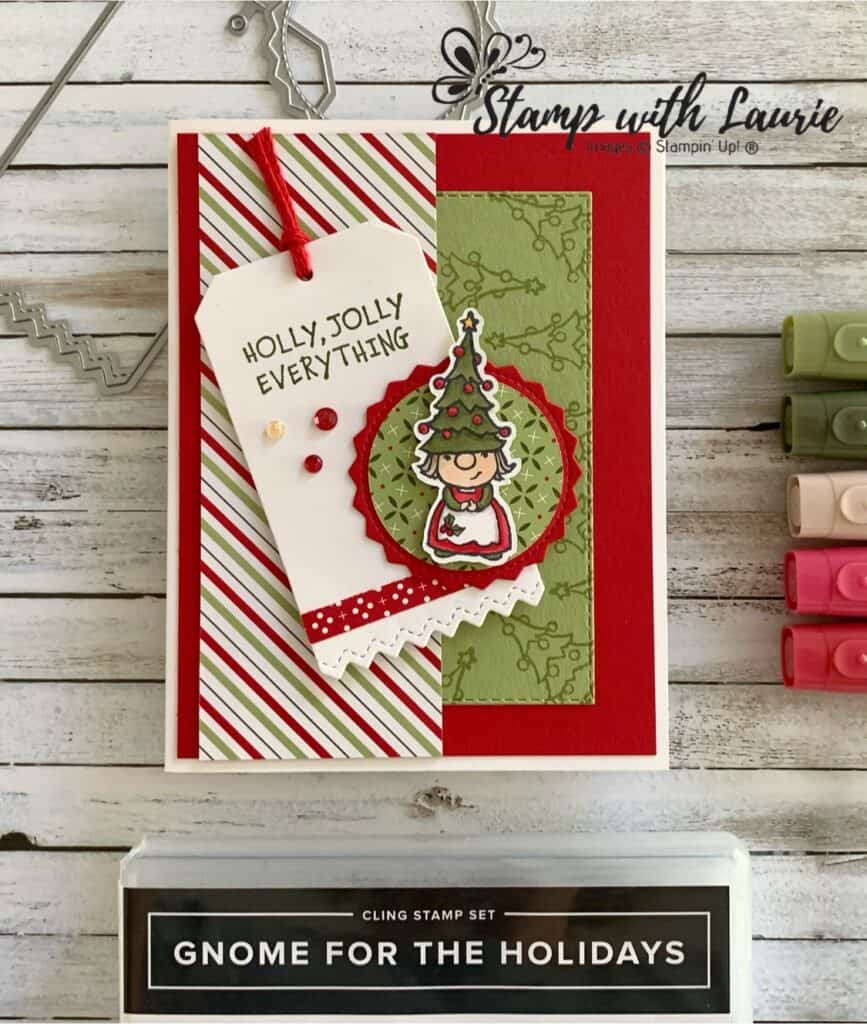
I used the hat of the girl gnome to stamp the edges of the Pear Pizzazz Stitched Rectangle. Such a neat technique using that stamp in a different way. Both my gnomes were coloured with Stampin’ Blends matching the Heartwarming Hugs Designer Series Paper and Ribbon using the Smooth Colouring Technique (more info on this technique).

The Girl Gnome from my Holly, Jolly Gnome Christmas Cards
The Girl Gnome

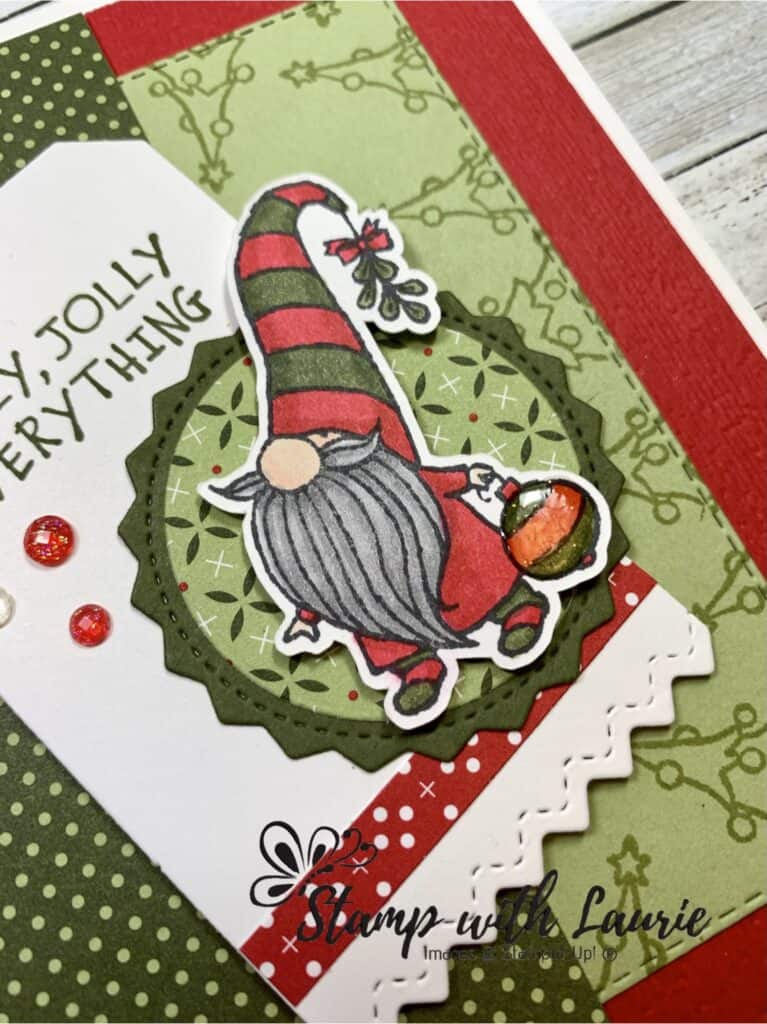
Since the gnomes do not come with dies, I fussy cut them out to make them pop up from the card. For embellishments, I tied the Real Red Braided Linen Trim through the tag’s hole, added a scattering of Wonderful Gems and added Shimmery Crystal Effects to the Christmas Bauble. 

Close Up of The Shimmery Crystal Effects on Bauble

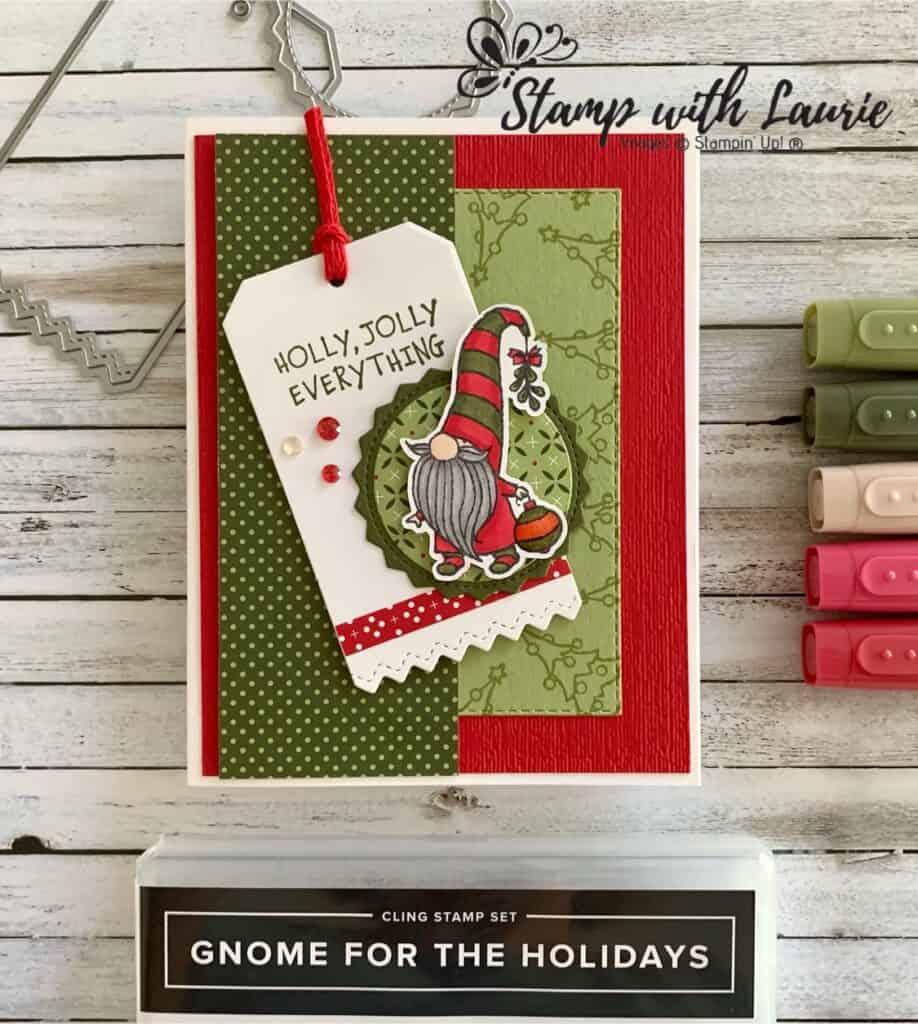
One difference between the two cards, besides the different pieces of the DSP, is that I used the Subtle 3D Embossing Folder on the guy gnome version to add a bit more visual effect.

The Guy Gnome from my Holly, Jolly Gnome Christmas Cards
The Guy Gnome

Supplies for My Holly Jolly
Gnome Christmas Cards:

Stamps: Gnome for the Holidays Stamp Set (153322

Dies: North Pole Wonder Dies (153523), Stitched Rectangles Dies (151820)

Inks: Tuxedo Black Memento Ink Pad (132708), Pear Pizzazz Classic Stampin’ Pad (147104)

Paper: Whisper White Thick (140272 ), Real Red (102482), Pear Pizzazz (131201), Mossy Meadow (133676), Heartwarming Hugs Designer Series Paper (153492)

Accessories: Subtle 3D Embossing Folder (151775), Bronze & Ivory Stampin’ Blends Combo Pack (154922), Real Red Stampin’ Blends Combo Pack (1548990, Mossy Meadow Stampin’ Blends Combo Pack (148547), Smoky Slate Stampin’ Blends Combo Pack (145058), Crumb Cake Stampin’ Blends Combo Pack (154882), Mango Melody Stampin’ Blends Combo Pack (154888), Petal Pink Stampin’ Blends Combo Pack (154893), Real Red Braided Linen Trim (153546), Wonderful Gems (153536), Shimmery Crystal Effects (150892), Paper Snips (103579), Bone Folder (102300), Stampin’ Seal (152813), Stampin’ Dimensionals (104430), Mini Stampin’ Dimensionals (144108

Measurements: 

  • Whisper White Thick: 8 ½” x 5 ½”; scored at 4 ¼”
  • Real Red: 5 ¼” x 4”
  • Pear Pizzazz: 3” x 4 3/8” (third largest Stitched Rectangle Die)
  • Mossy Meadow/Real Red: 2” x 2”
  • Whisper White:
    • 2 x 3 5/8” (tag)
    • 2 ½” x 1 ½” (gnomes)
  • Heartwarming Hugs Designer Series Paper:
    • 1 ¾” x 1 ¾”
    • 5 ¼” x 2”
    • ¼” x 2”
  • Real Red Braided Linen Trim: 3”

For Further Info:

Hope you like my Holly Jolly Gnome Christmas cards!

Beautiful Poppy Birthday Card using Smooth Colouring Technique
Video Tutorial: Smooth Colouring

You will find the items listed above in my online store.