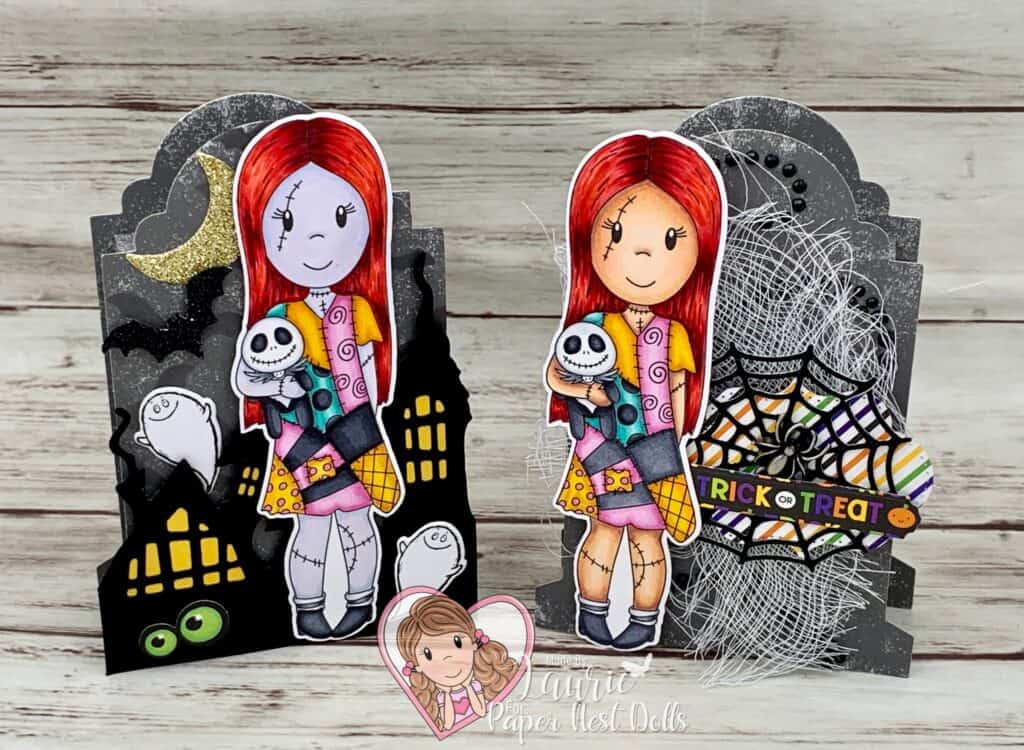
Tombstone Treat Boxes

Decorated Treat boxes for Halloween
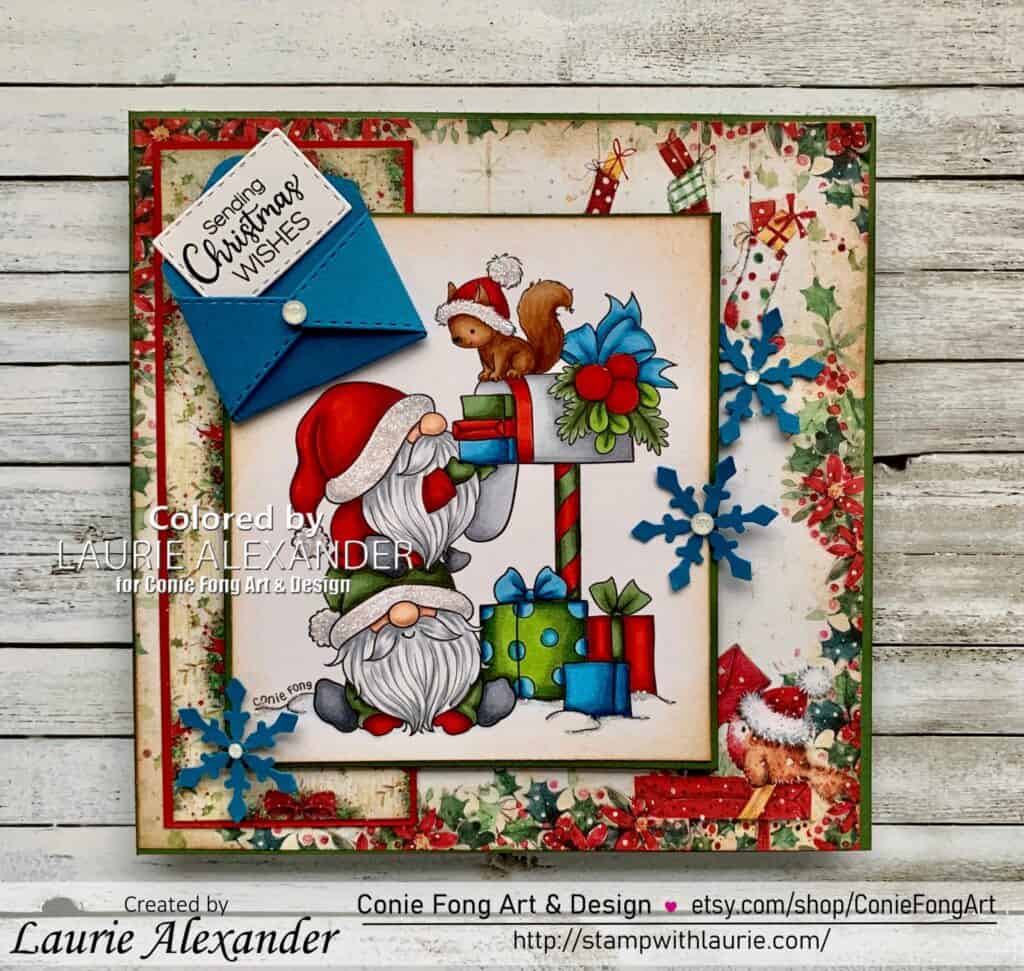
My Tombstone Treat Boxes

Happy Halloween Crafty Friends! It’s Laurie here! Today I am sharing My Tombstone Treat Boxes as my Design Team Inspiration for Paper Nest Dolls using Ragdoll Sally.

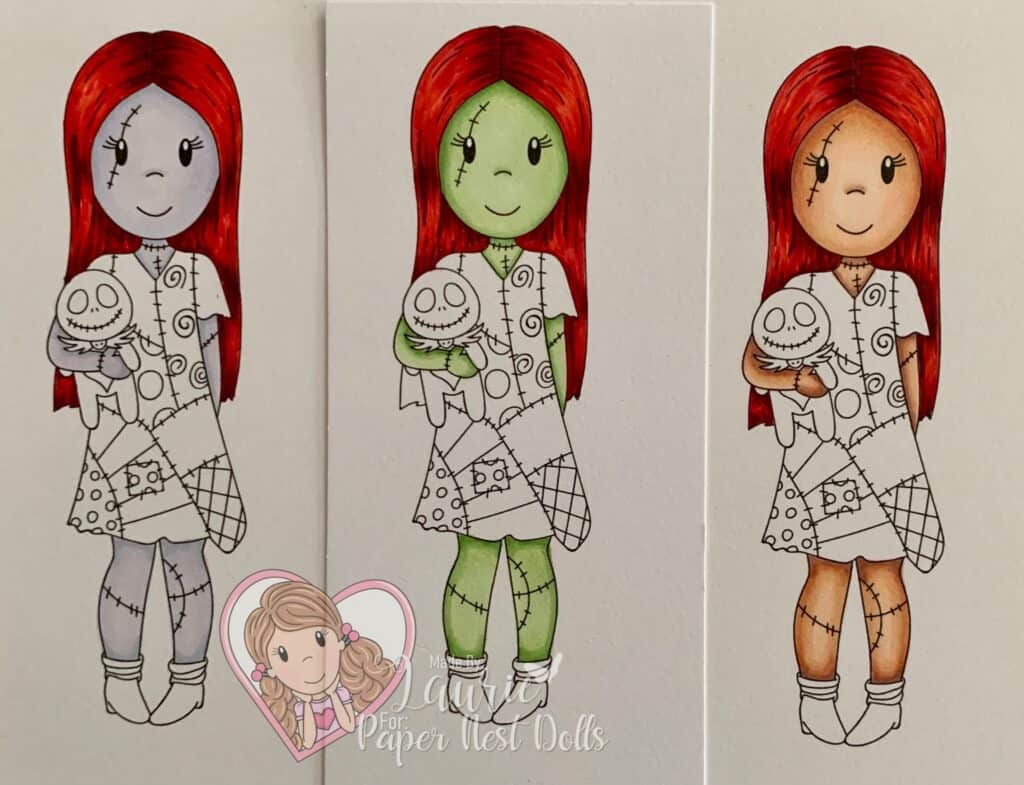
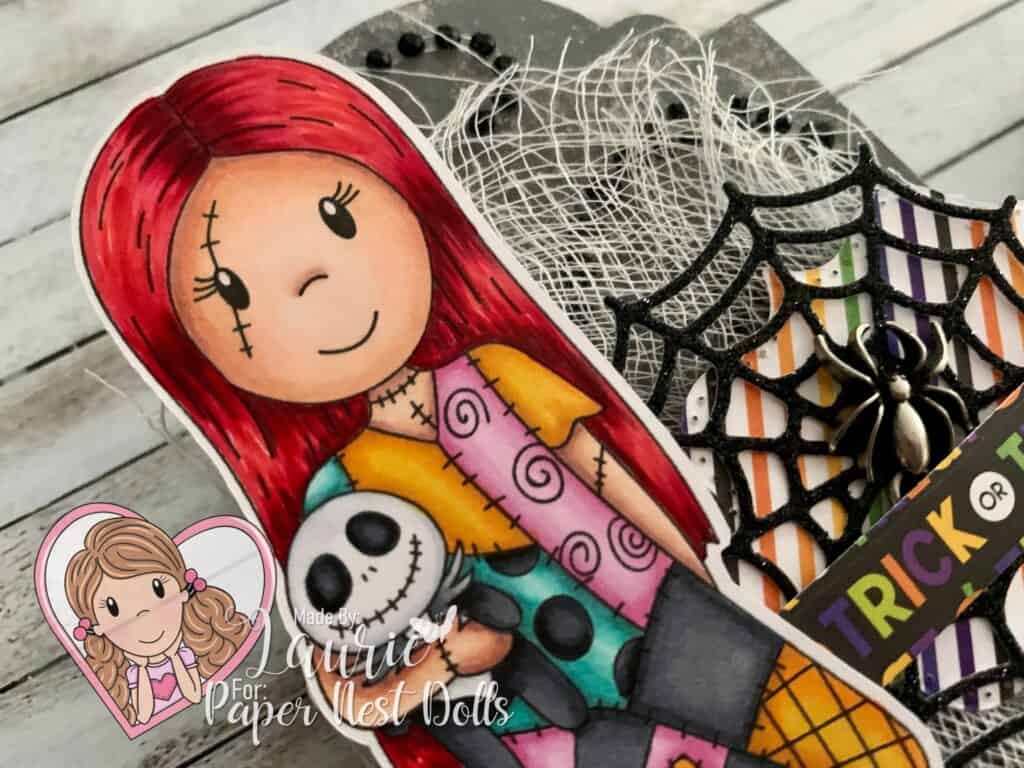
I had a lot of fun colouring this cutie with my Copic Markers! In fact, I coloured her skin in three different tones. So, I created a poll in The Paper Nest Dolls Inspiration Facebook Group on which skin tone was the most popular. The most popular green skin tone was used to create a card (Link to it here), but I couldn’t resist colouring the other two to create my treat boxes.
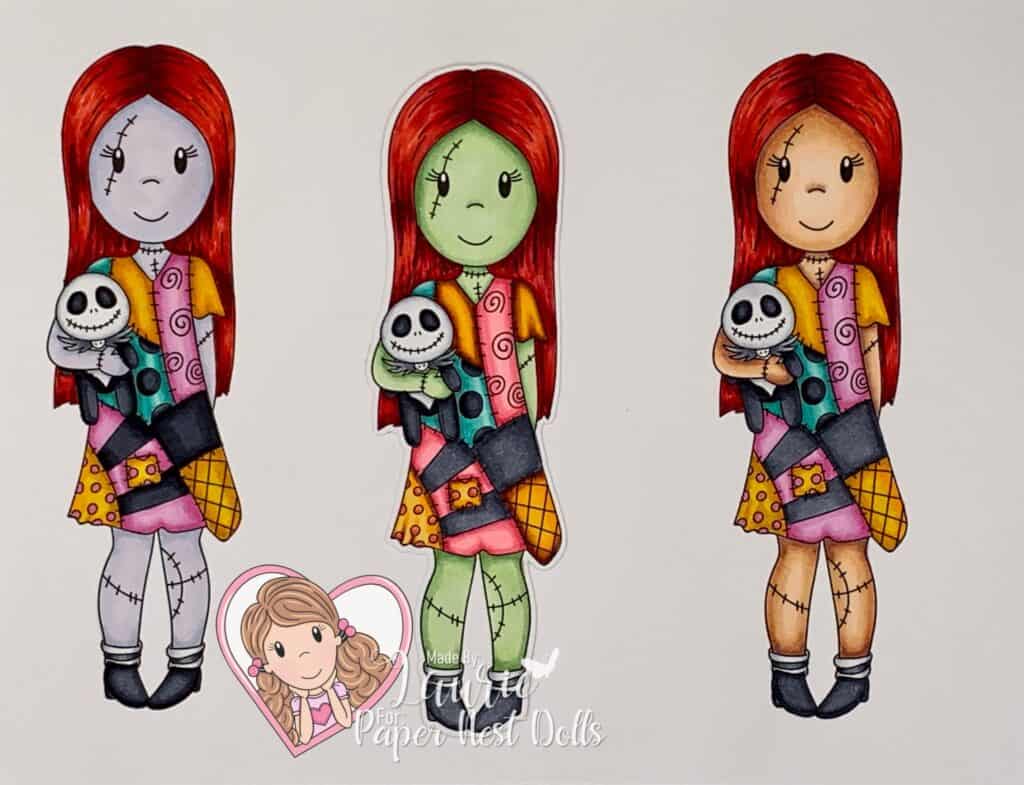
My Coloured Digital Stamps
My Coloured Ragdoll Sallys

Since it’s Halloween what better way to celebrate with treat boxes to give out to all those cute trick-or-treaters! The Stampin’ Up! Tombstone Treat Boxes were so fun to decorate with lots of little bits from my stash! And the finishing touch was my coloured Ragdoll Sallys!

————————–

Copic Markers:

Hair: R29/R27/R24/C5
Purple Skin: BV20/B60/V20
Natural Skin: E000/E00/E21/E11/E04
Blacks on Dress: C7/C5/C4
Blues: BG18/BG15/BG13/BG11
Yellows: Y38/YR23/Y15
Pinks: RV55/RV63/RV52
Shoes: C7/C5/C4
Socks: C4/C3/C0
Jack Stuffie: C9/C7/C5
Jack’s Head: C3/C0/3
Jack’s Collar: C5/C4/C3
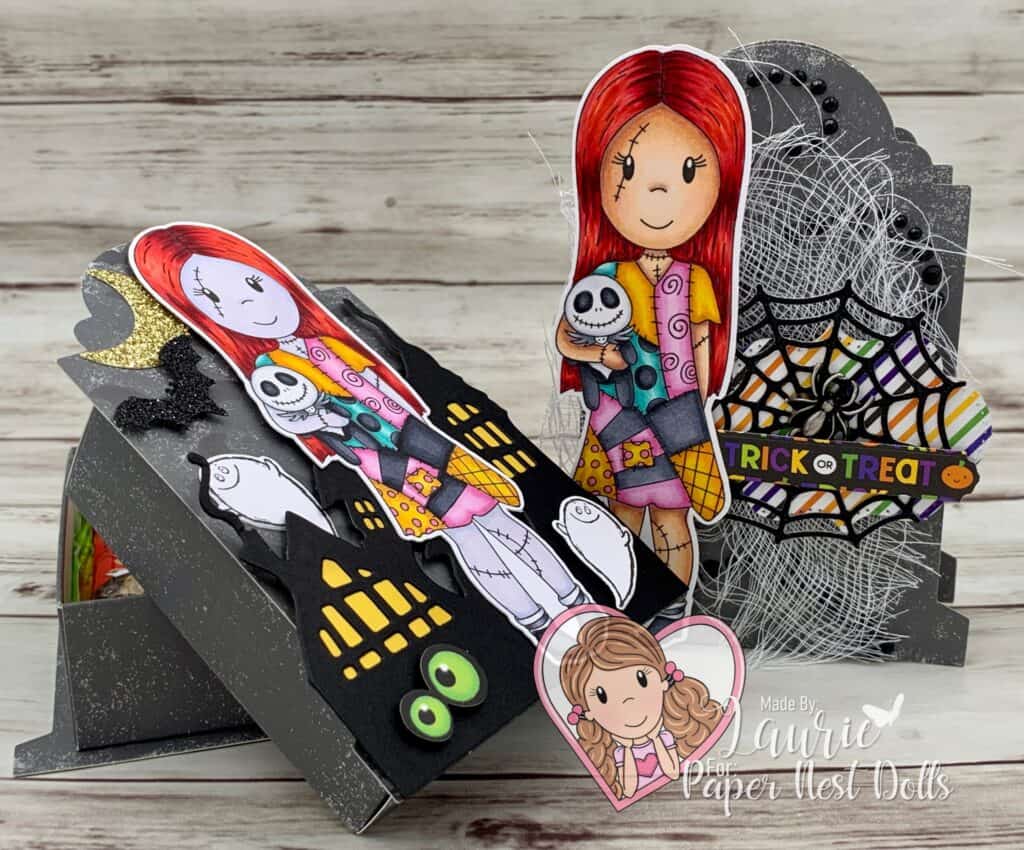
My Treat Boxes Opened

————————–

Recipe for My Tombstone Treat Boxes:

Ragdoll Sally, Paper Nest Dolls
Paper Basics – Stamper’s Select White Cardstock, Papertrey Ink
Tombstone Treat Boxes, Stampin’ Up!

Treat Box 1
Black Glimmer Paper, Stampin’ Up!
Gold Glimmer Paper, Stampin’ Up!
Scary Town Builder Dies, Stamp AnnieThing
Cauldron Bubble Bundle, Stampin’ Up!
Sliding Star Framelits Dies, Stampin’ Up!
KP Halloween Die-Cut Cardstock, K& Company
Spooky Bats Punch, Stampin’ Up!
Basic Black and Crushed Curry Card Stock
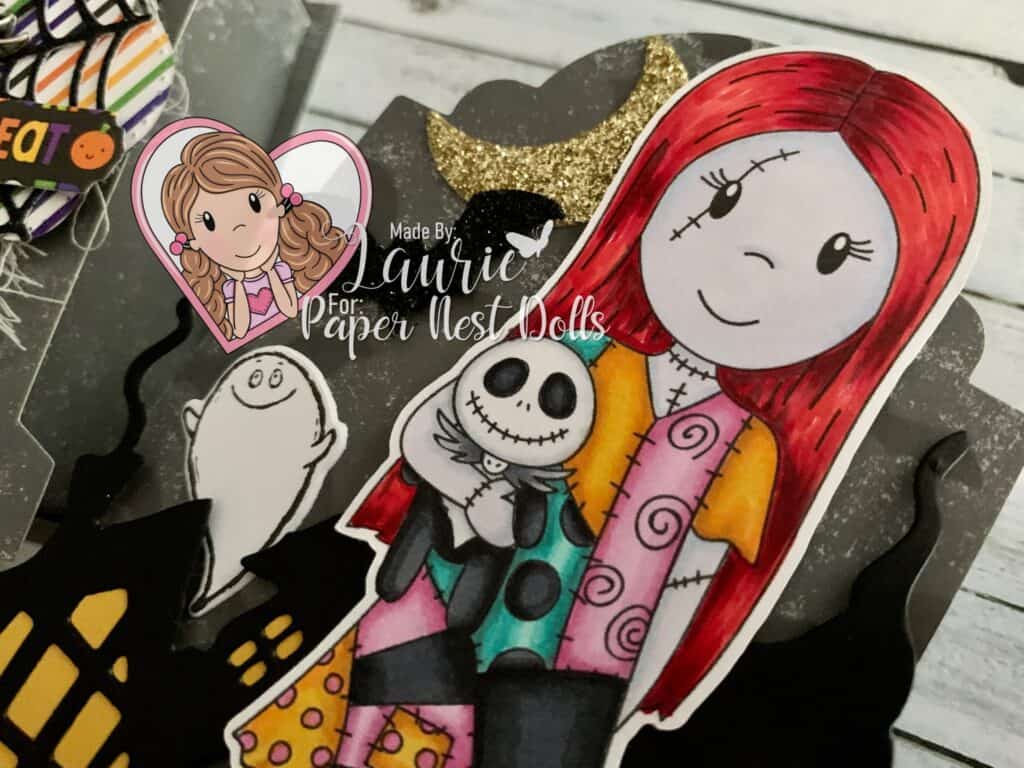
Decorated Treat Box
Treat Box 1

Treat Box 2
Ghouls & Goodies 6” x 6” Paper Pad Doodlebug Design Inc.
Frightful Tags Dies, Stampin’ Up!
Black Glimmer Paper, Stampin’ Up!
Haunted Adhesive Rhinestones, Recollections
Idea-ology Adornments, Tim Holtz
Cheese Cloth
Basic Black Card Stock
Another Decorated Treat Box
Treat Box 2

Finished Treat Boxes size: 3.5” x 5”

————————–

To view my Paper Nest Dolls cards, please click here.

Hope you like my Design Team Inspiration using
Ragdoll Sally by Paper Nest Dolls!

Thank you for stopping by!

Hugs,
Laurie

Sending Christmas Wishes Card

My DesignTeam Card with Gnomes Mailing Presents
Sending Christmas Wishes Card

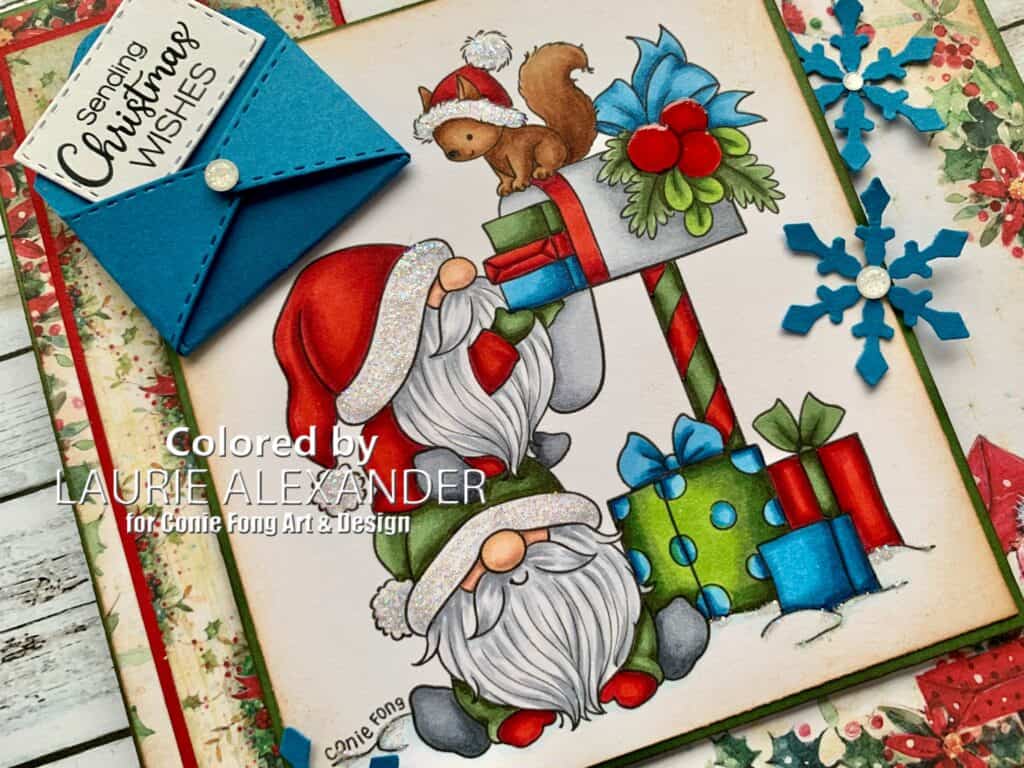
Hello Crafty Friends! It’s Laurie here! Have you started your Christmas cards? This is my one first since Christmas in July. I am sharing my Sending Christmas Wishes Card as my Design Team Card for Conie Fong Art & Design using the cute Christmas Mailbox Gnome. You receive the stamp and the sentiment Sending Christmas Love in PNG and JPG. I used the sentiment from the Christmas Gnome Stack since it suited my letter shape.

Details of My Card

I had so much fun colouring these cuties with my Copic markers in traditional greens and reds, but I added a pop of unexpected blue in the presents and bows. I love paper since it has a robin with a Christmas letter in his mouth. You can see him in the lower-right corner. I thought it would be fun to have an opened envelope with my sentiment tucked inside in one of the corners. A couple of punched snowflakes with some sparkly Kraftin’ Kimmie Dots tied in my blue. I used a lot of glitter with Star Dust stickles on their hat trim, pompoms and snow, Glossy Accents on the red Christmas baubles and Clear Wink of Stella on all the bows.

————————–

Copic Markers:

Skin: E000/E00/E21/E11/E04
Hair: C4/C3/C2
Shoes: C6/C4/C3
Reds: R39/R29/R27/R24
Greens: G99/G94/G21
Blues: B12/B14/B37
Squirrel: E37/E35/E33/E31
Mailbox: C4/C3/C1/R39/R29/R27/R24
Leaves: G99/G94/G21/YG67/YG03
Snow: B0000/Star Dust Stickles

Close Up of My Card
Close Up of The Gnomes on my Design Team Card

————————–

Card Recipe for My Sending Christmas Wishes Card:

Christmas Mailbox Gnome, Conie Fong Art & Design
Paper Basics – Stamper’s Select White Cardstock, Papertrey Ink
A Robin’s Christmas Paper Pack, Wild Rose Studios
Snail Dies, Stampin’ Up!
Snowflake Punch, From my Stash
Kraftin’ Kimmie Dots, Kraftin’ Kimmie Stamps
Vintage Photo Distress Ink, Ranger
Star Dust Stickles, Ranger
Glossy Accents, Ranger
Clear Wink of Stella, Stampin’ Up!
Garden Green, Real Red and
Pacific Point Card Stock, Stampin’ Up!

Finished cards size: 6” x 6”

————————–

To view my other Conie Fong Art & Design cards, please click here.

Hope you like my Design Team Inspiration Card using
Christmas Mailbox Gnome for Conie Fong Art & Design!

Thank you for stopping by!

Hugs,
Laurie
Birthday Slimline Shaker Card

My Design Team Card
Birthday Slimline Shaker Card

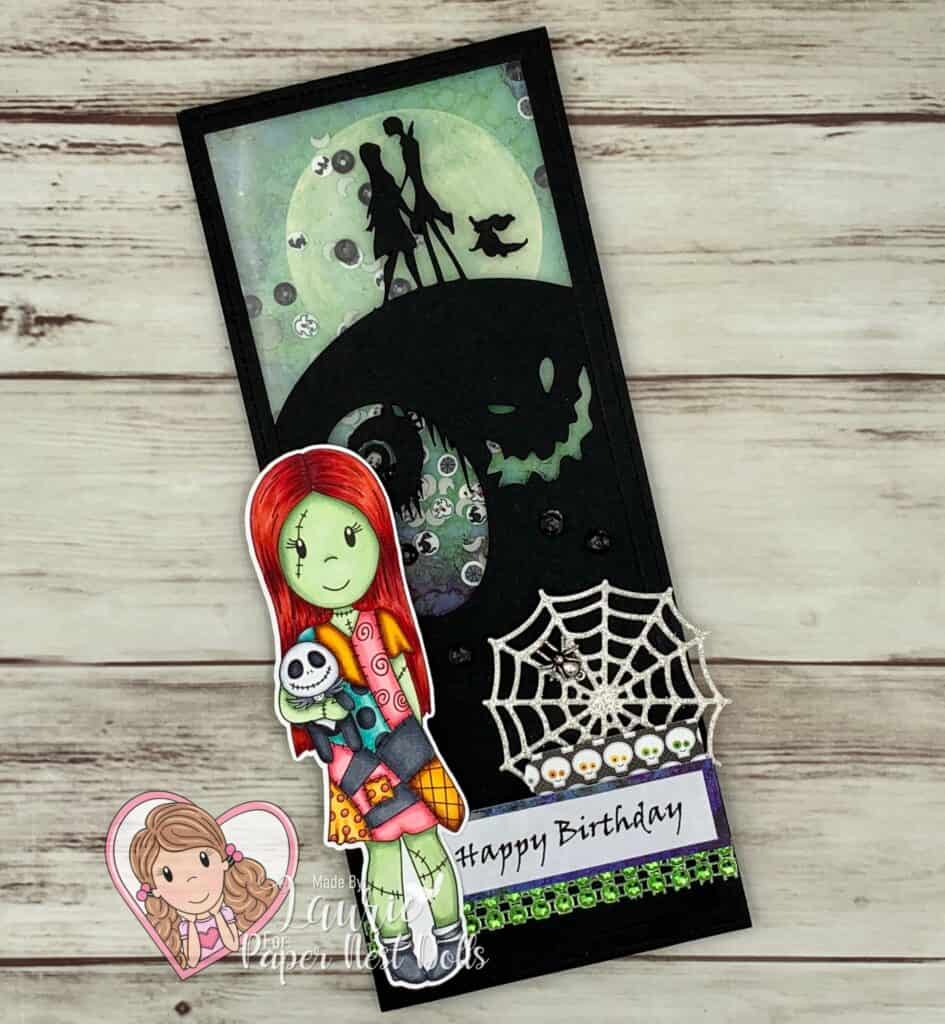
Hello Crafty Friends! It’s Laurie here! Today I am sharing My Birthday Slimline Shaker Card as my Design Team Inspiration Card for Paper Nest Dolls using the Ragdoll Sally. Every year, my Hubby and I watch Nightmare Before Christmas for Halloween. It’s also my Hubby’s birthday on Thursday and I thought a birthday card with Ragdoll Sally would be perfect for him.

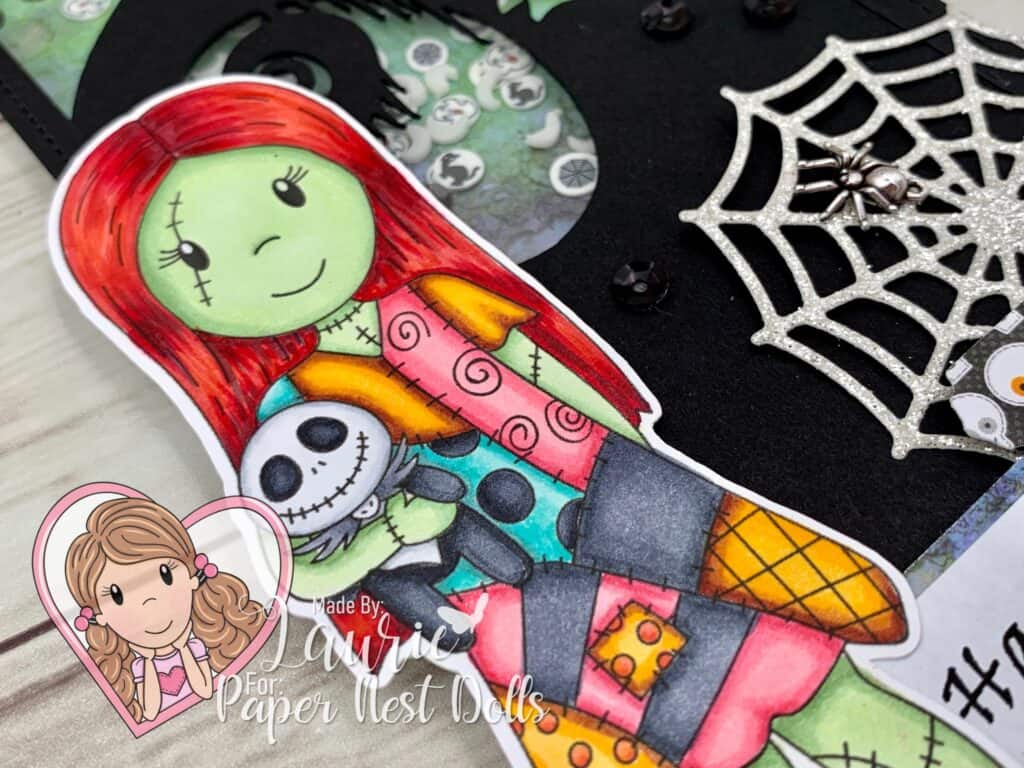
I had a lot of fun colouring this cutie with my Copic Markers! In fact, I coloured her skin in three different tones. So, I created a poll in The Paper Nest Dolls Inspiration Facebook Group on which skin tone was the most popular. It turned out that the green skin tone was the winner. So, I used her for my card.

Green, purple and natural skin tones
Skin Tones of Ragdoll Sally by Paper Nest Dolls

Of course, I also coloured the others and created Halloween treat boxes with them which I plan to share later this week.

My Card Details

For my card, I decided to create not only a slimline card, but a shaker card with glow in the dark moons! So fun! I know my Hubby will get a kick out of it! I found this cool graphic on Etsy for Nightmare Before Christmas. So, I used my Silhouette Cameo to tweak it to fit my shape and then die cut it out. The moon paper was 6” x 6”, but since I only needed it for the top half of my card, I trimmed it down to fit.

The Happy Birthday sentiment was printed out on my computer using Word and the Viner Hand ITC font. I created a collage of different items around the sentiment including the glittery spider web and spider trinket. Don’t you love the pop of green that the mesh created at the bottom of the card to mirror her skin and the Lavinia moon paper!

————————–

Copic Markers:

Hair: R29/R27/R24/C5
Skin: G24/G21/G20/G40
Blacks on Dress: C7/C5/C4
Blues: BG18/BG15/BG13/BG11
Yellows: E18/E15/Y38/Y35
Pinks: RV14/RV13/RV21
Shoes: C7/C5/C4
Socks: C4/C3/C0
Jack Stuffie: C9/C7/C5
Jack’s Head: C3/C0/3
Jack’s Collar: C5/C4/C3

Close Up of coloured Digital Stamp
Close Up of Ragdoll Sally

————————–

Card Recipe for My Birthday Slimline Shaker Card:

Ragdoll Sally, Paper Nest Dolls
Paper Basics – Stamper’s Select White Cardstock, Papertrey Ink
Spellbound 2 SceneScapes 6” x 6” Paper, Lavinia Stamps
October 21St 6″ x 6″ Paper Pad, Doodlebug Design Inc.
Window Sheet, Stampin’ Up!
Dazzling Diamonds Glimmer Paper, Stampin’ Up!
Jack Skellington Bundle, SunMagicArt, Etsy
Silhouette Cameo
Small Slimline with Lift the Flaps, Lawn Fawn
Large Slimline with Sliders, Lawn Fawn
Frightful Tags Dies, Stampin’ Up!
Green Rhinestone Mesh, Crafts, Dollarama
Moon-Glow in the Dark Shakers, Dress my Crafts
Halloween Shakers, Dress my Crafts
Black Sequins, My Stash
Spider Trinkets, Stampin’ Up!
Basic Black Card Stock
Finished card size: 3.5” x 8.25”

————————–

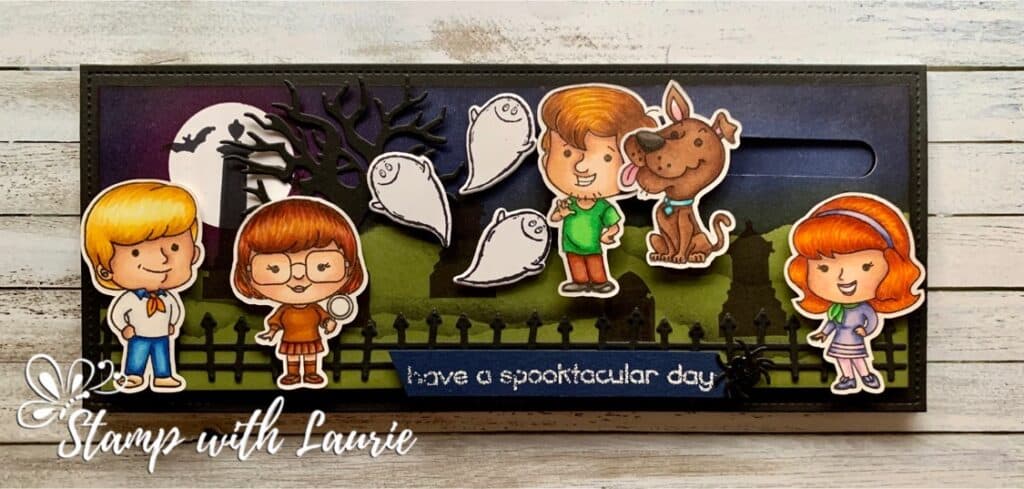
My Hubby’s birthday card from last year was an interactive slider card. To find out more about it, please click here.

My Have a Spooktacular Birthday Card
My Have a Spooktacular Slider Birthday Card

To view my other Paper Nest Dolls cards, please click here.

To view my other interactive cards, please click here.

Hope you like my Design Team Inspiration Card using
Ragdoll Sally by Paper Nest Dolls!

Thank you for stopping by!

Hugs,
Laurie
Witching You A Happy Halloween

My Halloween Cards with a Witch on Them
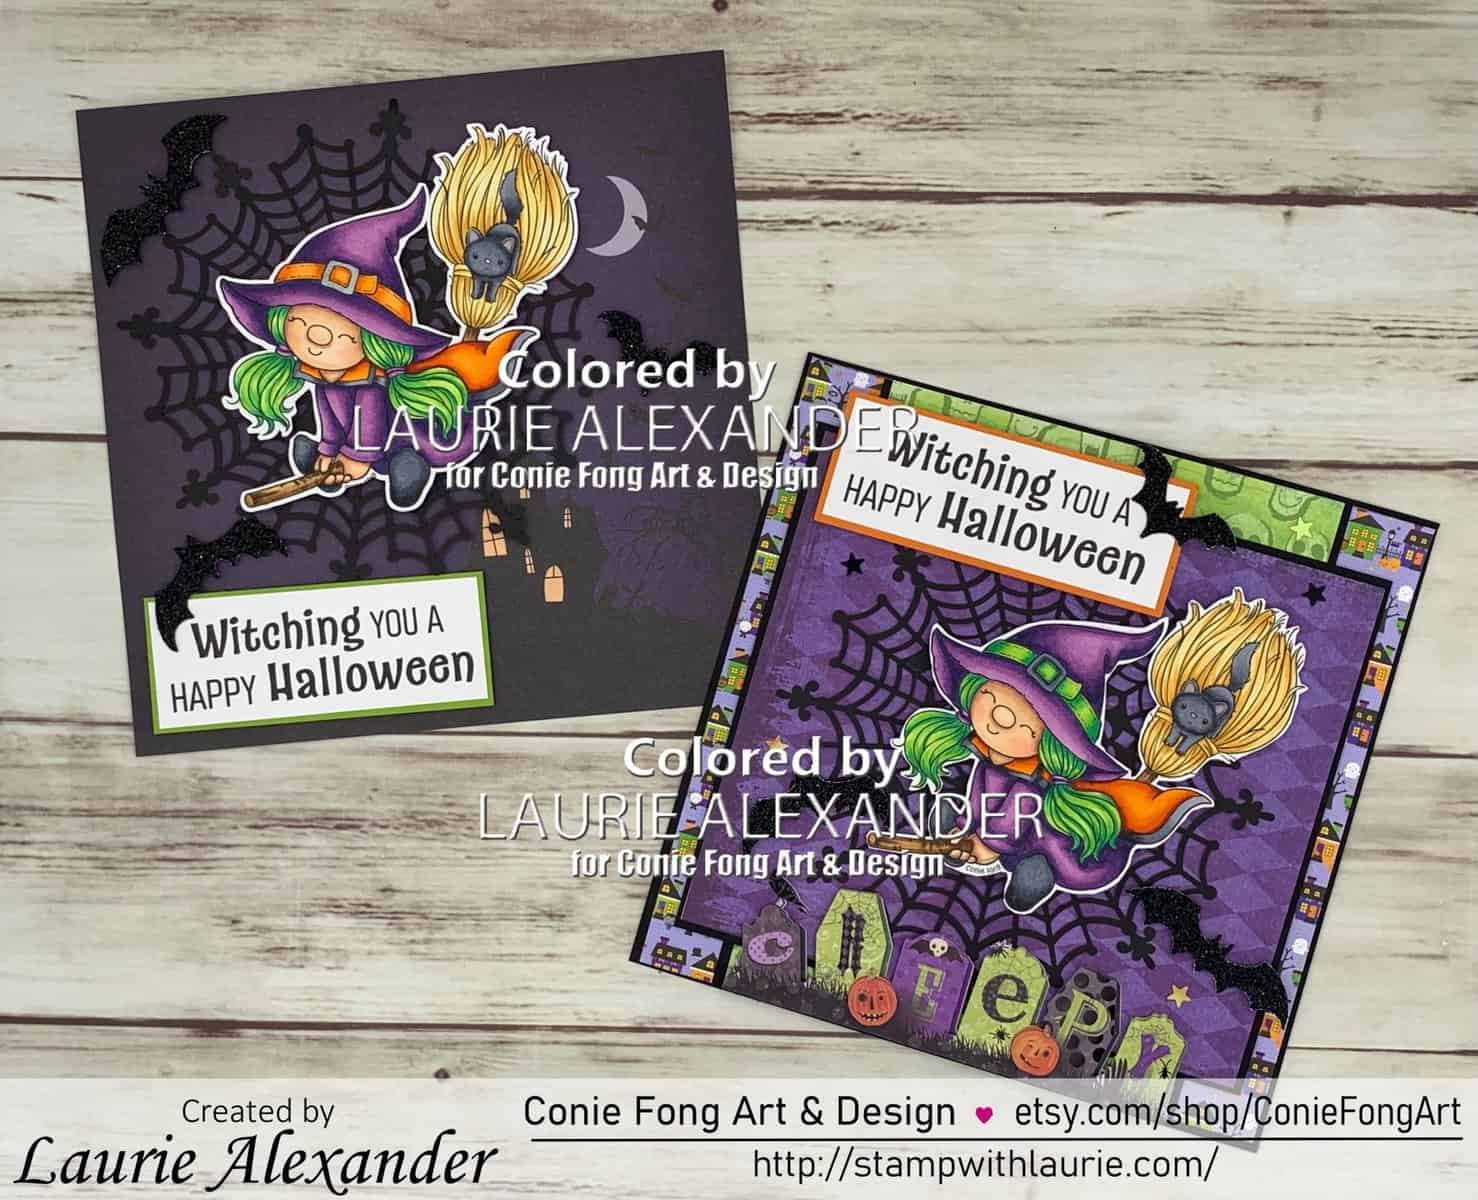
My Witching You A Happy Halloween Cards

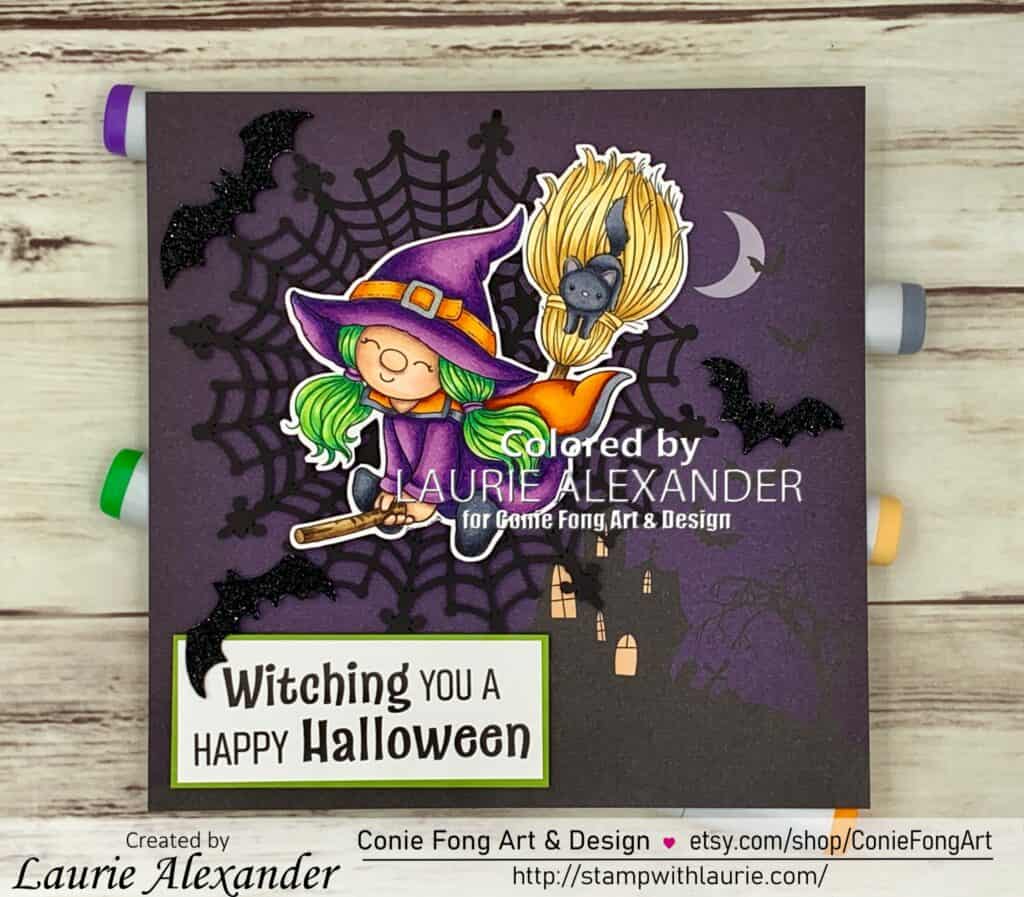
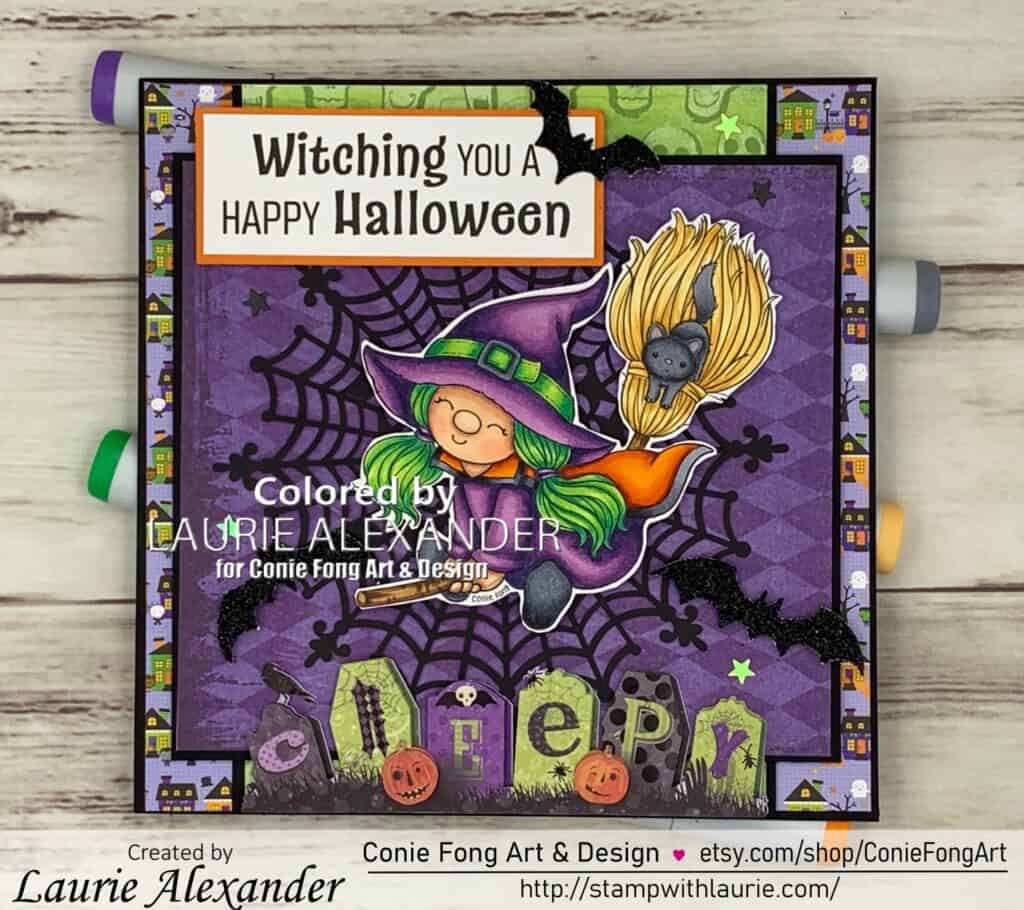
Hello Crafty Friends! It’s Laurie here! Halloween is only a few more weeks away and I couldn’t resist sharing another Halloween card! In fact, I am sharing two cards this time since I love this digital stamp so much! I am sharing my Witching You A Happy Halloween Cards as my Design Team Cards for Conie Fong Art & Design using the cute Witchy Broomstick Gnome. She comes with 7 images including the sentiment Witching You A Happy Halloween.

Details of My Cards

Have you ever found that you have two different ideas for a digital stamp that you want to explore? I did for this cute stamp! For my cards, I created a CAS (Clean and Simple) card and another one that has many layers to it. Which type of card is your preference? I tend to lean towards lots of layers and details, but this paper from Spellbound just called to be used with minimal details.

My Clean and Simple Card with a Witch
My Clean and Simple Card

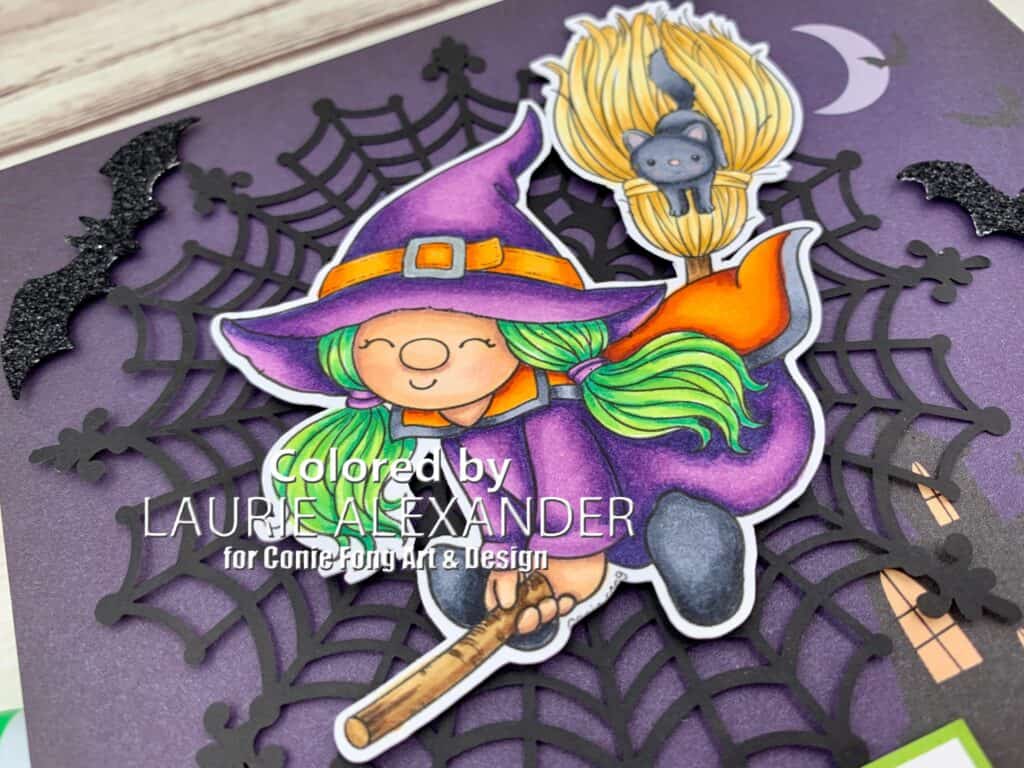
I love the spooky scene on the paper. So, I angled my witch to show it peeking out from behind her. I added a spider web doily to make her pop from the background, some glittery bats, and the sentiment that come with her to my card. That was all this card needed.

My Other Halloween Card
My Detailed Halloween Card

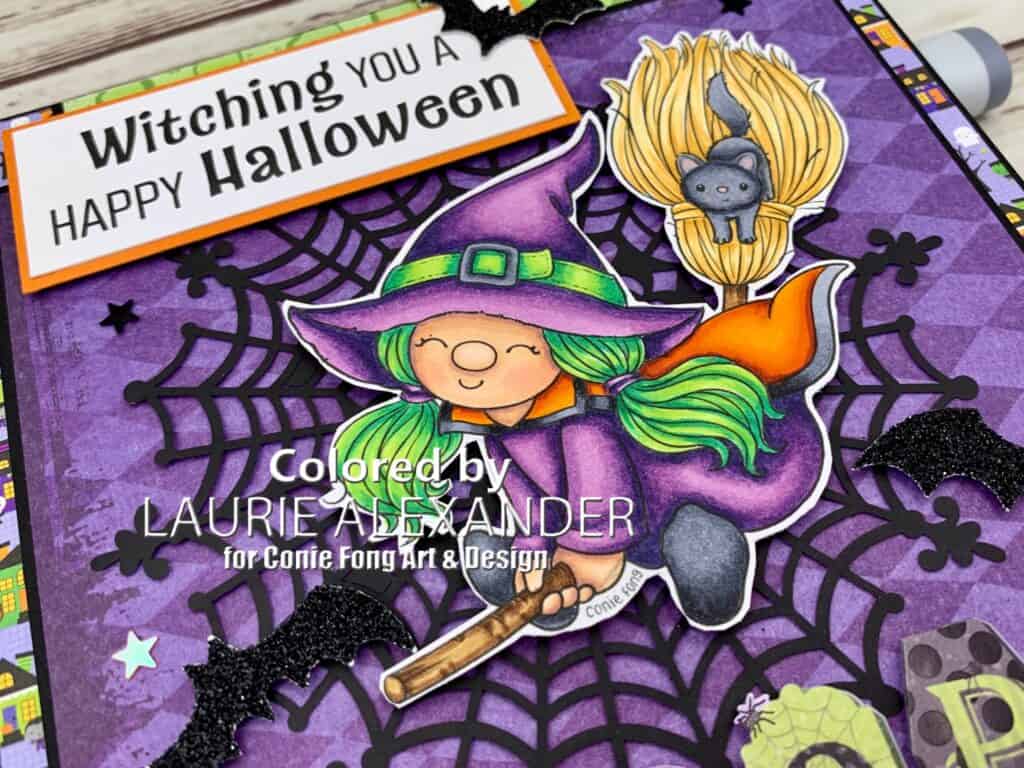
For my second card, I used several different layers of paper that matched the fun Copic Markers colours that I used on my witches. I used the same doily and glittery bats but added a graveyard sticker at the bottom of my card like she is flying over a graveyard. A scattering of star sequins adds some sparkle to the background.

————————–

Copic Markers:

Skin: E000/E00/E21/E11/E04
Greens: G17/G14/YG23/YG03
Purples: BV08/V17/V15/V12
Shoes: C9/C7/C5/C4
Oranges: E18/YR15/YR16/YR07
Cat: C7/C5/C4/R20
Broom: YR23/YR21/Y21/E59/E57/E55

Close Up of The CAS Card

————————–

Card Recipe for Witching You A Happy Halloween:

Witchy Broomstick Gnome, Conie Fong Art & Design
Paper Basics – Stamper’s Select White Cardstock, Papertrey Ink
Spellbound 6” x 6” Paper Pad, Fancy Pants Designs
Ghouls& Goodies 6’ x 6” Paper Pad, Doodlebug Design Inc.
KP Halloween Designer Mat Pad, K & Company
BW Haunted Word Dimensional Stickers, K & Company
Spider Web Doilies, Stampin’ Up!
Spooky Bat Punch, Stampin’ Up!
Cute Stars Adhesive-Backed Sequins, Stampin’ Up!
Black Glitter Paper, Stampin’ Up!
Silver Gelly Roll Pen
Basic Black, Pumpkin Pie and
Granny Apple Green Card Stock, Stampin’ Up!

Finished cards size: 6” x 6”

Close Up of Witch on my Card
Close Up of Witchy Broomstick Gnome

————————–

To view my other Conie Fong Art & Design cards, please click here.

Hope you like my Design Team Inspiration Cards using
Witchy Broomstick Gnome for Conie Fong Art & Design!

Thank you for stopping by!

Hugs,
Laurie
You’re my Gingerbread Card

My Stampin' Up! Card with Gingerbread Cookies on It
You’re my Gingerbread Card

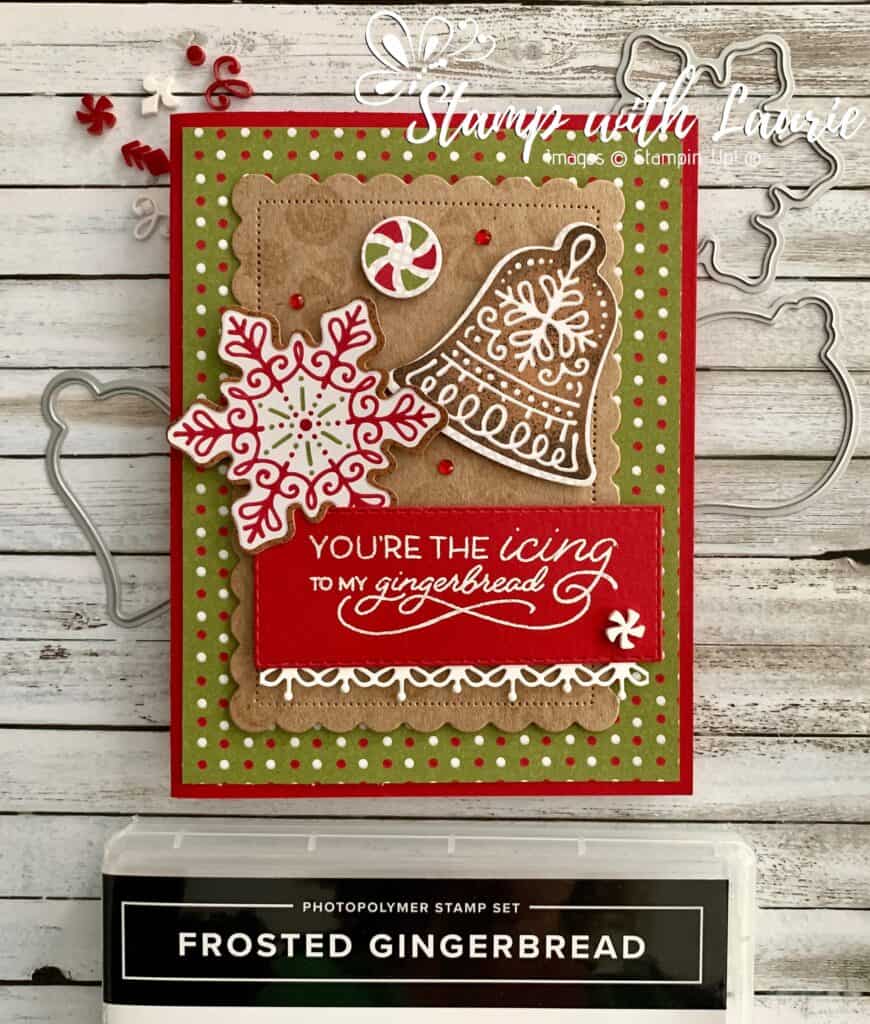
Hello Crafty Friends! Laurie here again! I am sharing my You’re my Gingerbread Card using the Frosted Gingerbread Bundle by Stampin’ Up!

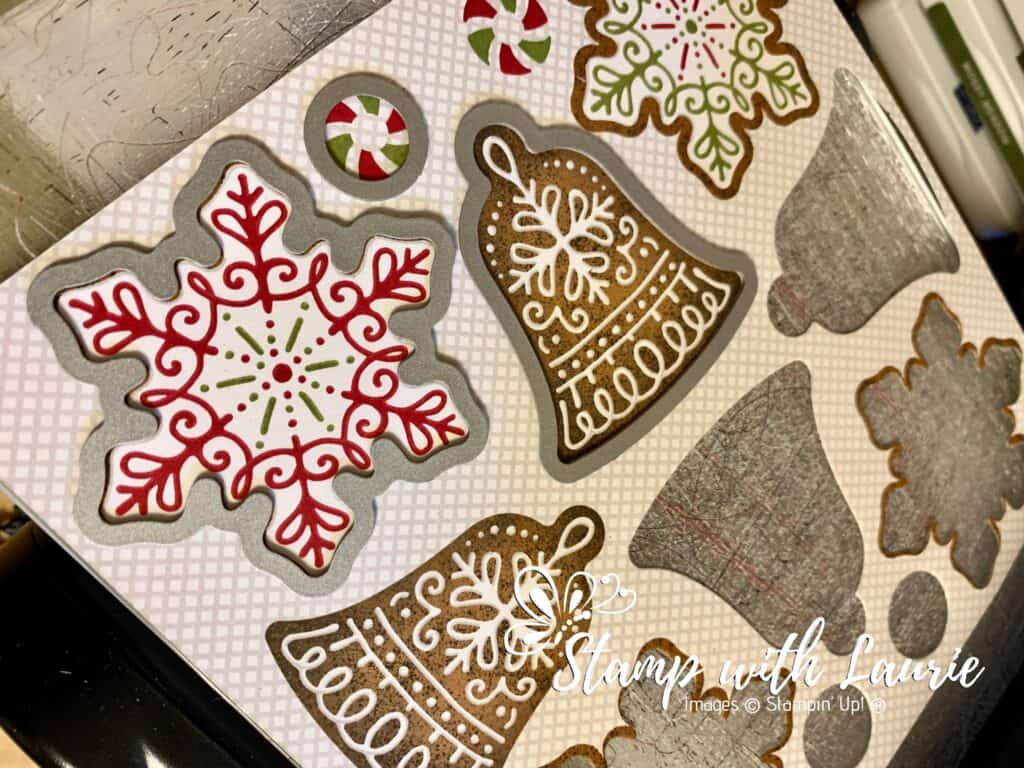
For my card, I wanted to use the Gingerbread Dies to die cut the images out of the Gingerbread & Peppermint Designer Series Paper. I love that you can do this to create your cards! Great for mass producing your Christmas cards!

Paper with Gingerbread Cookies on It
Gingerbread & Peppermint Designer Series Paper with Gingerbread Dies

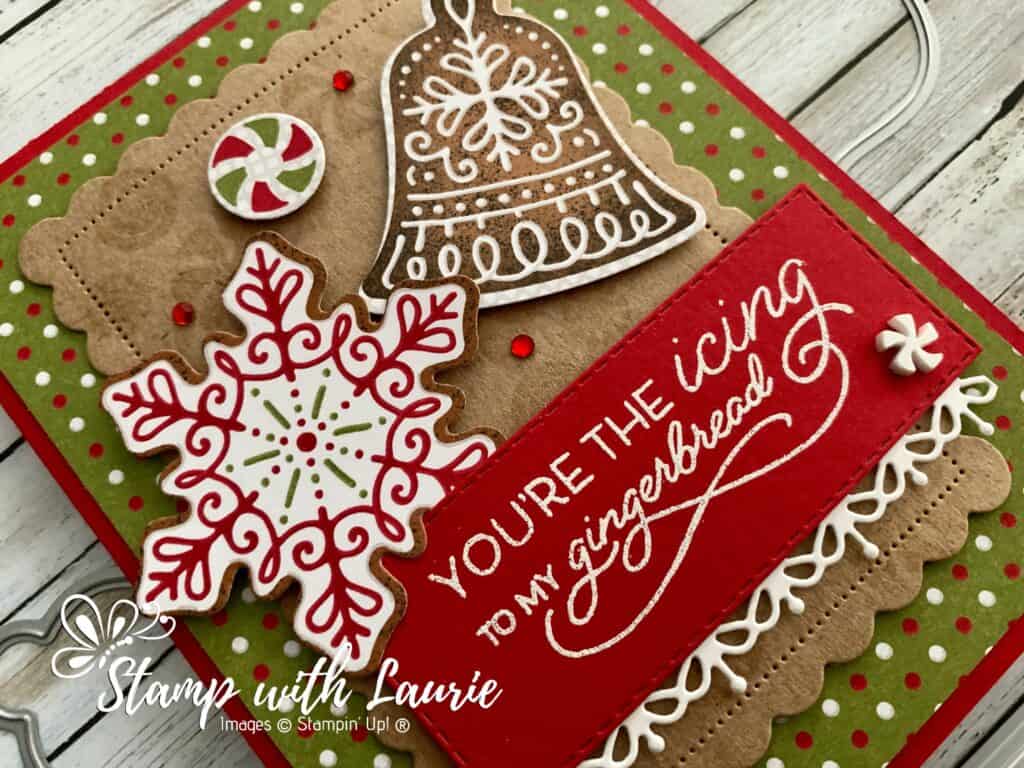
I thought the Kraft paper would tie in nicely with the brown cookies in the DSP. Once I die cut it with the largest scallop die, I stamped the peppermint swirls all over it in Versamark. This tone-on-tone look adds a subtle bit of interested without taking away from the delicious cookies.

I also stamped in Versamark the sentiment on a piece of Real Red that I die cut using one of the Stitched Rectangles Dies. This I embossed in white using my Heat Tool. I added the gingerbread trim in Basic White under my sentiment trimming it to fit the rectangle. I added a fun Gingerbread & Peppermint Acrylic Shape and a scattering of Red Rhinestone Basic Jewels to tie in my colours and theme.

Supplies:

Stamps/Bundles/Dies: Frosted Gingerbread Bundle (156807), Scalloped Contours Dies (155560), Stitched Rectangles Dies (151820)

Inks: VersaMark Ink Pad (102283)

Paper: Real Red (102482), Basic White (159276), Kraft 6″ x 6″ Paper Pack (156325), Gingerbread & Peppermint Designer Series Paper (156313)

Accessories: Basics Embossing Powder (155554), Gingerbread & Peppermint Acrylic Shapes (156322), Red Rhinestone Basic Jewels (146924), Bone Folder (102300), Stampin’ Dimensionals (104430), Stampin’ Seal (152813), Mini Glue Dots (103683), Heat Tool (129053)

Close Up of My Card with Gingerbread Cookies
Close Up of my Card

Measurements: 

  • Real Red: 2 pieces
    • 5 ½” x 8 ½” scored at 4 ¼”
    • 3 ¼” x 1 ¼” (Sentiment)
  • Gingerbread & Peppermint Designer Series Paper: 4” x 5 ¼”
    • 2 Die cut Cookies and one peppermint swirl
  • Basic White: Scrap
  • Kraft: 3 ¼” x 4 ½”

More Information on You’re My Gingerbread Card:

For more of my Stampin’ Up! cards, please click here.

Here is a video on the Gingerbread & Peppermint Suite:
https://www.youtube.com/watch?v=8nTXh3UT6i4

You will find the items listed above in my online store.

My Happy Thanksgiving Card

A Thanksgiving Card with Leaves on It
My Happy Thanksgiving Card

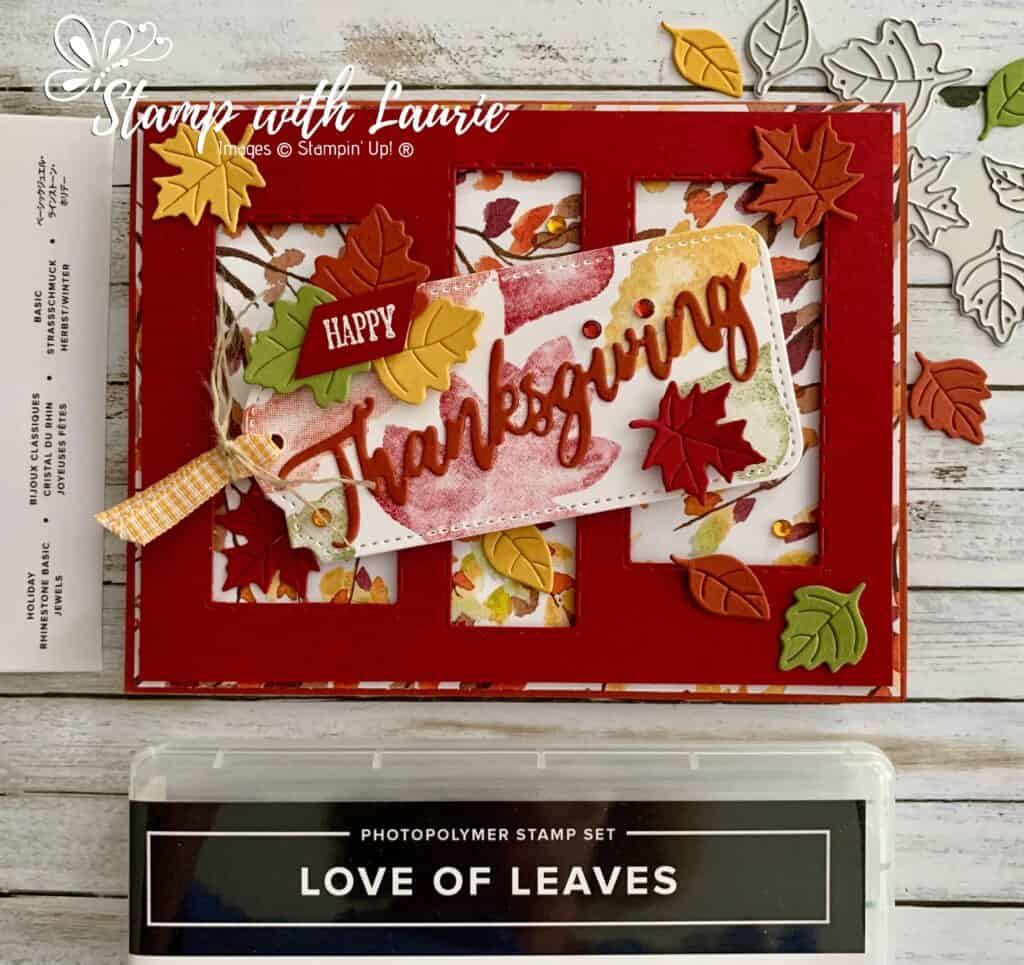
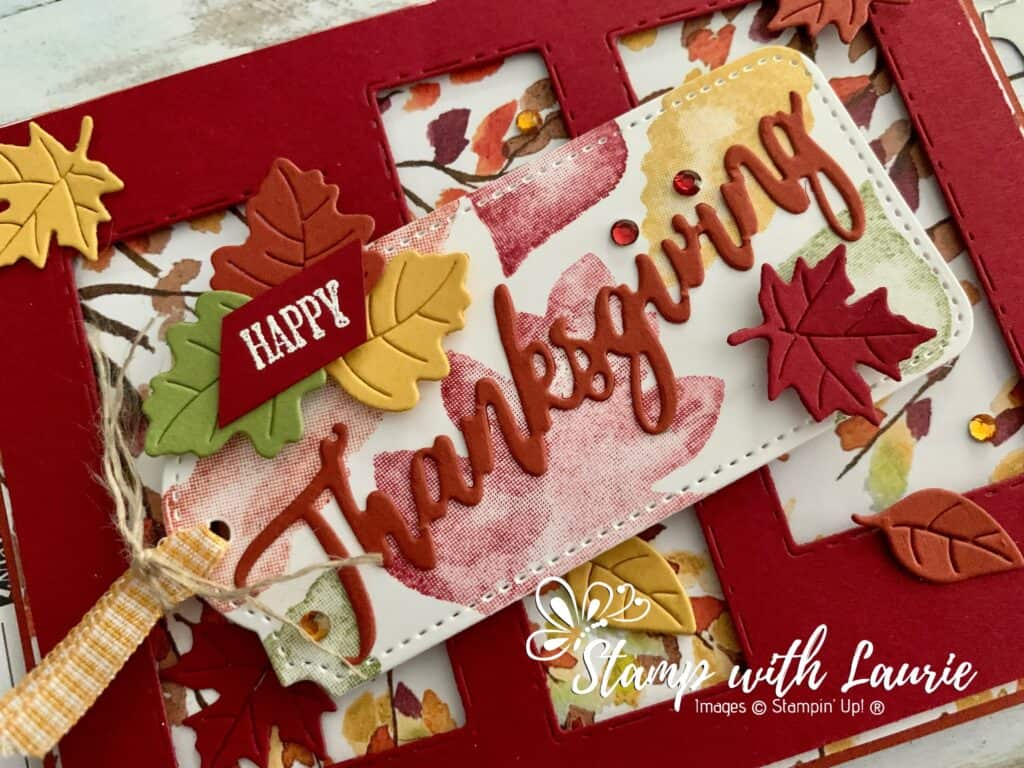
Happy Thanksgiving to my Canadian Crafty Friends! Laurie here again! I am sharing My Happy Thanksgiving Card using several dies, including Tailor Made Tags Dies, Giving Gifts Dies, Picture This Dies and Word Wishes Dies to create my festive card.

For my card, I wanted to create a very Autumnal card for this time of year. So, I pulled out Cherry Cobbler, Cajun Craze, Bumblebee and Old Olive to create my Fall wonderland card. I stamped each leaf off before stamping it onto my tag. I wanted a subtle background for my die cut word and leaves. The HAPPY was white embossed onto a scrap of Cherry Cobbler and layered onto a pile of leaves. I added to the tag, the Gingham Ribbon, and the Linen Twine which I frayed to create a rustic look.

The Beauty of the Earth Designer Series Paper has the perfect Fall paper in it that was destined for my card. I thought that the Picture This Dies would be a great way to have this DSP poking out. A scattering of die cut leaves and rhinestones make this card feel like there is movement to the falling leaves.

Supplies:

Stamps/Bundles/Dies: Tailor Made Tags Dies (155563), Giving Gifts Dies (156563), Picture This Dies (155559), Word Wishes Dies (149629), A Wish for Everything Stamp Set (149320)

Inks: VersaMark Ink Pad (102283), Cherry Cobbler Classic Stampin’ Pad (147083), Cajun Craze Classic Stampin’ Pad (147085), Bumblebee Classic Stampin’ Pad (153116), Old Olive Classic Stampin’ Pad (147090)

Paper: Cajun Craze (119684), Cherry Cobbler (119685), Basic White (159276), Bumblebee (153077), Old Olive (100702), Beauty of the Earth Designer Series Paper (155841)

Accessories: Basics Embossing Powder (155554), Bumblebee Gingham Ribbon (153658), Holiday Rhinestone Basic Jewels (150457), Linen Thread (104199), Bone Folder (102300), Stampin’ Dimensionals (104430), Stampin’ Seal (152813), Mini Glue Dots (103683), Heat Tool (129053)

Close Up of my Card
Close Up of My Thanksgiving Card

Measurements: 

  • Cajun Craze: 3 pieces
    • 5 ½” x 8 ½” scored at 4 ¼”
    • 3 ½” x 1” (Sentiment)
    • Scraps for leaves
  • Beauty of the Earth Designer Series Paper: 4 1/8” x 5 3/8”
  • Cherry Cobbler: 4” x 5 ¼”
    • Scraps for leaves
  • Basic White: 3 7/8” x 1 13/16”
  • Bumblebee: Scraps
  • Old Olive: Scraps

More Information on My Happy Thanksgiving Card:

For more of my Stampin’ Up! cards, please click here.

You will find the items listed above in my online store.

My Perfectly Wicked Interactive Card

Perfectly Wicked Sentiment
My Perfectly Wicked Interactive Card

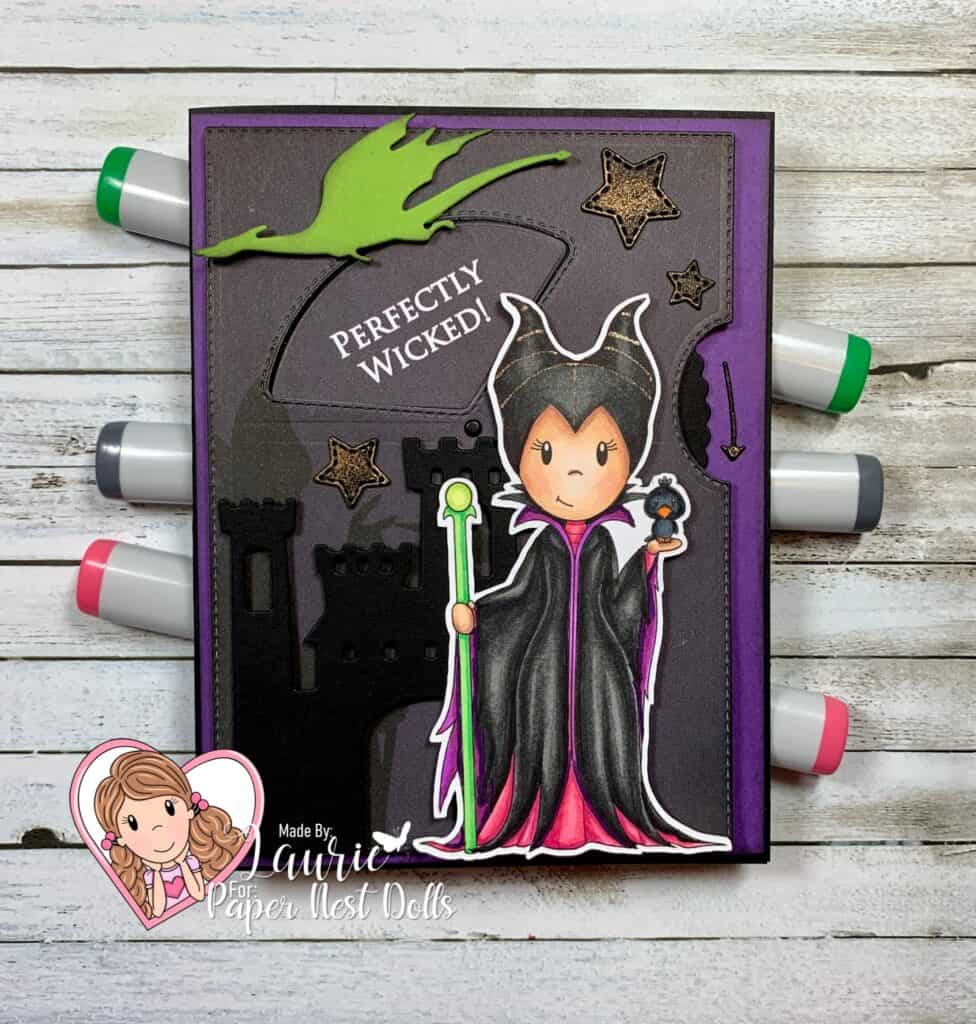
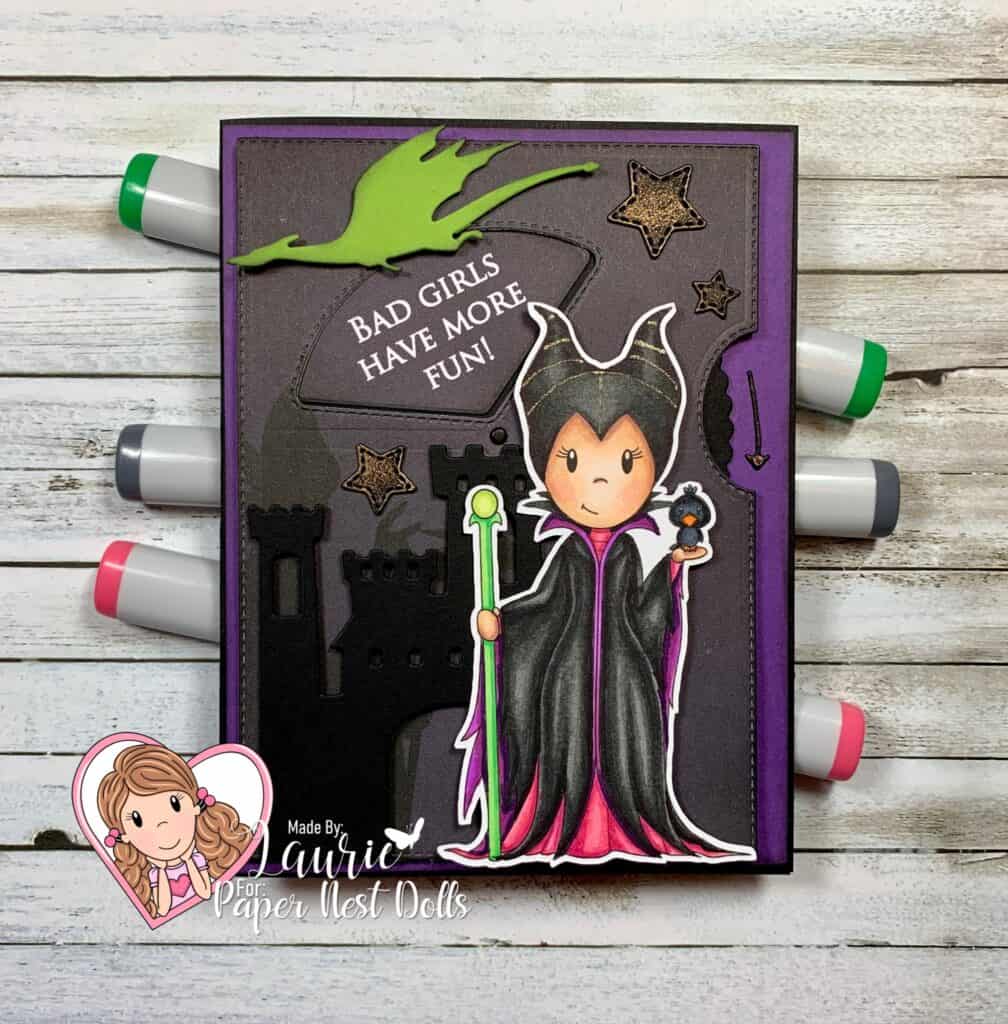
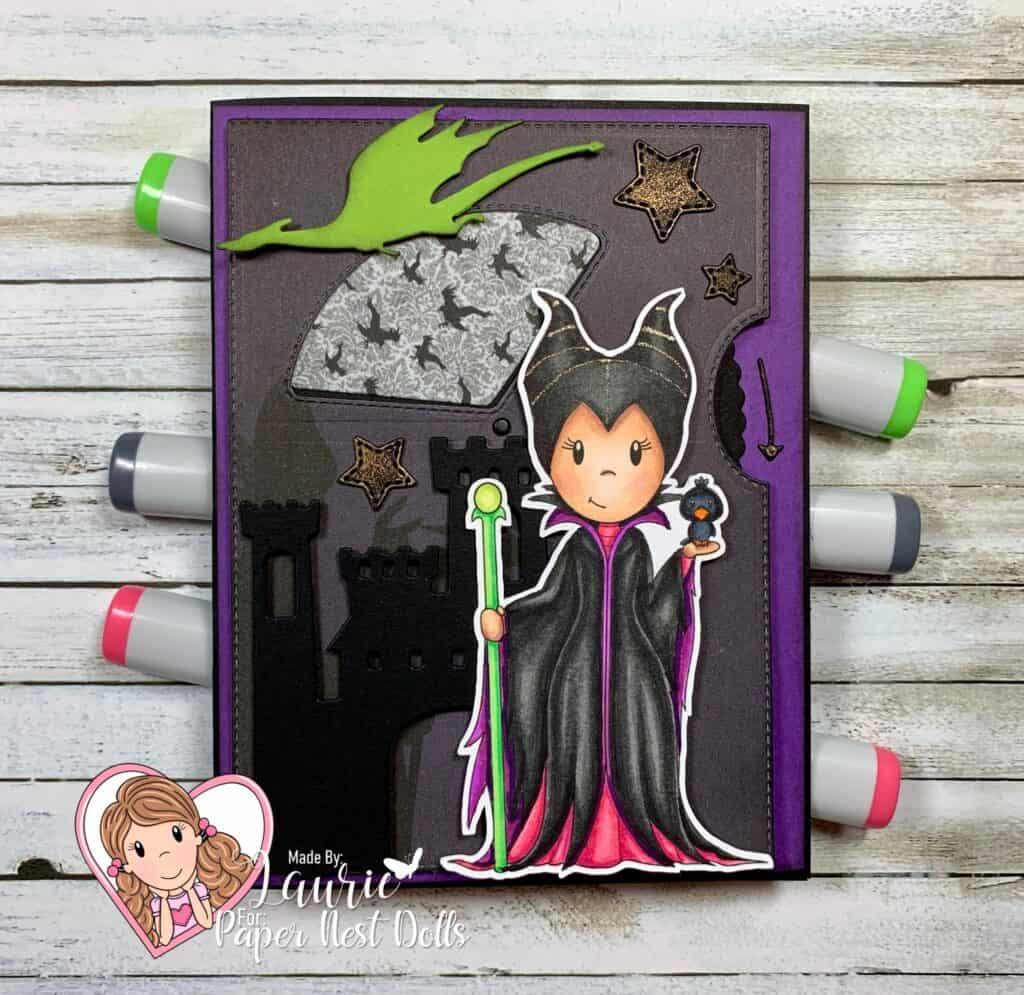
Hello Crafty Friends! It’s Laurie here! Today I am sharing My Perfectly Wicked Interactive Card as my Design Team Inspiration Card for Paper Nest Dolls using the Evil Fairy.

I was honoured to have been asked to present at the Paper Nest Dolls’ Party with the Villains Virtual Weekend Retreat that was this past weekend. I had so much fun creating my cards for the event that I made an extra one that I thought I would share with you today. The other cards that I presented at the Retreat will be posted at the end of this post.

To get in the mood and for inspiration, I just had to watch the movies both the live action and the cartoon! Any excuse to watch Disney is a good excuse in my books! Lol!

Video of my Card in Action

Movie of My Perfectly Wicked Interactive Card

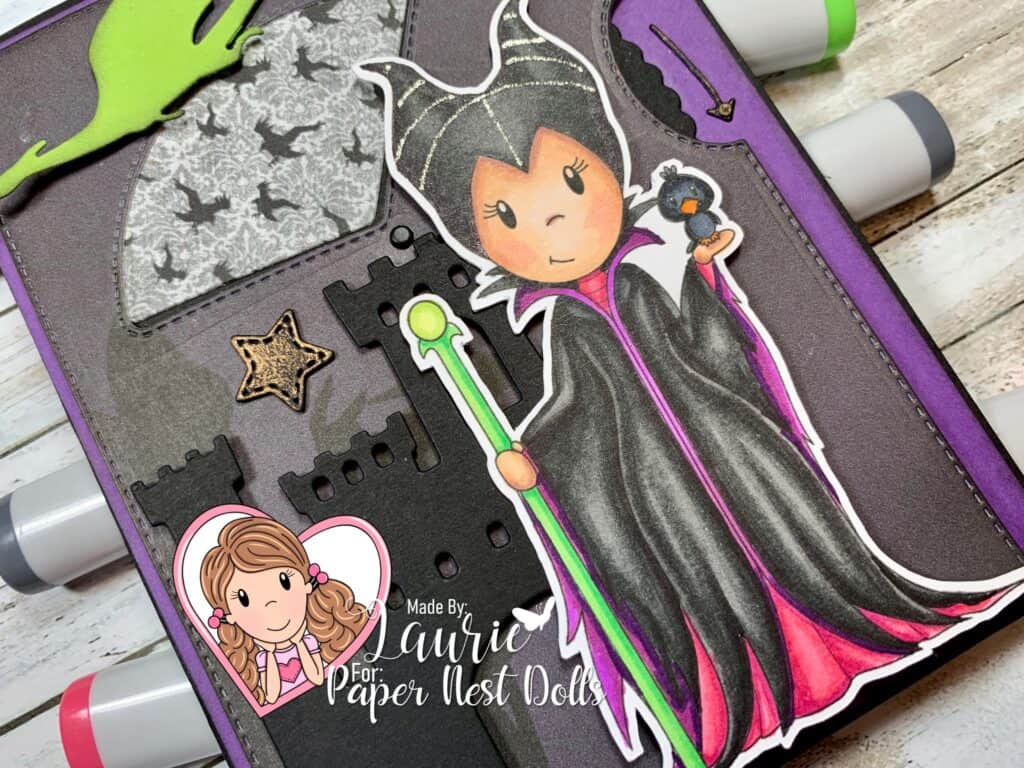
For this card, I coloured the Evil Fairy with my Copic Markers to match the Disney cartoon. I have been wanting to use the Give a Whirl Dies from Stampin’ Up! and thought it would be perfect for my card! It is so fun to spin that little dial and see all the fun sentiments! These sentiments… “Perfectly Wicked!” and “Bad Girls Have More Fun!” …were created in Word. I added one of the digital papers behind them to blend in with the paper that I used on my card base. Since the Evil Fairy turns into a dragon at the end of the movie, I couldn’t resist adding a bright green dragon with a dusting of Black Soot on its edges. A castle and a few stars that were brushed with the Aged Brass were the only other elements that I added to my card.

Bad Girls Have More Fun! Sentiment

————————–

Copic Markers:

Skin: E04/E11/E21/E00/E000/R20
Blacks: T10/T8/T7/T6/T5
Purple: V09/V06/V04
Dress: RV17/RV14/RV13
Staff: YG09/YG06/YG03/YG00
Crows: C9/C7/C6/C5/YR04/YR02

Close Up of The Stamp on My Card
Close Up of The Evil Fairy on My Card

————————–

Card Recipe for
My Perfectly Wicked Interactive Card:

Evil Fairy, Paper Nest Dolls
Maleficent Inspired 8.5×11 Digital Paper Pack, Monbonbon, Etsy
Build a Castle Dies, Whimsey Stamps
Give It A Whirl Dies, Stampin’ Up!
Black Soot Distress Ink, Ranger Ink
Mini Ink Blending Tool, Ranger Ink
Art Alchemy-Metallique Wax-Aged Brass, Prima Marketing
Clear Star Gelly Roll Pen
Gorgeous Grape, Granny Apple Green and Black Card Stock

Finished card size: 4.25” x 5.5”

My Design Team Card
My Perfectly Wicked Interactive Card

————————–

Cards from the Party with
The Villains Retreat Weekend

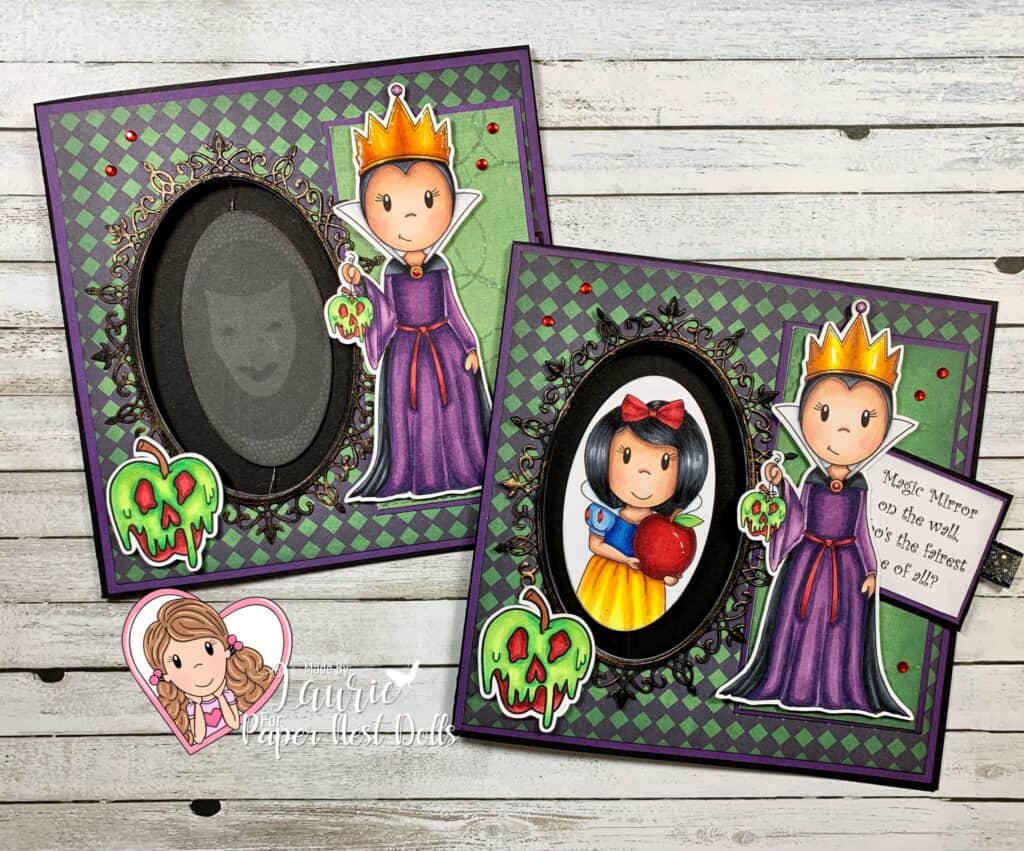
Spinner Card
Spinner Card Using Evil Queen and Princess with Apple by Paper Nest Dolls
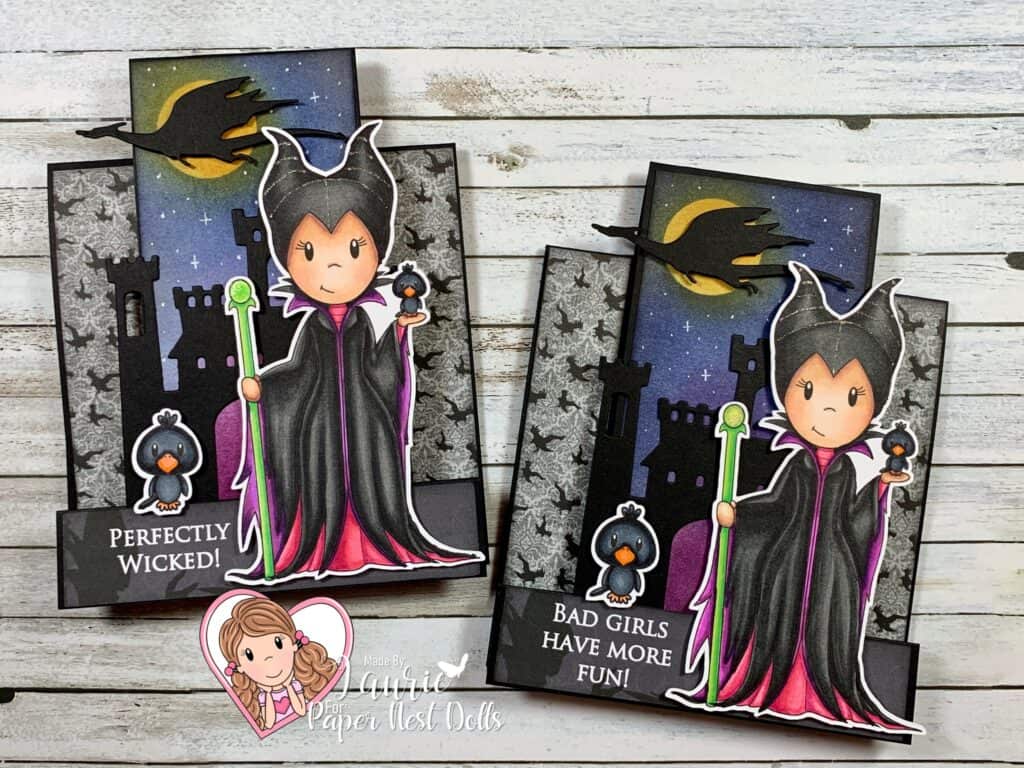
Centre-Step Card
Centre-Step Card with Evil Fairy by Paper Nest Dolls

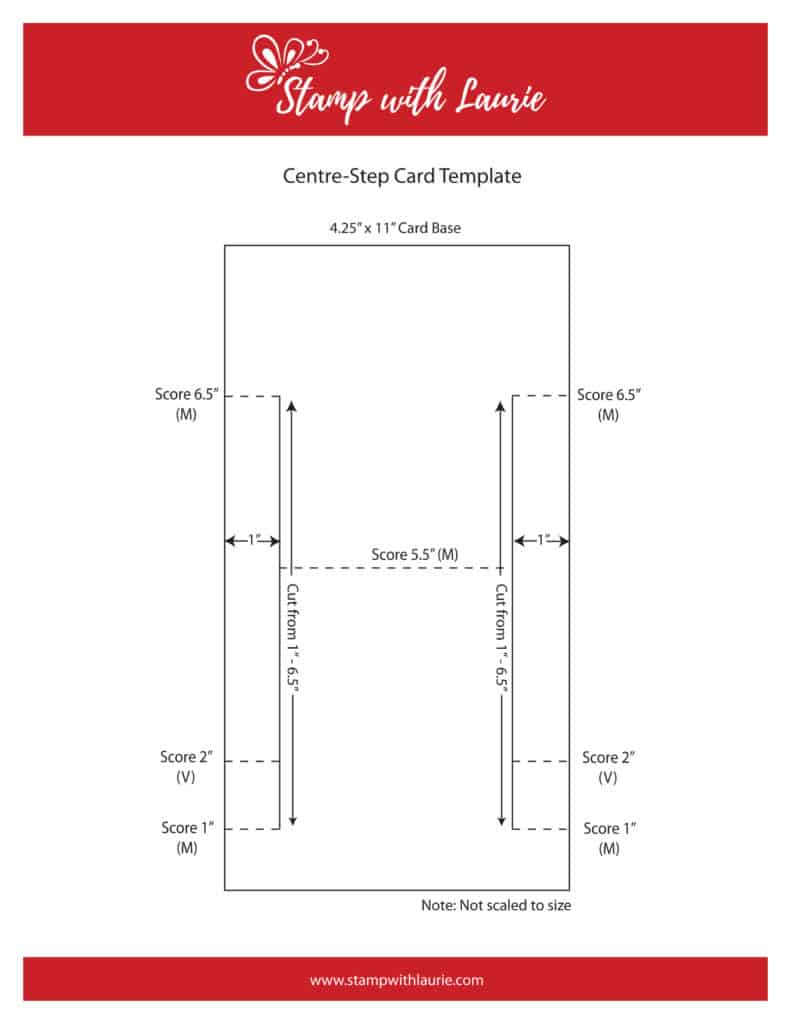
Downloadable Centre-Step Template
(Click Image)

Centre-Step Card Template

To view my other Paper Nest Dolls cards, please click here.

To view my other interactive cards, please click here.

Hope you like my Design Team card using
Evil Fairy by Paper Nest Dolls!

Thank you for stopping by!

Hugs,
Laurie