You’re Stellar Wobble Card

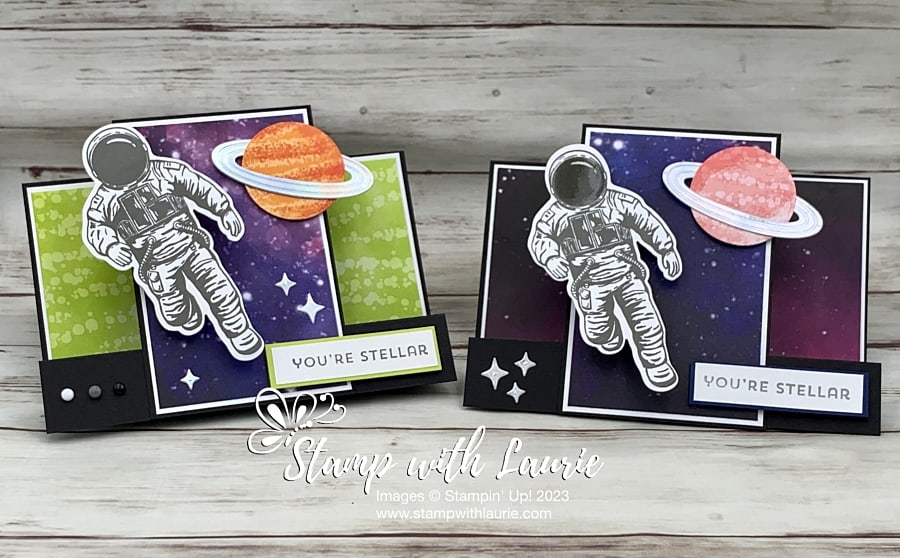
A card with an Astronaut and planet on it.
You’re Stellar Wobble Card

Hello Crafty Friends! Laurie here again! I am sharing my You’re Stellar Wobble Card using the Stargazing Suite Collection by Stampin’ Up! This Collection includes the Reach for the Stars Stamp Set, Reach for the Stars Dies and Stargazing 12” x 12” Designer Series Paper.

The Details of My Card

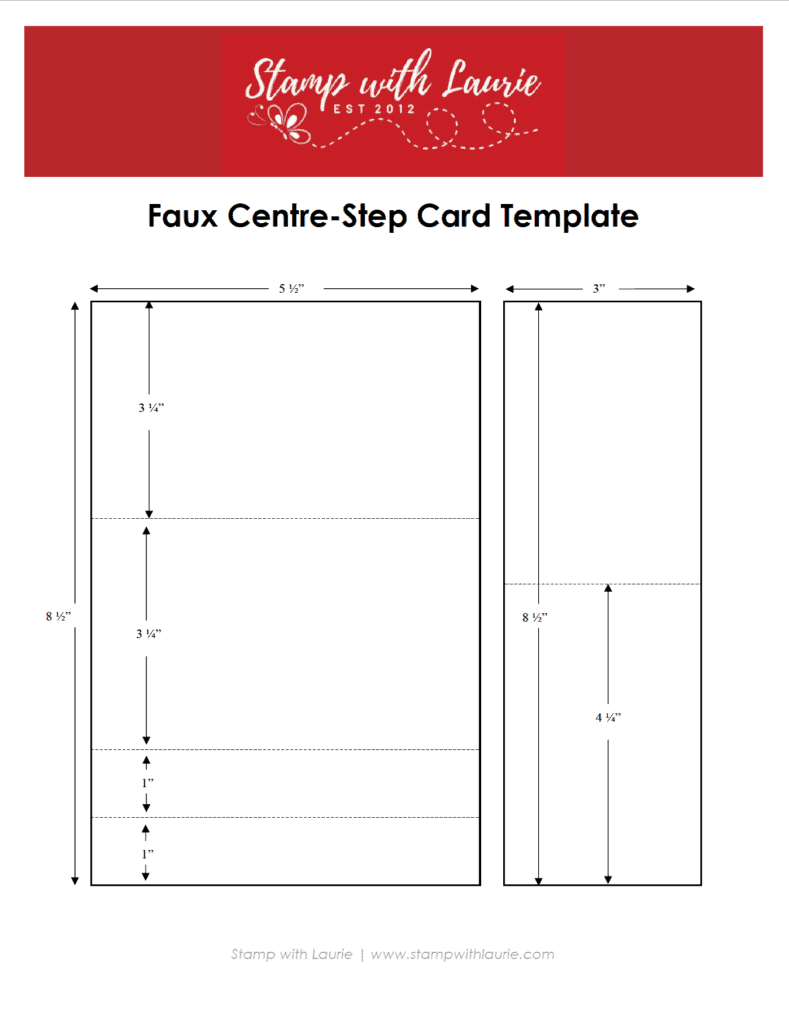
My card was for a swap, and I decided to make a fun faux centre-step card to allow enough room for the astronaut and a planet to fit on my centre panel. I used the measurements from my faux centre-step template which I have included at the end of this post.

When I saw this Suite in the Annual Catty, I knew that I wanted to make a wobble card as well! They are so fun and interactive! I bought the Mini Action Wobble on Amazon.ca, but you could easily make your own by using a piece of bendable wire and wrap it around a pencil. Then, secure one end to your wobble piece and the other end to the card base.

Astronaut in Action

Since I made this card for a swap, I needed several planets, but only a couple fit the planet die and the rings die. I really wanted to use the ring die with silver foil paper! I thought it would add some cosmic shimmer along with the die cut stars! So, I fudged it. Tip: if you die cut the larger planets, make sure that the shadow is showing in the centre of the die. This gives it a realistic 3D look.
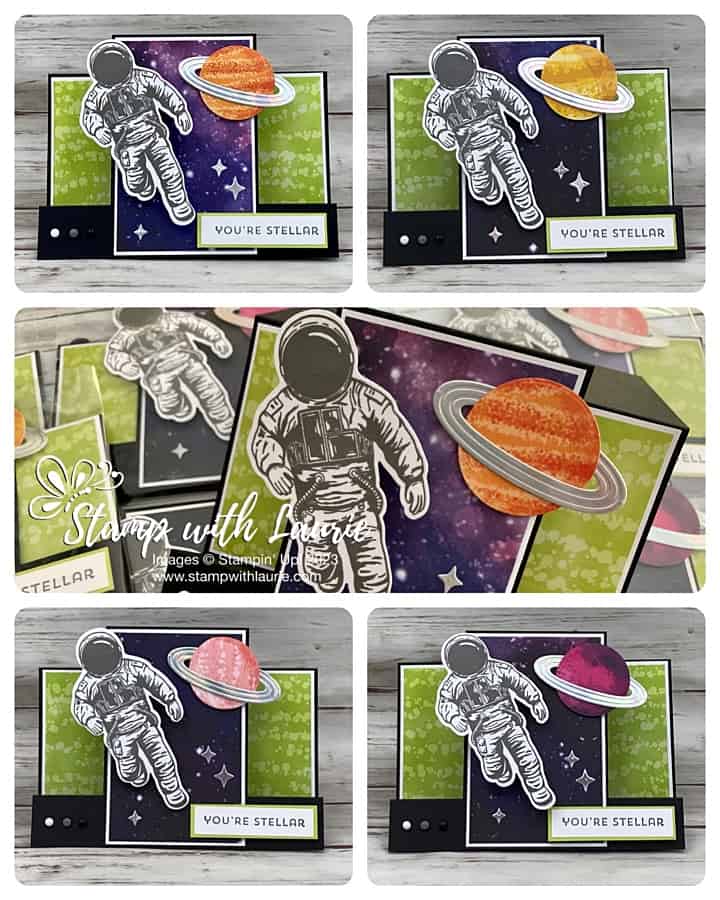
All Cards with Different Planets
Swap Cards with Different Planets

I decided to stamp my astronaut and sentiment in Basic Gray since there was already a lot of black to my card. Besides, it was a good alternative to colouring the astronaut since I would have used Smoky Slate to colour his shadows and left most of him white anyways. So, this did it for me!

Tip: to figure out where to place glue for the centre panel, I used my grid paper a pencil to mark the section.
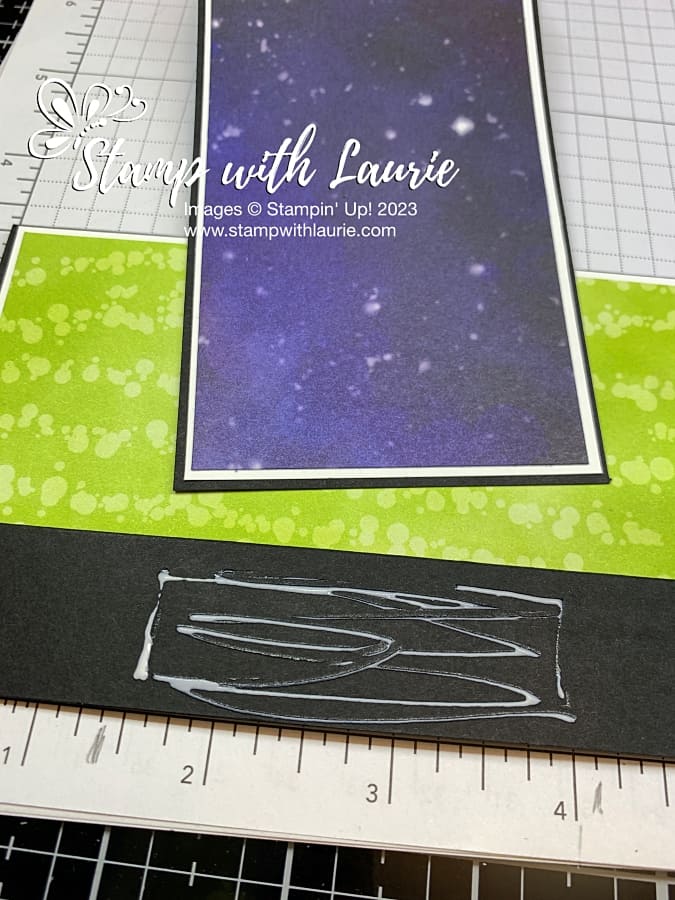
Showing Gluing Tip
Showing Gluing Tip

The only embellishments were three Classic Matte Dots in each colour tying in my colour scheme. Of course, they had to be in a row showing my Star Trekkie side of me! Lol!

I made another card as well for a friend. This time I added the retired Shimmery Crystal Effects to the astronaut’s helmet. So fun!

Supplies:

Stamps/Bundles/Dies: Stargazing Suite Collection (161189)

Inks: Basic Gray (149165)

Paper: Basic Black (121045), Basic White (159276), Lemon Lime Twist (144245), Silver Foil 12” x 12” Specialty Pack (156457), Stargazing 12” x 12” Designer Series Paper (in Collection)

Accessories: Classic Matte Dots (158146), Multipurpose Liquid Glue (110755), Bone Folder (102300), Stampin’ Dimensionals (104430), Stampin’ Seal (152813), Mini Glue Dots (103683), Grid Paper (130148), pencil, Mini Action Wobble (from Amazon.ca)
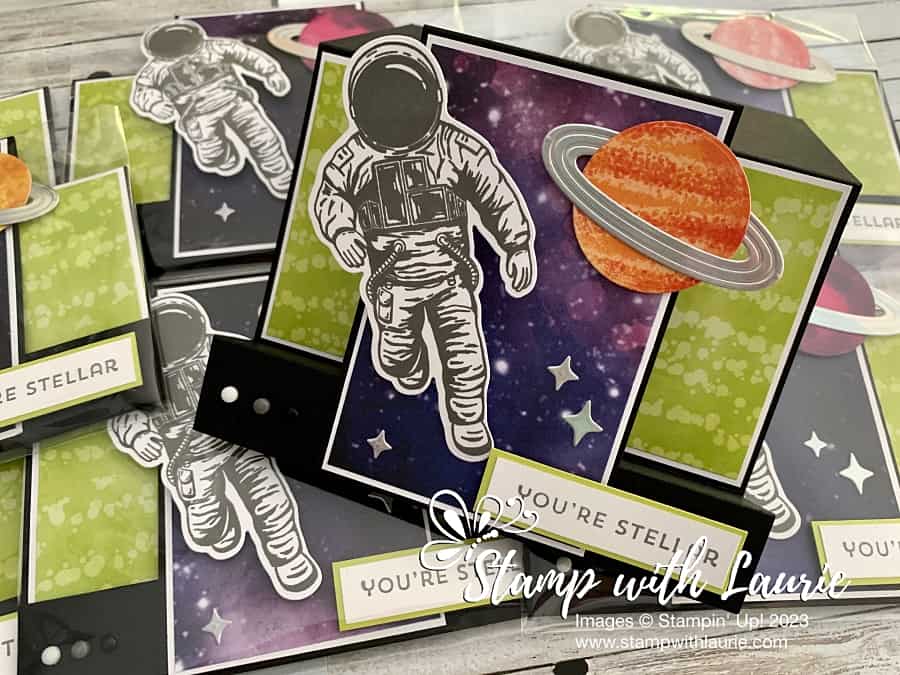
Multiple cards with astronaut and planet on then
Swap Cards

Measurements: 

  • Basic Black: (2 pieces)
    • 8 ½” x 5 ½” cut/scored according to template below
    • 8 ½” x 3” cut/scored according to template below
  • Basic White: (4 pieces)
    • Sentiment: 2 ¼” x ½”
    • Astronaut: 4” x 2”
    • Centre Panel: 4-1/8” x 2-5/8”
    • Back Panel: 3-5/8” x 3-1/8”
  • Lemon Lime Twist
    • Scrap
  • Silver Foil (2 pieces):
    • 2 ½” x 1”
    • Stars: Scrap
  • Stargazing 12” x 12” Designer Series Paper (3 pieces):
    • Centre Panel: 4” x 2 ½”
    • Back Panel: 3” x 5 ¼”
    • Planet

More Information on My You’re Stellar Wobble Card

Downloadable Faux Centre-Step Template

To download a PDF of the Faux Centre-Step Template, please click here or on the picture.

Downloadable Faux Centre-Step Template

For more of my Stampin’ Up! cards, please click here.

You will find the items listed above in my online store.

Va Shopping Card 

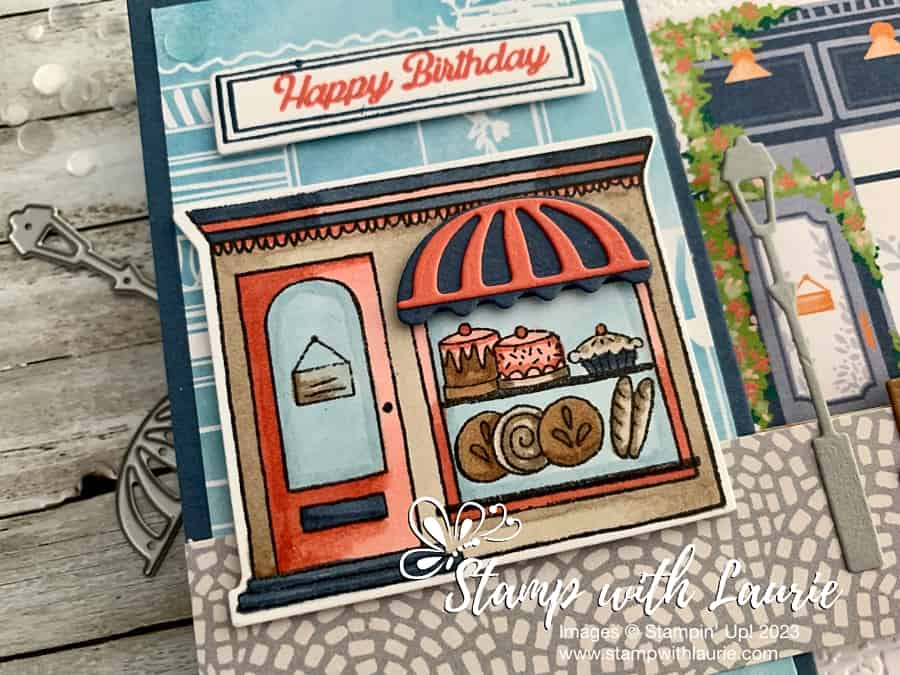
A Birthday card with a bakery and florist on a boulevard
Va Shopping Card

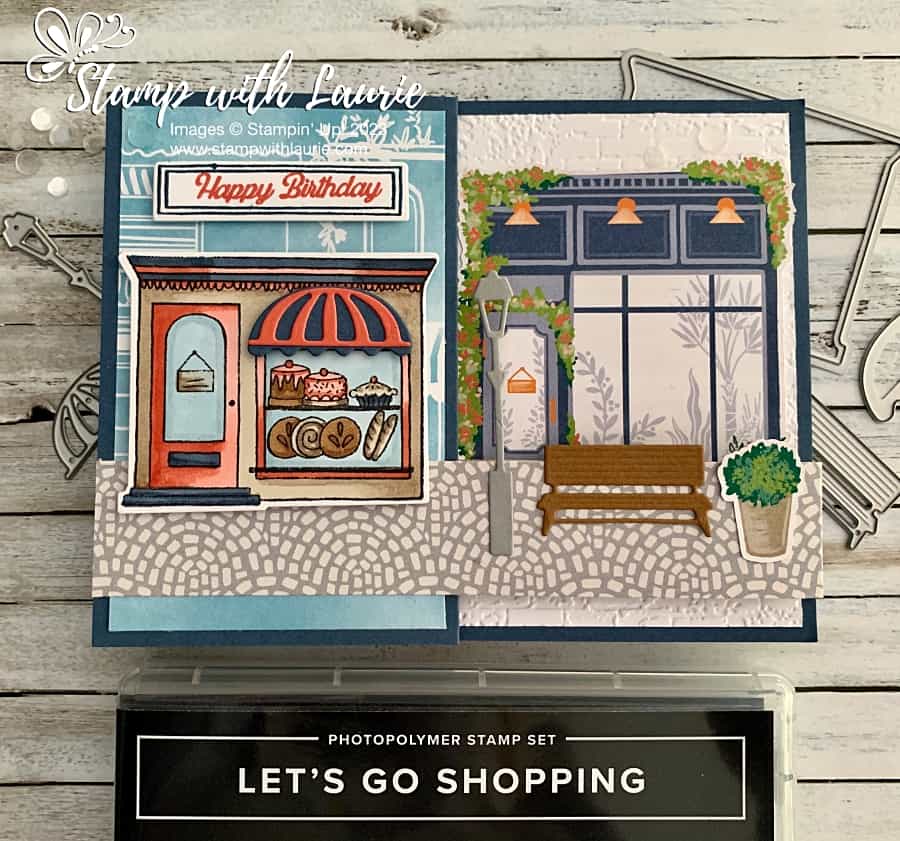
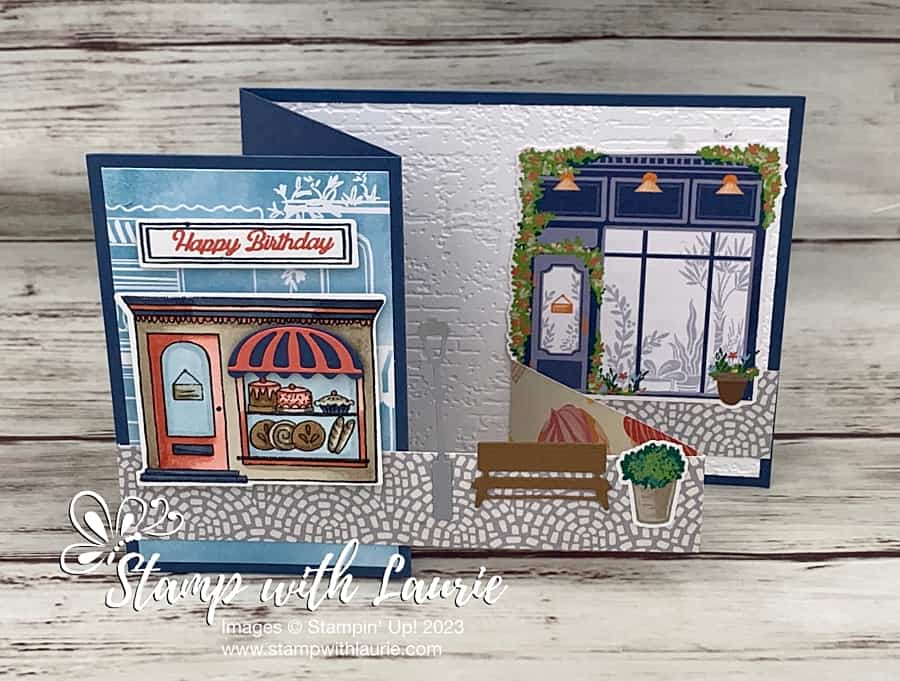
Hello Crafty Friends! Laurie here again! I am sharing my Va Shopping Card using the Les Shoppes Suite Collection by Stampin’ Up!

The Details of My Card

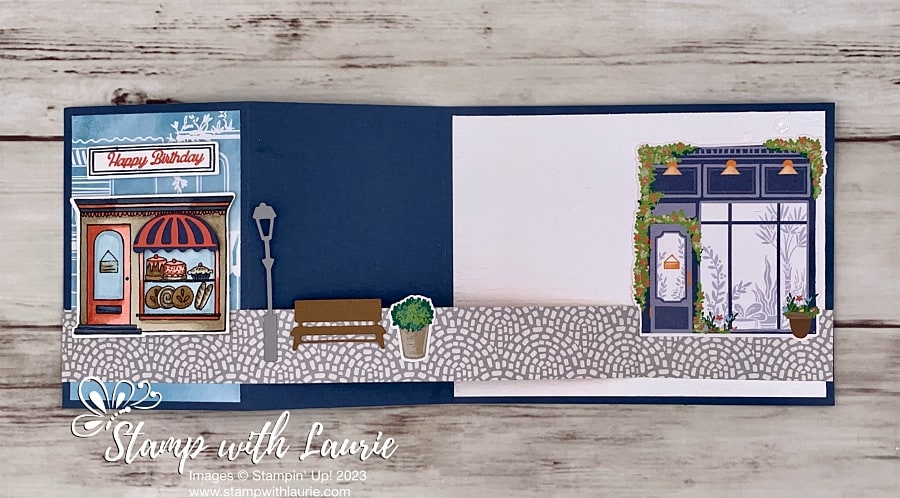
When I saw this Suite in the Annual Catty, this card immediately popped into my head! Lol! It’s a double Z fold card with the shops running along the cobbled Z part.

Open card displaying the boulevard
Open Z Fold Displayed

For my card, I decided to make a bakery since what is better for a birthday than a bakery filled with birthday cakes! The Let’s Go Shopping Photopolymer Stamp Set is so neat that you can interchange the stamps for a bakery, a bookshop, or a cafe! So, I coloured my bakery with my Stampin’ Blends to match the Les Shoppes Design Series Paper. I added a die cut awning to the window in matching colours to the bakery. I even popped it up with dimensionals so that it felt more 3D.

Close Up of Bakery
Close Up of Bakery

Since I was creating a boulevard of shops, I thought the die cut lamppost and bench would be fun accents without covering up the building in the background when the card was closed. The planter was also die cut out from the DSP, but you could stamp and colour it instead.

I used the Exposed Brick 3D Embossing Folder to emboss the Basic White as a background for my DSP building. You could leave it unbossed to write on.

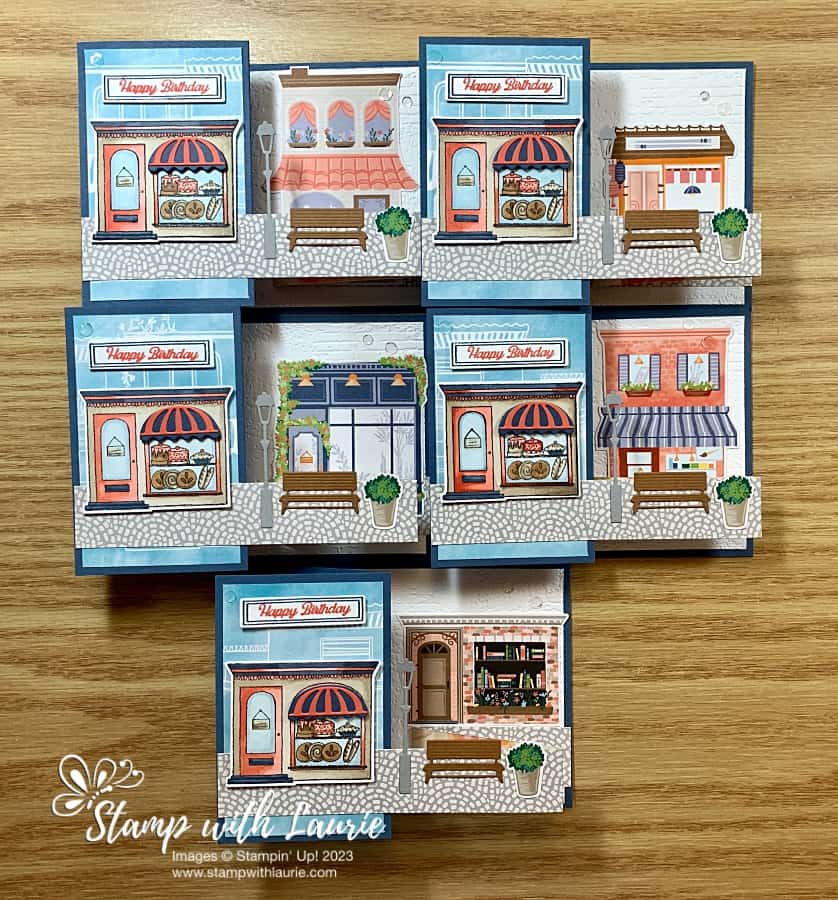
I made this card for a swap and used the different buildings in the DSP. There were 19 cards in total. So, a lot of fussy cutting was done! Lol! Here are the 5 designs with the different buildings that suited my cards.

Cards with Different Shops
Swap Cards with Different Shops

The sentiment was stamped in matching colours to the awning and die cut out. 

The finishing touch was a scattering of Loose Silver Sequins that are included in the Collection.

Supplies:

Stamps/Bundles/Dies: Les Shoppes Suite Collection (161337)

Inks: Tuxedo Black Memento Ink (132708), Misty Moonlight (102283), Calypso Coral (147101)

Paper: Basic White (159276), Misty Moonlight (153118), Smoky Slate (131202), Pecan Pie (161717), Calypso Coral (122925), Les Shoppes 12″ x 12″ Designer Series Paper (in Collection)

Accessories: Exposed Brick 3D Embossing Folder (161600), Misty Moonlight Stampin’ Blends Combo Pack (153108), Calypso Coral Stampin’ Blends Combo Pack (154881), Crumb Cake Stampin’ Blends Combo Pack (154882), Pecan Pie Stampin’ Blends Combo Pack (161674), Balmy Blue Stampin’ Blends Combo Pack (154830), Loose Silver Sequins (in Collection), Paper Snips (103579), Bone Folder (102300), Stampin’ Dimensionals (104430), Stampin’ Seal (152813), Mini Glue Dots (103683)

Measurements: 

  • Misty Moonlight (2 pieces): 
    • 4 ¼” x 11” scored at 2 ¾” and 5 ½”
    • Scrap for Awning
  • Basic White (3 pieces):
    • 4” x 5 ¼”
    • 2” x 2 ½”
    • Scrap for Sentiment
  • Smoky Slate
    • Scrap for Light Post
  • Pecan Pie:
    • Scrap for Bench
  • Calypso Coral:
    • Scrap for Awning
  • Les Shoppes 12″ x 12″ Designer Series Paper (4 pieces):
    • 4” x 2 ½”
    • 11” x 1”: Scored at 5 ½” and 8 ¼”
    • One of the shops
    • Planter
Card Open Displaying the Boulevard View

More Information on My Va Shopping Cards

For more of my Stampin’ Up! cards, please click here.

You will find the items listed above in my online store.
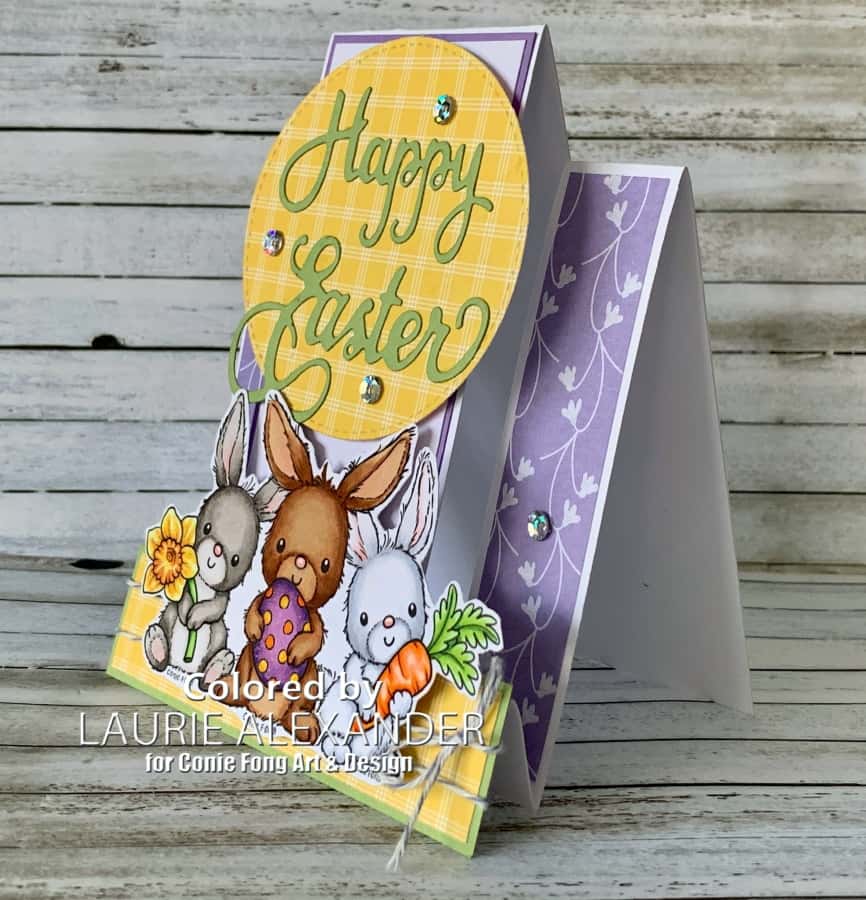
My Easter Bunny Trio Card

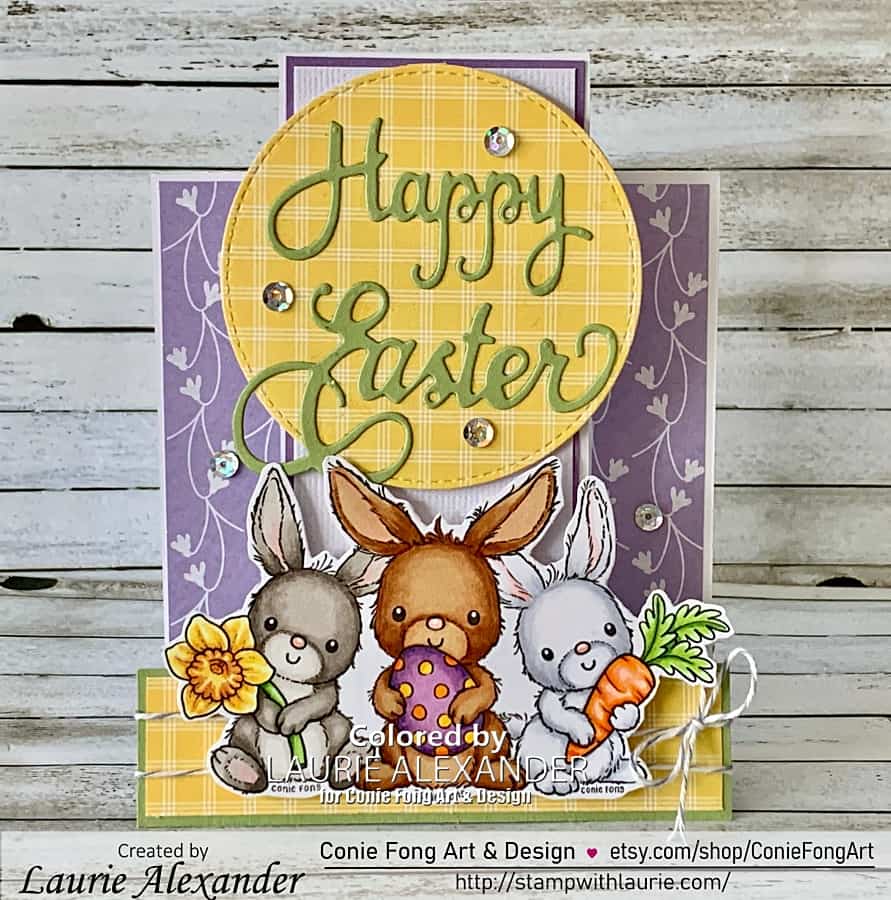
An easter card with 3 bunnies on it.
Easter Bunny Trio Card

Hello Crafty Friends! It’s Laurie here! I am sharing My Easter Bunny Trio Card as my Design Team Inspiration Card for Conie Fong Art & Design using the New Release Easter Rabbit Trio Bundle.

This Bundle includes 4 images:

  • Title 1: Easter Rabbit Trio 
  • Title 2: Rabbit Holding Egg
  • Title 3: Rabbit Holding Daffodil
  • Title 4: Rabbit Holding Carrot

The Details of My Card

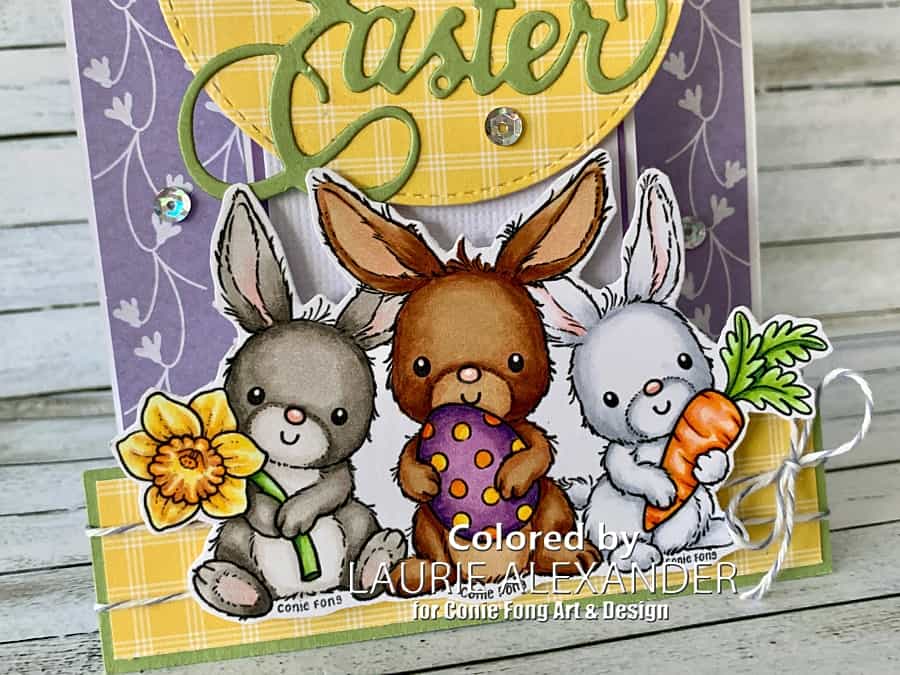
For my card, I thought I would create a fun Centre-Step card (downloadable template at end of post) with these three cuties on it! The bunnies come as individual images, but if you get the PNG versions, you can use Microsoft Word to place them together like I did. I made the Egg Bunny larger than the other two since he is in front of the other two.

Once I printed them out, I coloured them with my Copic markers. I decided to colour them in different colours since bunnies come in all sorts of colours and to distinguish them from each other. I coloured the Easter egg to match the purple paper with yellow to match the daffodil and orange to match the carrot. You could say that the Easter egg tied up my colour scheme in a bow.

Side View of card to show the dimension of the easel card.
Side View of Easel Card

I went with soft pastels of purples, yellows, and greens for my paper choices since they are the perfect Easter colors! The Wisteria Wonder Baker’s Twine tied in a bow behind my cuties added some interest to the yellow base. The sentiment piece was die cut with a 3” stitched circle die on the yellow paper from the Welcome Easter Paper Pad by Echo Park. The die cut sentiment was glued directly to the circle.

I used Clear Wink of Stella on the Easter egg to make it sparkle. A scattering of sequins was added to give even more sparkle.

————————–

Copic Markers:

Egg Bunny: E37/E35/E33/E31/R20
Daffodil Bunny: W6/W4/W2/W1/0/R20
Carrot Bunny: C3/C1/0/R20
Egg: V17/V15/V12/YR07/YR04/Y17/Y15
Daffodil Outside Petals: E13/Y17/Y15/Y11
Daffodil Inside Petals: E15/YR16/Y17/Y15/Y11
Stamin: YR16
Carrot: YR07/YR04/YR02/YR00
Daffodil Stem/Carrot Leaves: G28/YG25/YG23/YG11

Close Up of Bunnies
Close Up of Bunnies

————————–

Card Recipe for My Easter Bunny Trio Card:

Easter Rabbit Trio Bundle, Conie Fong Art & Design
Paper Basics – Stamper’s Select White Cardstock, Papertrey Ink
Spring Gnomes 8” x 8” Paper Pad, Beverly Eden, The Artists’ Collection, The Paper Boutique
Welcome Easter 6” x 6” Paper Pad, Echo Park Paper Co.
3” Stitched Circle Die, Memory Box
Happy Easter Dies, From my Stash!
Wisteria Wonder Baker’s Twine, Stampin’ Up!
Sequins, From my Stash!
Clear Wink of Stella, Stampin’ Up!
Multipurpose Liquid Glue, Stampin Up!
Dimensionals, Stampin’ Up!
Basic White, Highland Heather, and Pear Pizzaz Card Stock, Stampin’ Up!

Finished card size: 5 ½” x 4 ¼”

————————–

To view my other Conie Fong Art & Design projects, please click here.

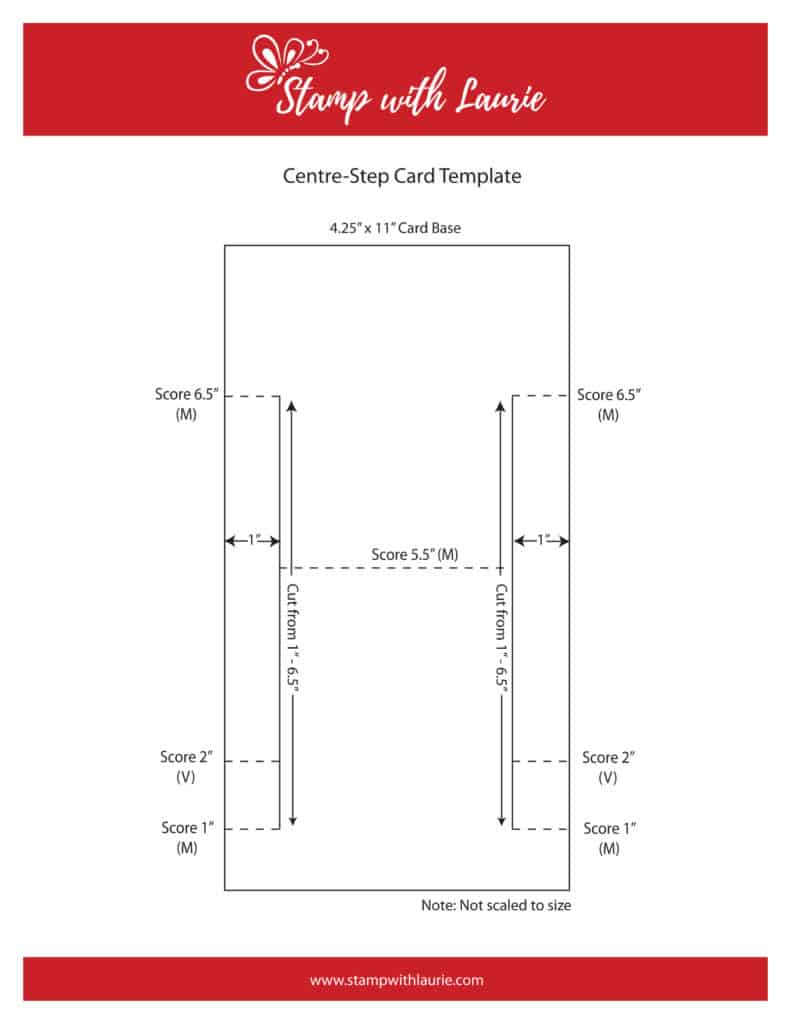
Downloadable Centre-Step Template
To download a PDF of the Centre-Step Template, please click here or on the picture.

Centre-Step Card Template

Hope you like my Design Team Inspiration Card using Easter Rabbit Trio Bundle for Conie Fong Art & Design!

Thank you for stopping by!

Hugs,
Laurie

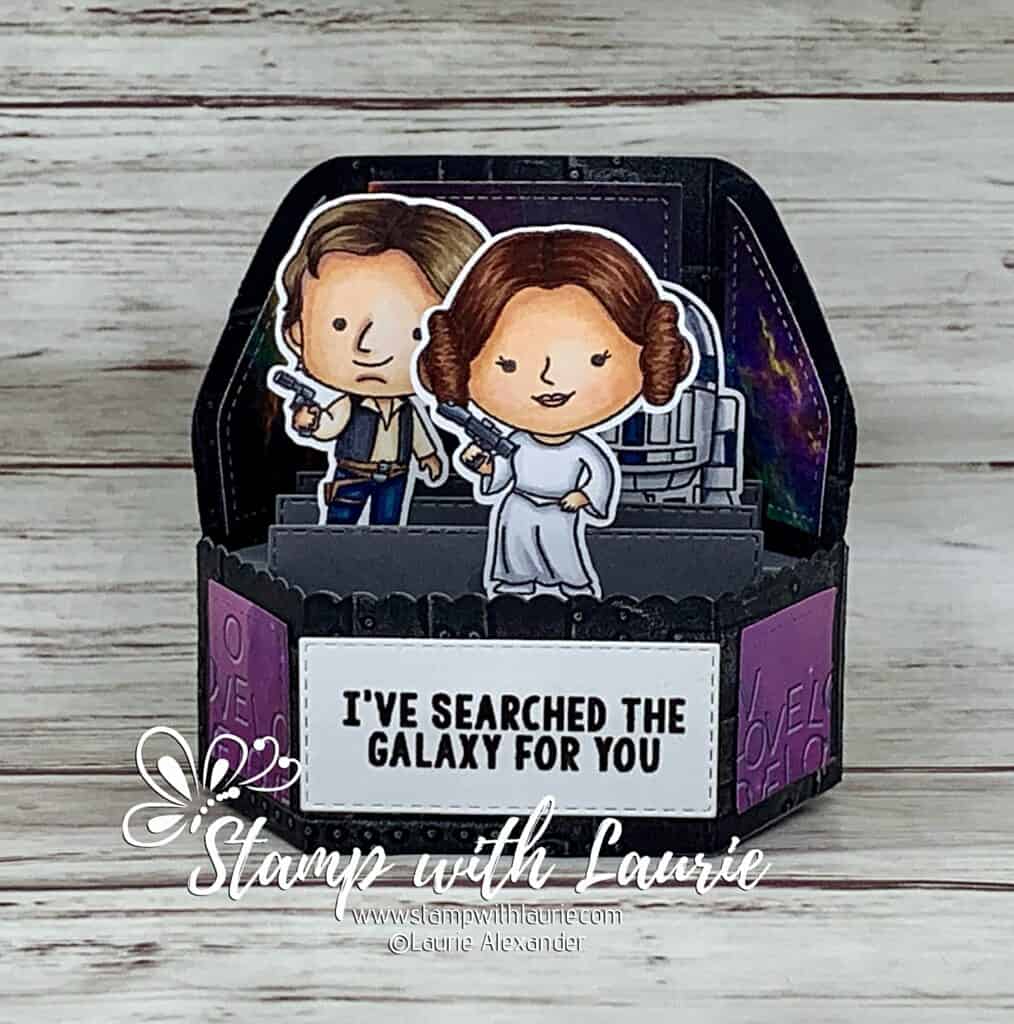
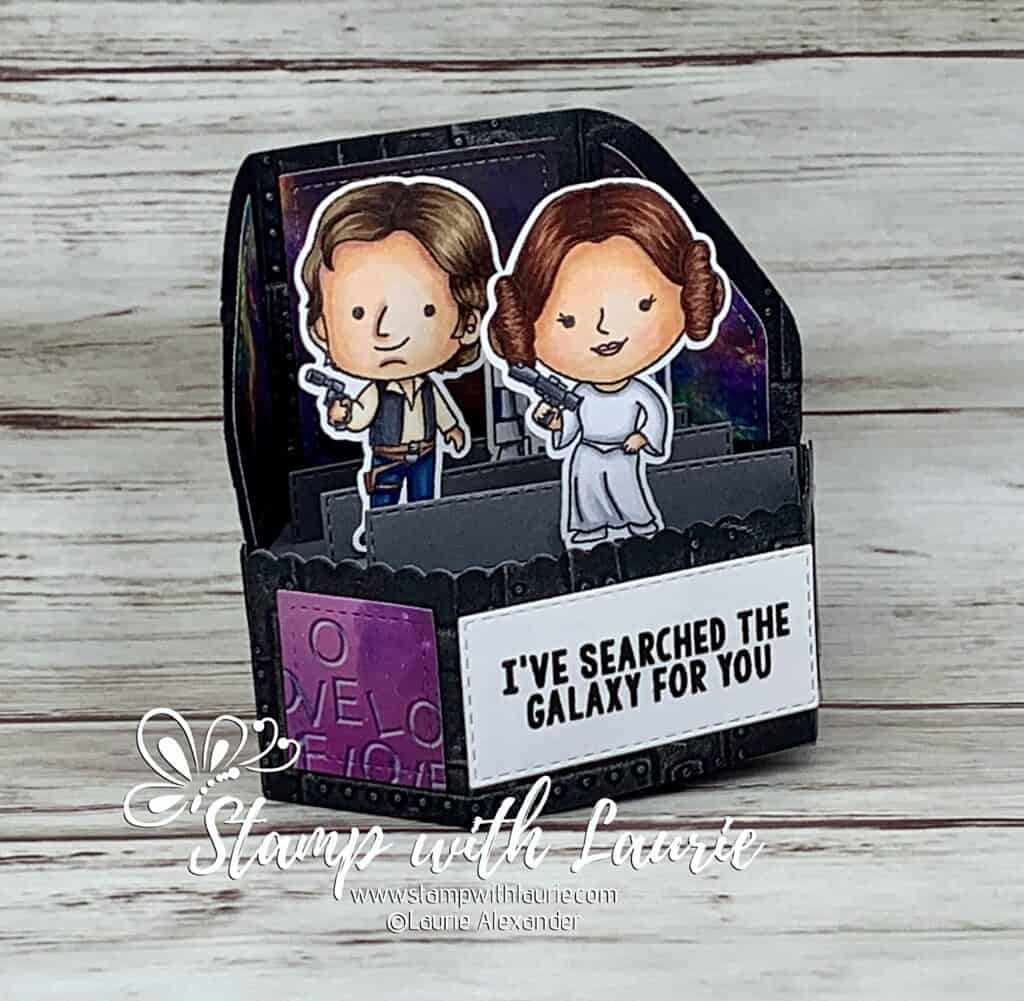
My Galaxy Platform Card 

A 3D card that has a droid and man and woman
My Galaxy Platform Card

Hello Crafty Friends! It’s Laurie here to share My Galaxy Platform Card using the Galactic Fighter and the Galactic Sidekicks Stamp Sets by Kindred Stamps!

A friend of mine asked for me to create a custom Star Wars Valentine card for her Hubby who is a huge Star Wars fan! As you might know, I have many different Star Wars stamps, but I decided to use Kindred Stamps since I just received them recently and their stamps are the right size for platform cards!

I had fun making another platform card for my brother’s birthday (I will link to it at the end of this post) that I decided to make one as an option from which my friend could choose. I also made a regular A2 card as another possibility and will post that another day.

The Details of My Card

My friend asked for Leia, Hans Solo and R2D2. So, I coloured them with my Copic markers in their traditional colours. When I showed her the stamp set, she loved the sentiment “I’ve searched the galaxy for you”.

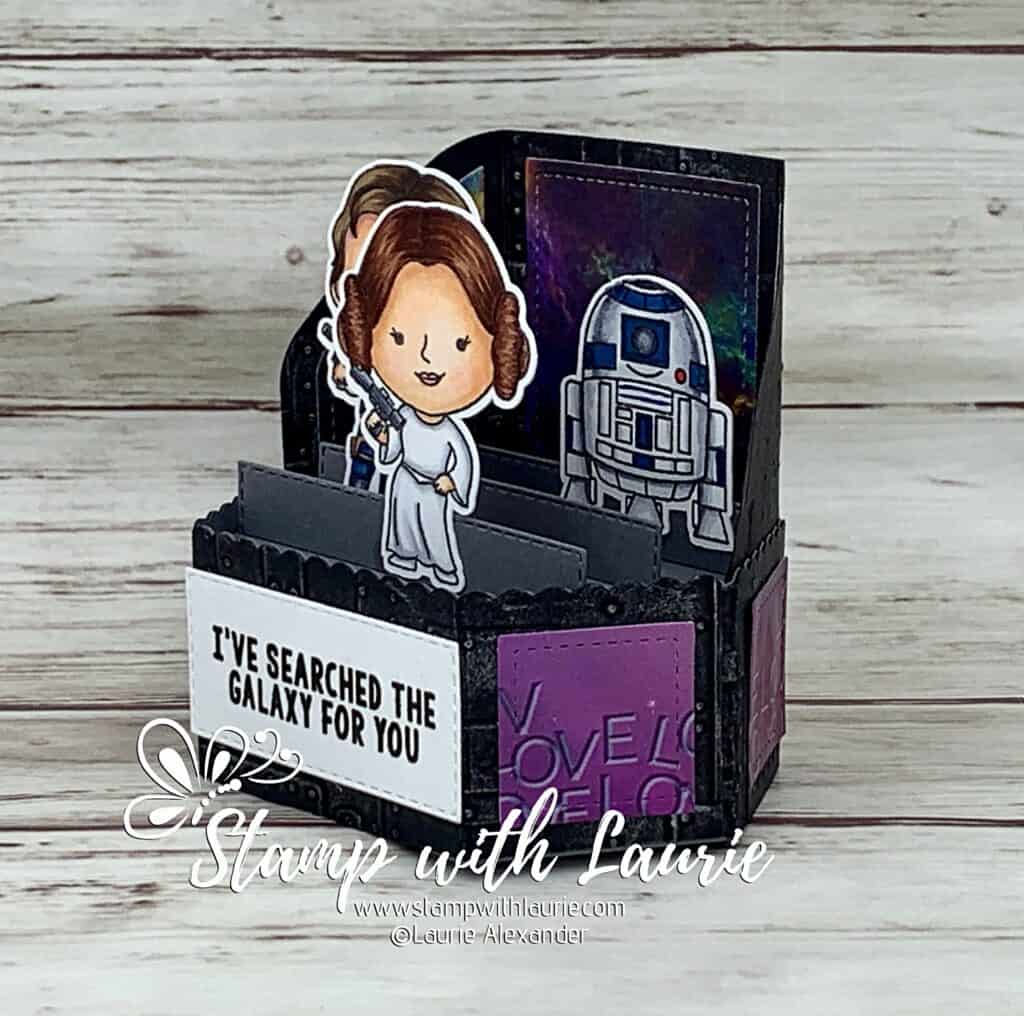
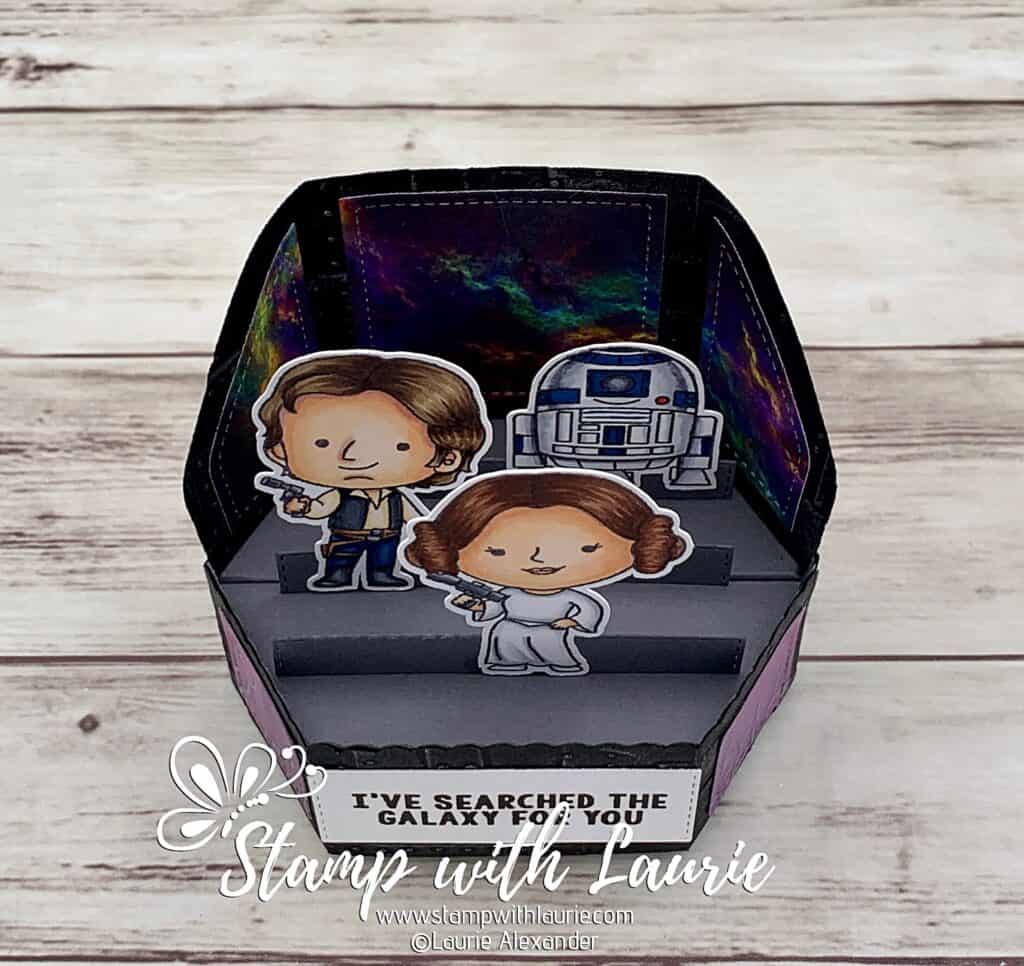
I thought it would be fun for the platform to represent the Millennium Falcon’s bridge. So, I used the Foundry Embossing Folder to emboss the Basic Black die cut that wrapped around the card. Next, I rubbed Brushed Iron Wax to make all the details stand out. Perfect for a look of metal that had been cobbled together since the ship had been battered together so many times. Lol! I made the base Basic Gray like a metal floor and used the stitched rectangle die from the Add On to create stability for the pop-up characters.

Since this was supposed to be the Millennium Falcon’s bridge, I used a pretty Nebula paper from Whimsy Stamps for the windows behind R2D2.

The Stamp AnnieThing Galactic paper had the perfect Valentine theme with the word LOVE against a galaxy of twinkling stars. And it matched my Nebula paper!

I added a few red resin hearts to the sentiment but forgot to take another photo. So, you will just have to imagine that! Lol!

————————–

Copic Markers:

Leia
Skin: E000/E00/E21/E11/E04/R20
Hair: E29/E27/E25
Lips: R22
Dress: C3/C1/0
Gun: C7/C5/C3

Side View of Leia and Hans Solo

Hans Solo
Skin: E000/E00/E21/E11/E04
Hair: E49/E47/E43/E42
Shirt: E53/E51/E50
Pants: B39/B99/B97/B37
Vest/Boots/Gun: C7/C5/C3
Holster: E27/E25/E23/C5/C3

Side View of Woman and droid
Side View of Leia and R2D2

R2D2
B99/B37/C7/C5/C3/C1/R27

————————–

Card Recipe for My Galaxy Platform Card:

Galactic Fighter Stamp Set and the Galactic Sidekicks Stamp Set, Kindred Stamps
Paper Basics – Stamper’s Select White Cardstock, Papertrey Ink
Tuxedo Black Memento Ink
Galactic Love 6” x 6” Paper Pad, Stamp AnnieThing
Nebula 8.5” x 3.5” Designer Paper, Whimsy Stamps
Platform Pop-Up Dies, Lawn Fawn
Platform Pop-Up Add-On Dies, Lawn Fawn
3-D Texture Fades Embossing Folder – Foundry by Tim Holtz, Sizzix
Brushed Iron Metallique Wax, Art Alchemy
Resin Hearts Embellishments, Stampin’ Up!
Basic Black, and Basic Gray Card Stock, Stampin’ Up!

Finished card size: 5 ¼” x 3-5/8”

Top View Of Platform Card

————————–

To view my other Kindred Stamps cards, please click here.

To view my other platform card, please click here or on the photo.

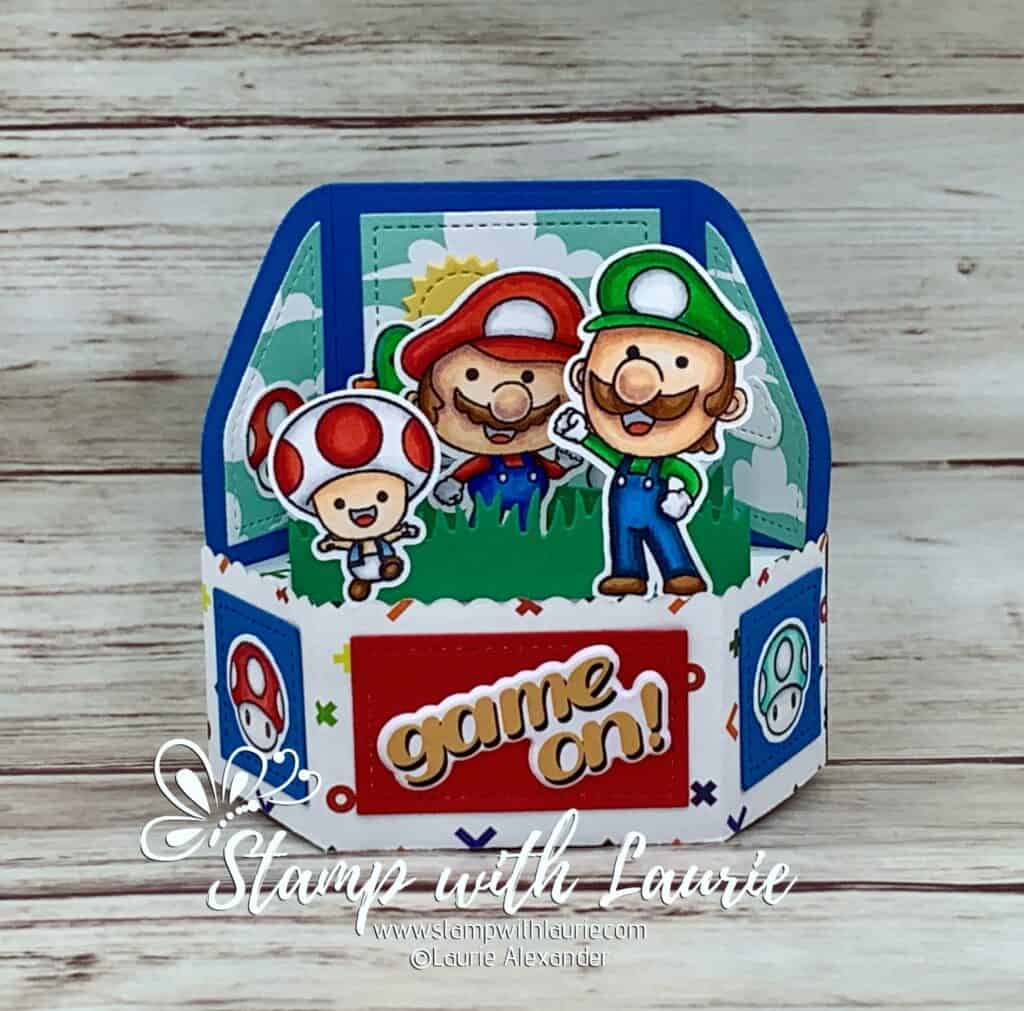
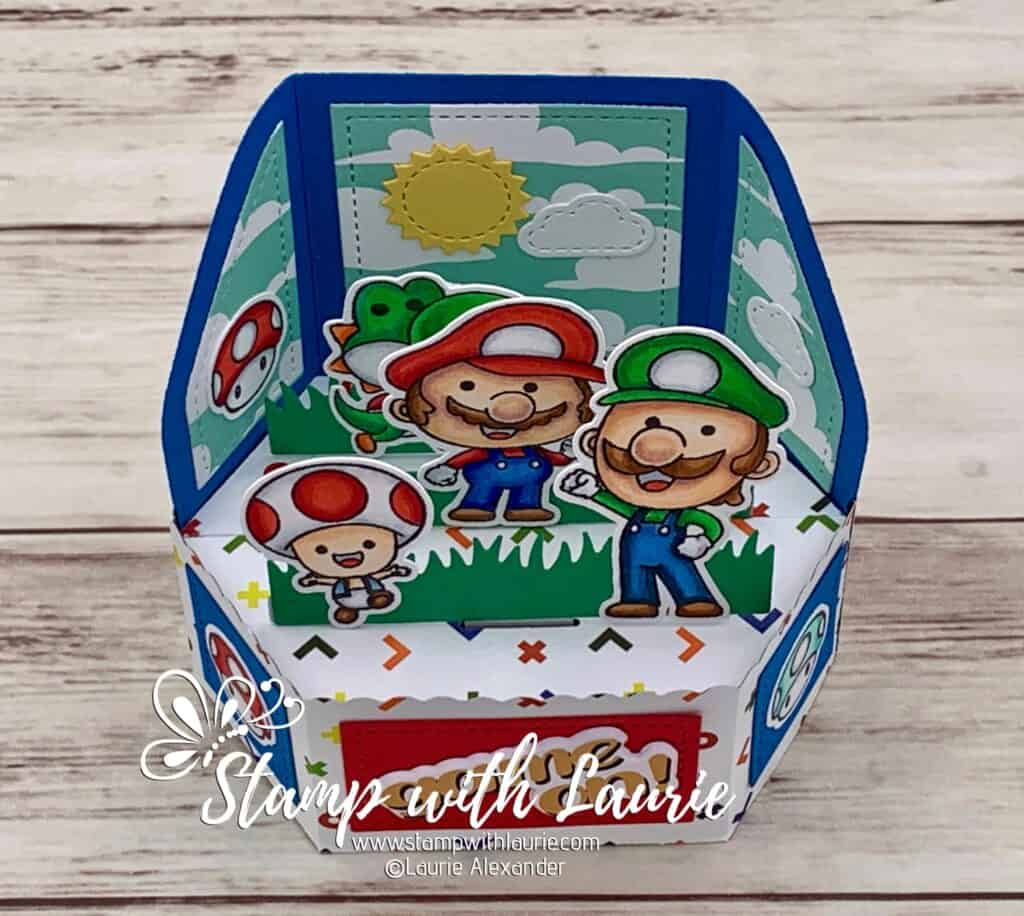
A pop-up card with Super Mario Brothers
Game on Platform Card

Hope you like My Galaxy Platform Card using Galactic Fighter and the Galactic Sidekicks Stamp Sets by Kindred Stamps!

Thank you for stopping by!

Hugs,
Laurie

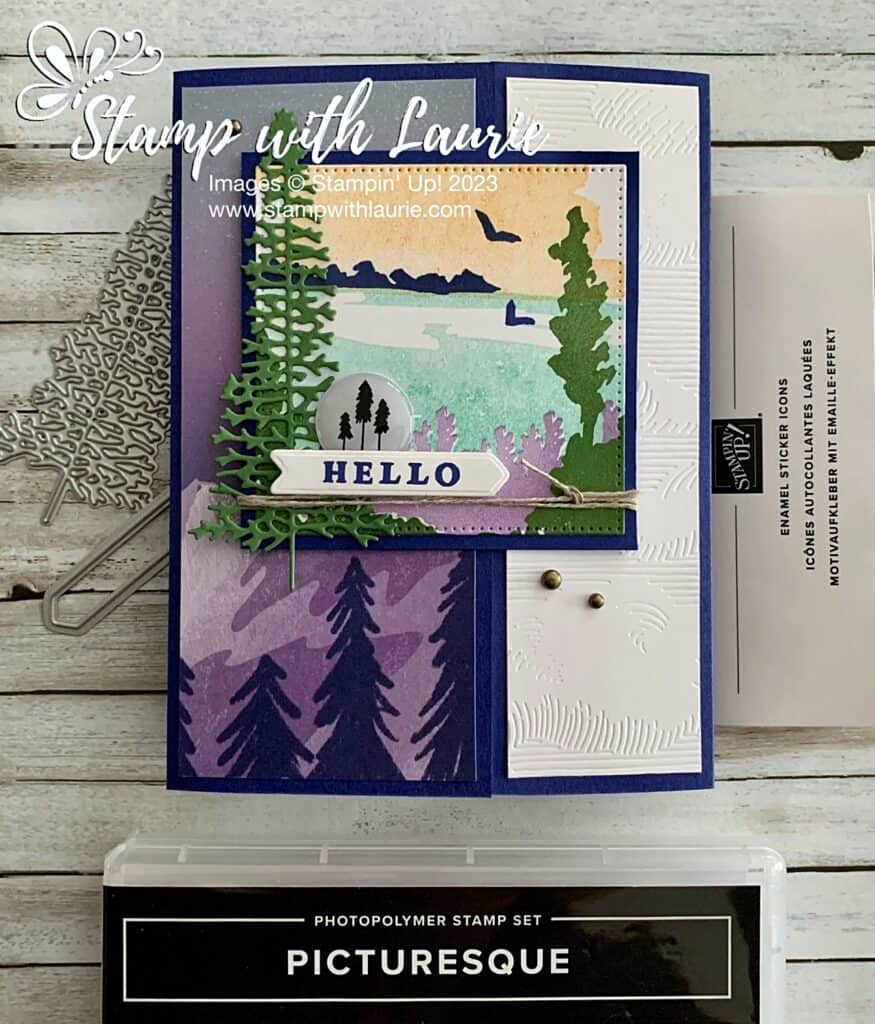
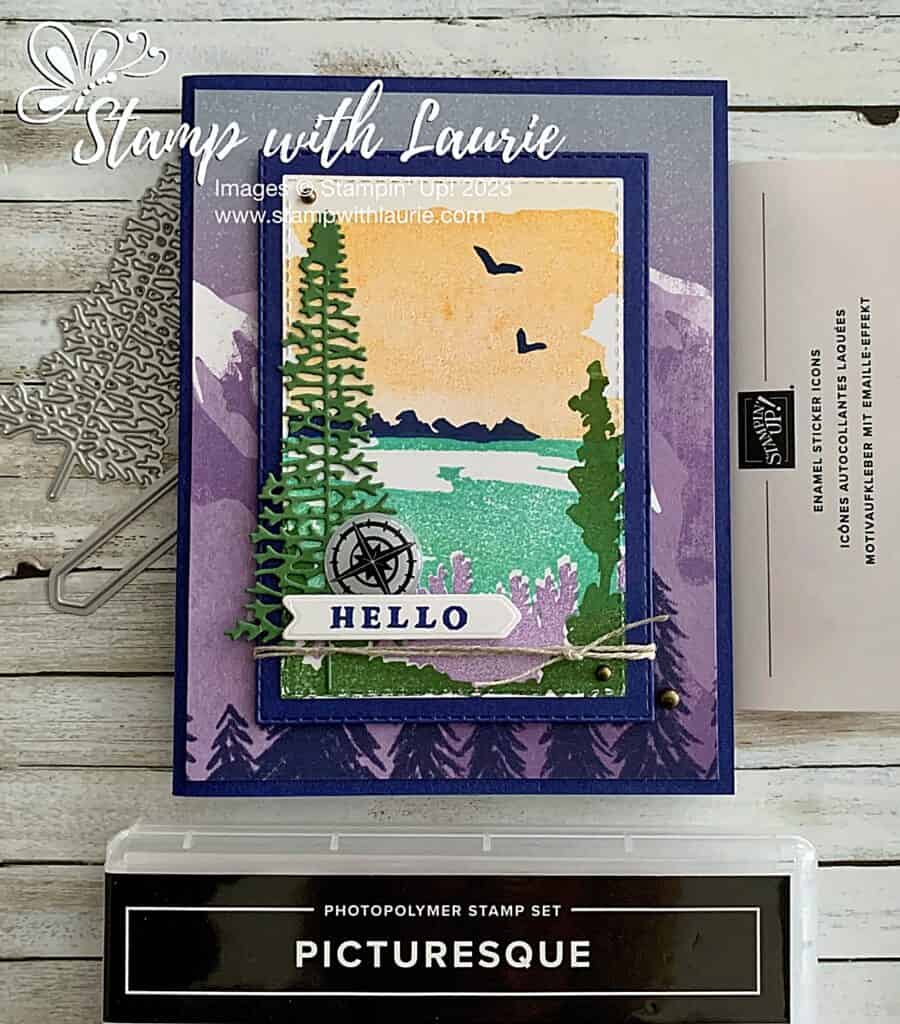
My Picturesque Hello Card 

A card with a nature scene with lake and trees
My Picturesque Hello Card

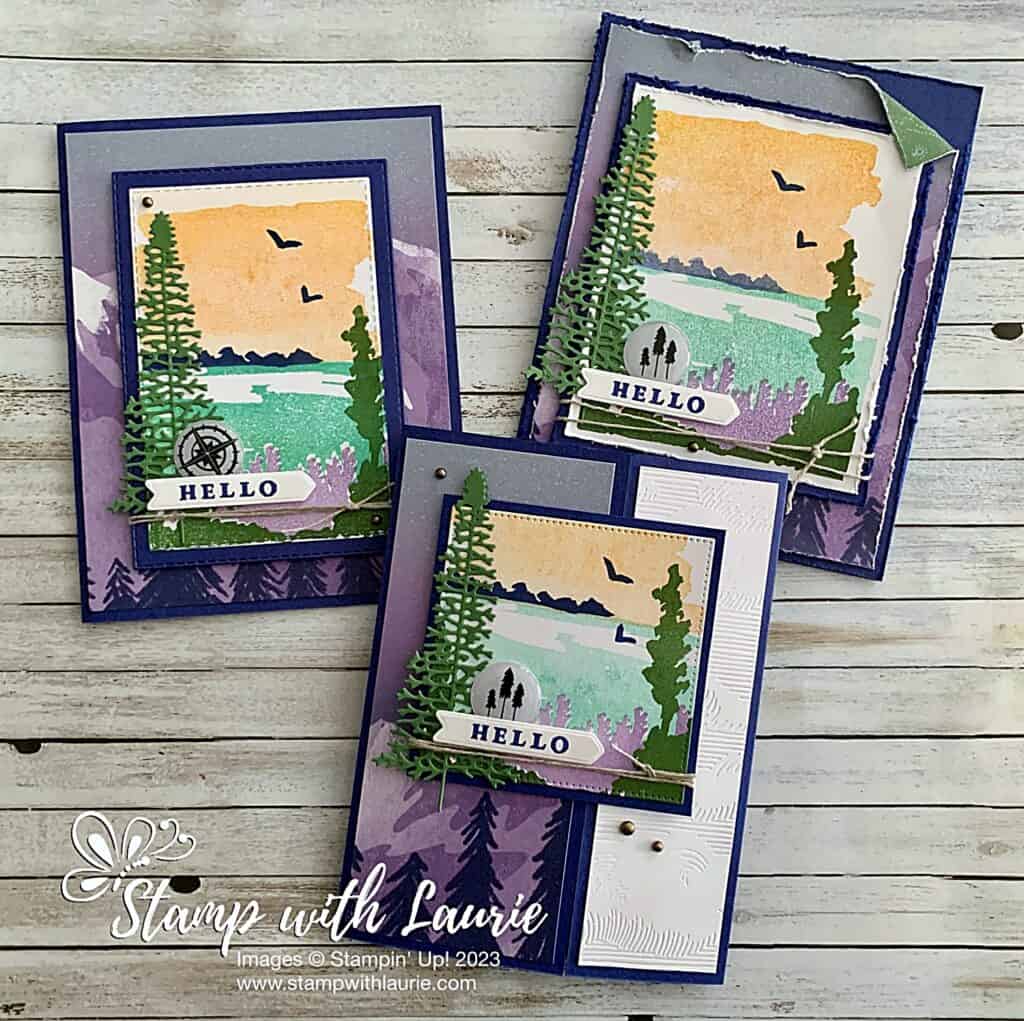
Hello Crafty Friends! Laurie here again! I am sharing My Picturesque Hello Card using the Picturesque Stamp Set by Stampin’ Up! I had a lot of fun playing with this stamp set that I made three cards all with slight variations. One is a gate fold card, another an easel card, and the third is a regular card.

The Details of My Gate Fold Card

I needed to create a swap and decided that I would use the Picturesque Stamp Set for it and create a gate fold card. Give the set some love since there wasn’t a lot of cards out there using it and I always need more masculine card!

I decided this stamp set would be perfect with the Enjoy the Journey Designer Series Paper to create an outdoorsy masculine theme. It is currently free during Sale-a-Bration!

I went with one flap larger than the other since I wanted to show off the DSP. The Into the Clouds Embossing Folder created some interest on the smaller flap while lightening my card up. It also helped to balance the sentiment cluster.

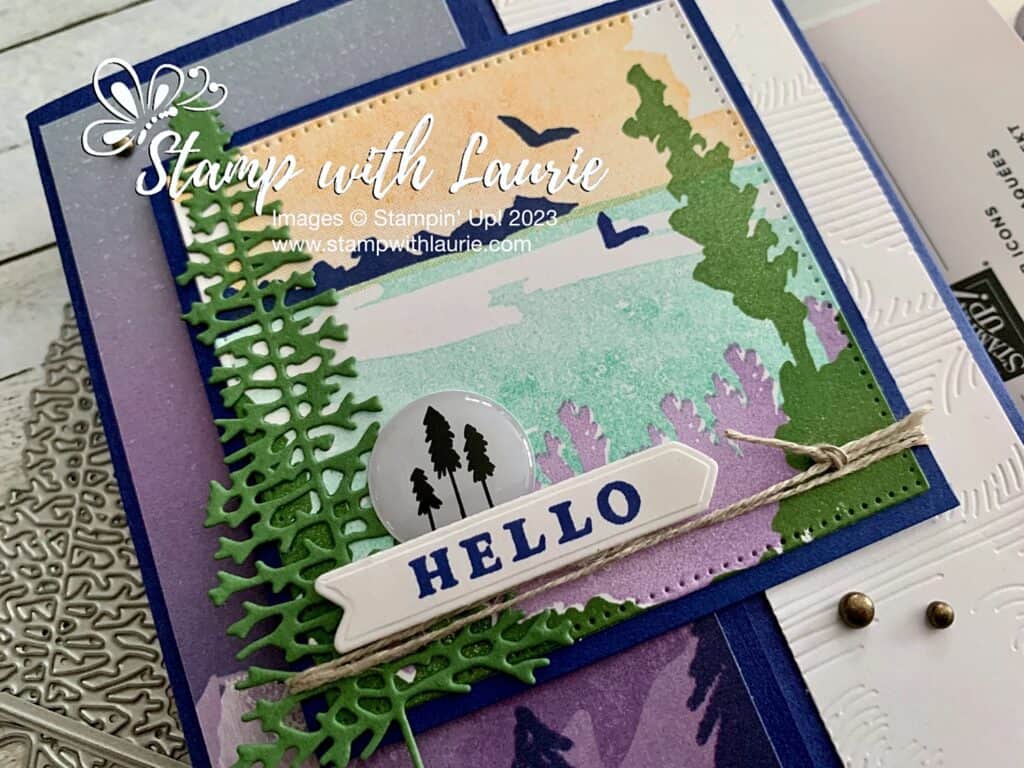
Close Up of stamped nature scene
Close Up of Focal Point on my Card

For my stamped image, I used several colours to represent a sunset over a nature scene. The Coastal Cabana and Mango Melody were both stamped off once before stamping on the Basic White. For the sky, I decided to use the Oceanfront Stamp Set to give it a painted feel, but you could use the water stamp from the Picturesque Stamp Set instead.

Once everything was stamped, I used the largest stitched square from the Stylish Shapes Dies to cut it out and matted it with Starry Sky card stock.

Next, I wound some linen thread twice around my focal point and tied it in a knot on the opposite side from the sentiment cluster. The die cut tree was from the Majestic Mountain Dies and I thought it added to my outdoorsy theme and balanced the stamped tree on my focal point.

I stamped the sentiment in Starry Sky and used the arrow die from the All That Dies. I loved how it pointed into the scene while creating a base for the sticker and tree.

Those Enamel Sticker Icons are so neat! I went with the tree icon on my swaps since it went well with the die cut tree and my outdoorsy theme. The finishing touch was three Rustic Metallic Adhesive-Backed Dots.

The Details for My Other Cards

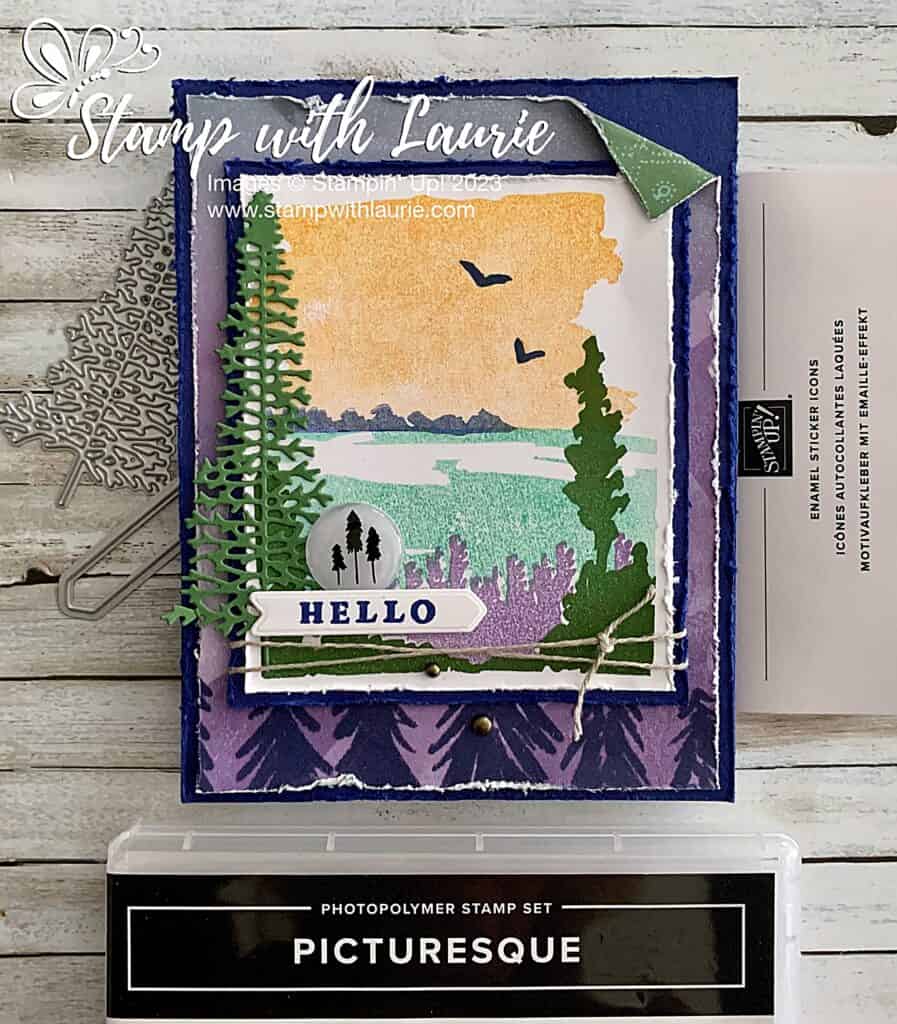
For the Easel card, I decided to give it a distressed look by using my scissors to run along the edges of everything. I even folded down a corner of the DSP so that the Garden Green back can be seen.

A card that is an easel with a nature scene on it.
Easel Card Closed

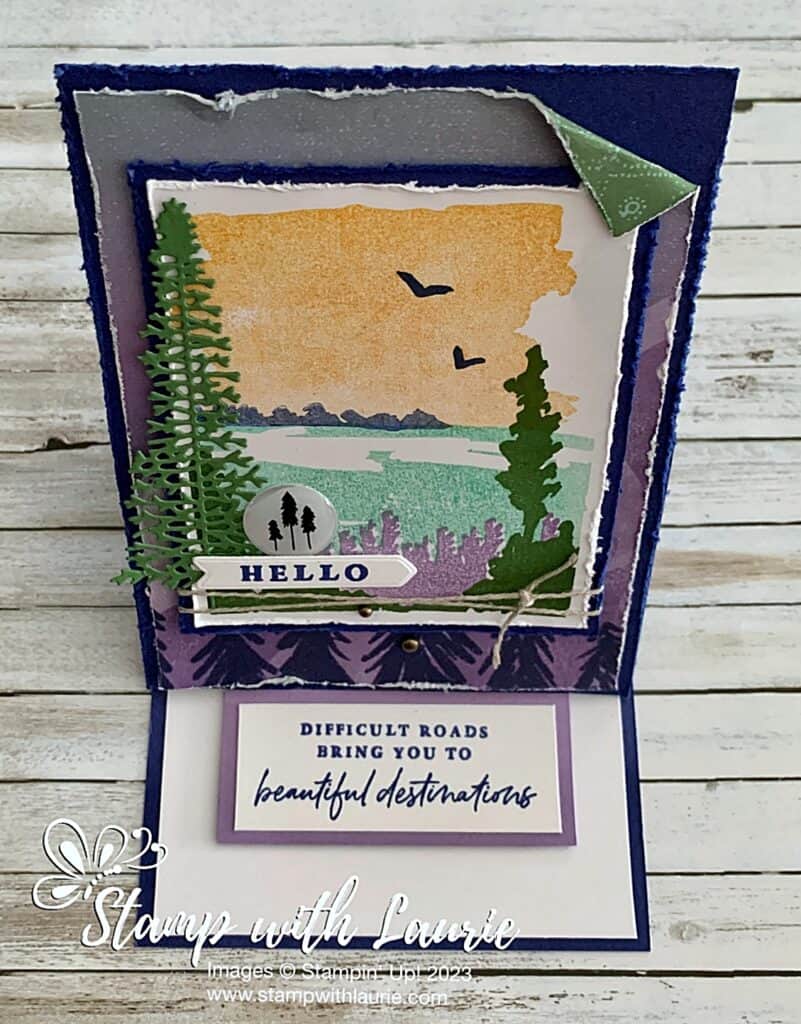
I loved the encouraging sentiment and decided to use it for the inside as a stopper so that the easel could stand up.

Easel Card Open
Easel Card Opened

The full card was stamped the same way, but I used the Stitched Rectangle Dies to die cut the focal point and mat out. I also used the compass from the Enamel Sticker Icons.

A Regular Card with the nature scene
Regular Card Base

Supplies:

Stamps/Bundles/Dies: Picturesque Stamp Set (160511), Majestic Mountain Dies (151608), All That Dies (159078), Oceanfront Stamp Set (157862), Stylish Shapes Dies (159183), Stitched Rectangle Dies (151820)

Inks: Garden Green (147089), Highland Heather (146986), Coastal Cabana (147097), Starry Sky (159212), Mango Melody (147093)

Paper: Starry Sky (159263), Garden Green (102584), Basic White (159276), Enjoy the Journey 12″ x 12″ Designer Series Paper (160586)

Accessories: Into the Clouds Embossing Folder (159171), Enamel Sticker Icons (160598), Rustic Metallic Adhesive-Backed Dots (159082), Linen Thread (104199), Multipurpose Liquid Glue (110755), Bone Folder (102300), Stampin’ Dimensionals (104430), Stampin’ Seal (152813), Paper Snips Scissors (103579)

Measurements: 

  • Starry Sky (2 pieces): 
    • 5 ½” x 8 ½” scored at 2 ½” and 6 ¾”
    • 3” x 3”
  • Basic White (3 pieces):
    • 1 ½” x 5 ¼”
    • 3” x 3”
    • Scrap for Sentiment
  • Garden Green:
    • Scrap
  • Enjoy the Journey DSP:
    • 2 ¼” x 5 ¼”
All Three card together
All Three Cards Using the Picturesque Stamp Set

More Information on My Picturesque Hello Card:

For more of my Stampin’ Up! cards, please click here.

You will find the items listed above in my online store.
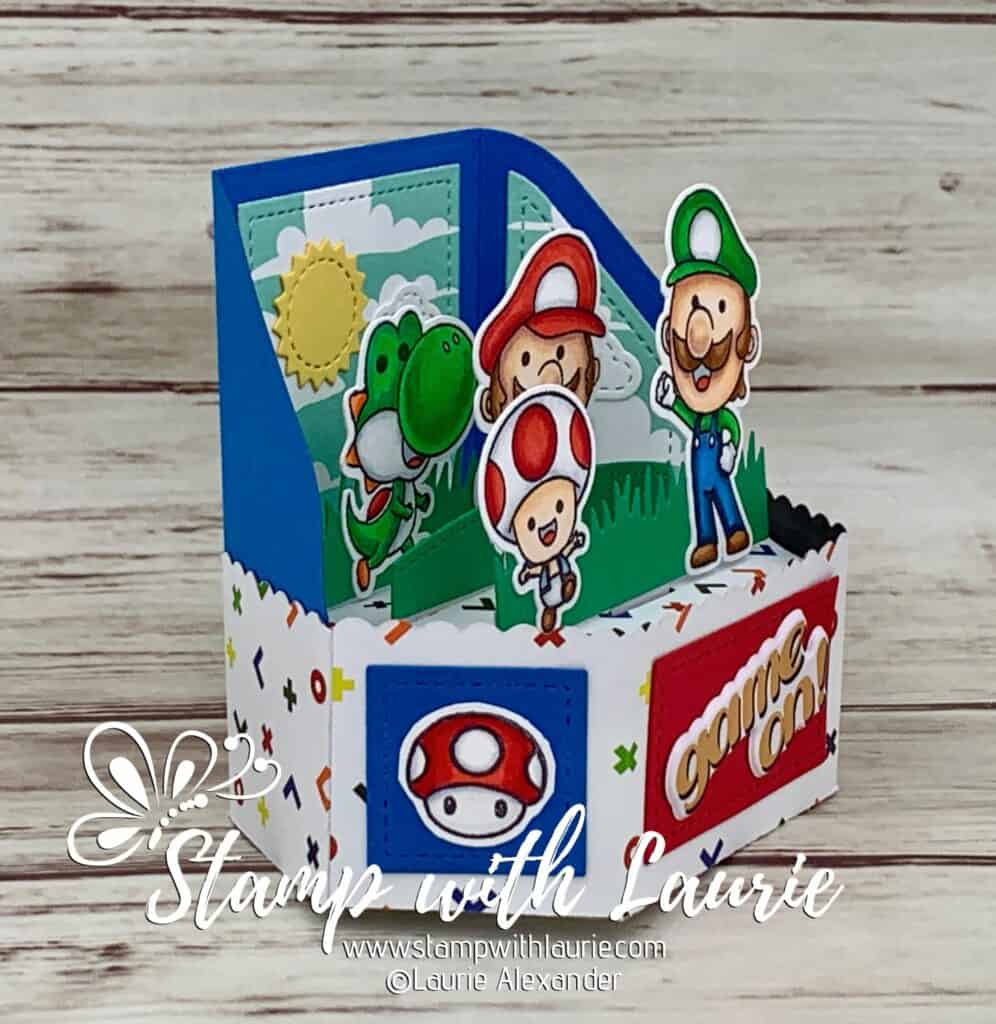
Game on Platform Card 

A pop-up card with Super Mario Brothers
Game on Platform Card

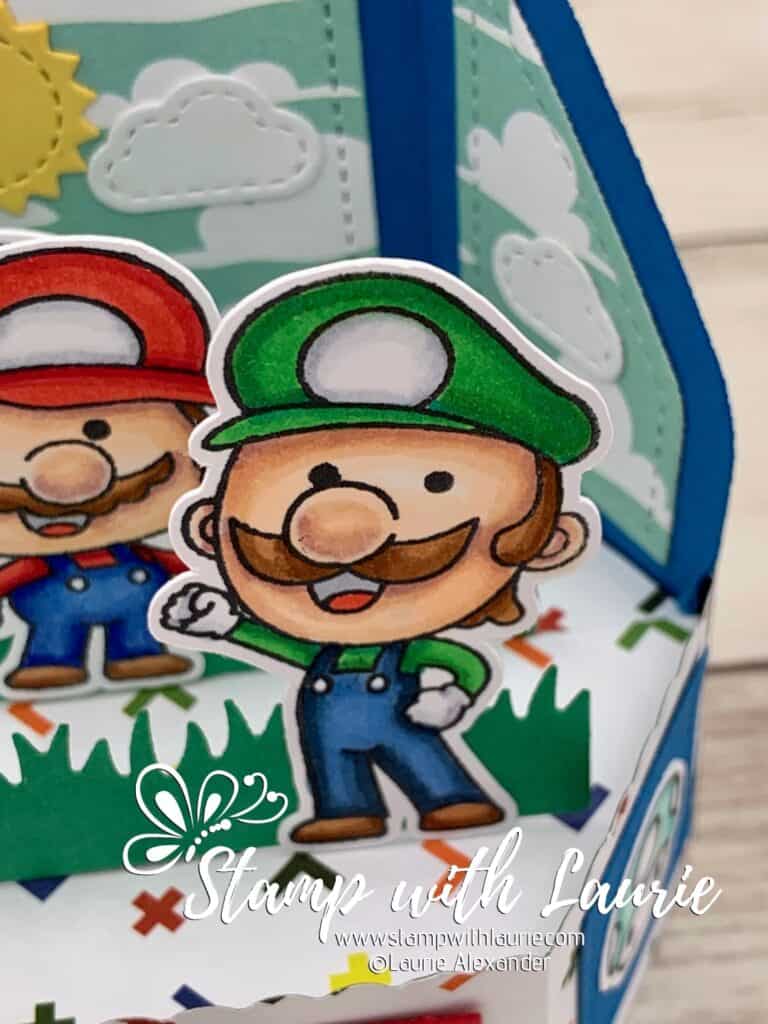
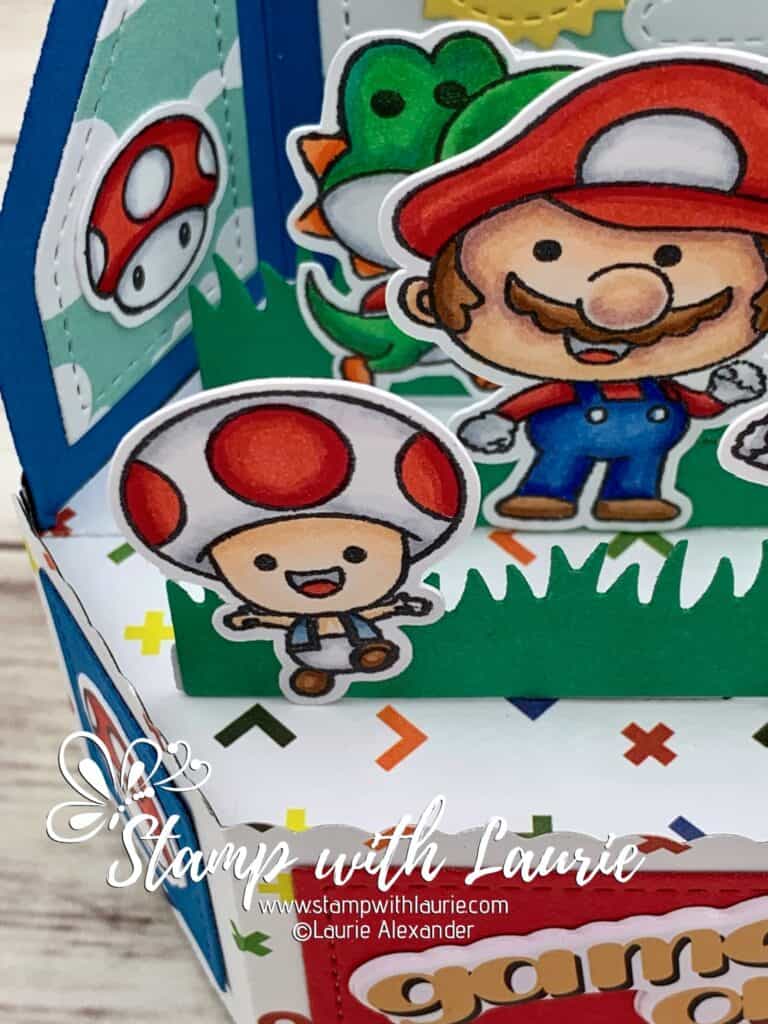
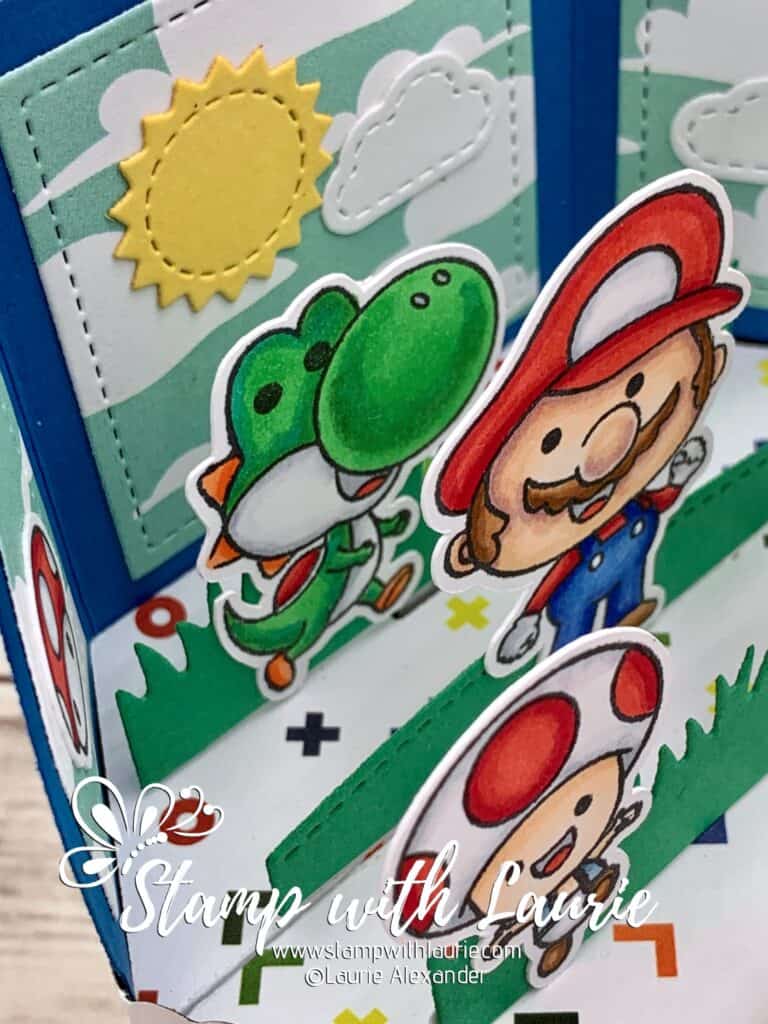
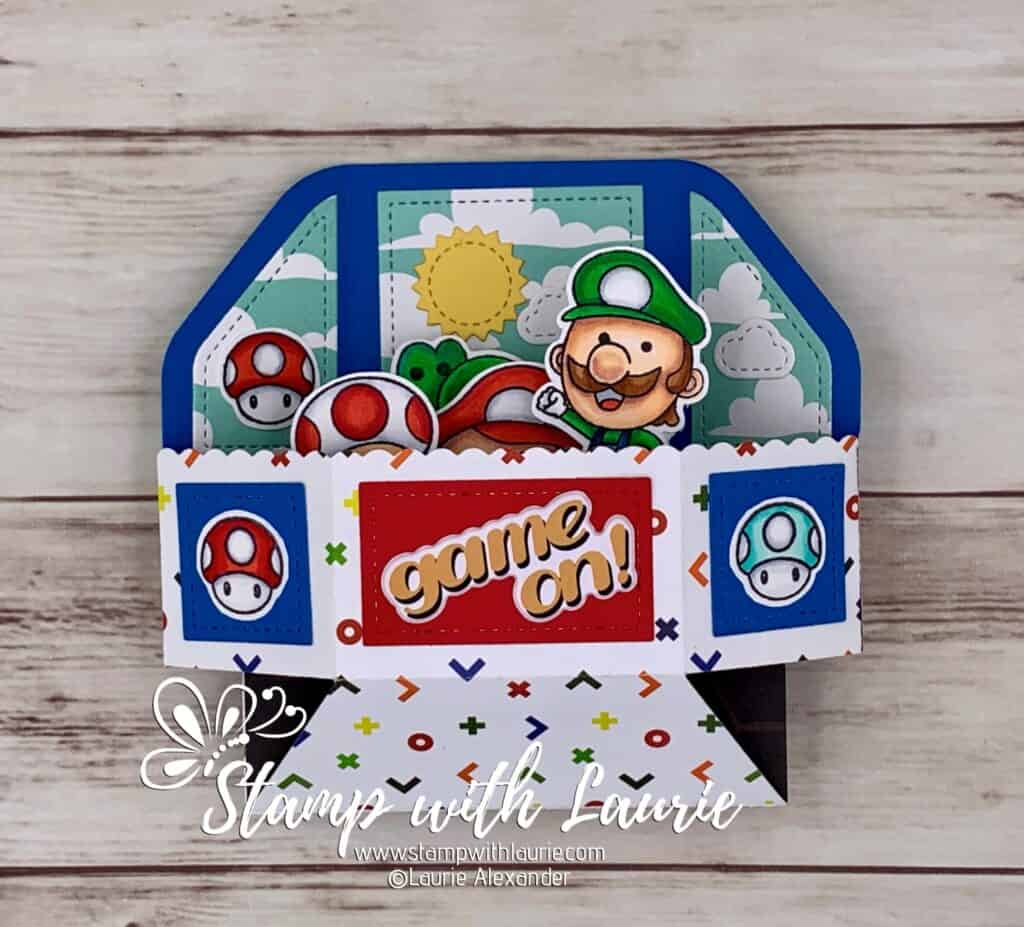
Hello Crafty Friends! It’s Laurie here to share my Game on Platform Card using the Game on Limited Edition Box by Kindred Stamps!

One of my brother’s recently had a birthday and he loved playing Super Mario Brothers when he was growing up. I also bought the Lawn Fawn Platform Pop-Up Dies and the Platform Pop-Up Add-On Dies recently. So, I thought a platform card using his favourite characters would be a fun card to send him!

The Details of My Card

I coloured several characters with my Copic markers in the bright primary colours from the game. Then, I assembled the platform dies and add-on dies to create my scene. The dies come with everything you need to create a scene. I used the grass and hill dies from the platform and added the sun and clouds dies from the Add-on. Once my platform was completed, I just had to add my characters.

Side View of Platform Card with Super Mario Brothers
Side View of Platform Card

The only embellishment I used was a “game on” puffy sticker on the front.

I love how the platform folds down for mailing and fits perfectly in a 5 ½” x 5 ½” envelope!

————————–

Copic Markers:

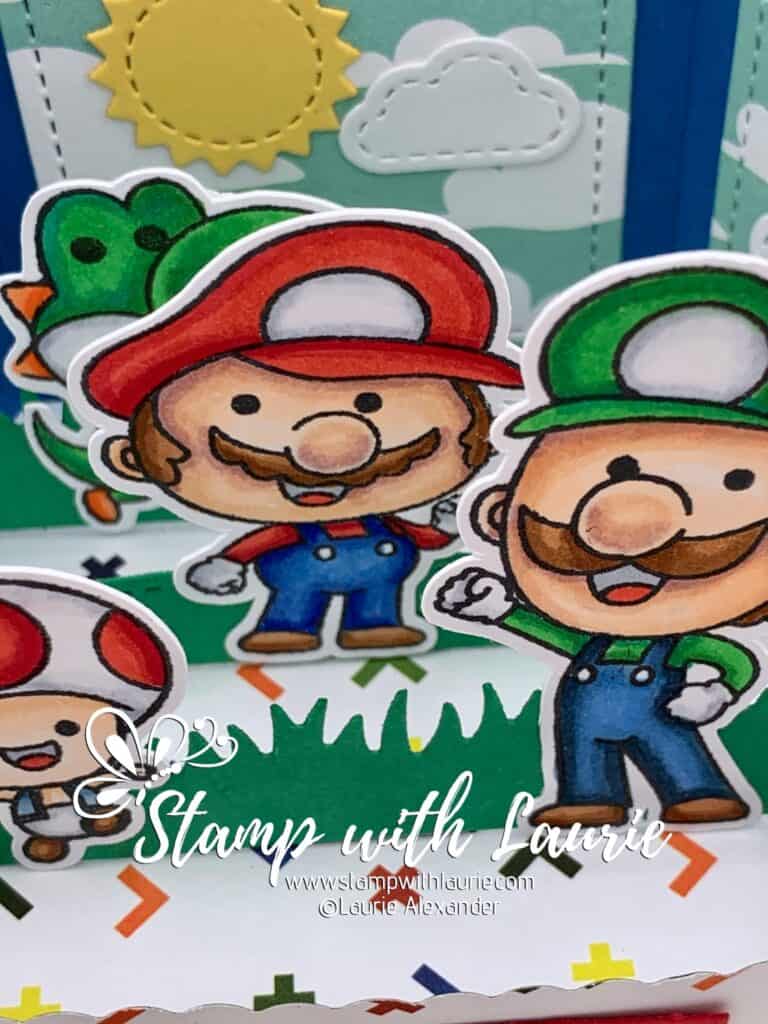
Mario
Skin: E000/E00/E21/E11/E04
Hair: E37/E35/E33
Hat/Top: R29/R27/R24
Pants: B29/B26/B24
Shoes: E37/E35/E33
Whites: C3/C1/0

Close Up of Mario
Close Up of Mario

Luigi
Skin: E000/E00/E21/E11/E04
Hair: E347/E35/E33
Hat/Top: G07/YG09/G16
Pants: B29/B26/B24
Shoes: E37/E35/E33
Whites: C3/C1/0

Close Up of Luigi
Close Up of Luigi

Toad
Skin: E000/E00/E21
Hat: R29/R27/R24/C3/C1/0
Pants: C3/C1/0
Top: B95/B93/B91
Tongue/Mouth: R27/C3
Shoes: E37/E35/E33

Close Up of Toad
Close Up of Toad

Yoshi
Greens: G07/YG09/G16
Whites: C3/C1/0
Oranges: YR07/YR02/YR00
Reds: R29/R24
Tongue/Mouth: R27/C3

Close Up of Yoshi
Close Up of Yoshi

Mushrooms
Blue/Greens: BG13/BG11/BG10
Reds: R29/R24/R24
Whites: C3/C1/0

Platform Folded Flat

————————–

Card Recipe for My Game on Platform Card:

Game on Limited Edition Box, Kindred Stamps
Paper Basics – Stamper’s Select White Cardstock, Papertrey Ink
Tuxedo Black Memento Ink
Game Over 12” x 12” Paper, Photo Play
Myths & Magic Designer Series Paper, Stampin’ Up!
Platform Pop-Up Dies, Lawn Fawn
Platform Pop-Up Add-On Dies, Lawn Fawn
Family Fun Puffy Stickers, Simple Stories
Pacific Point, Real Red and Cucumber Crush Card Stock, Stampin’ Up!

Finished card size: 5 ¼” x 3-5/8”

Top View of Platform

————————–

To view my other Kindred Stamps cards, please click here.

Hope you like my Game on Platform Card the Game on Limited Edition Box by Kindred Stamps!

Thank you for stopping by!

Hugs,
Laurie

Here Comes Santa Card

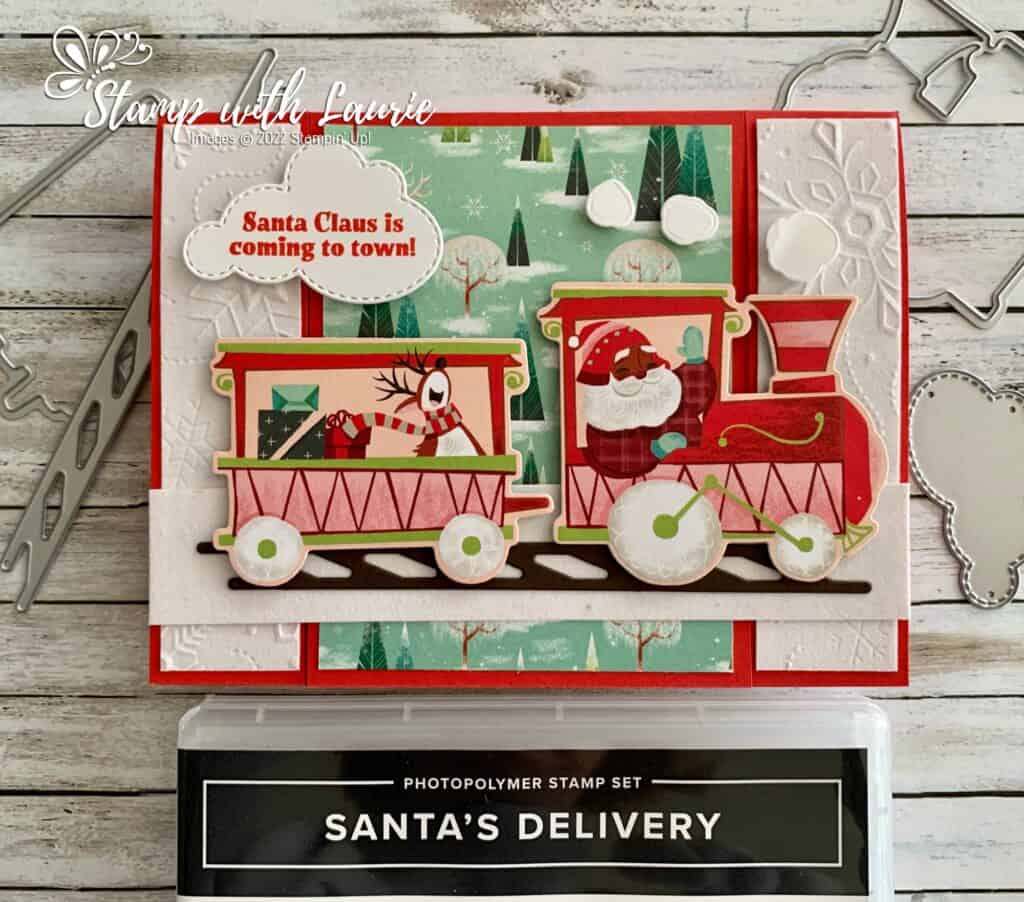
A Christmas Card with Santa arriving on a train with presents
Here Comes Santa Card

Hello Crafty Friends! Laurie here again! I am sharing my Here Comes Santa Card using the Santa’s Delivery Bundle which include the Santa’s Delivery Stamp Set and the Santa’s Train Dies by Stampin’ Up!

The Details of My Card

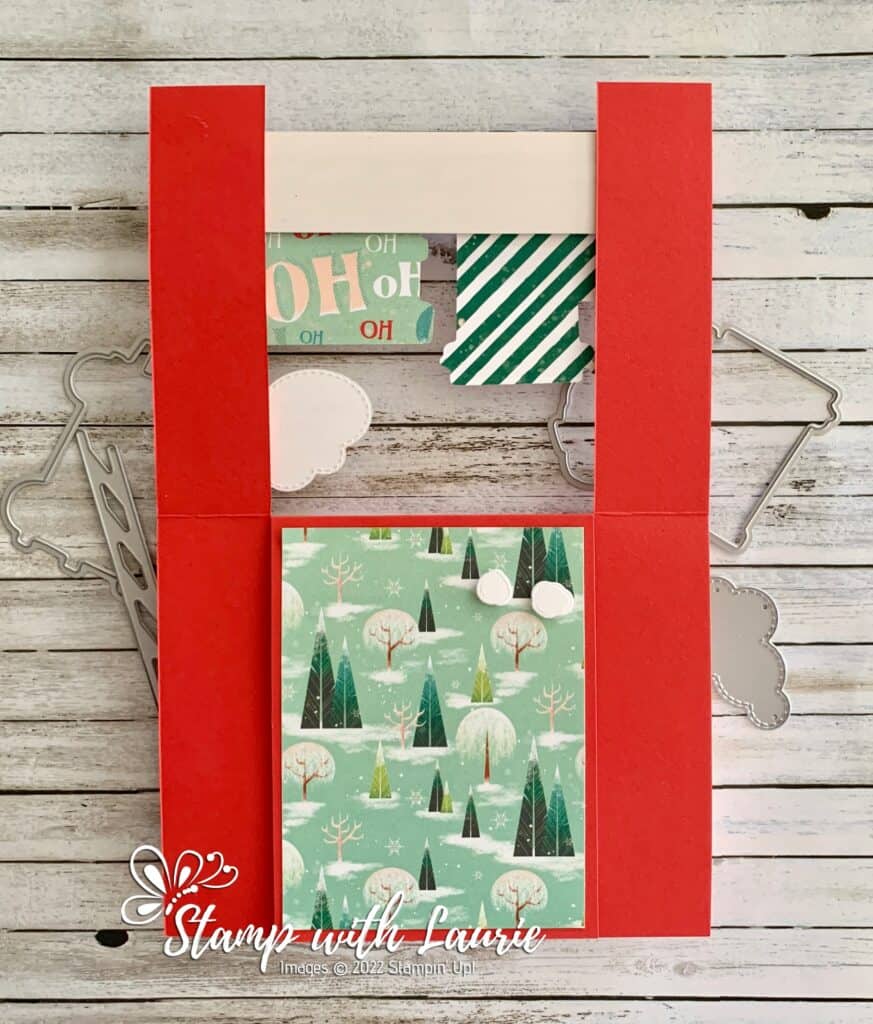
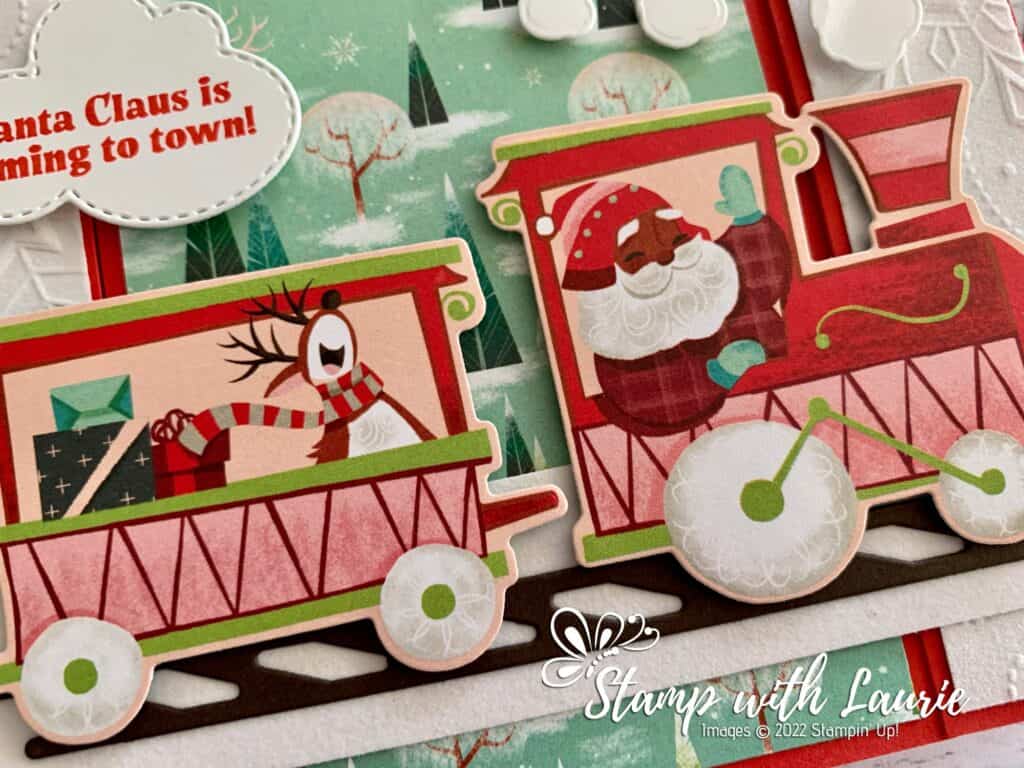
For my card, I decided that I wanted to create a fun bridge card with Santa riding in on his train! I love that you can die cut pieces from the DSP like Santa’s train making this a fast and easy card!

I used the Snowy White Velvet Sheets for the embossed snowflakes on either side of the bridge and for the bridge part that spans the two pieces.

Inside of Card Showing Bridge

The only stamping was the sentiment in Poppy Parade on the cloud die from the Give it a Whirl Dies. 

Supplies:

Stamps/Bundles/Dies: Santa’s Delivery Bundle (159590), Give It a Whirl Dies (154336)

Inks: Poppy Parade Classic Stampin’ Pad (147050)

Paper: Poppy Parade (119793), Basic White (159276), Early Espresso (119686), Santa Express Designer Series Paper (159582), Snowy White Velvet Sheets (156405)

Accessories: Wintry 3D Embossing Folders (155433), Bone Folder (102300), Stampin’ Dimensionals (104430), Stampin’ Seal (152813), Mini Glue Dots (103683)

Close Up of Santa on Train

Measurements: 

  • Poppy Parade: 
    • 5 ½” x 8 ½” scored at 4 ¼”
    • Cut 1-1/8” from either end leaving 3 ¼” centre piece
  • Snowy White Velvet Sheets:
    • 4” x 1” (2 pieces)
    • 1 x 5 ½”
  • Santa Express Designer Series Paper:
    • 4” x 3”
    • Santa
    • Train car with presents
  • Basic White:
    • Scraps for sentiment and puffs of smoke
  • Early Espresso:
    • 5” x ½”

More Information on My Here Comes Santa Card:

For more of my Stampin’ Up! cards, please click here.

You will find the items listed above in my online store.
My Wintery Christmas Barn

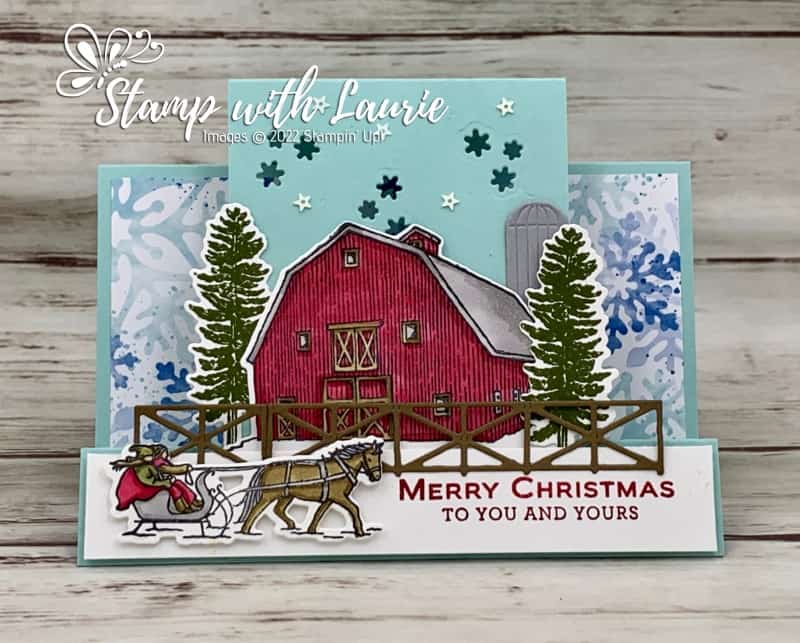
Christmas Card with a Horse Sled infant of a Barn
My Wintery Christmas Barn

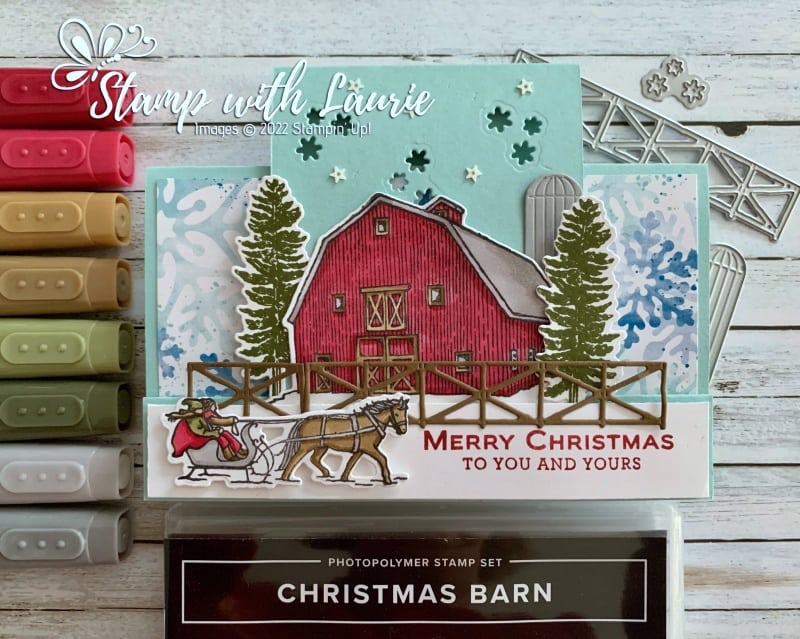
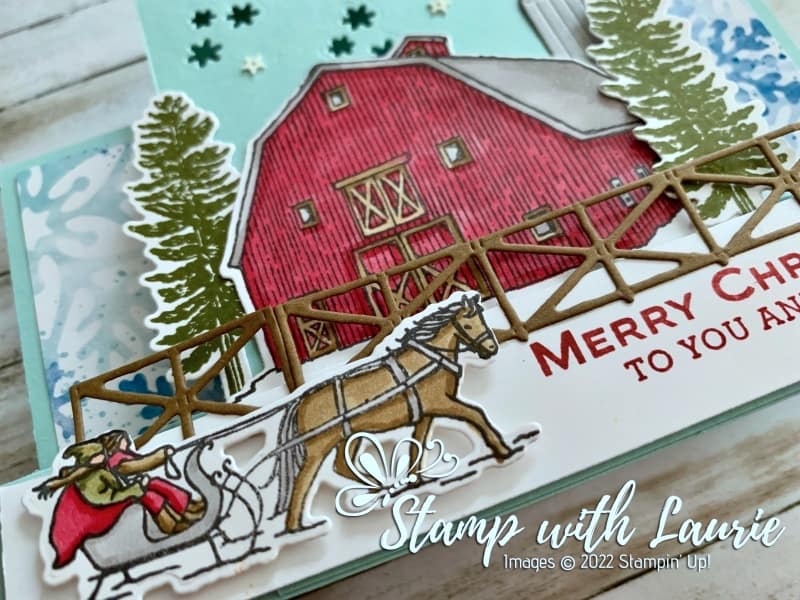
Hello Crafty Friends! Laurie here again! I am sharing My Wintery Christmas Barn using the Christmas Barn Bundle by Stampin’ Up! which includes the Christmas Barn Stamp Set and the Barn Dies.

The Details of My Card

For my card, I decided to make a faux centre-step card to allow enough room for the barn to fit on the centre panel. I created my faux centre-step card using my template with all my measurements that I have included at the end of this post. Some die cut snowflake were added at the top of the centre panel to create some interest before adhering it to the card base. You could add DSP as another option.

Side View of Card
Side View Of Faux Centre-Panel Card

My Stampin’ Blends were used to colour the elements to create my winter wonderland scene. I have included some links to past colouring tutorials using Stampin’ Blends at the end of this post.

Once I die cut them out, I stamped the sentiment in Cherry Cobbler on the Basic White strip on the right side to allow room for the sled. I popped this piece up so that I could tuck in the barn and trees behind it. Before adding the sled, I trimmed the fence to fit and glued it in place.

Close Up of Barn on Card
Close Up of Barn

I thought the Storybook Gnomes Designer Series Paper was perfect with its large snowflakes to add to my winter wonderland theme and you can see it through the die cut snowflakes on the centre panel! All the embellishments needed was to add the Sparkle & Shine Sequins to create a flurry of more snowflakes!

Supplies:

Stamps/Bundles/Dies: Christmas Barn Bundle (159749)

Inks: Cherry Cobbler Classic Stampin’ Pad (147083), Mossy Meadow Classic Stampin’ Pad (147111), Tuxedo Black Memento Ink Pad (132708)

Paper: Basic White (159276), Pool Party (122924), Soft Suede (115318), Smoky Slate (131202), Storybook Gnomes Designer Series Paper (159615)

Accessories: Cherry Cobbler Stampin’ Blends Combo Pack (154880), Mossy Meadow Stampin’ Blends Combo Pack (154890), Soft Suede Stampin’ Blends Combo Pack (154906), Smoky Slate Stampin’ Blends Combo Pack (154904), Sparkle & Shine Sequins (158137), Bone Folder (102300), Stampin’ Dimensionals (104430), Stampin’ Seal (152813), Mini Glue Dots (103683)

My Wintery Christmas Barn Card Standing Up

Measurements: 

  • Pool Party: (2 pieces)
    • 8 ½” x 5 ½” cut/scored according to template below
    • 8 ½” x 3” cut/scored according to template below
  • Basic White: (5 pieces)
    • Sentiment: 7/8” 5-3/8”
    • Barn: 3 ½” x 2 ¼”
    • Trees: 2 ½” x 1” (2 pieces)
    • Sled: 2 ½” x 1”
  • Soft Suede:
    • Scraps
  • Storybook Gnomes Designer Series Paper:
    • 3” x 5 ¼”

More Information on My Wintery Christmas Barn:

Downloadable Faux Centre-Step Template

To download a PDF of the Faux Centre-Step Template, please click here or on the picture.

Downloadable Faux Centre-Step Template

How to Use Stampin’ Blends
https://stampwithlaurie.com/wp-content/uploads/2020/08/Stampin-Up-Blends-2020.pdf

Part 1Whiskey Business Card using Blending Different Colours Technique
Video Tutorial: Blending Different Colours Together

Part 2Country Harvest Card using Light to Dark Technique
Video Tutorial: Light to Dark/Dark to Light Colouring

Part 3Beautiful Poppy Birthday Card using Smooth Colouring Technique
Video Tutorial: Smooth Colouring

Part 4Let’s Gather Together Card using Tip to Tip Blending Technique
Video Tutorial: Tip to Tip Colouring

Part 5So Grateful Cardinal Card using Flicking Colouring Technique
Video Tutorial: Flicking Colouring

Part 6Let’s Celebrate You Card using Flicking of Different Colours Technique
Video Tutorial: Flicking of Different Colours Technique

No-Lines Technique CardsMy Cardinal Anniversary Card and My Cardinal Card

How to Create a Scene: https://youtu.be/6w4fkxgA9rg

For more of my Stampin’ Blends cards, please click here.

To view my other Centre-Step cards, please click here.

For more of my Stampin’ Up! cards, please click here.

You will find the items listed above in my online store.