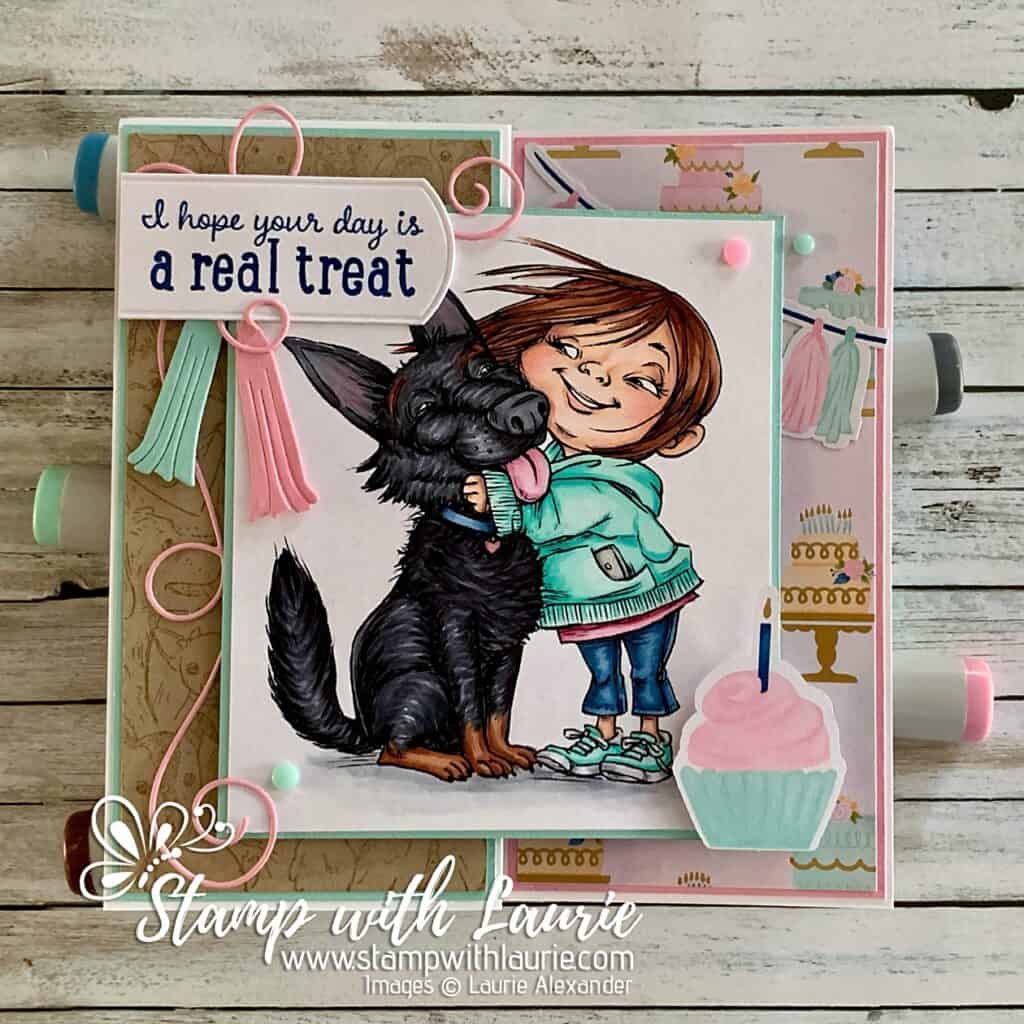
My Birthday Treat Card

My Birthday Treat Card - Birthday card with a girl and dog on it
My Birthday Treat Card

Hello Crafty Friends! It’s Laurie here! I am sharing My Birthday Treat Card using the sweet Daisy and Me by Mo’s Digital Pencil. I have a birthday twin whose birthday is the same day as mine! She loves her dogs and when I saw this new digital stamp, I knew it was perfect for her birthday card!

The Details of My Birthday Treat Card

For my card, I decided to create a Z-fold card so that I could decorate all the panels with the gorgeous Wildflower Birthday Specialty Designer Series Paper by Stampin’ Up! The ready-to-use die cuts that are included in the DSP were perfect for my birthday theme!

But first, I coloured with my Copic markers the dog and girl to look like my friend and her dog, Rocky! He has very distinctive marking including eyebrows! Lol. I added Glossy Accents to her phone and Clear Star Gelly Roll Pen to the heart tag on Rocky’s collar.
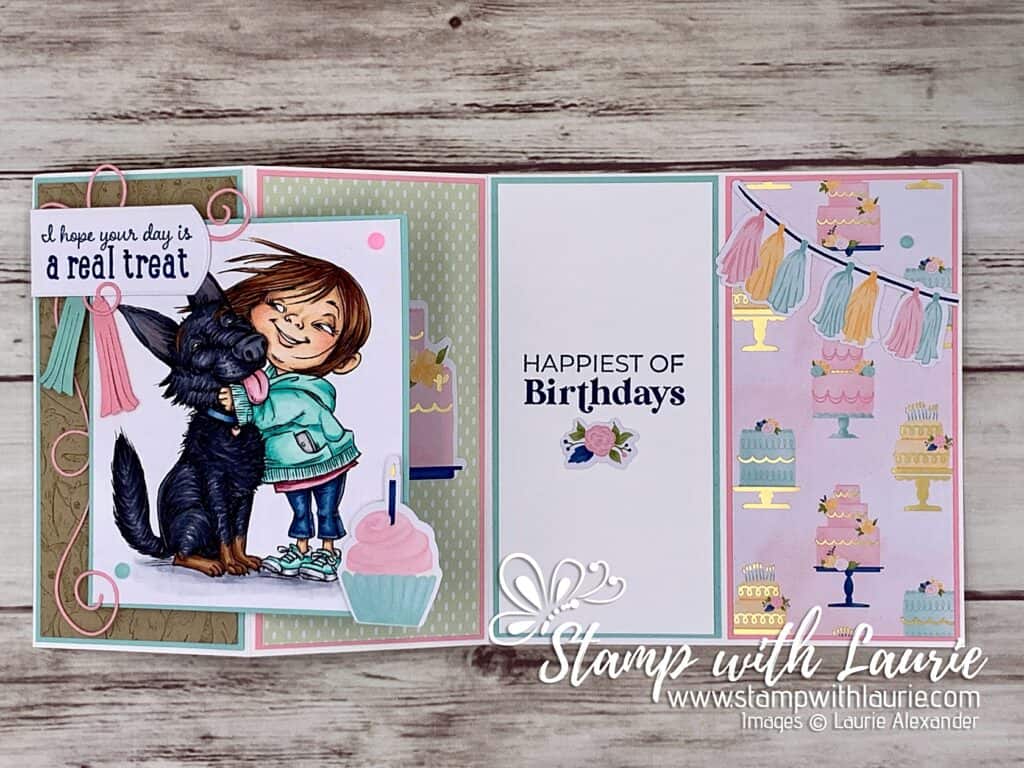
All Panels of the Card Showing
Z-Fold

To add to the birthday celebrations, I used the Birthday Celebration Dies by Stampin’ Up!, as well as, a bow Corner Die from Memory Box on the front panel of the card. The cupcake was from the DSP ready-to-use die cuts and matched my colour scheme perfectly!

The sentiment was from the retired Pampered Pets Stamp Set and stamped in Blueberry Bushel before die cutting it with one of the Unbounded Love Dies.
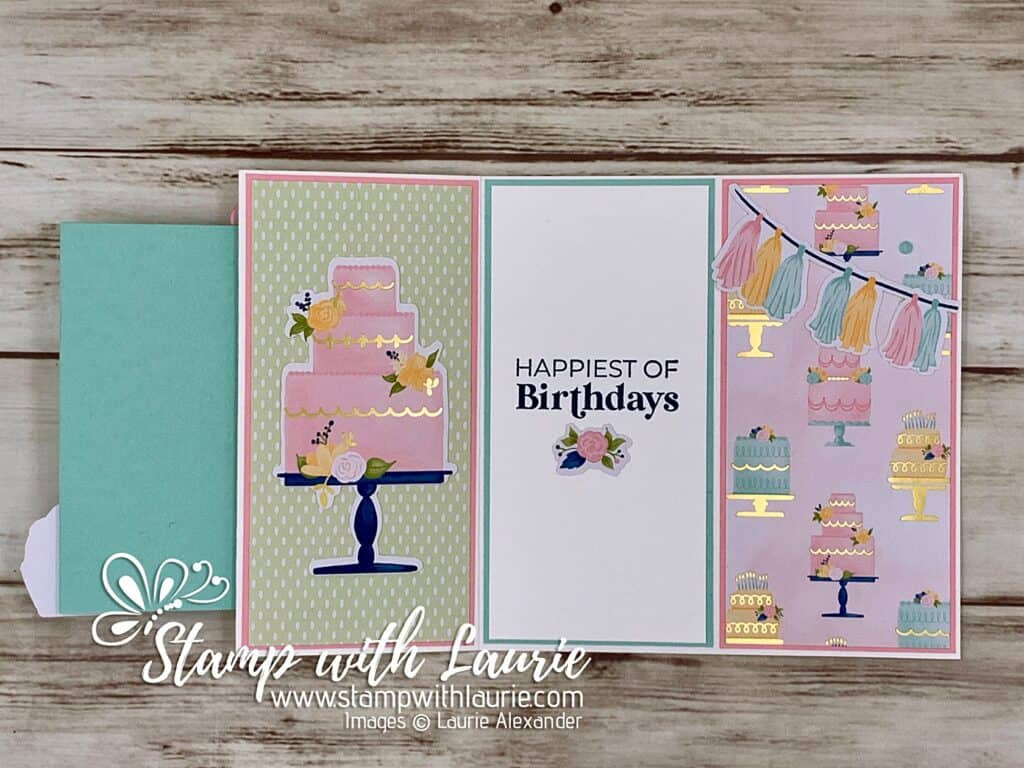
Inside Panels of Card

For the inside, I decorated the panels with the DSP and die-cuts. Don’t you love that cake and banner! So festive! The inside sentiment was from the Throughout the Year Stamp Set by Stampin’ Up! and stamped in Blueberry Bushel as well. A floral die cut was the finishing touch to the sentiment panel.

For embellishments, I added some Party Dots on the front to matched my colour scheme.

————————–

Copic Markers:

Skin: E000/E00/E21/E11/E04/R20
Hair: E27/E25/E23
Hoodie: BG13/BG11/BG10
T-Shirt: R85/R83/R81
Jeans: B99/B97/B95/B93/B91
Shoes: BG13/BG11/BG10/C3/C1/0
Phone: C3/C1/0/Glossy Accents
Dog: C9/C7/C5/E27/E25/E23/C3/R20
Dog’s Tongue: R85/R83/R81
Dog’s Collar: B97/B95/B91/R85/R81/Clear Star Gelly Roll Pen
Ground: C3/C1/0
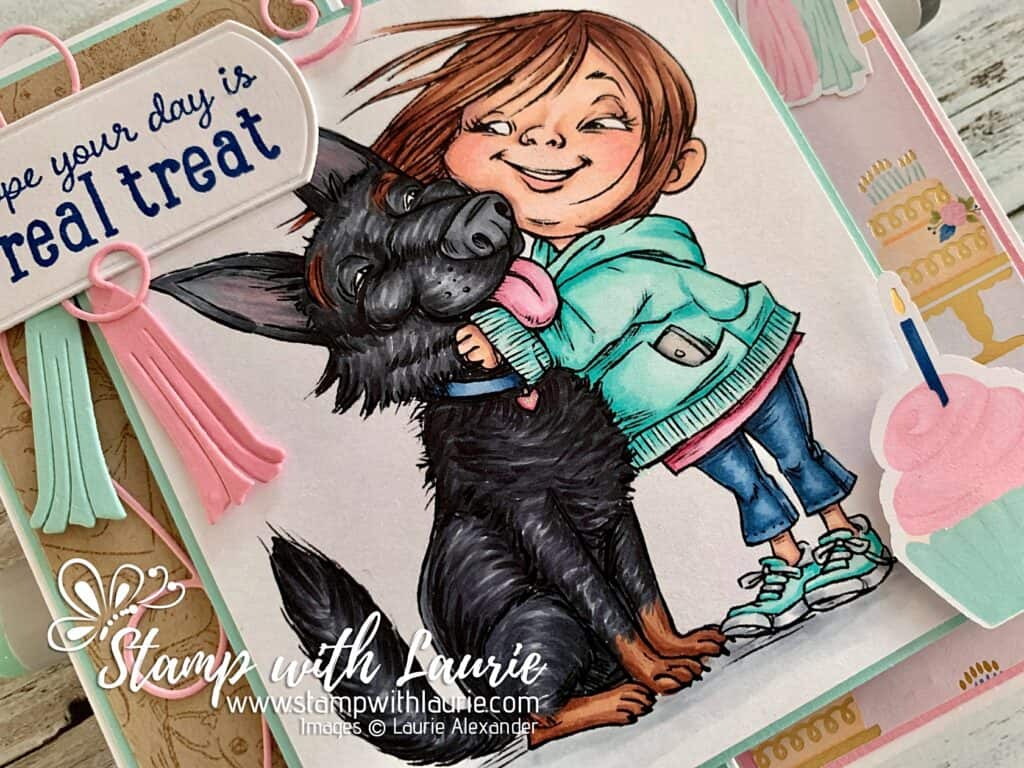
Close up of Dog and Girl
Close up of Rocky and Sheina

————————–

Card Recipe for My Birthday Treat Card:

Daisy and Me, Mo’s Digital Pencil
Paper Basics – Stamper’s Select White Cardstock, Papertrey Ink
Wildflower Birthday Specialty Designer Series Paper, Stampin’ Up!
Corner Bow Die, Memory Box
Unbounded Love Dies, Stampin’ Up!
Birthday Celebration Dies, Stampin’ Up!
Doggone Friendly Stamp Set, Stampin’ Up!
Throughout the Year Stamp Set, Stampin’ Up!
Pampered Pets Stamp Set, Stampin’ Up!
Blueberry Bushel Classic Ink Pad, Stampin’ Up!
Crumb Cake Classic Ink Pad, Stampin’ Up!
Party Dots, Stampin’ Up!
Glossy Accents, Ranger
Clear Star Gelly Roll Pen, Sakura

Pretty in Pink, Pool Party and Crumb Cake Card Stock, Stampin’ Up!

Finished card size: 5 ½” x 5 ½”

————————–

To view my other Mo’s Digital Pencil cards, please click here.

Hope you like My Birthday Treat Card using Daisy and Me by Mo’s Digital Pencil!

Thank you for stopping by!

Hugs,
Laurie

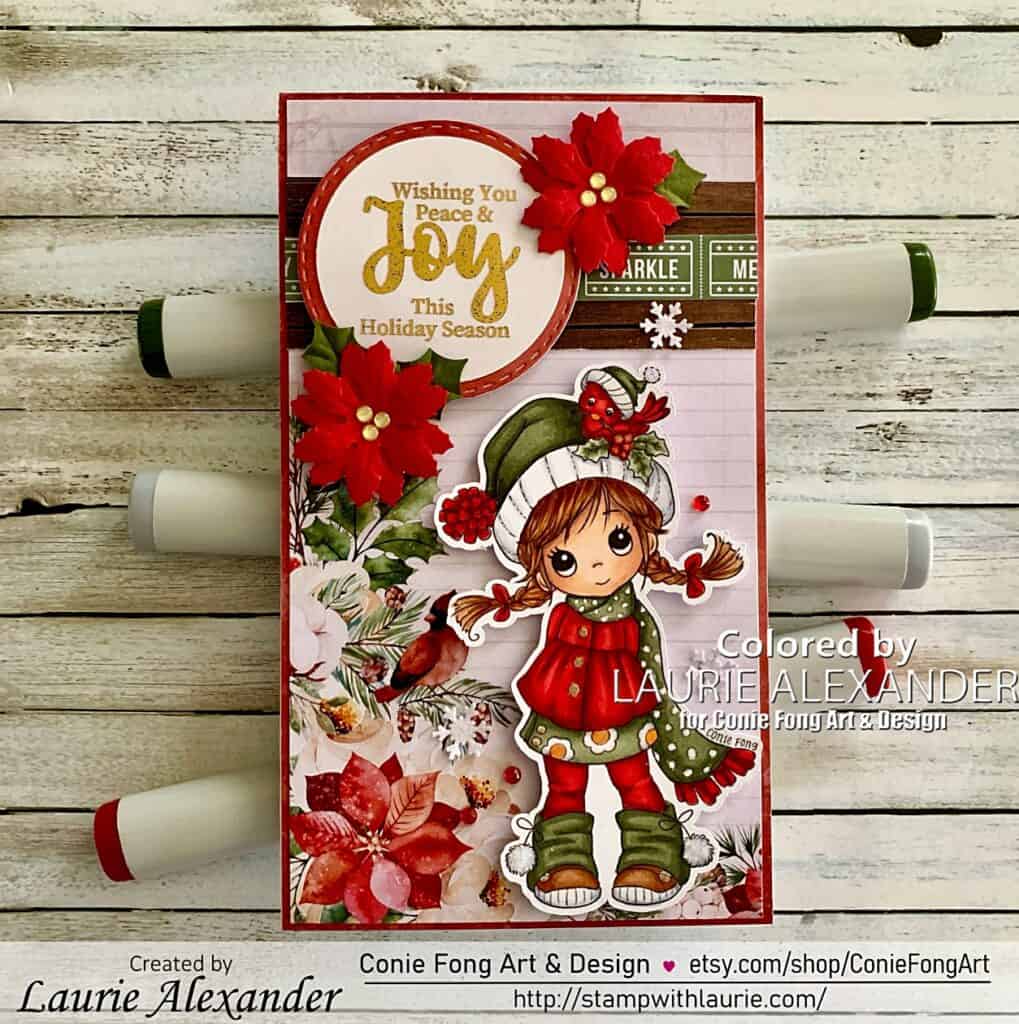
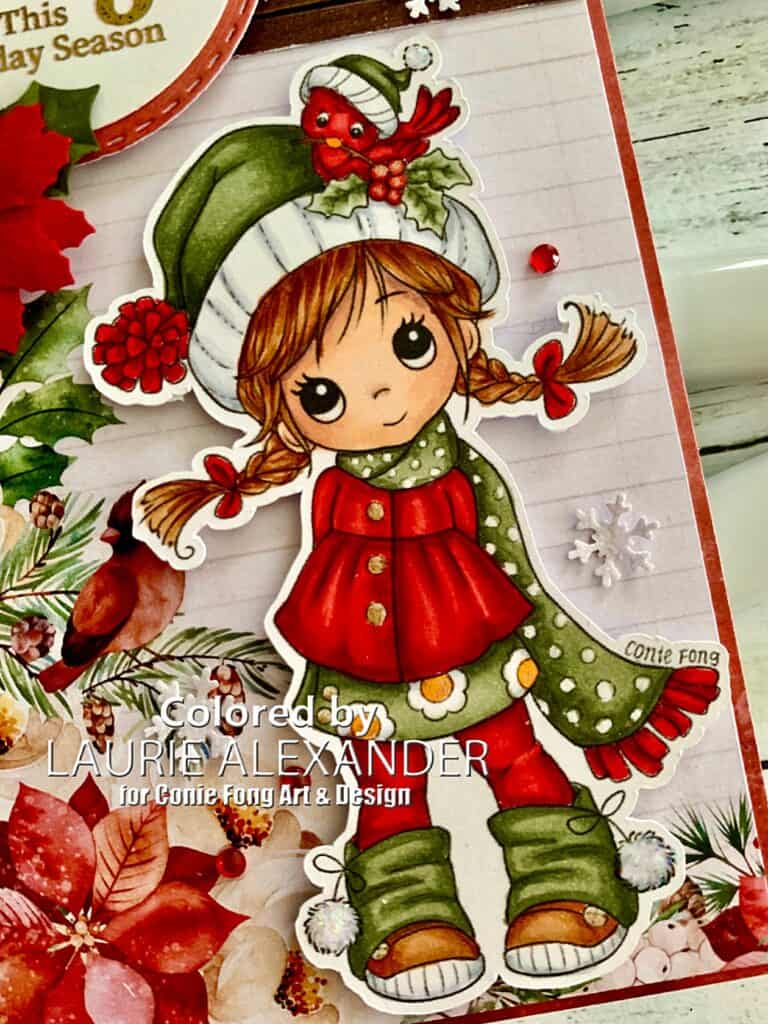
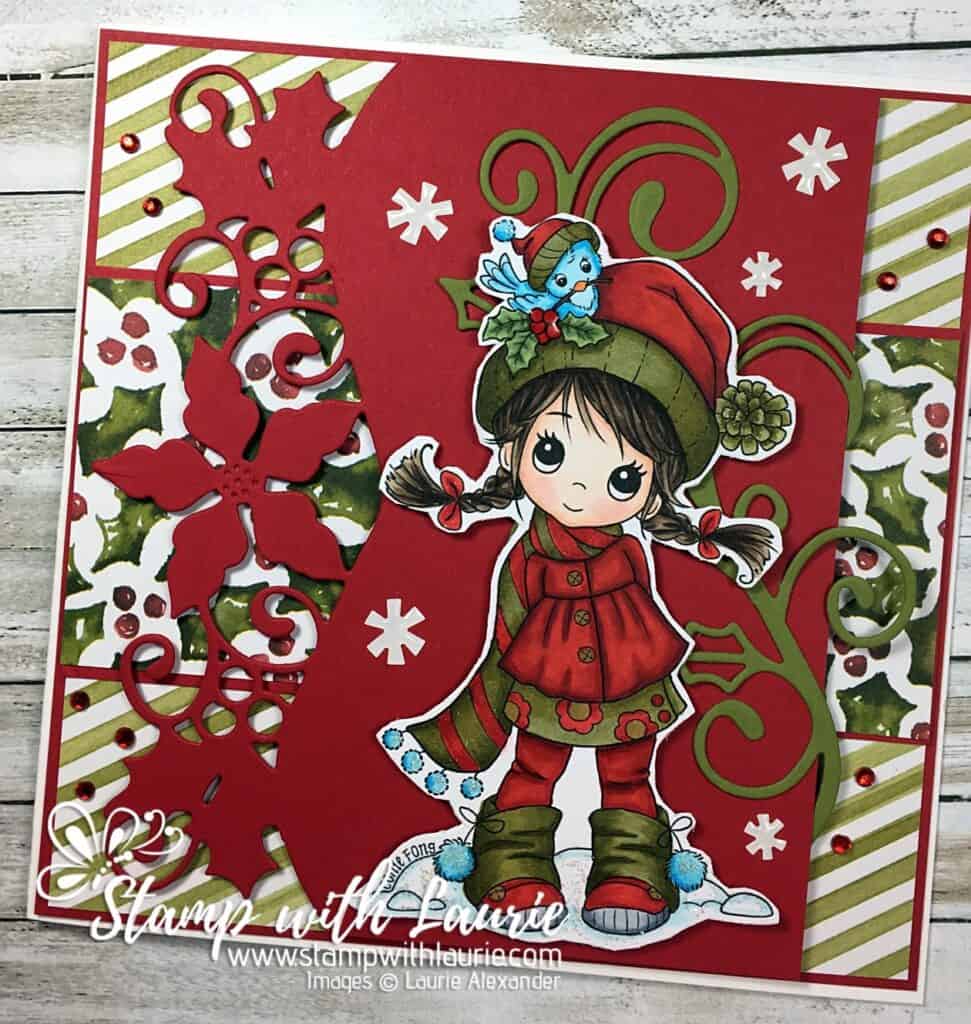
Peace & Joy Christmas Card

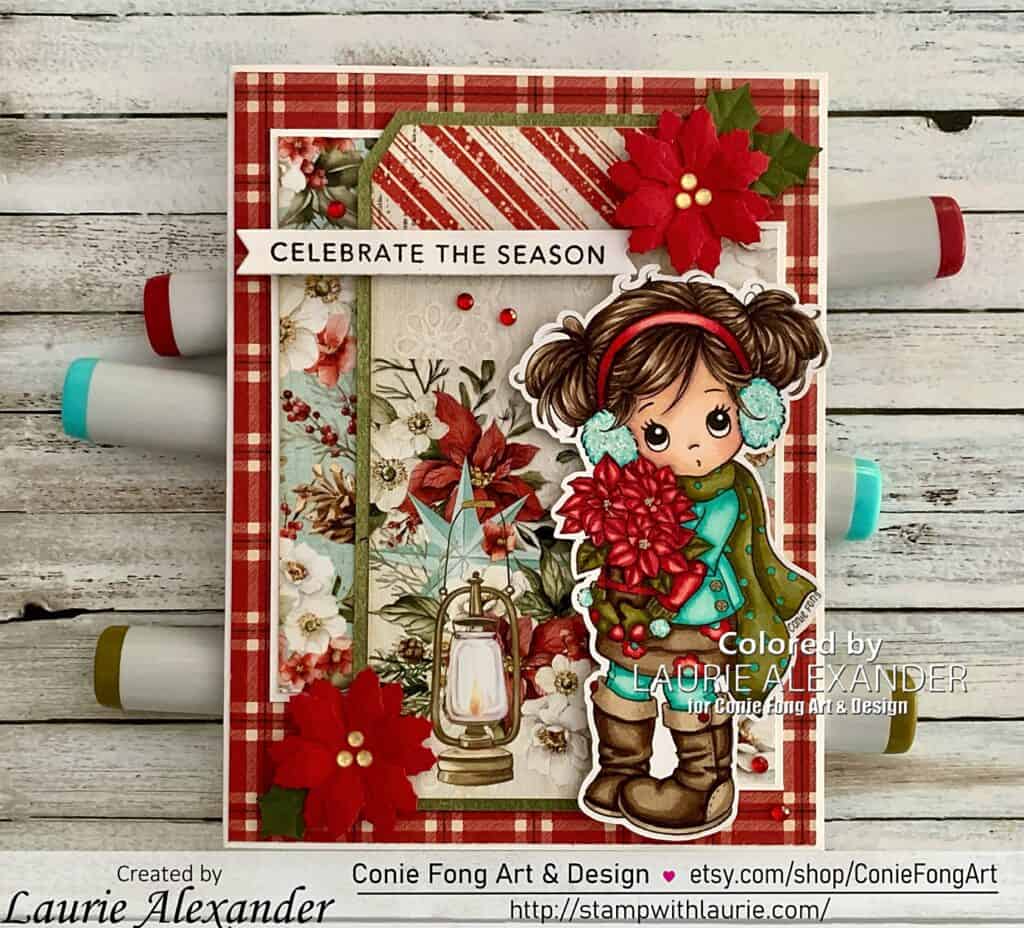
Peace & Joy Christmas Card - a Christmas card with a girl and a bird on her hat.
Peace & Joy Christmas Card

Hello Crafty Friends! It’s Laurie here! I am sharing my Peace & Joy Christmas Card as my Design Team Inspiration Card for Conie Fong Art & Design using Molly Cutie from the Molly Winter Bundle. This Bundle includes 4 digital stamps:

  • Molly’s Winter Friends
  • Molly’s Joy
  • Molly Cutie
  • Molly Cutie Without Birdie

The Details of My Peace & Joy Christmas Card

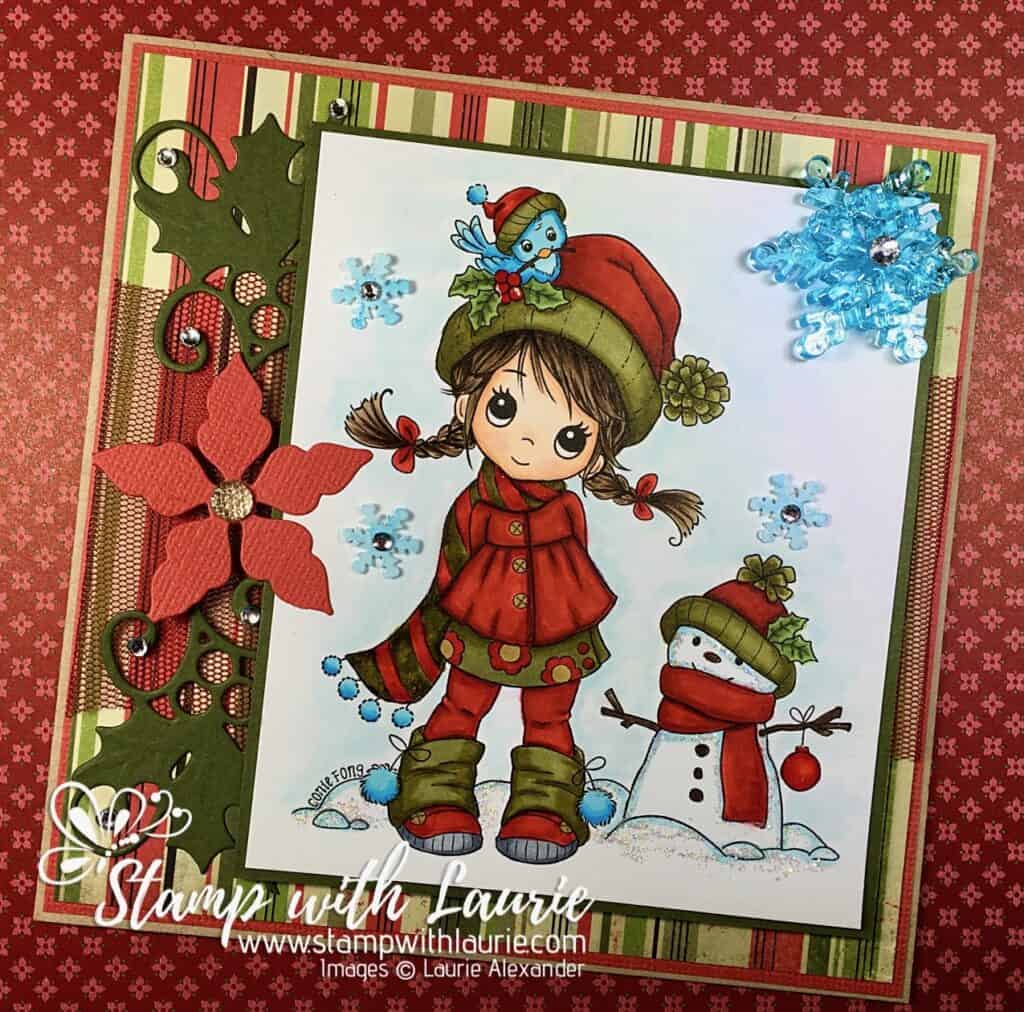
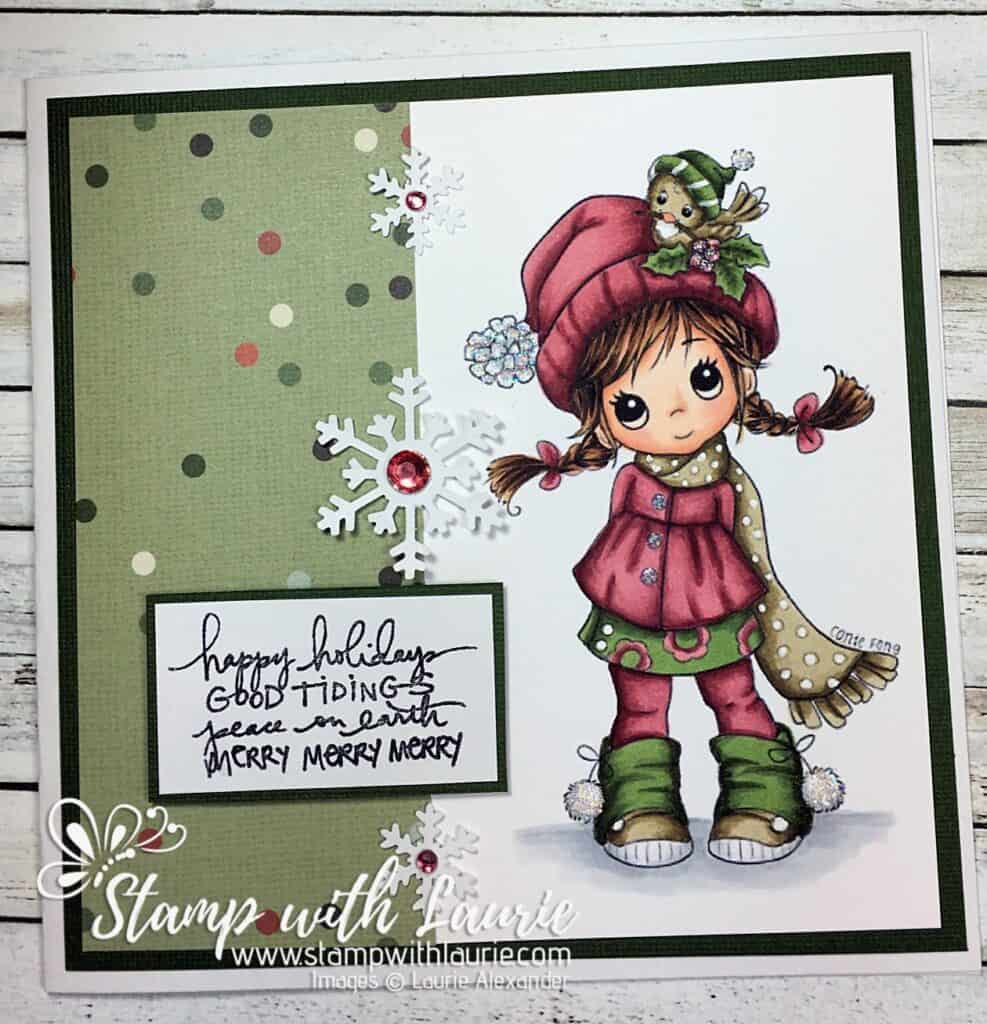
I checked and this was my fourth time colouring different variations of this stamp! Lol! It is obviously one of my favourites of Conie Fong! The other three were before I was on Conie’s Design Team, and I will include them at the end of this post.

For my card, I had this gorgeous Merry Little Christmas Paper Collection by Paper Rose. So, I decided to use the piece that had the cardinal on it since I coloured the birdie as a cardinal this time. I also used the paper for the sentiment banner with the wood and Christmas word tickets.

The sentiment was foil embossed in gold with my laminator and gold foil. This is something that I have discovered recently and plan to do more often! So fun! I backed the foiled sentiment with a stitched circle from the red paper in the Collection. Tip: I die cut it out of the centre of the red mat that is behind my floral piece. Since you do not see it, it saved on paper.

The poinsettias were hand punched and assembled with gold glitter dots to mirror the poinsettia in the paper.

I had some punched glittery snowflakes on my desk from another card. So, I added them for interest.

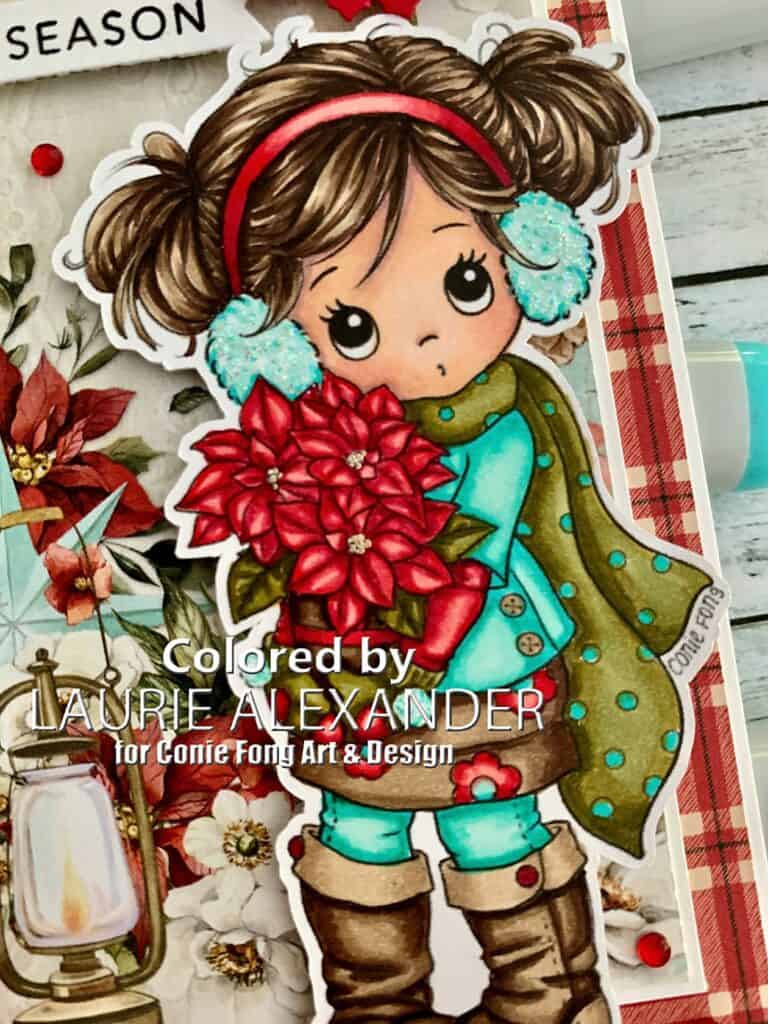
Finally, for sparkle, I added some red rhinestones around her, as well as Star Dust Stickles to Molly’s and the bird’s pompoms. Clear Star gelly roll was added to the flowers on her dress with white gelly roll added to the polka dots on her scarf and gold gelly roll to her buttons. Glossy Accents was added to the berries that the birdie is carrying. You can never have too much sparkle on a Christmas card! Lol!

————————–

Copic Markers:

Skin: E000/E00/E21/E11/E04/R20
Hair: E39/E37/E35/E33
Reds: R39/R37/R35/R32
Greens: BG99/BG96/BG93
Whites: C3/C1/0
Yellows: YR16


Close Up of Girl
Close Up of Molly

————————–

Card Recipe for My Peace & Joy Christmas Card:

Molly Winter Bundle, Conie Fong Art & Design
Paper Basics – Stamper’s Select White Cardstock, Papertrey Ink
Merry Little Christmas 6” x 6” Paper Collection, Paper Rose
White Glimmer Paper, Stampin’ Up!
Snowflake Border Punch, Martha Stewart
Sentiment, Sassy LLC
2” Layering Stitched Circle Die, Memory Box
1 ¾” Circle Punch, Stampin” Up!
Gold Foil, My Stash
Laminator
Laser Printer
Gold Glitter Enamel Dots, Stampin’ Up!
Clear Star Gelly Roll Pen, Sakura
Gold Gelly Roll Pen, Sakura
White Gelly Roll Pen, Sakura
Star Dust Stickles, Ranger
Glossy Accents, Ranger
Red Rhinestone Basic Jewels, Stampin’ Up!

Real Red and Mossy Meadow Card Stock, Stampin’ Up!

Finished card size: 6” x 3 ½”

————————–

Little girl with a snowman
Molly’s Winter Friends
Christmas card with the same girl and bird
Molly Cutie
Another Christmas card with the same girl
Molly Cutie

To view my other Conie Fong Art & Design projects, please click here.

Hope you like my Design Team Inspiration Card using Molly Cutie from Molly Winter Bundle for Conie Fong Art & Design!

Thank you for stopping by!

Hugs,
Laurie
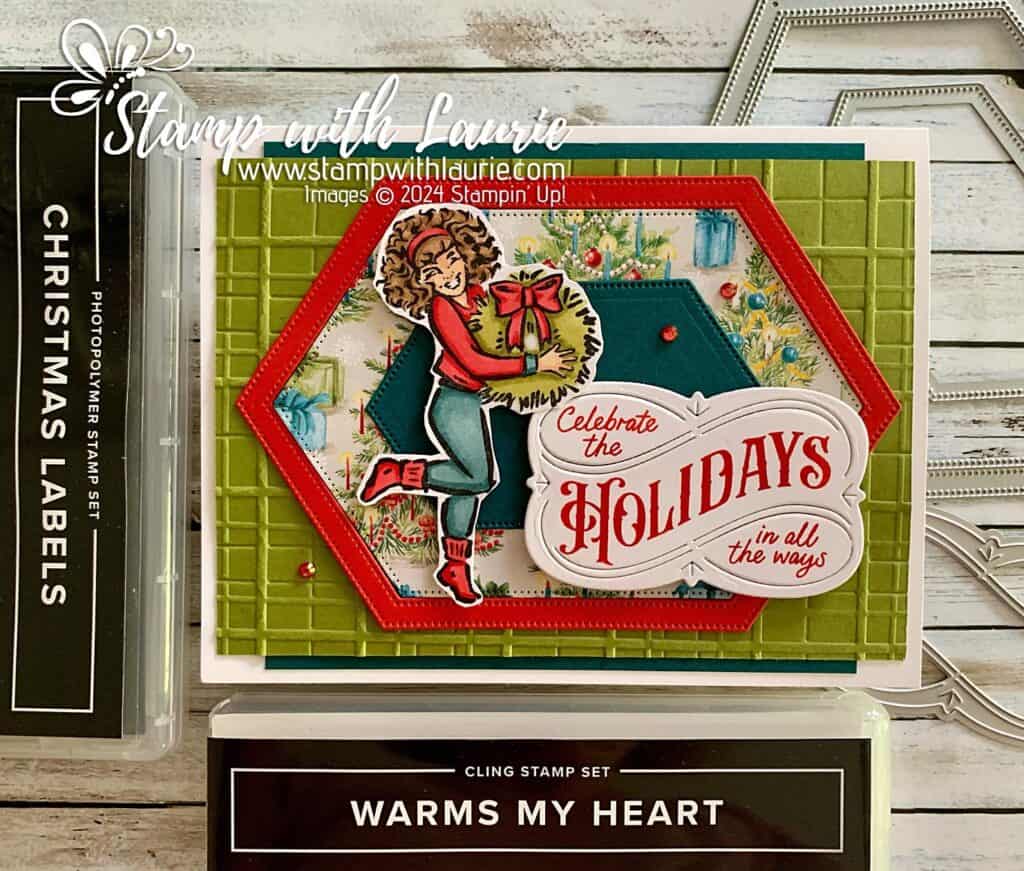
Celebrate Christmas Card

Celebrate Christmas Card - a Christmas card with a girl holding a wreath
Celebrate Christmas Card

Hello Crafty Friends! Laurie here again! I am sharing my Celebrate Christmas Card using the Warms My Heart Stamp Set and the Sentimental Christmas Designer Series Paper by Stampin’ Up!

The Details of My Celebrate Christmas Card

My card was for a swap with other demonstrators, and I thought it would be fun to pull out my Blends to colour the wreath girl from the Warms My Heart Stamp Set. I was inspired by the card with the pumpkin girl that was in the Mini Catalogue, but I made it my own by changing it up and using only the dies.

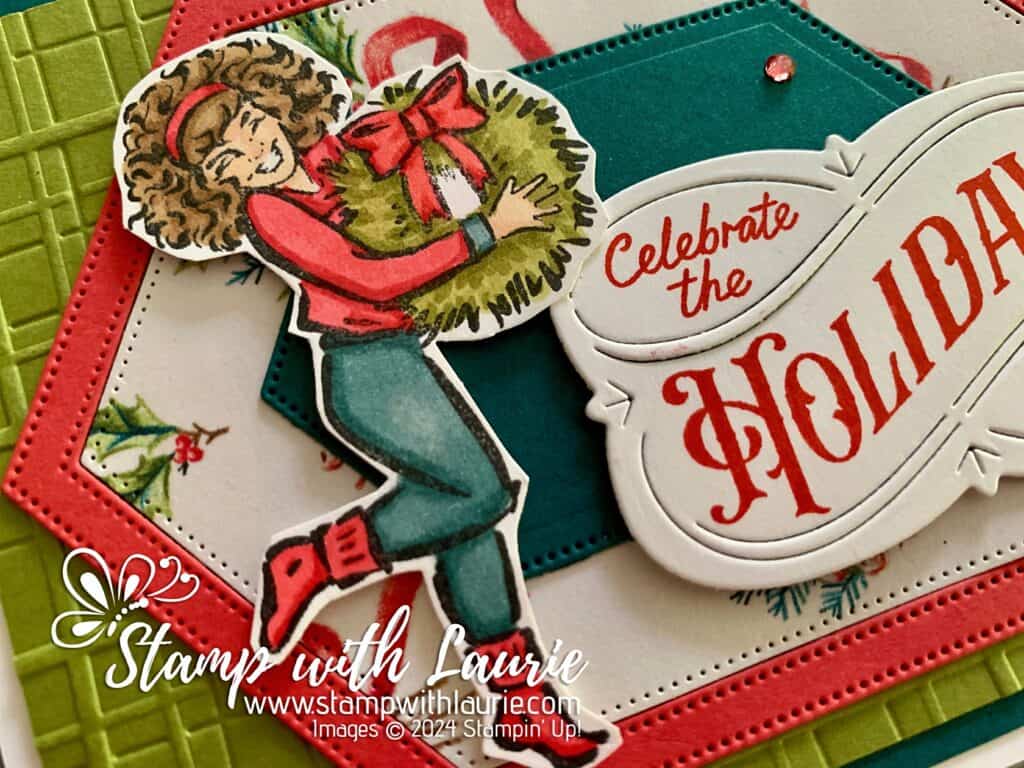
For my card, I coloured the girl with colours that I pulled from the Sentimental Christmas Designer Series Paper that I used for one of the panels. I made two versions of the card depending on what DSP I had available.

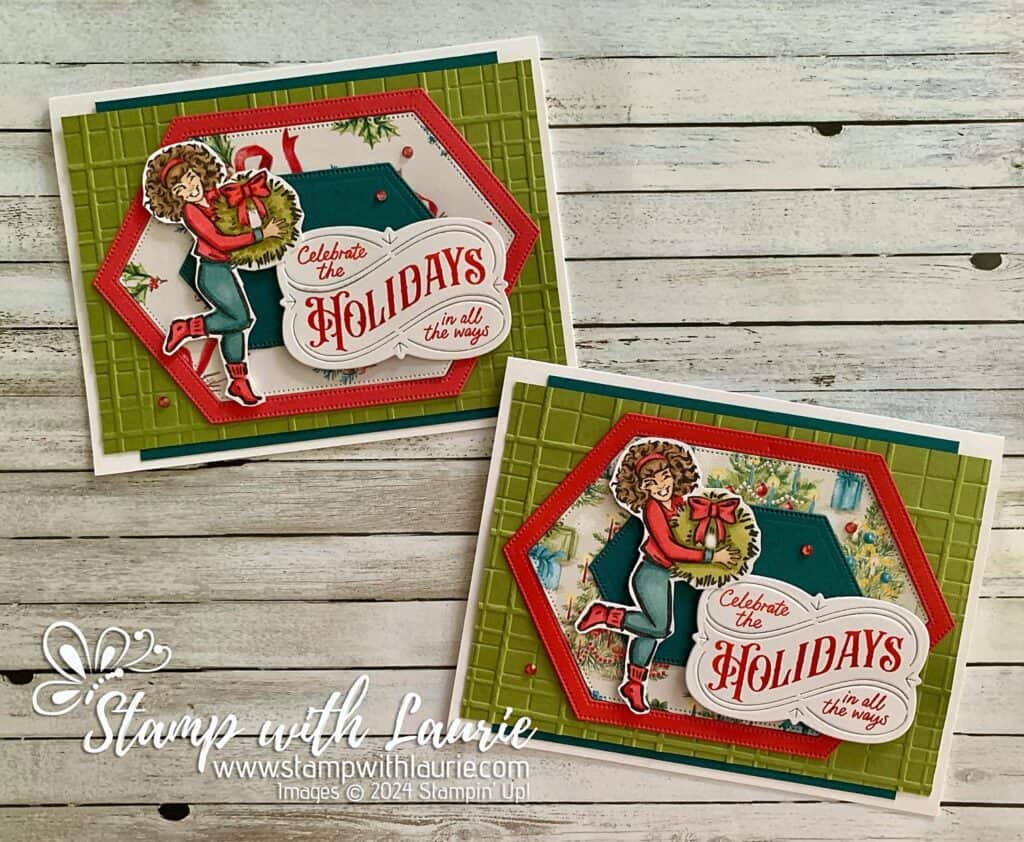
Two Christmas cards with different papers behind the girl holding the wreath
My Different Version of the Card

For the sentiment, I pulled out the Christmas Labels Bundle and stamped it in Poppy Parade to match the card stock. 

To add some interest to the background, I embossed the Old Olive card stock with the Forever Plaid 3D Embossing Folder.

As a finishing touch to my card, I used my Dark Poppy Parade Stampin’ Blend to colour some Rhinestone Basic Jewels and added them to my card.

Supplies:

Stamps/Bundles/Dies: Warms My Heart Stamp Set (164267), Wildflower Designs Dies (163333), Christmas Labels Bundle (164101)

Inks: Poppy Parade Classic Stampin’ Pad (147050), Tuxedo Black Memento Ink Pad (132708) 

Paper: Thick Basic White (159229), Pretty Peacock (150880), Old Olive (100702), Poppy Parade (119793), Sentimental Christmas 12” x 12” Designer Series Paper (164209)

Accessories: Forever Plaid 3D Embossing Folder (164049), Rhinestone Basic Jewels (144220), Pretty Peacock Stampin’ Blends Combo Pack (161676), Poppy Parade Stampin’ Blends Combo Pack (154958), Old Olive Stampin’ Blends Combo Pack (154892), Pecan Pie Stampin’ Blends Combo Pack (161674), Medium Light Stampin’ Blends Combo Pack (159463), Stampin’ Paper Trimmer (152392), Bone Folder (102300), Stampin’ Dimensionals (104430), Mini Stampin’ Dimensionals (144108), Stampin’ Seal (152813), Multipurpose Liquid Glue (110755)

Close Up of Girl holding wreath
Close Up of Girl

Measurements: 

  • Thick Basic White:
    • 8 ½” x 5 ½” scored at 4 ¼”
  • Old Olive:
    • 5 ¼” x 3 ¾”
  • Pretty Peacock:
    • 4” x 4 ½”
    • 2” x 3”
  • Poppy Parade:
    • 5” x 3 ½”
  • Basic White:
    • Scrap for Sentiment
  • Sentimental Christmas Designer Series Paper:
    • 4 ½” x 3”

More Information on My Celebrate Christmas Card

For more of my Stampin’ Up! cards, please click here.

For more of my Stampin’ Blends cards, please click here.

You will find the items listed above in my online store.

Warm Winter Wishes Card

Warm Winter Wishes Card - A Christmas card with a girl holding a tree and squirrel
Warm Winter Wishes Card

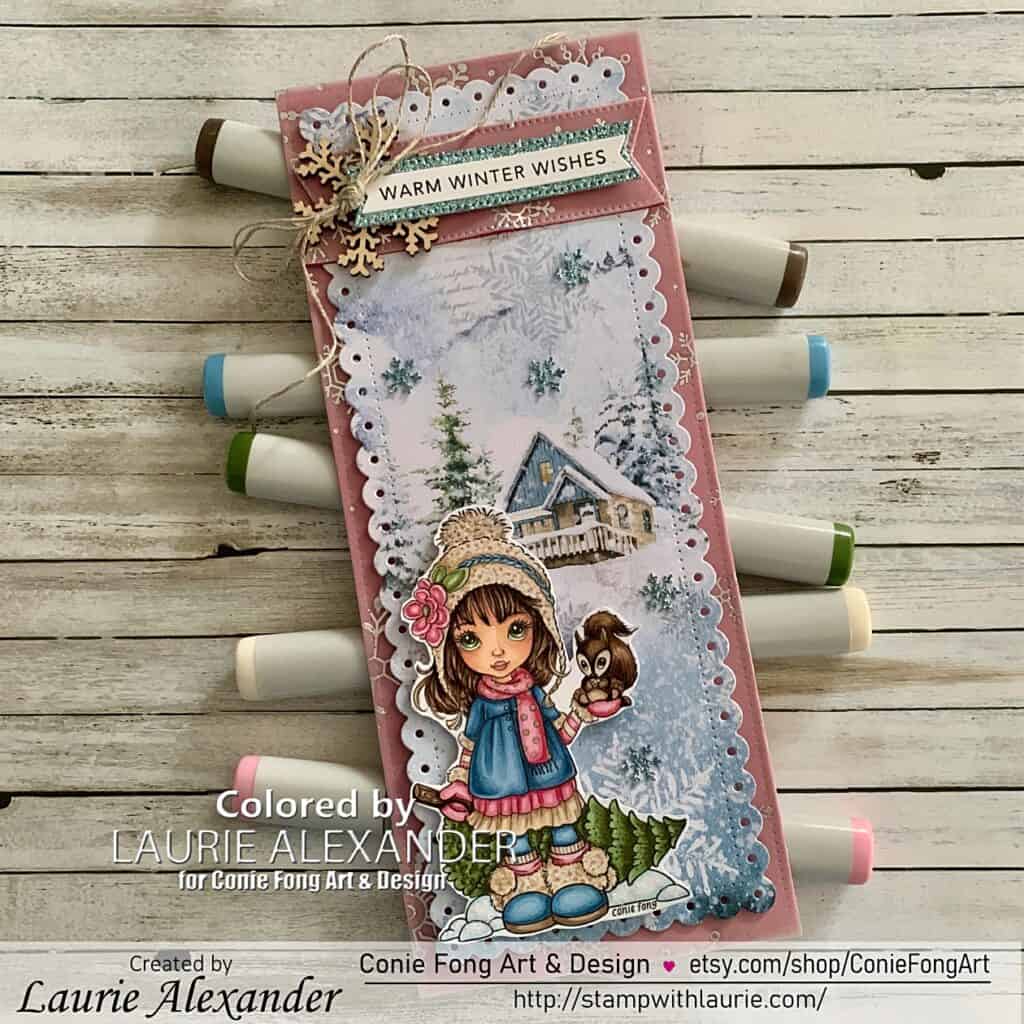
Hello Crafty Friends! It’s Laurie here! I am sharing my Warm Winter Wishes Card as my Design Team Inspiration Card for Conie Fong Art & Design using Sally and Little Squirrel.

The Details of My Warm Winter Wishes Card

This stamp was one of the first stamps by Conie Fong Art & Design that I bought! I just loved Sally with her little friend, and I knew that I wanted to colour her with some of my favourite Copic marker combos!

I had this gorgeous Ciao Bella Paper that I thought would be a perfect background for her! So, I decided to make a slimline card that would show as much of the wintery scene as possible including the house.

To tie in the pinks, I went with some Rose Red card stock on which I layered vellum with silver foiled snowflakes to tie in the wintery feeling of my card.

For my sentiment cluster, I layered several flags with the different papers that I used on my card. A wooden snowflake and some linen thread add to the rustic feel of my wintery scene.

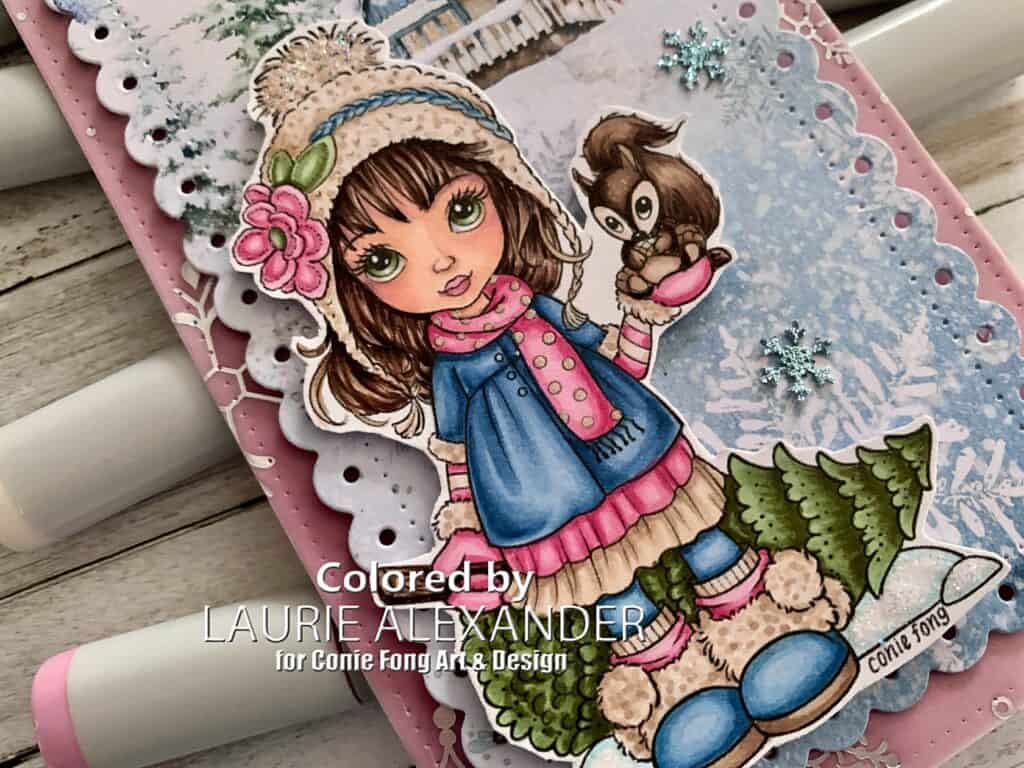
Finally, for sparkle, I added some Balmy Blue punched snowflakes to my scene, as well as Star Dust Stickles to Sally’s hat’s pompom and the snow that she is standing on. Clear Wink of Stella was used on the flower on her hat and Clear Star to the polka dots on her scarf.

————————–

Copic Markers:

Skin: E000/E00/E21/E11/E04/R20
Hair/Tree Trunk: E49/E47/E44/E43
Blues: B97/B95/B93/B91
Greens: G99/G94/G21
Pinks: R85/R83/R81
Light Browns: E49/E42/E41/E40
Squirrel: E49/E47/E44/E43/E42/E41
Snow: B000/B0000/0/Star Dust Stickles

Close Up of girl holding tree and squirrel
Close Up of Sally and Little Squirrel

————————–

Card Recipe for My Warm Winter Wishes Card:

Sally and Little Squirrel, Conie Fong Art & Design
Paper Basics – Stamper’s Select White Cardstock, Papertrey Ink
Winter Journey 8” x 8” Paper Pad, Ciao Bella Paper
Balmy Blue Glimmer Paper Stampin’ Up!
Snowflake Border Punch, Martha Stewart
Holiday Fancy Foil Designer Vellum, Stampin’ Up!
Dotted Slimline Dies, Studio Katia
Simple Strips – Christmas, Taylored Expressions
Simple Strips Dies, Taylored Expressions
VersaFine Onyx Black Ink Pad, Tsukineko
Stylish Shaped Dies, Stampin’ Up!
Linen Thread, Stampin’ Up!
Wooden Snowflake, Stampin’ Up!
Clear Star Gelly Roll Pen, Sakura
Star Dust Stickles, Ranger
Clear Wink of Stella, Stampin’ Up!

Rose Red Card Stock, Stampin’ Up!

Finished card size: 8 ½” x 3 ½”

————————–

To view my other Conie Fong Art & Design projects, please click here.

Hope you like my Design Team Inspiration Card using Sally and Little Squirrel for Conie Fong Art & Design!

Thank you for stopping by!

Hugs,
Laurie
Autumn Wishes Alternative Cards

Autumn Wishes Alternative Cards - two cards with Autumn themes
Autumn Wishes Alternative Cards

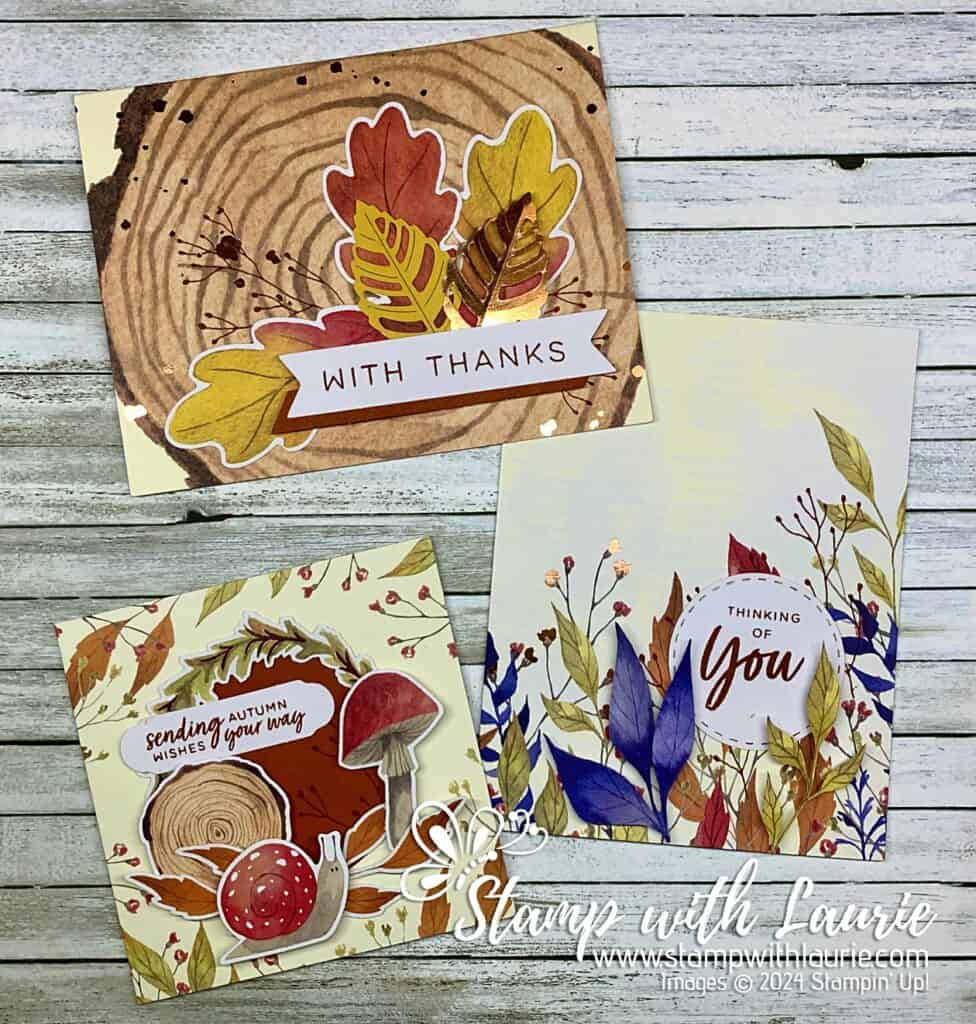
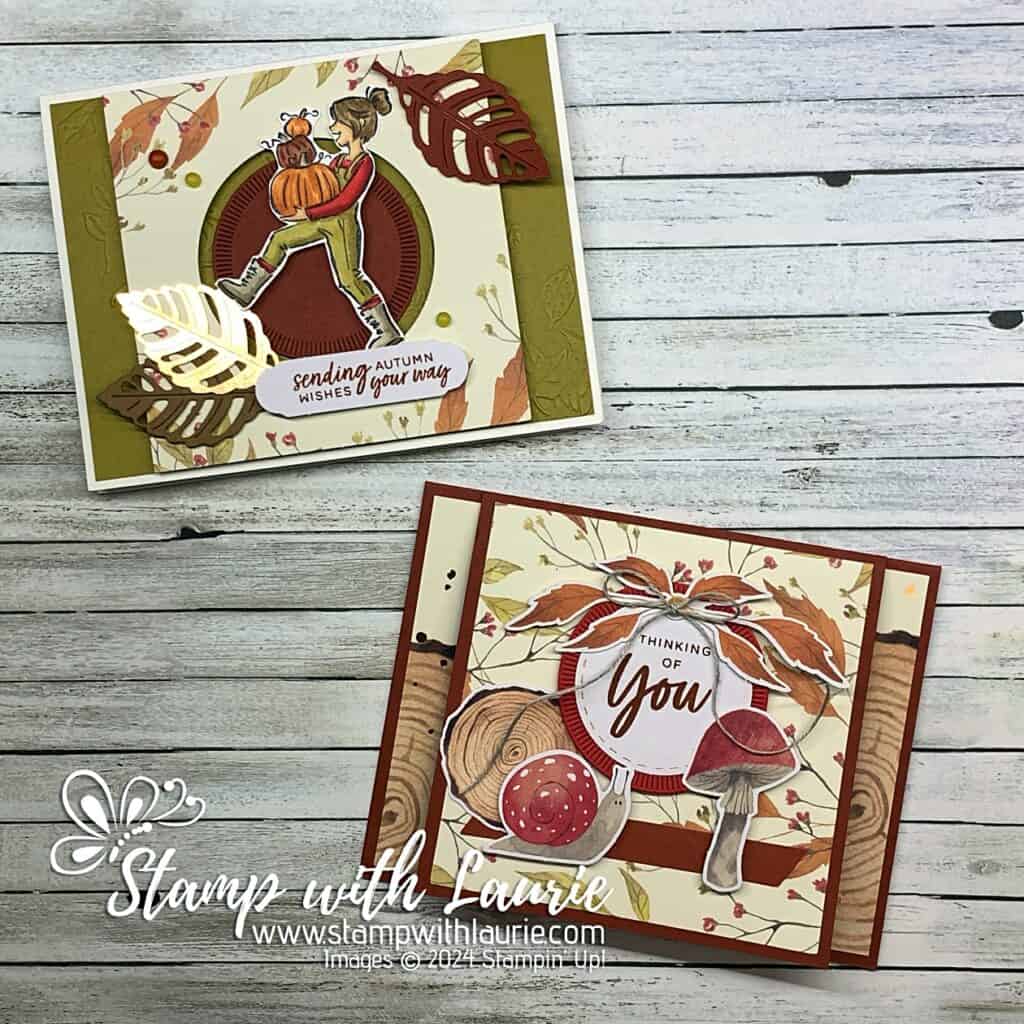
Hello Crafty Friends! Laurie here again! I am sharing my Autumn Wishes Alternative Cards using the Autumn Abundance September 2024 Paper Pumpkin Kit by Stampin’ Up! Since this weekend is our Canadian Thanksgiving, I decided to create two alternative cards for the holiday!

But, first, here are the three cards that the kit makes. Perfect for this time of year!

Three cards with Autumn themes
Autumn Abundance September 2024 Paper Pumpkin Kit

The Details of My Autumn Wishes Alternative Cards

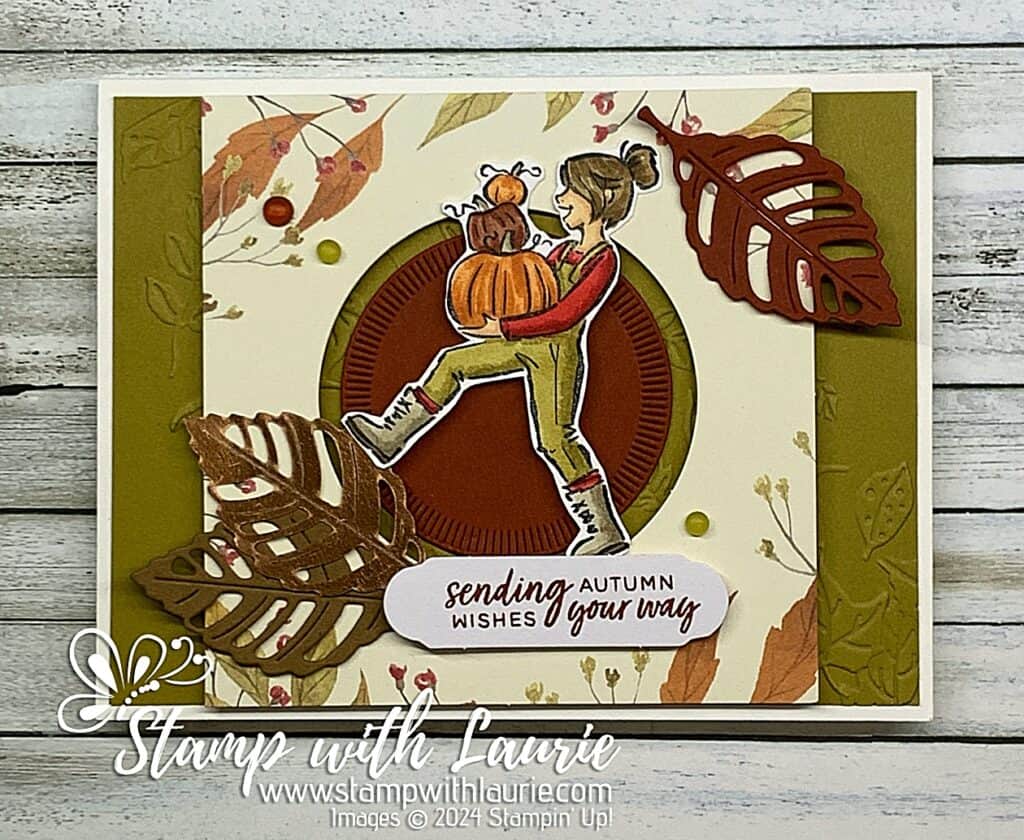
My Hey Pumpkin Card

For my first alternative card, I decided to do some colouring with my Stampin’ Blends using the girl with the pumpkins from the Warms My Heart Stamp Set. I thought she would suit my autumnal theme very well!

An Autumn card with a girl carrying pumpkins
My Hey Pumpkin Card

I used the front half of the smaller leaves card to create a focal point for my girl. To separate her from the Leaf Fall 3D Embossing Folder that I used for the Wild Wheat background, I added a Cajun Craze die cut circle using the Spotlight on Nature Dies.

Next, I added the bronze foil leaf in the kit and two more leaves for which I used the add-on Every Celebration Dies. For embellishments, I added three Faux Glass Dots that matched my colour scheme.

Measurements:

  • Basic White Card Base:
    • 8 ½” x 4 ¼”
    • 3” x 2 ¼” (to stamp girl)
  • Wild Wheat:
    • 5 ¼” x 4”
    • Scrap for leaf
  • Cajun Craze:
    • 2-1/8” x 2-1/8”
    • Scrap for leaf
  • Kit Leaves Card Front:
    • 4” x 4”
  • Other Pieces from Kit:
    • Bronze Leaf
    • Sentiment

My Triple Panel Card

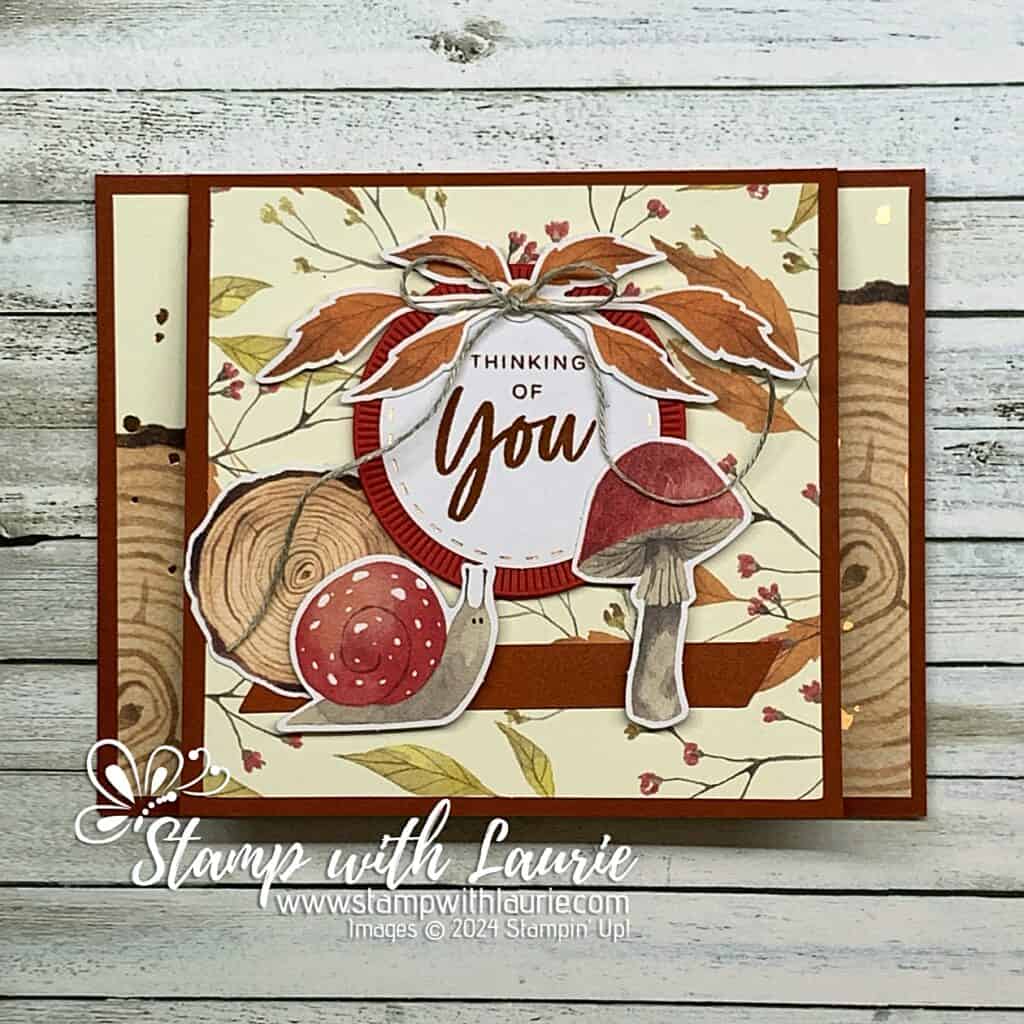
For my second alternative card using the Autumn Abundance September 2024 Paper Pumpkin Kit, I made a triple panel card. 

Since I had leftover the back of the smaller card, I used it for the front of this card. For the front panel, I die cut a Poppy Parade circle using the Spotlight on Nature Dies to layer behind my sentiment. I added some Linen Thread tied into a bow for my embellishment.

I made the Cajun Craze mat a little longer and scored it to create a tab that I tucked in behind the log DSP.

Another Autumn card with nature elements
My Triple Panel Card

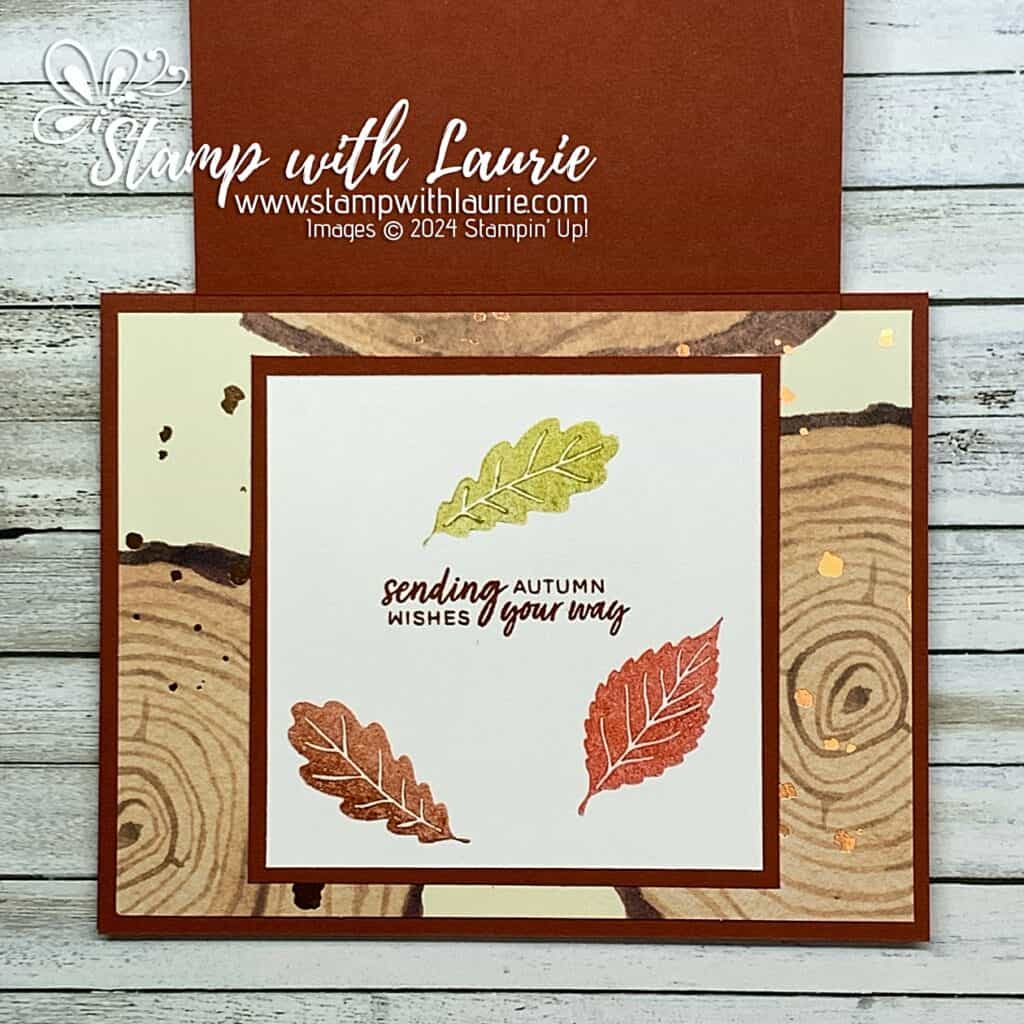
For the middle panel, I used the front of the log card base and then added a sentiment with stamped off leaves in Cajun Craze, Wild Wheat and Poppy Parade. 

Inside of Card
Panel 2 of My Triple Panel Card

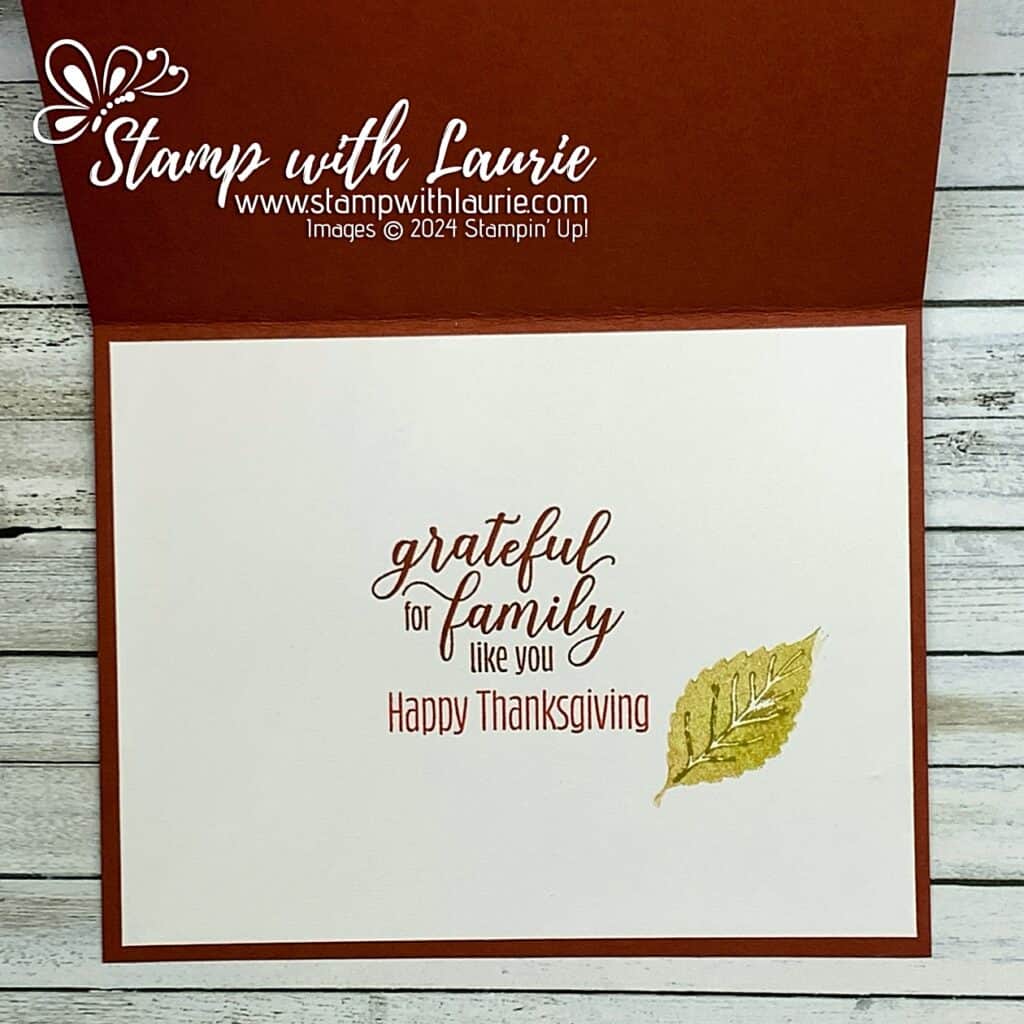
Since I planned to send this card to my family for Thanksgiving, I wanted the final panel to say, “Happy Thanksgiving” and the sentiments from The Gift of Fall August 2019 Paper Pumpkin Kit were perfect for my card! They were stamped in Cajun Craze and Poppy Parade. One final leaf was stamped in Wild Wheat beside the sentiment.

Inside the final panel
Final Panel of My Triple Panel Card

Measurements:

  • Cajun Craze:
    • 8 ½” x 4 ¼”
    • 4 ¼” x 6” with score mark at 4 ¼” (tuck tab behind log DSP)
    • 3 ½” x 3 ½”
  • Basic White:
    • 3 ¼” x 3 ¼”
    • 4” x 5 ¼”
  • Kit Leaves Card Front:
    • 4” x 4”
  • Kit Log Card Front:
    • 4” x 5 ¼”
  • Other Pieces from Kit:
    • Snail
    • Log
    • Mushroom
    • Leaves
    • Cajun Craze Strip
    • Sentiment

More Information on My Autumn Wishes Alternative Cards

For more of my Stampin’ Up! paper Pumpkin cards, please click here.

You will find the items listed above in my online store

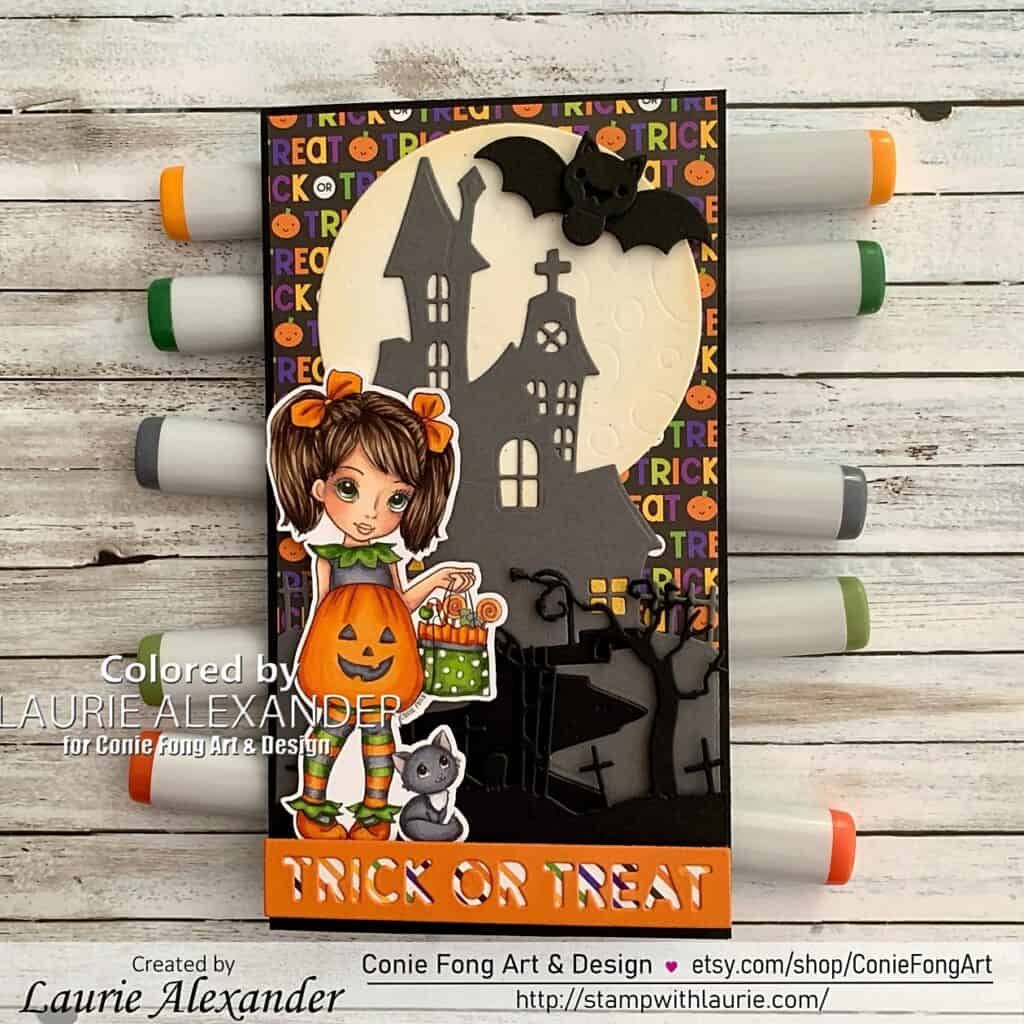
My Trick or Treat Card

My Trick or Treat Card - A Halloween Card with a little girl trick or treating
My Trick or Treat Card

Hello Crafty Friends! It’s Laurie here! I am sharing My Trick or Treat Card as my Design Team Inspiration Card for Conie Fong Art & Design using Penelope Pumpkin from the Wynona Witch, Candy Sally, Penelope Pumpkin Bundle.

This purchase includes 5 Images:

  • Wynona Witch V1 – With Pumpkin Basket
  • Candy Sally Left
  • Candy Sally Right
  • Penelope Pumpkin V1-With Polka Dot Bag
  • Candy Sally with Trixie Right

The Details of My Trick or Treat Card

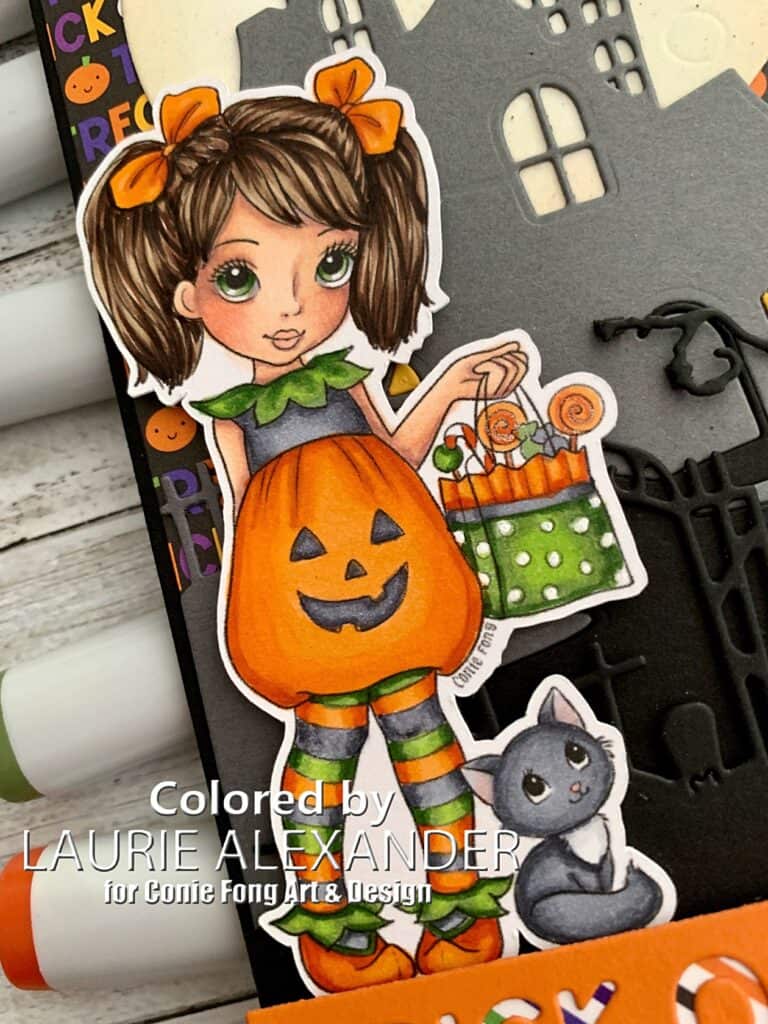
I just love Penelope in her little pumpkin costume going trick or treating with her sweet friend! I decided to colour her in traditional Halloween colours with my Copic markers to match the Doodlebug papers. 

For my scene, I went with a spooky house and graveyard in front of it. Of course, she must go through the graveyard to visit the house and, you must have an eerie full moon on Halloween night! Lol! To make my moon even more eerie, I brushed Crushed Curry Ink along the edges. One thing that is cool, is that my moon glows in the dark! Finally, I added a cute 3D bat to my scene.

Next, I added the Trick or Treat paper behind my scene instead of a traditional night sky as an homage to her activity. In addition, I added the striped paper in matching colours behind the words Trick or Treat at the bottom of my card.

Finally, to add some sparkle, I used Clear Star Gelly Roll Pen on her lollipops and Clear Wink of Stella to her bag. For the polka dots on her bag, I used a White Gelly Roll Pen.

————————–

Copic Markers:

Skin: E000/E00/E21/E11/E04/R20
Hair: E49/E47/E44/E43
Oranges: E15/YR18/YR15/YR14/YR12
Greens: YG67/YG63/YG03
Blacks: C6/C4/C3
Cat: C6/C4/C3/C0/0/R20

Close Up of little girl
Close Up of Penelope Pumpkin

————————–

Card Recipe for My Trick or Treat Card:

Wynona Witch, Candy Sally, Penelope Pumpkin Bundle, Conie Fong Art & Design
Paper Basics – Stamper’s Select White Cardstock, Papertrey Ink
Ghouls & Goodies 6” x 6” Paper Pad, Doodlebug Design Inc.
Glow-in-the-Dark Specialty Paper, Stampin’ Up!
Haunted House Coverplate, Photo Play
Full Moon Dies, Lawn Fawn
Boneyard Edgers, Frantic Stamper Inc.
Reverse Cut Halloween Words, Frantic Stamper Inc.
Crushed Curry Ink, Stampin’ Up!
Blending Brushes, Stampin’ Up!
Clear Star Gelly Roll Pen, Sakura
White Gelly Roll Pen, Sakura
Clear Wink of Stella, Stampin’ Up!
Basic Black and Basic Gray Card Stock, Stampin’ Up!

Finished card size: 6 ½” x 3-5/8”

————————–

To view my other Conie Fong Art & Design projects, please click here.

Hope you like my Design Team Inspiration Card using Wynona Witch, Candy Sally, Penelope Pumpkin Bundle for Conie Fong Art & Design!

Thank you for stopping by!

Hugs,
Laurie
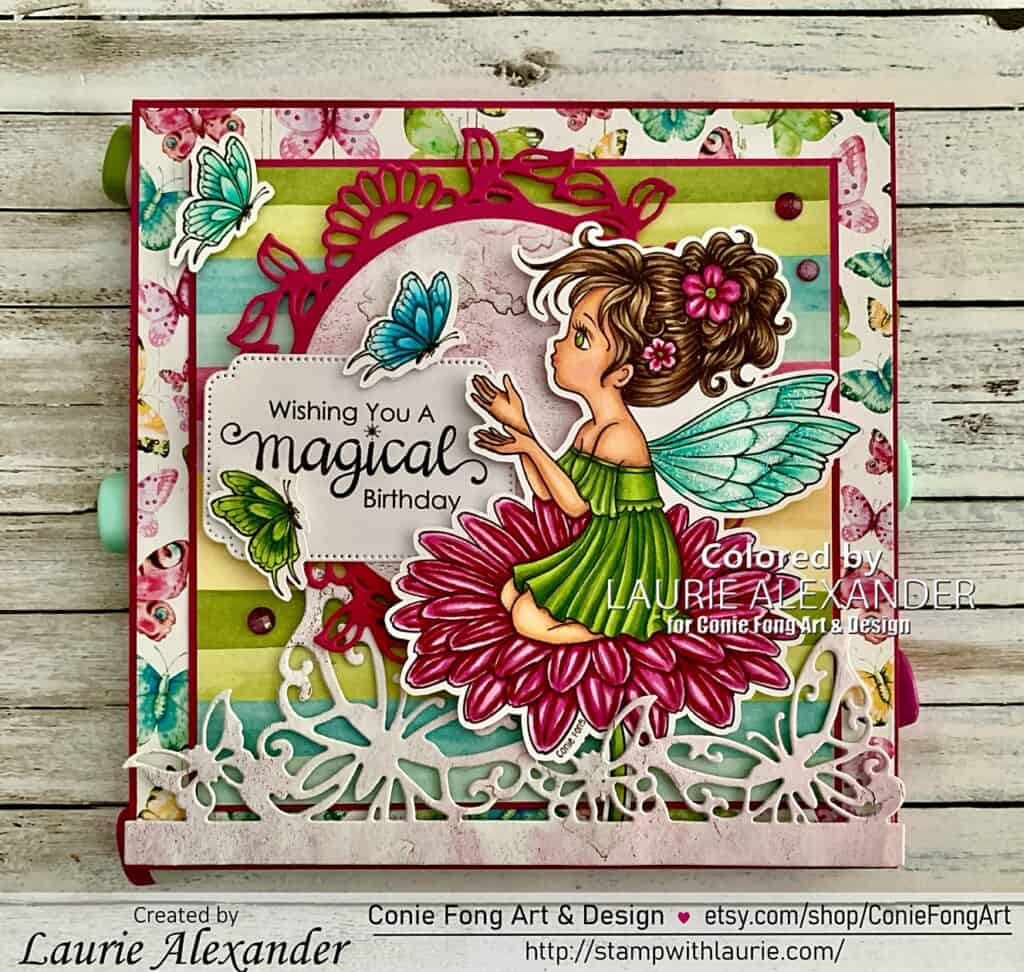
My Flutterby Birthday Card 

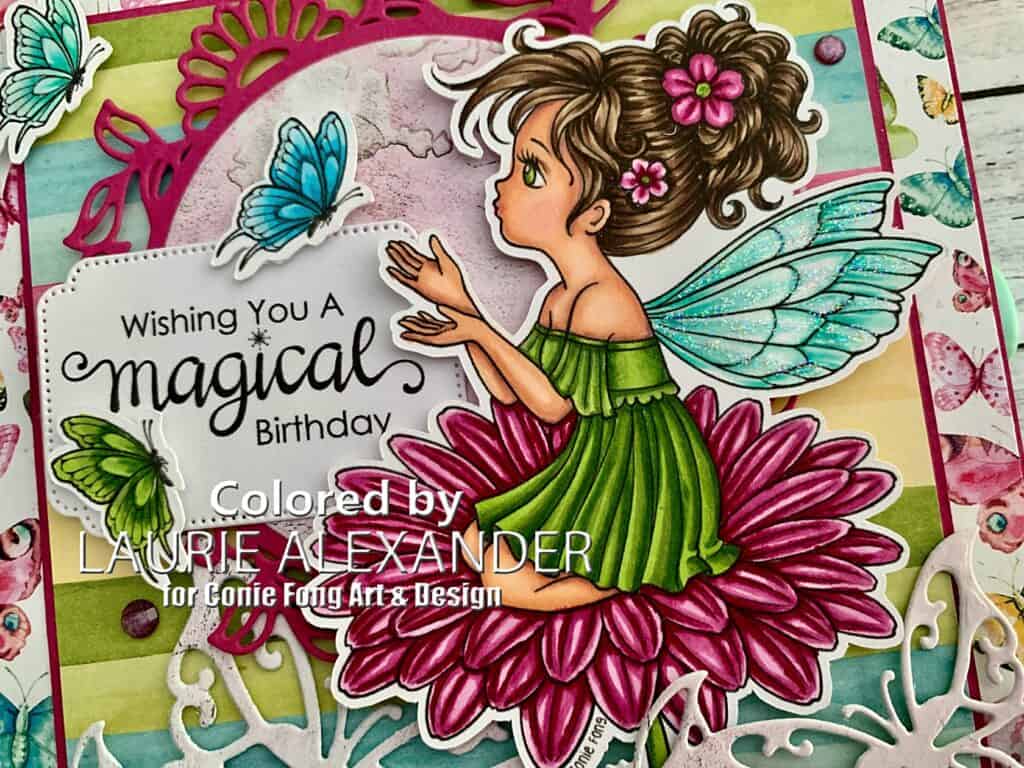
My Flutterby Birthday Card - a birthday card with a fairy sitting on a flower looking at butterflies
My Flutterby Birthday Card

Hello Crafty Friends! It’s Laurie here! I am sharing My Flutterby Birthday Card as my Design Team Inspiration Card for Conie Fong Art & Design using the sweet Flutterby Daisy.

This purchase includes 5 Images:

  • Image 1 & 2: Flutterby Daisy (Girl facing right/left) JPEG format
  • Image 3: Flutterby Daisy – without daisy flower
  • Sentiment 1: Fluttering by with a friendly hi
  • Sentiment 2: Enjoy the simple things

The Details of My Flutterby Birthday Card

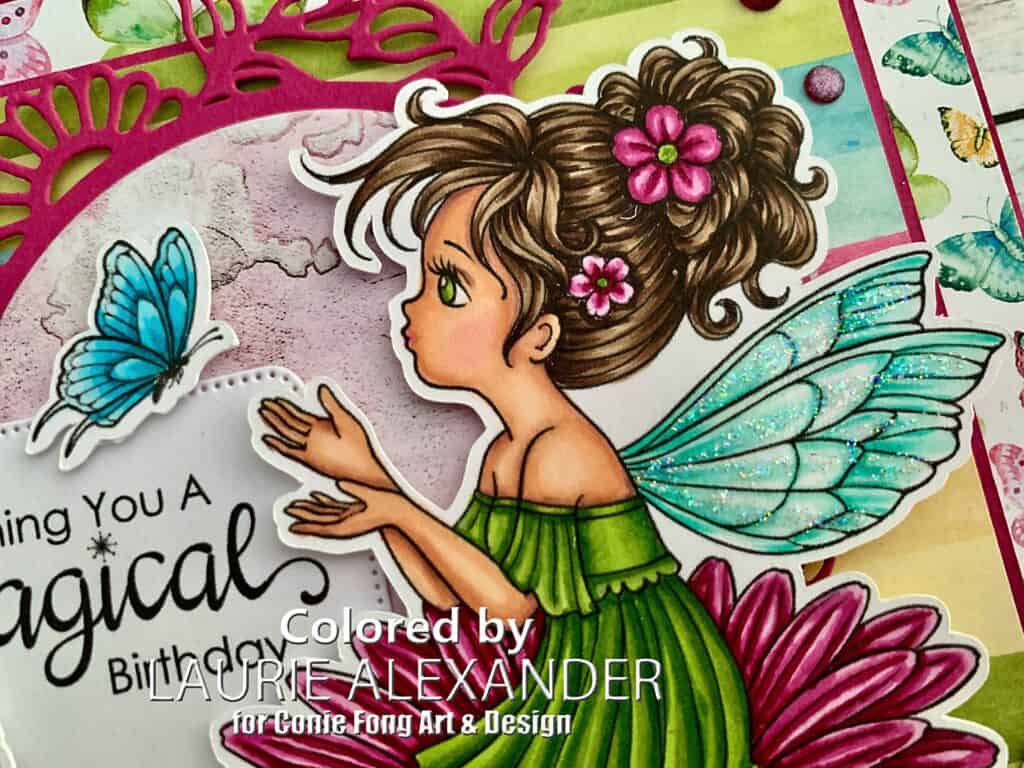
For my card, I decided that I wanted to use Flutterby Daisy facing left with her daisy. I loved colouring her and her daisy with my Copic markers in bright cheery colours to match my Mintay papers. Flutterby comes with one butterfly, but I thought a couple of extra butterflies would add a touch of fun to my card!

Close Up of Fairy
Close Up of Flutterby

I found this beautiful Daisy Circle Frame a while back and thought it would be perfect for the backdrop of Flutterby! So, I die cut it in a colour that matched my colouring of her daisy and the papers.

Since I wanted to create a birthday card, I used the sentiment from the Dandelion Wishes stamp. Perfect for a fairy birthday card! Though I did use “Fluttering by with a friendly hi” for the inside of my card.

Next, I added a butterfly die cut border of the Mintay papers along the bottom of the card with it overlapping the daisy in places hiding the stem end of the coloured daisy.

Finally, the finishing touch was a scattering of Berry Burst Shimmer Gems around my card.

————————–

Copic Markers:

Skin: E000/E00/E21/E11/E04/R20
Hair: E49/E47/E44/E43
Dress: YG67/YG63/YG03
Wings: BG13/BG11/BG10/Star Dust Stickles
Flowers: RV69/RV66/RV63
Dark Blue Butterfly: BG09/BG05/BG01/BG000/Clear Wink of Stella
Light Blue Butterfly: BG13/BG11/BG10/Clear Wink of Stella
Green Butterfly: YG67/YG63/YG03/Clear Wink of Stella

Flutterby
Flutterby

————————–

Card Recipe for My Flutterby Birthday Card:

Flutterby Daisy, Conie Fong Art & Design
Dandelion Wishes, Conie Fong Art & Design
Paper Basics – Stamper’s Select White Cardstock, Papertrey Ink
Better Times 6” x 6” Paper Pad, Mintay Papers– Daisy Circle 
Daisy Circle Frame Die, Creative Expressions
Unbounded Love Dies, Stampin’ Up!
Butterfly Border Die, Joy Crafts
Purple Fine Shimmer Gems, Stampin’ Up!
Star Dust Stickles, Ranger
Clear Wink of Stella, Stampin’ Up!

Berry Burst Card Stock, Stampin’ Up!

Finished card size: 5 ½” x 5 ½”

————————–

To view my other Conie Fong Art & Design projects, please click here.

Hope you like my Design Team Inspiration Card using Flutterby Daisy for Conie Fong Art & Design!

Thank you for stopping by!

Hugs,
Laurie
My Poinsettia Season Card

My Poinsettia Season Card - a Christmas card with a girl holding a poinsettia
My Poinsettia Season Card

Hello Crafty Friends! It’s Laurie here! Christmas in July might be over, but I am still adding to my Christmas card supply. Lol! So, I am sharing My Poinsettia Season Card as my Design Team Inspiration Card for Conie Fong Art & Design using the sweet Holly Poinsettia

The Details of My Poinsettia Season Card

I loved colouring Holly with her poinsettias using my Copic markers! She is such a sweetie!! I used colours to match the gorgeous Mintay paper! To add some sparkle, I used Star Dust Stickles on her ear muffs and pom poms on her mittens. 

Of course, I had to use a tag from the matching Paper Elements for my backdrop of Holly. To tie in the greens of my colouring, I gave the tag a mat with one of the papers in the pad.

The Paper Elements also came with some envelopes that you make. I thought the floral envelope with the blue background perfectly matched my colour scheme. So, I trimmed a piece off the envelope and cut it in half. These pieces I matted with white and placed them in opposite corners of my tag so that they are peeking out from my focal point.

Since Holly had poinsettias, I decided to use my Poinsettia and Holly Punch by Nellie to make some paper flowers. The flowers were accented with Gold Glitter Enamel Dots. The gold centres mirrored the gold Gelly Roll Pen that I used on Holly’s poinsettias.

The sentiment was stamped in black and die cut out with matching the die.

Finally, the finishing touch was a scattering of red rhinestones around my card.

————————–

Copic Markers:

Skin: E000/E00/E21/E11/E04/R20
Hair: E49/E47/E44/E43/E42
Reds: R39/R37/R35/R32
Blues: BG15/BG13/BG11/BG10
Greens: YG99/YG97/YG95/YG93
Browns: E49/E47/E44/E43/E42
Poinsettias: R39/R37/R35/R32/Gold Gelly Roll Pen

Close Up of girl holding the poinsettia
Close Up of Holly Poinsettia

————————–

Card Recipe for My Poinsettia Season Card:

Holly Poinsettia, Conie Fong Art & Design
Paper Basics – Stamper’s Select White Cardstock, Papertrey Ink
White Christmas 6” x 8” Paper Pad, Mintay Papers
White Christmas Paper Elements, Mintay Papers
Simple Stripes – Christmas Stamp, Taylored Expressions
Simple Stripes Die, Taylored Expressions
Versafine Onyx Ink, Tsukineko’s
Floral Punch Poinsettia, Nellie’s Choice
Floral Punch Holly Leaf, Nellie’s Choice
Gold Glitter Enamel Dots, Stampin’ Up!
Red Rhinestones Basic Jewels, Stampin’ Up!
Star Dust Stickles, Ranger
Gold Gelly Roll Pen, Sakura

Real Red, Mossy Meadow, Thick Basic White Card Stock, Stampin’ Up!

Finished card size: 4 ¼” x 5 ½”

————————–

To view my other Conie Fong Art & Design projects, please click here.

Hope you like my Design Team Inspiration Card using Holly Poinsettia for Conie Fong Art & Design!

Thank you for stopping by!

Hugs,
Laurie
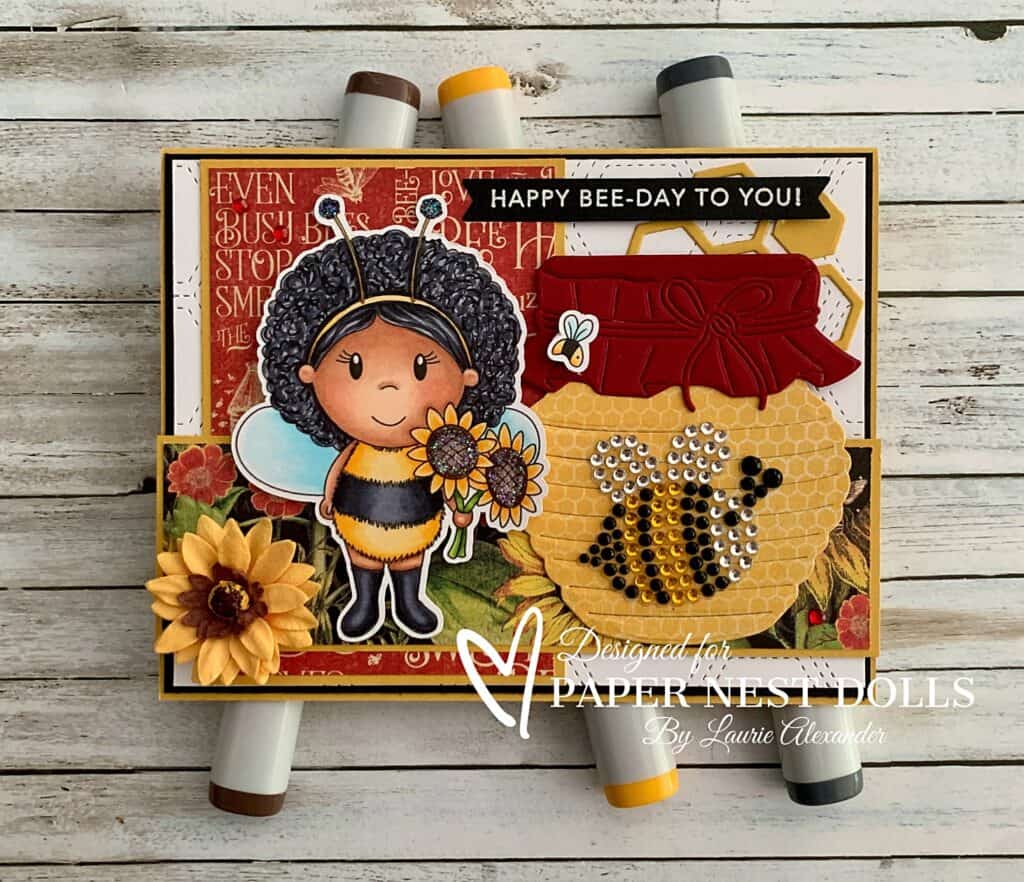
My Happy Bee-Day Card 

My Happy Bee-Day Card - a little girl in a bee outfit with a large honey pot beside her.
My Happy Bee-Day Card

Hello Crafty Friends! It’s Laurie here! I am sharing My Happy Bee-Day Card as my Design Team Inspiration Card for Paper Nest Dolls using Lil Bee Amara! Isn’t she a cutie in her bee outfit with her little bee friend!

The Details of My Happy Bee-Day Card

For my card, I decided to use the Let It Bee Paper by Graphic 45. It was perfect for my bee theme with sunflowers and bees on it! Plus, all the words about bees made it a must!

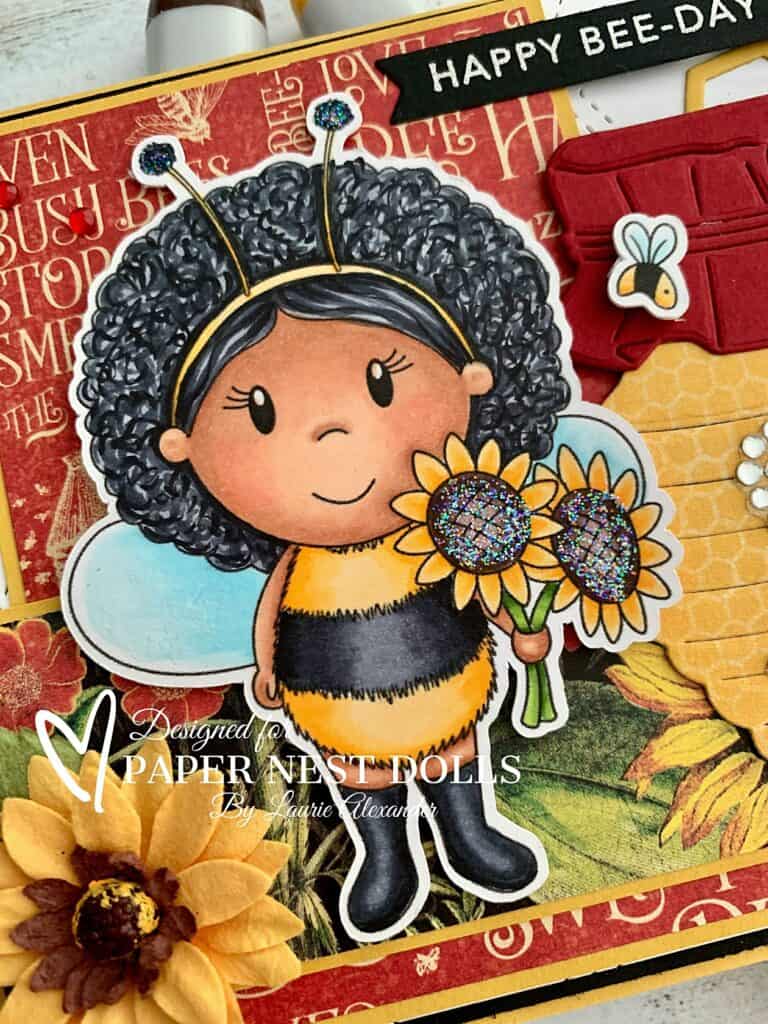
Next, I coloured Amara and her sunflowers with my Copic markers. I had a lot of fun colouring her beautiful skin tone and her hair with all those curls!

I knew that I wanted to use the honey pot die with her. So, I die cut the honeycomb paper for the jar and decided to keep the top as Cherry Cobbler card stock so that her bee friend would show up well. The bee crystal sticker was from my stash and had been waiting for the perfect card. It fit perfectly on the honey pot letting everyone know it had honey in it.

For my card base, I used the Honeycomb Quilt Top Dies by Concord & 9th to add interest. I also tucked in some Honeycomb Clusters behind the honey pot.

The sentiment was heat embossed in white on Basic Black card stock and die cut out.

Finally, I added a scattering of red rhinestones and a paper sunflower to mirror my colour scheme and theme. I used Star Dust Stickles on the sunflower centres and her Bee Antenna-Headband and Clear Wink of Stella on her wings.

————————–

Copic Markers

Skin: E15/E13/E11/E00/E000/R20
Hair: C9/C7/C6/C4
Bee Outfit: Y38/Y35/Y32/C9/C7/C6/C4
Sunflowers: Y38/Y35/Y32/E79/E77/E74/E71
Sunflower Stems: YG67/YG63/YG03
Wings: B00/B000/B0000
Little Bee: Y38/Y35/Y32

Close Up of girl in Bee Outfit
Close Up of Lil Bee Amara

————————–

Card Recipe for My Happy Bee-Day Card

Lil Bee Amara, Paper Nest Dolls
Paper Basics – Stamper’s Select White Cardstock, Papertrey Ink
Let It Bee Papercrafting Paper, Graphic 45
Honey Pot Fancy Dies, Hero Arts
Honeycomb Cluster Die, Taylored Expressions
Honeycomb Quilt Top Dies, Concord & 9th
Mini Strips – Bee Mine Stamp, Taylored Expressions
Mini Strips Flag Die, Taylored Expressions
Versamark Ink, Stampin’ Up!
White Embossing Powder, Stampin’ Up!
Heat Tools, Stampin’ Up!
Sunflower Paper Flower, The Paper Studio
Bee Crystal Sticker, Michaels Arts & Crafts, Mark Richards Enterprises Inc.
Red Rhinestone Basic Jewels, Stampin’ Up!
Star Dust Stickles, Ranger
Clear Wink of Stella, Stampin’ Up!

Finished card size: 5 ½” x 4 ¼”

Stamp Size: 4”

————————–

To view my other Paper Nest Dolls cards, please click here.

Hope you like my Design Team Inspiration Card using Lil Bee Amara by Paper Nest Dolls!

Thank you for stopping by!

Hugs,
Laurie
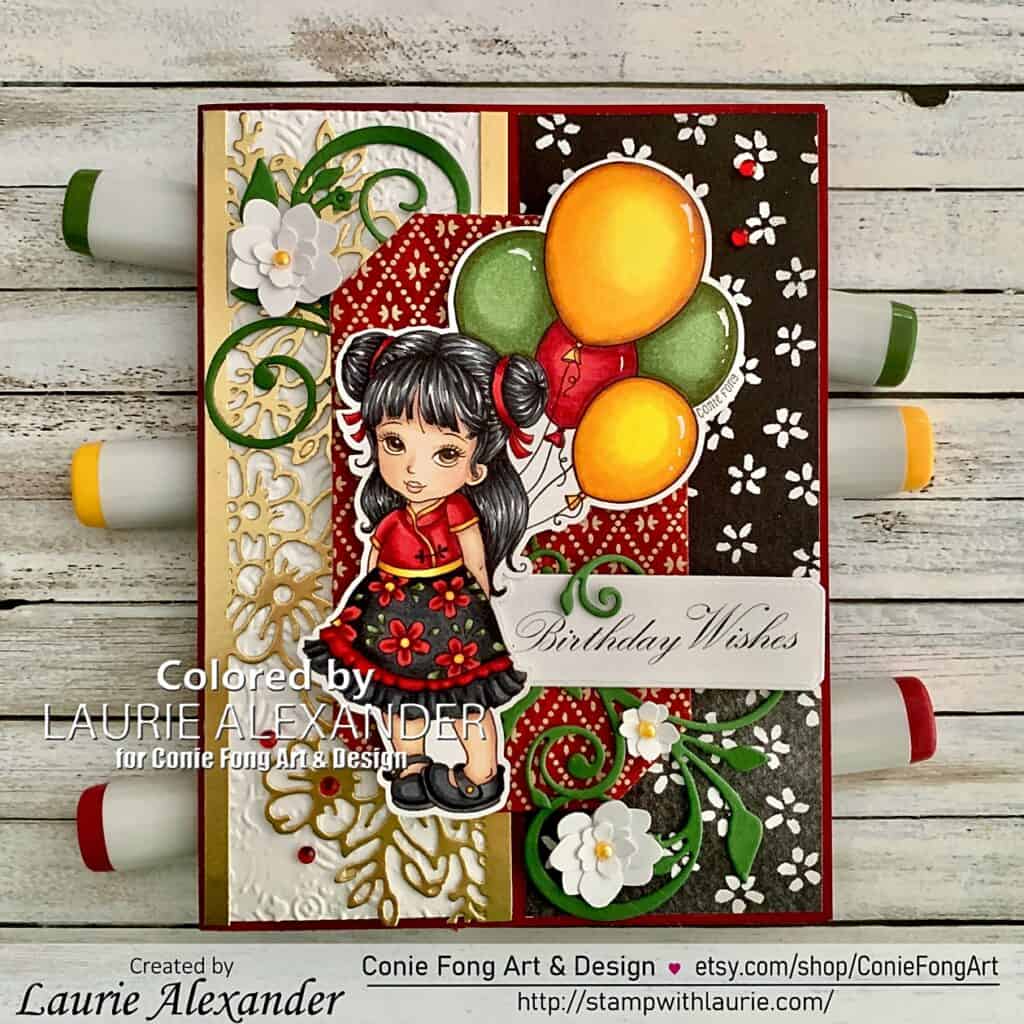
Birthday Blossom Wishes Card

Birthday Blossom Wishes Card - a birthday card with a little girl holding balloons
Birthday Blossom Wishes Card

Hello Crafty Friends! It’s Laurie here! I am sharing my Birthday Blossom Wishes Card as my Design Team Inspiration Card for Conie Fong Art & Design using the beautiful Little Blossom. She is perfect for a birthday card for a special someone!

The purchase includes 3 Images:

  • 1 Image: Little Blossom Holding Balloons
  • 2 Image: Little Blossom
  • 3 Image: Little Blossom without background

The Details of My Birthday Blossom Wishes Card

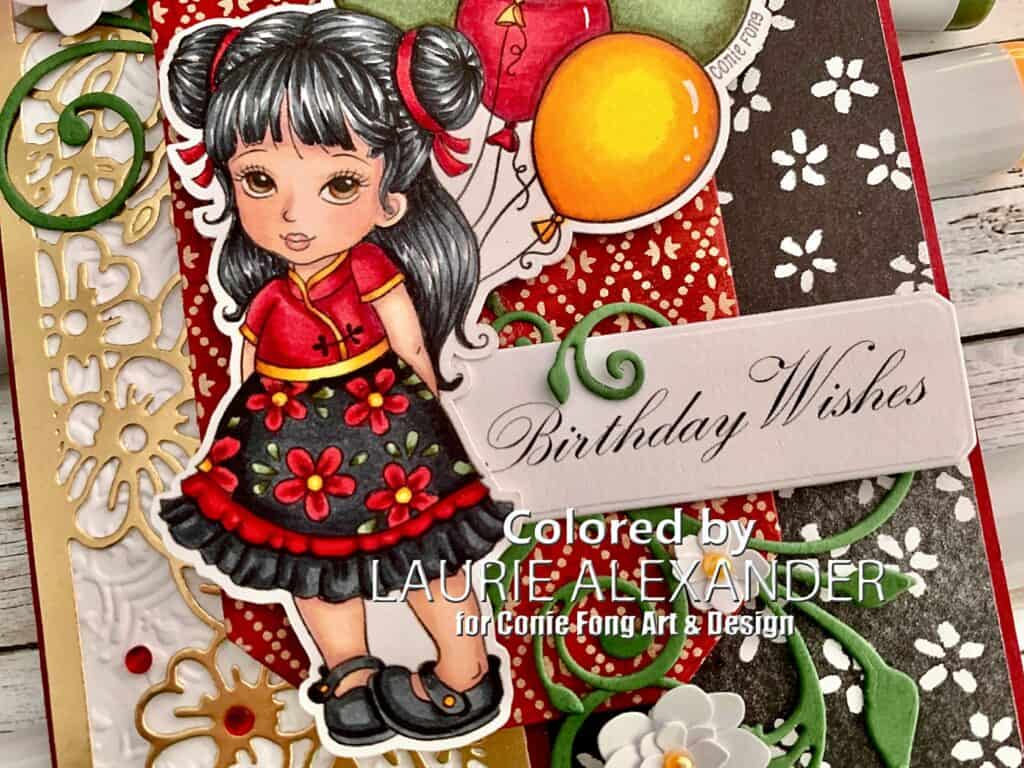
I was given as a gift this beautiful handmade paper in rich reds and golds and knew I wanted to use it as a backdrop for Little Blossom on my card. So, I coloured her with my Copic markers in red and blacks with golds for the trim. I added green to the leaves on her dress and some of the balloons to break up the colours.

For my card, I had a gorgeous bloom border die from Paper Rose that looked like the flowers on her dress. So, I die cut Gold Foil Paper to match the golden trim on her dress. To add interest behind the bloom die, I embossed a piece of Basic White card stock with the Distressed Tile Embossing Folder. This gave it a slight texture without interfering with the beautiful golden flowers.

Next, I added a piece of floral black and white DSP to balance out the other side. Again, I thought the flowers looked similar to the flowers on her dress.

Now for my focal point! I used the beautiful handmade paper behind her and added some greenery to tie in the green balloons. The finishing touch was to add a few white blooms to brighten up my card. For the pearls in the centres, I coloured them with my Y38 Copic marker.

To add a sparkle, I added a scattering of Red Rhinestone and Clear Wink of Stella on her hair ties, the flowers and gold trim of her dress.

————————–

Copic Markers:

Skin: E000/E00/E21/E11/E04/R20
Hair: C9/C7/C6
Eyes: E59/E57/E55/C3/C1/0
Lips: R20
Reds: R39/R37/R35
Blacks: C9/C7/C6
Yellows: E15/Y38/Y35/Y06
Greens: G99/G94/G21
Pearls: Y38

Close up of Little girl
Close up of Little Blossom

————————–

Card Recipe for My Birthday Blossom Wishes Card:

Little Blossom, Conie Fong Art & Design
Paper Basics – Stamper’s Select White Cardstock, Papertrey Ink
Lost & Found, Union Square 6” x 6” Paper Pad, My Mind’s Eye
Petal Passion Designer Series Paper, Stampin’ Up!
Gold Foil Sheets, Stampin’ Up!
Wedding Blooms Border Die, Paper Rose
Small Elegant Flourish Die, Paper Rose
Countryside Corners Dies, Stampin’ Up!
Distressed Tile 3D Embossing Folder, Stampin’ Up!
Hydrangea Punch, Martha Stewart
Iridescent Pearl Basic Jewels, Stampin’ Up!
Red Rhinestone Basic Jewels, Stampin’ Up!
Clear Wink of Stella, Stampin’ Up!

Cherry Cobbler, Garden Green, and Basic White Card Stock, Stampin’ Up!

Finished card size: 5 ½” x 4 ¼”

————————–

To view my other Conie Fong Art & Design projects, please click here.

Hope you like my Design Team Inspiration Card using Little Blossom for Conie Fong Art & Design!

Thank you for stopping by!

Hugs,
Laurie
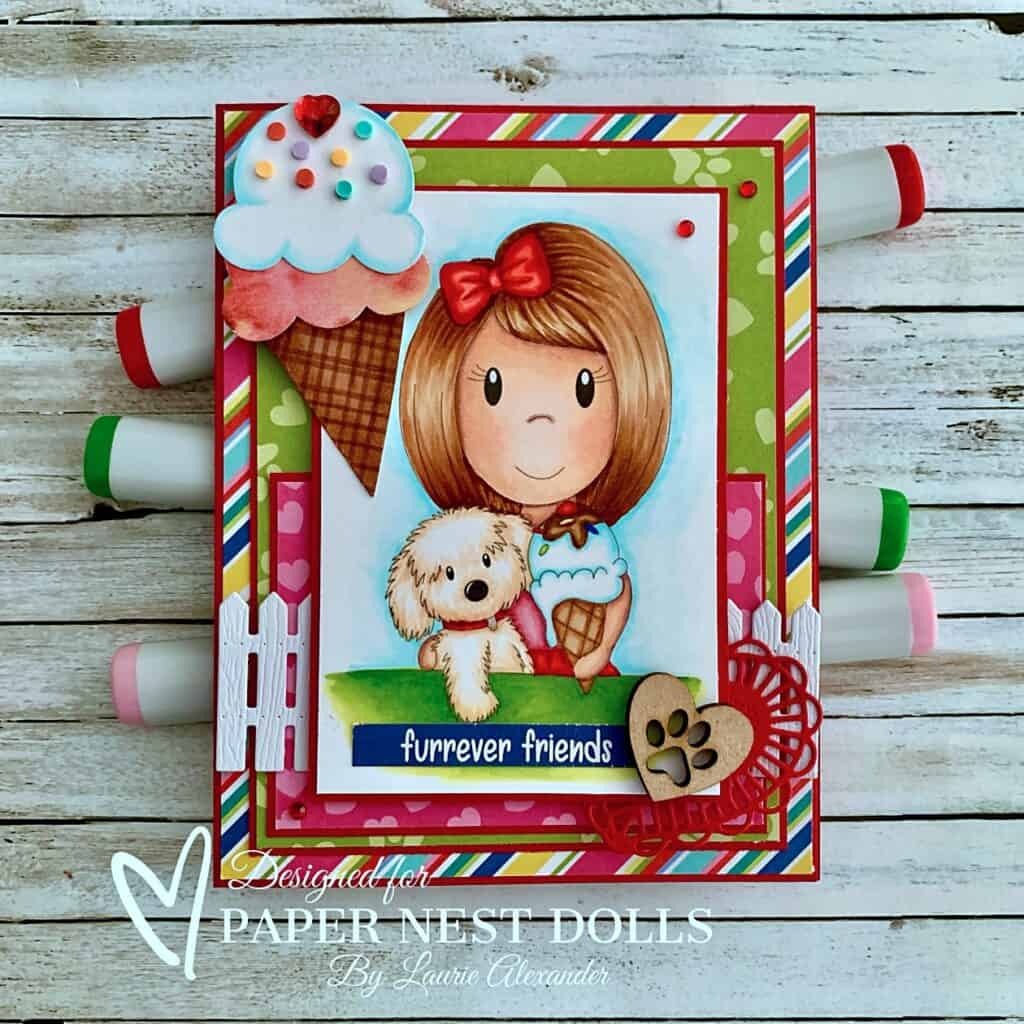
Just Me and My Puppy

Just Me and My Puppy - a card with a girl holding a puppy and and ice cream cone
Just Me and My Puppy

Hello Crafty Friends! It’s Laurie here! It is starting to feel like summer! So, I am sharing Just Me and My Puppy as my Design Team Inspiration Card for Paper Nest Dolls using Emmas Sweet Friend enjoying an ice cream cone together! 

The Details of Just Me and My Puppy

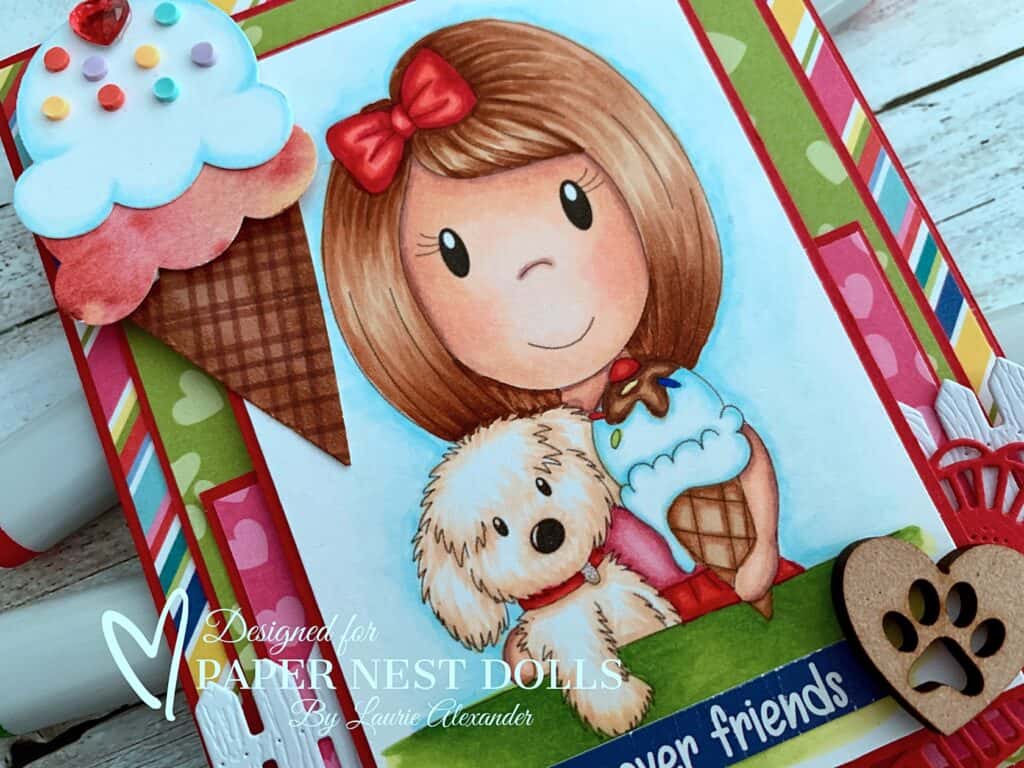
I just love this sweet digital stamp which reminded me of my puppy So, I coloured him with my Copic markers to look like my Jesse Pup. To match Jesse, I coloured Emma to look like me so that my card looked like my puppy and me! So fun!

For my card, I decided to use the Pampered Pooch Collection by Photo Play with its bright colours and puppy theme. Even the sentiment “furrever friends” is a sticker from that collection.

Next, I added a die cut white wooden fence using the Wood Textured Specialty Paper to add some interest to the background and balance out my card.

Since they are sharing an ice cream cone, I thought I would build a double scooped one with sprinkles and a heart rhinestone that I coloured red with my Copic marker. I even coloured the punched-out ice cream with my Copic markers to give it definition.

To balance out the ice cream cone, I added a MDF heart with a paw print inside which I placed beside my sentiment and layered a die cut heart beneath it.

Finally, for embellishments, I added a scattering of red rhinestones and used Clear Star Gelly Roll Pen for the dog tag.

————————–

Copic Markers

Skin: E04/E11/E21/E00/E000/R20
Hair: E37/E35/E33/E31
Pinks: R85/R83/R81 
Reds: R29/R27/R24
Puppy: E53/E51/E50
Greens: YG17/YG25/YG23/YG21
Sprinkles: B28/R27/Y13/YG25
Ice Cream/Sky: B00/B000/B000
Heart Rhinestone: R27

Close Up of the girl with her puppy
Close Up of Emma and her Friend

————————–

Card Recipe for Just Me and My Puppy

Emmas Sweet Friend, Paper Nest Dolls
Paper Basics – Stamper’s Select White Cardstock, Papertrey Ink
Pampered Pooch 12” x 12” Collection Pack, Photo Play
Ice Cream Corner Designer Series Paper, Stampin’ Up!
Wood Textured Specialty Paper, Stampin’ Up!
Picket Fence Die-namics, My Favorite Things
Heart MDF Shape, Hunkydory
Two of Hearts Dies, Cheery Lynn Designs
Ice Cream Cone Builder Punch, Stampin’ Up!
Ice Cream Corner Sprinkles, Stampin’ Up!
Red Rhinestone Basic Jewels, Stampin’ Up!
Heart Rhinestone, From my Stash
Clear Star Gelly Roll Pen, Sakura

Finished card size: 5 ½” x 4 ¼”

Stamp Size: 4”

————————–

To view my other Paper Nest Dolls cards, please click here.

Hope you like my Design Team Inspiration Card using Emmas Sweet Friend by Paper Nest Dolls!

Thank you for stopping by!

Hugs,
Laurie
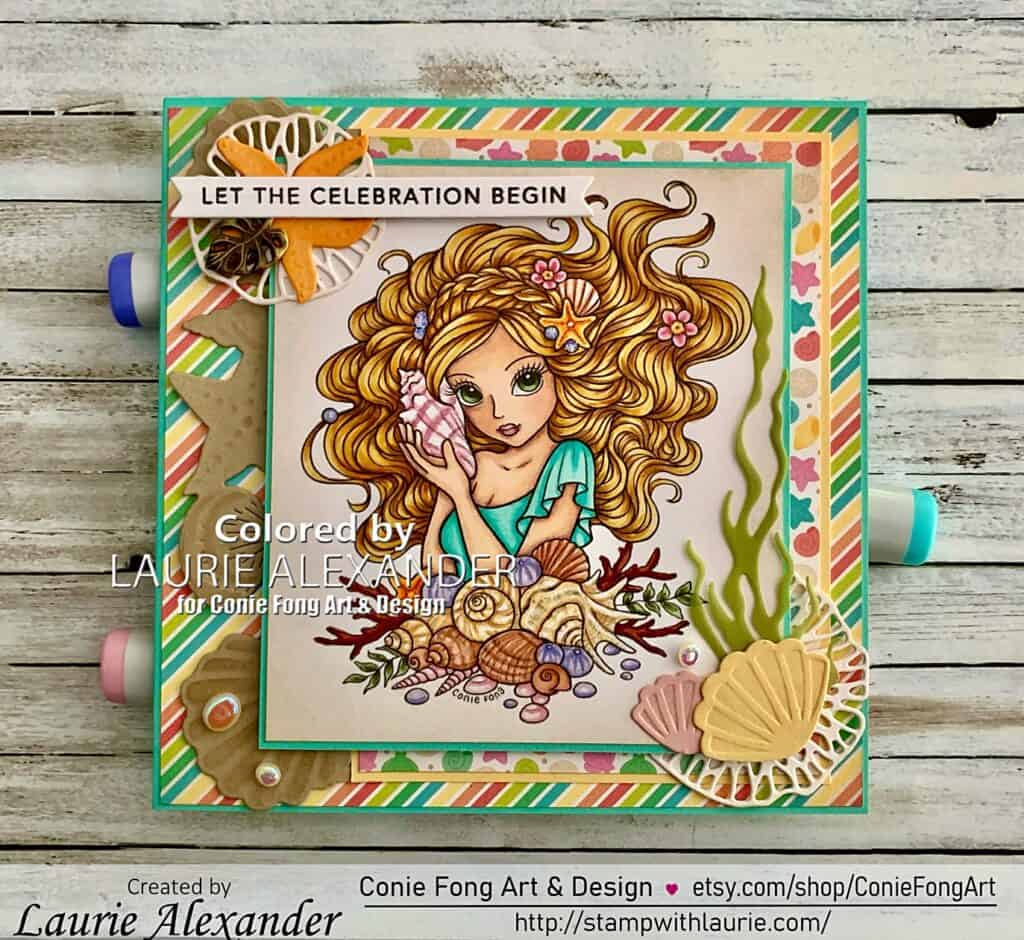
Birthday Shellabration Card 

Birthday Shellabration Card - a birthday card with a girl listening to a shell
Birthday Shellabration Card

Hello Crafty Friends! It’s Laurie here! I am sharing my Birthday Shellabration Card as my Design Team Inspiration Card for Conie Fong Art & Design using the beautiful Seashell Rosealea. I love this image so much I have used her for another card awhile back. I will include a link at the end of this post to my other card.

The Details of My Birthday Shellabration Card

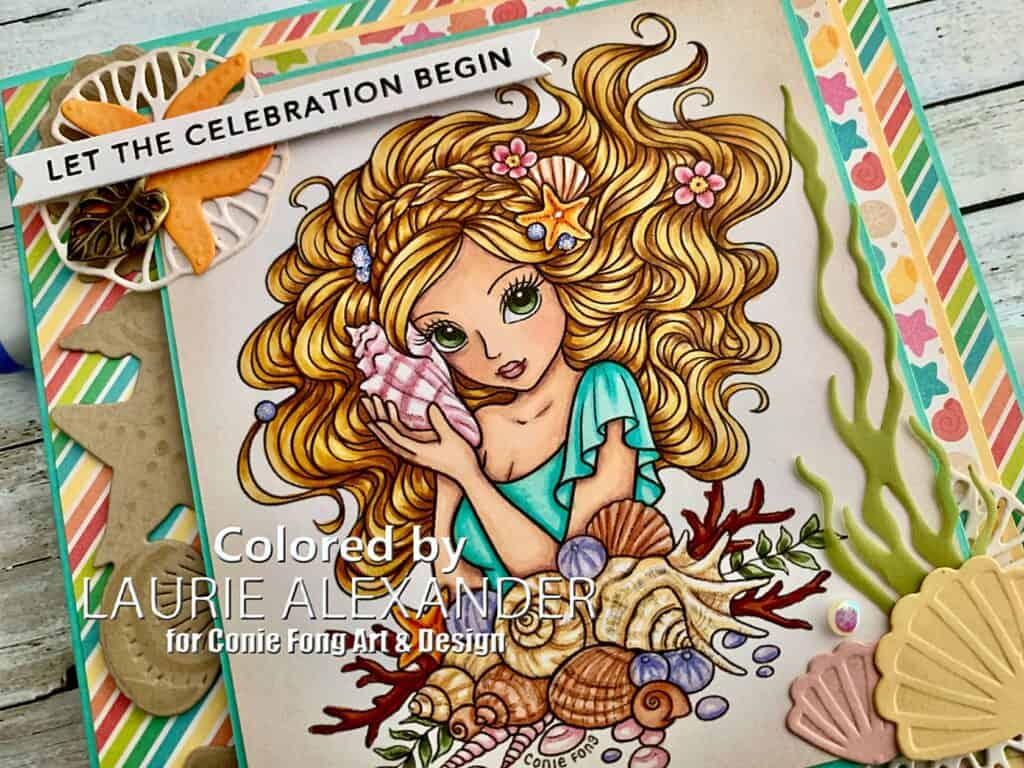
For my card, I decided to colour with my Copic markers Rosealea in Summer colours matching the Doodlebug papers. I had a lot of fun colouring her hair and all her beautiful shells! Once she was done, I used a blending brush to add some Crumb Cake “sand” along the edges.

To mirror her shells, I used a cluster of shell die cuts with other ocean elements in opposite corners. The starfish in the sentiment cluster was brushed with Peach Pie Ink to give it dimension and look like the starfishes in my colouring. I also brushed Crumb Cake Ink to the Basic White coral rounds to give them dimension and a sandy look. I couldn’t resist using a leaf trinket with my sentiment cluster to highlight it!

A border of shells peeking out behind her were embossed with my Embossing Mat to make the details really stand out. Then, I brushed Crumb Cake Ink to bring out the details even more. Tip: leave the die cut shells in the metal frame, brush the ink over the frame so that only the raised areas get the ink. This keeps the ink off the other areas making the raised areas stand out even more.

To add a sparkle, I added a scattering of Flat Adhesive-Backed Pearls, Clear Wink of Stella on the flowers and Star Dust Stickles to the pearls in her hair.

————————–

Copic Markers:

Skin: E000/E00/E21/E11/E04/R20
Hair: E25/YR24/Y26/Y21
Top: BG15/BG13/BG11
Eyes: G99/G94/G21/C3/C1/0
Lips: R83/R81
Starfishes: YR18/YR04/Y38/Y35
Shells 1: E15/E13/E11
Shells 2: E33/Y32
Pearls/Shells 3: BV000/BV13
Shells 4: R83/R81
Coral: E19/E18/E15
Flowers: R85/R53/R81/YR24/Y21
Leaves: G99/G94/G21

Close Up of girl holding shell
Close Up of Rosealea

————————–

Card Recipe for My Birthday Shellabration Card:

Seashell Rosealea, Conie Fong Art & Design
Paper Basics – Stamper’s Select White Cardstock, Papertrey Ink
Seaside Summer 6” x 6” Paper Pad, Doodlebug Design Inc.
Perennial Essence Vellum Cardstock, Stampin’ Up!
Build-an-Ocean Die Set, Whimsy Stamps
Seaside Wishes Dies, Stampin’ Up!
Joy! Crafts Shell Border Die
Embossing Mat, Stampin’ Up!
Manual Die Cutting Machine
Simple Strips – Birthday, Taylored Expressions
Simple Strips Die, Taylored Expressions
VersaFine Ink, Onyx Black, Tsukineko
Flat Adhesive-Backed Pearls, Stampin’ Up!
Tropical Oasis Trinkets, Stampin’ Up!
Crumb Cake Classic Ink, Stampin’ Up!
Peach Pie Classic Ink, Stampin’ Up!
Blending Brush, Stampin’ Up!
Star Dust Stickles, Ranger
Clear Wink of Stella, Stampin’ Up!

Coastal Cabana, Basic White, So Saffron, Peach Pie, Blushing Bride and Crumb Cake Card Stock, Stampin’ Up!

Finished card size: 5 ½” x 5 ½”

————————–

Blog Challenges

I am entering this card into the following challenges:
613 Avenue CreateJune 2024-Anything Goes
Morgan’s ArtWorld Challenge#77-Anything GoesCreative Team’s Favourite Winner
A Place to StartJUNE 2024 – ANYTHING GOES w/Optional Twist: ANYTHING BUT A CARDTop Sprout
The Outlawz Challenges BlogJune 2024
A Perfect Time To Craft Open Challenge June, #6-20242nd Place
Dream Valley ChallengesChallenge # 318 – Summer ColoursWinner
Card making, Craft, Papercraft Scrapbooking Digi Choosday ChallengeWK 23 Anything Goes
Daisy Chain ChallengesChallenge #86 – Birthday

————————–

Here is my other card using this same stamp but facing right. For more information on my card, please click here.

A birthday card with a girl listening to a seashell
Seashell Wishes Card

To view my other Conie Fong Art & Design projects, please click here.

Hope you like my Design Team Inspiration Card using Seashell Rosealea for Conie Fong Art & Design!

Thank you for stopping by!

Hugs,
Laurie
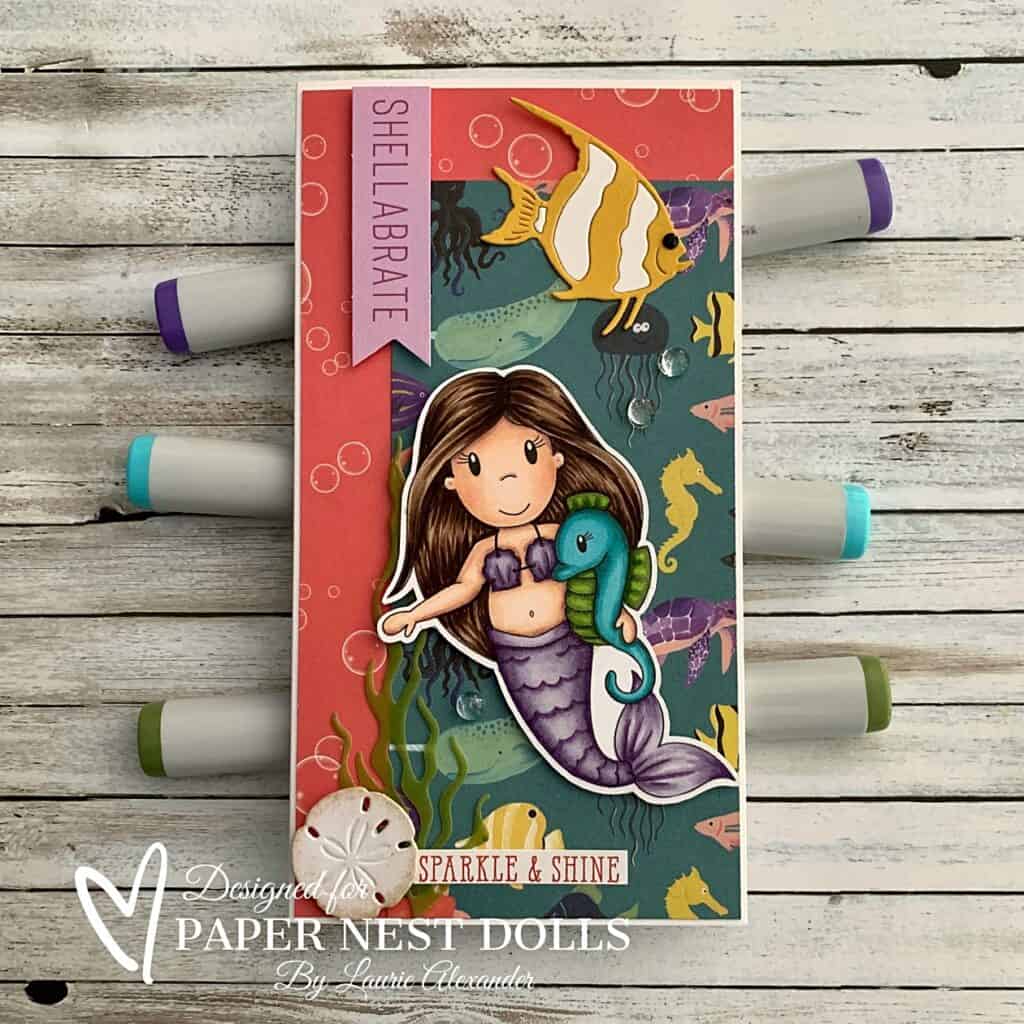
My Shellabrate Birthday Card 

My Shellabrate Birthday Card - a birthday card with a mermaid holding a seahorse on it
My Shellabrate Birthday Card

Hello Crafty Friends! It’s Laurie here! One final mermaid card for MerMay from me! I am sharing My Shellabrate Birthday Card as my Design Team Inspiration Card for Paper Nest Dolls using Mermaid Ellie with Seahorse

The Details of My Shellabrate Birthday Card

For my card, I decided to use the Mermaid Tales Collection Kit by Echo Park since it was perfect for my Mermaid theme! The Kit came with paper and stickers. So, I used the “Sparkle & Shine” sticker as well as the paper on my card. The Shellabrate flag was from the Mermaid Dreams Frames & Tags also by Echo Park.

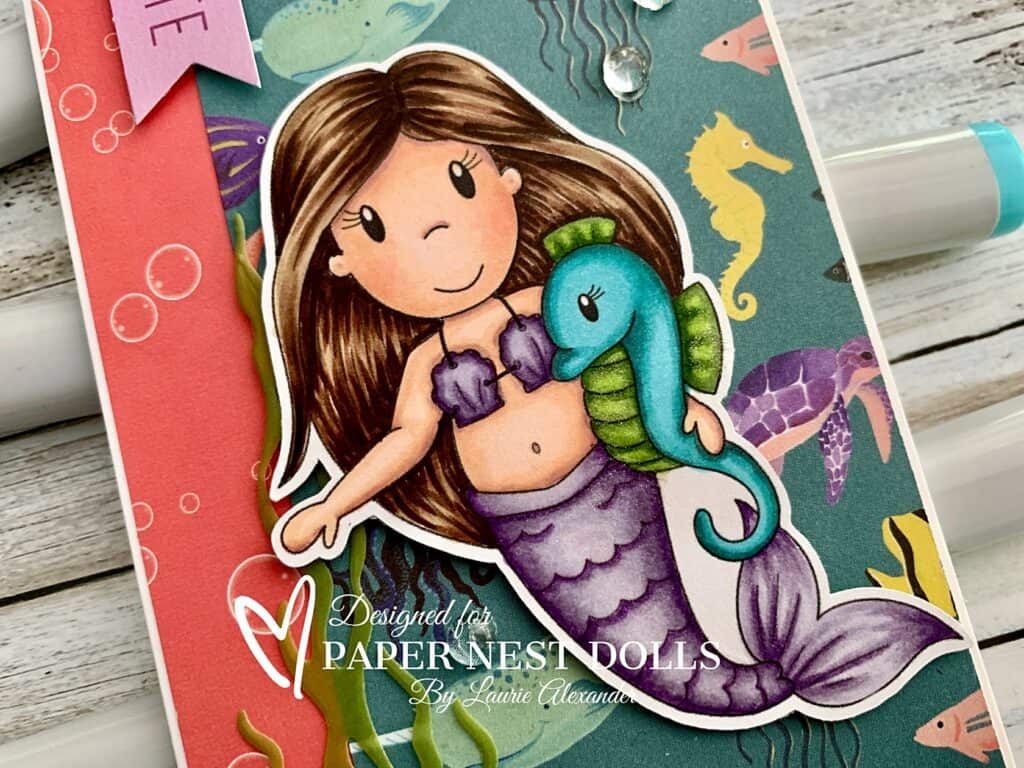
Once I picked my papers, I used the colours from it to colour Ellie with my Copic markers. I used Clear Wink of Stella on her tail and on the fins of the seahorse to add some sparkle just like the sticker said!

Next, I added an angel fish die cut to match the fish in the paper, as well as a shell and seaweed beside the sticker to help ground her.

Finally, for embellishments, I added three dew drops that look like air bubbles to mirror the air bubble paper. I also added a black rhinestone for the fish’s eye.

————————–

Copic Markers

Skin: E04/E11/E21/E00/E000/R20
Hair: E49/E47/E44/E43
Purples: V17/V25/V22/V20 
Blues: BG53/BG57/BG78
Greens: YG67/YG63/YG03

Close Up of Mermaid with Seahorse
Close Up of Mermaid Ellie with Seahorse

————————–

Card Recipe for My Shellabrate Birthday Card

Mermaid Ellie with Seahorse, Paper Nest Dolls
Paper Basics – Stamper’s Select White Cardstock, Papertrey Ink
Mermaid Tales Collection Kit, Echo Park Paper Co.
Mermaid Dreams Frames & Tags, Echo Park Paper Co.
Perennial Essence Vellum Cardstock, Stampin’ Up!
Build-an-Ocean Die Set, Whimsy Stamps
Angel Fish Die Set, Frantic Stamper Inc.
Crumb Cake Classic Ink, Stampin’ Up!
Blending Brush, Stampin’ Up!
Spring Blooms Dew Drops, The Robin’s Nest
Black Rhinestone Basic Jewels, Stampin’ Up!
Clear Wink of Stella, Stampin’ Up!

Finished card size: 5 ½” x 4 ¼”

Stamp Size: 4”

————————–

To view my other Paper Nest Dolls cards, please click here.

Hope you like my Design Team Inspiration Card using Mermaid Ellie with Seahorse by Paper Nest Dolls!

Thank you for stopping by!

Hugs,
Laurie
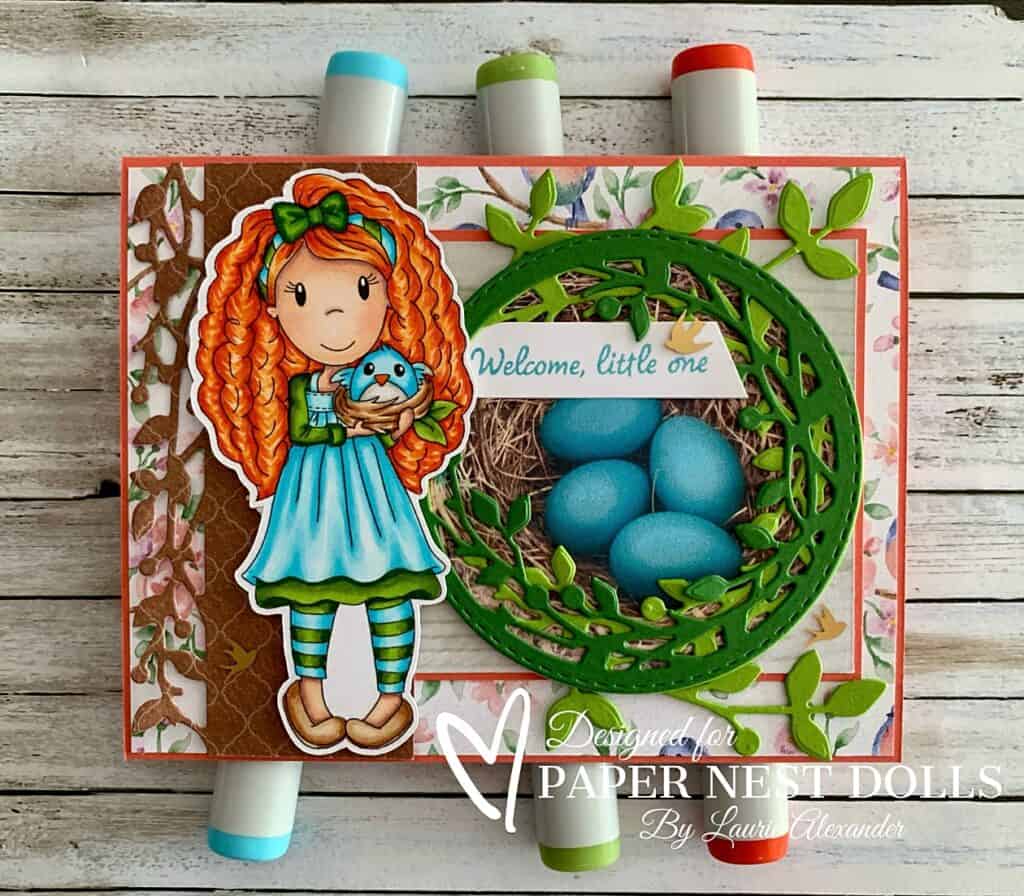
Welcome Little One Card

Welcome Little One Card - a baby card with a girl holding a bird nest with a baby bird in it
Welcome Little One Card

Hello Crafty Friends! It’s Laurie here! I am sharing my Welcome Little One Card as my Design Team Inspiration Card for Paper Nest Dolls using Avery with Bird Nest. We discovered a bird nest with some robin eggs on one of our outdoor lights. So, I couldn’t resist creating a card around this miracle! I even used a photo of the eggs in the nest on my card!

The Details of My Welcome Little One Card

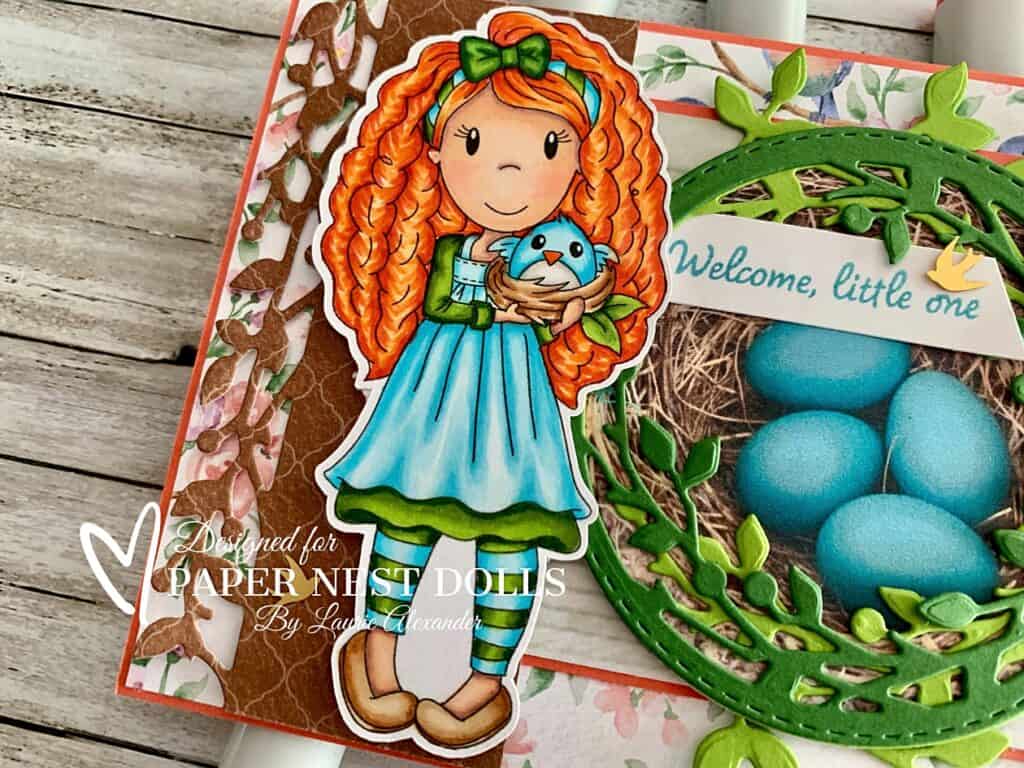
For my card, I decided to colour with my Copic markers Avery in similar colours to the eggs and nest but went with a bright red hair for all those gorgeous curls!

Next, I die cut the printed photo with a stitched circle die. I used this same die for all three layers of my “nest” so they would line up when layered. The top two offset layers consisted of leaves in two different greens to add dimension. I also added a few sprigs of leaves emanating from my nest.

I used the border leaf die on the darker DSP behind Avery to tie in my theme and make her stand out from the other DSP.

The sentiment was stamped in Balmy Blue, and one end was cut at an angle with my Paper Snips.

Finally, for embellishments, I added three birds from the Adhesive-Backed Dragonflies & Birds for a bit of sparkle.

————————–

Copic Markers

Skin: E04/E11/E21/E00/E000/R20
Hair: R08/YR07/YR14/YR21
Blues: BG02/BG01/BG000
Greens: YG67/YG63/YG03
Browns: E35/E33/E31/E30
Bird: BG02/BG01/BG000/W3/W1/W00

Close Up of girl holding bird nest
Close Up of Avery

————————–

Card Recipe for My Welcome Little One Card

Avery with Bird Nest, Paper Nest Dolls
Paper Basics – Stamper’s Select White Cardstock, Papertrey Ink
Spring Garden 12” x 12” Paper Collection, Paper Rose
Flight & Airy 12” x 12” Designer Series Paper, Stampin’ Up!
Stitched Layering Circle Dies, Memory Box
Birds & More Dies, Stampin’ Up!
Cradled in Love Stamp Set, Stampin’ Up!
Balmy Blue Ink Pad, Stampin’ Up!
Adhesive-Backed Dragonflies & Birds, Stampin’ Up!
Paper Snips, Stampin’ Up!
Computer and Printer
Calypso Coral, Granny Apple Green, and Garden Green Card Stock, Stampin’ Up!

Finished card size: 5 ½” x 4 ¼”

Stamp Size: 4”

————————–

To view my other Paper Nest Dolls cards, please click here.

Hope you like my Design Team Inspiration Card using Avery with Bird Nest by Paper Nest Dolls!


Thank you for stopping by!

Hugs,
Laurie
My Welcome MerMay Card 

My Welcome MerMay Card - a mermaid in an underwater scene
My Welcome MerMay Card

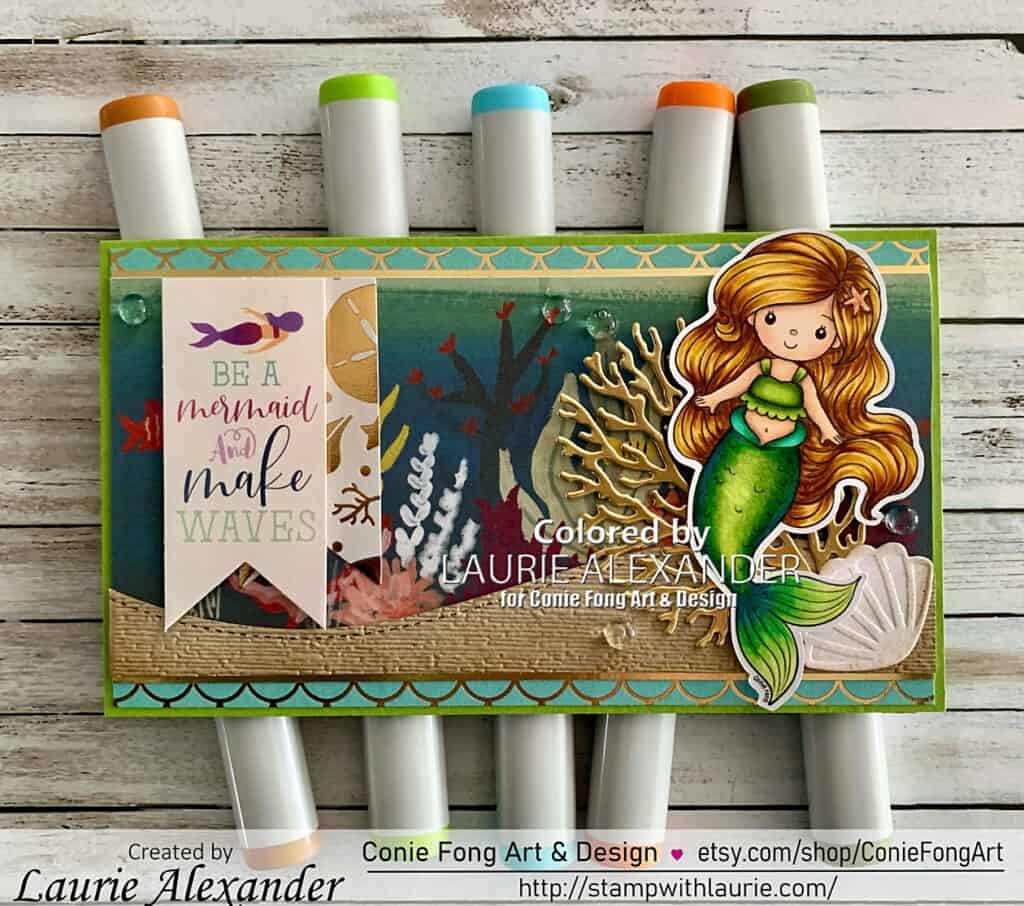
Hello Crafty Friends! It’s Laurie here! I am sharing My Welcome MerMay Card using the new release Little Mermaid by Conie Fong Art & Design as my Design Team Inspiration Card. Every May is MerMay in the card making industry and Conie Fong didn’t disappoint with this new release! Welcome to MerMay!
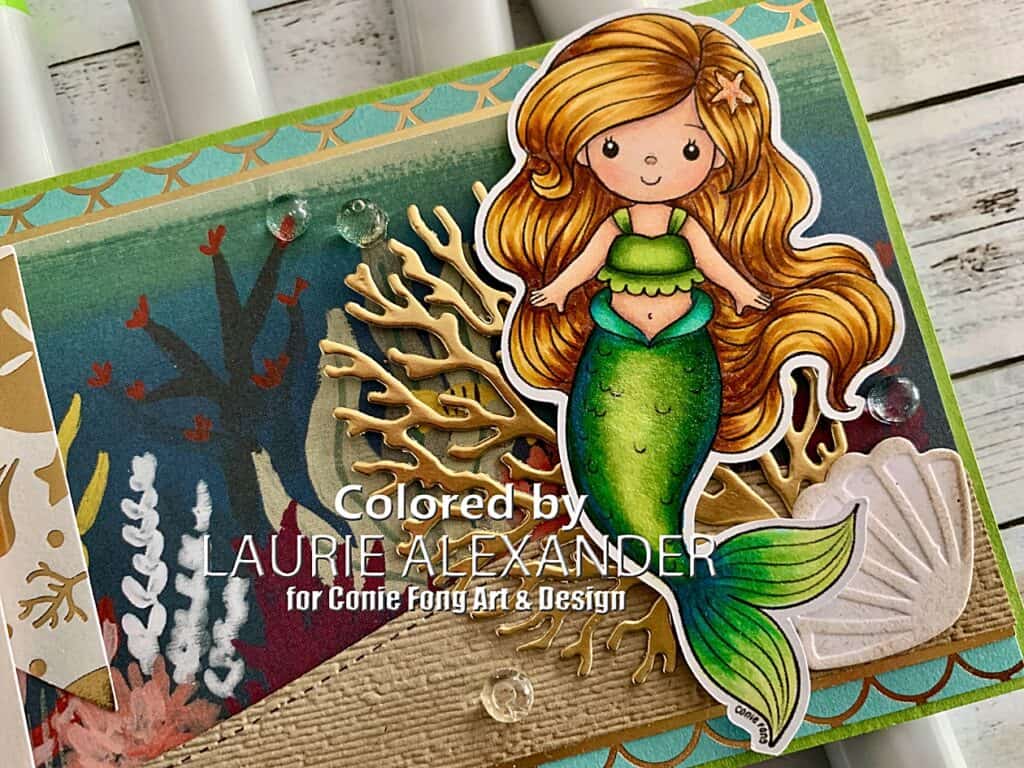
The Details of My Welcome MerMay Card

For my card, I decided to create a mini slimline card with an underwater scene for this cutie. The Mermaid Tales paper had a scene that was perfect for my background! Behind that I added paper with blue/green mermaid scales with golden accents and gold foil borders.

But first, I coloured my mermaid with my Copic markers in watery blue/green colours to match my scene. I had a lot of fun colouring the tail so that it shimmers between the blues to the greens! To add more shimmer, I used Clear Wink of Stella on her tail and Clear Star Gelly Roll Pen on her starfish in her hair. 

Next, I die cut the sandy bottom with the Slimline Stitched Hillside Border and used the Subtle 3D Embossing Folder to give it some texture. Once that was done, I brushed Crumb Cake ink along the edges for even more texture.

To create a backdrop for her, I die cut a Basic White shell on which I brushed Crumb Cake to bring out the detail. Behind that, I added a gold fold die cut coral to tie in my golden accents.

The sentiment flag was from the Mermaid Dreams Frames & Tags and was perfect for my card! I layered beneath it another die cut flag with gold shells on it. Even more gold accents! Lol! All these golden accents really added a beautiful sparkle to the card!

The finishing touch was a scattering of dew drops which I thought looked like air bubbles.

————————–

Copic Markers:

Skin: E000/E00/E21/E11/E04/R20
Hair: E25/YR24/Y26/Y21
Top: YG67/YG23/YG00
Tail: BG09/BG05/BG01/YG23/YG00/Clear Wink of Stella
Starfish: Y38/YR04/YR18/Clear Star Gelly Roll Pen

Close Up of Little Mermaid

————————–

Card Recipe for My Welcome MerMay Card:

Little Mermaid, Conie Fong Art & Design
Paper Basics – Stamper’s Select White Cardstock, Papertrey Ink
Mermaid Tales Collection Kit, Echo Park Paper Co.
Enchanting Paper Pad, Recollections, Michael’s Arts & Crafts
Gold Foil Sheets, Stampin’ Up!
Mermaid Dreams Frames & Tags, Echo Park Paper Co.
Build-an-Ocean Die Set, Whimsy Stamps
Slimline Stitched Hillside Border, Lawn Fawn
Banners Framelits Dies, Stampin’ Up!
Subtle 3D Embossing Folder, Stampin’ Up
Crumb Cake Classic Ink, Stampin’ Up!
Blending Brush, Stampin’ Up!
Spring Blooms Dew Drops, The Robin’s Nest
Clear Star Gelly Roll Pen, Sakura
Clear Wink of Stella, Stampin’ Up!
Granny Apple Green, Basic White, and Crumb Cake Card Stock, Stampin’ Up!

Finished card size: 3 ½” x 6-1/8”

————————–

To view my other Conie Fong Art & Design projects, please click here.

Hope you like my Design Team Inspiration Card using Little Mermaid for Conie Fong Art & Design!

Thank you for stopping by!

Hugs,
Laurie