My Lantern Window Card 

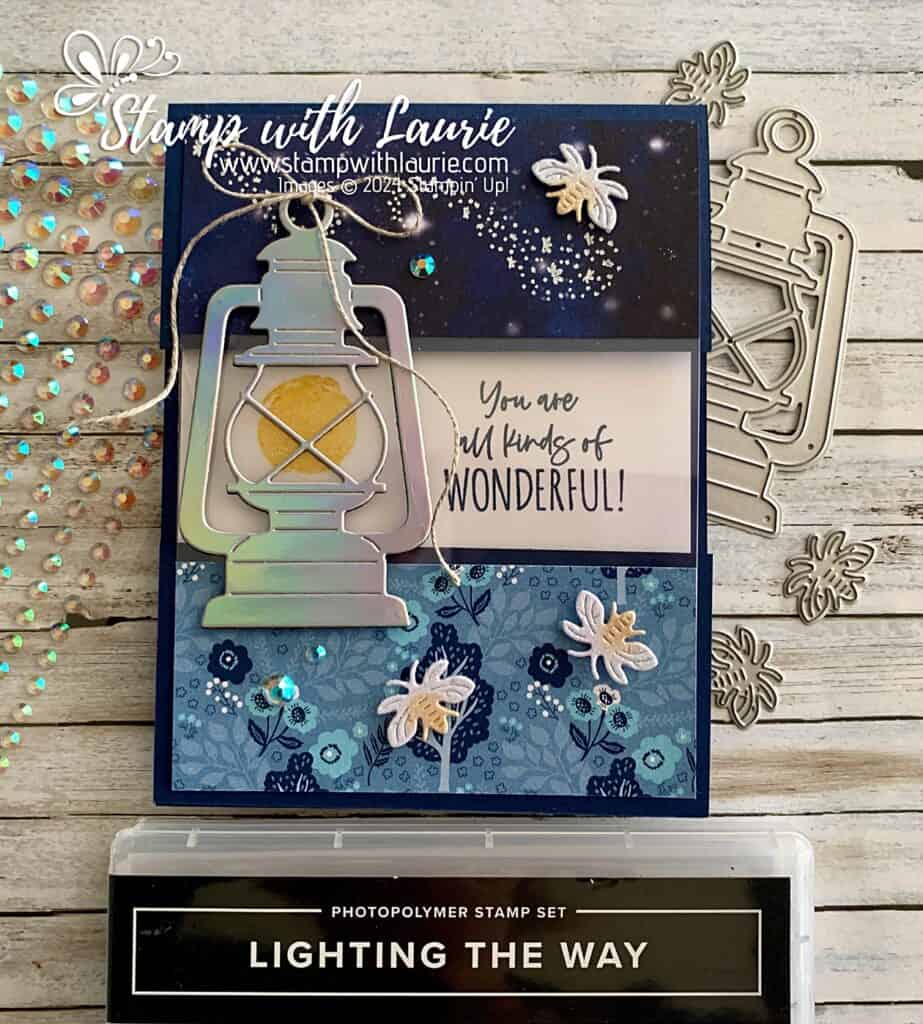
My Lantern Window Card - a thank you card with a lantern in a window
My Lantern Window Card

Hello Crafty Friends! Laurie here again! I am sharing My Lantern Window Card using the Lighting the Way Stamp Set and the Lighting the Way Dies by Stampin’ Up!

The Details of My Lantern Window Card

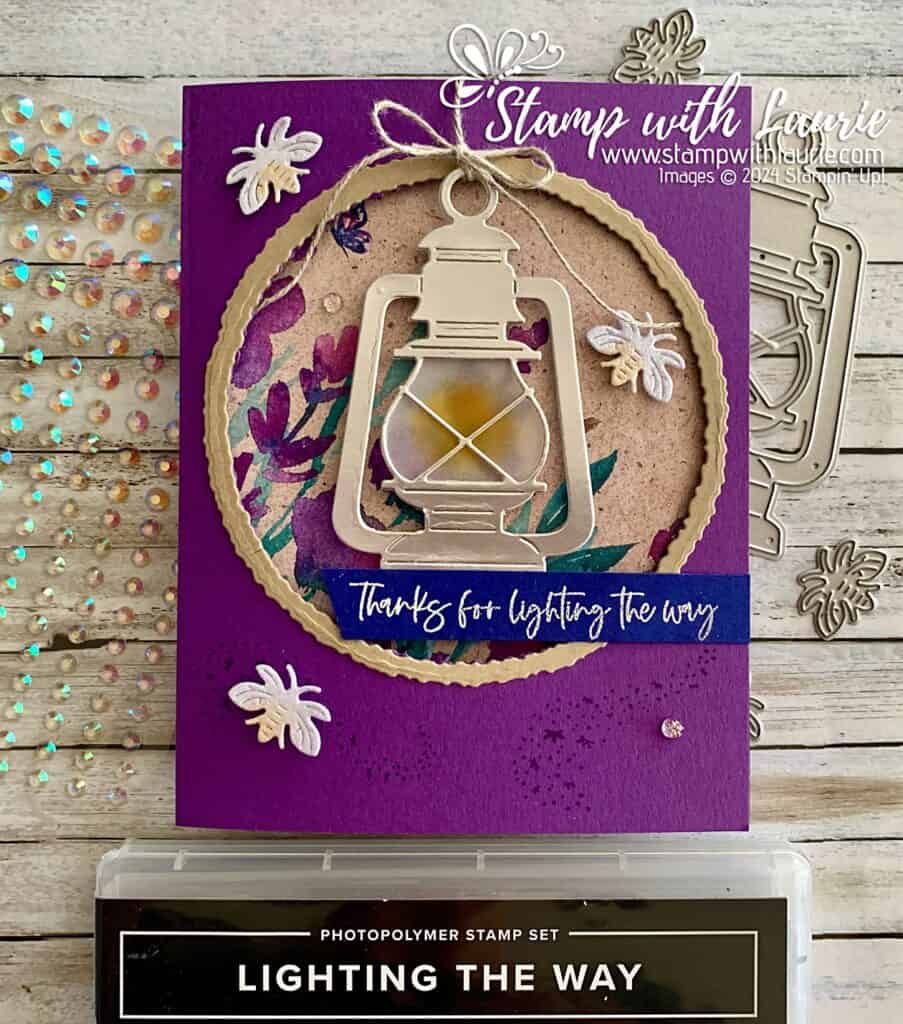
For my card, I decided to create a Window Double Open Fun Fold that allowed the gorgeous Perennial Lavender Designer Series Paper to show through behind the beautiful lantern.

First, I stamped the trail of lights in Gorgeous Grape on the card base for a tone-on-tone look.

Next, I used with the Deckle Circle Dies to create my window frame. Tip: add glue along the edge of the larger Crumb Cake die cut circle and adhere to the Gorgeous Grape card base before cutting out the circle centre. Then cut out both at the same time so that everything lines up.

I die cut the fireflies in White Glimmer Specialty Paper and brushes some Crushed Curry to their tails to make them glow. I placed the two on the front of the card following the trail of lights and one on the inside showing through the window.
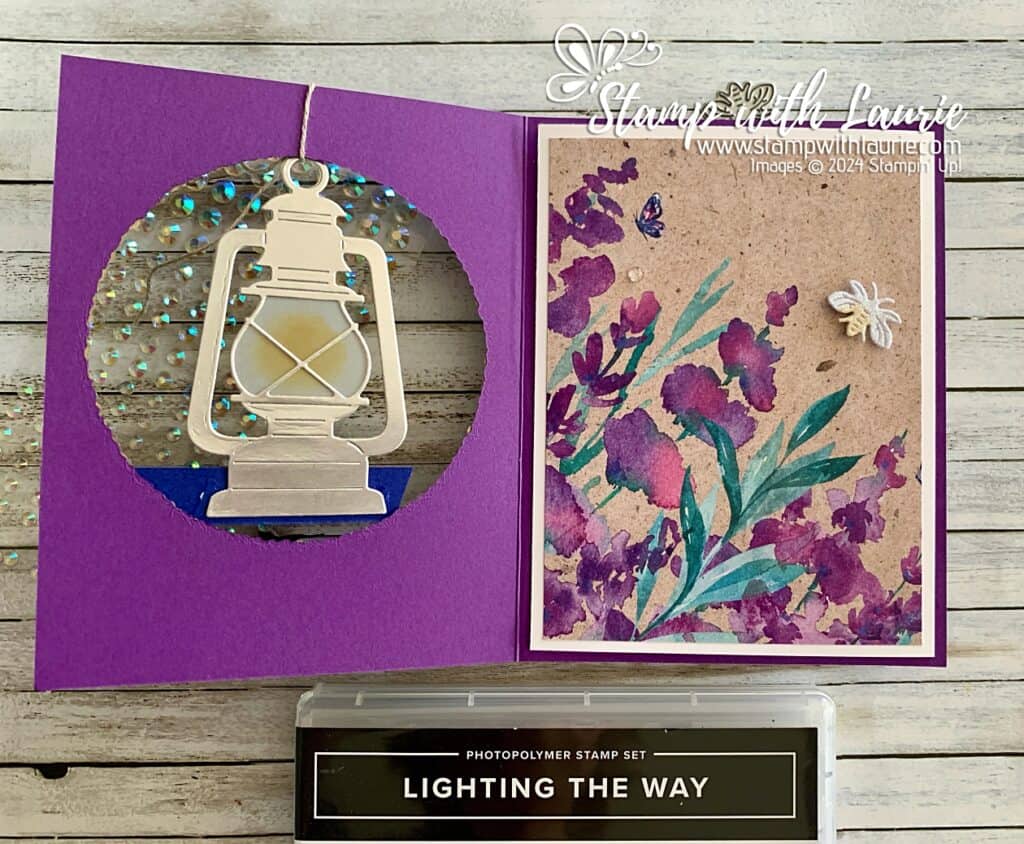
Inside of Card showing floral paper
Inside of Card

The lantern was die cut twice in the Holographic Paper for the front and for the back to give the lantern a finished look from inside. I added some vellum to the inside of the lantern on which I stamped the fire glow in Crushed Curry.

The embossed sentiment helped to hold the lantern in place while a bow of Linen Thread and a glue dot anchored the top of the lantern.

For the inside of the card, I created the double open part by adhering the Perennial Lavender Designer Series Paper to folded Basic White card stock. Thus, creating a perfect place to write your message.
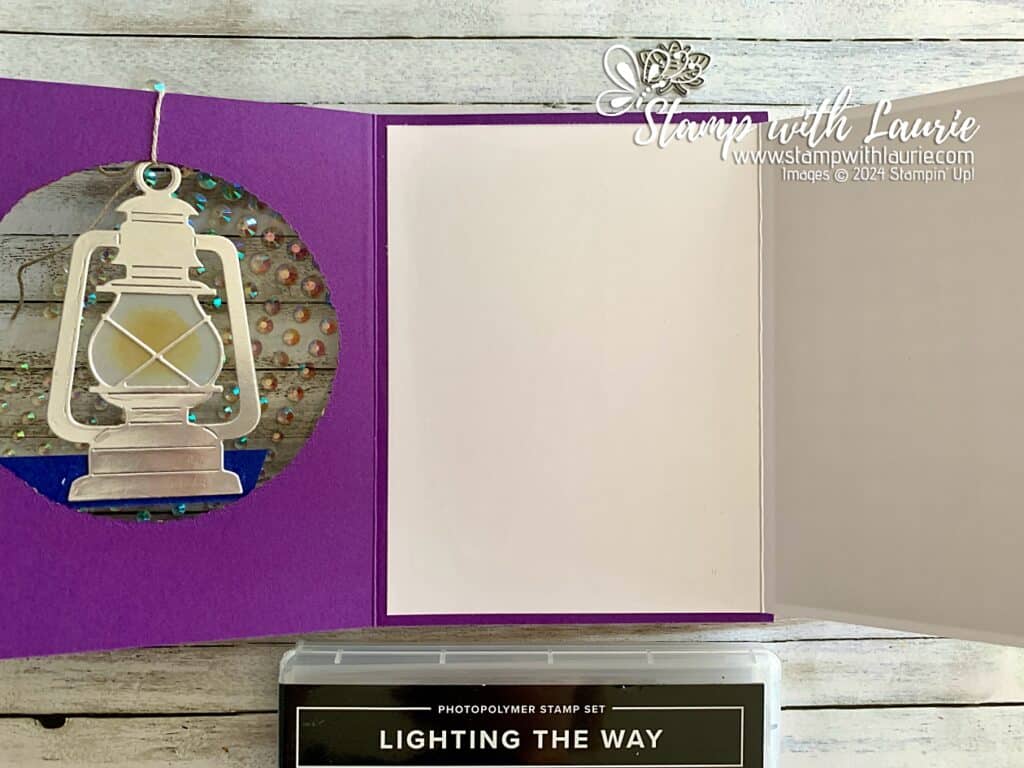
The Message Inside Part

Finally, to add a bit more magical shimmer, I used the Iridescent Rhinestone Basic Jewels scattered around my lantern. These are also retiring. So, make sure you get them before they are gone.

Supplies:

Stamps/Bundles/Dies: Lighting the Way Stamp Set (160868), Lighting the Way Dies (160496), Deckled Circle Dies (162286)

Inks: Gorgeous Grape (147099), VersaMark Ink Pad (102283), Crushed Curry (147087)

Paper: Gorgeous Grape (146987), Basic White (159229), Crumb Cake (120953), Starry Sky (159263), Vellum (101856), White Glimmer Specialty Paper (163769), Holographic Trio Specialty Paper (161744), Perennial Lavender Designer Series Paper (162593)

Accessories: Linen Thread (104199), Iridescent Rhinestone Basic Jewels (158130), Basics Embossing Powder (155554), Heat Tool (129053), Blending Brushes (153611), Paper Snips (103579), Bone Folder (102300), Stampin’ Dimensionals (104430), Stampin’ Seal (152813), Mini Glue Dots (103683)
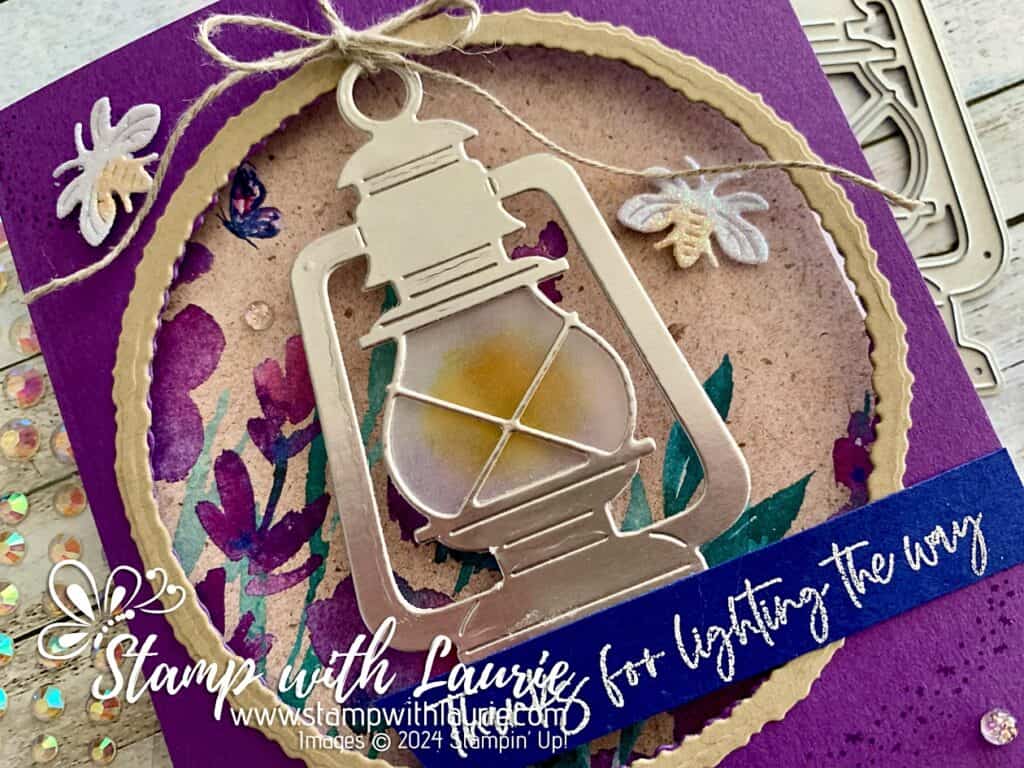
Close Up of Lantern
Close Up of Lantern

Measurements: 

  • Gorgeous Grape:
    • 5 ½” x 8 ½” scored a 4 ¼”
  • Basic White:
    • 5 ¼” x 8” scored at 4” (inside of card)
  • Crumb Cake:
    • 4” x 4”
  • Holographic Trio Specialty Paper (Lantern) x 2:
    • 3 ½” x 2”
  • Starry Sky:
    • Scrap
  • Vellum:
    • Scrap
  • White Glimmer Specialty Paper:
    • Scrap
  • Perennial Lavender DSP:
    • 5” x 3 ¾”

More Information on My Lantern Window Card

I also made a split panel card using the same stamp set/dies and incorporated the lantern into it. For more information on this card, please click here

Light the Way Card - a card with a lantern and fireflies on it
Light the Way Card

For more of my Stampin’ Up! cards, please click here.

You will find the items listed above in my online store.

Fancy Fold Step Card 

Fancy Fold Step Card - a birthday card that has lots of folds
Fancy Fold Step Card

Hello Crafty Friends! Laurie here again! I am sharing my alternative Fancy Fold Step Card using the March 2024 Memorable Meadows Paper Pumpkin. I have made this fun fold several times for different recipients, and it’s always Wowed them!

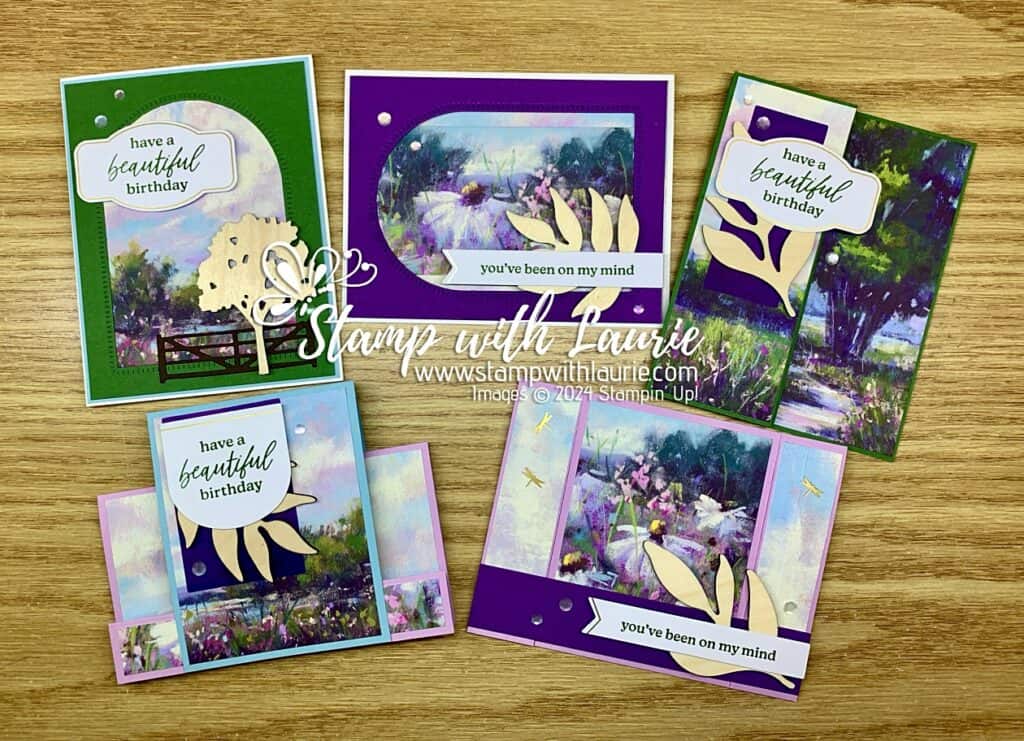
This Kit makes 9 cards of which I made three. I always like to make one set of the cards in the kit and then play with it to see what alternatives I can design.

Three cards made by a Kit
Cards from March 2024 Memorable Meadows Paper Pumpkin Kit

I made a total of nine cards with six being alternatives. I had a lot of fun playing with this kit! My alternatives included a bridge card, a faux-centre step card, a z-fold card, a fancy fold step card and two others.

My Other Alternative Cards

The Details of My Fancy Fold Step Card

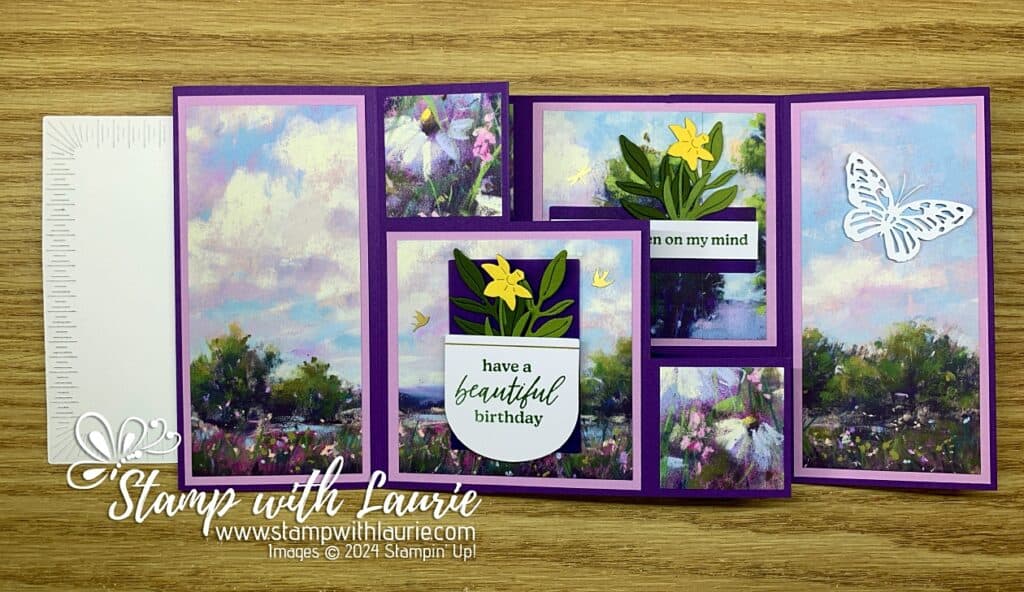
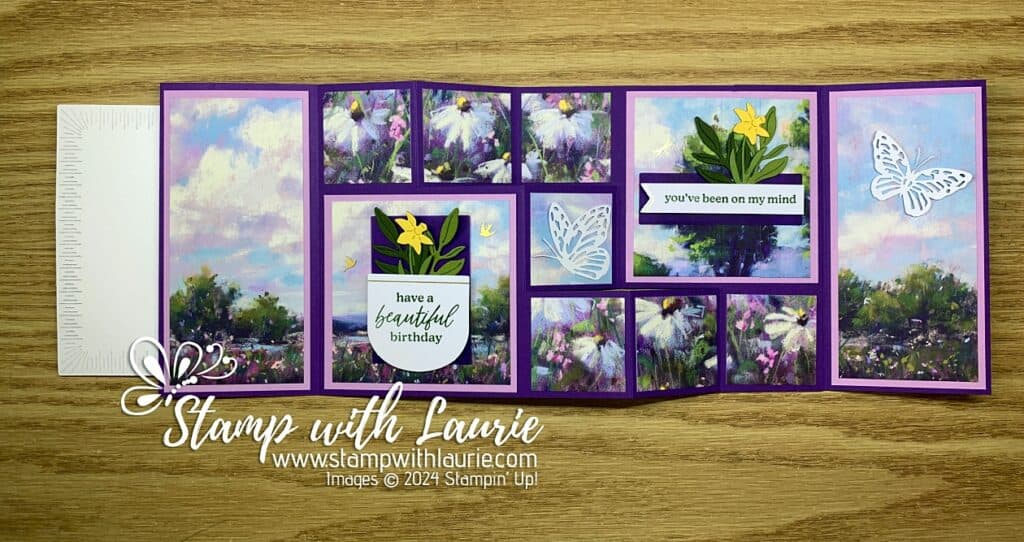
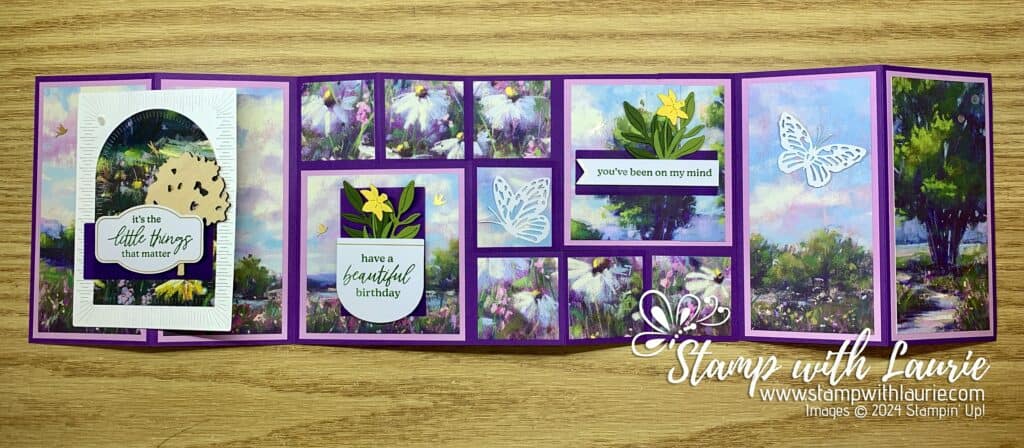
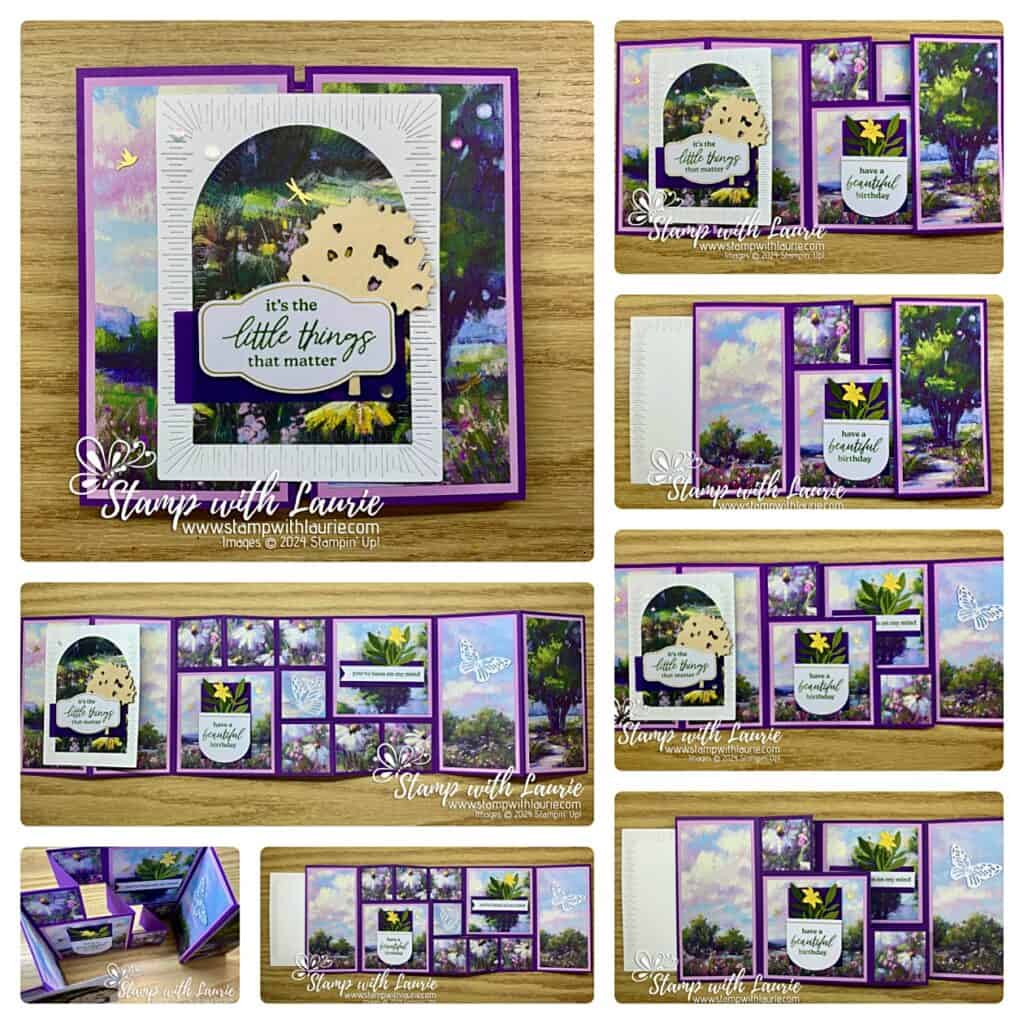
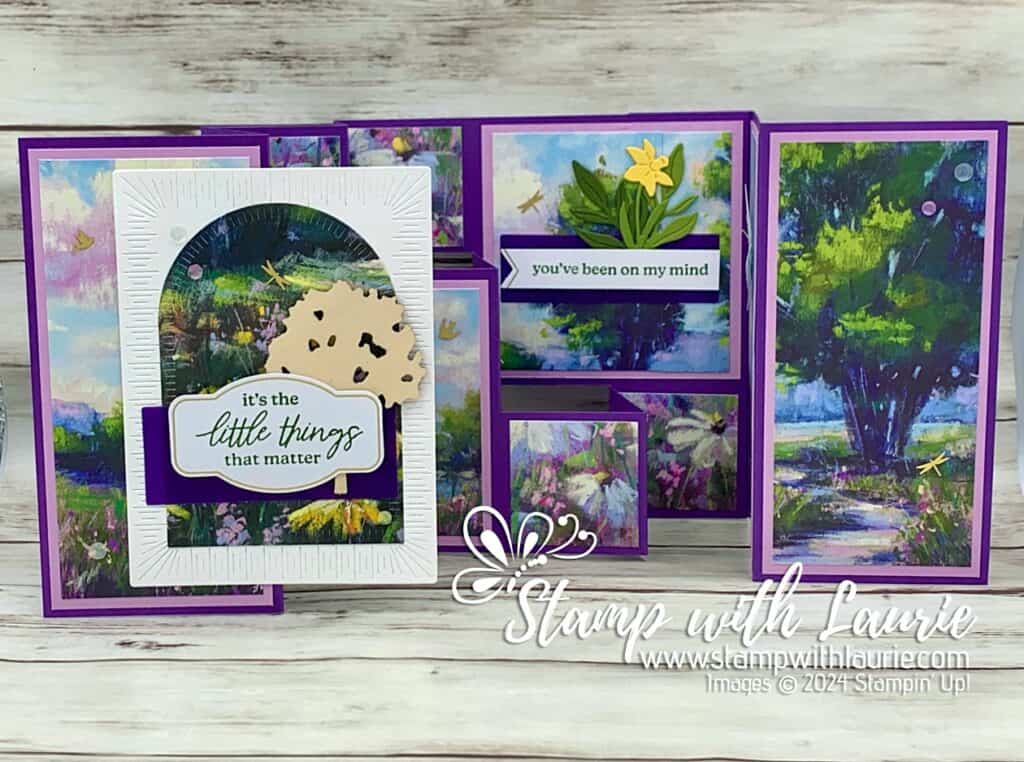
For this fun-fold card, I used 3 card bases front and back from the Paper Pumpkin Kit. I loved that the card bases were printed with a continual scene from front to back! With some careful measuring, this made it easy to create my card.

Front of Card

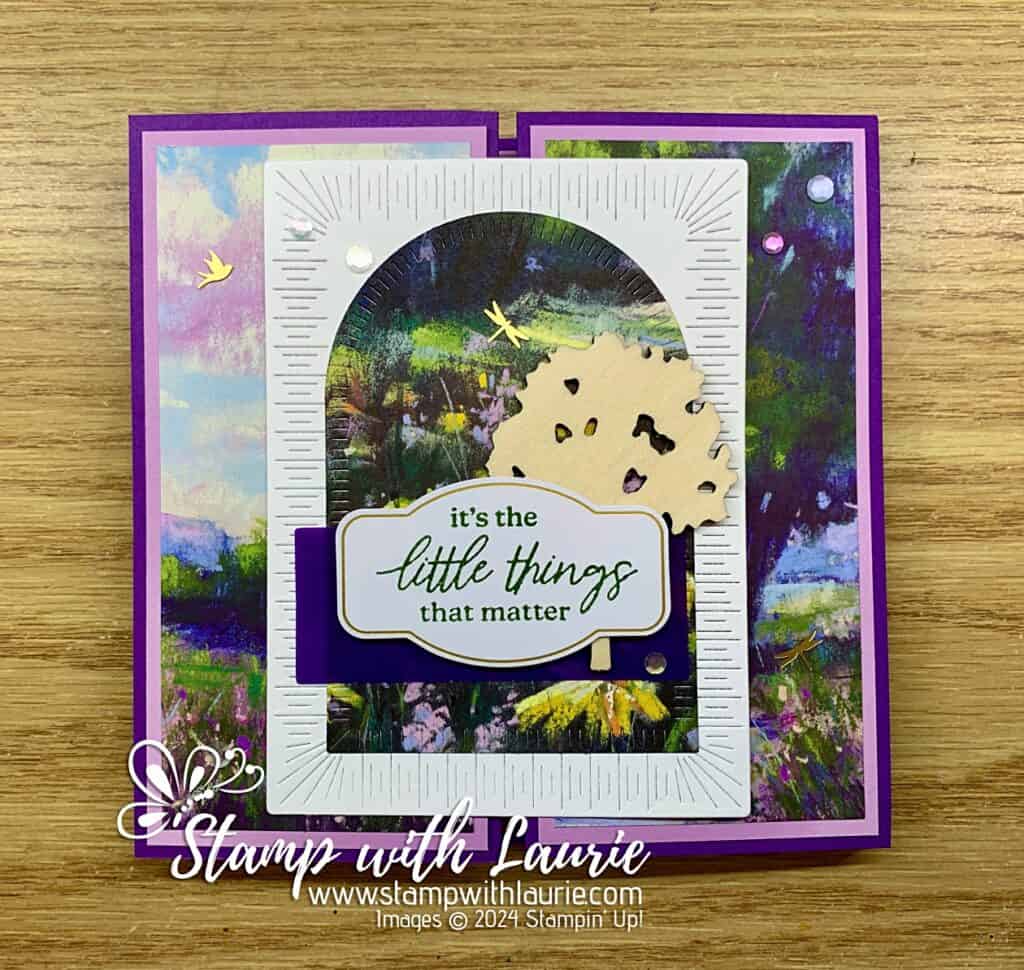
To decorate the front of my card, I used the arch from the Garden Meadow Dies and one of the sheets from the Meandering Meadows 6” x 6” Designer Series Paper that had some Daffodil Delight on it. I knew I wanted to use the daffodil die from The Love of Spring Dies to decorate my inside. So, I wanted to bring this colour throughout my card. The Radiating Stitches Die was a perfect backdrop for my arched focal point!

Front of My Card
Front of My Card

I used the Adhesive-backed iridescent embellishments, the wooden tree, and some Adhesive-Backed Dragonflies & Birds to decorate my card front.

Inside of card

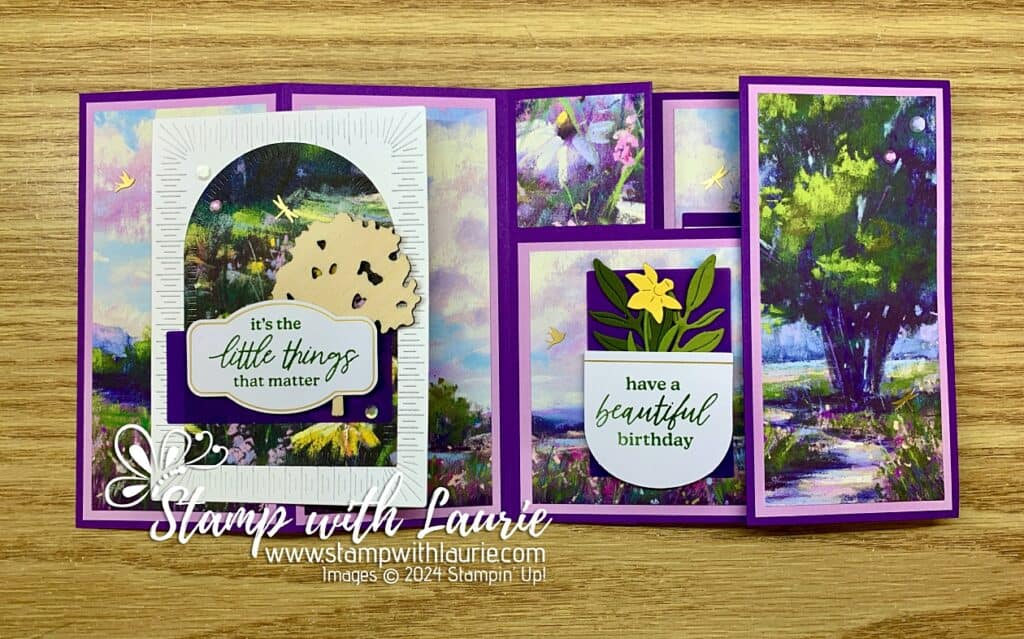
For the larger panels, I used the same card base for the panels that when folded are side by side. For example, I used the larger tree card base for the two front panels that are shown when the card is close. Then, I used the smaller panoramic card base for the two large inside panels. I trimmed the left and right card base sides at 2 ½” wide making sure I used the matching panels when they were adhered. I saved the scored pieces for the large squares. Luckily, the decorations hid the score lines well.

First Opening of Inside of Card

Next, I used the daisy card base for six of the small squares. I did not mat these since the squares are already so small. Again, I made sure to cut them so that they matched when laid down in a row. The centre square was left over from the scraps.

Second Opening of Inside of Card

To decorate my card, I stamped the sentiments in Garden Green on the different precut pieces with gold foil. I layered the leaves and daffodils behind the two inside my card using the vellum pieces that come in the kit to accent them.

Third Opening of Inside of Card

More adhesive-backed iridescent embellishments, Adhesive-Backed Dragonflies & Birds and two Paper Butterfly Accents were used to decorate the inside.

Card Fully Opened
Card Fully Opened

Supplies:

Stamps/Dies/Bundles: March 2024 Memorable Meadows Paper Pumpkin, The Love of Spring Dies (164396), Garden Meadow Dies (162740), Radiating Stitches Dies (161595)

Inks: Garden Green Spot (In Kit)

Paper: Gorgeous Grape (146987), Fresh Freesia (155613), Basic White (159276), Old Olive (100702), Mossy Meadow (133676), Daffodil Delight (119683), Meandering Meadows 6” x 6” Designer Series Paper (162735)

Accessories: Adhesive-backed iridescent embellishments (in Kit), Pressed wood embellishments (in Kit), Adhesive-Backed Dragonflies & Birds (162743), Paper Butterfly Accents (162612), Bone Folder (102300), Stampin’ Dimensionals (In Kit), Stampin’ Seal (152813), Mini Glue Dots (In Kit)

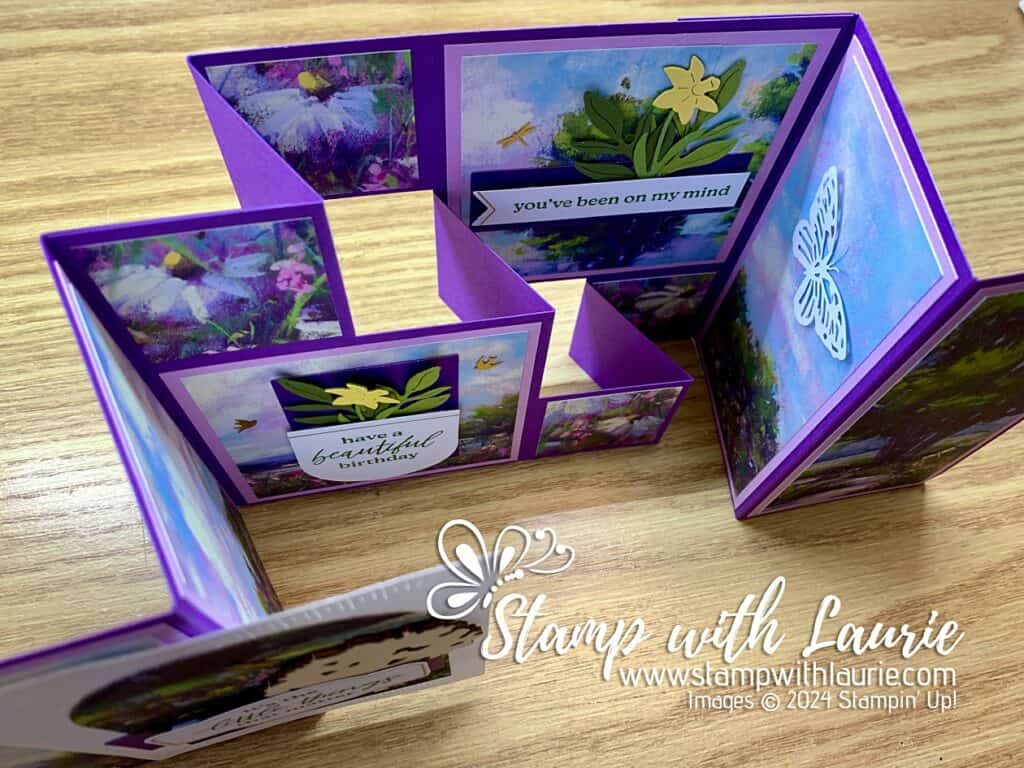
Top View of Card
Top View of Card

Measurements: 

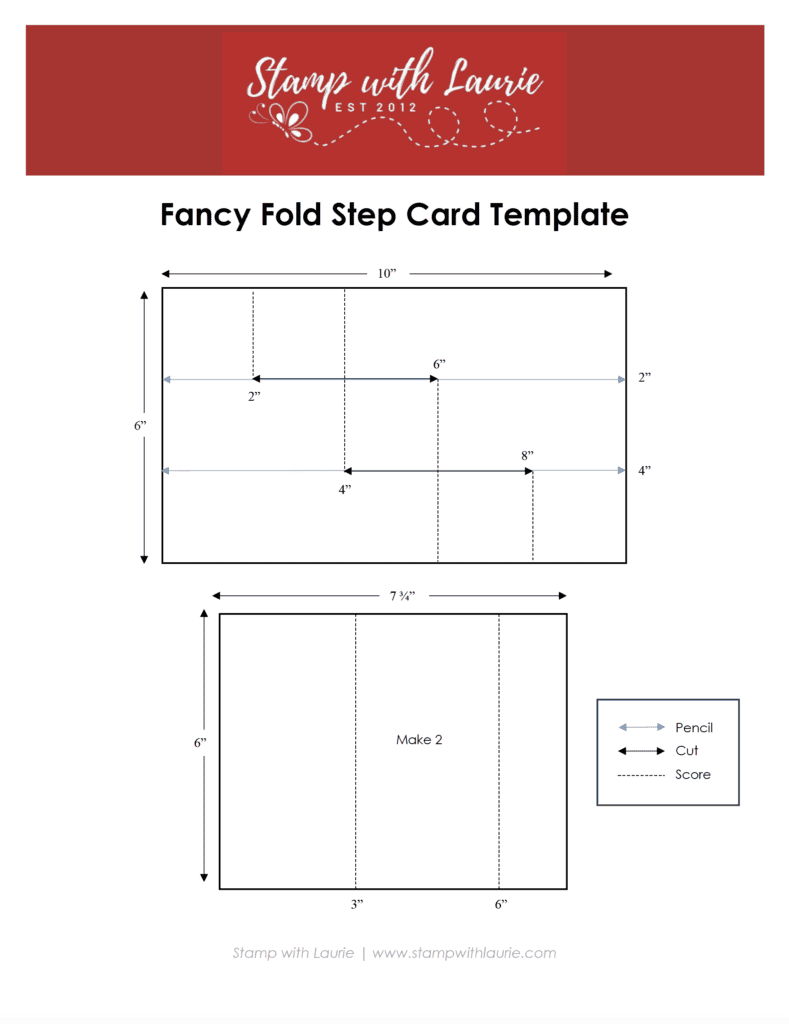
  • Gorgeous Grape cut/scored according to template below (3 pieces):
    • 7 ¾” x 6” (2 pieces)
    • 10” x 6”
  • Fresh Freesia: (6 pieces)
    • 2 ¾” x 5 ¾” (4 pieces)
    • 3 ¾” x 3 ¾” (2 pieces)
  • Basic White:
    • 4” x 5 ½”
  • Old Olive:
    • Scraps for leaves (2 pieces)
  • Mossy Meadow:
    • Scraps for leaves (2 pieces)
  • Daffodil Delight:
    • Scraps for flowers (2 pieces)
  • Meandering Meadows 6″ x 6″ Designer Series Paper:
    • 3” x 4 ½” (for arch on front of card)
  • Memorable Meadows Paper Pumpkin:
    • 2 ½” x 5 ½” (4 pieces)
    • 3 ½” x 3 ½” (2 pieces)
    • 1 ¾” x 1 ¾” (7 pieces)
Collage of Different Layers

More Information on My Fancy Fold Step Card

Here is a video of my card in action.

Fancy Fold Step Card Instructions & Template

To download a PDF of the Fancy Fold Step Card Instructions & Template, please click here or on the picture.

Fancy Fold Step Card Instructions & Template

Finished card size: 6” x 6”

For more of my Stampin’ Up! cards, please click here.

You will find the items listed above in my online store.
You Light the Way Card 

Light the Way Card - a card with a lantern and fireflies on it
Light the Way Card

Hello Crafty Friends! Laurie here again! I am sharing my Light the Way Card using the Lighting the Way Stamp Set and the Lighting the Way Dies by Stampin’ Up! These are both set to retire end of this month. So, get yours while you can!

The Details of My Light the Way Card

This card was created for a swap, and I thought a split panel card with the lantern connecting the two pieces would be fun! I used a Window Sheet for the transparent window to give added stability.

For my card, I went with the Stargazing Designer Series Paper for the top half for the sky and the Countryside Inn Designer Series Paper for the bottom half for the ground. I die cut the fireflies in White Glimmer Specialty Paper and brushes some Crushed Curry to their tails to make them glow. Next, I embossed a trail of lights in the wake of the firefly on the Stargazing Designer Series Paper.

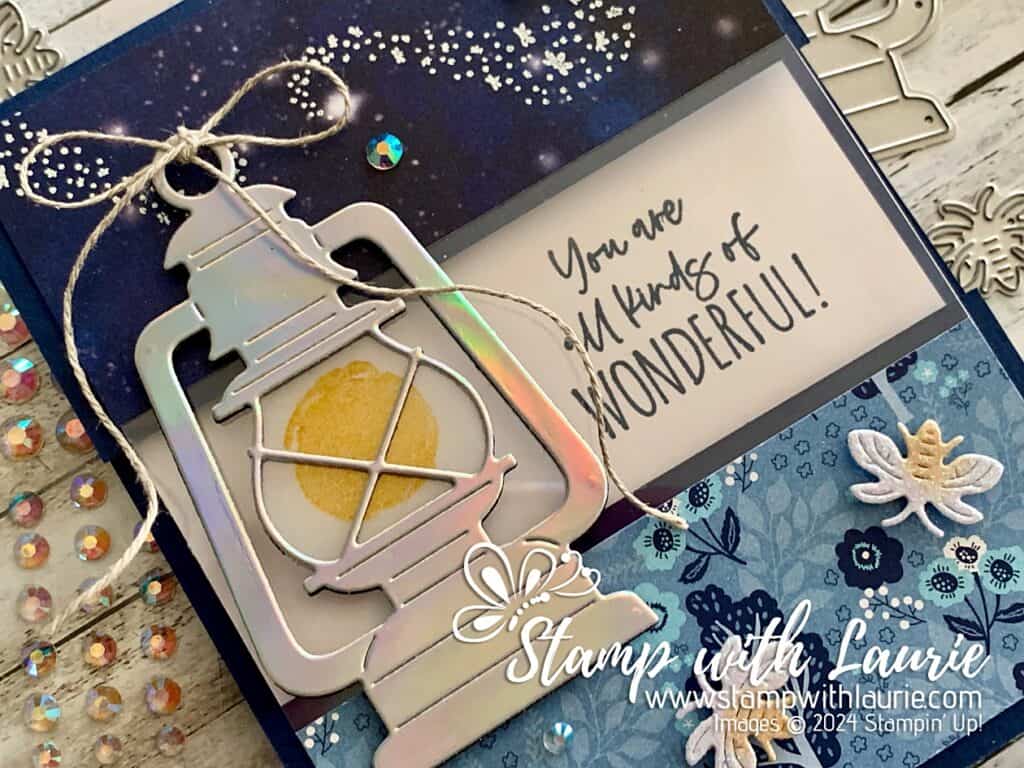
The lantern was die cut twice. Once in the Holographic Paper for the front and again in Basic Black for the back to give the lantern a finished look from inside. I added some vellum to the inside of the lantern on which I stamped the fire glow in Crushed Curry. A bow of Linen Thread added to the top of the lantern finished it off.

Tip: for the sentiment, adhere the Basic White piece inside and then using the Night of Navy card base pieces for placement, stamp the sentiment before decorating them.

Finally, to add a bit more magical shimmer, I used the Iridescent Rhinestone Basic Jewels scattered around my lantern. These are also retiring. So, make sure you get them before they are gone.

Close Up of Lantern on Card
Close Up of Lantern

Supplies:

Stamps/Bundles/Dies: Lighting the Way Stamp Set (160868), Lighting the Way Dies (160496)

Inks: Night of Navy (147110), VersaMark Ink Pad (102283), Crushed Curry (147087)

Paper: Night of Navy (100867), Basic White (159229), Basic Black (121045), Vellum (101856), White Glimmer Specialty Paper (163769), Holographic Trio Specialty Paper (161744), Window Sheets (142314), Stargazing Designer Series Paper (161175), Countryside Inn Designer Series Paper (161467)

Accessories: Linen Thread (104199), Iridescent Rhinestone Basic Jewels (158130), Basics Embossing Powder (155554), Heat Tool (129053), Blending Brushes (153611), Paper Snips (103579), Bone Folder (102300), Stampin’ Dimensionals (104430), Stampin’ Seal (152813), Mini Glue Dots (103683)

Measurements: 

  • Night of Navy:
    • 4 ¼” x 9 ½” scored a 5 ½”, fold and trim one side at 2”. Taking the separate piece, trim 2” off keeping this for the bottom panel.
  • Basic White:
    • 5 ¼” x 4” (inside of card)
  • Window Sheet:
    • 5 ¼” x 4”
  • Holographic Trio Specialty Paper (Lantern):
    • 3 ½” x 2”
  • Basic Black (Lantern):
    • 3 ½” x 2”
  • Vellum:
    • Scrap
  • White Glimmer Specialty Paper:
    • Scrap
  • Stargazing DSP:
    • 4” x 1 ¾”
  • Countryside Inn DSP:
    • 4” x 1 ¾”

More Information on My Light the Way Card

For more of my Stampin’ Up! cards, please click here.

You will find the items listed above in my online store