My Beary Christmas Cards 

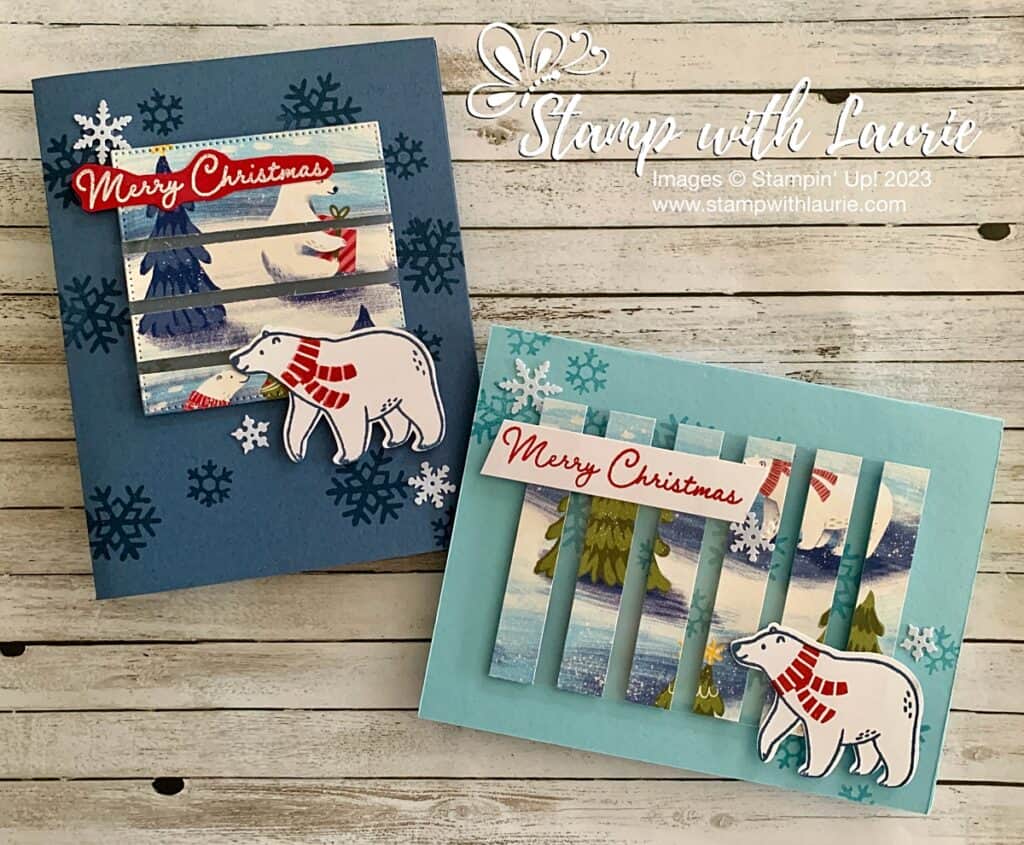
My Beary Christmas Cards  - two Christmas card with a Polar Bear and a wintery scene
My Beary Christmas Cards

Hello Crafty Friends! Laurie here again! I am sharing My Beary Christmas Cards using the Beary Cute Bundle by Stampin’ Up! which includes the Beary Cute Stamp Set and coordinating Beary Cute Punch. This bundle is retiring. So, make sure you get it before it’s too late!

The Details of My Beary Christmas Cards

For my cards, I decided to make a floating element using one of the scenes from the Beary Christmas Designer Series Paper. I had so much fun that I created two different cards with the same elements. For one, I used Misty Moonlight and the other, Balmy Blue card stock bases. A floating element uses acetate or window sheet on which you adhere strips of DSP leaving gaps between the pieces. Then you use dimensionals under the DSP to make it look like the element is floating.

The scene strips were cut at ½” width and lined up in order on my window sheet for placement before adhering them down. I started with the two end pieces and then the centre ones working out to the ends. Tip: use grid paper for an even gap between pieces. Since the DSP was ½ wide, it allowed me to place my dimensionals behind the paper. Thus, hiding them to complete my floating element.

Misty Moonlight Card

I made the Misty Moonlight card portrait and used the largest square from the Stylish Shapes Dies to die cut my square once I had adhered the 5 DSP scene pieces to the Window Sheet.
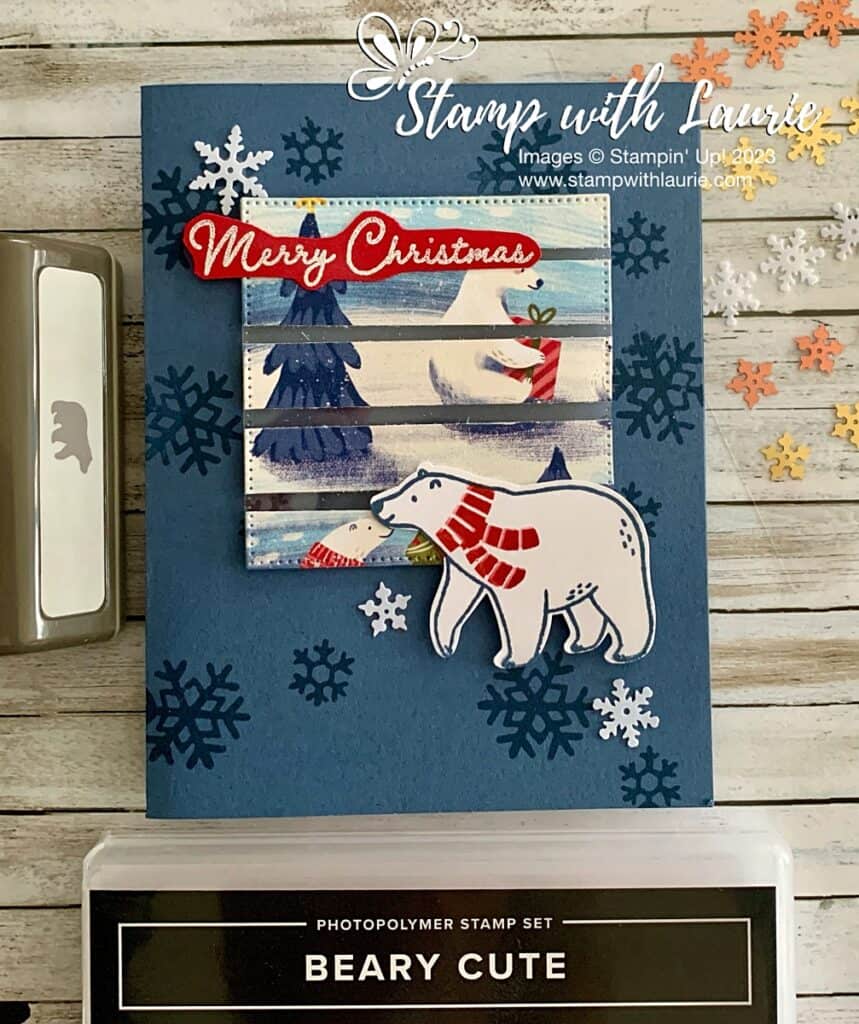
Misty Moonlight Card with a Polar Bear on it.
Misty Moonlight Card

I stamped snowflakes in Misty Moonlight for a tone-on-tone around my central focal point.

The sentiment was white embossed on some Real Red card stock and then fussy cut with my Paper Snips.

The polar bear was stamped in Misty Moonlight and Real Red for his scarf before it was punched out.

Balmy Blue Card

For my Balmy Blue card, I decided that I wanted to use more of the DSP. So, I made the floating element larger with 6 pieces of DSP and wider gaps. I stamped the Balmy Blue snowflakes at an angle through the centre of the card. This allowed the snowflakes to show through the Window Sheet!
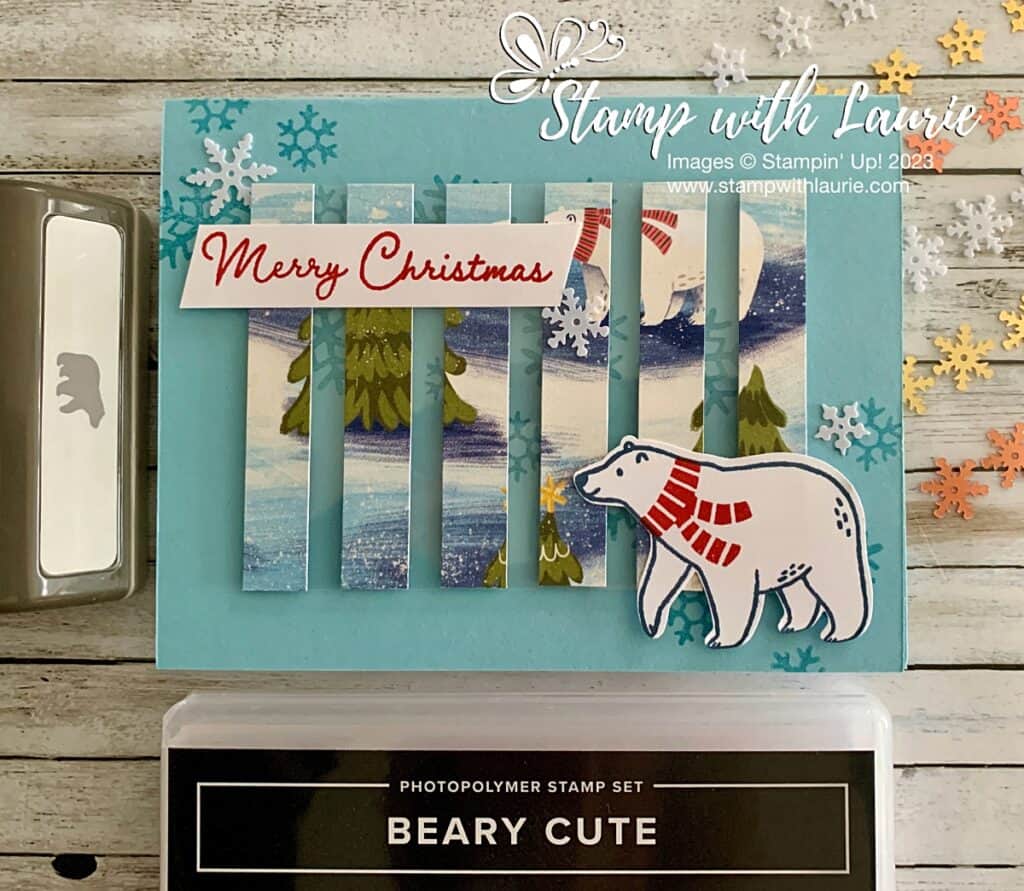
Balmy Blue Card with a Polar Bear on it
Balmy Blue Card

The sentiment was stamped in Real Red and snipped on an angle with my Paper Snips.

For both cards, I used the white snowflakes from the Adhesive-Backed Snowflake Assortment as my embellishments.

Supplies:

Stamps/Bundles/Dies: Beary Cute Bundle (162023), Stylish Shapes Dies (159183)

Inks: Misty Moonlight Classic Stampin’ Pad (153118), VersaMark Ink (102283), Balmy Blue Classic Stampin’ Pad (147105), Real Red Classic Stampin’ Pad (147084)

Paper: Misty Moonlight (153081), Balmy Blue (146982), Window Sheets (142314), Real Red (102482), Basic White (159276), Beary Christmas Designer Series Paper (162015)

Accessories: Adhesive-Backed Snowflake Assortment (162129), Basics Embossing Powder (155554), Embossing Additions Tool Kit (159971), Heat Tool (129053), Paper Snips (103579), Grid Paper (130148), Bone Folder (102300), Stampin’ Dimensionals (104430), Mini Glue Dots (103683), Mulitpurpose Liquid Glue (110755)

Measurements: 

  • Misty Moonlight/Balmy Blue:
    • 8 ½” x 5 ½” scored at 4 ¼”
  • Window Sheet:
    • 3” x 3” (for Misty Moonlight Card)
    • 3” x 4 1/8” (for Balmy Blue Card)
  • Real Red:
    • Scrap
  • Basic White: (3 pieces)
    • 2” x 2 ½” (Polar Bears)
    • Scrap (Sentiment)
  • Beary Christmas Designer Series Paper:
    • 3” x 2 ½” (for Misty Moonlight Card)
    • 3” x 3” (for Balmy Blue Card)

More Information on My Beary Christmas Cards:

For more of my Stampin’ Up! cards, please click here.

You will find the items listed above in my online store

My Vintage Christmas Card 

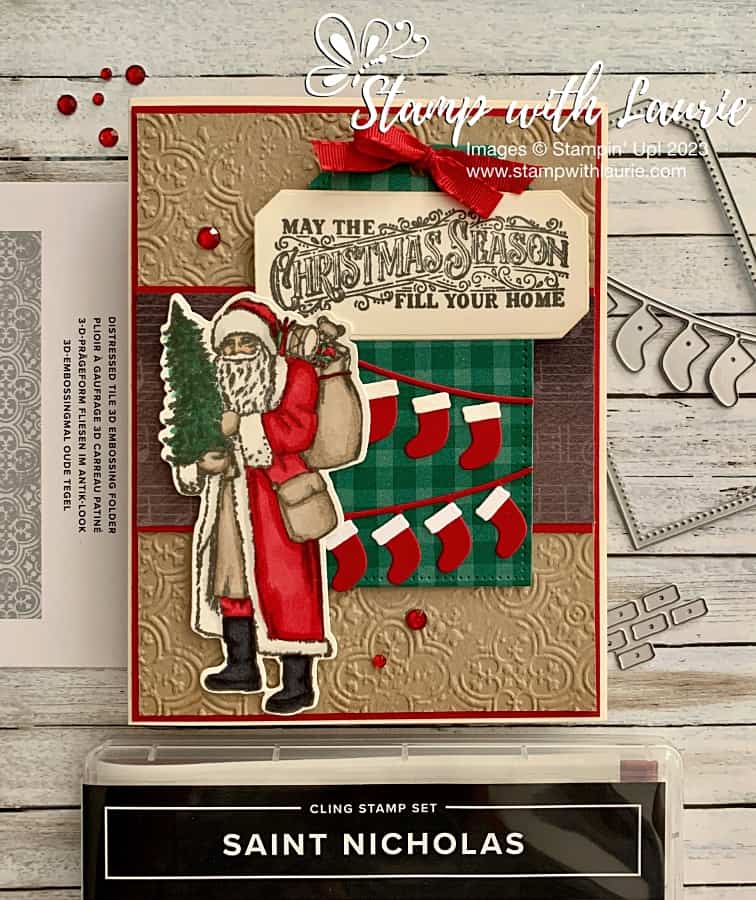
My Vintage Christmas Card - a Christmas card with an old fashioned Santa carrying a tree and presents
My Vintage Christmas Card

Hello Crafty Friends! Laurie here again! I am sharing My Vintage Christmas Card using the Saint Nicholas Bundle by Stampin’ Up! which includes the Saint Nicholas Stamp Set and the Saint Nicholas Dies. My card was designed for a swap of the September-December 2023 Mini Catalogue.

The Details of My Vintage Christmas Card

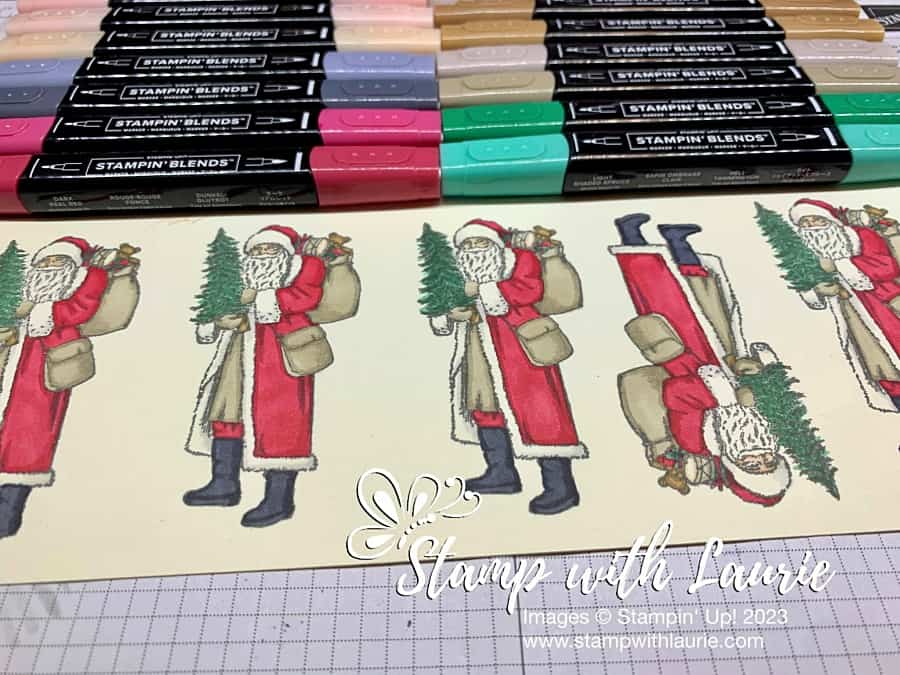
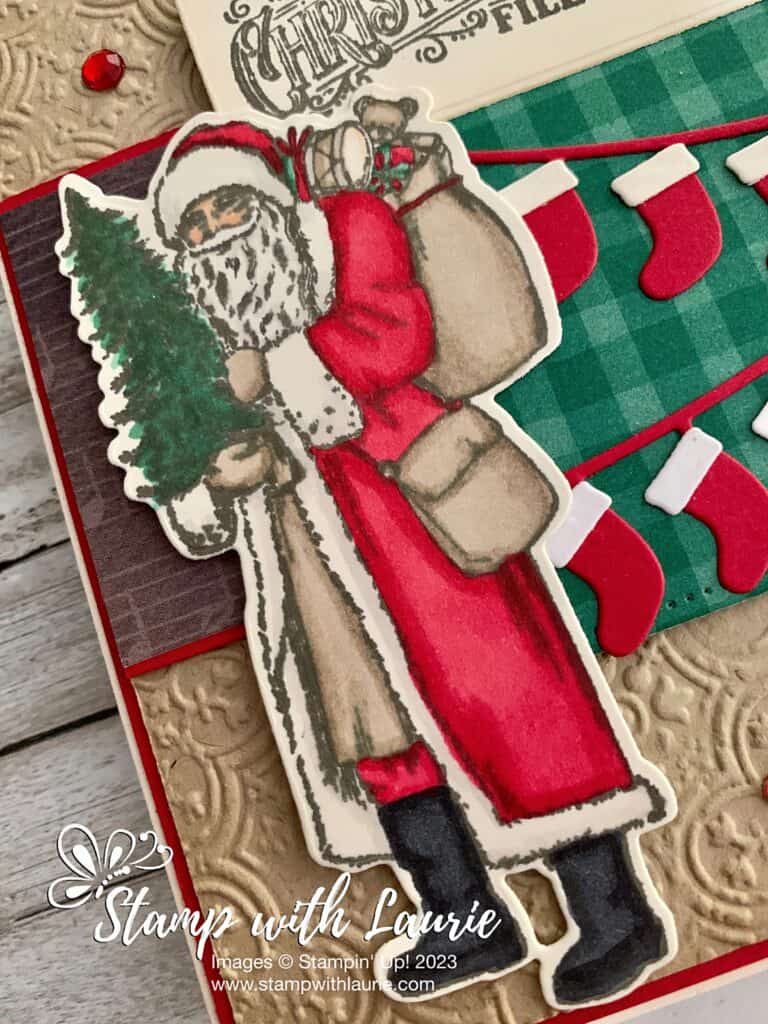
For my card, I decided to make a vintage feel card since the Saint Nicholas is an old fashion Santa Claus. To achieve this feeling, I stamped Saint Nicholas on Very Vanilla card stock in Gray Granite Ink to give him a lighter, almost no-lines, look rather than the traditional Memento black that I usually use with my Stampin’ Blends. I have included some links at the end of this post with more Stampin’ Blends colouring tips.

My Colourings of Santa Claus
My Colourings of Saint Nicholas

Once Saint Nicholas was coloured with my Blends, I die cut him out with the matching Saint Nicholas Dies. 

Next, I embossed the Crumb Cake card stock with the Distressed Tile 3D Embossing Folder and brushed Crumb Cake ink along the edges to give it a worn look. The sentiment was also brushed with Crumb Cake once it was stamped in Gray Granite and die cut out with the Countryside Corners Dies.

I loved the stockings and decided to create a DSP tag incorporating them and the sentiment. The tag was inspired by one of the cards in the catalogue. The catalogues are a great place for inspiration! Lol! I added a Real Red bow at the top of the tag to match my colour scheme.

A strip of music DSP with a Real Red matt helped to anchor my focal point. The final embellishments were a couple of gems from the Loose Holly Gems & Sequins.

Supplies:

Stamps/Bundles/Dies: Saint Nicholas Bundle (163859), Tailor Made Tags Dies (155563), Countryside Corners Dies (161471)

Inks: Gray Granite Classic Stampin’ Pad (147118), Crumb Cake Classic Stampin’ Pad (147116)

Paper: Thick Very Vanilla (144237), Real Red (102482), Crumb Cake (120953), Very Vanilla (101650), Joy of Christmas Designer Series Paper (161958)

Accessories: Distressed Tile 3D Embossing Folder (162189), Real Red Stampin’ Blends Combo Pack (154899), Crumb Cake Stampin’ Blends Combo Pack (154882), Shaded Spruce Stampin’ Blends Combo Pack (154903), Smoky Slate Stampin’ Blends Combo Pack (154904), Basic Black Stampin’ Blends Combo Pack (154843), Stampin’ Blends Light Combo Pack (159465), Stampin’ Blends Color Lifter (144608), Loose Holly Gems & Sequins (161981), Real Red & Burlap Ribbon Combo Pack (160386), Blending Brushes (153611), Bone Folder (102300), Stampin’ Dimensionals (104430), Stampin’ Seal (152813), Mini Glue Dots (103683), Mulitpurpose Liquid Glue (110755)

Close Up of Santa Claus
Close Up of Saint Nicholas

Measurements: 

  • Thick Very Vanilla:
    • 8 ½” x 5 ½” scored at 4 ¼”
  • Real Red: (3 pieces)
    • 5-3/8” x 4-1/8”
    • 2-1/8” x 4”
    • Scraps (Stockings)
  • Crumb Cake:
    • 4” x 5 ¼”
  • Very Vanilla: (3 pieces)
    • 2” x 3 ¾” (Saint Nicholas)
    • 2-7/8” x 1-5/16” (Sentiment)
    • Scraps (Stockings)
  • Joy of Christmas Designer Series Paper: (2 pieces)
    • 2” x 4”
    • 2” 3-7/8” (Tag)

More Information on My Vintage Christmas Card:

For more of my Stampin’ Blends cards, please click here.

For more of my Stampin’ Up! cards, please click here.

You will find the items listed above in my online store.

How to Use Stampin’ Blends
https://stampwithlaurie.com/wp-content/uploads/2020/08/Stampin-Up-Blends-2020.pdf

Part 1Whiskey Business Card using Blending Different Colours Technique
Video Tutorial: Blending Different Colours Together

Part 2Country Harvest Card using Light to Dark Technique
Video Tutorial: Light to Dark/Dark to Light Colouring

Part 3Beautiful Poppy Birthday Card using Smooth Colouring Technique
Video Tutorial: Smooth Colouring

Part 4Let’s Gather Together Card using Tip to Tip Blending Technique
Video Tutorial: Tip to Tip Colouring

Part 5So Grateful Cardinal Card using Flicking Colouring Technique
Video Tutorial: Flicking Colouring

Part 6Let’s Celebrate You Card using Flicking of Different Colours Technique
Video Tutorial: Flicking of Different Colours Technique

No-Lines Technique CardsMy Cardinal Anniversary Card and My Cardinal Card

How to Create a Scene:https://youtu.be/6w4fkxgA9rg