My Happy 2024 Calendars

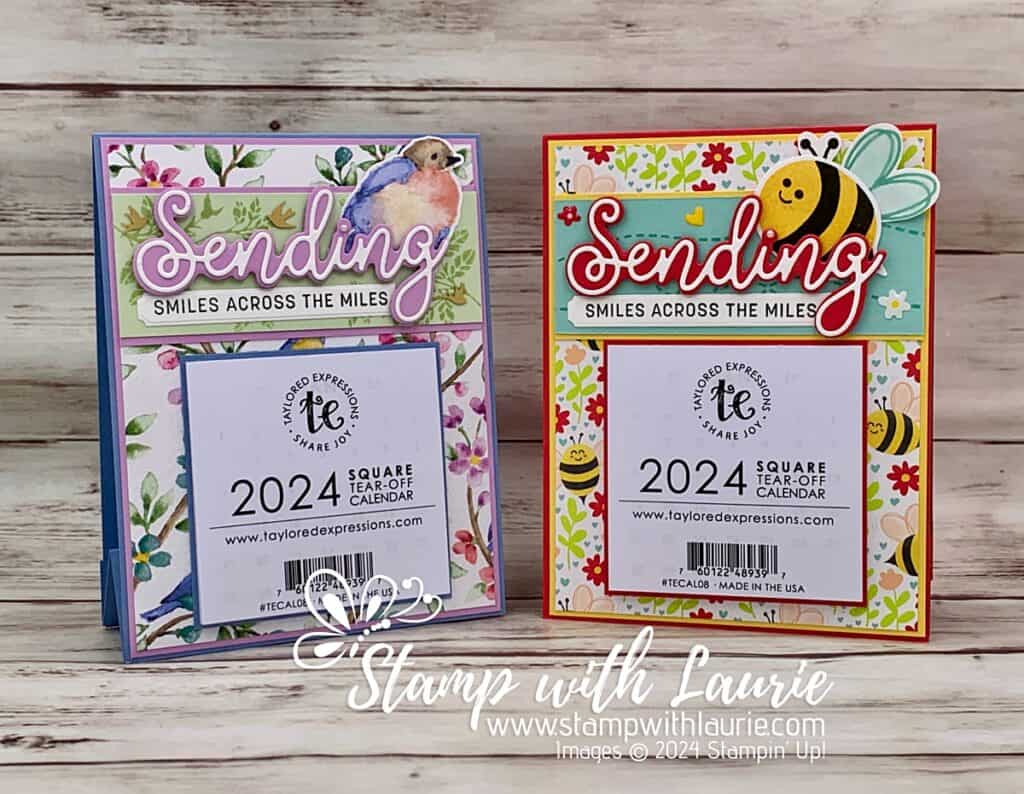
Happy 2024 Calendars - two handmade calendars. One with a bee on it and one with a bird.
My Happy 2024 Calendars

Hello Crafty Friends! Laurie here again! I am sharing My Happy 2024 Calendars using the Bee My Valentine Bundle and the Flight & Airy Designer Series Paper by Stampin’ Up! I didn’t get done my Christmas cards this year due to catching Covid. So instead, I decided to send out calendars to some of my customers in the new year.

The Details of My Happy 2024 Calendars

For my calendars, I decided to create two different calendars with the same design but using different products. I couldn’t resist using the beautiful Flight & Airy Designer Series Paper which is a Sale-a-bration freebie if you spend $60.00 CDN on qualifying orders. And don’t you just love those cute bees from the Bee My Valentine Bundle!
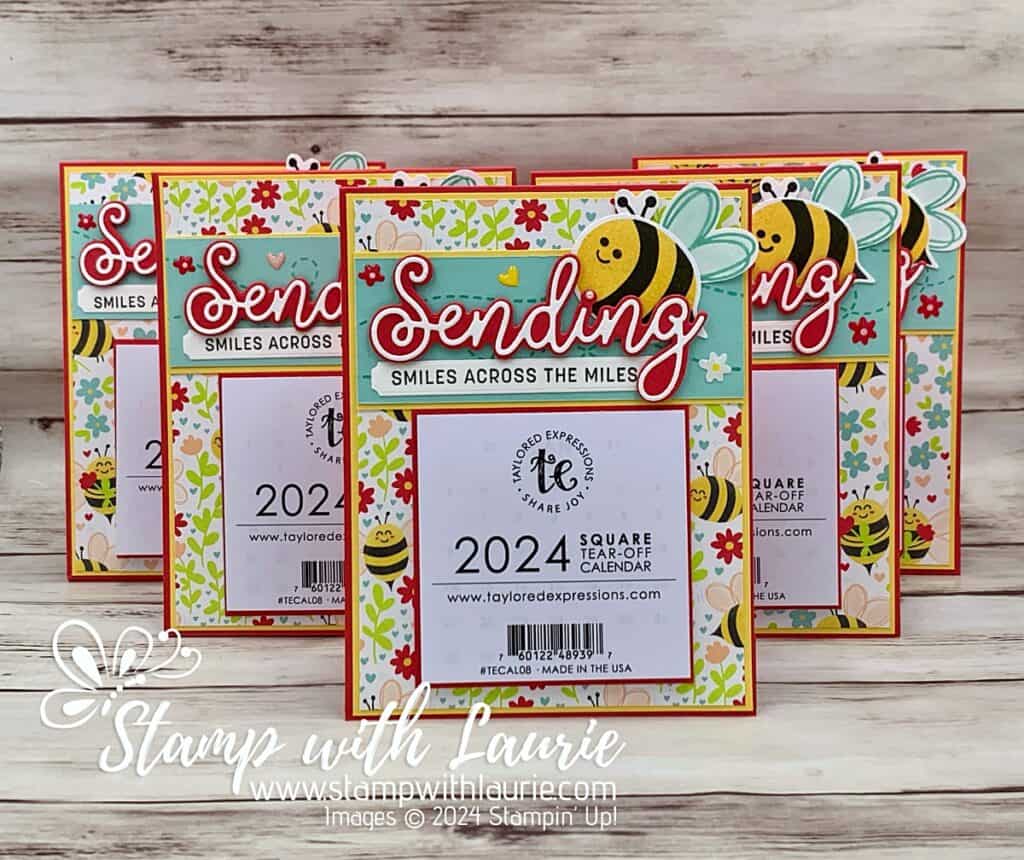
Five Bee Calendars
Bee Calendars

Since I planned to mail these out, the Sending Dies was perfect way to send “smiles across the miles”! To add some interest to the Pool Party and Soft Sea Foam card stocks behind my focal point, I did some tone-on-tone stamping. For the Pool Party one, I stamped a couple of times the bee trail in Pool Party. For the Soft Sea Foam, I stamped the leaves from the Softly Sophisticated Bundle twice in Soft Sea Foam. This bundle is also free with a $120 CDN on qualifying orders during Sale-a-bration.
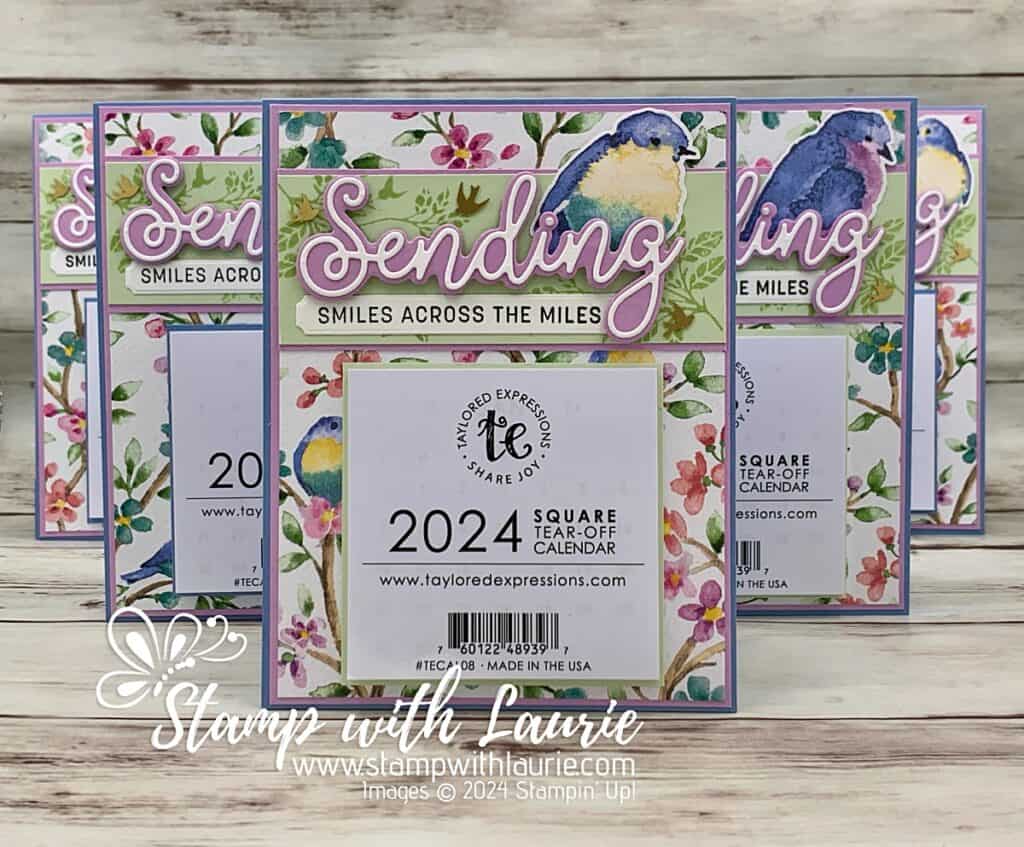
Five Bird Calendars
Bird Calendars

The bee was stamped and punched out with the matching builder punch. The birds were fussy cut from the Flight & Airy DSP. I used different birds for each calendar since there was such a selection from which to choose.
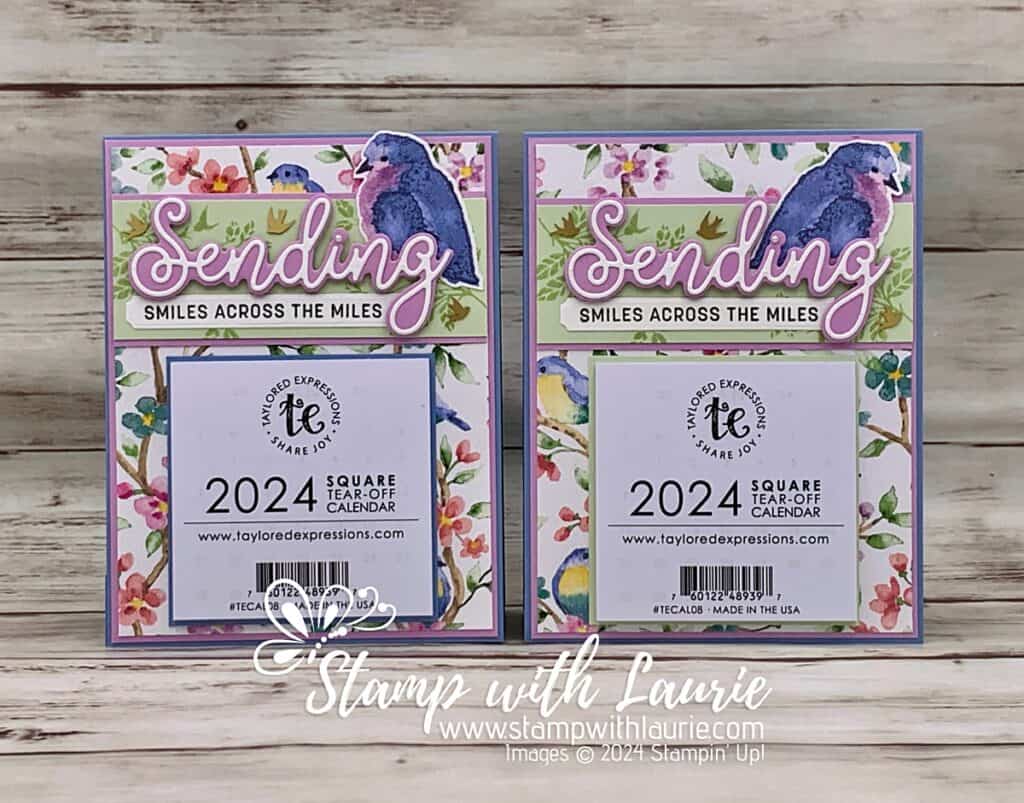
Two of the Bird Calendars

Next, I used the Adhesive-Backed Hearts & Flowers and Adhesive-Backed Dragonflies & Birds for embellishments. I also used a pearl for the “i” in “Sending”.
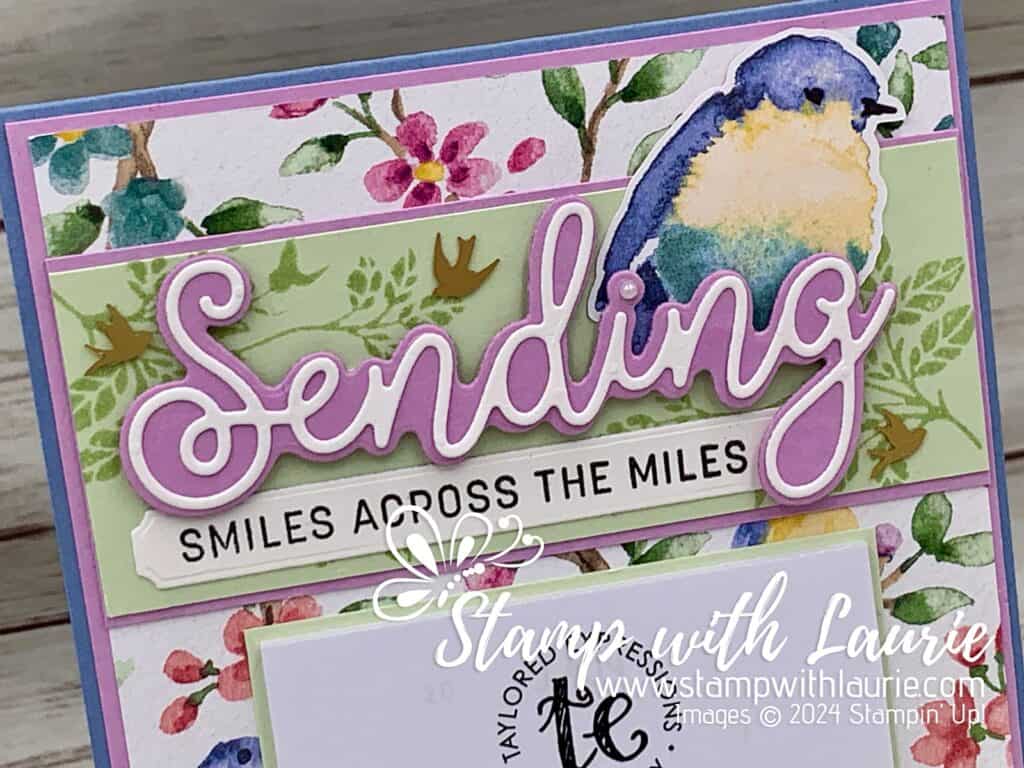
Close Up of Focal Point with Bird

The final thing was to use the technique where you press the ink pad lid when closed to get some ink. I did this with the Pool Party ink pad and picked it up with my Wink of Stella. This gave the bee wings a nice sparkle!
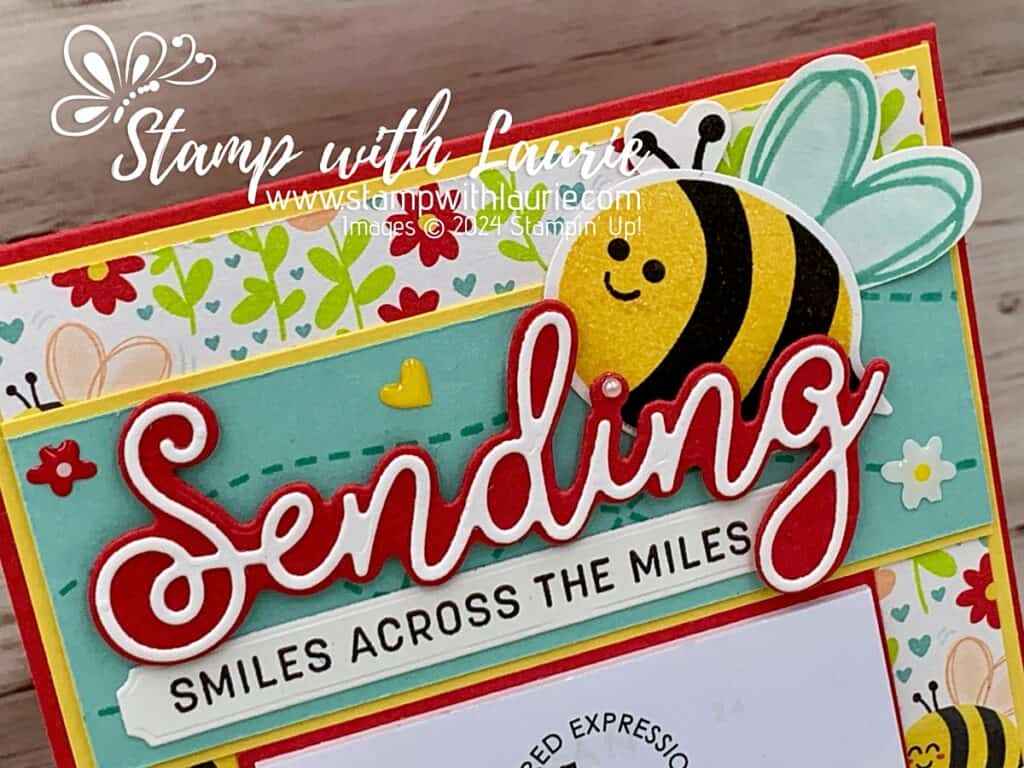
Close Up of Focal Point with Bee

Supplies:

Stamps/Bundles/Dies: Bee My Valentine Bundle (162554), Sending Smiles Stamp Set (158701), Sending Dies (159271), Softly Sophisticated Bundle (162947)

Inks: Pool Party Classic Stampin’ Pad (147107), Sea Foam Classic Stampin’ Pad (147102), Tuxedo Black Memento Ink Pad (132708), Daffodil Delight Classic Stampin’ Pad (147094), 

Paper: Real Red (102482), Balmy Blue (146982), Soft Sea Foam (146988), Pool Party (122924), Fresh Freesia (155613), Daffodil Delight (119683), Basic White (159276), Bee Mine Designer Series Paper (162546), Flight & Airy Designer Series Paper (162977)

Accessories: Adhesive-Backed Hearts & Flowers (162557), Iridescent Pearl Basic Jewels (158987), Adhesive-Backed Dragonflies & Birds (162743), Wink of Stella (141897), Paper Trimmer (152392), Paper Snips (103579), Bone Folder (102300), Stampin’ Dimensionals (104430), Mini Stampin’ Dimensionals (144108), Stampin’ Seal (152813), Mini Glue Dots (103683), Taylored Expression Calendars
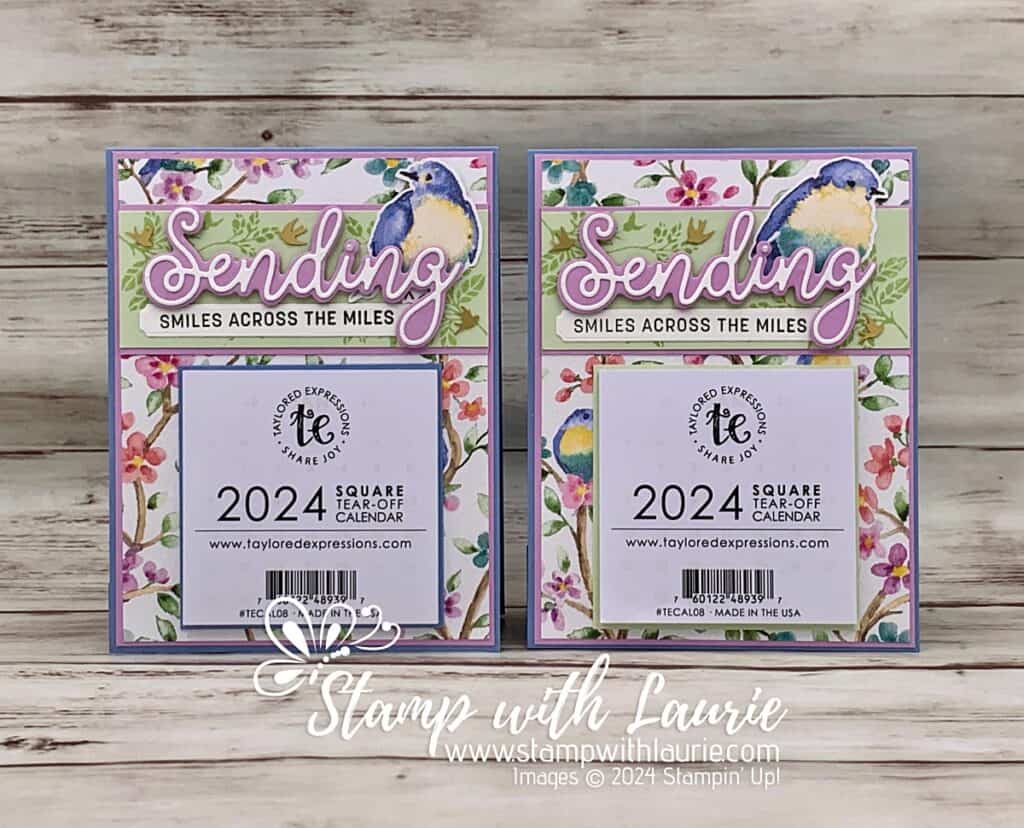
Two Different Birds on Calendars

Measurements: 

  • Real Red/Balmy Blue (3 pieces):
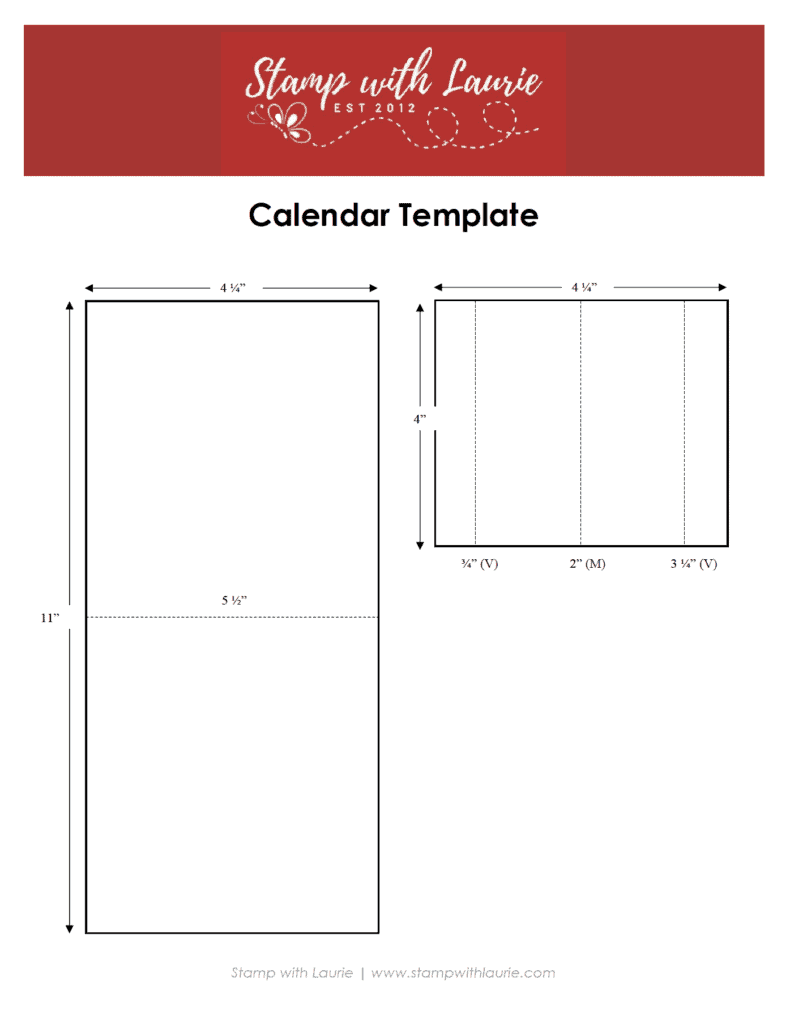
    • 11” x 4 ¼” scored at 5 ½”
    • 4” x 4 ¼” scored at ¾”, 2” and 3 ¼” along 4” side
    • 3-7/8” x 3-7/8” (for behind calendar)
    • 1 ½” x 3 ½” (Sending die)
  • Daffodil Delight/Fresh Freesia: 
    • 4-1/8” x 5-3/8”
    • 4” x 2-5/8”
    • 1 ½” x 3 ½” (Sending die)
  • Pool Party/Soft Sea Foam: 4” x 2 ½”
  • Basic White:
    • 1 ½” x 3-3/8” (Sending die)
    • 3/8” x 3-3/8” (Sentiment)
    • 1 ¾” x 1-3/16” (Bee body)
    • Scraps for wings and antenna
  • Bee Mine Designer Series Paper:
    • 4” x 5 ¼”
  • Flight & Airy Designer Series Paper:
    • 4” x 5 ¼”
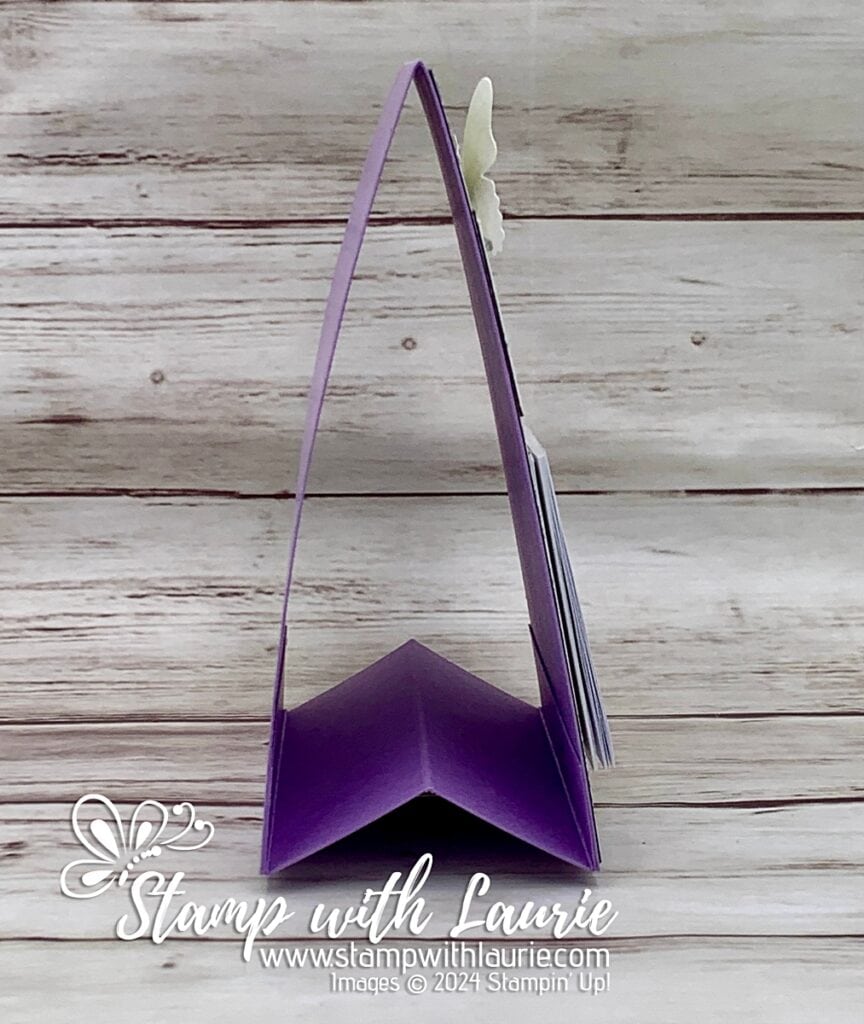
Side View of Calendar

More Information on My Happy 2024 Calendars

To download a PDF of the Calendar Template, please click here or on the picture.

Downloadable Calendar Template

For more of my Stampin’ Up! cards, please click here.

You will find the items listed above in my online store.

Boo and Scary On Halloween Card

Halloween Card with Trick-or-Treaters on it
Boo and Scary On Halloween Card

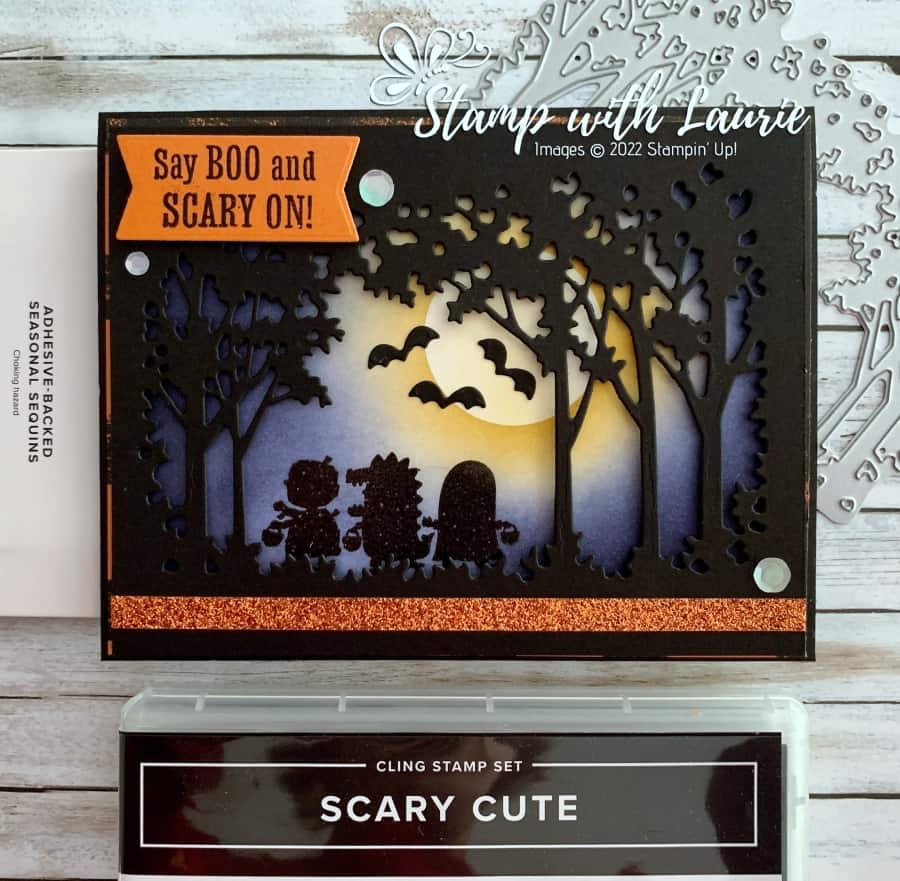
Hello Crafty Friends! Laurie here again! I am sharing my Boo and Scary On Halloween Card using the Scary Cute Bundle which includes the Scary Cute Stamp Set and the Scary Silhouettes Dies. I love making Halloween cards and had a lot of fun with this bundle! In fact, I made 2 cards using it with slight variations. I will share the other one next week as we lead up to Halloween!

The Details of My Card

For my card, I thought the Grove Dies die cut in Basic Black would create a perfect spooky scene for my little tricker-or-treaters! So, I pulled out my Blending Brushes and Masking Paper to create the eerie night sky. I used the 1 3/8” inch circle die (second smallest) from the Layering Circles Dies to create my moon. Once that was in place, I blended Tuxedo Black on the edges of the Basic White piece, followed by Night of Navy and then Crushed Curry around the moon. When I removed the mask, I lightly brushed Crush Curry over the moon to give it a yellow glow.

My trick-or-treaters were stamped in Versamark, and heat embossed in black. I wanted to get a good solid image and thought this would work better than just stamping. Tip: use the die cut grove to help position where you would like you stamp to go.

Since the die cut grove took up most of the front, I made the Gingham Cottage DSP 1/8” larger all around to allow it to be seen and gave the card some colour.

There was room at the bottom to place the Pumpkin Pie Glitter Washi Tape. It ties in the DSP and the sentiment which was embossed in black as well. A few sequins were added to add some interest.

Supplies for My Boo and Scary On Halloween Card:

Stamps/Bundles/Dies: Scary Cute Bundle (159852), Grove Dies (157844), Layering Circles Dies (151770)

Inks: Tuxedo Black Memento Ink Pad (132708), VersaMark Ink (102283), Night of Navy Classic Stampin’ Pad (147110), Crushed Curry Classic Stampin’ Pad (147087)

Paper: Basic Black (121045), Pumpkin Pie (105117), Basic White (159276), Gingham Cottage Designer Series Paper (159651)

Accessories: Blending Brushes (153611), Stampin’ Up! Masking Paper (155480), Basics Embossing Powder (155554), Heat Tool (129053), Embossing Additions Tool Kit (159971), Adhesive-Backed Seasonal Sequins (159964), Glitter Washi Tape (159973), Bone Folder (102300), Black Stampin’ Dimensionals (150893), Stampin’ Seal (152813), Mini Glue Dots (103683)

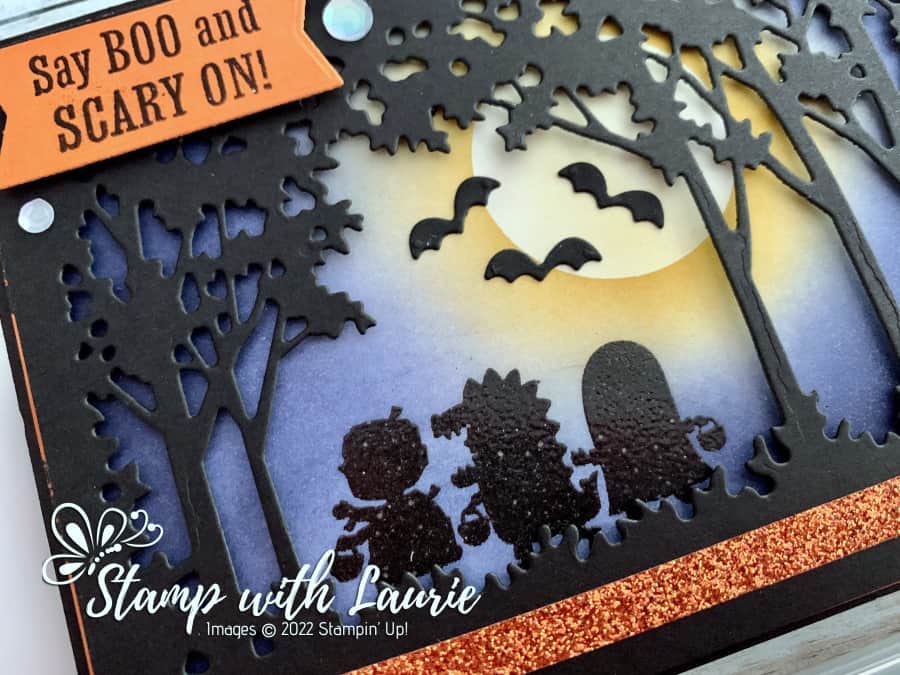
Close Up of Tricker-or-Treaters on Halloween Card
Close Up of Tricker-or-Treaters

Measurements: 

  • Basic Black: 
    • 5 ½” x 8 ½” scored a 4 ¼”
    • 5 ¼” x 4”
    • Scraps for Bats
  • Basic White:
    • 5-1/8” x 3-7/8”
  • Pumpkin Pie:
    • Scrap (sentiment)
  • Gingham Cottage Designer Series Paper: 5-3/8” x 4-1/8”

More Information on My Boo and Scary On Halloween Card:

For more of my Stampin’ Up! cards, please click here.

You will find the items listed above in my online store.
My Peachy Keen Birthday Card

A Birthday Card with Peaches on it.
Peachy Keen Birthday Card

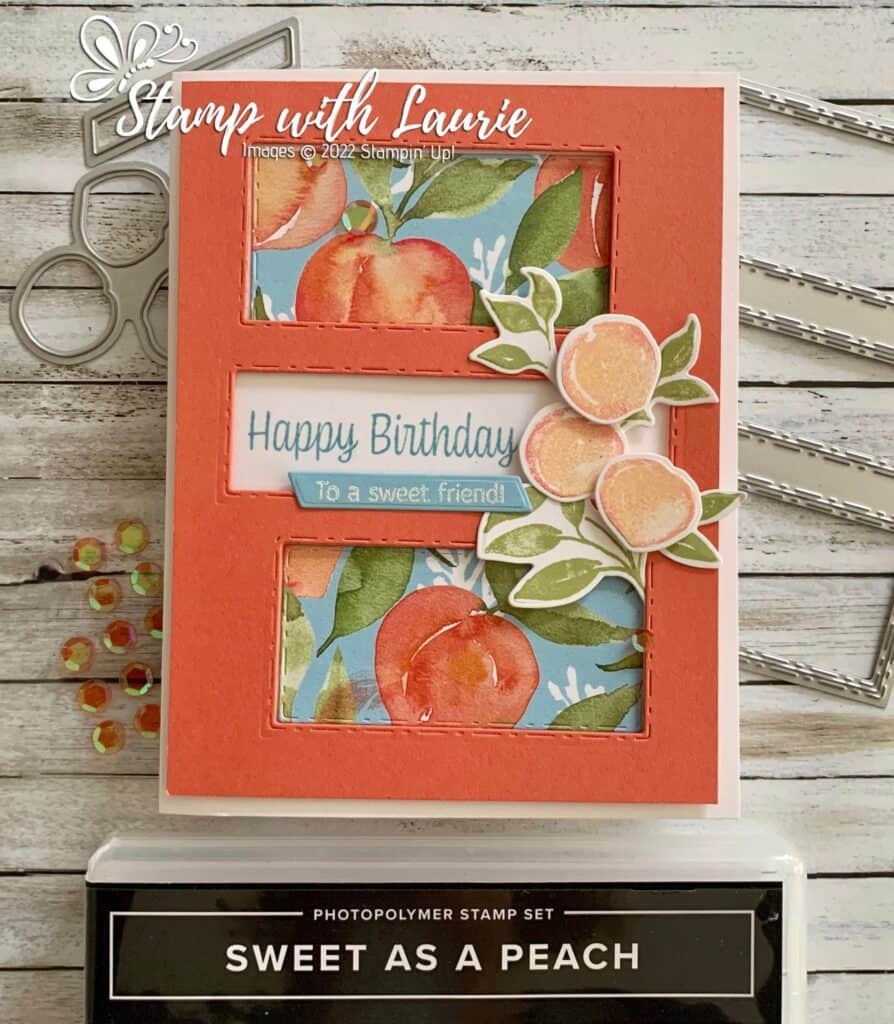
Hello Crafty Friends! Laurie here again! I am sharing My Peachy Keen Birthday Card using the Sweet As a Peach Bundle which includes the Sweet As a Peach Stamp Set and the matching Peach Dies.

The Details of My Card

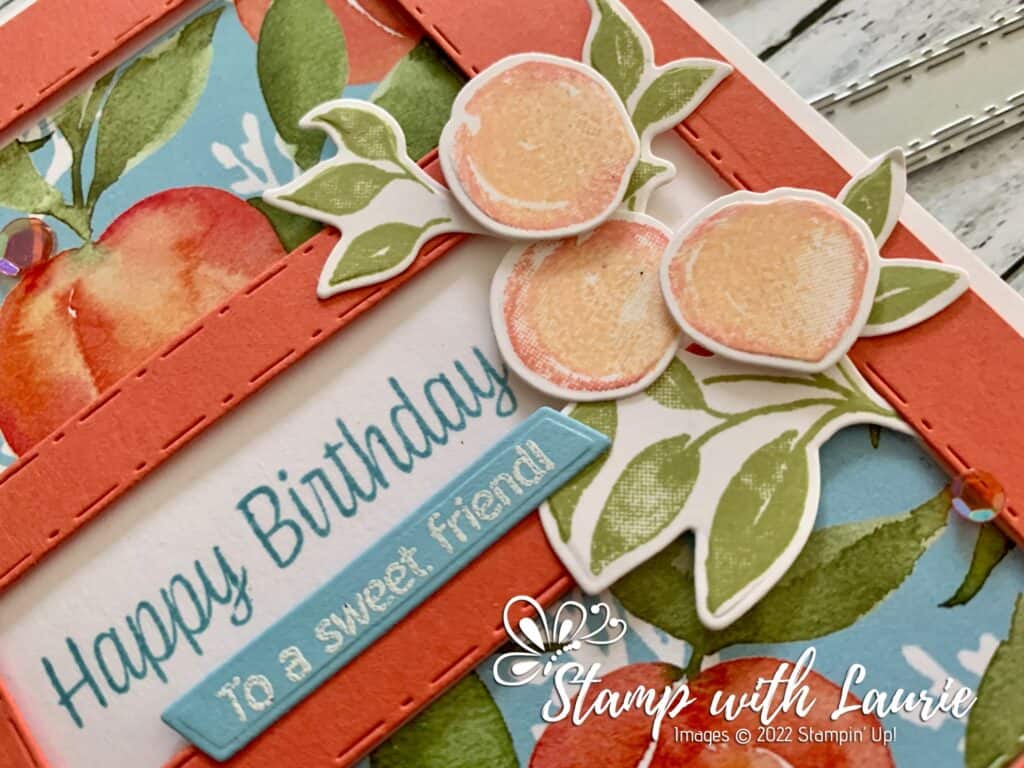
For my card, I love the colours of the pretty You’re a Peach Designer Series Paper and decided that I wanted to pair it with the Picture This Dies.

For the sentiment, I positioned the die cut Calypsol Coral piece, without adhering it, on the card base and stamped the sentiment directly onto the Thick Basic White card base. Next, I popped up the Calypso Coral card stock with dimensionals onto the card base. I then used liquid adhesive on the DSP shifting them into place to allow them to peek through the two of the openings. For the Balmy Blue sentiment, I white embossed it with my heat gun to make it pop.

I decide that I wanted the Pear Pizzazz leaves to be exploding from the Picture This Dies frame onto the sentiment with the stamped peaches layered on top.

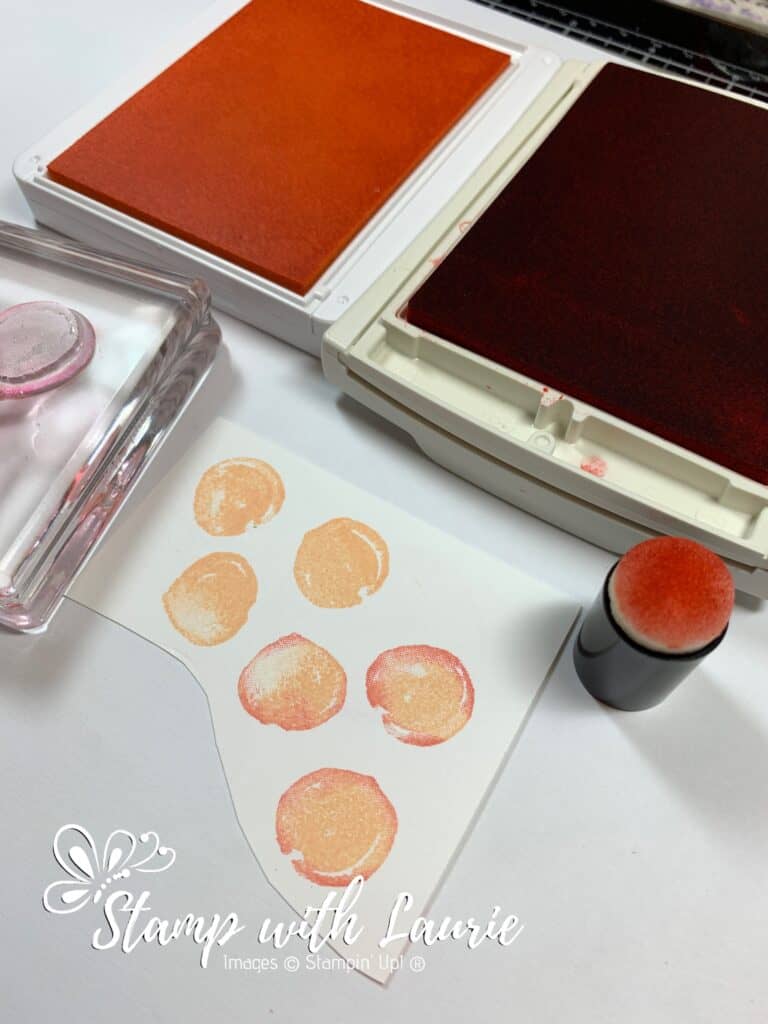
For the peaches, I used a technique where you use a sponge dauber to add a second colour to your stamps and create dimension. I stamped the peaches from the Sweet as a Peach stamp set twice. The top three are in Pale Papaya. The bottom three are Pale Papaya with Calypso Coral daubed on the edges after inking them with the Pale Papaya. What a difference it makes!

Technique to add second colour to the peaches.
Sponge Dauber Technique to Add Second Colour to Stamp

A couple of Calypso Coral Artistry Blooms Sequins tie in the colour scheme and add a bit of sparkle.

Supplies:

Stamps/Bundles/Dies: Sweet As a Peach Bundle (155823), Picture This Dies (155559)

Inks: Calypso Coral Classic Stampin’ Pad (147101), Pale Papaya Classic Stampin’ Pad (155670), Balmy Blue Classic Stampin’ Pad (147105), Pear Pizzazz Classic Stampin’ Pad (147104), VersaMark Ink (102283)

Paper: Calypso Coral (122925), Thick Basic White (159229), Basic White (159276), Balmy Blue (146982), You’re a Peach Designer Series Paper (155686)

Accessories: Basics Embossing Powder (155554), Sponge Daubers (133773), Artistry Blooms Sequins (152477), Bone Folder (102300), Stampin’ Dimensionals (104430), Stampin’ Seal (152813), Mini Glue Dots (103683), Multipurpose Liquid Glue (110755), Heat Tool (129053)

Close Up of My Card with Peaches on it
Close Up of My Card

Measurements: 

  • Thick Basic White: 5 ½” x 8 ½” scored at 4 ¼”
  • Calypso Coral: 5 ¼” x 4”
  • Basic White (2 pieces):
    • 1 ¾” x 1 ½” (Peaches)
    • 2 ¾” x 2 ¼” (Leaves)
  • You’re a Peach Designer Series Paper (2 pieces): 2 11/16” x 1 5/16”
  • Balmy Blue: 1 3/16” x ¼”

More Information on My Peachy Keen Birthday Card:

For more of my Stampin’ Up! cards, please click here.

You will find the items listed above in my online store.
My Sweet Birthday Card

My Sweet Birthday Card

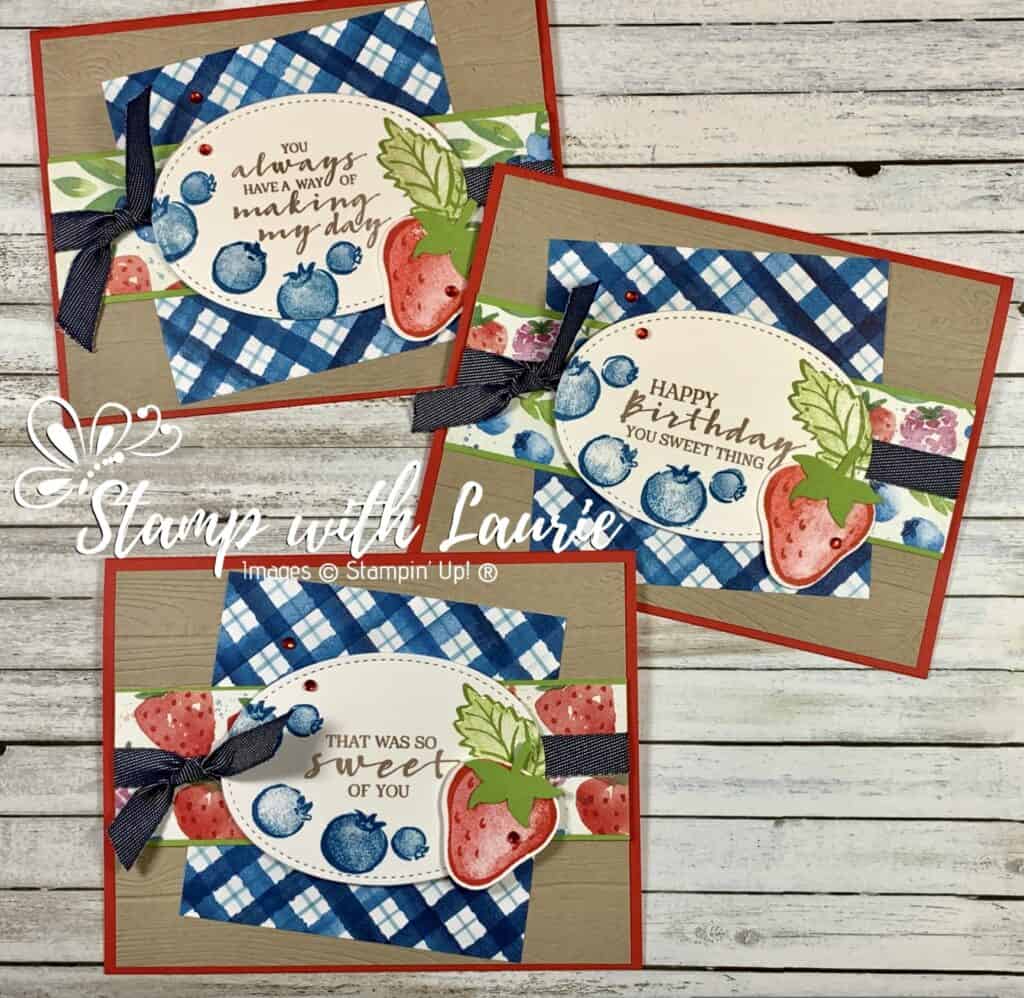
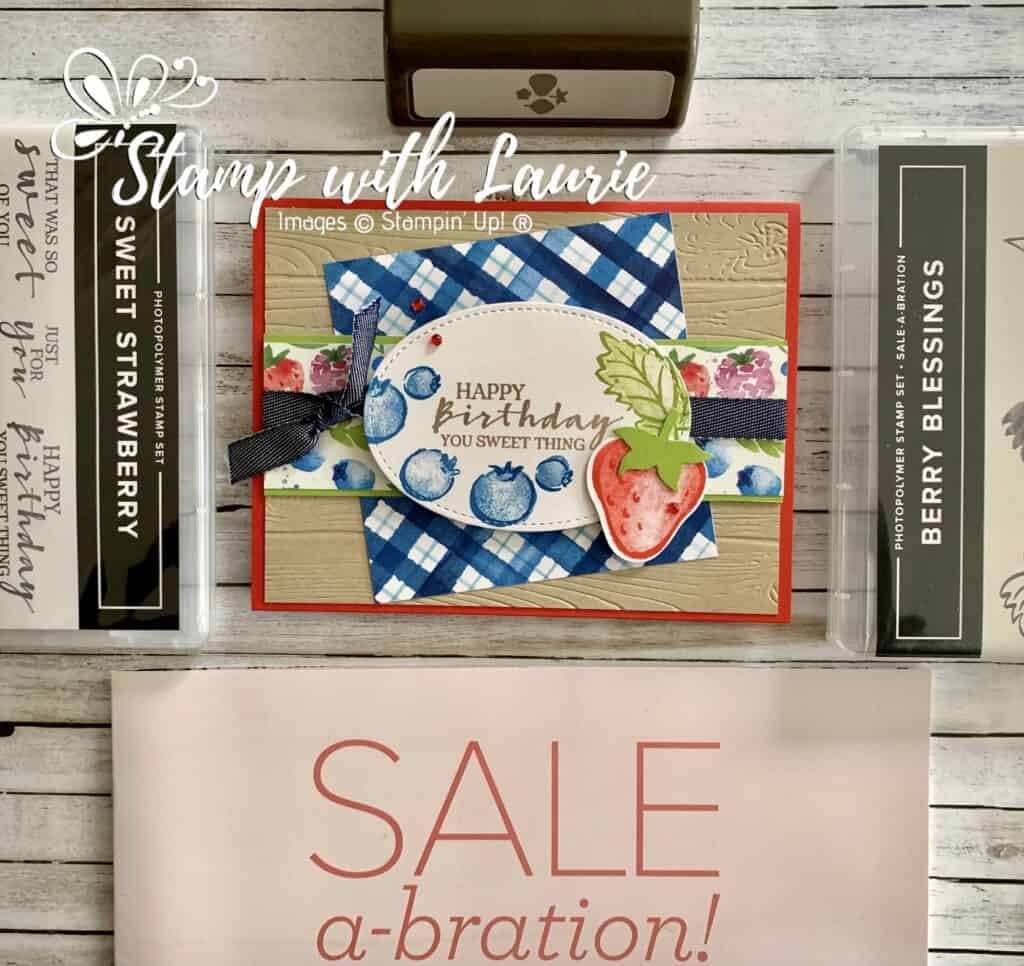
Today is I am sharing My Sweet Birthday Card that I made for a swap using the Sweet Strawberry Bundle and the Sale-a-Bration Berry Bliss Bundle. There is only a few more day left of the Jan-Feb 2021 Sale-a-Bration and you can get the Berry Bliss Bundle for free with a qualifying $120 order.

I love how these two bundles coordinate with their berry sweet theme! The Berry Delightful Designer Series Paper is so pretty with its fresh and juicy paper designs. Both stamp sets are Distinktive and consist of two-step stamping to give you texture and dimension to your images.

Who doesn’t love a coordinating punch and what is better than the Strawberry Builder Punch! I even punched out a coordinating Granny Apple Green stem to top my strawberry.

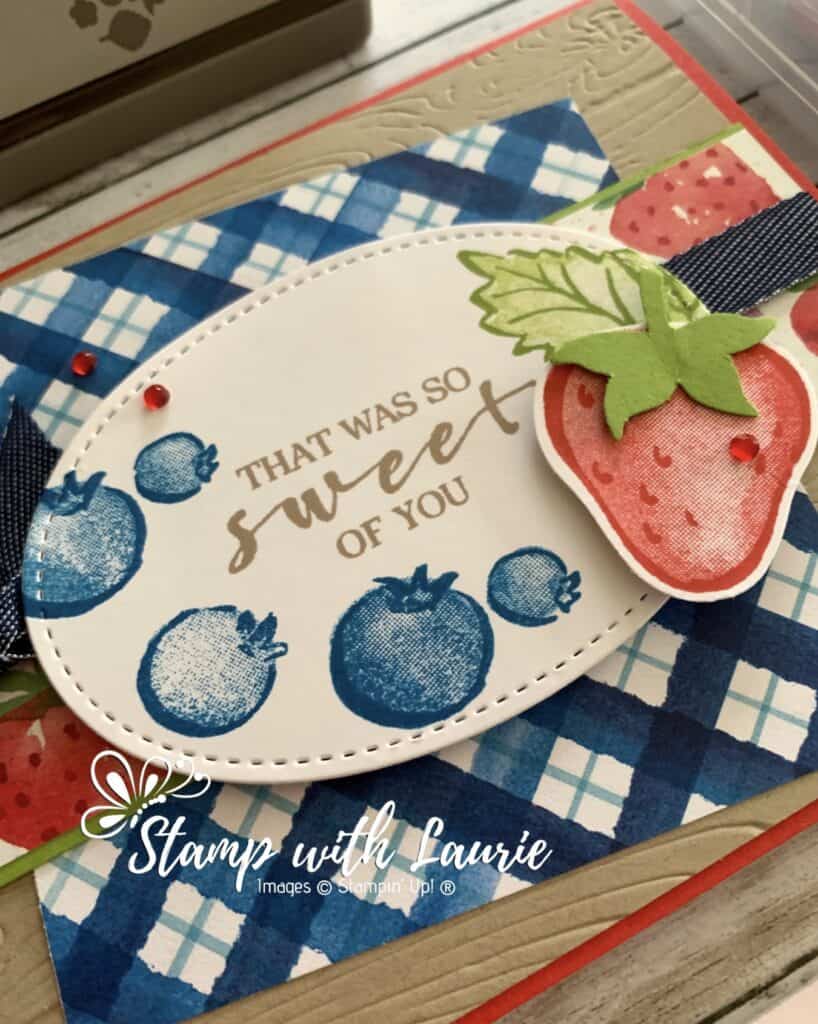
I wanted to create a country theme by using the Pinewood Planks 3D Embossing Folder and the Denim Ribbon. The Stitched Oval also adds to my theme. The plaid DSP reminded me of a table cloth that has been laid on the ground to enjoy your picnic of berries. A couple of Red Rhinestones are the finishing touch and add a bit of sparkle to the card.

I had so much fun with my card that I ended up making 3 versions all with different sentiments.

Three Variations of my Card

Supplies:

Stamps/Bundles/Dies: Sweet Strawberry Bundle (156214), Berry Blessings Bundle (157613)

Inks: Crumb Cake Classic Stampin’ Pad (147116), Poppy Parade Classic Stampin’ Pad (147050), Pacific Point Classic Stampin’ Pad (147098), Granny Apple Green Classic Stampin’ Pad (147095)

Paper: Poppy Parade (119793), Crumb Cake (120953), Basic White (159276), Granny Apple Green (146990), Berry Delightful Designer Series Paper (157613)

Accessories: Pinewood Planks 3D Embossing Folder (152320), 3/8″ Denim Ribbon (149590), Stitched Shapes Dies (152323), Red Rhinestone Basic Jewels (146924), Bone Folder (102300), Stampin’ Dimensionals (104430), Stampin’ Seal (152813), Glue Dots (103683)

Close Up of One of My Cards

Measurements: 

  • Poppy Parade: 5 ½” x 8 ½” scored at 4 ¼”
  • Crumb Cake: 5 ¼” x 4”
  • Basic White: 5 ¼” x 1 ½”
  • Granny Apple Green: 5 ¼” x 1 5/8” and scrap
  • Berry Delightful Designer Series Paper: 5 ¼” x 2 5/16”
  • Denim Ribbon: 2 pieces at 6” and 4”

For Further Info:

Hope you like My Sweet Birthday Card.

For more of my Stampin’ Up! cards, please click here.

You will find the items listed above in my online store.
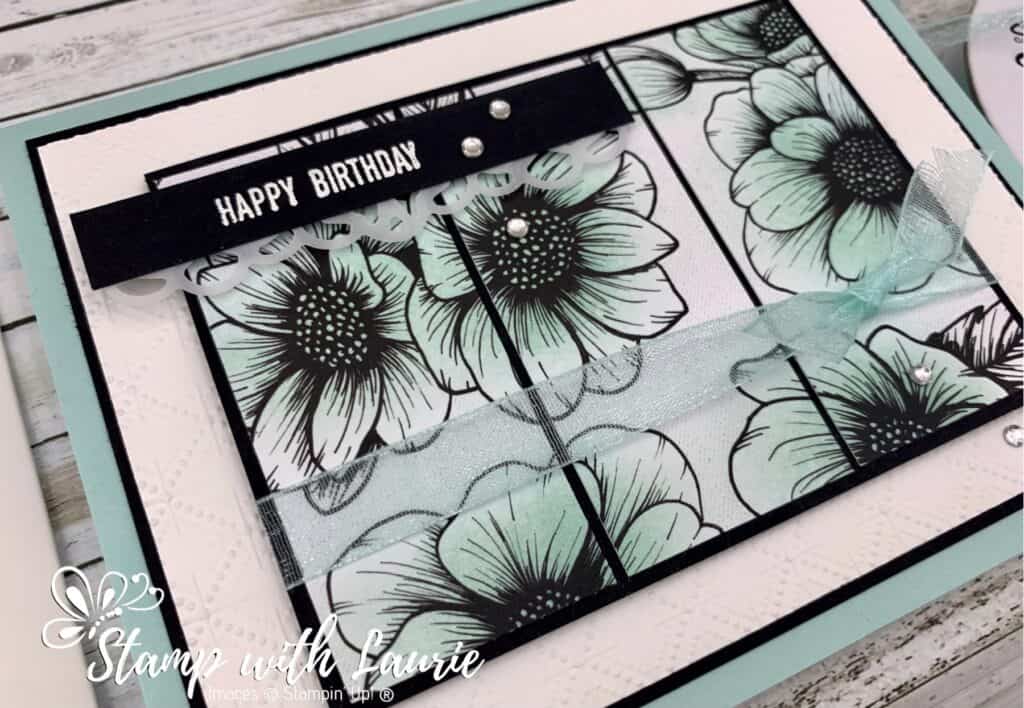
Happy Birthday to Me!

Happy Birthday to Me! Card

Today is my birthday! So I thought I would share my Happy Birthday to Me Card celebrating me and my friend, Sheina, who’s birthday is today as well! Happy Birthday Sheina!

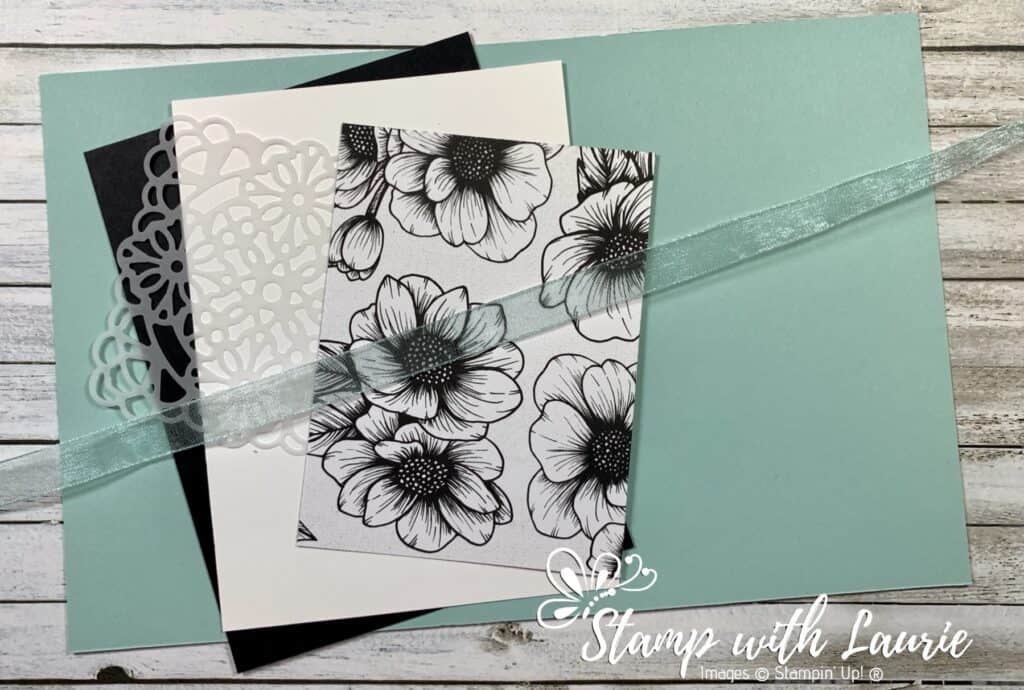
I recently attended a Virtual Stampin’ Up! Christmas Party that was put on by our team leader. The party was delayed until January since Covid was affecting delivery schedules. For this party, we were we given a package of products including a Pool Party card base, Basic Black Card Stock, Basic White Card Stock, a piece of True Love Designer Series Paper, a Square Vellum Doily and Pool Party Sheer Ribbon to create a mystery card. We could use these supplies anyway we liked to create something to share with the group. We could also add any additional supplies to the card that we wished.

Package of Products
Package of Products

My Additional Supplies

So, I added the Dainty Diamonds 3D Embossing Folder, Pool Party Ink, VersaMark Ink, White Embossing Powder, Basic Black Card Stock and Rhinestone Basic Jewels to create my final card.

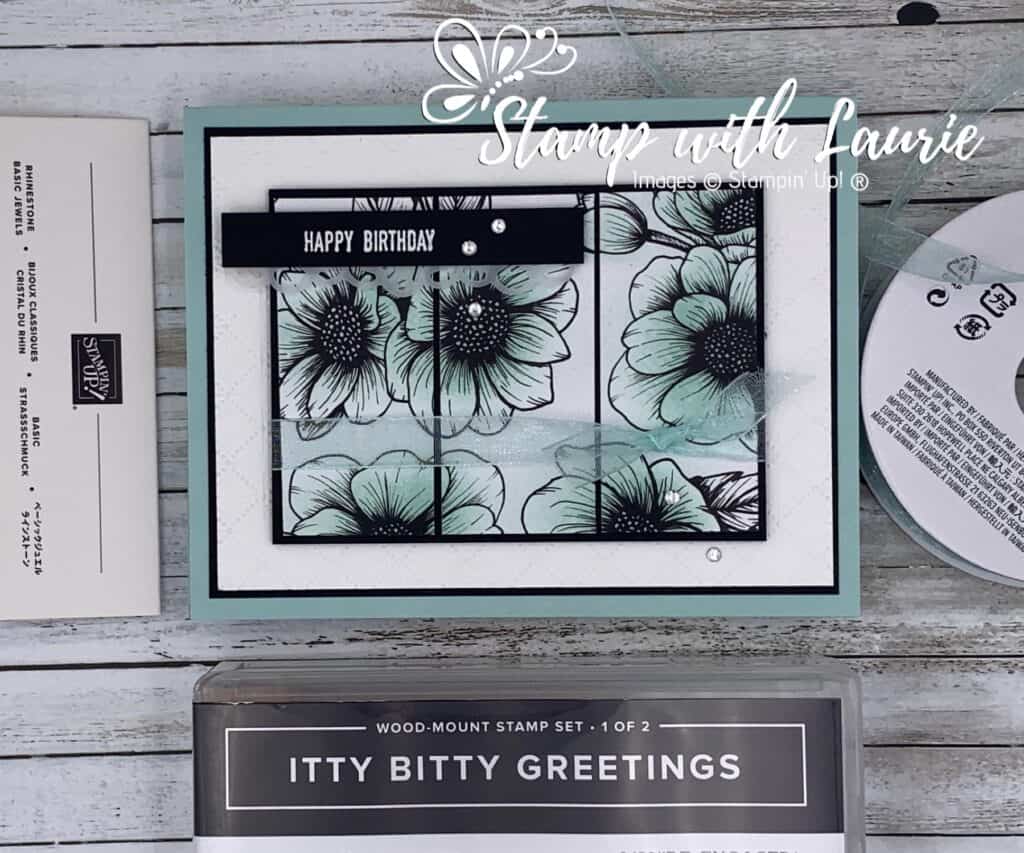
I love the very elegant black/white True Love DSP with the floral motif on one side and geometrics on the other. There are so many ways to add colour to it. You could colour it with the Stampin’ Blends, the Stampin’ Write Markers, sponges or daubers. I chose to add Pool Party Ink using the new Blending Brushes.

I then trimmed it into 3 equal pieces and added it to the Basic Black mat. Once the sentiment was heat set on the Basic Black card stock, I added a trimmed down edge of the Square Doily so that it peeks out. I tied the pretty Pool Party Shimmer Ribbon around my focal point and popped it up with dimensionals. I added a scattering of Rhinestone Basic Jewels to add some shimmer.

Supplies:

Stamps/Bundles/Dies: Itty Bitty Greetings Stamp Set (151331

Inks: VersaMark Ink (102283), Pool Party Classic Stampin’ Pad (147107)

Paper: Pool Party (122924), Basic White (159276), Basic Black (121045), True Love Designer Series Paper (154281)

Accessories: Dainty Diamonds 3D Embossing Folder (152702), Blending Brushes (153611), Pool Party 3/8” Sheer Ribbon(152462), White Stampin’ Emboss Powder (109132), Heat Tool (129053), Square Vellum Doilies (152484), Rhinestone Basic Jewels (144220), Bone Folder (102300), Stampin’ Dimensionals (104430), Stampin’ Seal (152813), Glue Dots (103683)

Close Up of Happy Birthday to Me! Card

Measurements: 

  • Pool Party: 5 ½” x 8 ½” scored at 4 ¼”
  • Basic Black: 3 pieces
    •  5 1/8” x 3 7/8”
    • 2 7/8” x 4”
    • 3” x ½”
  • Basic White: 3 ¾” x 5”
  • True Love Designer Series Paper: 1 piece 3 ¾” x 2 ¾” then trimmed into 3 pieces at 1 ¼” x 2 ¾”

For Further Info:

Hope you like my Happy Birthday to Me! Card.

If you would like see more of my Stampin’ Up! cards, please click here.

You will find the items listed above in my online store

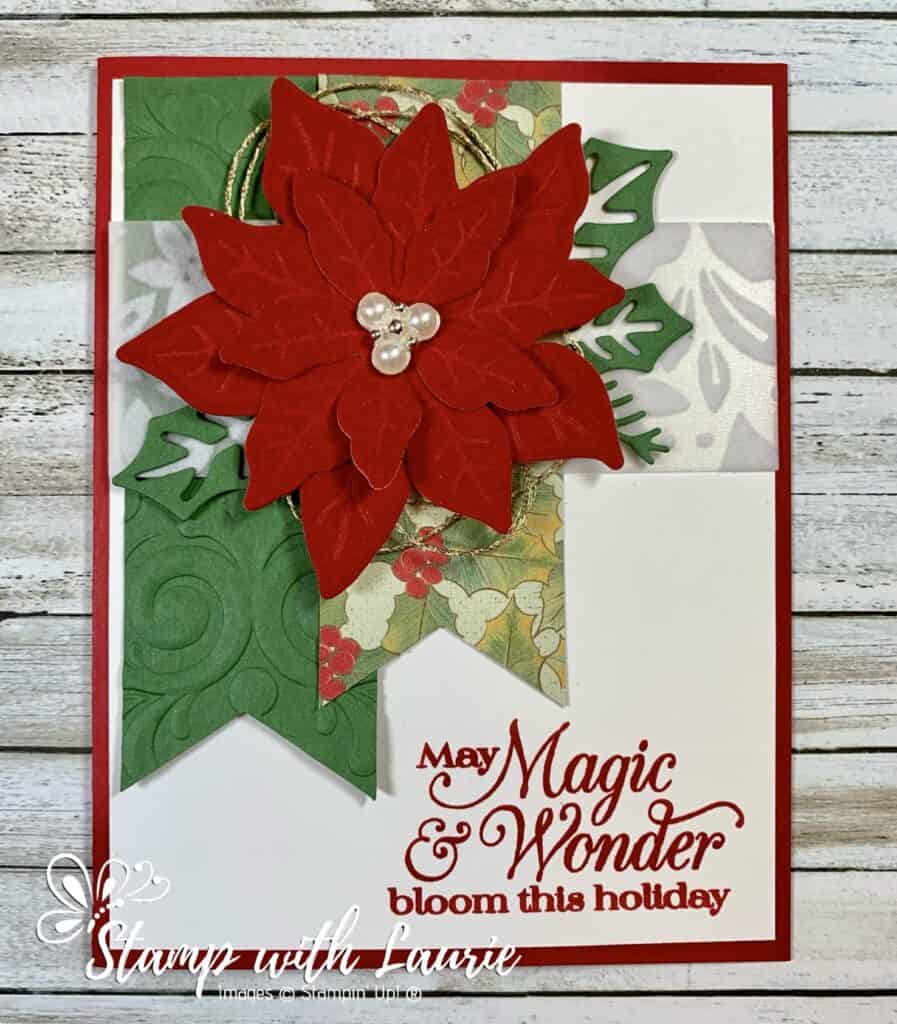
My Christmas Poinsettia Card

My Poinsettia Card
My Christmas Poinsettia Card

I am sharing My Christmas Poinsettia Card using the Poinsettia Petals Bundle by Stampin’ Up! Who wouldn’t love to receive a card like this with all the touchable accents!

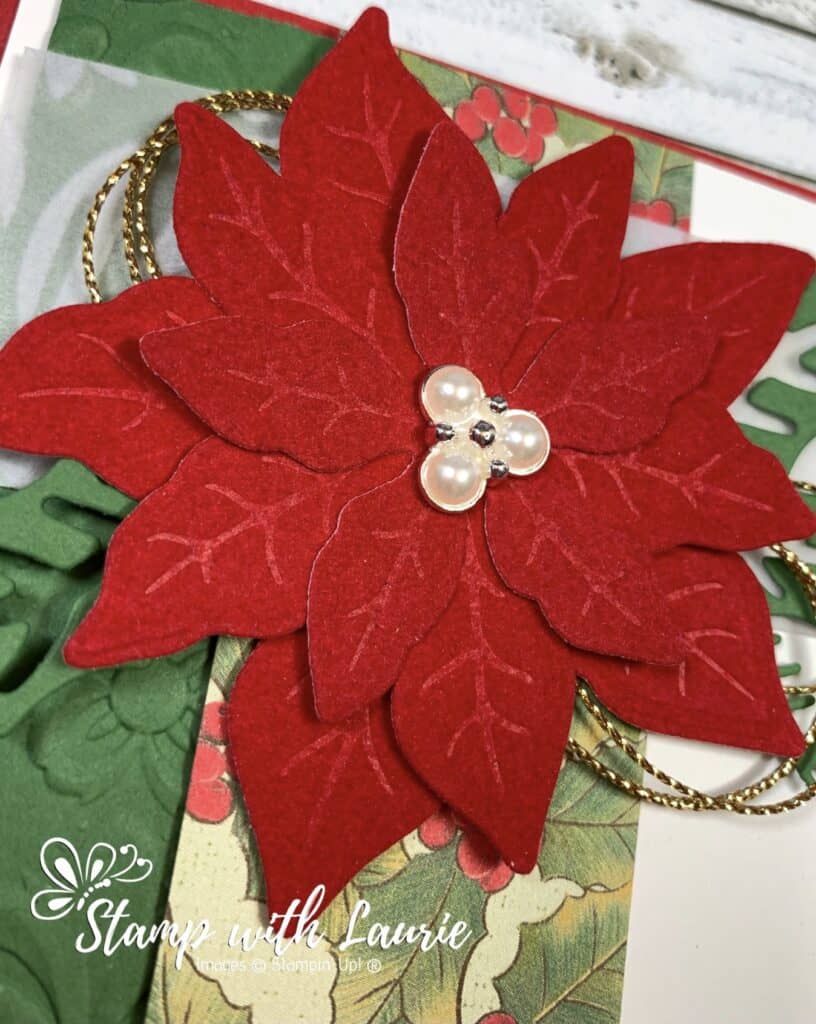
I love the details you get from the Poinsettia Dies where you can see the veins of the petals and they are especially striking on the Red Velvet Paper! You can achieve this by layering the cutting dies and the embossing dies together. Resulting in only one pass through your die cutting machine.

For my card, I used a number of products from the Poinsettia Place Suite including the Poinsettia Place Designer Series Paper and the beautiful Beaded Pearls which are currently on sale! You can just see the Poinsettia Specialty Paper running horizontally underneath the poinsettia. I used a bone folder to give the poinsettia flower extra dimension by curling the leaves a little. The gold cord from the Wonder of the Season Ribbon Combo Pack and the Beaded Pearl add a touch of shimmer  to the card. I just love the softness of this card with all its textures from the different papers used!

Close Up of My Poinsettia Card
Close Up of My Christmas Poinsettia Card

Supplies:

Stamps/Bundles/Dies: Poinsettia Petals Bundle (155148), Sweetest Borders Dies (153559)

Inks: Real Red Classic Stampin’ Pad (147084)

Paper: Real Red (102482), Whisper White (100730), Garden Green (102584), Red Velvet Paper (153490), Plush Poinsettia Specialty Paper (153486), Poinsettia Place Designer Series Paper (153487)

Accessories: Parisian Flourish 3D Embossing Folder (151474), Triple Banner Punch (138292), Wonder of the Season Ribbon Combo Pack (153537), Beaded Pearls (153534), Bone Folder (102300), Stampin’ Dimensionals (104430), Mini Stampin’ Dimensionals (144108), Stampin’ Seal (152813), Glue Dots (103683)

Measurements: 

  • Real Red: 5 ½” x 8 ½” scored at 4 ¼”
  • Whisper White: 5 ¼” x 4”
  • Plush Poinsettia Specialty Paper: 1 ½” x 4”
  • Garden Green: 1 ½” x 4 ¾” (banner)
    • Scraps for leaves
  • Poinsettia Place Designer Series Paper: 1 ½” x 4 ¼”
  • Gold Cord from Wonder of the Season Ribbon Combo Pack: 24”
  • Red Velvet Paper: 3 pieces
    • 3 1/8” x 3 ¼”
    • 2 ¾” x 2 ¾”
    • 2 1/8” x 2 1/8”

For Further Info:

Hope you like My Christmas Poinsettia Card!

If you wish to see my other Stampin’ Up! cards, please click here.

You will find the items listed above in my online store.
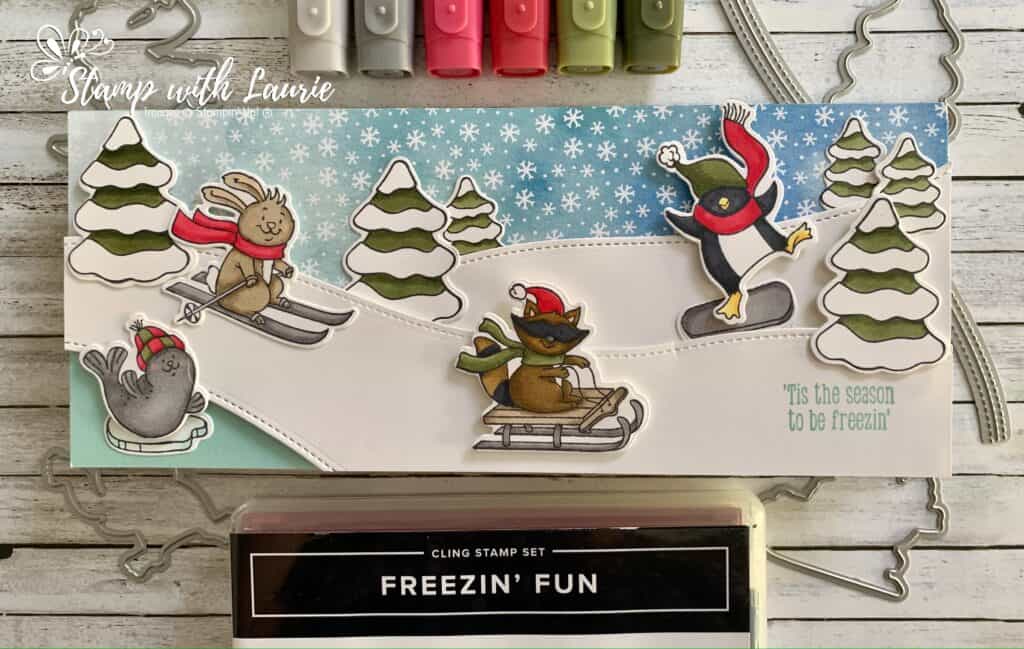
My Freezin’ Friends Card

My Freezin' Friends Card
My Freezin’ Friends Card

I am sharing My Freezin’ Friends Card using the Freezin’ Fun Bundle by Stampin Up! Aren’t these just the cutest critters frolicking in their winter wonderland!

I wanted to create a winter scene that used all the characters. So, I made a slimline card (3 ½” x 8 ½”) to fit them all on it. Next, I pulled out my Stampin’ Blends and coloured all the cute critters and trees in my Smooth Colouring Technique (see post here on this technique). I used the stitched hill die to create my snow hills. For the front snow hill, I cut the hill once and then lined up the die with the first cut to create a longer hill than the die usually makes. Since I place the seal on an ice floe, I thought he should be floating on a lake. So, I used the hill die to create the edge of the lake and place Pool Party card stock behind it to represent the water. The Snowflake Splendor Designer Series Paper was perfect for the sky!

Stampin’ Blends Recipe

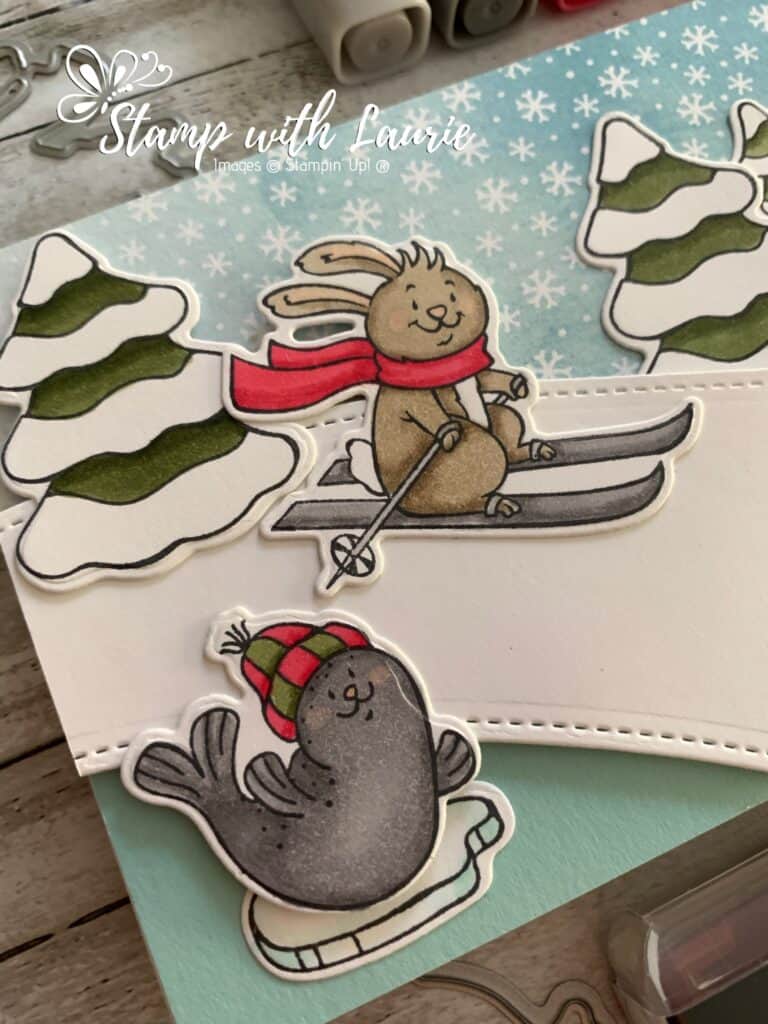
I use Crumb Cake, Real Red, Petal Pink and Smokey Slate Stampin’ Blends for the rabbit. For the seal, I used Smoky Slate, Petal Pink, Real Red and Mossy Meadow Stampin Blends. I use Pool Party Stampin’ Blends for the ice floe and Mossy Meadow for the trees.

Close Up of Rabbit and Seal
Close Up of Rabbit and Seal from My Freezin’ Friends Card

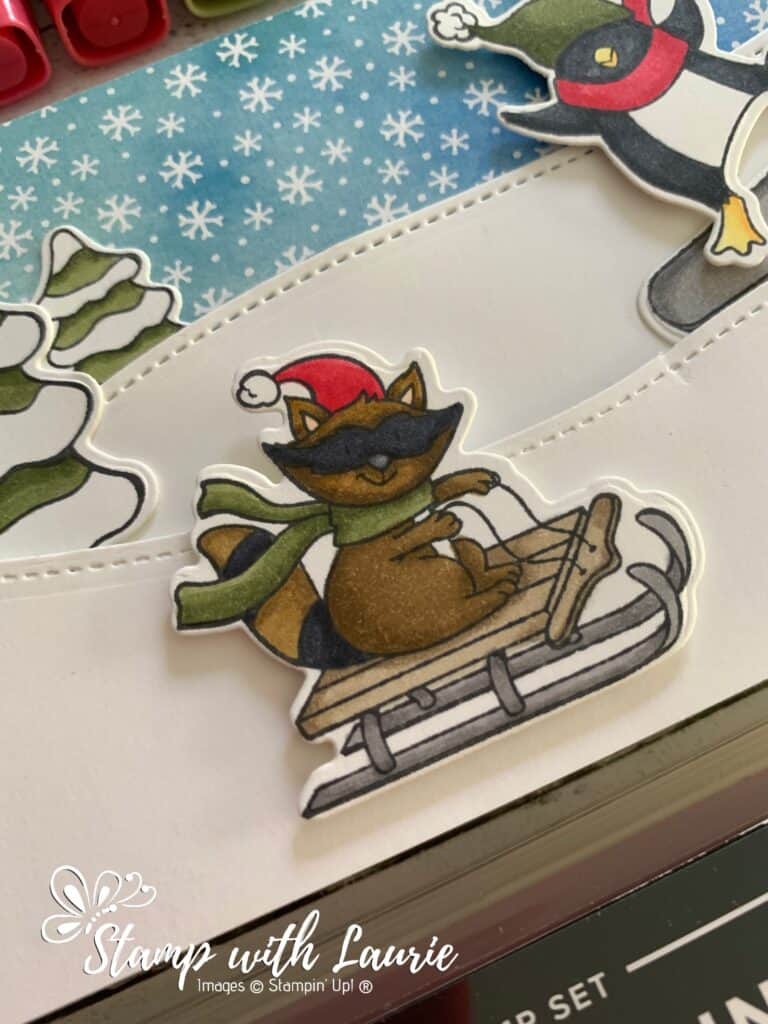
For the raccoon, I used Soft Suede, Basic Black, Real Red, Crumb Cake and Smokey Slate Stampin’ Blends.

Close Up of Raccoon
Close Up of Raccoon from My Freezin’ Friends Card

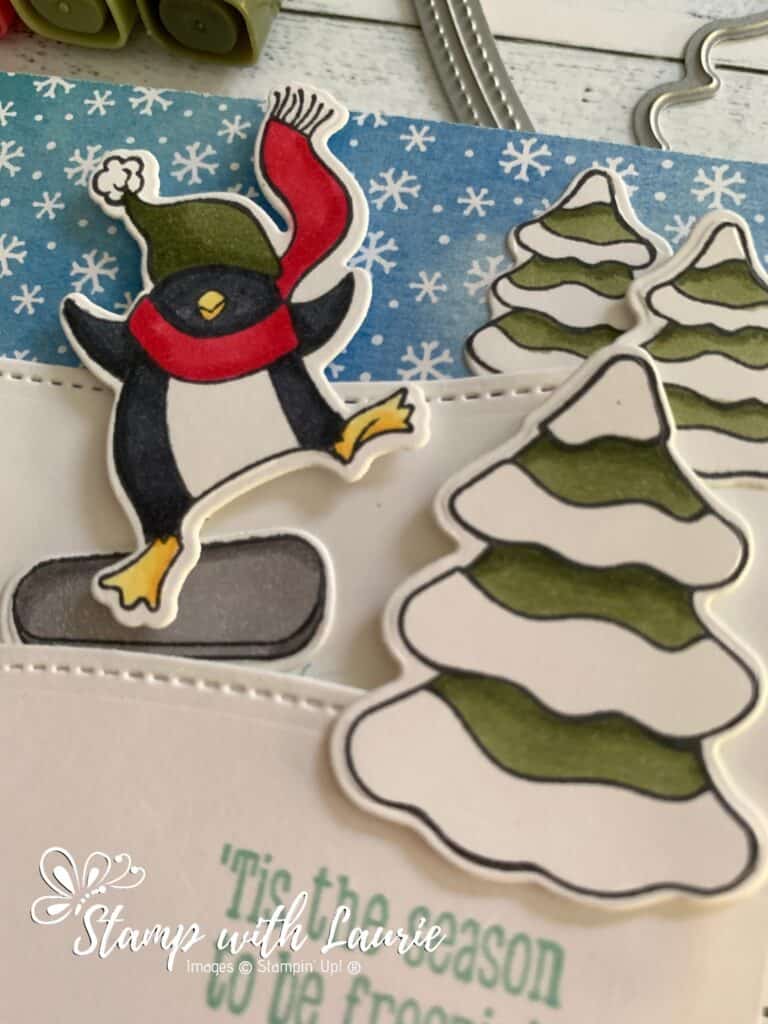
For the Penguin, I used Basic Black, Mossy Meadow, Real Red and Mango Melody Stampin’ Blends. His snowboard was Smokey Slate Stampin’ Blends.

Close up of the Penguin
Close of the Penguin from My Freezin’ Friends Card

Supplies:

Stamps/Bundles: Freezin’ Fun Bundle (155176)

Inks: Tuxedo Black Memento Ink Pad (132708), Pool Party Classic Stampin’ Pad (147107)

Paper: Whisper White Thick (140272), Whisper White (100730), Pool Party (122924), Snowflake Splendor Designer Series Paper (153512)

Accessories: Real Red Stampin’ Blends Combo Pack (154899), Mossy Meadow Stampin’ Blends Combo Pack (154890), Basic Black Stampin’ Blends Combo Pack (154843), Smoky Slate Stampin’ Blends Combo Pack (145058), Crumb Cake Stampin’ Blends Combo Pack (154882), Soft Suede Stampin’ Blends Combo Pack (154906), Mango Melody Stampin’ Blends Combo Pack (154888), Bone Folder (102300), Stampin’ Dimensionals (104430), Mini Stampin’ Dimensionals (144108), Stampin’ Seal (152813), Foam Adhesive Strips(141825), Glue Dots (103683)

Measurements: 

  • Whisper White Thick: 8 ½” x 7” scored at 3 ½”
  • Whisper White:
    • Hills: 8 ½” x 2 ½”
      • 3” x 6 ¼”
    • Rabbit: 1 ¾” x 2”
    • Seal: 1 1/8” x 1 3/8”
    • Racoon: 1 5/8” x 1 ¾”
    • Penguin: 1 ¼” x 1 ¾”
    • Trees: 3 large trees: 1 11/16” x 1 ¼”
      • 3 small trees: ¾” x 1”
    • Ice Floe: ½” x 1/8”
    • Snowboard: ½” x 1/8”
  • Pool Party: 1 ½” x 2 ¾”
  • Snowflake Splendor Designer Series Paper: 8 ½” x 2”

For Further Info:

Hope you like My Freezin’ Friends Card!

The smooth Colouring Technique: Beautiful Poppy Birthday Card using Smooth Colouring Technique
Video Tutorial: Smooth Colouring

You will find the items listed above in my online store.
Boughs of Christmas Card

My Boughs of Christmas Card

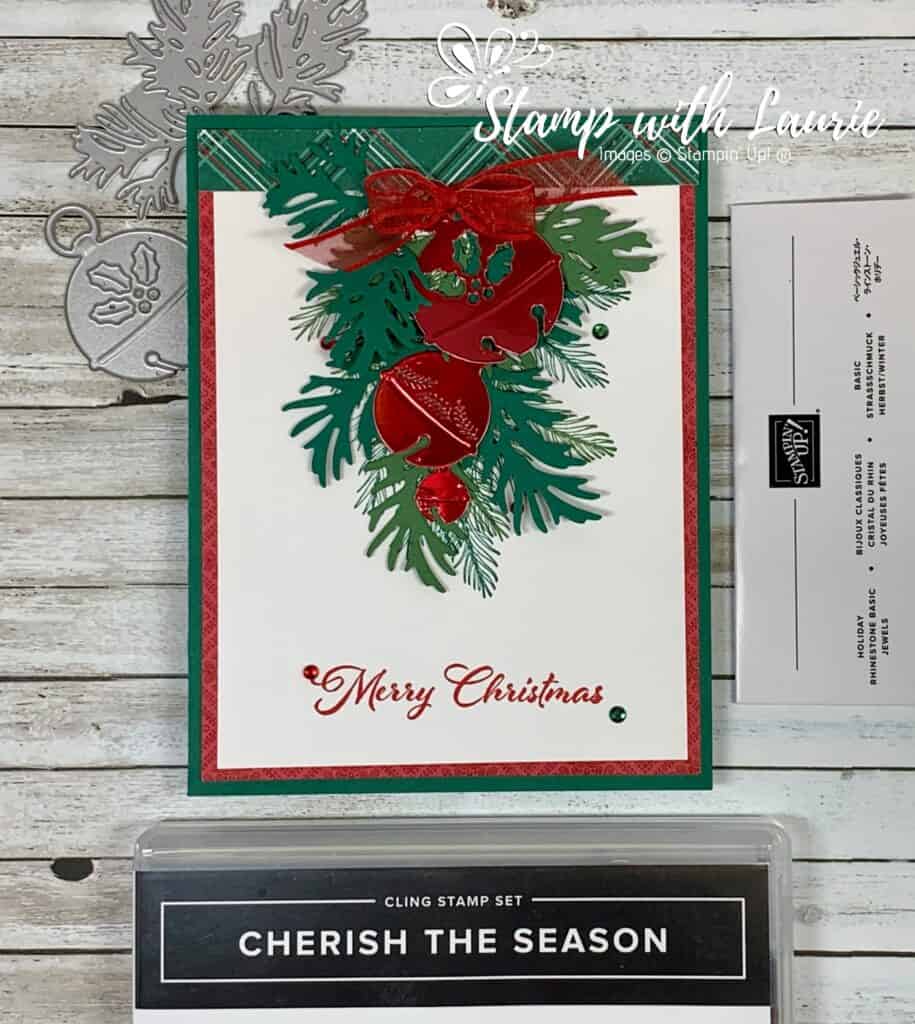
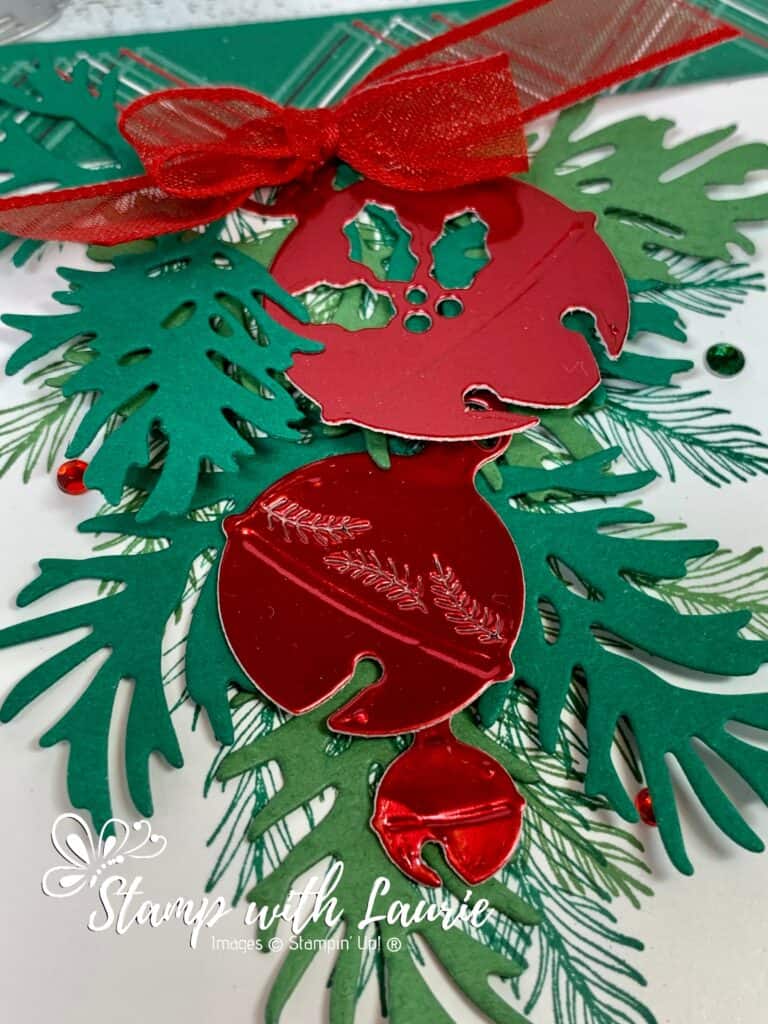
I am sharing my Boughs of Christmas Card using the Cherish the Season Bundle and the Beautiful Boughs Dies. Who wouldn’t love to receive a card with Christmas boughs and these gorgeous Red Foil bells! I love the details of the bells, especially the large one with the holly die cuts!

I pulled my colour scheme from the ‘Tis the Season 6″ x 6″ Designer Series Paper to design my card. The top DSP piece adds a header that hides all the branch ends and creates balance with the Real Red sentiment. I stamped the branches from the Cherish the Season Bundle in Garden Green and Shaded Spruce on the Whisper White card stock in the shape of my boughs. Then, I layered the die cut boughs in Garden Green and Shaded Spruce from the Beautiful Boughs Dies on top of so that my stamping just peeks out from underneath. The Red Foil bells are strategically placed by tucking them into the boughs.

The beautiful Real Red Sheer Ribbon is tied in a bow. Red Rhinestone Basic Jewels and Shaded Spruce rhinestones from the Holiday Rhinestone Basic Jewels add a bit of sparkle amongst the boughs.

Close Up of My Boughs of Christmas Card

Supplies:

Stamps: Cherish the Season Bundle (155154)

Dies: Beautiful Boughs Dies (150661)

Inks: Garden Green Classic Stampin’ Pad (147089), Shaded Spruce Classic Stampin’ Pad (147088), Real Red Classic Stampin’ Pad (147084)

Paper: Whisper White (100730), Shaded Spruce (146981), Garden Green (102584), Red & Green Foil Sheets (153510), ‘Tis the Season 6″ x 6″ Designer Series Paper (153489)

Accessories: Real Red 3/8″ Sheer Ribbon (153535), Red Rhinestone Basic Jewels (146924), Holiday Rhinestone Basic Jewels (150457), Paper Snips (103579), Bone Folder (102300), Stampin’ Seal (152813), Glue Dots (103683)

Measurements: 

  • Shaded Spruce: 8 ½” x 5 ½”; scored at 4 ¼”
  • Garden Green (2 pieces): 2” x 2 7/8”
    • 1” x 2”
  • Shaded Spruce (3 pieces): 2” x 2 7/8”
    • 1” x 2” (2 of these)
  • Red Foil Sheets (3 pieces):
    • 1 11/16” x 1 3/8”
    • 1 ¼” x 1”
    • 5/8” x ½”
  • ‘Tis the Season 6″ x 6″ Designer Series Paper: 5 ¼” x 4”
    • ½” x 4”
  • Real Red 3/8″ Sheer Ribbon: 7”

For Further Info:

Hope you like my Boughs of Christmas Card!

You will find the items listed above in my online store

Holly Jolly Gnome Christmas

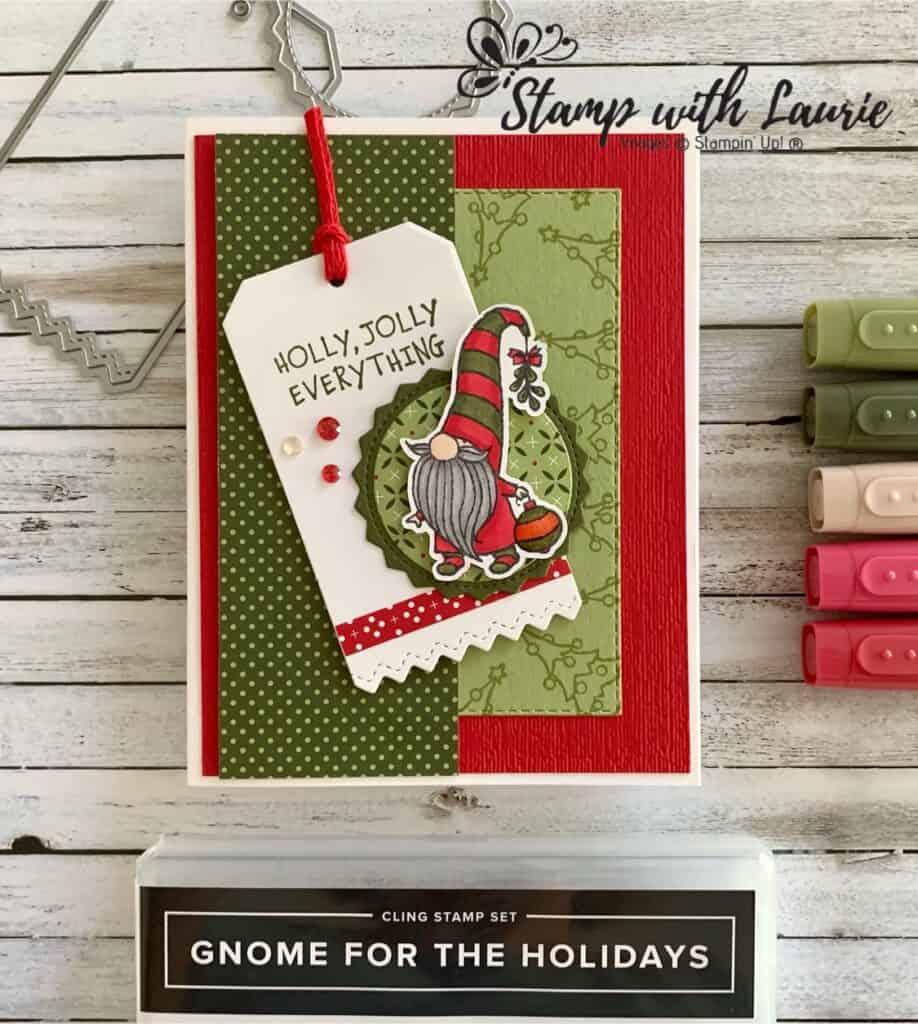
My Holly, Jolly Gnome Christmas Cards
My Holly Jolly Gnome Christmas Cards

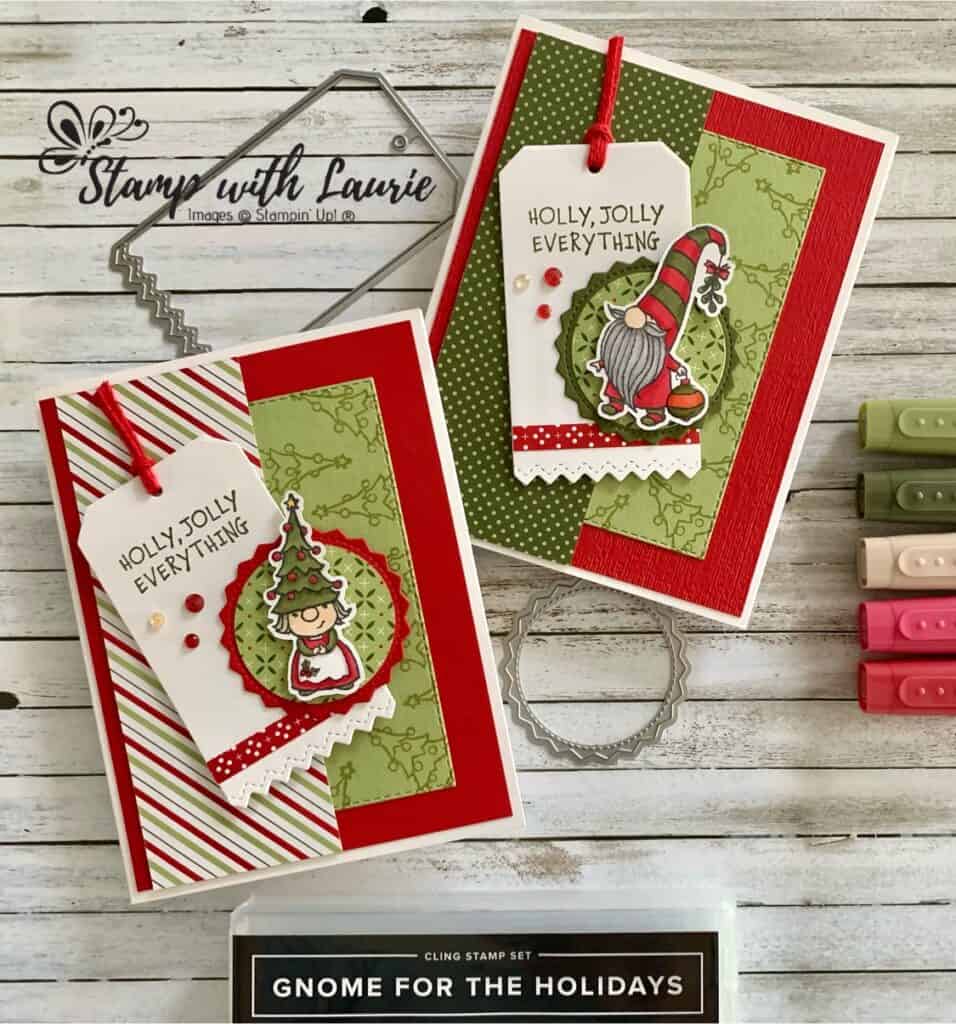
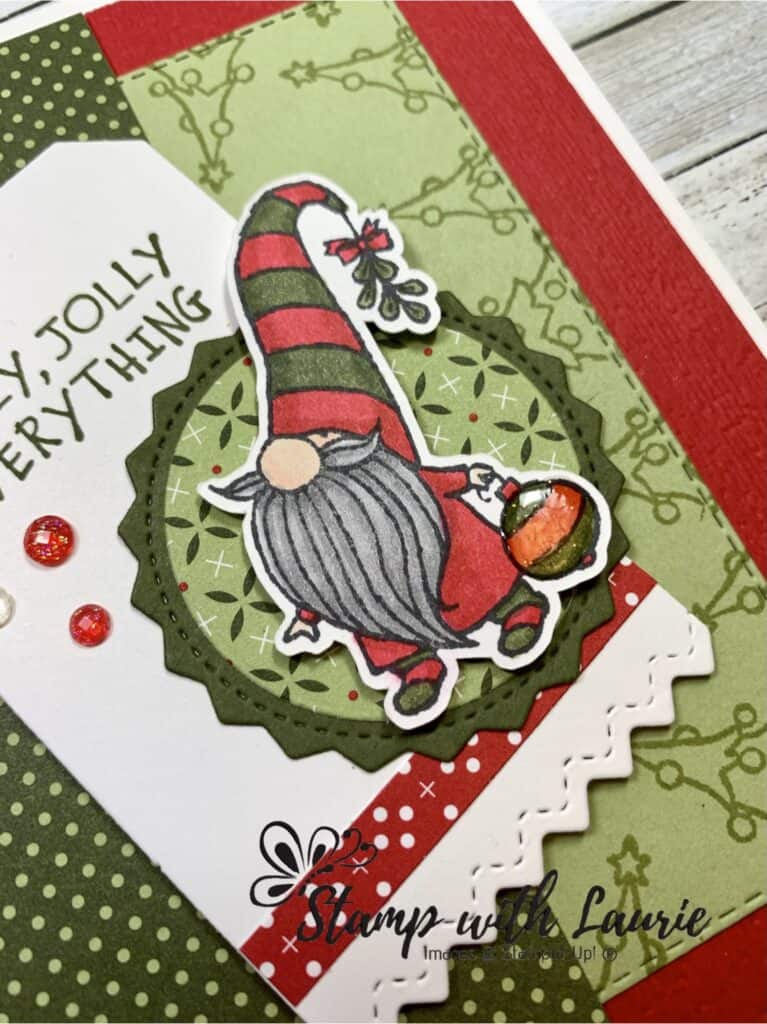
Halloween is over! Time for some Christmas cards! Today I am sharing with you my Holly Jolly Gnome Christmas cards using the Gnome For The Holidays Cling Stamp Set by Stampin’ Up! I love the gnomes from this set and the cute sentiments such as “There’s no place like GNOME for the Christmas season”! So, I made 2 variations of my card using two different gnomes.

For both cards, I combined the stamp set and the dies from the North Pole Wonder Dies to create a fun tag.

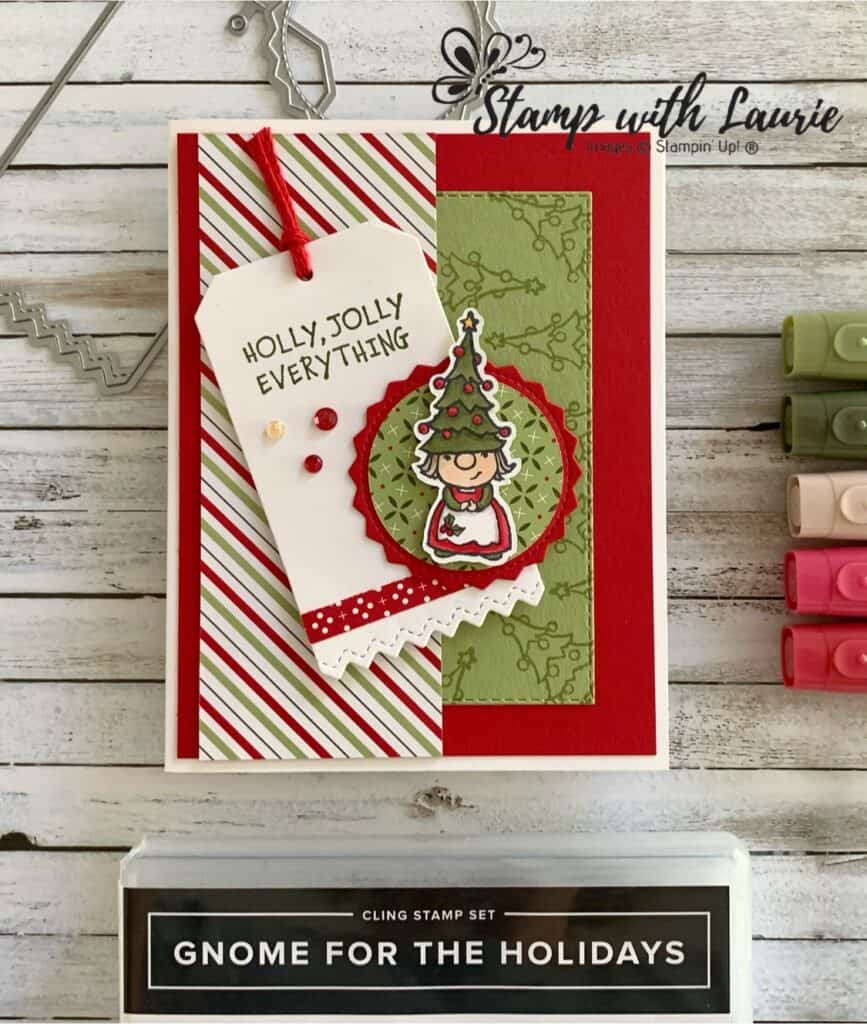
I used the hat of the girl gnome to stamp the edges of the Pear Pizzazz Stitched Rectangle. Such a neat technique using that stamp in a different way. Both my gnomes were coloured with Stampin’ Blends matching the Heartwarming Hugs Designer Series Paper and Ribbon using the Smooth Colouring Technique (more info on this technique).

The Girl Gnome from my Holly, Jolly Gnome Christmas Cards
The Girl Gnome

Since the gnomes do not come with dies, I fussy cut them out to make them pop up from the card. For embellishments, I tied the Real Red Braided Linen Trim through the tag’s hole, added a scattering of Wonderful Gems and added Shimmery Crystal Effects to the Christmas Bauble. 

Close Up of The Shimmery Crystal Effects on Bauble

One difference between the two cards, besides the different pieces of the DSP, is that I used the Subtle 3D Embossing Folder on the guy gnome version to add a bit more visual effect.

The Guy Gnome from my Holly, Jolly Gnome Christmas Cards
The Guy Gnome

Supplies for My Holly Jolly
Gnome Christmas Cards:

Stamps: Gnome for the Holidays Stamp Set (153322

Dies: North Pole Wonder Dies (153523), Stitched Rectangles Dies (151820)

Inks: Tuxedo Black Memento Ink Pad (132708), Pear Pizzazz Classic Stampin’ Pad (147104)

Paper: Whisper White Thick (140272 ), Real Red (102482), Pear Pizzazz (131201), Mossy Meadow (133676), Heartwarming Hugs Designer Series Paper (153492)

Accessories: Subtle 3D Embossing Folder (151775), Bronze & Ivory Stampin’ Blends Combo Pack (154922), Real Red Stampin’ Blends Combo Pack (1548990, Mossy Meadow Stampin’ Blends Combo Pack (148547), Smoky Slate Stampin’ Blends Combo Pack (145058), Crumb Cake Stampin’ Blends Combo Pack (154882), Mango Melody Stampin’ Blends Combo Pack (154888), Petal Pink Stampin’ Blends Combo Pack (154893), Real Red Braided Linen Trim (153546), Wonderful Gems (153536), Shimmery Crystal Effects (150892), Paper Snips (103579), Bone Folder (102300), Stampin’ Seal (152813), Stampin’ Dimensionals (104430), Mini Stampin’ Dimensionals (144108

Measurements: 

  • Whisper White Thick: 8 ½” x 5 ½”; scored at 4 ¼”
  • Real Red: 5 ¼” x 4”
  • Pear Pizzazz: 3” x 4 3/8” (third largest Stitched Rectangle Die)
  • Mossy Meadow/Real Red: 2” x 2”
  • Whisper White:
    • 2 x 3 5/8” (tag)
    • 2 ½” x 1 ½” (gnomes)
  • Heartwarming Hugs Designer Series Paper:
    • 1 ¾” x 1 ¾”
    • 5 ¼” x 2”
    • ¼” x 2”
  • Real Red Braided Linen Trim: 3”

For Further Info:

Hope you like my Holly Jolly Gnome Christmas cards!

Beautiful Poppy Birthday Card using Smooth Colouring Technique
Video Tutorial: Smooth Colouring

You will find the items listed above in my online store.
Let’s Gather Together Card

My Let's Gather Together Card
My Let’s Gather Together Card

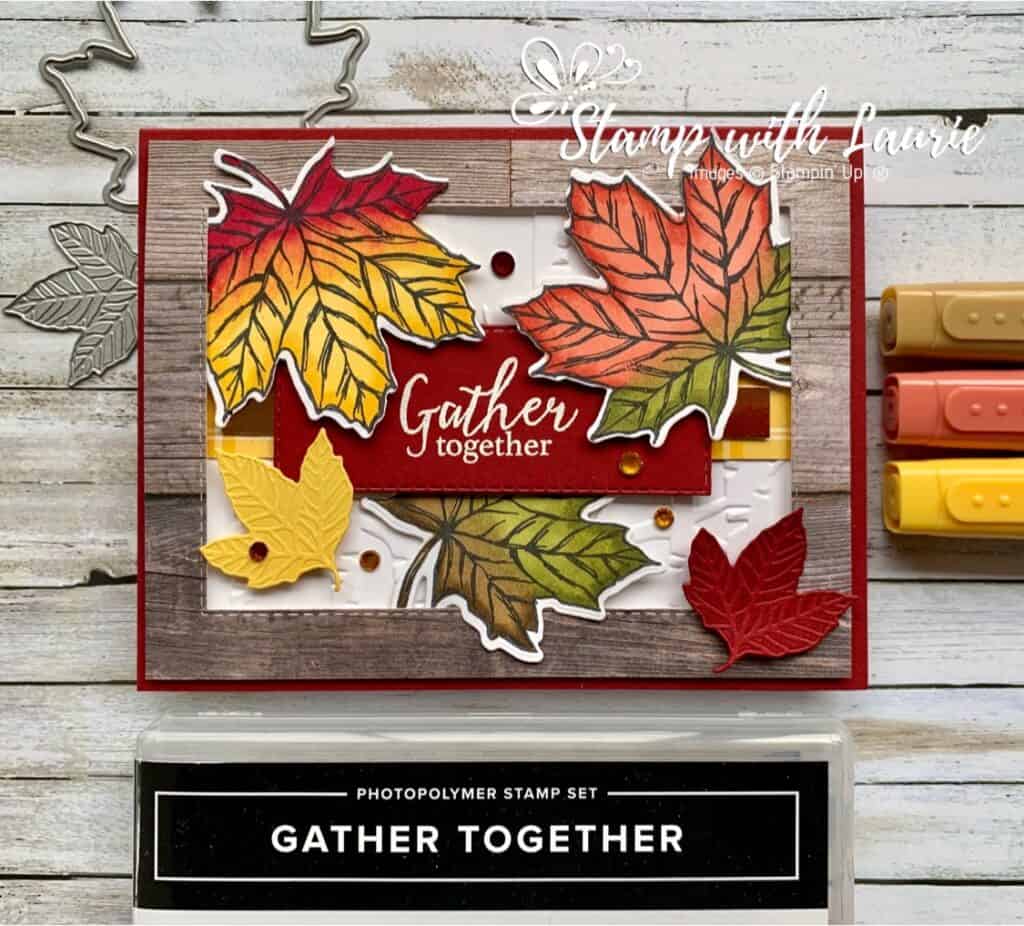
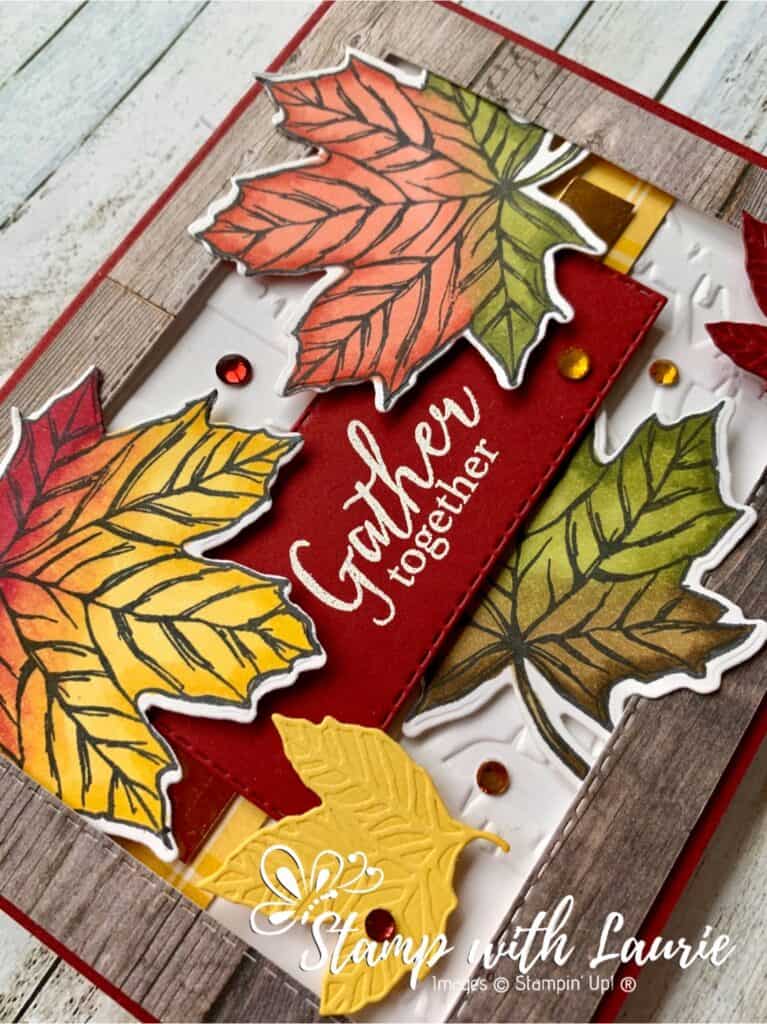
For Technique Tuesday, I am sharing the Tip to Tip Blending Technique for my Let’s Gather Together Card using the Gather Together Bundle by Stampin’ Up! I love Fall and all the colours of the leaves that it brings! So, I thought the Tip to Tip would be perfect to showcase those colours! For my card, I create a frame using a Stitched Rectangle and the In Good Taste Designer Series Paper with the leaves “exploding” out of it. I used the Woodlands Embossing Folder as my base behind all the leaves “falling” from the trees. To tie in the Daffodil Delight colour, I used a strip of the Plaid Tidings Designer Series Paper and one of the leaves die cut and embossed. A strip of Copper Foil Paper and a scattering of Holiday Rhinestones Basic Jewels add a bit of shimmer to my card.

For part 4 of my colouring videos with Stampin’ Blends from my presentation, I am demonstrating the Tip to Tip Blending Technique. The other 3 parts are listed below at the end of this document.

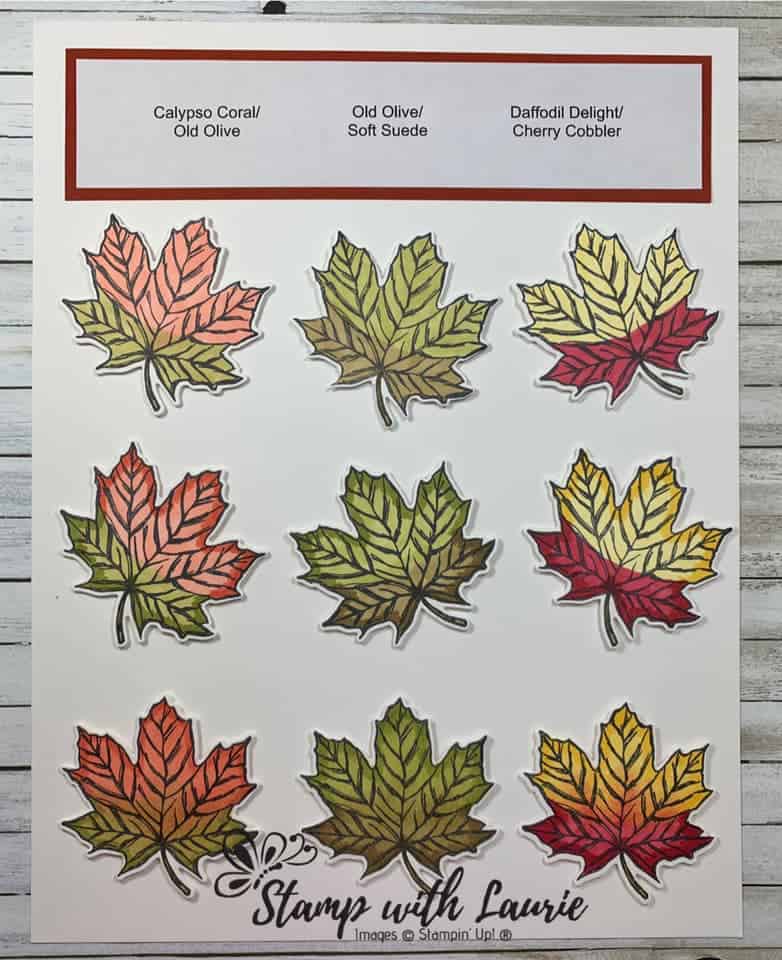
Tip to Tip Blending Technique Chart

Tip to Tip Blending Technique

To combine two different coloured blends on an image, try the Tip to Tip Blending Technique. This gives you a smooth transition of colors and doesn’t end up looking all blotchy where the colors meet. I’ve chosen Calypso Coral and Old Olive Stampin’ Blends for my first leaf.

  1. Stamp the image with Memento Ink.
  2. Apply the Light Calypso Coral and Light Old Olive Stampin’ Blends to the image. Meet somewhere in the middle with the colors – it doesn’t have to be neat.
  3. With the Dark Calypso Coral and Dark Old Olive Stampin’ Blends, add a layer of color around the edge of the image.
  4. Brush the tip of the Light Calypso Coral Stampin’ Blends over the tip of the Light Old Olive Stampin’ Blends to pick up some color. The Calypso Coral Stampin’ Blends marker then acts as your brush to apply a mix of both colors to the center of the leaf. I kept working these blends together until I was happy with the transition where the colors meet.

To demonstrate that this Tip to Tip Technique can work with other colors, I’ve created leaves using Old Olive with Soft Suede and Daffodil Delight with Cherry Cobbler. Don’t worry about your markers being contaminated—all you need to do is run them over some scrap paper a few times and the nibs will clean themselves.

Tip to Tip Blending Technique Tutorial Video

Supplies:

Stamps/Bundle: Gather Together Bundle (153036)

Inks: Tuxedo Black Memento Ink Pad (132708), VersaMark Ink (102283)

Paper: Cherry Cobbler (119685), Whisper White (100730), Daffodil Delight (119683), In Good Taste Designer Series Paper (152494), Copper Foil Sheets (142020), Plaid Tidings 6″ x 6″ Designer Series Paper (153527)

Accessories: Stitched Rectangles Dies (151820), Woodland Embossing Folder (152881), White Stampin’ Embossing Powder (109132), Holiday Rhinestone Basic Jewels (150457), Cherry Cobbler Stampin’ Blends Combo Pack (154880), Daffodil Delight Stampin’ Blends Combo Pack (154883), Calypso Coral Stampin’ Blends Combo Pack (154881), Old Olive Stampin’ Blends Combo Pack (154892), Soft Suede Stampin’ Blends Combo Pack (154906), Stampin’ Blends Color Lifter (144608 ), Paper Snips (103579), Bone Folder (102300), Mini Glue Dots (103683), Stampin’ Seal (152813), Stampin’ Dimensionals (104430)

Measurements: 

  • Cherry Cobbler: 8 ½” x 5 ½”; scored at 4 ¼”
    • Small leaf die:1 ½”x 1 ½”
    • Sentiment: 3 ½” x 1 ½”
  • Whisper White: 5” x 3 ½”
    • 3 pieces: 2 ½” x 2 ½” (for larger leaves)
  • Daffodil Delight: 1 ½”x 1 ½”
  • In Good Taste Designer Series Paper: 5 ¼” x 4”
  • Plaid Tidings 6″ x 6″ Designer Series Paper: 1” x 5”
  • Copper Foil Sheets: 3/8” x 4 1/8” (scrap)
Close Up of my Let's Gather Together Card
Close Up of my Let’s GatherTogether Card

Instructions for My Let’s Gather Together Card: 

  1. Fold the Cherry Cobbler card stock in half to create the card base.
  2. Stamp the leaves in Tuxedo Black Memento Ink on the 3 pieces of Whisper White
  3. Colour the leaves with the Stampin’ Blends listed above using the video for reference when colouring them
  4. Die cut the leaves with the corresponding dies from the Gather Together Bundle
  5. Using the Gather Together Bundle, die cut the smallest leaves in Daffodil Delight and Cherry Cobbler
  6. Die cut with the third largest Stitched Rectangle a frame from the In Good Taste Designer Series Paper
  7. Emboss the Whisper White card stock with the Woodland Embossing Folder
  8. Stamp the sentiment in VersaMark Ink on the Cherry Cobbler piece and heat emboss it with White Stampin’ Embossing Powder
  9. Die cut the sentiment out with the fourth smallest Stitched Rectangle
  10. Using Stampin’ Seal, adhere the embossed Whisper White piece in the center of the Cherry Cobbler base
  11. Adhere with Stampin’ Seal the Plaid Tidings piece in the centre of the Whisper White piece and adhere the Gold Foil piece centered on top
  12. Position two of the largest leaves where you want them at the top of the frame and adhere them with glue dots
  13. Position part of the third leave under the sentiment and adhere with glue dots.
  14. Add dimensionals to the leaves where they may need to have extra support
  15. Using dimensionals, pop up the sentiment in the centre of the card base
  16. Using dimensionals, pop up the frame making sure that some parts of the larger leaves are tucked under the frame and some parts are on top to create the “exploding” look
  17. Adhere the Daffodil Delight and Cherry Cobbler leaves to the Whisper White piece with dimensionals
  18. Add a scattering of the Holiday Rhinestones wherever needed to fill in space.

For Further Info:

Hope you like my Let’s Gather Together Card!

My Colouring Notes from my presentation:
https://stampwithlaurie.com/wp-content/uploads/2020/08/Stampin-Up-Blends-2020.pdf

Part 1Whiskey Business Card using Blending Different Colours Technique
Video Tutorial: Blending Different Colours Together

Part 2: Country Harvest Card using Light to Dark Technique
Video Tutorial: Light to Dark/Dark to Light Colouring

Part 3: Beautiful Poppy Birthday Card using Smooth Colouring Technique
Video Tutorial: Smooth Colouring

Part 4: Let’s Gather Together Card using Tip to Tip Blending Technique
Video Tutorial: Tip to Tip Colouring

Part 5So Grateful Cardinal Card using Flicking Colouring Technique
Video Tutorial: Flicking Colouring

Part 6: Let’s Celebrate You Card using Flicking of Different Colours Technique
Video Tutorial: Flicking of Different Colours Technique

You will find the items listed above in my online store.
Paris Sketch Challenge Card

My Paris Sketch Challenge Card

Today I am sharing my Paris Sketch Challenge Card. My Demonstrator Group has been giving us Sketch Challenges each week that we can join in during this difficult time to keep us busy and to explore our creative side.

Sketch Challenge Image
Card Sketch Challenge

I decided to use the Parisian Beauty Bundle for this sketch challenge as a last hurrah since it is retiring. I’m very sad to see this set go, but it will be added to my stash for future projects. I had so much fun with this sketch that you get two cards for the price of one, as well as a bonus one that I will share next week. For these two cards that I am highlighting today, I just switched the coloured card stock. The Pool Party card was the one that I decided to use for my swap.

Here is the second card using a Petal Pink base and Pool Party scalloped frame and different ink colours.

My Second Card using the Sketch

Supplies:

Stamps: Parisian Beauty Bundle (153778), Forever Blossoms Cling Stamp Set (151457)

Inks: Tuxedo Black Memento Ink Pad (132708), Pool Party Classic Stampin’ Pad (147107), Petal Pink Classic Stampin’ Pad (147108)

Paper: Whisper White Thick (140272 ), Pool Party (122924), Petal Pink (146985), Whisper White (100730), Parisian Blossoms Specialty Designer Series Paper (151192), Champagne Foil Sheets (144748)

Accessories: Stitched Shapes Dies (152323), Layering Squares Dies (151772), Parisian Flourish 3D Embossing Folder (151474), Champagne Rhinestone Basic Jewels (151193), Bone Folder (102300), Paper Snips (103579), Multipurpose Liquid Glue (110755), Mini Glue Dots (103683), SNAIL Adhesive (104332), Stampin’ Dimensionals (104430)

Measurements: 

  • Whisper White Thick: 8 ½” x 5 ½”; scored at 4 ¼” 
  • Pool Party: 4 x 5 ¼”
  • Petal Pink: 2 ½” x 2 ½”
  • Whisper White: 2 ¼” x 2 ¼” 
  • Parisian Blossoms Specialty Designer Series Paper: 5” x 2”
  • Champagne Foil Sheets: 5” x 3”
The Two Card using the Sketch

Instructions:

  1. Fold the Whisper White Thick card stock in half to create the card base.
  2. Die cut the Whisper White piece with the second largest square from the Stitched Shapes Dies.
  3. Stamp the Sentiment from the Parisian Beauty Cling Stamp Set in Tuxedo Black Memento Ink Pad on the stitched Whisper White piece.
  4. Using the single blossom from the Forever Blossoms Cling Stamp Set, stamp it in Petal Pink.
  5. Stamp the Fleur De Lys border in Pool Party at the top and bottom.
  6. Die cut the Petal Pink card stock with the fourth largest scalloped square from the Layering Squares Dies.
  7. Emboss the Pool Part card stock with the Parisian Flourish 3D Embossing Folder.
  8. Die cut the Eiffel Tower from the Champagne Foil Sheets.
  9. Attached with Multipurpose Liquid Glue the Parisian Blossoms Specialty Designer Series Paper to the embossed Pool Party piece at an angle.
  10. Turn over the Pool Party piece and trim the corners from the DSP with Paper Snips.
  11. Attach the Pool Party piece to the Whisper White card base with Multipurpose Liquid Glue.
  12. Using Glue Dots, attached the Eiffel Tower on the left side.
  13. Adhere the sentiment piece to the scalloped Petal Pink piece with SNAIL.
  14. Using dimensionals add the sentiment piece to the card.
  15. Scatter three Champagne Rhinestone Basic Jewels on the card.

For Further Info:

Hope you liked my Paris Sketch Challenge Card!

Here’s is a Stampin’ Up! video of the Parisian Blossoms Specialty Designer Series Paper:
https://www.youtube.com/watch?v=POFPLitOa5g&feature=emb_logo

You will find the items listed above in my online store at:  https://www.stampinup.com/ecweb/product/153934/parisian-blossoms-suite-bundle-english?dbwsdemoid=2103981

Love You Lots Valentine Card

Love You Lots Valentine Card with Belly Band

Happy Valentine’s Day! My Love You Lots Valentine Card is perfect to give to that special Valentine! This Gate Fold card is sure to impress with its belly band using the From My Heart Specialty Designer Series Paper. Love this DSP with its Real Red and Flirty Flamingo foil accents! So shimmery and shiny! The Real Red Heart Doily with the accented heart that has been punched out of the DSP really adds to the belly band!

Love You Lots Valentine Card with Belly Band Removed

Supplies:

Stamps: Heartfelt Photopolymer Stamp Set (151417

Inks: Real Red Classic Stampin’ Pad (147084)

Paper: Flirty Flamingo (141416), Whisper White (100730), From My Heart Specialty Designer Series Paper (151189)

Accessories: Heart Doilies (151191), Heart Punch Pack (151292), Bone Folder (102300), SNAIL Adhesive (104332), Stampin’ Dimensionals (104430)

Measurements: 

  • Flirty Flamingo: 8 ½” x 5 ½”; scored at 2 1/8” and 6 ¼” along the 8 ½” side
  • Whisper White: 2 pieces at 1 7/8” x 5 ¼” 
  • From My Heart Specialty Designer Series Paper: 12” x ¾” and one heart punched out of DSP

Instructions:

  1. Score the Flirty Flamingo card stock at 2 1/8” and 6 ¼” along the 8 ½” side to create the card base
  2. Stamp in Real Red the sentiment on one of the pieces of Whisper White.
  3. Adhere the Whisper White pieces to the front of the Flirty Flamingo card base. 
  4. Next, wrap the strip of DSP around the card. Secure at the back using snail.
  5. Adhere the Heart Doily to the band using snail.
  6. Punch out the heart from the From My Heart Specialty Designer Series Paper.
  7. Using dimensionals, adhere the punch out heart to the front of the doily.

For Further Info:

Hope you like my Love You Lots Valentine Card!

You will find the items listed above in my online store at:
https://www.stampinup.com/ecweb/default.aspx?dbwsdemoid=2103981