Tool Time Father’s Day Card

Tool Time Father’s Day Card -  a pop-up card with tools on a tool bench
Tool Time Father’s Day Card

Hello Crafty Friends! Laurie here again! I am sharing my Tool Time Father’s Day Card using the Trusty Tools Bundle and the Trusty Toolbox 12” x 12” Designer Series Paper by Stampin’ Up! I love that the Trusty Tools Dies can cut out the tools from the Trusty Toolbox 12” x 12” Designer Series Paper which is free during Sale-a-Bration!

For my card, I decided to create a fun free standing pop-up card to display the die cut tools from the DSP on a pegboard! I made this card for a swap and used different tools from the DSP like the hammer, paint brush and wrenches while others, I fussy cut out. The thing that is great about these cards is that they fold flat to be mailed, but the recipient has that Wow! when they pop it up! 
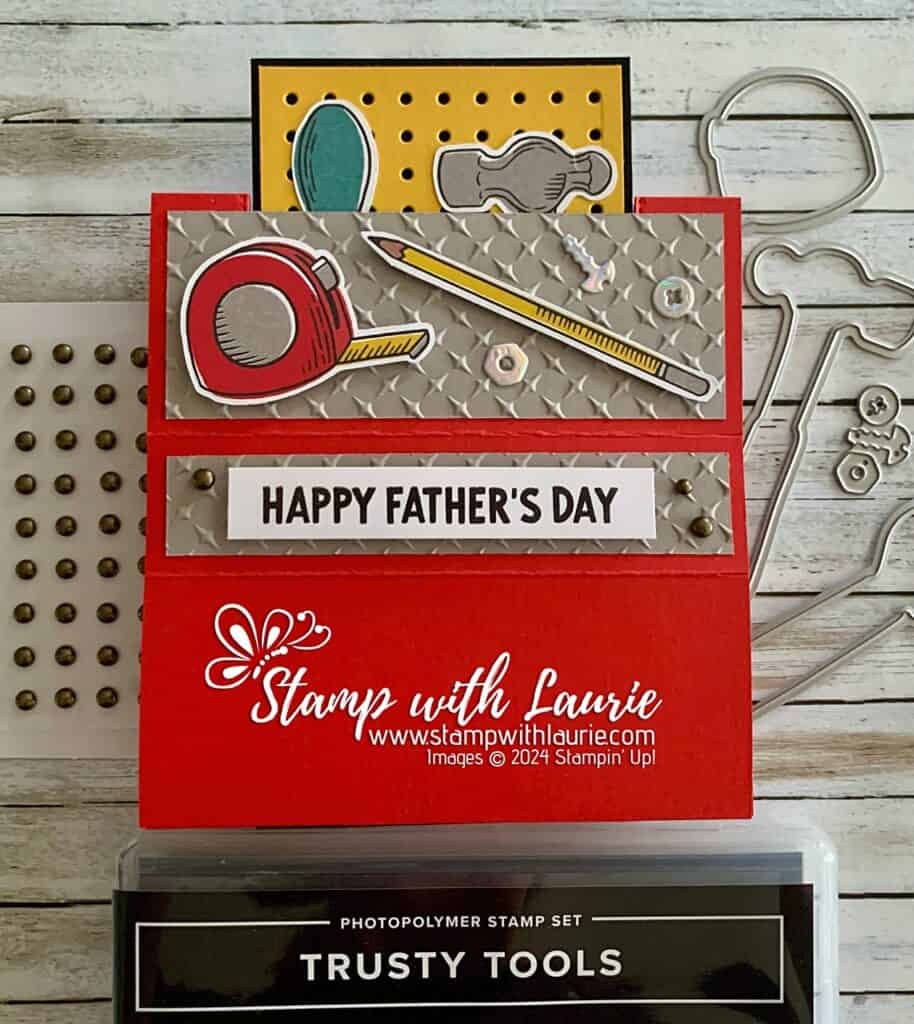
Card Folded Flat for Mailing

The Details of My Tool Time Father’s Day Card

For my pegboard, the die didn’t run the full length of the Crushed Curry card stock. So, I placed the die at the top leaving a small border. Next, I used liquid glue to adhere it to the Basic Black piece with a Basic White piece on the back for the message. I stamped the nuts and screw in Gray Granite in the corners of the Basic White piece to add interest. For the tools, I adhered them with liquid glue, as well since I wanted the pegboard piece to be as a flat as possible to allow it to slide.

Next, I scored and cut the Poppy Parade piece according to the instructions below. I have created a template that you can download at the end of this post.
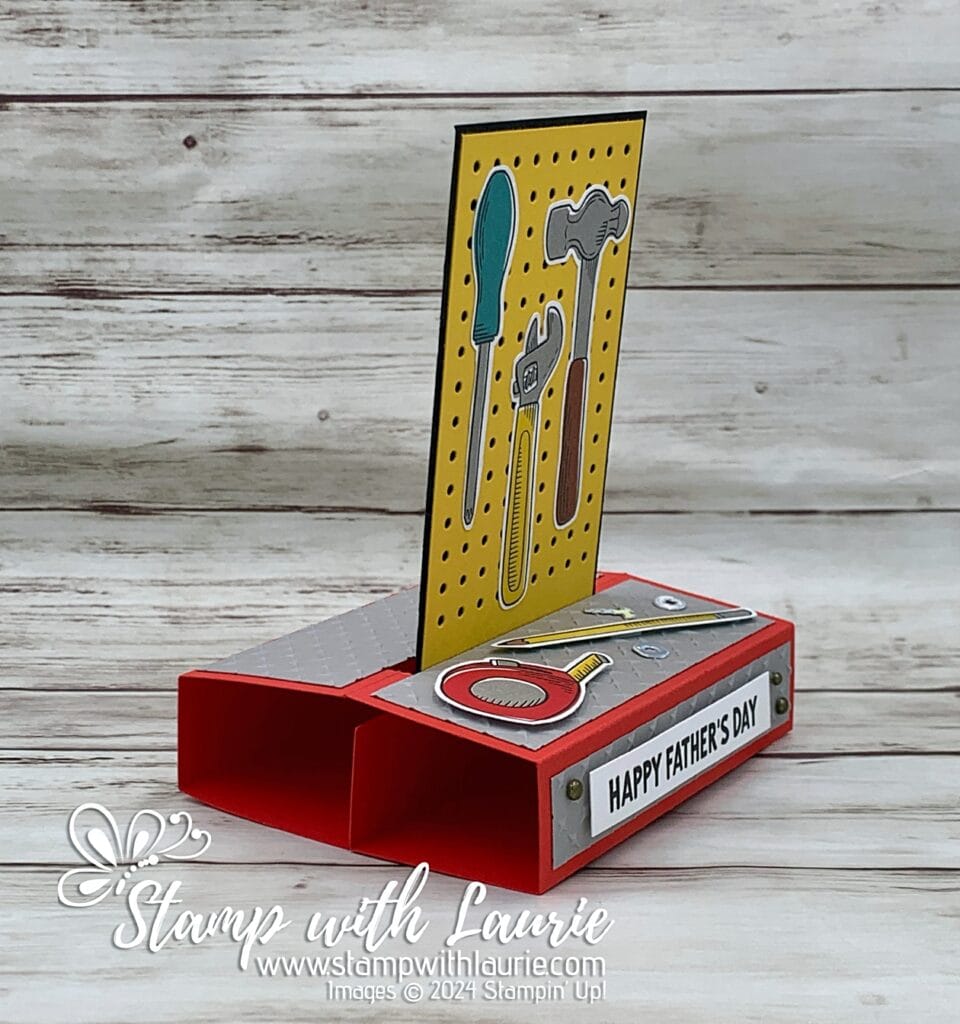
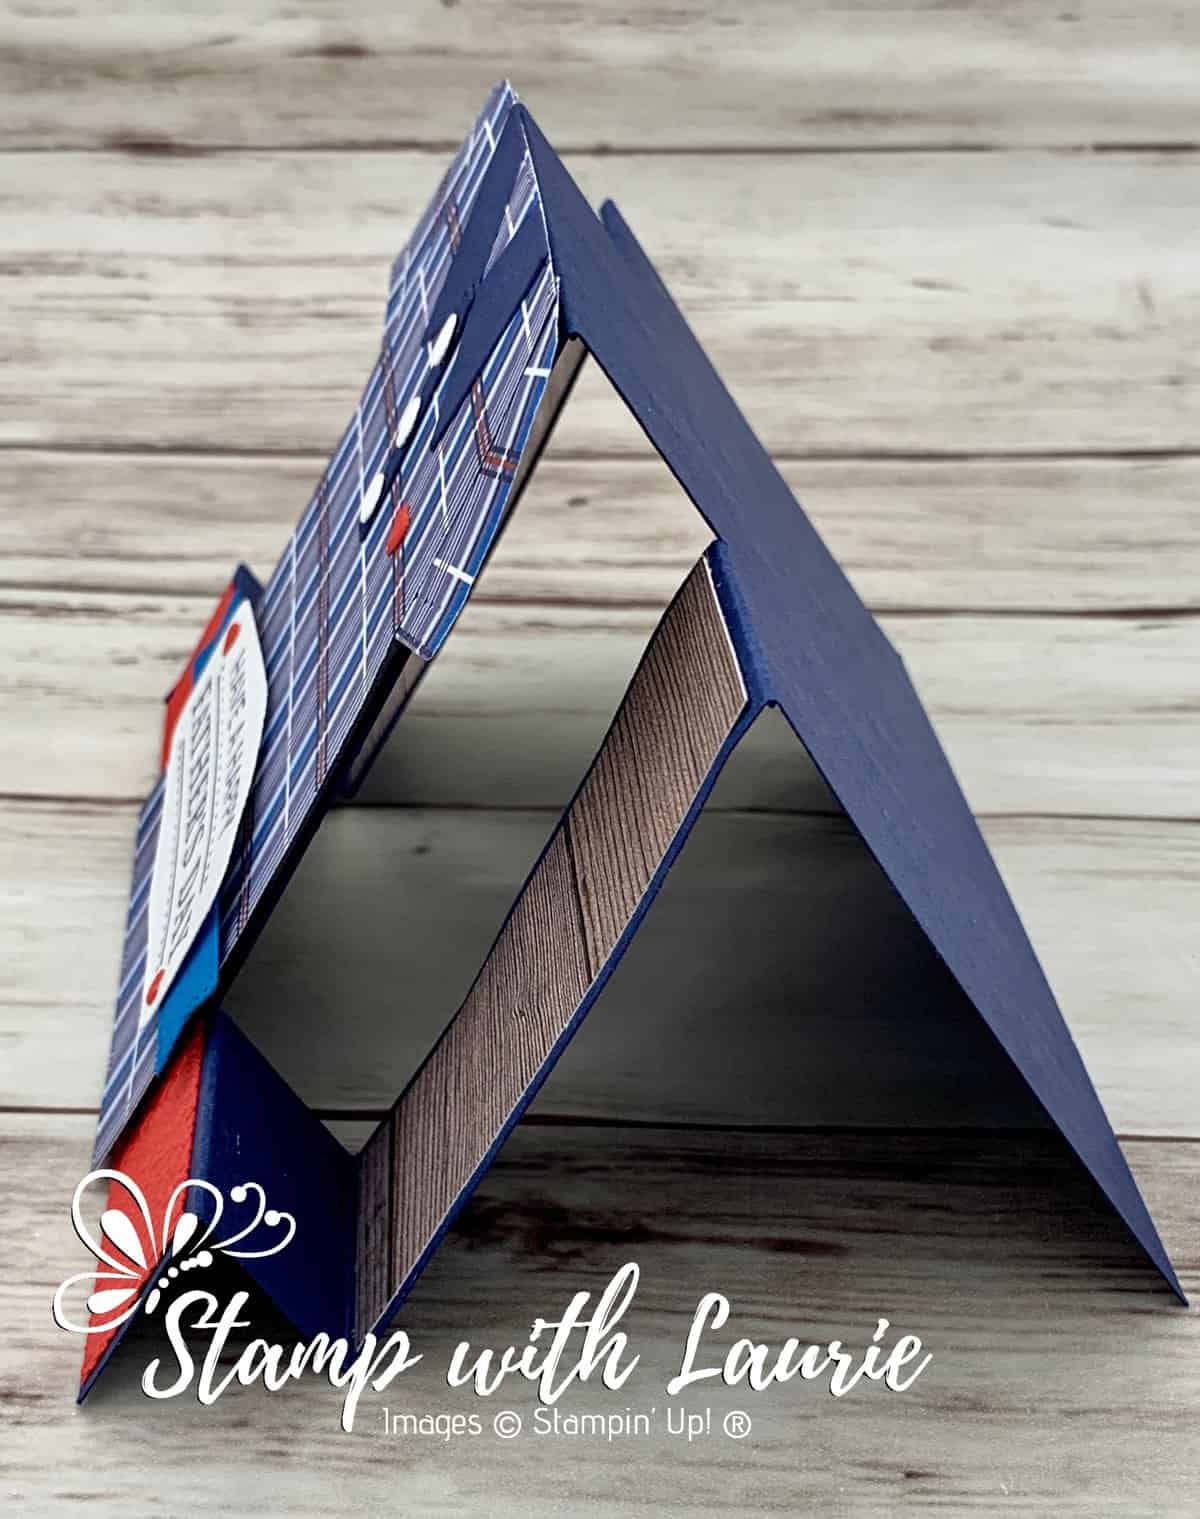
Side View Of Card
Side View Of Card

Once that was done, I inserted the pegboard through cut and lined it up with the bottom of the folded Pappy Parade piece. Then I adhere it in place and then glue the other side of the bottom to it. This will create the pop-up mechanism.

To decorate my “work table”, I used Gray Granite strips embossed with the Metal Plate Embossing Folder to make it look industrial. The pencil and measuring tape were fussy cut out and laid down like they were just set down. The silver piece of Holographic Trio Specialty Paper was perfect for my nuts and screw to give them a metallic look.

The sentiment was stamped in Black with a trio of Rustic Metallic Adhesive-Backed Dots to add to my masculine theme.
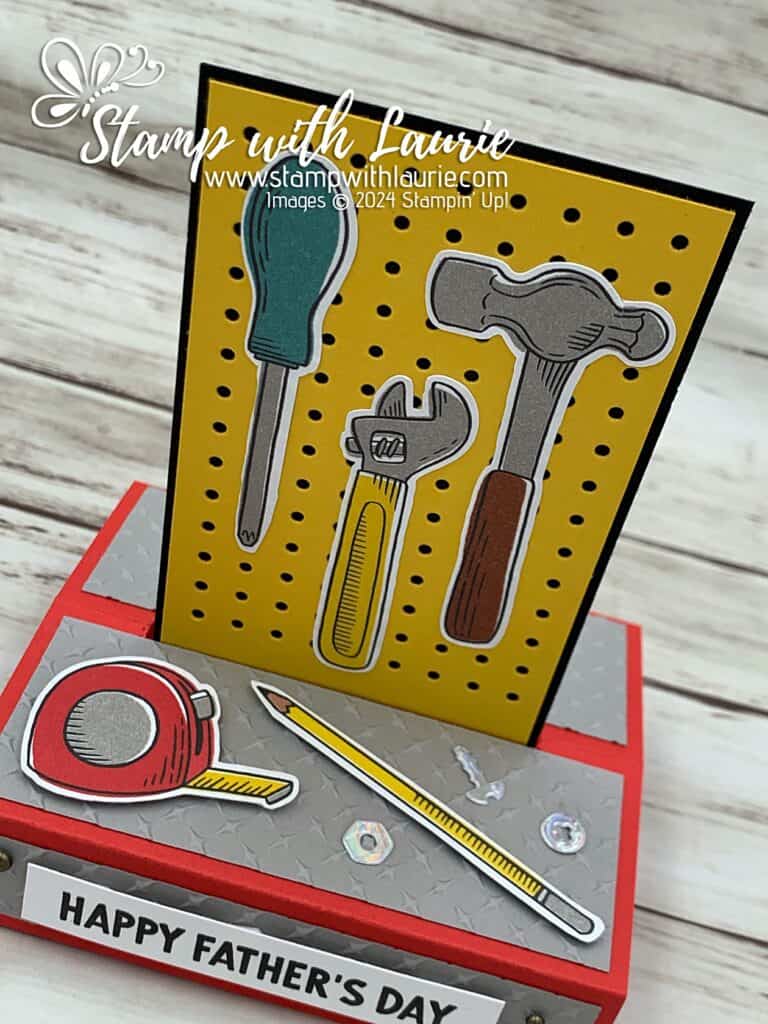
Top View of Tool Bench
Top View of Card

Supplies:

Stamps/Bundles/Dies: Trusty Tools Bundle (162723)

Inks: Tuxedo Black Memento Ink Pad (132708), Gray Granite Classic Stampin’ Pad (147118) 

Paper: Poppy Parade (119793), Gray Granite (146983), Crushed Curry (131199), Basic Black (121045), Basic White (159276), Holographic Trio Specialty Paper (161744), Trusty Toolbox Designer Series Paper (162978)

Accessories: Metal Plate 3D Embossing Folder (160766), Rustic Metallic Adhesive-Backed Dots (159082), Paper Trimmer (152392), Paper Snips (103579), Bone Folder (102300), Stampin’ Dimensionals (104430), Mini Stampin’ Dimensionals (144108), Stampin’ Seal (152813), Mini Glue Dots (103683), Multipurpose Liquid Glue (110755)
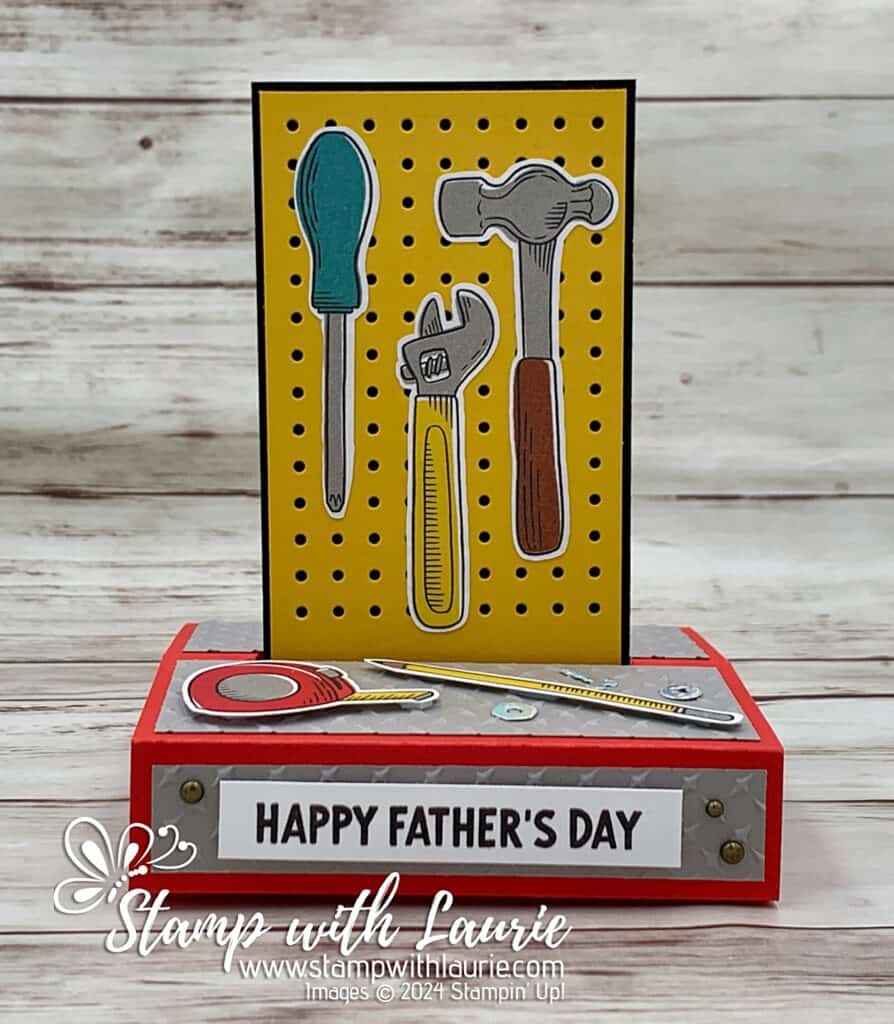
One of the Pop-Up Cards
Single Pop-Up Card

Measurements: 

  • Poppy Parade:
    • 11” x 4 ¼” scored at 1”, 2 ¾”, 3 ¾”, 5 ½”, 7 ¼”, 8 ¼” and 10”
    • Vertical cut at 5 ½” score that is ¾” from the top and ¾” from the bottom
  • Gray Granite (4 pieces): 
    • 4” x ¾” (2 pieces)
    • 4” x 1 ½” (2 pieces)
  • Basic Black: 2 ¾” x 5 ½”
  • Crushed Curry: 2 5/8” x 5 ¼”
  • Basic White (2 pieces):
    • 2 5/8” x 4
    • Scrap (Sentiment)
  • Holographic Trio Specialty Paper:
    • Scrap
  • Trusty Toolbox Designer Series Paper:
    • 3 tools, pencil and measurement tape

More Information on My Tool Time Father’s Day Card

Downloadable Free Standing Pop-Up Card Template

Downloadable Free Standing Pop-Up Card
Downloadable Free Standing Pop-Up Card Template

For more of my Stampin’ Up! cards, please click here.

You will find the items listed above in my online store.

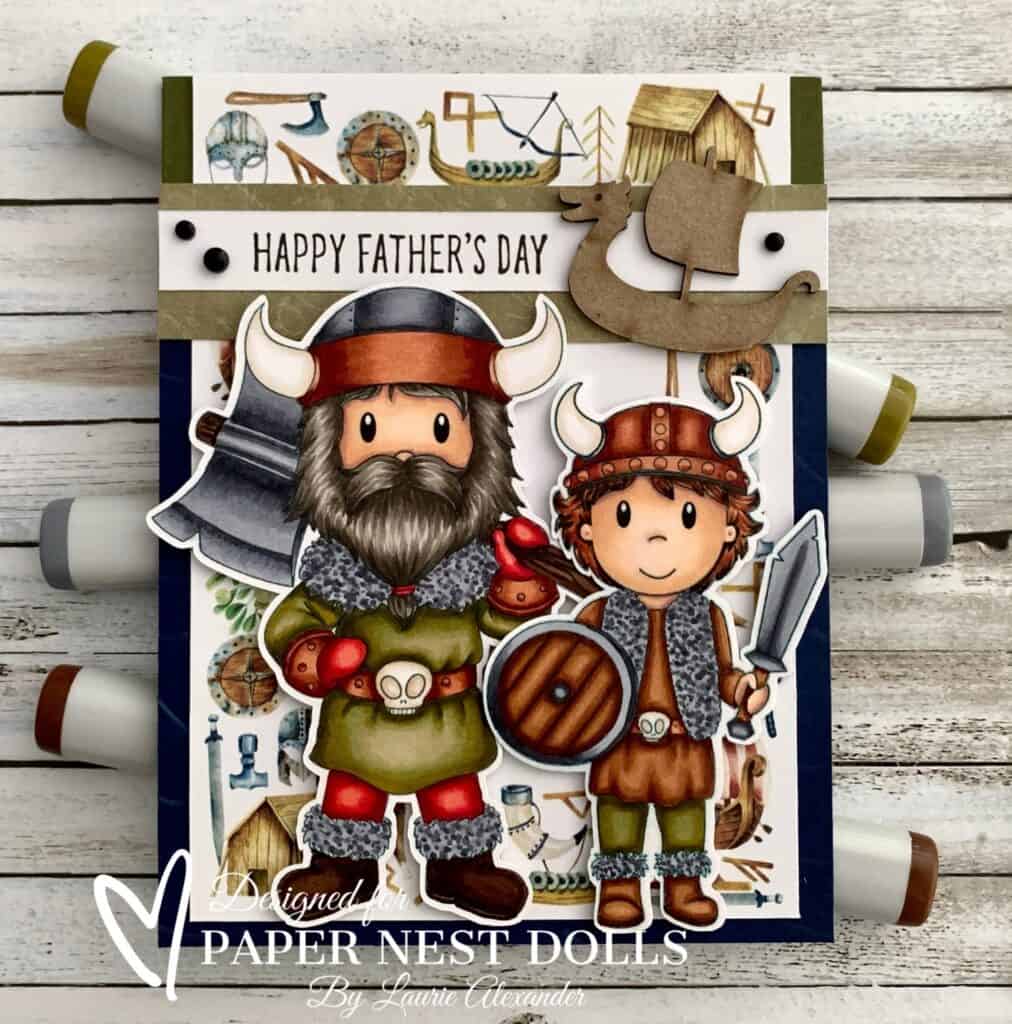
My Viking Father’s Day Card

A Father's Day card with a viking father and son
My Viking’s Father’s Day Card

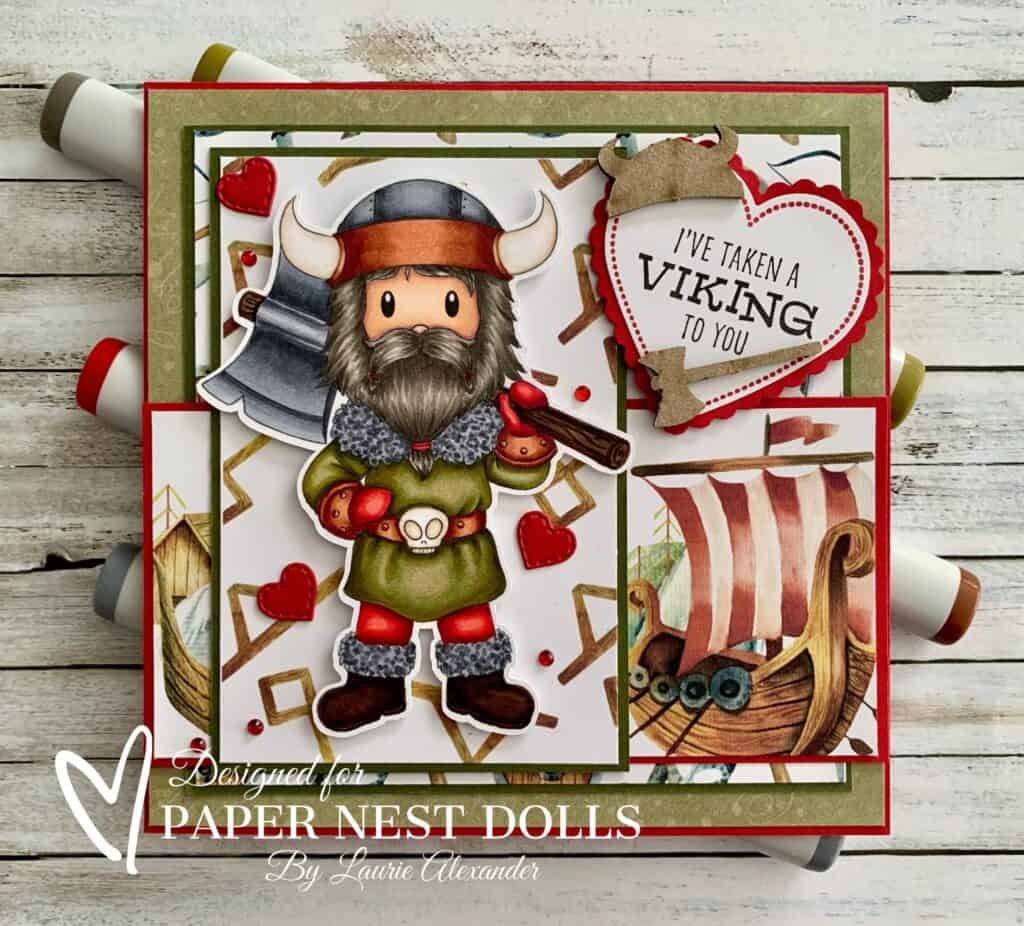
Hello Crafty Friends! It’s Laurie here! I am sharing My Viking Father’s Day Card for my Design Team Inspiration for Paper Nest Dolls using the Viking Bundle. This bundle has three characters and two animals – Viking Andrew (with and without the mustache ties), Viking Owen, Viking Dragon, and Viking Boar. I love this bundle and made another card using just Viking Andrew without the mustache ties. I will include a link to it at the end of this post.

The Details of My Card

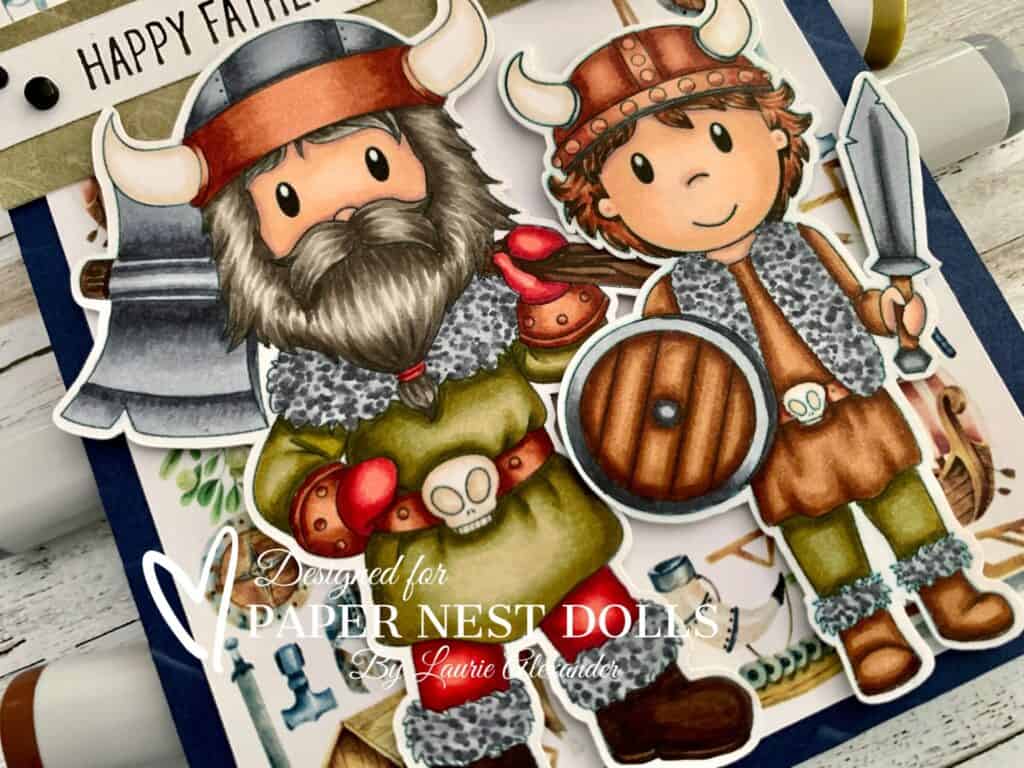
I thought using Viking Andrew and Viking Owen together would make a perfect Father’s Day card! I had so much fun colouring with my Copic markers this brawny guy and his son in appropriate Viking colours! Their colouring even matches another card called My Let’s Go A-Viking Card that I made for Paper Nest Dolls for their New Year’s Day Event. Wouldn’t all three make a great family card!

For my card, I kept it simple simple to make the stamps stand out. I used the High Seas Embossing Folder to emboss the waves on Night of Navy card stock. This was placed on a Mossy Meadow card base. Next, I used a frame with Viking imagery that came with the digital papers for the perfect backdrop for my father and son! My simple sentiment was layered on a scrap of the Cozy Winter paper. This paper pack is not just for winter but has all-purpose patterns as well. The finishing touch was the Viking chipboard ship and some black matte dots.

————————–

Copic Markers

Viking Andrew
Skin: E04/E11/E21/E00/E000
Hair: W7/W6/W5/W3
Top: YG99/YG97/YG95/YG93/YG91
Pants/Mitts: R39/R37/R35/R32
Fur Trim: C7/C5/C3
Boots: E49/E47/E44
Axe: C7/C5/C4/C3/E49/E47/E44
Brass/Belt/Bracers: E18/E15/E11
Steel on Helmet: C7/C5/C3
Skull on Belt: E42/E41/E40/0
Horns on Helmet: E41/E40/0

Close Up of Viking Father and Son

Viking Owen
Skin: E04/E11/E21/E00/E000
Hair: E49/E39/E19/E13
Top/Boots/Shield: E29/E37/E35/E33
Pants: YG99/YG97/YG95/YG93/YG91
Fur Vest: C7/C5/C3
Steel: C7/C5/C3
Helmet/Belt: E18/E15/E11
Skull on Belt: E42/E41/E40/0
Horns on Helmet: E41/E40/0

————————–

Supplies for My Viking Father’s Day Card:

Viking Bundle, Paper Nest Dolls
Paper Basics – Stamper’s Select White Cardstock, Papertrey Ink
Cozy Winter 12” x 12” Designer Paper Pack, P13
Viking Digital Paper, Happy Watercolor Shop
High Seas Embossing Folder, Stampin’ Up!
Home & Garden Stamp Set, Stampin’ Up! (Sentiment)
Tuxedo Black Memento Ink Pad, Stampin’ Up!
Seafaring Chipboard, Kraftin’ Kimmie Stamps
Classic Matte Dots, Stampin’ Up! (Hearts)
Night of Navy, Mossy Meadow and Basic White Card Stock

Stamp Sizes
Viking Andrew: 4”
Viking Owen: 3 ½”

Finished card size: 5 ½” x 4 ¼”

————————–

To view my other Paper Nest Dolls cards, please click here.

My Other Viking Cards

For more information on my cards, please click the photos.

Valentine card with a Viking on it
Will You Be My Viking, Valentine?
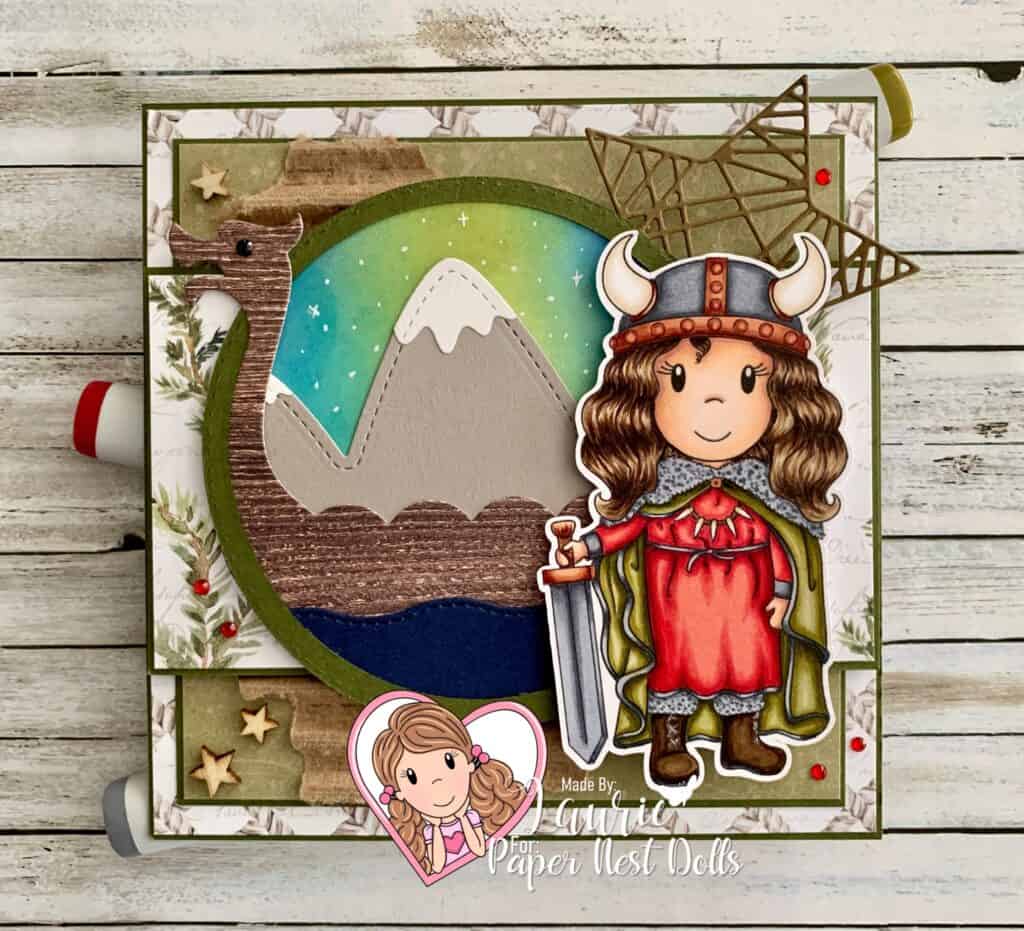
A card with a Viking on it.
My Let’s Go a Viking Card

Hope you like My Viking Father’s Day Card using the Viking Bundle by Paper Nest Dolls!

Thank you for stopping by!

Hugs,
Laurie

You’re Flippin’ Awesome Card

Card with BBQ Tools on it
You’re Flippin’ Awesome Card

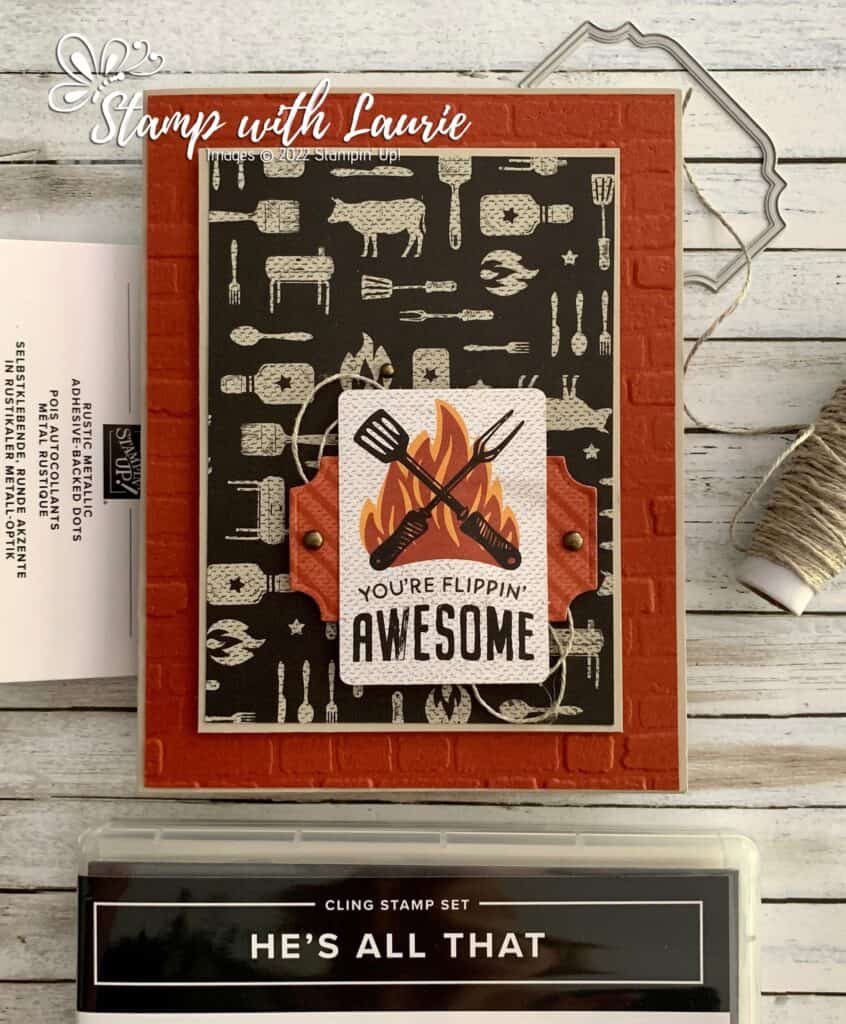
Hello Crafty Friends! Laurie here again! Father’s Day is just a few weeks away and I thought I would share with you my You’re Flippin’ Awesome Card using the new He’s The Man Suite Collection by Stampin’ Up! This suite is perfect for car lovers, grilling enthusiasts, camping buffs, and more! My Father-in-law loves to BBQ and I though this suite would make a perfect Father’s Day card for him! 

The Details of My Card

This card is a fast and easy card to make! No stamping involved on the front, but I did stamp the inside with “Wishing You a Happy Father’s Day” using the He’s All That Stamp Set that comes in the Collection.

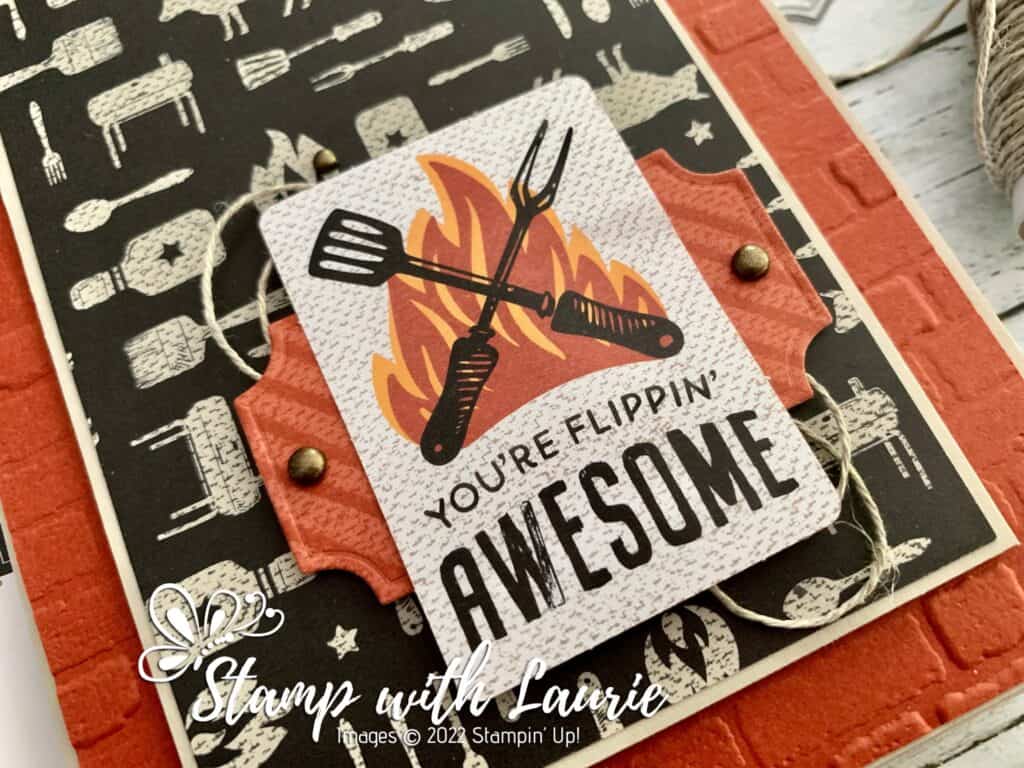
The He’s The Man Designer Series Paper comes with 2 die cut sheets and I used one of the die cuts for my sentiment. Easy-peasy! To give it more of a focal point, I added a piece of DSP and die cut it out using the He’s All That Dies. I turned it so that it flanks the sentiment on either side. I love the “framed” look that the die gives the die cut piece. Gave it that little extra detail!

The Rustic Metallic Adhesive-Backed Dots were a perfect accompaniment to my manly card! I placed one on either side of the sentiment and one above it to the left. Tip: you always want odd numbers since they are pleasing to the eye.

The final thing I added to my focal point was some looped Linen Thread behind everything. How manly is that thread!

For the DSP, I made it smaller than usual since I wanted the Brick & Mortar 3D Embossing Folder to show up more. I went with a Cajun Craze bricked piece since it matched my DSP and what is more appropriate than orange bricks!

All this was place on a Sahara Sand card base.

Supplies:

Stamps/Bundles/Dies: He’s The Man Suite Collection (159083)

Inks: Tuxedo Black Memento Ink Pad (132708) For sentiment on inside card

Paper: Sahara Sand (121043), Cajun Craze (119684), Basic White (for inside card) (159276), He’s the Man 12″ x 12″ Specialty Designer Series Paper (included in Collection)

Accessories: Brick & Mortar 3D Embossing Folder (149643), Rustic Metallic Adhesive-Backed Dots (included in Collection), Linen Thread (104199), Bone Folder (102300), Stampin’ Dimensionals (104430), Mini Stampin’ Dimensionals (144108), Stampin’ Seal (152813), Mini Glue Dots (103683)

Close Up of Focal Point on card
Close Up of My Card

Measurements: 

  • Sahara Sand: (2 pieces)
    • 5 ½” x 8 ½” scored a 4 ¼”
    • 3 ¼”x 4 ½”
  • Cajun Craze”
    • 5 ¼” x 4”
  • Basic White: (inside of card)
    • 5 ¼” x 4”
  • He’s the Man Specialty Designer Series Paper: (2 pieces)
    • 3-1/8” x 4-3/8”
    • 2-3/8” x 1-5/8”

More Information on My You’re Flippin’ Awesome Card :

For more of my Stampin’ Up! cards, please click here.

Stampin’ Up! video that shows off the fun designs of the He’s the Man Suite: https://www.youtube.com/watch?v=UW1QMUO3s8E

You will find the other items listed above in my online store.

My Father’s Day Card

My Father's Day Card
My Father’s Day Card

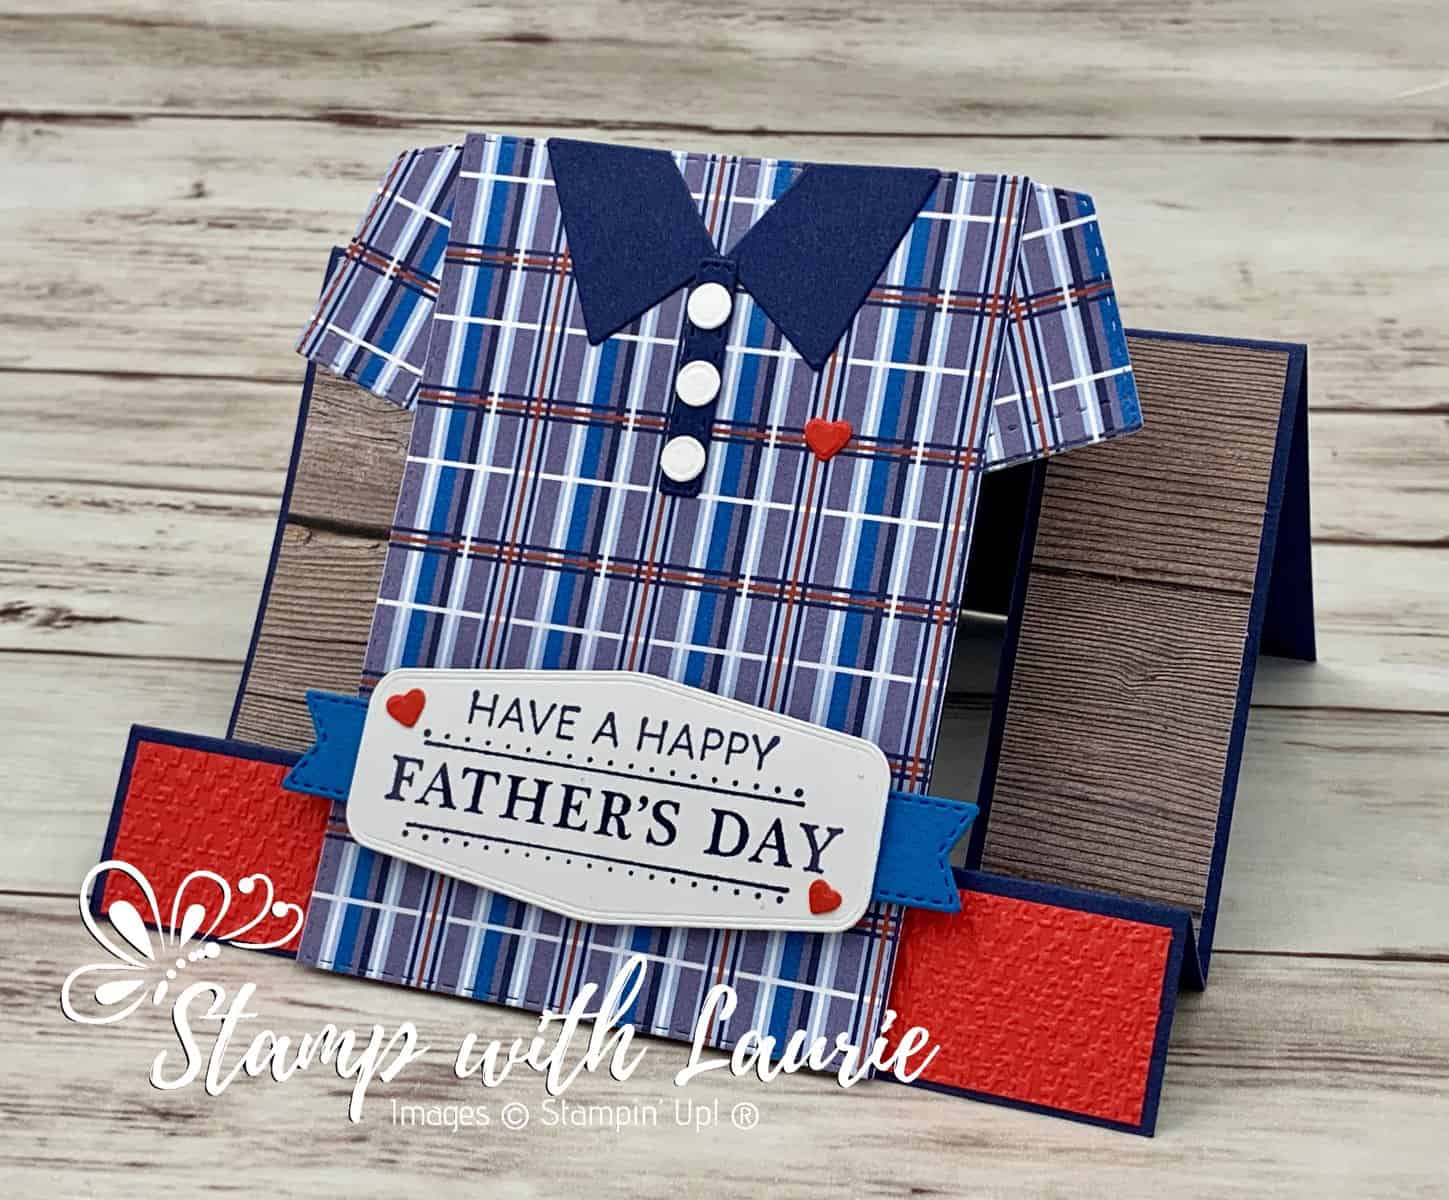
Today is I am sharing My Father’s Day Card that is using the Handsomely Suited Bundle by Stampin’ Up! I decided to create a Centre-Step Fun Fold card with the shirt on the centre panel. There is a link at the end of this post to a Horizontal Centre-Step Template.

The Details of My Card

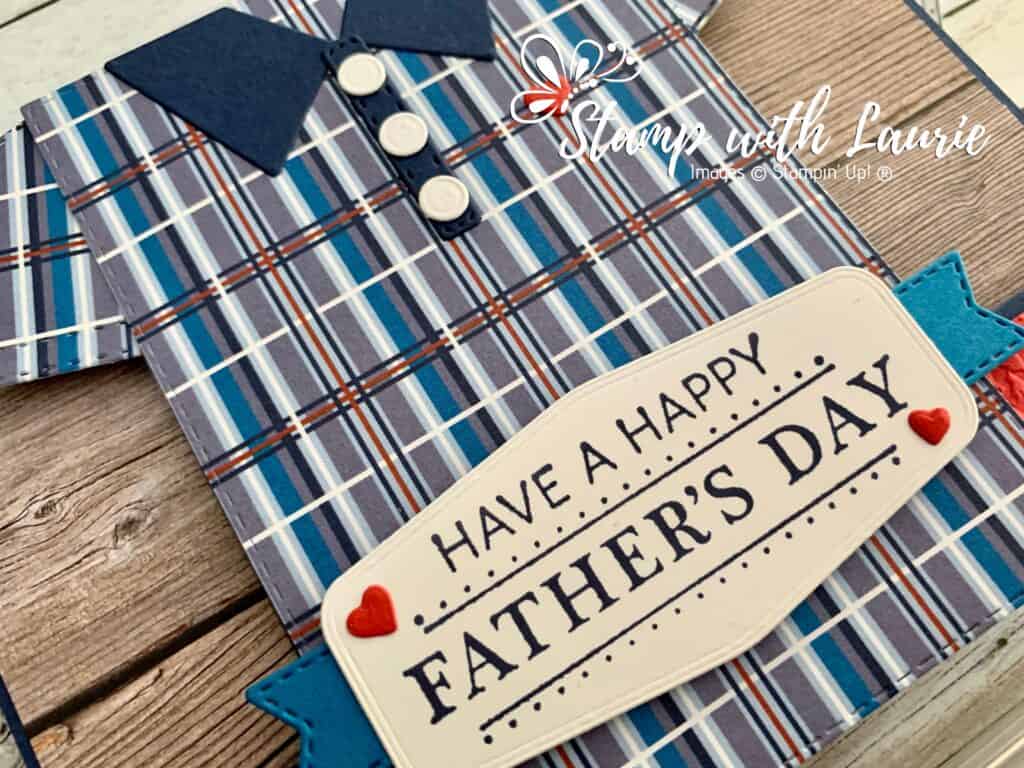
My Father-in-law isn’t a suit kind of guy, but he does wear golf shirts in blues. So, I created a short sleeve golf shirt using the Well Suited Designer Series Paper. For the sleeves, I used the pocket die and the shirt was die cut from the Stitched Rectangle Dies. I trimmed the stitched rectangle to 4 ¼” after it was die cut to fit an envelope. A number of his shirts are Lacoste with a small green allegator on the left side. Since I didn’t have any alligator dies, I used the hearts from the paws of the Pets Dies. I also figured that having a heart to represent his real heart was perfect for Father’s Day!

My Father's Day Card
My Father’s Day Card

For my sentiment, I didn’t think “Have a Happy Father’s Day Handsome” coming from both my husband and I would be appropriate for my father-in-law. So, I used the technique of covering the part of the sentiment that I didn’t want with scotch tape. Then, I inked the stamp up and removed the tape before stamping. Once the sentiment was stamped like this, I discovered that it fit perfectly in one of the dies from the Tasteful Labels Dies. The Pacific Point banner that flanks my sentiment was also from the Tasteful Labels Dies, but it wasn’t long enough to show on both sides of my sentiment. So, I cut in half giving the illusion that my banner is longer than it is.

For my other panels, I used the In Good Taste Designer Series Paper since he is a very handy man and likes to build things with wood. The Tasteful Textile 3D Embossing Folder was perfect for that material kind of look it gives my card. 

Tips for Cutting/Scoring Card Base

At 1 ¼” from the edge of the long side of card stock cut from 1” to 5 ¼” using the Paper Trimmer blade guide. Once I cut one side, I flipped the card stock over to cut the other side. Make sure that your new cut line will be parallel to the first one. Turn so that the long edge of card stock is horizontal and score side panels at 1”, 2” and 5 ¼” and 4 ¼” for the centre panel. To download a PDF file, please see the template link at the end of the post or click the image below.

Horizontal Centre-Step Card
Horizontal Centre-Step Card Template

Supplies:

Stamps/Bundles/Dies: Handsomely Suited Bundle (156240), Tasteful Labels Dies (152886), Stitched Rectangle Dies (151820)

Inks: Night of Navy Classic Stampin’ Pad (147110)

Paper: Night of Navy (100867), Pacific Point (111350), Poppy Parade (119793), Basic White (159276), Well Suited Designer Series Paper (154562), In Good Taste Designer Series Paper (152494)

Accessories: Tasteful Textile 3D Embossing Folder (152718), Bone Folder (102300), Stampin’ Dimensionals (104430), Stampin’ Seal (152813), Mini Glue Dots (103683), Multipurpose Liquid Glue (110755), Paper Trimmer (152392)

Close Up of My Card
Close Up of My Father’s Day Card

Measurements: 

  • Night of Navy: 5 ½” x 8 ½” (see template for score marks), scraps (collar, buttonholes)
  • Well Suited Designer Series Paper (3 pieces): 3” x 4 3/8” (trimmed to 4 ¼” after die cut to fit envelope), scraps for sleeves
  • In Good Taste Designer Series Paper (2 pieces): 1” x 3 1/8”
  • Basic White: 1 ¼” x 2 ¾”, scraps (buttons)
  • Pacific Point: ½” x 2 3/16”
  • Poppy Parade: 1” x 5 3/8”, scraps (hearts)
Side View of My Card
Side View of My Father’s Day Card

For Further Info:

Hope you like My Father’s Day Card. To download a PDF of this card, please click here.

For more of my Stampin’ Up! cards, please click here.

You will find the items listed above in my online store.

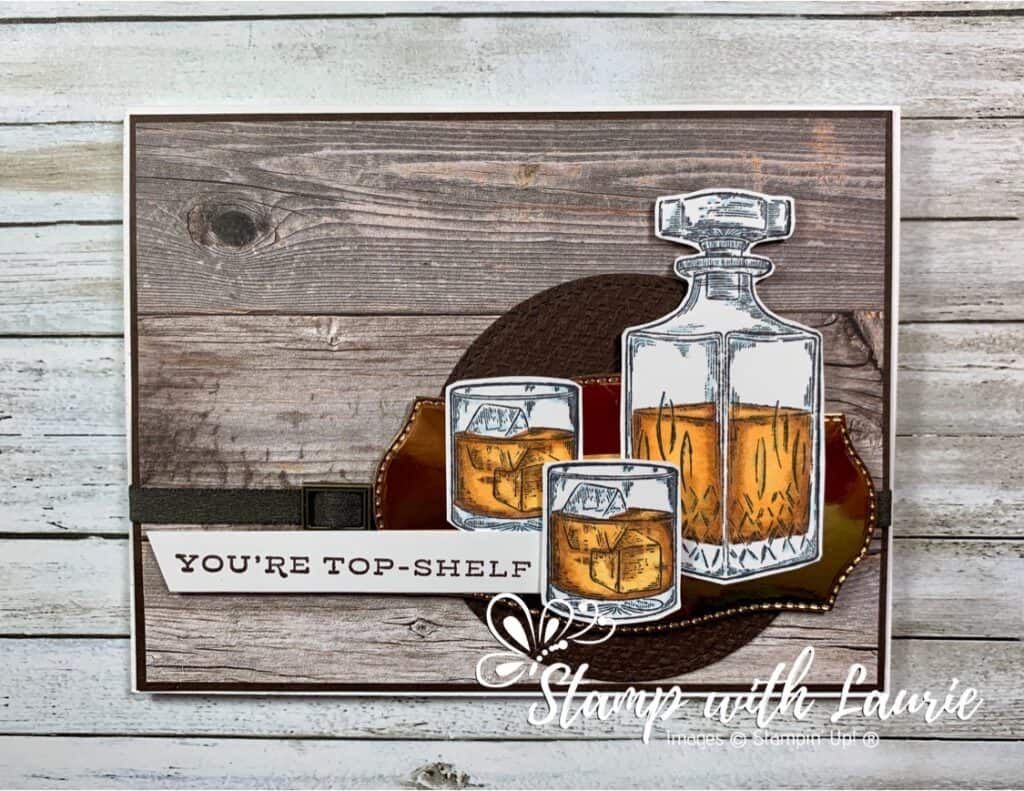
My Whiskey Business Card

My Whiskey Business Card

I was honoured to be asked to virtually demonstrate in a Facebook Live my Blends Colouring Techniques to some fellow demonstrators. So, I thought I would share for Technique Tuesdays some of my colouring techniques from the live video each week highlighting a card that I presented. The first card that I am highlighting this week is my Whiskey Business Card. I hope you will check back each week and maybe learn something new!

This card is perfect for that man in your life who loves his whiskey! This can be a Father’s Day card, a birthday card, a congratulations card…so many options. For this card, I wanted to create an old-world library kind of feel with the whiskey on a brass platter waiting for someone to help themselves. The World of Good Designer Series Paper with the wood image lends itself very well to that feel. The Early Espresso Faux Suede Ribbon and the buckle from the Antiqued Corners & Slides Elements both add to this feel as well.

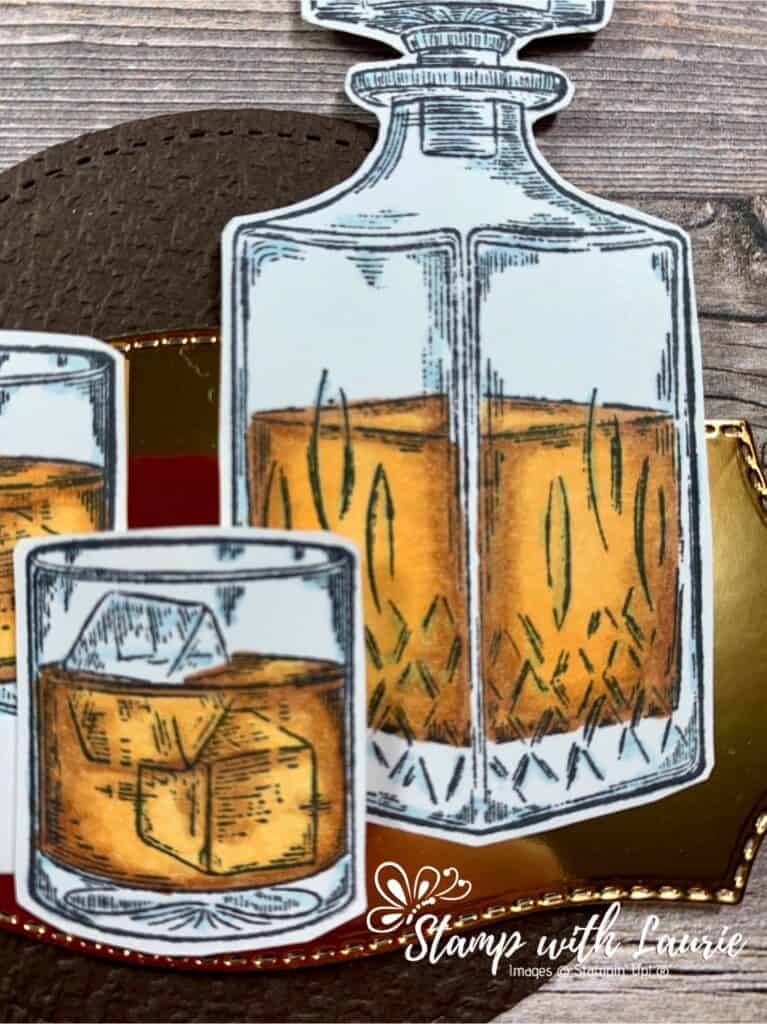
Close Up of My Colouring for My Whiskey Business Card

Supplies:

Stamps: Whiskey Business Stamp Set (154091)

Inks: Tuxedo Black Memento Ink Pad (132708)

Paper: Whisper White Thick (140272 ), Early Espresso (119686), Whisper White (100730), Brass Foil Sheets (153057), World of Good Designer Series Paper (152491)

Accessories: Stitched Shapes Dies (152323), Tasteful Labels Dies (152886), Tasteful Textile 3D Embossing Folder (152718), Antiqued Corners & Slides Elements (152471), Early Espresso Faux Suede Ribbon (152472), Cinnamon Cider Stampin’ Blends Combo Pack (153105), Mango Melody Stampin’ Blends Combo Pack (154888), Balmy Blue Stampin’ Blends Combo Pack (148544), Stampin’ Blends Color Lifter (144608 ), Paper Snips (103579), Bone Folder (102300), Adhesive Sheets (152334 ), Multipurpose Liquid Glue (110755 ), Mini Glue Dots (103683), Stampin’ Seal (152813), Stampin’ Dimensionals (104430)

Measurements: 

  • Whisper White Thick: 8 ½” x 5 ½”; scored at 4 ¼” 
  • Early Espresso: 2 pieces
    • 1/8” x 5 3/8” (for mat)
    • 3 ¼” x 3 ¼” (for circle)
  • World of Good Designer Series Paper: 4” x 5 ¼”
  • Brass Foil Sheets: 3 ¾” x 2”
  • Whisper White – 2 pieces: 3 ¼” x ½” (sentiment)
    • Scrap large enough to stamp glasses and tumbler
  • Early Espresso Faux Suede Ribbon: 6”

Instructions:

  1. Fold the Whisper White Thick card stock in half to create the card base.
  2. Stamp the whiskey decanter and glasses in Tuxedo Black Memento Ink Pad on the scrap of Whisper White
  3. Die cut the Early Espresso card stock with the largest Stitched Circle Die
  4. Emboss the stitched circle with the Tasteful Textile 3D Embossing Folder
  5. Die cut the Brass Foil piece with the appropriate Tasteful Labels Dies
  6. Colour the whiskey decanter and glasses with Cinnamon Cider and Dark Mango Melody for the liquid and Light Balmy Blue and Color Lifter for the glass according to the video:
Whiskey Business Colouring Tutorial Video
  1. Fussy cut the decanter and glasses out
  2. Stamp the sentiment in Tuxedo Black Memento Ink Pad on the Whisper White piece. Trim one end on an angle
  3. Adhere the World of Good Designer Series Paper to the Early Espresso mat
  4. Thread the buckle onto the Early Espresso Faux Suede Ribbon and affix the ribbon to the card
  5. Adhere this piece to the card base with Stampin’ Seal
  6. Slip the embossed stitched circle under the ribbon and adhere with Multipurpose Liquid Glue
  7. Using dimensionals, adhere the brass “platter so that it straddles the ribbon
  8. Adhere the decanter and one glass using Stampin’ Seal on the “platter”
  9. Use dimensionals for the remaining glass
  10. Affix the sentiment under the raised glass with a glue dot and a dimensional at the other end of sentiment

For Further Info:

Hope you like my Whiskey Business Card!

My Colouring Notes from my presentation:
https://stampwithlaurie.com/wp-content/uploads/2020/08/Stampin-Up-Blends-2020.pdf

Part 1: Whiskey Business Card using Blending Different Colours Technique
Video Tutorial: Blending Different Colours Together

Part 2: Country Harvest Card using Light to Dark Technique
Video Tutorial: Light to Dark/Dark to Light 

Part 3Beautiful Poppy Birthday Card using Smooth Colouring Technique
Video Tutorial: Smooth Colouring

Part 4: Let’s Gather Together Card using Tip to Tip Blending Technique
Video Tutorial: Tip to Tip Colouring

Part 5So Grateful Cardinal Card using Flicking Colouring Technique
Video Tutorial: Flicking Colouring

Part 6: Let’s Celebrate You Card using Flicking of Different Colours Technique
Video Tutorial: Flicking of Different Colours Technique

You will find the items listed above in my online store.