My Roll With It Shaker Card

My Roll With It Shaker Card

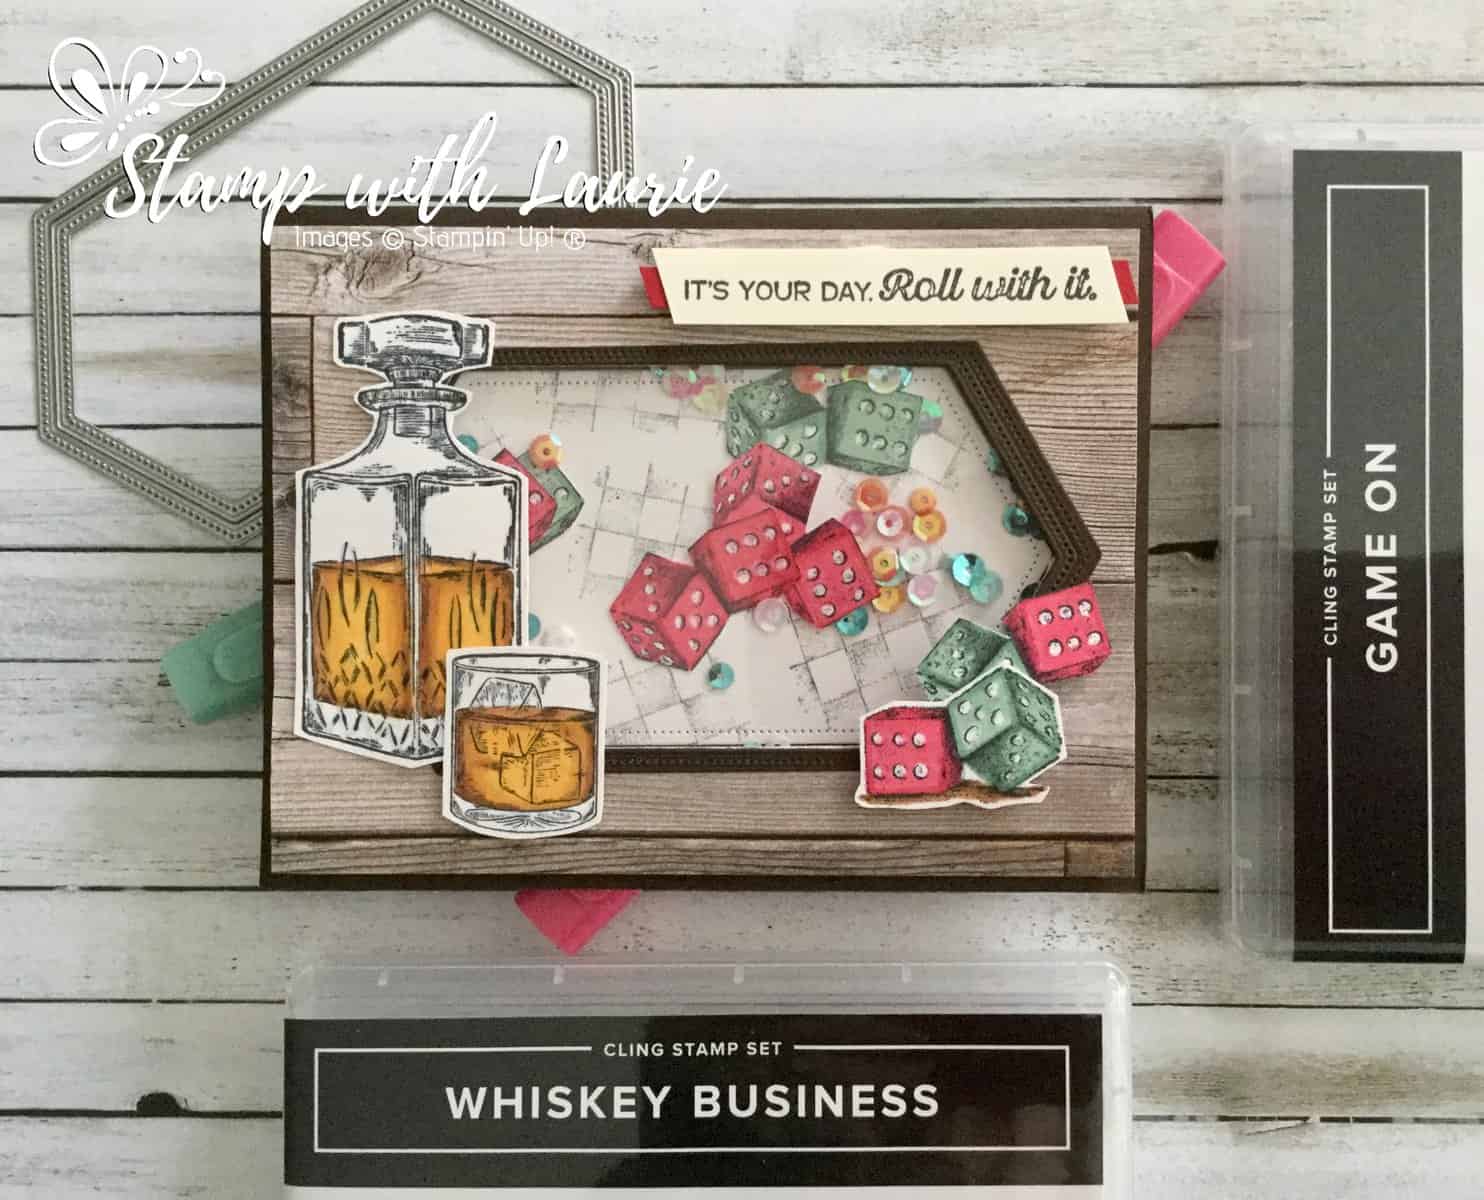
Tomorrow is my Hubby’s birthday! So, today I am sharing with you my Roll With It Shaker Card that I plan to give to him. I thought a shaker card would be so fun! It is using two stamp sets, Whiskey Business and Game On, that are perfect for him! We love to play games and have game time with our friends and family on a regular basis! Now he can shake the card and his dice will always come up 6 and 5! LOL! I even coloured the dice with the Real Red and Just Jade Stampin’ Blends to match the ones that he uses. In addition to gaming, he loves his single malt scotch and is always trying different types.

Details of My Roll With It Shaker Card

For my card, I wanted to create a masculine feel. So, the In Good Taste Designer Series Paper with Early Espresso card stock was perfect for it! I use the two largest Stitched Nested Labels to create my window frame. I stamped the checkerboard in Memento Black off twice before I randomly stamped it a third time on my Whisper White background piece. Once I did this, I created my shaker part with Foam Adhesive Strips, a piece of Window Sheet, a pinch of Woven Threads Sequins and my “dice”.

For the dice and the scotch, I stamped them on Whisper White with Memento Black. I then used my Stampin’ Blends to colour them. The dice were Real Red Dark/Light and Just Jade Dark/Light with Cinnamon Cider Dark/Light for the ground. The Scotch was Cinnamon Cider Dark/Light and Mango Melody Dark with Balmy Blue Light and Color Lifter for the glass. Once these were coloured, I fussy cut them out.

The sentiment stamped in Memento Black from Game On with a splash of Real Red behind it was perfect for my card! The finishing touch was decorating the inside by combining the two stamp sets again to create my sentiment.
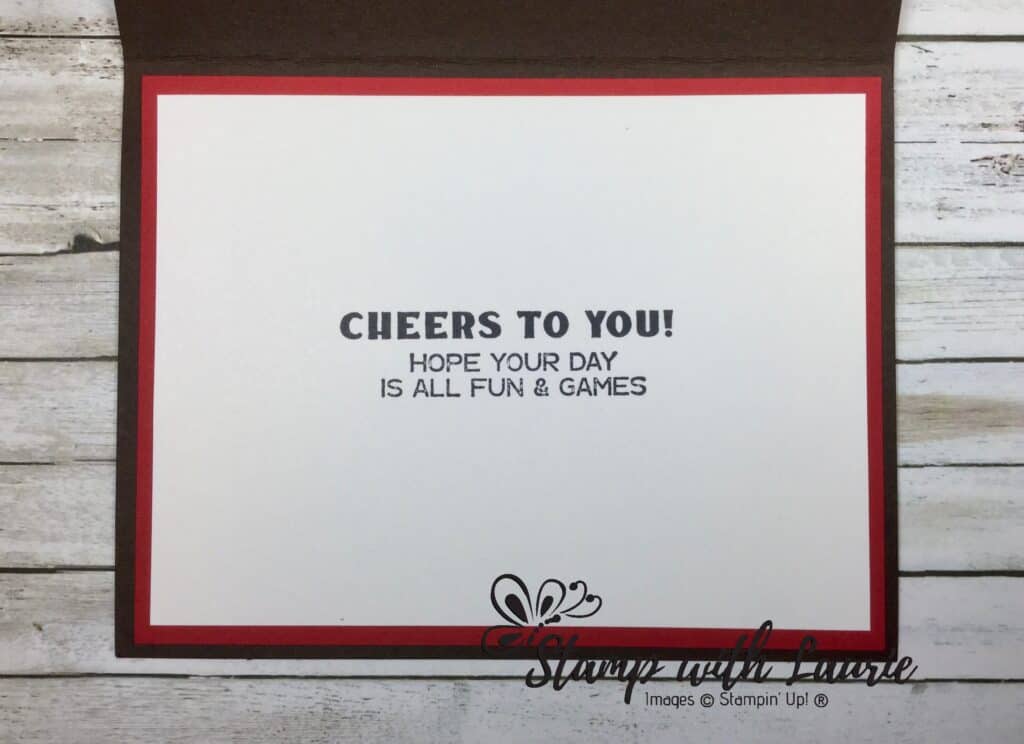
Inside of Close Up of Dice from My Roll With It Shaker Card

My Roll With It Shaker Card in Action

My Roll With It Shaker Card in Action

Here is a video that I presented to some fellow demonstrators that shows how to colour with Stampin’ Blends the decanter from the Whiskey Business Stamp Set.

My Whiskey Business Colouring Tutorial

Supplies:

Stamps: Whiskey Business Stamp Set (152550), Game On Stamp Set (152646)

Dies: Stitched Nested Labels Dies (149638)

Inks:Tuxedo Black Memento Ink Pad (132708)

Paper: Real Red (102482), Early Espresso (119686), Whisper White (100730), Window Sheets (142314), In Good Taste Designer Series Paper(152494)

Accessories: Woven Threads Sequin Assortment(149498), Cinnamon Cider Stampin’ Blends Combo Pack (153105), Mango Melody Stampin’ Blends Combo Pack (154888), Balmy Blue Stampin’ Blends Combo Pack (148544), Stampin’ Blends Color Lifter (144608), Paper Snips (103579), Bone Folder (102300), Stampin’ Seal (152813), Stampin’ Dimensionals (104430), Foam Adhesive Strips (141825), Mini Glue Dots (103683)

Measurements: 

  • Early Espresso: 2 pieces of each
    • 8 ½” x 5 ½”; scored at 4 ¼”
    • 5” x 2 5/8” (shaker frame)
  • Whisper White: 4 pieces of each
    • 5” x 3” (background piece)
    • Scraps (dice, decanter, glass)
    • 3” x ½” (sentiment)
    • 4 ¾” x 4” (Inside of card)
  • Real Red: 2 pieces of each:
    • 5” x 4 ¼” (Inside of card)
    • Scrap
  • Window Sheet: 5” x 3”
  • In Good Taste Designer Series Paper: 5” x 4 ¼”

For Further Info:

Hope you like my Roll With it Shaker Card!

For another Whiskey Business Card, check out this link.

You will find the items listed above in my online store.

My Whiskey Business Card

My Whiskey Business Card

I was honoured to be asked to virtually demonstrate in a Facebook Live my Blends Colouring Techniques to some fellow demonstrators. So, I thought I would share for Technique Tuesdays some of my colouring techniques from the live video each week highlighting a card that I presented. The first card that I am highlighting this week is my Whiskey Business Card. I hope you will check back each week and maybe learn something new!

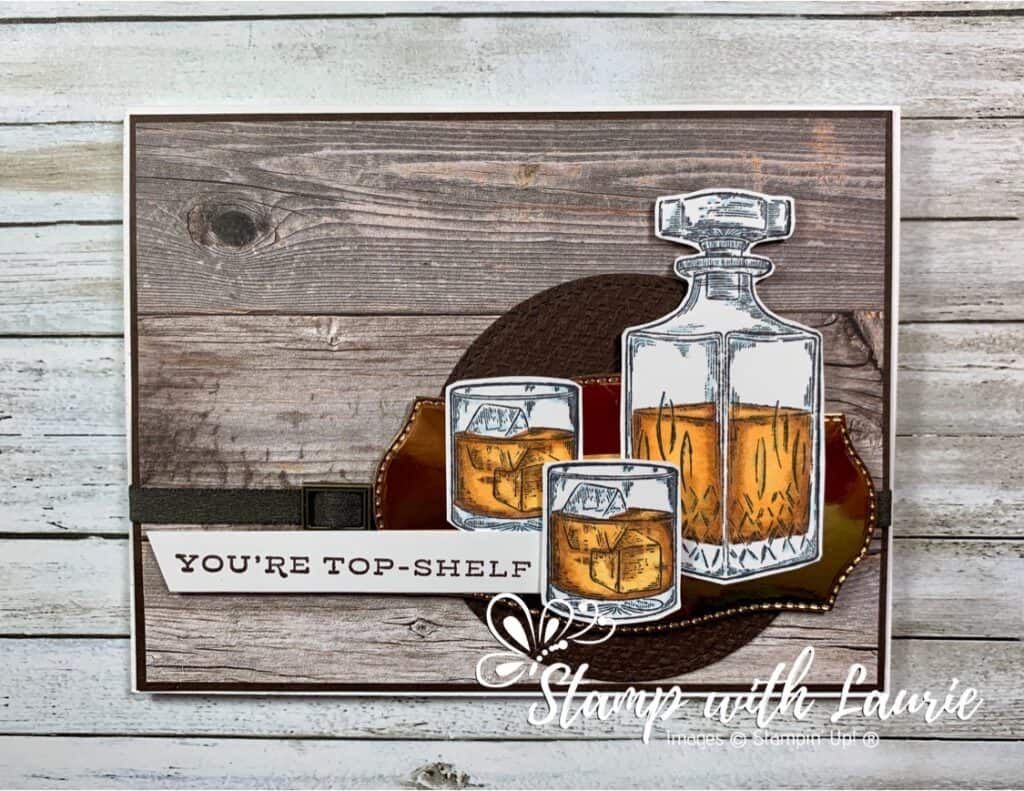
This card is perfect for that man in your life who loves his whiskey! This can be a Father’s Day card, a birthday card, a congratulations card…so many options. For this card, I wanted to create an old-world library kind of feel with the whiskey on a brass platter waiting for someone to help themselves. The World of Good Designer Series Paper with the wood image lends itself very well to that feel. The Early Espresso Faux Suede Ribbon and the buckle from the Antiqued Corners & Slides Elements both add to this feel as well.

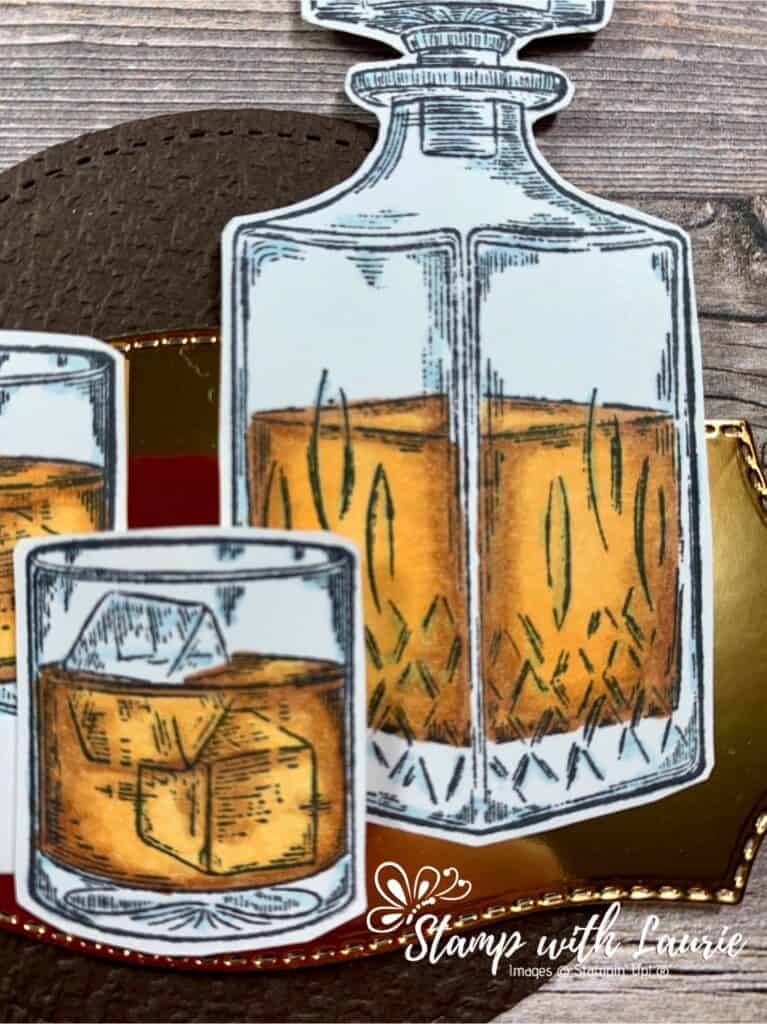
Close Up of My Colouring for My Whiskey Business Card

Supplies:

Stamps: Whiskey Business Stamp Set (154091)

Inks: Tuxedo Black Memento Ink Pad (132708)

Paper: Whisper White Thick (140272 ), Early Espresso (119686), Whisper White (100730), Brass Foil Sheets (153057), World of Good Designer Series Paper (152491)

Accessories: Stitched Shapes Dies (152323), Tasteful Labels Dies (152886), Tasteful Textile 3D Embossing Folder (152718), Antiqued Corners & Slides Elements (152471), Early Espresso Faux Suede Ribbon (152472), Cinnamon Cider Stampin’ Blends Combo Pack (153105), Mango Melody Stampin’ Blends Combo Pack (154888), Balmy Blue Stampin’ Blends Combo Pack (148544), Stampin’ Blends Color Lifter (144608 ), Paper Snips (103579), Bone Folder (102300), Adhesive Sheets (152334 ), Multipurpose Liquid Glue (110755 ), Mini Glue Dots (103683), Stampin’ Seal (152813), Stampin’ Dimensionals (104430)

Measurements: 

  • Whisper White Thick: 8 ½” x 5 ½”; scored at 4 ¼” 
  • Early Espresso: 2 pieces
    • 1/8” x 5 3/8” (for mat)
    • 3 ¼” x 3 ¼” (for circle)
  • World of Good Designer Series Paper: 4” x 5 ¼”
  • Brass Foil Sheets: 3 ¾” x 2”
  • Whisper White – 2 pieces: 3 ¼” x ½” (sentiment)
    • Scrap large enough to stamp glasses and tumbler
  • Early Espresso Faux Suede Ribbon: 6”

Instructions:

  1. Fold the Whisper White Thick card stock in half to create the card base.
  2. Stamp the whiskey decanter and glasses in Tuxedo Black Memento Ink Pad on the scrap of Whisper White
  3. Die cut the Early Espresso card stock with the largest Stitched Circle Die
  4. Emboss the stitched circle with the Tasteful Textile 3D Embossing Folder
  5. Die cut the Brass Foil piece with the appropriate Tasteful Labels Dies
  6. Colour the whiskey decanter and glasses with Cinnamon Cider and Dark Mango Melody for the liquid and Light Balmy Blue and Color Lifter for the glass according to the video:
Whiskey Business Colouring Tutorial Video
  1. Fussy cut the decanter and glasses out
  2. Stamp the sentiment in Tuxedo Black Memento Ink Pad on the Whisper White piece. Trim one end on an angle
  3. Adhere the World of Good Designer Series Paper to the Early Espresso mat
  4. Thread the buckle onto the Early Espresso Faux Suede Ribbon and affix the ribbon to the card
  5. Adhere this piece to the card base with Stampin’ Seal
  6. Slip the embossed stitched circle under the ribbon and adhere with Multipurpose Liquid Glue
  7. Using dimensionals, adhere the brass “platter so that it straddles the ribbon
  8. Adhere the decanter and one glass using Stampin’ Seal on the “platter”
  9. Use dimensionals for the remaining glass
  10. Affix the sentiment under the raised glass with a glue dot and a dimensional at the other end of sentiment

For Further Info:

Hope you like my Whiskey Business Card!

My Colouring Notes from my presentation:
https://stampwithlaurie.com/wp-content/uploads/2020/08/Stampin-Up-Blends-2020.pdf

Part 1: Whiskey Business Card using Blending Different Colours Technique
Video Tutorial: Blending Different Colours Together

Part 2: Country Harvest Card using Light to Dark Technique
Video Tutorial: Light to Dark/Dark to Light 

Part 3Beautiful Poppy Birthday Card using Smooth Colouring Technique
Video Tutorial: Smooth Colouring

Part 4: Let’s Gather Together Card using Tip to Tip Blending Technique
Video Tutorial: Tip to Tip Colouring

Part 5So Grateful Cardinal Card using Flicking Colouring Technique
Video Tutorial: Flicking Colouring

Part 6: Let’s Celebrate You Card using Flicking of Different Colours Technique
Video Tutorial: Flicking of Different Colours Technique

You will find the items listed above in my online store.