Just Saying Hello Card

My Design Team Card
My Just Saying Hello Card

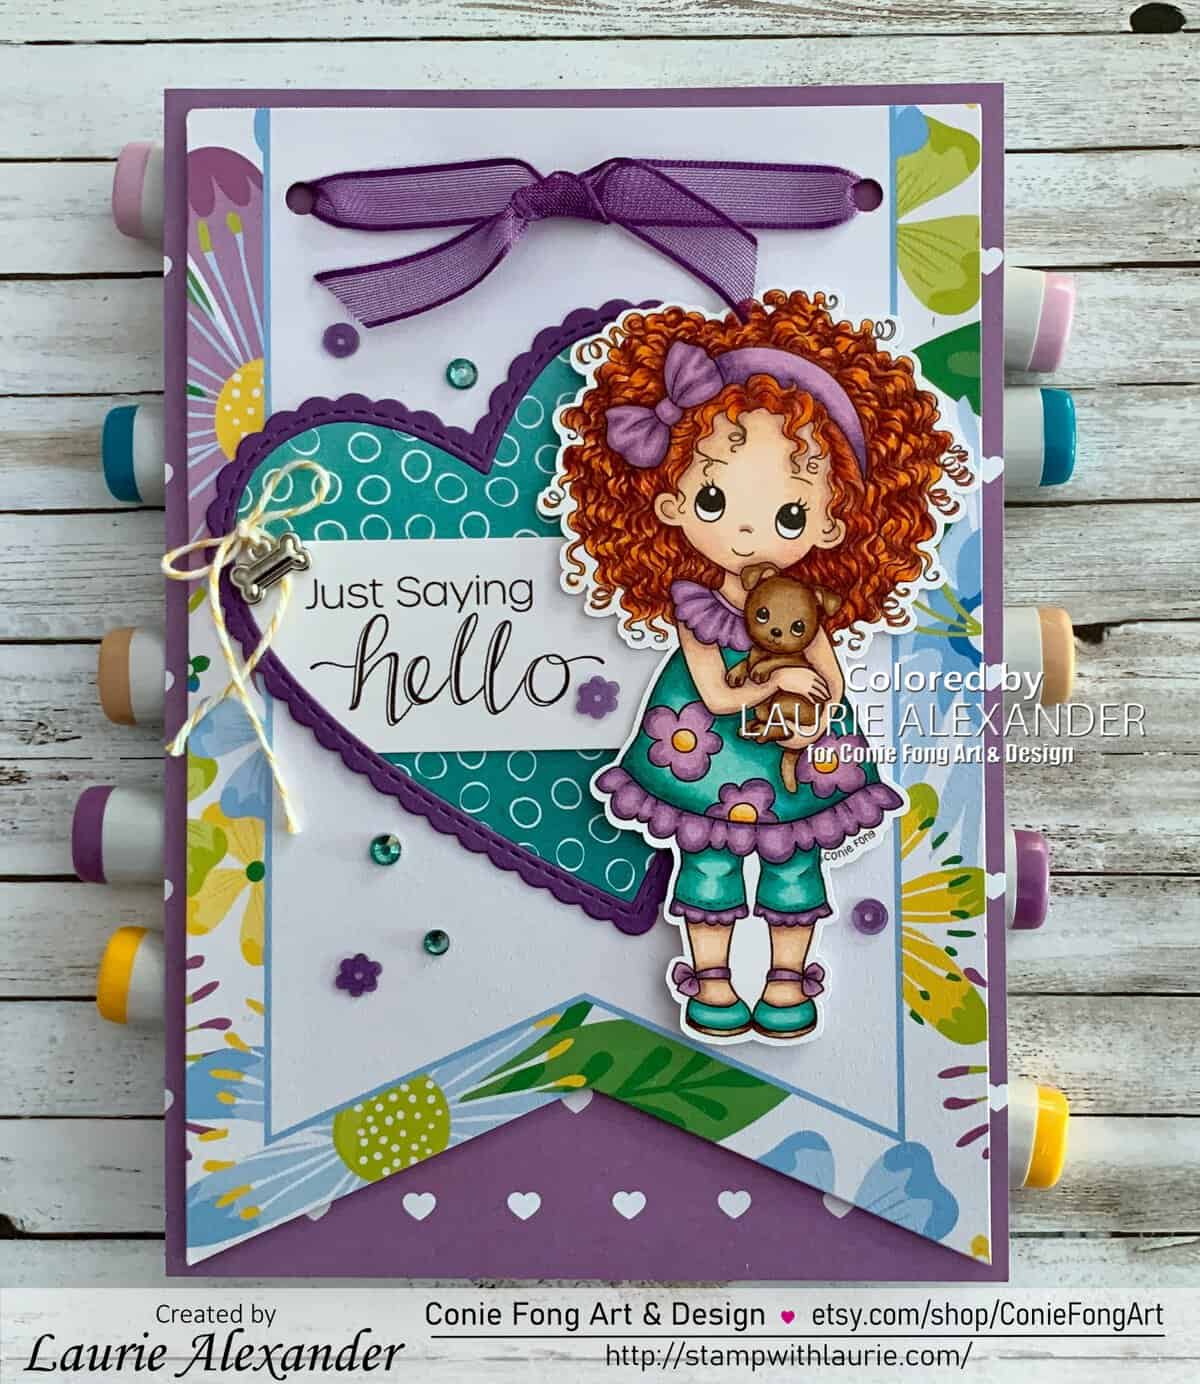
Hello Crafty Friends! It’s Laurie here! I am sharing my Just Saying Hello Card as my second May Design Team Card for Conie Fong Art & Design.

For my card, I used the sweet Sophie and Puppy and coloured her with my Copic markers. I couldn’t resist colouring all her luscious curls red! Did you see her adorable puppy too! The sentiment is from the Maisy and Cory Mice Bundle. I thought having it layered into the heart made it pop out as if Sophie is saying “Just saying hello!” to the recipient.

I had a paper pad of banners that I thought would provide a perfect backdrop for her! It made a large 5” x 7” card but set her of really nicely. Since I wasn’t planning to use it as a banner, I tied some Gorgeous Grape sheer ribbon between the holes for the banner part. For my embellishments, I used some sequins, bakers twine and the cutest dog bone trinket! I also added rhinestones which I coloured with my Copic marker to match my card. Clear Wink of Stella was used on the flowers of her dress, hair bow and shoe bows to add a bit of subtle shimmer.

————————–

Copic Markers:

Skin: E000/E00/E21/E11/E04/R20
Hair: YR14/YR18/E08/E18
Blues: BG57/BG23/BG13/BG11
Purples: V17/V15/V12
Yellows: Y32/Y35/Y38
Puppy: E37/E35/E33E31E30/R20
Rhinestones: BG57
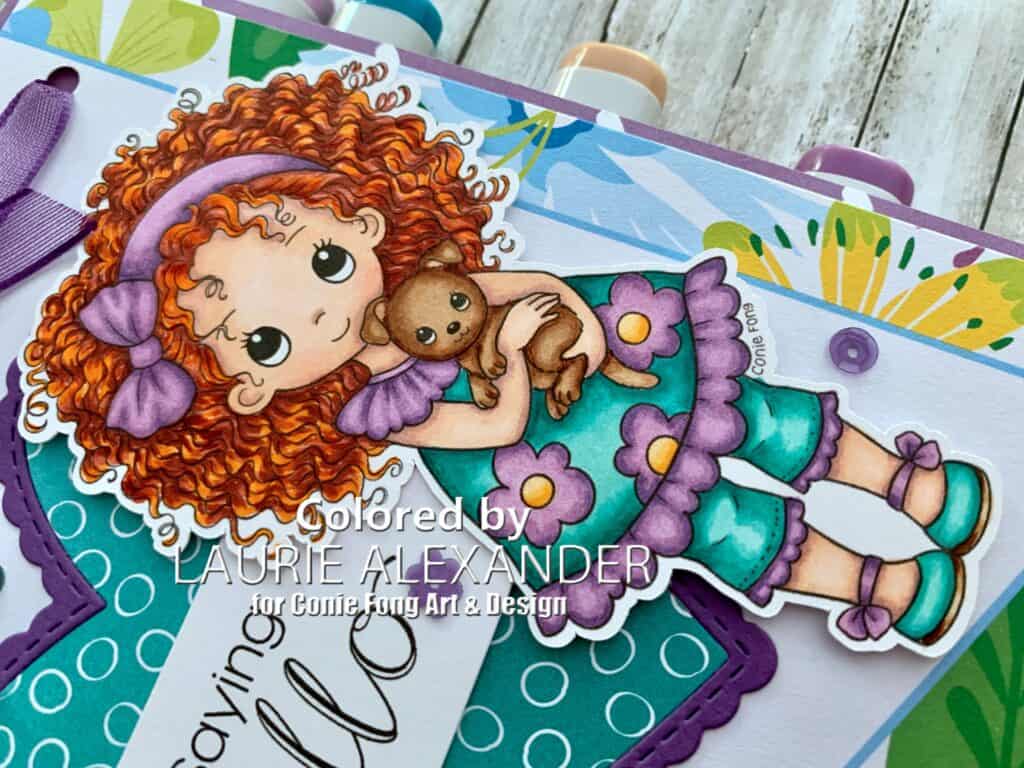
Close Up of My Design Team Card

————————–

Card Recipe for My Puppy Love Card:

Sophie and Puppy, Conie Fong Art & Design
Maisy and Cory Mice Bundle, Conie Fong Art & Design
Paper Basics – Stamper’s Select White Cardstock, Papertrey Ink
Studio 112 6” x 12” Paper Pad, K & Company
Craft it Flora Banner Pad, Recollections
Oh So Ombre 6” x 6” Designer Series Paper, Stampin’ Up!
Be Mine Stitched Dies, Stampin’ Up!
Gorgeous Grape Sheer Ribbon, Stampin’ Up!
Rhinestone Basic Jewels, Stampin’ Up!
Gingham Gala Adhesive-Backed Sequins, Stampin’ Up!
Crushed Curry Baker’s Twine, Stampin’ Up!
Playful Pets Trinkets, Stampin’ Up!
Clear Wink of Stella, Stampin’ Up!
Gorgeous Grape and Whisper White Card Stock, Stampin’ Up!

Finished card size: 5” x 7”

————————–

To view my other Conie Fong Art & Design cards, please click here.

Hope you like my Design Team card using
Sophie and Puppy for Conie Fong Art & Design!

Thank you for stopping by!

Hugs,
Laurie

Welcome Spring Card

My Design Team Card
Welcome Spring Card

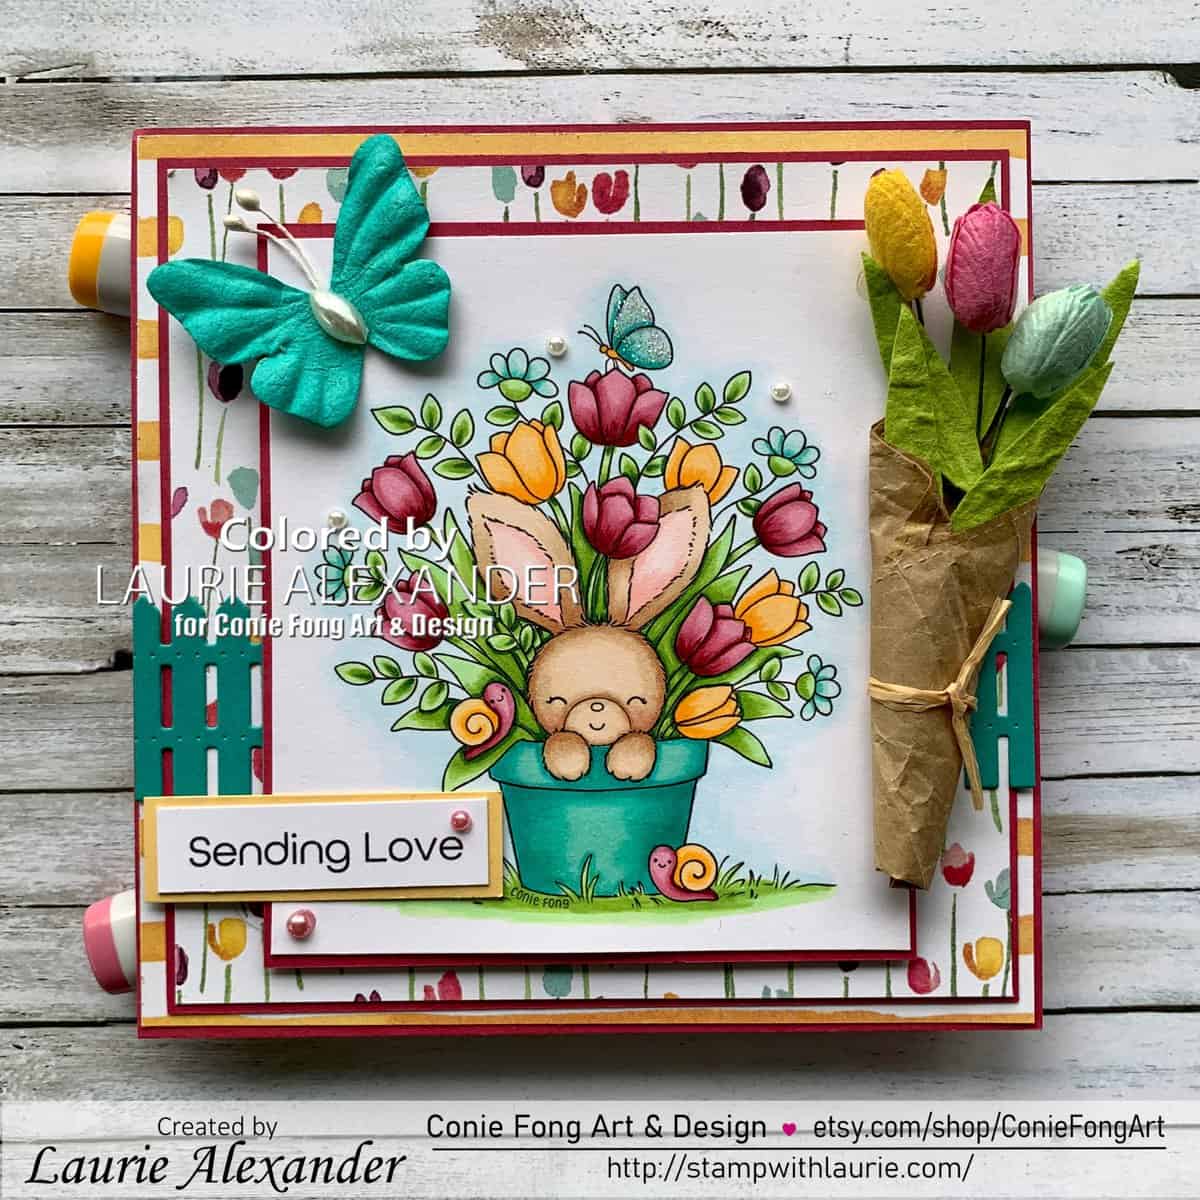
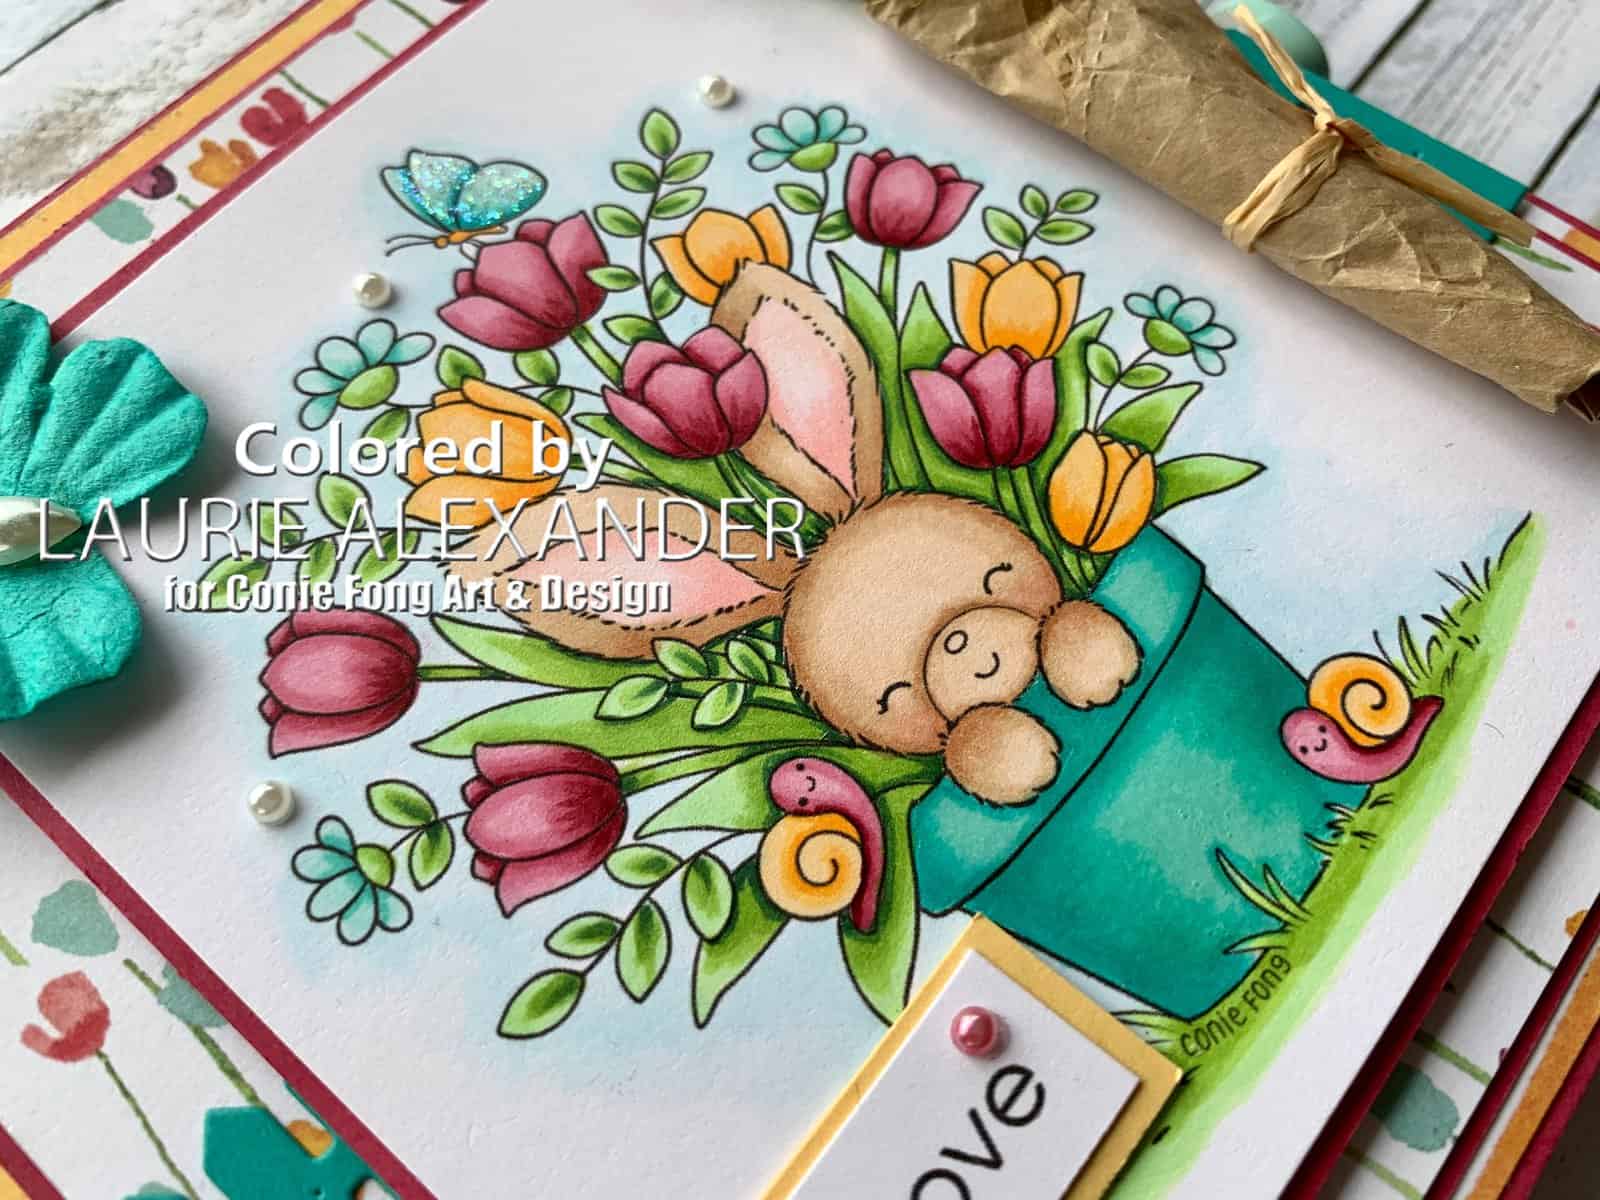
Hello Crafty Friends! It’s Laurie here! I am sharing my Welcome Spring Card as my Design Team Card for Conie Fong Art & Design. This digital stamp is called Bunny Tulips and comes with the bunny in the flower pot and two sentiments.

Spring has finally arrived in my part of the world! The tulips and daffodils are blooming, and the birds are singing. I love Spring and the renewal of life that it brings!

For my card, I coloured this sweet stamp with my Copic markers in Spring like colours of pink, yellow and blue. Did you know that you can have pink and yellow snails! Lol! I love how the bunny is peeking out of the flower pot! I used Glossy Accents on the pot to give it a shine and Stickles on the butterfly to make her sparkle!

For my embellishments, I had some paper tulips that were very long. So, I sniped them down and wrapped them like a bouquet you get in the store. I used some paper ribbon that I die cut into a square for the wrap. A piece of raffia tied around the bundle finishes this lovely bouquet off. I added a paper butterfly that matches the fence which was die cut using the Picket Fence Die-namics. I coloured a few of the pearls to match my card and added a few uncoloured ones to match the paper butterfly.

————————–

Copic Markers:

Bunny: E33/E31/E30/R20/R00
Pinks: R89/R85/R83/R81
Yellows: Y38/Y35/Y32
Blues: BG15/BG11/BG10
Grass: YG11/YG23/YG25/G28
Sky: BG0000/BG000
Pearls: R85

Close Up of My Design Team Card

————————–

Card Recipe for My Welcome Spring Card:

Bunny Tulips, Conie Fong Art & Design
Paper Basics – Stamper’s Select White Cardstock, Papertrey Ink
Painted Blooms Designer Series Paper, Stampin’ Up!
Paper Butterflies, Spring, A Charmed Life, Michael’s Arts & Crafts
Picket Fence Die-namics, My Favorite Things
Stitched Shapes Dies, Stampin Up!
Paper Tulips, Thai Paper Flower
Raffia, My Stash
Paper Ribbon, My Stash
Pearl Basic Jewels, Stampin’ Up!
Glossy Accents, Ranger
Star Dust Stickles, Ranger
Rose Red Card Stock, Stampin’ Up!

Finished card size: 5.5” x 5.5”

————————–

To view my other Conie Fong Art & Design cards, please click here.

Hope you like my Design Team card using Bunny Tulips for Conie Fong Art & Design!

Thank you for stopping by!

Hugs,
Laurie
My Sweet Maisy Card

My Design Team Card
My Sweet Maisy Card

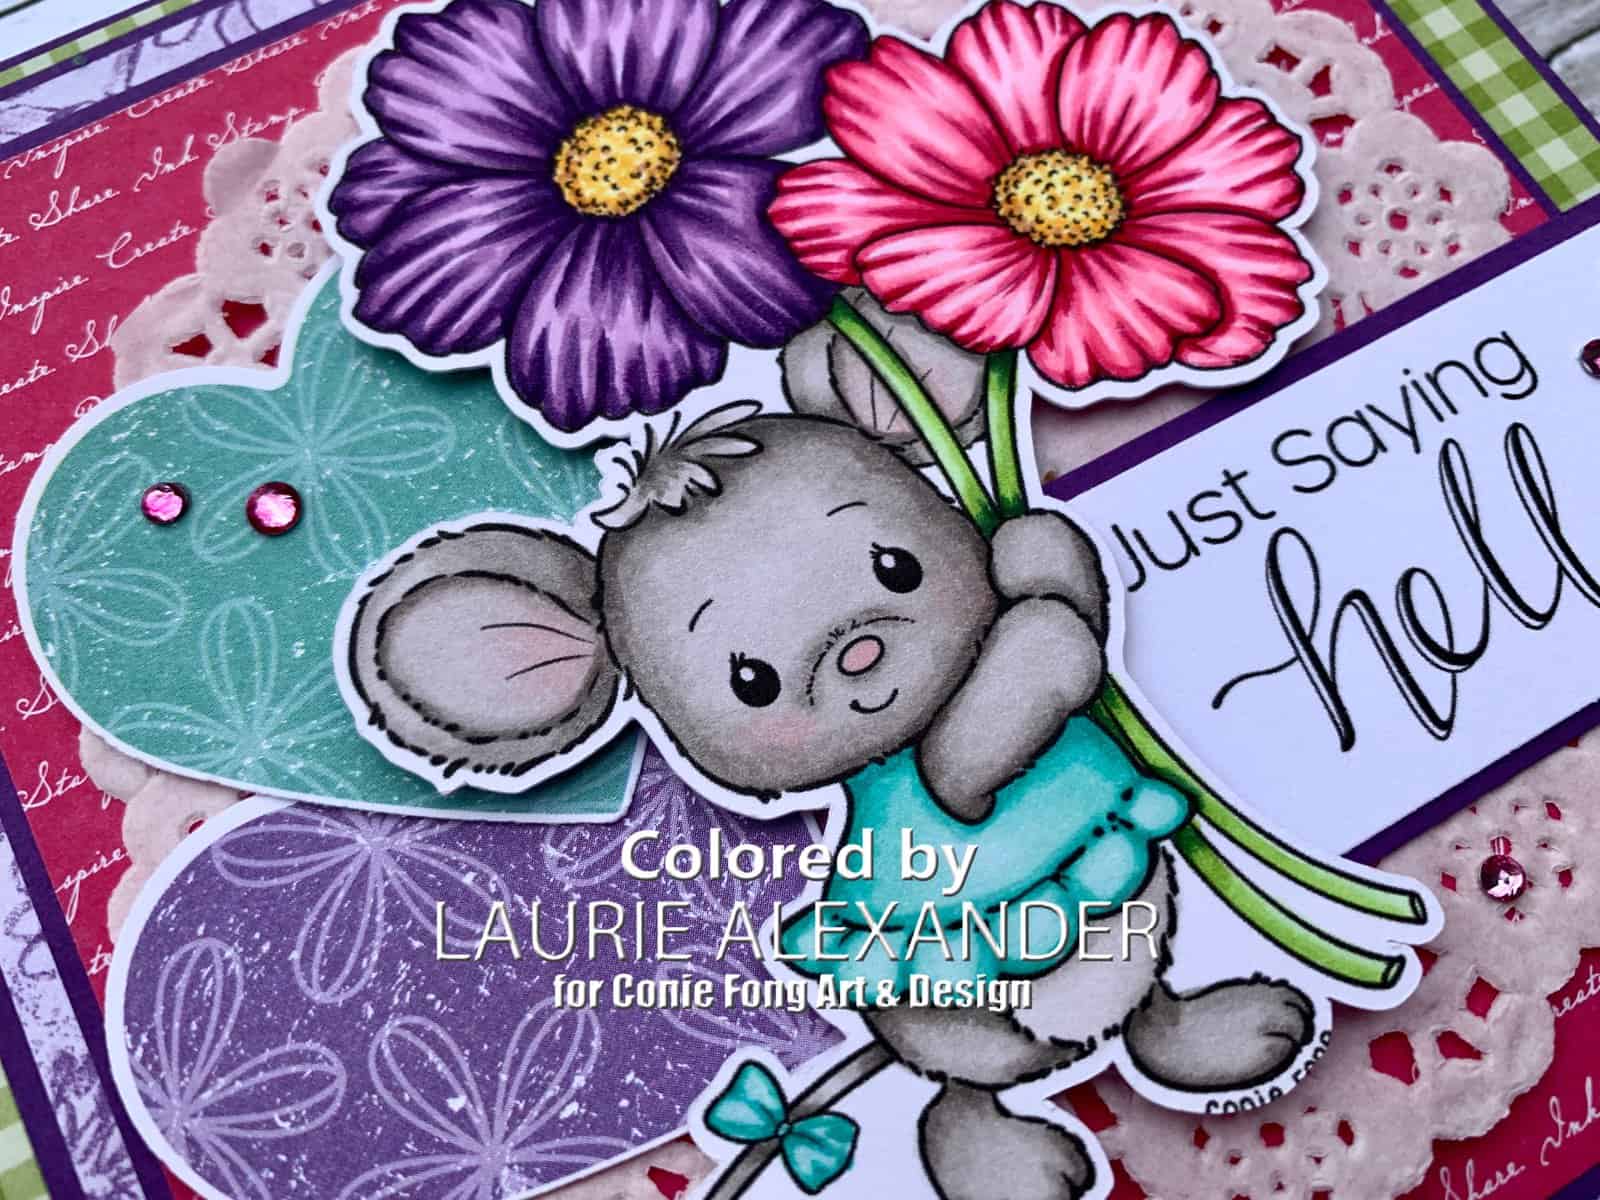
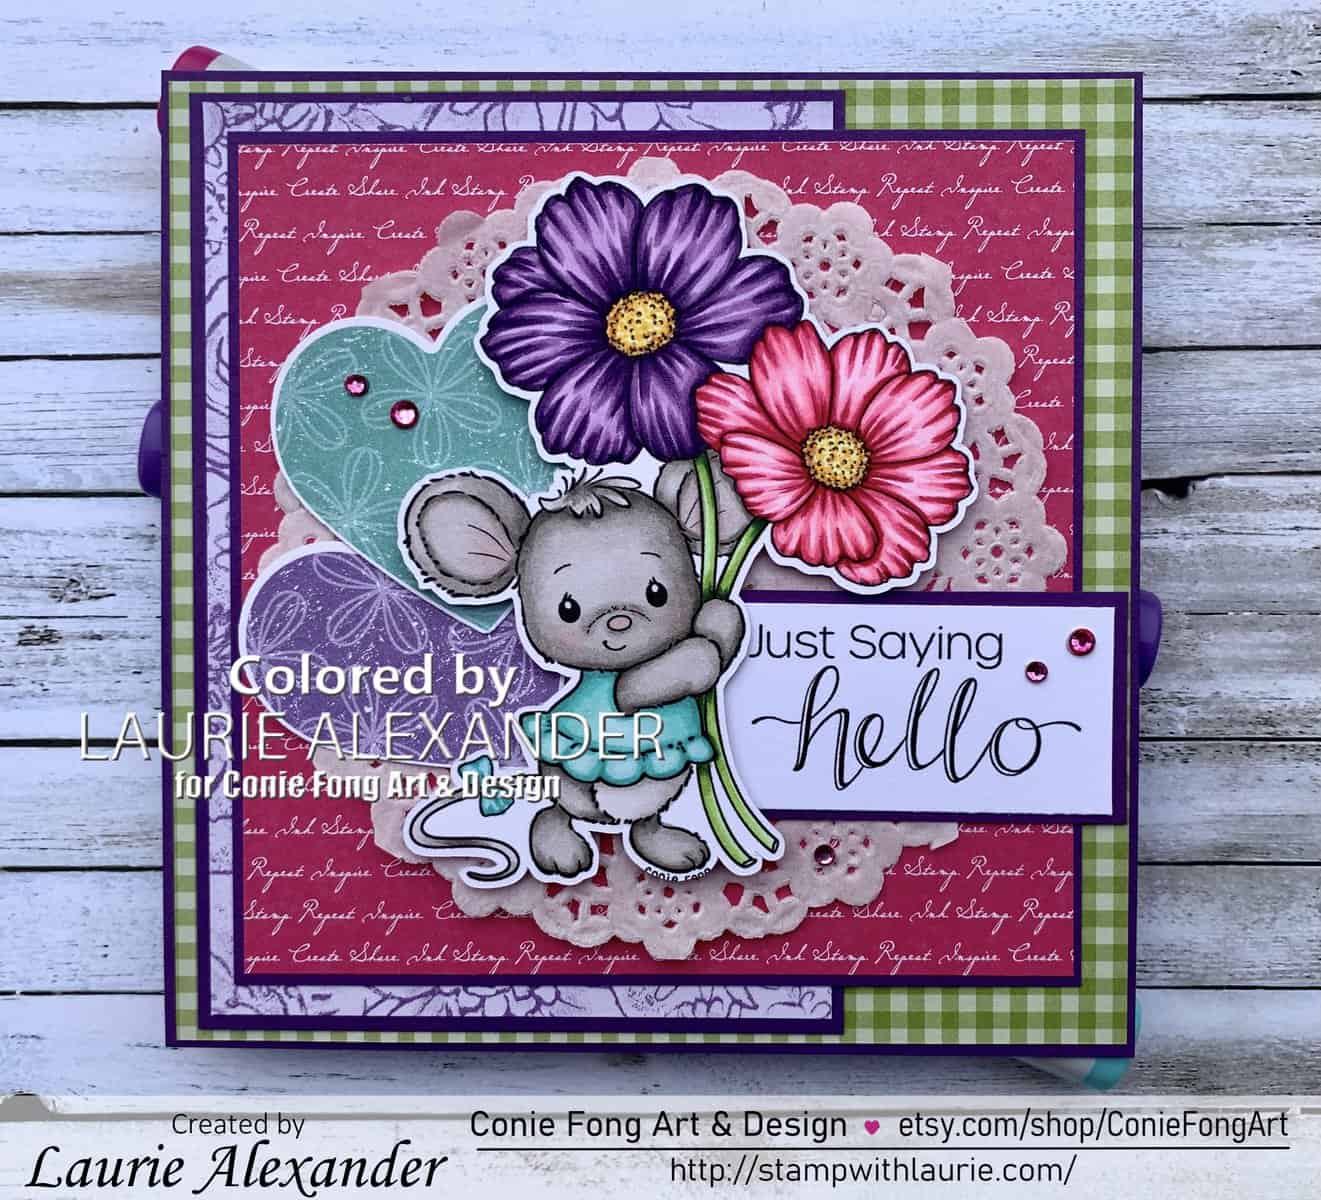
Hello Crafty Friends! It’s Laurie here! I am sharing My Sweet Maisy Card as my Design Team Card for Conie Fong Art & Design. This digital stamp bundle is called Maisy and Cory Mice Bundle and comes with six images including two mice and 4 sentiments.

I just coloured Maisy with my Copic markers for my card thinking it would make a sweet Mother’s Day card. My cosmos flowers came out vibrant and bright to create a nice cheery card. I used Granny Apple Green and Melon Mambo Designer Series paper from the Brights Collection by Stampin’ Up! to match my bright and cheery colours. The doily I found loose in my stash and thought it created a perfect backdrop for Maisy. The hearts were punched out from the Please as Punch Designer Series Paper to be layered behind Maisy. I love the sentiments that come with the bundle and thought that “Just saying hello” could be used for so many different occasions. To add some bling to my card, I wanted to use some rhinestones but tie in the pink. So, I coloured them with my RV 19 Copic marker. Voila! Instant matching embellishments!

————————–

Copic Markers:

Maisy’s Fur: W5/W3/W1/0/R20
Maisy’s Dress: BG15/BG13/BG11/BG10
Purple Cosmo Flower: V09/V17/V15/V12
Pink Cosmo Flower: RV29/RV25/RV23/RV21
Flower Centers: E13/Y15/Y11/Y22
Stems: YG11/YG23/YG25/G28
Rhinestones: RV19

Close Up of My Design Team Card

————————–

Card Recipe for My Sweet Maisy Card:

Maisy and Cory Mice Bundle, Conie Fong Art & Design
Paper Basics – Stamper’s Select White Cardstock, Papertrey Ink
Brights 6” x 6” Designer Series Paper, Stampin’ Up!
Pleased as Punch Designer Series Paper, Stampin’ Up!
Botanical Butterfly Designer Series Paper, Stampin’ Up!
4.5” Doily, from my Stash
Heart Punch Pack, Stampin Up!
Rhinestone Basic Jewels, Stampin’ Up!
Clear Wink of Stella, Stampin’ Up!
Gorgeous Grape Card Stock, Stampin’ Up!
Finished card size: 5.5” x 5.5”

————————–

To view my other Conie Fong Art & Design cards, please click here.

Hope you like my Design Team card using
Maisy and Cory Mice Bundle for Conie Fong Art & Design!

Thank you for stopping by!

Hugs,
Laurie
My Some Bunny Card

My Design Team Card
My Some Bunny Card

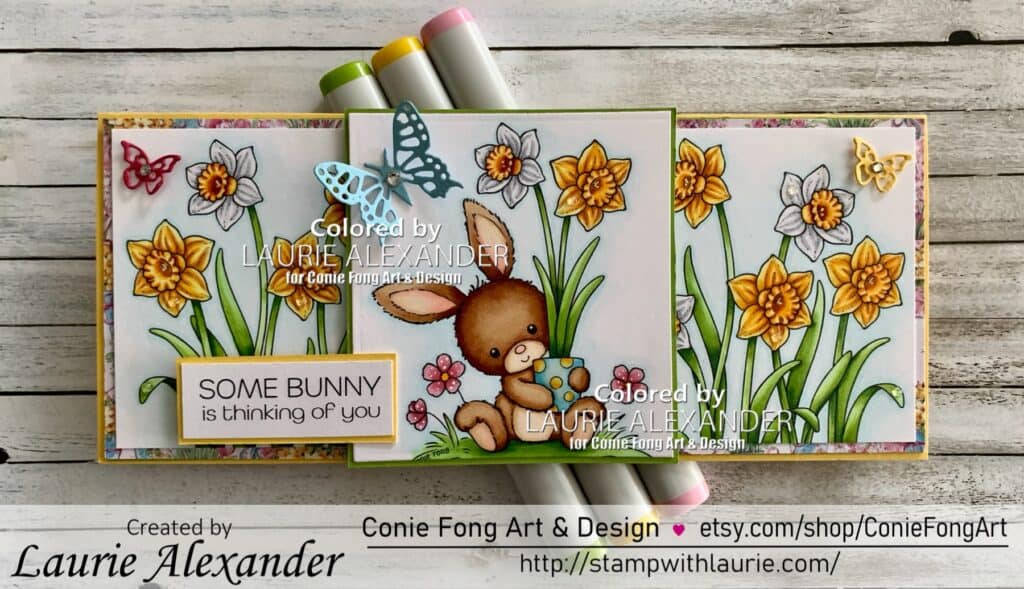
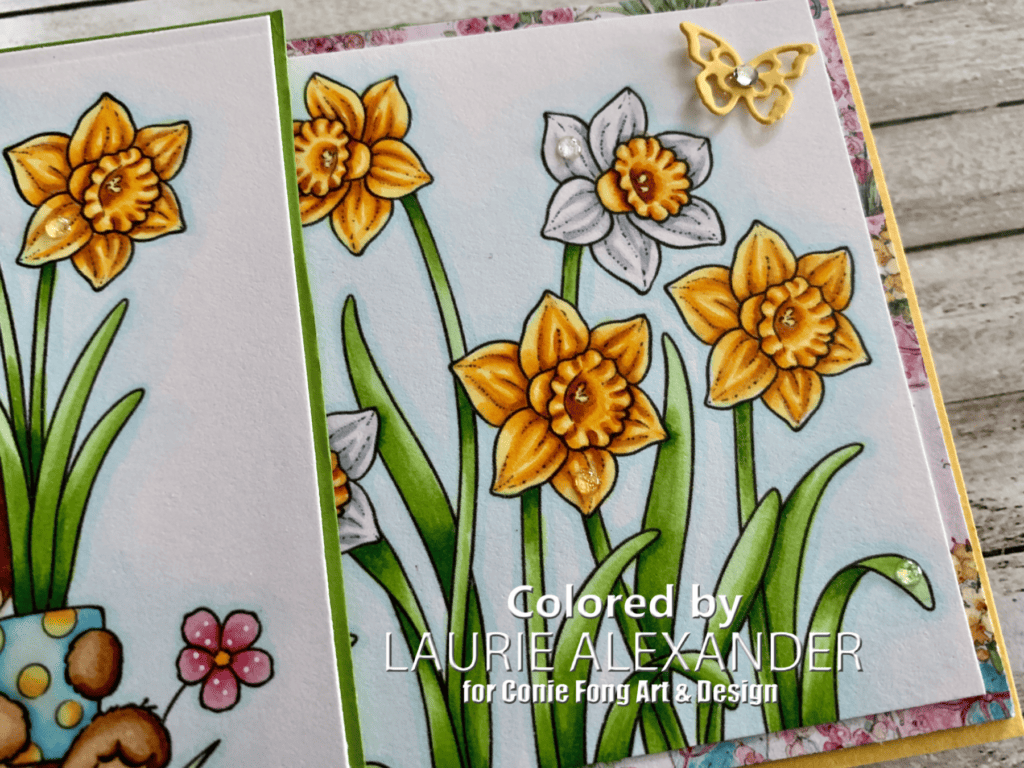
Hello Crafty Friends! It’s Laurie here! I am sharing My Some Bunny Card as my Design Team Card for Conie Fong Art & Design. This card uses 3 different digital stamps including Bunny Daffodil Bundle which includes 9 stamps and Daffodil Flowers Bundle which includes 7 stamps.

I thought it would be cute to create a slimline card and use the Fields of Daffodils with the sweet Bunny Daffodil in front almost like he has picked those flowers just for you!

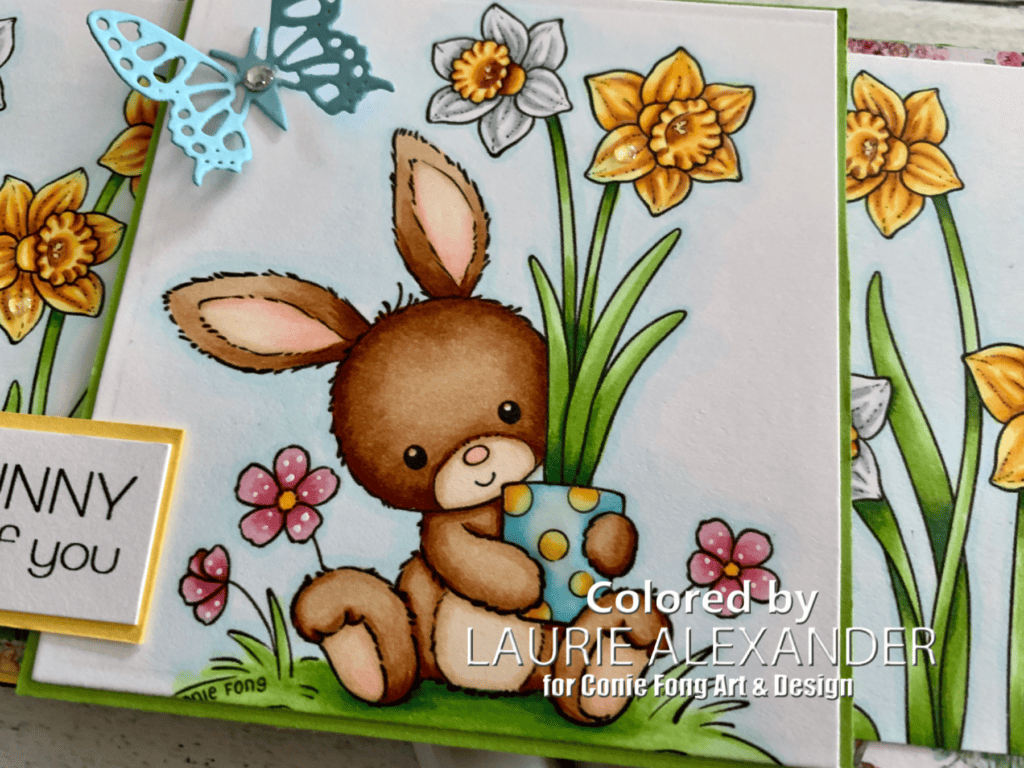
Sweet Bunny from Bunny Daffodil Digital Stamp

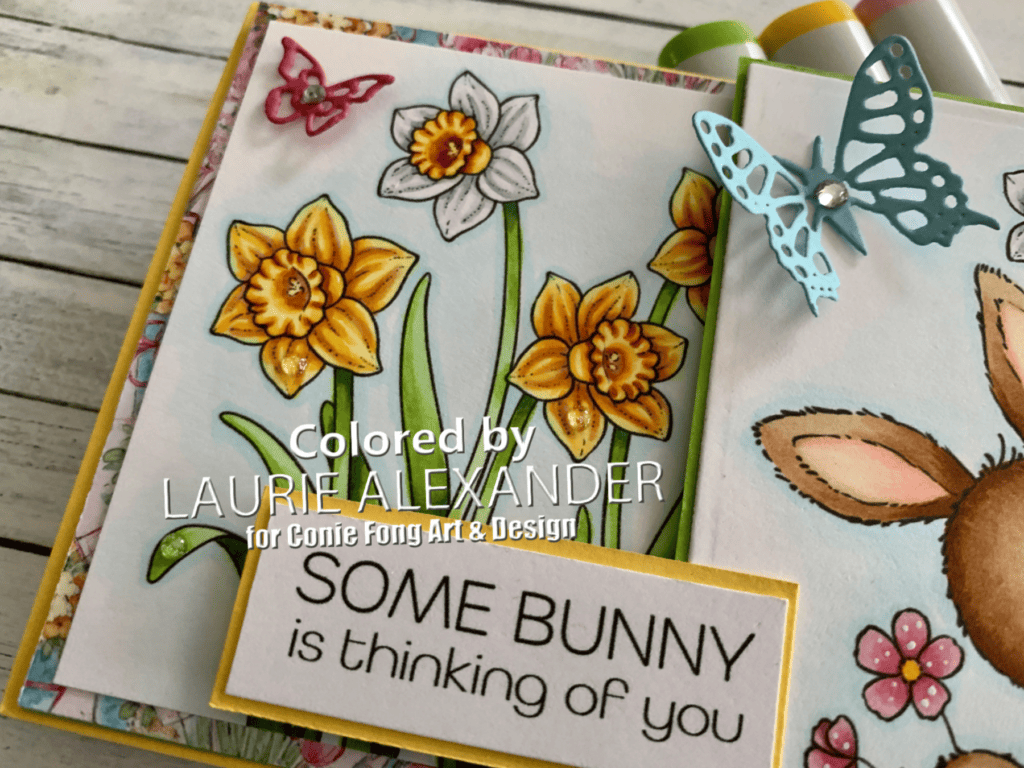
I decided to colour my daffodils in both yellows and white/yellows to give a variation to my field of daffodils. Daffodils can come in many different colours, but these are the colours that I have in my garden. My favourite is the white with yellow centres! To fit my field onto the slim line base, I cut it in half so that there is a slight gap which you can’t see behind the bunny. So, it looks like a continual field of daffodils! I did the same thing with the 6” pretty paper that you can just see peeking out as a border around the daffodils. This saves paper and you can’t see the gap hidden behind the bunny. A win-win situation! A couple of die cut butterflies with rhinestones and some epoxy water drops is all the embellishments that this card needed.

————————–

Copic Markers:

Bunny: E37/E35/E34/E31/E31/R20
Yellow Daffodils (Outside Petals): E13/Y17/Y15/Y11
Yellow Daffodils (Inside Petals): E15/YR16/Y17/Y15/Y11
White Daffodils (Outside Petals): C3/C1/C0/
White Daffodils (Inside Petals): E18/YR18/YR16/Y15/Y11
Leaves: YG11/YG23/YG25/G28
Pot: B02/B01/B000/B0000/Y17/Y15/Y11/Glossy Accents
Pink Flowers: R56/R85/R81/R81/Y17/White Gelly Roll Pen
Sky: B000/B0000/0

Left Side of my Field of Daffodils Panel

————————–

Card Recipe for My Some Bunny Card:

Bunny Daffodil Bundle and Daffodil Flowers Bundle, Conie Fong Art & Design
Paper Basics – Stamper’s Select White Cardstock, Papertrey Ink
Annabelle’s Garden 6” x 6” Paper Pack, Wild Rose Studios
Butterfly Beauty Dies, Stampin’ Up!
Glitter and Clear Epoxy Shapes, Stampin Up!
Rhinestone Basic Jewels, Stampin’ Up!
White Gelly Roll Pen, Sakura
Glossy Accents, Ranger
Daffodil Delight, Granny Apple Green, Balmy Blue
and Rose Red Card Stock, Stampin’ Up!

Finished card size: 8.5” x 3.5”

Right Side of my Field of Daffodils Panel

————————–

To view my other Conie Fong Art & Design cards, please click here.
To view my other Slim Line Cards, please click here.

Hope you like my Design Team card using
Bunny Daffodil Bundle and Daffodil Flowers Bundle for Conie Fong Art & Design!

Thank you for stopping by!

Hugs,
Laurie
Hydrangea Thank You Card

My Hydrangea Thank You Card

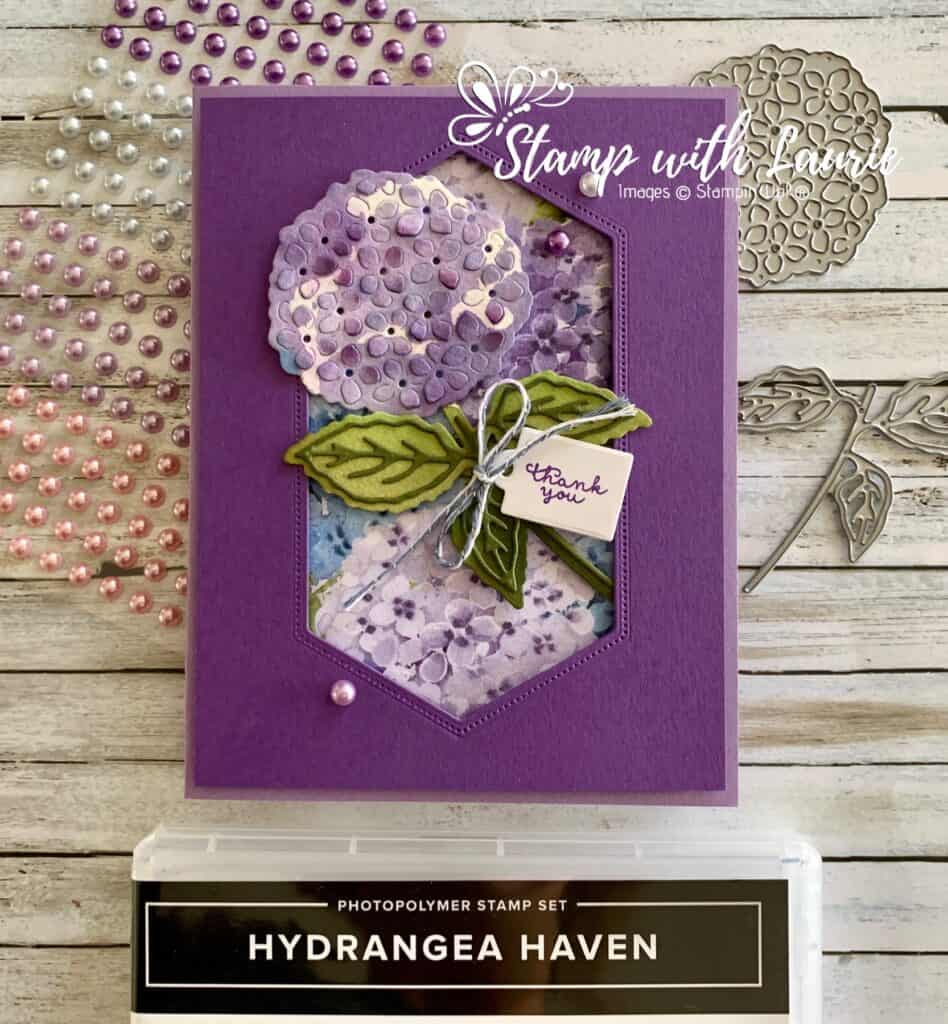
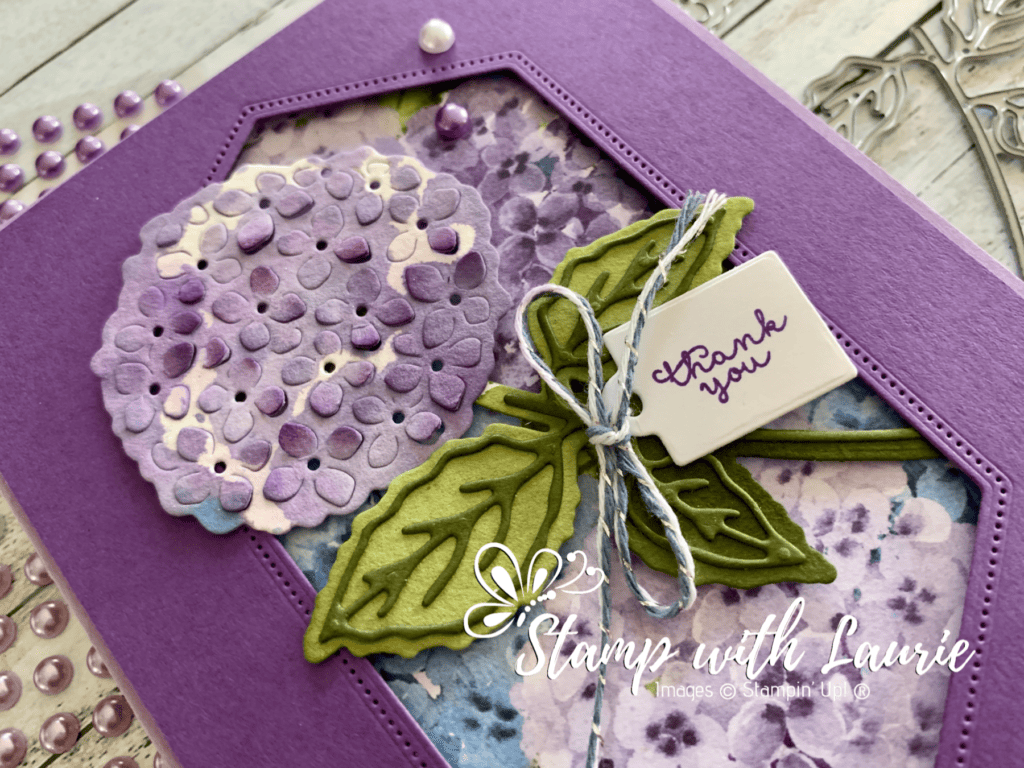
Today is I am sharing my Hydrangea Thank You Card that I made for a swap using the beautiful Hydrangea Haven Bundle by Stampin Up! I love how the watercolour hydrangea pops out of the DSP and the Stitched Nested frame!

I swooned over the Hydrangea Hill Designer Series Paper when I saw it! All my favourite colours are in it like Gorgeous Grape, Highland Heather and Mossy Meadow to name just a few! So, I decide that I wanted to use some of the colours in the DSP for my hydrangea flower head and leaves.

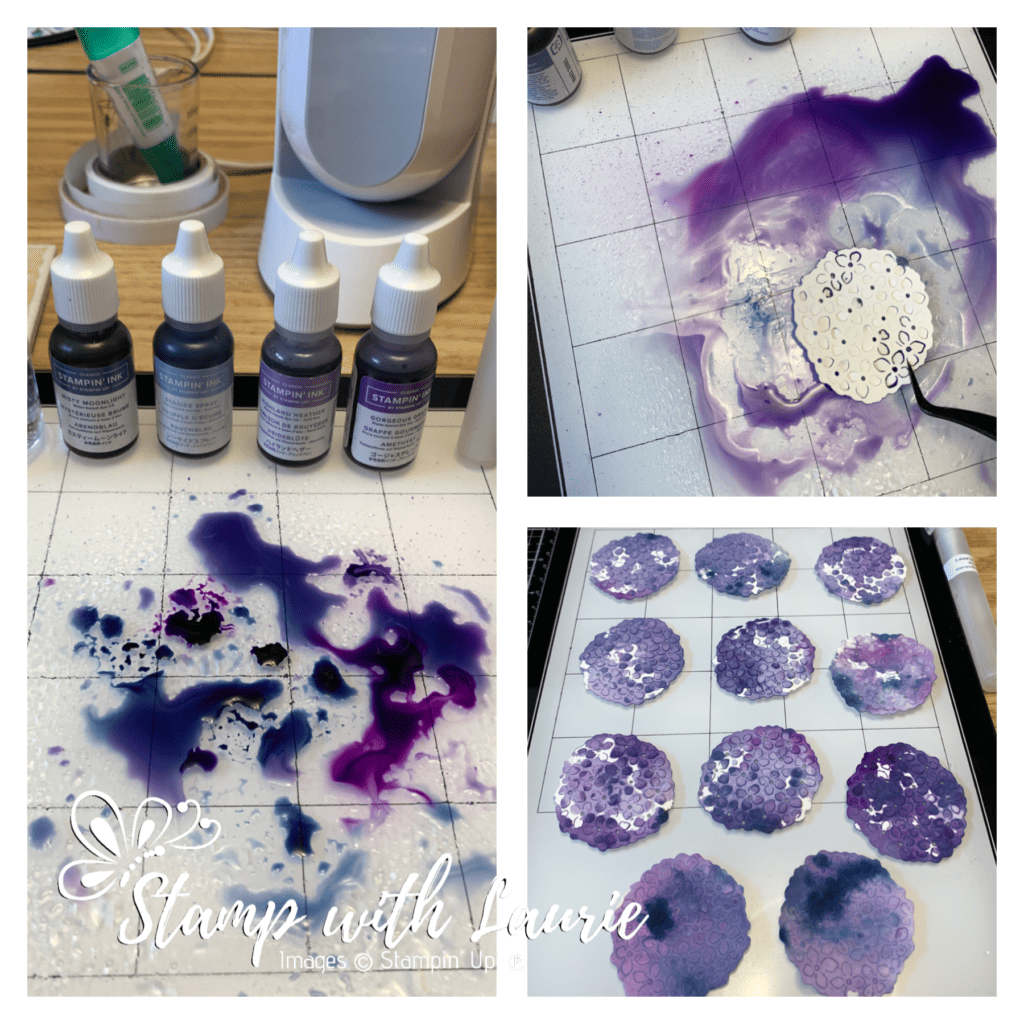
The Process of the Watercolour Technique

Prepare to get all inky! For my card, I pulled out my Stampin’ Up! Ink Refills of Gorgeous Grape, Highland Heather, Misty Moonlight and Seaside Spray to use on my watercolour paper. I drop a couple of drips of each colour onto my work space and added a few spritzes of the Frost White Shimmer Paint (that was premixed with rubbing alcohol) and then a few spritzes of water. I then dragged my watercolour paper through the ink picking up the colours.

The Process of the Hydrangea Watercolour Technique
The Process of the Watercolour Technique

Once the ink was dried on the flower heads, I used my Blending Brush to add a bit more Gorgeous Grape to the raised petals to give it a bit more dimension.

I did the same steps for the stem and leaves using Old Olive and Mossy Meadow.

Here is a video that I presented to fellow demonstrators showing this technique:

Video Demonstrating The Watercolour Technique

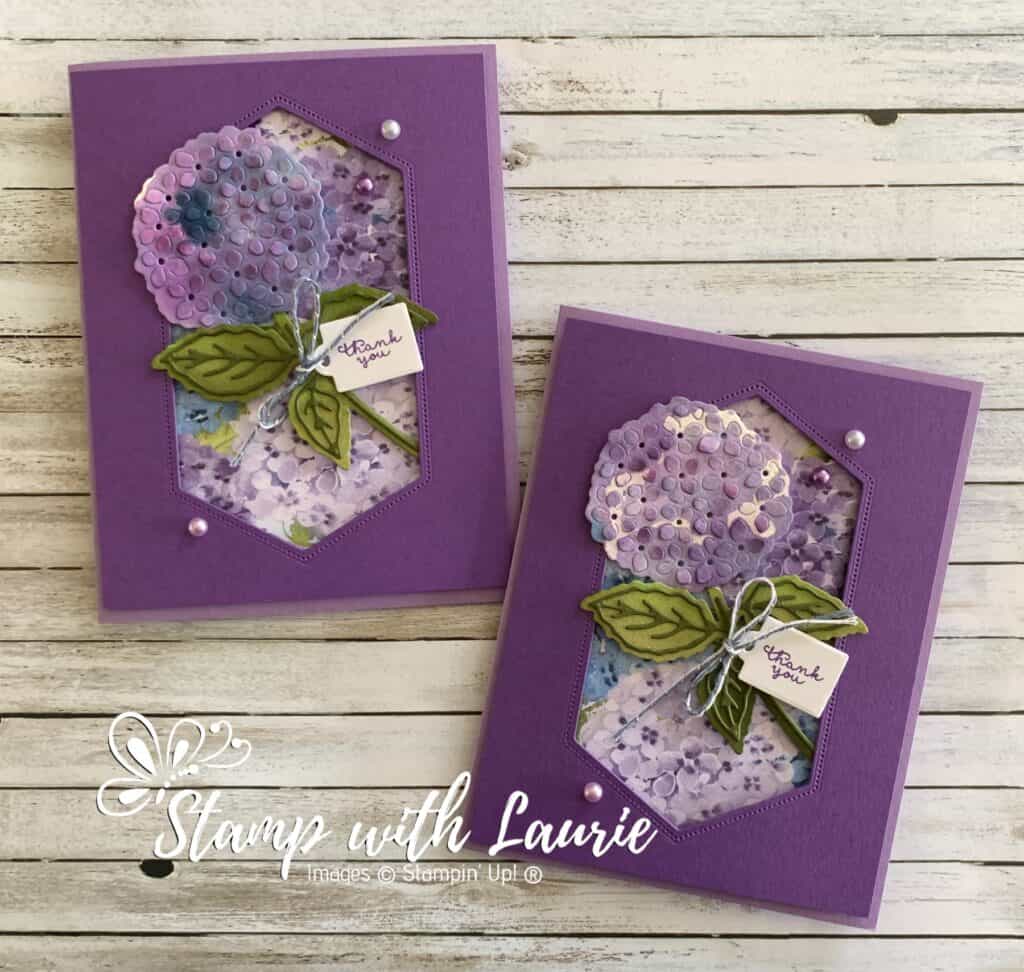
I love this look since you can get different variations in the flowers. Here is an example of both light and dark flower heads.

Two Versions of the Hydrangea Watercolour Technique

A scattering of the pretty Pastel Pearls and the Misty Moonlight/silver Baker’s Twine are all the embellishments this card need. 

Supplies:

Stamps/Bundles/Dies: Hydrangea Haven Bundle (156251), Stitched Nested Labels Dies (149638)

Inks: Gorgeous Grape Classic Stampin’ Pad (147099)

Paper: Highland Heather (146986), Gorgeous Grape (146987), Basic White (159276), Mossy Meadow (133676), Hydrangea Hill Designer Series Paper (154570), Fluid 100 Watercolour Paper (149612)

Accessories: Gorgeous Grape Classic Stampin’ Ink Refill (147164), Highland Heather Classic Stampin’ Ink Refill (147167), Misty Moonlight Classic Stampin’ Ink Refill (153124), Seaside Spray Classic Stampin’ Ink Refill (150092), Old Olive Classic Stampin’ Ink Refill (100531), Mossy Meadow Classic Stampin’ Ink Refill (133651), Frost White Shimmer Paint (147046), Stampin’ Spritzer (126185), Pastel Pearls (154571), Flowers For Every Season Ribbon Combo Pack (153620), Blending Brushes (153611), Bone Folder (102300), Stampin’ Dimensionals (104430), Stampin’ Seal (152813), Glue Dots (103683), Rubbing Alcohol, Water

Close Up of My Hydrangea Thank You Card

Measurements: 

  • Highland Heather: 5 ½” x 8 ½” scored at 4 ¼”
  • Gorgeous Grape: 5 ¼” x 4”
  • Basic White: 1” x ¾”
  • Hydrangea Hill Designer Series Paper: 2 ¾” x 4 ¾”
  • Watercolour Paper: 2 pieces:
    • 1 7/8” x 2” (flower head)
    • 2 ¾” x 3”
  • Misty Moonlight/Silver Baker’s Twine: 5”

For Further Info:

Hope you like my Hydrangea Thank You Card.

For more of my Stampin’ Up! cards, please click here.

You will find the items listed above in my online store.

Thinking of You Card

My Thinking of You Card

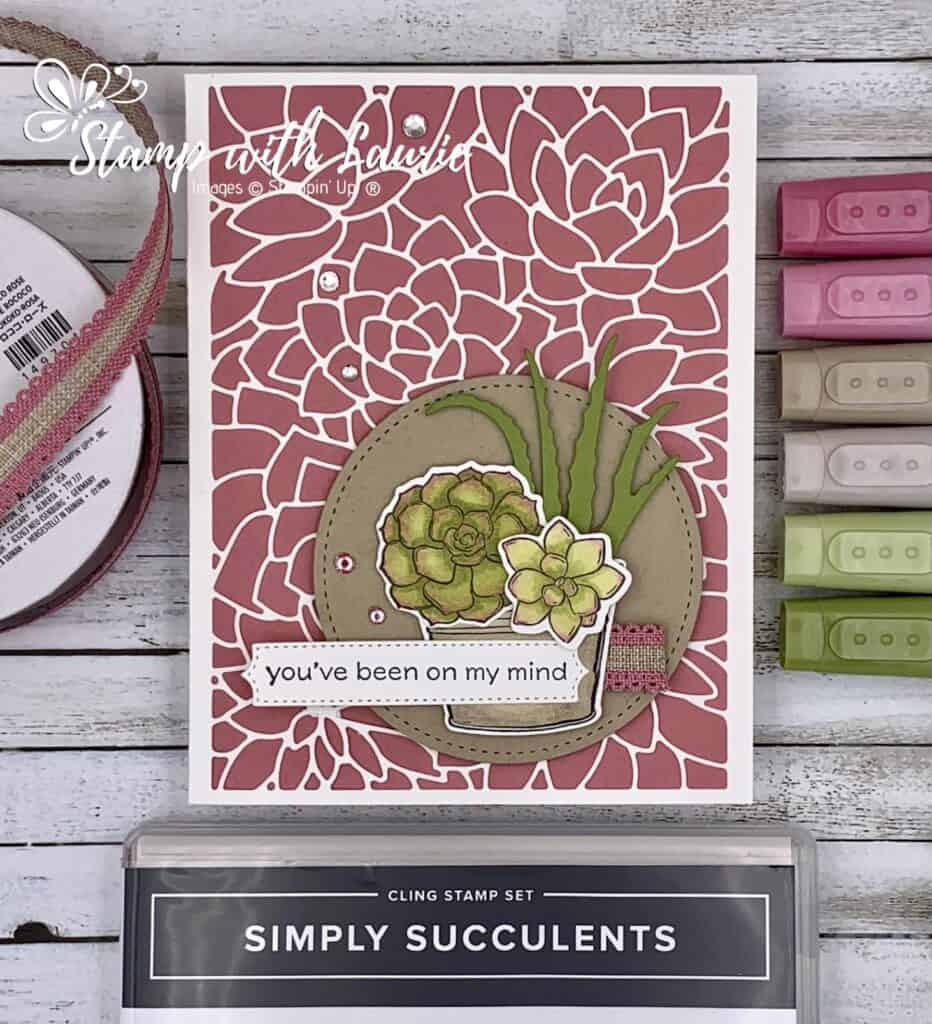
Today is I am sharing my Thinking of You Card using the Simply Succulents Bundle by Stampin’ Up! A good friend and I love succulents. And as you know, I love to colour! Double whammy! So, when I saw this bundle, I knew that I would be getting it!

For my card, I used my Stampin’ Blends to colour using the tip-to-tip technique for the flowers and the smooth colouring technique for the pot. I have added links to my colouring techniques videos from a presentation at the end of this post if you wish to learn more. This card was easy to put together since the images were a quick colour.

I thought that the die cut of the succulents that spans a whole card front is so beautiful. So, I decided to use that for my background with a Rococo Rose card base. Rococo is one of the 2019-2021 In Colors that I am going to miss the most! It will be retiring with the new Catalogue in May. So, make sure you get all your favourite retired items before they are gone!

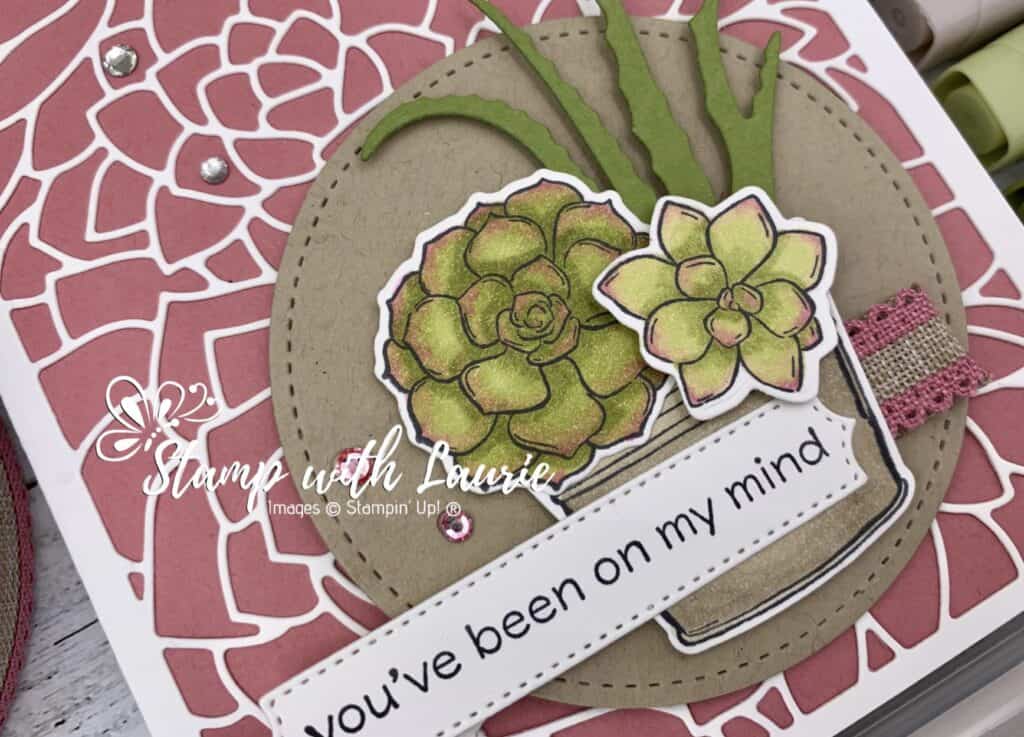
I created a focal point with the largest Stitched Circle Die where I added my bouquet and sentiment. A scattering of Rhinestone Basic Jewels of which I coloured a few with my Rococo Rose Dark Blend and Rococo Rose Scalloped Linen Ribbon are all the embellishments this card needed.

Supplies:

Stamps/Bundles/Dies: Simply Succulents Bundle (156264)
Inks: Tuxedo Black Memento Ink Pad (132708)
Paper: Rococo Rose (150882), Crumb Cake (120953), Basic White (159276), Old Olive (100702)
Accessories: Stitched Shapes Dies (152323), Rococo Rose 1/2″ Scalloped Linen Ribbon (149704), Old Olive Stampin’ Blends Combo Pack (154892), Crumb Cake Stampin’ Blends Combo Pack (154882), Rococo Rose Stampin’ Blends Combo Pack (154900), Rhinestone Basic Jewels (144220), Bone Folder (102300), Stampin’ Dimensionals (104430), Stampin’ Seal (152813), Glue Dots (103683)

Close Up of My My Thinking of You Card

Measurements: 

  • Rococo Rose: 5 ½” x 8 ½” scored at 4 ¼”
  • Basic White (5 pieces):
    • Background ½” x 8 ½”
    • Sentiment: 2 5/8” x ½”
    • Larger Flower: 1 3/8”
    • Smaller Flower: 1”
    • Pot: 1 ¼” x 1 5/8”
  • Old Olive: 2” x 2 1/8”
  • Crumb Cake: 2 7/8”
  • Rococo Rose Scalloped Linen Ribbon: 2”

For Further Information:

Hope you like my Thinking of You Card.

For more information on my colouring, here are some videos of my colouring techniques:
1 – PartWhiskey Business Card using Blending Different Colours Technique
Video Tutorial: Blending Different Colours Together
2 – PartCountry Harvest Card using Light to Dark Technique
Video Tutorial: Light to Dark/Dark to Light Colouring
3 – PartBeautiful Poppy Birthday Card using Smooth Colouring Technique
Video Tutorial: Smooth Colouring
4 – PartLet’s Gather Together Card using Tip to Tip Blending Technique
Video Tutorial: Tip to Tip Colouring
5 – PartSo Grateful Cardinal Card using Flicking Colouring Technique
Video Tutorial: Flicking Colouring
6 – PartLet’s Celebrate You Card using Flicking of Different Colours Technique
Video Tutorial: Flicking of Different Colours Technique

My Colouring Notes:
https://stampwithlaurie.com/wp-content/uploads/2020/08/Stampin-Up-Blends-2020.pdf

For more of my Stampin’ Up! cards, please click here.

You will find the items listed above in my online store

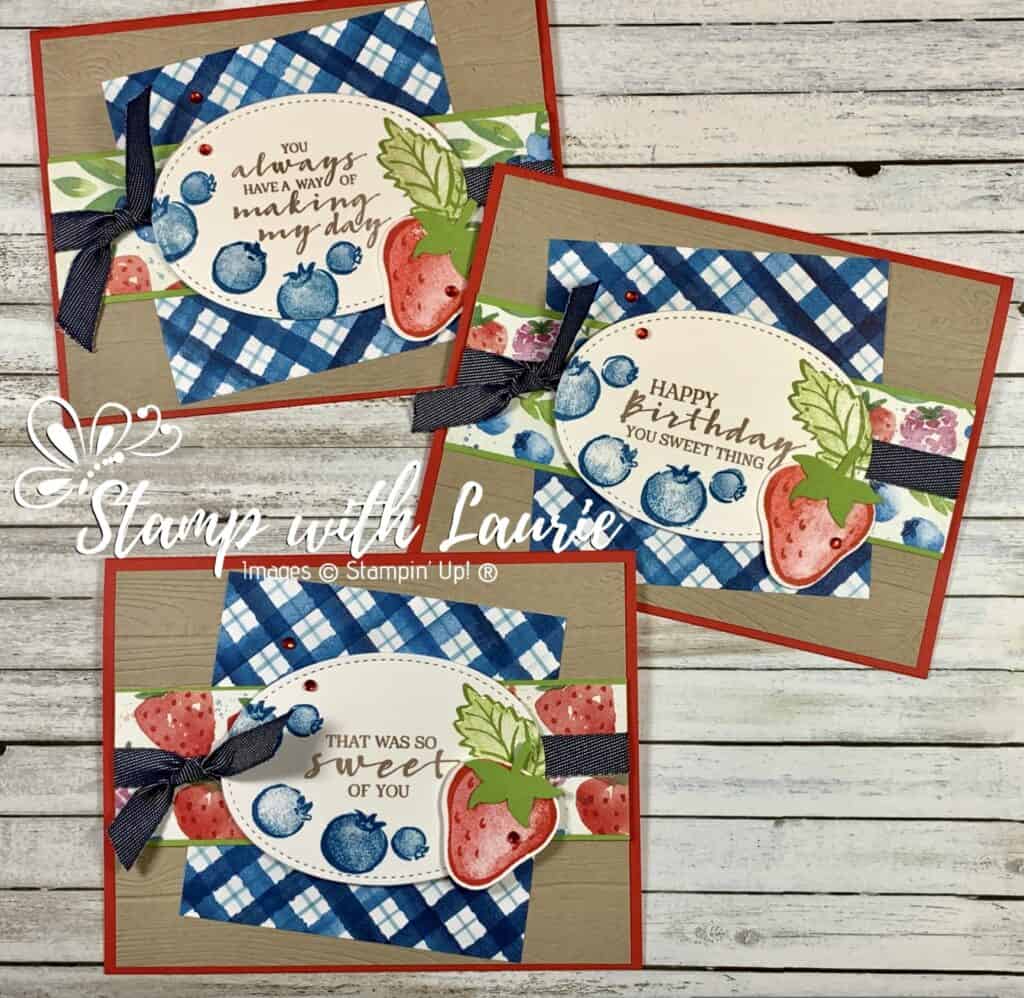
My Sweet Birthday Card

My Sweet Birthday Card

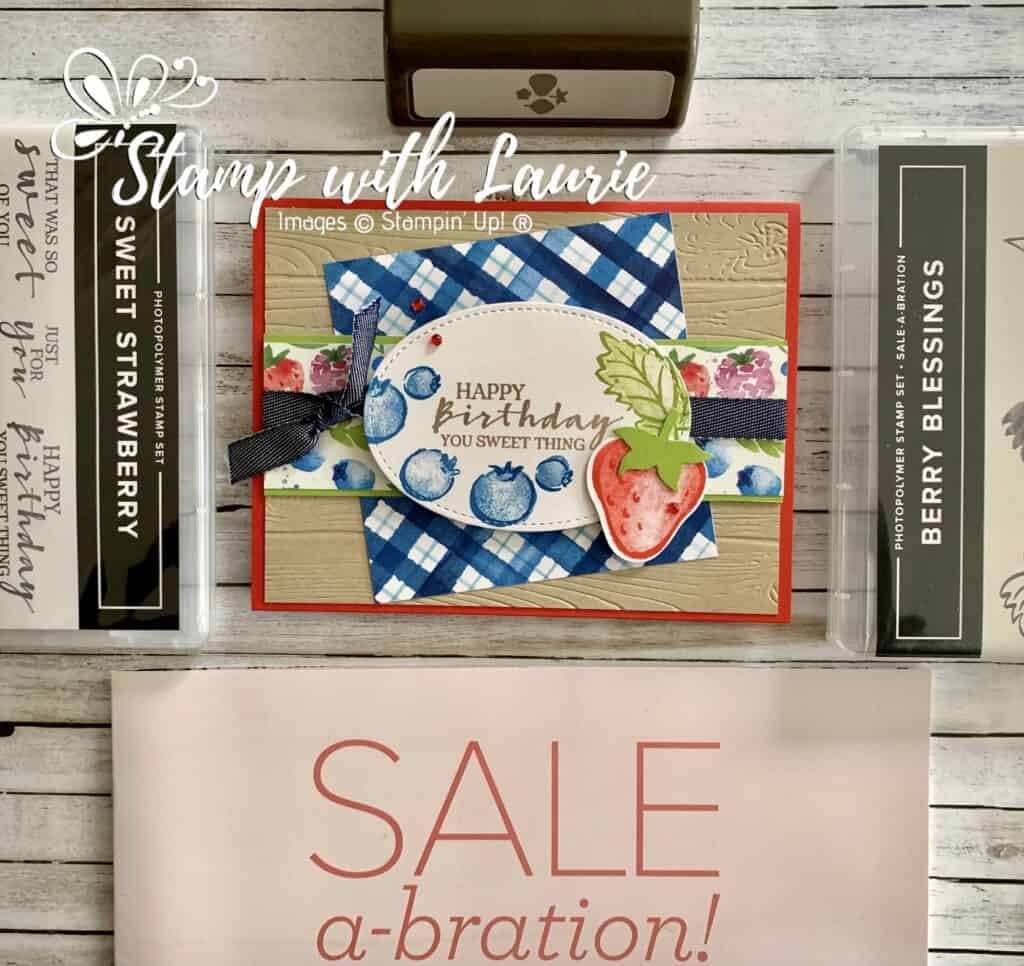
Today is I am sharing My Sweet Birthday Card that I made for a swap using the Sweet Strawberry Bundle and the Sale-a-Bration Berry Bliss Bundle. There is only a few more day left of the Jan-Feb 2021 Sale-a-Bration and you can get the Berry Bliss Bundle for free with a qualifying $120 order.

I love how these two bundles coordinate with their berry sweet theme! The Berry Delightful Designer Series Paper is so pretty with its fresh and juicy paper designs. Both stamp sets are Distinktive and consist of two-step stamping to give you texture and dimension to your images.

Who doesn’t love a coordinating punch and what is better than the Strawberry Builder Punch! I even punched out a coordinating Granny Apple Green stem to top my strawberry.

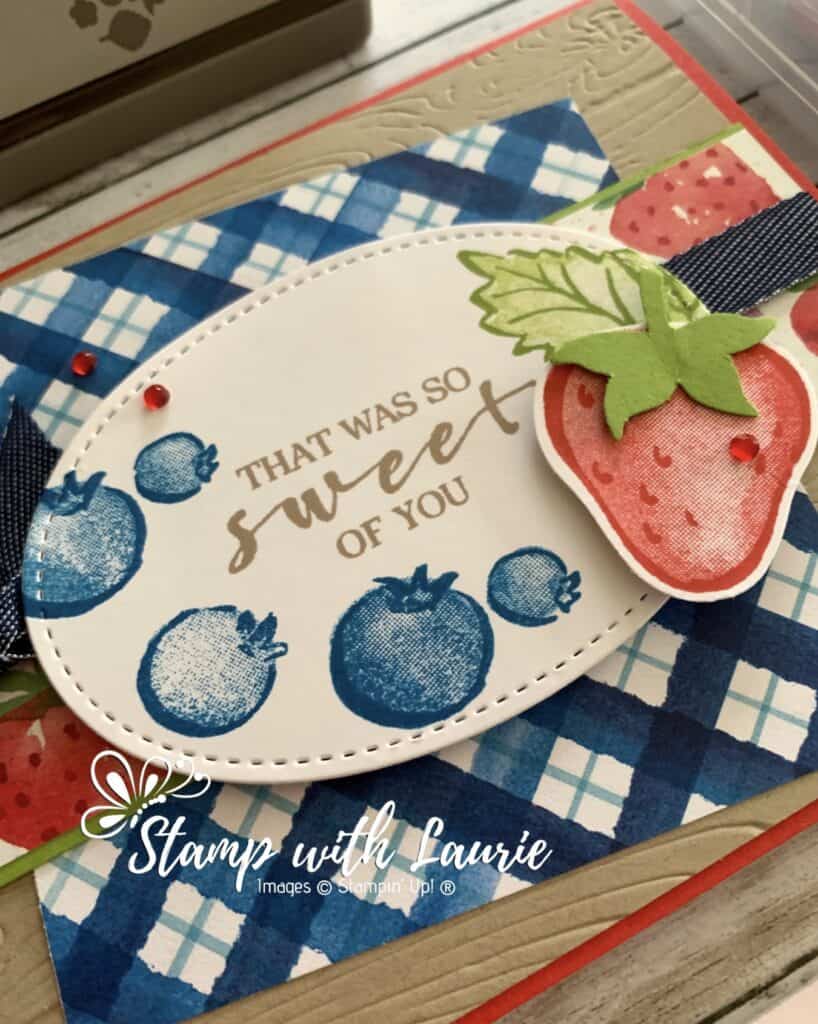
I wanted to create a country theme by using the Pinewood Planks 3D Embossing Folder and the Denim Ribbon. The Stitched Oval also adds to my theme. The plaid DSP reminded me of a table cloth that has been laid on the ground to enjoy your picnic of berries. A couple of Red Rhinestones are the finishing touch and add a bit of sparkle to the card.

I had so much fun with my card that I ended up making 3 versions all with different sentiments.

Three Variations of my Card

Supplies:

Stamps/Bundles/Dies: Sweet Strawberry Bundle (156214), Berry Blessings Bundle (157613)

Inks: Crumb Cake Classic Stampin’ Pad (147116), Poppy Parade Classic Stampin’ Pad (147050), Pacific Point Classic Stampin’ Pad (147098), Granny Apple Green Classic Stampin’ Pad (147095)

Paper: Poppy Parade (119793), Crumb Cake (120953), Basic White (159276), Granny Apple Green (146990), Berry Delightful Designer Series Paper (157613)

Accessories: Pinewood Planks 3D Embossing Folder (152320), 3/8″ Denim Ribbon (149590), Stitched Shapes Dies (152323), Red Rhinestone Basic Jewels (146924), Bone Folder (102300), Stampin’ Dimensionals (104430), Stampin’ Seal (152813), Glue Dots (103683)

Close Up of One of My Cards

Measurements: 

  • Poppy Parade: 5 ½” x 8 ½” scored at 4 ¼”
  • Crumb Cake: 5 ¼” x 4”
  • Basic White: 5 ¼” x 1 ½”
  • Granny Apple Green: 5 ¼” x 1 5/8” and scrap
  • Berry Delightful Designer Series Paper: 5 ¼” x 2 5/16”
  • Denim Ribbon: 2 pieces at 6” and 4”

For Further Info:

Hope you like My Sweet Birthday Card.

For more of my Stampin’ Up! cards, please click here.

You will find the items listed above in my online store.

Grace’s Garden Gate Card

Grace’s Garden Gate Card
My Grace’s Garden Gate Card

Today I am sharing this pretty Grace’s Garden Gate Card. For this card, I combined the Beautiful Moments Stamp Set and the Grace’s Garden Bundle. I thought these two sets went perfectly together! The Pressed Petals Specialty Designer Series Paper is perfect for the gate. I used my Paper Snips to cut the gate doors so that it can open to reveal the beautiful scene beyond. Wouldn’t it be wonderful to walk through a lavender field! There is a Sneak Peek of one of the new Greenery Embossing Folders that frames the scene. Let’s get started.

My Grace's Garden Gate Card Close Up
My Grace’s Garden Gate Card Close Up

Supplies for Grace’s Garden Gate Card:

Stamps:  Beautiful Moments Cling Stamp Set (151677), Grace’s Garden Bundle  (153789), Very Versailles Cling Stamp Set (149275)

Inks: Tuxedo Black Memento Ink Pad (132708), Highland Heather Classic Stampin’ Pad (147103)

Paper: Pool Party (122924), Old Olive (100702), Rococo Rose (150882), Whisper White (100730), Whisper White Thick (140272 ), Pressed Petals Specialty Designer Series Paper (149500)

Accessories: Garden Gateway Dies (151512), Pool Party Stampin’ Blends Markers Combo Pack (144605), Old Olive Stampin’ Blends Marker Combo Pack (154892), Highland Heather Stampin’ Blends Markers Combo Pack (147276), Rococo Rose Stampin’ Blends Combo Pack (149572), Crumb Cake  Stampin’ Blends Combo Pack (154882), Ivory Stampin’ Blends Marker (144606), Greenery Embossing Folder (152716), Rhinestone Basic Jewels (144220), Paper Snips (103579), Bone Folder (102300), Multipurpose Liquid Glue (110755), Mini Glue Dots (103683), SNAIL Adhesive (104332), Stampin’ Dimensionals (104430)

Measurements for Grace’s Garden Gate Card: 

  • Whisper White Thick: 8 ½” x 5 ½”; scored at 4 ¼” 
  • Pool Party: 4 ¼” x 5 ½”
  • Old Olive: 3” x 5½”
  • Whisper White:
    • 2 ¼” x 3 ¾” (for scene)
    • 2 pieces at 1 ¼” x 2 ¾” (flowers)
    • 1 piece 3 ¾” x ¾” (sentiment) 
  • Rococo Rose: scraps
  • Pressed Petals Specialty Designer Series Paper:
    • 2 ¾” x 4” (Gate)
    • 2 pieces at ½” x 5 ½” 
My Grace's Garden Card with Open Gate
My Grace’s Garden Gate Card with Open Gate

Instructions for Grace’s Garden Gate Card: 

  1. Fold the Whisper White Thick card stock in half to create the card base.
  2. Stamp the image of the girl on the larger piece of Whisper White in Tuxedo Black Memento Ink Pad.
  3. Stamp the butterflies above the girl in Memento. Using the Blends markers, colour her and the scene.
  4. Using the die cut from the Garden Gateway Dies that corresponds to the inside of the gate, cut her out.
  5. Next, stamp the larger flower image in Tuxedo Black Memento Ink on the two pieces of Whisper White card stock and colour with the Blends markers. Die cut them out with corresponding die.
  6. Stamp the sentiment from the Very Versailles Cling Stamp Set in Highland Heather on the Whisper White strip.
  7. Die cut the gate from the Pressed Petals Specialty Designer Series Paper.
  8. Using the flower dies from the Garden Gateway Dies, die cut them in Rococo Rose.
  9. Emboss the Old Olive piece using the large leaves from the Greenery Embossing Folders.
  10. Using SNAIL, adhere the Pool Party card stock to the Whisper White card base.
  11. Adhere the strips of script from the Pressed Petals Specialty Designer Series Paper to the Old Olive piece
  12. Adhere the embossed piece with Multipurpose Liquid Glue to the Pool Party piece.
  13. Position the scene closer to the top of card and adhere with Multipurpose Liquid Glue to Old Olive piece.
  14. Position the gate over the scene and adhere with Multipurpose Liquid Glue.
  15. Using Paper Snips, cut the center of the gate door and fold back.
  16. Adhere the flowers on either side of the gate with dimensionals.
  17. Adhere the sentiment with dimensionals making sure not to overlap the gate so that it can open.
  18. Using glue dots, adhere three Rococo Rose flowers and add rhinestones to the centre of them.

For Further Info:

Hope you like my Grace’s Garden Gate Card!

You will find the items listed above in my online store at:  https://www.stampinup.com/ecweb/products/201025/peaceful-poppies?dbwsdemoid=2103981.

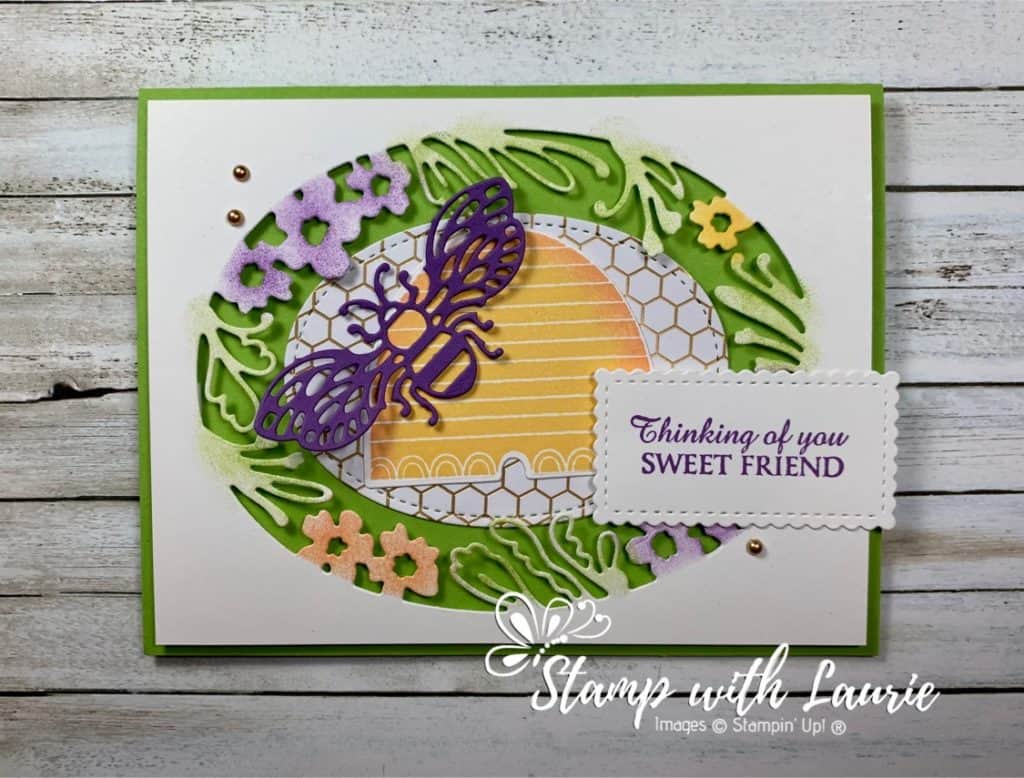
Spring Honey Bee Card

My Spring Honey Bee Card

Welcome to the first day of Spring with my Spring Honey Bee Card. I am so ready for the nicer weather to arrive! I knew that I wanted to create a Spring vignette where you are looking through the flower frame from the Petal Labels Dies towards the beehive from the Honey Bee Bundle. By sponging the Spring like colours of Daffodil Delight, Granny Apple Green, Calypso Coral and Gorgeous Grape with a dauber onto the flowers, I created my Spring scene. Such bonny colours to welcome Spring! For the hive, I created dimension with two different colours of Daffodil Delight and the sponged Calypso Coral on the edges. Love the Gorgeous Grape bee as a accent! Unfortunately, the Golden Honey DSP is not available anymore, but you could use the honeycomb die from the Honey Bee Bundle instead. Let’s get started!

Supplies:

Stamps:  Honey Bee Cling Stamp Set (151527)

Inks: Granny Apple Green Stampin’ Pad (147095), Daffodil Delight Classic Stampin’ Pad (147094), Calypso Coral Classic Stampin’ Pad (147101), Gorgeous Grape Classic Stampin’ Pad (147099)

Paper: Granny Apple Green (146990), Whisper White (100730), Gorgeous Grape (146987), SAB Golden Honey DSP (retired)

Accessories: Petal Labels Dies (149635), Honey Bee Bundle (153792), Stitched So Sweetly Dies (151690), Stitched Shapes Dies (152323), Sponge Daubers (133773), Metallic Pearls (146282), Stampin’ Dimensionals (104430), Bone Folder (102300), SNAIL Adhesive (104332), Mini Glue Dots (103683)

Measurements: 

  • Granny Apple Green: 8 ½” x 5 ½”; scored at 4 ¼”
  • Whisper White: 5 ¼” x 4”, 2 ½“ x 2” (hive) and the scrap leftover from the Petal Labels floral frame for the sentiment
  • SAB Golden Honey DSP : 3 ½” x 2 ½” 
  • Gorgeous Grape: 1 ¼“ x 2 ½” 

Instructions: 

  1. Fold the Granny Apple Green card stock in half to create the card base.
  2. Centre the Petal Labels Dies in the middle of the large piece of Whisper White and die cut out.
  3. Taking a sponge dauber, sponge Granny Apple Green, Daffodil Delight, Calypso Coral and Gorgeous Grape onto the flowers and leaves that were die cut out of the Whisper White.
  4. Ink up the hive in Daffodil Delight and then using a sponge dauber, sponge the edges with Calypso Coral. This gives a soft look to the edges. You could use the rock n’ roll technique instead, but the edge between the two inks wouldn’t be as soft.
  5. Die cut the hive out with the Detailed Bee Dies.
  6. Taking the scrap from the Petal Labels floral frame, stamp the sentiment in Gorgeous Grape. This will save you some card stock…and we are all about getting the most from our card stock!
  7. Die cut the sentiment out with the second smallest Stitched So Sweetly Die.
  8. Die cut the SAB Golden Honey DSP with the largest oval from the Stitched Shapes Dies.
  9. Using the Detailed Bee Dies, die cut the detailed bee from the Gorgeous Grape.
  10. Using dimensionals, center the floral frame on the Granny Apple Green card base.
  11. Centre the SAB Golden Honey DSP in the open floral frame and adhere with SNAIL.
  12. Using SNAIL Adhesive, center the hive onto the SAB Golden Honey DSP.
  13. The Gorgeous Grape bee is affixed with glue dots to the hive. Bend the wings up to give it dimension.
  14. The sentiment is affixed with SNAIL on the right side and a dimensional on the left side.
  15. Three Metallic Pearls tie in the gold from the DSP and add a bit of sparkle.

For Further Info:

Hope you like my Spring Honey Bee Card!

You will find the items listed above in my online store at:
https://www.stampinup.com/ecweb/default.aspx?dbwsdemoid=2103981