My Happy 2024 Calendars

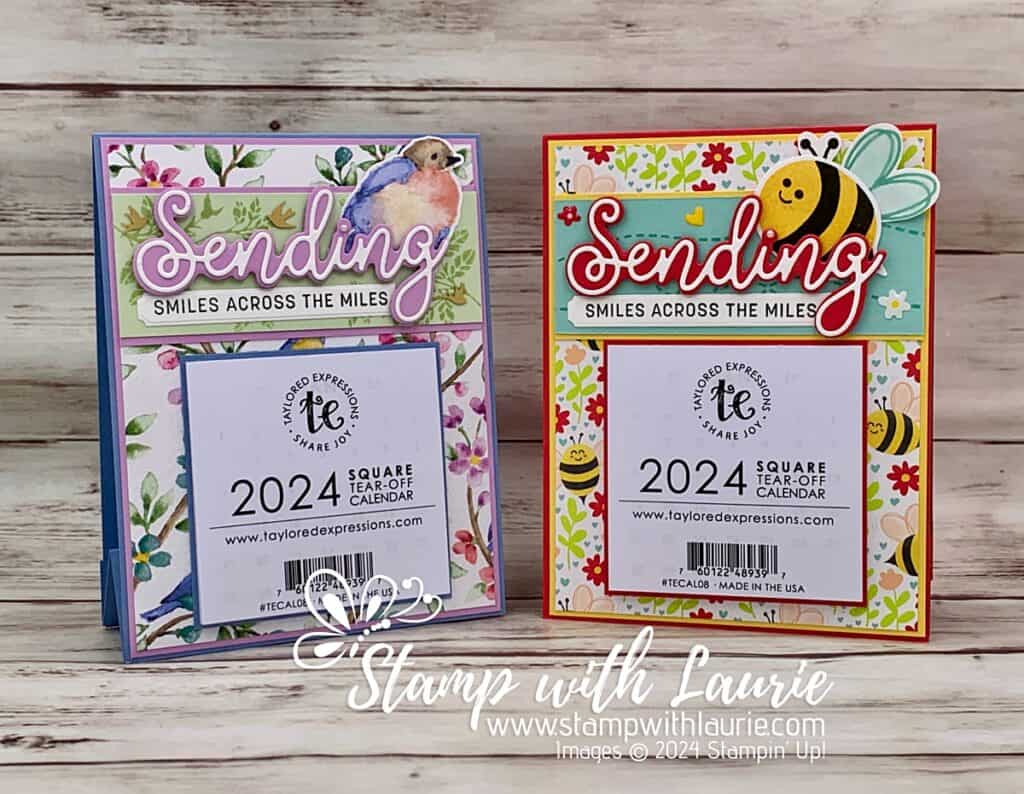
Happy 2024 Calendars - two handmade calendars. One with a bee on it and one with a bird.
My Happy 2024 Calendars

Hello Crafty Friends! Laurie here again! I am sharing My Happy 2024 Calendars using the Bee My Valentine Bundle and the Flight & Airy Designer Series Paper by Stampin’ Up! I didn’t get done my Christmas cards this year due to catching Covid. So instead, I decided to send out calendars to some of my customers in the new year.

The Details of My Happy 2024 Calendars

For my calendars, I decided to create two different calendars with the same design but using different products. I couldn’t resist using the beautiful Flight & Airy Designer Series Paper which is a Sale-a-bration freebie if you spend $60.00 CDN on qualifying orders. And don’t you just love those cute bees from the Bee My Valentine Bundle!
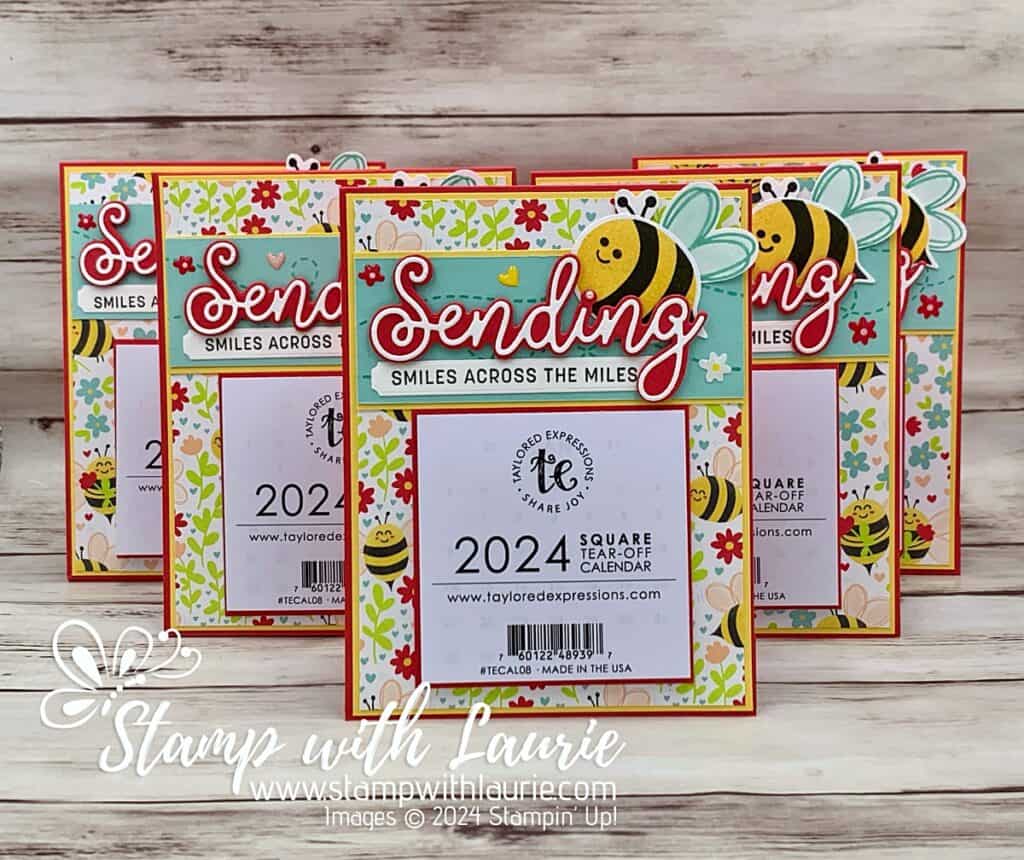
Five Bee Calendars
Bee Calendars

Since I planned to mail these out, the Sending Dies was perfect way to send “smiles across the miles”! To add some interest to the Pool Party and Soft Sea Foam card stocks behind my focal point, I did some tone-on-tone stamping. For the Pool Party one, I stamped a couple of times the bee trail in Pool Party. For the Soft Sea Foam, I stamped the leaves from the Softly Sophisticated Bundle twice in Soft Sea Foam. This bundle is also free with a $120 CDN on qualifying orders during Sale-a-bration.
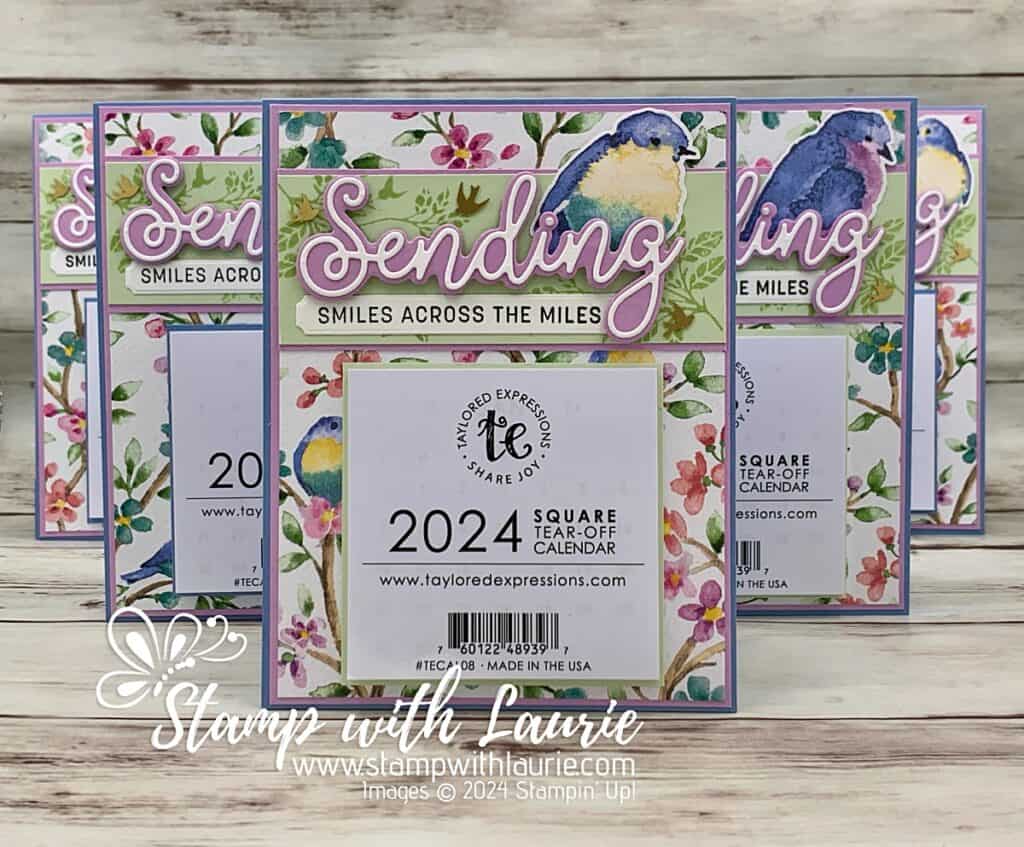
Five Bird Calendars
Bird Calendars

The bee was stamped and punched out with the matching builder punch. The birds were fussy cut from the Flight & Airy DSP. I used different birds for each calendar since there was such a selection from which to choose.
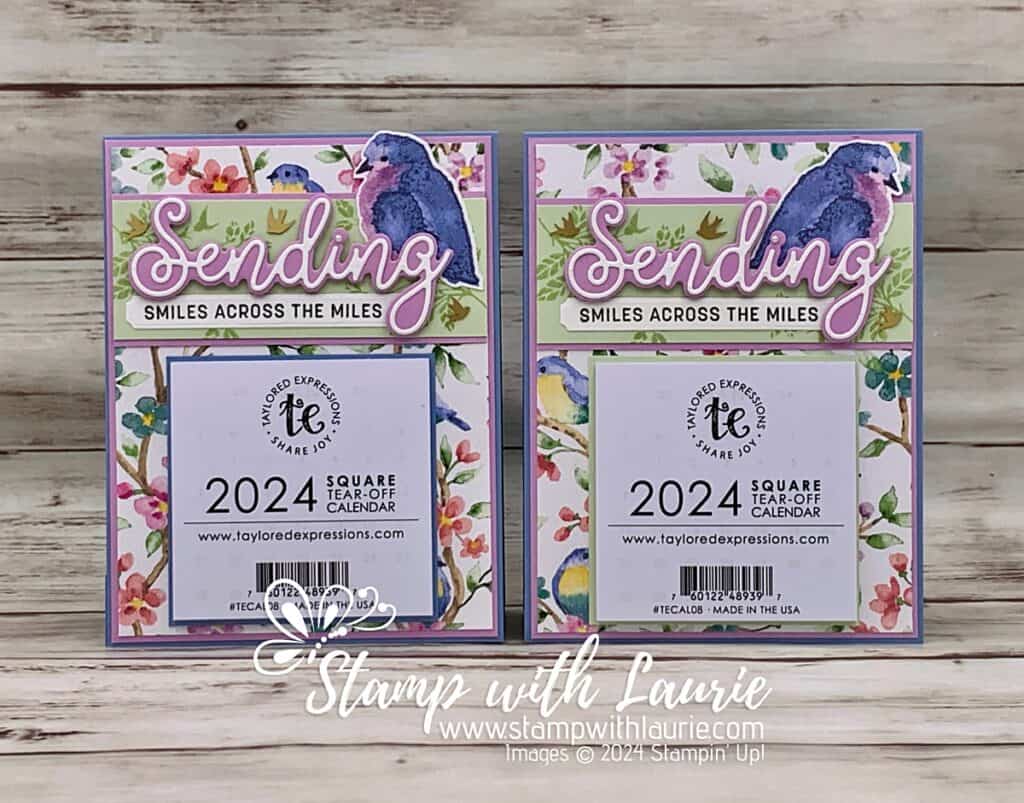
Two of the Bird Calendars

Next, I used the Adhesive-Backed Hearts & Flowers and Adhesive-Backed Dragonflies & Birds for embellishments. I also used a pearl for the “i” in “Sending”.
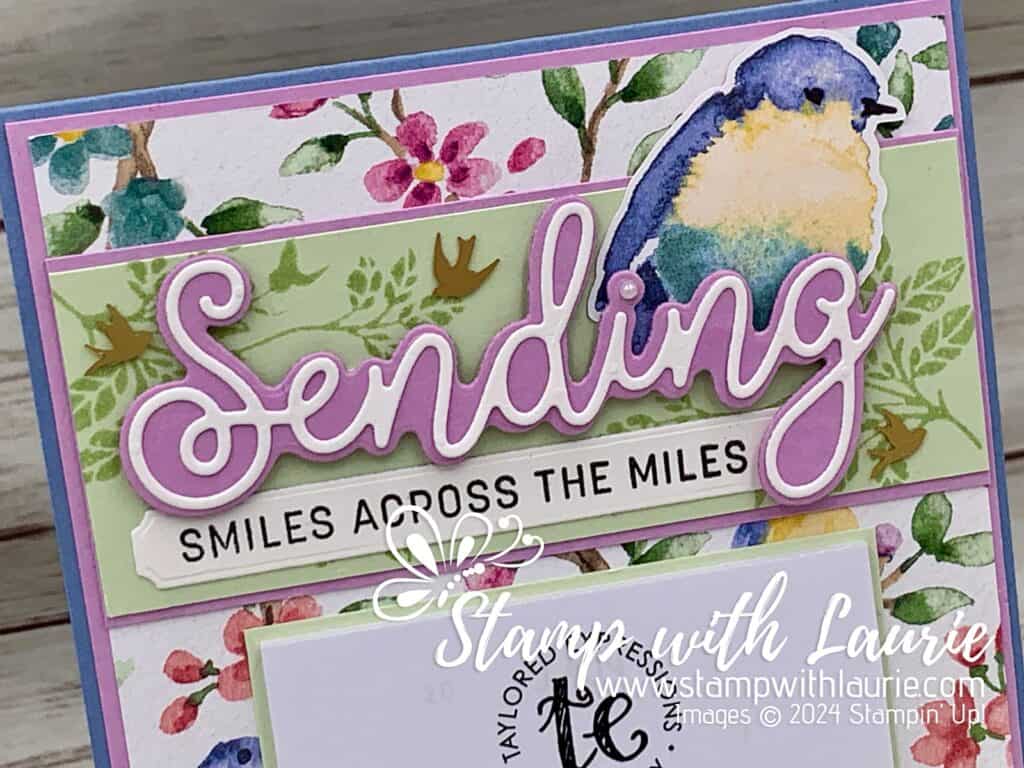
Close Up of Focal Point with Bird

The final thing was to use the technique where you press the ink pad lid when closed to get some ink. I did this with the Pool Party ink pad and picked it up with my Wink of Stella. This gave the bee wings a nice sparkle!
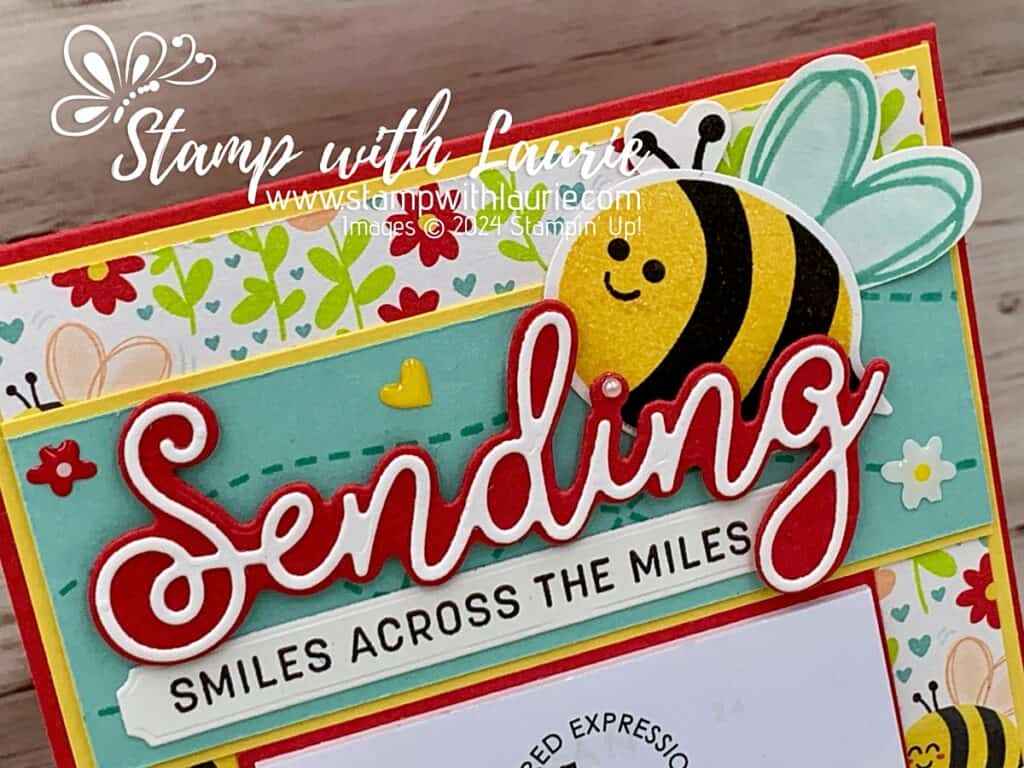
Close Up of Focal Point with Bee

Supplies:

Stamps/Bundles/Dies: Bee My Valentine Bundle (162554), Sending Smiles Stamp Set (158701), Sending Dies (159271), Softly Sophisticated Bundle (162947)

Inks: Pool Party Classic Stampin’ Pad (147107), Sea Foam Classic Stampin’ Pad (147102), Tuxedo Black Memento Ink Pad (132708), Daffodil Delight Classic Stampin’ Pad (147094), 

Paper: Real Red (102482), Balmy Blue (146982), Soft Sea Foam (146988), Pool Party (122924), Fresh Freesia (155613), Daffodil Delight (119683), Basic White (159276), Bee Mine Designer Series Paper (162546), Flight & Airy Designer Series Paper (162977)

Accessories: Adhesive-Backed Hearts & Flowers (162557), Iridescent Pearl Basic Jewels (158987), Adhesive-Backed Dragonflies & Birds (162743), Wink of Stella (141897), Paper Trimmer (152392), Paper Snips (103579), Bone Folder (102300), Stampin’ Dimensionals (104430), Mini Stampin’ Dimensionals (144108), Stampin’ Seal (152813), Mini Glue Dots (103683), Taylored Expression Calendars
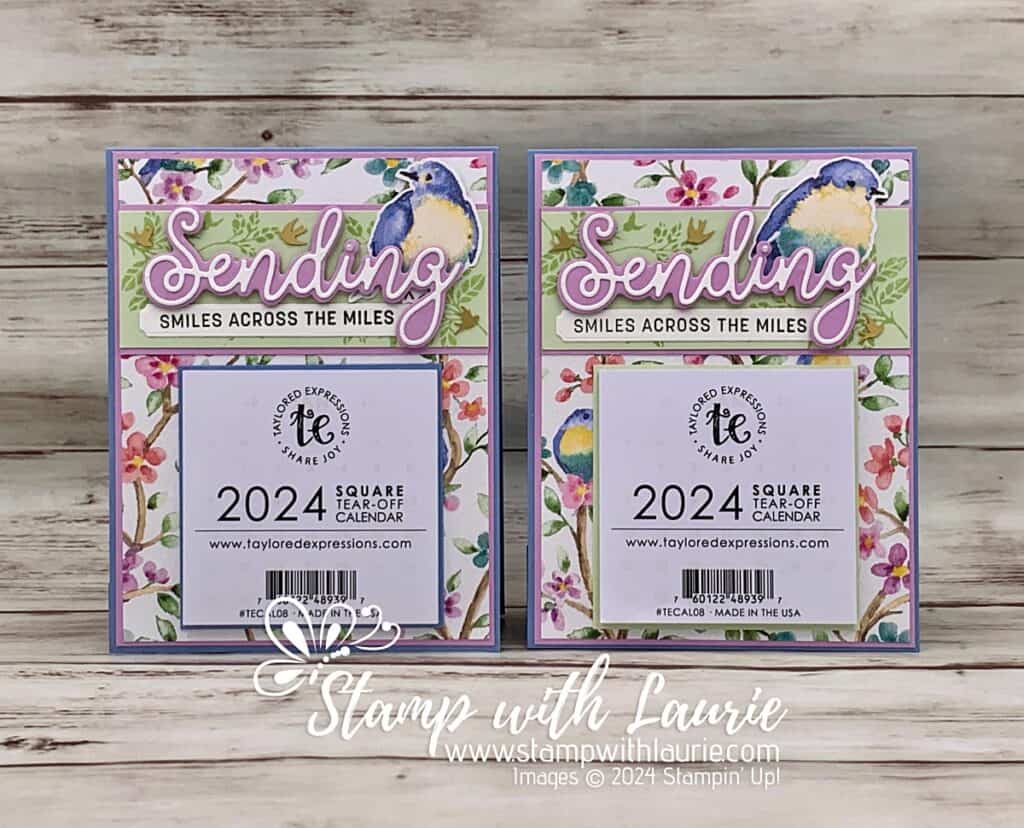
Two Different Birds on Calendars

Measurements: 

  • Real Red/Balmy Blue (3 pieces):
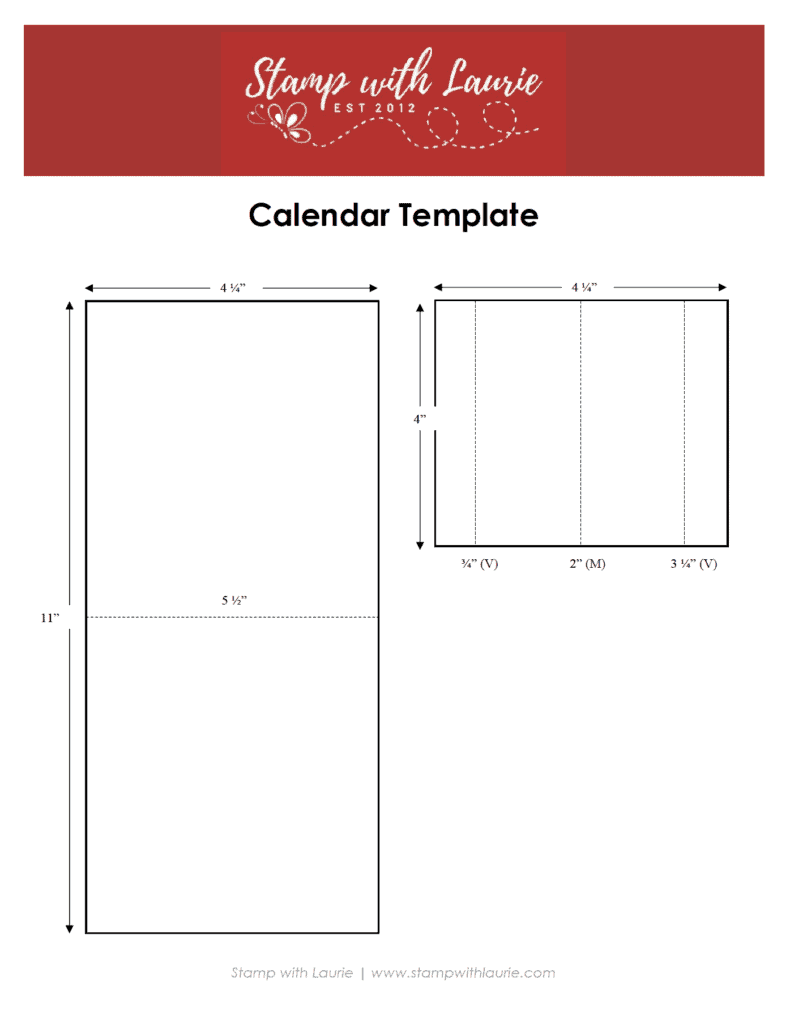
    • 11” x 4 ¼” scored at 5 ½”
    • 4” x 4 ¼” scored at ¾”, 2” and 3 ¼” along 4” side
    • 3-7/8” x 3-7/8” (for behind calendar)
    • 1 ½” x 3 ½” (Sending die)
  • Daffodil Delight/Fresh Freesia: 
    • 4-1/8” x 5-3/8”
    • 4” x 2-5/8”
    • 1 ½” x 3 ½” (Sending die)
  • Pool Party/Soft Sea Foam: 4” x 2 ½”
  • Basic White:
    • 1 ½” x 3-3/8” (Sending die)
    • 3/8” x 3-3/8” (Sentiment)
    • 1 ¾” x 1-3/16” (Bee body)
    • Scraps for wings and antenna
  • Bee Mine Designer Series Paper:
    • 4” x 5 ¼”
  • Flight & Airy Designer Series Paper:
    • 4” x 5 ¼”
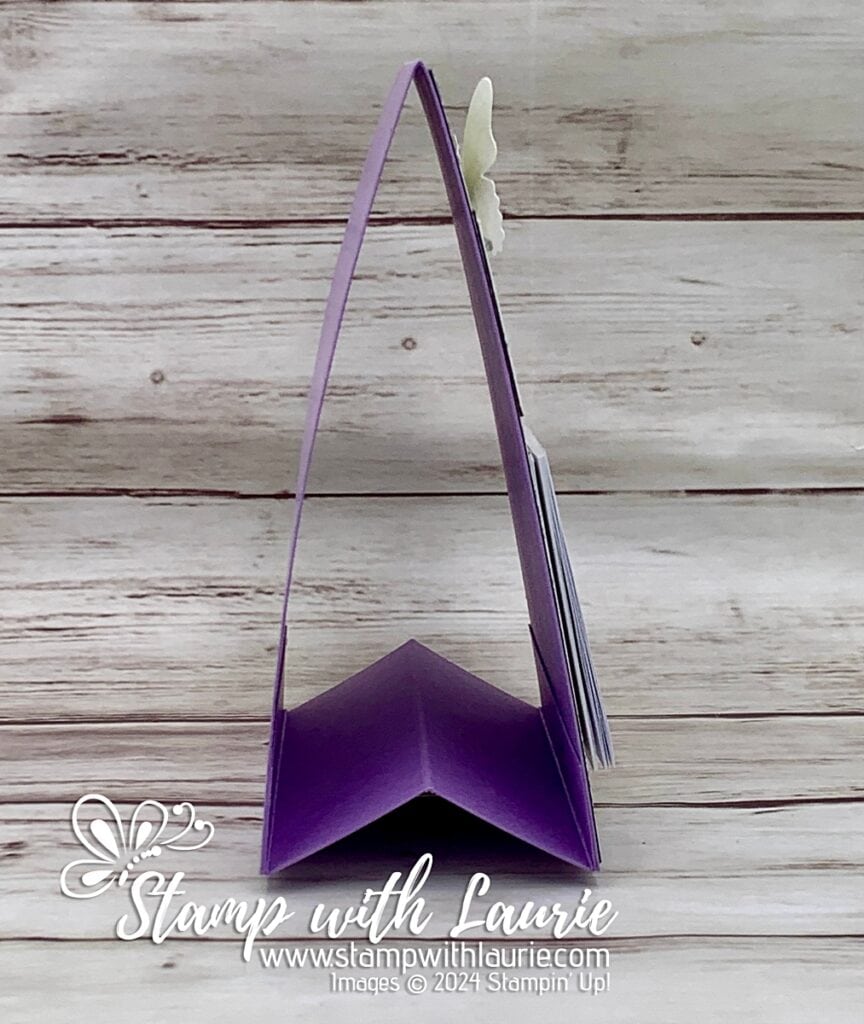
Side View of Calendar

More Information on My Happy 2024 Calendars

To download a PDF of the Calendar Template, please click here or on the picture.

Downloadable Calendar Template

For more of my Stampin’ Up! cards, please click here.

You will find the items listed above in my online store.

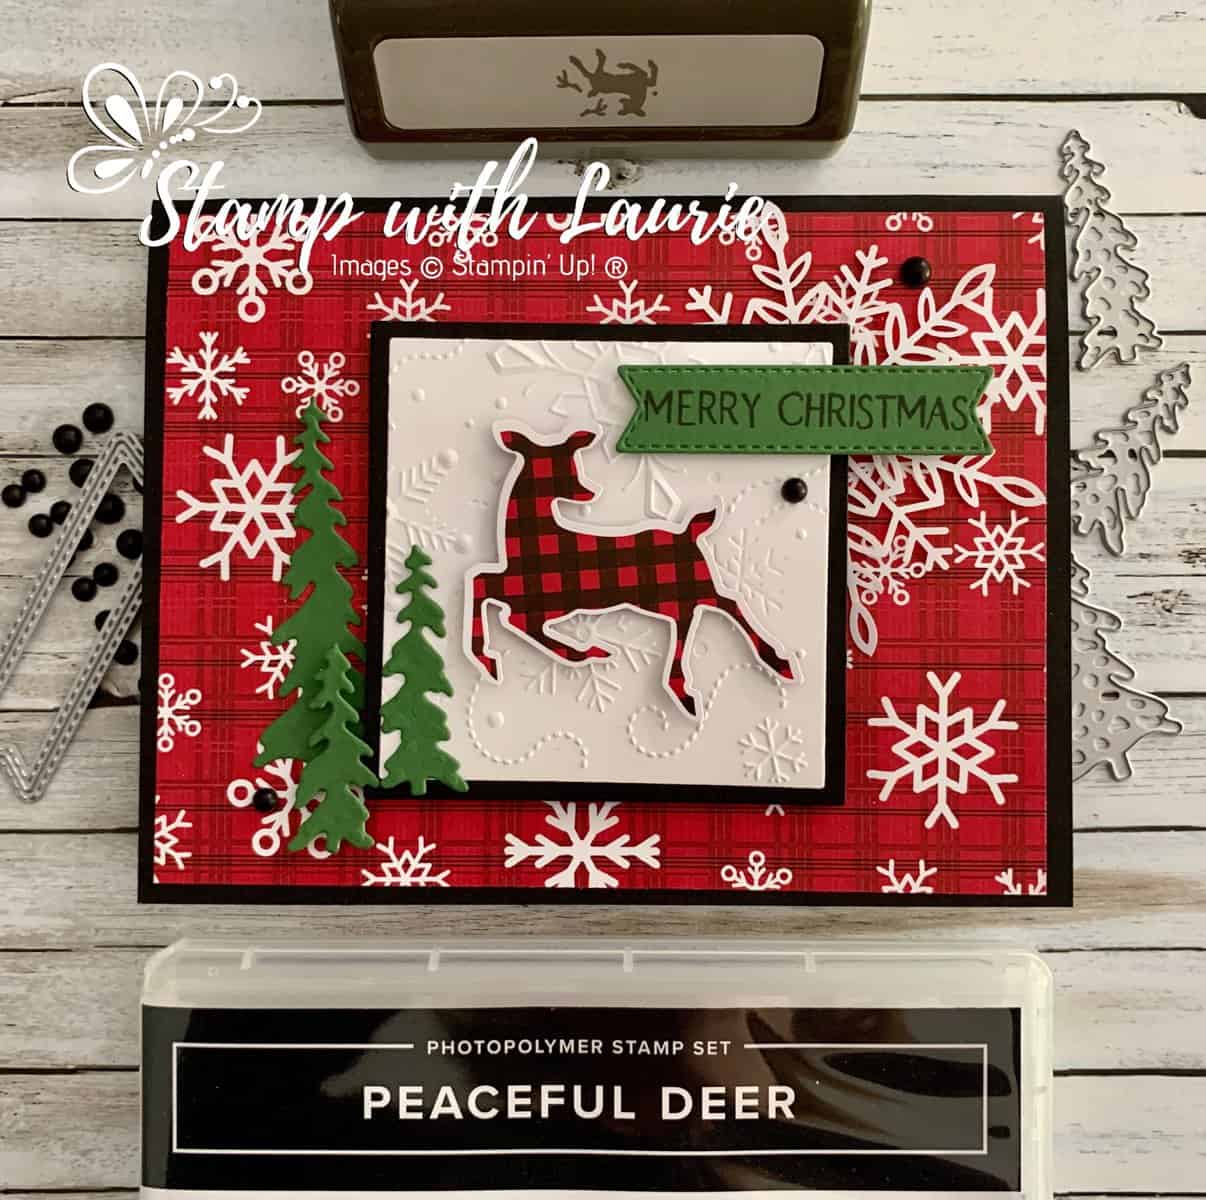
My Rustic Christmas Deer Card

My Rustic Christmas Card with a Deer on it
My Rustic Christmas Deer Card

Hello Crafty Friends! Laurie here again! I am sharing My Rustic Christmas Deer Card using the free Sale-a-Bration Peaceful Prints Designer Series Paper and the matching Peaceful Deer Bundle. I can’t believe that today is the last day of Sale-a-Bration! You only have until tonight to get free products for every $60 you spend! Don’t miss out!

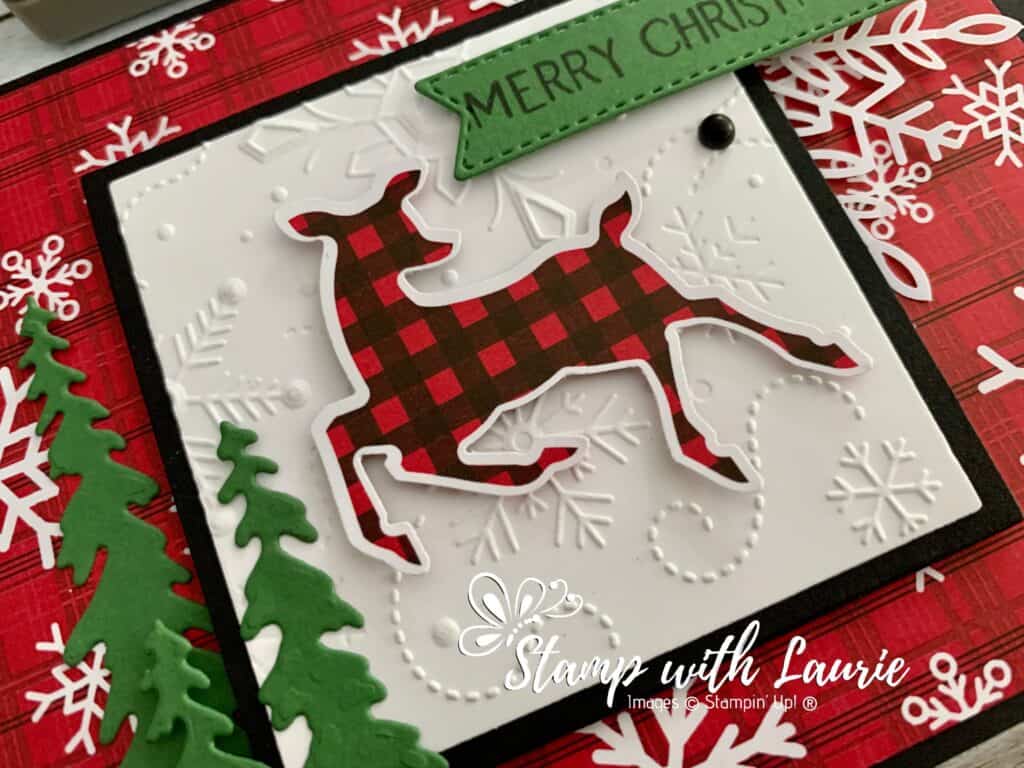
For my card, it is all about this wintery DSP and I knew that I wanted to create a rustic Christmas card with the Buffalo checked deer and those gorgeous snowflakes on the Rea lRed background! I love that the deer on the DSP can be punched out using the Deer Builder Punch! I embossed the Basic White square with the snowflakes embossing folder from the Wintry 3D Embossing Folders to set off my deer. To add a bit of unexpected colour, I used the die cut trees from the Cabin Dies and stamped the sentiment on Garden Green Card Stock. To tie in the black from the deer, I used a black mat and card base. The Matte Black Dots were perfect embellishment for my rustic card!

Supplies:

Stamps/Bundles/Dies: Peaceful Deer Bundle (156391), Cabin Dies (156404), Tasteful Labels Dies (152886)

Inks: Tuxedo Black Memento Ink Pad (132708)

Paper: Basic Black (121045), Basic White (159276), Garden Green (102584), Peaceful Prints Designer Series Paper (156628)

Accessories: Wintry 3D Embossing Folders (155433), Wonderful Snowflakes (156340), Matte Black Dots (154284), Bone Folder (102300), Stampin’ Dimensionals (104430), Stampin’ Seal (152813), Mini Glue Dots (103683)

Close Up of Deer on My Card

Measurements: 

  • Basic Black: 2 pieces
    • 5 ½” x 8 ½” scored at 4 ¼”
    • 2 7/8” x 2 7/8”
  • Peaceful Prints Designer Series Paper: 4” x 5 ¼” and punch out deer
  • Basic White: 2 5/8” x 2 5/8”
  • Garden Green: Scrap for trees and sentiment

More Information on My Rustic Christmas Deer Card:

For more of my Stampin’ Up! cards, please click here.

To check out the free August – September 2021 Sale-a-Bration products, please click here.

You will find the items listed above in my online store.

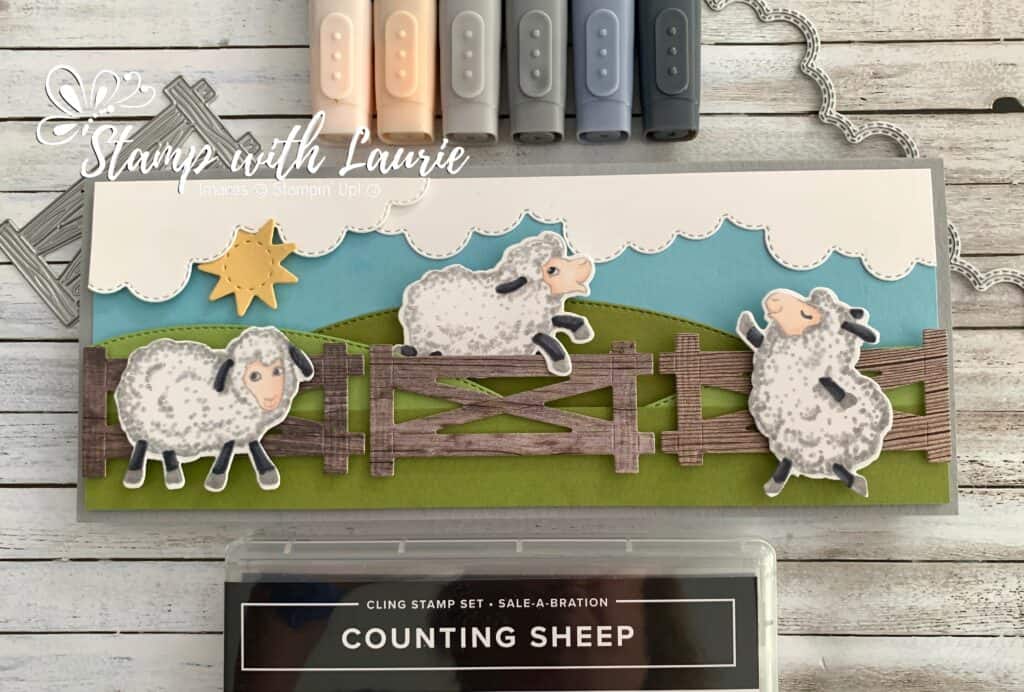
My Great Escape Card

My Stampin' Up! Card
My Great Escape Card

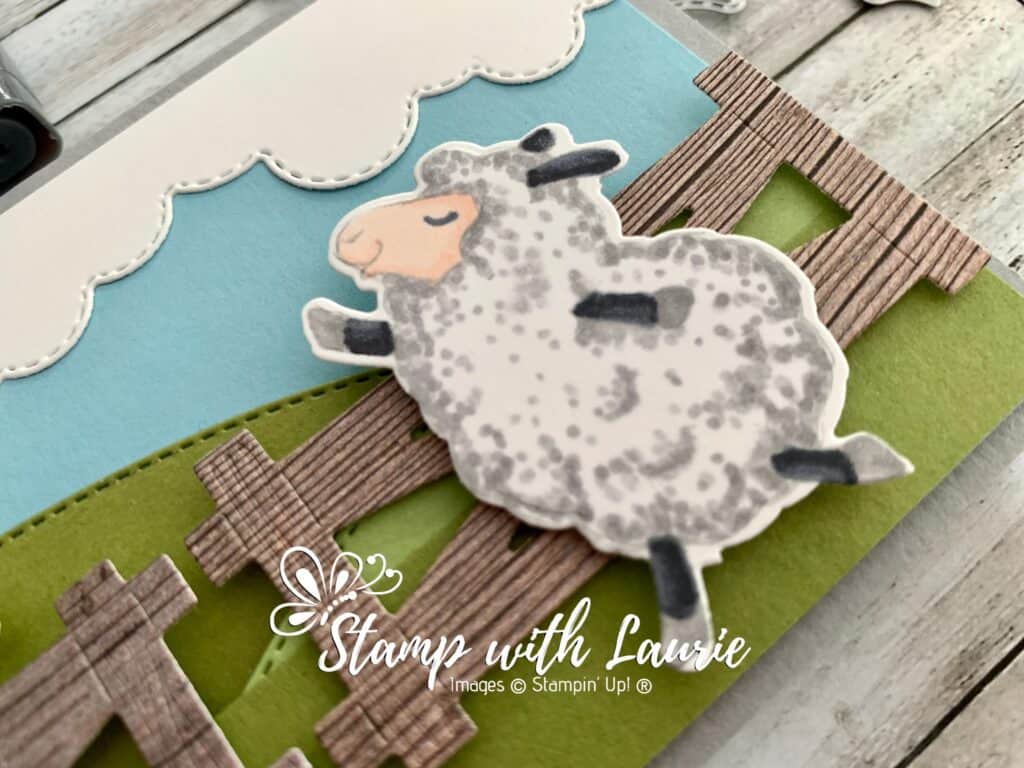
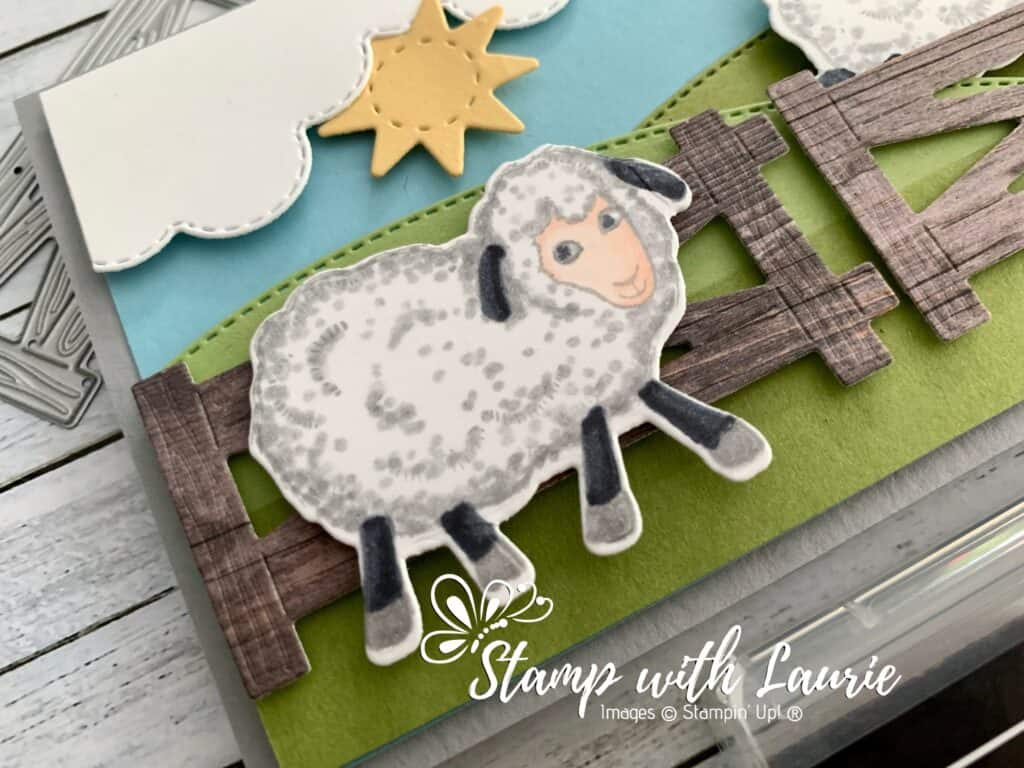
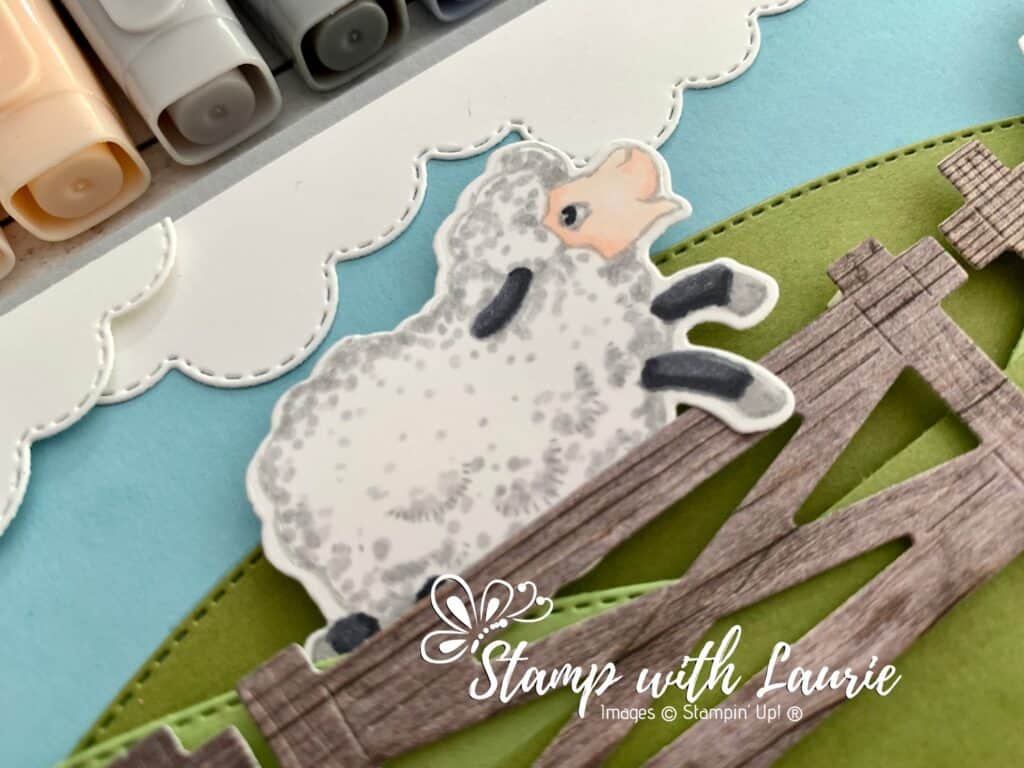
Hello Crafty Friends! Laurie here again! I am sharing My Great Escape Card using the Counting Sheep Stamp Set and matching Sheep Dies by Stampin’ Up! You can get both for free with a qualifying order during Sale-A-Bration. I am a big fan of Shaun the Sheep and love watching all the antic that he gets up to with the other sheep at the farm! The ewe on the right reminds me of him as she orchestrates a breakout from the farmer’s field. Lol!

Close up sheep on of my card
Close Up of Ewe Orchestrating Escape

My Colouring Techniques

For my card, I used several techniques to colour my sheep so that they looked fluffy. I stamped the sheep in Smokey Slate Classic Ink on Basic White card stock. This allowed me to colour with the no-line technique which created a softer finished image without the harsh black lines with Memento Ink. Once the colouring was finished, the lines would fade in with the dots.

The second techniques I used was dots for their wool. I used the Dark Smokey Slate Stampin’ Blend in the shadows. So, along the edges where the stamped Smokey Slate ink was, where the artist indicated fluffiness in the wool and anywhere I thought a shadow would show up.

Next, I used the Light Smokey Slate Stampin’ Blend to add to the shadow areas and extend my dots further into the image from the shadows. I added a few random dots to break up the white areas in the centre of the wool.

Finally, I used my Stampin’ Blends Color Lifter and lightly brushed over all the dots to soften them a little bit. For the face and legs, I used the Smooth colouring technique. For more information on these techniques and others, I have included links on how to use your Stampin’ Blends at the end of this post.

Close Up of Sheep on Left Side

The Details of my Card

I decided that I needed a slimline card to fit my scene so that I could include all three sheep in the great escape. Since the Basic Border Dies that I used were not long enough for a slimline card, I had to create layers to fill my scene. With lots of dimensionals, I was able to create a hilly pastureland with a cloud filled sky. For my pastureland I used two different card stocks, Pear Pizzaz and Old Olive, to add dimension to my scene. I added an 8 ½” strip of Old Olive at the base of my card on top of all the hills to hide all the uneven pieces. The In Good Taste DSP was perfect for my wooden fences.

Supplies:

Stamps/Bundles/Dies: Counting Sheep Stamp Set (156591), Sheep Dies (156600), Basic Borders Dies (155558)

Inks: Smoky Slate Classic Stampin’ Pad (147113)

Paper: Smoky Slate (131202), Balmy Blue (146982), Pear Pizzazz (131201), Old Olive (100702), Basic White (159276), So Saffron (105118), In Good Taste Designer Series Paper (152494)

Accessories: Smoky Slate Stampin’ Blends Combo Pack (154904), Basic Black Stampin’ Blends Combo Pack (154843), Petal Pink Stampin’ Blends Combo Pack (154893), Stampin’ Blends Color Lifter (144608), Bone Folder (102300), Stampin’ Dimensionals (104430), Stampin’ Seal (152813)

Close Up of Jumping Sheep
Close Up of Escaping Sheep

Measurements: 

  • Smoky Slate: 7” x 8 ½” scored at 3 ½” – finished card 3 ½” x 8 ½”
  • Balmy Blue: 8 ¼” x 3 ¼”
  • Old Olive: 1 ½” x 5” (hill in distance)
    • 1” x 8 ¼” (flat band at bottom of hills)
  • Pear Pizzazz: 1 ½” x 5” (left hill)
    • 1 ½” x 3” (right hill)
  • Basic White: 5 ¾” x 1 1/8” (right cloud)
    • 3 ¼” 1 ¼” (left cloud)
    • 2 ¼” x1 ½” (Sheep – 3 pieces)
  • So Saffron: scraps
  • In Good Taste Designer Series Paper: 3” x 1 ½” (3 pieces)

More Information on My Great Escape Card:

Hope you like My Great Escape Card!

How to Use Stampin’ Blends
https://stampwithlaurie.com/wp-content/uploads/2020/08/Stampin-Up-Blends-2020.pdf

Part 1Whiskey Business Card using Blending Different Colours Technique
Video Tutorial: Blending Different Colours Together

Part 2Country Harvest Card using Light to Dark Technique
Video Tutorial: Light to Dark/Dark to Light Colouring

Part 3Beautiful Poppy Birthday Card using Smooth Colouring Technique
Video Tutorial: Smooth Colouring

Part 4Let’s Gather Together Card using Tip to Tip Blending Technique
Video Tutorial: Tip to Tip Colouring

Part 5So Grateful Cardinal Card using Flicking Colouring Technique
Video Tutorial: Flicking Colouring

Part 6Let’s Celebrate You Card using Flicking of Different Colours Technique
Video Tutorial: Flicking of Different Colours Technique

No-Lines Technique CardsMy Cardinal Anniversary Card and My Cardinal Card

For more of my Stampin’ Blends cards, please click here.

For more of my Stampin’ Up! cards, please click here.

You will find the items listed above in my online store.
My Sweet Birthday Card

My Sweet Birthday Card

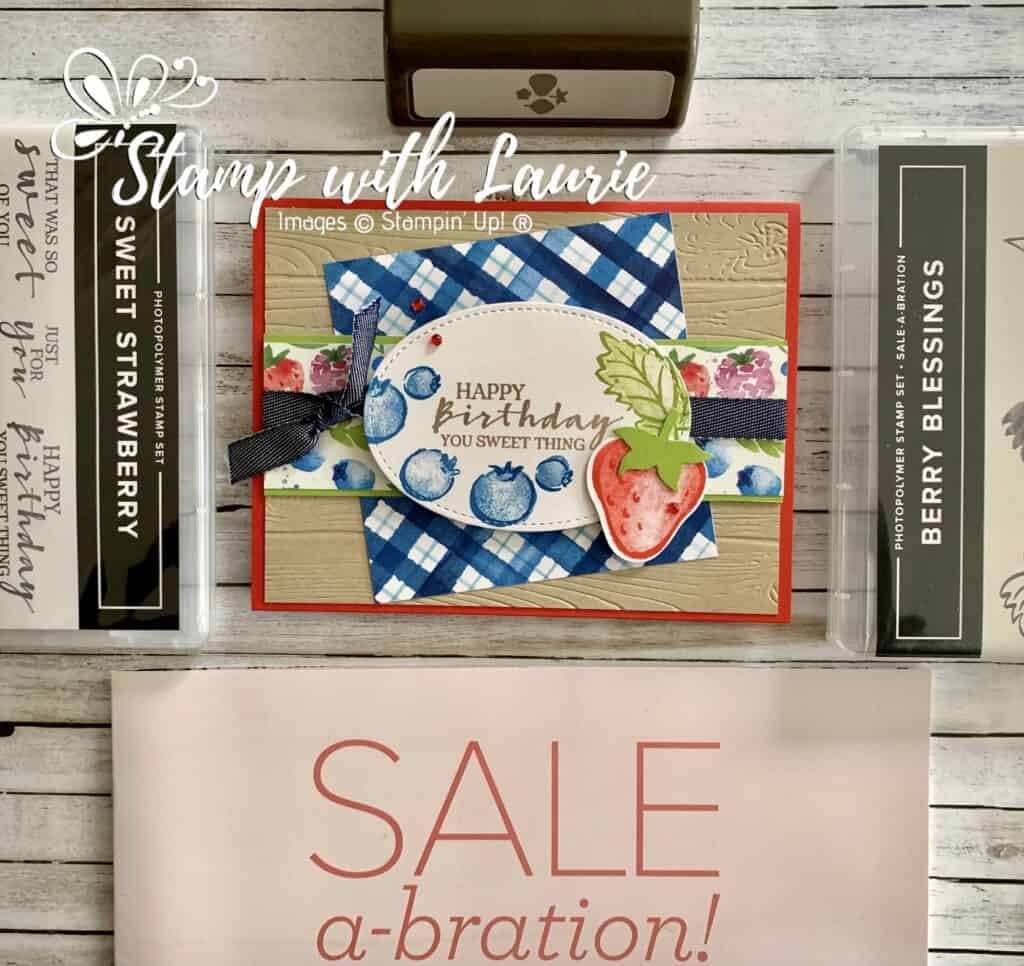
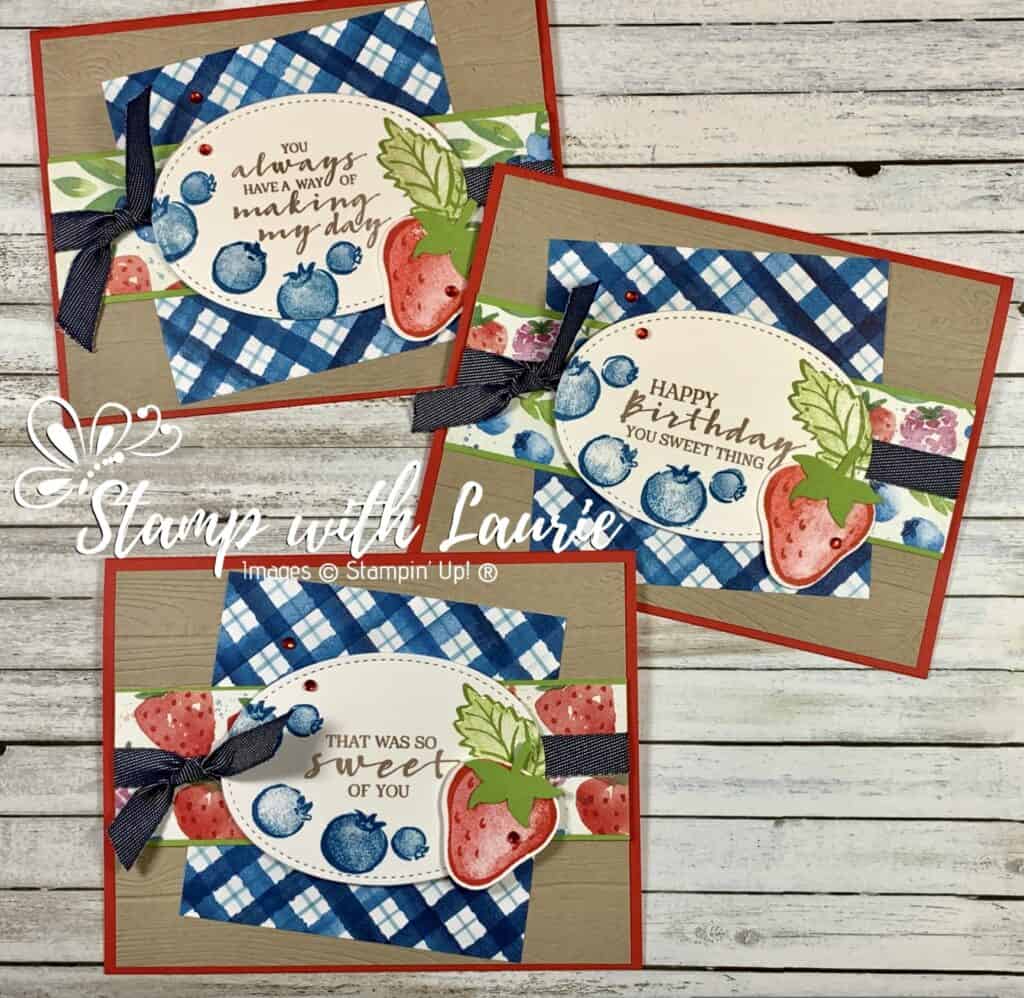
Today is I am sharing My Sweet Birthday Card that I made for a swap using the Sweet Strawberry Bundle and the Sale-a-Bration Berry Bliss Bundle. There is only a few more day left of the Jan-Feb 2021 Sale-a-Bration and you can get the Berry Bliss Bundle for free with a qualifying $120 order.

I love how these two bundles coordinate with their berry sweet theme! The Berry Delightful Designer Series Paper is so pretty with its fresh and juicy paper designs. Both stamp sets are Distinktive and consist of two-step stamping to give you texture and dimension to your images.

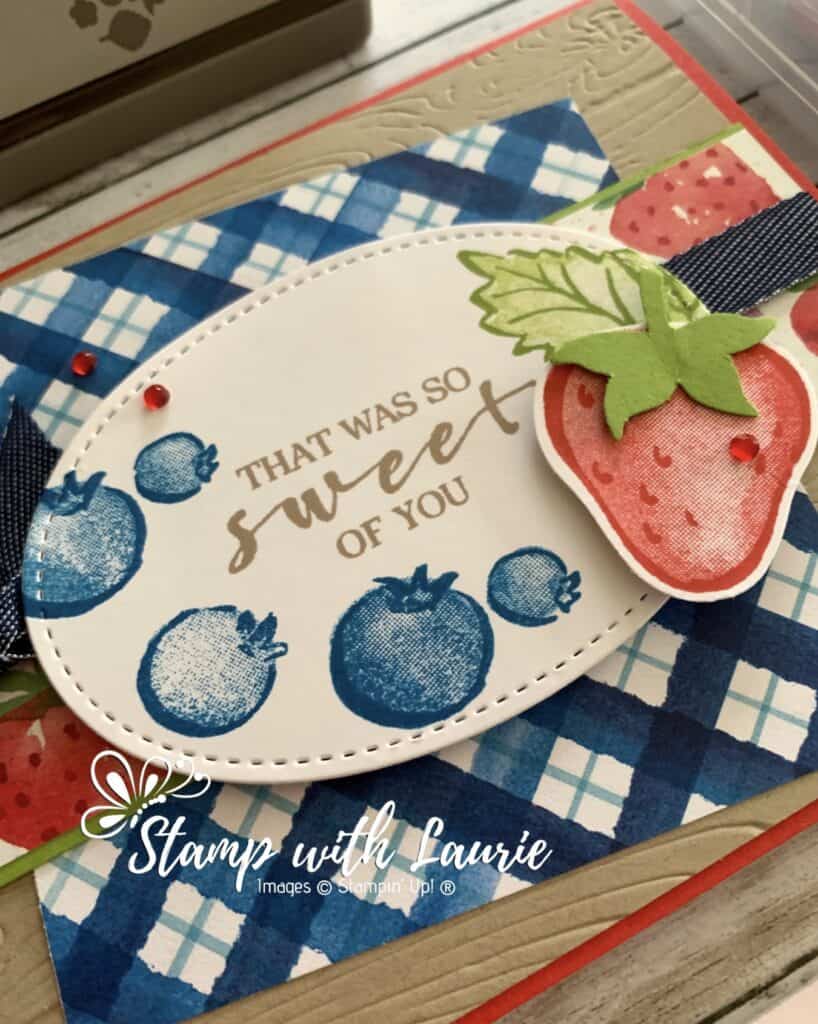
Who doesn’t love a coordinating punch and what is better than the Strawberry Builder Punch! I even punched out a coordinating Granny Apple Green stem to top my strawberry.

I wanted to create a country theme by using the Pinewood Planks 3D Embossing Folder and the Denim Ribbon. The Stitched Oval also adds to my theme. The plaid DSP reminded me of a table cloth that has been laid on the ground to enjoy your picnic of berries. A couple of Red Rhinestones are the finishing touch and add a bit of sparkle to the card.

I had so much fun with my card that I ended up making 3 versions all with different sentiments.

Three Variations of my Card

Supplies:

Stamps/Bundles/Dies: Sweet Strawberry Bundle (156214), Berry Blessings Bundle (157613)

Inks: Crumb Cake Classic Stampin’ Pad (147116), Poppy Parade Classic Stampin’ Pad (147050), Pacific Point Classic Stampin’ Pad (147098), Granny Apple Green Classic Stampin’ Pad (147095)

Paper: Poppy Parade (119793), Crumb Cake (120953), Basic White (159276), Granny Apple Green (146990), Berry Delightful Designer Series Paper (157613)

Accessories: Pinewood Planks 3D Embossing Folder (152320), 3/8″ Denim Ribbon (149590), Stitched Shapes Dies (152323), Red Rhinestone Basic Jewels (146924), Bone Folder (102300), Stampin’ Dimensionals (104430), Stampin’ Seal (152813), Glue Dots (103683)

Close Up of One of My Cards

Measurements: 

  • Poppy Parade: 5 ½” x 8 ½” scored at 4 ¼”
  • Crumb Cake: 5 ¼” x 4”
  • Basic White: 5 ¼” x 1 ½”
  • Granny Apple Green: 5 ¼” x 1 5/8” and scrap
  • Berry Delightful Designer Series Paper: 5 ¼” x 2 5/16”
  • Denim Ribbon: 2 pieces at 6” and 4”

For Further Info:

Hope you like My Sweet Birthday Card.

For more of my Stampin’ Up! cards, please click here.

You will find the items listed above in my online store.