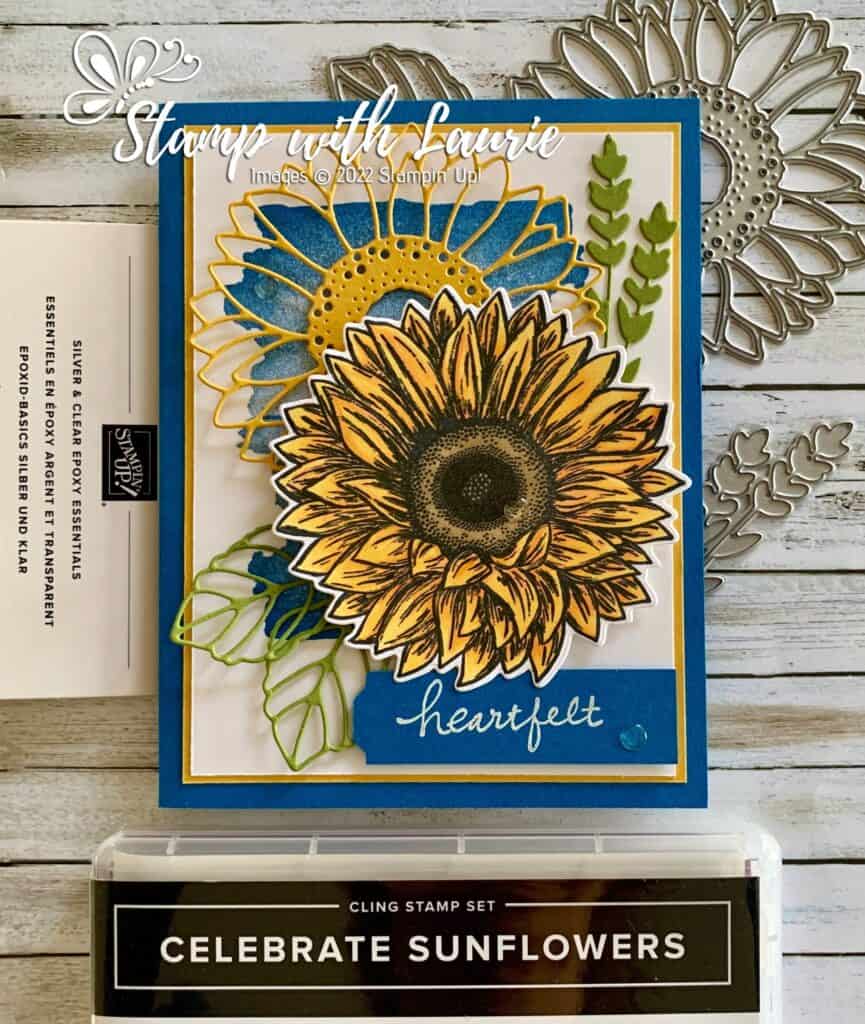
Heartfelt Sunflower Wishes Card

A card with a Sunflower on it
Heartfelt Sunflower Wishes Card

Hello Crafty Friends! Laurie here again! I am sharing my Heartfelt Sunflower Wishes Card using the Celebrate Sunflowers Bundle by Stampin’ Up! This bundle is currently on sale for the March 2022 Savings Are in Bloom Sale. Check it out in my online store: https://www.stampinup.ca/products/celebrate-sunflowers-bundle-(english)?demoid=2103981.

The Details of My Card

For my card, I wanted to show my support for the Ukraine people. My heart bleeds for them and anyone who are affected by this war! So, I decided to create a sunflower card since it is their national flower. I also decided to use Bumblebee and Pacific Point as my card stock choices to reflect the colours of the Ukrainian flag. 

To highlight the sunflowers, I stamped in Pacific Point the sky stamp from the Oceanfront Stamp Set a couple of times on the Basic White card stock. I love how it peeks out from the top die cut sunflower! Once that was done, I layered my pieces. The sentiment was heat embossed with white embossing powder and punched out with the Lovely Labels Pick a Punch. A scattering of epoxy shapes represents the “tears of the people” in my mind.

I have created several cards with this bundle in the past. I will include links to the cards at the bottom of this post. There is even a quick video on YouTube explaining the advanced colouring technique I used on the sunflower.

Colouring Video of Sunflower

Supplies:

Stamps/Bundles/Dies: Celebrate Sunflowers Bundle (154065), Oceanfront Stamp Set (157862), Lovely You Stamp Set (152525)

Inks: Tuxedo Black Memento Ink Pad (132708), VersaMark Ink (102283), Pacific Point Classic Stampin’ Pad (147098)

Paper: Pacific Point (111350), Bumblebee (153077), Basic White (159276), Old Olive (100702)

Accessories: Lovely Labels Pick a Punch (152883), Silver & Clear Epoxy Essentials (155567), Basics Embossing Powder (155554), Mango Melody Stampin’ Blends Combo Pack, Calypso Coral Stampin’ Blends Combo Pack (154881), Soft Suede Stampin’ Blends Combo Pack (154906), Stampin’ Blends Color Lifter (144608), Heat Tool (129053), Bone Folder (102300), Stampin’ Dimensionals (104430), Stampin’ Seal (152813), Mini Glue Dots (103683)
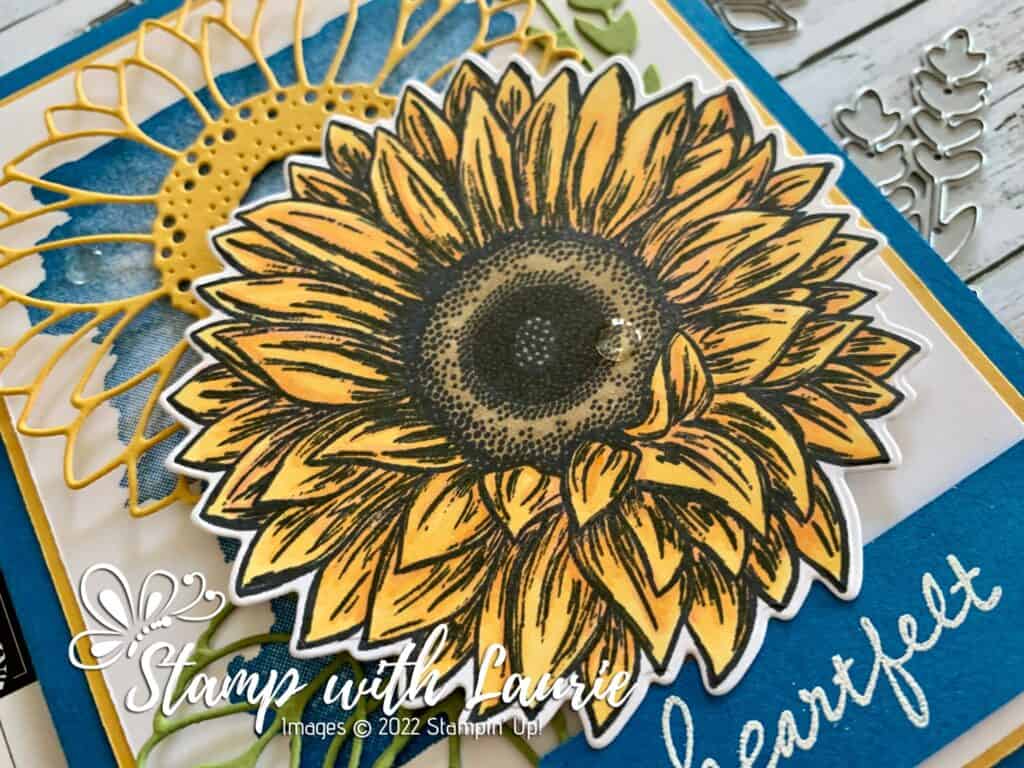
Close Up of the Coloured Sunflower on the card
Close Up of Coloured Sunflower on Card

Measurements: 

  • Pacific Point: (2 pieces)
    • 5 ½” x 8 ½” scored a 4 ¼”
    • Scrap (sentiment)
  • Bumblebee: (2 pieces)
    • 5 1/8” x 3 7/8”
    • 3 5/16” x 3 ¼” (sunflower)
  • Old Olive: (3 pieces)
    • Scraps (leaves – 3 pieces)
  • Basic White: (2 pieces)     
    • 3 ¾” x 5”
    • 3 5/16” x 3 ¼” (sunflower)

More Information on my Heartfelt Sunflower Wishes Card:

For more of my Stampin’ Up! cards, please click here.

For the other items on sale, please click here.

For the Celebrate Sunflowers Bundle, please click here.

You will find the items listed above in my online store.

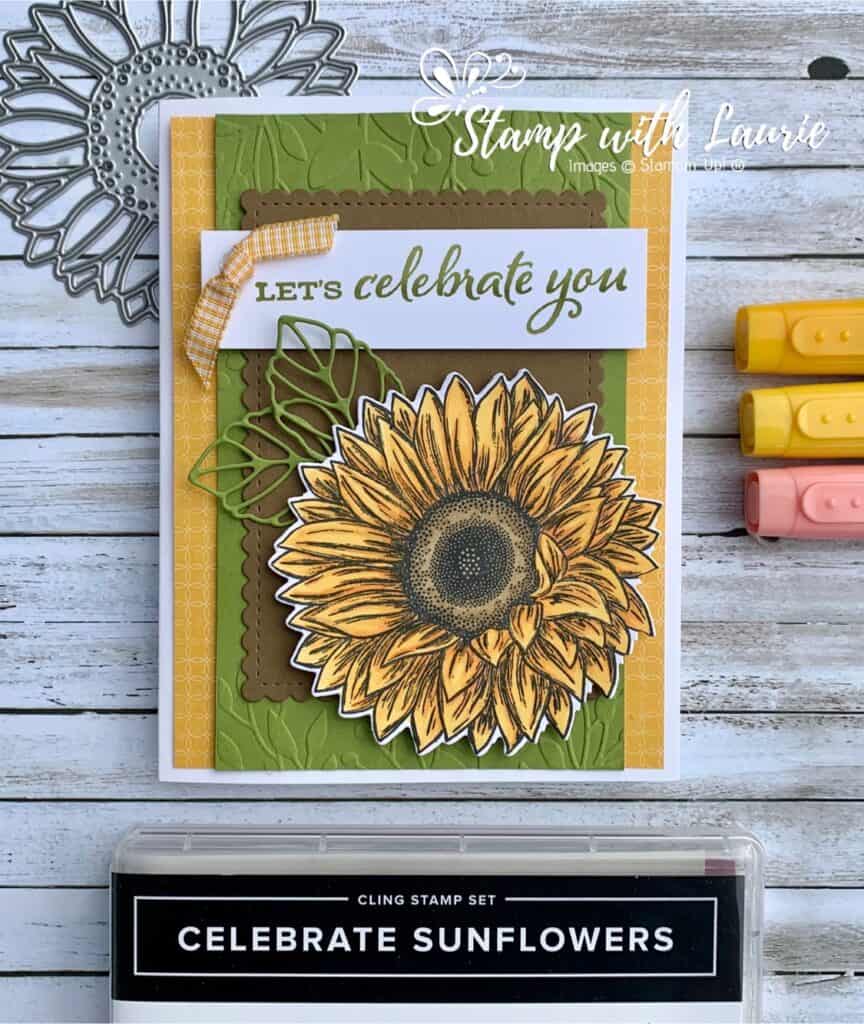
Let’s Celebrate You Card

Link to post: https://stampwithlaurie.com/lets-celebrate-you-card/

Video Tutorial: Flicking of Different Colours Technique

Let's Celebrate You Card
Let’s Celebrate You Card

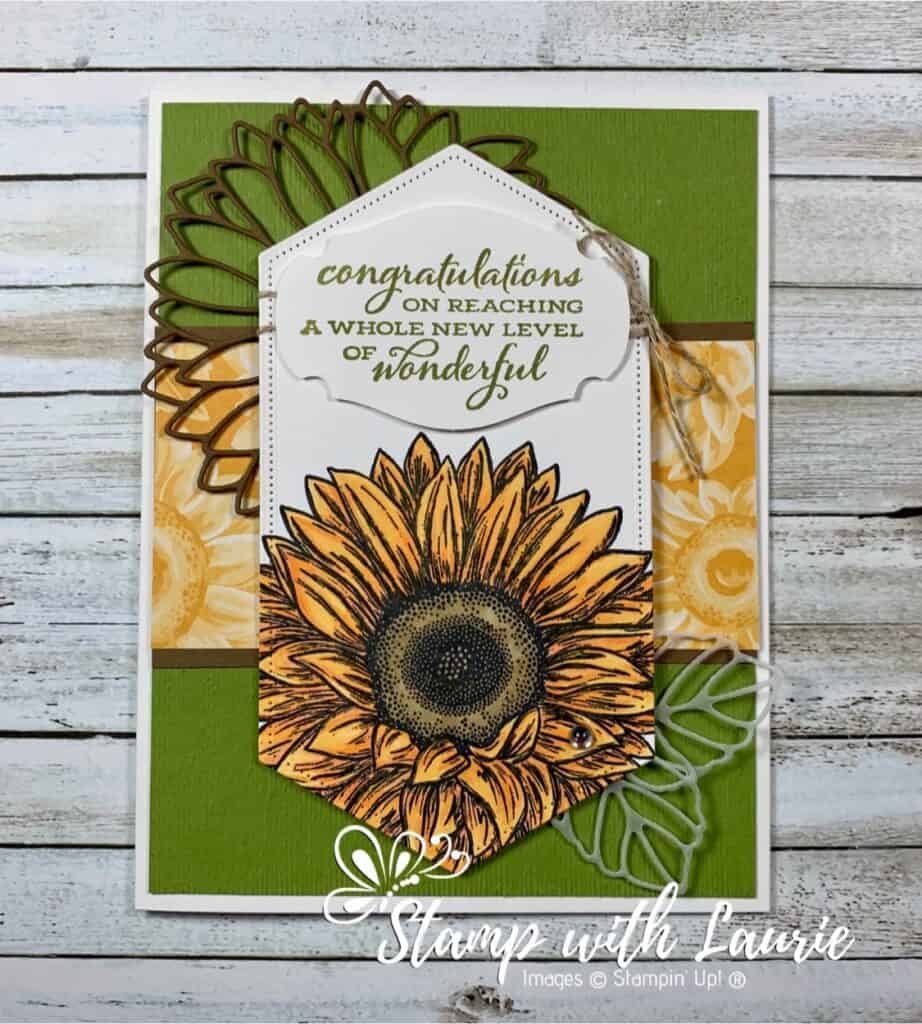
My Congratulations Card

Link to post: https://stampwithlaurie.com/my-congratulations-card/

My Sunflower Congratulation Card

I’m sharing my card at the following challenges:

Color Hues-Special Double Challenge: Blue and Yellow
The Flower Challenge #66 Use Scraps

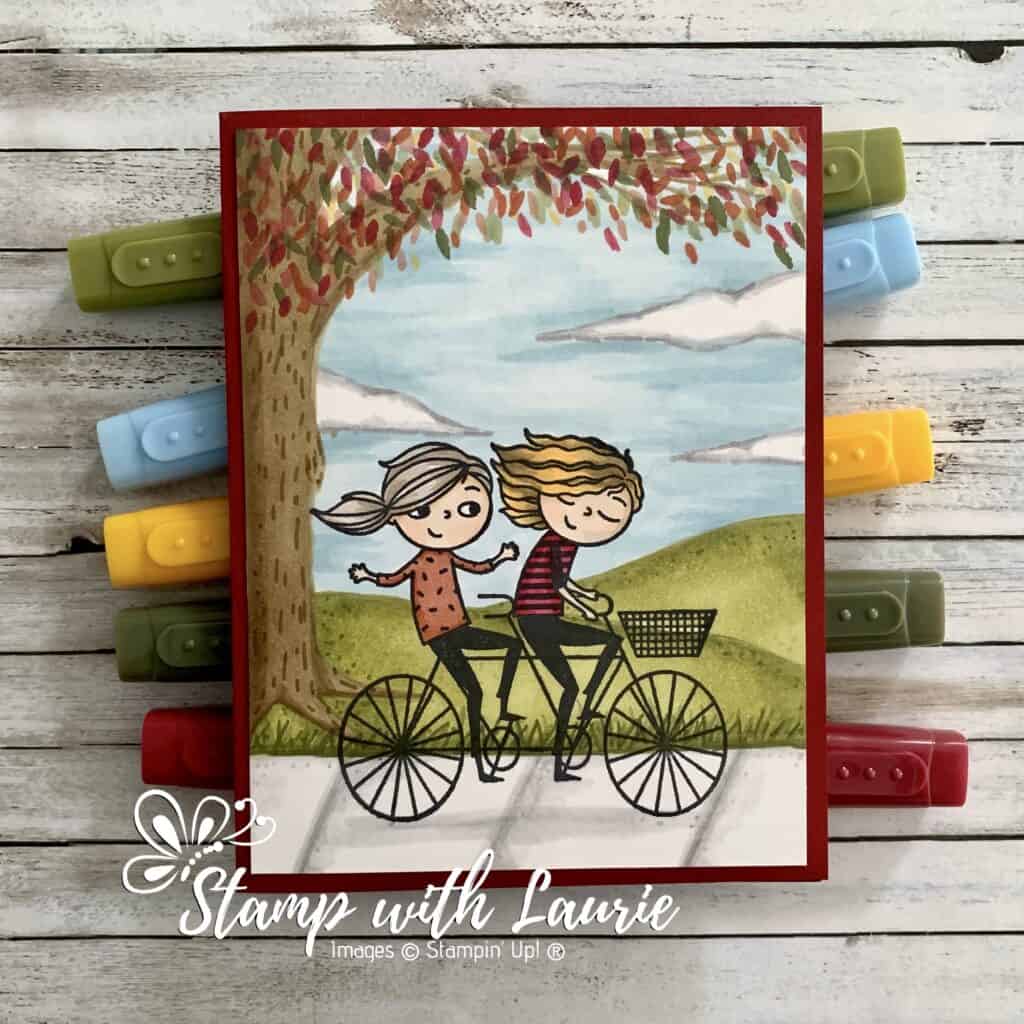
My Welcome Fall Card

My Welcome Fall Card

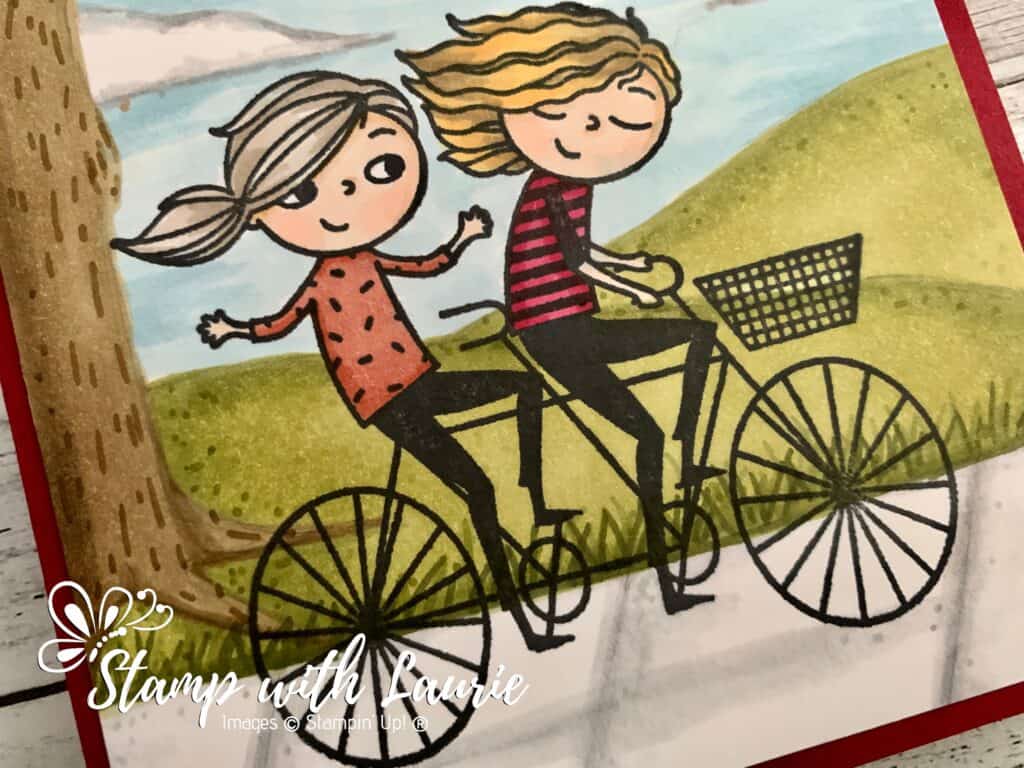
Welcome Fall! Hello Crafty Friends! Laurie here again! I was honoured to have been asked to present my colouring using Stampin’ Blends at a playdate this past weekend for fellow Stampin’ Up! demonstrators. So, I thought I would share my card and first YouTube video with you on the First Day of Fall. For My Welcome Fall Card, I used the Right Behind You Stamp Set and a ton of Stampin’ Blends including the Color Lifter which I used a lot in this video!

I mentioned another video and notes in my presentation. I have included those notes and several videos from that presentation at the end of this post for your reference.

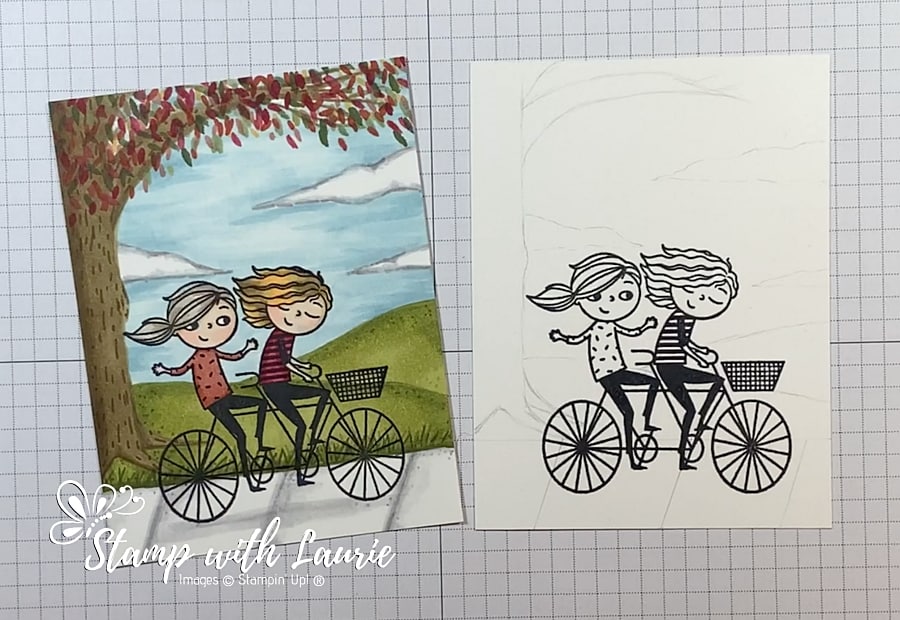
Pencil Sketch of Scene

For my card, I stamp multiple times the girls riding the bicycle in Tuxedo Black Memento Ink on my Stamparatus to get a good coverage of ink on their pants. Next, I lightly drew in as a guide a simple scene with a sidewalk, a tree, some hills, and clouds. Once I did that, I started my colouring. Here is my very first YouTube video so that you can follow along:

YouTube Video
YouTube Video of How to Create a Scene With Stampin’ Blends

Stampin’ Blends:

Skin: Ivory/Petal Pink Dark
Ponytail Girl’s Hair: Crumb Cake Light/Dark
Sweater: Cajun Craze Light/Dark
Second Girl’s Hair: Soft Suede Light/Dark/Mango Melody Dark
Shirt: Cherry Cobbler Light/ Dark
Sidewalk/Clouds: Gray Granite Light/Dark/Color Lifter
Sky: Balmy Blue Light/Dark/Color Lifter
Grass: Old Olive Light/Dark/ Mossy Meadow Light/Dark
Tree Trunk: Soft Suede Light/Dark
Leaves: Cherry Cobbler Light/Dark
Cajun Craze Light/Dark
Old Olive Light/Dark
Mossy Meadow Light/Dark
Mango Melody Dark

Supplies:

Stamp: Right Behind You Cling Stamp Set (155790

Ink: Tuxedo Black Memento Ink Pad (132708)

Paper: Basic White (159276), Cherry Cobbler (119685)

Accessories: Stamparatus (146276), Stampin’ Blends Color Lifter (144608), Bronze & Ivory Stampin’ Blends Combo Pack (154922), Petal Pink Stampin’ Blends Combo Pack (154893), Crumb Cake Stampin’ Blends Combo Pack (154882), Old Olive Stampin’ Blends Combo Pack (154892), Balmy Blue Stampin’Blends Combo Pack (154830), Soft Suede Stampin’ Blends Combo Pack (154906), Gray Granite Stampin’ Blends Combo Pack (154886), Cherry Cobbler Stampin’ Blends Combo Pack (154880), Cajun Craze Stampin’ Blends Combo Pack (154879), Mossy Meadow Stampin’ Blends Combo Pack (154890), Bone Folder (102300), Stampin’ Dimensionals (104430), Stampin’ Seal (152813)

Measurements: 

  • Cherry Cobbler: 5 ½” x 8 ½” scored at 4 ¼”
  • Basic White: 4” x 5 ¼”
Close Up of my Card
Close Up of The Stamped Girls on my Card

More Information on My Welcome Fall Card:

To watch my YouTube video of my presentation on how to create a scene with Stampin’ Blends:
https://youtu.be/6w4fkxgA9rg

How to Use Stampin’ Blends
https://stampwithlaurie.com/wp-content/uploads/2020/08/Stampin-Up-Blends-2020.pdf

Part 1Whiskey Business Card using Blending Different Colours Technique
Video Tutorial: Blending Different Colours Together

Part 2Country Harvest Card using Light to Dark Technique
Video Tutorial: Light to Dark/Dark to Light Colouring

Part 3Beautiful Poppy Birthday Card using Smooth Colouring Technique
Video Tutorial: Smooth Colouring

Part 4Let’s Gather Together Card using Tip to Tip Blending Technique
Video Tutorial: Tip to Tip Colouring

Part 5So Grateful Cardinal Card using Flicking Colouring Technique
Video Tutorial: Flicking Colouring

Part 6Let’s Celebrate You Card using Flicking of Different Colours Technique
Video Tutorial: Flicking of Different Colours Technique

No-Lines Technique CardsMy Cardinal Anniversary Card and My Cardinal Card

For more of my Stampin’ Blends cards, please click here.

For more of my Stampin’ Up! cards, please click here.

You will find the items listed above in my online store

Peony Thank You Card

My Peony Thank You Card

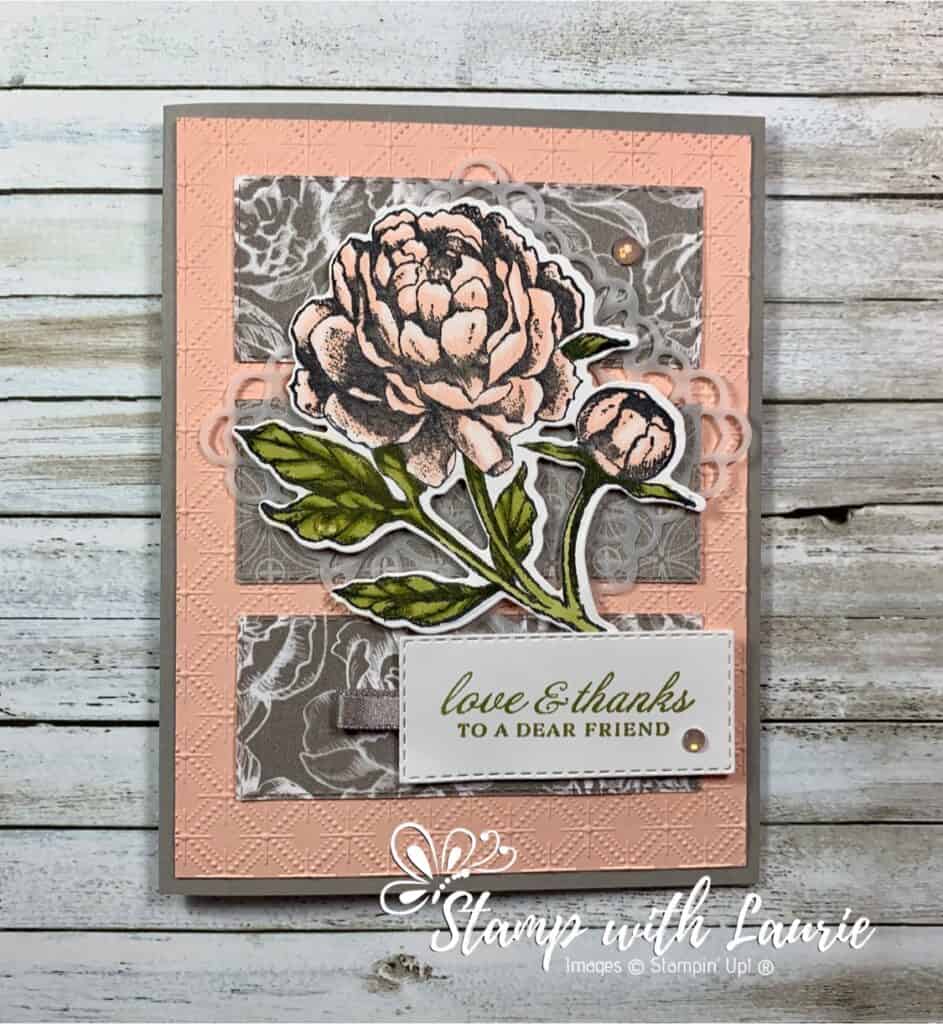
Today is I am sharing my Peony Thank You Card that I made for a swap using the beautiful Peony Garden Suite Collection. I love peonies and when I saw this collection, I knew that I had to buy it! It is getting lots of love! So far, I have made 4 cards with it! I am sharing two of those cards here.

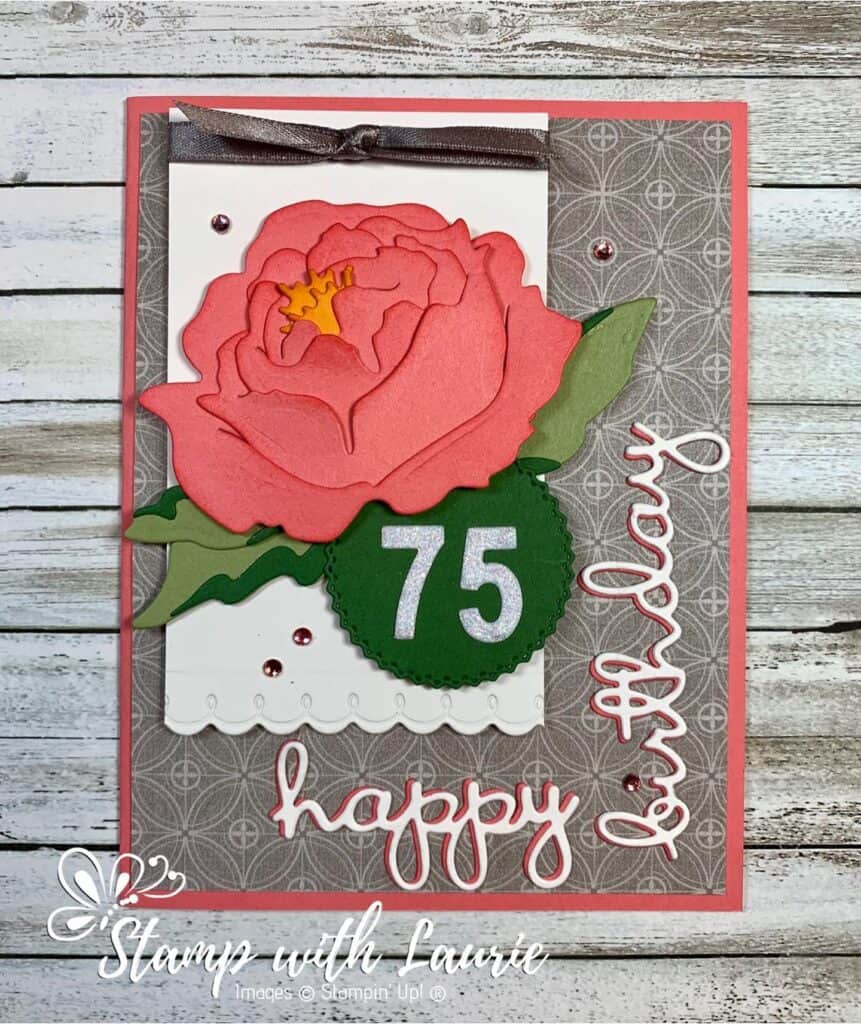
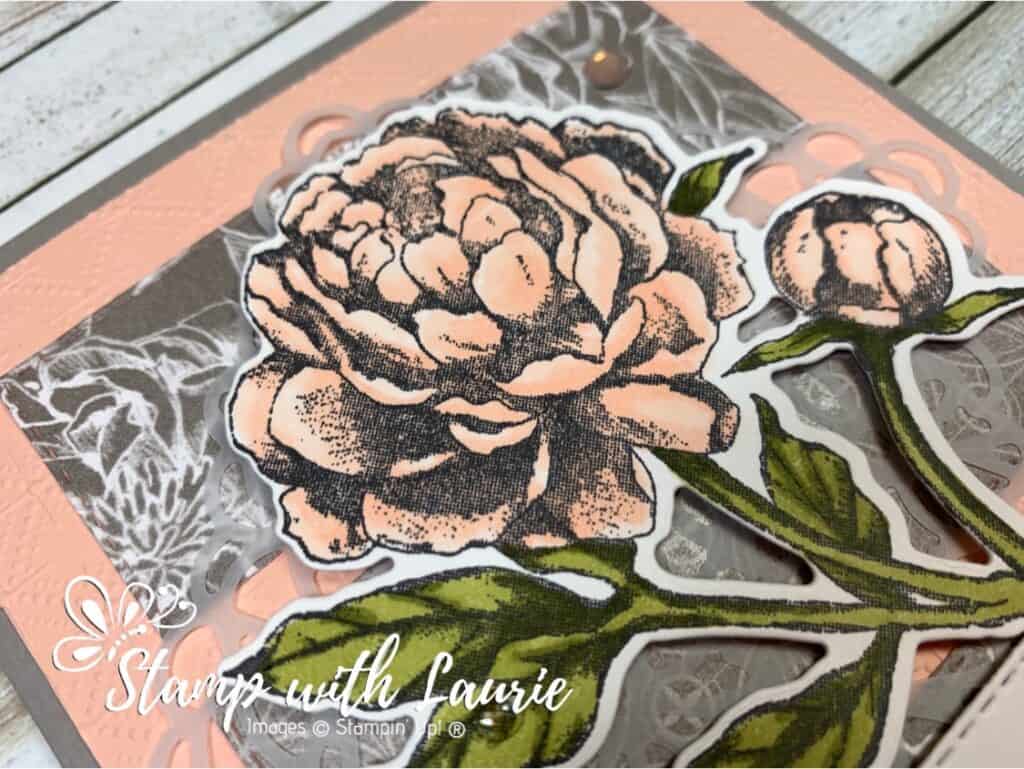
For my card, I pulled out my Stampin’ Up! Blends in Petal Pink and Old Olive to colour this gorgeous flower. I love how you can use the matching dies to cut out the blooms, but there are also dies that build a 3D peony bloom as well! I made the card below for my Mom’s 75th birthday using the 3D bloom and it was gorgeous!

Birthday Card with the 3D Peony Bloom
My Mom’s Birthday Card with the 3D Peony Bloom

I love the softness of the Peony Garden Designer Series Paper and that was from where I pulled my colour scheme of Petal Pink and Gray Granite with a touch of Old Olive.

I used the pretty Dainty Diamonds 3D Embossing Folder on the Petal Pink card stock. For embellishments, I used the Gray Granite Ribbon, a Square Vellum Doily and a scattering of Elegant Faceted Gems.

Supplies:

Stamps/Bundles/Dies: Prized Peony Bundle (154056), Stitched Rectangles Dies (151820)

Inks: Tuxedo Black Memento Ink Pad (132708), Old Olive Classic Stampin’ Pad (147090)

Paper: Gray Granite (146983), Petal Pink (146985), Basic White (159276), Peony Garden Designer Series Paper (152483)

Accessories: Dainty Diamonds 3D Embossing Folder (152702), Old Olive Stampin’ Blends Combo Pack (154892), Petal Pink Stampin’ Blends Combo Pack (154893), Gray Granite Ribbon (152463), Elegant Faceted Gems (152464), Square Vellum Doilies (152484), Bone Folder (102300), Stampin’ Dimensionals (104430), Stampin’ Seal (152813), Glue Dots (103683)

Measurements: 

  • Gray Granite: 5 ½” x 8 ½” scored at 4 ¼”
  • Petal Pink: 5 ¼” x 4”
  • Basic White: 2 pieces
    • 2 3/8” x 1” (sentiment)
    • 2 ¾” x 3 ½”
  • Peony Garden Designer Series Paper: 3 pieces at 3 ¼” x 1 ¼”
  • Gray Granite Ribbon: 2”
Close Up of My Peony Thank You Card

For Further Info:

Hope you like my Peony Thank You Card.

For more information on my colouring, here are some videos of my colouring techniques:

1 – PartWhiskey Business Card using Blending Different Colours Technique
Video Tutorial: Blending Different Colours Together

2 – PartCountry Harvest Card using Light to Dark Technique
Video Tutorial: Light to Dark/Dark to Light Colouring

3 – PartBeautiful Poppy Birthday Card using Smooth Colouring Technique
Video Tutorial: Smooth Colouring

4 – PartLet’s Gather Together Card using Tip to Tip Blending Technique
Video Tutorial: Tip to Tip Colouring

5 – PartSo Grateful Cardinal Card using Flicking Colouring Technique
Video Tutorial: Flicking Colouring

6 – PartLet’s Celebrate You Card using Flicking of Different Colours Technique
Video Tutorial: Flicking of Different Colours Technique

My Colouring Notes:
https://stampwithlaurie.com/wp-content/uploads/2020/08/Stampin-Up-Blends-2020.pdf

You will find the items listed above in my online store.

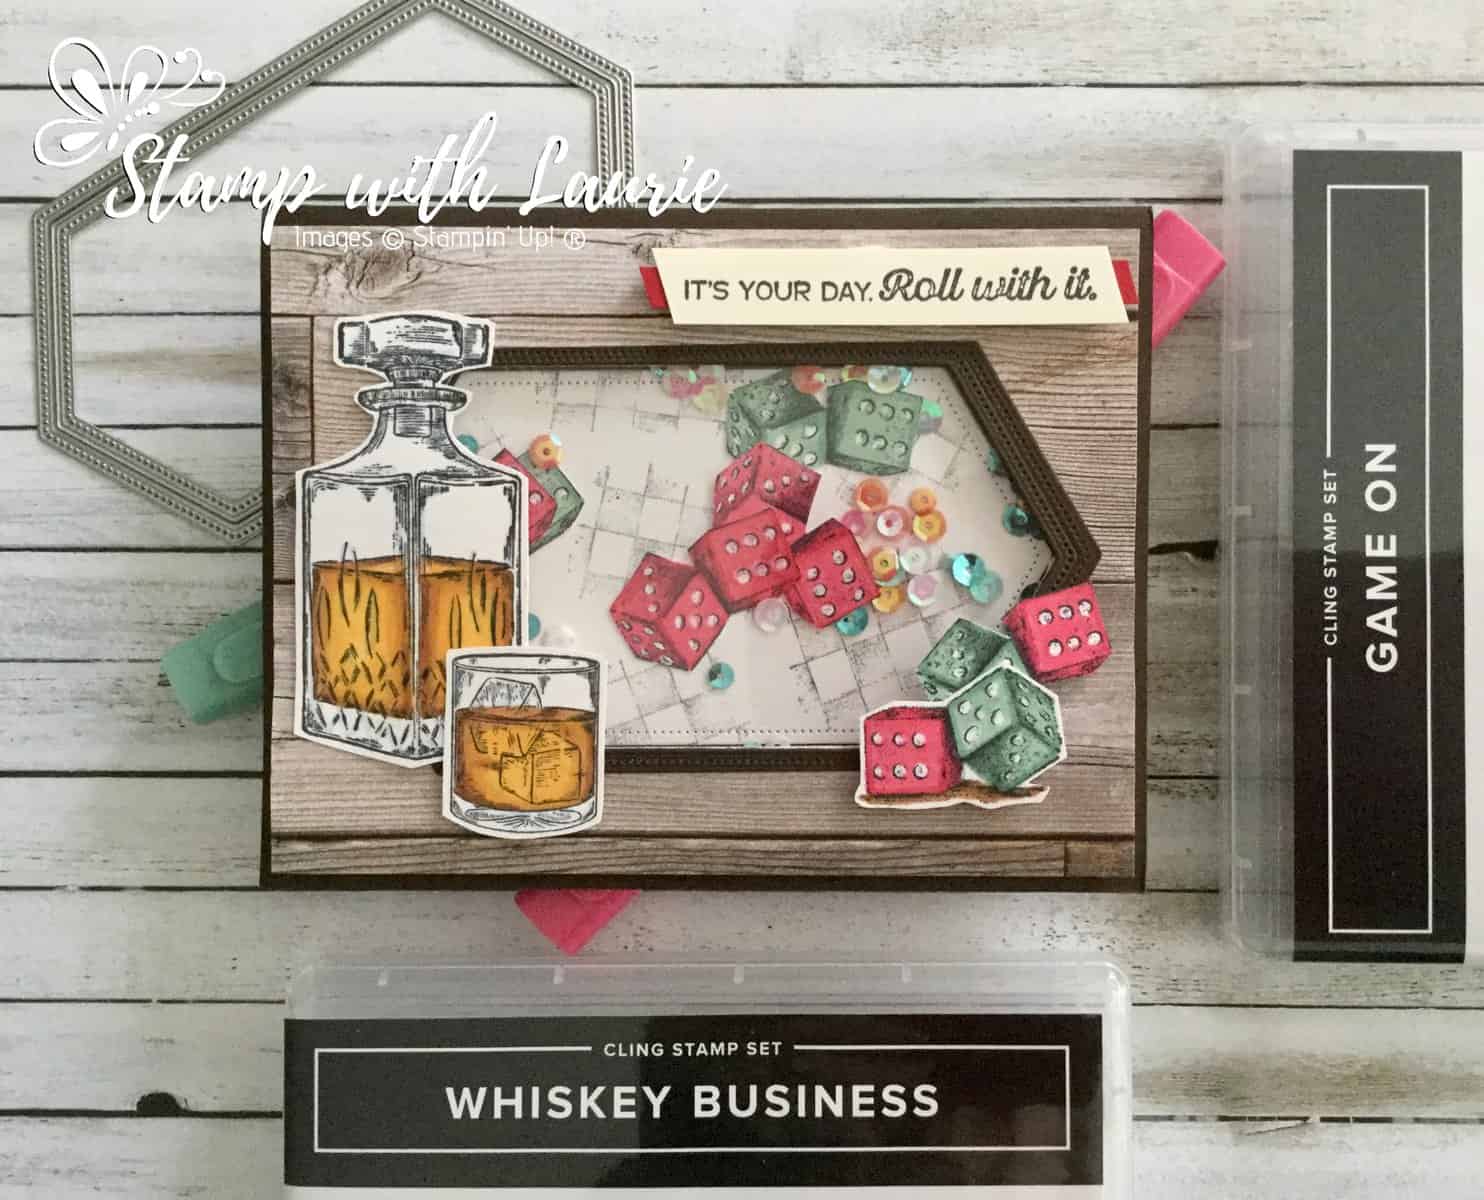
My Roll With It Shaker Card

My Roll With It Shaker Card

Tomorrow is my Hubby’s birthday! So, today I am sharing with you my Roll With It Shaker Card that I plan to give to him. I thought a shaker card would be so fun! It is using two stamp sets, Whiskey Business and Game On, that are perfect for him! We love to play games and have game time with our friends and family on a regular basis! Now he can shake the card and his dice will always come up 6 and 5! LOL! I even coloured the dice with the Real Red and Just Jade Stampin’ Blends to match the ones that he uses. In addition to gaming, he loves his single malt scotch and is always trying different types.

Details of My Roll With It Shaker Card

For my card, I wanted to create a masculine feel. So, the In Good Taste Designer Series Paper with Early Espresso card stock was perfect for it! I use the two largest Stitched Nested Labels to create my window frame. I stamped the checkerboard in Memento Black off twice before I randomly stamped it a third time on my Whisper White background piece. Once I did this, I created my shaker part with Foam Adhesive Strips, a piece of Window Sheet, a pinch of Woven Threads Sequins and my “dice”.

For the dice and the scotch, I stamped them on Whisper White with Memento Black. I then used my Stampin’ Blends to colour them. The dice were Real Red Dark/Light and Just Jade Dark/Light with Cinnamon Cider Dark/Light for the ground. The Scotch was Cinnamon Cider Dark/Light and Mango Melody Dark with Balmy Blue Light and Color Lifter for the glass. Once these were coloured, I fussy cut them out.

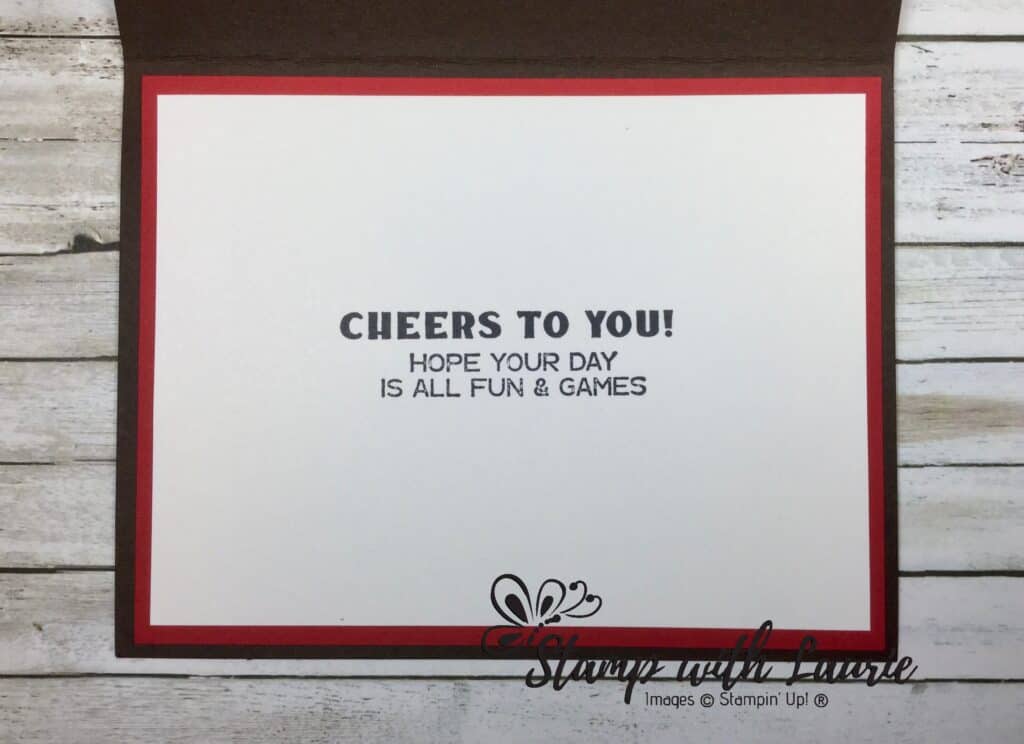
The sentiment stamped in Memento Black from Game On with a splash of Real Red behind it was perfect for my card! The finishing touch was decorating the inside by combining the two stamp sets again to create my sentiment.

Inside of Close Up of Dice from My Roll With It Shaker Card

My Roll With It Shaker Card in Action

My Roll With It Shaker Card in Action

Here is a video that I presented to some fellow demonstrators that shows how to colour with Stampin’ Blends the decanter from the Whiskey Business Stamp Set.

My Whiskey Business Colouring Tutorial

Supplies:

Stamps: Whiskey Business Stamp Set (152550), Game On Stamp Set (152646)

Dies: Stitched Nested Labels Dies (149638)

Inks:Tuxedo Black Memento Ink Pad (132708)

Paper: Real Red (102482), Early Espresso (119686), Whisper White (100730), Window Sheets (142314), In Good Taste Designer Series Paper(152494)

Accessories: Woven Threads Sequin Assortment(149498), Cinnamon Cider Stampin’ Blends Combo Pack (153105), Mango Melody Stampin’ Blends Combo Pack (154888), Balmy Blue Stampin’ Blends Combo Pack (148544), Stampin’ Blends Color Lifter (144608), Paper Snips (103579), Bone Folder (102300), Stampin’ Seal (152813), Stampin’ Dimensionals (104430), Foam Adhesive Strips (141825), Mini Glue Dots (103683)

Measurements: 

  • Early Espresso: 2 pieces of each
    • 8 ½” x 5 ½”; scored at 4 ¼”
    • 5” x 2 5/8” (shaker frame)
  • Whisper White: 4 pieces of each
    • 5” x 3” (background piece)
    • Scraps (dice, decanter, glass)
    • 3” x ½” (sentiment)
    • 4 ¾” x 4” (Inside of card)
  • Real Red: 2 pieces of each:
    • 5” x 4 ¼” (Inside of card)
    • Scrap
  • Window Sheet: 5” x 3”
  • In Good Taste Designer Series Paper: 5” x 4 ¼”

For Further Info:

Hope you like my Roll With it Shaker Card!

For another Whiskey Business Card, check out this link.

You will find the items listed above in my online store.

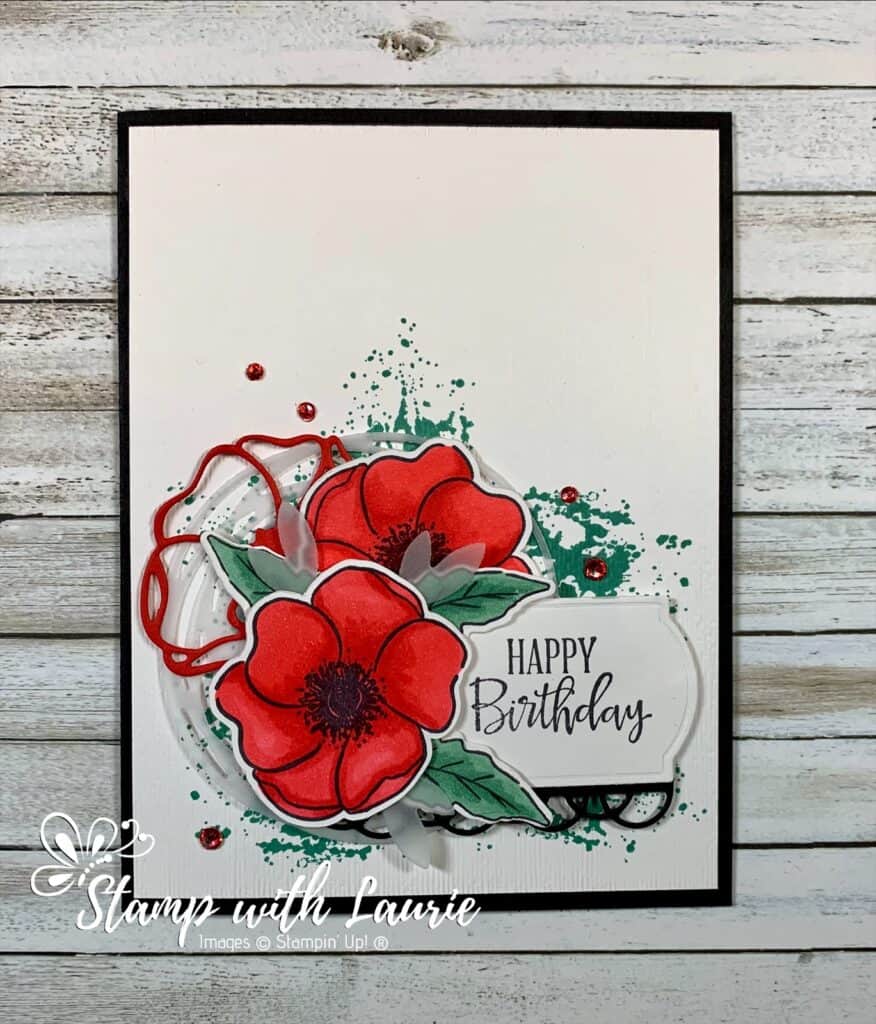
My Beautiful Poppy Birthday Card

My Poppy Birthday Card
My Beautiful Poppy Birthday Card

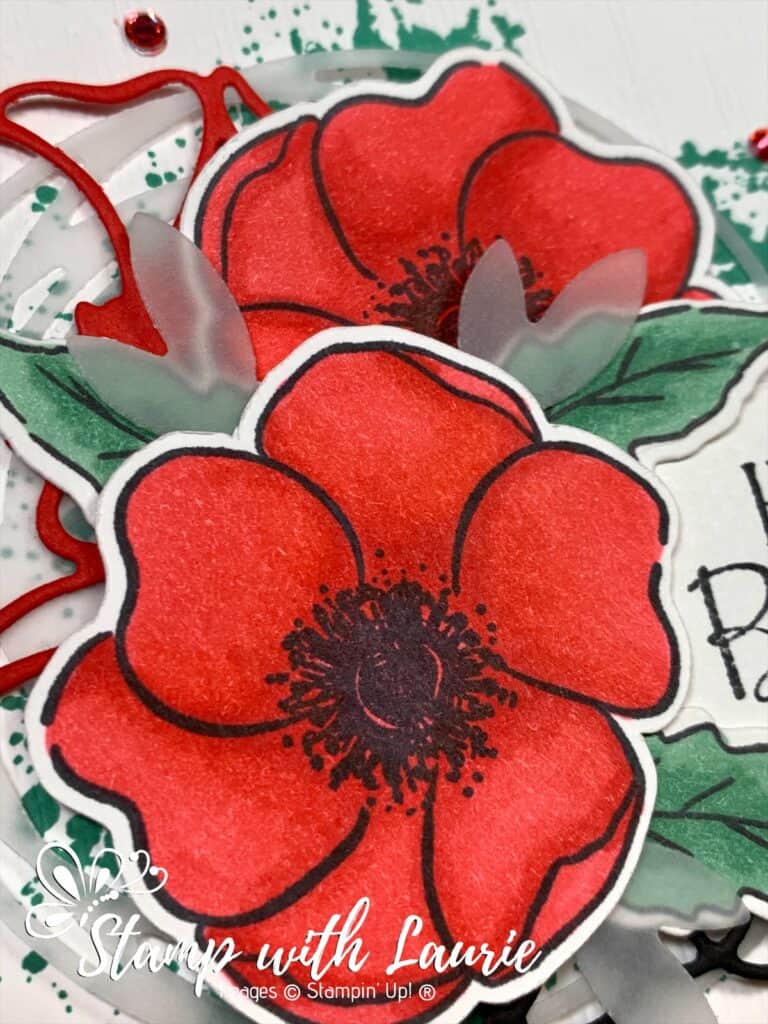
For Technique Tuesday, I am sharing my smooth colouring technique for my beautiful Poppy Birthday Card using the Painted Poppies Bundle. I used both this bundle and the Poppy Moment Dies for this stunning card. They compliment each other so well! Of course, I had to use Poppy Parade Stampin’ Blends to colour my poppies! I wanted to make the colouring the main focal point, but couldn’t resist using the Subtle 3D Embossing Folder on the Whisper White card stock once I stamped the Just Jade splotches. To add a bit of subtle dimension, I used Vellum for some of the leaves and the circular accent that grounds the piece. The Basic Rhinestones were coloured with the Dark Poppy Parade Stampin’ Blend to match my card.

For part 3 of my colouring videos with Stampin’ Blends, I am demonstrating the smooth colouring technique. The other 2 parts are listed below at the end of this document. One of the most exciting things about Blends, as the name suggests, is their blending capabilities. 

Smooth Colouring Technique

  • Apply a smooth layer in small circles of the lightest colour to your image. If you have a large area to cover, work in sections to keep the ink moist. This wet ink will help with the blending.
  • Add the dark colour where the shadows will be using a flicking motion to help with the blending process and reduce the amount of ink needed for a smooth blend.
  • Use the light colour to blend along the area where the dark and the light colours meet
  • You may need to go over it a few times to get it blended how you like.
  • Blends have the ability to lay down smooth, even colour without streaks
  • Colour in small circles keeping the leading edge wet and allow the ink to blend to create a seamless look
  • Make sure you saturate the entire area so that you eliminate any light or mottled areas
  • Check the back of your paper to make sure that the ink is saturating evenly
My Poppy Birthday Card Colouring Tutorial

Supplies:

Stamps: Painted Poppies Bundle (153827)

Inks: Tuxedo Black Memento Ink Pad (132708), Just Jade Classic Stampin’ Pad (153115)

Paper: Basic Black (121045), Whisper White (100730), Poppy Parade (119793), Vellum (101856)

Accessories: Poppy Moments Dies (151594), Subtle 3D Embossing Folder (151775 ), Rhinestone Basic Jewels (144220), Poppy Parade Stampin’ Blends Combo Pack (154958), Just Jade Stampin’ Blends Combo Pack (153107), Stampin’ Blends Color Lifter (144608 ), Paper Snips (103579), Bone Folder (102300), Mini Glue Dots (103683), Stampin’ Seal (152813), Stampin’ Dimensionals (104430)

Measurements: 

  • Basic Black: 8 ½” x 5 ½”; scored at 4 ¼”
    • Scraps for scallop die
  • Whisper White: 4” x 5 ¼”
    • 1 ½” x 2 ¾” (sentiment)
    • 2 pieces: 2” x 2” (for poppies)
    • Scraps for 3 leaves
  • Poppy Parade: 2 ¼” x 1 ½”
  • Vellum: 3” x 3” (circular accent)
    • Scraps for 3 leaves
Close Up of My Beautiful Poppy Birthday Card

Instructions for My Poppy Birthday Card: 

  1. Fold the Basic Black card stock in half to create the card base.
  2. Stamp the poppies and leaves in Tuxedo Black Memento Ink on Whisper White
  3. Colour the poppies and leaves with the Stampin’ Blends listed above using the video for reference when colouring the poppies
  4. Die cut the poppies and leaves with the corresponding dies from the Painted Labels Dies
  5. Using the Poppy Moments Dies, die cut the poppy outline in Poppy Parade
  6. Die cut a scrap of Basic Black card stock with the scallop border dies from the Painted Labels Dies
  7. Die cut a scrap of Vellum with the small leaves with the stem from the Poppy Moments Dies
  8. Using the Painted Labels Dies, die cut the circular accent in Vellum
  9. Stamp the sentiment in Tuxedo Black Memento Ink on Whisper White and die cut it out with the appropriate Painted Labels Dies
  10. Stamp the splotch in Just Jade in the bottom half of the Whisper White piece
  11. Emboss this piece with the Subtle Embossing Folder and adhere to the card base
  12. Using glue dots, adhere the Vellum circle to the card base
  13. Adhere the Basic Black scallop border to the sentiment and attach to the card base with dimensionals
  14. Using glue dots, adhere the Basic Black poppy center to the poppy frame and adhere to the Vellum circle with glue dots.
  15. Slip one of the poppies behind the sentiment and adhere with glue dots
  16. Adhere with glue dots, the leaves to the other poppy and place on card base with dimensionals
  17. Colour the Basic Rhinestones with the Dark Poppy Parade Stampin’ Blend and add to the card

For Further Info:

Hope you like my Poppy Birthday Card!

My Colouring Notes from my presentation:
https://stampwithlaurie.com/wp-content/uploads/2020/08/Stampin-Up-Blends-2020.pdf

Part 1: Whiskey Business Card using Blending Different Colours Technique
Video Tutorial: Blending Different Colours Together

Part 2: Country Harvest Card using Light to Dark Technique
Video Tutorial: Light to Dark/Dark to Light

Part 3: Beautiful Poppy Birthday Card using Smooth Colouring Technique
Video Tutorial: Smooth Colouring

Part 4: Let’s Gather Together Card using Tip to Tip Blending Technique
Video Tutorial: Tip to Tip Colouring

Part 5So Grateful Cardinal Card using Flicking Colouring Technique
Video Tutorial: Flicking Colouring

Part 6: Let’s Celebrate You Card using Flicking of Different Colours Technique
Video Tutorial: Flicking of Different Colours Technique

You will find the items listed above in my online store.