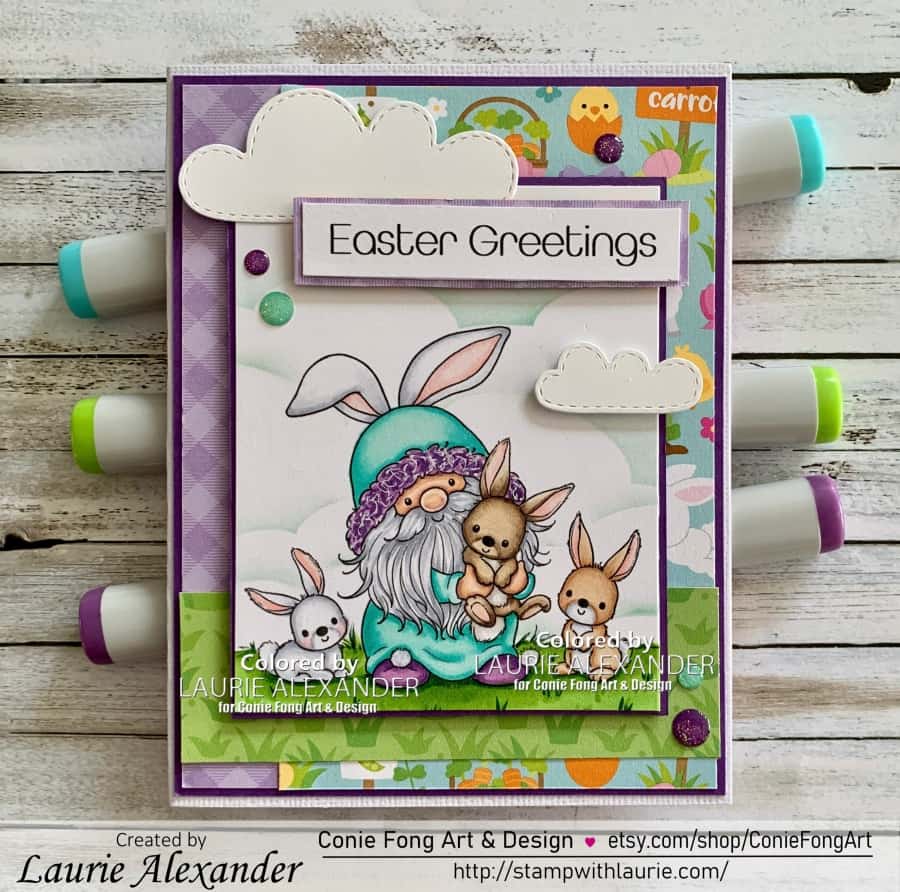
My Easter Greetings Card

A card with a gnome in a bunny costume.
My Easter Greetings Card

Hello Crafty Friends! It’s Laurie here! Easter is just around the corner! So, I am sharing My Easter Greetings Card as my Design Team Inspiration for Conie Fong Art & Design using Easter Bunny Gnome and Sentiment Bundle. This cutie comes with 8 digital stamps including:

Easter Bunny Gnome PNG
Easter Bunny Gnome – No Bowtie PNG
Bunny V1 PNG
Easter Bunny Gnome With Background PNG
Easter Bunny Gnome With Background – No Bowtie PNG
Bunny V2 PNG
Easter Greetings Sentiment PNG
Egg PNG

So many choices, but in the end, I used Easter Bunny Gnome With Background – No Bowtie.

The Details of My Card

For my card, I decided to colour the gnome’s outfit in Easter colours of purple and blue/green. For the trim on his hat, I did some colouring called stumbling. It is something I learned recently and thought it would look neat for his trim. Stumbling is where you do squiggles in different colours building it up to create dimension.

I thought I would create a scene since these cuties came with a background. So, once I finished colouring everything, I pulled out my Krafty Basics Stencil and sponge some clouds in the sky. A couple of die cut clouds added some dimension. I layered the sentiment onto a cloud to add some visual interest. A scattering of glitter dots helped tie in my colour scheme.

————————–

Copic Markers:

Skin: E000/E00/E21/E11/E04
Hair: C4/C3/C1
Blue/Greens: BG15/BG13/BG11/BG10
Purples: V17/V15/V12
Bunny Ears: C3/C1/0/R20/R00
Pom Poms: C3/C1/0
White Bunny: C3/C1/0/R20/R00
Right Bunny: E33/E31/E30/R20/R00/C3/C1/0
Bunny in Arms: E44/E43/E419/W3/W1/R20/R00
Grass: G28/YG25/YG23/YG11
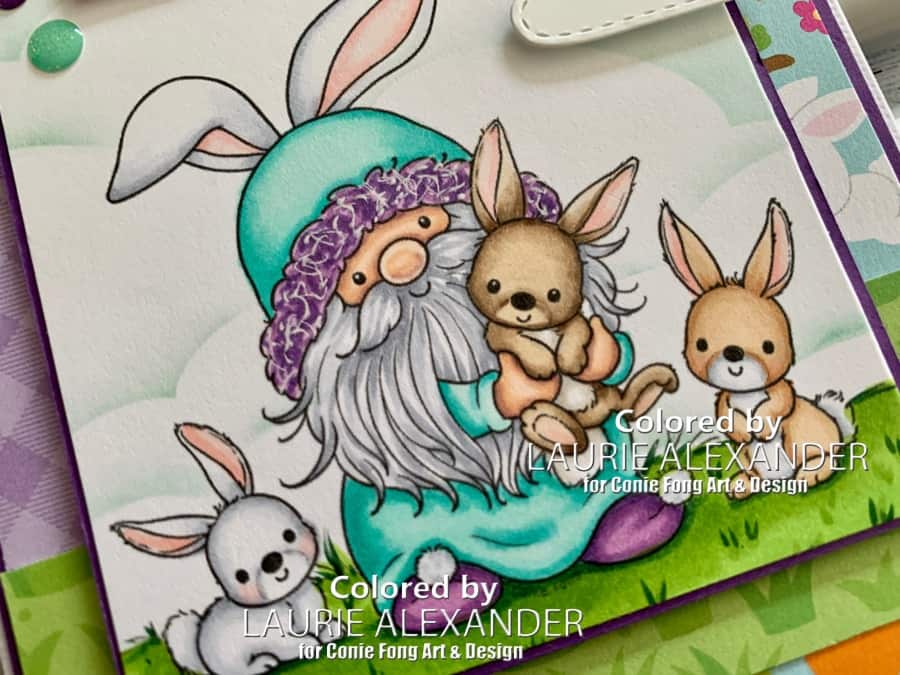
Close Up of Card
Close Up of Easter Bunny Gnome

————————–

Card Recipe for My Easter Greetings Card:

Easter Bunny Gnome and Sentiment Bundle, Conie Fong Art & Design
Paper Basics – Stamper’s Select White Cardstock, Papertrey Ink
Hoppy Easter 12” x 12” Paper Pack, Doodlebug Design Inc.
Spring Showers Dies, Lawn Fawn
Krafty Basics Stencil, Kraftin’ Kimmie Stamps
Pool Party Classic Stampin’ Pad, Stampin’ Up!
Blending Brushes, Stampin’ Up!
Glitter Enamel Dots, Stampin’ Up!
White Gelly Roll Pen, Sakura
Black Gelly Roll Pen, Sakura
Gorgeous Grape and Basic White Card Stock, Stampin’ Up!

Finished card size: 5.5” x 4.25”

————————–

To view my other Conie Fong Art & Design projects, please click here.

Hope you like my Design Team Inspiration Card using
Easter Bunny Gnome and Sentiment Bundle for Conie Fong Art & Design!

Thank you for stopping by!

Hugs,
Laurie

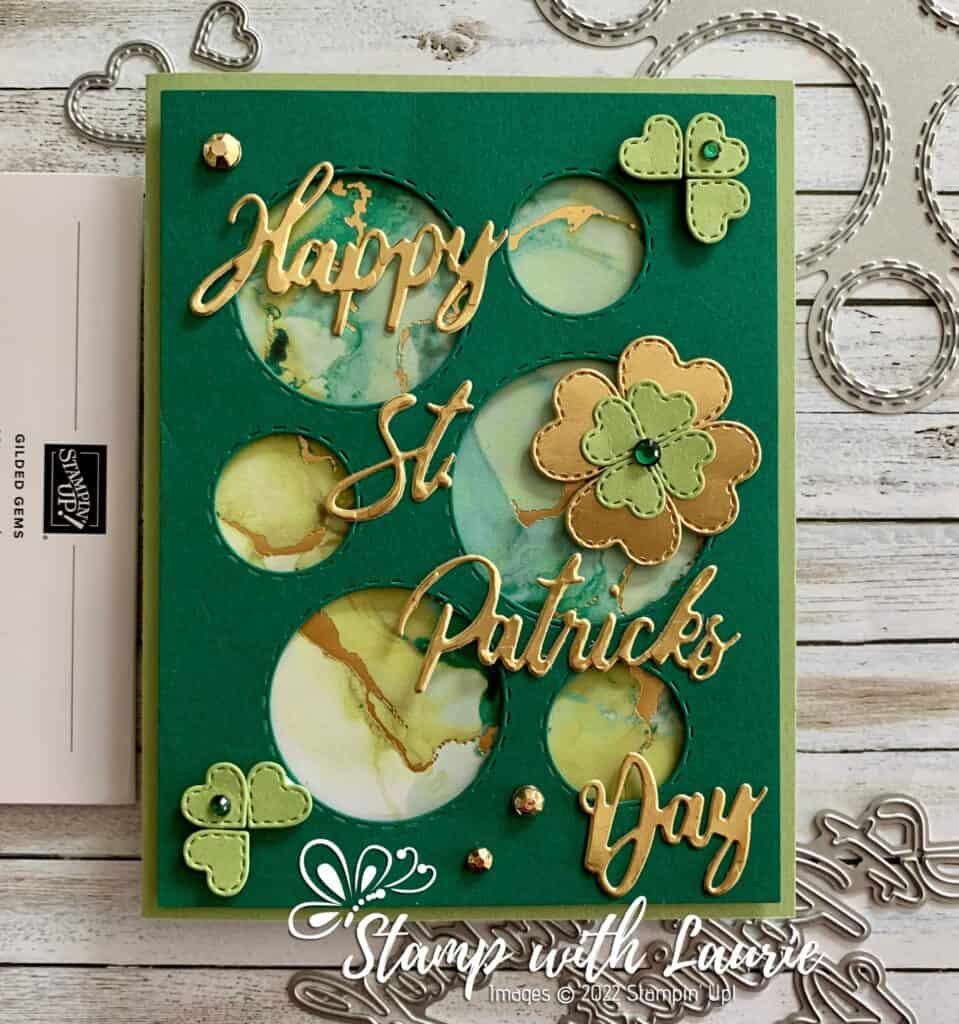
Happy St. Patrick’s Day Card

Happy St. Patrick’s Day Card

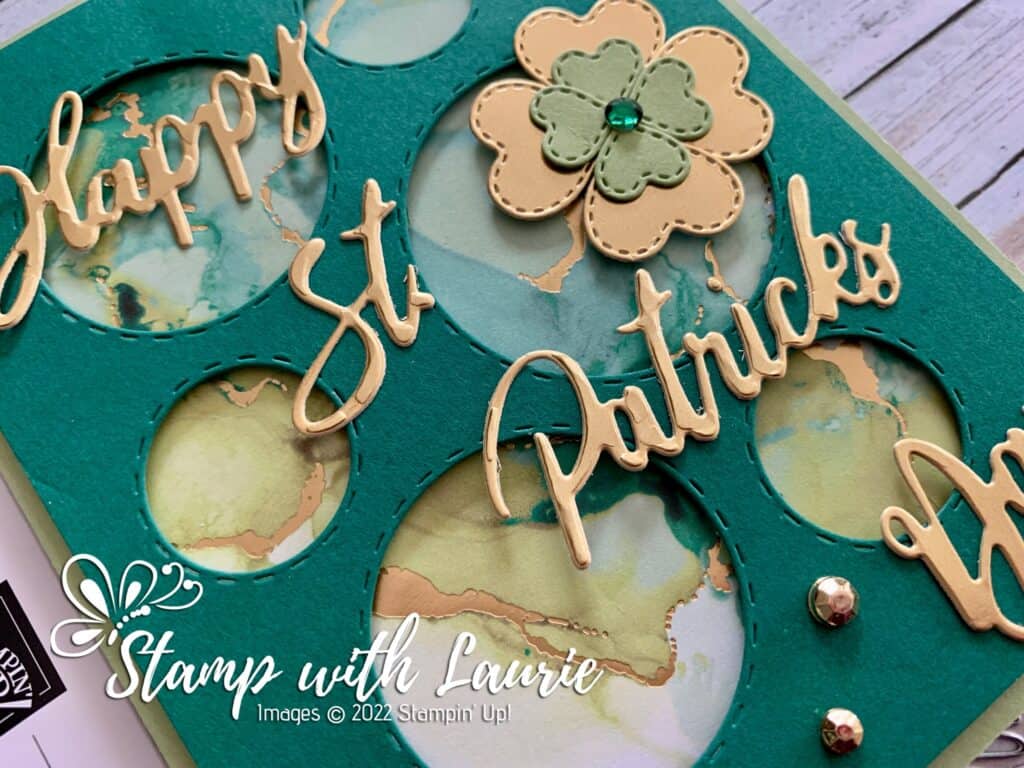
Hello Crafty Friends! Happy St. Patrick’s Day! Laurie here again! I am sharing my Happy St. Patrick’s Day Card using the Word Wishes Dies and the Give It A Whirl Dies by Stampin’ Up! 

The Details of My Card

For my card, I decided to use several dies to create a card to celebrate St. Patrick’s Day. My starting point was the beautiful Expressions in Ink Specialty Designer Series Paper. The piece of DSP I used had these beautiful swirls in Shaded Spruce and Pear Pizzazz with gold foiling. Perfect colours for St. Patrick’s Day! I decided to use the Picture This Dies so that the DSP can peek through. A layering of the sentiment in matching gold foil are staggered down the front of the card. Since, I didn’t have shamrock dies, I used the stitched hearts from the Give it a Whirl Dies to create them by placing them side by side. A scattering of Gilding Gems and Shaded Spruce Rhinestones add some sparkle to the card!

Supplies:

Stamps/Bundles/Dies: Word Wishes Dies (149629), Picture This Dies (155559), Give It a Whirl Dies (154336)

Paper: Pear Pizzazz (131201), Shaded Spruce (146981), Expressions in Ink Specialty Designer Series Paper (155464), Gold Foil Sheets (132622)

Accessories: Gilded Gems (152478), Holiday Rhinestone Basic Jewels (150457), Bone Folder (102300), Stampin’ Dimensionals (104430), Stampin’ Seal (152813), Mini Glue Dots (103683)

Close Up of Card with shamrocks on it
Close Up of Card

Measurements: 

  • Pear Pizzazz:
    • 5 ½” x 8 ½” scored a 4 ¼”
    • Hearts: Scraps
  • Shaded Spruce: 5 ¼” x 4”
  • Expressions in Ink Specialty Designer Series Paper: 5 1/8” x 3 7/8”
  • Gold Foil Sheets:
    • Happy: 2” x 1-1/8”
    • St. Patrick’s: 3-1/8” x 1-1/16”
    • Day: 1-3/16” x 15/16
    • Hearts: (4 pieces) 1” x 1-1/8”

More Information on my Happy St. Patrick’s Day Card:

For more of my Stampin’ Up! cards, please click here.

You will find the items listed above in my online store.

From the Herd Birthday Card

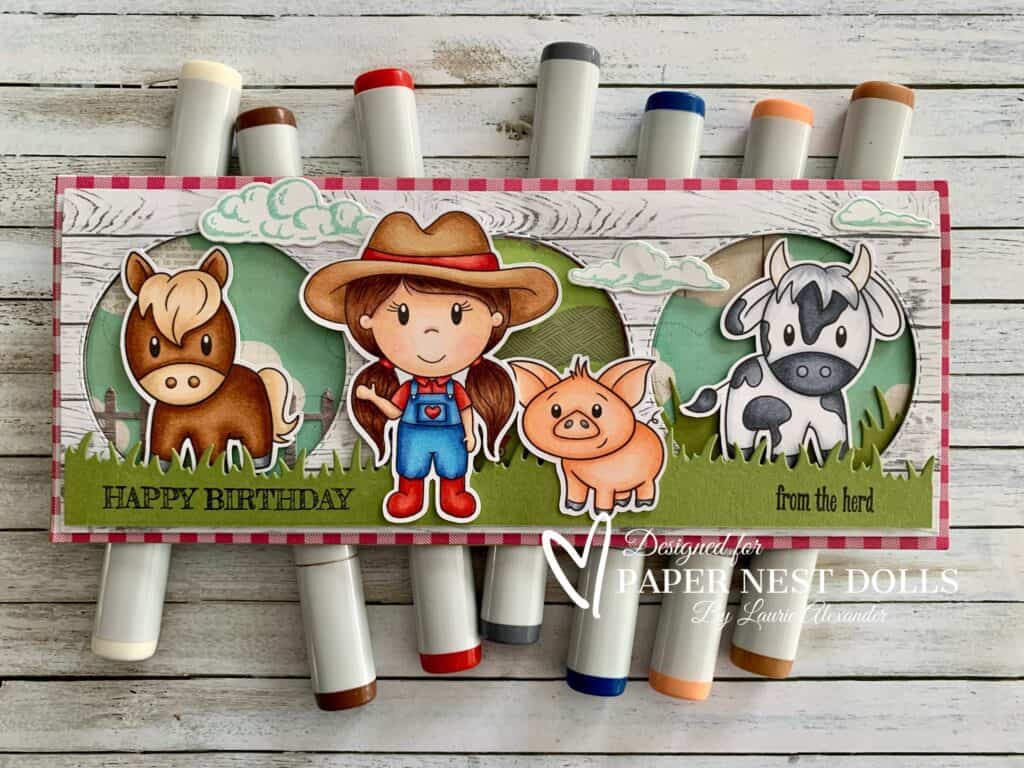
Card with farmers horse, cow and pig on it
From the Herd Birthday Card

Hello Crafty Friends! It’s Laurie here! I am sharing my From the Herd Birthday Card using Down on the Farm by Paper Nest Dolls for my Design Team Inspiration Card. This bundle comes with 15 digital stamps including 5 dolls, horse, cow, pig, ewe, chicken coop, tractor, hay, corn, sunflowers and so many more.

The Details of My Card

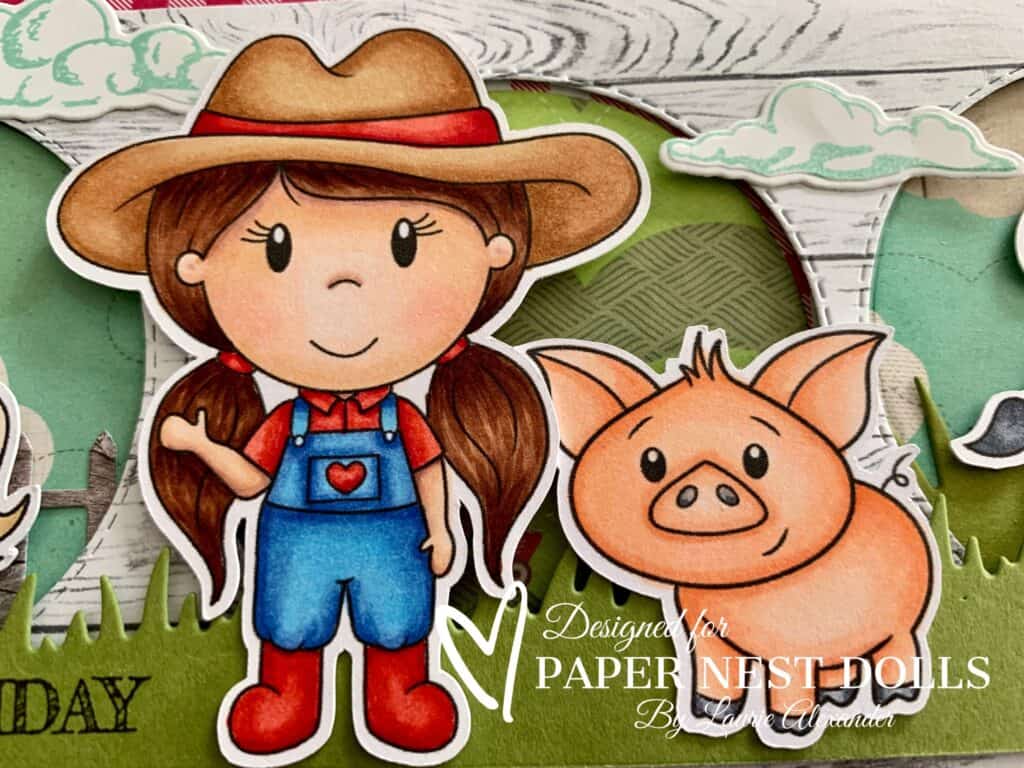
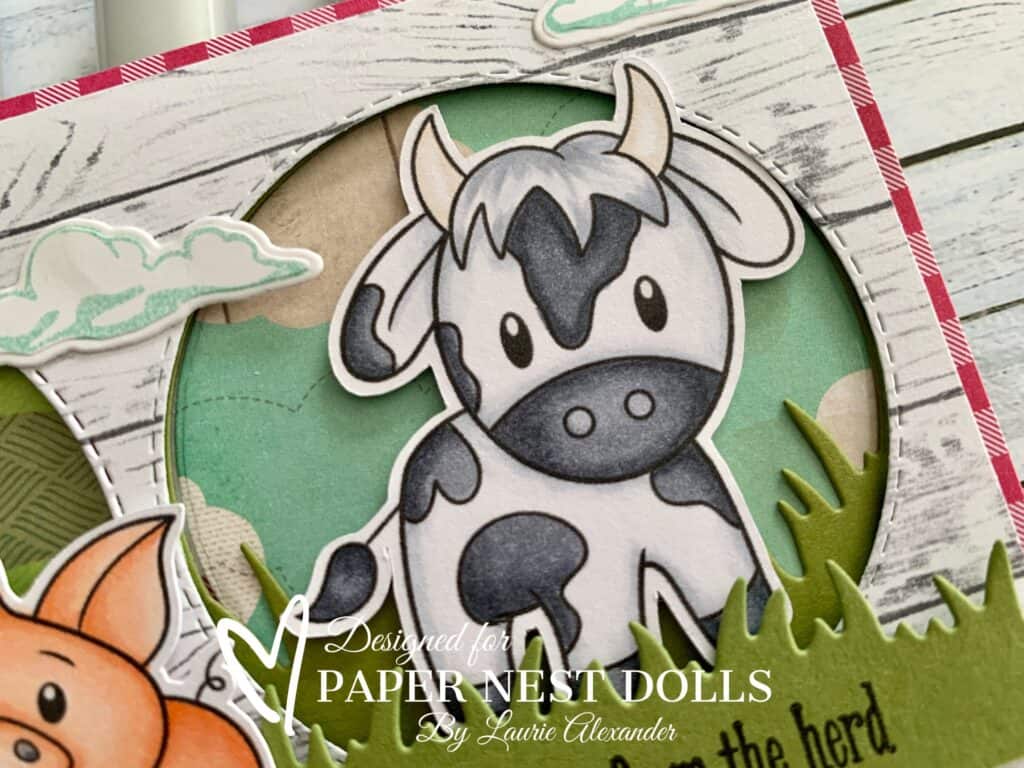
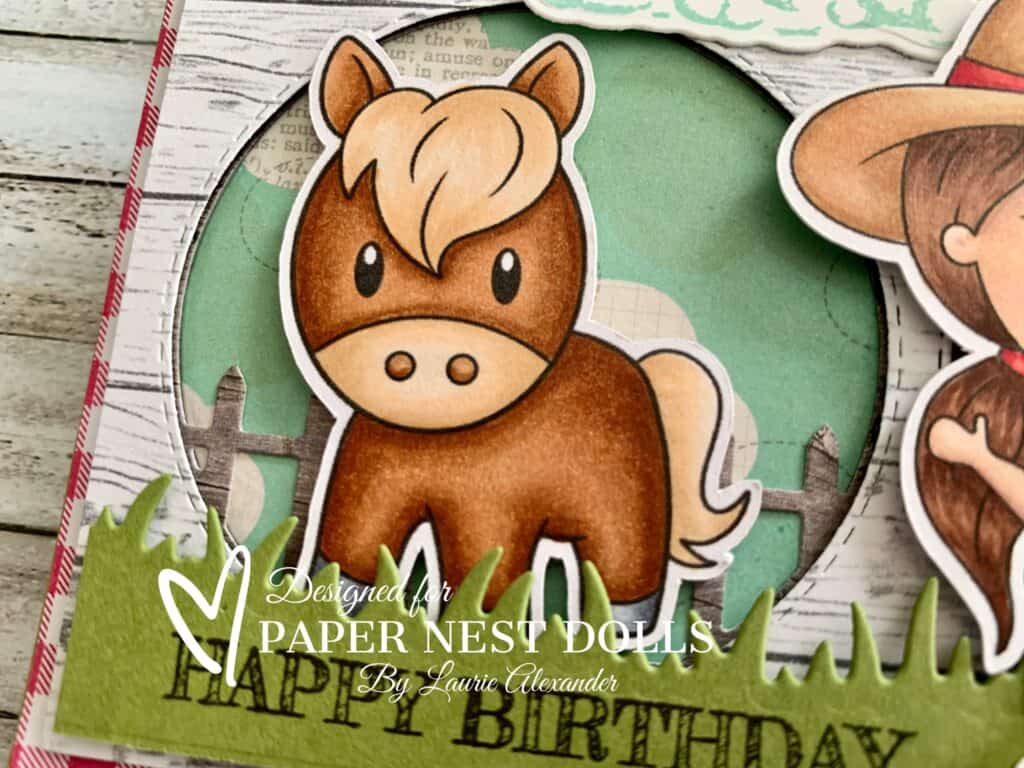
For my card, I decided to create a slimline card to fit my characters. So, I used my new Picket Fences Diecutting System with the circle dies since one was a fence and the other was grass. Perfect for my farm card! I die cut the fence out of some paper that looked like wood. I added sky paper behind the cow and horse but added a farmer’s field paper behind the girl and pig. To add to my farm theme, I use some wooden boards paper to create my vignettes of the scenes. I wanted the girl and pig to stand out. So, I placed them in front of everything on the die cut grass that has the stamped sentiment. Don’t you just love the sentiment, “Happy Birthday from the Herd. Lol!

————————–

Copic Markers:

Horse
Coat: E37/E35/E33
Mane: E53/E51/E50
Hoofs: C6/C4/C3

Close Up of Horse on Card

Girl Farmer
Skin: E000/E00/E21/E11/E04
Hair: E29/E27/E25/E23
Shirt/Boots: R29/R27/R24/R22
Pants: B26/B23/B12
Hat: E35/E33/E31/R29/R27/R24/R22

Pig
Skin: YR02/YR00/E01/E000
Hoofs: C6/C4/C3

Close Up of Girl Farmer and Pig

Cow
Hide: C7/C6/C4/C3/C0/0
Hair: C3/C0
Hoofs: C6/C4/C3
Horns: E41/E40/0

Close Up of Cow on Card

————————–

Card Recipe for My From the Herd Birthday Card:

Down on the Farm, Paper Nest Dolls
Paper Basics – Stamper’s Select White Cardstock, Papertrey Ink
I {Heart} Summer Paper Pad, Simple Stories
Cock-a-doodle-doo! Paper Pad, Kaiser Craft
In Good Taste Designer Series Paper, Stampin’ Up!
Heart & Home Designer Series Paper, Stampin’ Up!
Gingham Garden Designer Series Paper, Stampin’ Up!
Slim Line Diecutting System, Picket Fence Studios
Build a Fairy Garden Die Set, Whimsy Stamps
Windmill Fields Dies, Stampin’ Up!
Tulip Fields Stamp Set, Stampin’ Up!
From the Herd Stamp Set, Stampin’ Up!
VersaFine Black Ink, Tsukineko
Pool Party Classic Ink Pad, Stampin Up!
Old Olive and Basic White Card Stock, Stampin’ Up!

Finished card size: 8.5” x 3.5”

————————–

To view my other Paper Nest Dolls cards, please click here.

Hope you like my Design Team card using
Down on the Farm by Paper Nest Dolls!

Thank you for stopping by!

Hugs,
Laurie
Heartfelt Sunflower Wishes Card

A card with a Sunflower on it
Heartfelt Sunflower Wishes Card

Hello Crafty Friends! Laurie here again! I am sharing my Heartfelt Sunflower Wishes Card using the Celebrate Sunflowers Bundle by Stampin’ Up! This bundle is currently on sale for the March 2022 Savings Are in Bloom Sale. Check it out in my online store: https://www.stampinup.ca/products/celebrate-sunflowers-bundle-(english)?demoid=2103981.

The Details of My Card

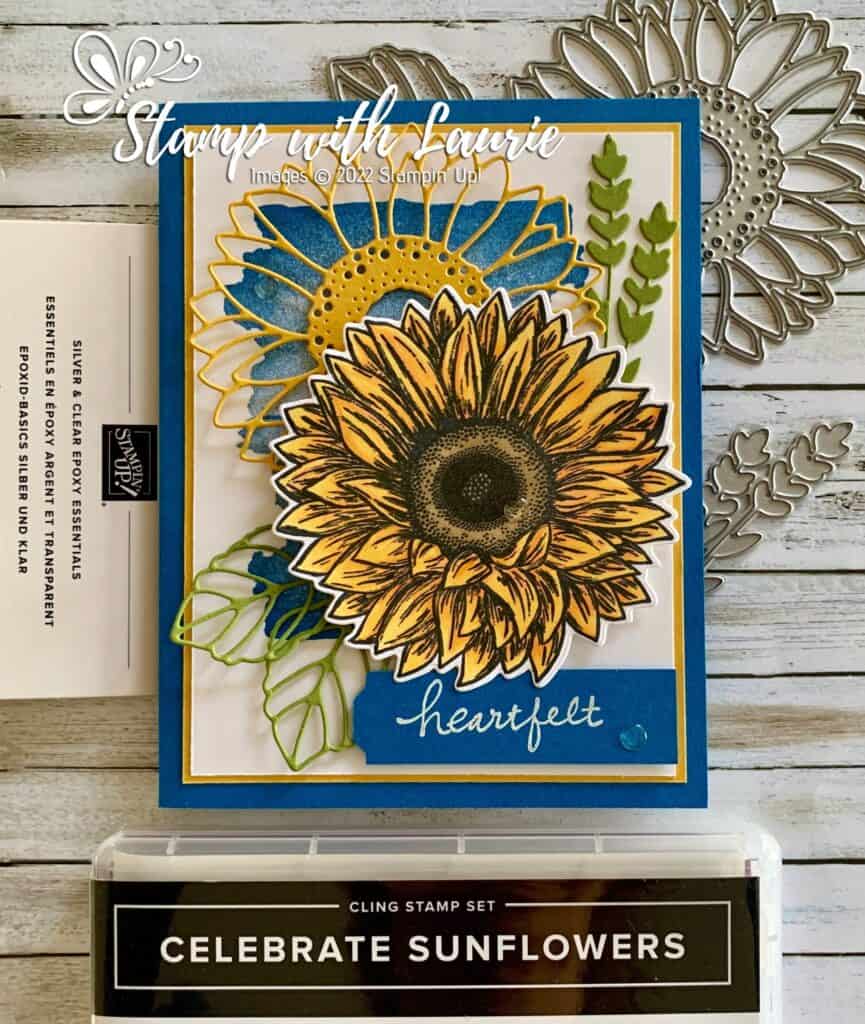
For my card, I wanted to show my support for the Ukraine people. My heart bleeds for them and anyone who are affected by this war! So, I decided to create a sunflower card since it is their national flower. I also decided to use Bumblebee and Pacific Point as my card stock choices to reflect the colours of the Ukrainian flag. 

To highlight the sunflowers, I stamped in Pacific Point the sky stamp from the Oceanfront Stamp Set a couple of times on the Basic White card stock. I love how it peeks out from the top die cut sunflower! Once that was done, I layered my pieces. The sentiment was heat embossed with white embossing powder and punched out with the Lovely Labels Pick a Punch. A scattering of epoxy shapes represents the “tears of the people” in my mind.

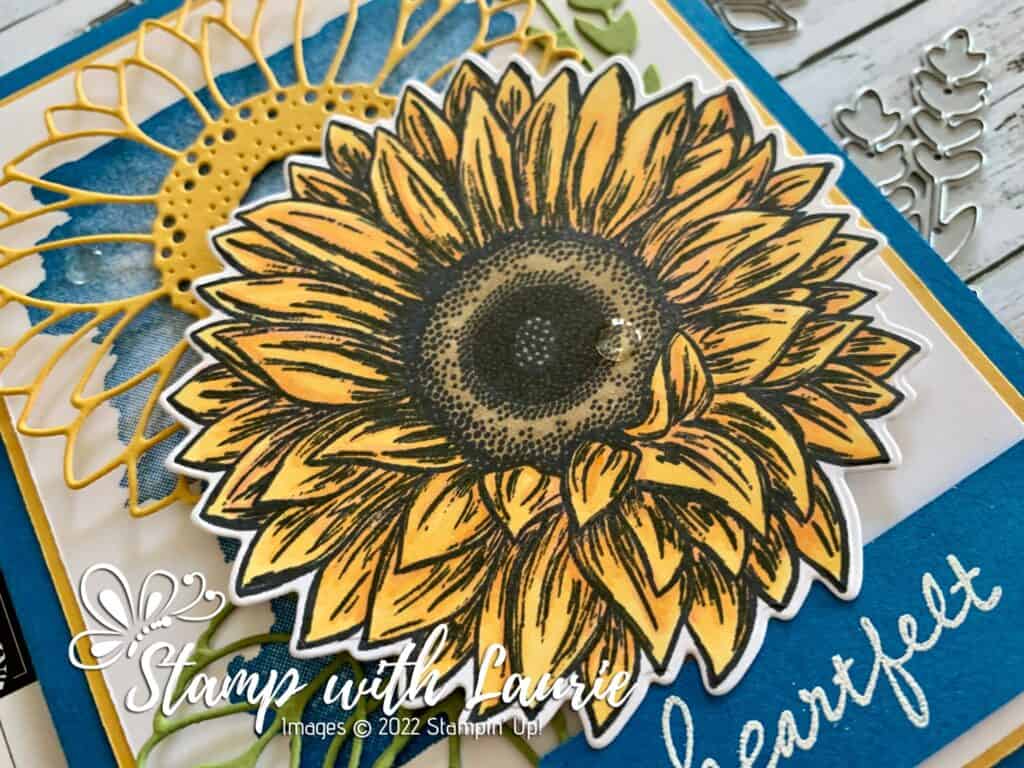
I have created several cards with this bundle in the past. I will include links to the cards at the bottom of this post. There is even a quick video on YouTube explaining the advanced colouring technique I used on the sunflower.

Colouring Video of Sunflower

Supplies:

Stamps/Bundles/Dies: Celebrate Sunflowers Bundle (154065), Oceanfront Stamp Set (157862), Lovely You Stamp Set (152525)

Inks: Tuxedo Black Memento Ink Pad (132708), VersaMark Ink (102283), Pacific Point Classic Stampin’ Pad (147098)

Paper: Pacific Point (111350), Bumblebee (153077), Basic White (159276), Old Olive (100702)

Accessories: Lovely Labels Pick a Punch (152883), Silver & Clear Epoxy Essentials (155567), Basics Embossing Powder (155554), Mango Melody Stampin’ Blends Combo Pack, Calypso Coral Stampin’ Blends Combo Pack (154881), Soft Suede Stampin’ Blends Combo Pack (154906), Stampin’ Blends Color Lifter (144608), Heat Tool (129053), Bone Folder (102300), Stampin’ Dimensionals (104430), Stampin’ Seal (152813), Mini Glue Dots (103683)

Close Up of the Coloured Sunflower on the card
Close Up of Coloured Sunflower on Card

Measurements: 

  • Pacific Point: (2 pieces)
    • 5 ½” x 8 ½” scored a 4 ¼”
    • Scrap (sentiment)
  • Bumblebee: (2 pieces)
    • 5 1/8” x 3 7/8”
    • 3 5/16” x 3 ¼” (sunflower)
  • Old Olive: (3 pieces)
    • Scraps (leaves – 3 pieces)
  • Basic White: (2 pieces)     
    • 3 ¾” x 5”
    • 3 5/16” x 3 ¼” (sunflower)

More Information on my Heartfelt Sunflower Wishes Card:

For more of my Stampin’ Up! cards, please click here.

For the other items on sale, please click here.

For the Celebrate Sunflowers Bundle, please click here.

You will find the items listed above in my online store.

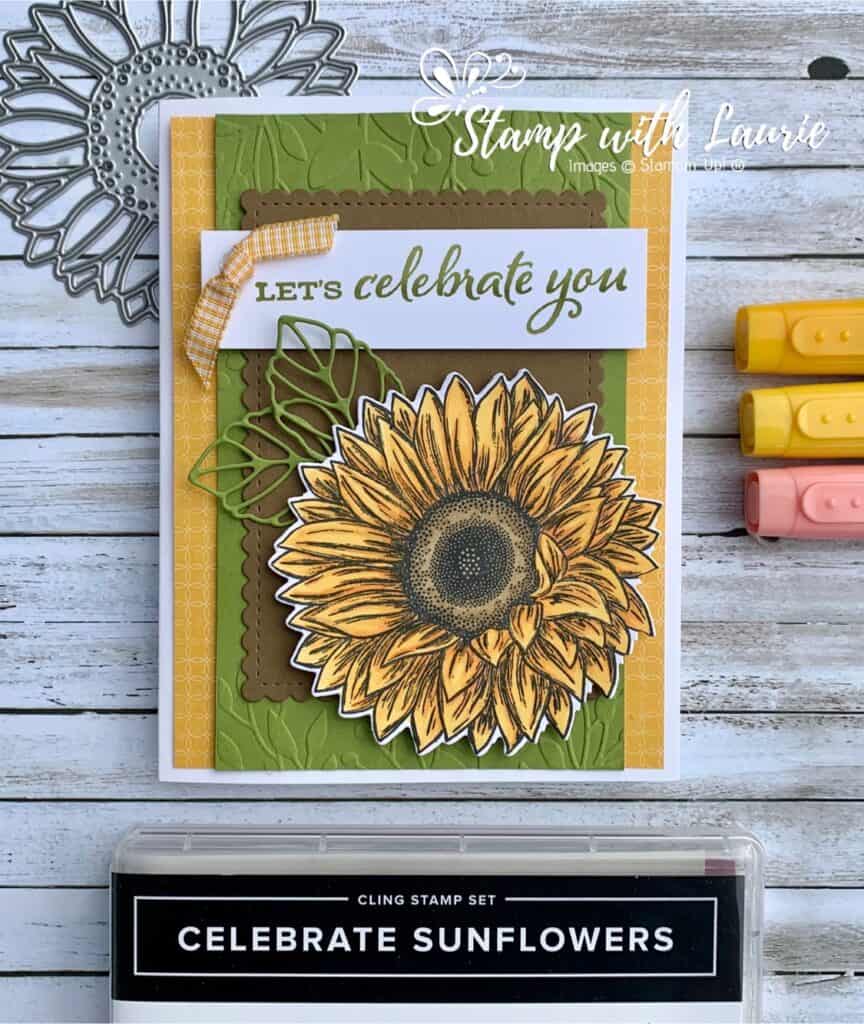
Let’s Celebrate You Card

Link to post: https://stampwithlaurie.com/lets-celebrate-you-card/

Video Tutorial: Flicking of Different Colours Technique

Let's Celebrate You Card
Let’s Celebrate You Card

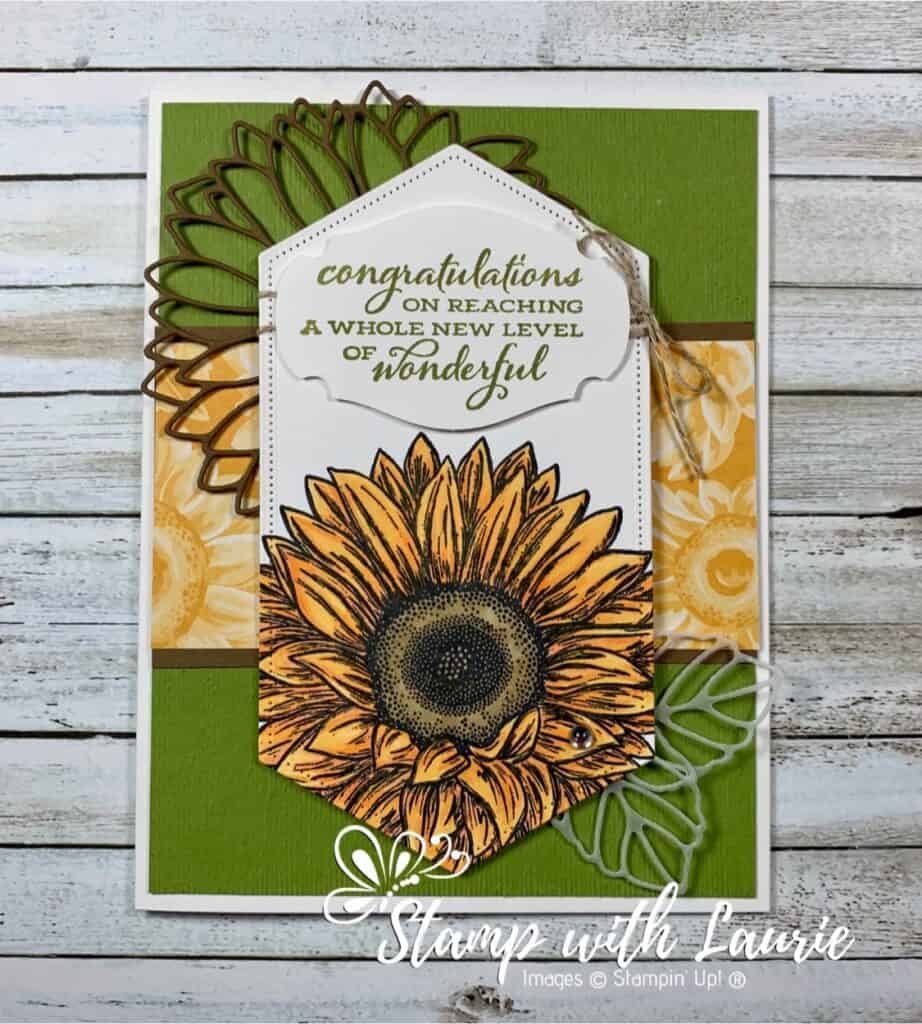
My Congratulations Card

Link to post: https://stampwithlaurie.com/my-congratulations-card/

My Sunflower Congratulation Card

I’m sharing my card at the following challenges:

Color Hues-Special Double Challenge: Blue and Yellow
The Flower Challenge #66 Use Scraps

My Snowy Birthday Card

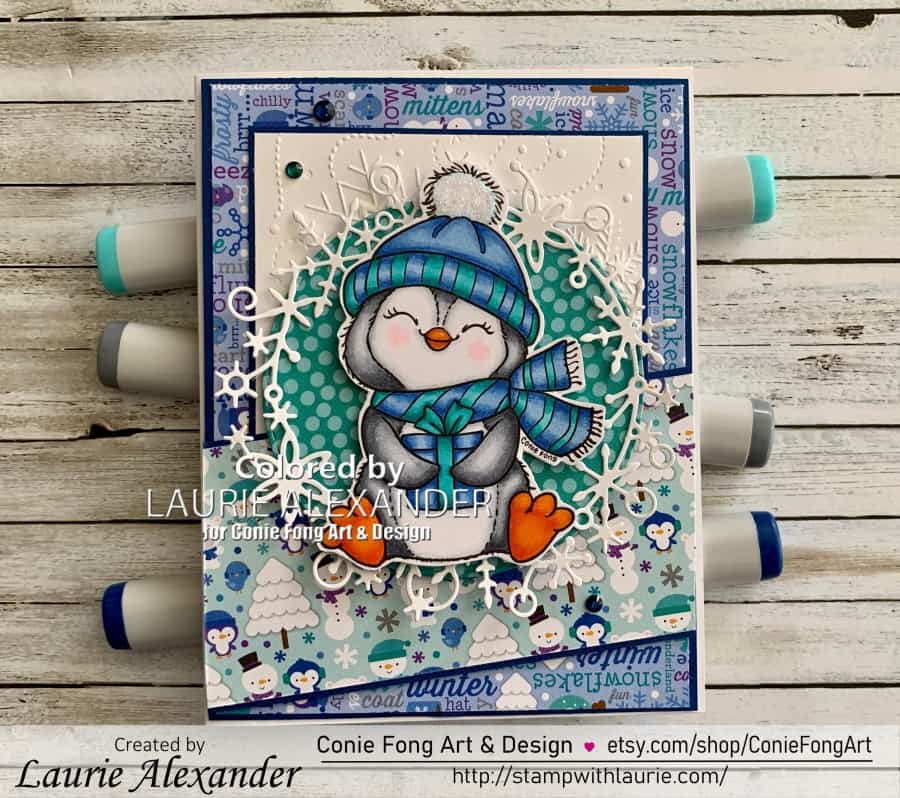
Card with Penguin holding present
My Snowy Birthday Card

Hello Crafty Friends! It’s Laurie here! I am sharing My Snowy Birthday Card as my Design Team Inspiration for Conie Fong Art & Design using Snowy With Present. This cutie is a free digital stamp in the Conie Fong Art & Design Group on Facebook. You can find him here with some other freebies: https://www.facebook.com/media/set/?set=oa.439587832883062&type=3.

The Details of My Card

This cutie can be used for so many things like Christmas, Valentine, Baby, Anniversary, Birthday, basically any kind of celebration! I have several winter birthdays and I decided that he would be perfect for one of my birthday cards.

I coloured him with my Copic markers to match my paper. The Doodlebug Paper was perfect for my wintery theme, and it had the cutest penguins on it! To add to my wintery theme, I embossed some white card stock with snowflakes and added a snowflake wreath to frame my focal point. A couple of rhinestones tied in the colour scheme and added sparkle.

————————–

Copic Markers:

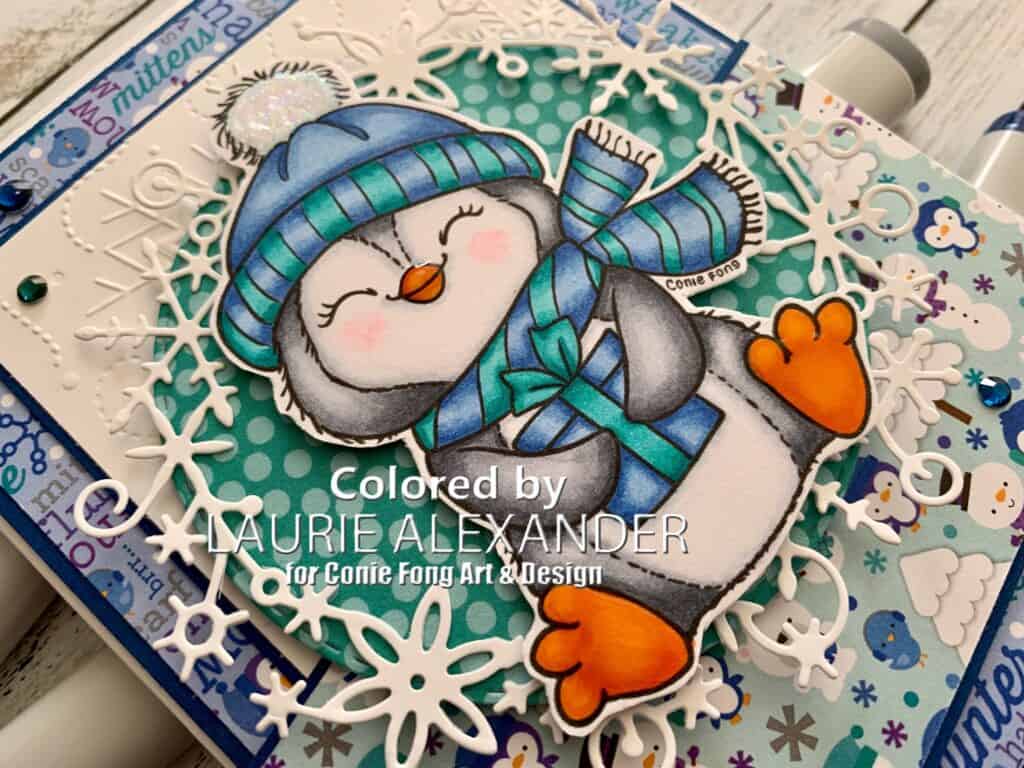
Fur: C7/C5/C3/C1
Beak/Feet: YR68/YR16/YR15/Glossy Accents
Blues: B26/B23/B12
Blue/Greens: BG49/BG15/BG45

Close up of Penguin with present on card
Close Up of Snowy With Present

————————–

Card Recipe for My Snowy Birthday Card:

Snowy With Present, Conie Fong Art & Design
Paper Basics – Stamper’s Select White Cardstock, Papertrey Ink
Frosty Friends 6” x 6” Paper Pad, Doodlebug Design Inc.
Frostyville Wreath Die, Memory Box
Stitched Layering Circle Dies, Memory Box 
Wintery 3D Embossing Folders, Stampin’ Up!
Noble Peacock Rhinestones, Stampin’ Up!
White Gelly Roll Pen
Star Dust Stickles, Ranger
Glossy Accents, Ranger
Blueberry Bushel and Basic White Card Stock, Stampin’ Up!

Finished card size: 5.5” x 4.25”

————————–

To view my other Conie Fong Art & Design projects, please click here.

Hope you like my Design Team Inspiration Card using
Snowy With Present for Conie Fong Art & Design!

Thank you for stopping by!

Hugs,
Laurie
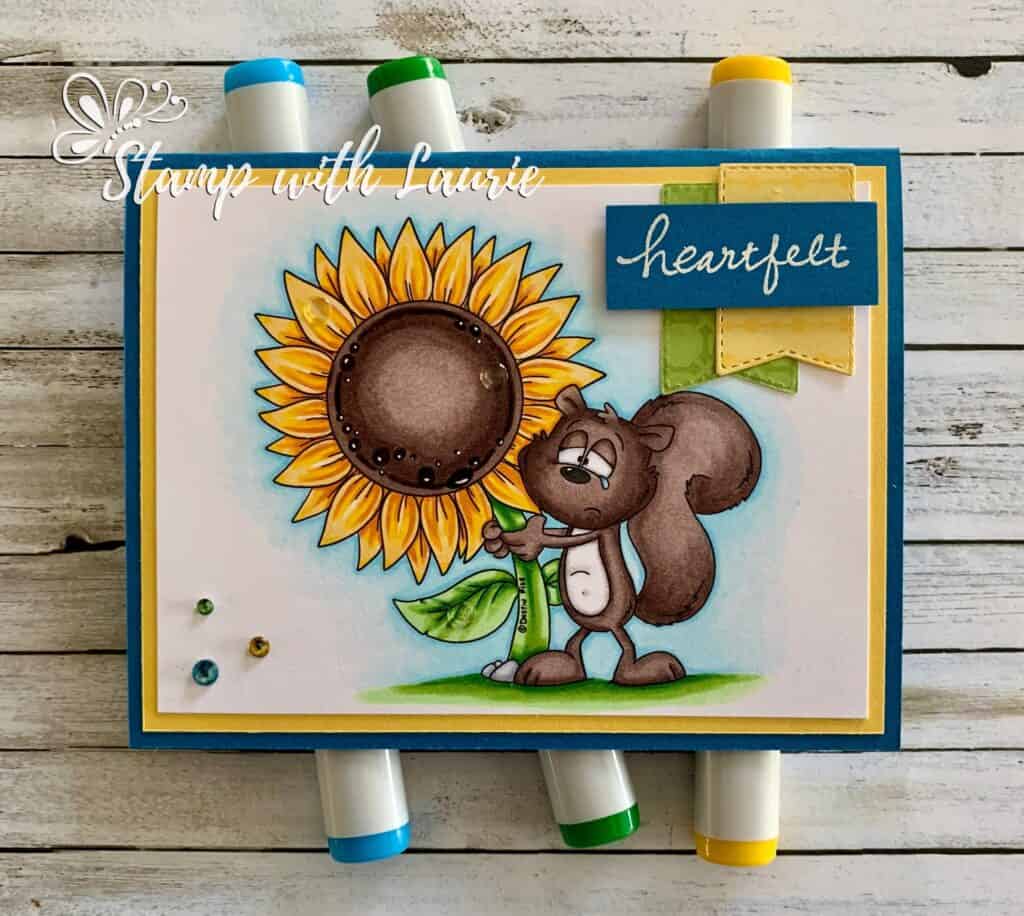
My Tears for Ukraine Card

Squirrel holding a sunflowers with tear in his eye
My Tears for Ukraine Card

Hello Crafty Friends! It’s Laurie here! I am sharing My Tears for Ukraine Card using the Clarence with Sunflower for Ukraine illustrated by Dustin Pike for The Rabbit Hole Designs. The people at TRHD were kind enough to make this stamp free so that we can all show our support for the Ukraine.

This stamp really sums up how I feel about all the unrest going on with Russia and the Ukraine! My heart bleeds for the Ukraine! So, I wanted to show my support in the best what I can…through my crafting!

The Details of My Card

For my card, I decided to make the stamp the focal point with minimal embellishments and paper since this card is all about the message!

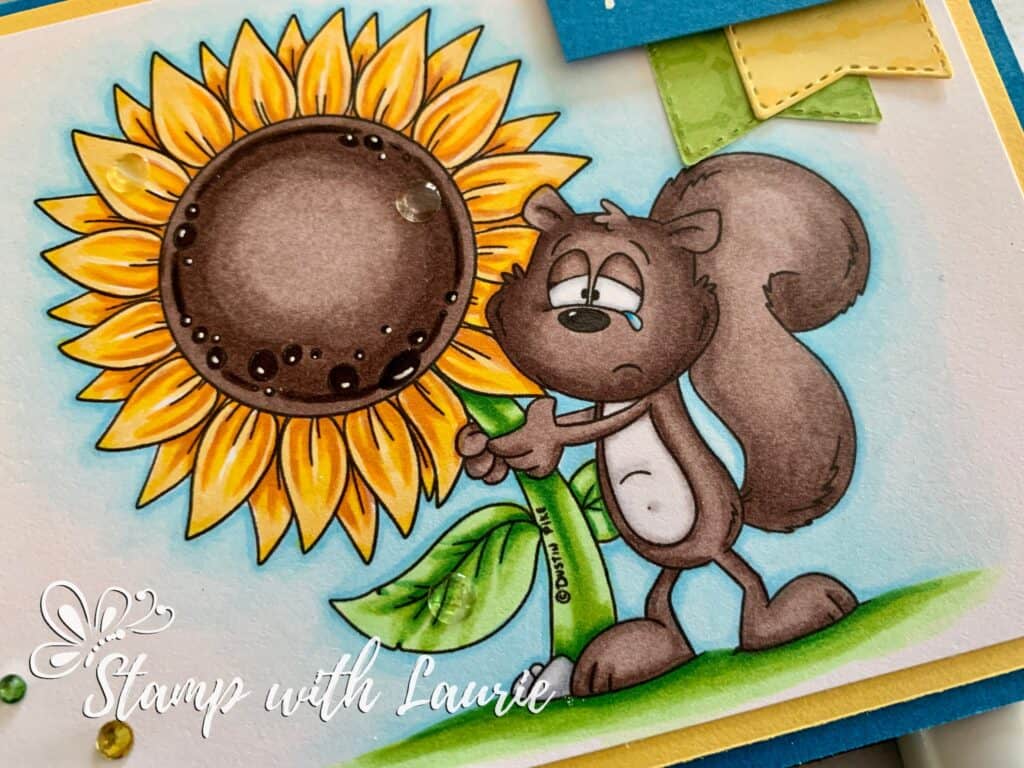
I coloured Clarence and his sunflower with my Copic markers and added a few accents with my White Gelly Roll Pen on the seeds of the sunflower.

I decided to use Daffodil Delight and Pacific Point as my card stock choices to reflect the colours of the Ukrainian flag. A couple of layered paper flags under the “heartfelt” sentiment help to set it off. I wanted it to be highlighted since this is what my card is all about. To match my colour choices, I coloured some clear rhinestones with my Copic markers. Finally, I added some clear epoxy stickers on certain parts of the flower to represent the tears of the people. 

————————–

Copic Markers:

Fur/Flower Centre: E49/E77/E74/E71
Tummy/Eyes: C3/C1/0
Petals: E15/Y38/Y15/Y21
Stem/Leaves/Grass: G07/YG23/YG11
Rocks: C4/C3/C1
Sky: B02/B00/B000/0
Rhinestones: G07/B02/Y38

Close Up of Stamp
Close Up of Clarence with Sunflower for Ukraine

————————–

Card Recipe for My Tears for Ukraine Card:

Clarence with Sunflower for Ukraine, The Rabbit Hole Designs
Paper Basics – Stamper’s Select White Cardstock, Papertrey Ink
Regals colour collection with this Regals 6″ x 6″ Designer Series Paper, Stampin’ Up!
Brights colour collection with this Brights 6″ x 6″ Designer Series Paper, Stampin’ Up!
Tasteful Labels Dies, Stampin’ Up!
Basics Embossing Powder, Stampin Up!
Lovely You Stamp Set, Stampin Up!
Rhinestones Basic Jewels, Stampin’ Up!
Heat Tool, Stampin’ Up!
Silver & Clear Epoxy Stickers, Stampin’ Up!
White Gelly Roll Pen
Pacific Point and Daffodil Delight Card Stock, Stampin’ Up!

Finished card size: 5.5” x 4.25”

————————–

To view my other Copic Marker cards, please click here.

Hope you like my card in support of the Ukraine using the free digital stamp
Clarence with Sunflower for Ukraine from The Rabbit Hole Designs!

Thank you for stopping by!

Hugs,
Laurie
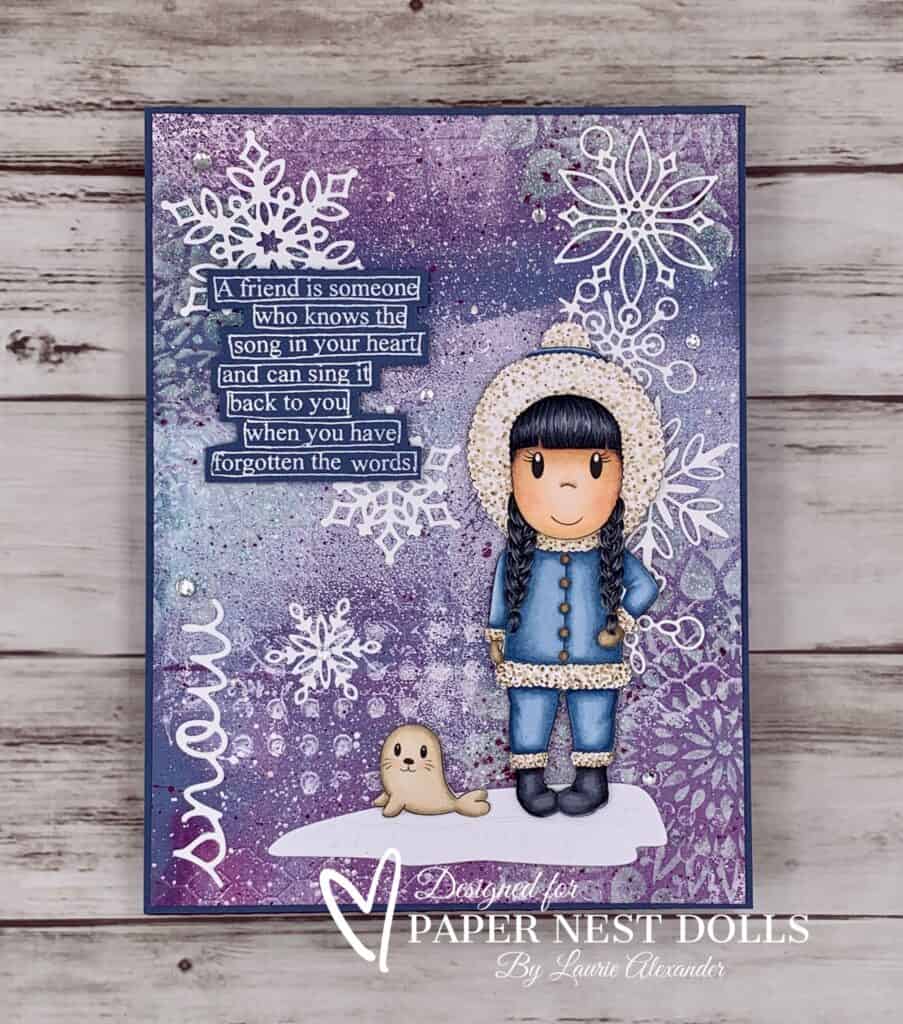
My Winter Wonderland Mixed Media Piece

Mixed Media Piece using Eskimo Ellie by Paper Nest Dolls
My Winter Wonderland Mixed Media Piece

Hello Crafty Friends! It’s Laurie here! I am sharing My Winter Wonderland Mixed Media Piece using Eskimo Ellie by Paper Nest Dolls for my Design Team Inspiration Project. We are still in the depths of winter here is Canada. So, I thought I would make something pretty to brighten the last of the winter days.

The Details of My Project

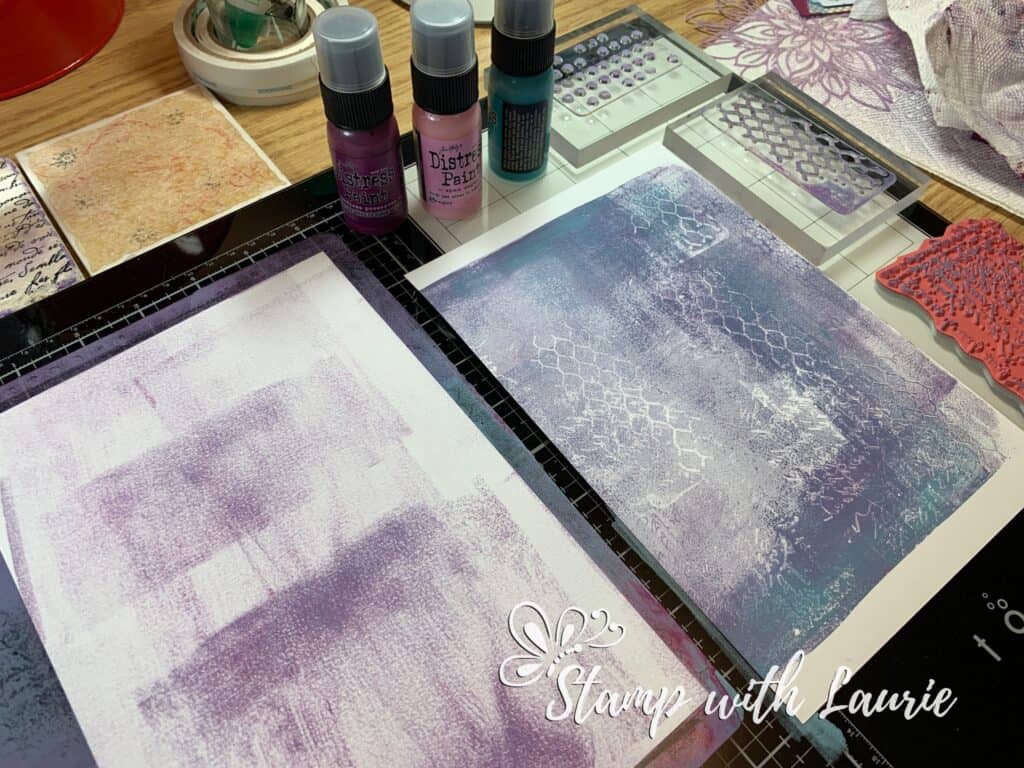
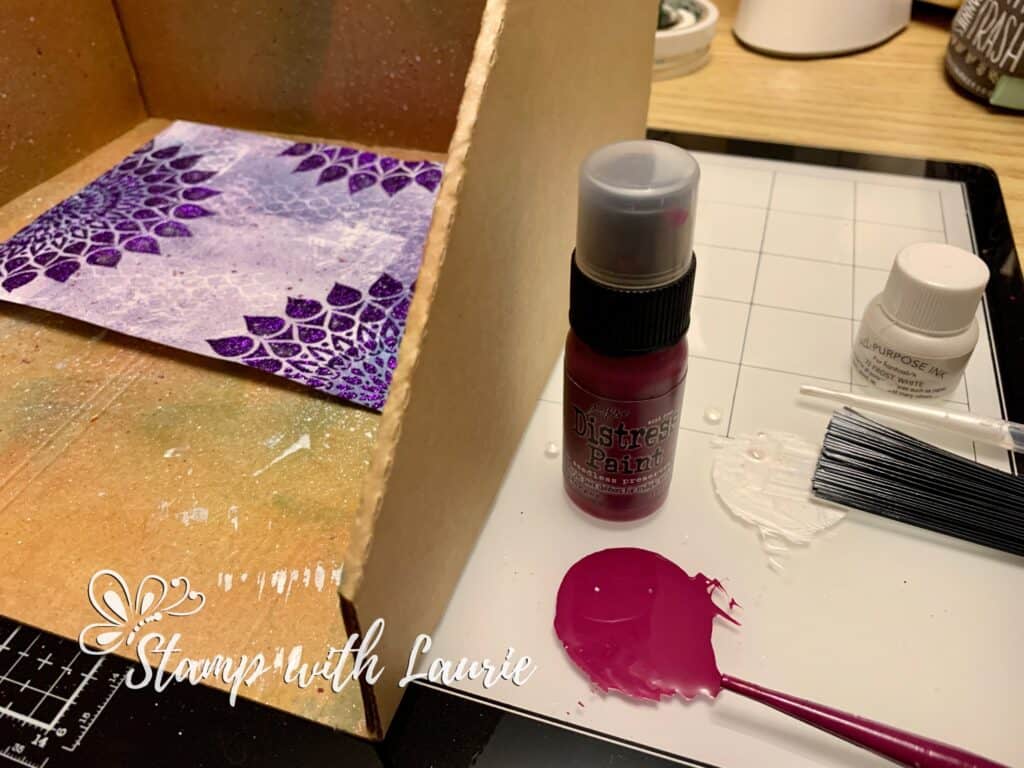
I decided to create a Mixed Media piece. Something that I haven’t done before but have always wanted to create. So, I pulled out my 8” x 10” Gel Printing Plate, my Distress Paints and brayer and went to town. Once I had paint laid down and before it dried, I stamped several different stamps to add interest to my background piece. I placed my mixed media paper over the gel plate and pulled several prints from it.

Prints from Gel Press
My Prints from Gel Press

Once everything was dried, I added some shimmery embossing paste using a stencil. I then splattered some paint all over with my splatter brush.

Splattering Paint
Splattering Paint in my Splatter Box

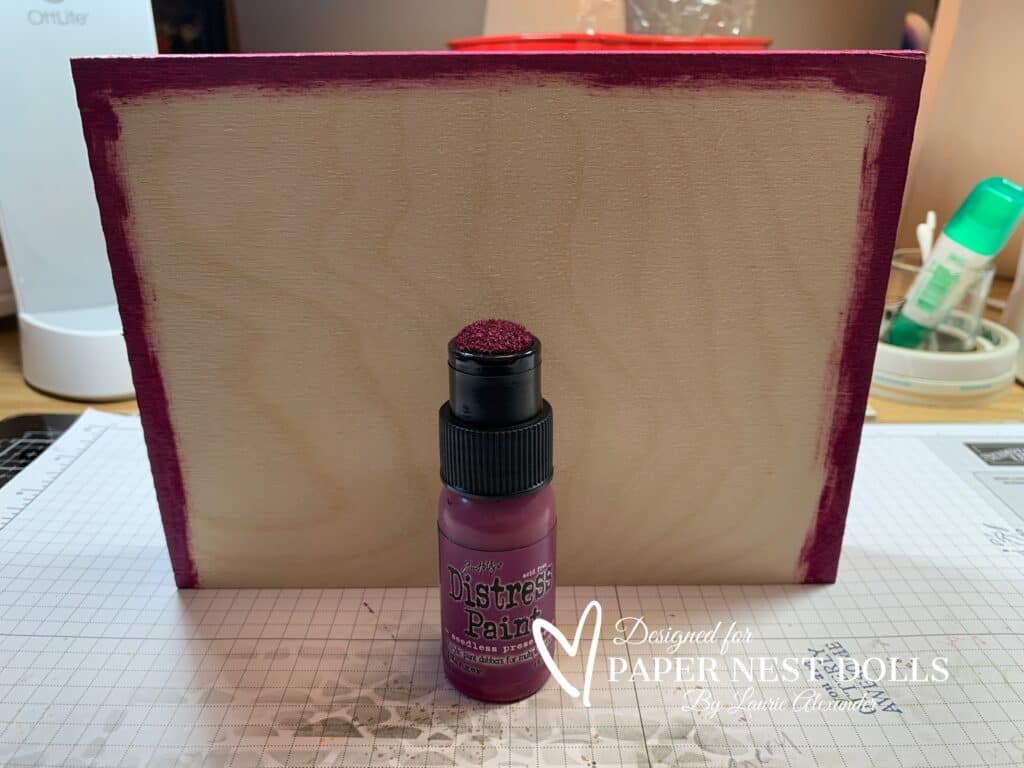
At this point, I painted the sides of the wood frame with Seedless Preserves to bring out that colour from the print.

Painted Frame
Painted Frame with Seedless Preserves

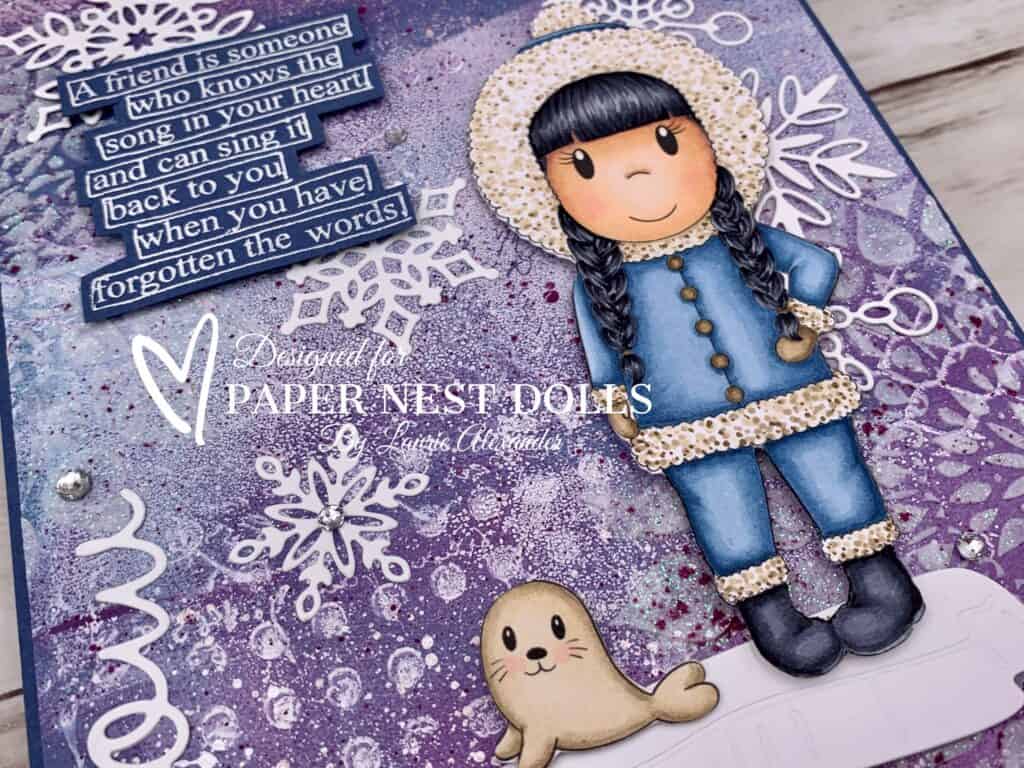
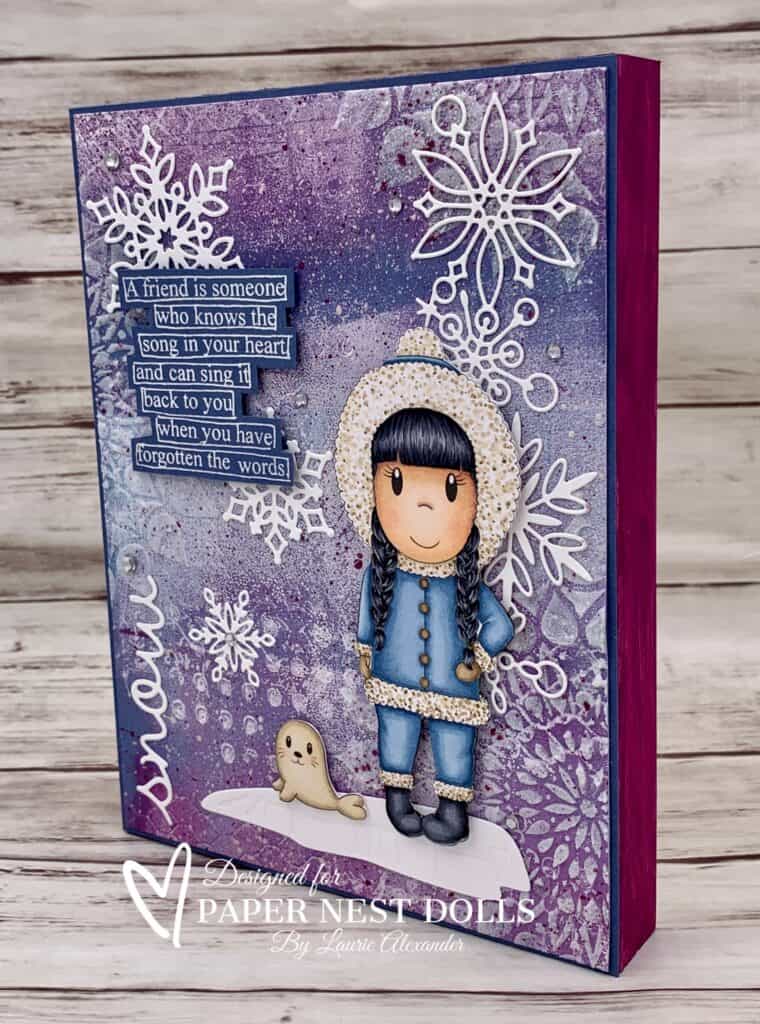
I trimmed down my print, framed it with a matching blue card stock and glued it to my dried frame. Then, I added my “snow” and snowflake dies. Next came, the white embossed sentiment which used the same blue card stock as the frame. I fussy cut my Copic coloured images and used a die cut iceberg to help ground them. A scattering of rhinestones added more shimmer to the piece.

————————–

Eskimo Ellie

Skin: E04/E11/E21/E00/E000/R20
Hair: C10/C7/C5/C4
Jacket: B97/B95/B93/B91
Trim: E44/E43/E42/E41
Mitts: E44/E43/E42
Boots: C10/C7/C5/C4
Seal: E43/E42/E41

Close Up of Eskimo Ellie and Friend

————————–

Supplies for My Winter Wonderland Mixed Media Piece:

Eskimo Ellie, Paper Nest Dolls
Paper Basics – Stamper’s Select White Cardstock, Papertrey Ink
Mixed Media Paper, Canson
8” x 10” Gel Printing Plate, Gelli Arts
Peacock Feathers Distress Paint, Tim Holtz, Ranger
Seedless Preserves Distress Paint, Tim Holtz, Ranger
Spun Sugar Distress Paint, Tim Holtz, Ranger
Frost White All-Purpose Ink, Tsukineko
Shimmery White Embossing Paste, Stampin’ Up!
Ledger Script CMS241, Tim Holtz Collection, Stampers Anonymous
Distressed Textures Stamp #10105756, BoBunny
Distressed Textures Stamp #10105762, BoBunny
The Right Words DS016, Dylusions
Water Mandala Stencil, Sweet Sentiment
Snowflake Border Die, Frostyville, Memory Box
Polar Bears Dies, Stampin’ Up!
Snowfall Thinlits Dies, Stampin’ Up!
Seasonal Frames Thinlits Dies, Stampin’ Up!
Versamark Ink, Stampin’ Up!
Basics Embossing Powder, Stampin’ Up!
Heat Gun, Stampin’ Up!
Tim Holtz Distress Splatter Brush, Ranger
Splatter Booth
Brayer, Recollections, Michaels Arts & Crafts
Palette Knives, Stampin’ Up!
Paper Snips, Stampin’ Up!
Exacto Knife
6” x 8” Wood Painting Panel, Currys
Rhinestone Basic Jewels, Stampin’ Up!
Misty Moonlight and Basic White Card Stock, Stampin’ Up!

Finished piece size: 6” x 8”

Side View of Mixed Media Piece
Side View of My Mixed Media Piece

To view my other Paper Nest Dolls projects, please click here.

Hope you like My Winter Wonderland Mixed Media Piece using Eskimo Ellie by Paper Nest Dolls!

Thank you for stopping by!

Hugs,
Laurie
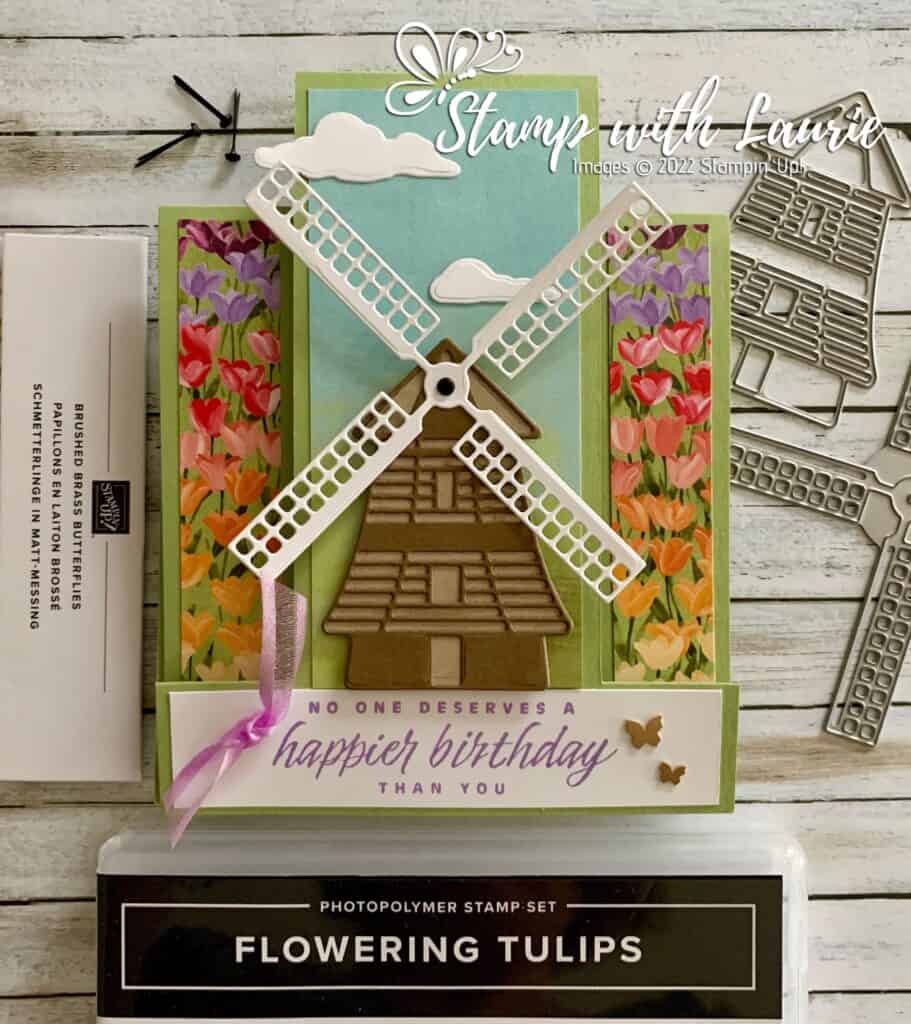
Flowering Fields Birthday Wishes Card

A Card with a Windmill on it
Flowering Fields Birthday Wishes Card

Hello Crafty Friends! Laurie here again! I am sharing my Flowering Fields Birthday Wishes Card using the Flowering Fields Stamp Set and the Windmill Fields Dies by Stampin’ Up!

The Details of My Card

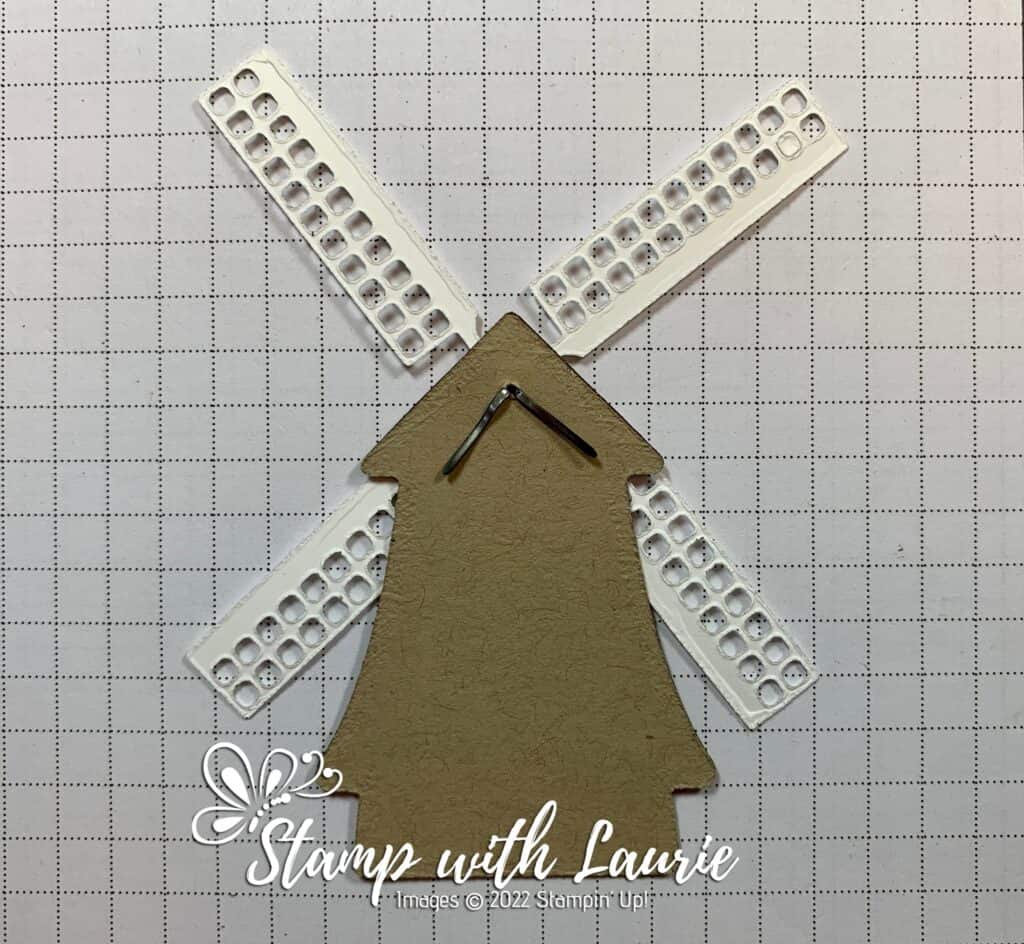
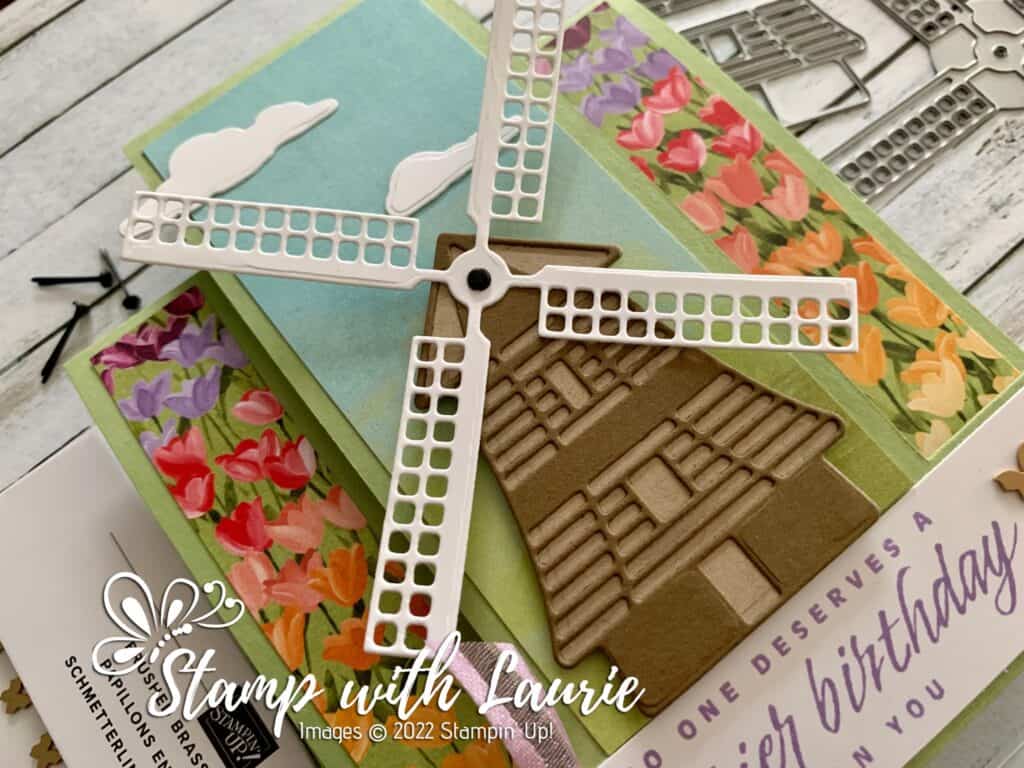
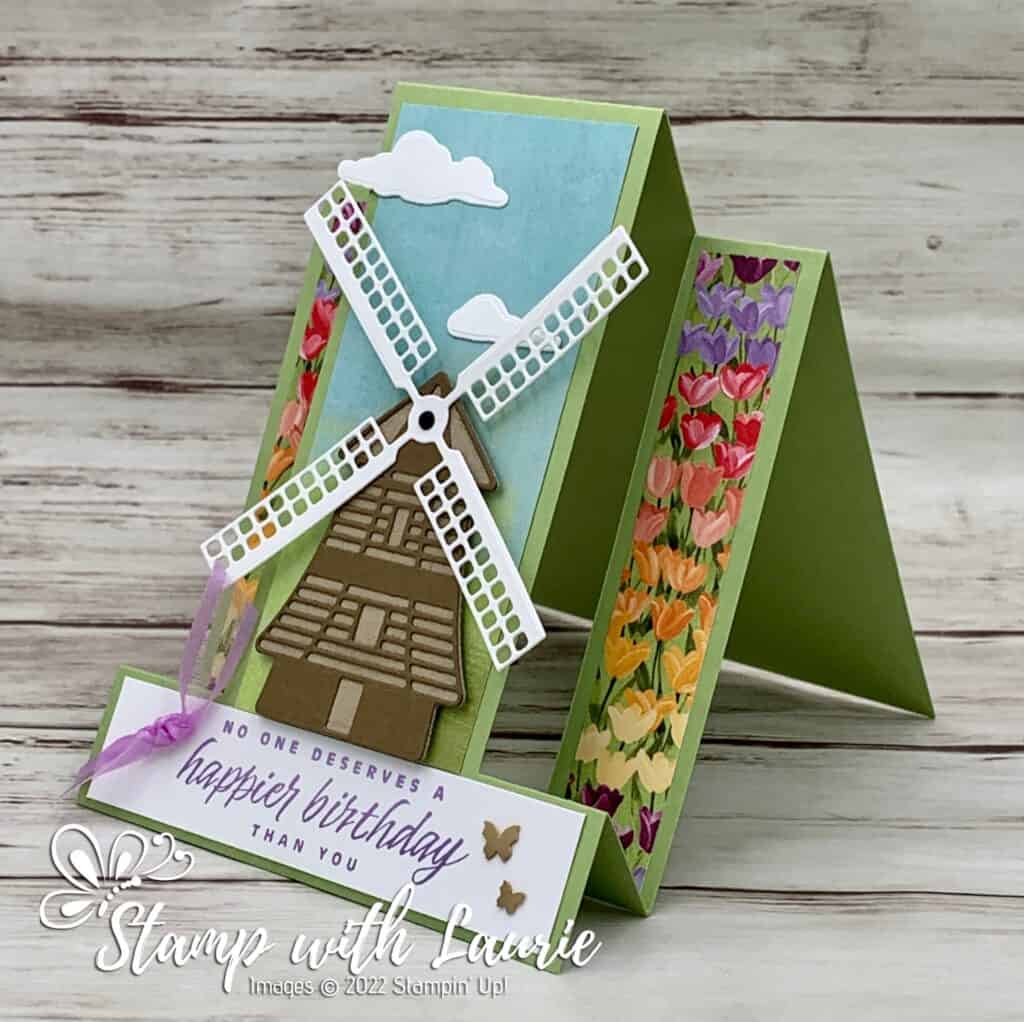
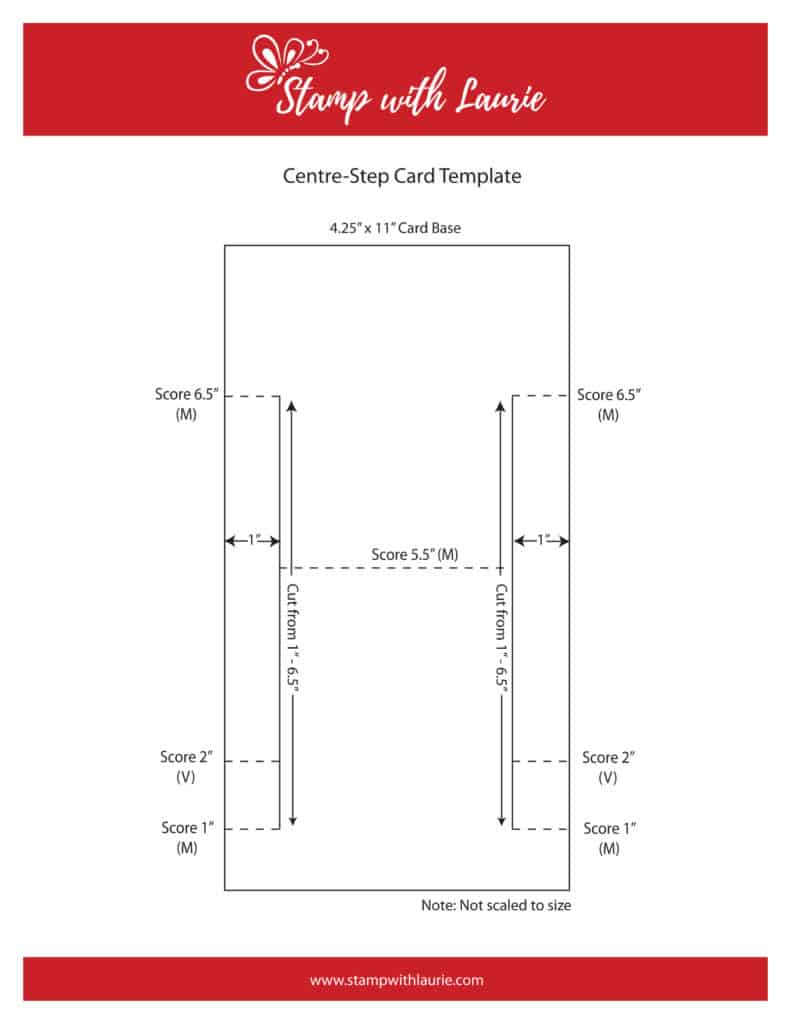
For my card, I thought it would be fun to create a Centre-Step Card, so it looks like the windmill is popping out of the tulip fields. Of course, if you have a windmill, wouldn’t it be fun to make it interactive! So, I added one of the round brads through the blades and into the windmill base.

Tip – to keep the brad from showing from behind the windmill on the card, folded down the arms at angle.

Position of Brads on Back of Windmill

The windmill was popped up with dimensionals to allow the back of the brad to have room. 

I love the beautiful Flowering Fields DSP and used it for the grass/sky piece behind the windmill and the tulip fields! I pulled the colours from the DSP for my sentiment and for the ribbon. A couple of the sweet butterflies balanced out the ribbon on the sentiment.

Supplies:

Stamps/Bundles/Dies: Flowering Tulips Stamp Set (157672), Windmill Fields Dies (157683)

Inks: Highland Heather Classic Stampin’ Pad (147103)

Paper: Pear Pizzazz (131201), Basic White (159276), Crumb Cake (120953), Soft Suede (115318), Flowering Fields 12″ x 12″ Designer Series Paper (157670)

Accessories: Brushed Brass Butterflies (158136), Fresh Freesia Open Weave Ribbon (155615), Round & Square Brads (155570), Bone Folder (102300), Stampin’ Dimensionals (104430), Stampin’ Seal (152813), Mini Glue Dots (103683)

Close of Up the Windmill

Measurements: 

  • Pear Pizzazz: 11” x 4 ¼” (see template)
  • Soft Suede: 2 ½” x 1 7/8”
  • Crumb Cake: 2 ½” x 1 7/8”
  • Basic White: 
    • 4” x 3” (Windmill Blades)
    • 4” x 7/8” (Sentiment)
    • Scraps (Clouds)
  • Flowering Fields Designer Series Paper:
    • 2 pieces: 4 ¼” x ¾”
    • 2” x 4 ½”
Side View of Centre-Step card
Side View of Centre-Step Card

More Information on my Flowering Fields Birthday Wishes Card:

For more of my Stampin’ Up! cards, please click here.

To download a PDF of the Centre-Step Template, please click here or on the picture.

Centre-Step Card Template

For a Stampin’ Up! video on the Flowering Fields Suite, please click here.

You will find the items listed above in my online store.