My Happy 2024 Calendars

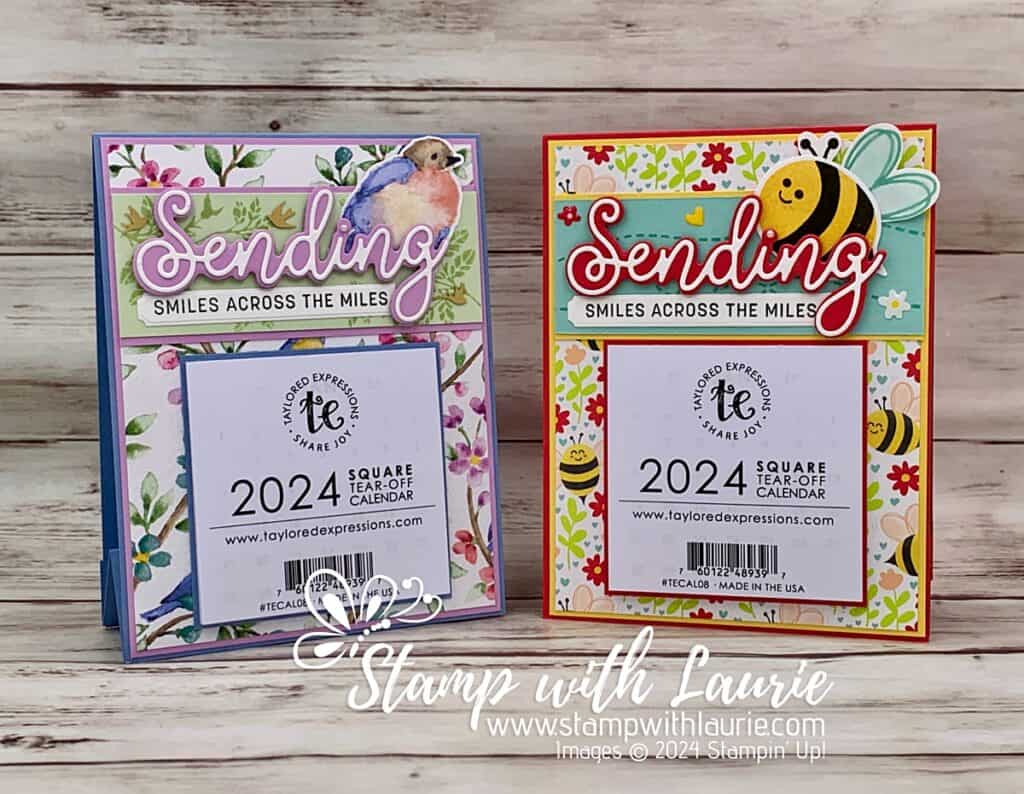
Happy 2024 Calendars - two handmade calendars. One with a bee on it and one with a bird.
My Happy 2024 Calendars

Hello Crafty Friends! Laurie here again! I am sharing My Happy 2024 Calendars using the Bee My Valentine Bundle and the Flight & Airy Designer Series Paper by Stampin’ Up! I didn’t get done my Christmas cards this year due to catching Covid. So instead, I decided to send out calendars to some of my customers in the new year.

The Details of My Happy 2024 Calendars

For my calendars, I decided to create two different calendars with the same design but using different products. I couldn’t resist using the beautiful Flight & Airy Designer Series Paper which is a Sale-a-bration freebie if you spend $60.00 CDN on qualifying orders. And don’t you just love those cute bees from the Bee My Valentine Bundle!
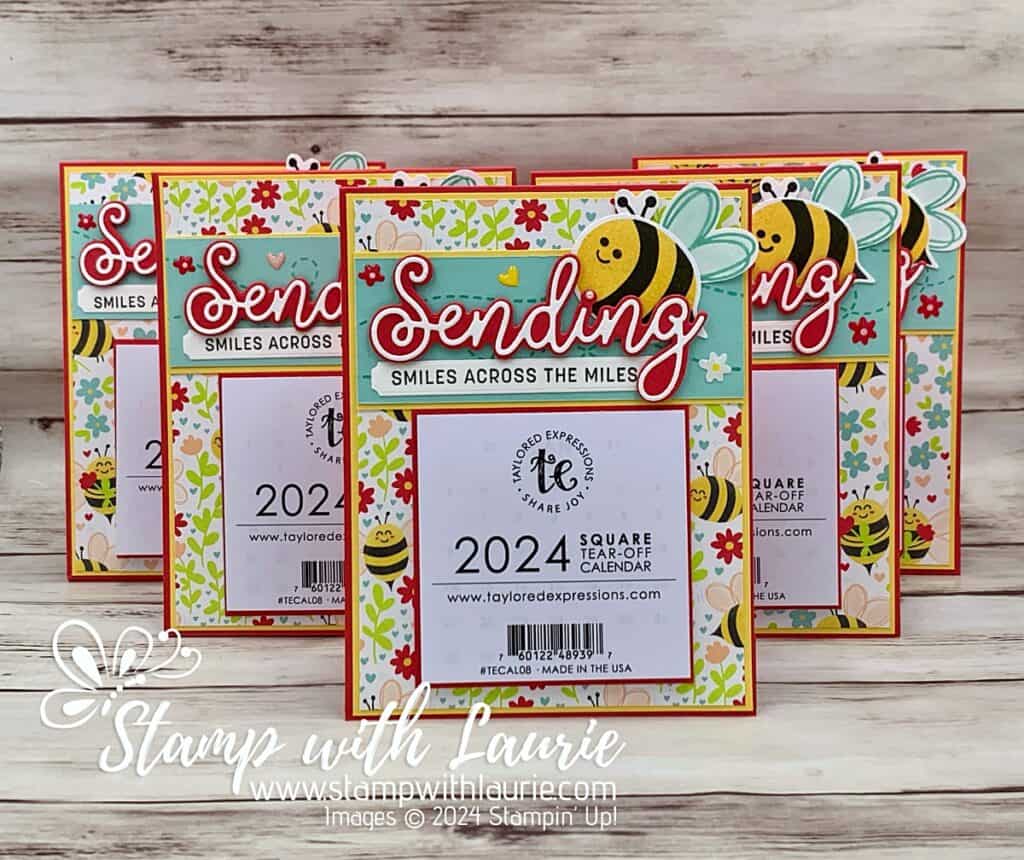
Five Bee Calendars
Bee Calendars

Since I planned to mail these out, the Sending Dies was perfect way to send “smiles across the miles”! To add some interest to the Pool Party and Soft Sea Foam card stocks behind my focal point, I did some tone-on-tone stamping. For the Pool Party one, I stamped a couple of times the bee trail in Pool Party. For the Soft Sea Foam, I stamped the leaves from the Softly Sophisticated Bundle twice in Soft Sea Foam. This bundle is also free with a $120 CDN on qualifying orders during Sale-a-bration.
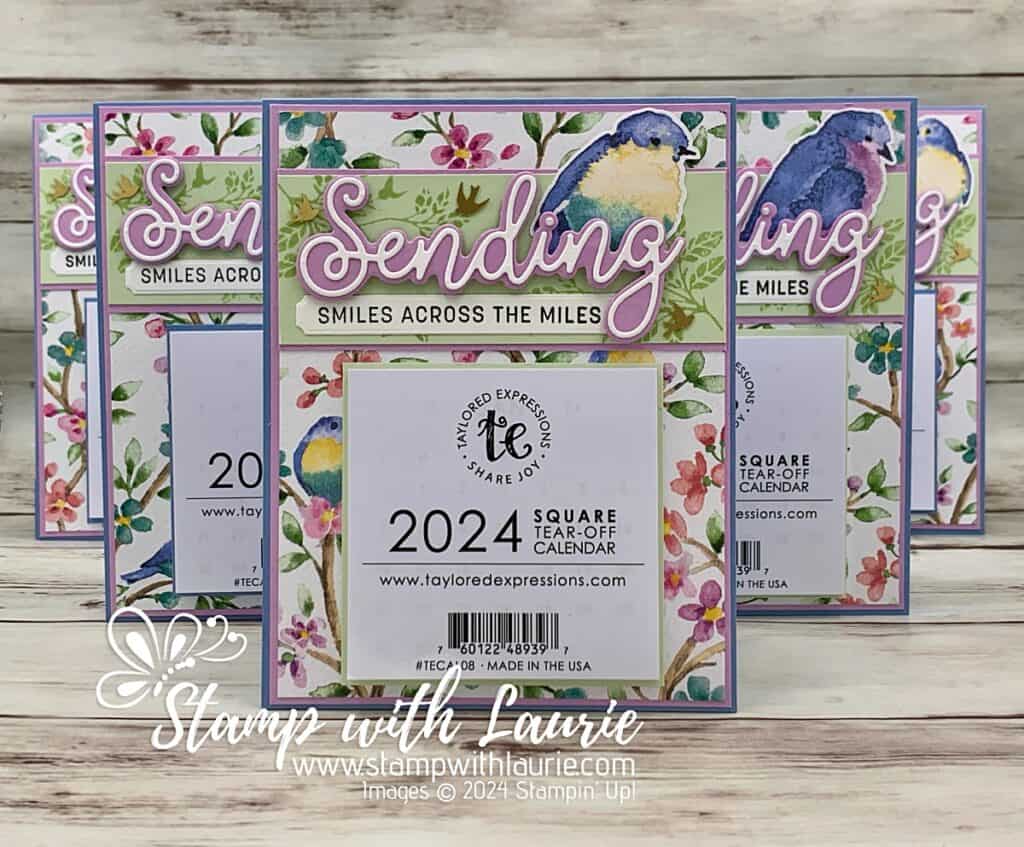
Five Bird Calendars
Bird Calendars

The bee was stamped and punched out with the matching builder punch. The birds were fussy cut from the Flight & Airy DSP. I used different birds for each calendar since there was such a selection from which to choose.
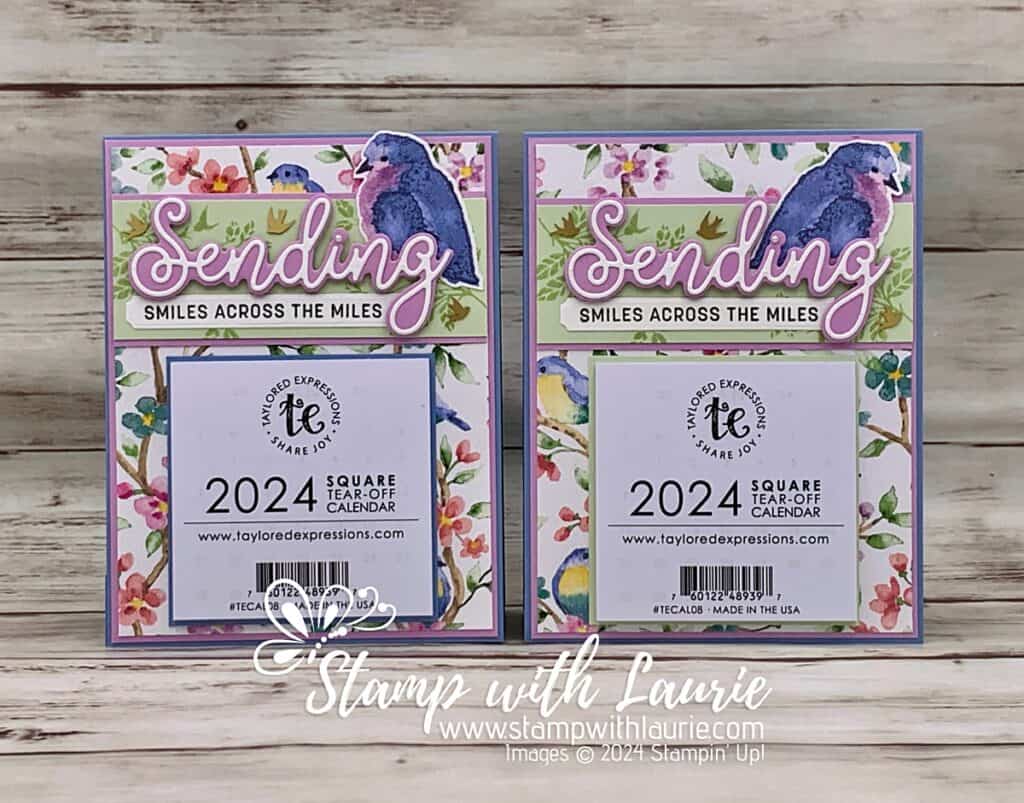
Two of the Bird Calendars

Next, I used the Adhesive-Backed Hearts & Flowers and Adhesive-Backed Dragonflies & Birds for embellishments. I also used a pearl for the “i” in “Sending”.
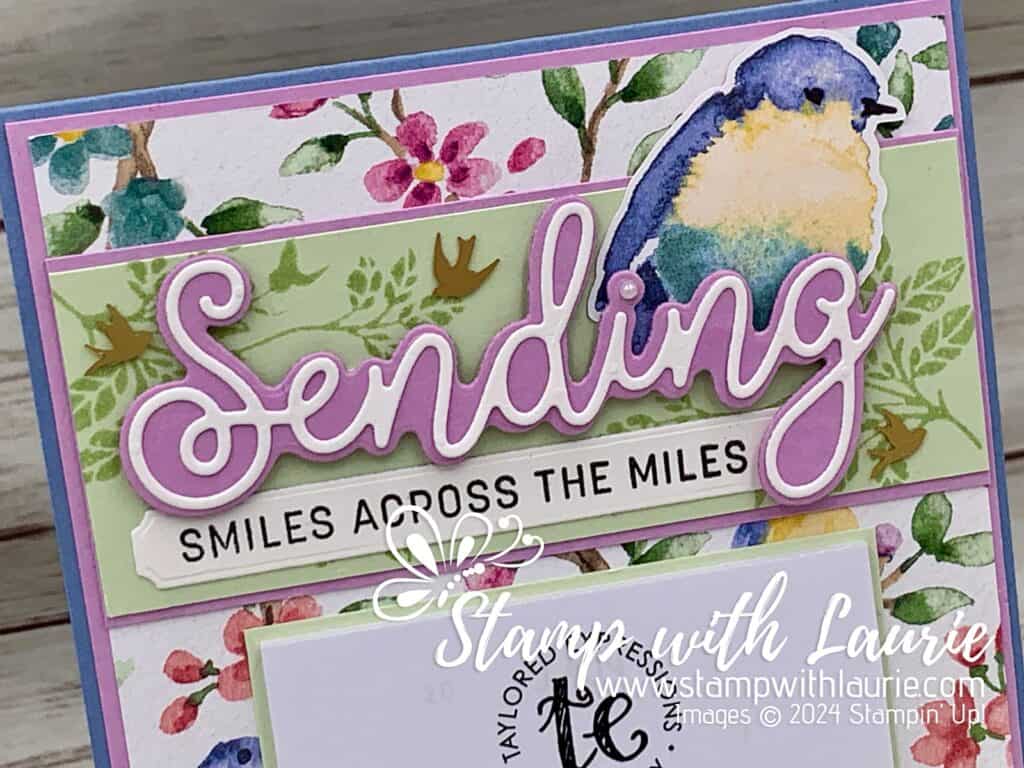
Close Up of Focal Point with Bird

The final thing was to use the technique where you press the ink pad lid when closed to get some ink. I did this with the Pool Party ink pad and picked it up with my Wink of Stella. This gave the bee wings a nice sparkle!
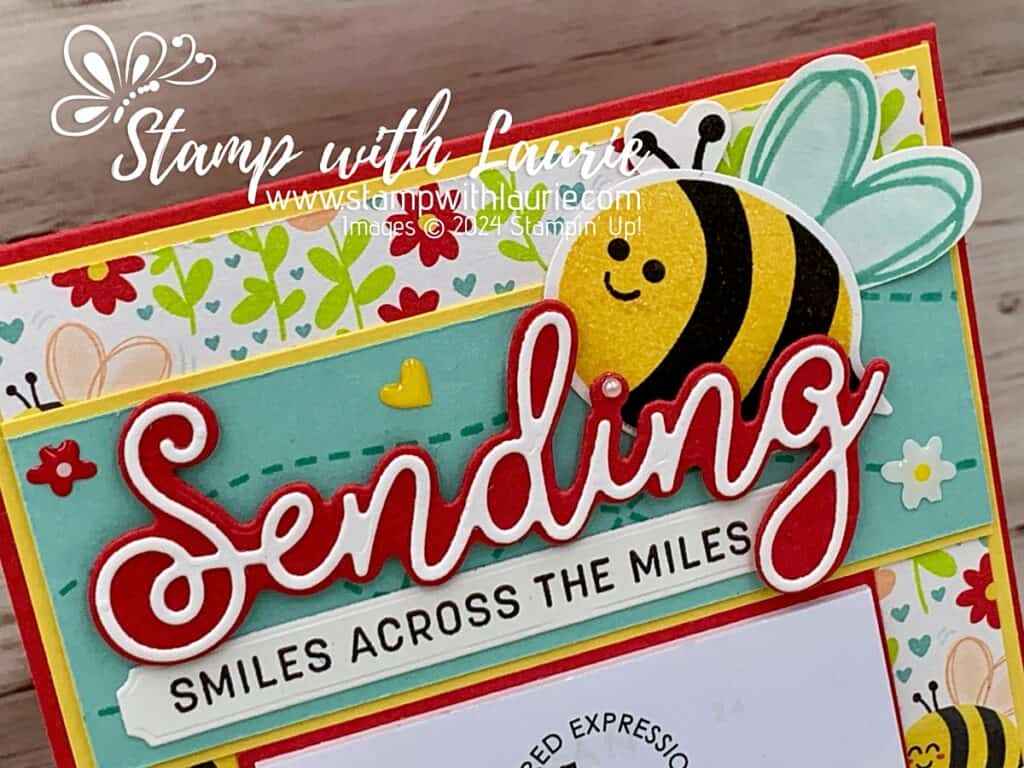
Close Up of Focal Point with Bee

Supplies:

Stamps/Bundles/Dies: Bee My Valentine Bundle (162554), Sending Smiles Stamp Set (158701), Sending Dies (159271), Softly Sophisticated Bundle (162947)

Inks: Pool Party Classic Stampin’ Pad (147107), Sea Foam Classic Stampin’ Pad (147102), Tuxedo Black Memento Ink Pad (132708), Daffodil Delight Classic Stampin’ Pad (147094), 

Paper: Real Red (102482), Balmy Blue (146982), Soft Sea Foam (146988), Pool Party (122924), Fresh Freesia (155613), Daffodil Delight (119683), Basic White (159276), Bee Mine Designer Series Paper (162546), Flight & Airy Designer Series Paper (162977)

Accessories: Adhesive-Backed Hearts & Flowers (162557), Iridescent Pearl Basic Jewels (158987), Adhesive-Backed Dragonflies & Birds (162743), Wink of Stella (141897), Paper Trimmer (152392), Paper Snips (103579), Bone Folder (102300), Stampin’ Dimensionals (104430), Mini Stampin’ Dimensionals (144108), Stampin’ Seal (152813), Mini Glue Dots (103683), Taylored Expression Calendars
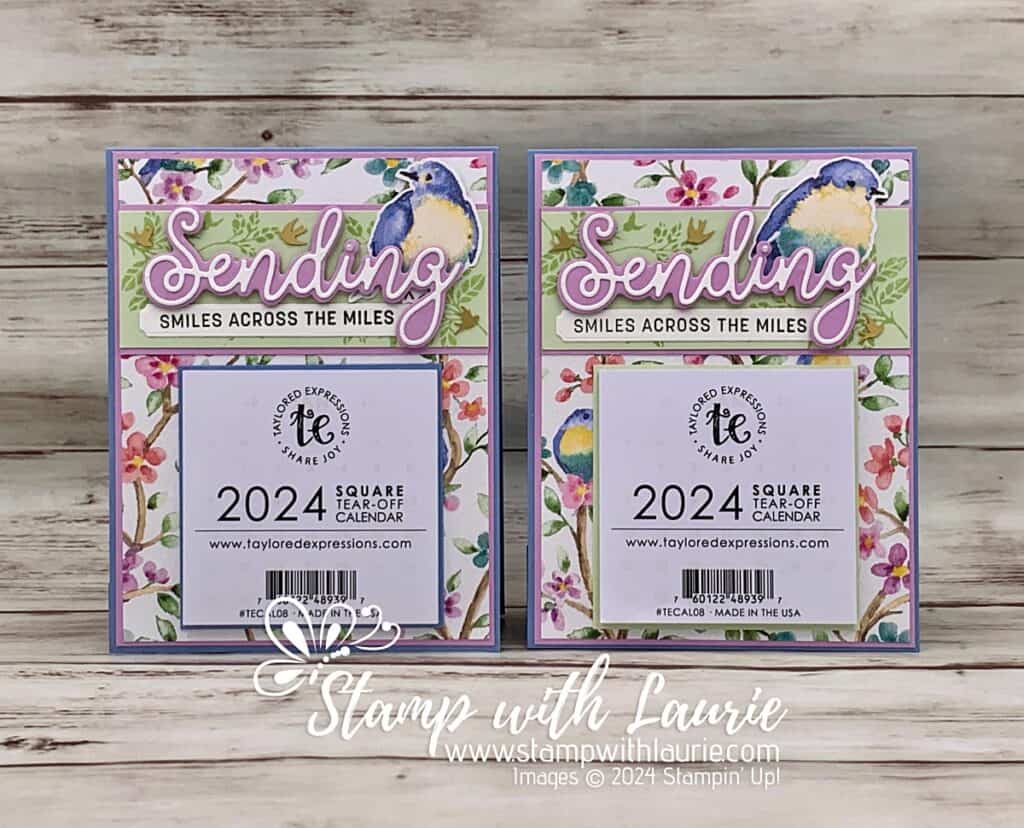
Two Different Birds on Calendars

Measurements: 

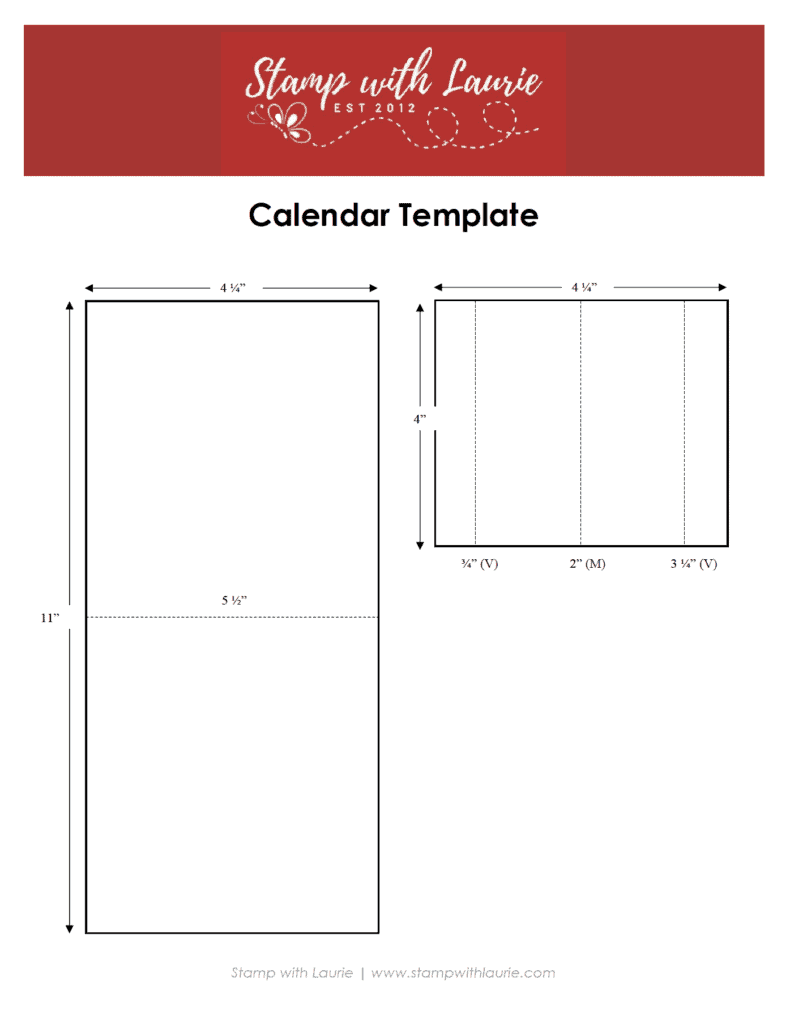
  • Real Red/Balmy Blue (3 pieces):
    • 11” x 4 ¼” scored at 5 ½”
    • 4” x 4 ¼” scored at ¾”, 2” and 3 ¼” along 4” side
    • 3-7/8” x 3-7/8” (for behind calendar)
    • 1 ½” x 3 ½” (Sending die)
  • Daffodil Delight/Fresh Freesia: 
    • 4-1/8” x 5-3/8”
    • 4” x 2-5/8”
    • 1 ½” x 3 ½” (Sending die)
  • Pool Party/Soft Sea Foam: 4” x 2 ½”
  • Basic White:
    • 1 ½” x 3-3/8” (Sending die)
    • 3/8” x 3-3/8” (Sentiment)
    • 1 ¾” x 1-3/16” (Bee body)
    • Scraps for wings and antenna
  • Bee Mine Designer Series Paper:
    • 4” x 5 ¼”
  • Flight & Airy Designer Series Paper:
    • 4” x 5 ¼”
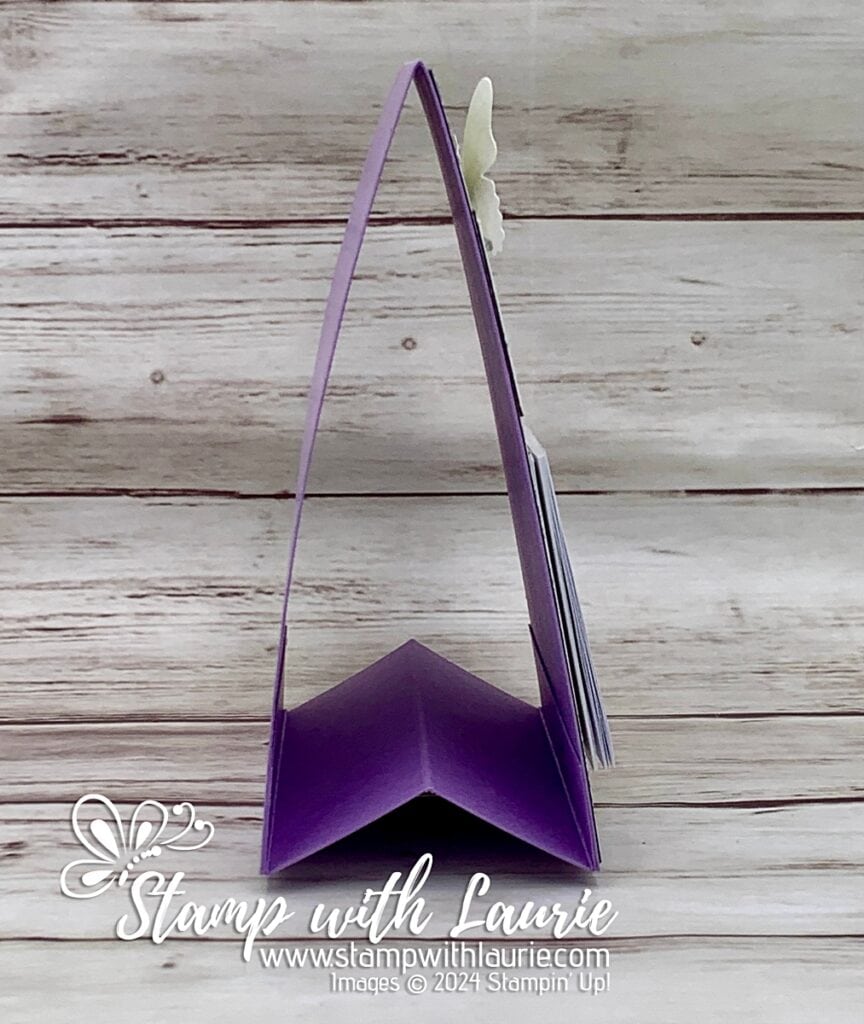
Side View of Calendar

More Information on My Happy 2024 Calendars

To download a PDF of the Calendar Template, please click here or on the picture.

Downloadable Calendar Template

For more of my Stampin’ Up! cards, please click here.

You will find the items listed above in my online store.

My Easter Basket

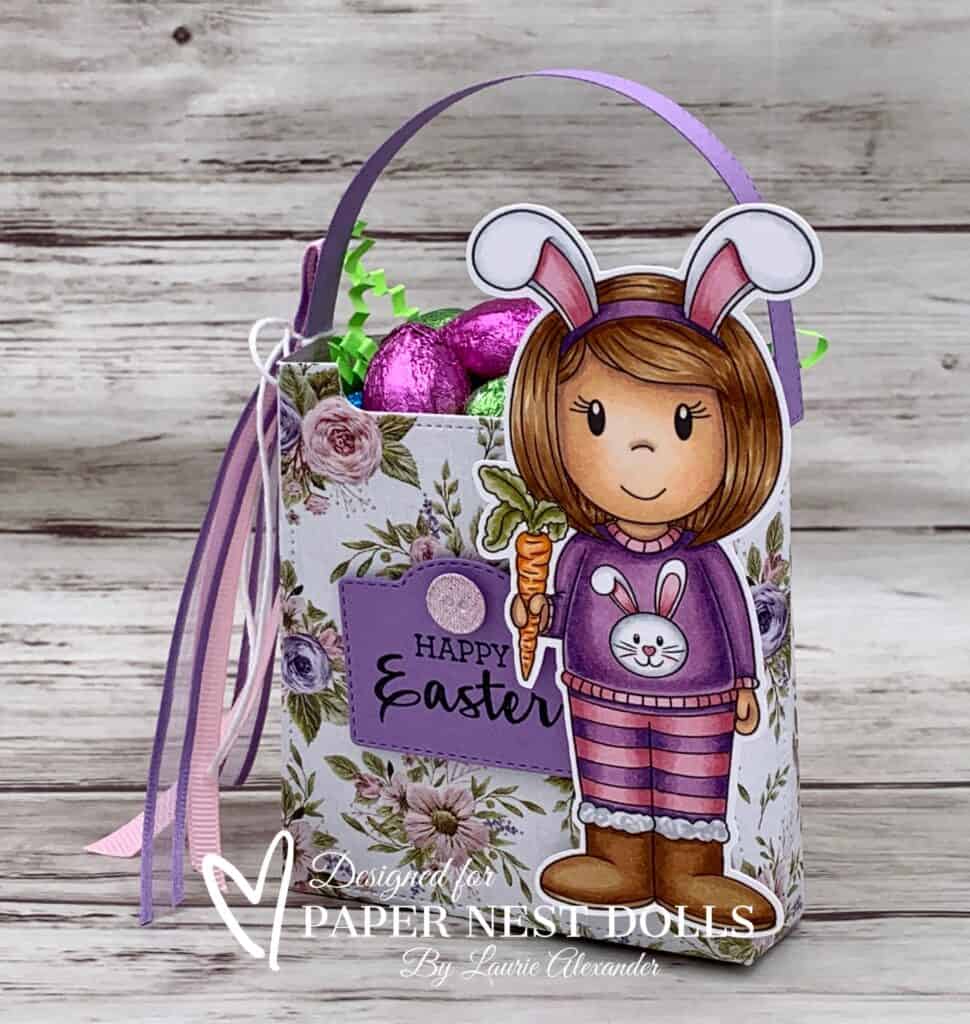
An Easter Basket
My Easter Basket

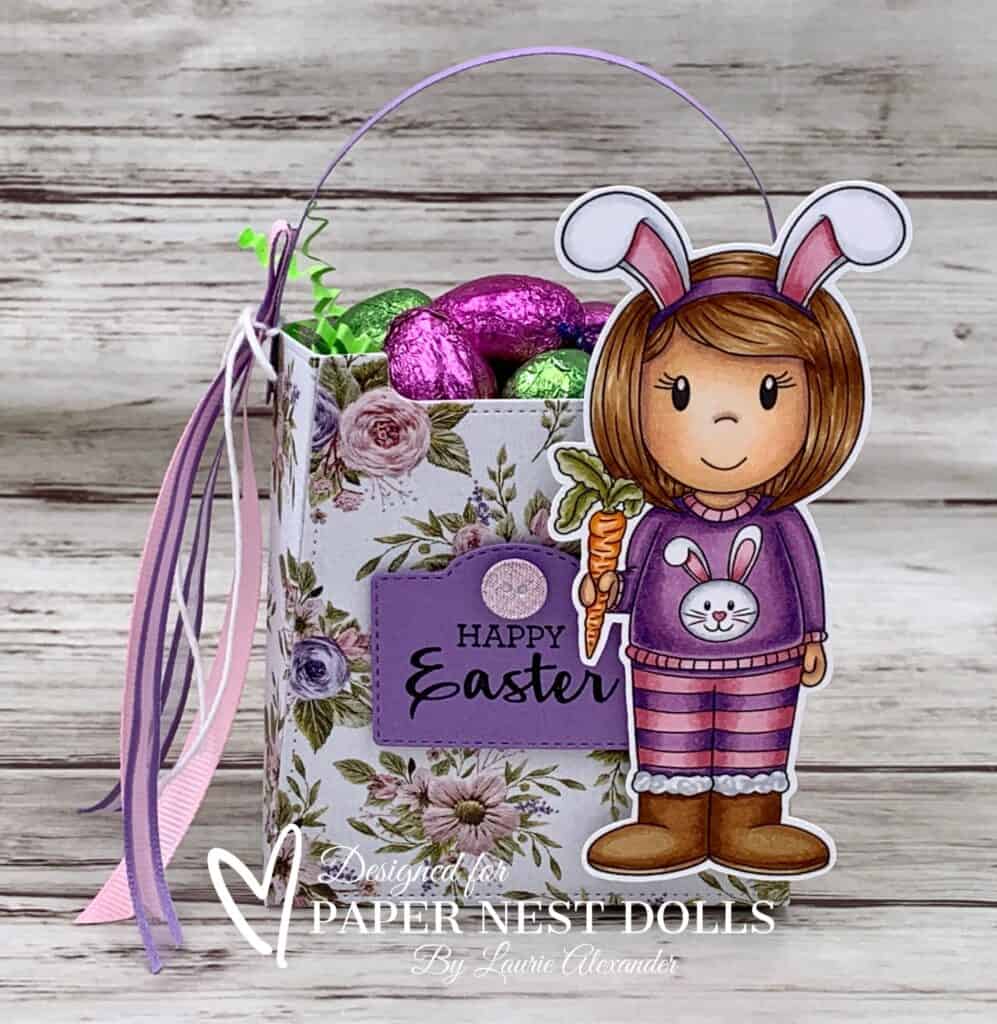
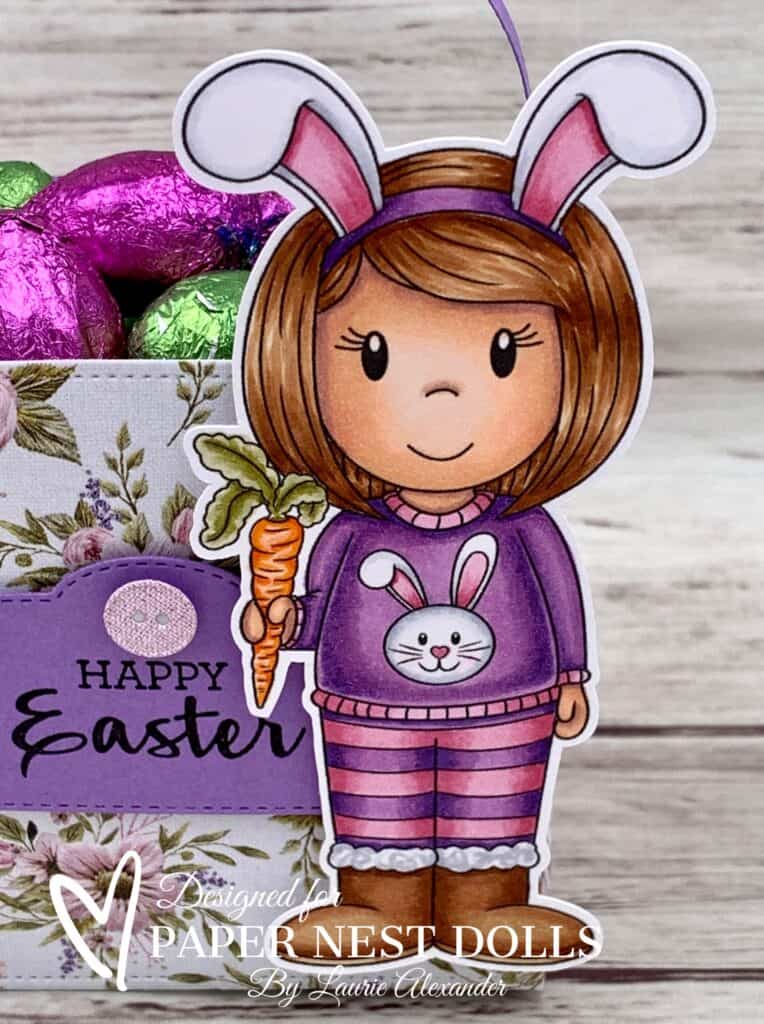
Hello Crafty Friends! It’s Laurie here! I am sharing My Easter Basket using Bunny Emma by Paper Nest Dolls for my Design Team Inspiration. Since Easter is this weekend, I thought an Easter basket would be fun with this cutie!

The Details of My Basket

For my basket, I picked out this pretty paper in soft Easter colours of pinks and purples. From that I pulled my Copic colour palette to colour Bunny Emma. The basket is really a purse die, but by using one handle instead of two, it transforms into a basket! I stamped the sentiment onto the cute, stitched pocket and added a die cut button from the paper.

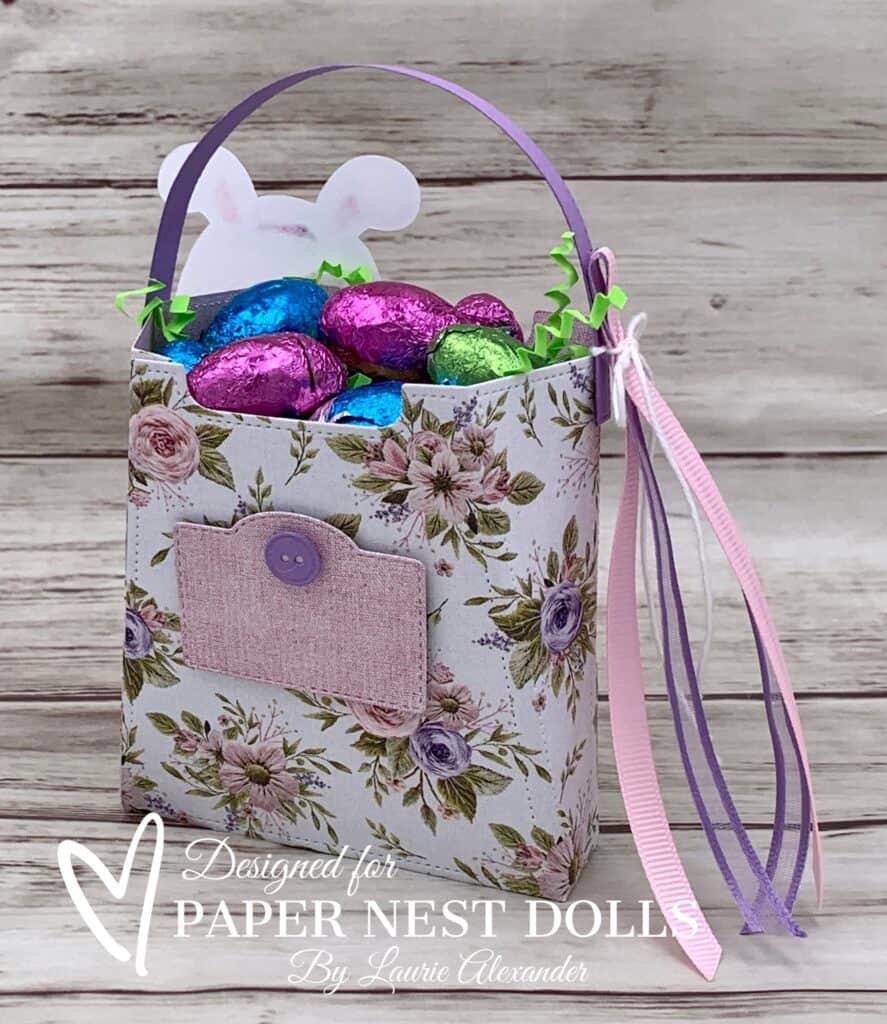
Of course, I just had to decorate the back of the basket with another pocket and button. The pink is from the other side of the pretty floral paper. So, it all goes together beautifully. The finishing touch are a few matching ribbons to balance out Bunny Emma.

Back View of My Easter Basket

All that is left is to fill your basket with Easter grass and chocolates!

————————–

Copic Markers:

Skin: E000/E00/E21/E11/E04
Hair/Boots: E37/E35/E33/E31
Purples: V17/V15/V12
Pinks: R859/R83/R81
Whites: C3/C0/0
Carrot: YR07/YR04/YR02/YR00/YG91/YG93/YG95/YG97

Close Up of Bunny Emma

————————–

Card Recipe for My Easter Basket:

Bunny Emma, Paper Nest Dolls
Paper Basics – Stamper’s Select White Cardstock, Papertrey Ink
Stitched with Love 6” x 6” Paper Pad, P13
All Dressed Up Dies, Stampin’ Up!
Arrange a Wreath Stamp Set, Stampin’ Up!
Pretty in Pink Grosgrain Ribbon, Stampin’ Up!
Highland Heather Organdy Ribbon, Stampin’ Up!
Baker’s Twine Essentials Pack, Stampin’ Up!
VersaFine Black Ink, Tsukineko
Easter Grass
Chocolates
Highland Heather Card Stock, Stampin’ Up!

Side View of My Easter Basket

————————–

To view my other Paper Nest Dolls cards, please click here.
Hope you like my Design Team Inspiration Project using
Bunny Emma by Paper Nest Dolls!

Thank you for stopping by!

Hugs,
Laurie

My Winter Wonderland Mixed Media Piece

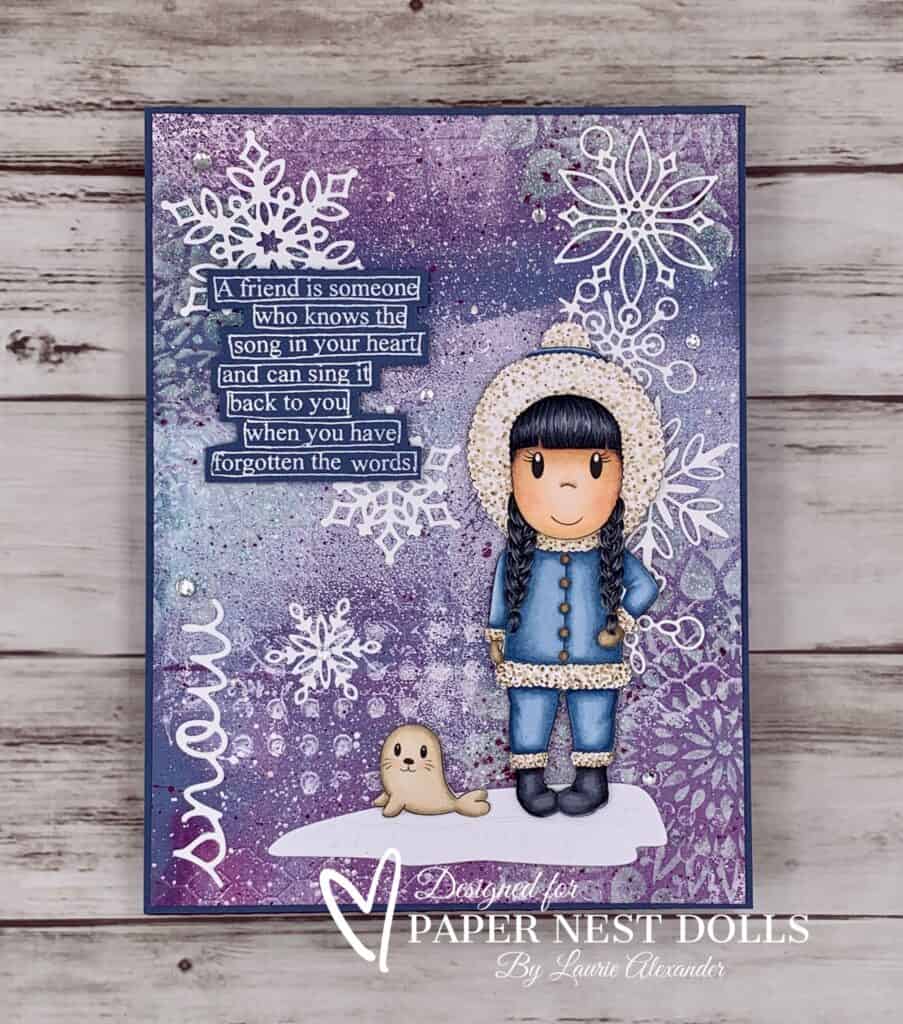
Mixed Media Piece using Eskimo Ellie by Paper Nest Dolls
My Winter Wonderland Mixed Media Piece

Hello Crafty Friends! It’s Laurie here! I am sharing My Winter Wonderland Mixed Media Piece using Eskimo Ellie by Paper Nest Dolls for my Design Team Inspiration Project. We are still in the depths of winter here is Canada. So, I thought I would make something pretty to brighten the last of the winter days.

The Details of My Project

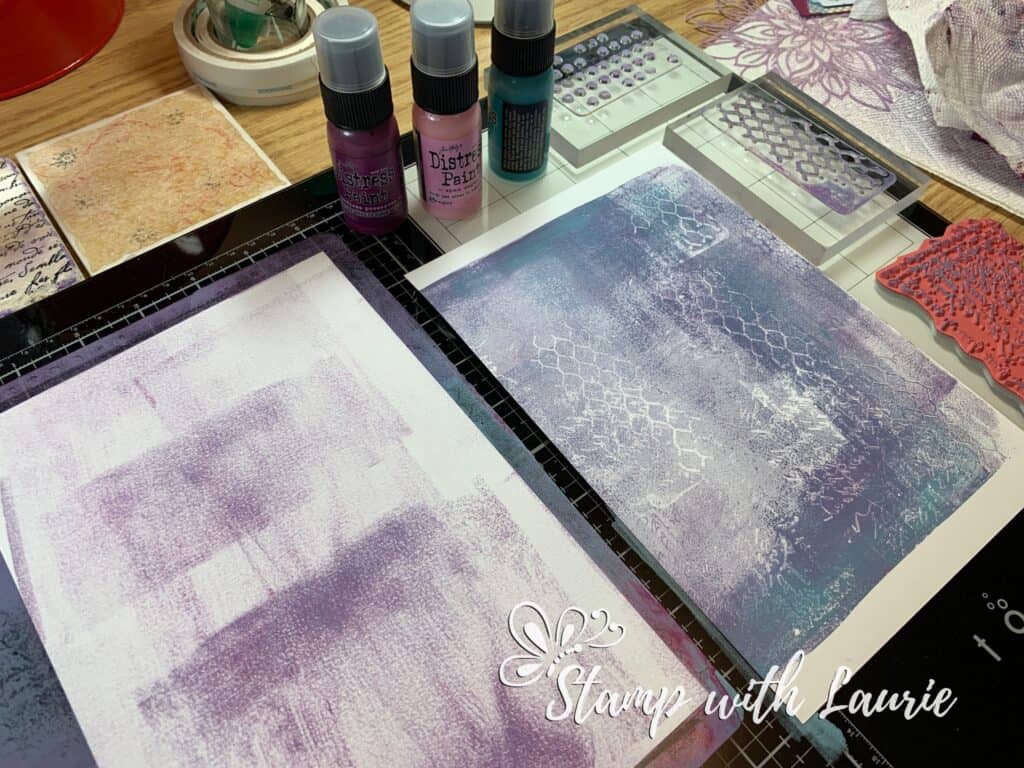
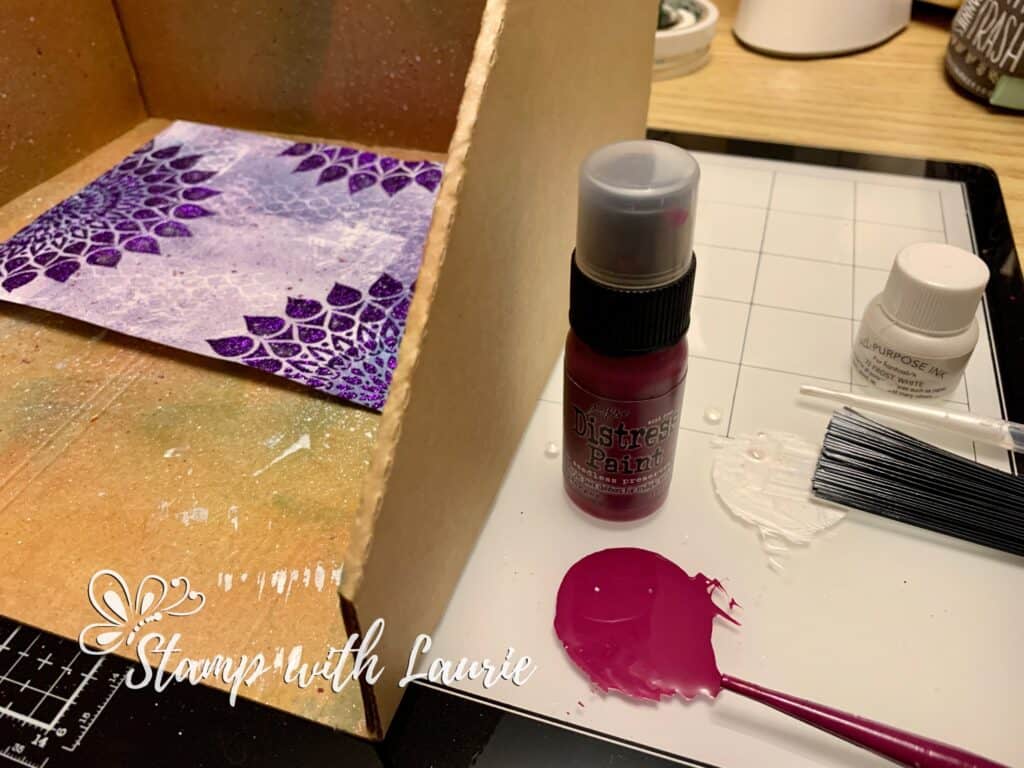
I decided to create a Mixed Media piece. Something that I haven’t done before but have always wanted to create. So, I pulled out my 8” x 10” Gel Printing Plate, my Distress Paints and brayer and went to town. Once I had paint laid down and before it dried, I stamped several different stamps to add interest to my background piece. I placed my mixed media paper over the gel plate and pulled several prints from it.
Prints from Gel Press
My Prints from Gel Press

Once everything was dried, I added some shimmery embossing paste using a stencil. I then splattered some paint all over with my splatter brush.

Splattering Paint
Splattering Paint in my Splatter Box

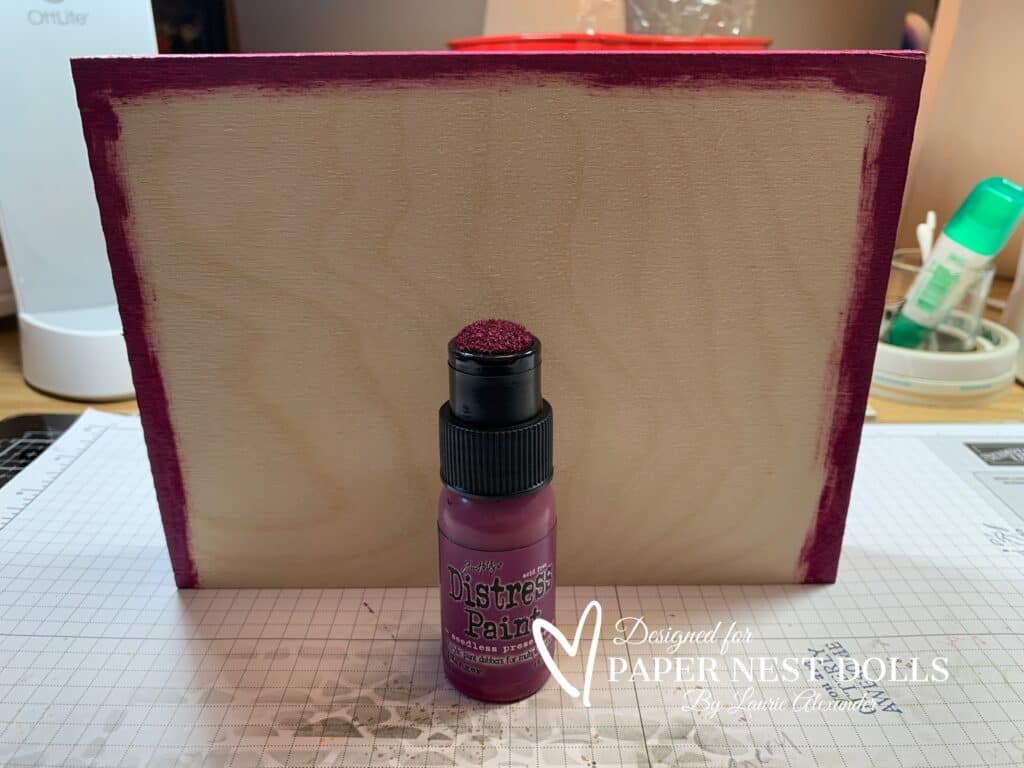
At this point, I painted the sides of the wood frame with Seedless Preserves to bring out that colour from the print.

Painted Frame
Painted Frame with Seedless Preserves

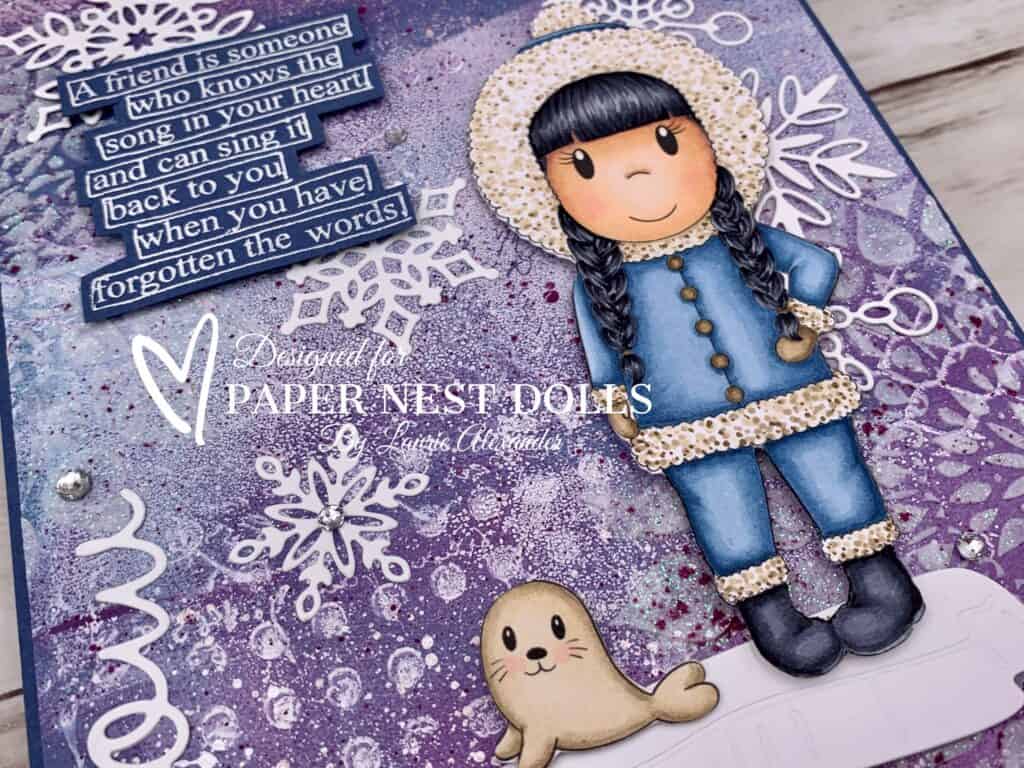
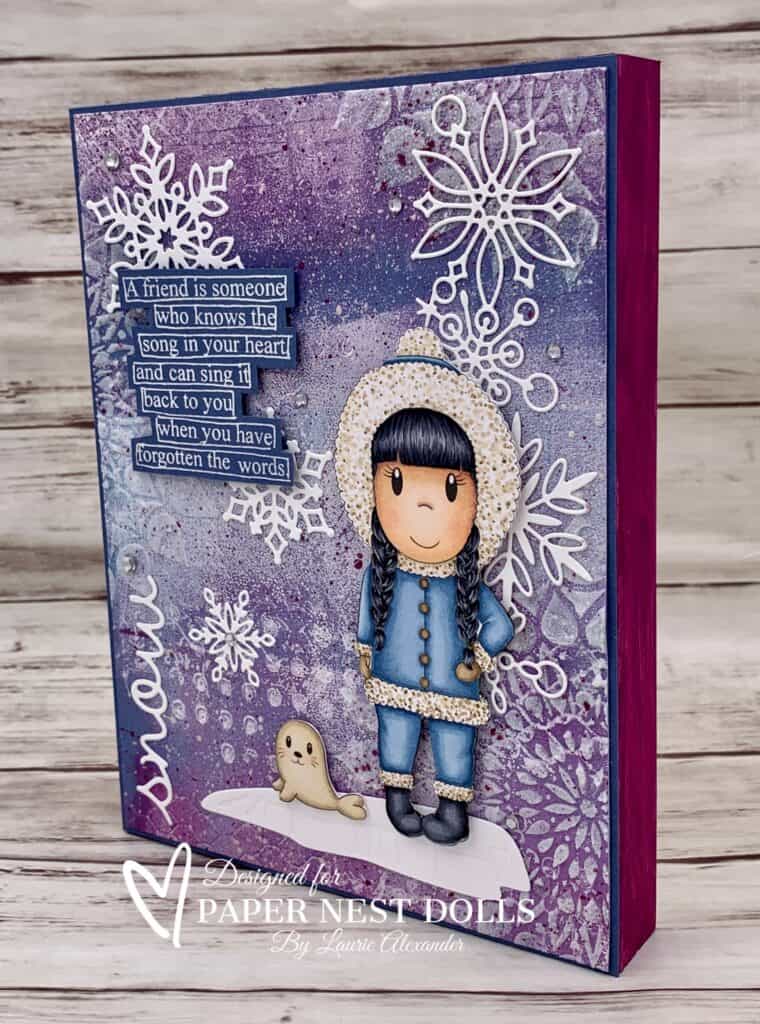
I trimmed down my print, framed it with a matching blue card stock and glued it to my dried frame. Then, I added my “snow” and snowflake dies. Next came, the white embossed sentiment which used the same blue card stock as the frame. I fussy cut my Copic coloured images and used a die cut iceberg to help ground them. A scattering of rhinestones added more shimmer to the piece.

————————–

Eskimo Ellie

Skin: E04/E11/E21/E00/E000/R20
Hair: C10/C7/C5/C4
Jacket: B97/B95/B93/B91
Trim: E44/E43/E42/E41
Mitts: E44/E43/E42
Boots: C10/C7/C5/C4
Seal: E43/E42/E41

Close Up of Eskimo Ellie and Friend

————————–

Supplies for My Winter Wonderland Mixed Media Piece:

Eskimo Ellie, Paper Nest Dolls
Paper Basics – Stamper’s Select White Cardstock, Papertrey Ink
Mixed Media Paper, Canson
8” x 10” Gel Printing Plate, Gelli Arts
Peacock Feathers Distress Paint, Tim Holtz, Ranger
Seedless Preserves Distress Paint, Tim Holtz, Ranger
Spun Sugar Distress Paint, Tim Holtz, Ranger
Frost White All-Purpose Ink, Tsukineko
Shimmery White Embossing Paste, Stampin’ Up!
Ledger Script CMS241, Tim Holtz Collection, Stampers Anonymous
Distressed Textures Stamp #10105756, BoBunny
Distressed Textures Stamp #10105762, BoBunny
The Right Words DS016, Dylusions
Water Mandala Stencil, Sweet Sentiment
Snowflake Border Die, Frostyville, Memory Box
Polar Bears Dies, Stampin’ Up!
Snowfall Thinlits Dies, Stampin’ Up!
Seasonal Frames Thinlits Dies, Stampin’ Up!
Versamark Ink, Stampin’ Up!
Basics Embossing Powder, Stampin’ Up!
Heat Gun, Stampin’ Up!
Tim Holtz Distress Splatter Brush, Ranger
Splatter Booth
Brayer, Recollections, Michaels Arts & Crafts
Palette Knives, Stampin’ Up!
Paper Snips, Stampin’ Up!
Exacto Knife
6” x 8” Wood Painting Panel, Currys
Rhinestone Basic Jewels, Stampin’ Up!
Misty Moonlight and Basic White Card Stock, Stampin’ Up!

Finished piece size: 6” x 8”

Side View of Mixed Media Piece
Side View of My Mixed Media Piece

To view my other Paper Nest Dolls projects, please click here.

Hope you like My Winter Wonderland Mixed Media Piece using Eskimo Ellie by Paper Nest Dolls!

Thank you for stopping by!

Hugs,
Laurie

My Happy Christmas Gnome Ornament

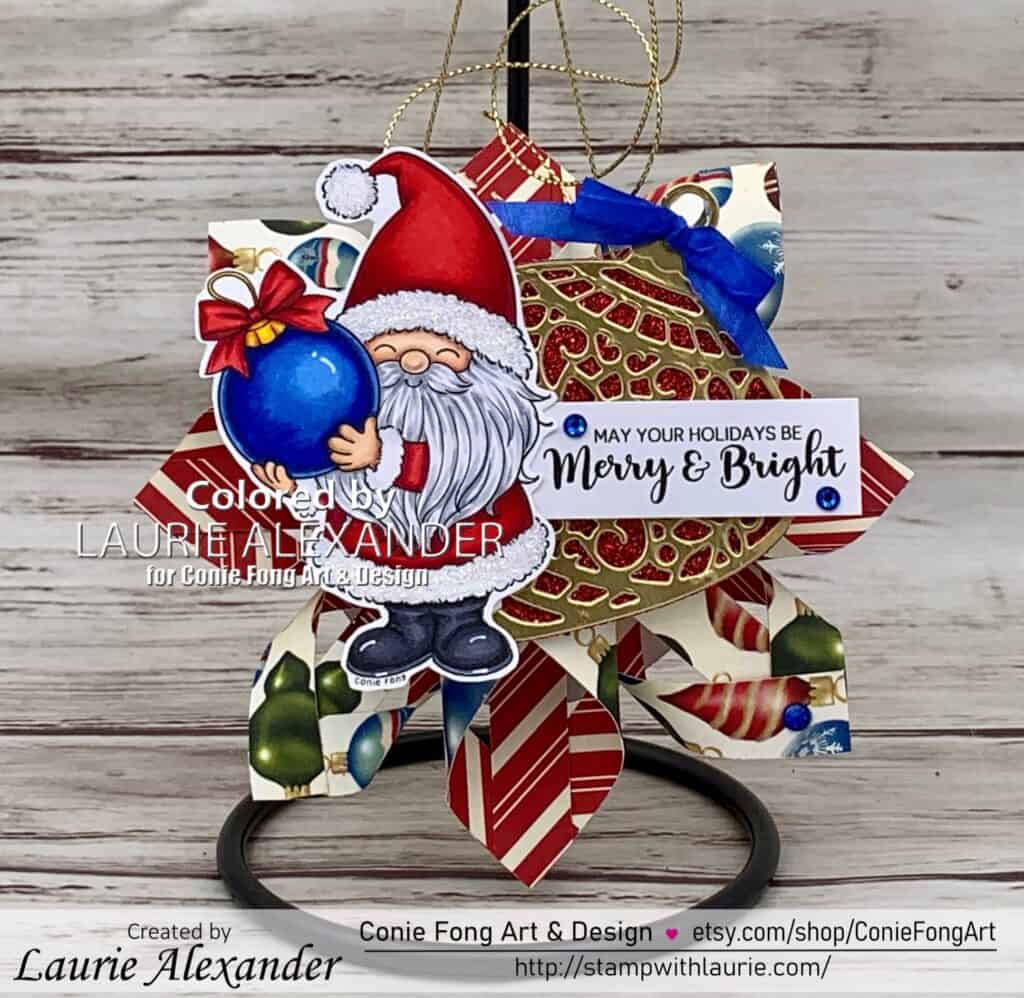
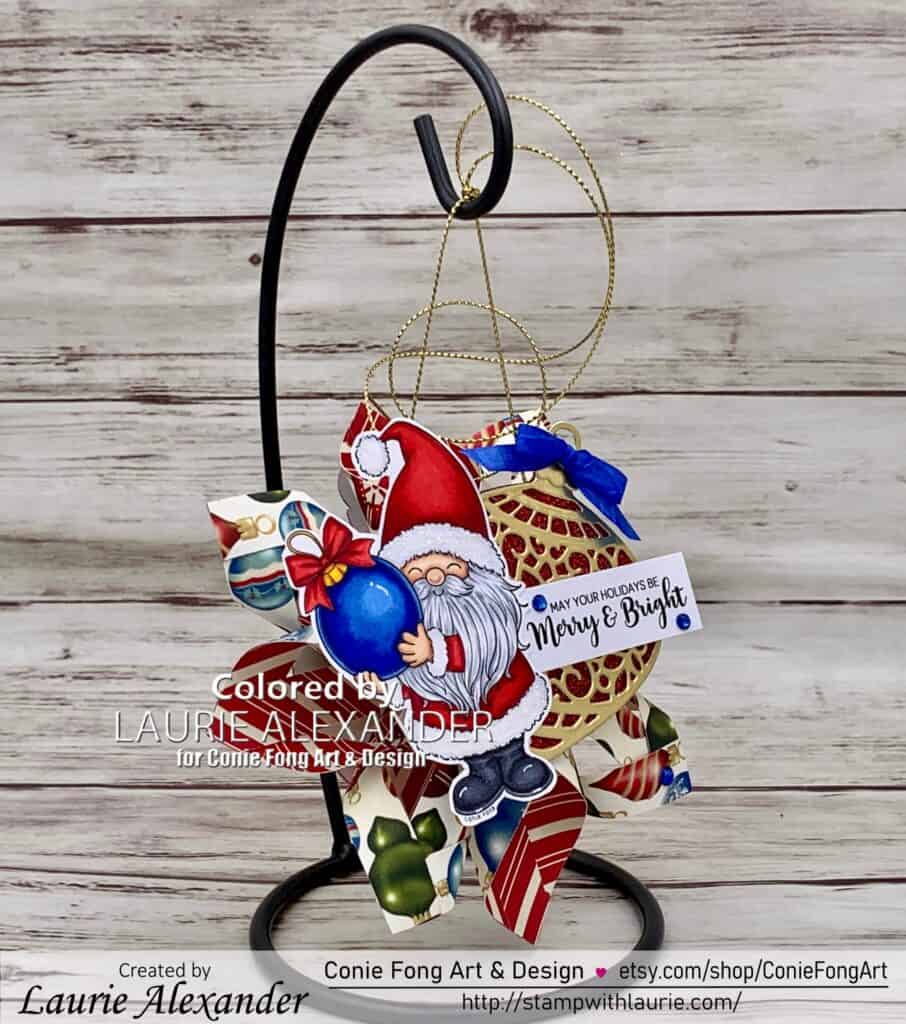
Ornament with Gnome on it
Christmas Gnome Ornament

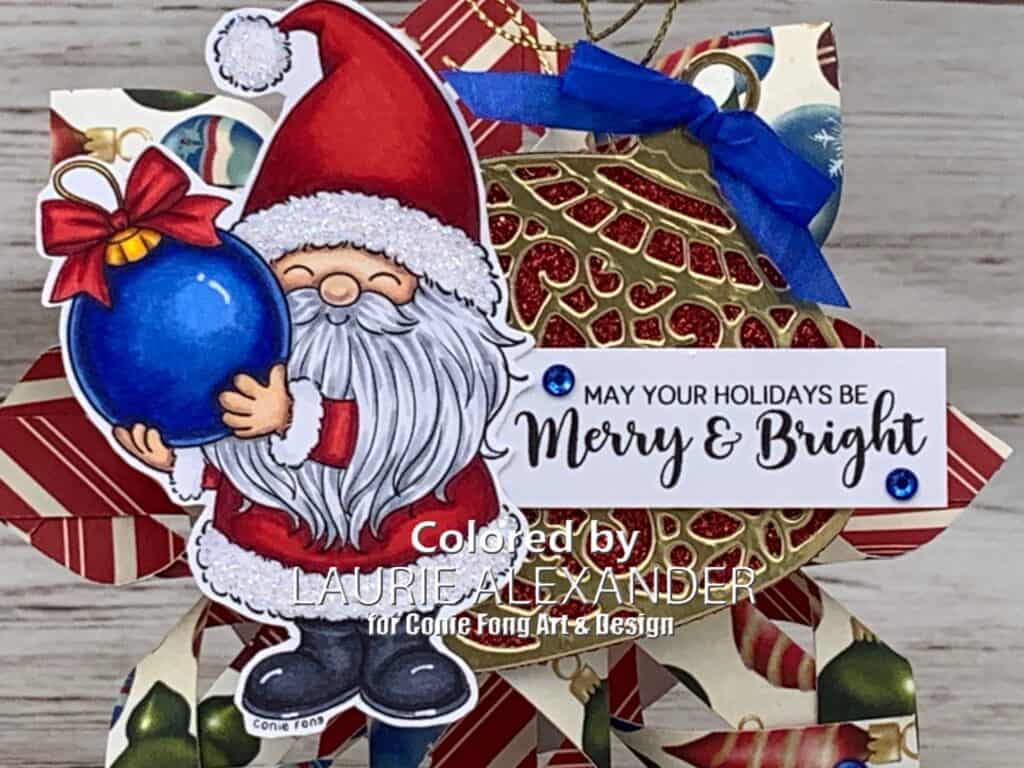
Hello Crafty Friends! It’s Laurie here! I am sharing my Happy Christmas Gnome Ornament as my Design Team Inspiration Project for Conie Fong Art & Design using the Bauble Gnome and Sentiment Bundle. He comes with 6 stamps including sentiments May Your Holidays Be Merry & Bright and Tis the Season to be Jolly in PNG and JPG.

Details of My Ornament

I decided that I wanted to create something a little different than a card with this cutie. So, I made a Scandinavian Star ornament using some Designer Series Paper that had baubles on one side and red stripes on the other. I had so much fun colouring him with my Copic markers in reds/whites with a pop of blue for his bauble to match my paper choice.

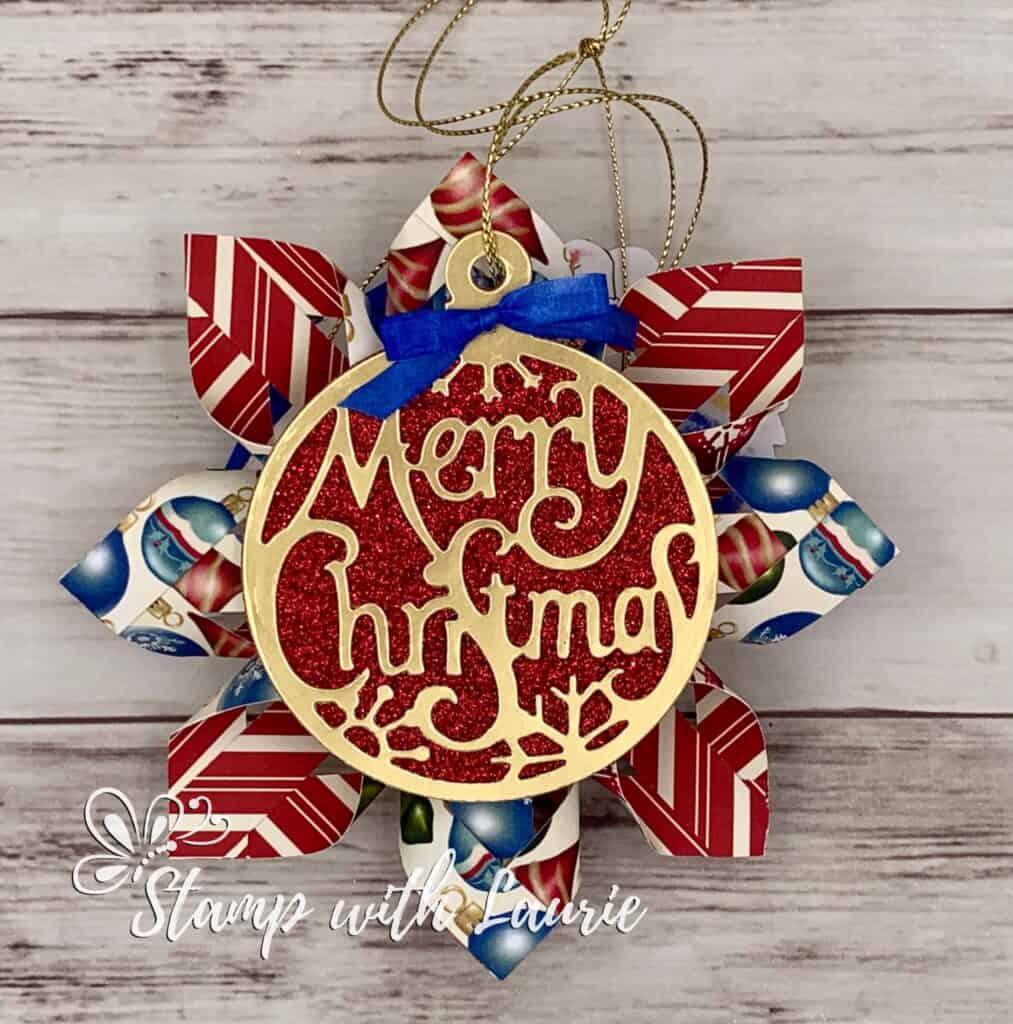
To decorate my ornament, I created a bauble with gold foil and red glimmer paper that I placed behind my gnome with the sentiment layered on it. Since you may see the back of the ornament, I also created another bauble on the back that says Merry Christmas. Since I didn’t have matching blue embellishments, I coloured the ribbon and rhinestones with my B28 Copic marker. A favourite technique I love to use to make things match! Some Gold trim is added to hang the ornament.

Back of Ornament
Back of Ornament with Merry Christmas Die Cut

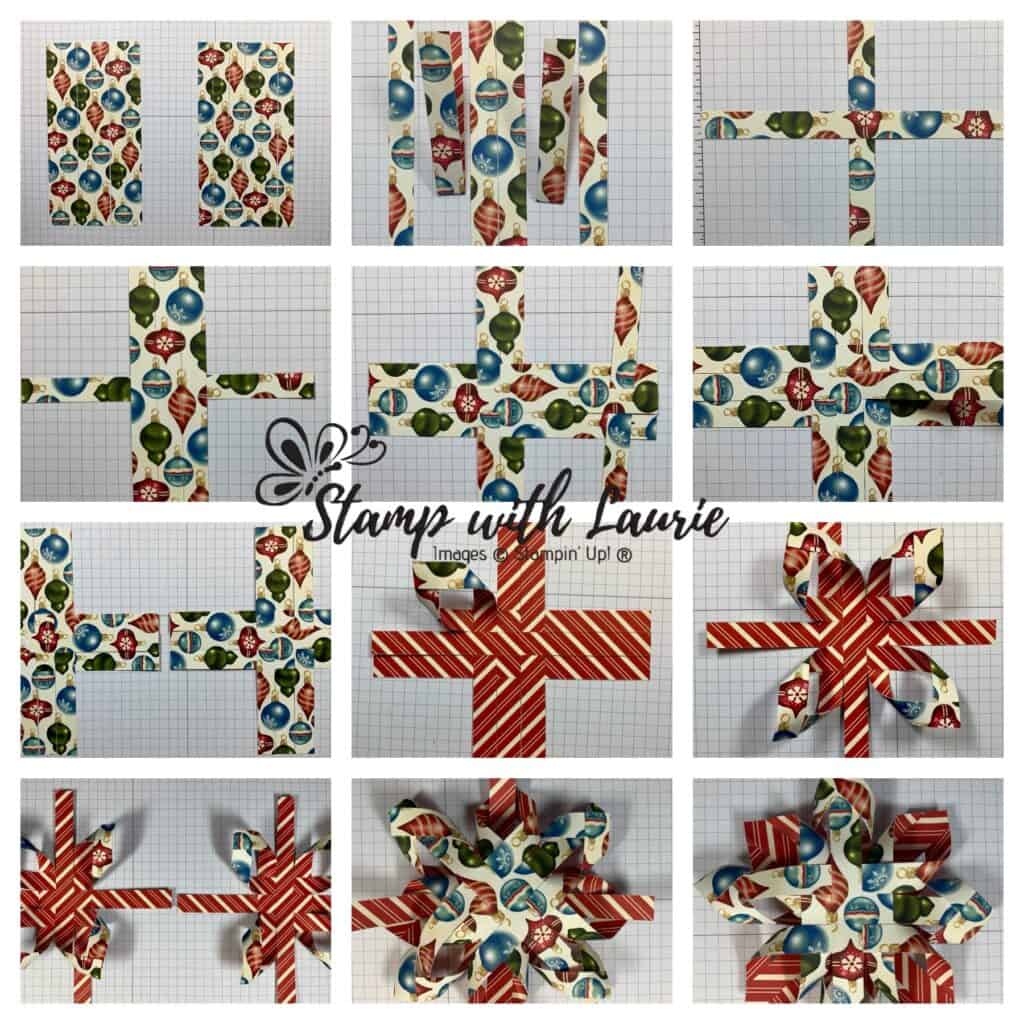
Instructions to Create A Scandinavian Star

  • Start with a 6” x 6” piece of DSP cut into 12 strips of ½” wide. Make 2 piles of 6 pieces. If you have a continual pattern, make sure they line up.
  • Fold two of the strips in half to find center point and adhere in a “plus” shape.
  • Adhere two more strip on either side of the top piece lining up pattern.
  • Weave two strips on either side of the DSP on the bottom piece and adhere.
  • Using the remaining six strips, repeat the preceding steps to create the other half of the ornament
  • Turn over and adhere the corner strips together. You’ll fold the strips under until the opposite side is showing, then adhere those ends together so they are flush.  If you are not seeing a “v” of the opposite side paper on the tips, then your ends are not being glued in the correct direction
  • Continue until all 4 corners are adhered.
  • Adhere the 4 corners of the other half so that you have 2 identical shapes.
  • Place one side facing down on top of the other, rotating it so that the points alternate, and the loose strips will each match up to an opposing point.
  • Thread each of the loose strips through the back of the points, so the whole ornament is loosely interlocking.
  • Adhere the loose ends to the underside of each point. 
  • Snip off the excess of each point to create a points for the star.
Steps to create Scandinavian Star
Steps to Create Scandinavian Star

————————–

Copic Markers:

Skin: E000/E00/E21/E11/E04
Hair: C4/C3/C1
Boots: C9/C7/C5
Reds: R39/R37/R35
Bauble: B39/B28/B24/B32
Gold: E15/Y38/Y35/Y06
Ribbon/Rhinestones: B28

Close Up of Bauble Gnome

————————–

Card Recipe for My Happy Christmas Gnome Ornament:

Bauble Gnome and Sentiment Bundle, Conie Fong Art & Design
Paper Basics – Stamper’s Select White Cardstock, Papertrey Ink
Home for Christmas Designer Series Paper, Stampin’ Up!
Gold Foil Sheets, Stampin’ Up!
Red Glimmer Paper, Stampin’ Up!
Merry Christmas Bauble Duo, Creative Expressions Die Paper Cuts Collection
Delicate Ornament Thinlits Dies, Stampin’ Up!
Whisper White Crinkled Seam Binding Ribbon, Stampin’ Up!
Rhinestone Basic Jewels, Stampin’ Up!
Simply Elegant Trim, Stampin’ Up!
Star Dust Stickles, Ranger
White Gelly Roll Pen, Sakura
Tombow Adhesive
Paper Snips

Finished ornament size: 5.25” x 5.25”

Showing the Layers of The Ornament

————————–

To view my other Conie Fong Art & Design projects, please click here.

Hope you like my Design Team Inspiration using
Bauble Gnome and Sentiment Bundle for Conie Fong Art & Design!

Thank you for stopping by!

Hugs,
Laurie

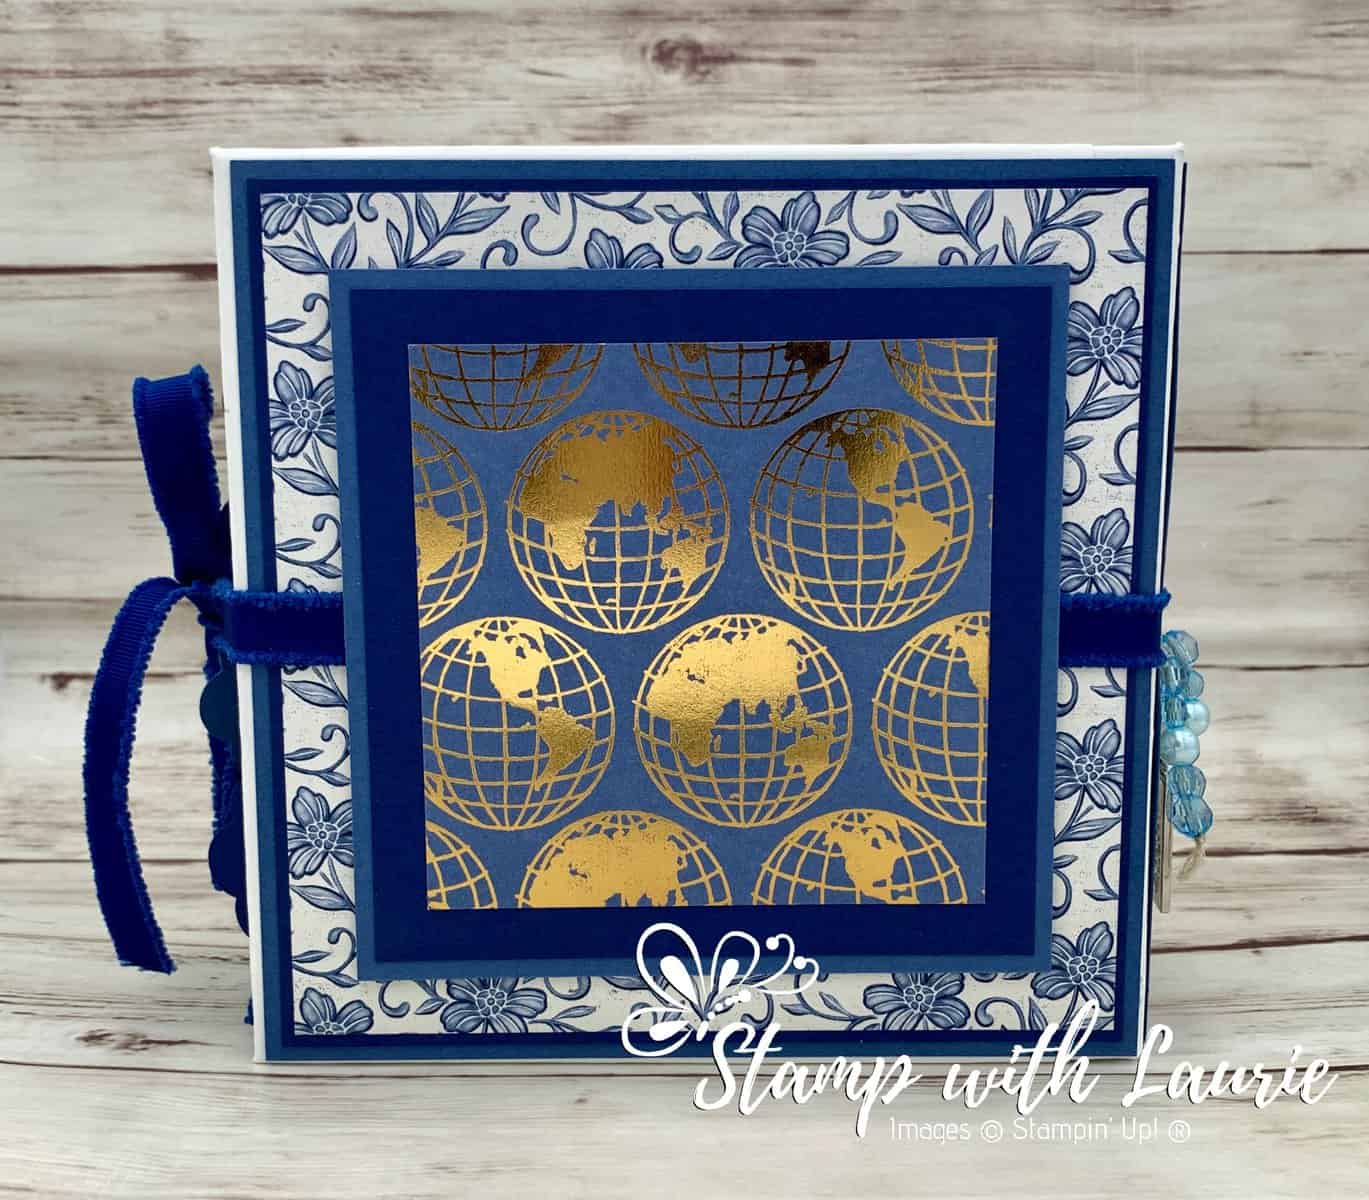
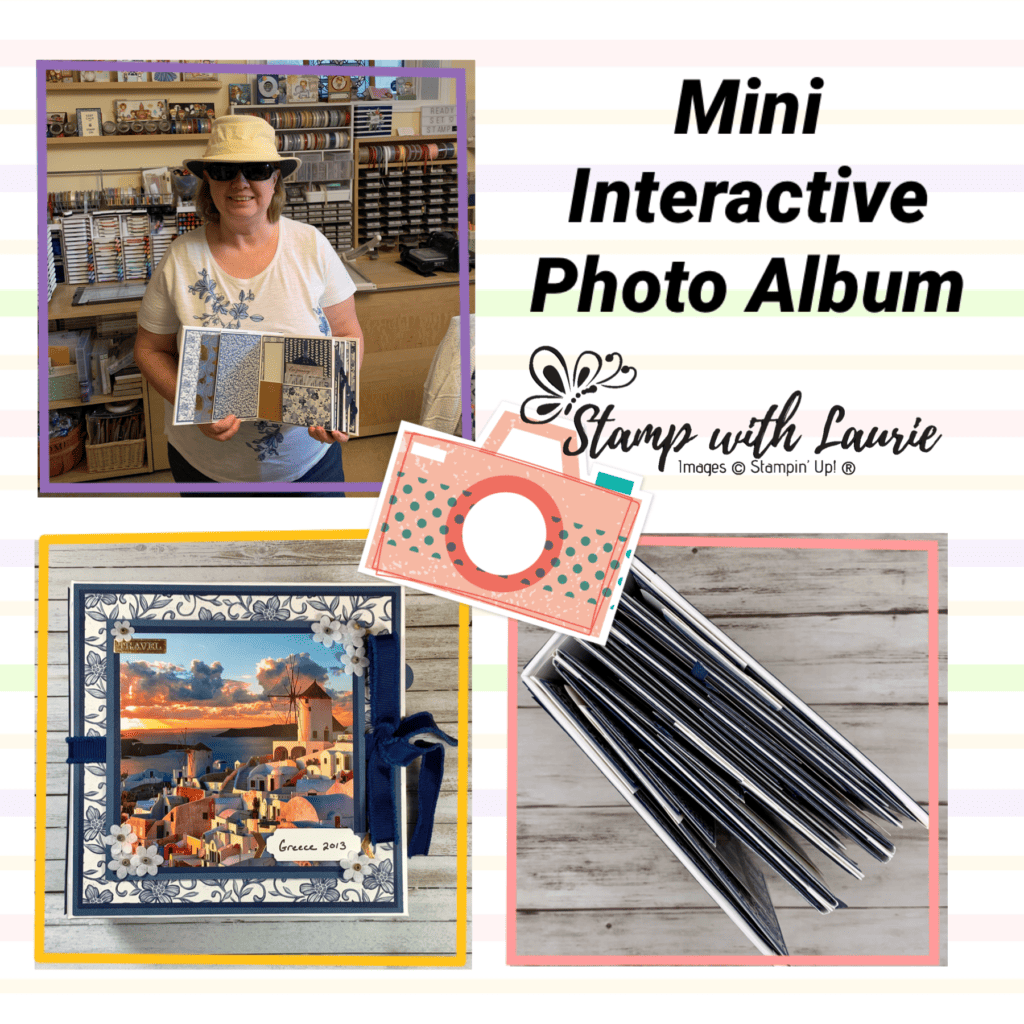
My Mini Interactive Photo Album

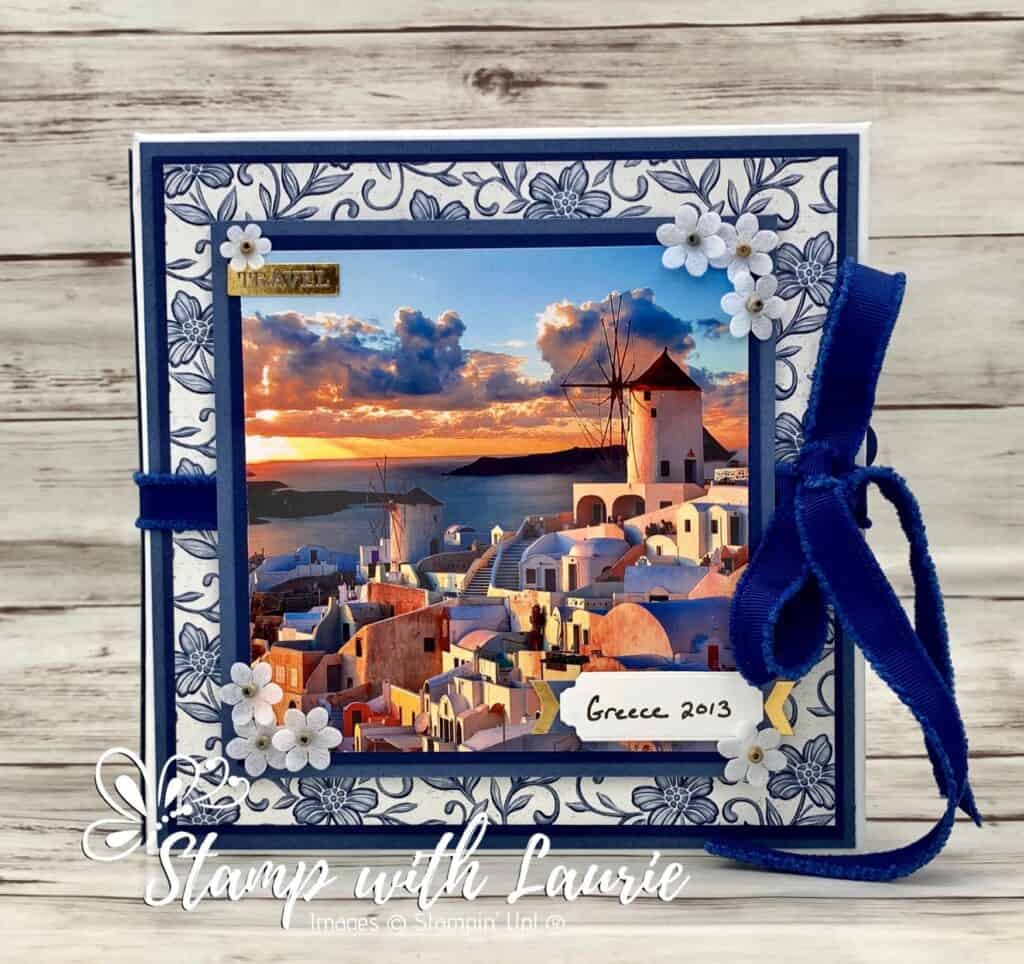
Cover of Mini Interactive Photo Album

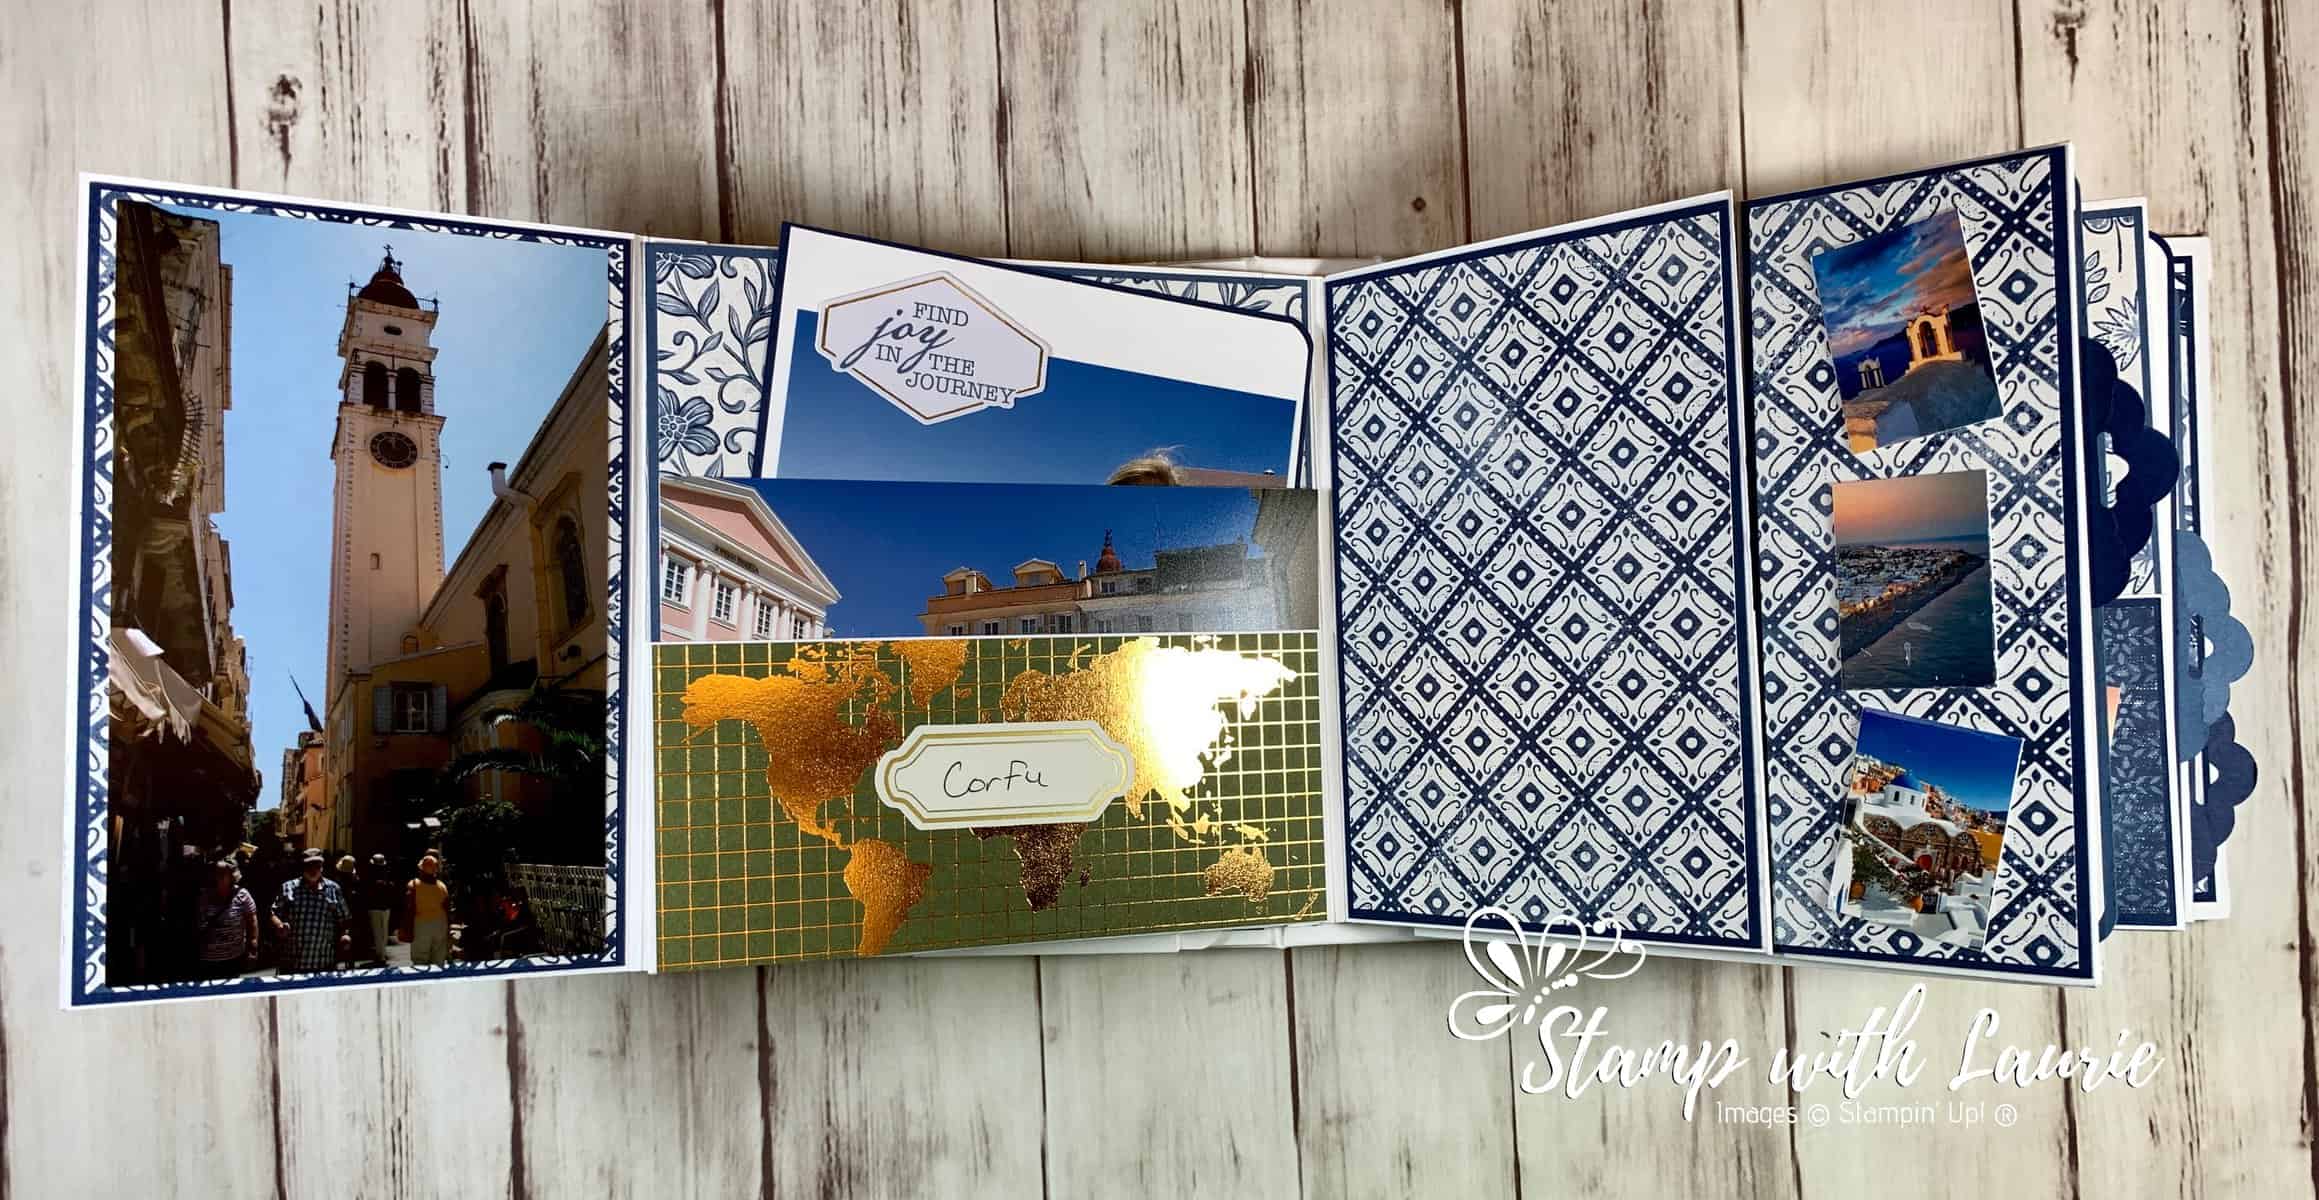
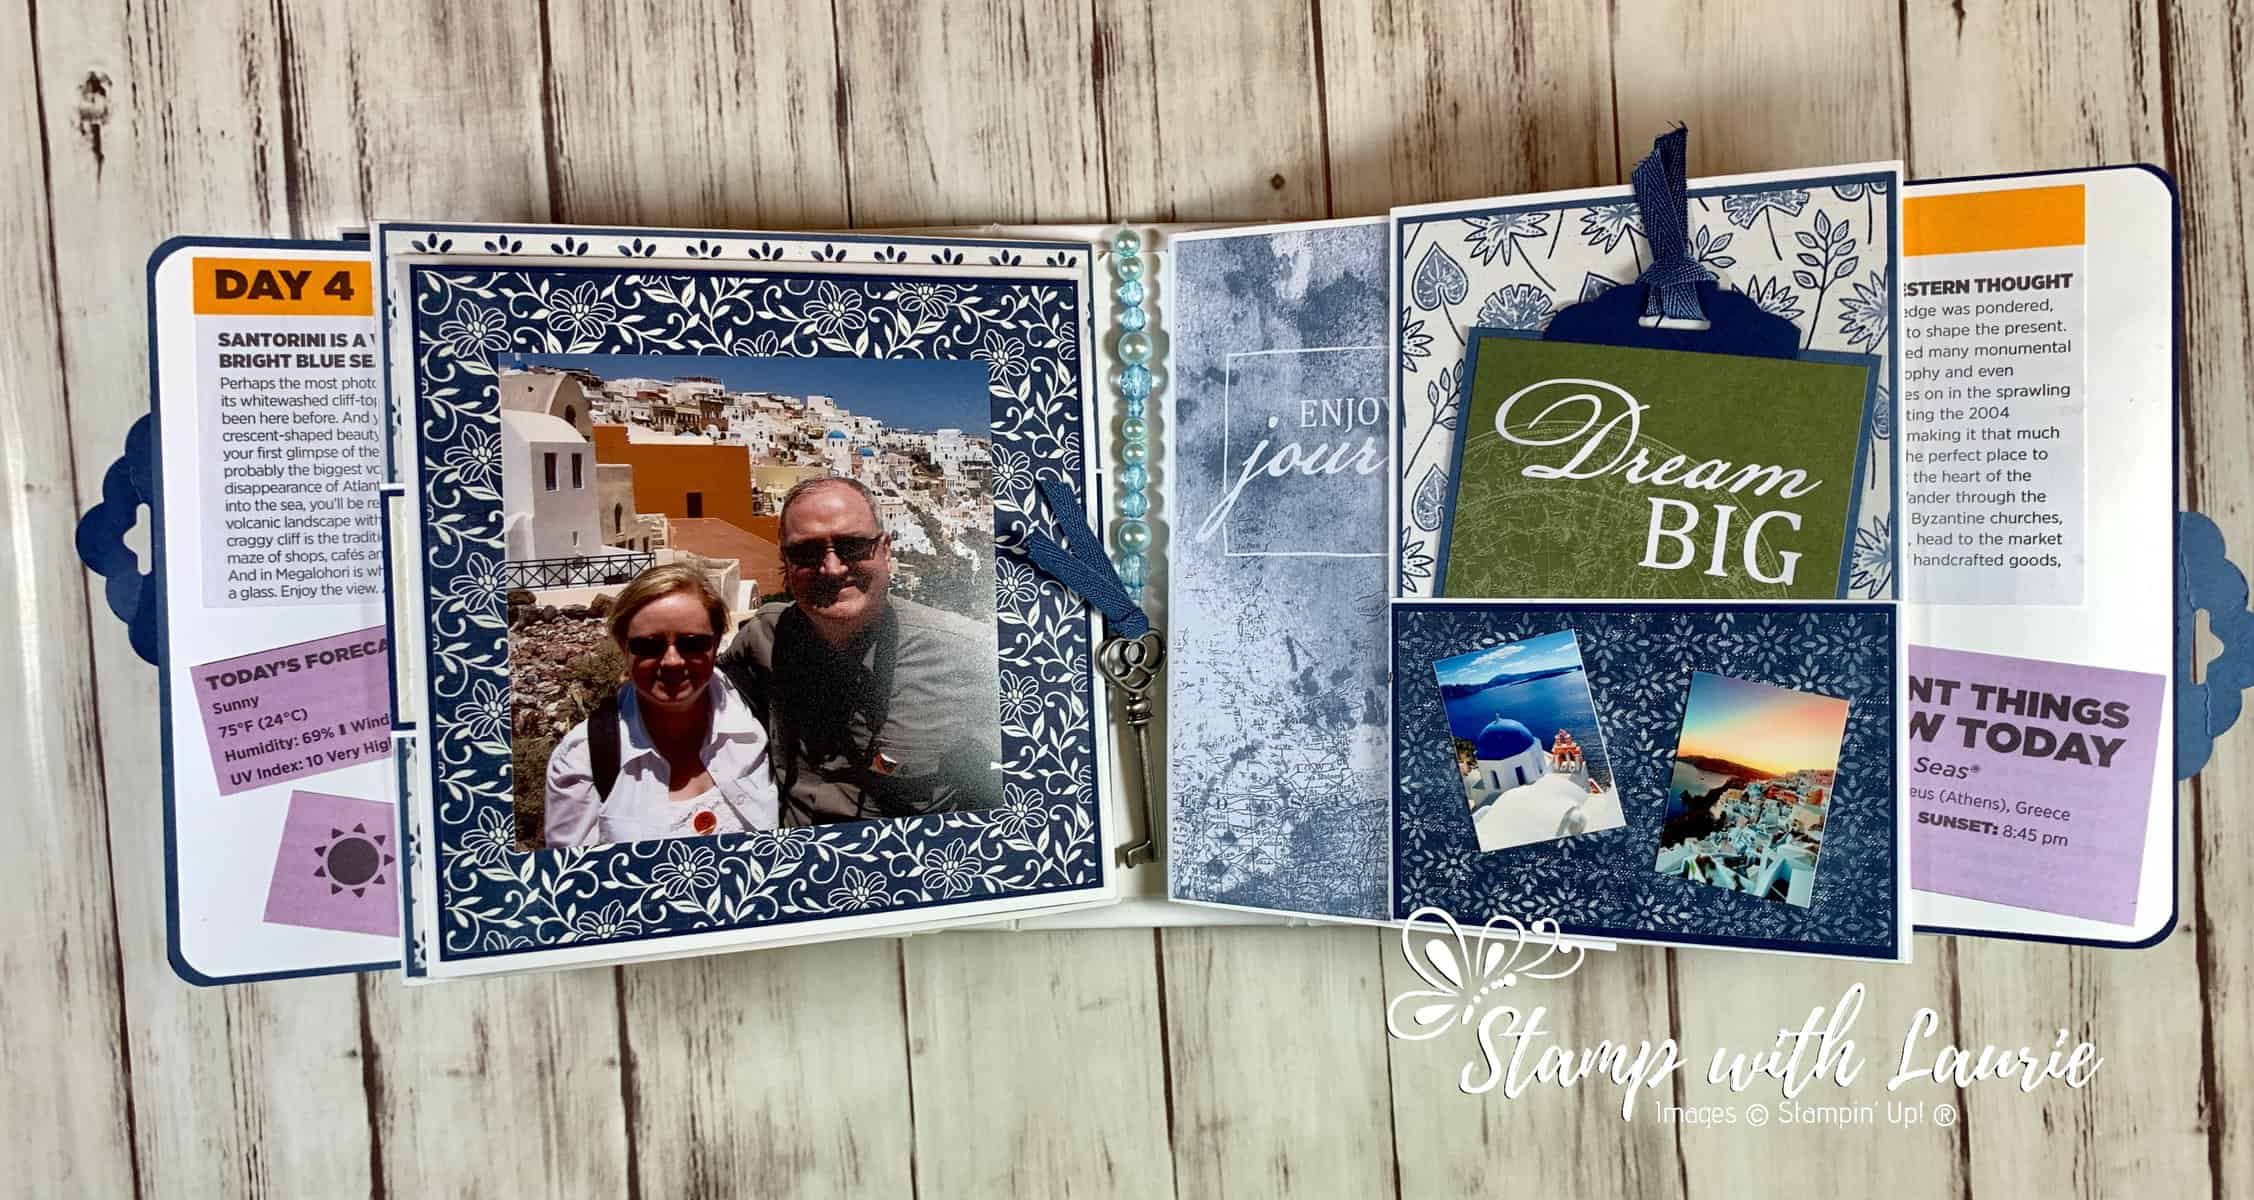
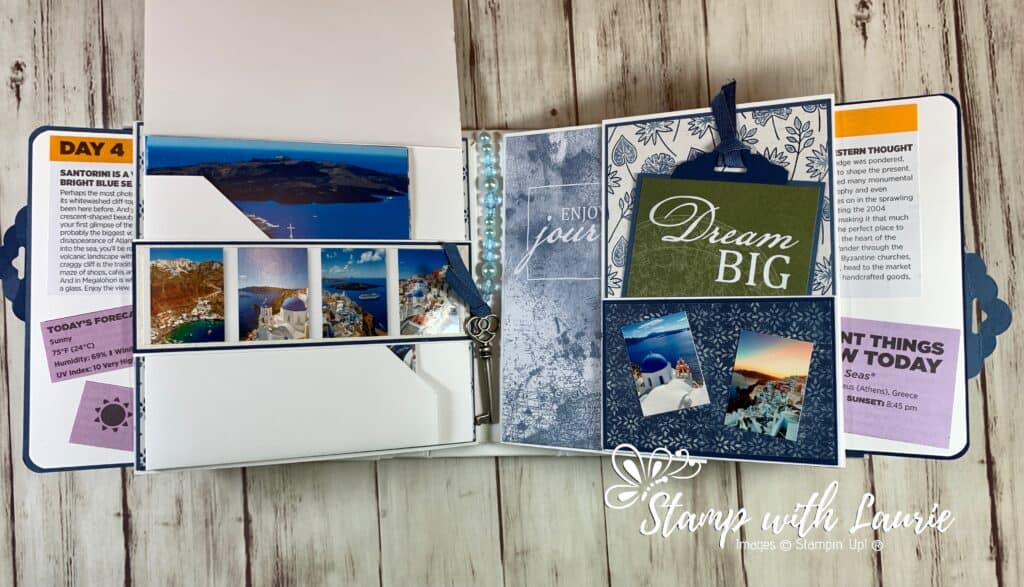
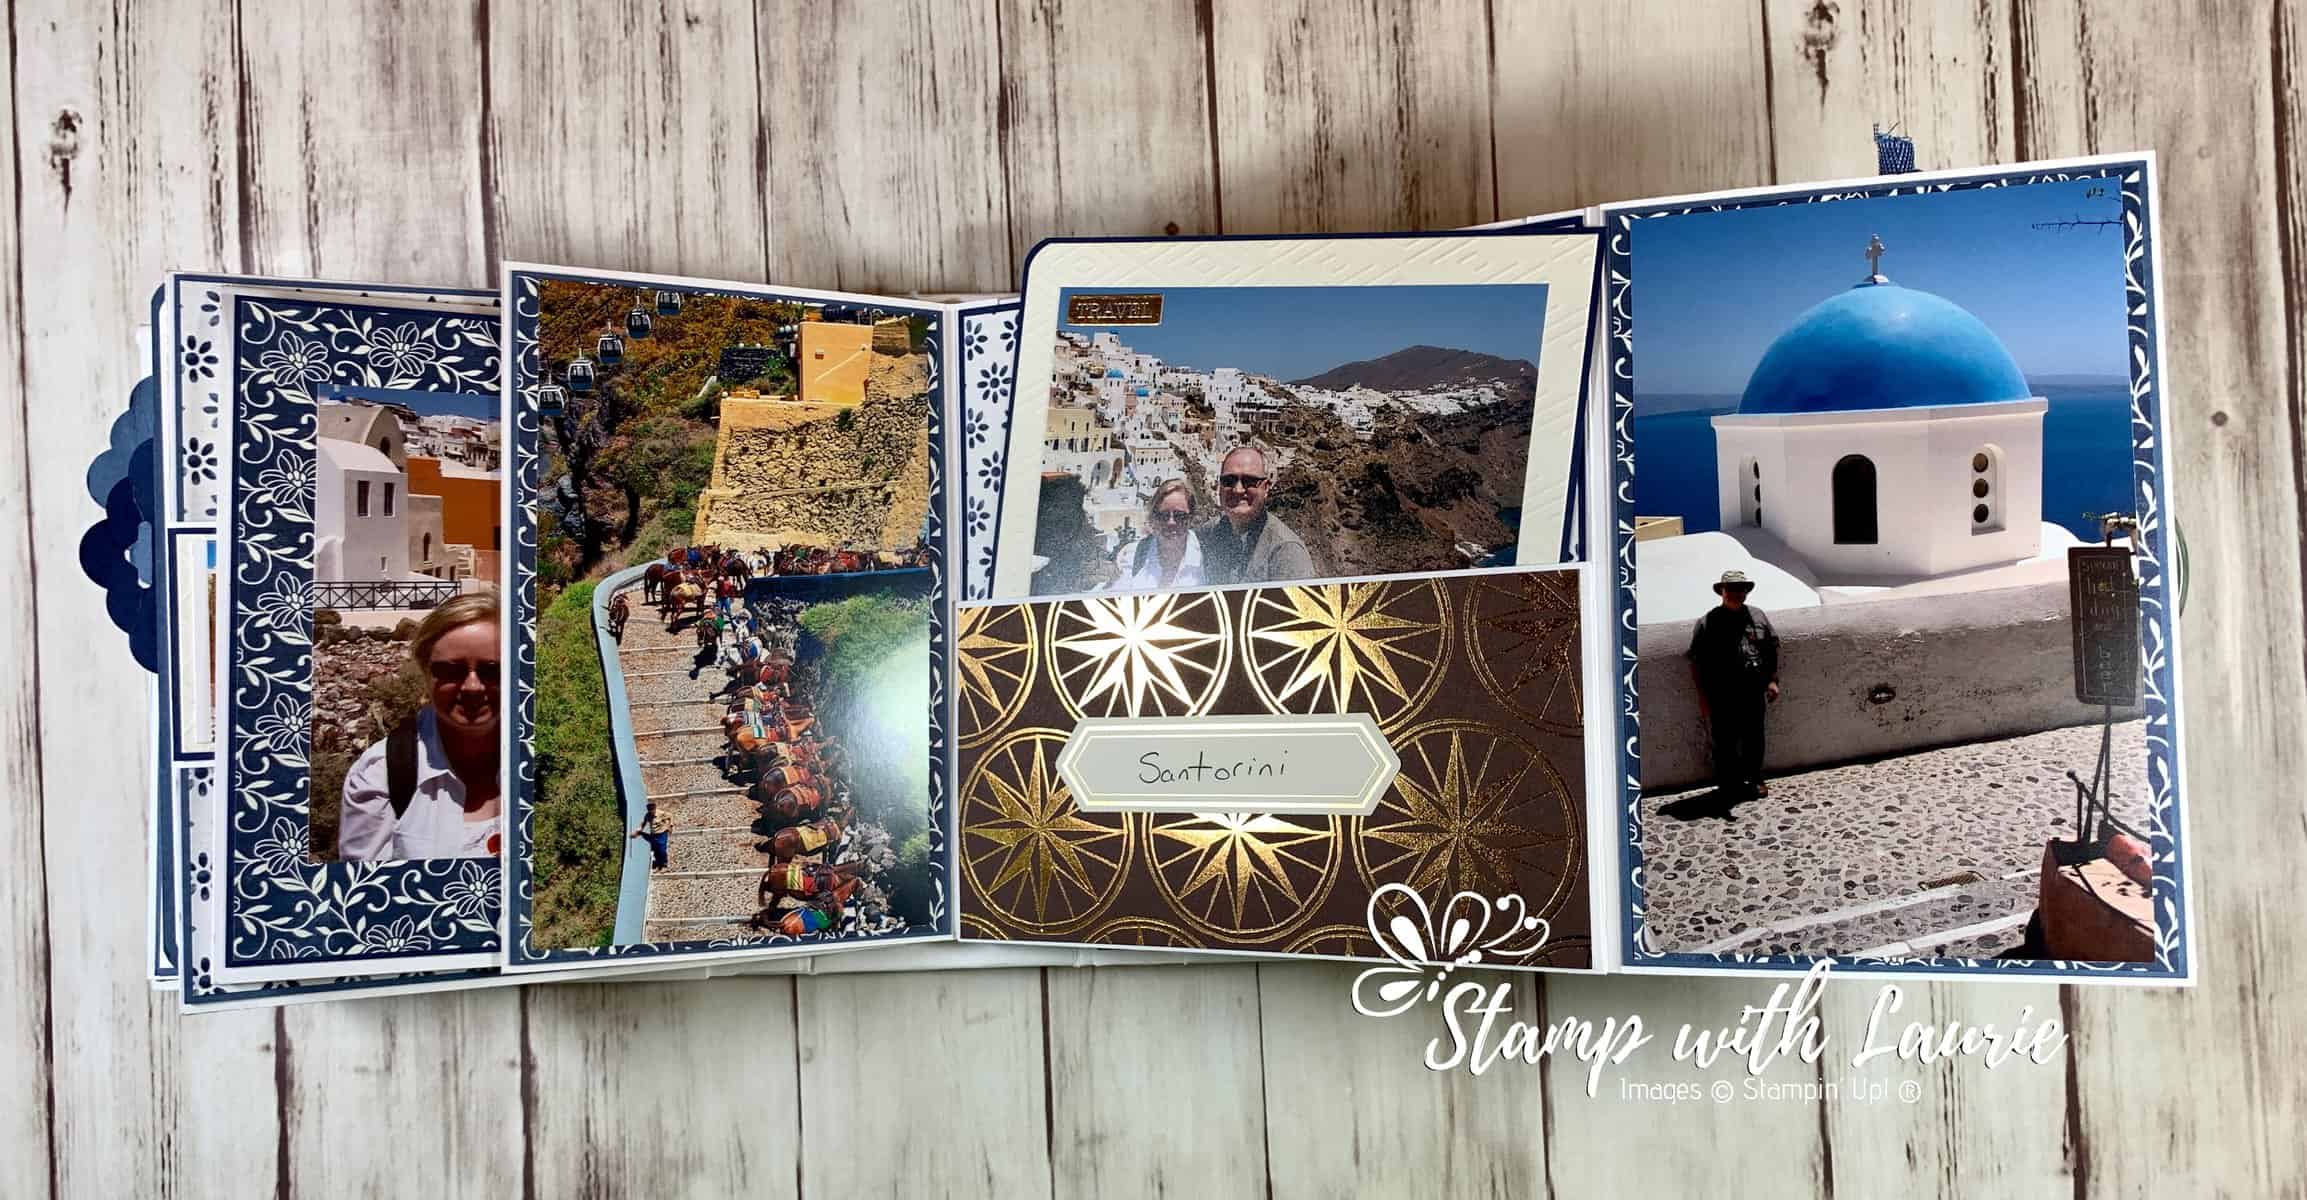
Today is I am sharing something different than a card. I was asked by a fellow demonstrator to create a project with a Greek theme for a Demonstrator Playdate. I decided instead of creating a card that I would make a photo album from scratch of a past trip that my husband and I went on which started in Paris went on to Venice to catch a cruise visiting Dubrovnik, Corfu, Santorini, Athens, Katakolon and back to Venice. So, I am sharing my Mini Interactive Photo Album using photos from that trip.

Video of my Mini Interactive Photo Album

Video of my Mini Interactive Photo Album
Music Copyright – Moose Ca Ca, My Big Fat Greek Wedding

I had wanted to create one of these interactive albums for a long time. So, I googled how to create one and found a four part series of videos by Cal Summers with a PDF with the measurements. I will include links to her PDF and videos at the end of this post.

The Details of My Album

This kind of album is perfect for any 6” x 6” Designer Series Paper. But, since the colours of the Greek flag are blue and white, I decided to use the Boho Indigo Product Medley. The pretty little paper flowers that come in the Medley were perfect to decorate my cover. I used the World of Good Memories and More Cards and stickers with their travel theme to decorate my album along with the cut outs from the Boho Indigo Medley. The Scallop Tag Topper Punch was used for my tags and pull outs.

What is so nice about this album is that it is flexible to suit your needs. It uses the same 4 page designs twice giving you 8 pages that you can place in whatever order you like.

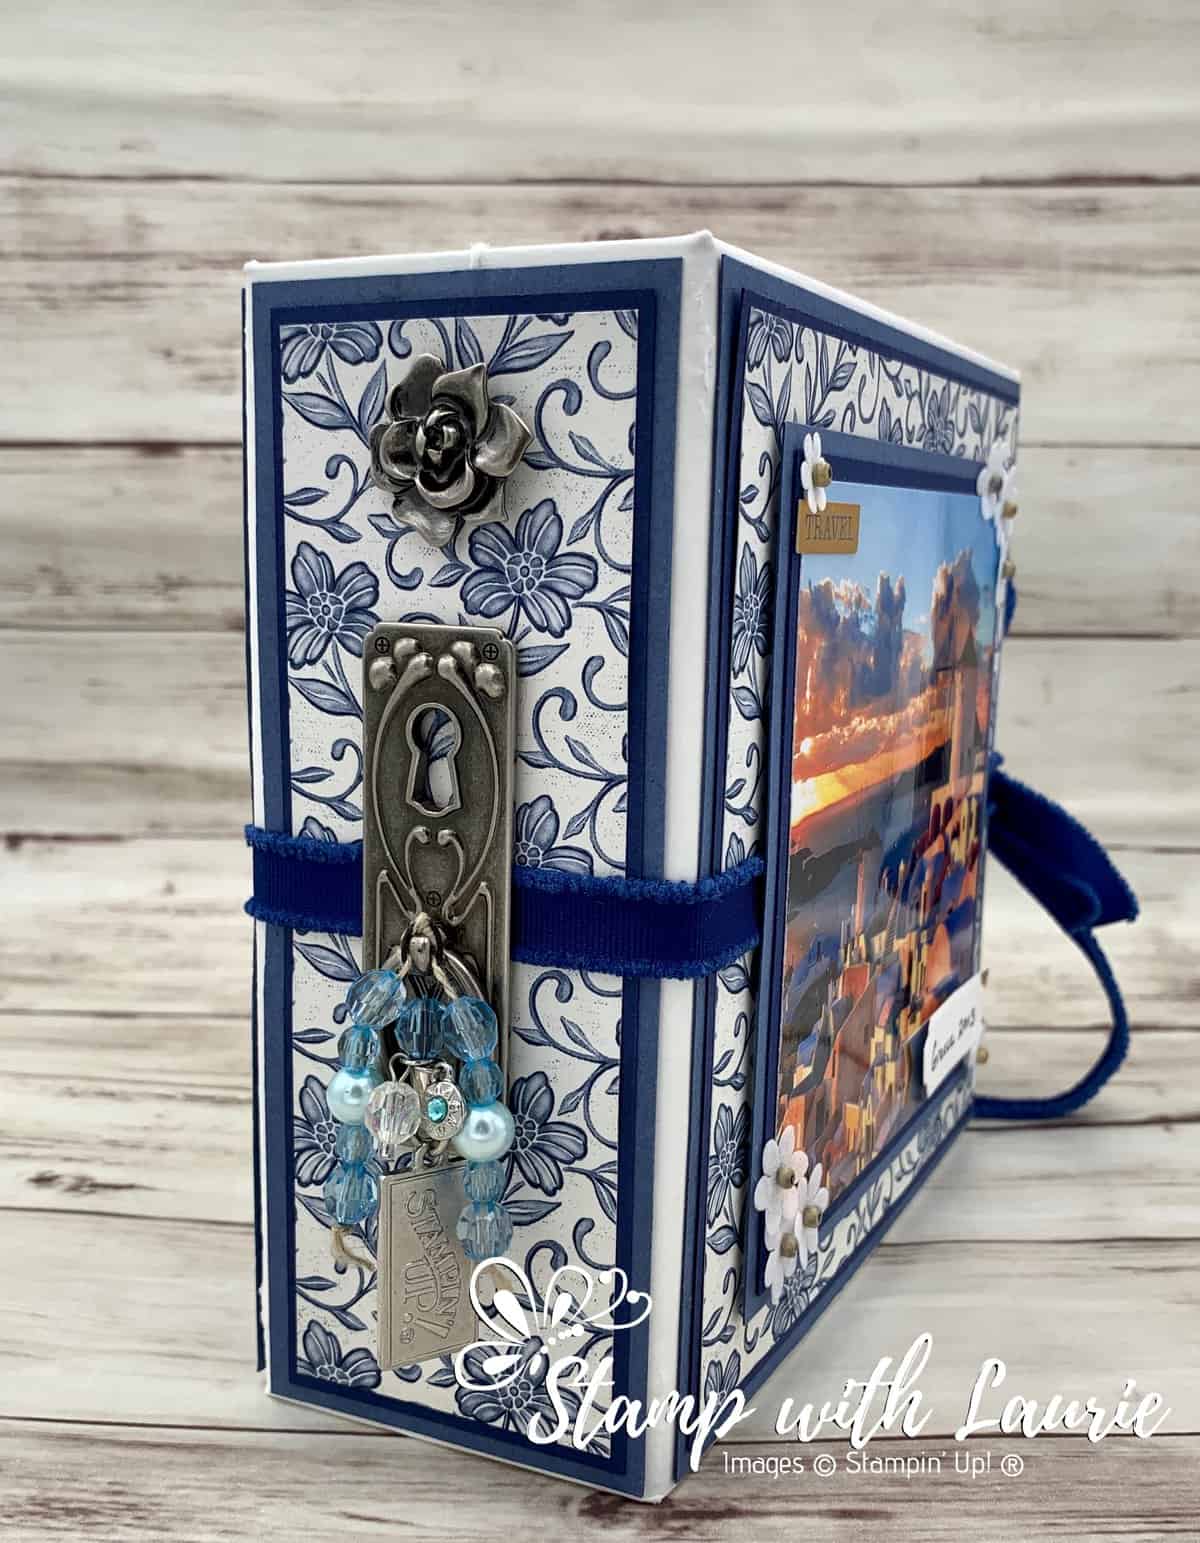
Spine of My Mini Album
Spine of My Mini Interactive Photo Album

I decorated my spine with a vintage metal key hole/latch with a rose that I bought from Michael’s Arts & Crafts a while back. The beads were from the dollar store and threaded on Whisper White Baker’s Twine from the Snail Mail Twine Combo Pack. I added a pretty charm with a blue stone to represent “Greece” and a Stampin’ Up! charm that I had from a key chain.

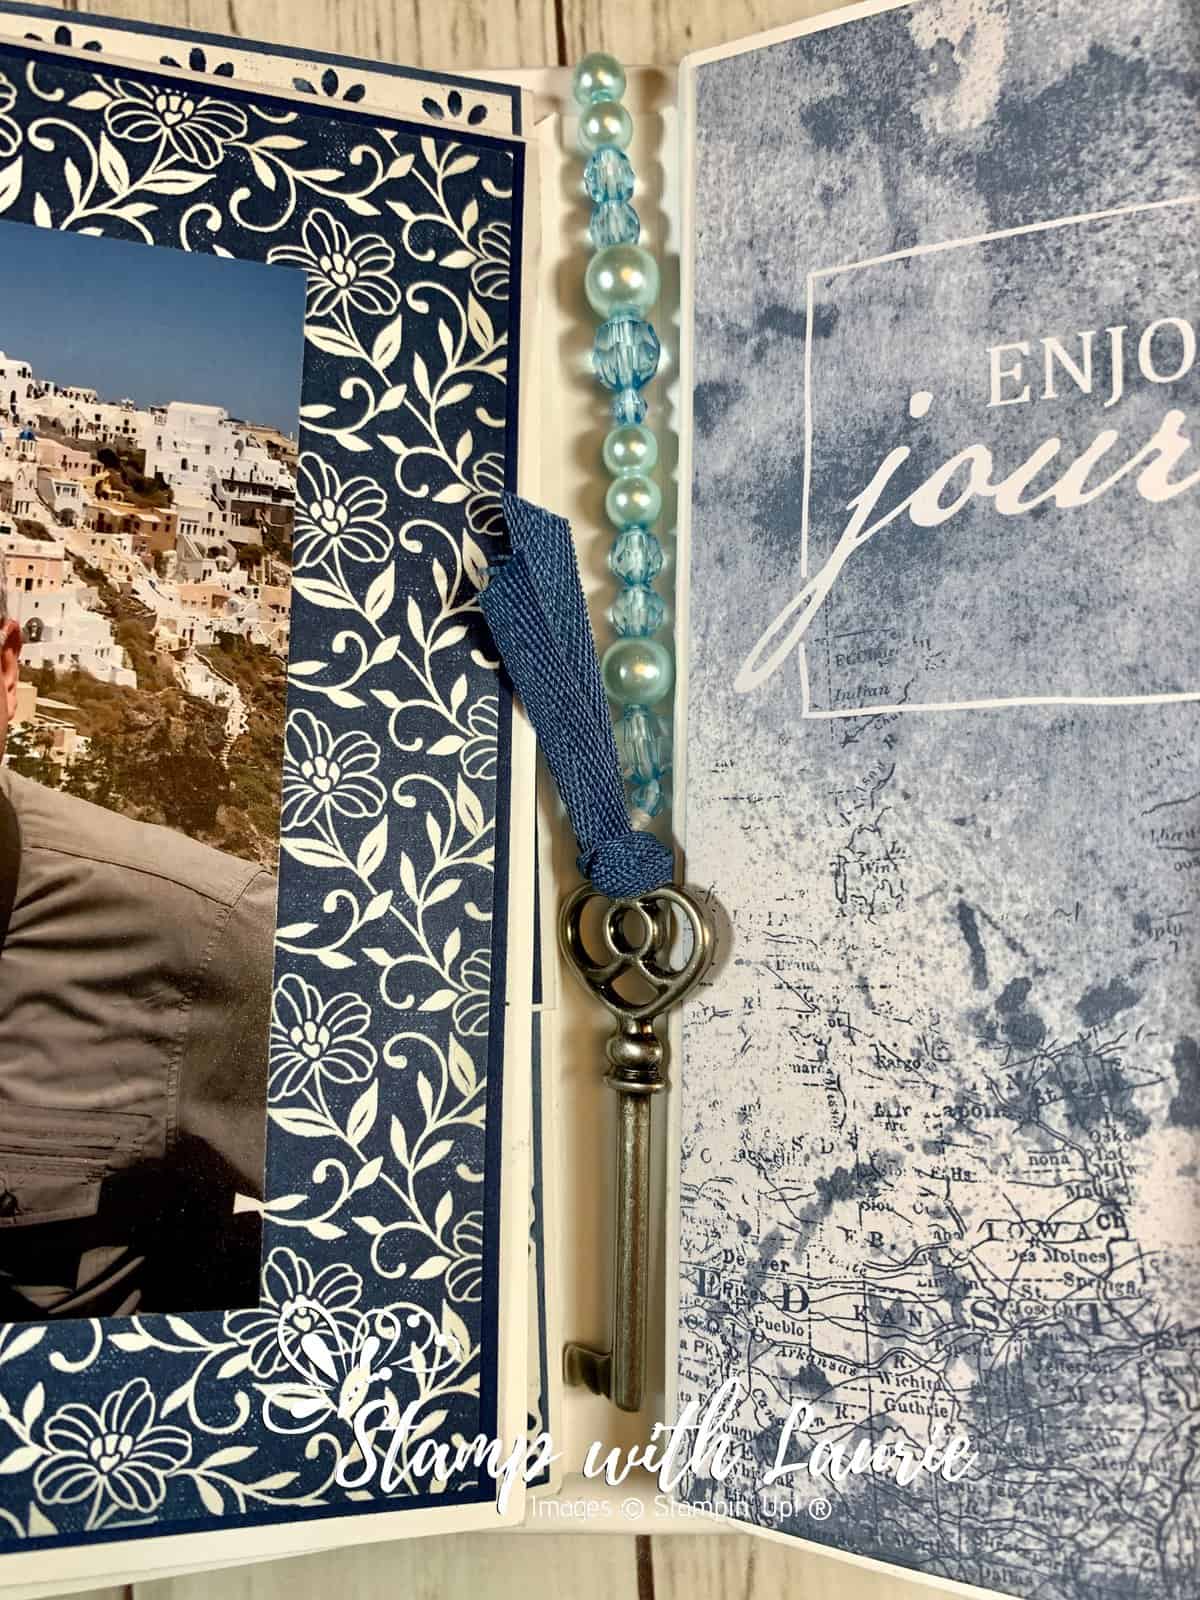
I also created a beaded bookmark with a key and Misty Moonlight Ribbon for the inside of my album.

Bookmark
Beaded Bookmark

Finally I decorated the back of the cover with the World of Good Designer Series Paper that has the golden globes on it. 

Back Cover
Back Cover of My Album

Some Tips

For my covers, I used the cardboard found with the instruction for the Paper Pumpkin Kits. I tend to keep them just in case I can recycle them somehow.

I didn’t have any Tyvek. So I used a used plastic mailing envelope that I cut down to the correct size. As long as it will not stretch or rip and is flexible, it should work.

Make sure that you secure the ribbon to tie your album closed to the cover before you add the decorative elements on the covers and spine. Lol!

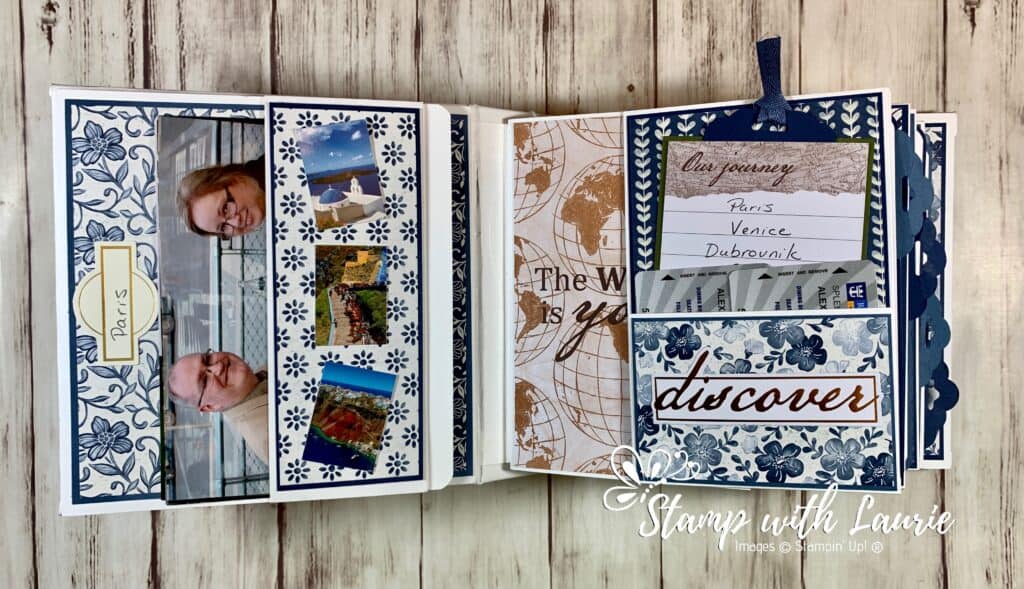
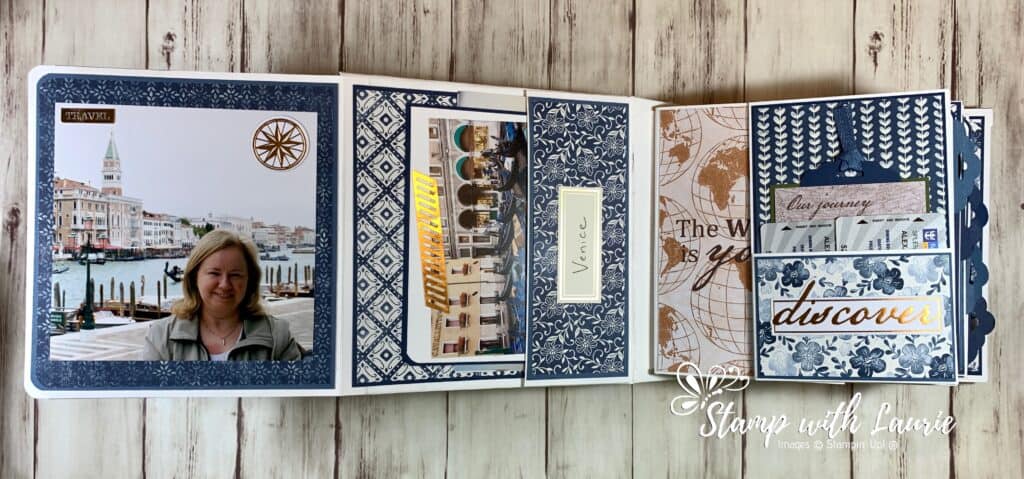
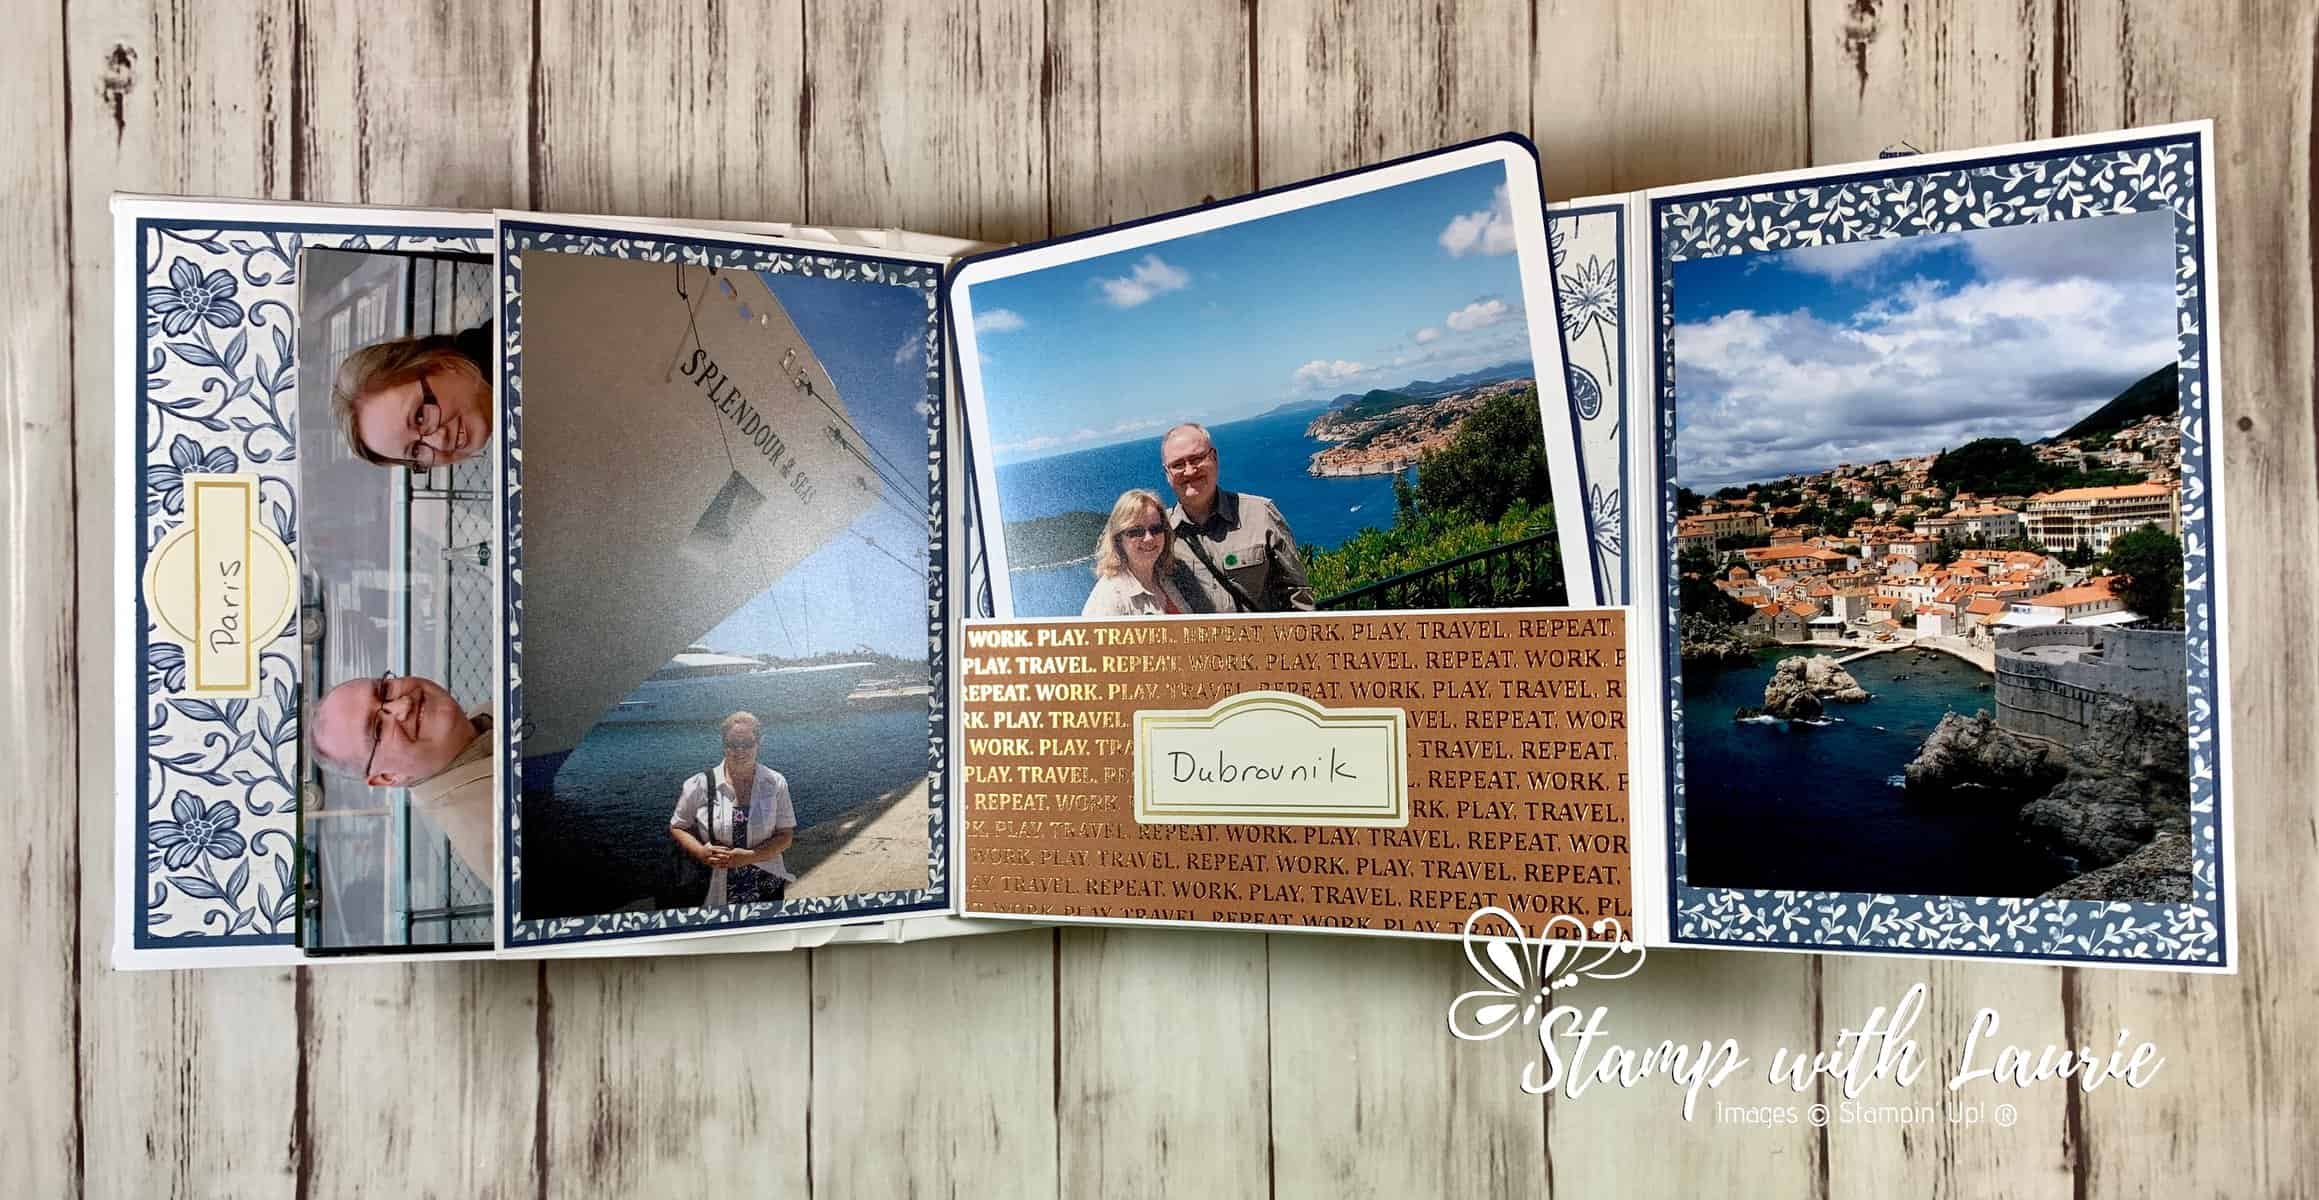
Photos of the Inside of my Album

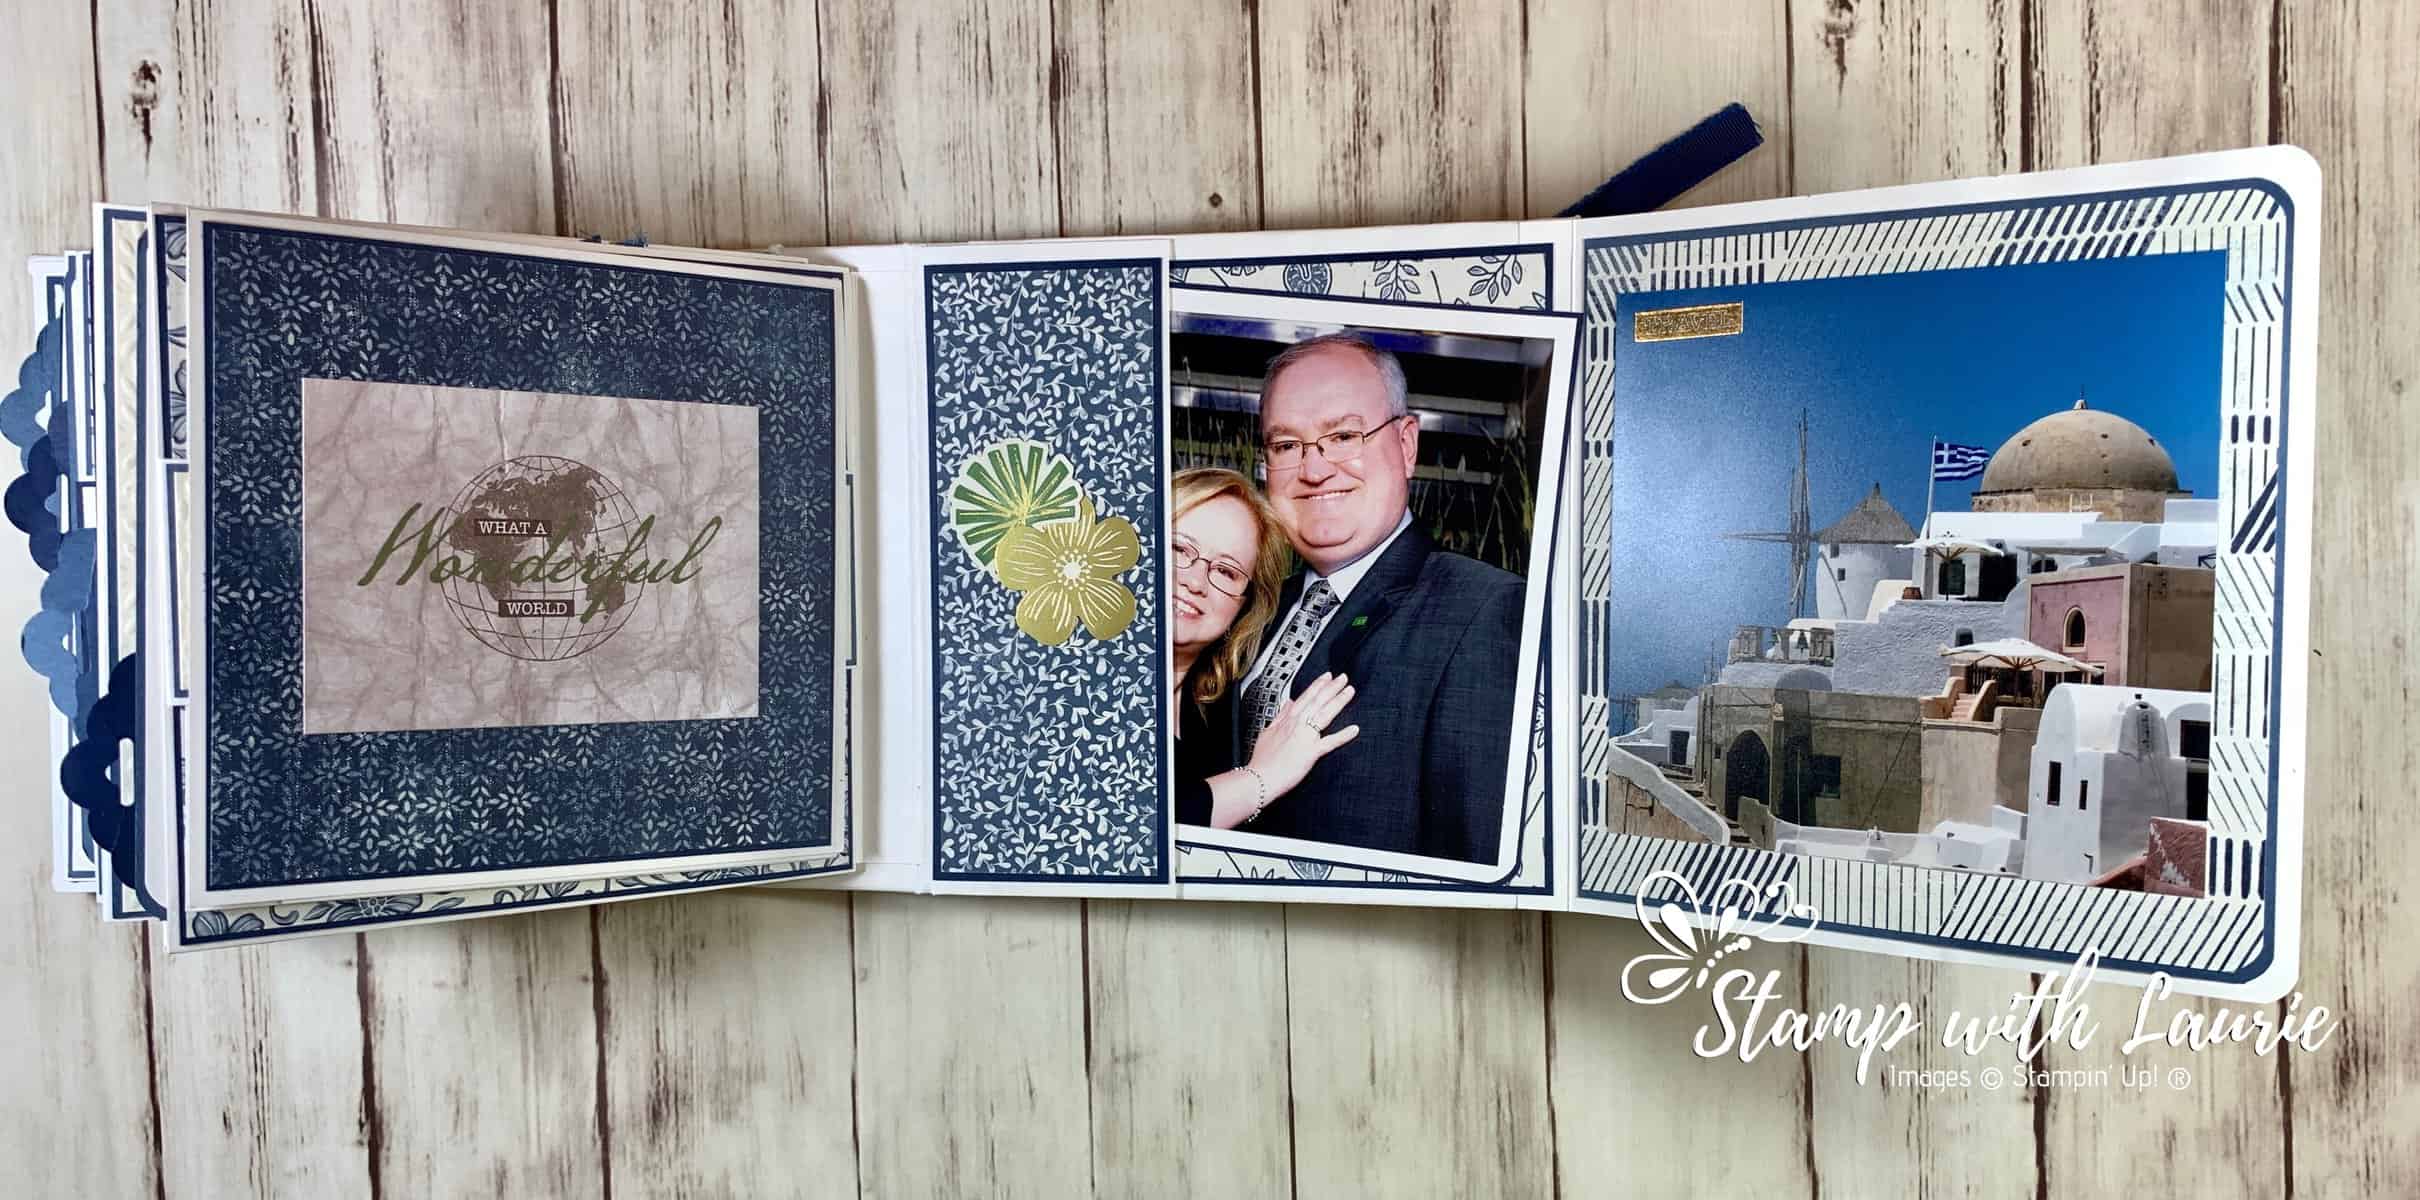
Inside Cover and Page 1
Paris – Spread of Inside Cover and Page 1
Inside Front Cover
Venice – Inside Front Cover
Page 1
Dubrovinik – Page 1
Page 2 and 3 Spread
Page 2 and 3 Spread
Page 1
Corfu – Page 2
Page 4 and 5 Spread
Page 4 and 5 Spread
Page 4
Page 4 – Picture Folder
Page 5 - Santorini
Santorini – Page 5
Page 6 and 7 Spread
Page 6 and 7 Spread
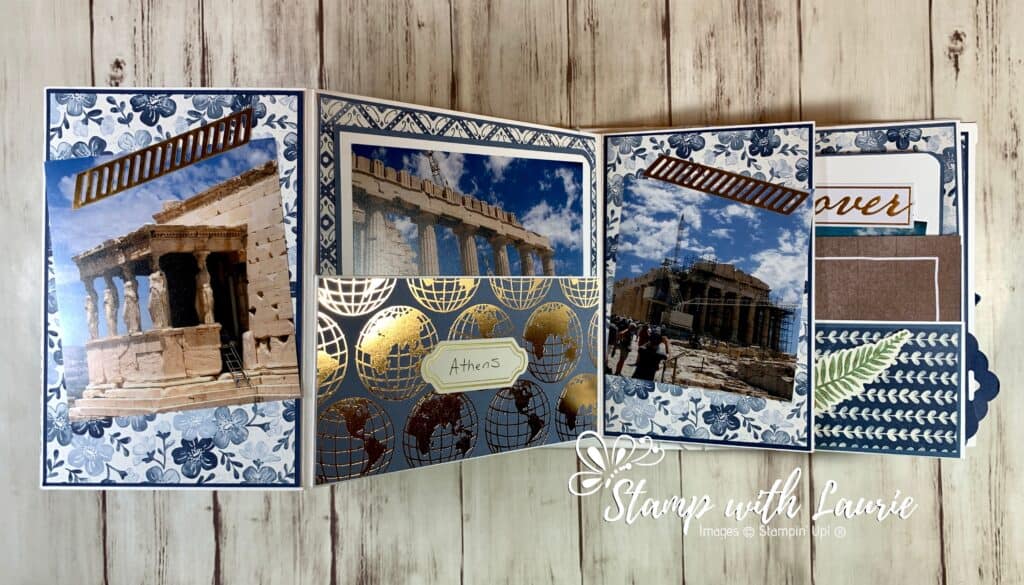
Page 6 - Athens
Athens – Page 6
Page 7
Page 7
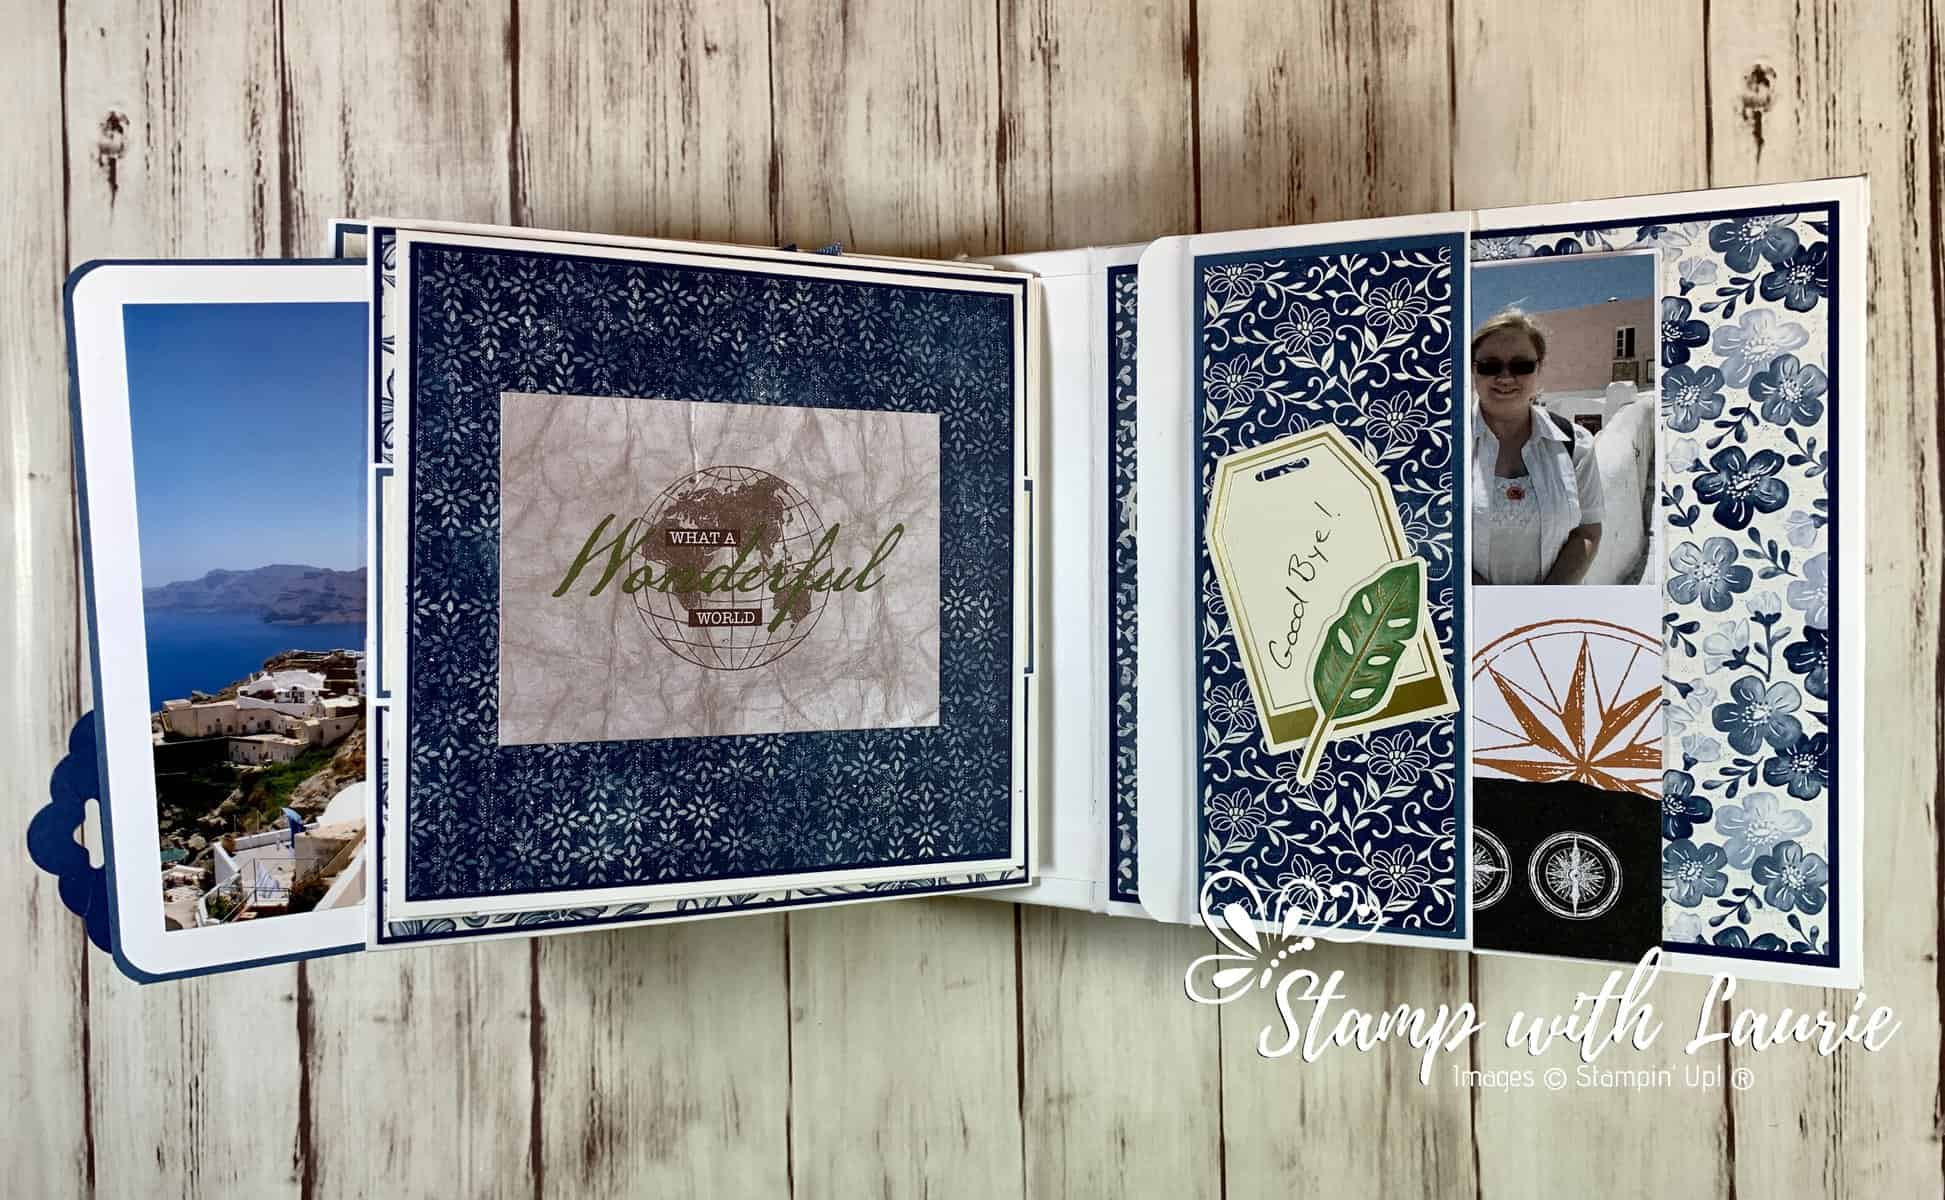
Spread
Spread of Page 8 and Inside Back Cover
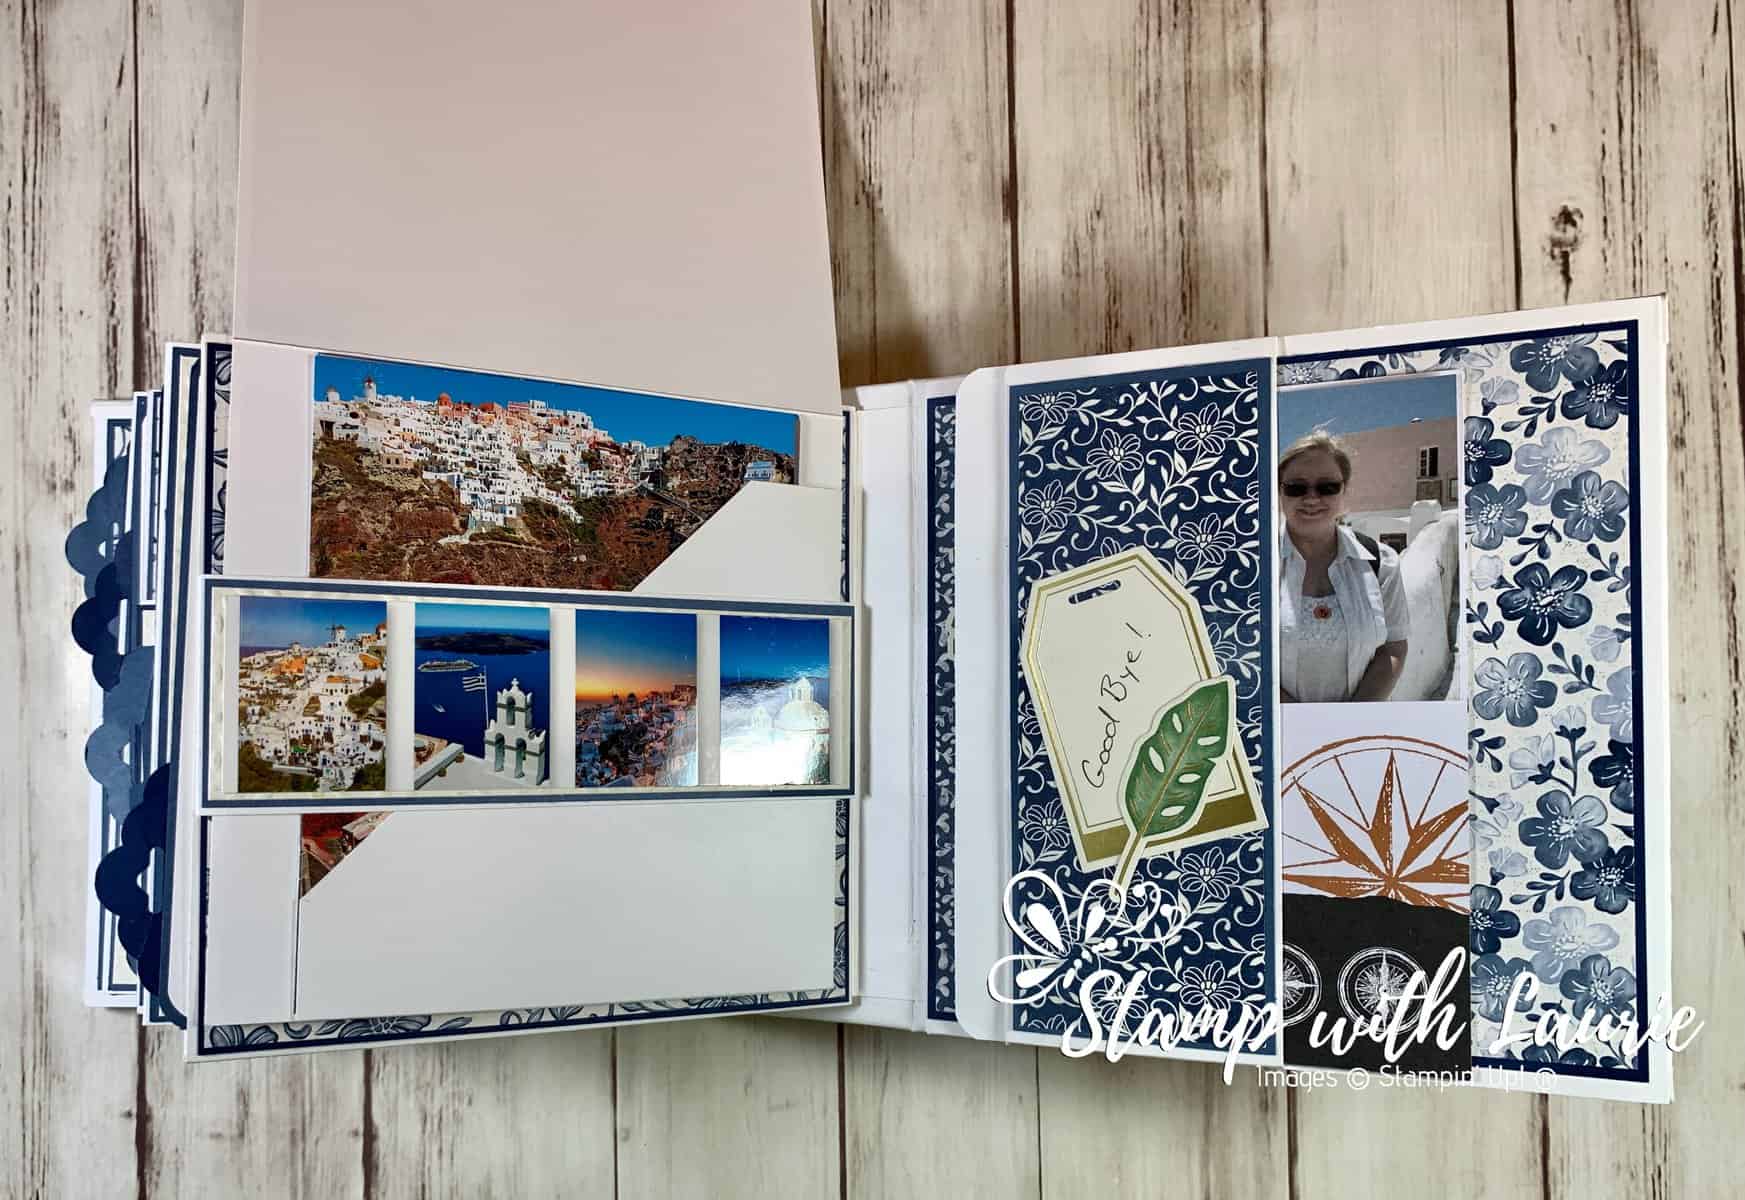
Page 8
Page 8 – Picture Folder
Back Cover
Back Cover Opened

Supplies:

Stamps/Bundles/Dies: Boho Indigo Product Medley, Field Tiles Dies (152707)

Paper: Night of Navy (100867), Misty Moonlight (153081), Basic White 12″ x 12″ (159231), World of Good Memories and More (153600), World of Good Designer Series Paper (152491)

Accessories: Basic Black Stampin’ Write Marker (100082), Misty Moonlight 2020-2022 In Color Ribbon (153624), Snail Mail Twine Combo Pack (154579), Decorative Beads, Bead Shop, Crafts (Dollar Store), Vintage Romance Journal and Album Knobs, Recollections (Michael’s Arts & Crafts), Daintyfied Lunar Charm (Michael’s Arts & Crafts), Scallop Tag Topper Punch, Paper Snips (103579), Bone Folder (102300), Stampin’ Dimensionals (104430), Stampin’ Seal (152813), Glue Dots (103683), Multipurpose Liquid Glue (110755), Envelope Punch Board (for rounding the pull outs), Aleene’s Tacky Glue, Cardboard, Flexible Plastic Envelope

My Photo Album
My Mini Interactive Photo Album with me in my Greek Outfit Ready to Present

For Further Information:

PDF with measurements by Cal Summers:
https://stampwithlaurie.com/small-square-mini/

Videos by Cal Summers:
https://www.youtube.com/watch?v=jPGYq2KRELI
https://www.youtube.com/watch?v=twYJqHW9nUc
https://www.youtube.com/watch?v=TbhHUfQOdtE
https://www.youtube.com/watch?v=TlXFJomClmQ

She also has two Facebook Groups that you can join:
https://www.facebook.com/calsummersworkshops/
https://www.facebook.com/groups/paperscissorsstory/

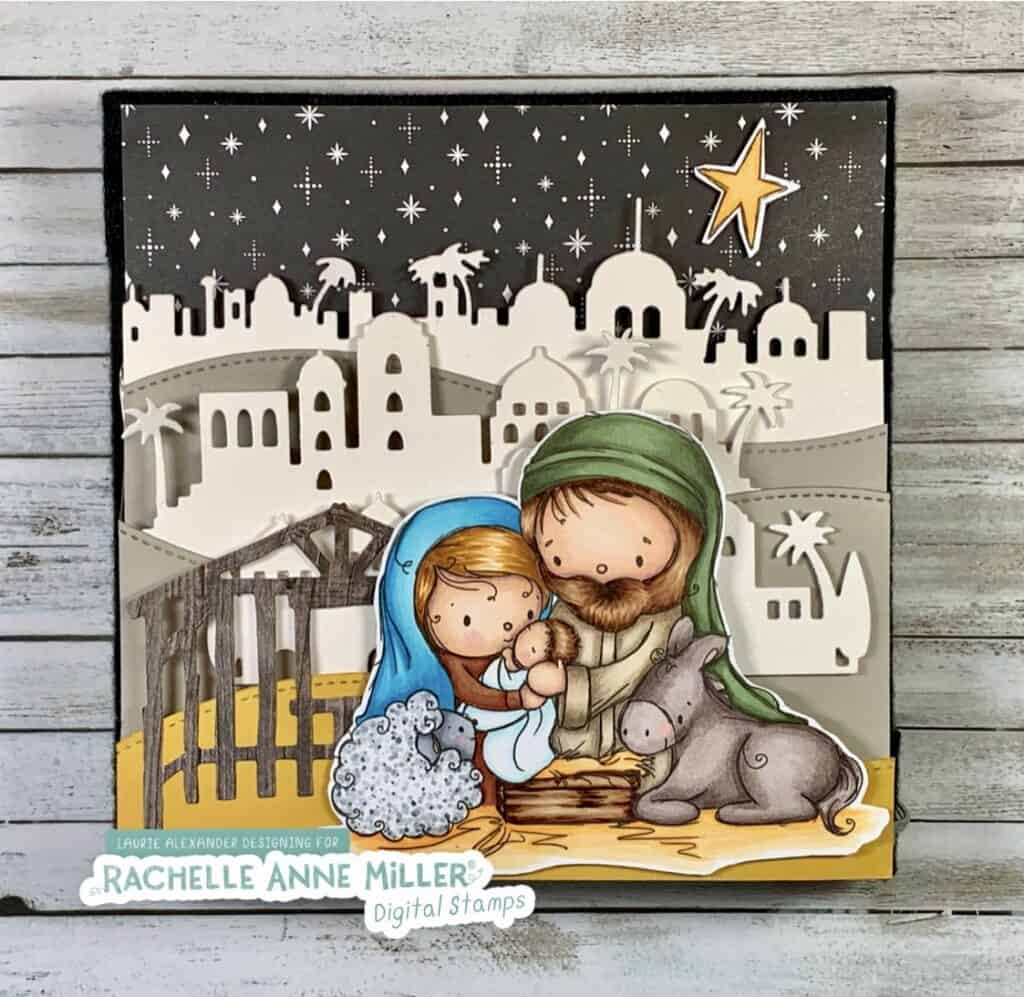
My Christmas Nativity Scene

My Christmas Nativity Scene

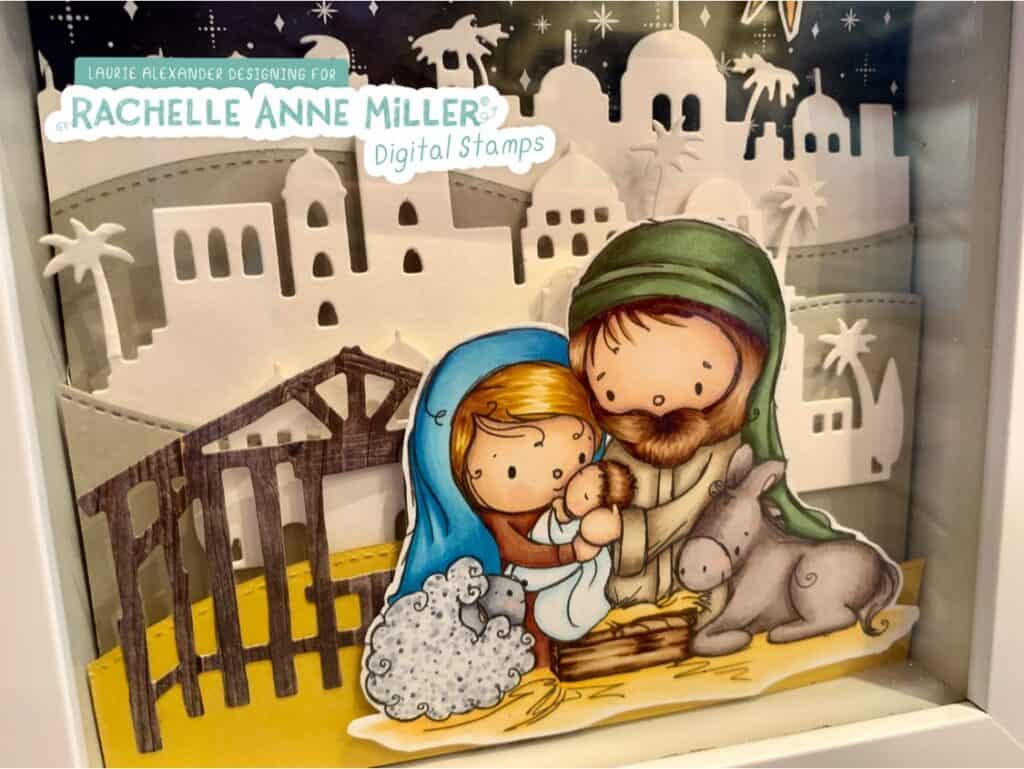
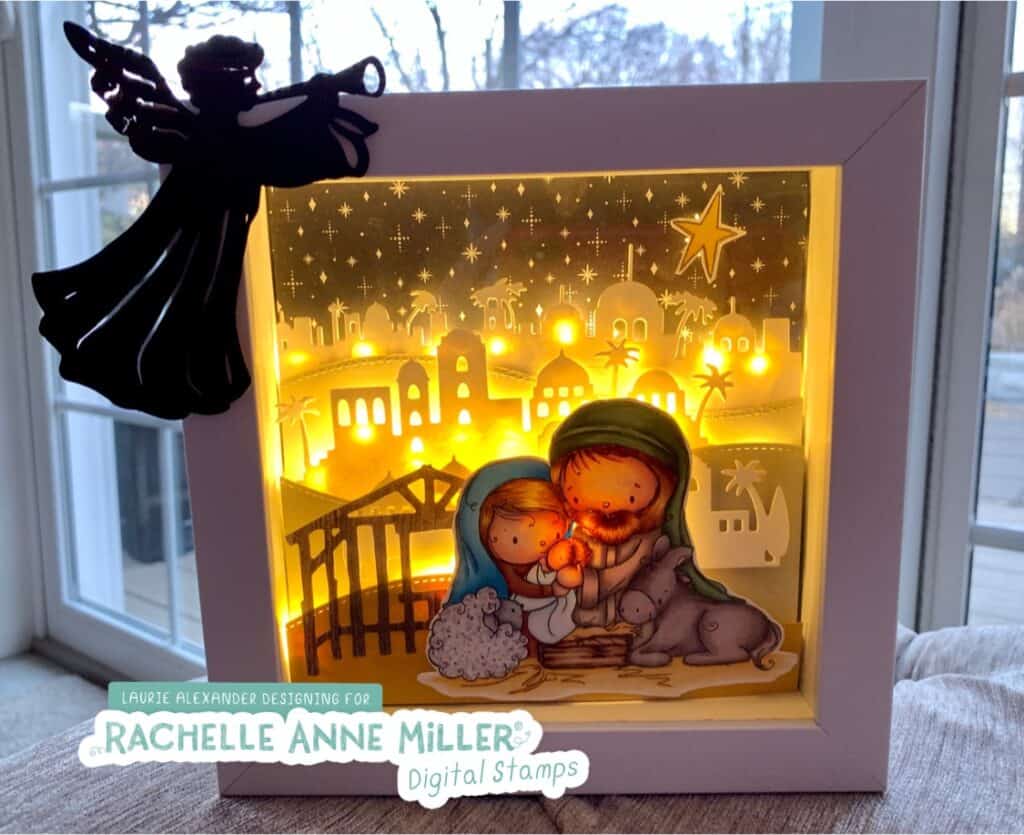
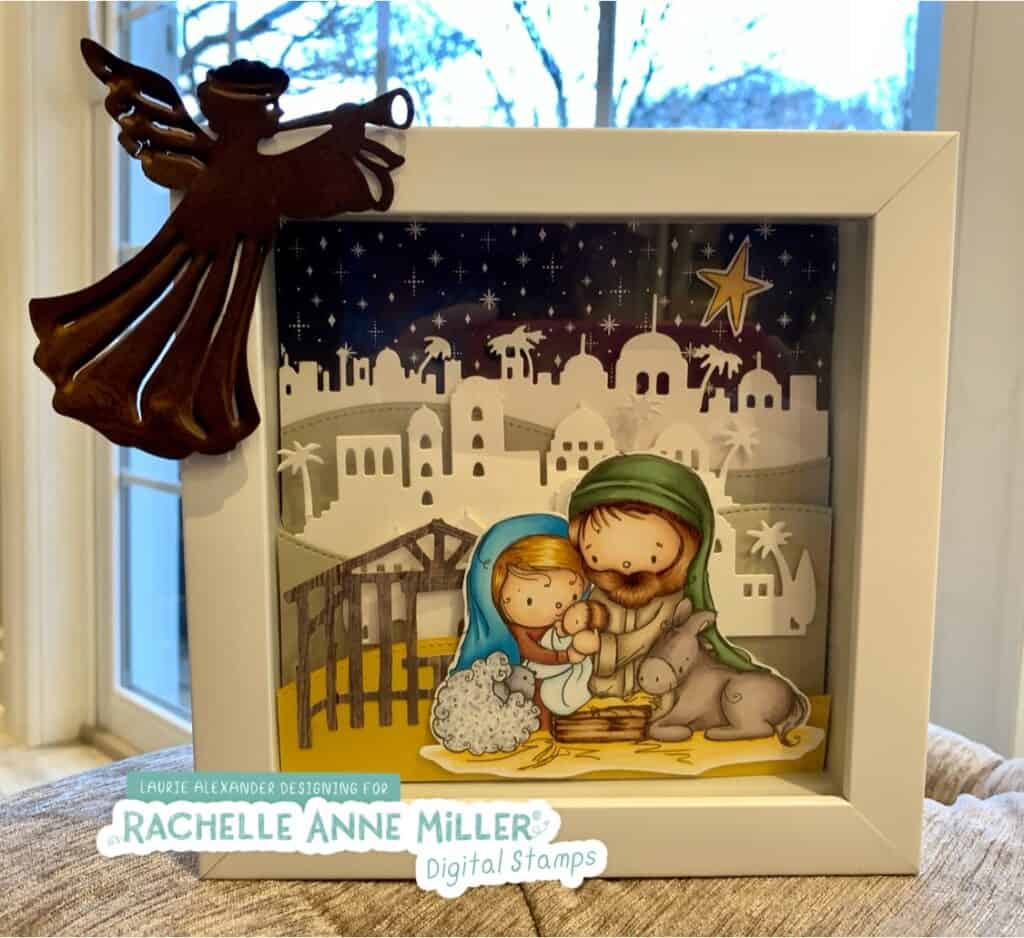
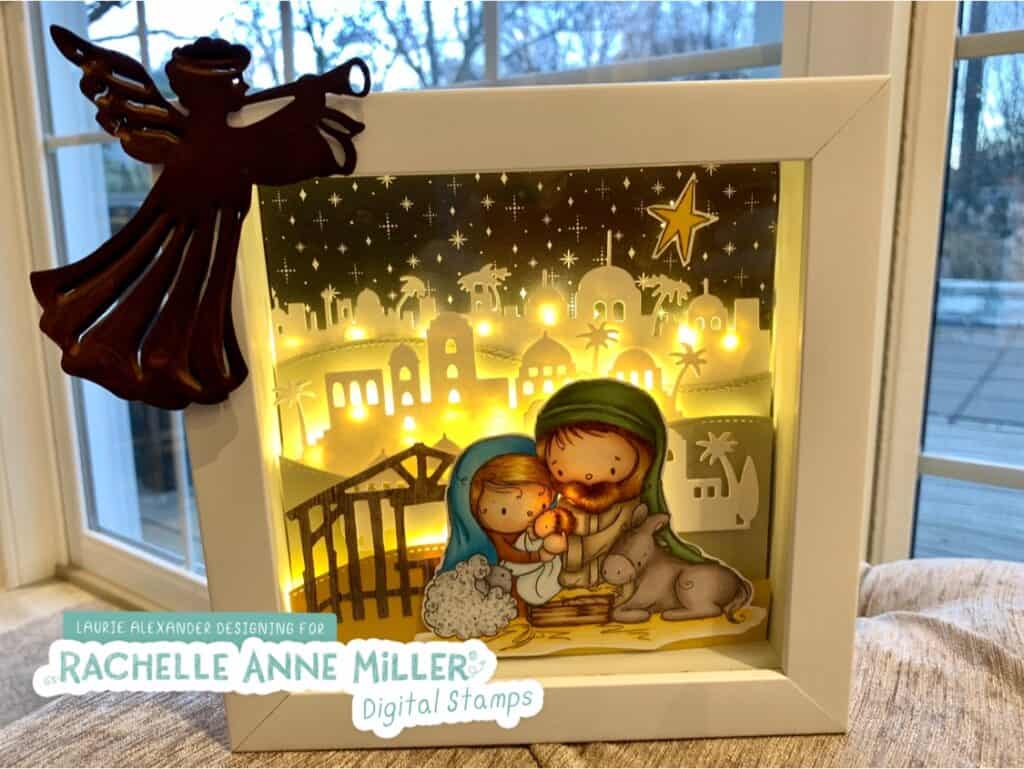
It’s Laurie here with My Christmas Nativity Scene as my Design Team Inspiration for Rachelle Anne Miller Creative Studios. This time I wanted to create something a little different than a card! So, I made a multi layered shadowbox that lights up using the beautiful Nativity Christmas Digital Stamp.

My Christmas Nativity Scene Light Box
My Christmas Nativity Scene Lightbox

The Details of My Scene

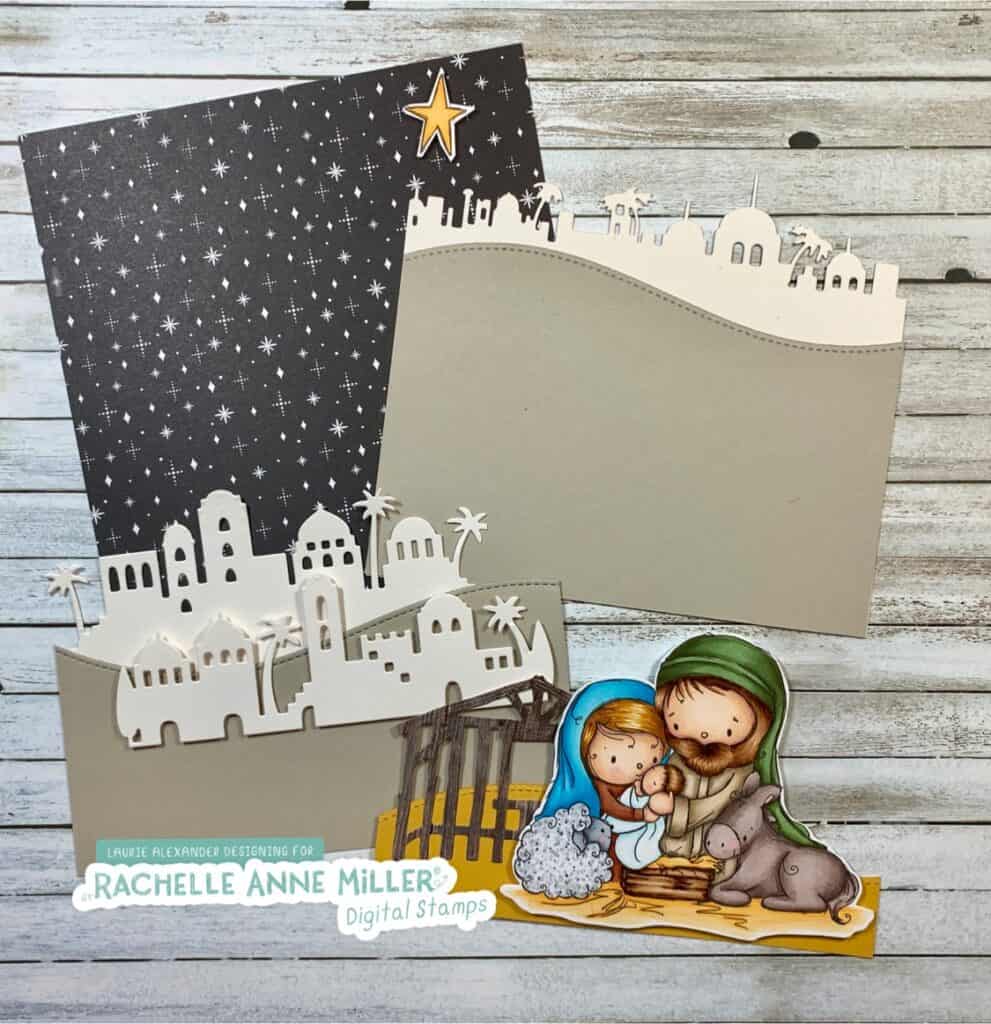
I had so much fun colouring the Holy Family with my Copic Markers! Once I did that, I created my scene using a number of dies from my stash. I ended up with 4 different layers. I love my focal point of the Family and the manger behind them! The In Good Taste Designer Series Paper from Stampin’ Up  has photographic images of wood. Perfect for my manger.

TIP: Since the inside of the frame is smaller than the outside, I made my largest layer 5 5/8″ x 5 5/8″. All layers were 5 5/8″ wide with varying heights depending on their position.

The Layers of My Christmas Nativity Scene
The Different Layers of My Christmas Nativity Scene

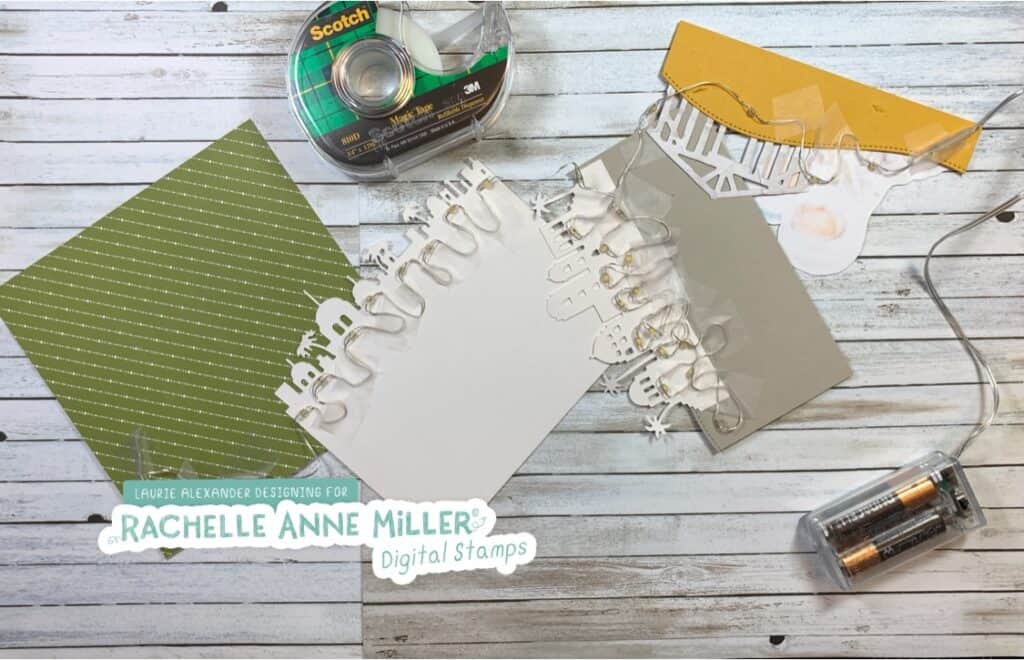
The next step was to attach the lights. The wire from the lights was very malleable allowing me to position them exactly where I wanted. I even added a couple of lights behind Jesus’s head to give him a glow. I ended up using a ton of scotch tape to secure the lights.

The Lights Adhered on the Back

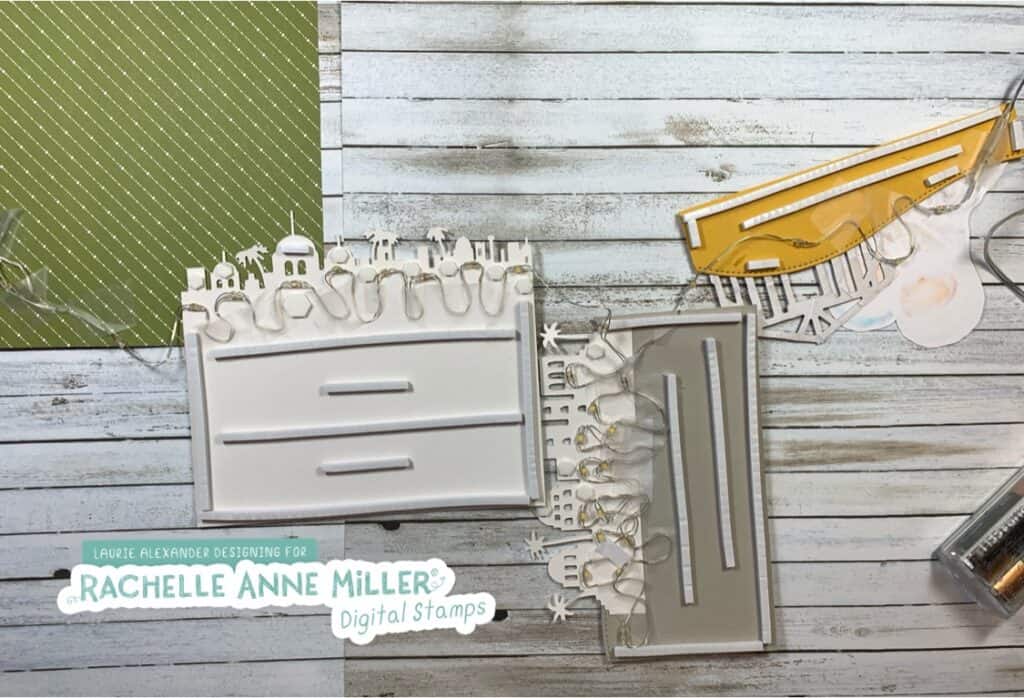
Once the lights were in place, the next step was to add Foam Adhesive Strips between the layers.

Dimensionals on the Back of The Layers

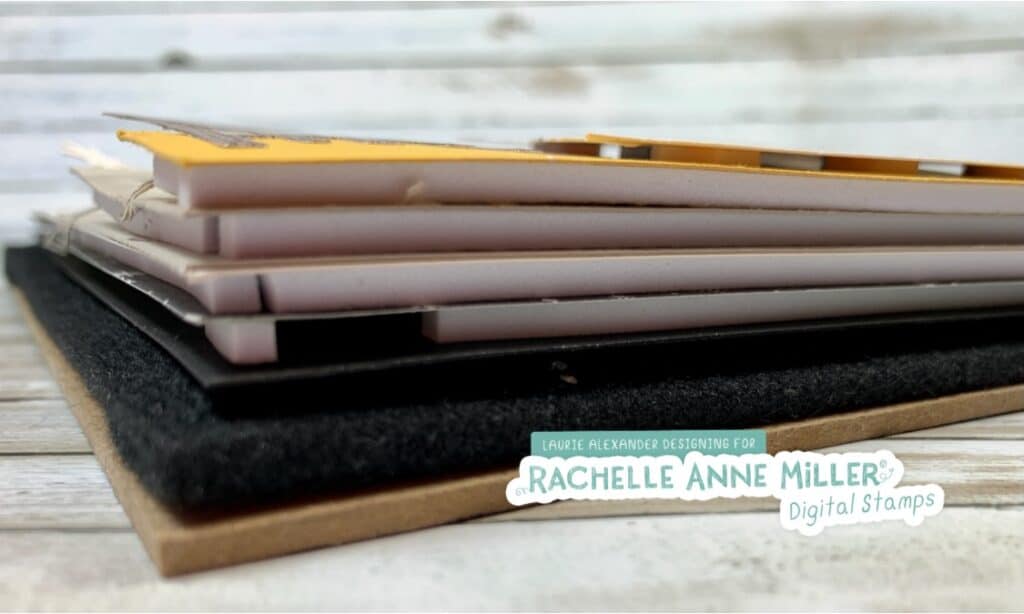
Here is a photo of all the layers adhered together. Now that is a lot of layers!

All the Layers Adhered Together

Not everyone is into home decor, but this project could easily be made into a card. If I remove the frame and lights, you get a good idea of how a card would look.

My Christmas Nativity Scene As a Possible Card

————————–

Copic Markers:

Skin: E000/E00/E21/E11/E04/R20
Mary’s Hair: E99/YR24/YR23
Joseph’s and Jesus’ Hair: E37/E35/E33/E31/E30
Mary’s Veil: B01/B02/B04
Mary’s Dress: E15/E08/E19
Joseph’s Robe: E40/E41/E42/E43/E44
Joseph’s Headdress: G21/G94/G99
Jesus’ Blanket: B0000/B000
Donkey: E70/E71/E74/E77/R20
Sheep: C0/C1/C2/C3/C4/R20
Wooden Manger Crib: E31/E34/E29/E37
Straw/Star: Y32/Y35/Y38

Close Up of The Holy Family

————————–

Card Recipe for My Christmas Nativity Scene

Rachelle Anne Miller Creative Studios, Nativity Christmas Digital Stamp
Paper Basics – Stamper’s Select White Cardstock, Papertrey Ink
Merry Little Christmas Designer Series Paper, Stampin’ Up!
Nativity Dies, Stampin’ Up!
Bethlehem Edgelits Dies, Stampin’ Up!
Bethlehem Edger Cutting Die, Frantic Stamper
Slimline Stitched Hillside Border Dies, Lawn Fawn
Angel Garden Pick, MultiCrafts & Gifts
Tiny Treasure, Christmas Celebrate It Mini Lights, Michaels Arts and Crafts
Studio Decor 6” x 6” Shadowbox, Michaels Arts and Crafts
In Good Taste Design Series Paper, Stampin’ Up!
Foam Adhesive Strips, Stampin’ Up!
Scotch Tape
Shimmery White, Sahara Sand and Crushed Curry Card Stock
Finished size: 6” x 6”

————————–

One Final Photo of My Christmas Nativity Scene All Lit Up!

To view my other Rachelle Anne Miller Creative Studios cards, please click here.

The Rachelle Anne Miller Digital Stamps Facebook Group is currently having a December Challenge: Anything Goes with Optional Twist Holiday! Don’t forget to enter to win some Rachelle Anne Miller Creative Studios Digital Stamps!

Hope you like My Christmas Nativity Scene with the Nativity Christmas Digital Stamp by Rachelle Anne Miller Creative Studios!
Thank you for stopping by!

Hugs,
Laurie