My Lavender Fields Card

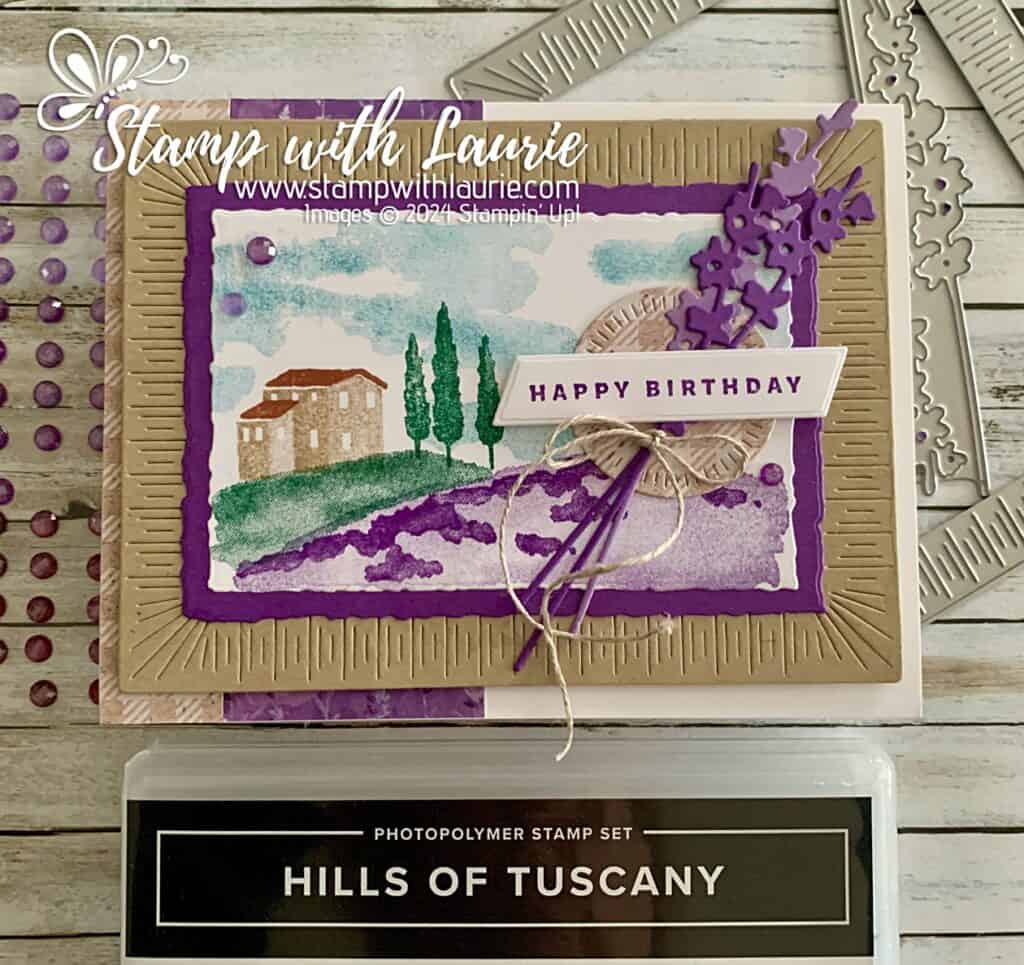
My Lavender Fields Card - A birthday card with a landscape scene
My Lavender Fields Card

Hello Crafty Friends! Laurie here again! I am sharing my Lavender Fields Card using the Hills of Tuscany Stamp Set by Stampin’ Up! It was my birthday recently and I always create a card for myself! 

The Details of My Lavender Fields Card

So, for my birthday card, I decided to create one that reminded me of our trip to Provence in France with the beautiful lavender fields. When I saw the Hills of Tuscany Stamp Set, I realized I could change the colours of the hills and voilà, Provence! Plus, the Painted Lavender Dies and Perennial Lavender 12” x 12” Designer Series Paper were perfect for my lavender fields card!

First, I stamped the largest field in Highland Heather followed by Gorgeous Grape to add interest and have it look like lavender. Next, I stamped a Shaded Spruce hill where I planned to place the house and trees. For the house, I used Crumb Cake for the walls and Copper Clay for the roof since we saw houses with those colours in France. Cypress trees, like the ones on the stamp, were also found all over Provence. So, I stamped them in Shaded Spruce to match the grasses. Finally, I stamped in Balmy Blue the sky twice to fill the space.

Next, using the Deckled Rectangles Dies, I die cut my scene and a Gorgeous Grape matt. For my card, I decided to frame my Provencal scene using the largest Radiating Stitches Dies in Crumb Cake almost like a picture hanging on a wall. Lol!

To complete my Provencal theme, I die cut a bouquet of lavender from Highland Heather and Gorgeous Grape which was tied with Linen Thread and layered it on a DSP circle die cut from the Radiating Stitches Dies. The sentiment from the Something Fancy Stamp Set was stamped in Gorgeous Grape and die cut out using a Something Fancy Die. I layered two strips of DSP on the left side of the Basic White card base to balance the sentiment cluster.

The finishing touch was a scattering of Purple Fine Shimmer Gems that match my colour scheme.
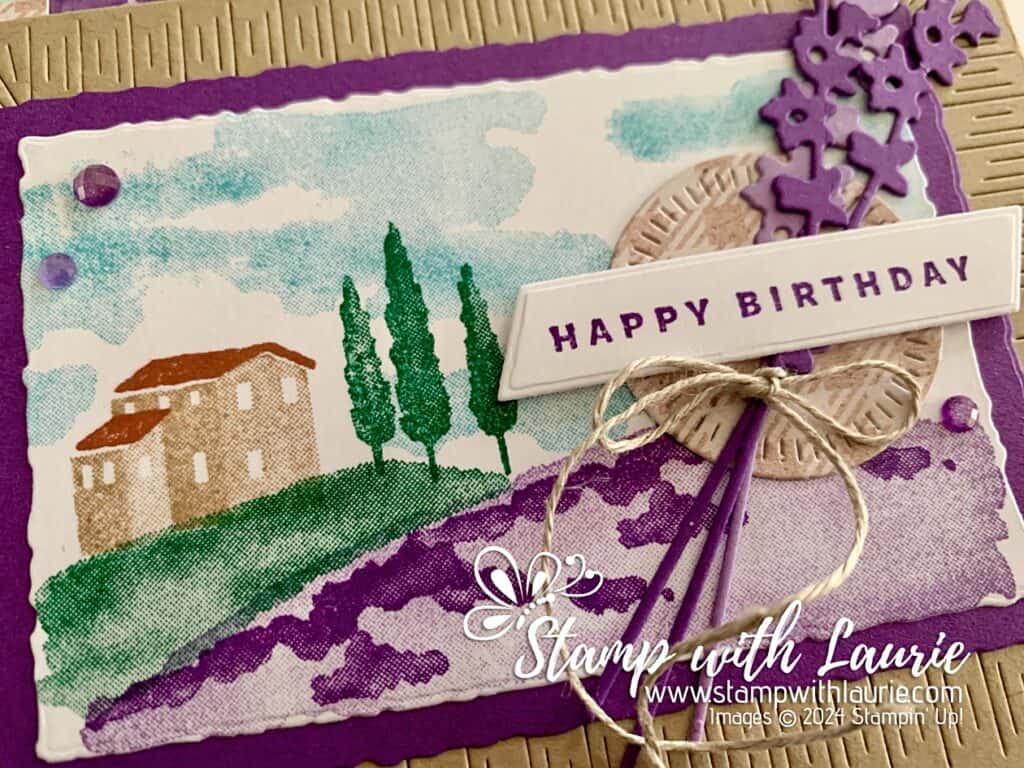
Close Up of My Lavender Fields
Close Up of the Provencal Scene

Supplies:

Stamps/Bundles/Dies: Hills of Tuscany (162682), Deckled Rectangles Dies (159173), Radiating Stitches Dies (161595), Painted Lavender Dies (162596), Something Fancy Dies (160424), Something Fancy Stamp Set (160416)

Inks: Gorgeous Grape (147099), Crumb Cake (147116), Highland Heather (147103), Copper Clay (161647), Shaded Spruce (147088), Balmy Blue (147105)

Paper: Thick Basic White (159229), Basic White (159276), Gorgeous Grape (146987), Crumb Cake (120953), Highland Heather (146986), Perennial Lavender 12” x 12” Designer Series Paper (162593)

Accessories: Linen Thread (104199), Purple Fine Shimmer Gems (162611), Paper Snips (103579), Bone Folder (102300), Stampin’ Dimensionals (104430), Stampin’ Seal (152813), Mini Glue Dots (103683)

Measurements: 

  • Thick Basic White
    • 8 ½” x 5 ½” scored at 4 ¼”
  • Crumb Cake:
    • 3-7/8” x 5 ¼”
  • Basic White:
    • 4” x 2-5/8”
    • Scrap for Sentiment
  • Gorgeous Grape (2 pieces):
    • 3” x 4 ¼”
    • Scrap for Lavender
  • Highland Heather:
    • Scrap for Lavender
  • Perennial Lavender 12” x 12” Designer Series Paper (3 pieces):
    • ¾” x 4 ¼”
    • ¾” x 1 ¾”
    • 1 ½” x 1 ½”

More Information on My Lavender Fields Card

For more of my Stampin’ Up! cards, please click here.

You will find the items listed above in my online store

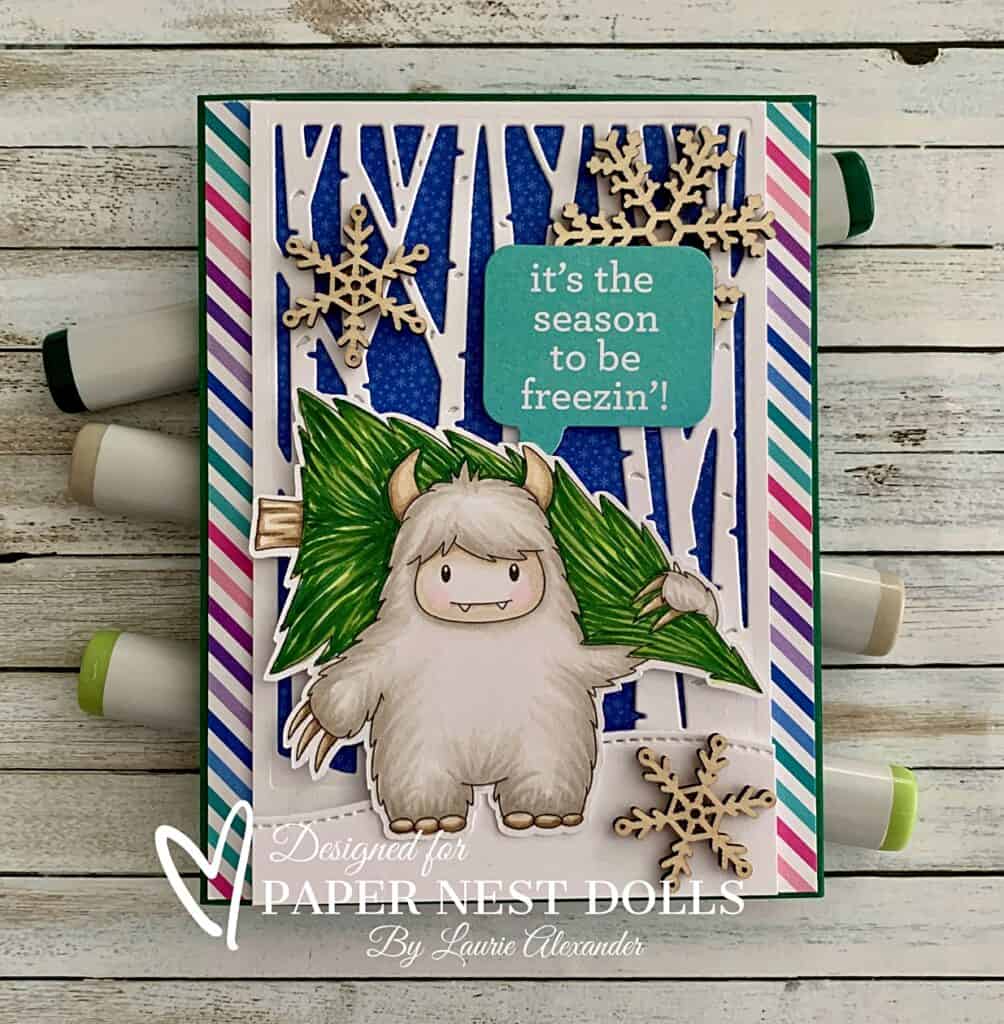
Season to be Freezin’ Card 

Season to be Freezin’ Card - a winter card with a Yeti holding a tree
Season to be Freezin’ Card

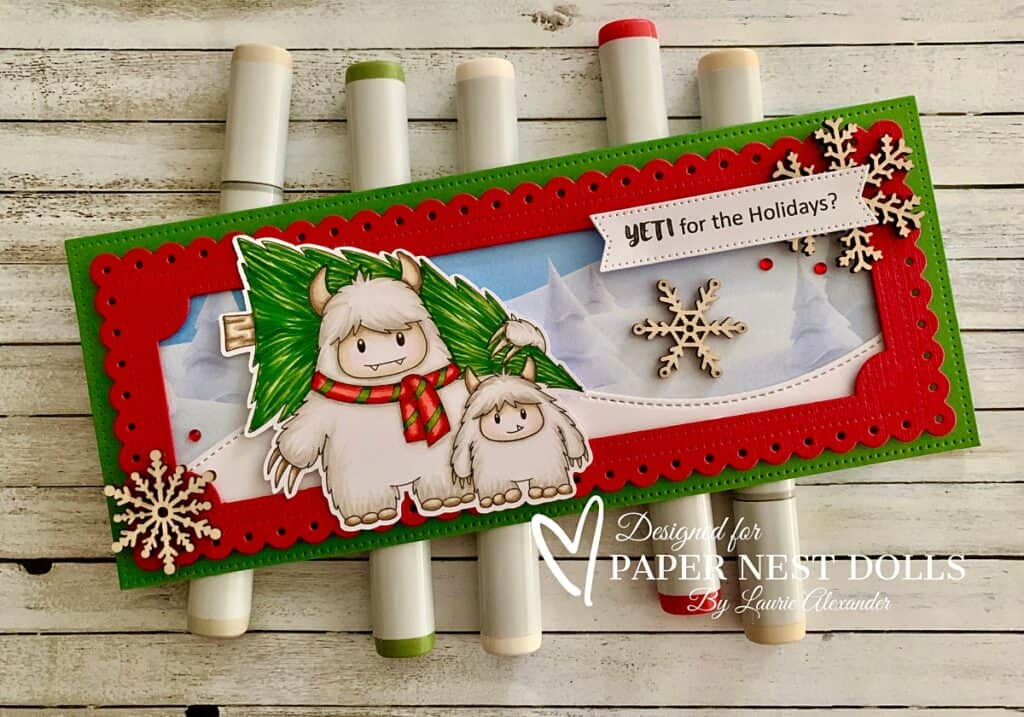
Hello Crafty Friends! It’s Laurie here! I am sharing my Season to be Freezin’ Card as my Design Team Inspiration Card for Paper Nest Dolls using Yeti with Tree. Paper Nest Dolls has several Yeti stamps to the point you could have a whole Yeti family! I just love these cuties so much that I made another card with the Yeti Father and Son for Christmas and have included a link at the end of this post to it.

The Details of My Season to be Freezin’ Card

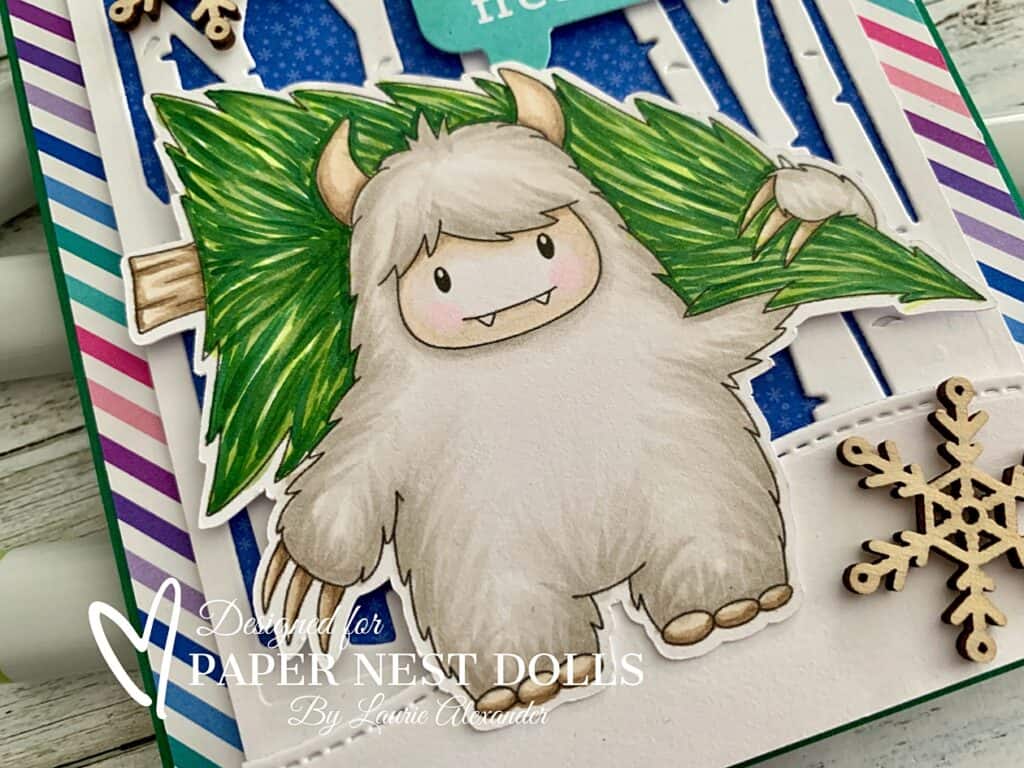
For my Yeti, I had coloured him with my Copic markers before Christmas but didn’t get a chance to get him onto a card. So, I decided to create a winter themed card for him. I coloured his fur texture with individual strokes in the shadows and left the highlights white. The tree was also coloured with individual strokes to create lots of texture.

The Doodlebug paper that I used, had Yetis on it, but I went with more neutral papers to create my wintery scene. The sentiment was from the matching Chit Chat and was perfect for my wintery theme.

Next, I added a birch tree die cut for my wintery scene and, to add interest, I used a Stitched Hillside Die to complete my scene.

For embellishments, I used some wooden snowflakes that I had in my stash for that rustic look.

————————–

Copic Markers

Fur: W3/W1/W0/0
Face: E43/E42/E41/E40/RV00/0
Horns/Nails/Tree Trunk: E44/E43/E42/E41
Tree: G29/YG63/YG03

Close Up of Yeti carrying a Tree
Close Up of Yeti with Tree

————————–

Card Recipe for My Season to be
Freezin’ Card

Yeti with Tree, Paper Nest Dolls
Paper Basics – Stamper’s Select White Cardstock, Papertrey Ink
Winter Wonderland 6” x 6” Paper Pad, Doodlebug Designs Inc.
Winter Wonderland Chit Chat, Doodlebug Designs Inc.
Slimline Stitched Hillside Border Dies, Lawn Fawn
Woodland Collection Birch Tree Forest, Sue Wilson
Wooden Snowflake Embellishments, Stampin’ Up!
Shaded Spruce Card Stock, Stampin’ Up!

Finished card size: 5 ½” x 4 ¼”

Stamp Size: 3”

————————–

To view my other Paper Nest Dolls cards, please click here.

My Yeti for the Holidays?

For more information on my card, please click here or on the photo.

Yeti for the Holidays Card - A Christmas Card with a Yeti Father and Son getting a Christmas Tree.
Yeti for the Holidays Card

Hope you like my Season to be Freezin’ Card using
Yeti with Tree by Paper Nest Dolls!

Thank you for stopping by!

Hugs,
Laurie

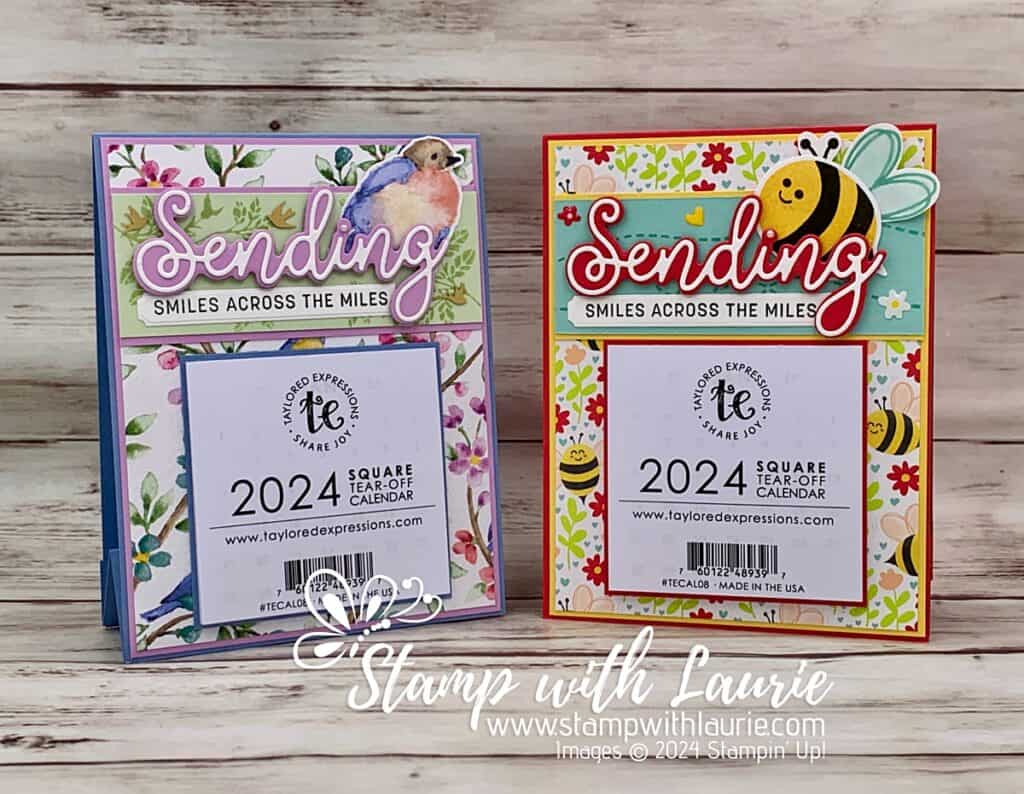
My Happy 2024 Calendars

Happy 2024 Calendars - two handmade calendars. One with a bee on it and one with a bird.
My Happy 2024 Calendars

Hello Crafty Friends! Laurie here again! I am sharing My Happy 2024 Calendars using the Bee My Valentine Bundle and the Flight & Airy Designer Series Paper by Stampin’ Up! I didn’t get done my Christmas cards this year due to catching Covid. So instead, I decided to send out calendars to some of my customers in the new year.

The Details of My Happy 2024 Calendars

For my calendars, I decided to create two different calendars with the same design but using different products. I couldn’t resist using the beautiful Flight & Airy Designer Series Paper which is a Sale-a-bration freebie if you spend $60.00 CDN on qualifying orders. And don’t you just love those cute bees from the Bee My Valentine Bundle!

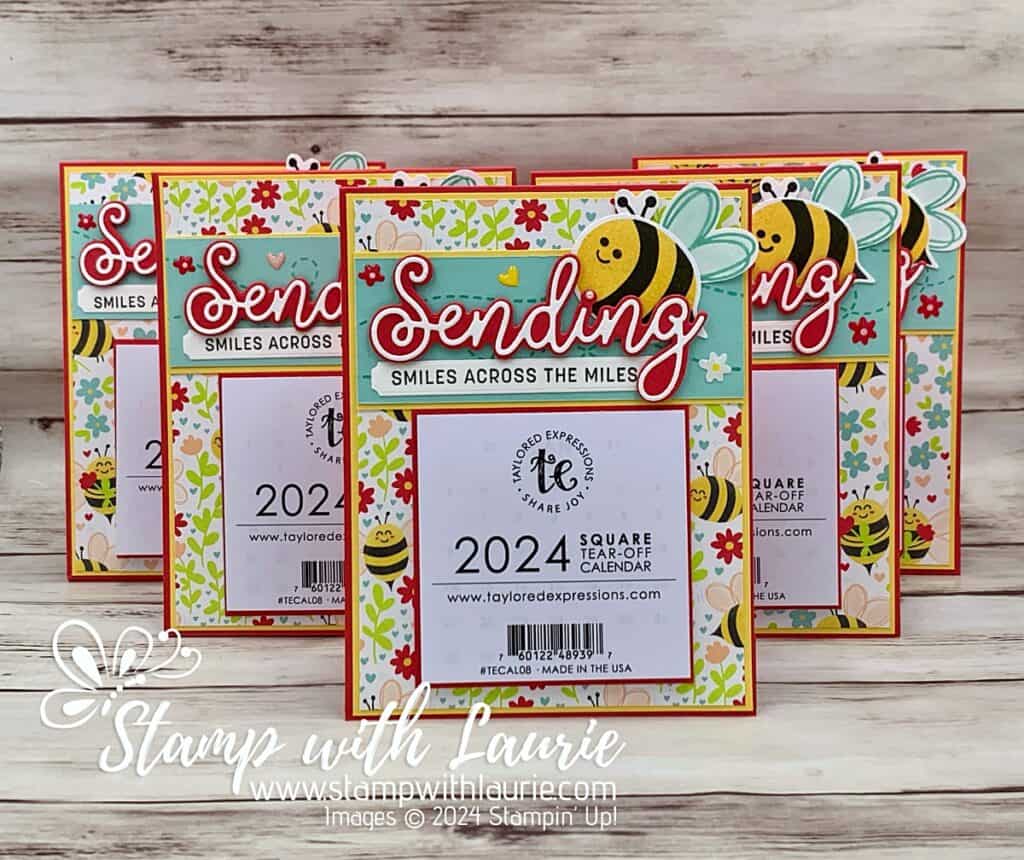
Five Bee Calendars
Bee Calendars

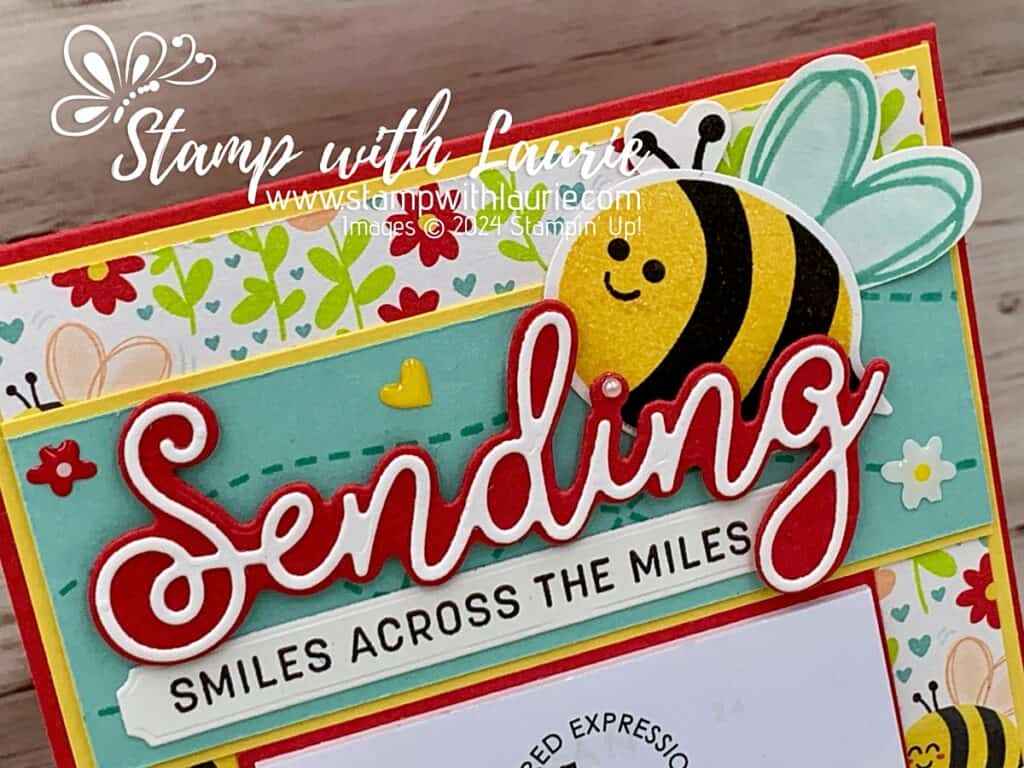
Since I planned to mail these out, the Sending Dies was perfect way to send “smiles across the miles”! To add some interest to the Pool Party and Soft Sea Foam card stocks behind my focal point, I did some tone-on-tone stamping. For the Pool Party one, I stamped a couple of times the bee trail in Pool Party. For the Soft Sea Foam, I stamped the leaves from the Softly Sophisticated Bundle twice in Soft Sea Foam. This bundle is also free with a $120 CDN on qualifying orders during Sale-a-bration.

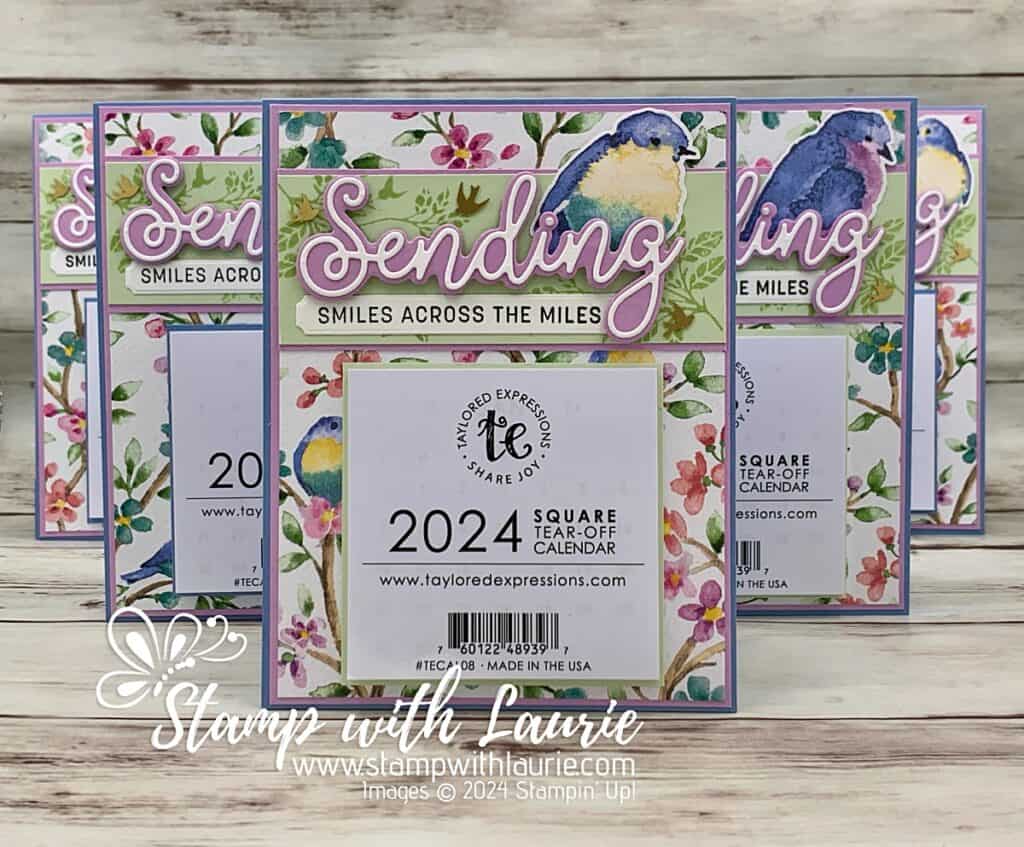
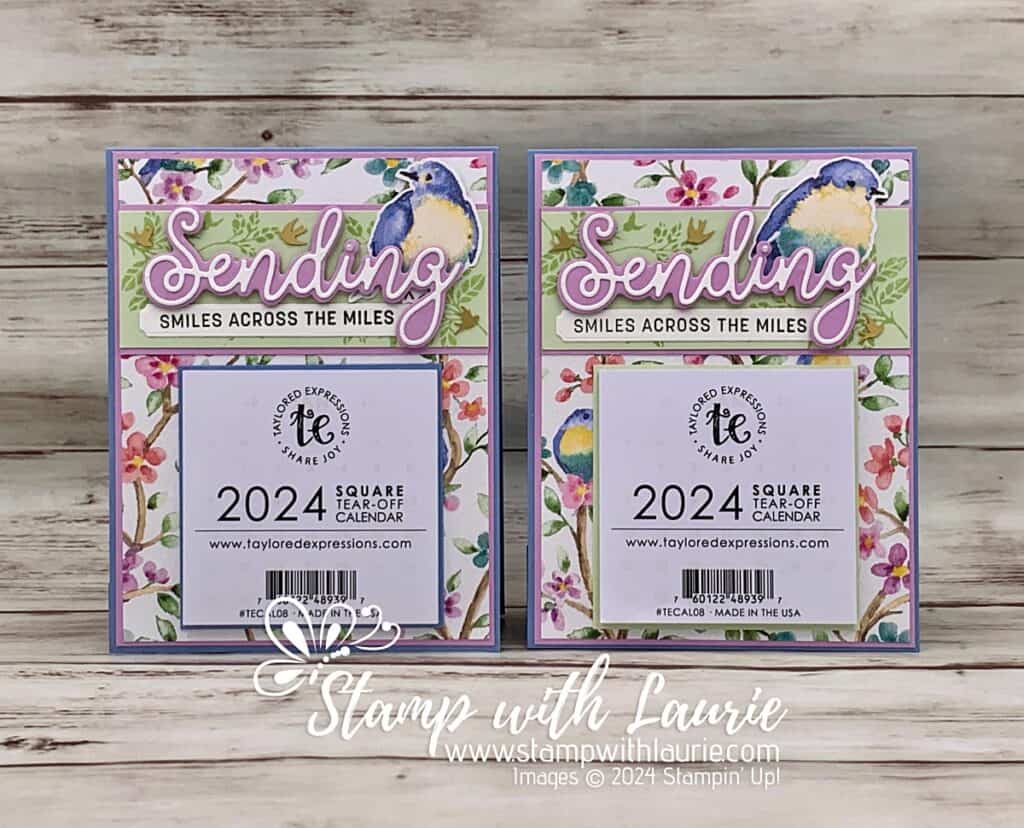
Five Bird Calendars
Bird Calendars

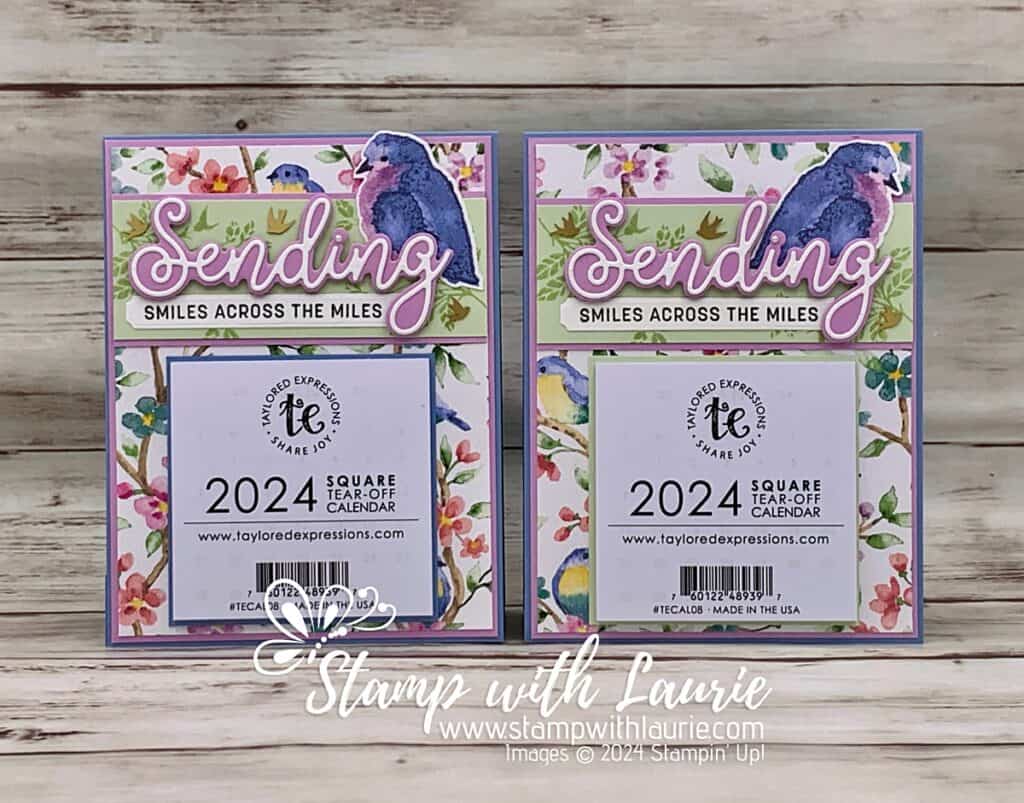
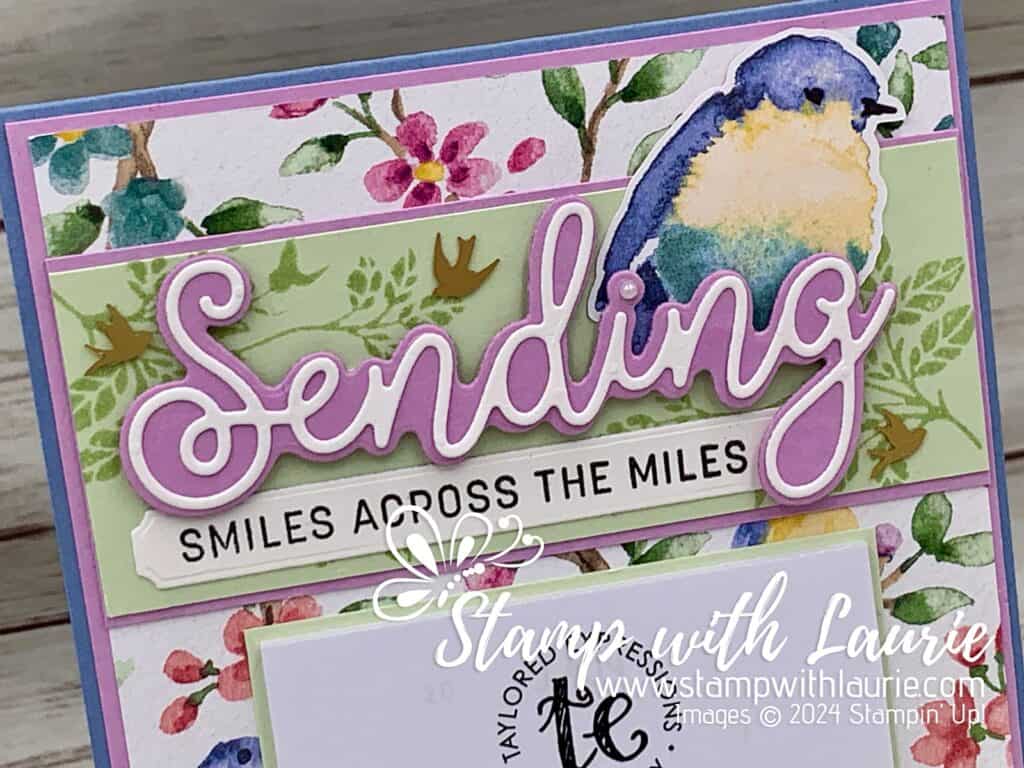
The bee was stamped and punched out with the matching builder punch. The birds were fussy cut from the Flight & Airy DSP. I used different birds for each calendar since there was such a selection from which to choose.

Two of the Bird Calendars

Next, I used the Adhesive-Backed Hearts & Flowers and Adhesive-Backed Dragonflies & Birds for embellishments. I also used a pearl for the “i” in “Sending”.

Close Up of Focal Point with Bird

The final thing was to use the technique where you press the ink pad lid when closed to get some ink. I did this with the Pool Party ink pad and picked it up with my Wink of Stella. This gave the bee wings a nice sparkle!

Close Up of Focal Point with Bee

Supplies:

Stamps/Bundles/Dies: Bee My Valentine Bundle (162554), Sending Smiles Stamp Set (158701), Sending Dies (159271), Softly Sophisticated Bundle (162947)

Inks: Pool Party Classic Stampin’ Pad (147107), Sea Foam Classic Stampin’ Pad (147102), Tuxedo Black Memento Ink Pad (132708), Daffodil Delight Classic Stampin’ Pad (147094), 

Paper: Real Red (102482), Balmy Blue (146982), Soft Sea Foam (146988), Pool Party (122924), Fresh Freesia (155613), Daffodil Delight (119683), Basic White (159276), Bee Mine Designer Series Paper (162546), Flight & Airy Designer Series Paper (162977)

Accessories: Adhesive-Backed Hearts & Flowers (162557), Iridescent Pearl Basic Jewels (158987), Adhesive-Backed Dragonflies & Birds (162743), Wink of Stella (141897), Paper Trimmer (152392), Paper Snips (103579), Bone Folder (102300), Stampin’ Dimensionals (104430), Mini Stampin’ Dimensionals (144108), Stampin’ Seal (152813), Mini Glue Dots (103683), Taylored Expression Calendars

Two Different Birds on Calendars

Measurements: 

  • Real Red/Balmy Blue (3 pieces):
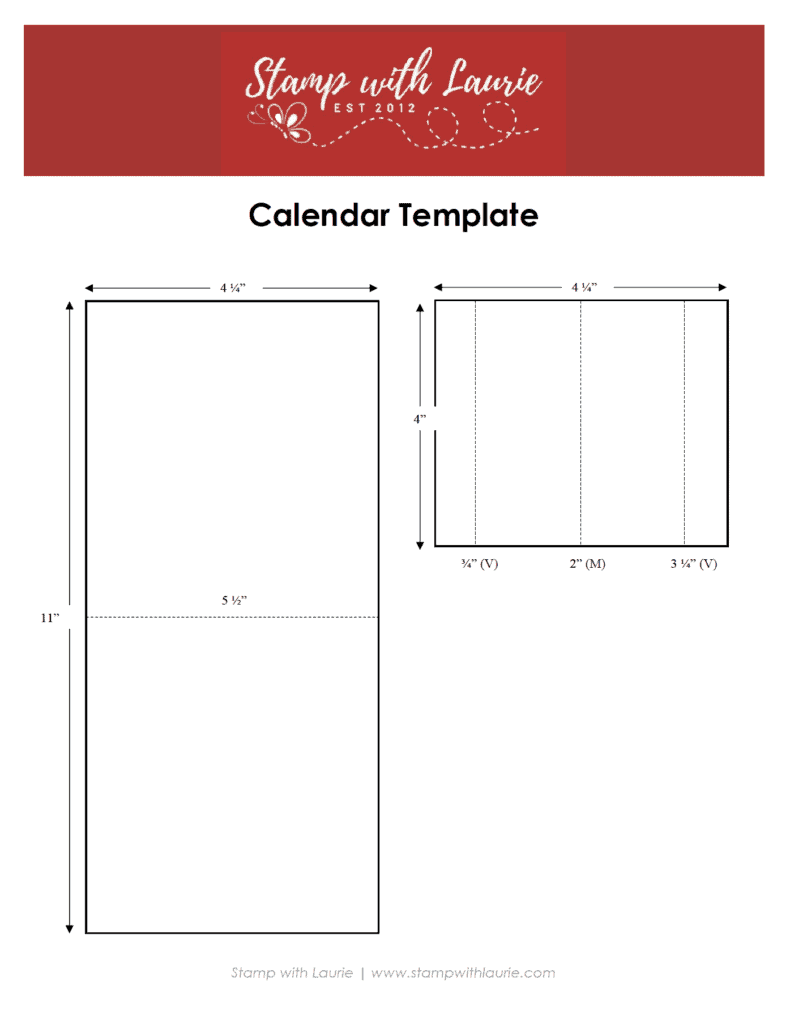
    • 11” x 4 ¼” scored at 5 ½”
    • 4” x 4 ¼” scored at ¾”, 2” and 3 ¼” along 4” side
    • 3-7/8” x 3-7/8” (for behind calendar)
    • 1 ½” x 3 ½” (Sending die)
  • Daffodil Delight/Fresh Freesia: 
    • 4-1/8” x 5-3/8”
    • 4” x 2-5/8”
    • 1 ½” x 3 ½” (Sending die)
  • Pool Party/Soft Sea Foam: 4” x 2 ½”
  • Basic White:
    • 1 ½” x 3-3/8” (Sending die)
    • 3/8” x 3-3/8” (Sentiment)
    • 1 ¾” x 1-3/16” (Bee body)
    • Scraps for wings and antenna
  • Bee Mine Designer Series Paper:
    • 4” x 5 ¼”
  • Flight & Airy Designer Series Paper:
    • 4” x 5 ¼”
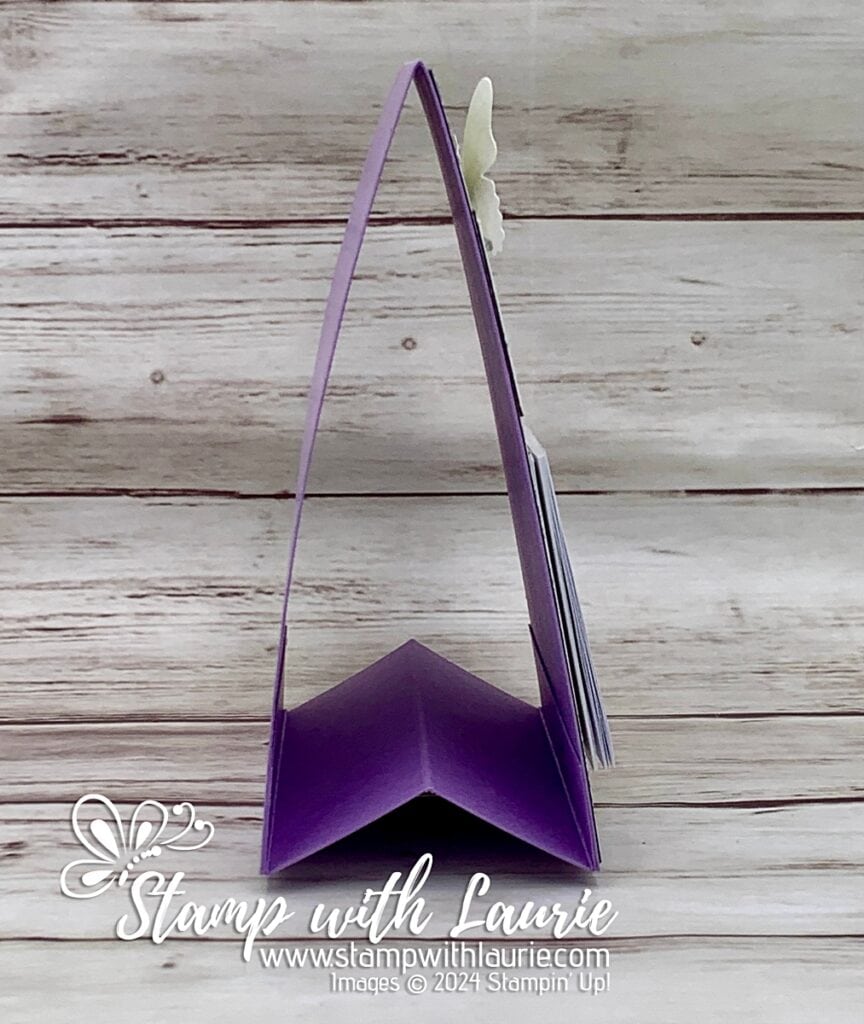
Side View of Calendar

More Information on My Happy 2024 Calendars

To download a PDF of the Calendar Template, please click here or on the picture.

Downloadable Calendar Template

For more of my Stampin’ Up! cards, please click here.

You will find the items listed above in my online store.

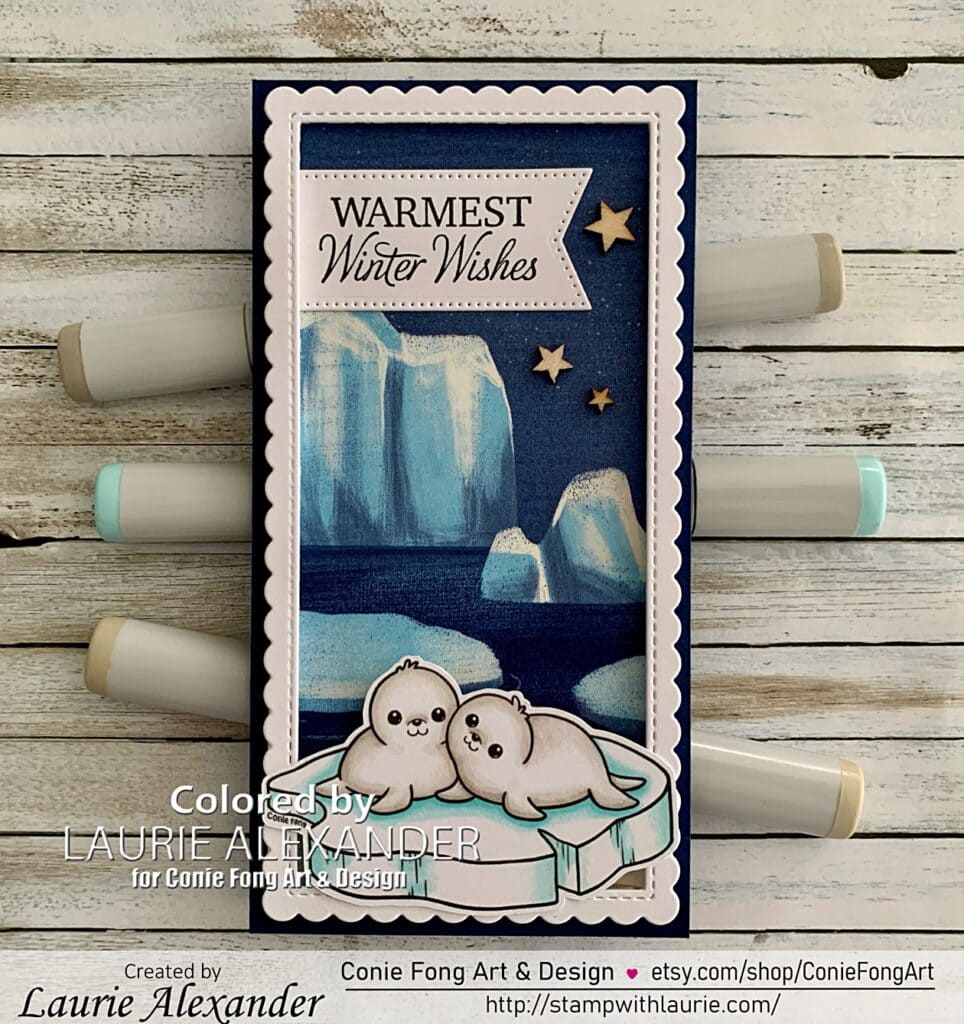
Warmest Winter Wishes Card 

Warmest Winter Wishes Card - a winter birthday card with baby seals in the Arctic.
Warmest Winter Wishes Card

Hello Crafty Friends! It’s Laurie here! I am sharing my Warmest Winter Wishes Card as my Design Team Inspiration Card for Conie Fong Art & Design using the Baby Seals On Iceberg from her drawing tutorial on You Tube. Conie Fong has started a Draw with Conie YouTube channel where you can draw along with her: https://www.youtube.com/@DrawWithConie. Don’t forget to subscribe to her channel while you are there for more tutorials that come out each week!

You can share your drawings in her Draw with Conie Facebook Group: https://www.facebook.com/groups/339082068864209/

The Details of My Warmest Winter Wishes Card

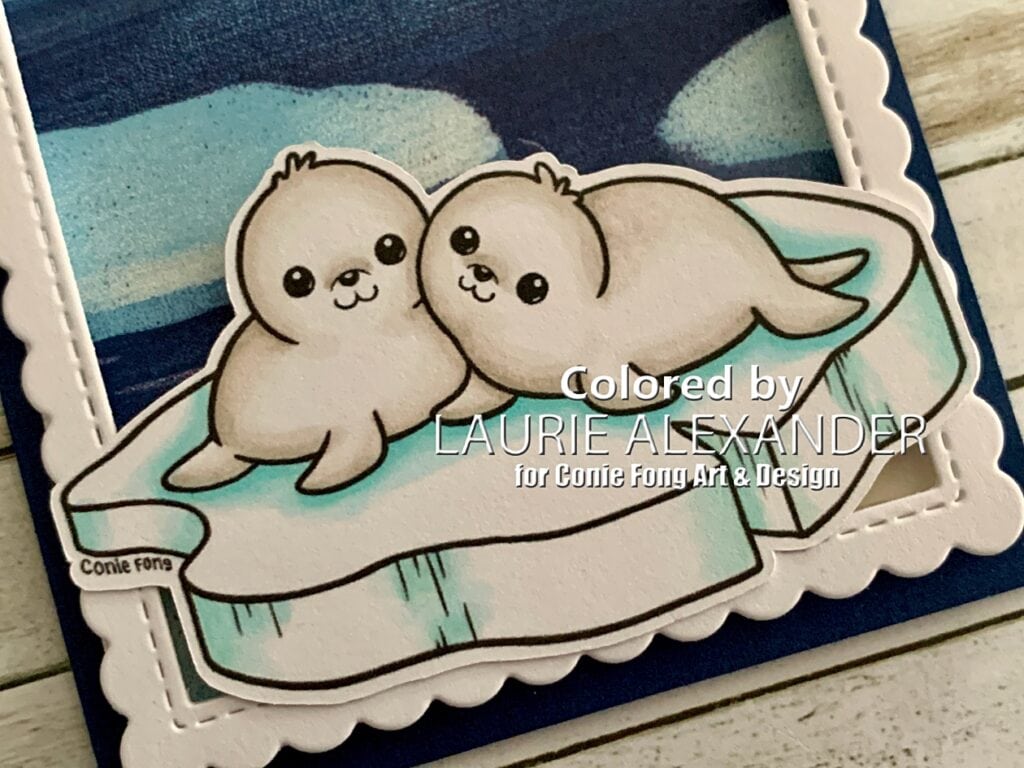
For my card, I kept my card design simple in line with the simple drawing of the seals. The seals were coloured with very few Copic markers leaving a lot of uncoloured white space. Really, I just coloured the shadows for them and the ice flow and used my Colorless Blender to soften the edges of the colour to the white.

I had the perfect Designer Series Paper from Stampin’ Up! to create a mini slimline card for these cuties! It had a winter artic scene with icebergs and ice flow, but it had polar bears on it! So, I strategically cut my DSP so that the bears would be hidden by the placement of my seals. Lol!

Next, I used a white mini slimline scallop die cut to frame my scene having it pop from all the blues. This also gave a support for my seals so that it looked like the seals are floating out of the scene.

The sentiment was stamped on white, and die cut with a stitched flag die. Again, I liked how it popped against the dark blue sky. The final touch was a few wooden stars that I had in my stash.

————————–

Copic Markers:

Seals: W3/W1/W0/0
Ice Flow: B01/B00/B000/0

Close Up of Baby Seals

————————–

Card Recipe for My Warmest Winter
Wishes Card:

Baby Seals On Iceberg, Conie Fong Art & Design
Paper Basics – Stamper’s Select White Cardstock, Papertrey Ink
Beary Christmas Designer Series Paper, Stampin’ Up!
Versafine Onyx Black Ink, Tsukineko
Essentials Mini Slimline Stitched Scallop Rectangle Die, Pink Fresh Studio
Stylish Shapes Dies, Stampin’ Up!
Free Skate Stamp Set, Stampin’ Up!
Foam Adhesive Strips, Stampin’ Up!
Wooden Star Elements. From My Stash
Night of Navy and Basic White Card Stock, Stampin’ Up!

Finished card size: 6 ¼” x 3 ¼”

————————–

To view my other Conie Fong Art & Design projects, please click here.

Hope you like my Design Team Inspiration Card using Baby Seals On Iceberg for Conie Fong Art & Design!

Thank you for stopping by!

Hugs,
Laurie