My Clockwork Anniversary Card

A card with a girl holding a pocket watch
My Clockwork Anniversary Card

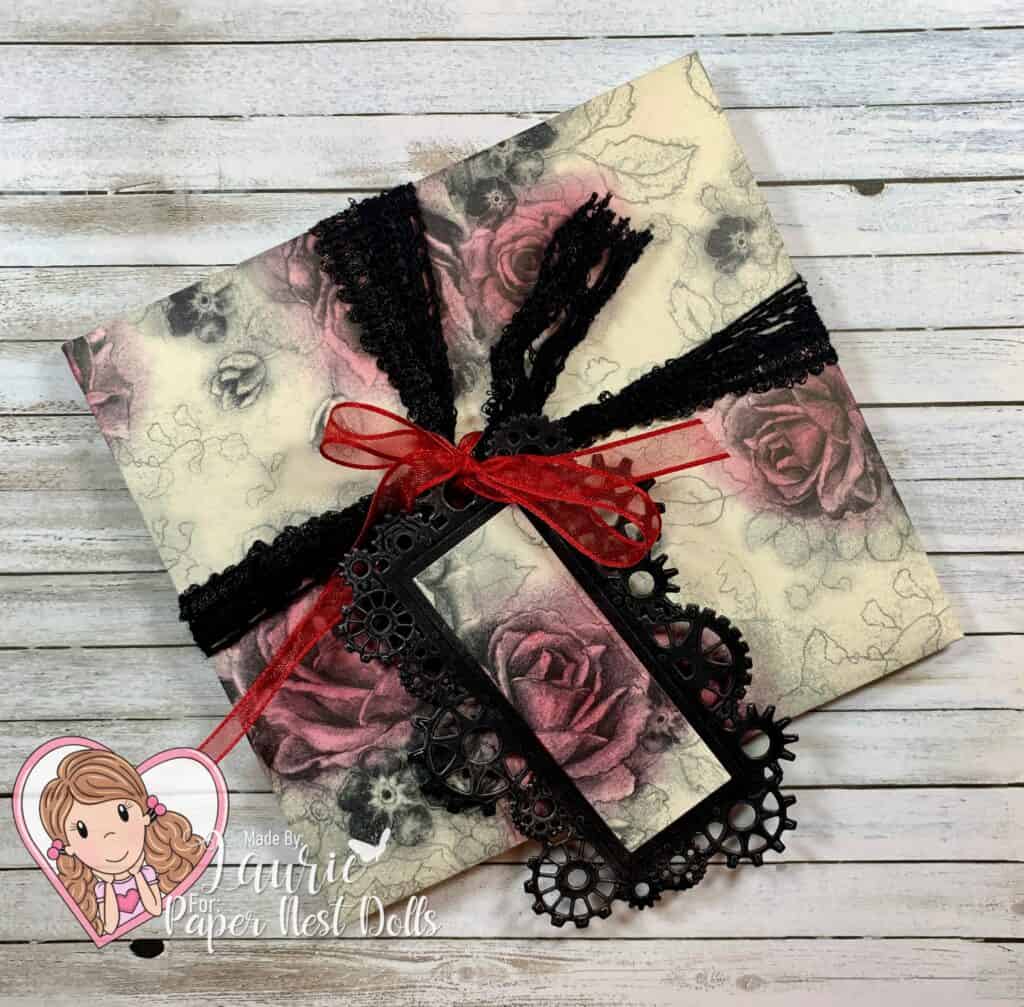
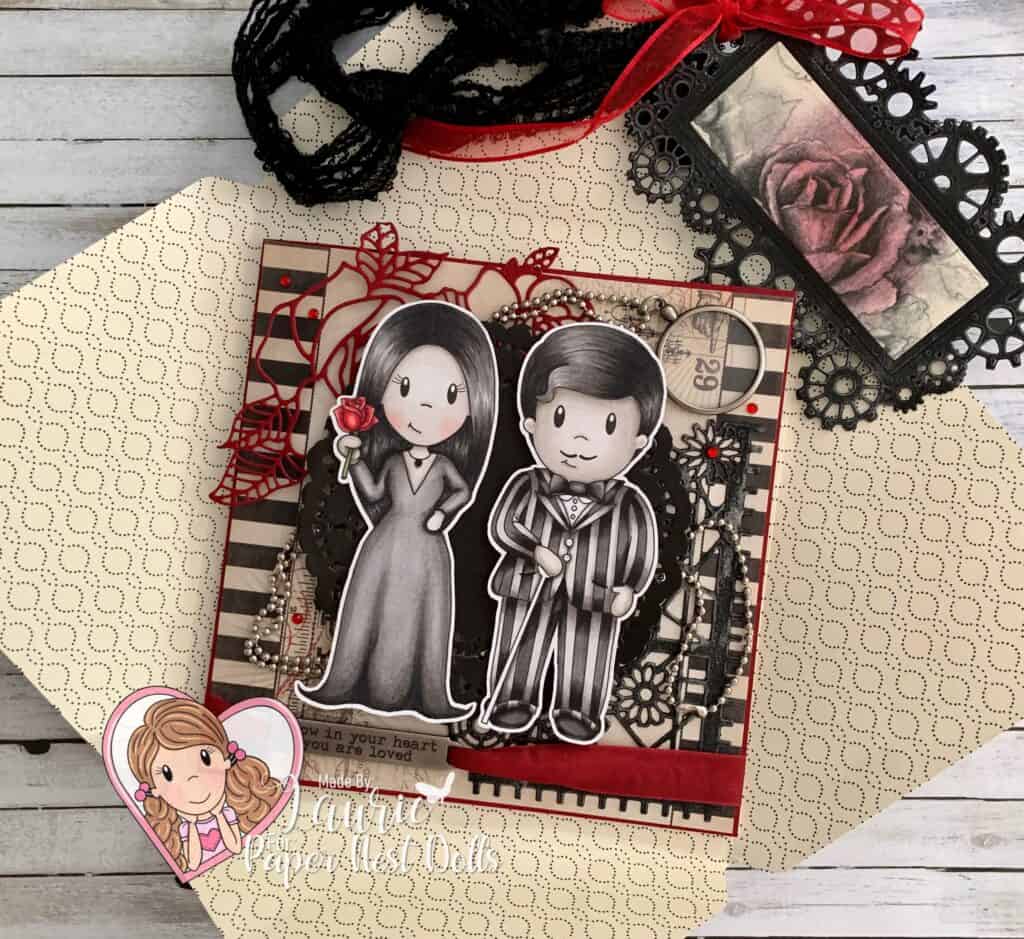
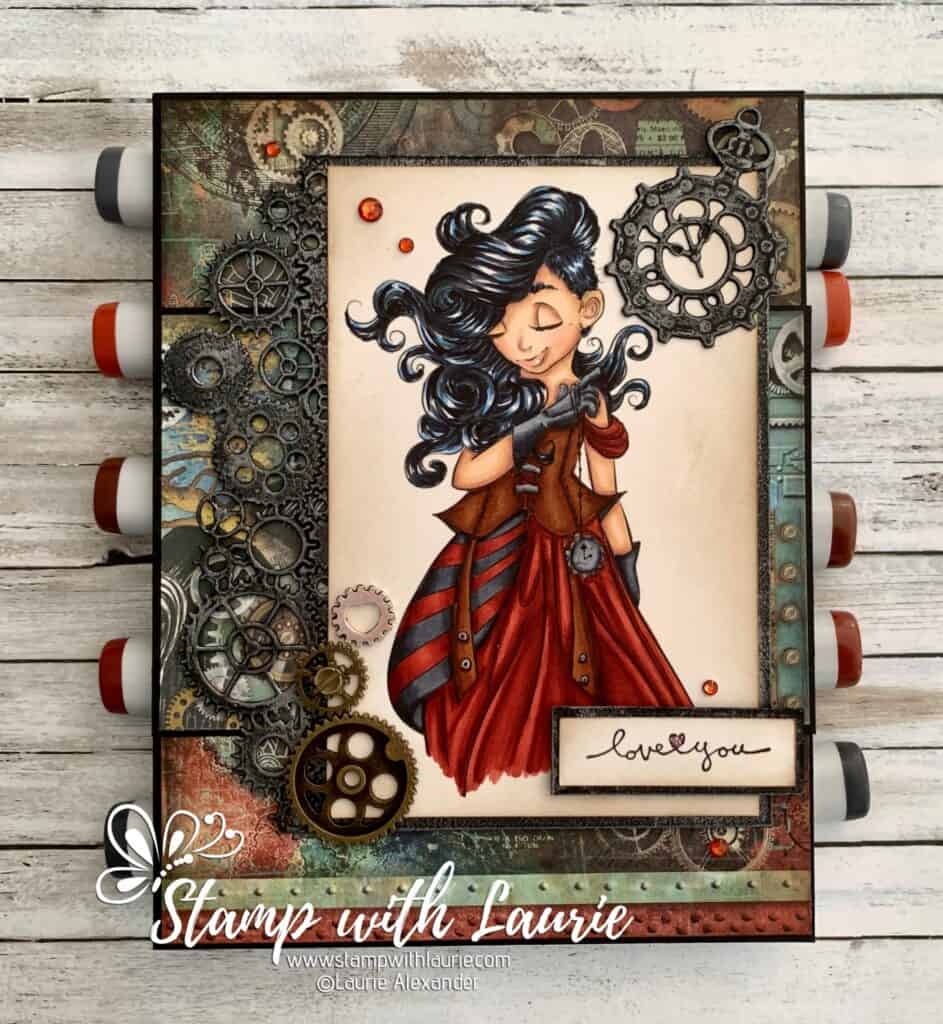
Hello Crafty Friends! It’s Laurie here with My Clockwork Anniversary Card using the beautiful Steampunk Time digital stamp By Krista Smith Stamps for my 28th wedding anniversary card for my Hubby.

My hubby loves anything steampunk and I found this awesome digital stamp by Krista Smith Stamps that I thought would make a beautiful card for him!

The Details of My Card

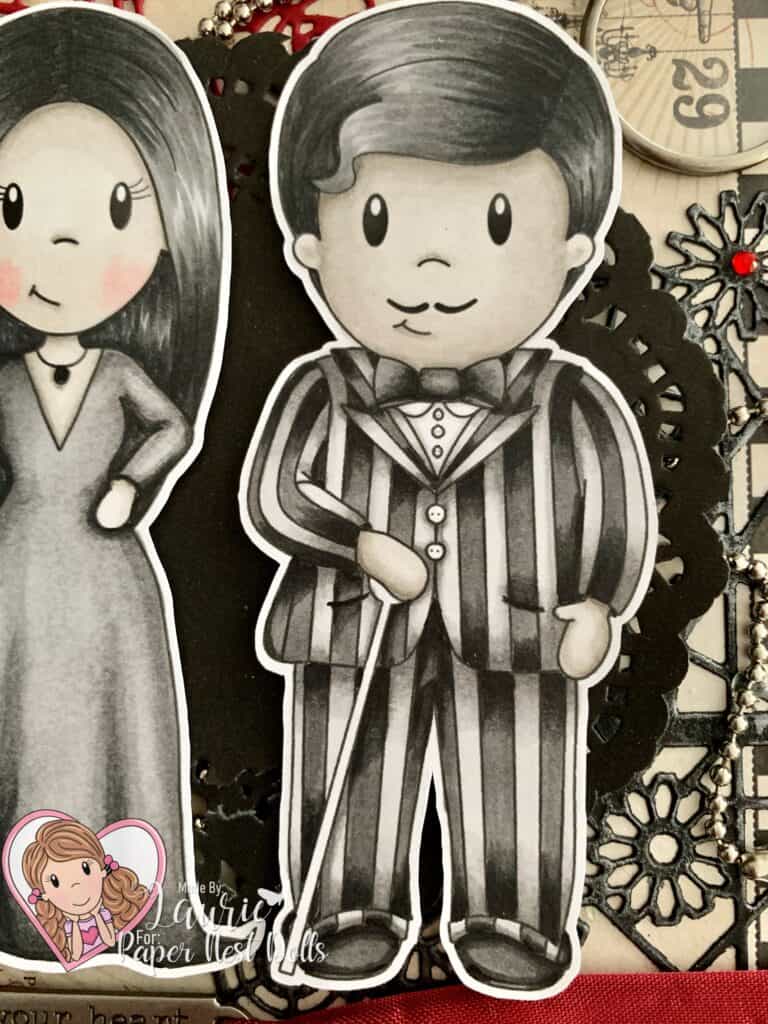
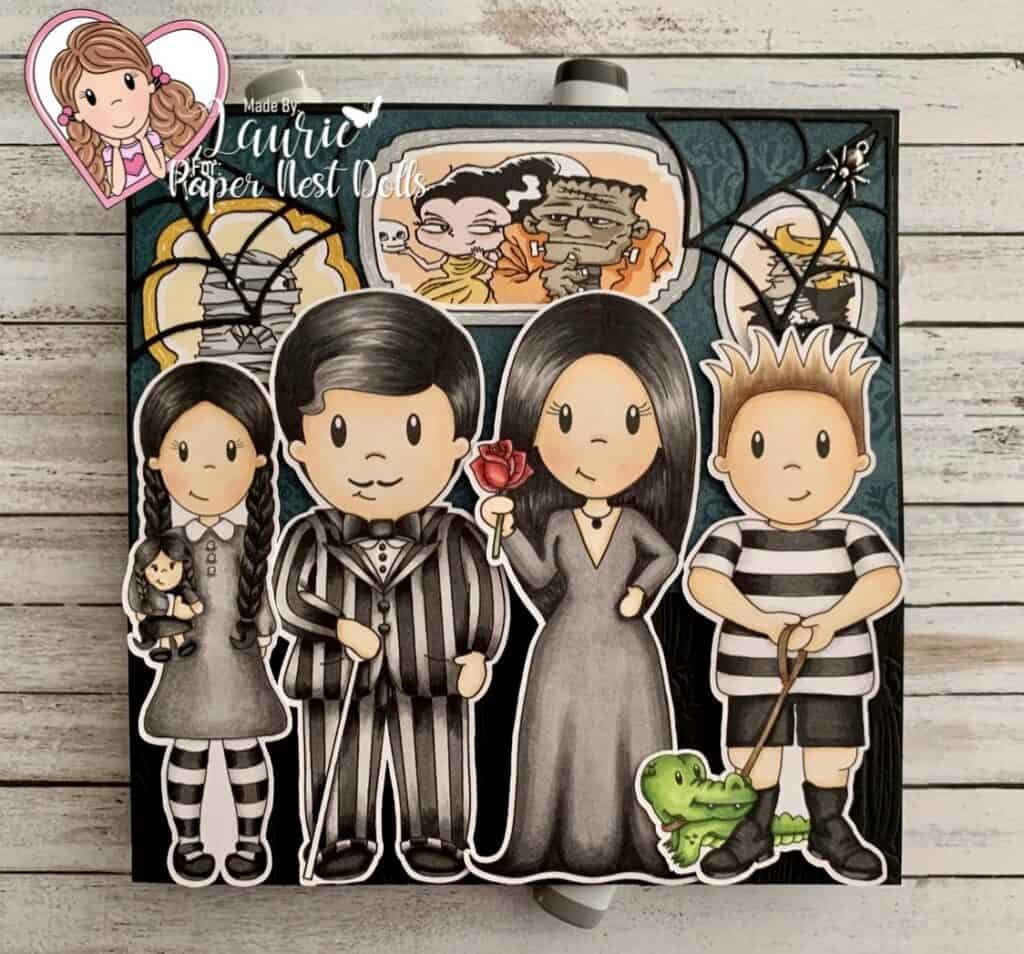
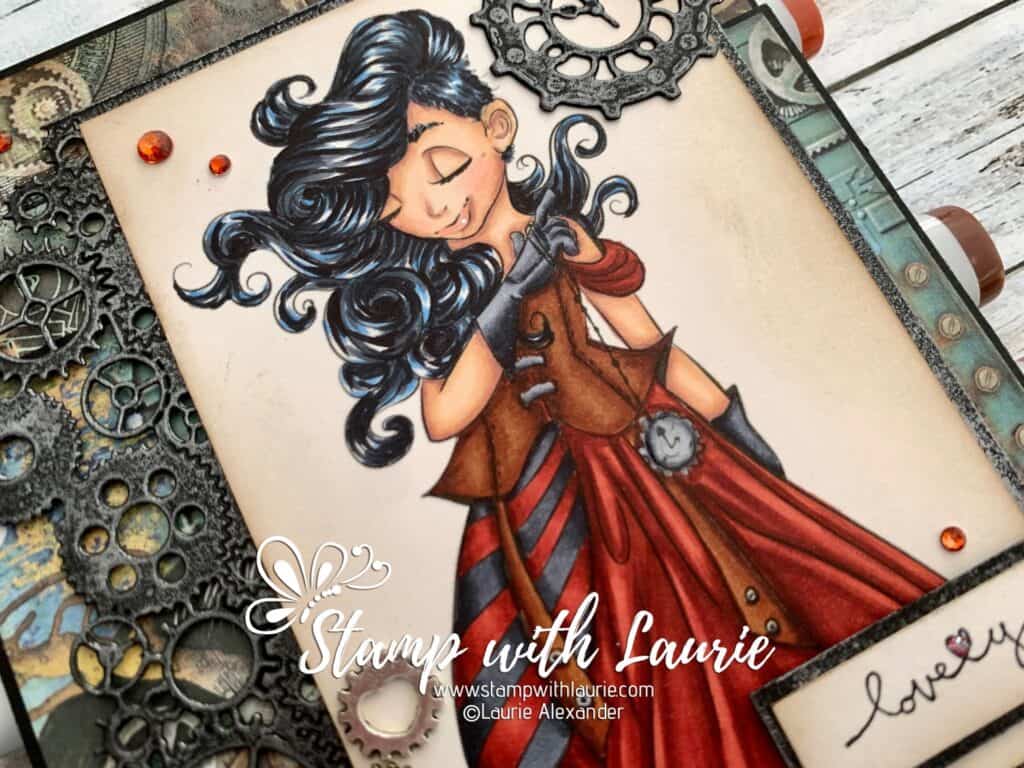
For my card, I decided to colour her with my Copic markers in muted tones to match my paper and my grungy steampunk theme. I haven’t used this colour scheme before but was very happy with how it turned out! I went with black hair with blue underpainting to give her a hip edge. Another first for me to colour like this!

Using Blue marker to add to black hair
Underpainting B24 to Hair

Once I finished colouring her, I blended some ink along the edges of the paper to give it a distressed look. I also blended ink along the edges of the design paper and sentiment to make them more worn. The paper from Stamperia was perfect for my steampunk theme since it had that industrial look to it.

Of course, I had to add the pocket watch die since she is holding a pocket watch. I rubbed some Brushed Iron Wax on it, the gears, and mats to make them look worn and to bring out the details on them. This is my new favourite product, next to my Copic markers, of course!

You can never have too many gears on a steampunk card! So, I pulled out my Tim Holtz idea-ology gears, as well as another small silver gear that I had in my stash. I love how the silver gear had a heart for the centre of it instead of a circle! Perfect for an anniversary card!

Glossy accents were added to her pocket watch and Star Dust Stickles was added to the heart for the sentiment.

Using another trick that I like to implement, I coloured the rhinestones with my Copic markers to match my colours.

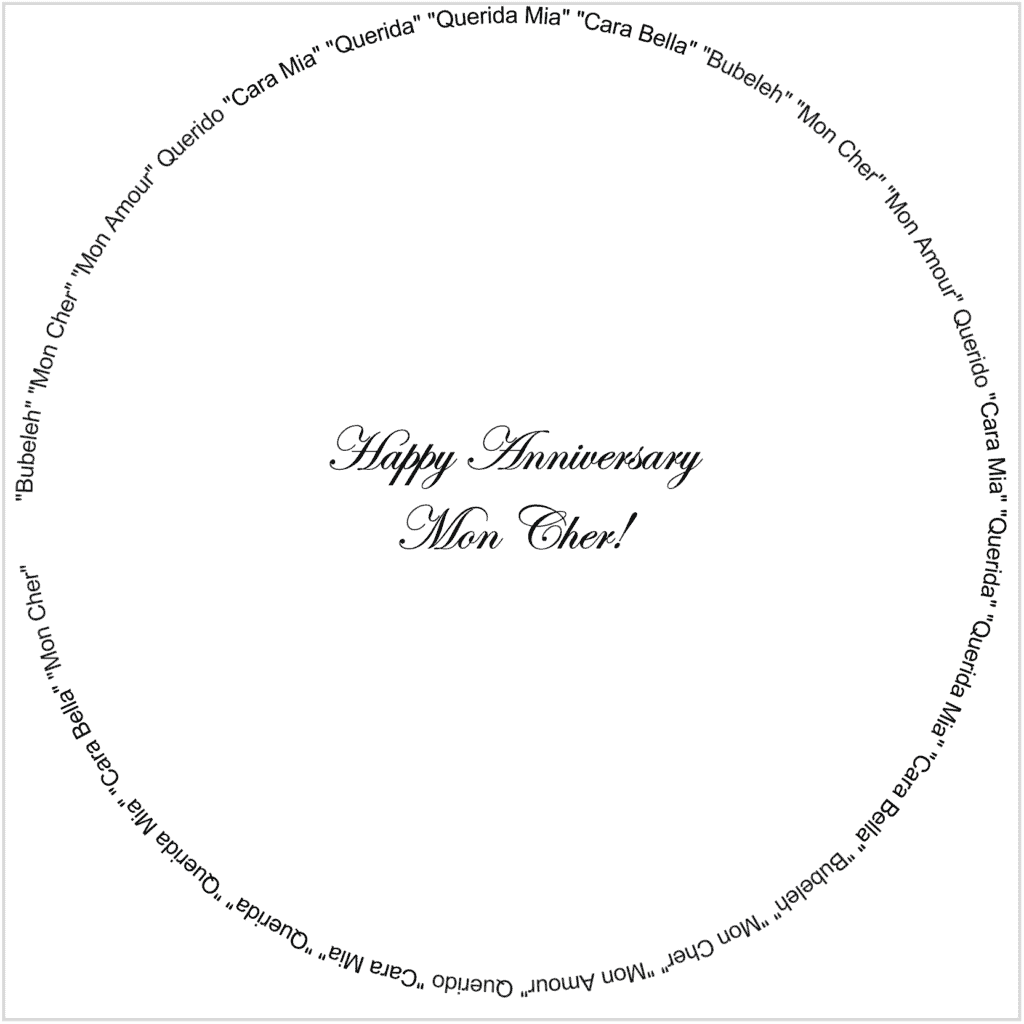
A simple sentiment with another heart says it all!

————————–

Copic Markers:

Skin: E000/E00/E21/E11/E04/R20
Hair: B24/C7/C9/100
Leather Vest: E29/E39/E35
Dress: E18/E09/E08/E07
Stripes: E18/E09/E08/E07/C9/C7/C6
Gloves: C9/C7/C6/C3
Metal Bits: C7/C5/C3
Rhinestones: E09

Close Up of Girl
Close Up of Steampunk Time Stamp

————————–

Card Recipe for My Clockwork Anniversary Card:

Steampunk Time, Krista Smith Stamps
Paper Basics – Stamper’s Select White Cardstock, Papertrey Ink
Mechanical Sea World 8″ x 8″ Paper Pad, Stamperia
Mixed Essentials Industrial Collection Steampunk Dies, Sue Wilson Creative
5.5” Gear Border die, From My Stash
Walnut Stain Distress Ink, Ranger
Mini Ink Blending Tool, Ranger 
Art Alchemy-Metallique Wax – Brushed Iron, Prima Marketing
Various Gears, Idea-ology, Tim Holtz
VersaFine, Onyx Black, Tsukineko
Rhinestone Basic Jewels, Stampin’ Up!
Star Dust Stickles, Ranger
Glossy Accents, Ranger

Basic Black Card Stock, Stampin’ Up!

Finished card size: 5” x 6 ½”

————————–

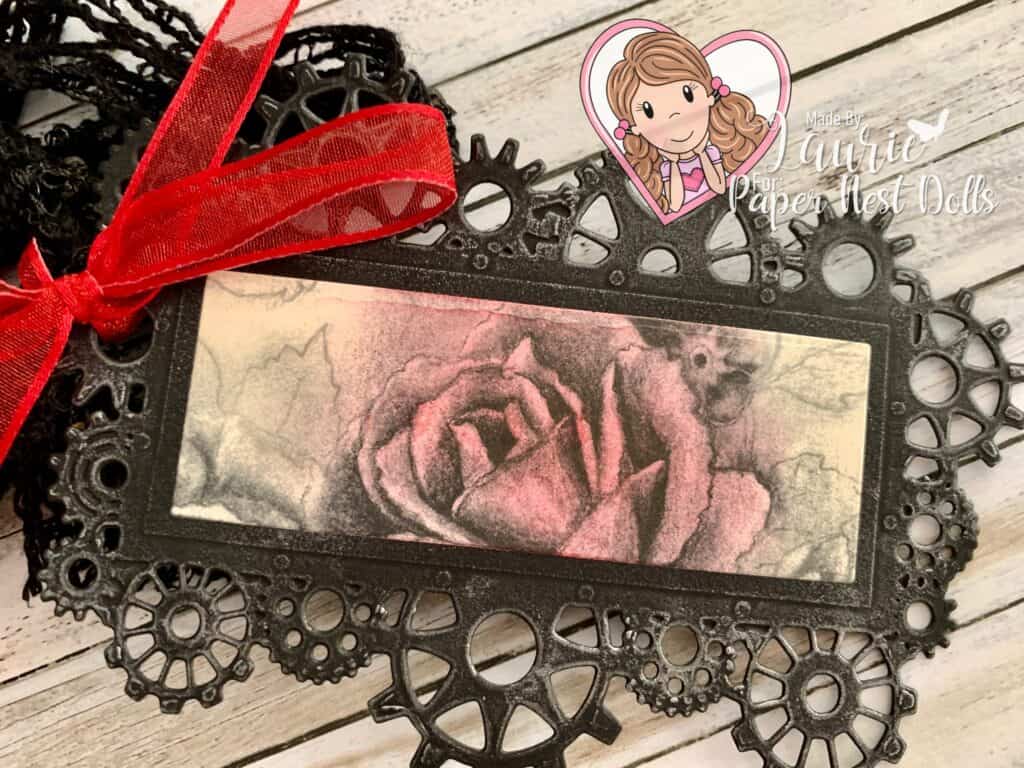
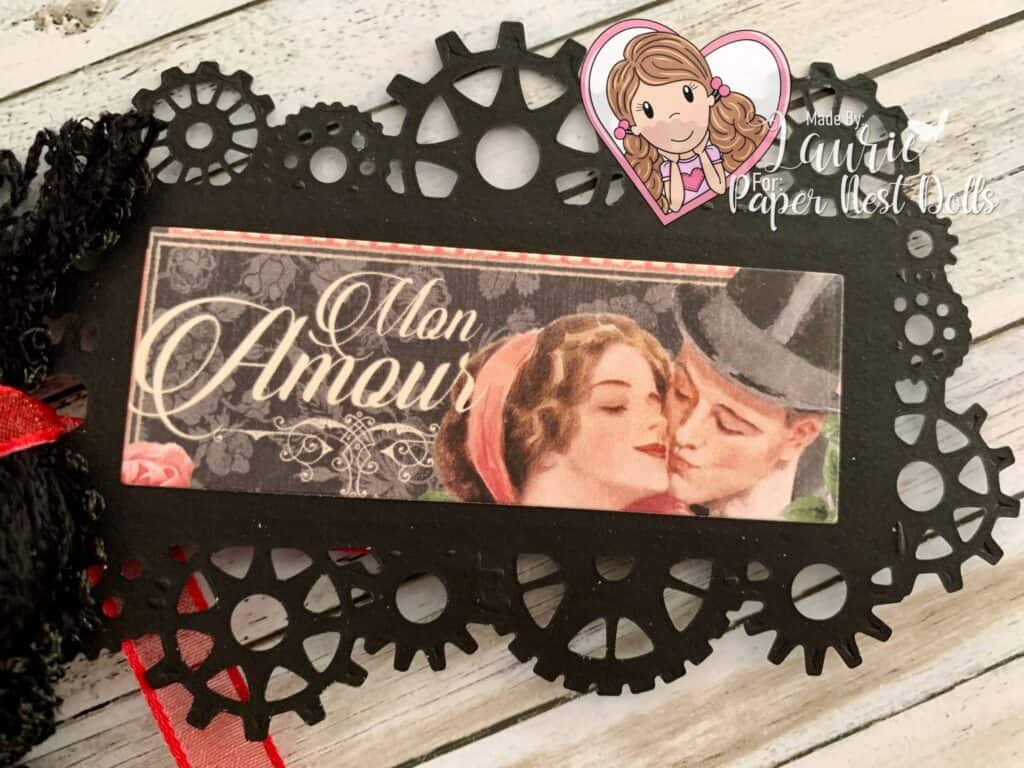
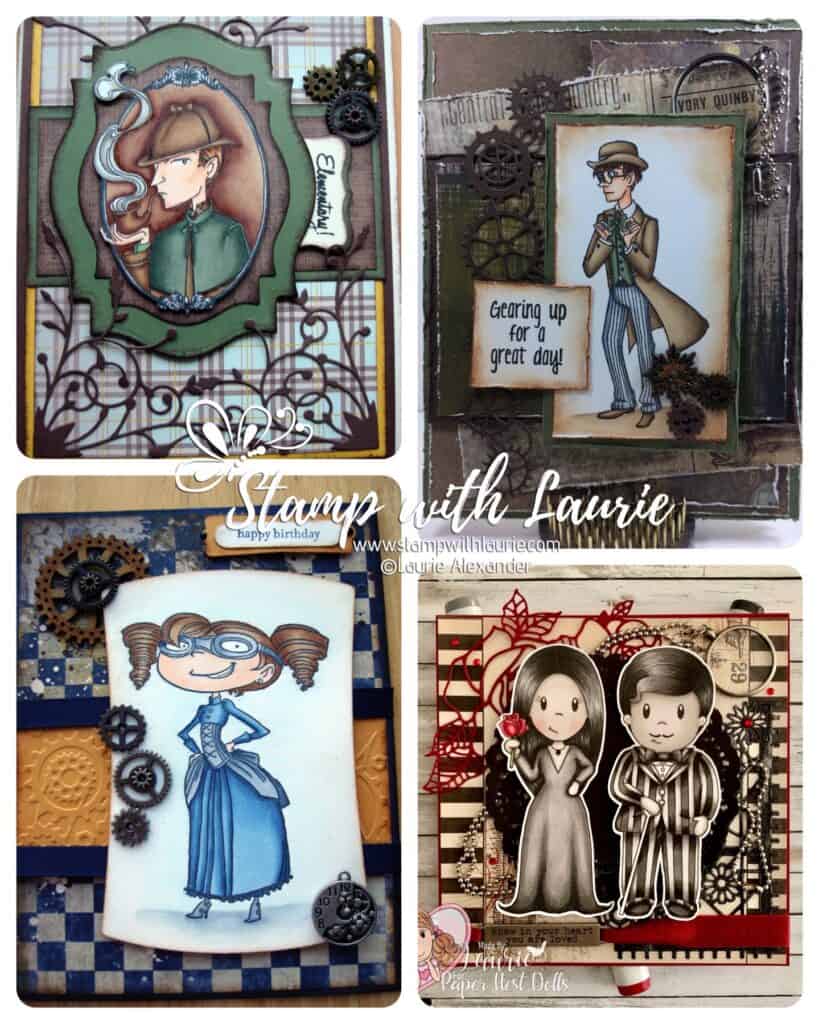
I have created several steampunk cards over the years for my hubby. Here are four of them that I have made.

Steampunk Cards That I Made
Past Steampunk Cards That I Made

Hope you like My Clockwork Anniversary Card using Steampunk Time by Krista Smith Stamps.

I am entering this card in the following challenge:
Passion For MarkersWeek 658 Challenge – use your favourite tool/product or embellishment

Thank you for stopping by!

Hugs,
Laurie

Love You Lots Card

Card with a girl catching raining hearts
Love You Lots Card

Hello Crafty Friends! It’s Laurie here! I am sharing Love You Lots Card using Raining Hearts by Paper Nest Dolls for my Design Team Inspiration Card.

The Details of My Card

My 28th wedding anniversary is coming up and I thought this cutie would be perfect for my hubby’s card from me!

I had fun colouring her with my Copic markers, especially the red! My hubby knows it’s one of my favourite colours. I even coloured her hair to look like mine when we first met. Don’t you love the falling hearts and her bucket filled with love!

The Smitten paper pulled out the red and pinks of my colouring. It has roses and hearts with keys on it. So, I decided to pull out my key embellishments as a nod to my Hubby having the key to my heart. I threaded it through some Real Red Ruffled ribbon to make it look like it was hanging from the card.

The die cut pink heart border added some popped up dimension to one side. All I added was some resin hearts to tie in the red colour scheme.

A pink stitched die cut heart and wooden heart added the perfect backdrop to my white embossed sentiment tying in my red and pink colour scheme!

————————–

Copic Markers:

Skin: E000/E00/E21/E11/E04/R20
Hair: E29/E27/E25/E23/E21
Reds: R29/R27/R25/R22
Yellows: Y38/Y35/Y32/E15
Hearts: R85/R83/R81
Soles of Boots: E27/E25/E23
Ground: E51/E50
Sky: B000/B000/0

Close Up of Girl catching hearts
Close Up of Girl

————————–

Card Recipe for Love You Lots Card:

Raining Hearts, Paper Nest Dolls
Paper Basics – Stamper’s Select White Cardstock, Papertrey Ink
Smitten, 6 x 6 Paper Pad, Authentique Paper
Cross Stitched Frame Borders Dies, Memory Box 
Give it a Whirl Dies, Stampin’ Up!
Love Notes Framelits Dies, Stampin’ Up!
Sealed with Love Stamp Set, Stampin’ Up!
VersaMark Ink Pad, Stampin’ Up!
White Stampin’ Emboss Powder, Stampin’ Up!
Real Red Mini Ruffled Ribbon, Stampin’ Up!
Resin Hearts Embellishments, Stampin’ Up!
Metal Key Embellishment, Michaels Arts & Crafts
Sending Love Embellishments, Wooden Heart, Stampin’ Up!
Clear Wink of Stella, Stampin’ Up! (on hearts)
Glossy Accents, Ranger (on boot and bucket)
Real Red and Rococo Rose Card Stock, Stampin’ Up!

Digital Stamp Size: 4” Tall

Finished card size: 5 ½” x 4 ¼”

————————–

To view my other Paper Nest Dolls cards, please click here.

Hope you like my Design Team card using
Raining Hearts by Paper Nest Dolls!


Thank you for stopping by!

Hugs,
Laurie

My Grease Lightning Card

Card with 50s greaser and girl with poodle skirt
My Grease Lightning Card

Hello Crafty Friends! It’s Laurie here! I am sharing My Grease Lightning Card as my Design Team Inspiration Card for Paper Nest Dolls using Decade Collection Greaser Owen and Decade Collection Poodle Skirt Emma. There are ten dolls in the Decade Collection that come in both rubber and digital stamps. You can find all the digital versions here.

Decade Doll Collection by Paper Nest Dolls

The Details of My Card

When I saw these two stamps, I knew that I had to create a card with them both on it! I had a lot of fun colouring them with my Copic markers! I even added Glossy Accents to the milkshake glass and Emma’s glasses.

For my card, I decided to create a 50s diner vibe using the most perfect paper with milk shakes, records, and black/white tiles that I found on Amazon.

I heat embossed with black embossing powder the record from the For the Record Stamp Set twice. Once on gray card stock and once on red card stock. Then, using several circle dies, I die cut the pieces out. I couldn’t resist using the red cardstock for the heart part in the centre of the record! And the grooves really show up well with the black embossing on the gray card stock. Don’t you love the sentiments, especially the puny one, that come with the stamp set!

Close Up of Card
Close Up of Card

Isn’t the car die so fun! I thought it would suit my 50’s vibe as an homage to Grease Lightning from the movie Grease. The door even opens. So, I had Owen’s leg halfway in almost like he was getting out of the card.

A red rhinestone and several black dot embellishments tie into my colour scheme.

————————–

Copic Markers

Greaser Owen
Skin
: E04/E11/E21/E00/E000
Hair: C9/C7/C6
Jacket/Boots: C9/C7/C6/C4
Jeans: B99/B97/B95/B93/B91
Belt: C9/C6/C7C3
Shirt: C3/C1/0

Close Up of Greaser
Close Up of Greaser Owen

Poodle Skirt Emma
Skin
: E04/E11/E21/E00/E000/R20
Hair: E29/E27/E25/E23/E21
Sweater/Scarf: R89/R85/R83/R81/C3/C1/0
Skirt: C9/C7/C6/C4
Glasses: R85/Glossy Accents
Shoes: C9/C6/E25/E23/C3/C1/0
Socks: C3/C1/0/R85
Milkshake: R85/R83/R81/C1/0/Glossy Accents
Cherry: R89/R85
Straw: R89/C3/0

Close Up of Girl in Poodle Skirt
Close Up of Poodle Skirt Emma

————————–

Card Recipe for My Grease Lightning Card

Decade Collection Greaser Owen and
Decade Collection Poodle Skirt Emma, Paper Nest Dolls
Paper Basics – Stamper’s Select White Cardstock, Papertrey Ink
50’s Diner Red & Black 8” x 8” Scrapbook Paper,
Crafters Delight by Leska Hamaty
Galvanized Metallic Paper, Stampin’ Up!
For The Record Stamp Set, Stampin’ Up!
Route 66 Dies, Local King Rubber Stamps
Layering Circles Dies, Stampin’ Up!
Standard Circle Dies, Spellbinders
Tuxedo Black Memento Ink Pad, Stampin’ Up!
VersaMark Ink, Stampin’ Up!
Basics Embossing Powder, Stampin’ Up!
Heat Tool, Stampin’ Up!
Classic Matte Dots, Stampin’ Up!
Rhinestone Basic Jewels, Stampin’ Up!
Glossy Accents, Ranger
Real Red, Basic Gray, and Basic White Card Stock, Stampin’ Up!

Finished card size: 5 ½” x 5 ½”

Stamps Size: 4”

————————–

To view my other Paper Nest Dolls cards, please click here.

My Other Cards in the Decade Collection

For more information on my cards, please click the photos.

Card with a Girl from Seventies and a retro bus on it
My Road Trip Card
Card with a Hippie Girl
Peace Not War Card

Hope you like my Design Team Inspiration Card using
Decade Collection Greaser Owen and
Decade Collection Poodle Skirt Emma by Paper Nest Dolls!

Thank you for stopping by!

Hugs,
Laurie

You’re Flippin’ Awesome Card

Card with BBQ Tools on it
You’re Flippin’ Awesome Card

Hello Crafty Friends! Laurie here again! Father’s Day is just a few weeks away and I thought I would share with you my You’re Flippin’ Awesome Card using the new He’s The Man Suite Collection by Stampin’ Up! This suite is perfect for car lovers, grilling enthusiasts, camping buffs, and more! My Father-in-law loves to BBQ and I though this suite would make a perfect Father’s Day card for him! 

The Details of My Card

This card is a fast and easy card to make! No stamping involved on the front, but I did stamp the inside with “Wishing You a Happy Father’s Day” using the He’s All That Stamp Set that comes in the Collection.

The He’s The Man Designer Series Paper comes with 2 die cut sheets and I used one of the die cuts for my sentiment. Easy-peasy! To give it more of a focal point, I added a piece of DSP and die cut it out using the He’s All That Dies. I turned it so that it flanks the sentiment on either side. I love the “framed” look that the die gives the die cut piece. Gave it that little extra detail!

The Rustic Metallic Adhesive-Backed Dots were a perfect accompaniment to my manly card! I placed one on either side of the sentiment and one above it to the left. Tip: you always want odd numbers since they are pleasing to the eye.

The final thing I added to my focal point was some looped Linen Thread behind everything. How manly is that thread!

For the DSP, I made it smaller than usual since I wanted the Brick & Mortar 3D Embossing Folder to show up more. I went with a Cajun Craze bricked piece since it matched my DSP and what is more appropriate than orange bricks!

All this was place on a Sahara Sand card base.

Supplies:

Stamps/Bundles/Dies: He’s The Man Suite Collection (159083)

Inks: Tuxedo Black Memento Ink Pad (132708) For sentiment on inside card

Paper: Sahara Sand (121043), Cajun Craze (119684), Basic White (for inside card) (159276), He’s the Man 12″ x 12″ Specialty Designer Series Paper (included in Collection)

Accessories: Brick & Mortar 3D Embossing Folder (149643), Rustic Metallic Adhesive-Backed Dots (included in Collection), Linen Thread (104199), Bone Folder (102300), Stampin’ Dimensionals (104430), Mini Stampin’ Dimensionals (144108), Stampin’ Seal (152813), Mini Glue Dots (103683)

Close Up of Focal Point on card
Close Up of My Card

Measurements: 

  • Sahara Sand: (2 pieces)
    • 5 ½” x 8 ½” scored a 4 ¼”
    • 3 ¼”x 4 ½”
  • Cajun Craze”
    • 5 ¼” x 4”
  • Basic White: (inside of card)
    • 5 ¼” x 4”
  • He’s the Man Specialty Designer Series Paper: (2 pieces)
    • 3-1/8” x 4-3/8”
    • 2-3/8” x 1-5/8”

More Information on My You’re Flippin’ Awesome Card :

For more of my Stampin’ Up! cards, please click here.

Stampin’ Up! video that shows off the fun designs of the He’s the Man Suite: https://www.youtube.com/watch?v=UW1QMUO3s8E

You will find the other items listed above in my online store.

My Flowers for You Card

A card with a dragon holding a bouquet of flowers
My Flowers for You Card

Hello Crafty Friends! It’s Laurie here! I am sharing My Flowers For You Card as my Design Team Inspiration Card for Conie Fong Art & Design using the Dragon Bouquet and Sentiment Bundle. This stamp is so versatile and can be used for so many occasions! It includes 6 images and comes in PNG or JPG:

  • Dragon Bouquet
  • Thinking Of You Sentiment
  • Have A Beautiful Day
  • Hello Friend
  • Just Because
  • Flowers For You Sentiment

The Details of My Card

For my card, I decided on the MME paper since I love the rustic wood texture and the collage on the paper! There is a sentiment on it under his feet, “start every day with a smile”. I thought this was such a sweet sentiment and would bring a smile to the recipient

From there, I picked out my Copic marker colours from the paper to colour my cute dragon and the bouquet. I also coloured some extra flowers that you get in the bundle in the colours I used for my bouquet. The sentiment from the bundle was die cut into a banner and layered with the coloured flowers and another banner below.

For embellishments, I used brass butterflies, clear epoxy dew drops and Clear Wink of Stella on the flowers.

————————–

Copic Markers:

Blue/Greens: BG49/BG15/BG13/BG32/BG11
Greens: YG67/YG63/YG03
Reds: R27/R24/R22
Yellows: Y26/Y28/Y21
Paper Bag: E44/E43/E42/E41
Sunflower: Y26/Y28/Y21/E42/E44/E43
Dragon’s Nails: E43/E41

Close Up of Dragon Holding a Bouquets of Flowers

————————–

Card Recipe for My Flowers for You Card:

Dragon Bouquet and Sentiment Bundle, Conie Fong Art & Design
Paper Basics – Stamper’s Select White Cardstock, Papertrey Ink
Dolled Up 6” x 6” Paper Pad, My Mind’s Eye
Stylish Shapes Dies, Stampin’ Up!
Silver & Clear Epoxy Essentials, Stampin’ Up!
Brushed Brass Butterflies, Stampin’ Up!
Clear Wink of Stella, Stampin’ Up!

Finished card size: 5.5” x 4.25”

————————–

To view my other Conie Fong Art & Design projects, please click here.

Hope you like my Design Team Inspiration Card using
Dragon Bouquet and Sentiment Bundle for Conie Fong Art & Design!

Thank you for stopping by!

Hugs,
Laurie

My Snowy Birthday Card

Card with Penguin holding present
My Snowy Birthday Card

Hello Crafty Friends! It’s Laurie here! I am sharing My Snowy Birthday Card as my Design Team Inspiration for Conie Fong Art & Design using Snowy With Present. This cutie is a free digital stamp in the Conie Fong Art & Design Group on Facebook. You can find him here with some other freebies: https://www.facebook.com/media/set/?set=oa.439587832883062&type=3.

The Details of My Card

This cutie can be used for so many things like Christmas, Valentine, Baby, Anniversary, Birthday, basically any kind of celebration! I have several winter birthdays and I decided that he would be perfect for one of my birthday cards.

I coloured him with my Copic markers to match my paper. The Doodlebug Paper was perfect for my wintery theme, and it had the cutest penguins on it! To add to my wintery theme, I embossed some white card stock with snowflakes and added a snowflake wreath to frame my focal point. A couple of rhinestones tied in the colour scheme and added sparkle.

————————–

Copic Markers:

Fur: C7/C5/C3/C1
Beak/Feet: YR68/YR16/YR15/Glossy Accents
Blues: B26/B23/B12
Blue/Greens: BG49/BG15/BG45

Close up of Penguin with present on card
Close Up of Snowy With Present

————————–

Card Recipe for My Snowy Birthday Card:

Snowy With Present, Conie Fong Art & Design
Paper Basics – Stamper’s Select White Cardstock, Papertrey Ink
Frosty Friends 6” x 6” Paper Pad, Doodlebug Design Inc.
Frostyville Wreath Die, Memory Box
Stitched Layering Circle Dies, Memory Box 
Wintery 3D Embossing Folders, Stampin’ Up!
Noble Peacock Rhinestones, Stampin’ Up!
White Gelly Roll Pen
Star Dust Stickles, Ranger
Glossy Accents, Ranger
Blueberry Bushel and Basic White Card Stock, Stampin’ Up!

Finished card size: 5.5” x 4.25”

————————–

To view my other Conie Fong Art & Design projects, please click here.

Hope you like my Design Team Inspiration Card using
Snowy With Present for Conie Fong Art & Design!

Thank you for stopping by!

Hugs,
Laurie

Love You More Than Chocolate Card

My Valentine Card with Chocolates on it.
Love You More Than Chocolate Card

Hello Crafty Friends! Laurie here again! I am sharing my Love you More Than Chocolate Card using the Nothing’s Better Than Stamp Set and matching Love You More Than Dies by Stampin’ Up! I have been meaning to play with this set and thought it would be perfect for a Valentine’s Day card!

The Details of My Card

For my card, I decided that I wanted to go with Early Espresso, Crumb Cake and Real Red for my colour scheme since they reminded me of a box of chocolates. 

I love how fun it is to replace the word “Chocolate” with the stamped image of the chocolates. Giving the receiver a subtle hint of what the card is all about. And just in case they miss that, I stamped in Early Expresso the word Chocolate and the outline of the chocolates on the Crumb Cake piece. For the stamped chocolates on the Basic White Card Stock, I used two-step stamping before die cutting them to create depth and dimension with Early Espresso for the outline and Crumb Cake for the silhouette.

To tie in the Real Red Designer Series Paper from the Regals Pack, I used Real Red for my hearts and Red Rhinestones to add sparkle. The stitched hearts were from the Give It a Whirl Dies. A favourite of mine for those little accents!

Supplies:

Stamps/Bundles/Dies: Nothing’s Better Than (158295), Love You More Than Dies (152698), Give It a Whirl Dies (154336), Stitched Rectangles Dies (151820)

Inks: Early Espresso Classic Stampin’ Pad (147114), Crumb Cake Classic Stampin’ Pad (147116)

Paper: Early Espresso (119686), Basic White (159276), Crumb Cake (120953), Real Red (102482), Regals 6″ x 6″ Designer Series Paper (155227)

Accessories: Red Rhinestone Basic Jewels (146924), Bone Folder (102300), Stampin’ Dimensionals (104430), Stampin’ Seal (152813), Mini Glue Dots (103683), Multipurpose Liquid Glue (110755)

Close Up of My Card
Close Up of My Card

Measurements: 

  • Early Espresso: 11” x 4 ¼” scored at 5 ½”
    • 2 7/8” x 1 7/8” (Words)
    • Scraps for hearts
  • Real Red: 4 ¼” x 4 ¼”
    • Scraps for hearts
  • Crumb Cake: 4” x 4 ¼”
  • Basic White: 2 ¼” x 3 5/8”
    • 1 ½” x ¾” (Chocolates Die)
  • Regals Designer Series Paper: 5 ¼” x 2”

More Information on my Love You More Than Chocolate Card:

For more of my Stampin’ Up! cards, please click here.

You will find the items listed above in my online store.

My Love Is In The Air Card

A card with a gnome flying with a balloon
My Love Is In The Air Card

Hello Crafty Friends! It’s Laurie here! I am sharing My Love Is In The Air Card as my Design Team Inspiration for Conie Fong Art & Design using the Gnome With Balloon and Sentiment Bundle. If you need a fast Valentine card, then this is it!

I had great fun colouring this cutie for a birthday card (link) that I thought he would make a fun Valentine card with his heart balloon! He comes with 9 stamps including a choice of heart balloon or round balloon, with or without grass and 5 sentiments that consist of Hello Love, Love Is In The Air (2 different styles), Happy Valentine’s Day and Heart Full Of Love in JPG. You can also get him in PNG.

Details of My Card

I decided that I wanted to use the Glorious Sky Slimline Paper for my background, but I die cut it down to fit a Mini Slimline card instead. This paper is awesome in that it completes the scene with minimal fuss. All I had to do was add my die cut sentiment with some Valentine flags and my coloured image which I popped onto an Action Wobble. What is more fun than an interactive card and this one is super cute!

My Card in Action

————————–

Copic Markers:

Skin: E000/E00/E21/E11/E04
Hair: C4/C3/C1
Reds: R29/R27/R24/R22
Shoes: C7/C5/C4/C3
Pom Pom: C3/C1/0/Star Dust Stickles

Close Up go Gnome with his balloon
Close Up of Gnome with Balloon

————————–

Card Recipe for My Love Is In The Air Card:

Gnome With Balloon and Sentiment Bundle, Conie Fong Art & Design
Paper Basics – Stamper’s Select White Cardstock, Papertrey Ink
Glorious Sky Slimline Paper Pack, Whimsy Stamps
From My Heart Designer Series Paper, Stampin’ Up!
Cork Specialty Paper, Stampin’ Up!
Large Mini Slimline Stackables Dies, Lawn Fawn
Stitched Rectangle Dies, Stampin’ Up!
Tasteful Labels Dies, Stampin’ Up!
Resin Hearts Embellishments, Stampin’ Up!
Action Wobble Spring
Star Dust Stickles, Ranger
Real Red and Basic White Card Stock, Stampin’ Up!

Finished card size: 6.5” x 3.5”

————————–

To view my other Conie Fong Art & Design projects, please click here.

Hope you like my Design Team Inspiration Card using
Gnome With Balloon and Sentiment Bundle for Conie Fong Art & Design!

Thank you for stopping by!

Hugs,
Laurie

My Viking Love Valentine Card

A Viking Girl surrounded by hearts
Viking Love Valentine Card

Hello Crafty Friends! Laurie here again! I am sharing My Viking Love Valentine Card using the Brave Vikings Stamp Set by Stampin’ Up! My Hubby loves history and especially Vikings! He even has a Viking outfit with sword tor Society for Creative Anachronisms events. So, it was a given that I would get this stamp set as soon as I saw it.

The Details of My Card

For my card, I decided to use the Pattern Party Designer Series Paper that you can get for free with a qualifying hostess party. This paper is awesome! It has so many patterns for different occasions and seasons, and you get 48 sheets (4 each of 12 double-sided designs)! The colourful hearts are perfect for a Valentine card and the diagonal stripe paper matches those colours perfectly!

I used the Heart Punch Pack to punch out my DSP and matching scallop hearts. The little Poppy Parade stitched hearts are from the Give It a Whirl Dies. I scattered the hearts willy-nilly to mirror to the whimsey of the Stitched with Whimsey Die on the Basic White. 

Once I stamped the Viking girl in Tuxedo Black Memento Ink, I pulled out my Stampin’ Blends to colour her using the colours pulled from the DSP. I then fussy cut her out. I placed her on the card so that she is pointing at the sentiment like she is saying the words. A scattering of Red Rhinestone Basic Jewels adds a bit of sparkle to the card.

Supplies:

Stamps/Bundles/Dies: Brave Vikings (157926), Stitched with Whimsey Dies (155314), Give It a Whirl Dies (154336)

Inks: Tuxedo Black Memento Ink (132708)

Paper: Poppy Parade (119793), Basic White (159276), Bermuda Bay (131197), Pattern Party Designer Series Paper (155426)

Accessories: Heart Punch Pack (151292), Poppy Parade Stampin’ Blends Combo Pack (154958), Granny Apple Green Stampin’ Blends Combo Pack (154885), Cinnamon Cider Stampin’ Blends Combo Pack (153105), Smoky Slate Stampin’ Blends Combo Pack (154904), Bronze & Ivory Stampin’ Blends Combo Pack (154922), Petal Pink Stampin’ Blends Combo Pack (154893), Red Rhinestone Basic Jewels (146924), Bone Folder (102300), Stampin’ Dimensionals (104430), Stampin’ Seal (152813), Mini Glue Dots (103683), Multipurpose Liquid Glue (110755), Paper Snips (103579)

Close Up of Viking Girl

Measurements: 

  • Poppy Parade: 5 ½” x 8 ½” scored at 4 ¼”
    • 2 Scallop Hearts: 2 3/16” x 2 1/8”
    • Scraps for Stitched Heart Die
  • Bermuda Bay: 2 3/16” x 2 1/8”
  • Basic White (3 pieces):
    • 5” x 3 ¾”
    • 1 15/16” x 1 7/8”
    • 2 ¼” x 1 ¾” (Viking Girl)
  • Pattern Party Peach Designer Series Paper: 5 ¼” x 4”
    • 1 15/16” x 1 7/8” (2 pieces)

More Information on My Viking Love Valentine Card:

For more of my Stampin’ Up! cards, please click here.

You will find the items listed above in my online store.

My Neighbourly Birthday Wish for You

The Flintstones
My Neighbourly Birthday Wish for You

Hello Crafty Friends! It’s Laurie here to share my Neighbourly Birthday Wish For You using the Prehistoric Family Limited Edition Box by Kindred Stamps! It’s my brother’s birthday today and we grew up on The Flintstones! So, I thought a fun slider card for his birthday would be right up his alley!

The Details of My Card

For my card, I decided to create a full scene, but to fit all my characters, I went with a slimline card. Once I coloured my characters, I built my prehistoric card. So, much fun! There is a great video on the Kindred Stamps website on how to do this. I found that my card was a bit top heavy, and the awning kept getting caught. So, I add 3 strategical placed washers underneath the wheels. Voila! Fixed!

Of course, if you have a car, you need a road! So, I used the stencil that came with the kit, a blender brush and ink to create my road. Then, I die cut the Gray Granite with the Lawn Fawn stitched rectangle since I wanted the stitching to frame my whole scene. Once that was done, I created my mechanism using the Heffy Doodle Pull Tab Dies and hid it behind the road. The clouds DSP was also die cut with the stitched rectangle to finish the frame of my scene. Once my scene was created, I added my characters finishing my prehistoric family!

————————–

Copic Markers:

Wilma
Skin: E04/E11/E21/E00/E000
Hair: YR00/YR18/YR16/YR14/YR12
Dress/Pearls: C3/C1/C00/0

Wilma and Betty
Wilma and Betty

Betty
Skin: E04/E11/E21/E00/E000
Hair: T10/T8/T6/T4
Dress: BG10/BG18/BG15/BG13/BG11
Necklace: C1/C7

House
Stone: C0/C1/C3
Door: B00/B02/B04
Windows: Y32/Y35/Y38

Fred and Barney
Fred and Barney

Fred
Skin: E04/E11/E21/E00/E000
Hair: C9/C7/C6
Outfit: YR00/YR18/YR16/YR14/YR12/C7
Tie: BG18/BG05

Barney
Skin: E04/E11/E21/E00/E000
Hair: Y000/Y19/Y17/Y15/Y13
Outfit: E79/E77/E74/E71/E70

————————–

Card Recipe for My Neighbourly Birthday Wish for You:

Prehistoric Family Limited Edition Box, Kindred Stamps
(Build A Prehistoric Car Die, Prehistoric House Stamp,
Prehistoric Family Stamp Set and Flag Stone Stencil)
Paper Basics – Stamper’s Select White Cardstock, Papertrey Ink
Myth & Magic Designer Series Paper, Stampin’ Up!
In Good Taste Designer Series Paper, Stampin’ Up!
Linen Specialty Paper, Stampin’ Up!
Large Slimline with Sliders Dies, Lawn Fawn (Stitched Rectangle)
Slimline Pull Tab Dies, Heffy Doodle (Slider Mechanism)
Spring Showers Dies, Lawn Fawn (Cloud)
Rainbow Builder Dies, Stampin’ Up! (Sun)
Tuxedo Black Memento Ink, Stampin’ Up!
Gray Granite Classic Ink Pad, Stampin’ Up!
Crushed Curry Classic Ink Pad, Stampin’ Up!
Blender Brushes, Picket Fence
3 Metal Washers to Balance Car
Gray Granite and Crushed Curry Card Stock, Stampin’ Up!

Finished card size: 3.5” x 8.5”

Video of Slider Card in Action

————————–

For more of my Copic cards, please click here.

Hope you like My Neighbourly Birthday Wish For You using the
Prehistoric Family Limited Edition Box by Kindred Stamps!

Thank you for stopping by!

Hugs,
Laurie

You’re my Gingerbread Card

My Stampin' Up! Card with Gingerbread Cookies on It
You’re my Gingerbread Card

Hello Crafty Friends! Laurie here again! I am sharing my You’re my Gingerbread Card using the Frosted Gingerbread Bundle by Stampin’ Up!

For my card, I wanted to use the Gingerbread Dies to die cut the images out of the Gingerbread & Peppermint Designer Series Paper. I love that you can do this to create your cards! Great for mass producing your Christmas cards!

Paper with Gingerbread Cookies on It
Gingerbread & Peppermint Designer Series Paper with Gingerbread Dies

I thought the Kraft paper would tie in nicely with the brown cookies in the DSP. Once I die cut it with the largest scallop die, I stamped the peppermint swirls all over it in Versamark. This tone-on-tone look adds a subtle bit of interested without taking away from the delicious cookies.

I also stamped in Versamark the sentiment on a piece of Real Red that I die cut using one of the Stitched Rectangles Dies. This I embossed in white using my Heat Tool. I added the gingerbread trim in Basic White under my sentiment trimming it to fit the rectangle. I added a fun Gingerbread & Peppermint Acrylic Shape and a scattering of Red Rhinestone Basic Jewels to tie in my colours and theme.

Supplies:

Stamps/Bundles/Dies: Frosted Gingerbread Bundle (156807), Scalloped Contours Dies (155560), Stitched Rectangles Dies (151820)

Inks: VersaMark Ink Pad (102283)

Paper: Real Red (102482), Basic White (159276), Kraft 6″ x 6″ Paper Pack (156325), Gingerbread & Peppermint Designer Series Paper (156313)

Accessories: Basics Embossing Powder (155554), Gingerbread & Peppermint Acrylic Shapes (156322), Red Rhinestone Basic Jewels (146924), Bone Folder (102300), Stampin’ Dimensionals (104430), Stampin’ Seal (152813), Mini Glue Dots (103683), Heat Tool (129053)

Close Up of My Card with Gingerbread Cookies
Close Up of my Card

Measurements: 

  • Real Red: 2 pieces
    • 5 ½” x 8 ½” scored at 4 ¼”
    • 3 ¼” x 1 ¼” (Sentiment)
  • Gingerbread & Peppermint Designer Series Paper: 4” x 5 ¼”
    • 2 Die cut Cookies and one peppermint swirl
  • Basic White: Scrap
  • Kraft: 3 ¼” x 4 ½”

More Information on You’re My Gingerbread Card:

For more of my Stampin’ Up! cards, please click here.

Here is a video on the Gingerbread & Peppermint Suite:
https://www.youtube.com/watch?v=8nTXh3UT6i4

You will find the items listed above in my online store.

My Steampunk Anniversary Card

My Design Team Card
My Steampunk Anniversary Card

Hello Crafty Friends! It’s Laurie here sharing My Steampunk Anniversary Card using Goth Dad and Goth Mom by Paper Nest Dolls for my Design Team Inspiration Card. In fact, I loved these cuties so much, that I created another card last year using the whole family. I will leave a link at the end of this post to that card.

I gave this fun card to my Hubby for our wedding anniversary this year. He loves anything steampunk and the Addams Family. So, I decided to add a steampunk vibe to my card with gears, a chain, a monocle, the Word Band, and my monochromatic colour scheme.

My Card Details

For my card, I decided that I wanted to colour the two images in black and white just like in the old TV series, but with a pop of red for the rose. I carried that colour scheme over with my paper choices and embellishments. The My Mind’s Eye paper was so perfect that I decided to make my card 6” x 6” and only cut off 1/8” for the card base. I lightly sponged Brushed Iron wax to my die cut corner gears to give them added dimension and placed them underneath Goth Dad. To mirror them, I place Cherry Cobbler die cut roses on the opposite corner underneath Goth Mom. A black doily helps to set off my focal point of the coloured stamps from the background.

Close Up of My Design Team Card

For embellishments, I used a Tim Holtz Monocle and Word Band that mirror the Brushed Iron Wax in colour. I picked up the Ball Bead Chain from my local hardware store. The Cherry Cobbler Ribbon and Red Rhinestone, tie in my pop of red colour.

My Envelope Details

Since I went with a 6” x 6” card, I need to create a custom envelope and my Envelope Punch Board came to the rescue.

My Envelope for My Card
Outside of My Envelope for My Card

I used some retired Stampin’ Up Designer Series Paper that carried the monochrome theme over from the card. I used a sponge dauber to dab Cherry Cobbler Ink to the roses on the paper to tie in my pops of red. Some black lace fiber blend tied my envelope together with a seal and gold heart sticker holding the ends together.

Inside of My Envelope with My Anniversary Card
Inside of My Envelope with My Design Team Card

For my tag, I used the gear tag die with the Brushed Iron Wax on the front of it and a piece of the rose paper. 

Front of my Tag
Front of Gear Tag with Rose

On the back of the tag, I used a piece of Graphic 45 paper that had the words “Mon Amour”. Gomez and Morticia are always speaking endearments in different languages to each other. So, I thought this would tie in my theme.

Back of My Tag
Back of My Gear Tag

Finally, the last thing I created was for the inside of my card. I took all the endearments that they said in the show and created a graphic with them.

Inside Sentiment of My Card

————————–

Copic Markers:

Goth Mom
Skin: W0/W1/W3/W5
Hair: T9/T7/T5/T4/T3
Dress: T9/T7/T5/T3
Rose: R39/R37/R35/R32/G21/G94/G99

Close Up of Goth Mom

Goth Dad

Skin: W0/W1/W3/W5
Hair: T9/T7/T5/T3
Suit: T9/T7/T5 (dark stripes), T5/T3/T1 (light stripes)
Tie: T9/T7/T5/T4
Shirt: T2/0
Shoes: T9/T7/T5

Close Up of Goth Dad

————————–

Card Recipe for My Steampunk Anniversary Card:

Goth DadGoth Mom, Paper Nest Dolls
Paper Basics – Stamper’s Select White Cardstock, Papertrey Ink
Lost & Found – Union Square Paper Pad, My Mind’s Eye
Mon Amour Collection 8” x 8” Paper Pad, Graphic 45
Timeless Elegance Designer Series Paper, Stampin Up!
Rose Bloom Metal Die, Paper Rose
Industrial Chic – Corner Die, Sue Wilson, Creative Expressions
Industrial Chic – Frame & Tag Die, Sue Wilson, Creative Expressions
Art Alchemy – Metallique Wax – Brushed Iron, Prima Marketing
Gift It, Christmas Black Paper Doily, Recollections, Michael’s Arts & Crafts
Moonlight Mistress, Busy Box Blends
Monocles, Idea-ology, Tim Holtz
30” Ball Bead Chain with Connector Clasp, Local Hardware Store
Word Bands, Idea-ology, Tim Holtz
Cherry Cobbler Seam Binding Ribbon, Stampin’ Up!
Envelope Punch Board
Red Rhinestones Basic Jewels, Stampin’ Up!
Cherry Cobbler Ink, Stampin’ Up!
Sponge Daubers, Stampin’ Up!
Cherry Cobbler and Basic Black Card Stock, Stampin’ Up!

Finished card size: 6” x 6”

————————–

To view my other card that I made last year using the Goth Family, please click here.

A Goth Family Portrait Halloween Card

To view my other Paper Nest Dolls cards, please click here.

Hope you like My Steampunk Anniversary Card
using Goth Dad and Goth Mom by Paper Nest Dolls

Thank you for stopping by!

Hugs,
Laurie

My Otter-ly Love Anniversary Card

My Anniversary Card for my Hubby
My Otter-ly Love Anniversary Card

Hello Crafty Friends! It’s Laurie here! I am sharing My Otter-ly Love Anniversary Card using From The Otter Side by Kraftin’ Kimmie Stamps. Today is our 27th Wedding Anniversary and this is one of the cards that I gave my Hubby.

Aren’t these two otters just the cutest with their heart shaped tummies! My Hubby loves otters. In fact, there is a YouTube channel that he loves to watch that is all about two otters, Kotaro and Hana, and the antics that they get up to living in an apartment in Japan!

For my card, I decided that I wanted to create a fun “watery” scene for my two otters. So, I pulled from my stash some Designer Series Paper that had fish and waves on it and die cut it into a heart. I embossed the Detailed Dots onto the Pacific Point background to represent water bubble. I love the detail of the Memory Box wave die! In fact, I loved it so much that I made two layers with one being in Vellum! I couldn’t resist having one of the cute otters holding a wooden heart! How perfect for an anniversary card! The fun puny sentiment “To my Otter Half” was white embossed on a strip of Pacific Point with a couple of heart embellishments. A couple more wooden hearts and some water droplets on the waves all add to my anniversary/watery scene!

————————–

Copic Markers:

Fur: E37/E35/E34/E33
Tummies: E33/E31/E30
Nose: R20
Water: B000

Close Up Of The Otters on my Card
Close up of the Otters on my My Hubby’s Anniversary Card

————————–

Card Recipe for My Otter-ly Love Anniversary Card:

From The Otter Side, Kraftin’ Kimmie Stamps
Paper Basics – Stamper’s Select White Cardstock, Papertrey Ink
High Tide Designer Series Paper, Stampin’ Up!
Vellum Cardstock, Stampin’ Up!
Big Splash Border Die, Memory Box
Sizzix Big Shot Framelits Hearts Collection, Stampin’ Up!
Decorative Dots Textured Impressions Embossing Folder, Stampin’ Up!
Sending Love Wooden Embellishments, Stampin’ Up!
Metallic Enamel Shapes, Stampin’ Up!
Clear Epoxy Shapes, Stampin’ Up!
Basic White Thick, Pacific Point and Soft Sky Card Stock, Stampin’ Up!

Finished card size: 5.25” x 5.25”

————————–

To view my other Copic cards, please click here.

Hope you like my anniversary card using
From The Otter Side by Kraftin’ Kimmie Stamps!

Thank you for stopping by!

Hugs,
Laurie

My Pansy Hello Card

My Stampin' Up! Card Using the Pansy Petals Suite
My Pansy Hello Card

Hello Crafty Friends! Laurie here again! I am sharing My Pansy Hello Card using the Pansy Petals Suite which includes the Pansy Patch Stamp Set, Pansy Dies, Pansy Petals Designer Series Paper and Bumblebee Trinkets by Stampin’ Up! Don’t you just love the details of that layered 3D pansy!

Close Up of the 3D Pansy Die

For my card, I knew that I wanted to use the Basic Border Dies with the beautiful DSP! So, I created an envelope liner look that allowed me to wrap the Bumblebee Gingham Ribbon around it. I pulled my colours from the DSP to create my gorgeous pansy. There are so many different colour combinations that you can create with the dies. There is even a die that can cut out some of the pansies in the DSP. I embossed the sentiment in white on a strip of Bumblebee card stock that I had left over from another project. I always save them just in case I can use them. What do you do with these scraps? The finishing touch was the sweet Bumblebee Trinket!

Supplies:

Stamps/Bundles/Dies: Pansy Petals Bundle (155674), Basic Borders Dies (155558)

Inks: VersaMark Ink (102283)

Paper: Fresh Freesia (155613), Basic White (159276), Blackberry Bliss (133675), Bumblebee (153077), Pansy Petals Designer Series Paper (155807)

Accessories: Basics Embossing Powder (155554), Bumblebee Trinkets (155568), Bumblebee Gingham Ribbon (153658), Heat Tool (129053), Bone Folder (102300), Stampin’ Dimensionals (104430), Stampin’ Seal (152813), Mini Glue Dots (103683), Paper Snips (103579)

Close Up of My Card
Close Up of My Card

Measurements: 

  • Fresh Freesia: 2 pieces
    • 5 ½” x 8 ½” scored at 4 ¼”
    • Scrap for pansy
  • Basic White: 2 pieces
    • 4” x 5 ¼”
    • Scrap for pansy
  • Blackberry Bliss: Scrap for pansy
  • Bumblebee: 2 pieces
    • 3 ½” x ½”
    • Scrap for pansy
  • Pansy Petals Designer Series Paper: 5 ½” x 2 ¼”
  • Bumblebee Gingham Ribbon: 6” and 4”

More Information on My Pansy Hello Card:

For more of my Stampin’ Up! cards, please click here.

Here is a video showing the Pansy Petals Suite: https://www.youtube.com/watch?v=dUT3h4xOCnY

You will find the items listed above in my online store.

My Summer Dreams Card

Hello Crafty Friends! It’s Laurie here! I can’t believe that Summer is almost over! So, in the hopes of making the summer last a little bit longer, I am sharing My Summer Dreams Card as my Design Team Card for Conie Fong Art & Design. My card is using the sweet Summer Dreams. This image would be perfect for so many occasions like Birthday, Mother’s Day, Thinking of You, Wedding to name just a few!

Details of My Card

For my card, I coloured this sweet image with my Copic markers to match the beautiful Botanical Tea paper by Graphic 45. I had a lot of fun colouring all those waves and curls in her hair and look at those pleats! Omgoodness! Such colouring fun!

I have been wanting for a while to use the Stitched Greenery Dies by Stampin’ Up! and thought that they would make a perfect subtle mat for my focal point. I die cut the Botanical Tea paper and my coloured image with the Labels Seventeen in two consecutive layering dies. I used my Blending Brush to add some Vintage Photo ink to the edges of all my paper and die cuts. Next, I turn the larger one on its side and punched two holes in it at one end and threaded ribbon through the holes for an unexpected touch.

To add to the botanical theme, I added a leaf trinket so that it looks like it is attached to the ribbon. I found a paper flower that matched my colouring perfectly. To add some matching blue embellishments, I coloured rhinestones with my B34 Copic markers and scattered them here and there.

————————–

Copic Markers:

Skin: E000/E00/E21/E11/E04/R20
Hair: YR31/E33/E35/E37
Pinks: R81/R83/R85/R89
Blues: B34/B23/B32
Browns: E70/E71/E74/E77
Flowers: B34/B32/R85/R81/Y17
Stems: YG03/YG63/YG67/G99
Sky: BG000/BG0000
Rhinestones: B34

Close Up of my Design Team Card

————————–

Card Recipe for My Summer Dreams Card:

Summer Dreams, Conie Fong Art & Design
Paper Basics – Stamper’s Select White Cardstock, Papertrey Ink
Botanical Tea Paper Pad, Graphic 45
Pink Buttons 6” x 6.5” Card Stock Paper, Recollections, Michaels Arts & Crafts
Nestabilities Labels Seventeen, Spellbinders
Stitched Greenery Dies, Stampin’ Up!
¼” Handheld Hole Punch, In my Stash
Marina Mist ¼” Cotton Ribbon, Stampin’ Up!
Tip Top Taupe Dotted Lace Trim, Stampin’ Up!
Bird Ballad Trinkets, Stampin’ Up!
Paper Flowers, Recollections, Michaels Arts & Crafts
Vintage Photo Distress Inks, Ranger
Blending Brushes, Stampin’ Up!
Basic Rhinestone Jewels, Stampin’ Up!
White Gelly Roll Pen
Marina Mist Card Stock, Stampin’ Up!

Finished card size: 5.75” x 5.75”

————————–

To view my other Conie Fong Art & Design cards, please click here.

Hope you like my Design Team Inspiration Card using
Summer Dreams for Conie Fong Art & Design!

Thank you for stopping by!

Hugs,
Laurie