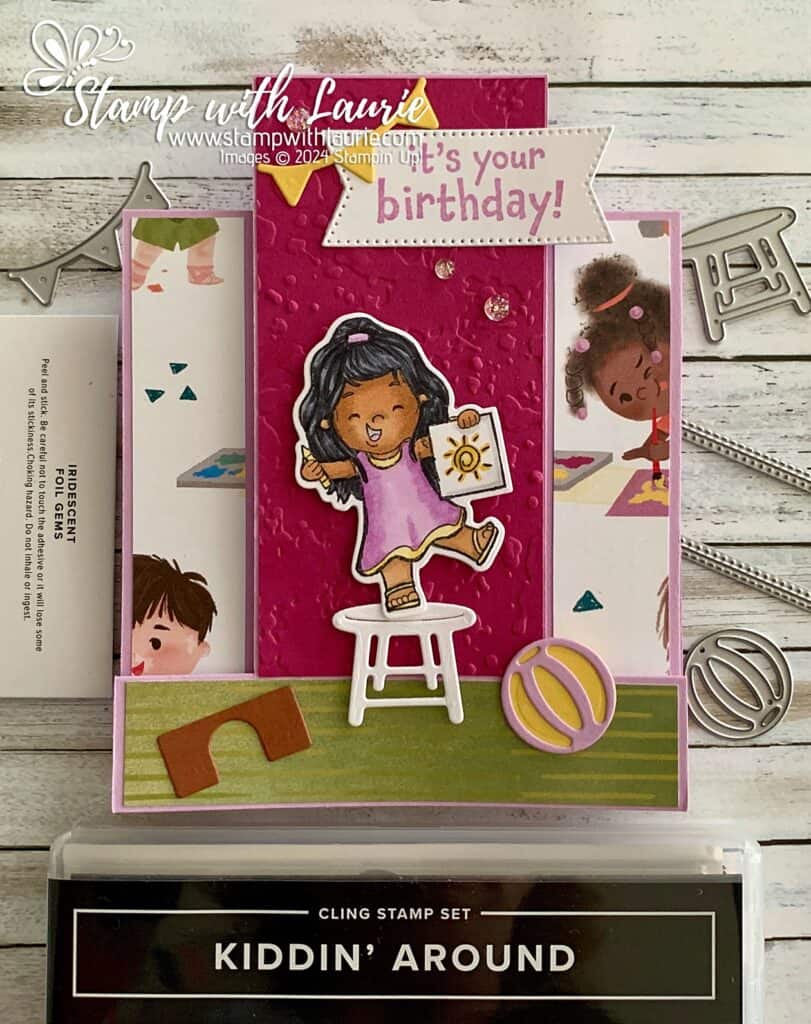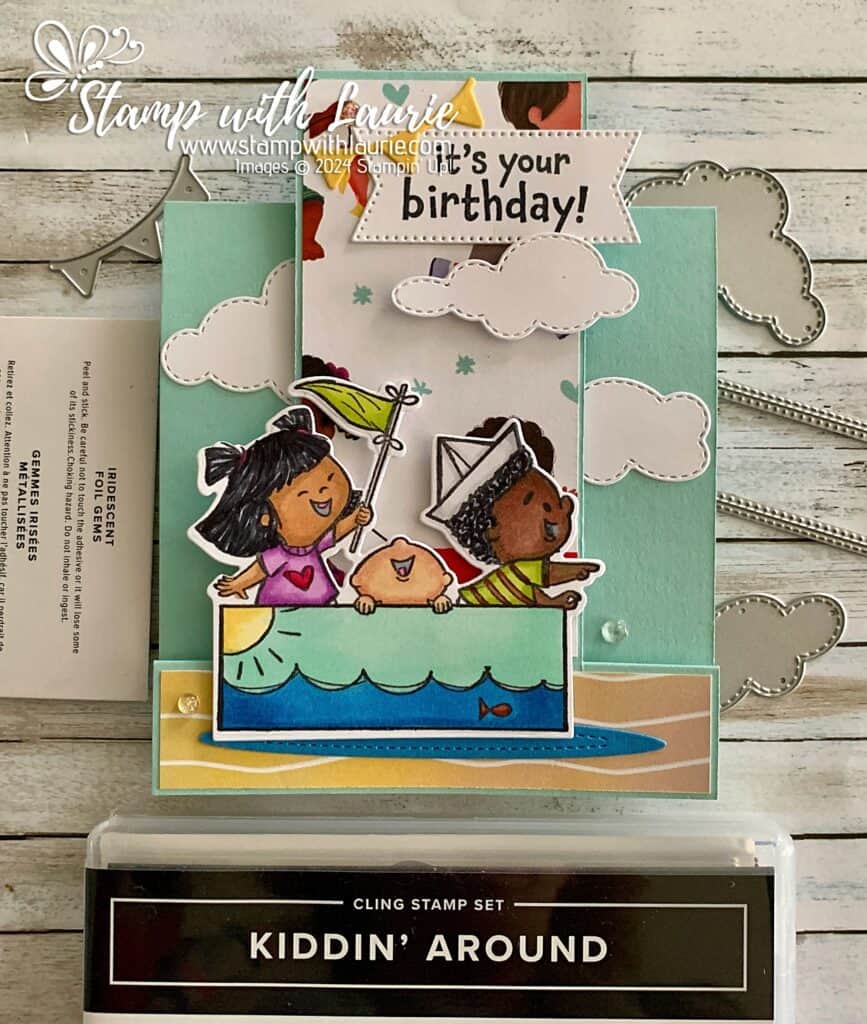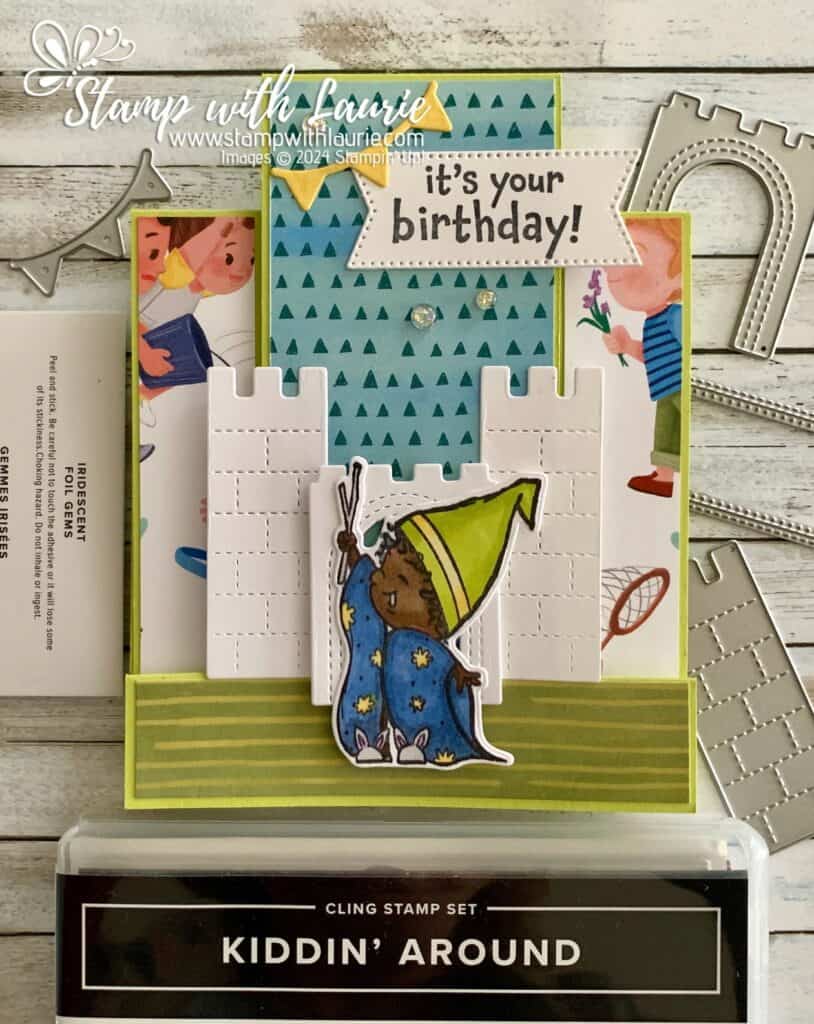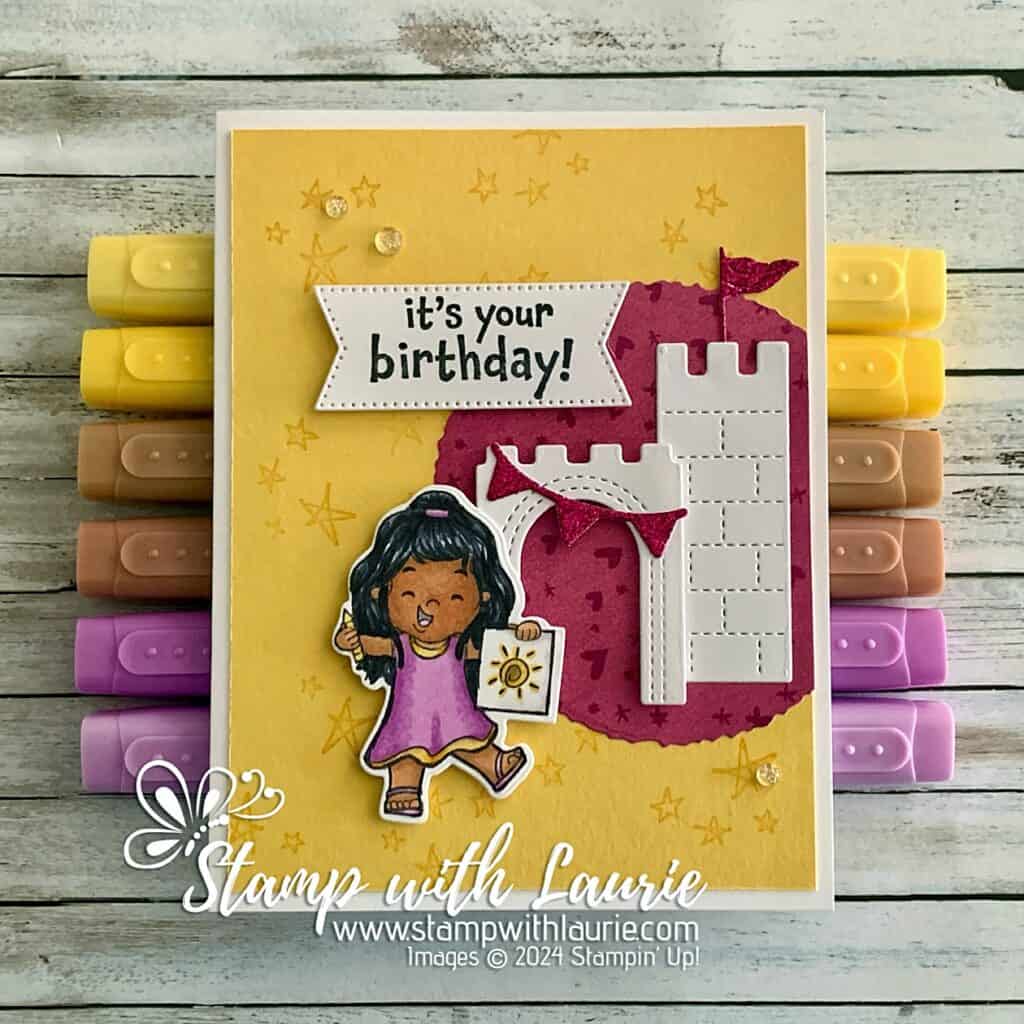
Hello Crafty Friends! Laurie here again! I am sharing My Kiddie Birthday Card using the Kiddin’ Around Bundle and the Just Kiddin’ 12” x 12” Designer Series Paper by Stampin’ Up! I am pleased to see that the Kiddin’ Around Stamp Set and the Kiddin’ Around Dies are carrying over to the new Catty! Yay!
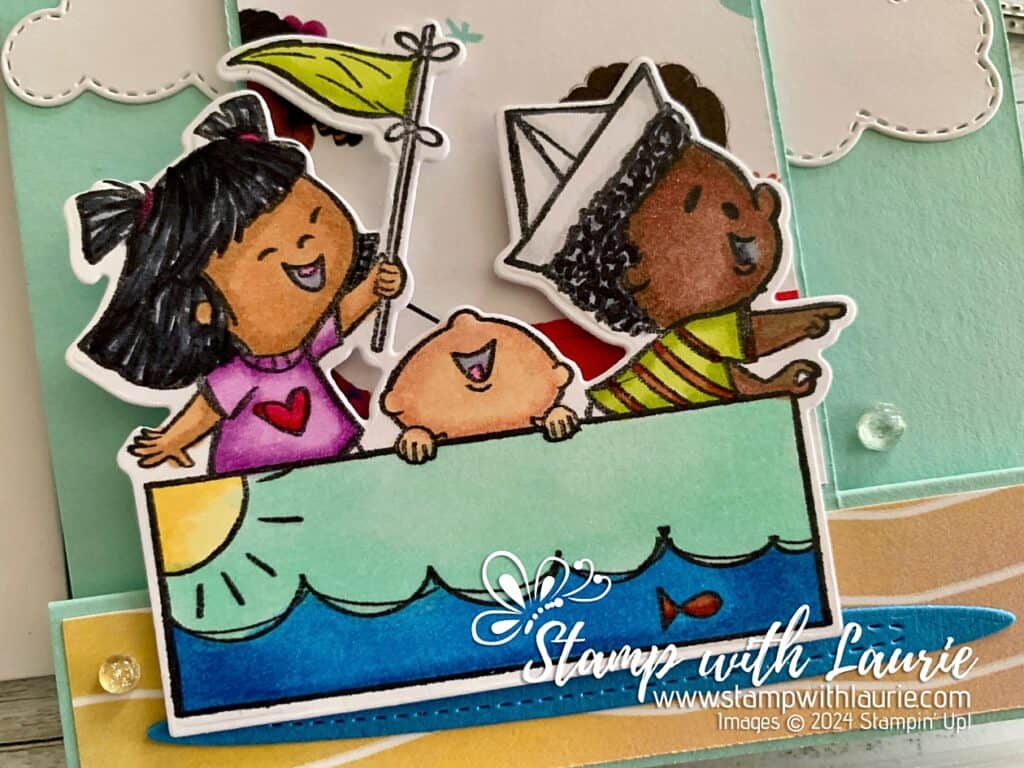
I was honoured to be asked to present my colouring techniques using Stampin’ Blends to several demonstrators at a Stampin’ Up! Play Date. They asked me to demonstrate colouring people with Stampin’ Blends and the Kiddin’ Around Stamp Set was perfect for this! I made several cards for the event, and this was one of them. I will include a link to my other cards at the end of this post.
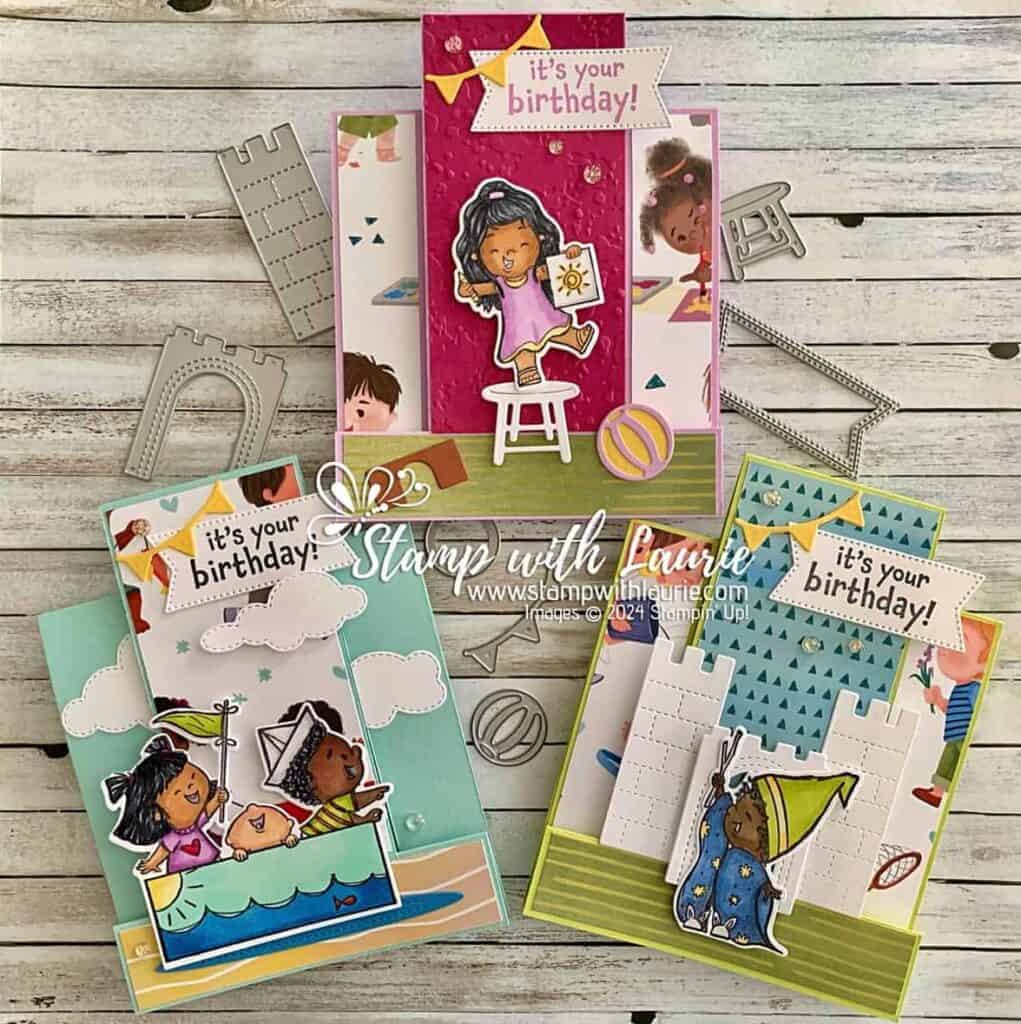
The Details of My Kiddie Birthday Card
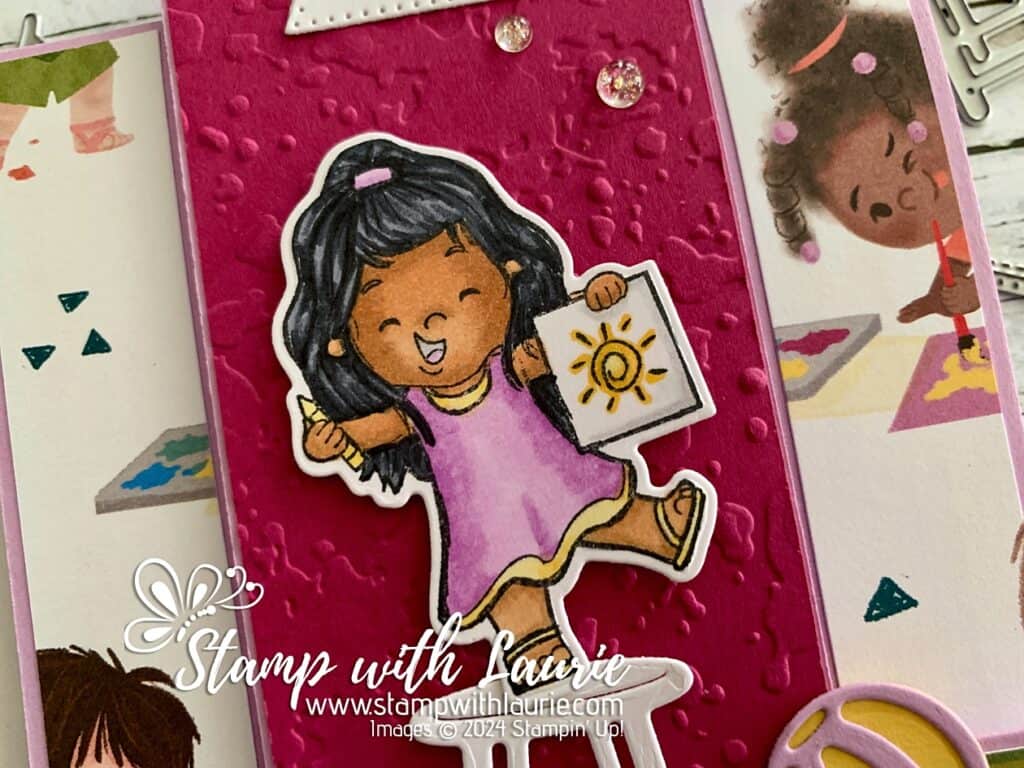
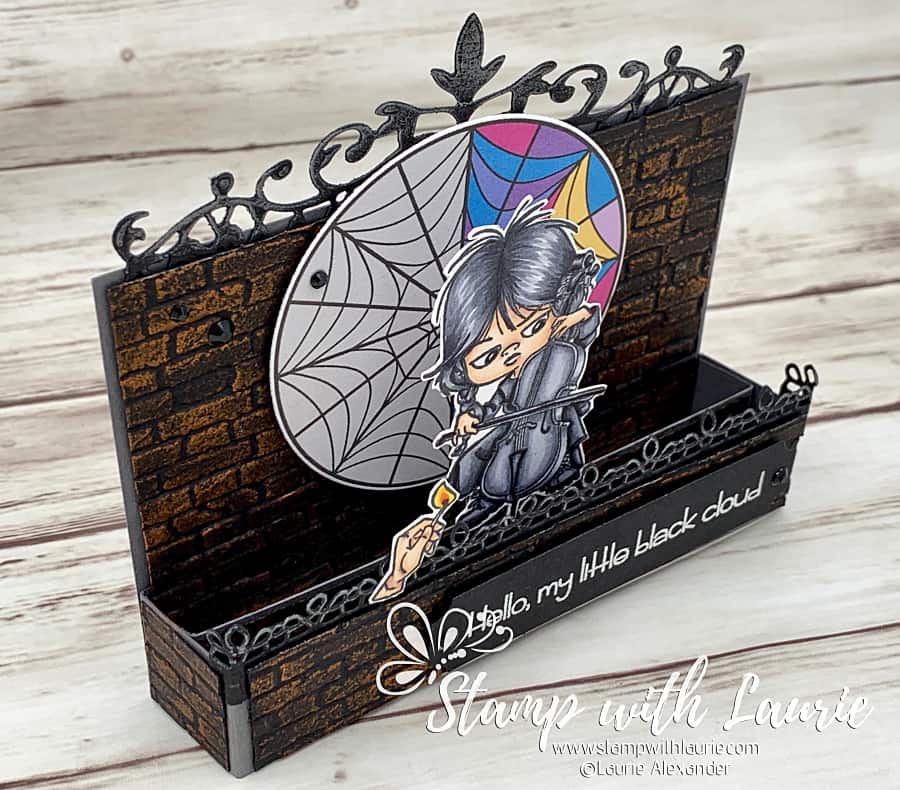
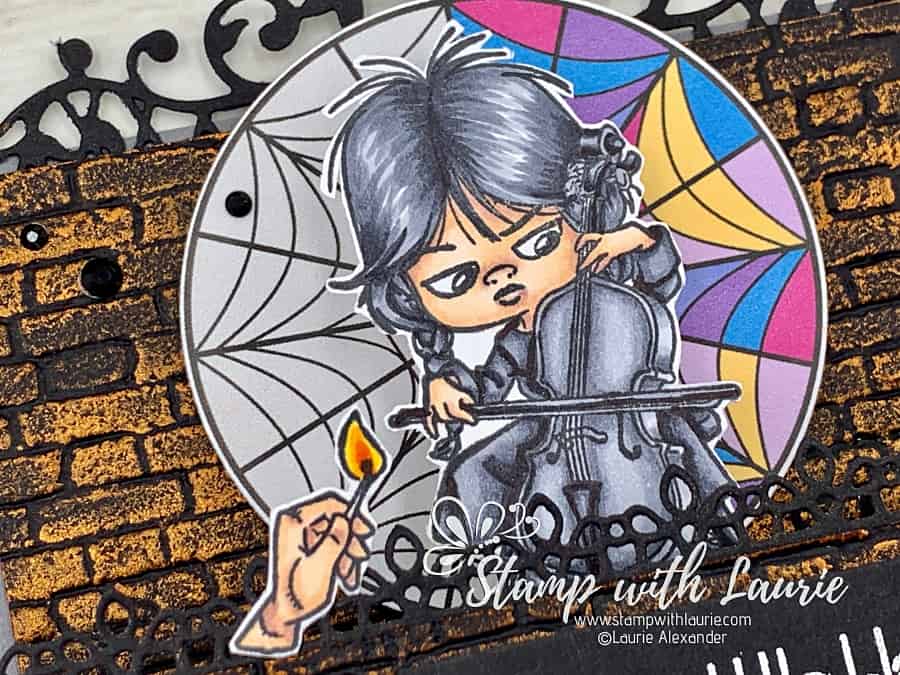
For this card, I decided to use the castle dies with the little girl from the stamp set and created a focal point with the Deckled Circle Dies.
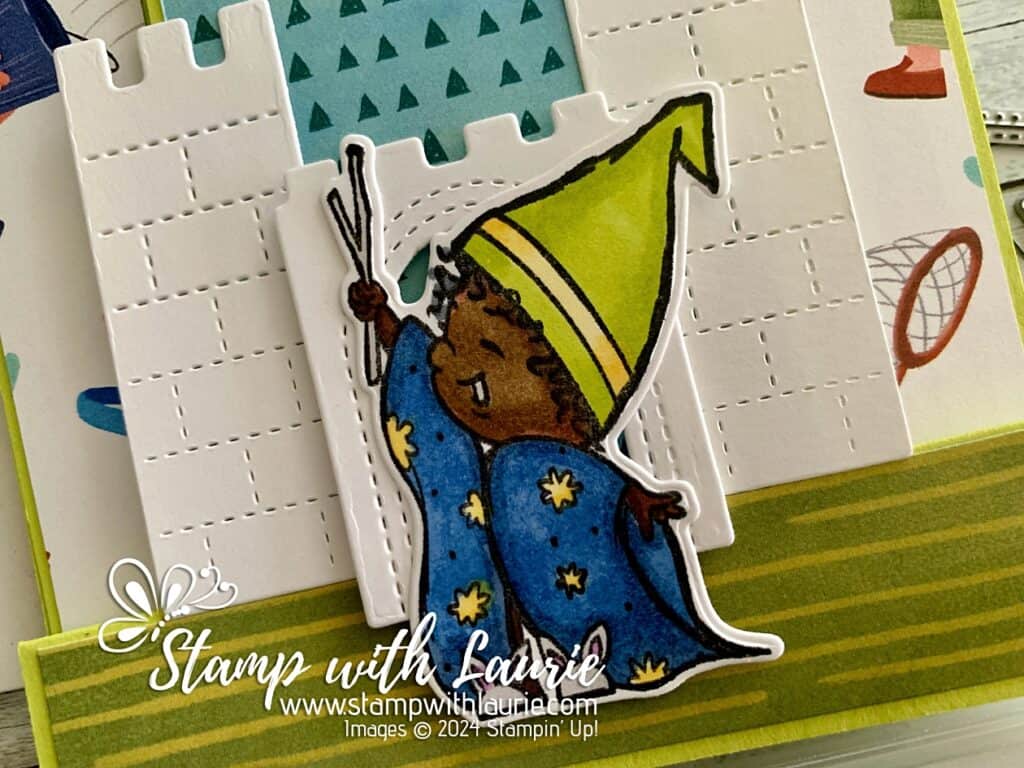
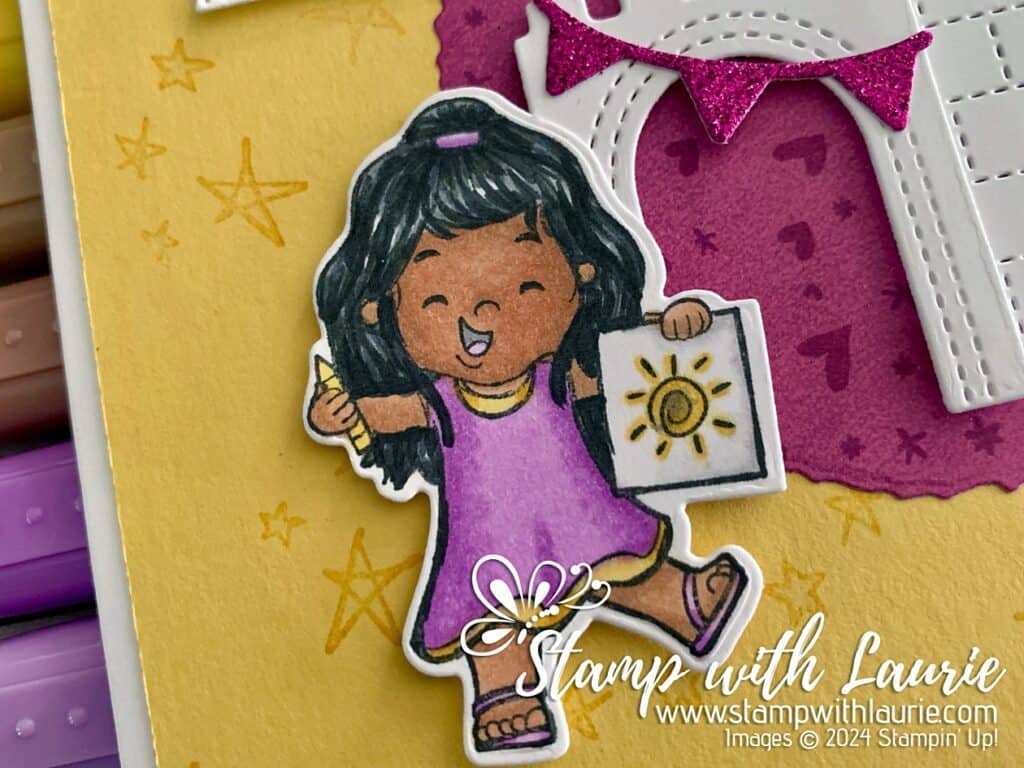
I used the Stampin’ Blends Medium Combo for her skin, Basic Black for her hair, Fresh Freesia, and Daffodil Delight for her dress. I created a fold in the centre of her dress by adding a small Fresh Freesia triangle to add interest. To add texture to her hair, I left some white highlights which I then coloured with the bullet tip of the Light Basic Black. I find that the felt tip is always darker than the bullet tip, thus making it great to add a third tone. You could also use the Smoky Slate for that third tone. I used Light Smoky Slate and Light Fresh Freesia for her mouth.
For her paper with her sun drawing, I used Light Smoky Slate along the top under her hand, left side and bottom of the page. Next, I used the Color Lifter along the edges of Smoky Slate to soften the edge and push the ink back into the shadows of the paper. I let that dry before adding the Daffodil Delight since I wanted control of the ink and for it not to spread. Wink of Stella was added to the sun.
The sentiment was stamped in Tuxedo Black Memento and die cut with the Stylish Shapes Dies. Next, the stars were stamped in Daffodil Delight for a tone-on-tone look and to add interest on the Daffodil Card Stock.
Finally, to match my DSP colour that I used, I went with Berry Burst Glimmer Specialty Paper for the flag and banner.
As a finishing touch to my card, I added some Iridescent Foil Gems on either side of my focal point.
Supplies:
Stamps/Bundles/Dies: Kiddin’ Around Bundle (162839), Stylish Shapes Dies (159183), Deckled Circle Dies (162286)
Inks: Tuxedo Black Memento Ink Pad (132708), Daffodil Delight Classic Stampin’ Pad (147094)
Paper: Thick Basic White (159229), Basic White (159276), Daffodil Delight (119683), Just Kiddin’ 12” x 12” Designer Series Paper (162828), Berry Burst, Old Olive & White 12” x 12” Glimmer Specialty Paper (163769)
Accessories: Iridescent Foil Gems (162842), Stampin’ Blends Medium Combo (159462), Basic Black Stampin’ Blends Combo (154843), Fresh Freesia Stampin’ Blends Combo (155518), Daffodil Delight Stampin’ Blends Combo (154883), Smoky Slate Stampin’ Blends Combo (154904), Stampin’ Blends Color Lifter (144608), Wink of Stella (141897), Paper Trimmer (152392), Bone Folder (102300), Stampin’ Dimensionals (104430), Mini Stampin’ Dimensionals (144108), Stampin’ Seal (152813), Mini Glue Dots (103683), Multipurpose Liquid Glue (110755)
Measurements:
- Thick Basic White:
- 8 ½” x 5 ½” scored at 4 ¼”
- Daffodil Delight:
- 5 ¼” x 4”
- Basic White:
- Scraps (Castle and Sentiment)
- 2 ½” x 2” (for Girl)
- Berry Burst Glimmer Specialty Paper:
- Scraps
- Just Kiddin’ Designer Series Paper:
- 3” x 3”
More Information on My Kiddie Birthday Card
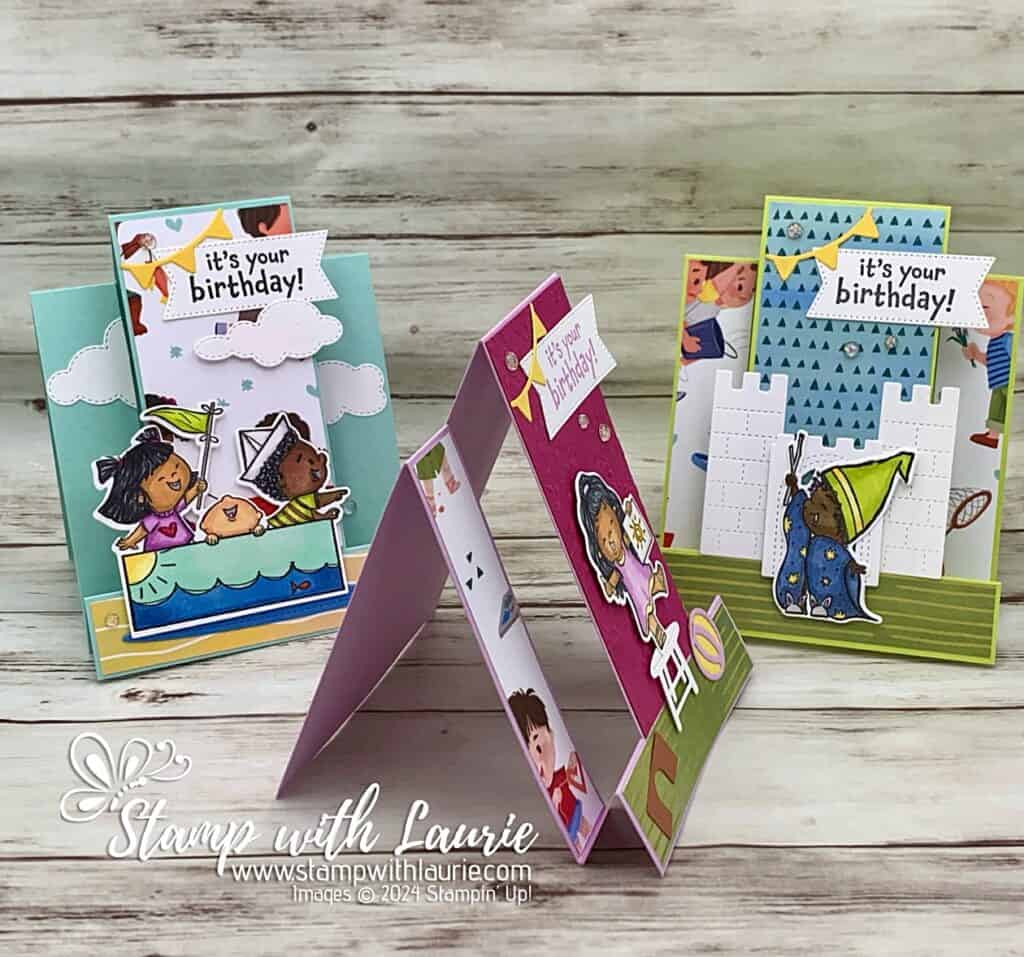
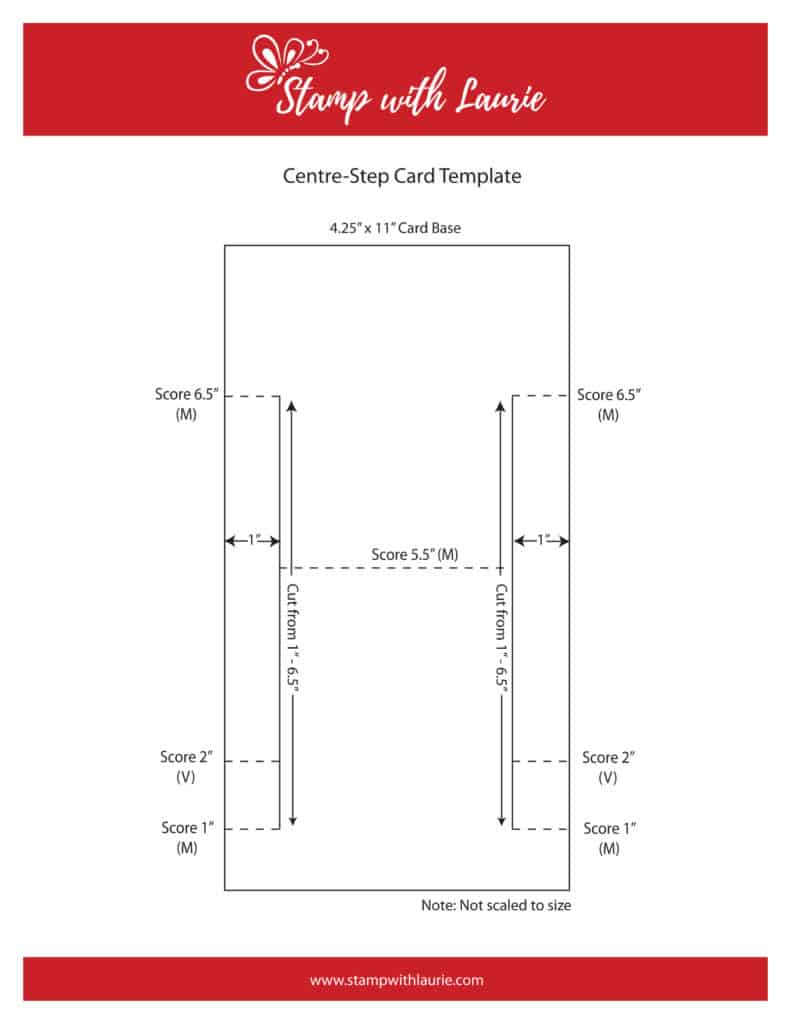
If you wish to learn more about my centre-step cards from my presentation, please click here or on the photo.
For more information on my colouring, here are some videos of my colouring techniques:
1 – Part: Whiskey Business Card using Blending Different Colours Technique
Video Tutorial: Blending Different Colours Together
2 – Part: Country Harvest Card using Light to Dark Technique
Video Tutorial: Light to Dark/Dark to Light Colouring
3 – Part: Beautiful Poppy Birthday Card using Smooth Colouring Technique
Video Tutorial: Smooth Colouring
4 – Part: Let’s Gather Together Card using Tip to Tip Blending Technique
Video Tutorial: Tip to Tip Colouring
5 – Part: So Grateful Cardinal Card using Flicking Colouring Technique
Video Tutorial: Flicking Colouring
6 – Part: Let’s Celebrate You Card using Flicking of Different Colours Technique
Video Tutorial: Flicking of Different Colours Technique
My Colouring Notes:
https://stampwithlaurie.com/wp-content/uploads/2020/08/Stampin-Up-Blends-2020.pdf
For more of my Stampin’ Up! cards, please click here.
You will find the items listed above in my online store.