Nature is an Adventure Card

A Cabin in the forest on a card
Nature is an Adventure Card

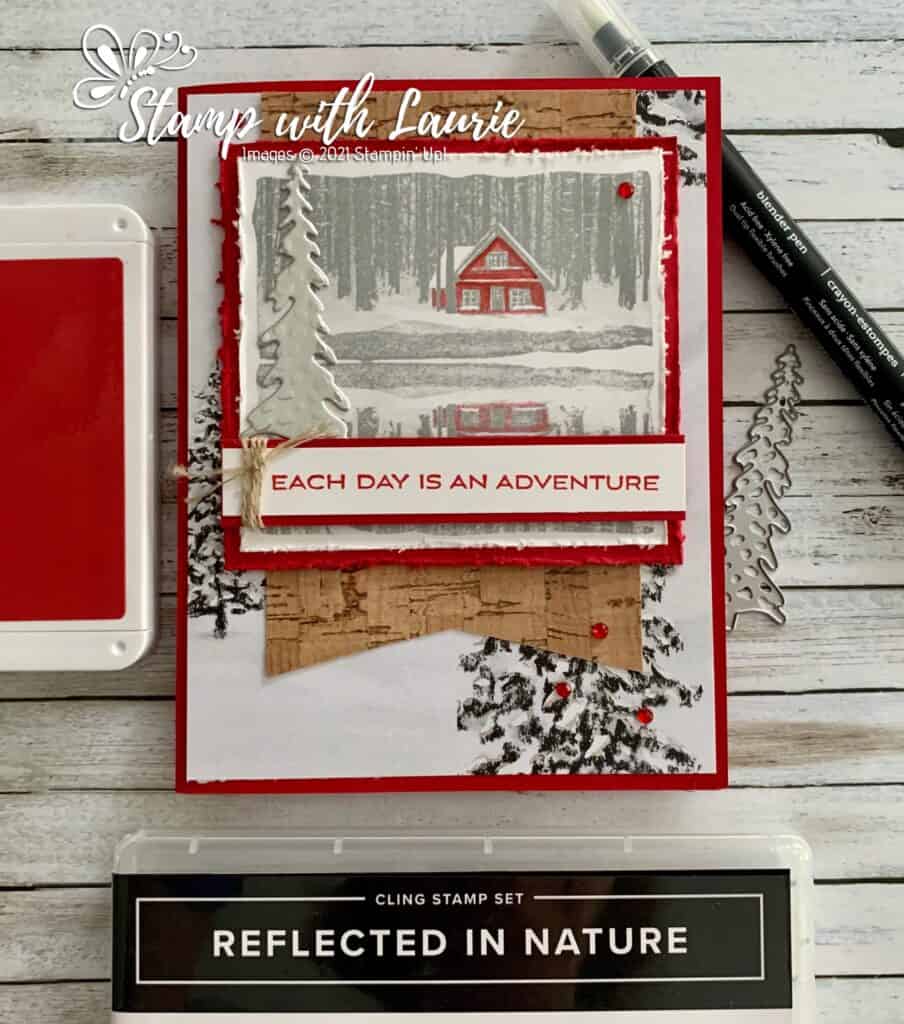
Hello Crafty Friends! Laurie here again! I am sharing my Nature is an Adventure Card using the Reflected in Nature Stamp Set by Stampin’ Up!

The Details of My Card

The inspiration for my card is the prints that you see which have one pop of red in amongst a black/white scene. To create this, I pulled out my Blender Pen once I had stamped the image. I took the pen and dipped it into my Real Red 

Ink Pad to pick up some ink. I started in the shadow areas, like under the roof line, and moved out from there. As you use the pen, the ink gets lighter and lighter until there is no more ink on it. I love this softer look that suited the stamped image! As the ink runs out, you get lots of dimension with the shadows, mid-tones, and highlights. I haven’t done this technique in a long time.

To match my rustic cottage in the woods theme, I distressed the edges of my stamped image and the Real Red mat with my Paper Snips. The Peaceful Place Designer Series Paper is gorgeous with its unexpected silver accents and perfect for my theme! I thought that adding a flag of the Cork Paper behind my focal point would add a bit of colour and interest. To match the silver accents on the DSP, I added a Silver Foil die cut tree from the Cabin Dies. For embellishments, I used Linen Thread wrapped around my sentiment and a scattering of Red Rhinestones to add some colour.

Supplies:

Stamps/Bundles/Dies: Reflected in Nature Stamp Set (156437), Cabin Dies (156404)

Inks: Real Red Classic Stampin’ Pad (147084), Smoky Slate Classic Stampin’ Pad (131202)

Paper: Real Red (102482), Basic White (159276), Cork 12″ x 12″ Specialty Paper (156393), Peaceful Place Designer Series Paper (156394), Silver Foil 12″ x 12″ Specialty Pack (156457)

Accessories: Blender Pens (102845), Linen Thread (104199), Red Rhinestone Basic Jewels (146924), Paper Snips (103579), Bone Folder (102300), Stampin’ Dimensionals (104430), Stampin’ Seal (152813), Mini Glue Dots (103683)
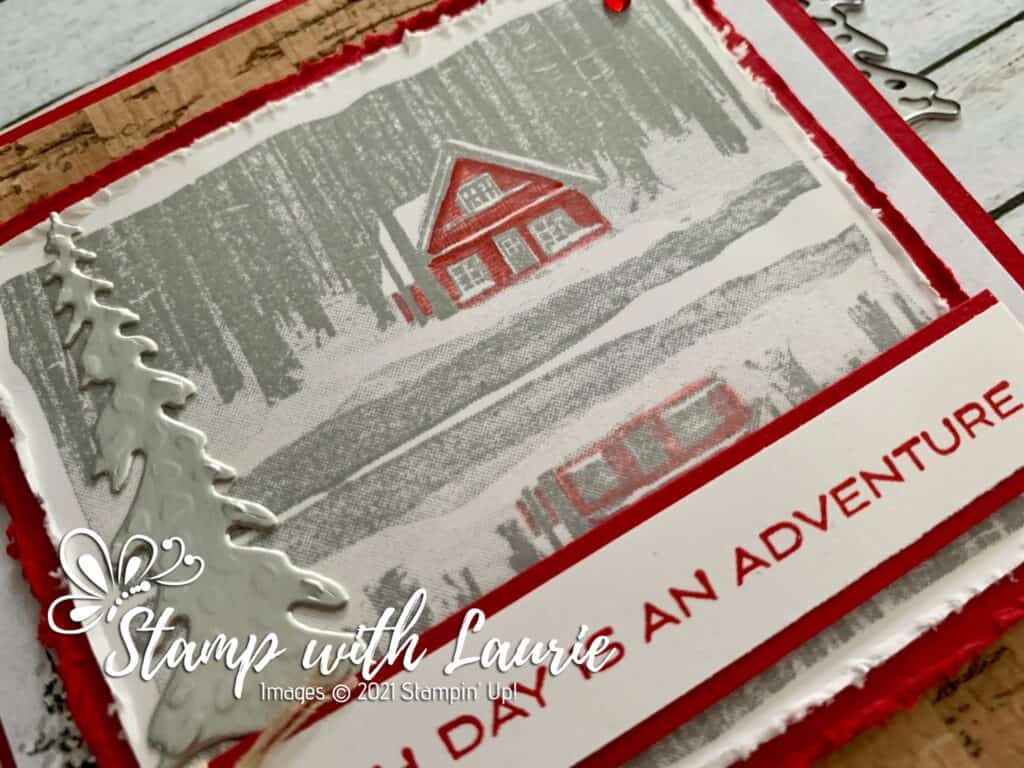
Close Up of the Cabin on my card
Close Up of the Cottage on My Card

Measurements: 

  • Real Red: 3 pieces
    • 5 ½” x 8 ½” scored at 4 ¼”
    • 3 ½” x 3 ¼”
    • 3 ½” x 5/8” (Sentiment)
  • Peaceful Place Designer Series Paper: 4” x 5 ¼”
  • Basic White: 2 pieces:
    • 3 ¼” x 3”
    • 3 ¼” x ½” (Sentiment)
  • Cork Specialty Paper: 2 7/8” x 4 ½”
  • Silver Foil Specialty Pack: scrap

More Information on My Nature is an Adventure Card:

For more of my Stampin’ Up! cards, please click here.

Here is a video on the Peaceful Place Suite:
https://youtu.be/bYaJWfSgoEQ

You will find the items listed above in my online store.

My Pansy Hello Card

My Stampin' Up! Card Using the Pansy Petals Suite
My Pansy Hello Card

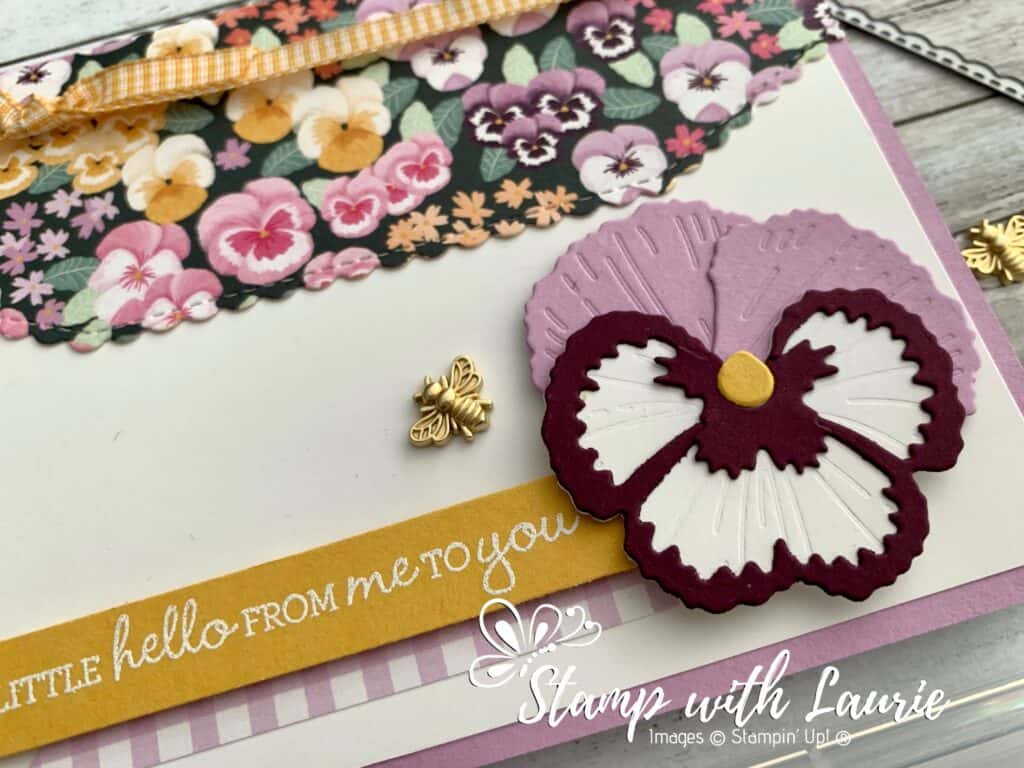
Hello Crafty Friends! Laurie here again! I am sharing My Pansy Hello Card using the Pansy Petals Suite which includes the Pansy Patch Stamp Set, Pansy Dies, Pansy Petals Designer Series Paper and Bumblebee Trinkets by Stampin’ Up! Don’t you just love the details of that layered 3D pansy!

Close Up of the 3D Pansy Die

For my card, I knew that I wanted to use the Basic Border Dies with the beautiful DSP! So, I created an envelope liner look that allowed me to wrap the Bumblebee Gingham Ribbon around it. I pulled my colours from the DSP to create my gorgeous pansy. There are so many different colour combinations that you can create with the dies. There is even a die that can cut out some of the pansies in the DSP. I embossed the sentiment in white on a strip of Bumblebee card stock that I had left over from another project. I always save them just in case I can use them. What do you do with these scraps? The finishing touch was the sweet Bumblebee Trinket!

Supplies:

Stamps/Bundles/Dies: Pansy Petals Bundle (155674), Basic Borders Dies (155558)

Inks: VersaMark Ink (102283)

Paper: Fresh Freesia (155613), Basic White (159276), Blackberry Bliss (133675), Bumblebee (153077), Pansy Petals Designer Series Paper (155807)

Accessories: Basics Embossing Powder (155554), Bumblebee Trinkets (155568), Bumblebee Gingham Ribbon (153658), Heat Tool (129053), Bone Folder (102300), Stampin’ Dimensionals (104430), Stampin’ Seal (152813), Mini Glue Dots (103683), Paper Snips (103579)

Close Up of My Card
Close Up of My Card

Measurements: 

  • Fresh Freesia: 2 pieces
    • 5 ½” x 8 ½” scored at 4 ¼”
    • Scrap for pansy
  • Basic White: 2 pieces
    • 4” x 5 ¼”
    • Scrap for pansy
  • Blackberry Bliss: Scrap for pansy
  • Bumblebee: 2 pieces
    • 3 ½” x ½”
    • Scrap for pansy
  • Pansy Petals Designer Series Paper: 5 ½” x 2 ¼”
  • Bumblebee Gingham Ribbon: 6” and 4”

More Information on My Pansy Hello Card:

For more of my Stampin’ Up! cards, please click here.

Here is a video showing the Pansy Petals Suite: https://www.youtube.com/watch?v=dUT3h4xOCnY

You will find the items listed above in my online store.

My Twisty Thank You Card

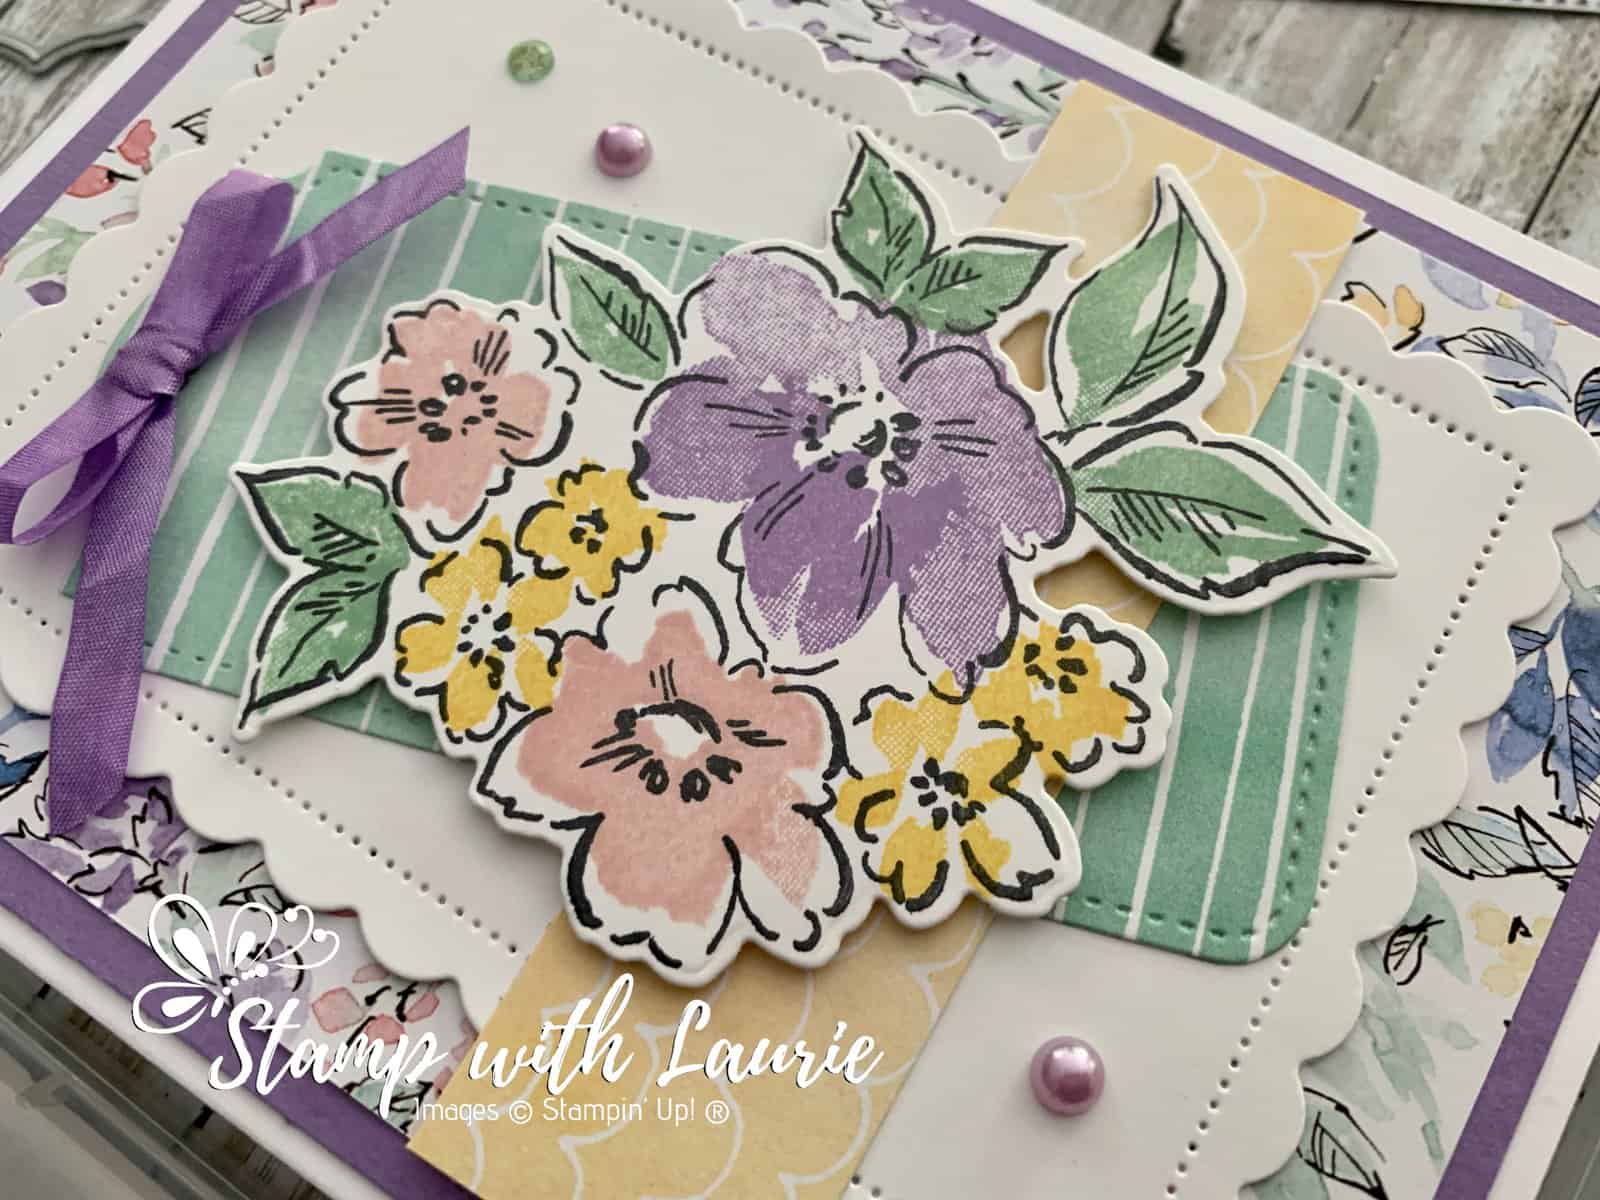
My Card Front
My Twisty Thank You Card

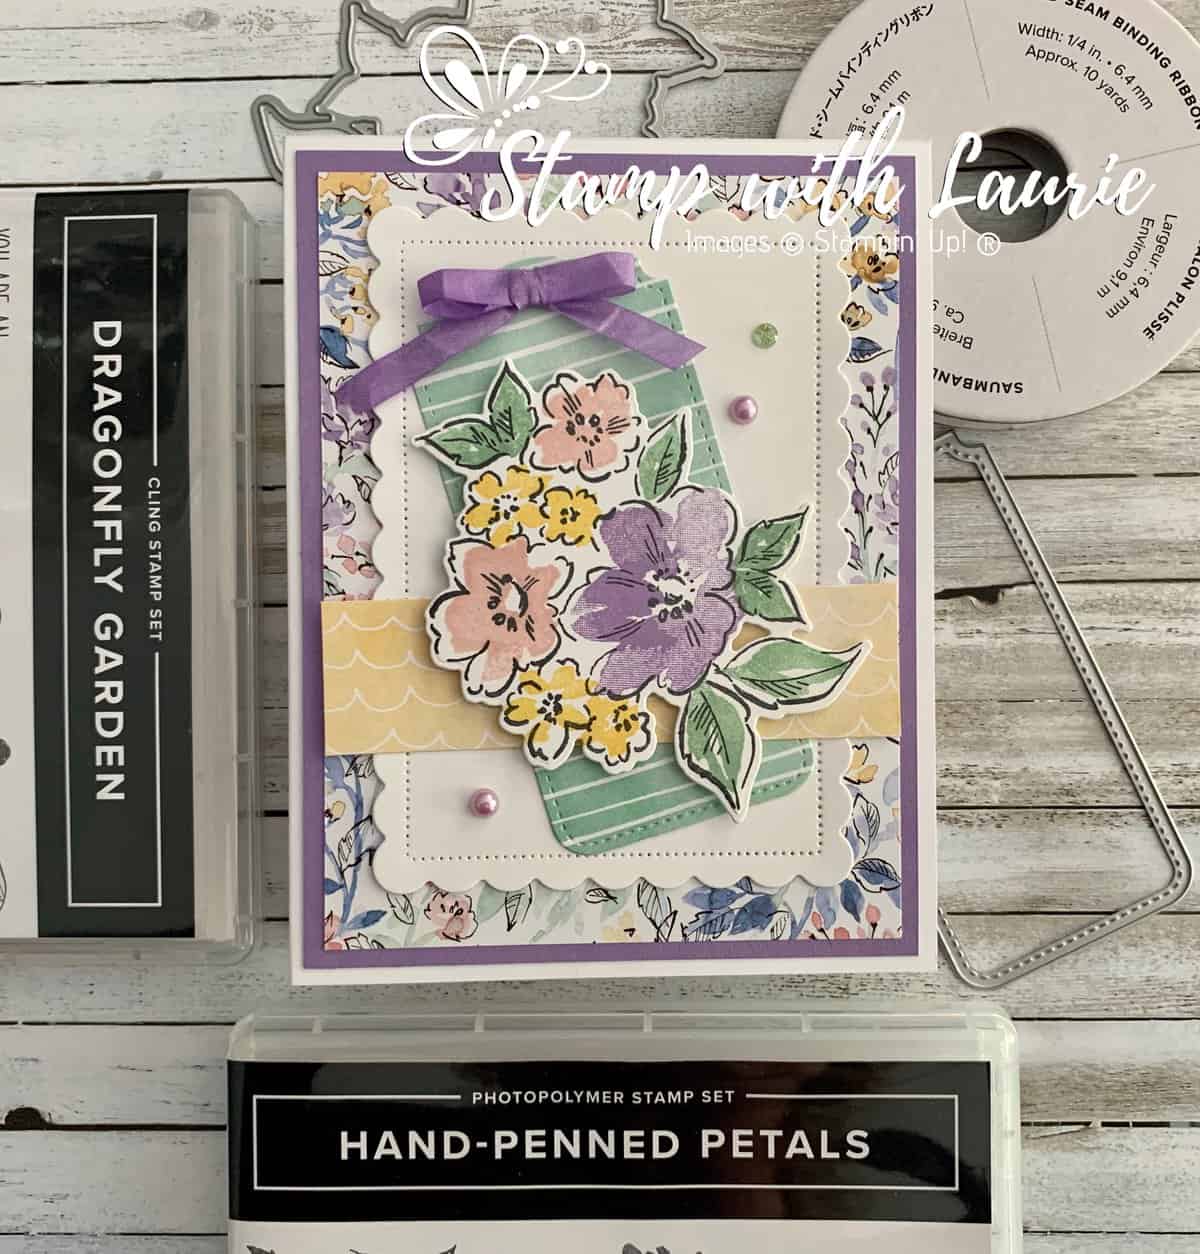
Hello Crafty Friends! I am excited to share My Twisty Thank You Card that I made using the beautiful Hand-Penned Designer Series Paper by Stampin’ Up! I made a similar card at a retreat and thought that it would be a perfect way to showcase this gorgeous DSP while providing an interactive fun fold!

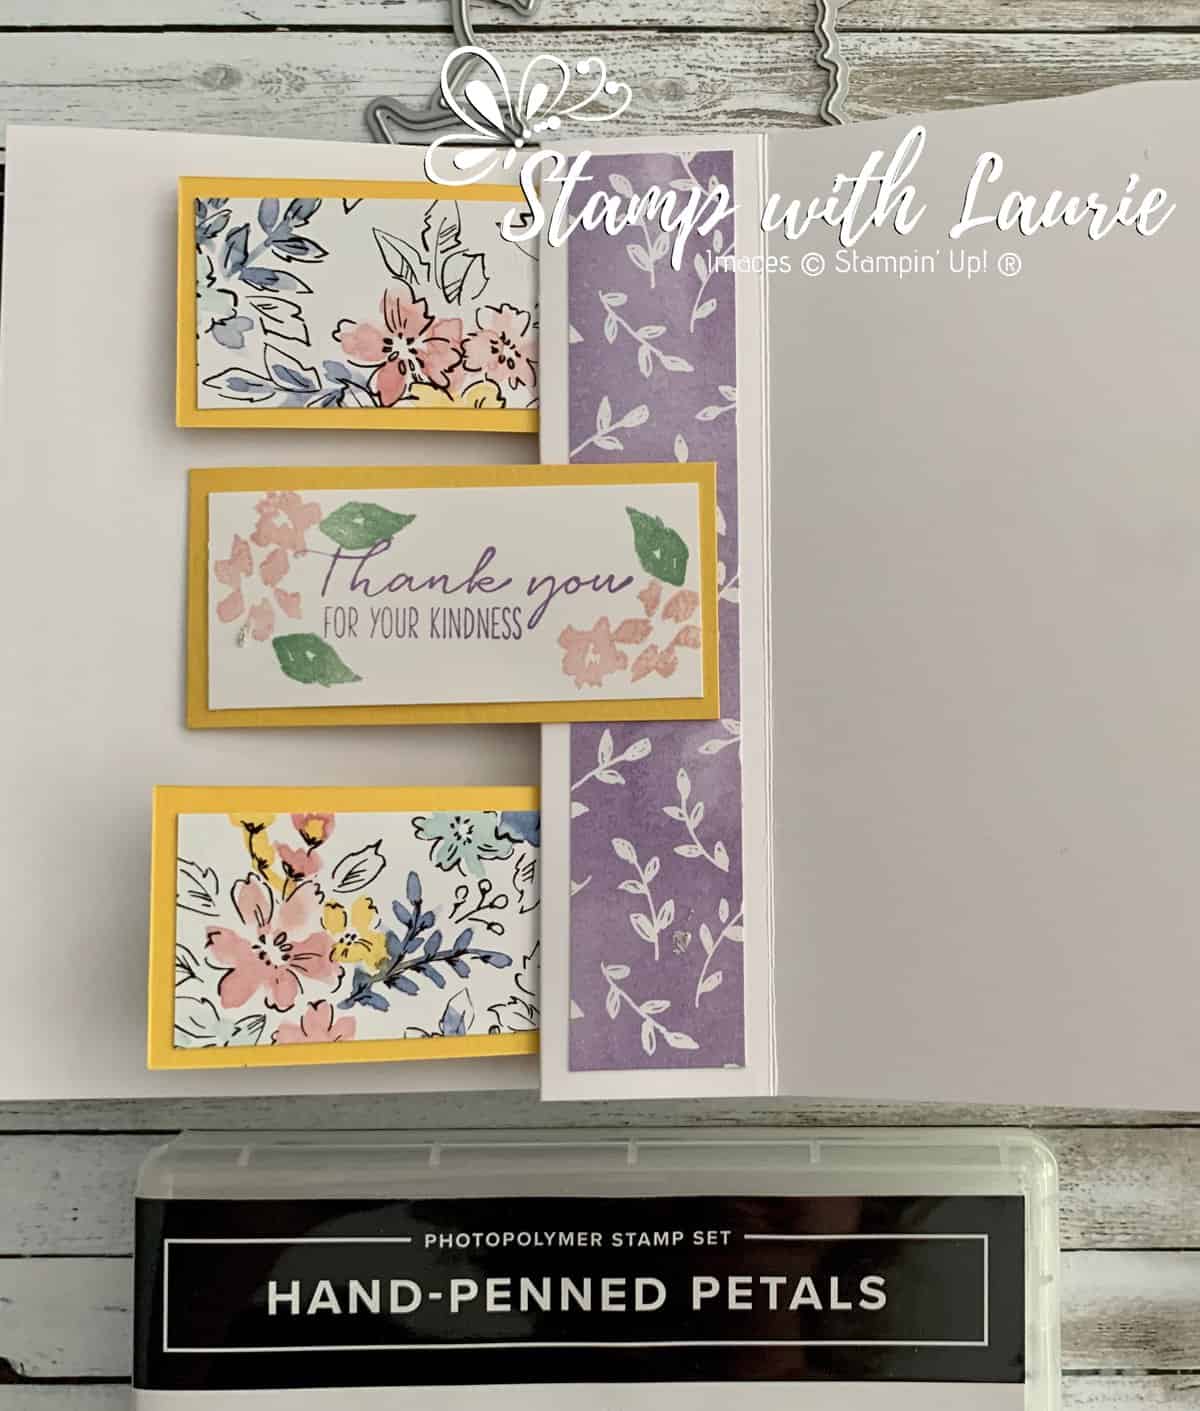
Don’t you just love that when you open the card you get the first set of sentiments and then you keep opening and the sentiments flip to see the other side of them. When the card is fully open, you get all three sentiments displayed.

My Twisty Thank You Card in Action

The Details of My Card

For my card, I used the Hand-Penned Petals Bundle which includes the Hand-Penned Petals Stamp Set and the matching Penned Flowers Dies by Stampin’ Up! Since I needed 3 sentiments that went together, I used the Dragonfly Garden Stamp Set as well. I have included my Twisty Card Template that you can download at the end of this post.

The Front of My Card

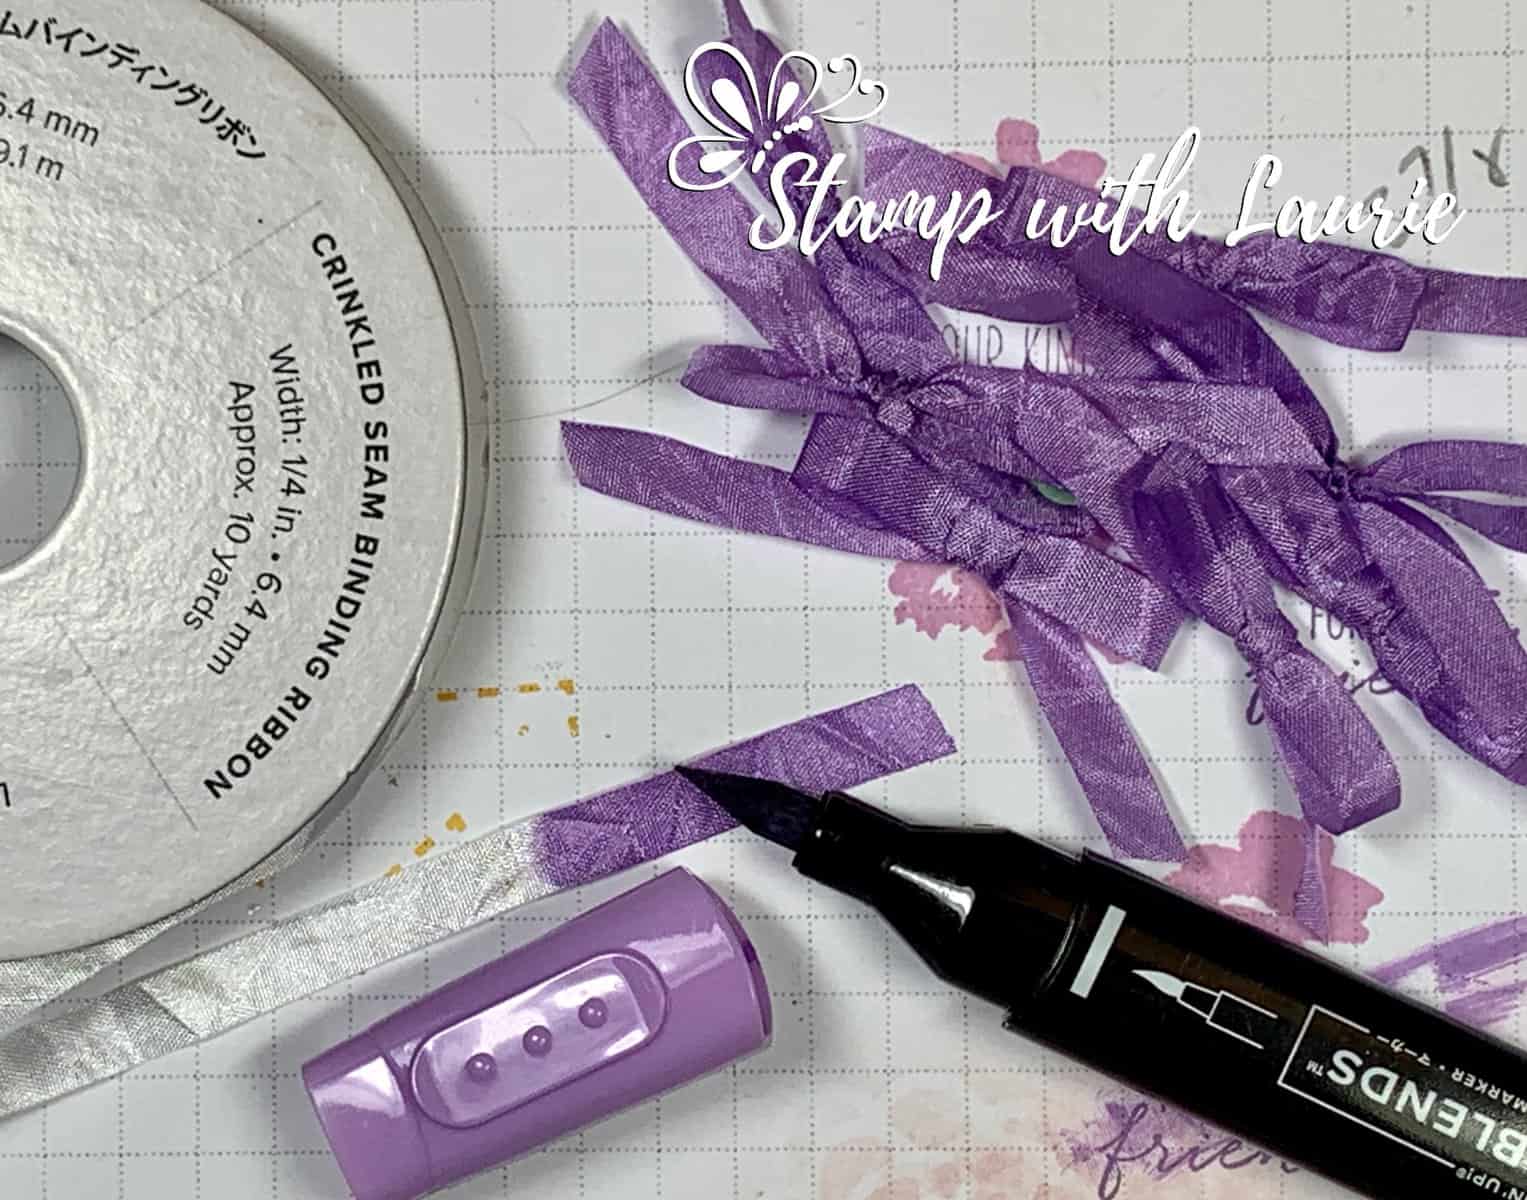
I stamped the colours of Highland Heather, Mint Macaron, Daffodil Delight and Blushing Bride for my flowers which matched the DSP and die cut them out with the matching dies. The Daffodil Delight piece of DSP helped to give a pop of colour to draw the eyes to the stamped flowers. I die cut the tag from the DSP as well. Love the Tailor Made Tags! They are so versatile! For my ribbon, I wanted it to match the colours of my card. So, I used my Dark Highland Heather Stampin’ Blend to colour the ribbon. This is a great way to add matching accents to your card!

Tip for using Markers on Ribbon
Tip for Colouring Ribbon with Stampin’ Blends

I found that the DSP is quite busy. So, to make my focal point stand out, I added a Basic White scallop cut piece underneath it to help ground it. A couple of Highland Heather pearls and a Mint Macaron Genial Gem tie in the colours of my card.

Close Up of My Card
Close Up of the Front of My Twisty Thank You Card

Inside of My Card

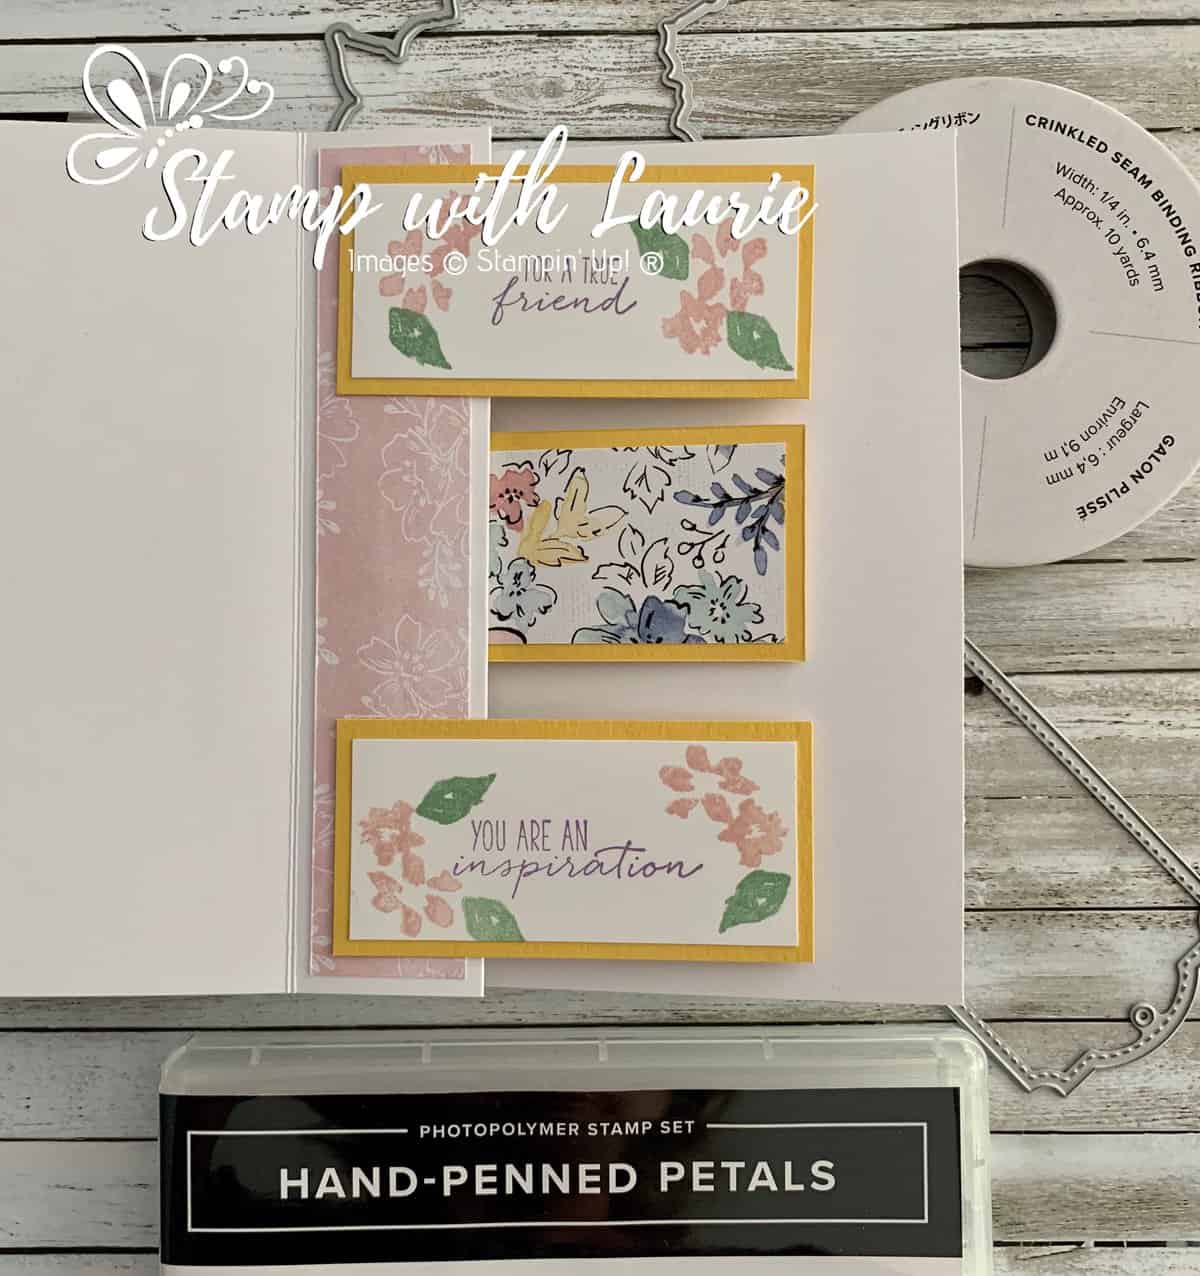
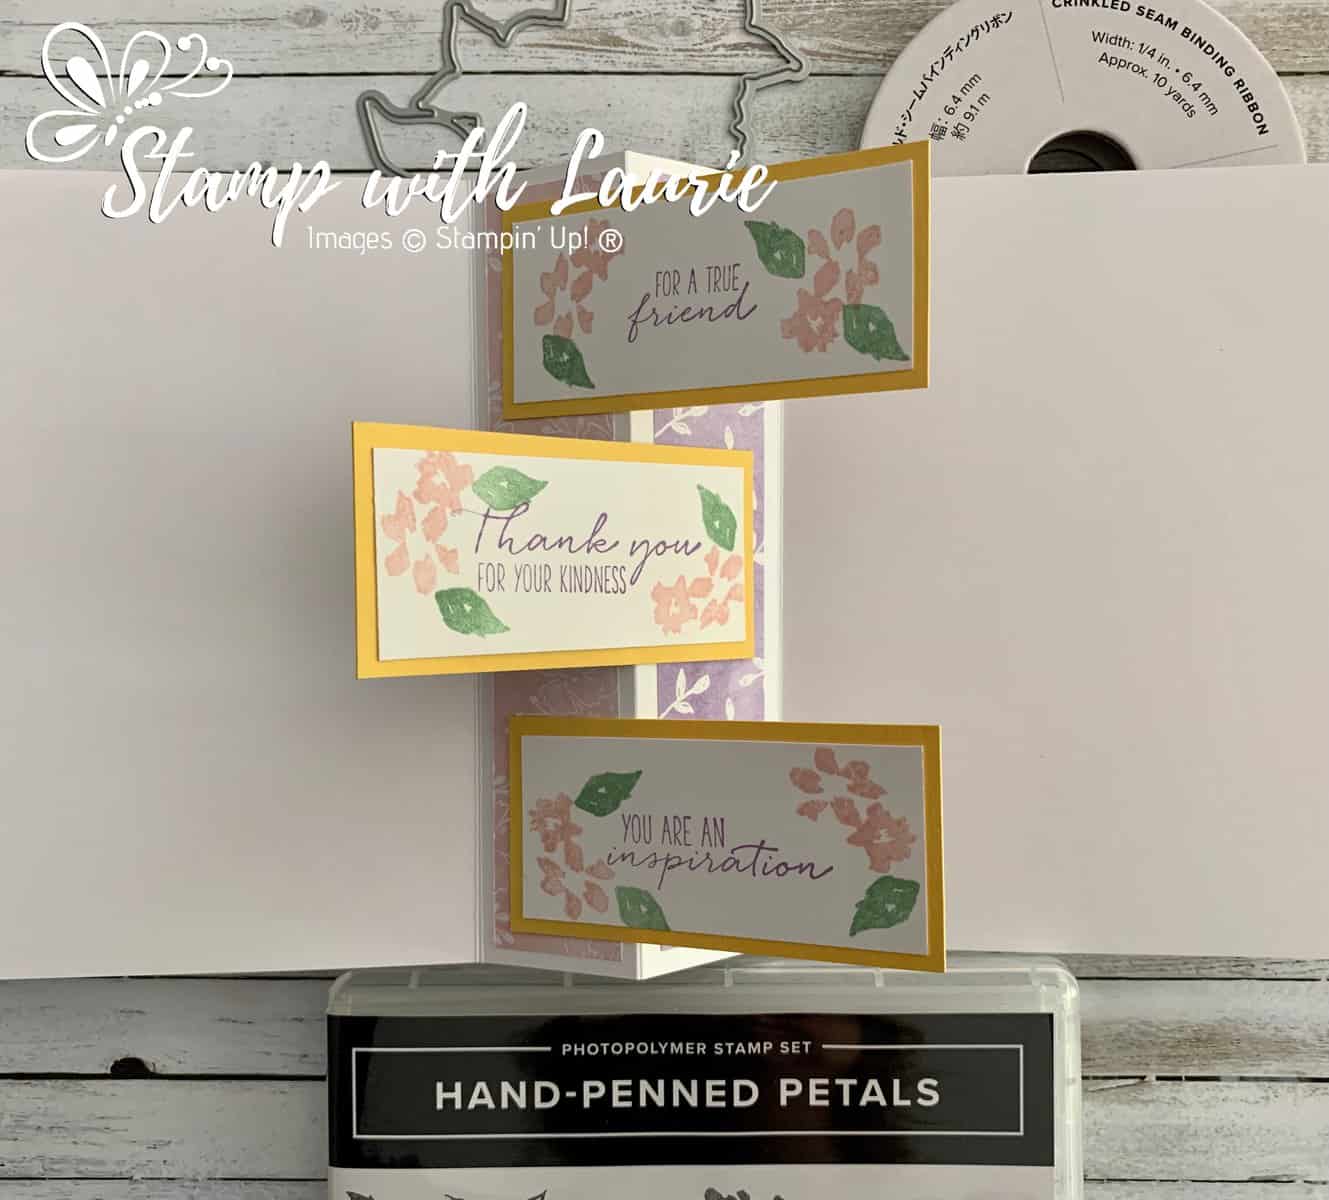
For the inside of my card, I added two of the neutral simple patterns to the inside folds and then attached the sentiment. I made sure that as you flip it, the sentiments made sense: “For a true friend” “You are an inspiration” Thank you for your kindness”. I added some DSP to the back of the sentiment pieces since you see the backs as they flip. Tip: adhere top and bottom sentiment pieces and then the middle to get even placement between the pieces.

Inside of my card
Inside of My Twisty Thank You Card

Supplies:

Stamps/Bundles/Dies: Hand-Penned Petals Bundle (155492), Dragonfly Garden Stamp Set (154411), Tailor Made Tags Dies (155563), Scalloped Contours Dies (155560)

Inks: Tuxedo Black Memento Ink Pad (132708), Highland Heather Classic Stampin’ Pad (147103), Mint Macaron Classic Stampin’ Pad (147106), Daffodil Delight Classic Stampin’ Pad (147094), Blushing Bride Classic Stampin’ Pad (147100)

Paper: Highland Heather (146986), Daffodil Delight (119683), Basic White (159276), Hand-Penned Designer Series Paper (158420)

Accessories: Whisper White Crinkled Seam Binding Ribbon (151326), Genial Gems (155500), Highland Heather Stampin’ Blends Combo Pack (154887), Pastel Pearls (154571), Bone Folder (102300), Stampin’ Dimensionals (104430), Stampin’ Seal (152813), Mini Glue Dots (103683)

The Flip Side
The Flip Side of the inside of My Card

Measurements: 

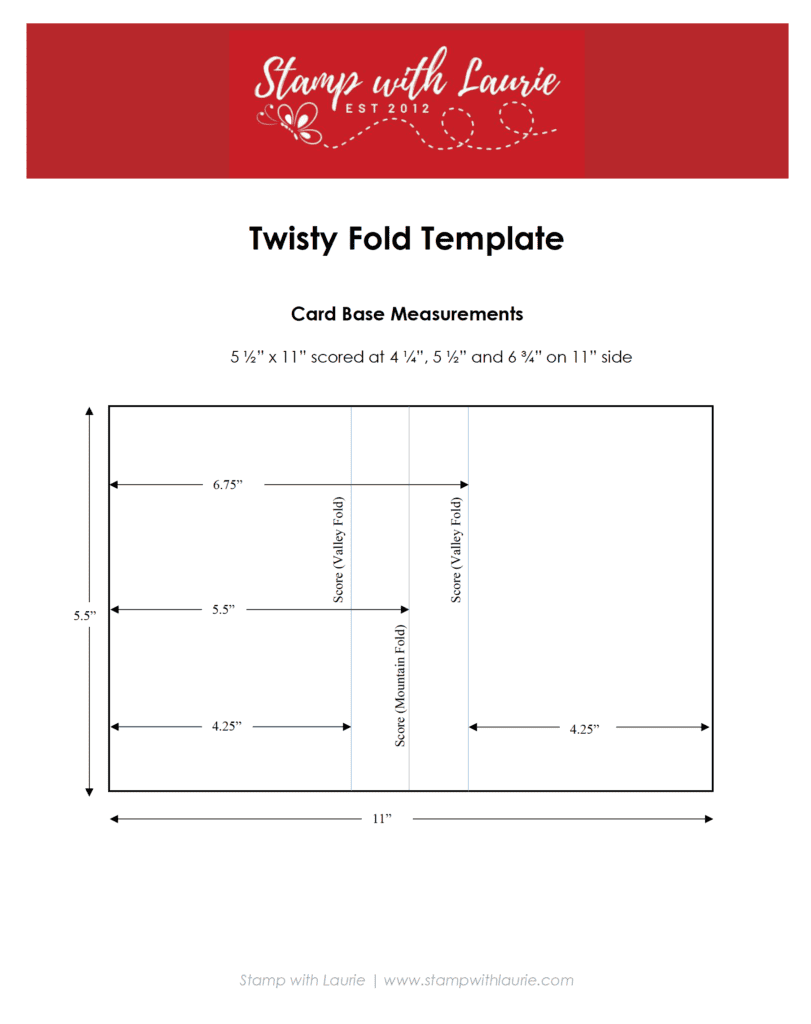
  • Basic White: 5 ½” x 11” scored at 4 ¼”, 5 ½” and 6 ¾”
  • Highland Heather: 4” x 5 ¼”
  • Hand-Penned Designer Series Paper: 3 ¾” x 5”
    • 1” x 3 ¾” (Daffodil Delight DSP)
    • 4” x 2” (Tag)
    • 1” x 5 ¼” (2 pieces)
    • 1 ¼” x 2 ¾” (3 pieces)
  • Basic White: 1 ¼” x 2 ¾” (3 pieces)
    • 3 ¼” x 4 ½” (Scalloped Contours Die)
    • 2 ¾” x 3 ½” (Penned Flowers Dies)
  • Daffodil Delight: 1 ½” x 3” (3 pieces)
  • Whisper White Crinkled Seam Binding Ribbon: 5”
Inside of Card
Sentiments Displayed When Card is Fully Opened

More Information on My Twisty Thank You Card:

Twisty Fold Template:

Twisty Fold Template Download

Hope you like my Twisty Thank You Card.

To download the Twisty Fold Template, please click here or on the image above.

For more of my Stampin’ Up! cards, please click here.

You will find the items listed above in my online store.

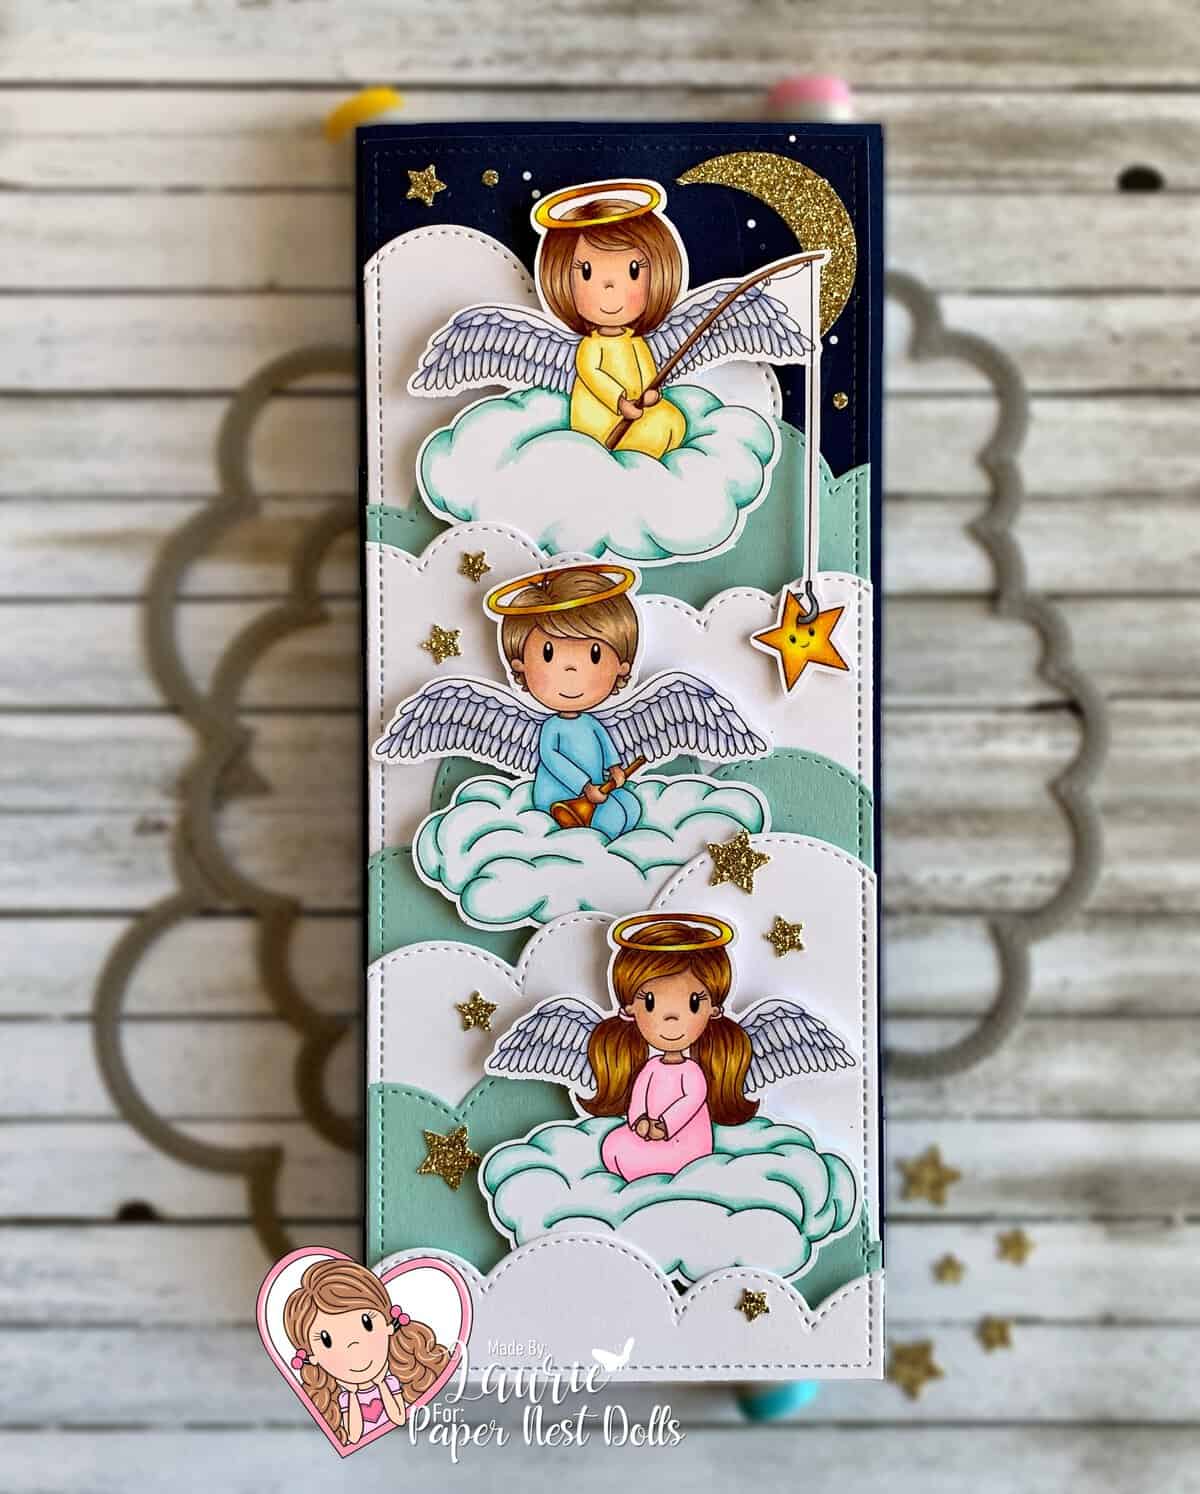
My Angelic Slimline Card

My Angelic Slimline Card

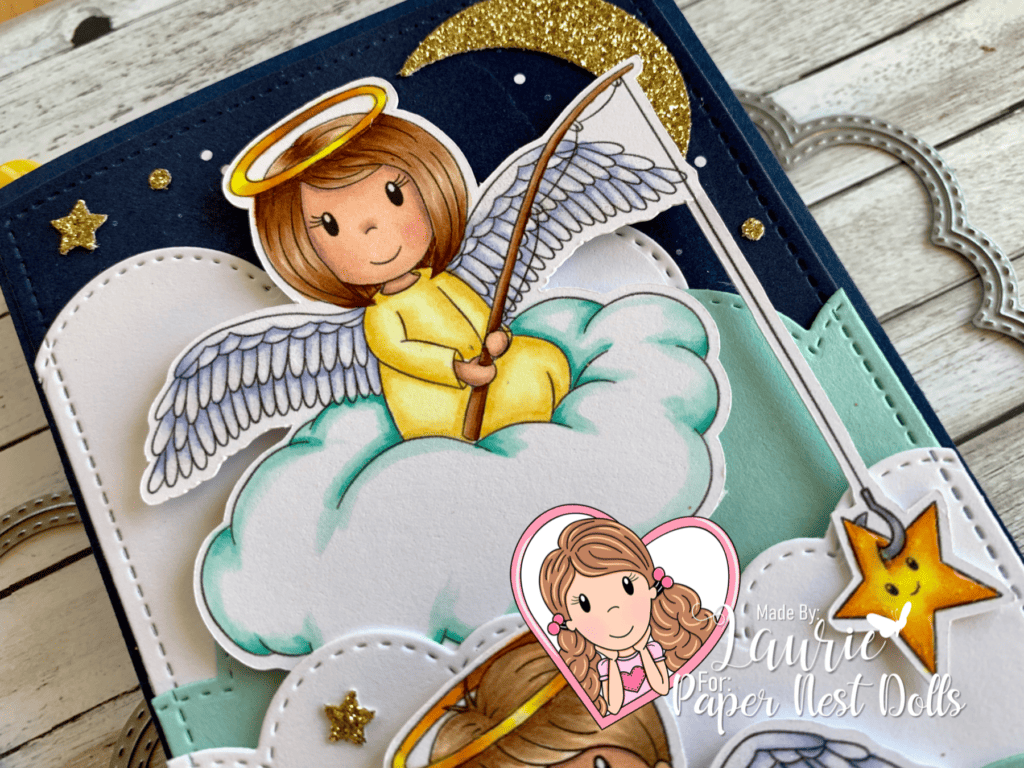
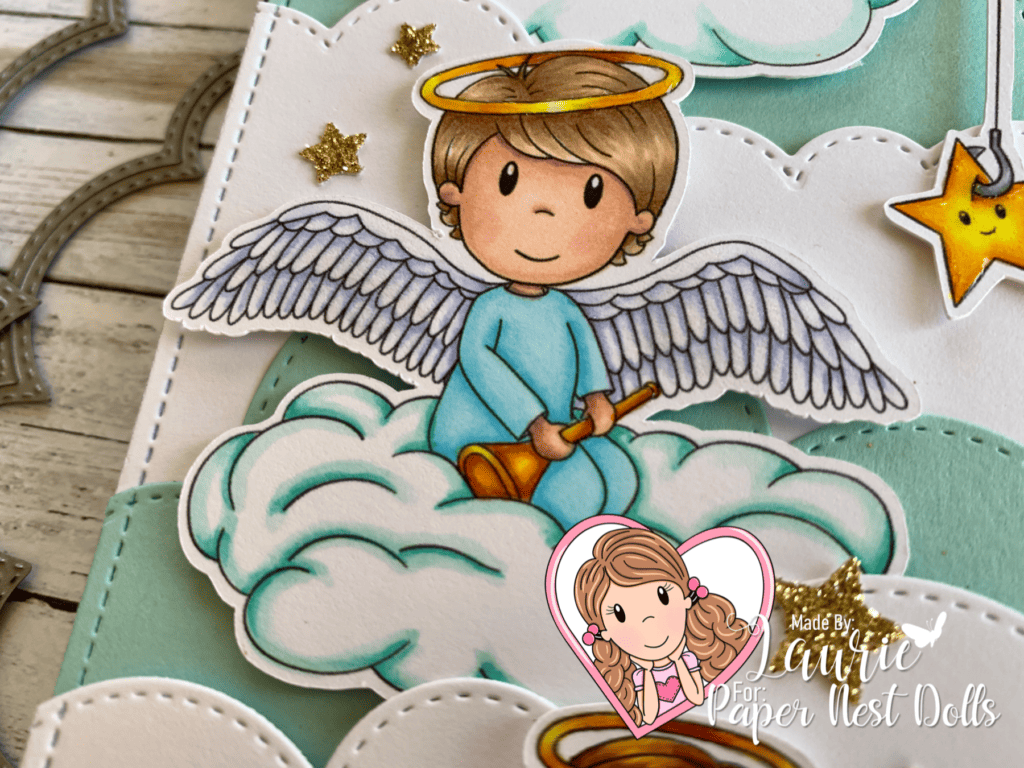
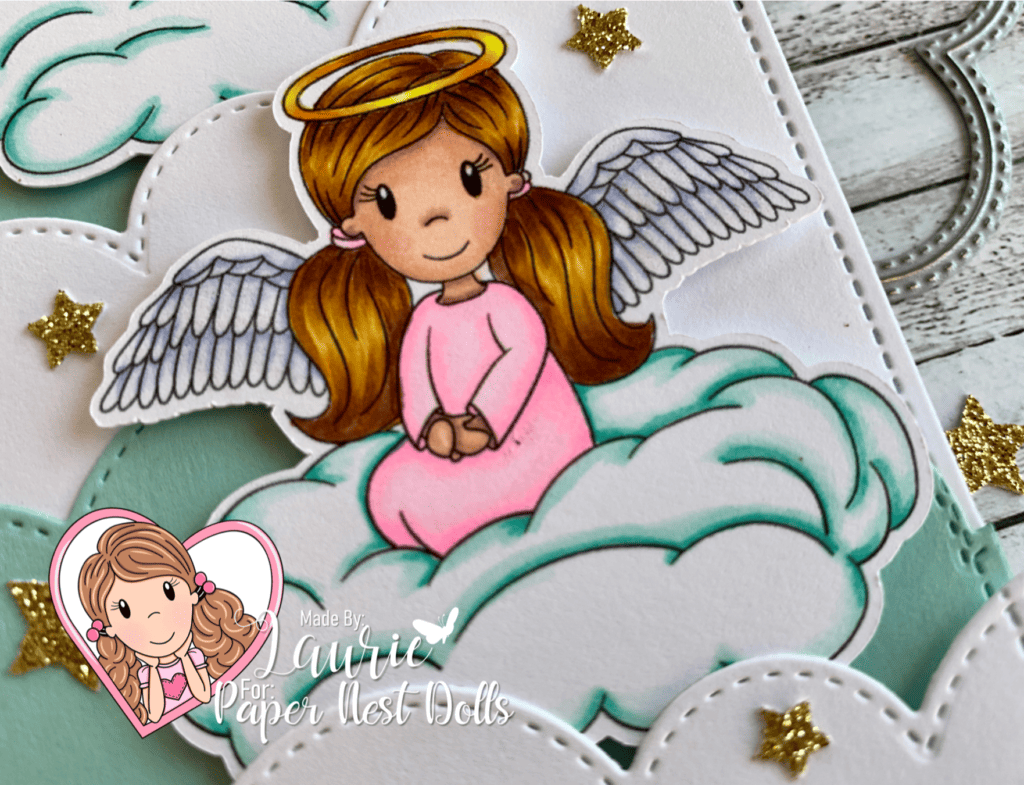
Hello Crafty Friends! It’s Laurie here! I am sharing My Angelic Slimline Card using Angel Emma Catching StarsAngel Owen on a Cloud and Angel Ellie on a Cloud all by Paper Nest Dolls. I thought that all three stamps together would make a fun slimline card!

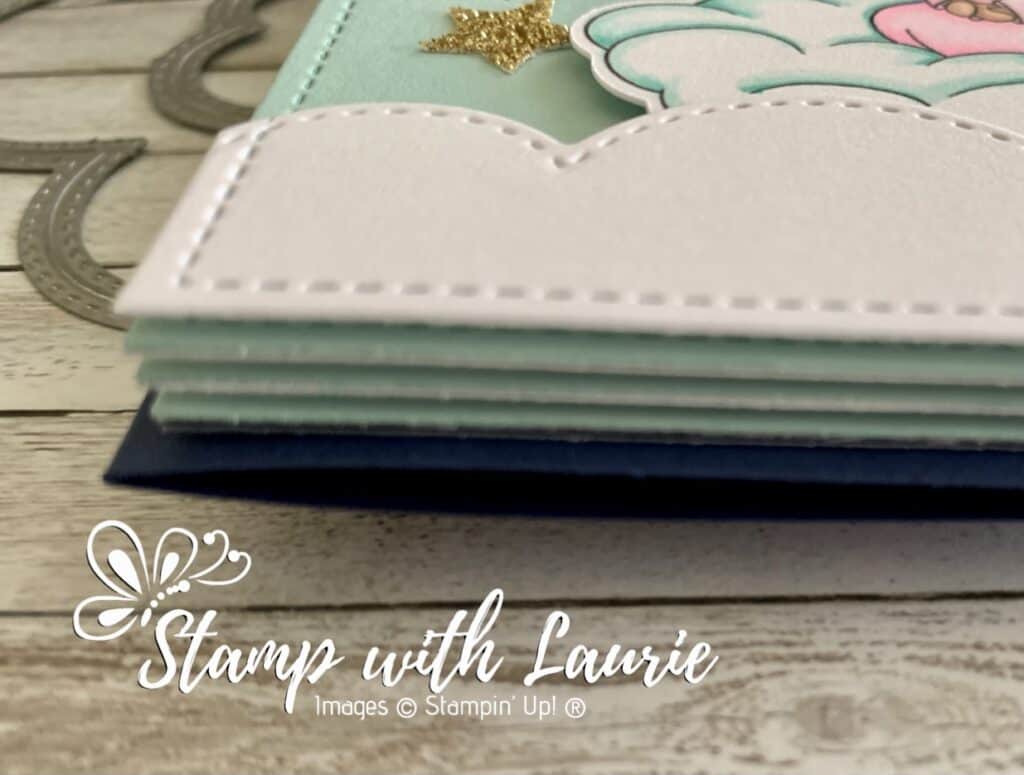
It was so much fun colouring these sweet angels in bright Spring-like colours! Can you see I’m longing for Spring! Lol! I used glossy accents on all the gold bits and Clear Wink of Stella on their wings since angel wings should sparkle! For my clouds, I alternated white and blue measuring each layer so that they all stack on each other with lots of dimensionals. Since I decided to create a night sky behind them, I added a glimmery moon and a scattering of stars throughout my scene.

The Layers of My Card

————————–

Copic Markers:

Angel Emma Catching Stars
Skin: E000/E00/E21/E11/E04/R20
Hair: E37/E35/E34/E31
Robe: Y00/Y11/Y15
Halo/Star: E15/Y38/Y35/Y06/Glossy Accents
Wings: B63/B60/0/Clear Wink of Stella
Fishing Pole: E37/E35/E34
Hook: C5/C3
Clouds: BG13/BG11/BG10/0

Angel Emma Catching Star

Angel Owen on Cloud
Skin: E000/E00/E21/E11/E04/R20
Hair: E57/E43/E55/E53/E50
Robe: B000/B00/B01/B02
Halo/Trumpet: E15/Y38/Y35/Y06/Glossy Accents
Wings: B63/B60/0/Clear Wink of Stella
Clouds: BG13/BG11/BG10/0

Angel Owen on Cloud
Angel Owen on Cloud

Angel Ellie on Cloud
Skin: E000/E00/E21/E11/E04/R20
Hair: E25/YR24/Y26/Y21
Robe: RV000/RV00/RV02
Halo: E15/Y38/Y35/Y06/Glossy Accents
Wings: B63/B60/0/Clear Wink of Stella
Clouds: BG13/BG11/BG10/0

Angel Ellie on Cloud

————————–

Card Recipe for My Angelic Slimline Card:

Angel Emma Catching StarsAngel Owen on a Cloud and
Angel Ellie on a Cloud, Paper Nest Dolls
Paper Basics – Stamper’s Select White Cardstock, Papertrey Ink
Twinkle Twinkle Designer Series Paper, Stampin’ Up
Large Slimline with Sliders Dies, Lawn Fawn
Stitched Cloud Edges Die-namics, My Favorite Things
Twinkle Builder Punch, Stampin’ Up!
Gold Glimmer Paper, Stampin’ Up!
Glossy Accents, Ranger
Clear Wink of Stella, Stampin’ Up!
Night of Navy, Pool Party and Basic White Card Stock, Stampin’ Up!

Finished card size: 3.5” x 8.5”

You can also find these stamps in rubber in the store:
Angel Emma Catching Stars
Angel Owen on a Cloud
Angel Ellie on a Cloud

————————–

To view my other Paper Nest Dolls cards, please click here.

Hope you like My Angelic Slimline Card using Angel Emma Catching Stars,
Angel Owen on a Cloud and Angel Ellie on a Cloud by Paper Nest Dolls!

Thank you for stopping by!

Hugs,
Laurie

Thinking of You Card

My Thinking of You Card

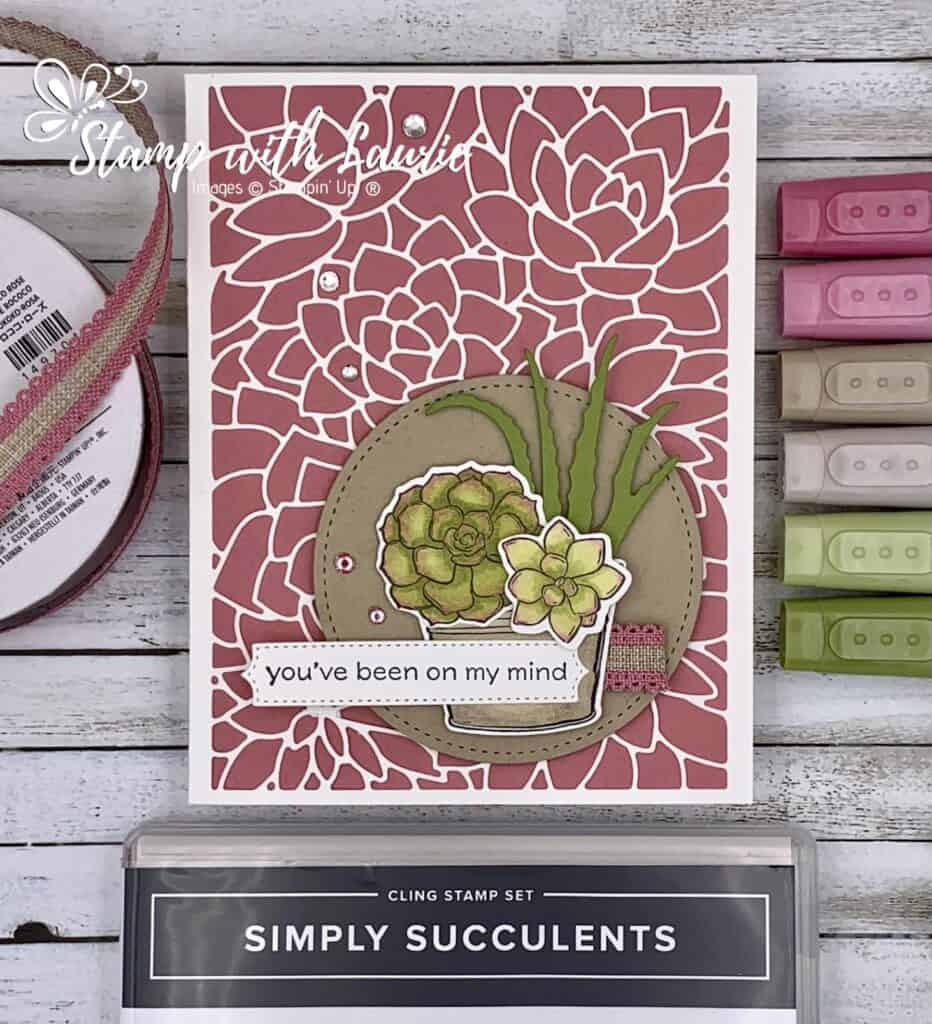
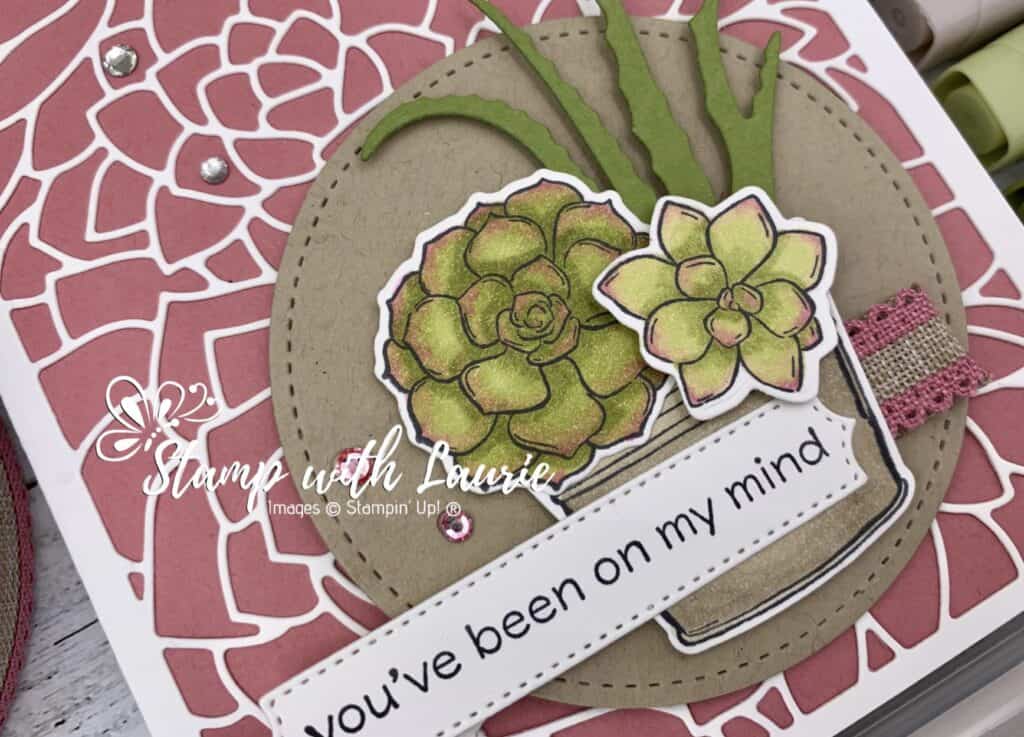
Today is I am sharing my Thinking of You Card using the Simply Succulents Bundle by Stampin’ Up! A good friend and I love succulents. And as you know, I love to colour! Double whammy! So, when I saw this bundle, I knew that I would be getting it!

For my card, I used my Stampin’ Blends to colour using the tip-to-tip technique for the flowers and the smooth colouring technique for the pot. I have added links to my colouring techniques videos from a presentation at the end of this post if you wish to learn more. This card was easy to put together since the images were a quick colour.

I thought that the die cut of the succulents that spans a whole card front is so beautiful. So, I decided to use that for my background with a Rococo Rose card base. Rococo is one of the 2019-2021 In Colors that I am going to miss the most! It will be retiring with the new Catalogue in May. So, make sure you get all your favourite retired items before they are gone!

I created a focal point with the largest Stitched Circle Die where I added my bouquet and sentiment. A scattering of Rhinestone Basic Jewels of which I coloured a few with my Rococo Rose Dark Blend and Rococo Rose Scalloped Linen Ribbon are all the embellishments this card needed.

Supplies:

Stamps/Bundles/Dies: Simply Succulents Bundle (156264)
Inks: Tuxedo Black Memento Ink Pad (132708)
Paper: Rococo Rose (150882), Crumb Cake (120953), Basic White (159276), Old Olive (100702)
Accessories: Stitched Shapes Dies (152323), Rococo Rose 1/2″ Scalloped Linen Ribbon (149704), Old Olive Stampin’ Blends Combo Pack (154892), Crumb Cake Stampin’ Blends Combo Pack (154882), Rococo Rose Stampin’ Blends Combo Pack (154900), Rhinestone Basic Jewels (144220), Bone Folder (102300), Stampin’ Dimensionals (104430), Stampin’ Seal (152813), Glue Dots (103683)

Close Up of My My Thinking of You Card

Measurements: 

  • Rococo Rose: 5 ½” x 8 ½” scored at 4 ¼”
  • Basic White (5 pieces):
    • Background ½” x 8 ½”
    • Sentiment: 2 5/8” x ½”
    • Larger Flower: 1 3/8”
    • Smaller Flower: 1”
    • Pot: 1 ¼” x 1 5/8”
  • Old Olive: 2” x 2 1/8”
  • Crumb Cake: 2 7/8”
  • Rococo Rose Scalloped Linen Ribbon: 2”

For Further Information:

Hope you like my Thinking of You Card.

For more information on my colouring, here are some videos of my colouring techniques:
1 – PartWhiskey Business Card using Blending Different Colours Technique
Video Tutorial: Blending Different Colours Together
2 – PartCountry Harvest Card using Light to Dark Technique
Video Tutorial: Light to Dark/Dark to Light Colouring
3 – PartBeautiful Poppy Birthday Card using Smooth Colouring Technique
Video Tutorial: Smooth Colouring
4 – PartLet’s Gather Together Card using Tip to Tip Blending Technique
Video Tutorial: Tip to Tip Colouring
5 – PartSo Grateful Cardinal Card using Flicking Colouring Technique
Video Tutorial: Flicking Colouring
6 – PartLet’s Celebrate You Card using Flicking of Different Colours Technique
Video Tutorial: Flicking of Different Colours Technique

My Colouring Notes:
https://stampwithlaurie.com/wp-content/uploads/2020/08/Stampin-Up-Blends-2020.pdf

For more of my Stampin’ Up! cards, please click here.

You will find the items listed above in my online store

Fine Art Birthday Card

My Fine Art Birthday Card

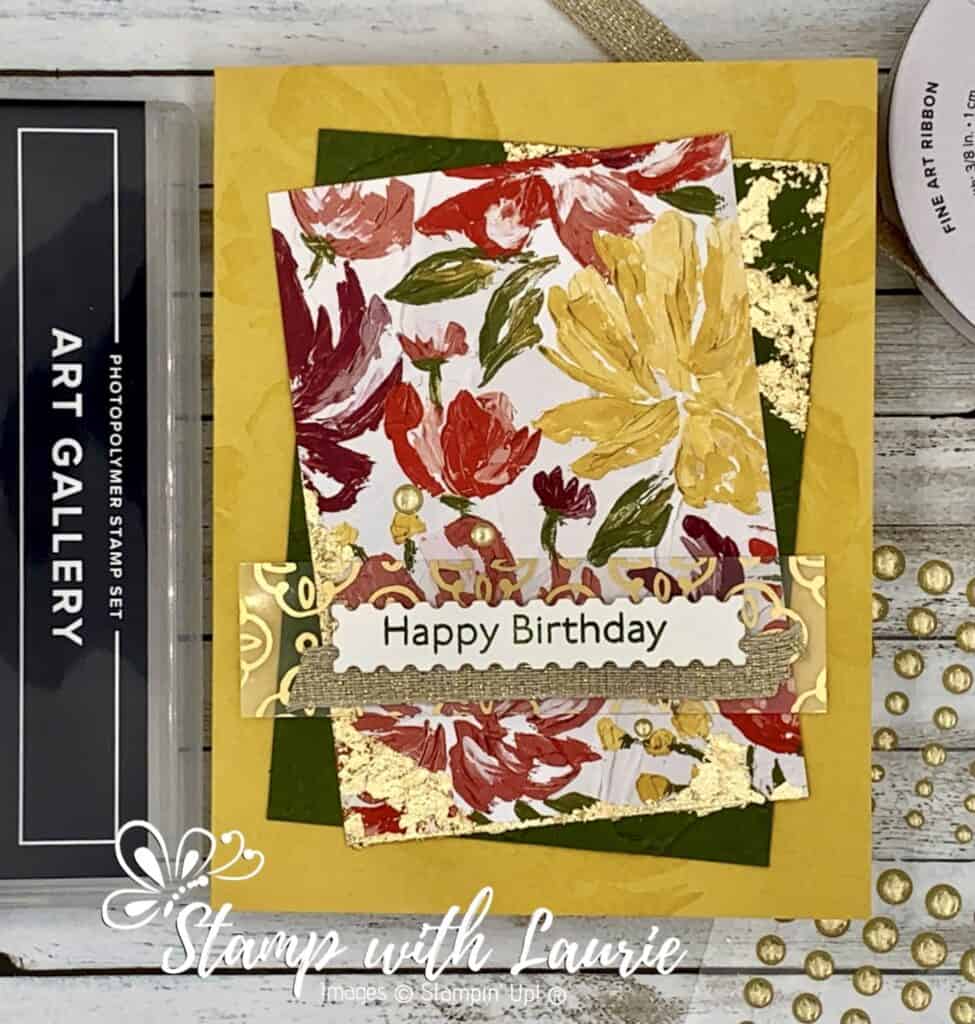
Today is I am sharing my Fine Art Birthday Card using the Fine Art Floral Suite Collection by Stampin’ Up! I love this collection with the lovely flowers and textures on a modern take on classic impasto paintings. Rich textures, lovely florals, gold leafing, and more all work together for a fine art experience that is sure to yield beautiful and elegant results.

The Art Gallery Photopolymer Stamp Set is so pretty with lots of lovely sentiments for all kinds of cards! And you can’t go wrong with the matching Floral Gallery Dies.

How to Use Gilded Leafing Embellishment

When I saw the Gilded Leafing Embellishment in the new mini, I was so excited! It was on the top of my list to buy. I have used similar products and just loved them. So, I knew I would love the Stampin’ Up! version.

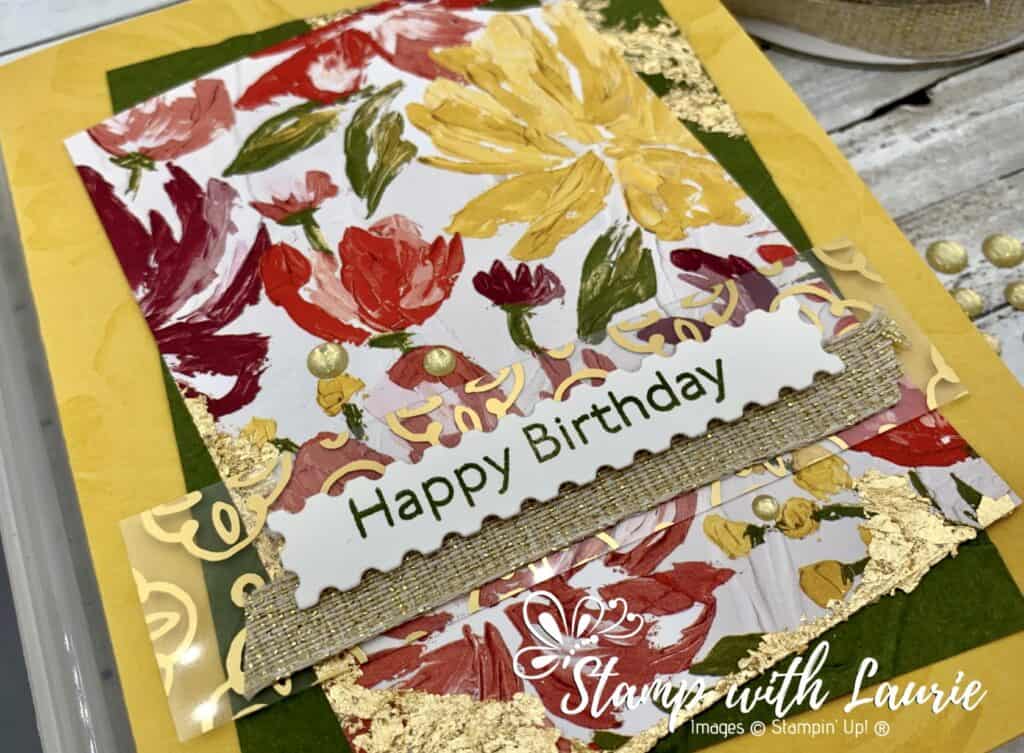
For my card, I took the VersaMark Ink Pad and rubbed it on opposite corners of the DSP and the Mossy Meadow card stock (which was embossed first with the Painted Texture 3D Embossing Folder). I then sprinkled Heat & Stick Powder to the ink and set it with my heat tool. It will melt like embossing powder but leaves a sticky residue behind to which you can adhere the Gold Gilding. I then burnished with my fingers the Gold Gilding removing the excess.

Imagine an artist, delicately painting individual canvases in a classic impasto style. It’s beautiful, isn’t it? That’s exactly what this paper is! A Stampin’ Up! artist hand-paint canvases with beautiful florals and textures in classic Stampin’ Up! colors. They then took those canvases, photographed them, and made them into this unique designer series paper. Your heart will grow wild when you get this paper in your hands. The pack includes florals, patterns, colour variance, and all the touches of professional paintings.

To finish my card, I added a strip of the gorgeous Golden Garden Designer Specialty Acetate behind the Fine Art Ribbon and the sentiment. A scattering of Gold Glitter Enamel Dots tie in the golden theme.

Supplies:

Stamps/Bundles/Dies: Art Gallery Bundle (156227)

Inks: Bumblebee Classic Stampin’ Pad (153116), Mossy Meadow Classic Stampin’ Pad (147111), VersaMark Ink Pad (102283

Paper: Bumblebee (153077), Mossy Meadow (133676), Basic White (159276), Golden Garden Designer Specialty Acetate (154557), Fine Art Floral Designer Series Paper (154558)

Accessories: Painted Texture 3D Embossing Folder (154317), 3/8″ Fine Art Ribbon (154561), Heat & Stick Powder (156110), Gilded Leafing Embellishment (154560), Gold Glitter Enamel Dots (152155), Heat Tool (129053 ), Bone Folder (102300), Stampin’ Dimensionals (104430), Stampin’ Seal (152813), Glue Dots (103683)

Close Up of My Fine Art Birthday Card

Measurements: 

  • Bumblebee: 5 ½” x 8 ½” scored at 4 ¼”
  • Mossy Meadow: 3 ¼” x 4 ½”
  • Basic White: ½” x 2 ¾”
  • Fine Art Floral Designer Series Paper: 3” x 4 ¼”
  • Golden Garden Designer Specialty Acetate: 1” and 3 ¾”
  • Fine Art Ribbon: 3 ½”

For Further Info:

Hope you like my Fine Art Birthday Card.

For more of my Stampin’ Up! cards, please click here.

You will find the items listed above in my online store.
Dragonfly Garden Card

My Dragonfly Garden Card

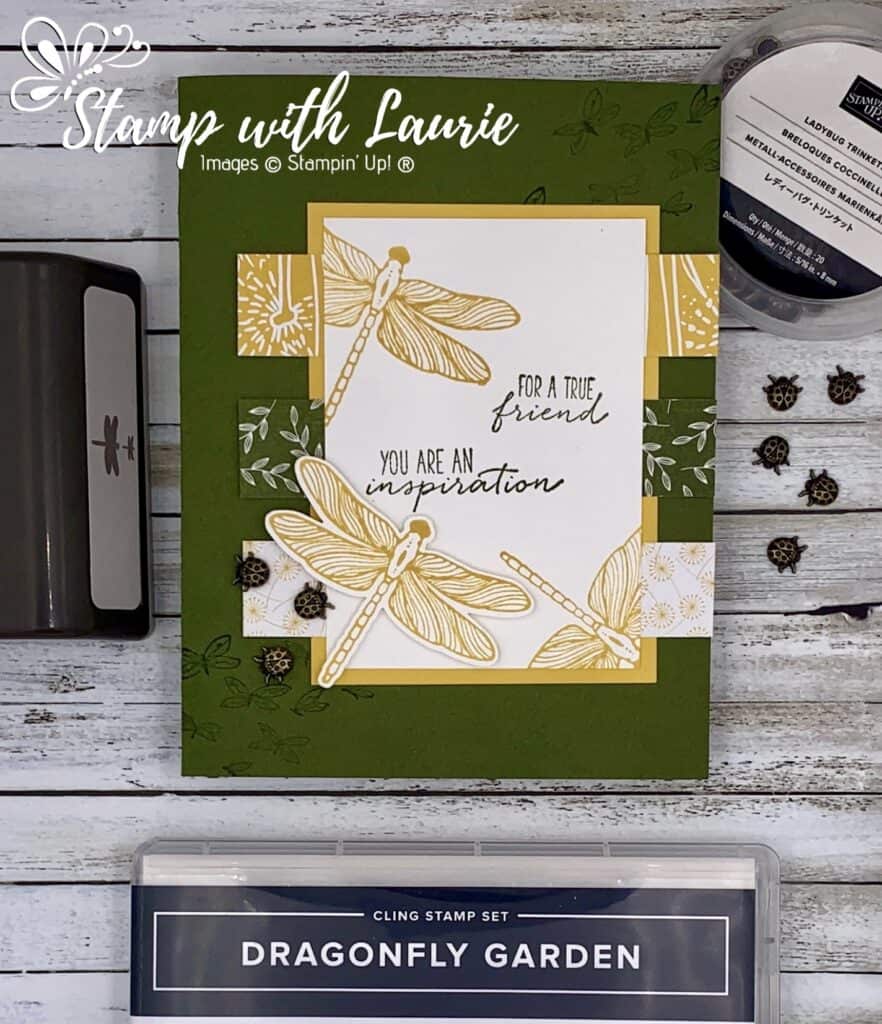
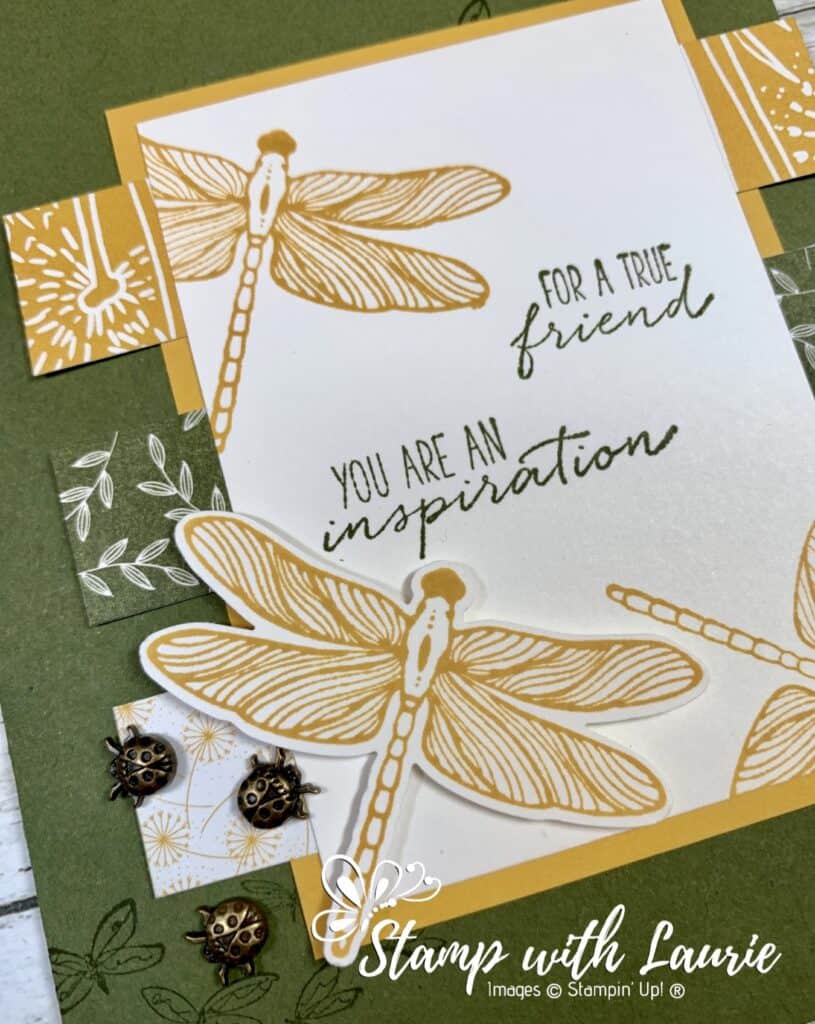
I was lucky enough to attend the Stampin’ Up! OnStage@Home Event in November. For this event, we were allowed to buy things from the new Mini Catalogue early! The Dragonfly Garden Bundle with the Dandy Garden Designer Series Paper and the Ladybug Trinkets were on the list. We made 3 cards using these products and I am sharing with you my first Dragonfly Garden Card today.

I love that you get a punch with the stamp set for this bundle! Makes it so handy! And those Ladybug Trinkets are so adorable!

Supplies:

Stamps/Bundles/Dies: Dragonfly Garden Bundle (156224)

Inks: Mossy Meadow Classic Stampin’ Pad (147111), Bumblebee Classic Stampin’ Pad (153116)

Paper: Mossy Meadow (133676), Whisper White (100730), Bumblebee (153077), Dandy Garden Designer Series Paper (154297)

Accessories: Ladybug Trinkets (154299), Bone Folder (102300), Stampin’ Dimensionals (104430), Stampin’ Seal (152813), Mini Glue Dots (103683)

Close Up of My Dragonfly Garden Card

Measurements: 

  • Mossy Meadow: 5 ½” x 8 ½” scored at 4 ¼”
  • Whisper White: 2 ½” x 3 ½”
  • Bumblebee: 2 ¾” x 3 ¾”
  • Dandy Garden Designer Series Paper (3 pieces): 3 ¾” x ¾”

For Further Information:

Hope you like My Dragonfly Garden Card!

To view my other Stampin’ Up! cards, please click here.

You will find the items listed above in my online store.
My Congratulations Card

My Congratulation Card

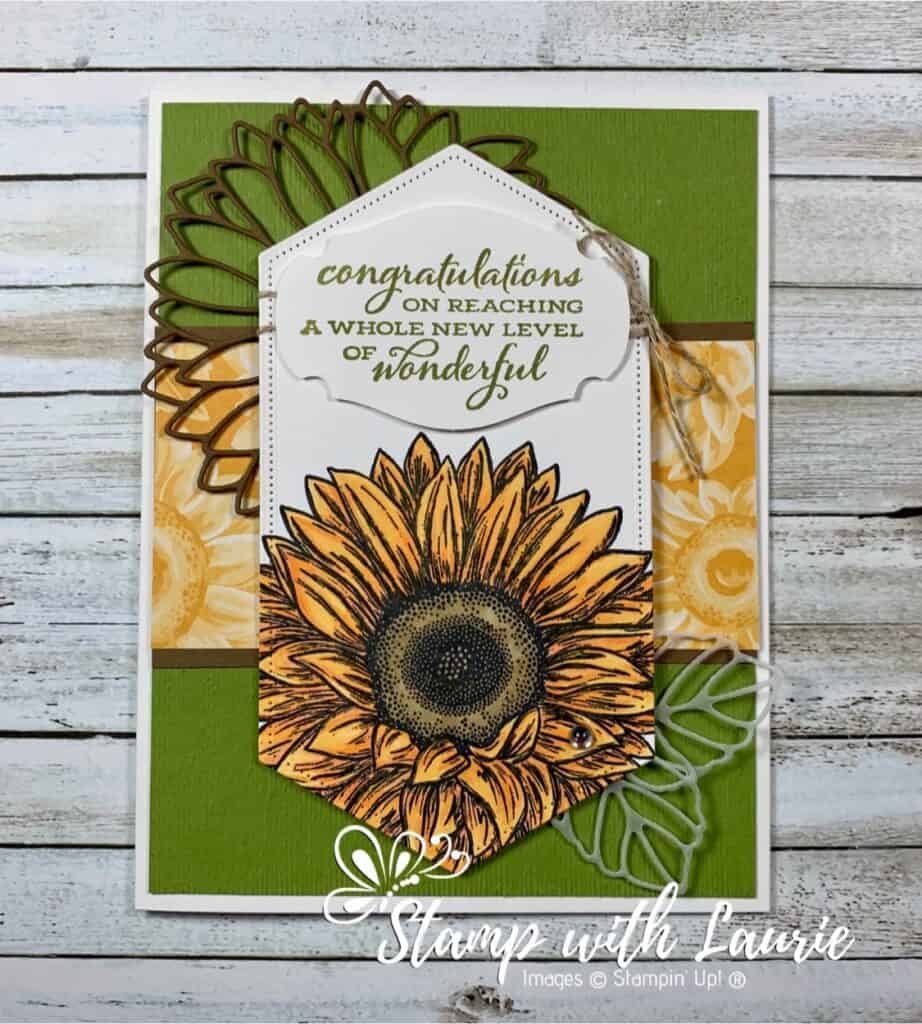
Today I am sharing a Congratulations Card that I created for a swap that used products from the new Annual Catalogue. This card with its sentiment would be perfect for all those recent graduates! I love the new Celebrate Sunflowers Stamp Set, especially the large sunflower!

Close Up of My Congratulation Card

For the sunflower, I used three markers, Mango Melody Light and Dark and Calypso Coral Light, for the petals. By adding a third colour, it creates more dimension and texture to what you are colouring. I used the Calypso Coral in the darkest of shadows that are indicated by the artist drawn lines. For the flower centre, I use Soft Suede Light and Dark, but for the Dark Suede, I dotted the marker to create texture that the artist has indicated with their dots. Let’s get started!

Supplies:

Stamps: Celebrate Sunflowers Bundle (154065)

Inks: Tuxedo Black Memento Ink Pad (132708), Pear Pizzazz Classic Stampin’ Pad (147104)

Paper: Whisper White Thick (140272 ), Pear Pizzazz (131201), Soft Suede (115318), Whisper White (100730), Vellum (101856), Flowers For Every Season 6″ X 6″ Designer Series Paper (152486)

Accessories: Stitched Nested Labels Dies (149638), Subtle 3D Embossing Folder (151775), Story Label Punch (150076), Mango Melody Stampin’ Blends Combo Pack (154888), Calypso Coral Stampin’ Blends Markers Combo Pack (144045), Linen Thread (104199), Frosted & Clear Epoxy Droplets (147801), Bone Folder (102300), Paper Snips (103579), Mini Glue Dots (103683), Stampin’ Seal (152813), Stampin’ Dimensionals (104430)

Measurements: 

  • Whisper White Thick: 8 ½” x 5 ½”; scored at 4 ¼” 
  • Pear Pizzazz: 4 x 5 ¼”
  • Soft Suede – 2 pieces:
    • 2 ¼” x 4” (behind the DSP)
    • 3 ¼” x 3 ¼” (for the outline of sunflower die)
  • Whisper White – 2 pieces:
    • 5 ¼” x 3” 
    • 3” x 2” (sentiment)
  • Flowers For Every Season Designer Series Paper: 2” x 4”
  • Vellum – 2 pieces: scraps

Instructions for Congratulations Card:

  1. Fold the Whisper White Thick card stock in half to create the card base.
  2. Emboss the Pear Pizzazz card stock with the Subtle 3D Embossing Folder.
  3. Stamp the large sunflower image from the bundle in the bottom-centre of the Whisper White piece.
  4. Colour the sunflower using the Blends using the technique that I mentioned in the text above.
  5. Die cut the sunflower out using the largest die from the Stitched Nested Labels Dies.
  6. Stamp the sentiment in Pear Pizzazz on the other piece of Whisper White and punch it out using the Story Label Punch.
  7. Die cut the square Soft Suede Card Stock with the outline of the sunflower die from the Celebrate Sunflowers Bundle.
  8. Die cut 2 leaves in vellum from the same bundle.
  9. Adhere the embossed Pear Pizzazz piece to the card base.
  10. Adhere the Soft Suede strip to the Flowers For Every Season Designer Series Paper and centre on the card base.
  11. Wrap the Linen Thread around the Stitched Nested piece and tie in a bow on the right side.
  12. Using glue dots, adhere the leaves to the bottom right corner of the Stitched Nested piece.
  13. Using glue dots, adhere the Soft Suede sunflower piece to the Stitched Nested piece.
  14. Attach the sunflower piece using dimensionals to the card base.
  15. Attached the sentiment using dimensionals.
  16. Take one Frosted & Clear Epoxy Droplets and add it to a petal of the sunflower to make it look like dew.

For Further Info:

Hope you like my Congratulations Card!

You will find the items listed above in my online store at:  https://www.stampinup.com/ecweb/products/1010001/flowers-for-every-season?dbwsdemoid=2103981.