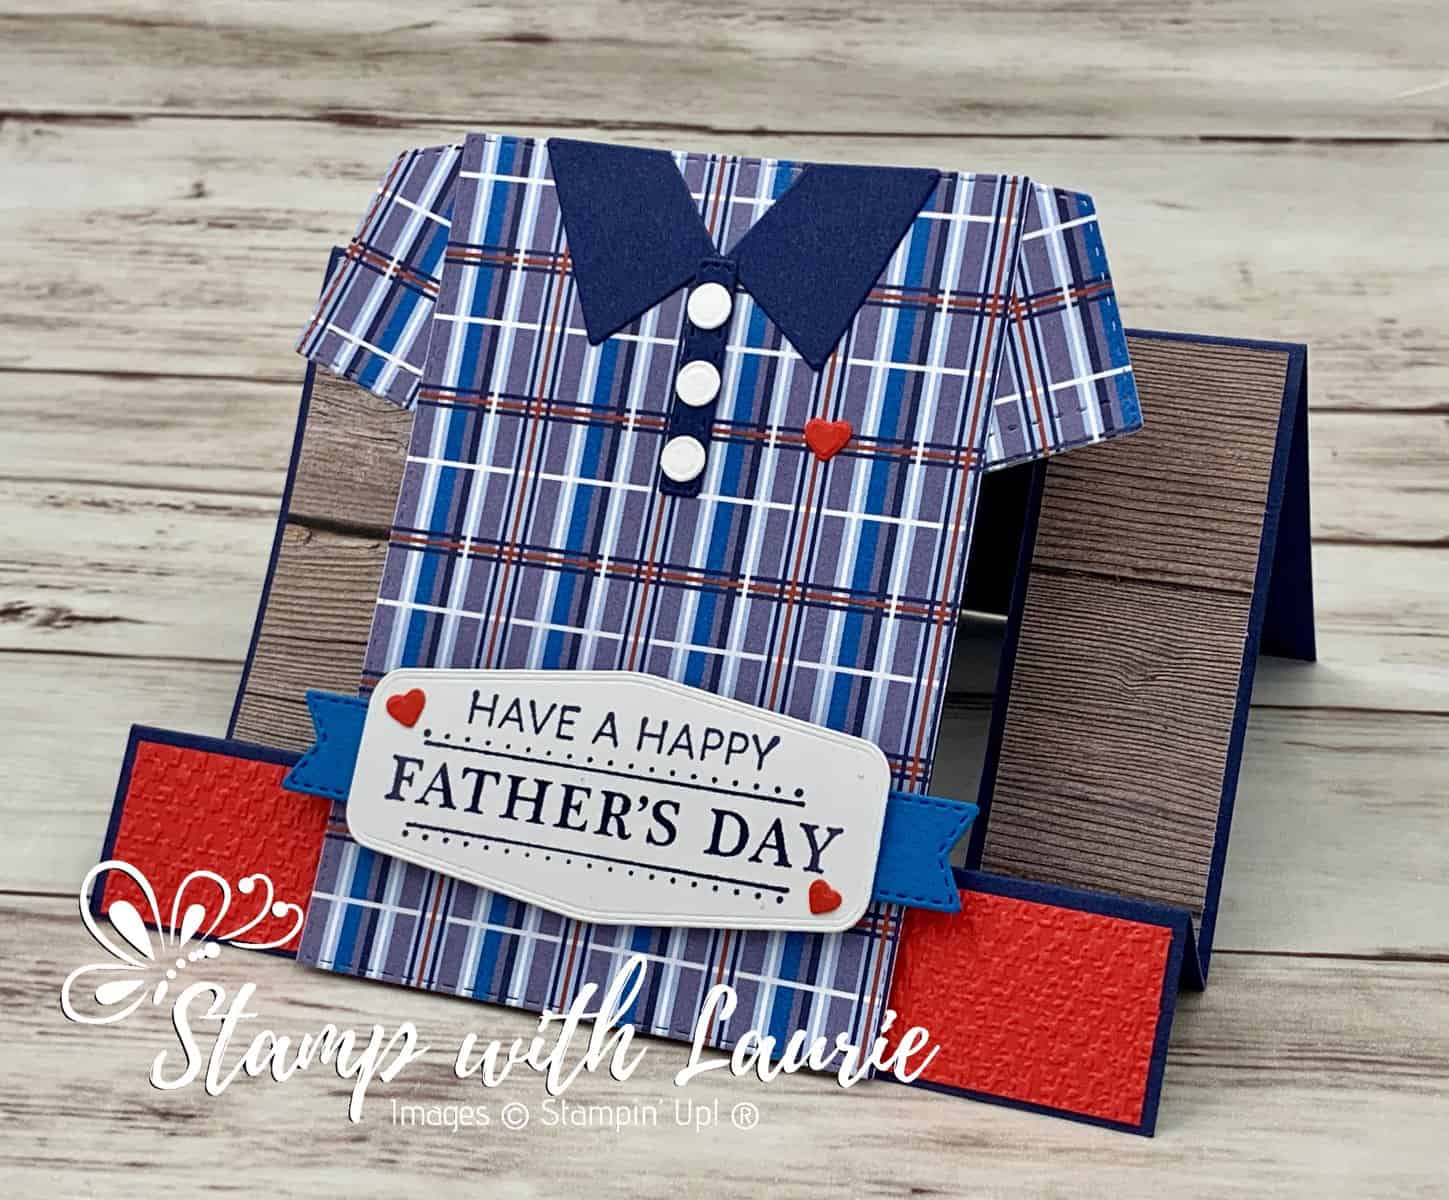
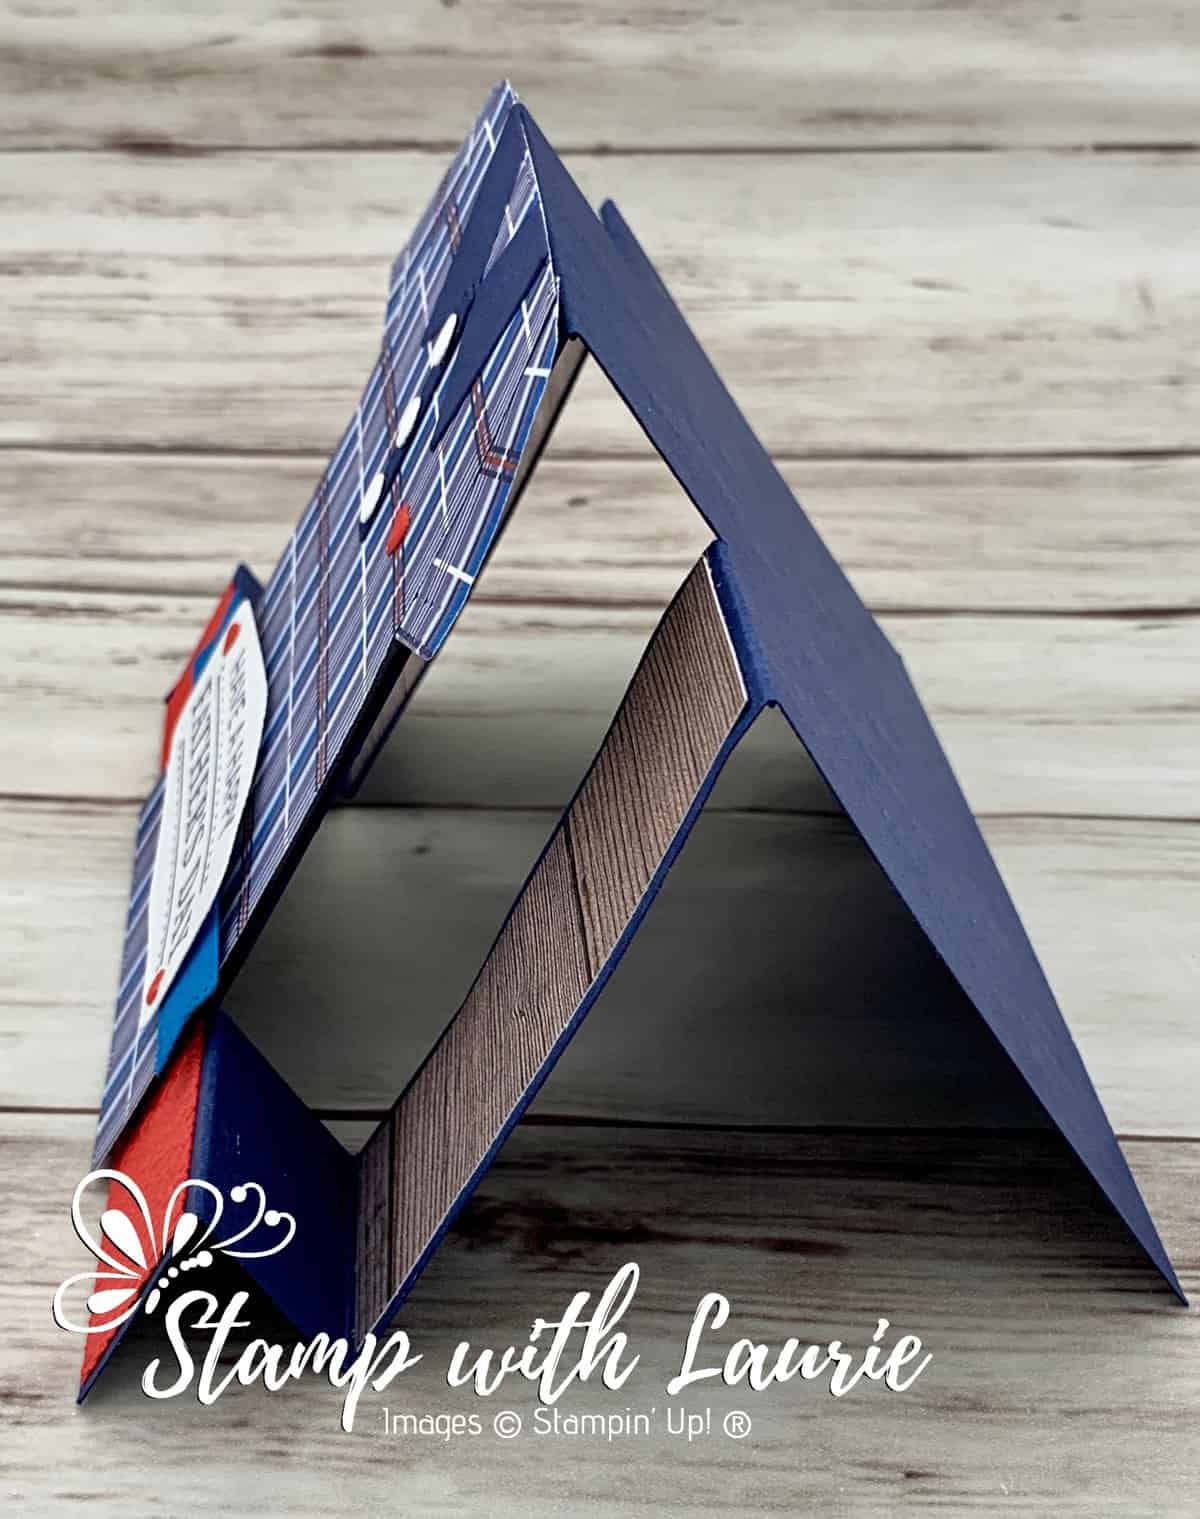
Today is I am sharing My Father’s Day Card that is using the Handsomely Suited Bundle by Stampin’ Up! I decided to create a Centre-Step Fun Fold card with the shirt on the centre panel. There is a link at the end of this post to a Horizontal Centre-Step Template.
The Details of My Card
My Father-in-law isn’t a suit kind of guy, but he does wear golf shirts in blues. So, I created a short sleeve golf shirt using the Well Suited Designer Series Paper. For the sleeves, I used the pocket die and the shirt was die cut from the Stitched Rectangle Dies. I trimmed the stitched rectangle to 4 ¼” after it was die cut to fit an envelope. A number of his shirts are Lacoste with a small green allegator on the left side. Since I didn’t have any alligator dies, I used the hearts from the paws of the Pets Dies. I also figured that having a heart to represent his real heart was perfect for Father’s Day!
My Father’s Day Card
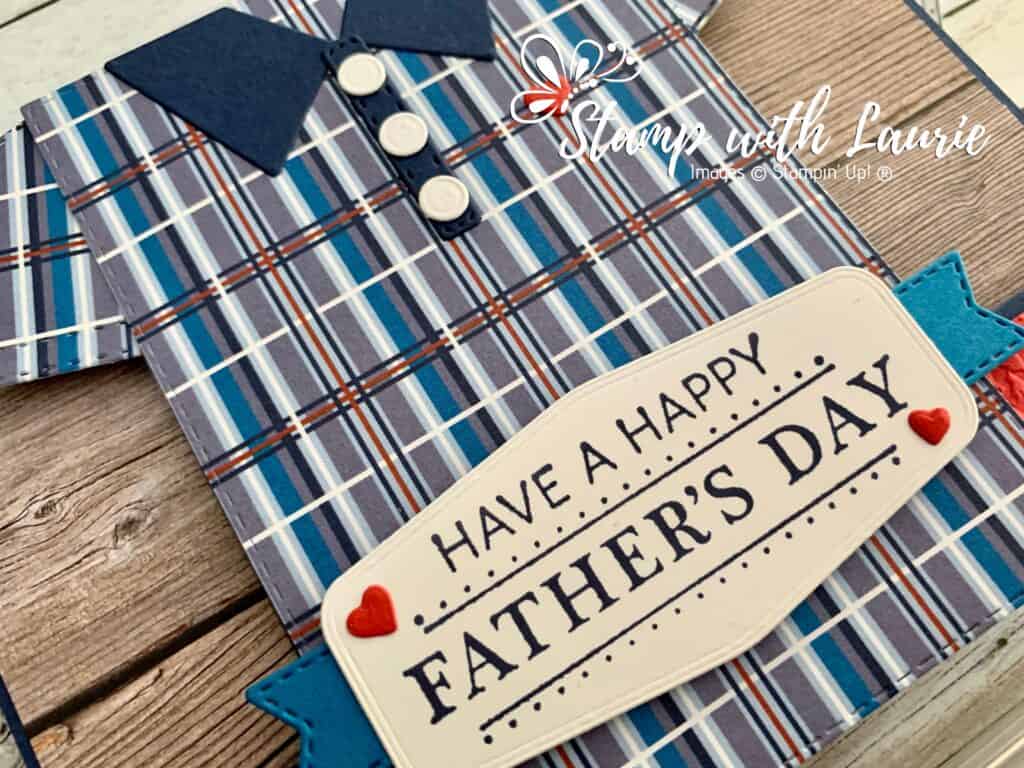
For my sentiment, I didn’t think “Have a Happy Father’s Day Handsome” coming from both my husband and I would be appropriate for my father-in-law. So, I used the technique of covering the part of the sentiment that I didn’t want with scotch tape. Then, I inked the stamp up and removed the tape before stamping. Once the sentiment was stamped like this, I discovered that it fit perfectly in one of the dies from the Tasteful Labels Dies. The Pacific Point banner that flanks my sentiment was also from the Tasteful Labels Dies, but it wasn’t long enough to show on both sides of my sentiment. So, I cut in half giving the illusion that my banner is longer than it is.
For my other panels, I used the In Good Taste Designer Series Paper since he is a very handy man and likes to build things with wood. The Tasteful Textile 3D Embossing Folder was perfect for that material kind of look it gives my card.
Tips for Cutting/Scoring Card Base
At 1 ¼” from the edge of the long side of card stock cut from 1” to 5 ¼” using the Paper Trimmer blade guide. Once I cut one side, I flipped the card stock over to cut the other side. Make sure that your new cut line will be parallel to the first one. Turn so that the long edge of card stock is horizontal and score side panels at 1”, 2” and 5 ¼” and 4 ¼” for the centre panel. To download a PDF file, please see the template link at the end of the post or click the image below.
Horizontal Centre-Step Card Template
Supplies:
Stamps/Bundles/Dies: Handsomely Suited Bundle (156240), Tasteful Labels Dies (152886), Stitched Rectangle Dies (151820)
Inks: Night of Navy Classic Stampin’ Pad (147110)
Paper: Night of Navy (100867), Pacific Point (111350), Poppy Parade (119793), Basic White (159276), Well Suited Designer Series Paper (154562), In Good Taste Designer Series Paper (152494)
Accessories: Tasteful Textile 3D Embossing Folder (152718), Bone Folder (102300), Stampin’ Dimensionals (104430), Stampin’ Seal (152813), Mini Glue Dots (103683), Multipurpose Liquid Glue (110755), Paper Trimmer (152392)
Close Up of My Father’s Day Card
Measurements:
Night of Navy: 5 ½” x 8 ½” (see template for score marks), scraps (collar, buttonholes)
Well Suited Designer Series Paper (3 pieces): 3” x 4 3/8” (trimmed to 4 ¼” after die cut to fit envelope), scraps for sleeves
In Good Taste Designer Series Paper (2 pieces): 1” x 3 1/8”
Basic White: 1 ¼” x 2 ¾”, scraps (buttons)
Pacific Point: ½” x 2 3/16”
Poppy Parade: 1” x 5 3/8”, scraps (hearts)
Side View of My Father’s Day Card
For Further Info:
Hope you like My Father’s Day Card. To download a PDF of this card, please click here.
For more of my Stampin’ Up! cards, please click here.
You will find the items listed above in my online store.
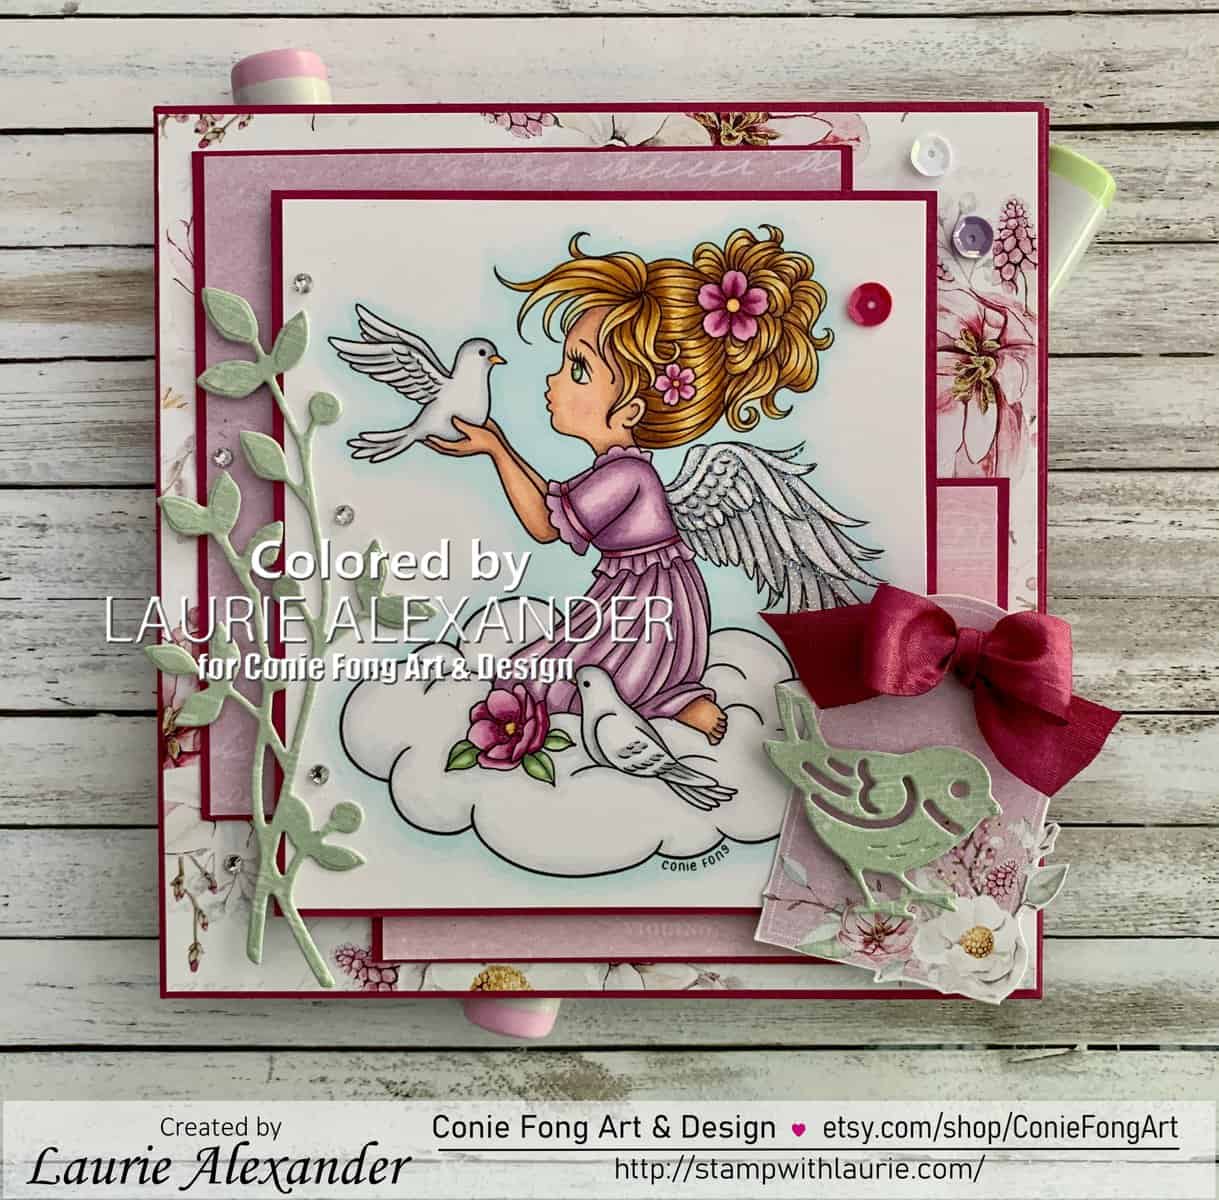
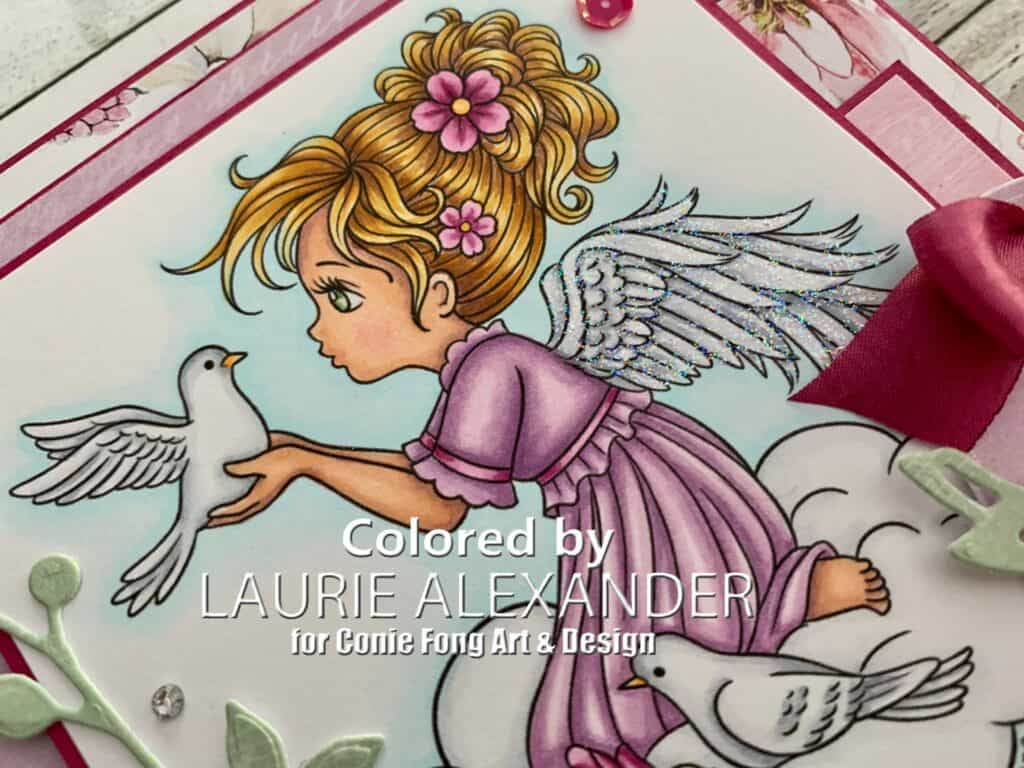
Hello Crafty Friends! It’s Laurie here! I am sharing my first Design Team Inspiration Card for June using the sweet digital stamp Angel Messenger by Conie Fong Art & Design. This is such a pretty image and can be used for so many occasions like Birthday, Sympathy, Get Well, Thinking of You and so on.
For my card, I had some leftover paper from the Kraftin’ Kimmie Stamps 2021 Spring Mini Retreat Weekend that I really loved with soft pinks, greens and purples. So, I used that to pull out my colours for my Copic markers. Once I coloured her wings, I used Star Dust Stickles to make them sparkle. Of course, all Angels have radiant wings! I love this paper so much that I used it for all my dies cut pieces including the bird and branches. The paper pad even has beautiful tags. I couldn’t resist fussy cutting one out and adding it with a pretty bow. A perfect setting for my die cut bird! A scattering of rhinestones and sequins were the only embellishments that my card needed.
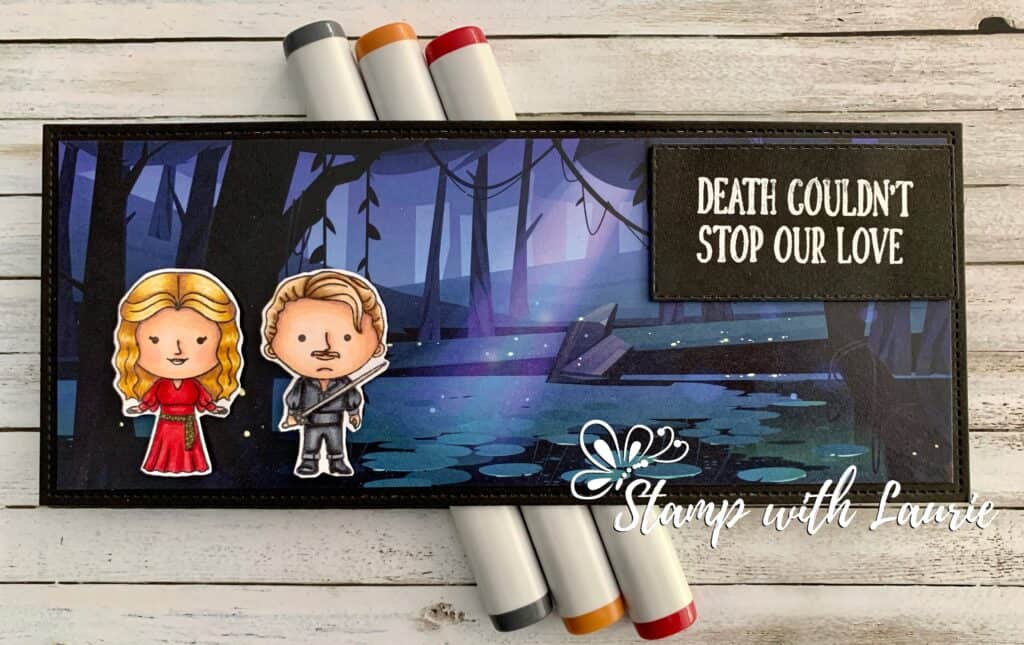
Hello Crafty Friends! It’s Laurie here to share my As You Wish Card using the Twoo Luv Stamp Set by Kindred Stamps! Princess Bride is one of my favourite movies ever! So, when I saw Kindred Stamps has this stamp set, I couldn’t resist buying it!
This is another super-fast card to make since the stamps colour up so quickly and the background paper is from the Enchanted Forest Paper Pack by Whimsy Stamps. I used my Copic markers to colour my characters to match the characters in the movie. I thought this slimline paper was perfect to represent the ‘Fire Swamp’ in the movie where Westley and Buttercup meet the R.O.U.S.’s (Rodents of Unusual Size)! The only other thing that needed to be added was the sentiment which I embossed in white on black cardstock. Easy-peasy!
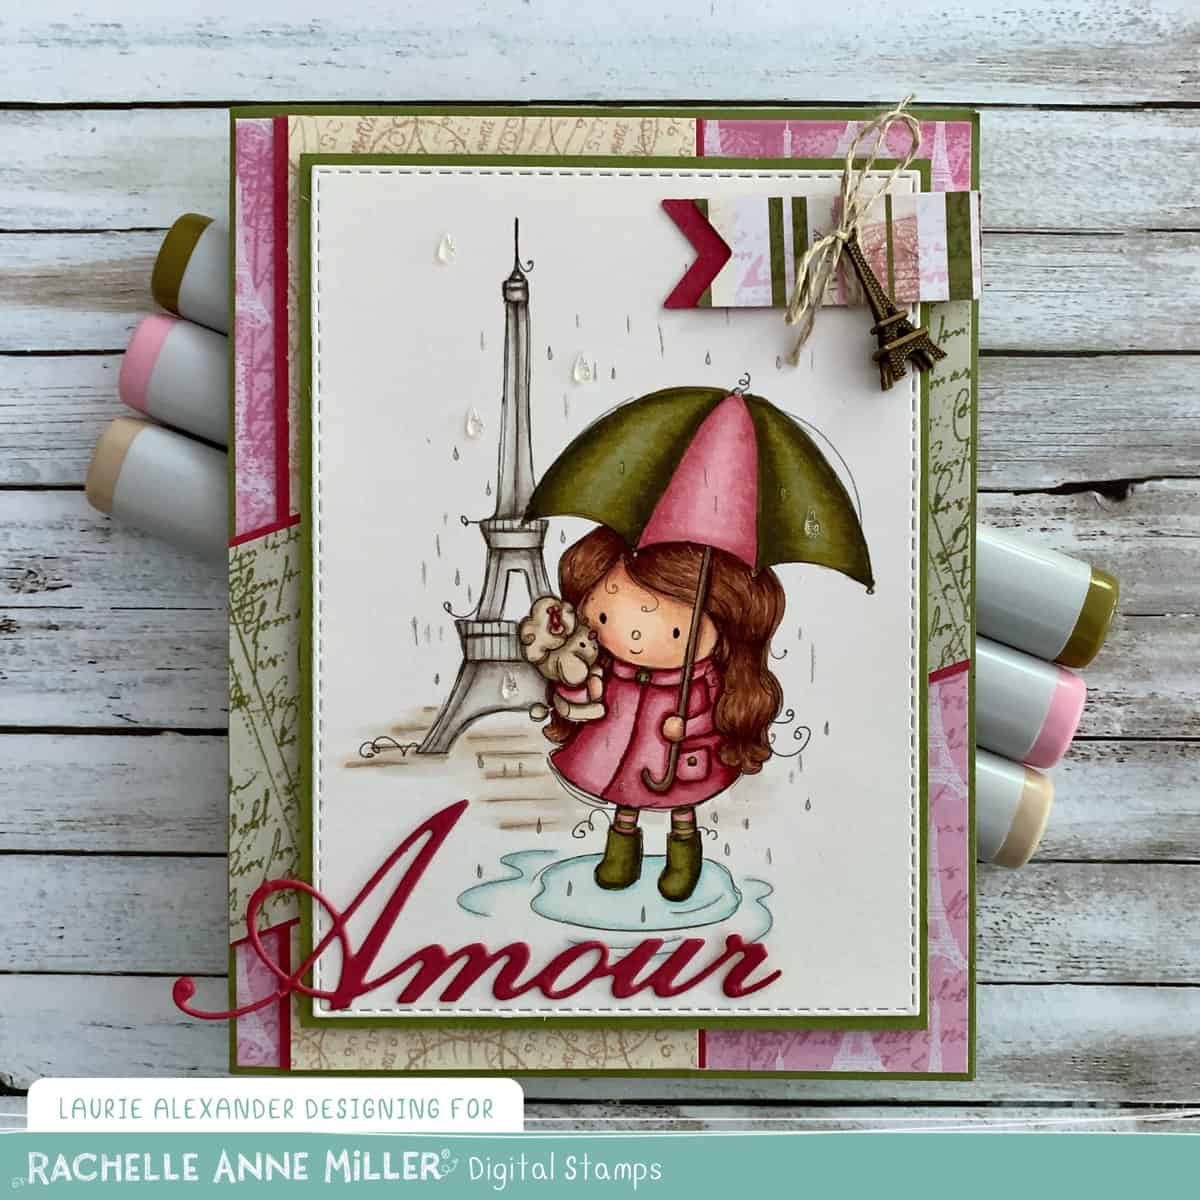
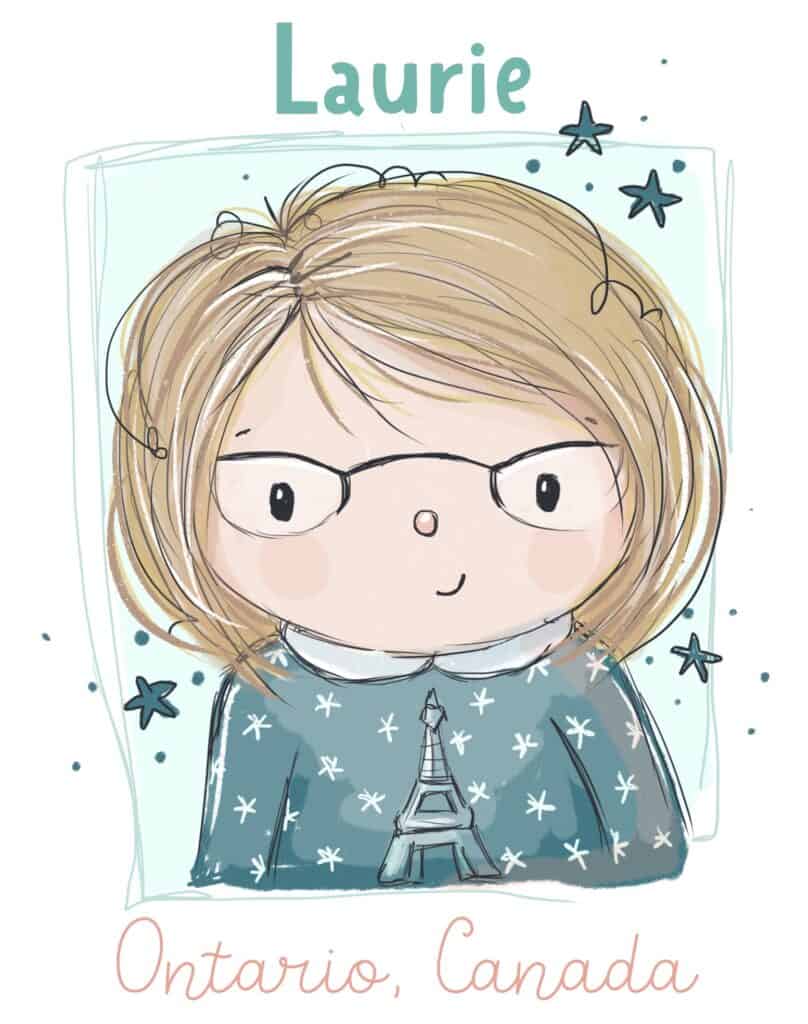
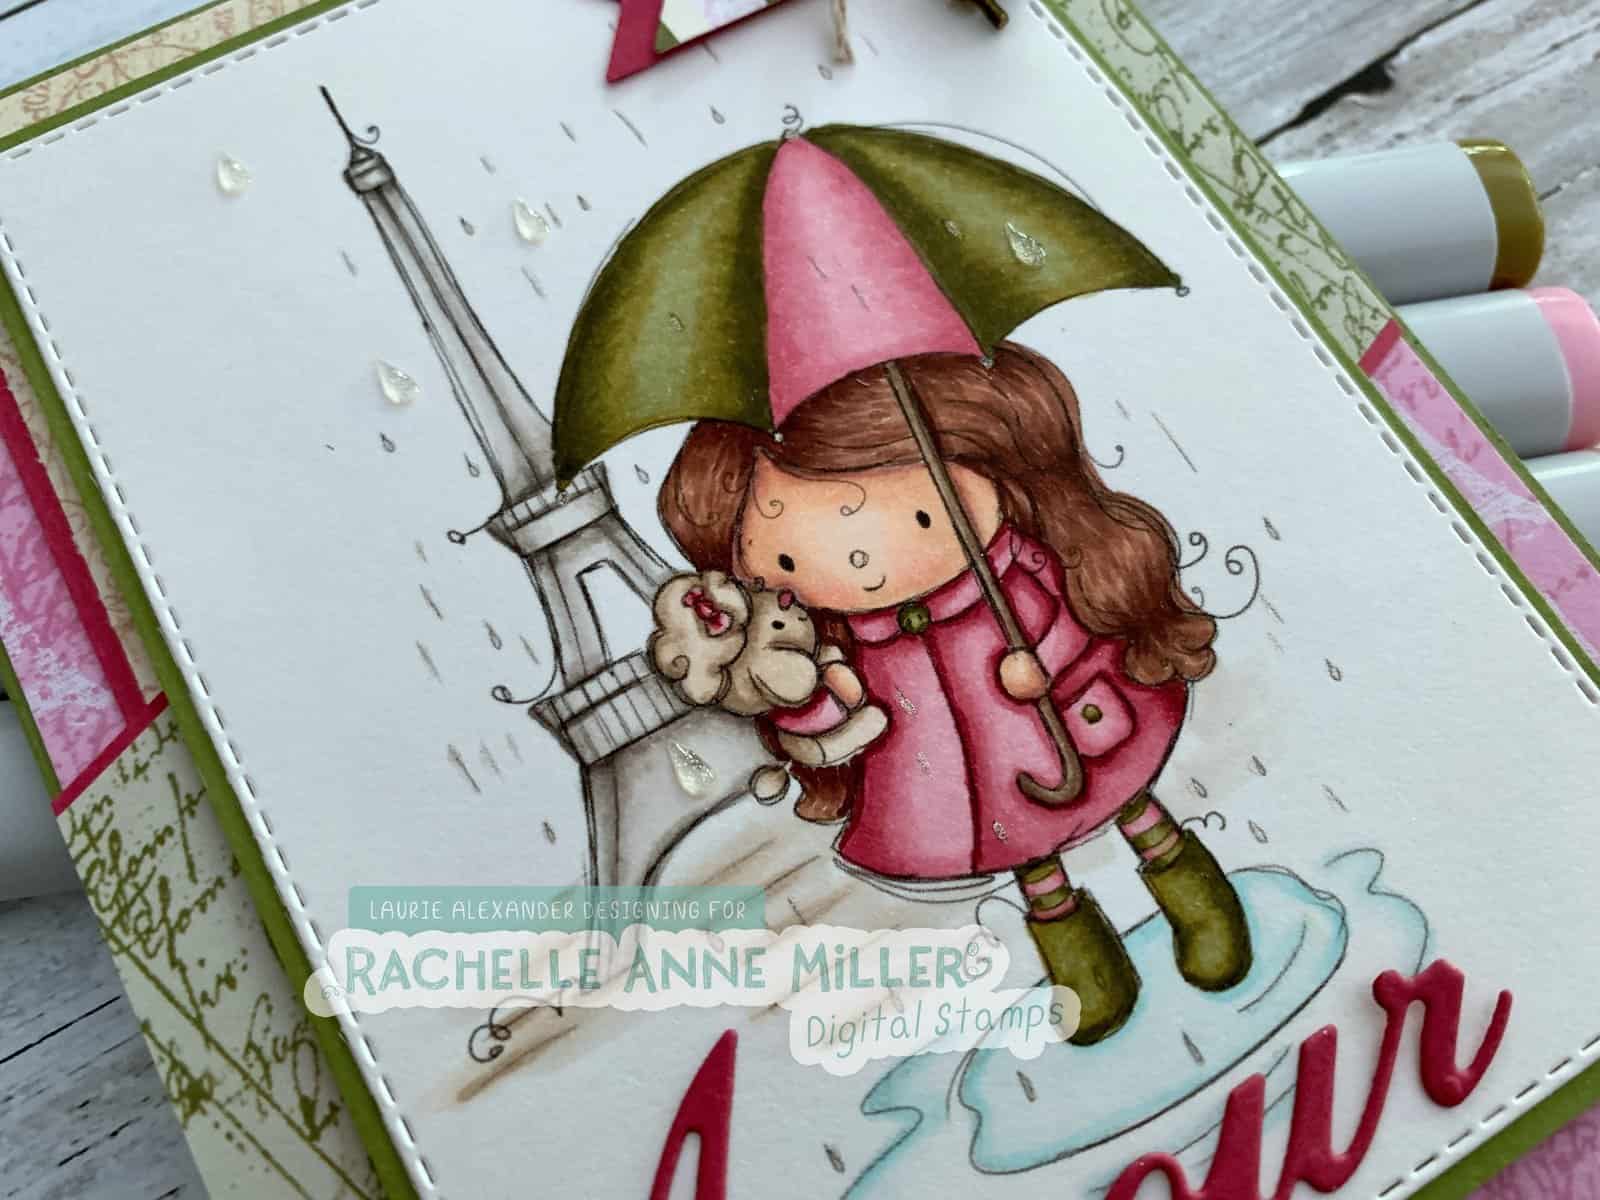
Hello Crafty Friends! It’s Laurie here sharing my last Design Team card for Rachelle Anne Miller Creative Studios. I have decided to step down from the Design Team to spend more time with my family. For my I Love Paris Card, I decide to use my favourite RAM stamp called ‘Paris’ Digital Stamp. Nothing is more beautiful than Paris any time of the year, even when it’s raining! We love to visit Paris as much as possible and have been there 4 times so far! In fact, my character as a Design Team Member had a little Eiffel Tower on her sweater. Isn’t she a cutie!
Laurie’s Design Team Character for Rachelle Anne Miller Creative Studios
For my card, I knew that I wanted to use the Letters From Paris Paper Pack from Wild Rose Studio. So, I coloured with my Copic markers to match the colours of my paper. The Amour word was perfect since Paris is known as the City of Love! Don’t you just love the Eiffel Tower charm with the linen thread tied in a bow to the flag! I used clear epoxy raindrops interspersed between the raindrop that sparkle from my Gelly Roll Pen because even the rain in Paris is magical!
‘Paris’ Digital Stamp, Rachelle Anne Miller Creative Paper Basics – Stamper’s Select White Cardstock, Papertrey Ink Letter from Paris 6” x 6” Paper Pack, Wild Rose Studios Stitched Rectangle Dies, Stampin’ Up! Parisian Dies, Stampin’ Up! Banners Framelits Dies, Stampin’ Up! Linen Thread, Stampin’ Up! L’Amour Eiffel Tower Charms, Maya Road Glitter and Clear Epoxy Shapes, Stampin’ Up! Clear Star Gelly Roll Pen Old Olive and Rose Red Card Stock, Stampin’ Up!
Finished card size: 5.5” x 4.25”
————————–
To view my other Rachelle Anne Miller Creative Studios cards, please click here.
Hope you like my I Love Paris Card using ‘Paris’ Digital Stamp! Thank you for stopping by!
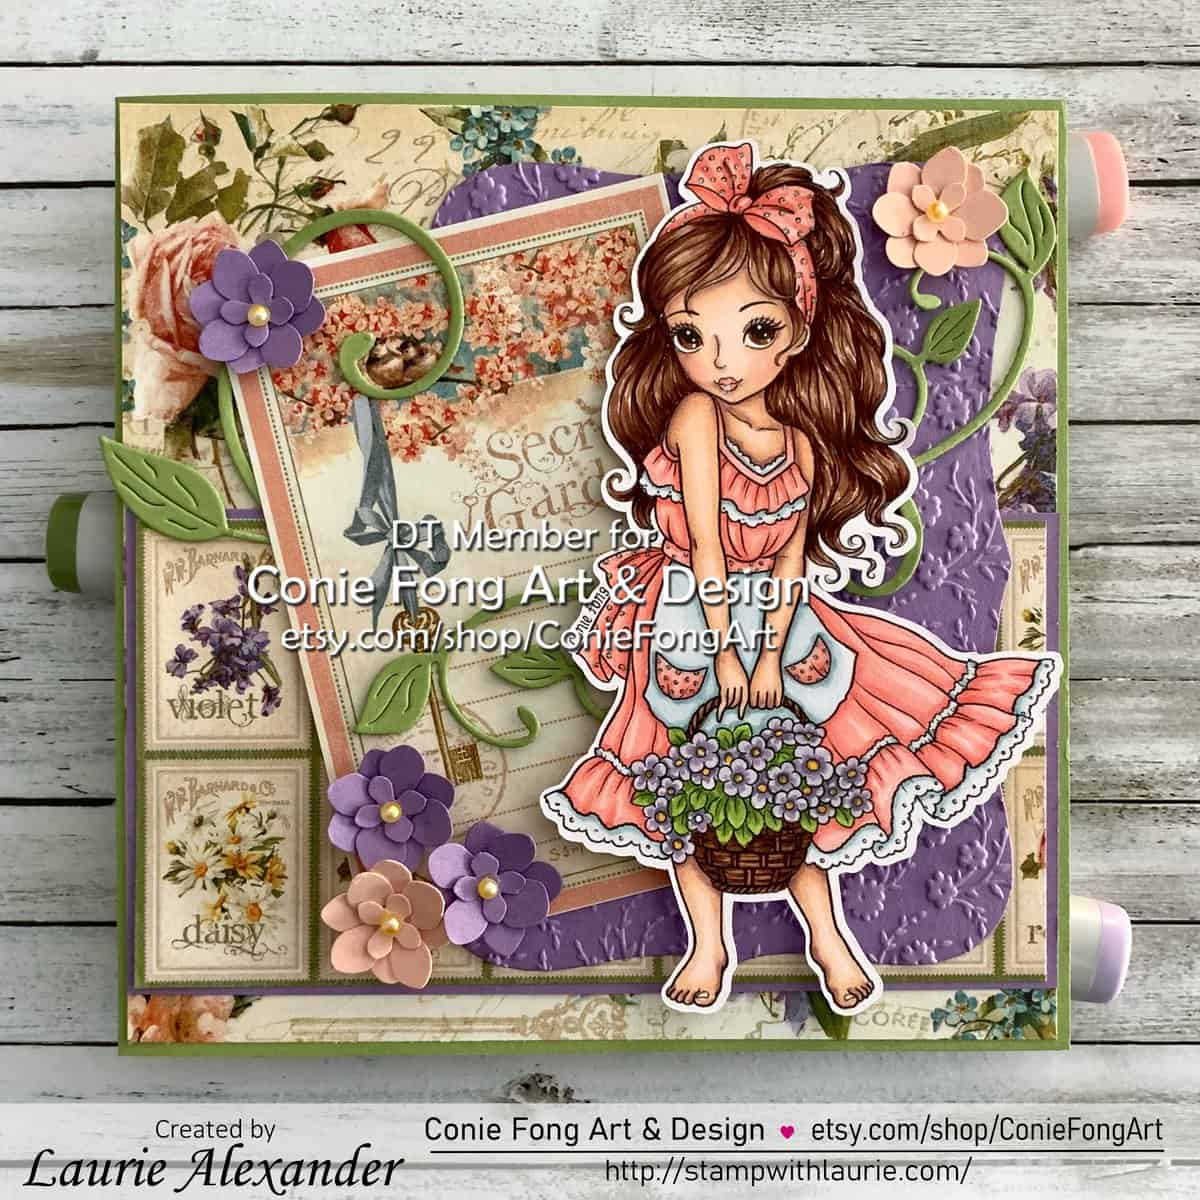
Hello Crafty Friends! It’s Laurie here! I am sharing my Secret Garden Card as my Design Team Card for Conie Fong Art & Design. This pretty digital stamp is calledSweet Annabelle. She is perfect for Mother’s Day, a birthday, thinking of you and so many other card occasions!
I love the Secret Garden Paper that I have in my stash and have been keeping it for a special card. So, I decided to use it for my card and coloured Annabelle with my Copic Markers in softs pinks, blues and purples to match. I added Clear Star Gelly Roll Pen to the dots on her apron and on her hair bow for a little bit of sparkle.
For the card base, I embossed a die cut piece of Highland Heather with the Ornate Floral 3D Embossing Folder to give Annabelle a subtle floral backdrop. From that I layered the leaves so that they are wrapped around the tag that came with the paper pad. A few hydrangeas made with a punch tie in the colours of my colouring. For the pearl flower centres, I coloured them with my Y17 Copic markers to match the flowers in her basket.
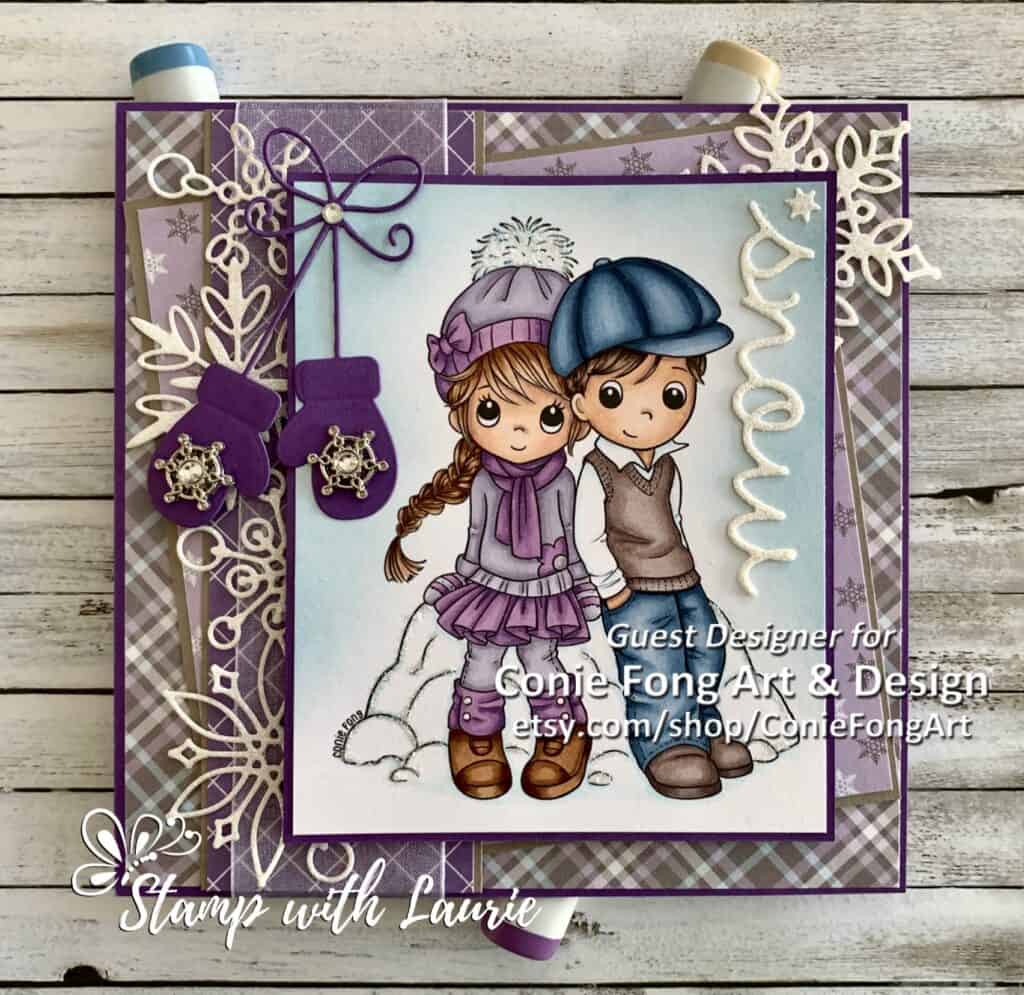
Hello Crafty Friends! It’s Laurie here! I am sharing My Winter Sweethearts Card as my last Guest Design Team Card for Conie Fong Art & Design. I am so excited that I have been asked to become a permanent Design Team Member with them starting in March! Yippee!
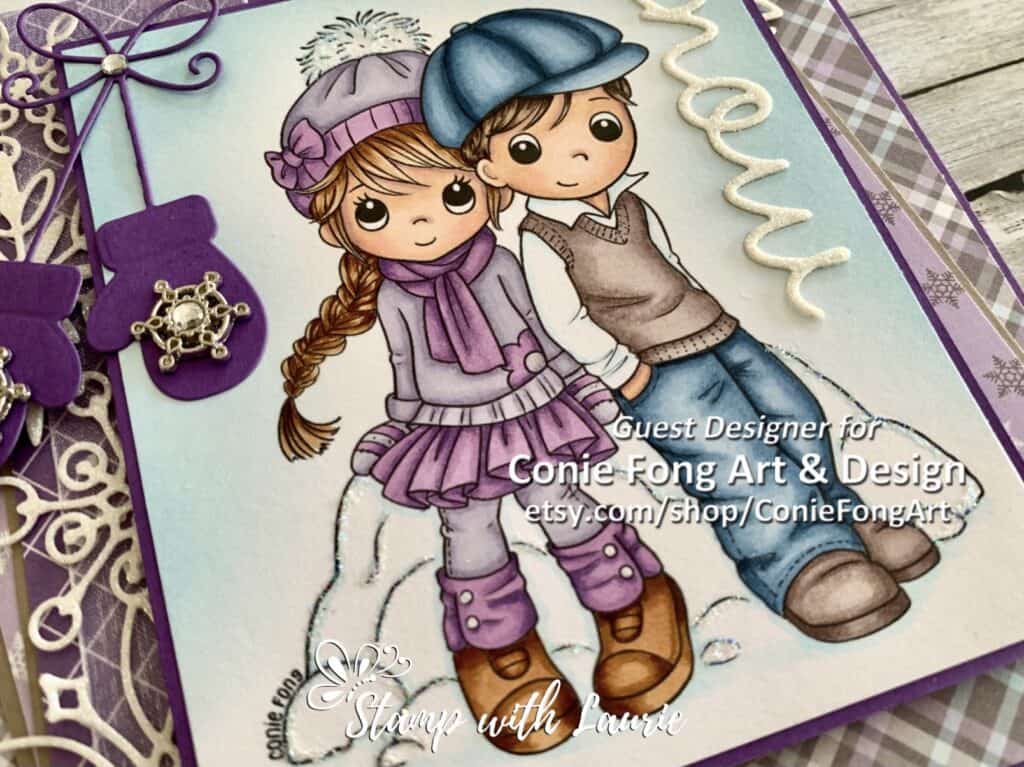
For my card, I used Winter Sweethearts and coloured them with my Copic markers to match my paper in purples and taupes. I coloured the girl in purples since it is one of my favourite colours. I coloured the boy with matching hat/jeans and boots/sweater since my hubby is all about matchy-matchy! LOL! Wouldn’t they make a great Valentine, Anniversary, Christmas, anything love card, but I made them my winter sweethearts!
————————–
Copic Markers:
Girl Skin: E000/E00/E21/E11/E04/R20 Hair: E39/E35/E34/E33/E31 Sweater/Leggings/Scarf: V20/V22/V25/ Clear Gelly Roll Pen on Flower Centre Dress/Leg Warmers: V12/V15/V17 Hat: V20/V22/V25/ V12/V15/V17/B000/0/Star Dust Stickles on Pompom Boots: E37/E35/E33/White Gelly Roll Pen on Buttons
Hello Crafty Friends! Happy Valentine’s Day! It’s Laurie here! I am so excited to be joining Conie Fong Art & Design as a Guest Design Team Member again for February with my My Penguin Love Valentine Card! For my February GDT card, I am using 2 different stamps. The top penguin is calledPenguin Heartstrings bottom penguin is called Penguin Bundle of Love. Aren’t they just the cutest!
Close Up of Penguin Heartstrings
I coloured both of these stamps with my Copic markers in the traditional Valentine colours of pink and red. I then, decided that I wanted both of them on the same card. So, I went with a slimline card with lots of hearts for Valentine’s Day! For the sentiment, I used markers to colour just the part of the stamp that I wanted and then “huffed” (technical term lol) on it to activate the ink. For a bit of sparkle, I added glossy accents to the penguins’ beaks, feet and the heart that the Penguin Bundle of Love is holding. I also added Star Dust Stickles to the heartstrings of the other penguin. One final touch is a scattering of Red Rhinestones.
Penguin Heartstrings and Penguin Bundle of Love, Conie Fong Art & Design Paper Basics – Stamper’s Select White Cardstock, Papertrey Ink Candy Conversations, Stampin’ Up! From My Heart Designer Series Paper, Stampin’ Up! Be Mine Stitched Dies, Stampin’ Up! Large Slimline with Sliders Dies, Lawn Fawn Two of Hearts Dies, Cheery Lynn Designs Project Life Cards and Labels Framelits Dies, Stampin’ Up! Real Red Stampin’ Write Marker, Stampin’ Up! Tuxedo Black Memento Marker, Tsukineko Red Rhinestone Basic Jewels, Stampin’ Up! Glossy Accents, Ranger Star Dust Stickles, Ranger Real Red, Rose Red and Whisper White Card Stock, Stampin’ Up!
Finished card size: 3.5” x 8.5”
————————–
To view my other Conie Fong Art & Design cards, please click here.
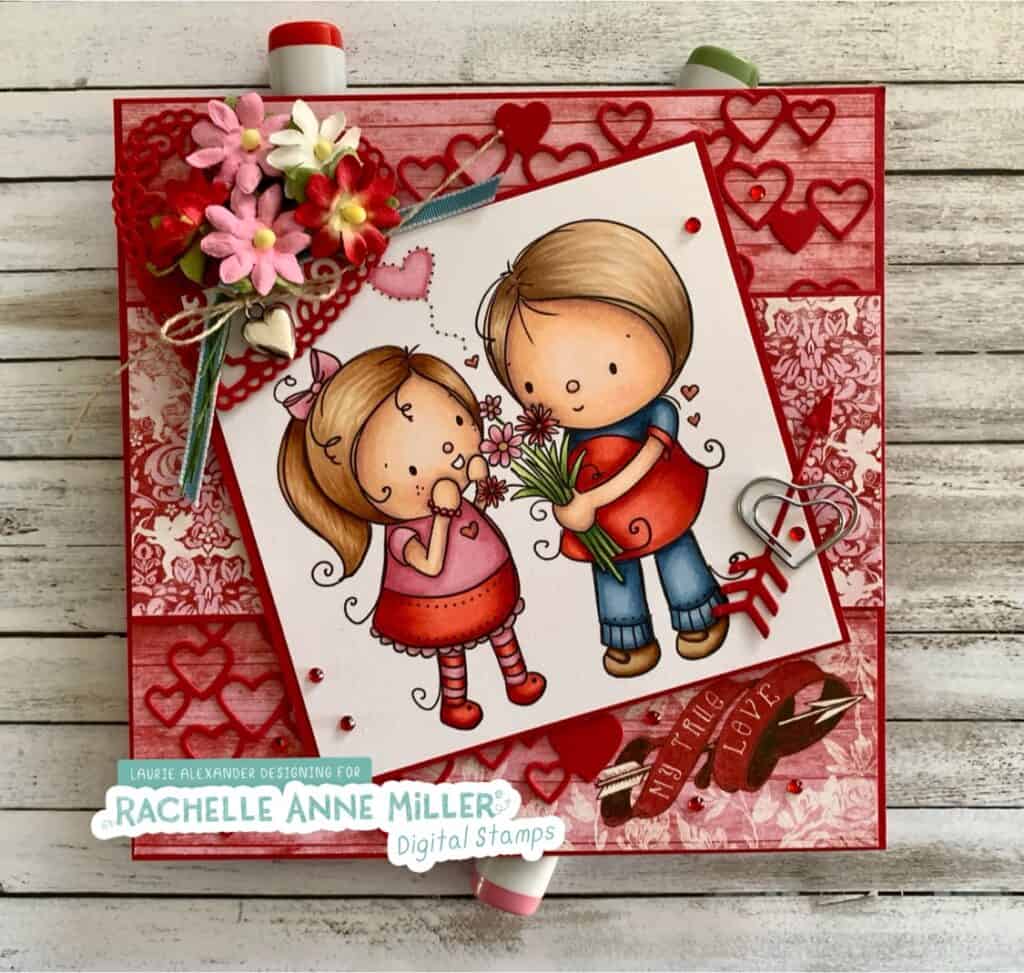
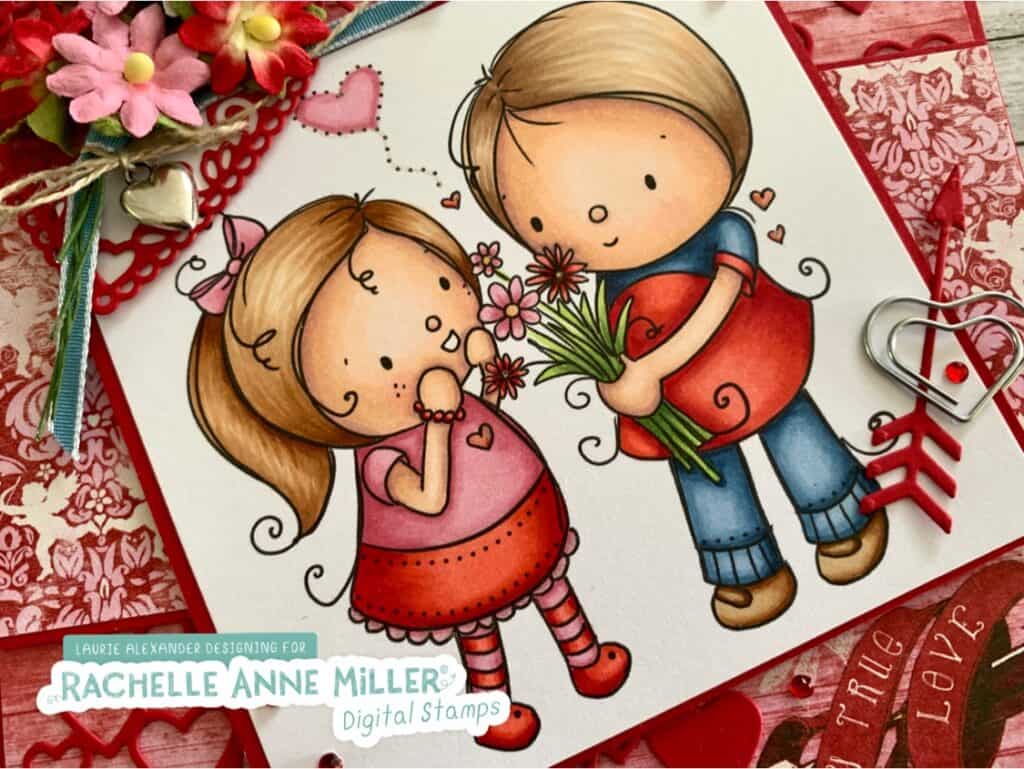
Hello Crafty Friends! It’s Laurie here with My True Love Card for Rachelle Anne Miller Creative Studios using the sweet ‘Flowers for You’ Digital Stamp. This stamp is perfect for that special someone on Valentine’s Day!
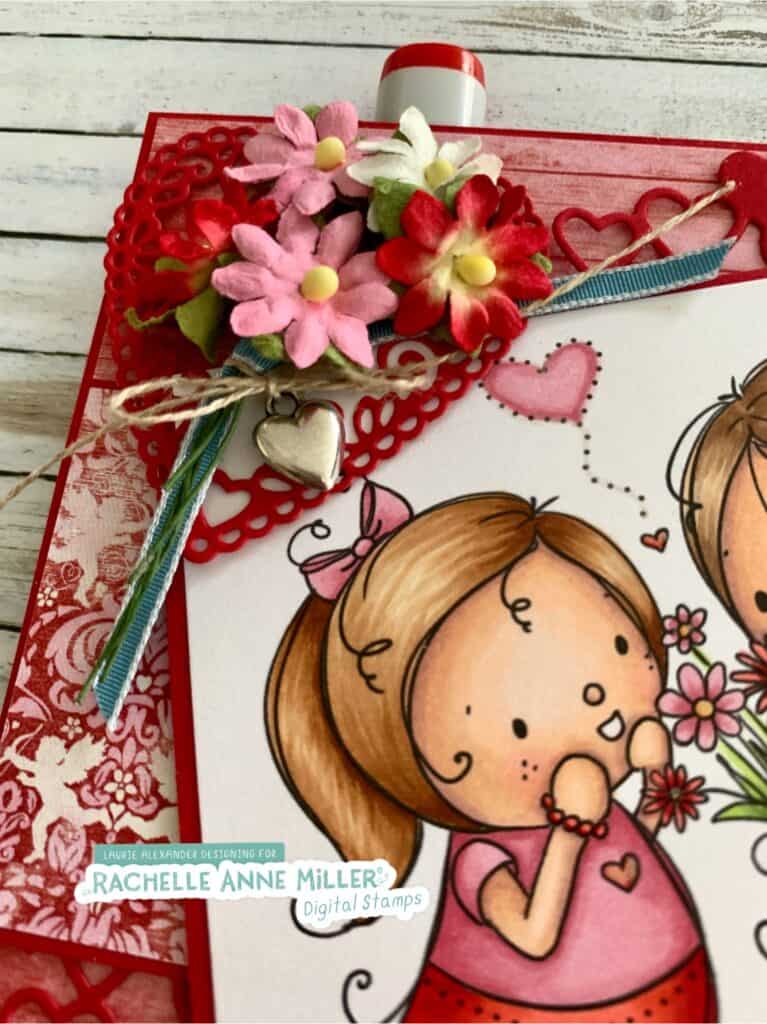
I love it when I receive flowers from my Hubby and this stamp reminds me of those wonderful moments! So, I coloured with my Copic Markers the couple to look like us. I created a bouquet that mimics the bouquet that the boy is giving the girl, but I added some ribbon, linen thread and a heart trinket all mounted on a filigree die cut heart. For the Detailed Hearts Die cut, I cut it in half and then offset it in opposite corners. A heart paper clip and red rhinestones along with Clear Gelly Roll Pen on the hearts and Clear Wink of Stella on the large heart add a bit of sparkle and whimsy. I angled my coloured focal point so that you could see the paper beneath that says My True Love. That is what my card is all about.
‘Flowers for You’ Digital Stamp, Rachelle Anne Miller Creative Paper Basics – Stamper’s Select White Cardstock, Papertrey Ink Smitten 6” x 6” Paper Pad, Authentique Detailed Hearts Die, Stampin’ Up! Be Mine Stitched Dies, Stampin’ Up! Love Notes Framelits Dies, Stampin’ Up! Linen Thread, Stampin’ Up! Marina Mist Taffeta Ribbon, Stampin’ Up! Paper Flowers, Recollections Heart Trinkets Embellishments, Stampin’ Up! Heart Clip Embellishment, Stampin’ Up! Red Rhinestone Basic Jewels, Stampin’ Up! Clear Gelly Roll Pen Clear Wink of Stella, Stampin’ Up! Real Red and Rose Red Card Stock, Stampin’ Up!
Finished card size: 6” x 6”
Close Up of the Paper Flower Bouquet
————————–
To view my other Rachelle Anne Miller Creative Studios cards, please click here.
My Guest Design Team Card for Conie Fong Art & Design
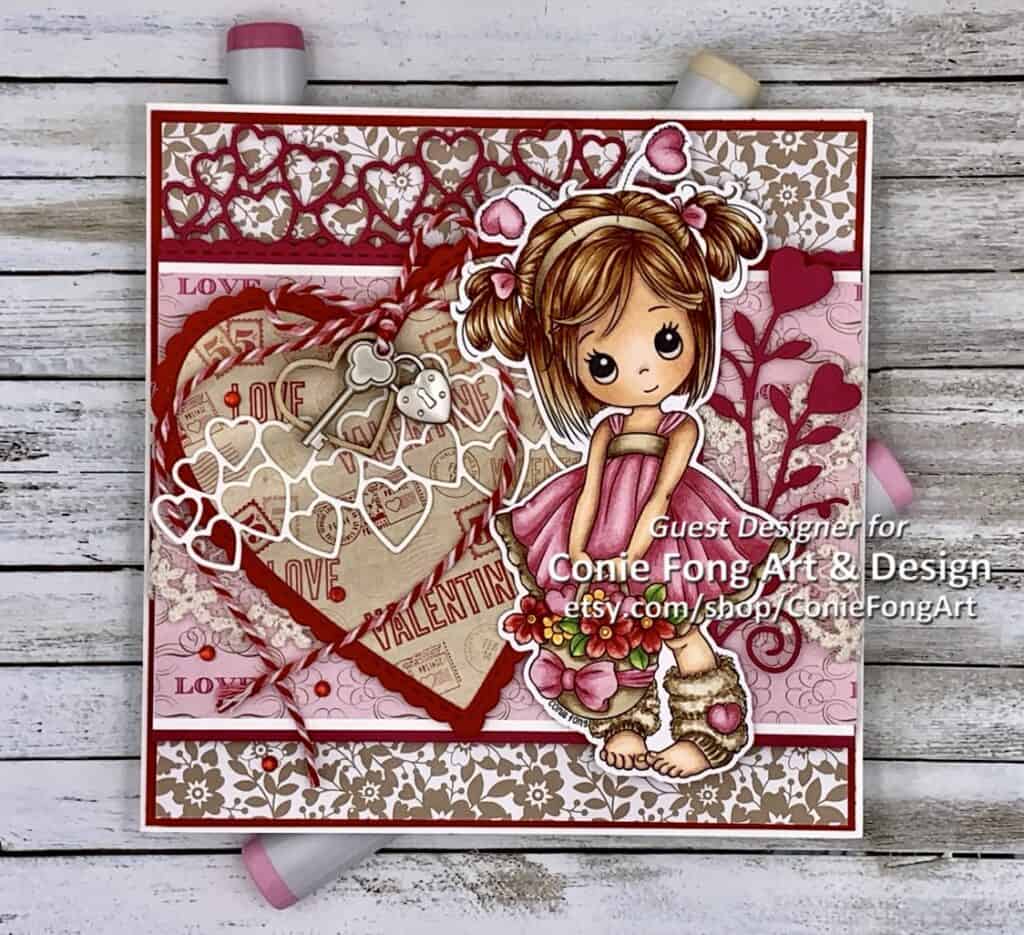
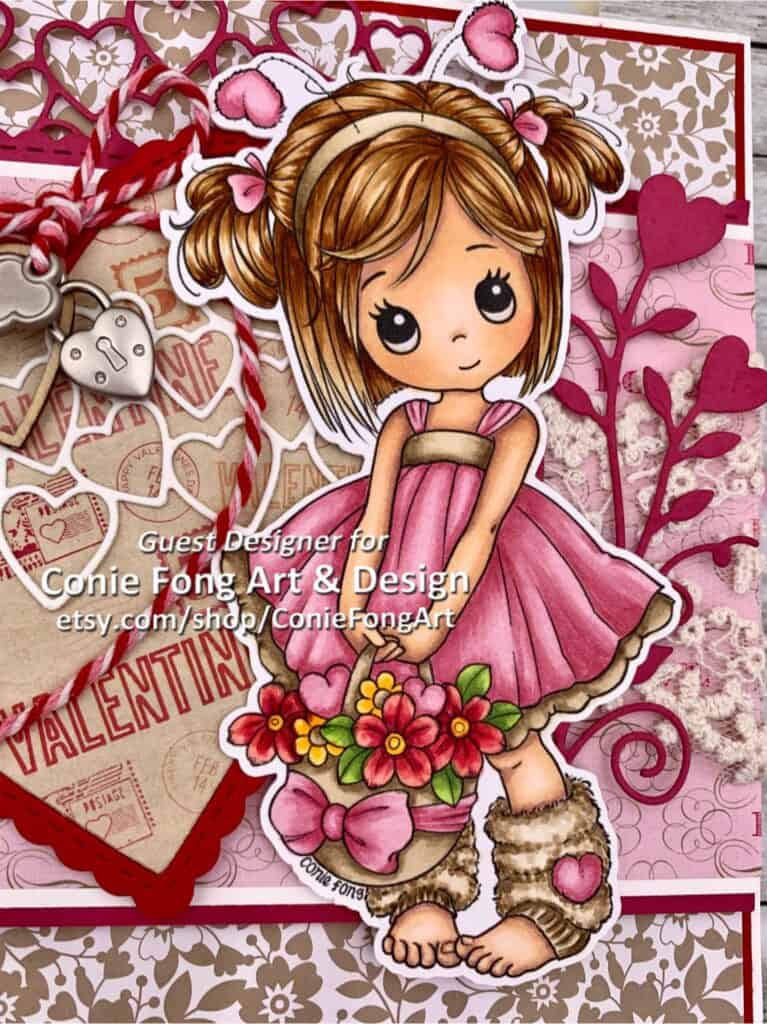
Hello Crafty Friends! It’s Laurie here! I am so excited to be joining Conie Fong Art & Design as a Guest Design Team Member again for January! For my first GDT card for January, I created Molly’s Valentine Card using Molly’s Basket of Love – with headband. This stamp comes in a set of three digital stamps including Molly’s Basket of Love and Molly Fairy.
I have been wanting to colour this sweet image for a while and thought that with Valentine’s Day next month, she would be perfect! Since she is a Valentine card, I coloured her with my Copic markers in pinks, reds and browns to match my paper. I pulled out my Be Mine Stitched Dies for the large heart and the cluster of smaller ones. For embellishments, I went into my stash of Stampin’ Up! trinkets for the key and heart lock and tied them with red/pink/white twine to a wooden heart. The twine ends were shaped into a heart since you can never have too many hearts on a Valentine card! I just love the ribbon with its soft curves and lacey details. A scattering of red rhinestones and Clear Wink of Stella on all of Molly’s hearts and the bow on her basket, add a bit of sparkle.
Close Up of My Guest Design Team Card for Conie Fong Art & Design
————————–
Card Recipe for Molly’s Valentine Card:
Molly’s Basket of Love – with headband, Conie Fong Art & Design Paper Basics – Stamper’s Select White Cardstock, Papertrey Ink 4.75” x 6.75” In Key and Heart Mat Pad, Martha Stewart Holidays Love Blossoms Designer Series Paper, Stampin’ Up! Be Mine Stitched Dies, Stampin’ Up! Love is Growing Die, Penny Black Sending Love Embellishments, Stampin’ Up! Key Trinkets Embellishments, Stampin’ Up! Heart Trinkets Embellishments, Stampin’ Up! Celebrate It Occasions Ribbon, Michaels Red, Pink and White Baker’s Twine Red Rhinestone Basic Jewels, Stampin’ Up! Clear Wink of Stella, Stampin’ Up! Real Red, Rose Red and Whisper White Card Stock, Stampin’ Up!
Finished card size: 5.5” x 5.5”
————————–
To view my other Copic Marker cards, please click here.
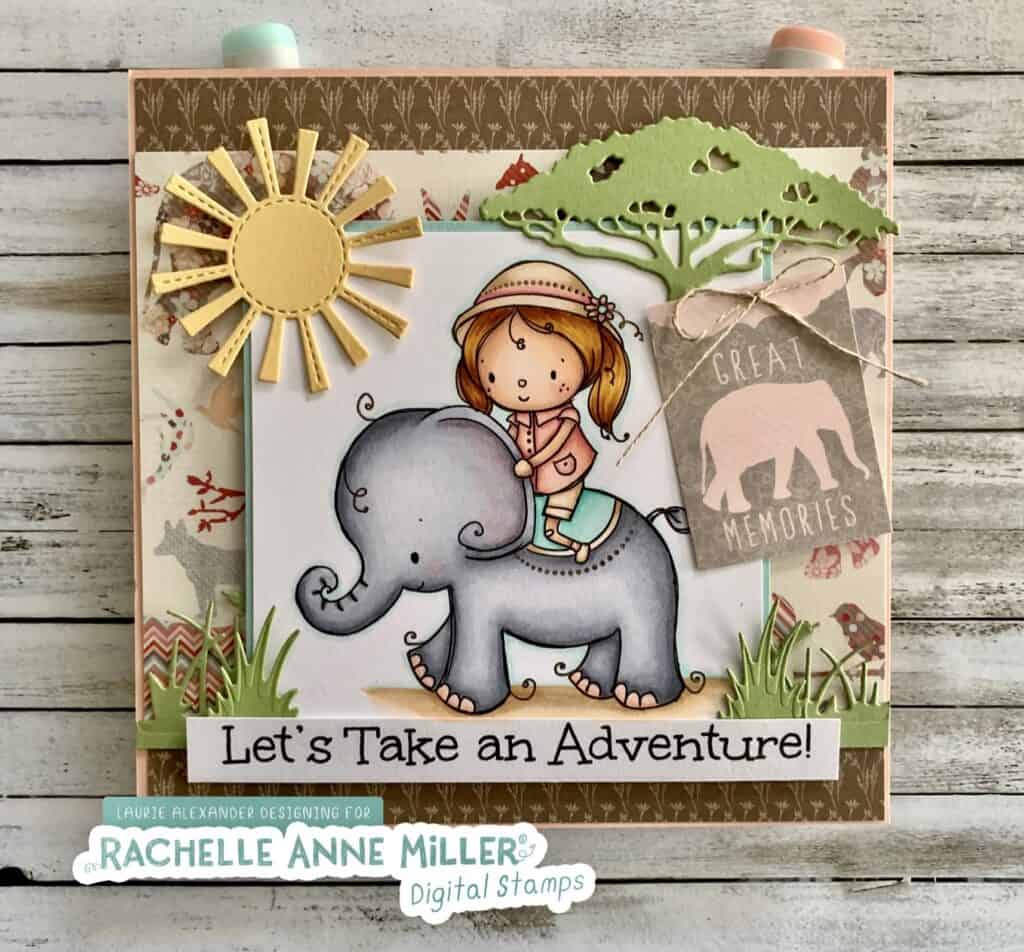
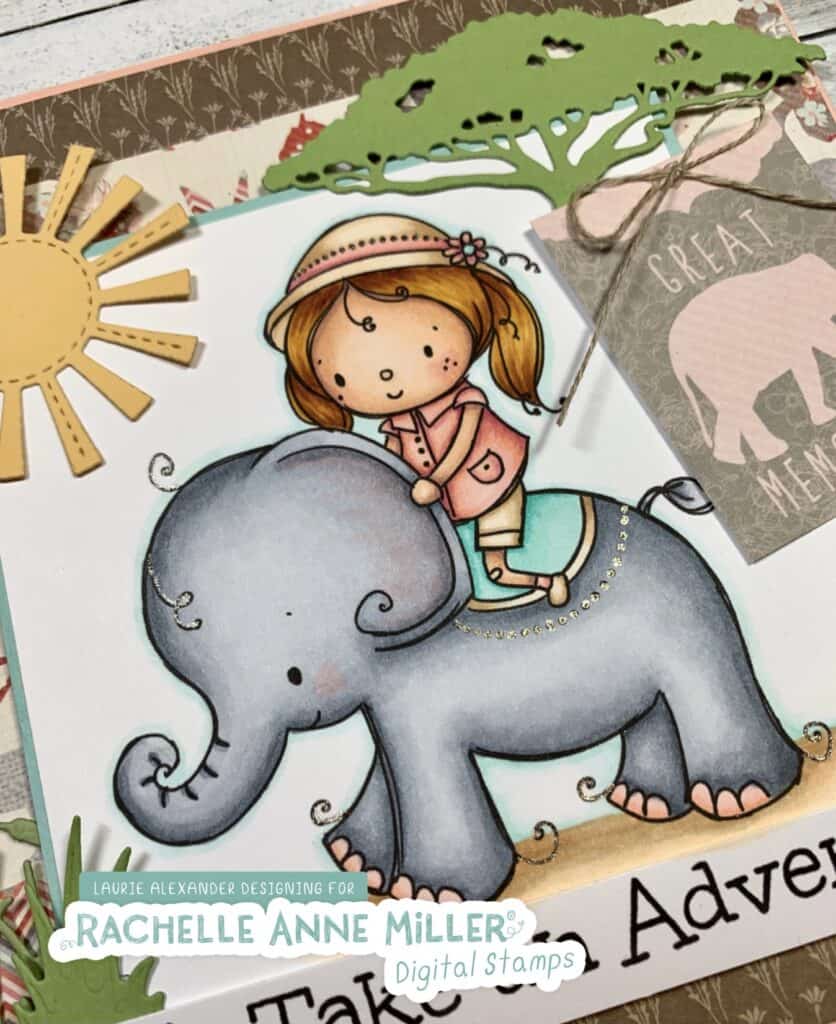
It’s Laurie here with A Grand Adventure Card for Rachelle Anne Miller Creative Studios using her cute Elephant Adventure Digital Stamp. This little girl looks like she is in for the ride of her life and making great memories as she does! One day, I hope to visit Africa and go on Safari with cameras. It’s on my Bucket List!
For my card, it may be hard to see, but the paper has elephants on it along with some other animals like giraffes, birds, hyaenas and more. So I knew I wanted to use that as my base for the card design. Even the Great Memories tag with the elephant came from that paper pack! The iconic Acacia Tree that is behind the tag came from the Safari Collection Dies and was perfect for my African theme!
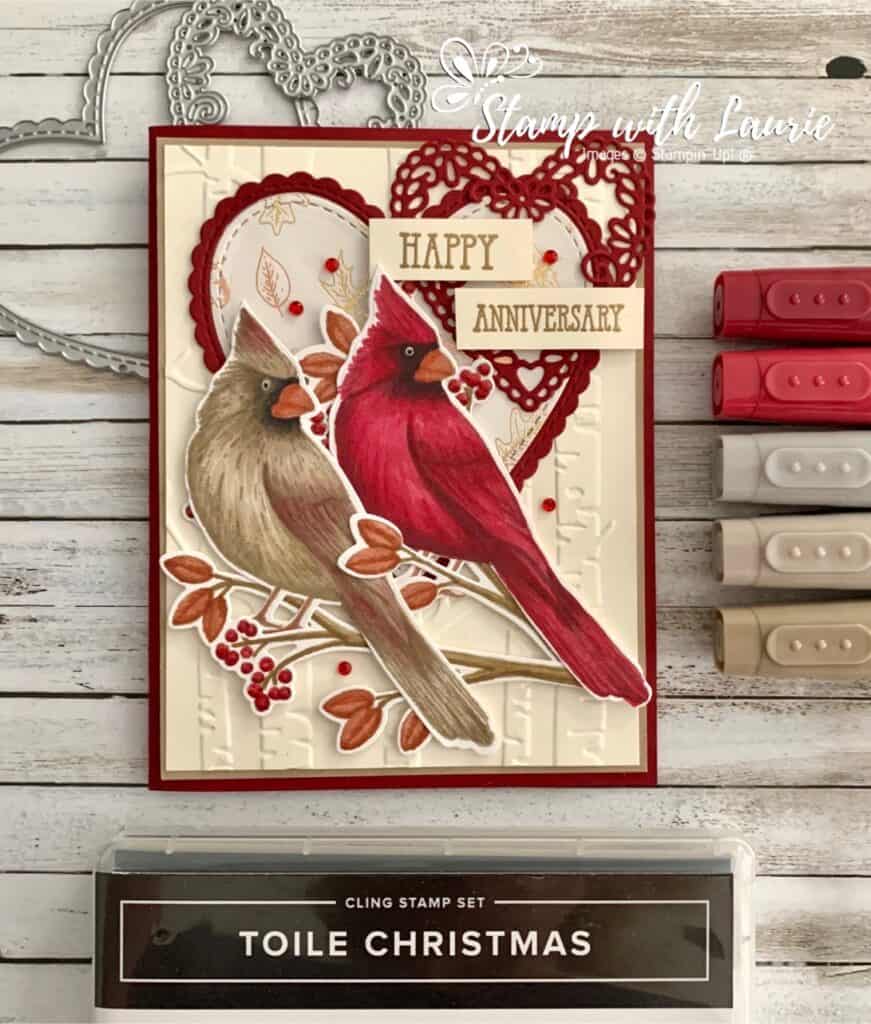
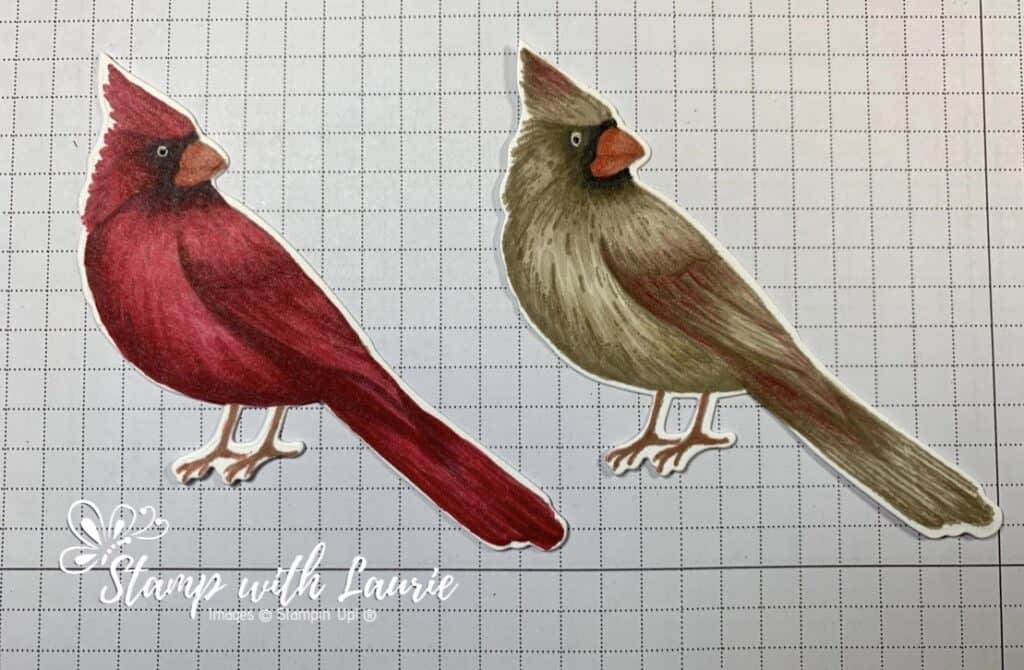
Today I am sharing with you my Cardinal Anniversary Card using the Toile Christmas Stamp Set and matching Christmas Cardinal Dies by Stampin’ Up! I was asked by a good friend to create a custom anniversary card for her to give to her husband. She mentioned that he loves cardinals and she would like one on the card. So, I decided to that two cardinals, a male and female, would be perfect for an anniversary card. Did you know that cardinals mate for life!
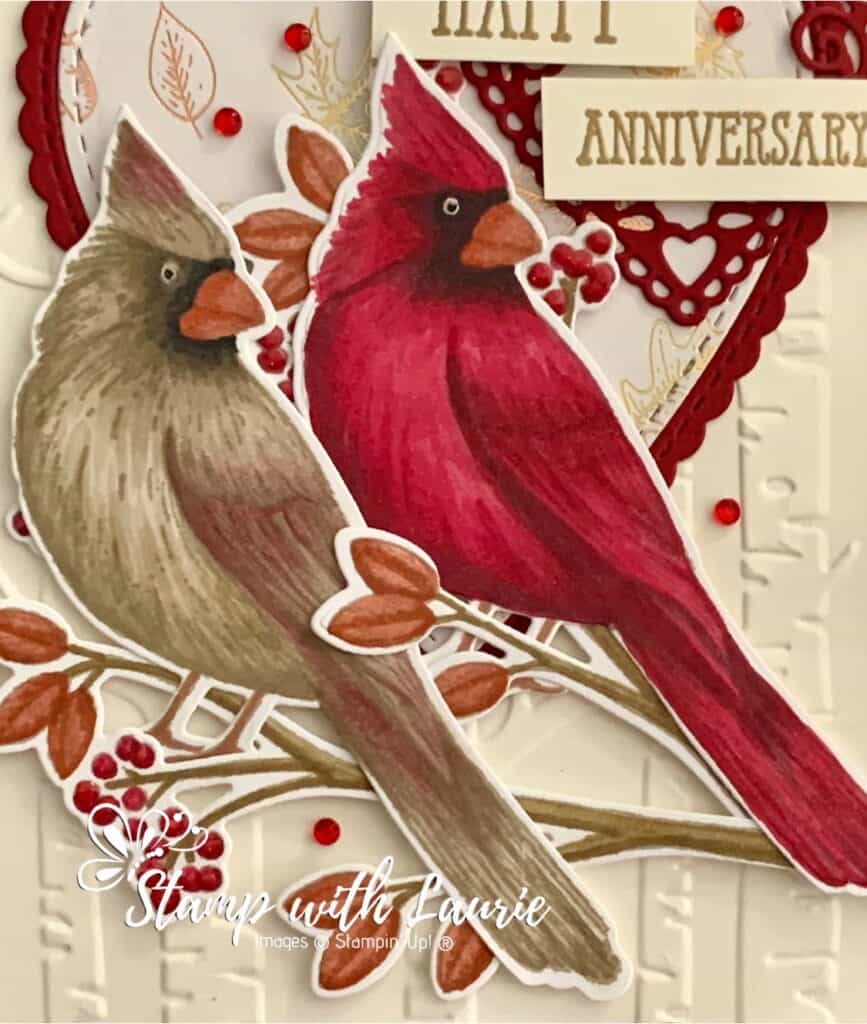
I decided to create a Fall scene with the Woodland Embossing Folder and the Gilded Autumn Specialty Designer Series Paper since they were married in October. I love the copper and gold gilded leaves on the paper! To tie in the gold accents, I embossed the sentiment from the Well Said Stamp Set in gold. For an anniversary card, I had to pull in the hearts with the Stitched Be Mine Dies! Some Red Rhinestone Basic Jewels and Shimmery Crystal Effects on the berries add a bit of sparkle to the card.
I used a number of techniques to colour my birds such as the No-Lines, Flicking and Tip-to-Tip. I included more information below, as well as some colouring videos at the end of this post.
For the male cardinal, I used Cherry Cobbler Light/Dark Blends and the Dark Smokey Slate Blend to darken the shadows in strategic locations, such as his tail, his breast and wing, giving the bird depth. For the female cardinal, I used Crumb Cake Light/Dark Blends and Light Crumb Cake/Dark Cherry Cobbler Blends.
My Cardinals Coloured with Stampin’ Blends
No-Lines Technique
I coloured these beautiful cardinals with the no-lines technique. This technique uses a light colour to stamp the image. For the cardinals, I used the Sahara Sand Classic Stampin’ Pad. The lighter colour gives you a guideline for your colouring without the harsh black lines and makes the image more real and vibrant.
Flicking Technique
Once stamped, I used a flicking technique with my Blends to create a lot of texture. This technique is achieved by applying ink in quick, single strokes. The key to this inking technique is to flick the marker tip across the page to create a single stroke that goes from dark to light.
Holding the marker loosely, start a downward movement towards the paper
As the marker tip touches the paper, quickly move across the paper, bringing your hand up and away from the paper. This will apply more ink at the beginning of the stroke and less at the end.
You may need to turn the paper to accommodate the angle that is most comfortable for you.
Flicks can be left unblended to create texture such as for hair or feathers (like this card). Or, they can be blended out to create smooth shading.
The Tip-to-Tip Technique
To combine two different coloured blends on the female cardinal, I used the Tip to Tip Blending Technique. This gives you a smooth transition of colors and doesn’t end up looking all blotchy where the colors meet. I’ve chosen the Light Crumb Cake Blend and the Dark Cherry Cobbler Blend for the female cardinal.
Brush the tip of the Light Crumb Cake Blend over the tip of the Dark Cherry Cobbler Blend to pick up some color. The Crumb Cake Blend then acts as your brush to apply a mix of both colors.
As you apply the Crumb Cake Blend, the Cherry Cobbler will eventually run out and only Crumb Cake is left. This creates a smooth transition between the two colours. I kept working these blends together until I was happy with the amount of Cherry Cobber I had on the bird.
Don’t worry about your markers being contaminated—all you need to do is run them over some scrap paper a few times and the nibs will clean themselves.
Close Up of my Cardinal Anniversary Card
Supplies:
Stamps: Toile Christmas Cling Stamp Set (150469), Well Said Stamp Set (148796)
Dies: Christmas Cardinal Dies (150640), Stitched Be Mine Dies (151814)
Inks: Tuxedo Black Memento Ink Pad (132708), Sahara Sand Classic Stampin’ Pad (147117), VersaMark (102283)
Paper: Cherry Cobbler (119685), Crumb Cake (120953), Very Vanilla (101650), Whisper White (100730), Gilded Autumn Specialty Designer Series Paper (153520)
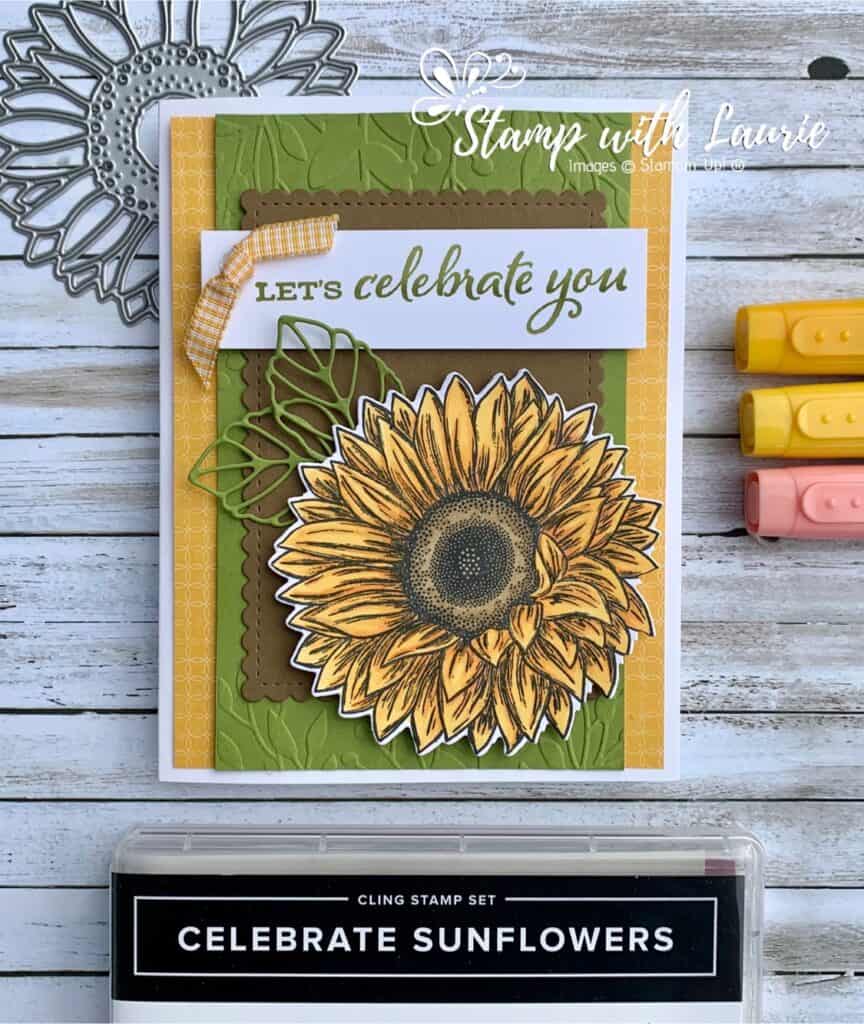
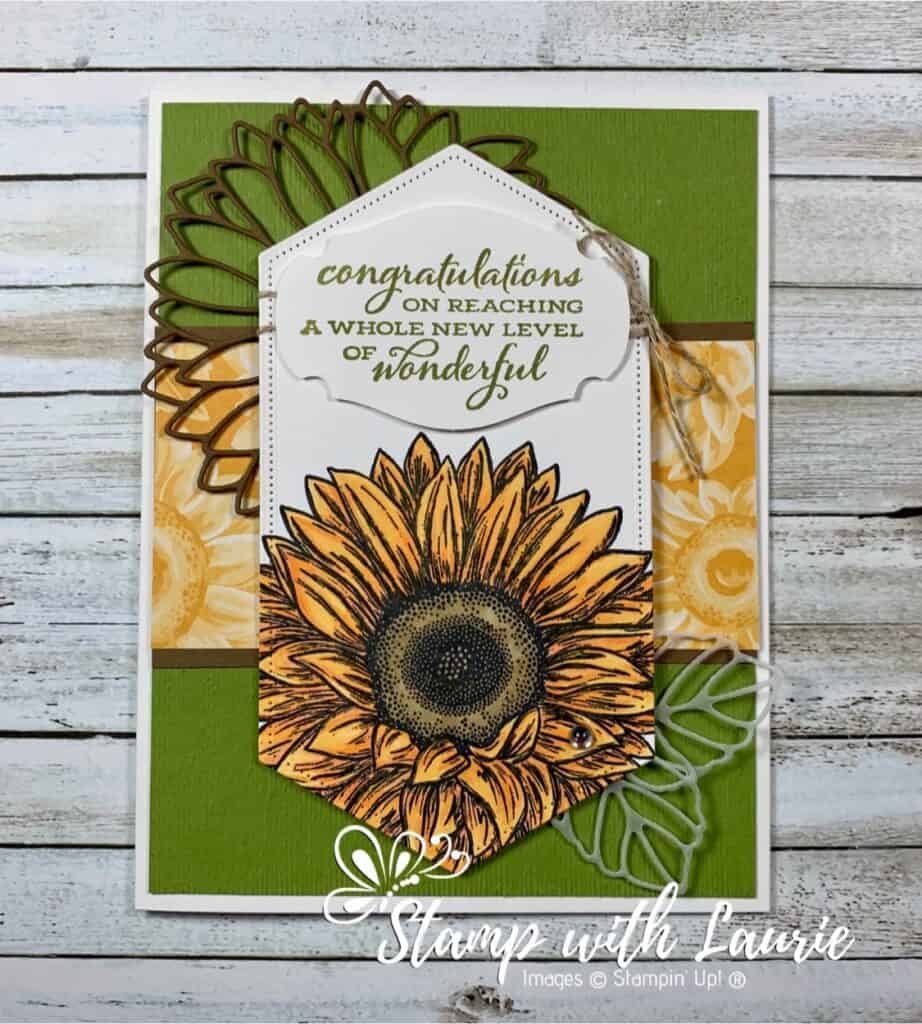
For Technique Tuesday, I am sharing my Let’s Celebrate You Card that is demonstrated in my last colouring video from my presentation to fellow demonstrators. I love this big bold sunflower image with the matching dies from the Celebrate Sunflowers Bundle! I created another card using this set in an earlier post and used the same technique. Just in case you wanted to check it out, I added a link to it at the end of this post.
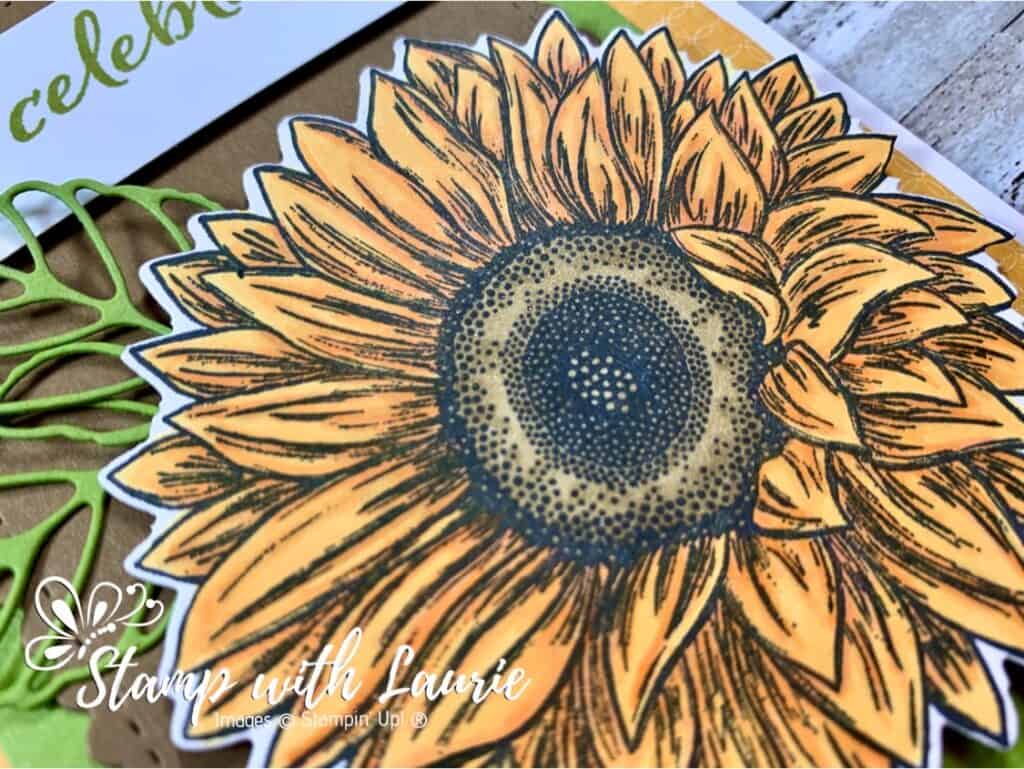
This advanced colouring technique uses 3 colours to creates more dimension and texture to what you are colouring. For the sunflower, I used three markers, Mango Melody Light and Dark and Calypso Coral Light, for the petals. I used the Calypso Coral in the darkest of shadows that are indicated by the artist drawn lines. For the flower centre, I use Soft Suede Light and Dark, but for the Dark Suede, I dotted the marker to create texture that the artist has indicated with their dots. In this video, I demonstrate this colouring technique:
My Video Demonstrating the Flicking of Different Colours Technique
Inks: Tuxedo Black Memento Ink Pad (132708), Old Olive Classic Stampin’ Pad (147090)
Paper: Whisper White Thick (140272 ), Old Olive (100702), Soft Suede (115318), Whisper White (100730), Flowers For Every Season 6″ X 6″ Designer Series Paper (152486)
Accessories: Stitched So Sweetly Dies (151690), Greenery Embossing Folders (152716), Bumblebee ¼” Gingham Ribbon (153658), Mango Melody Stampin’ Blends Combo Pack (154888), Calypso Coral Stampin’ Blends Combo Pack (154881), Old Olive Stampin’ Blends Combo Pack (154892), Soft Suede Stampin’ Blends Combo Pack (154906), Stampin’ Blends Color Lifter (144608 ), Paper Snips (103579), Bone Folder (102300), Mini Glue Dots (103683), Stampin’ Seal (152813), Stampin’ Dimensionals (104430)
Measurements:
Whisper White Thick: 8 ½” x 5 ½”; scored at 4 ¼”
Old Olive – 3 pieces:
3 ¼” x 5 ¼”
Scraps for leaves
Soft Suede: 4 ¼” x 3”
Whisper White – 3 pieces:
1” x 3 ½” (sentiment)
3 ½” x 3 ½” (sunflower)
Flowers For Every Season Designer Series Paper: 5 ¼” x ¾”
Bumblebee Gingham Ribbon: 4”
Close Up of My Let’s Celebrate You Card
Instructions for Let’s Celebrate You Card:
Fold the Whisper White Thick card stock in half to create the card base.
Emboss the Old Olive card stock with the leaves from the Greenery Embossing Folders.
Stamp the large sunflower image in Tuxedo Black Memento Ink Pad on the Whisper White piece.
Colour the petals with the Stampin’ Blends listed above using the Flicking of Different Colours Technique that is used in the video
Die cut the sunflower with the corresponding Celebrate Sunflowers Bundle.
Die cut the leaves from the scraps of Old Olive using the Celebrate Sunflowers Bundle.
Stamp with sentiment in Old Olive on the Whisper White piece.
Die cut the Soft Suede with the largest scalloped rectangle from the Stitched So Sweetly Dies.
Using Stampin’ Seal, adhere the Flowers For Every Season DSP on to the card base.
Adhere with Stampin’ Seal, the embossed piece in the centre of the Whisper White card base overlapping the Flowers For Every Season DSP.
Using Stampin’ Seal, adhere the scalloped rectangle in the center of the embossed piece.
Affix the leaves to the back of the sunflower using glue dots.
Using dimensionals, add the sentiment to the card.
Using dimensionals, add the sunflower to the card.
Tie the Bumblebee Gingham Ribbon in a knot and adhere it using a glue dot.
Here is the other card in which I used the same technique:
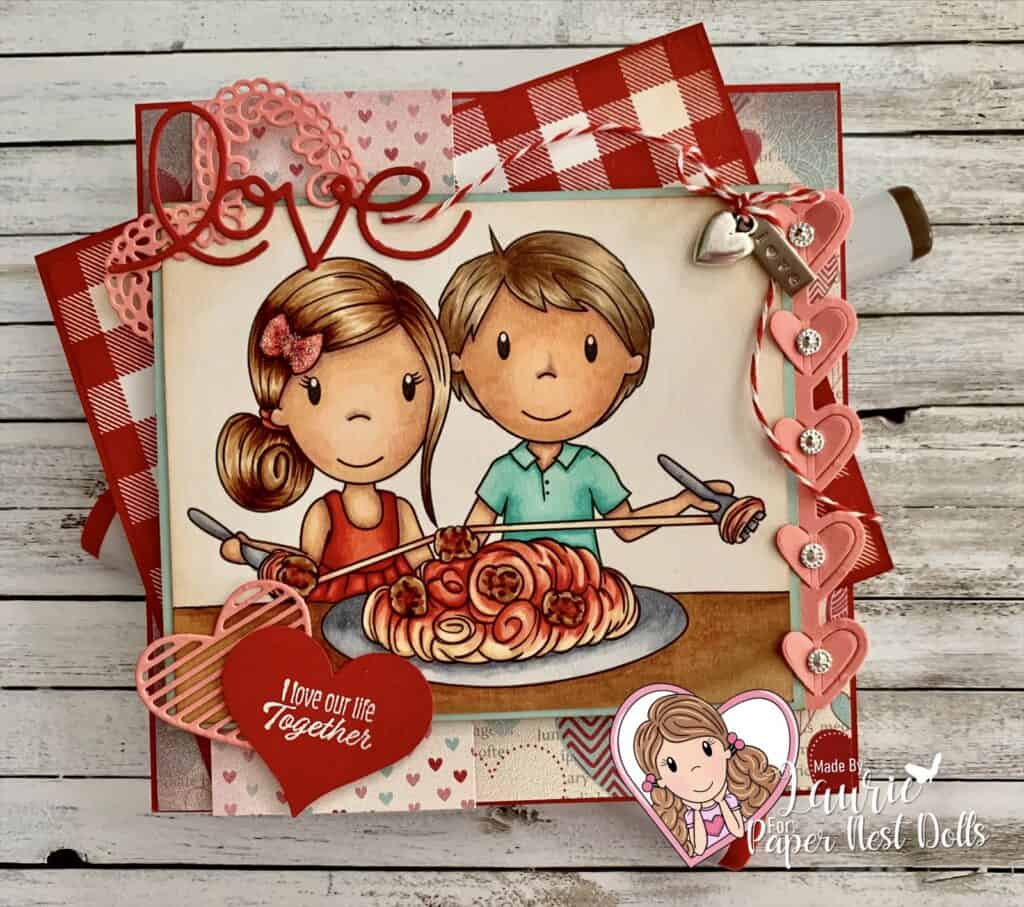
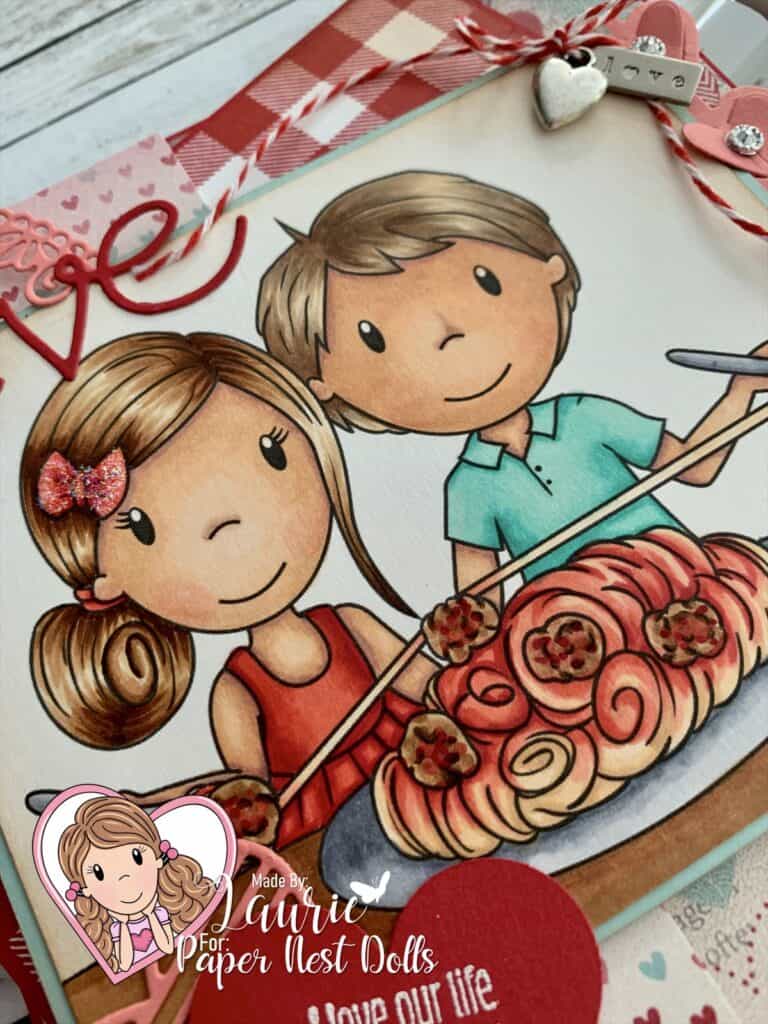
Hello Crafty Friends! It’s Laurie here sharing my That’s Amore Anniversary Card for the Design Team of Paper Nest Dolls. This sweet rubber stamp is called Italian Love. I coloured this cute couple to look like my Hubby and me since this card is for my Hubby and our 26th Wedding Anniversary which is today.
This card is my homage to when we first met and started dating in university. The first time I saw him, he was just back from a vacation in Florida. He was so tanned with his hair bleached from the sun. Hence why he is a little more tanned than me in my colouring. Lol! My hubby’s favourite dinner is spaghetti and meatballs. When we were dating, he would take me to Mother’s Pizza Parlour and Spaghetti House with their plastic red and white checked tablecloths for dinner. He would always order his spaghetti with a garlic bread with cheese. We never split it like the couple here, but that would have been so romantic!
Italian Love, Paper Nest Dolls Sweet Sentiment Premium Coloring Paper Tuxedo Black Memento Ink Pad Real Red Classic Ink Pad, Stampin’ Up! Tim Holtz Vintage Photo Distress Ink Pad, Ranger VersaMark Ink Pad White Stampin’ Emboss Powder, Stampin’ Up! More Amore Specialty Designer Series Paper, Stampin’ Up! Buffalo Check Clear Mount Stamp Set, Stampin’ Up! Meant to Be Cling Stamp Set, Stampin’ Up! Be Mine Stitched Framelits Dies, Stampin’ Up! Love Notes Framelits Dies, Stampin’ Up! Expressions Thinlits Dies, Stampin’ Up! Rhinestone Stickers, Dollorama Trinket Hearts, Stampin’ Up! Red/White Baker’s Twine Clear Star Stickles Stamping Sponges, Stampin’ Up! Real Red, Flirty Flamingo, Pool Party and Whisper White Card Stock, Stampin’ Up! Card Size: 5 ½” x 5 ½”
————————–
To view my other Paper Nest Dolls cards, please click here.
Hope you like my That’s Amore Card using Italian Love by Paper Nest Dolls!
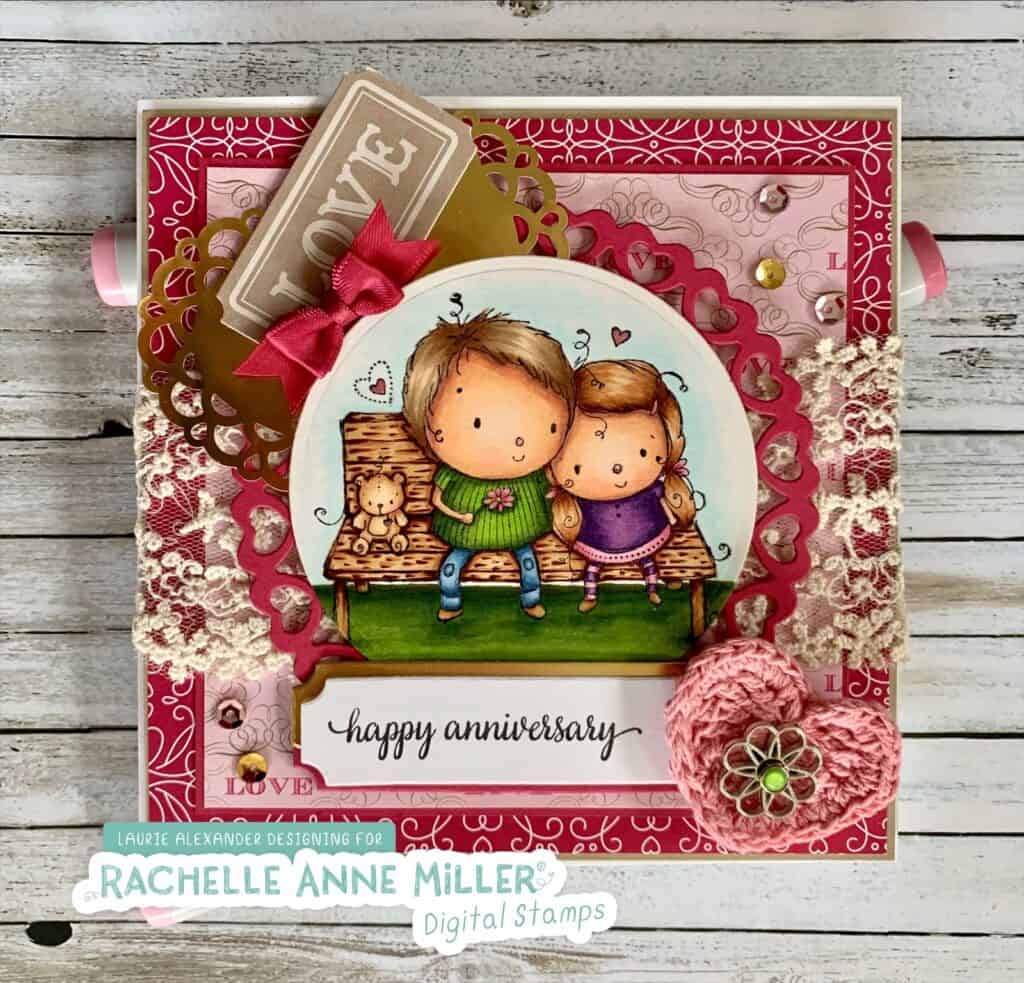
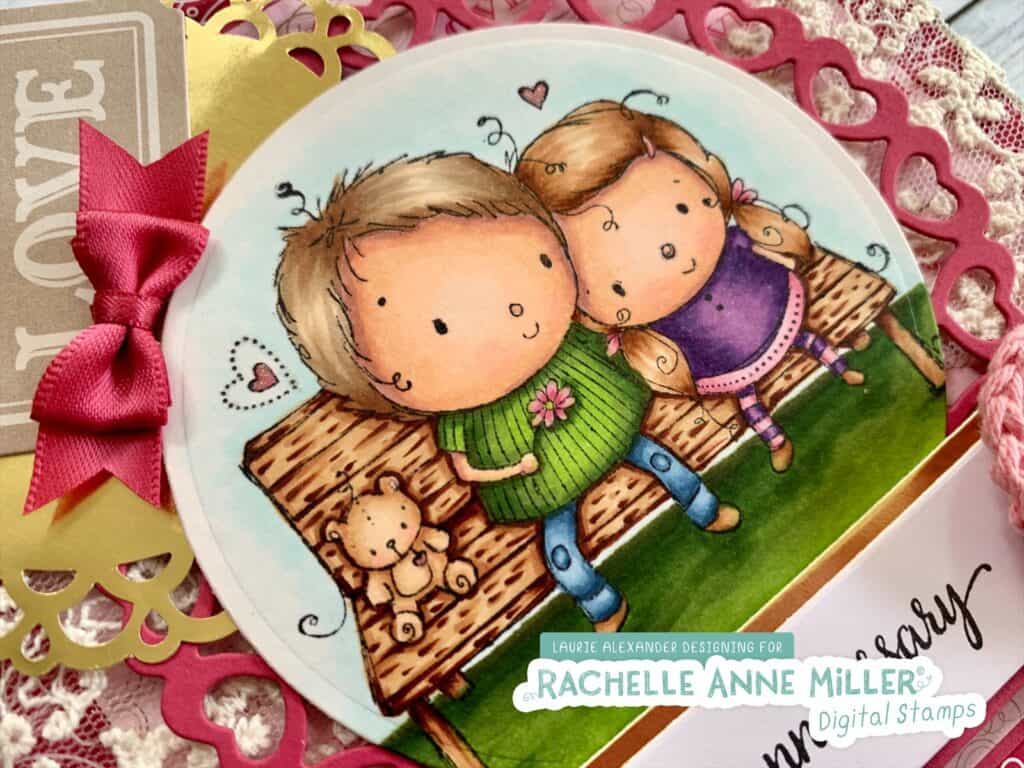
Hello Crafty Friends! It’s Laurie here with my Happy Anniversary Design Team Card for Rachelle Anne Miller Creative Studios. It is also being used for the Using Pattern Paper Challenge over on the Rachelle Anne Miller Digital Stamps Facebook Group. My card is using the ‘Young Love’ Digital Stamp that will be release in the future. On Thursday is our 26th Wedding Anniversary and this is the card that I am giving my hubby!
For my card, I wanted it to be all about our love with lots of hearts! I even coloured the girl and boy in our colours though it has been a long time since I have had long hair! Lol!
I love this sweet stamp so much with the boy giving his girl a Gerbera Daisy (one of my favourite flowers)! And did you see the cutest teddy bear siting on the bench beside the couple! Love that this guy is all about flowers and prezzies like mine is!! A bit of shimmer is added with the gold heart doily, Gold Foil Paper, the sequins and the jeweled brad. I also used two types of ribbon to add a softness to my card. I love the pink crochet heart and I couldn’t resist attaching the floral embellishment with the jewelled brad that mimics the gerbera daisy! Hope you like my card as much as I hope my Hubby likes it!
Card Recipe for My Happy Anniversary Design Team Card:
‘Young Love’ Digital Stamp, Rachelle Anne Miller Creative Studios Sweet Sentiment Premium Coloring Paper So In Love Stamp Set, Stampin’ Up! Heart Circles Dies, Spellbinders Standard Circle Dies, Spellbinders Project Life Cards and Labels Dies, Stampin’ Up! Love Blossoms Designer Series Paper, Stampin’ Up! Martha Stewart Holiday 4” x 6” Mat Pad, EK Success Tuxedo Black Memento Ink Pad Love Blossom Embellishment Kit, Stampin’ Up! (gold heart doily, bow, sequins) Artisan Embellishment Kit, Stampin’ Up! (love ticket) Filigree Brad, Stampin’ Up! Mini Jewel Brad, American Crafts Elements Celebrate It Occasions Ribbon, Michaels Crochet Heart, Craft It Valentine Embellishment, Recollections Gold Foil Paper, Stampin’ Up! Clear Gelly Roll Pen Crumb Cake, Rose Red and Whisper White Card Stock Finished card size: 5 ½” x 5 ½”
————————–
Happy Anniversary to my Hubby! Here’s to many more wonderful years together!
To view my other Rachelle Anne Miller Creative Studios cards, please click here.
Hope you like my Happy Anniversary Design Team Card using ‘Young Love’ Digital Stamp by Rachelle Anne Miller Creative Studios! Thank you for stopping by!
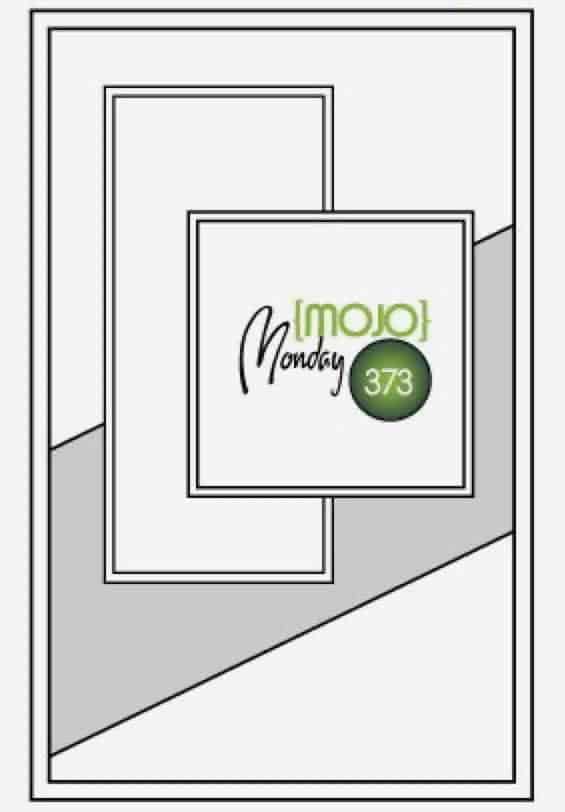
Today I am sharing my Paris Sketch Challenge Card. My Demonstrator Group has been giving us Sketch Challenges each week that we can join in during this difficult time to keep us busy and to explore our creative side.
Card Sketch Challenge
I decided to use the Parisian Beauty Bundle for this sketch challenge as a last hurrah since it is retiring. I’m very sad to see this set go, but it will be added to my stash for future projects. I had so much fun with this sketch that you get two cards for the price of one, as well as a bonus one that I will share next week. For these two cards that I am highlighting today, I just switched the coloured card stock. The Pool Party card was the one that I decided to use for my swap.
Here is the second card using a Petal Pink base and Pool Party scalloped frame and different ink colours.
Inks: Tuxedo Black Memento Ink Pad (132708), Pool Party Classic Stampin’ Pad (147107), Petal Pink Classic Stampin’ Pad (147108)
Paper: Whisper White Thick (140272 ), Pool Party (122924), Petal Pink (146985), Whisper White (100730), Parisian Blossoms Specialty Designer Series Paper (151192), Champagne Foil Sheets (144748)
Accessories: Stitched Shapes Dies (152323), Layering Squares Dies (151772), Parisian Flourish 3D Embossing Folder (151474), Champagne Rhinestone Basic Jewels (151193), Bone Folder (102300), Paper Snips (103579), Multipurpose Liquid Glue (110755), Mini Glue Dots (103683), SNAIL Adhesive (104332), Stampin’ Dimensionals (104430)
Measurements:
Whisper White Thick: 8 ½” x 5 ½”; scored at 4 ¼”
Pool Party: 4 x 5 ¼”
Petal Pink: 2 ½” x 2 ½”
Whisper White: 2 ¼” x 2 ¼”
Parisian Blossoms Specialty Designer Series Paper: 5” x 2”
Champagne Foil Sheets: 5” x 3”
The Two Card using the Sketch
Instructions:
Fold the Whisper White Thick card stock in half to create the card base.
Die cut the Whisper White piece with the second largest square from the Stitched Shapes Dies.
Stamp the Sentiment from the Parisian Beauty Cling Stamp Set in Tuxedo Black Memento Ink Pad on the stitched Whisper White piece.
Using the single blossom from the Forever Blossoms Cling Stamp Set, stamp it in Petal Pink.
Stamp the Fleur De Lys border in Pool Party at the top and bottom.
Die cut the Petal Pink card stock with the fourth largest scalloped square from the Layering Squares Dies.
Emboss the Pool Part card stock with the Parisian Flourish 3D Embossing Folder.
Die cut the Eiffel Tower from the Champagne Foil Sheets.
Attached with Multipurpose Liquid Glue the Parisian Blossoms Specialty Designer Series Paper to the embossed Pool Party piece at an angle.
Turn over the Pool Party piece and trim the corners from the DSP with Paper Snips.
Attach the Pool Party piece to the Whisper White card base with Multipurpose Liquid Glue.
Using Glue Dots, attached the Eiffel Tower on the left side.
Adhere the sentiment piece to the scalloped Petal Pink piece with SNAIL.
Using dimensionals add the sentiment piece to the card.
Scatter three Champagne Rhinestone Basic Jewels on the card.